



Round faces can take drama. The trick is making the color work with the shape instead of fighting it.
Red black highlights for round faces look best when they behave like contour makeup: darker pieces where you want the eye to pull back, brighter red where you want lift, length, or motion. Put a chunky red band across the widest part of the cheeks, and the whole thing can feel boxy. Shift that same color a few inches lower, or angle it through the front instead of straight across, and the face suddenly reads longer.
That’s why placement matters more than the exact shade. A cherry money piece, a wine-colored balayage, or a few black lowlights tucked under the surface can all flatter a round face — but only if the colorist thinks in lines and movement, not stripes. The best versions usually have one thing in common: they create vertical or diagonal flow, not width.
And yes, the look can be bold. It can also be soft, expensive-looking, and surprisingly wearable. Some versions whisper. Some shout. The good ones know where to stop.
1. Cherry Money Piece on Jet-Black Lengths
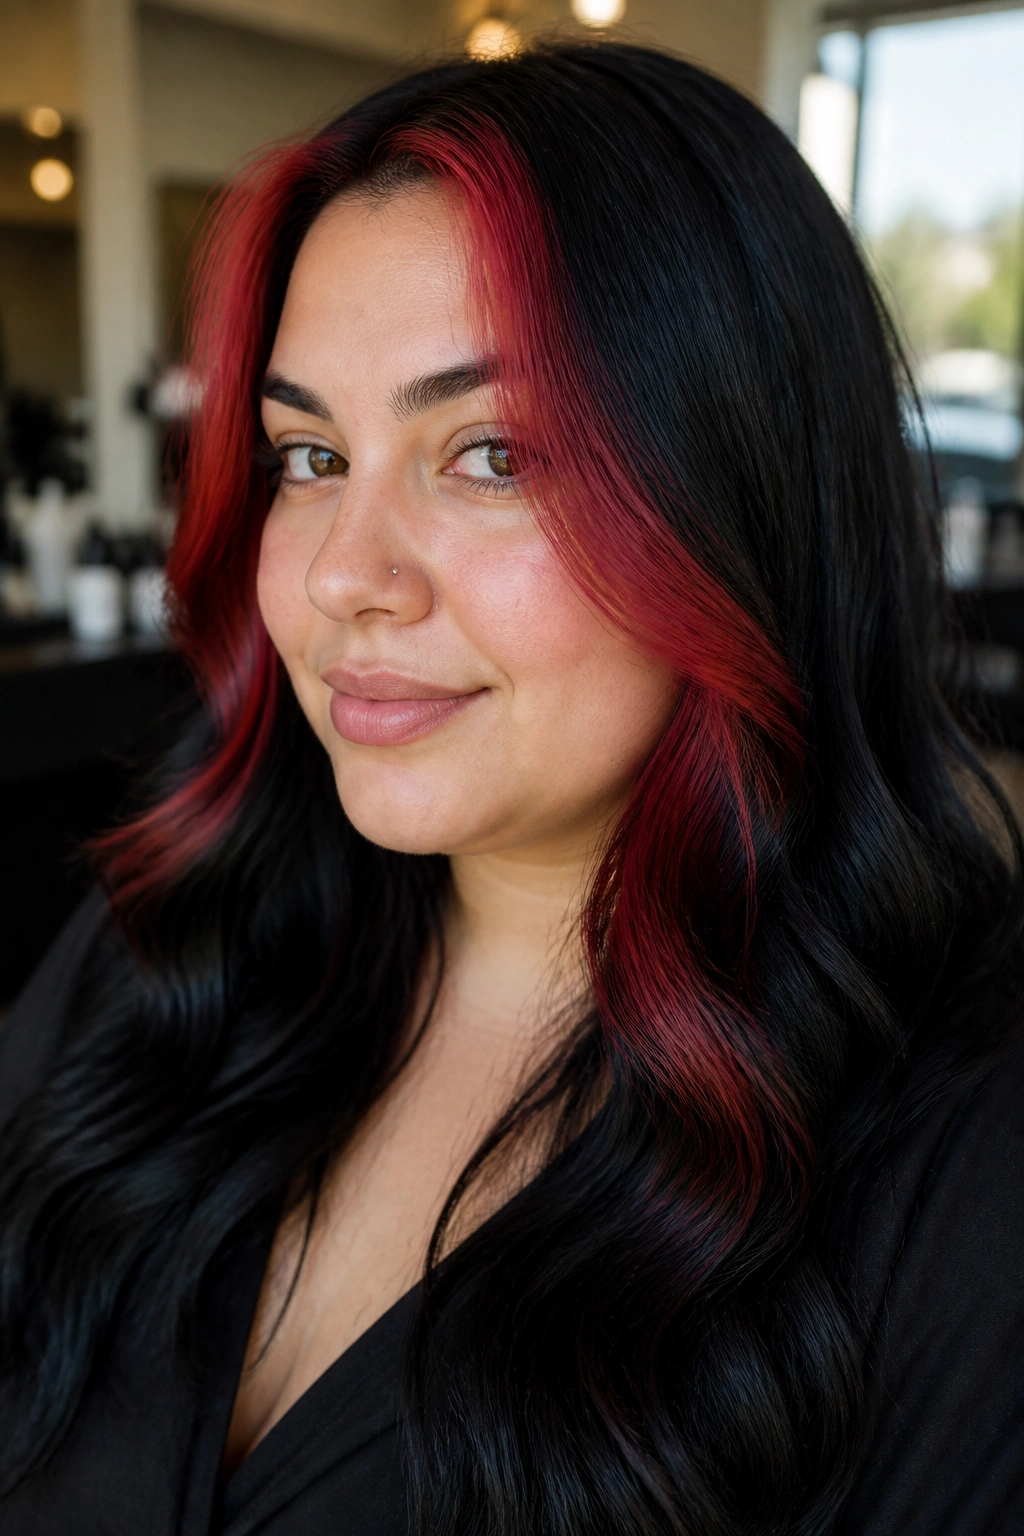
A sharp cherry money piece is one of the easiest ways to stretch a round face visually. The bright red sits right where people look first, while the jet-black base keeps the sides from puffing out. If you wear your hair long and straight, this one does a lot of the heavy lifting without needing a complicated cut.
Why It Works on a Round Face
The money piece should start a little below the forehead and travel past the cheekbone, not stop at it. That longer line pulls the eye down instead of out. If the red is kept around 1 to 1.5 inches wide on each side, it feels intentional; any wider and it can start to spread the face visually.
- Ask for deep cherry or ruby red around the hairline.
- Keep the rest of the hair blue-black or jet-black for contrast.
- Style with a middle or slightly off-center part so the front pieces fall vertically.
- Use a 1.25-inch curling iron only on the ends if you want bend, not volume at the cheeks.
My blunt take: this is the version I’d pick for anyone who wants impact without turning the whole head into a red-and-black billboard.
2. Burgundy Balayage Through Long Layers
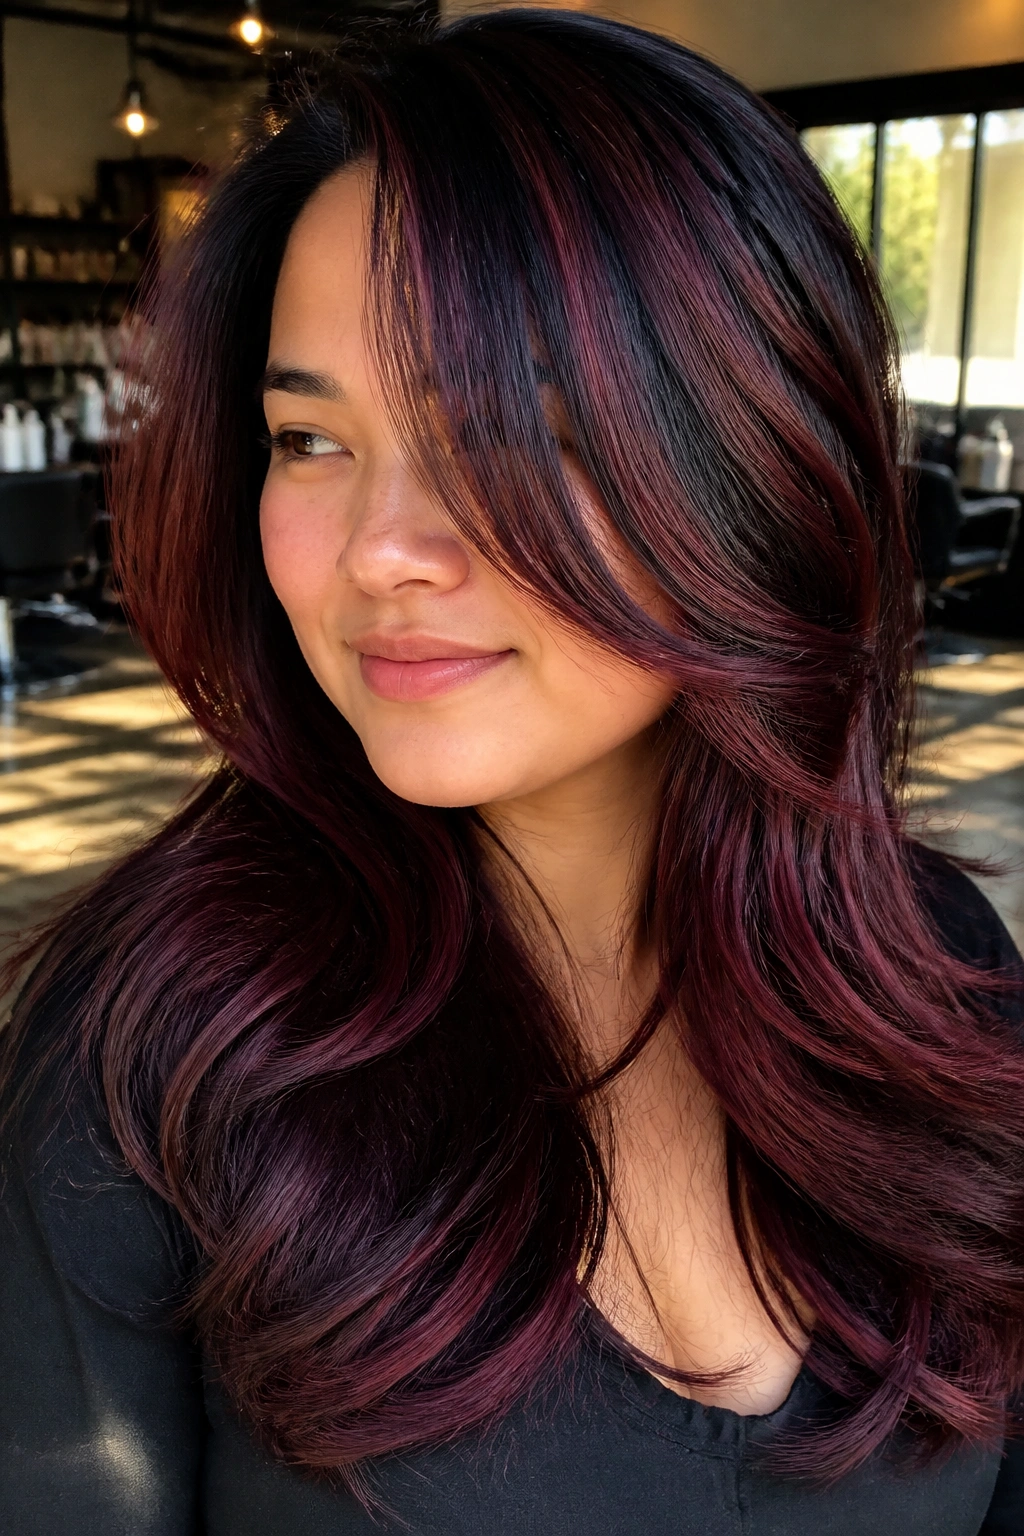
Burgundy balayage is the grown-up answer when you want red and black to look rich instead of loud. The red is painted in soft ribbons through long layers, so the color moves when you walk. On a round face, that movement matters. It keeps the eye traveling up and down instead of sitting right at cheek level.
This look works because the burgundy pieces can start lower than the widest part of the face — usually around the lower cheek or upper jaw — and then drift into the lengths. The black base underneath gives the whole thing depth, which keeps the color from flattening out. A one-length cut can make burgundy look heavier; long layers keep it airy.
Wear it with loose waves, but don’t overcurl the sides. You want a bend. Not a pouf. A soft wave through the mid-lengths and ends is enough to show the ribbons and still keep the face looking longer.
3. Crimson Peekaboo Panels Under a Dark Bob
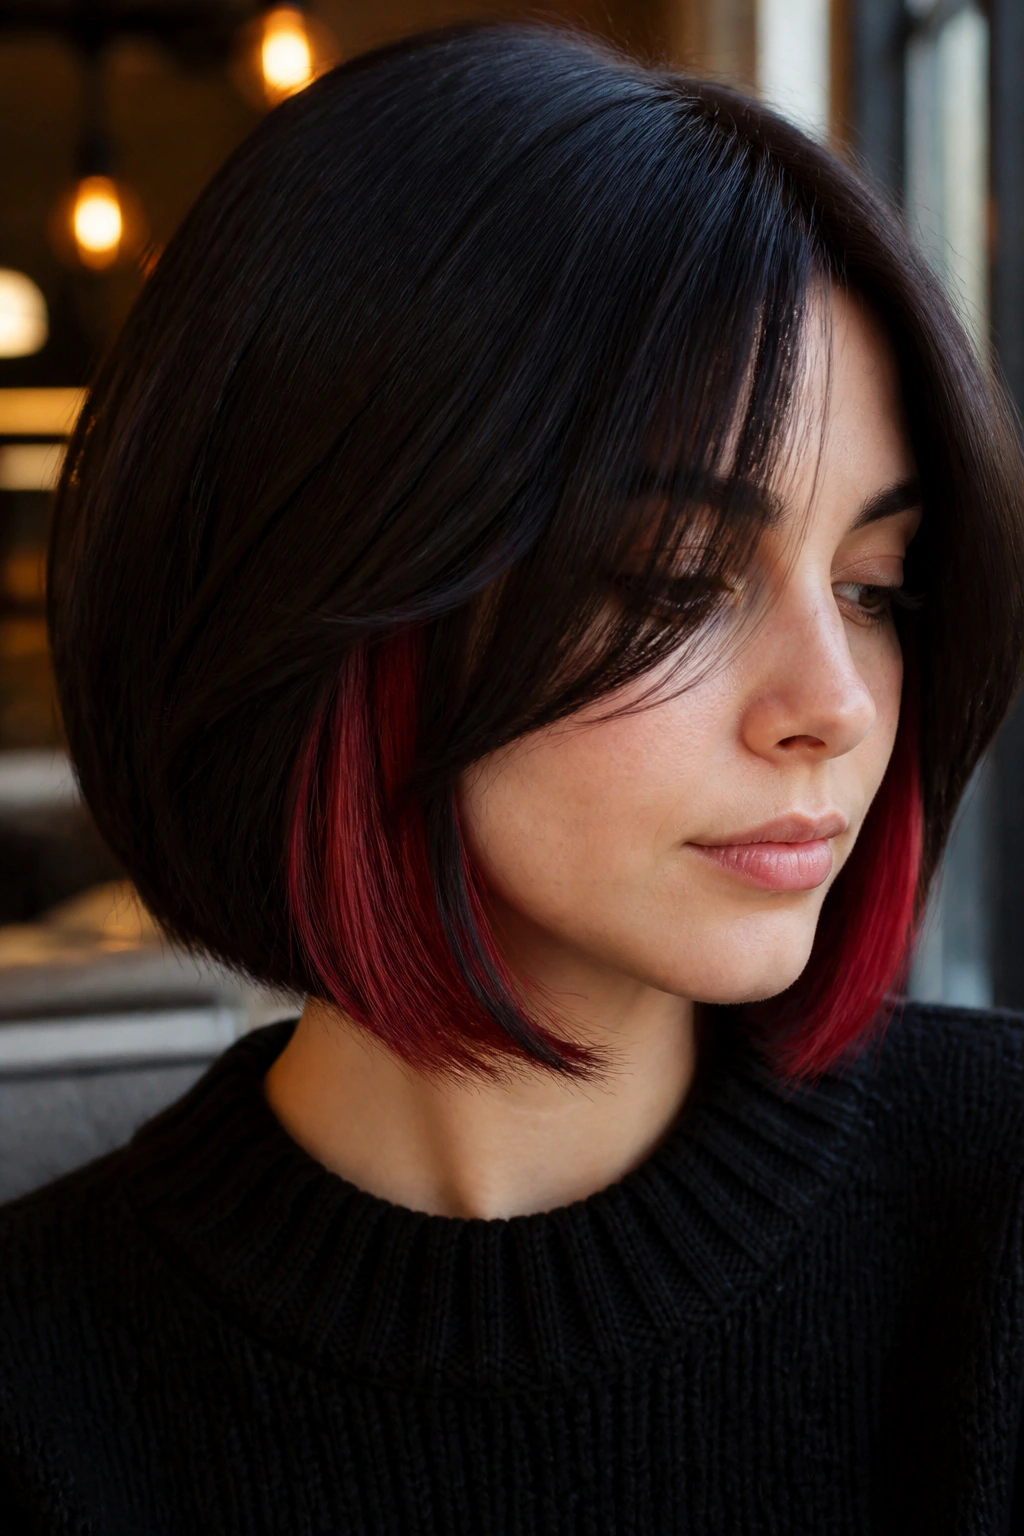
What makes peekaboo color so smart on a round face? It hides the boldness under the top layer, which means you get movement without adding width at the cheeks. A dark bob with crimson panels underneath can look sleek from the front and a little dangerous when it swings.
The trick is keeping the visible red slightly lower than the widest point of the face. If the bob hits at the chin, let the red live below that line, tucked under the outer layer. That way the eye drops down instead of expanding sideways. A blunt chin-length bob can get heavy fast, so I’d rather see this on a bob with a tiny bit of bevel at the ends.
How to Wear It
- Keep the top layer black or espresso-dark.
- Place the crimson panels under the surface and toward the back.
- Ask for a cut that sits 1 to 2 inches below the chin if you want more length.
- Flip one side behind the ear to show the peekaboo contrast.
This one has attitude. Quietly.
4. Ruby Babylights Around the Crown
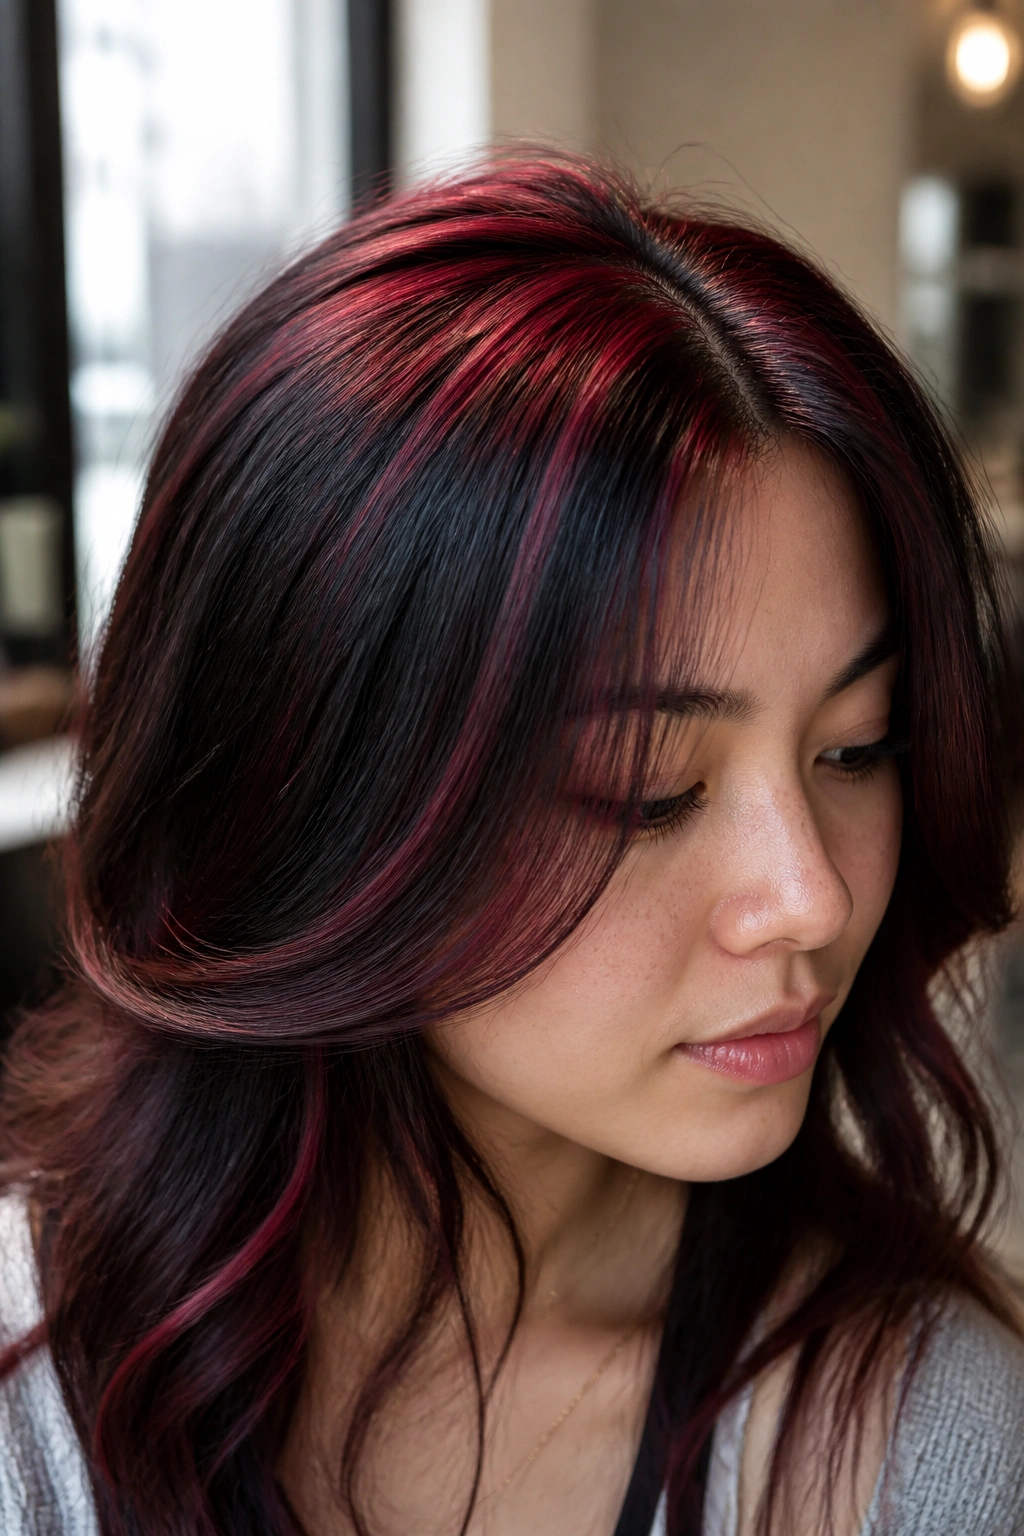
Tiny ruby babylights at the crown do something sneaky: they lift the eye upward. That’s gold for round faces, because height is usually your friend. Instead of putting brightness on the sides, this version concentrates the red up top, where it creates a small halo effect against the black base.
Babylights are thin — think weave-thin, not stripe-thin — and they should be blended enough that the crown looks soft, not frosted. Keep the red close to the part and upper layers. The sides can stay deeper and darker. That contrast gives the face more vertical shape, which is exactly what a round shape tends to need.
If your hair is fine, this is a strong choice because it doesn’t rely on heavy chunks of color to show up. A root lift with a round brush and a little shine spray will make the placement read clearly. If your hair is thick, the same idea still works — just ask for the lights to be scattered, not packed.
5. Mulled-Wine Lowlights with Soft Black Ends
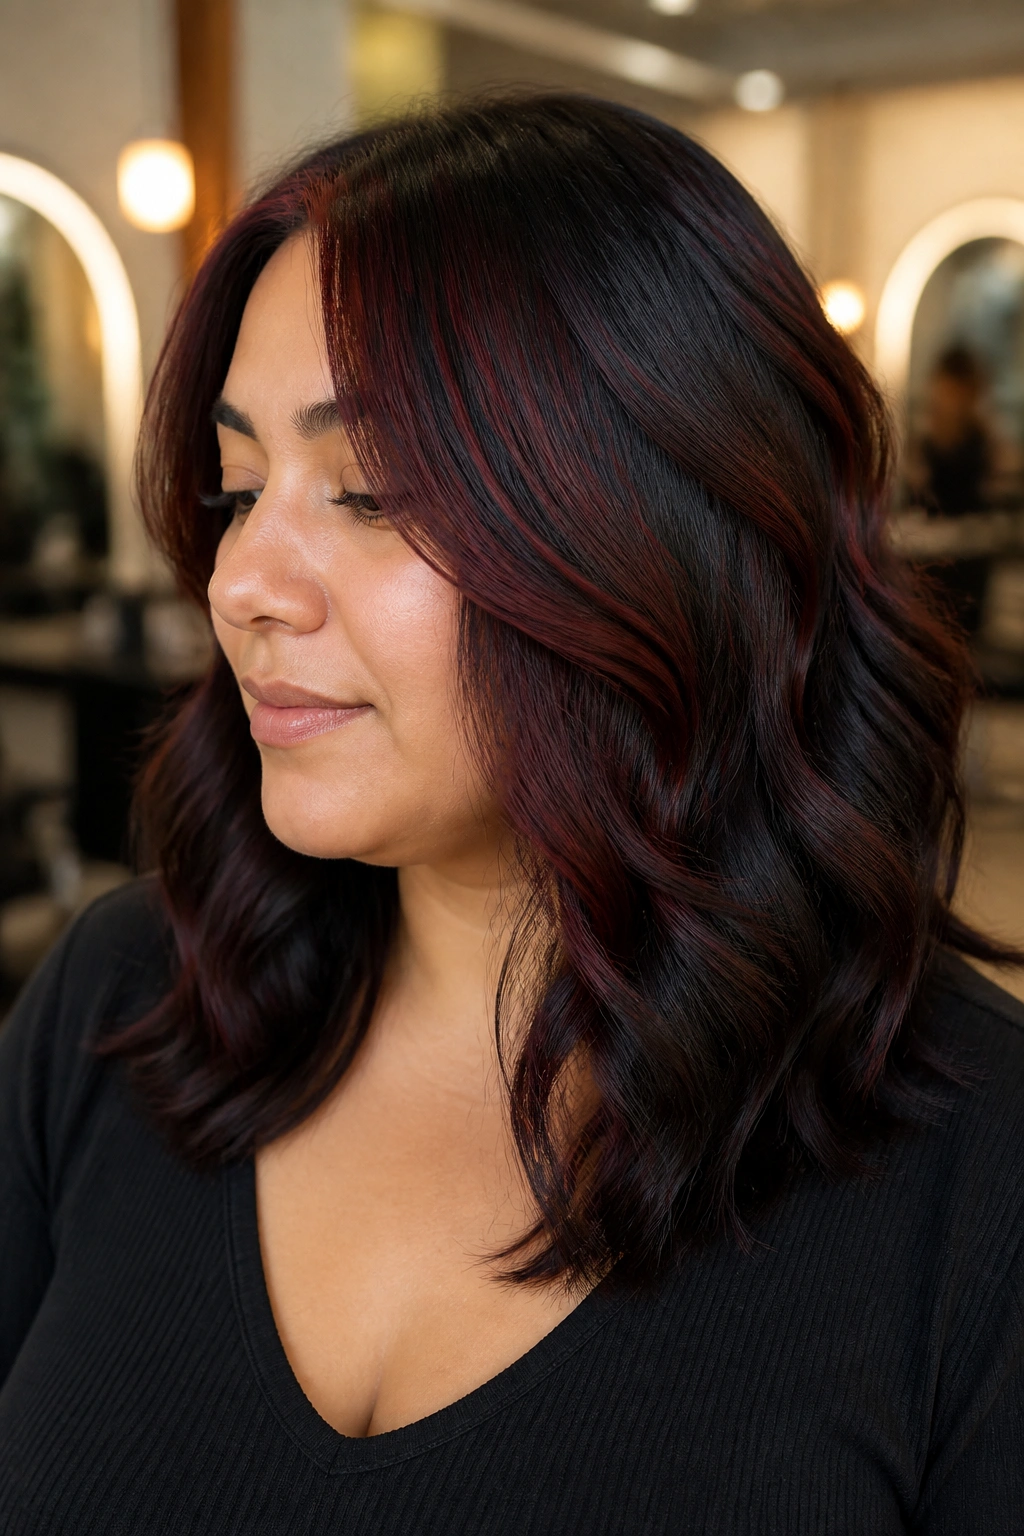
This one is for people who want shape more than brightness. Mulled-wine lowlights threaded through black hair can make the face look narrower without shouting about it. The color stays deep and moody, which is useful if you want something that doesn’t fight with every outfit.
The best part is the ends. When the black is kept soft and rich through the bottom few inches, the whole silhouette feels longer. Round faces often benefit when the eye travels downward, and darker ends help with that. Ask your colorist to keep the red lower on the shaft and avoid placing it right at the cheekbone line.
This look is especially good on thick hair, because the lowlights can cut visual bulk. On wavy hair, the wine shade catches light in the bends and gives the style more depth. If your hair tends to puff at the sides, this is one of the calmer, smarter ways to keep color interesting without widening the head shape.
6. Scarlet Face-Framing Slices on a Lob
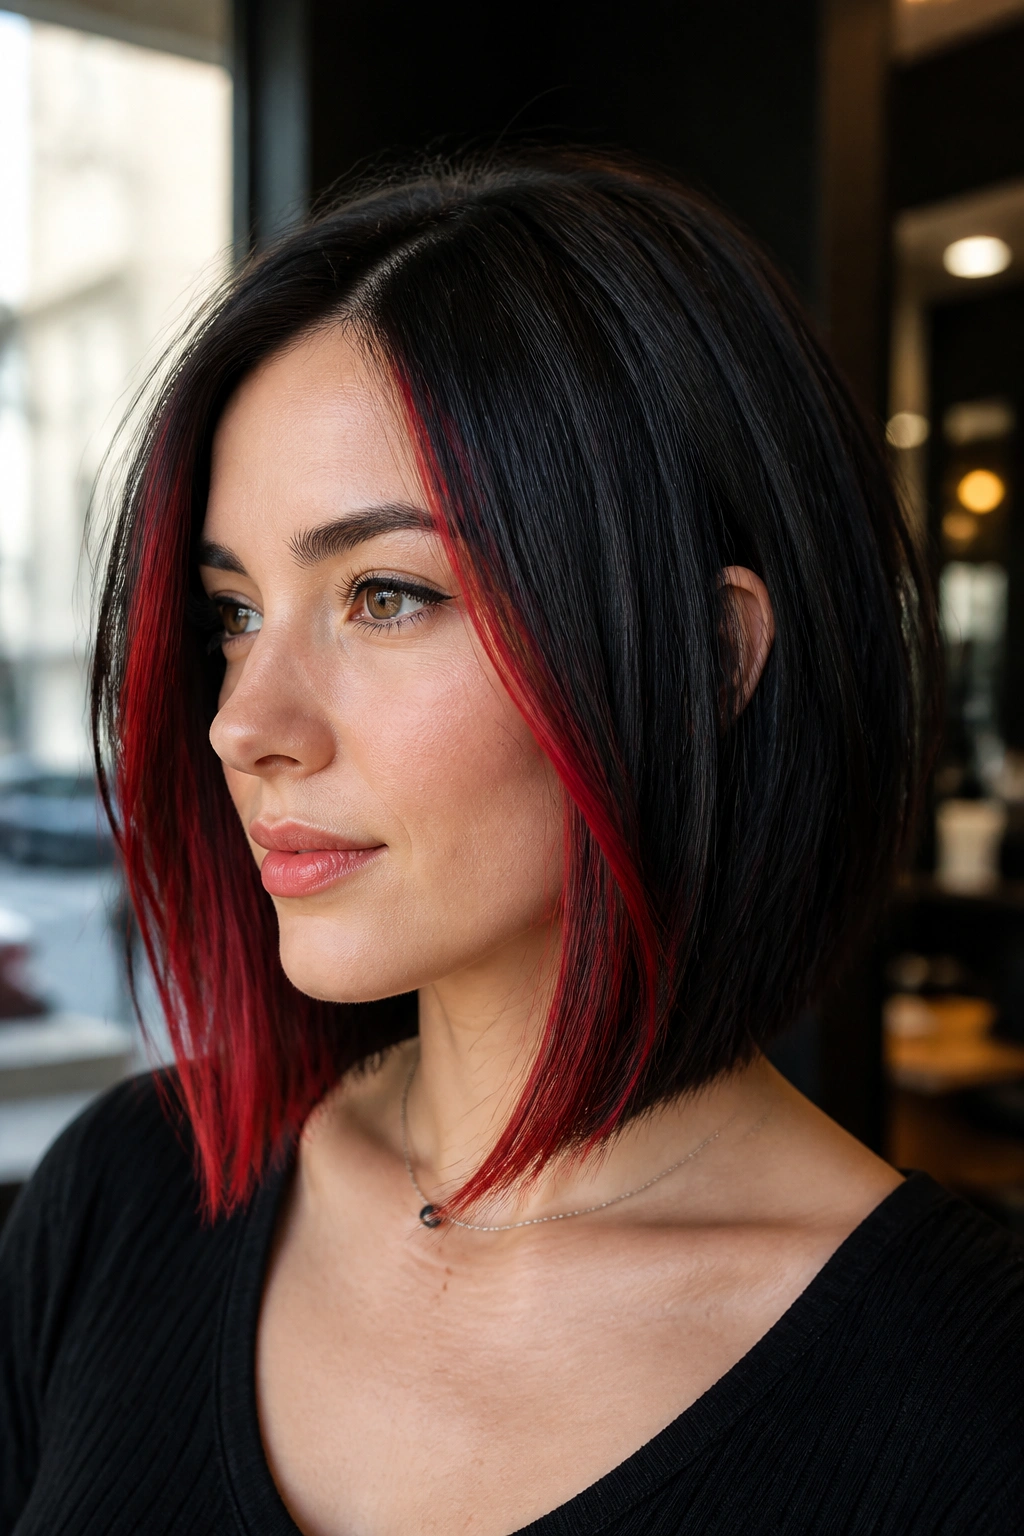
A lob can handle a lot, but round faces do better when the front pieces are sliced with purpose. Scarlet face-framing sections work because they create two clean vertical lines around the face, not a wide band across the middle. That’s the whole game here.
Unlike chunky all-over highlights, these slices should start near the cheekbone and angle down toward the collarbone. Keep them narrow — about half an inch to 1 inch each — so they read as shape, not bulk. The surrounding black gives the red real punch. If the base is too brown or too soft, the whole effect loses its edge.
I like this on a lob that sits just below the chin, especially with a side part. The part shift helps the color fall asymmetrically, which flatters a round face more than a perfect center line sometimes does. A flat iron bend at the ends can sharpen the line even more. Not much. Just enough.
7. Mahogany Ribbons on a Rounded Shag
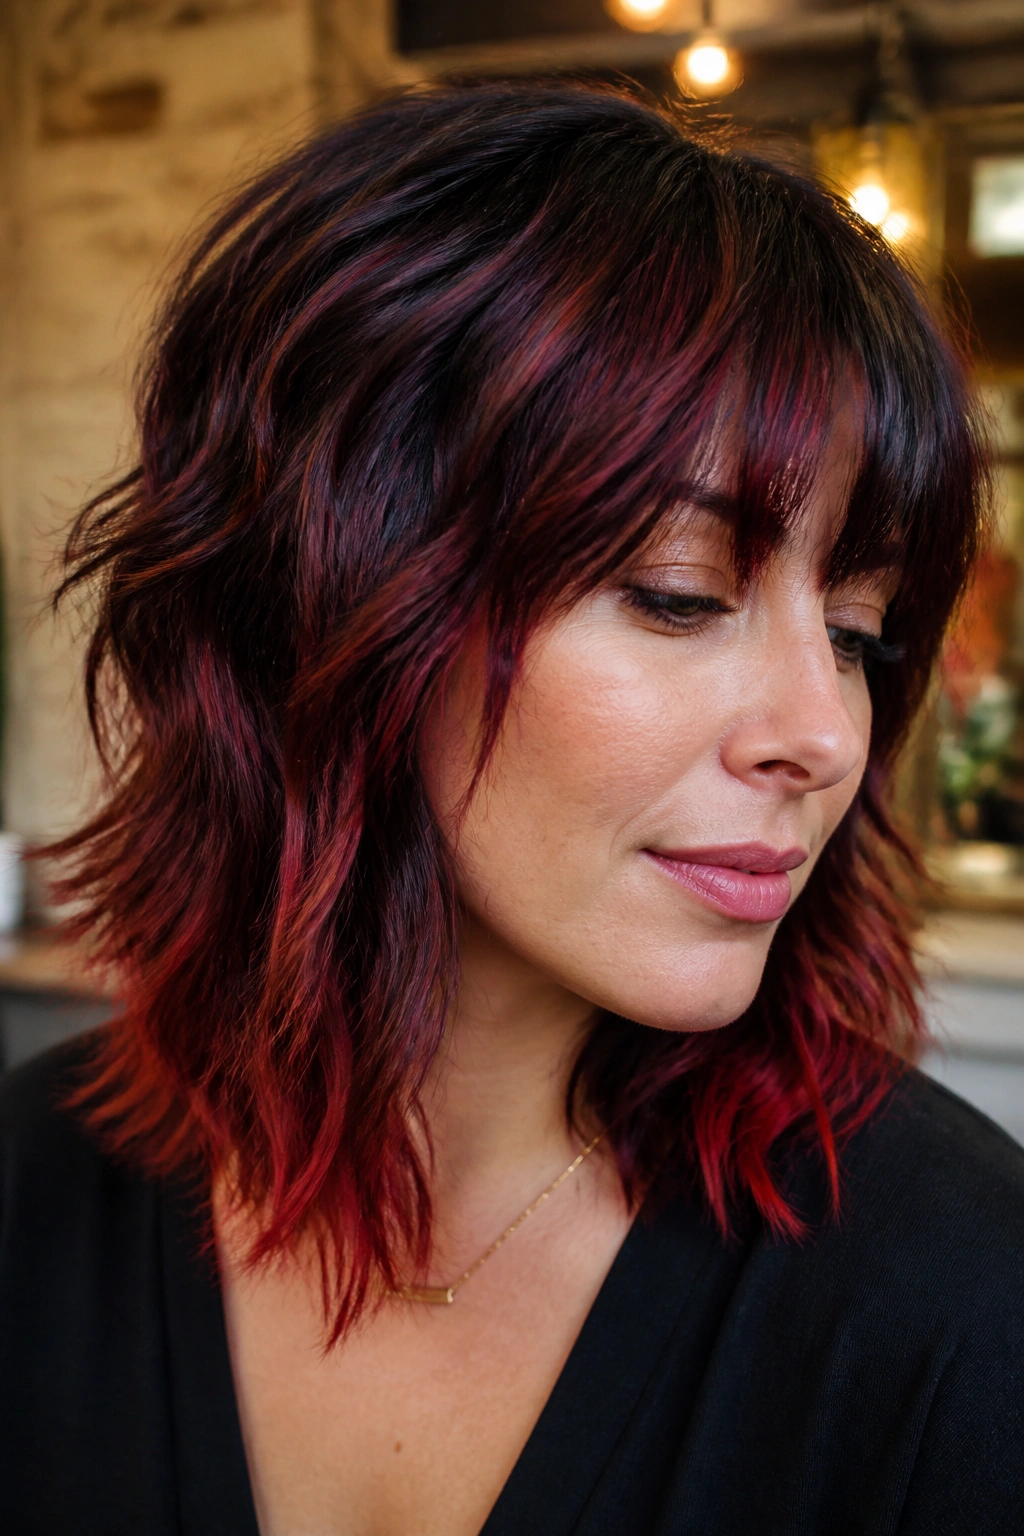
A shag already breaks up width, so it’s a natural partner for mahogany ribbons. The layers create movement, and the red-black mix keeps the texture from looking flat. On a round face, that broken-up shape matters because it stops the eye from reading the hair as one big circle.
What Makes It Different
The key is irregular placement. You do not want every layer painted the same way. Some pieces can be left nearly black, some can carry a thin mahogany ribbon, and some can be touched with red only at the ends. That unevenness is what gives the cut its bite.
- Ask for razor-soft or heavily layered ends.
- Keep the brightest ribbons below the cheekbones.
- Use a texturizing spray so the pieces separate instead of clumping.
- Let a few darker strands sit at the temples to avoid widening the face.
This is a good look if you like hair that looks a little messy on purpose. Too polished, and the shag loses its charm.
8. Red-Black Ombre with a Shadow Root
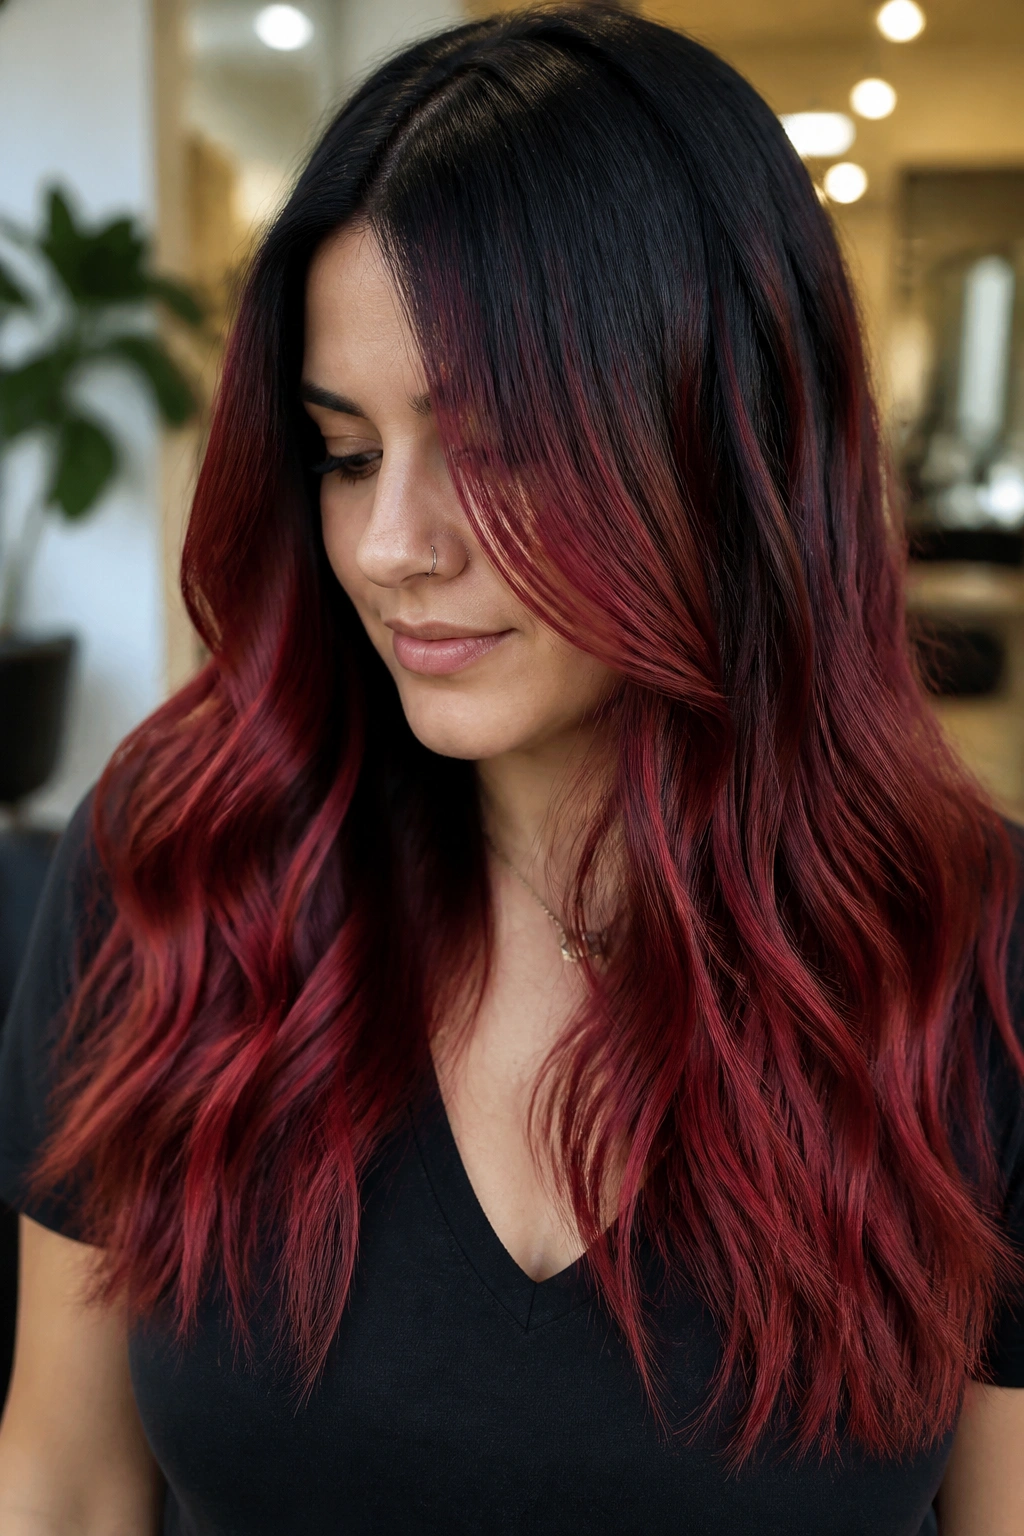
A shadow root can save a round face from looking bottom-heavy. That sounds backwards, but it isn’t. When the root stays dark and the red fades gradually through the mid-lengths, the eye follows a long vertical color field instead of a hard horizontal break.
Ombre can go wrong when the transition line sits too high. Then the face gets framed by a blunt color band, and that adds width. Keep the shift soft, stretched, and a little uneven. Black at the roots, deep red through the center, then a slightly darker red or blackened end can look especially sleek on long hair.
This is the version for someone who wants a little edge but hates constant upkeep at the root. The shadow does the blending for you, and the grow-out is more forgiving. Style it smooth or with long waves. Either way, the gradient should look like it falls, not spreads.
9. Wine-Toned Highlights on Curly Hair
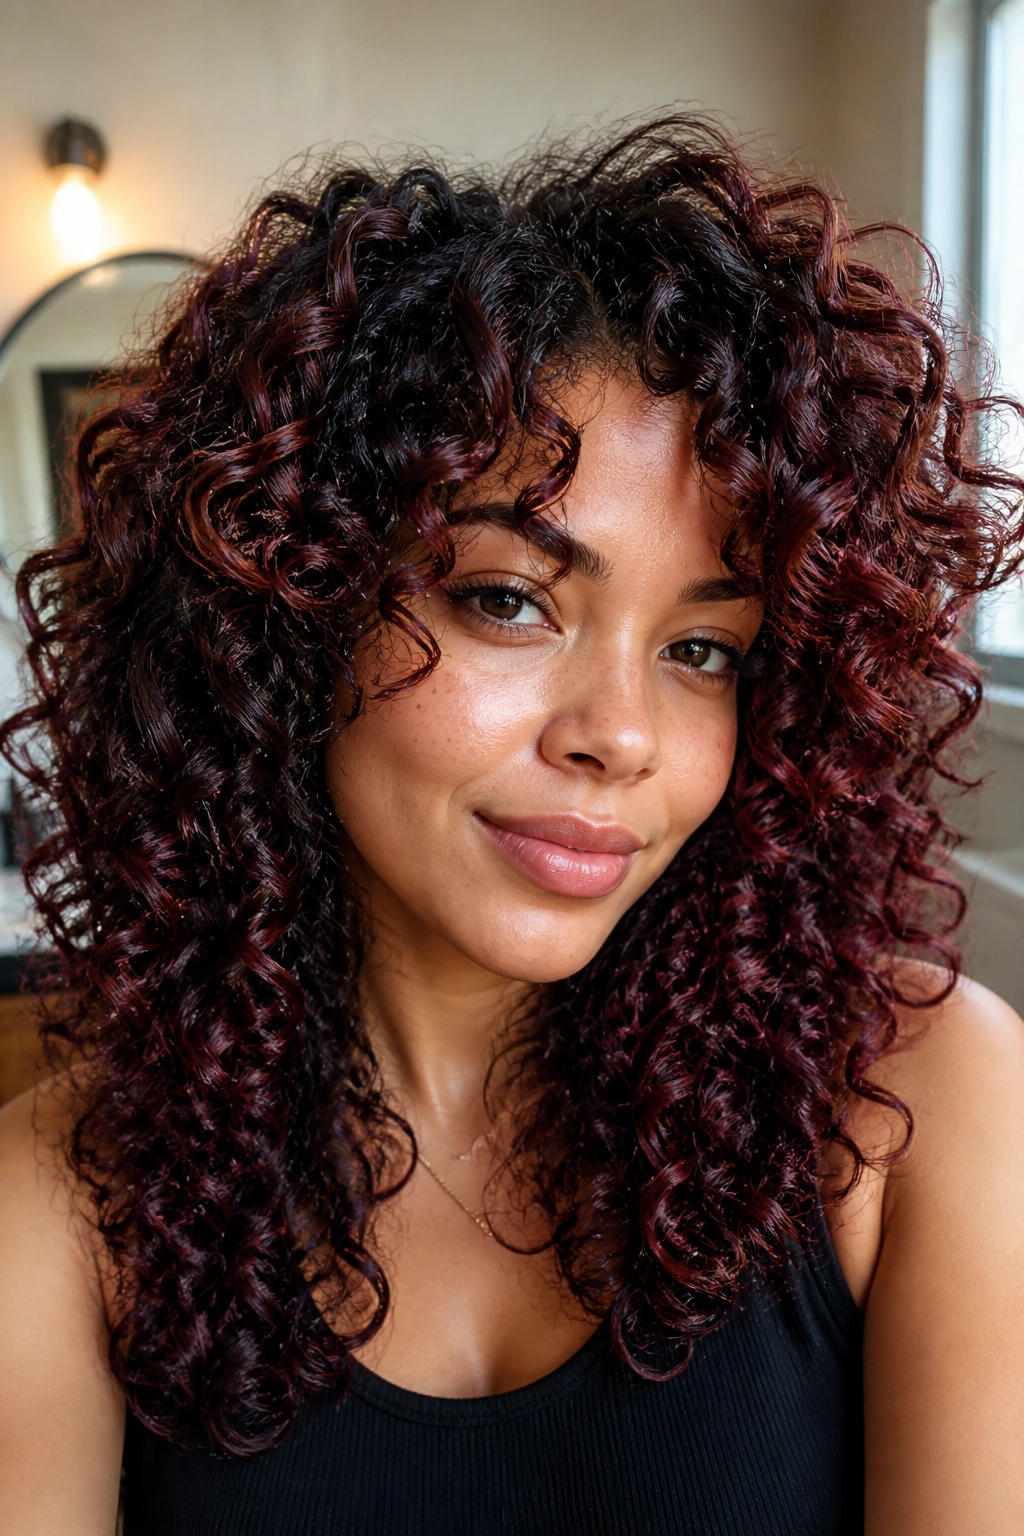
Curly hair and round faces can be a tricky pair if the color gets painted everywhere. Wine-toned highlights solve that by picking up just a few outer coils and letting the black or very dark base sit underneath. The result feels dimensional, not puffy.
The placement matters more than the exact curl pattern. You want the red to show on the outer ring of the curls, especially around the crown and the lower lengths, while the sides stay darker or more shadowed. That keeps the shape from ballooning out at cheek level. A diffuser helps here, because it sets the curl without making the red pieces frizz into one big cloud.
A small warning: don’t let the highlights start too high on the side sections. That’s where curly color can make the face look wider in a hurry. Keep the brightest wine tone higher on top and lower toward the ends. It’s a small detail, but it changes everything.
10. Black Underlights with Fire-Red Top Pieces
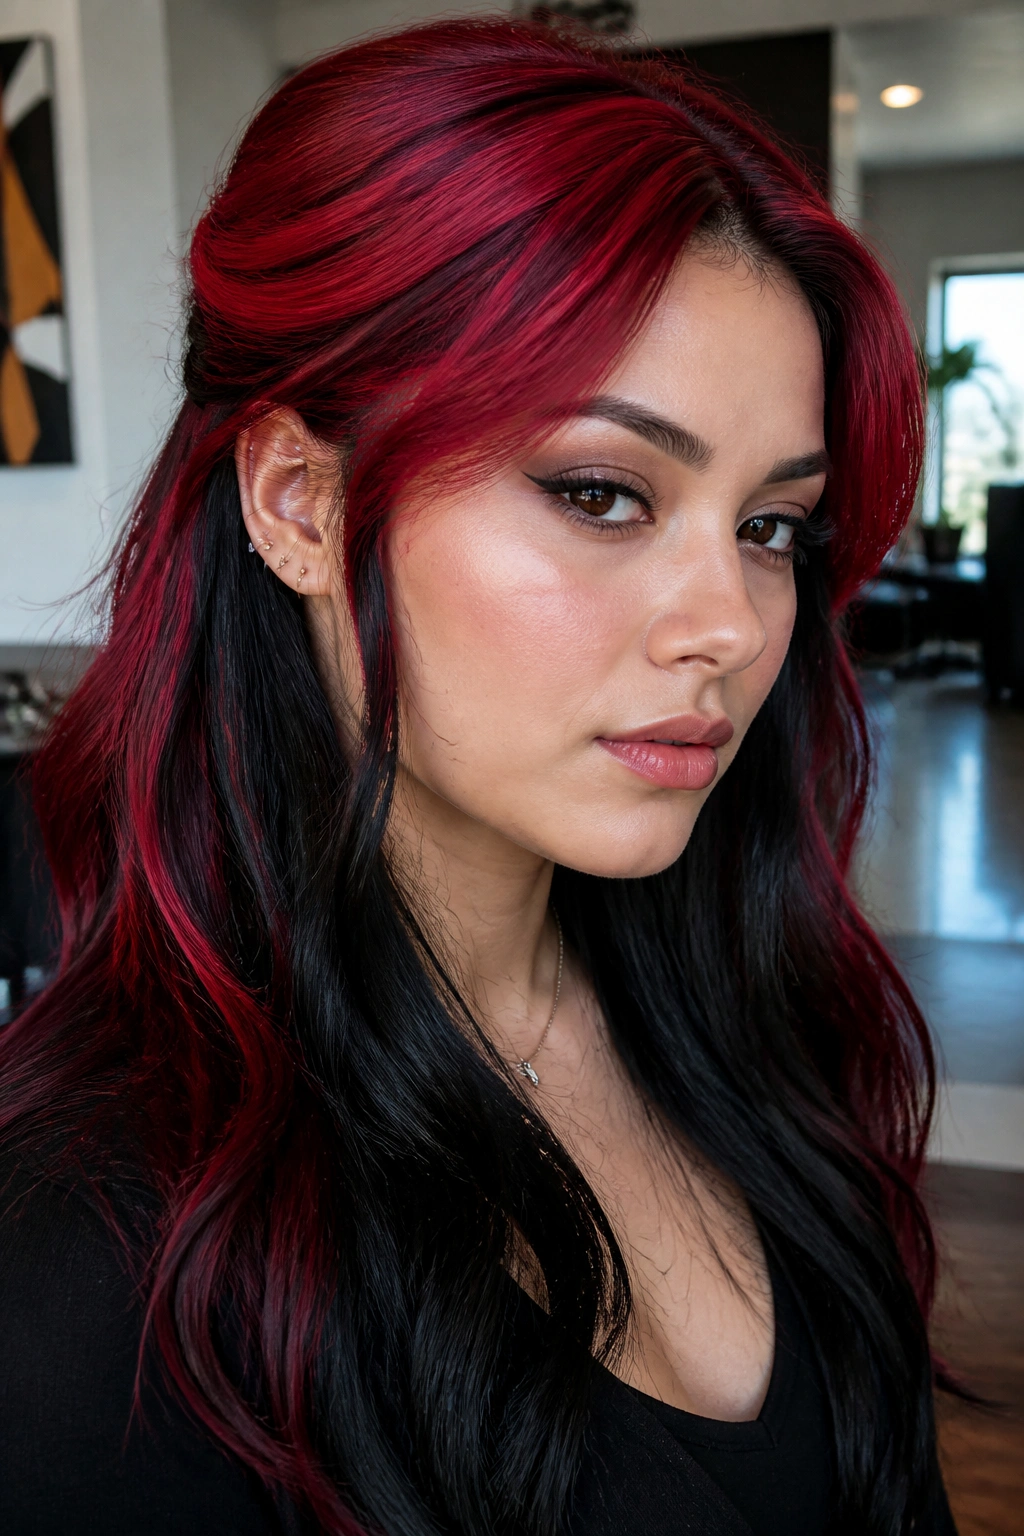
Picture a dark surface with fire-red peeking up through the top layers. That’s the appeal here. Black underlights add depth, while the brighter top pieces stay visible enough to give the style energy without spreading the color out across the cheeks.
This works especially well when the red is concentrated in vertical sections near the front and crown. If the color sits in the outer sides of the head, it can make a round face look fuller. Keep the top pieces slightly longer and let them fall past the cheekbone line. That gives the whole cut a little extra length.
The style feels modern, but it’s not hard to wear. Straight hair shows the contrast sharply. Loose waves soften it. If you like to tuck your hair behind one ear, even better — the dark underlayer becomes part of the shape, and the red reads like a flash rather than a block.
11. Auburn Veil Highlights for a Soft Pixie
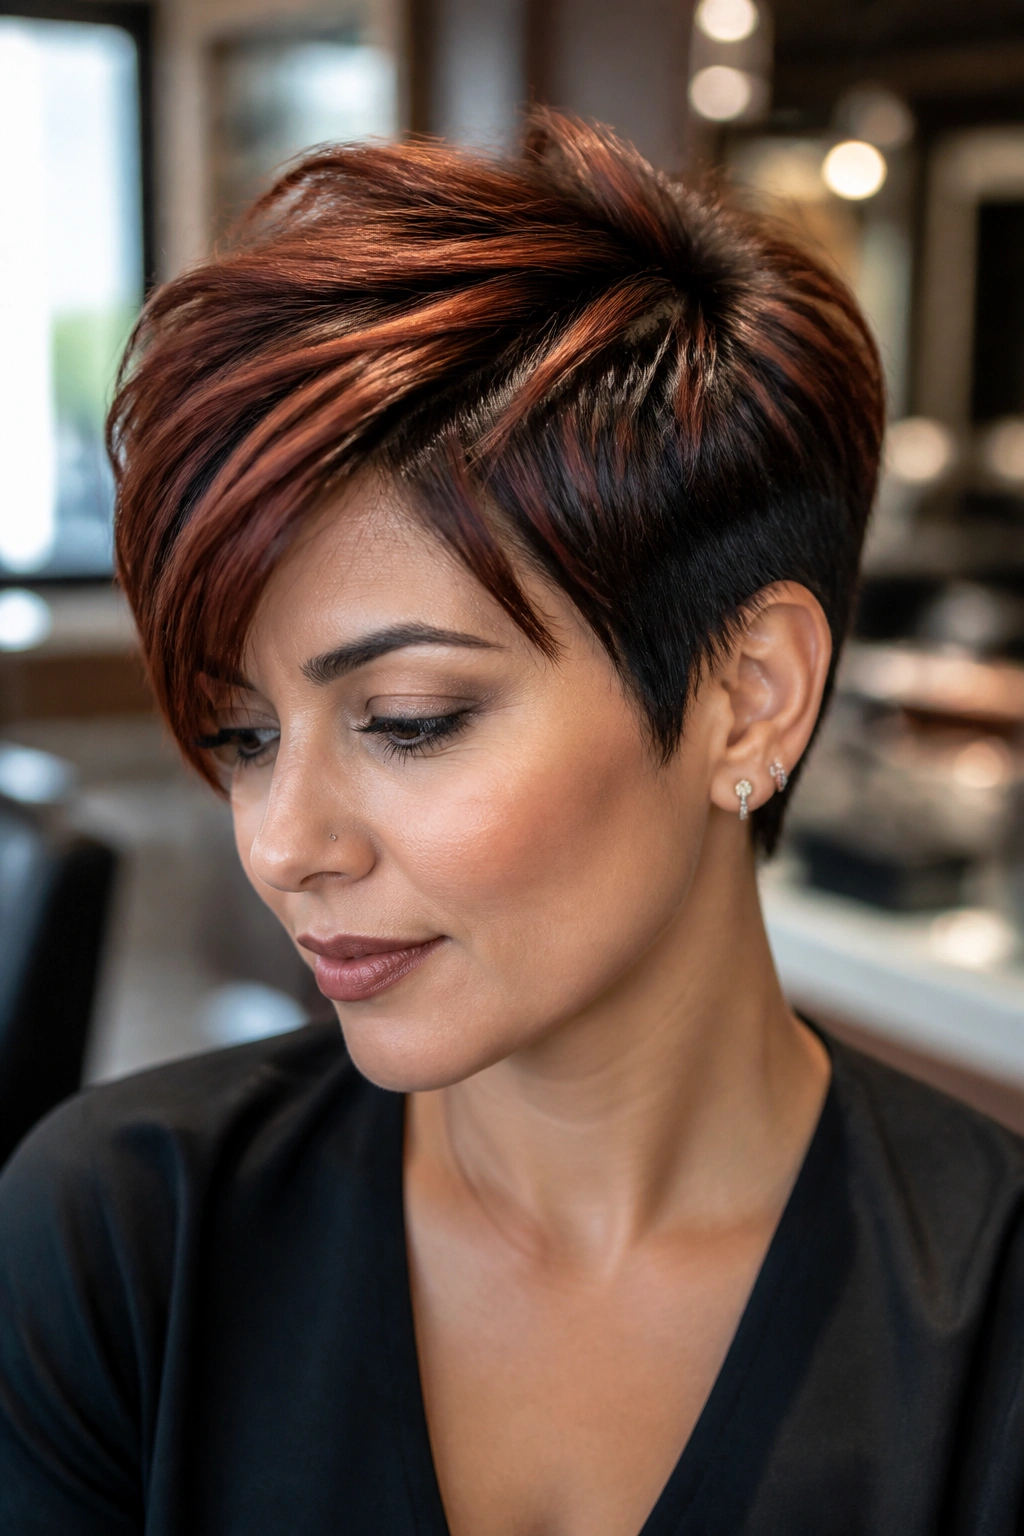
Short hair can absolutely flatter a round face, but it needs height and direction. A pixie with an auburn veil over black roots does both. The lighter red pieces sit on top, where they add lift, while the darker sides keep the shape neat instead of ballooning out.
The best version of this cut keeps the crown a little longer and the sides tighter. That helps the face look more oval because the eye reads upward. Ask for soft, feathery highlights — not a hard stripe — and keep the auburn concentrated through the top layers and fringe. The front can be swept slightly off-center to break the roundness.
This is one of the few short styles that can feel sharp without looking severe. If the texture is too flat, it loses the point. If it’s too spiky, it starts to feel dated. A little movement at the crown and a clean taper at the ears is the sweet spot.
12. Merlot Melt on Waist-Length Hair
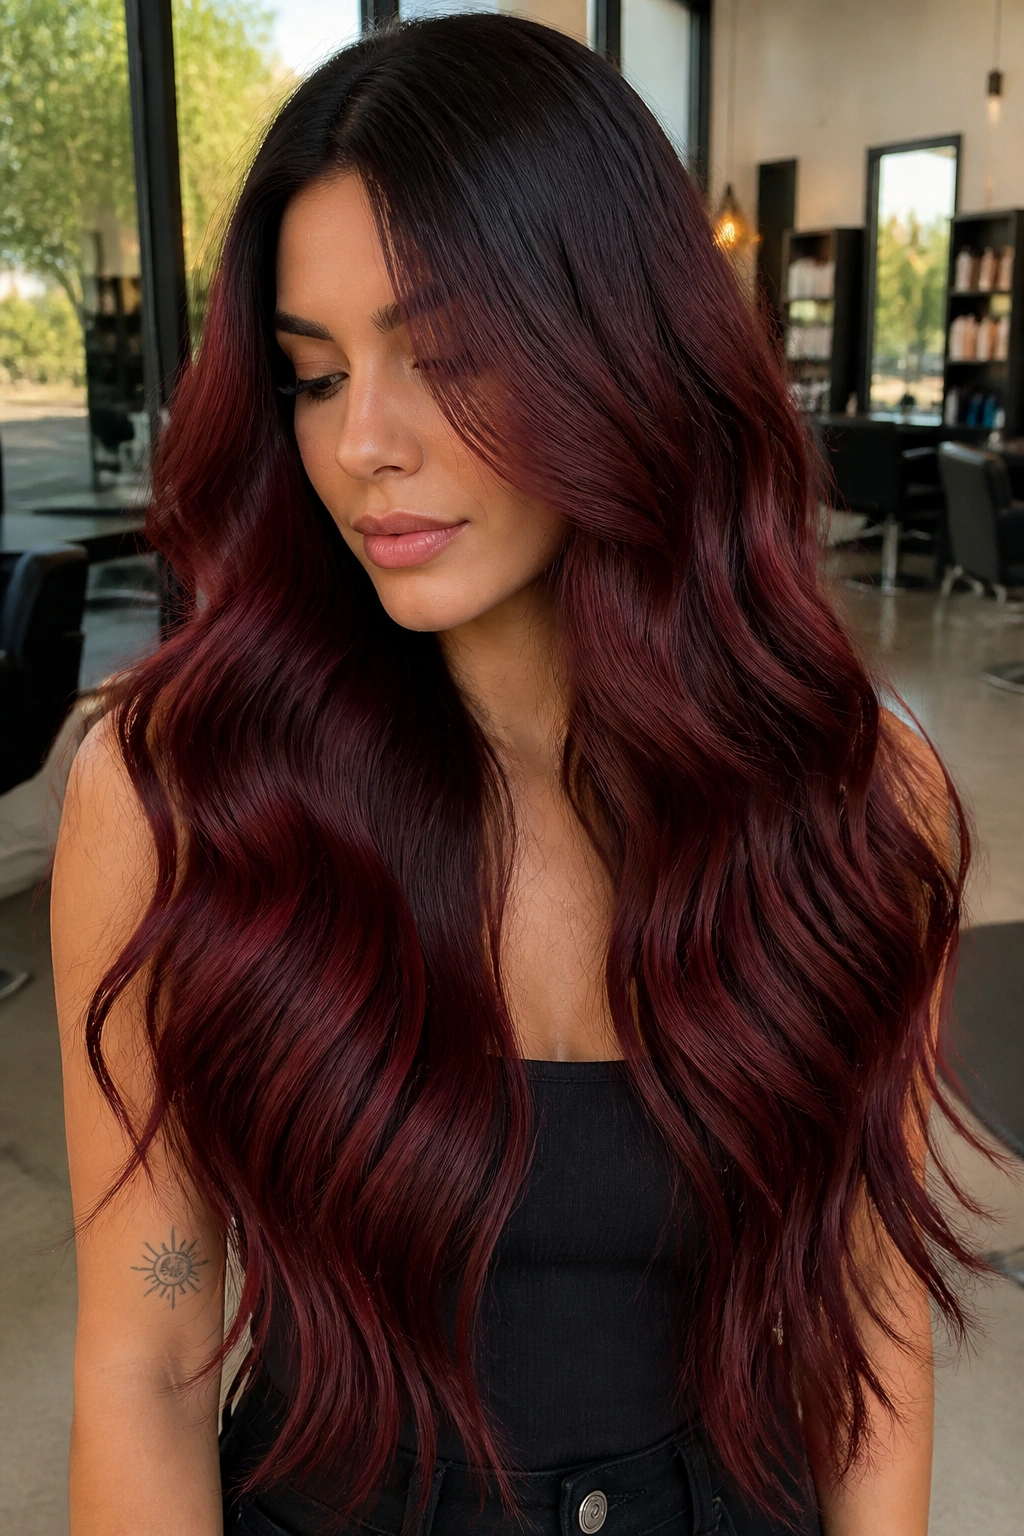
Long hair gives you room to create a real color fall, and that’s where merlot shines. A merlot melt moving over a black base can make a round face look longer simply because the eye keeps traveling down the hair. No tricks. Just line and length.
How to Get the Most From It
The color should begin softer near the roots and deepen as it moves through the lengths. That keeps the top from looking too wide. On waist-length hair, the contrast between black and merlot can be dramatic, so the blend has to stay smooth. Hard lines defeat the whole point.
- Ask for a black or espresso root shadow.
- Keep the merlot around mid-lengths to ends.
- Add long layers so the color doesn’t hang in one heavy curtain.
- Use a large-barrel iron, around 1.5 inches, for soft bends.
This one loves gloss. A shiny finish makes the red look deep instead of flat, and flat is the enemy here.
13. Velvet Black Panels with Cherry Tips
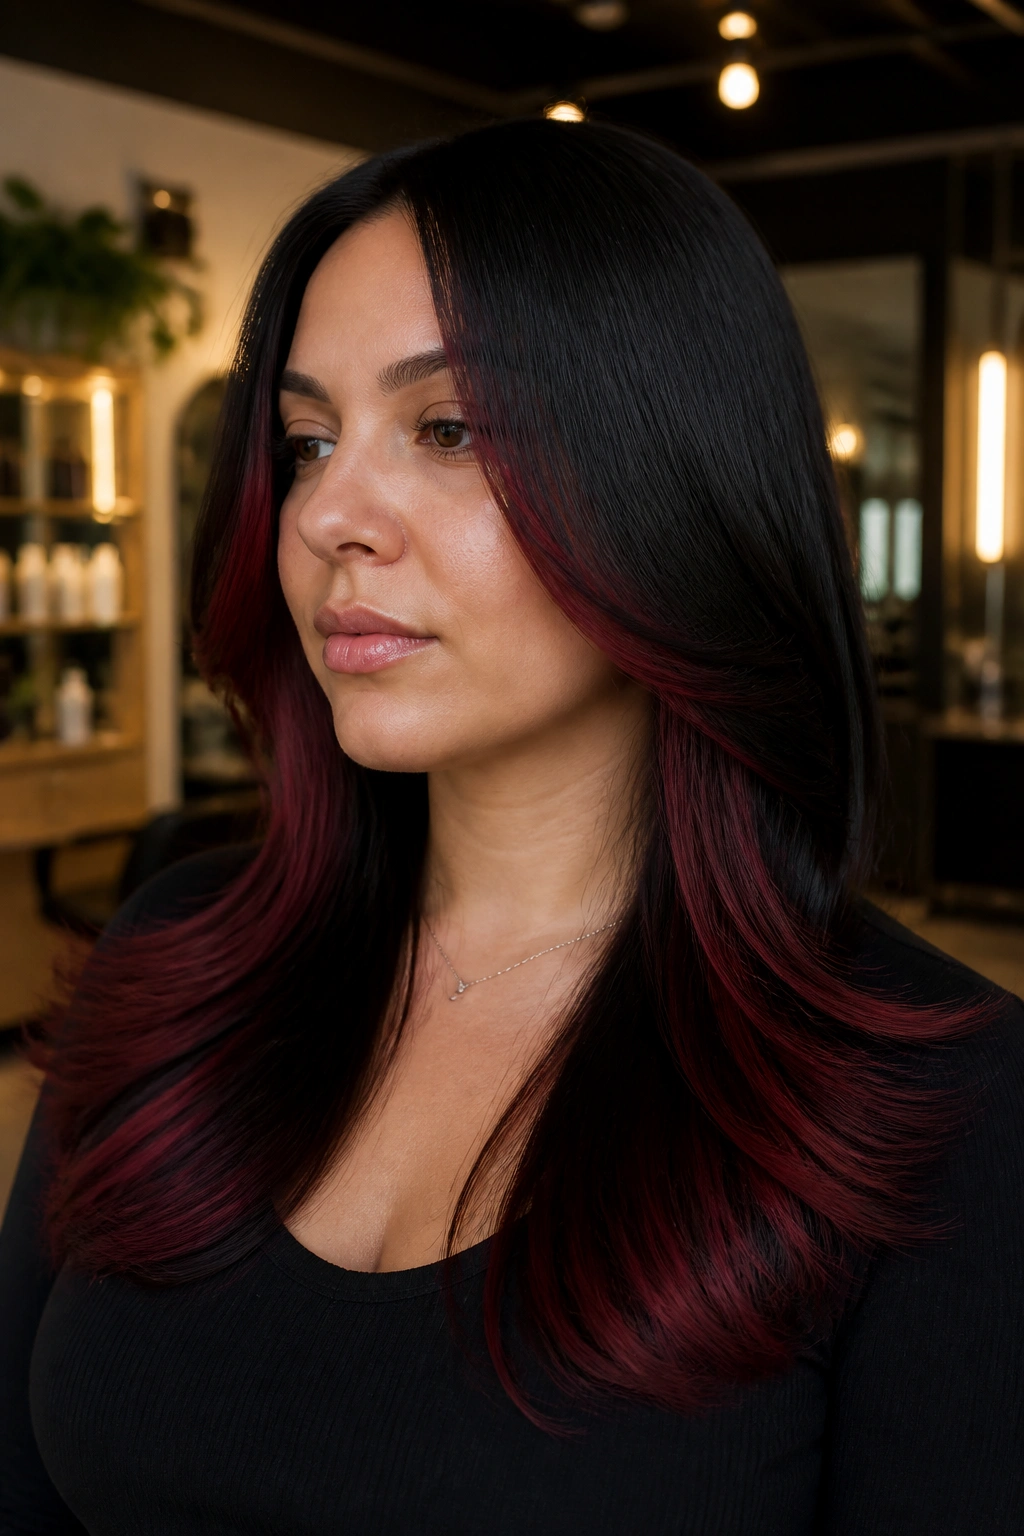
A lot of people think red needs to sit near the face to work. Not true. Velvet black panels around the temples can narrow a round face all by themselves, and the cherry tips give the whole style motion at the bottom, where it won’t broaden the cheeks.
The secret is in the balance. Keep the upper sides dark, almost like framing shadows, then let the cherry show on the last few inches of the hair. That draws the eye downward. On medium or long hair, it feels a little theatrical in a good way — like the hair was designed, not merely colored.
I’d choose this for straight styles and soft blowouts. Curly or very voluminous hair can sometimes spread the cherry too much across the lower half of the face. If that happens, keep the ends more tapered. The goal is a long line that finishes with a little spark.
14. Copper-Red Highlights on Black Waves
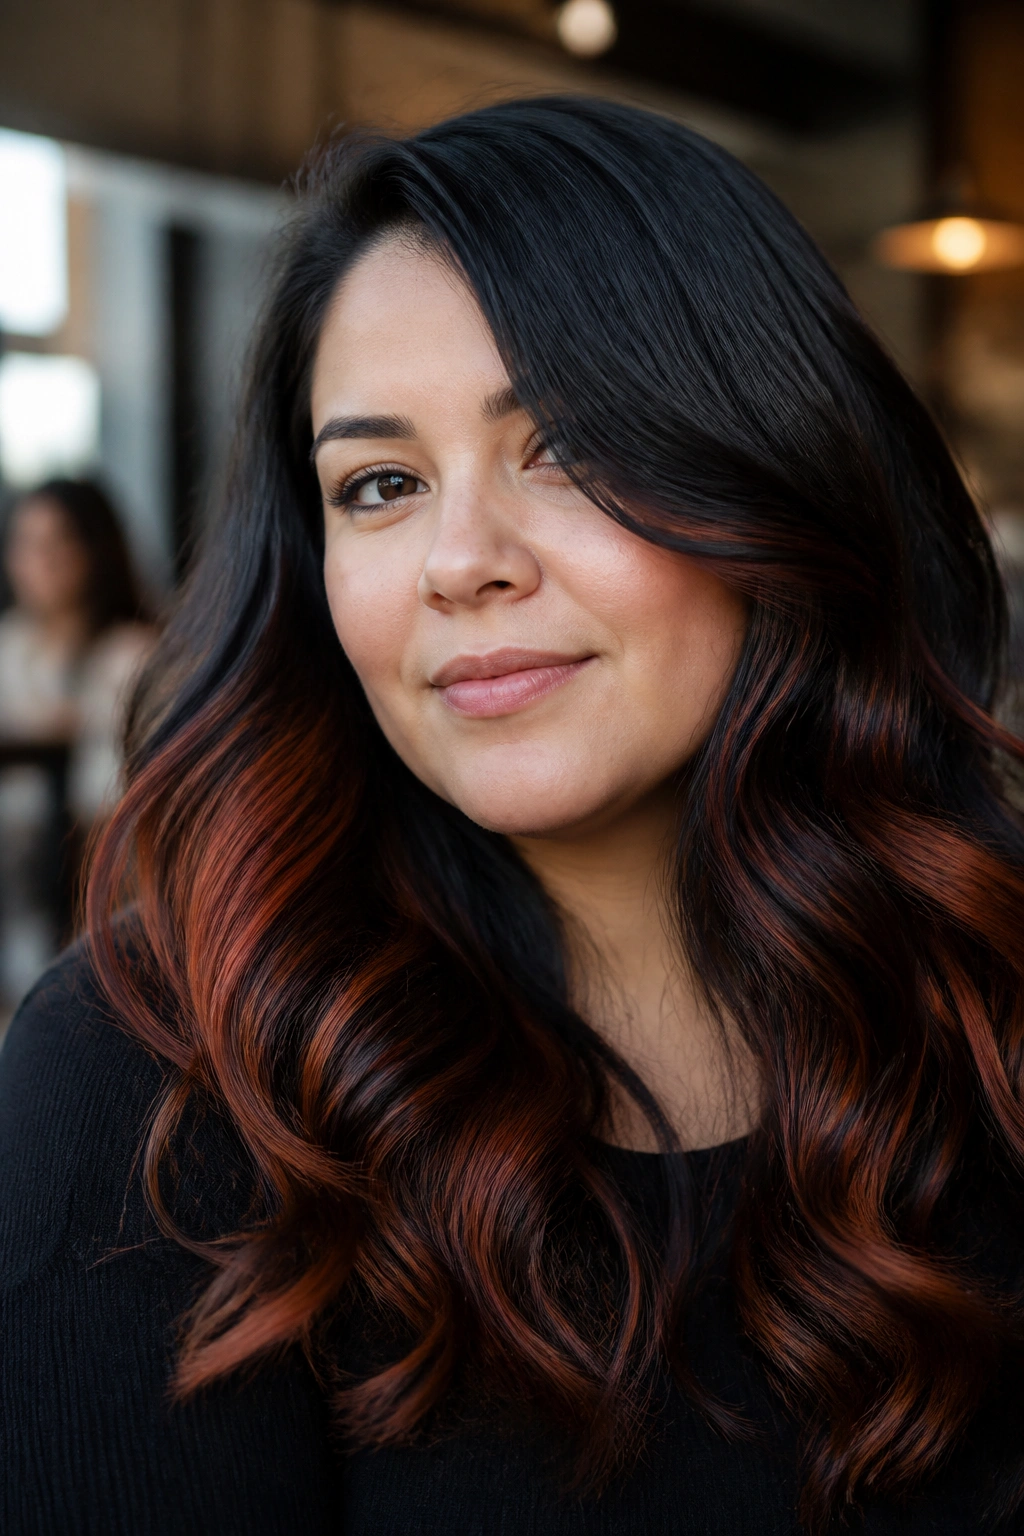
Copper-red can be kinder to a round face than a harsher neon red. It has warmth, but it doesn’t scream from across the room. On black waves, the copper reads like movement, especially when the brightest pieces are kept below the cheekbone.
That placement matters. Waves already add width if they start too high, so the color should follow the wave pattern lower down. Think collarbone, jaw, ends. Not temples and cheeks. A side part helps too, because it breaks the face up and gives the color a slightly asymmetrical fall.
This is a nice choice if you want red-black hair that feels wearable for work, dinner, and everything in between. It’s still bold. It just doesn’t announce itself in a blunt way. If you like a softer edge, copper is the shade I’d reach for before bright scarlet.
15. Deep Garnet Balayage for Thick Hair
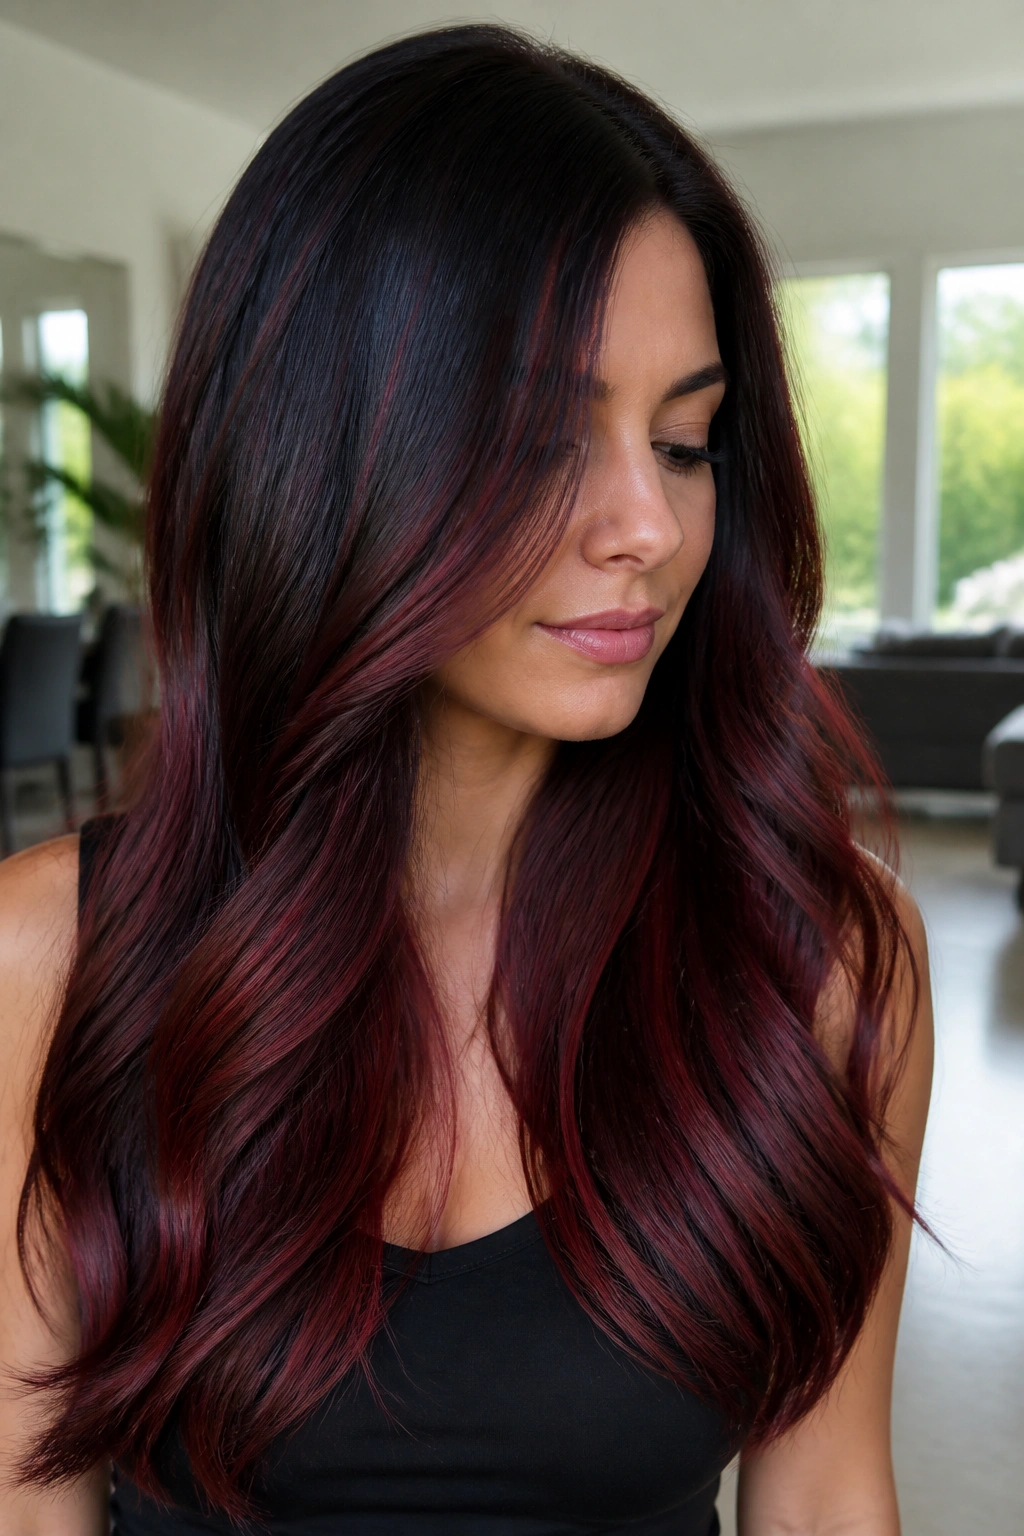
Thick hair needs color placement that respects bulk. Garnet balayage does that well because the red can be painted in thinner ribbons through the interior layers, leaving the surface darker and sleeker. On a round face, that internal contrast helps keep the sides from looking too wide.
A lot of people with thick hair make one mistake: they over-color the outer layer. Then every strand wants attention, and the silhouette gets bigger instead of smaller. Garnet is better when it’s tucked in and stretched through the mid-lengths. The black underneath should still be visible in the surface layer.
The Science Behind the Shape
Thick hair often expands the face line because it holds volume at the sides. By hiding some of the red in the interior, you keep the visual weight lower and closer to the body of the hair. A center part can work here if the layers are long; an off-center part works if you want extra length through the face.
A smoothing cream before blow-drying helps the balayage read as sleek, not frizzy.
16. Brick-Red Streaks with Chunky Black Lowlights
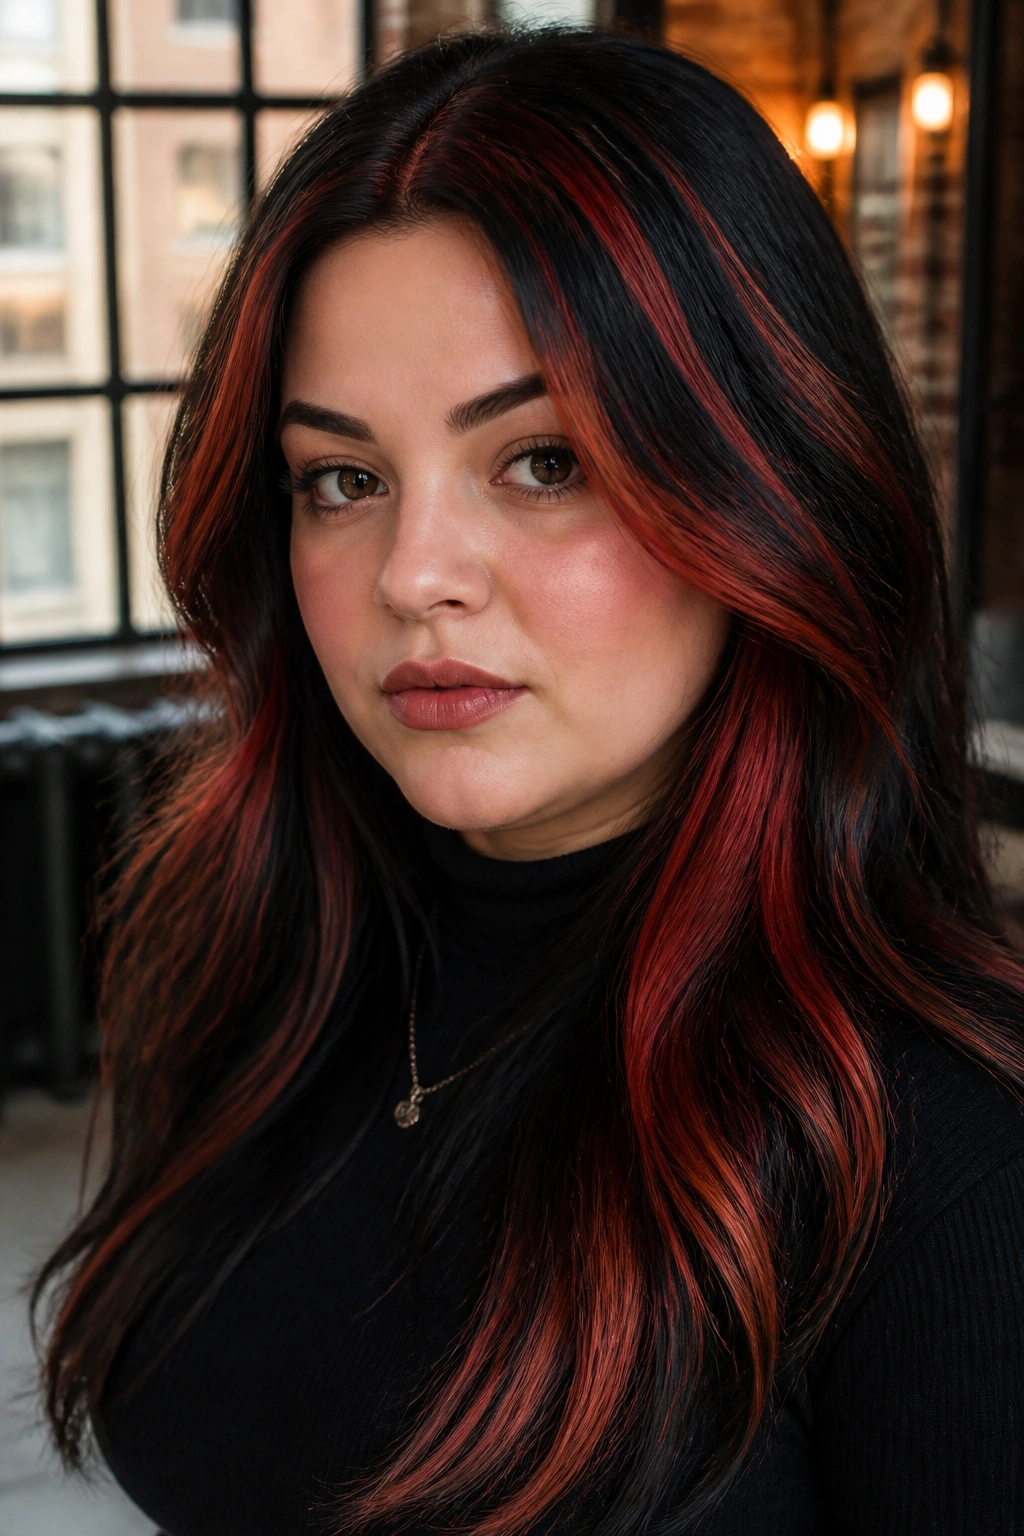
This is the boldest look on the list, and I’m not pretending otherwise. Brick-red streaks mixed with chunky black lowlights create a graphic, almost editorial effect. On a round face, the trick is to keep the streaks vertical or diagonal so they cut through the width rather than sitting across it.
This one is best when you want a visible color pattern, not a soft melt. The black lowlights should sit at the sides and underneath, where they carve out shape. The brick-red can then live through the top and front sections. If the highlights are too evenly spaced, the whole thing can look flat and a little dated. Uneven spacing keeps it alive.
It suits sharper cuts, stronger brows, and a person who likes hair with opinions. Not everyone does. That’s fine. If you want quiet color, skip this and move on. If you want the hair to lead the outfit, this one does the job.
17. Red Halo Highlights Around the Crown
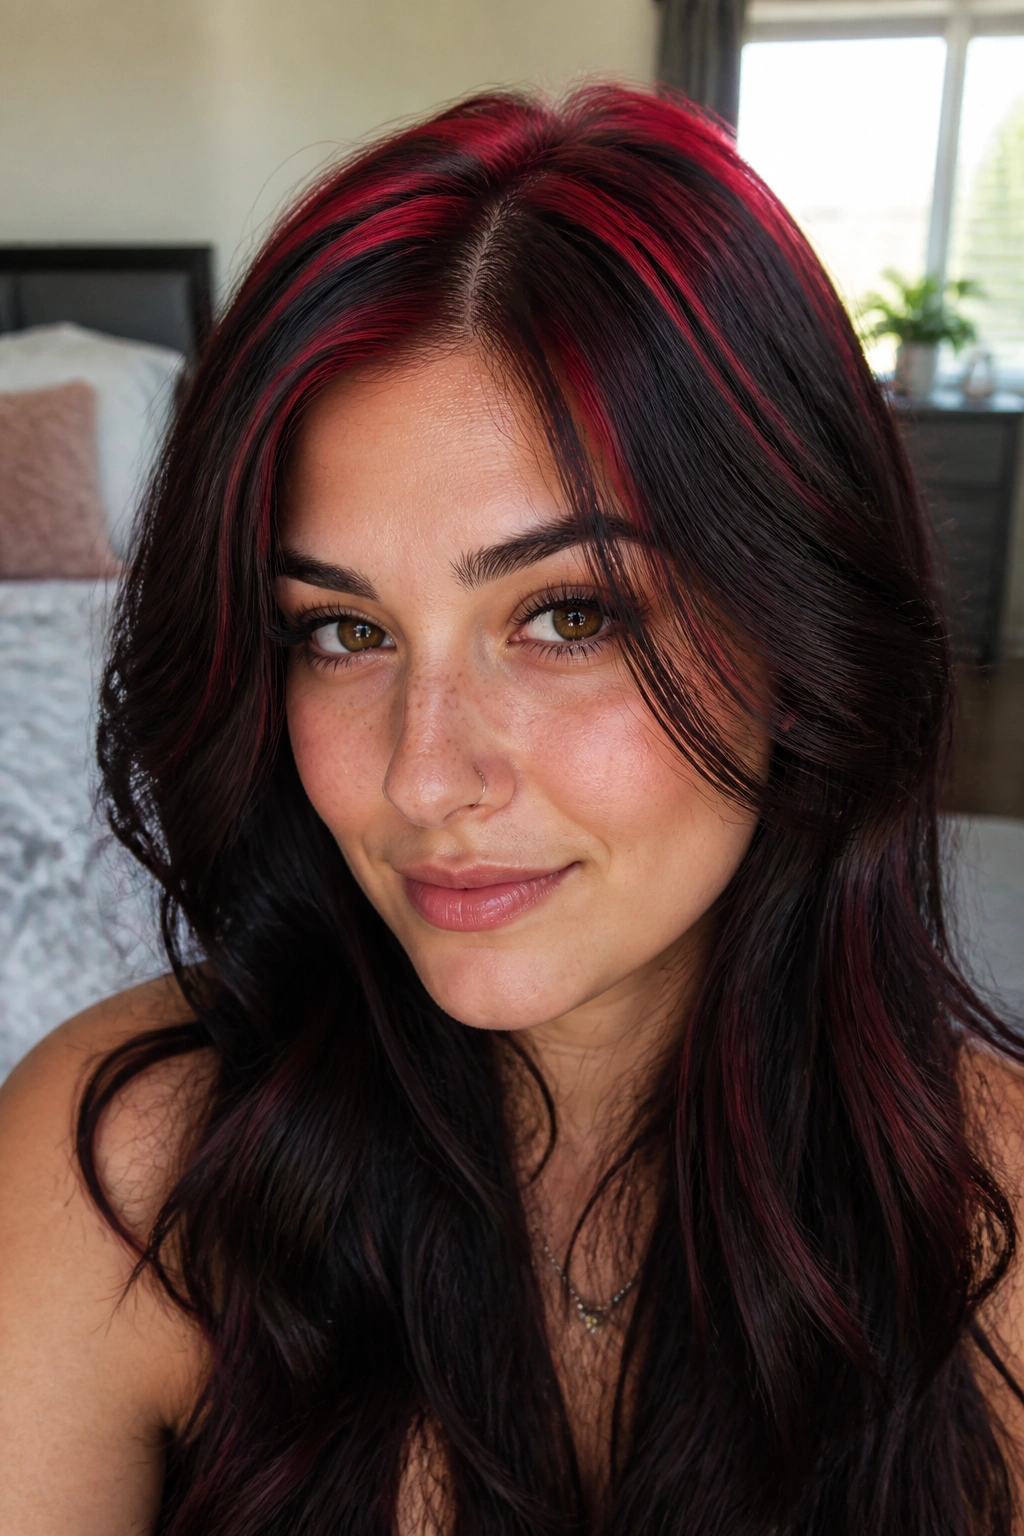
Why does a crown halo flatter a round face? Because it sends the eye upward before it sends it sideways. That little shift changes the whole reading of the face. Red halo highlights sit around the top of the head and keep the sides darker, which gives the illusion of height.
The placement should be soft and broken, not one clean ring. Think scattered lights around the top layers, with the brightest red near the part and just behind the hairline. You do not want a literal halo stripe. That would be too neat, and neat can turn rigid fast.
This color looks especially good with half-up styles. Pull a small section back at the crown, and the red catches the light while the dark lengths hang below. It’s also a smart option if your hair is fine and you want volume without teasing the life out of it. The color does part of the lifting for you.
18. Black Fringe with Red Temples and Sides
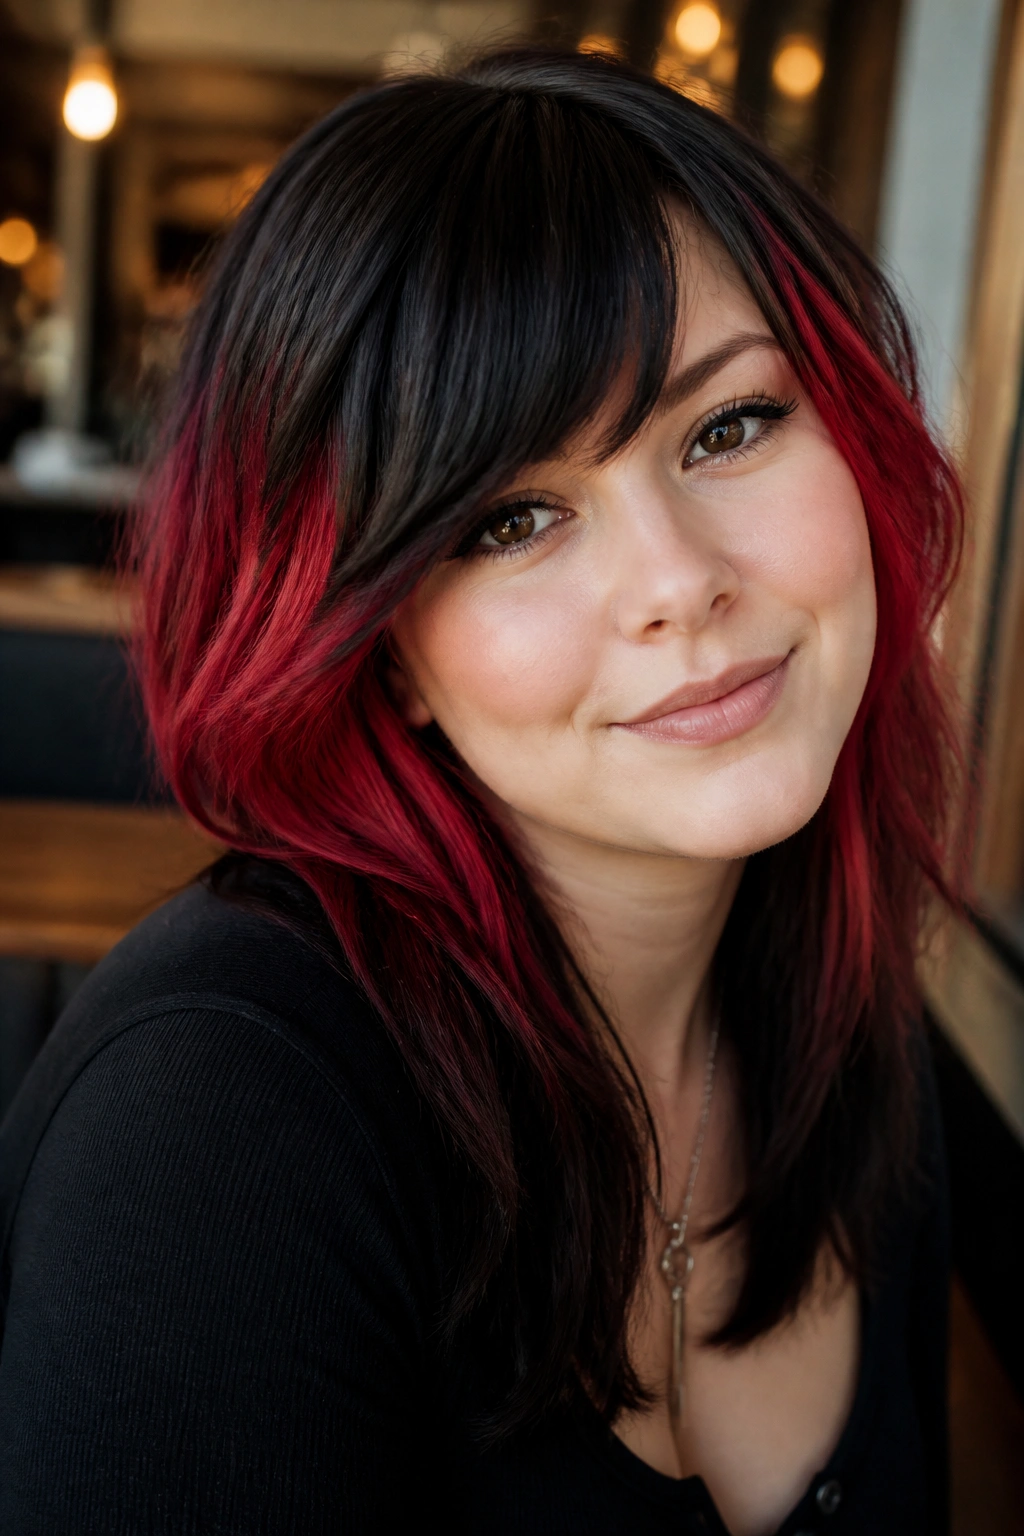
This is the look for someone who wants a little edge without losing shape control. Black fringe at the front keeps the eye centered, while red at the temples and outer sides breaks up the roundness. It’s an asymmetric trick, and it works because it prevents the face from reading as one smooth circle.
The best version uses a side-swept fringe rather than a blunt bang. Blunt bangs can shorten a round face fast. A fringe that moves diagonally across the forehead gives more length. Then the red at the temples adds just enough light to make the cut feel alive.
If you wear glasses, this can be especially good. The darker fringe keeps the frame area tidy, and the red at the sides gives the whole shape a little heat. Keep the color close to the head at the temples, not blown out wide, or you lose the slimming effect.
19. Cinnamon-Red Ribbon Highlights on a Lob
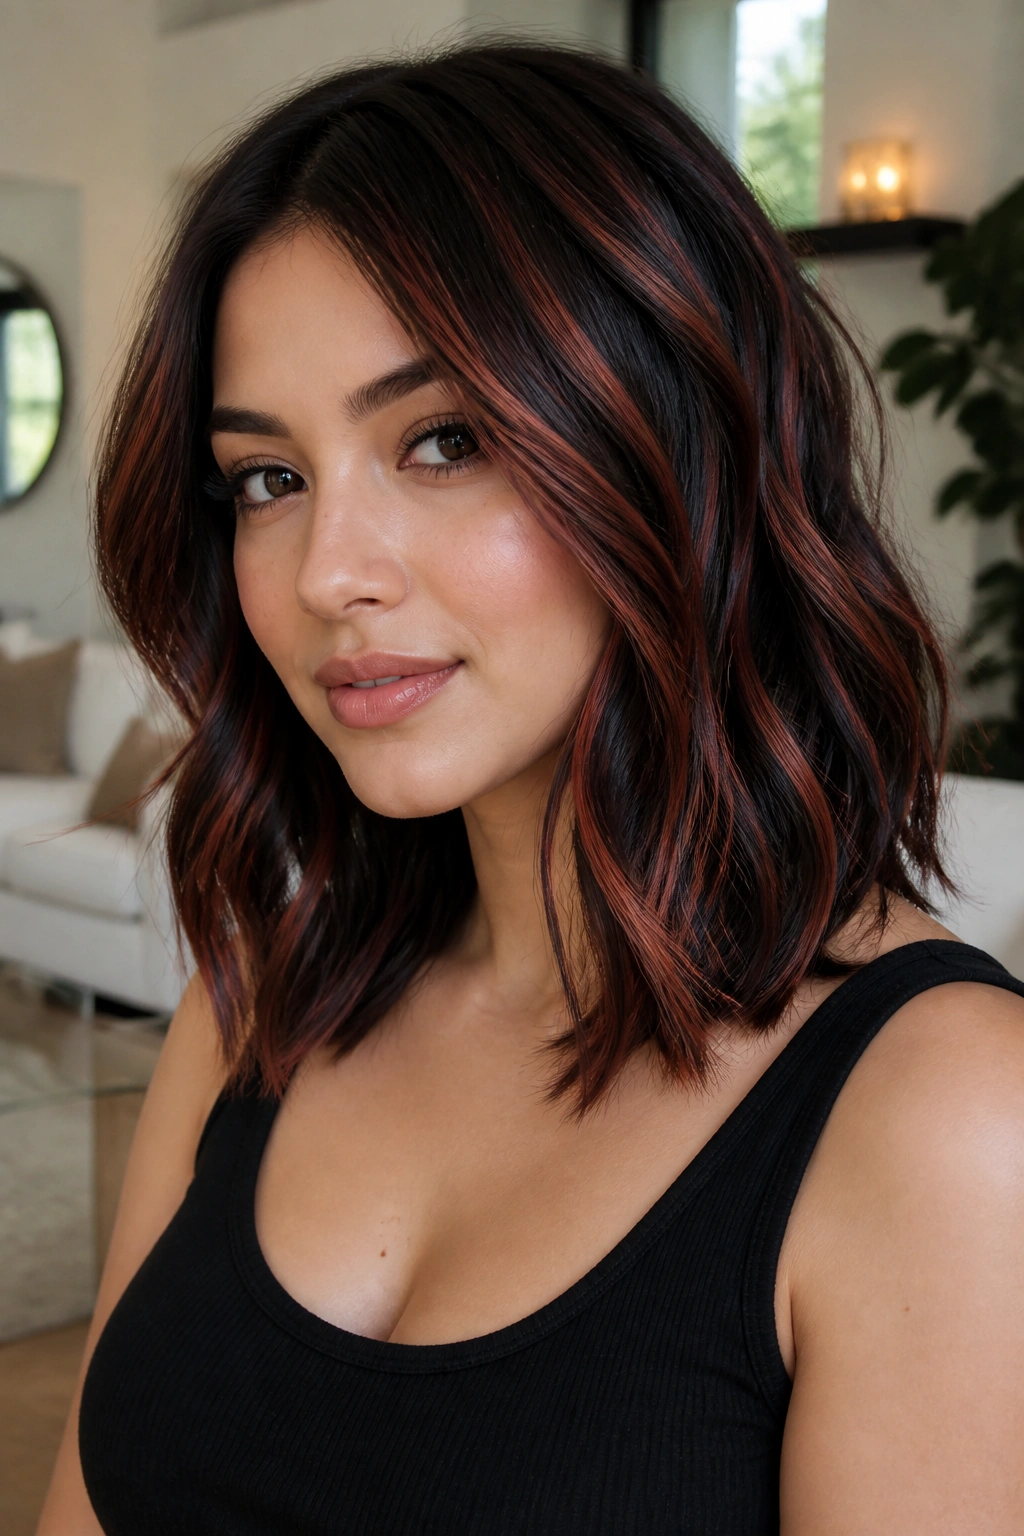
A lob with cinnamon-red ribbons is one of those styles that looks simple until you study it. Then you see how the ribbons travel from the upper cheek area down toward the collarbone, and that diagonal line is doing all the work. Round faces need that kind of direction.
The red should be thin enough to feel like movement, not blocks. I’d ask for ribbons no wider than three-quarters of an inch, especially near the front. The black base should still dominate, because the contrast is what gives the face its contour. Too much cinnamon and the whole shape starts to widen.
This is a friendly color choice if you don’t want the drama of cherry or scarlet. It warms the hair, plays nicely with waves, and still looks polished when worn straight. A lob with a slight underbend at the ends keeps the whole look tucked in around the jaw instead of flaring out.
20. Dark Cherry Money Piece with Blunt Ends
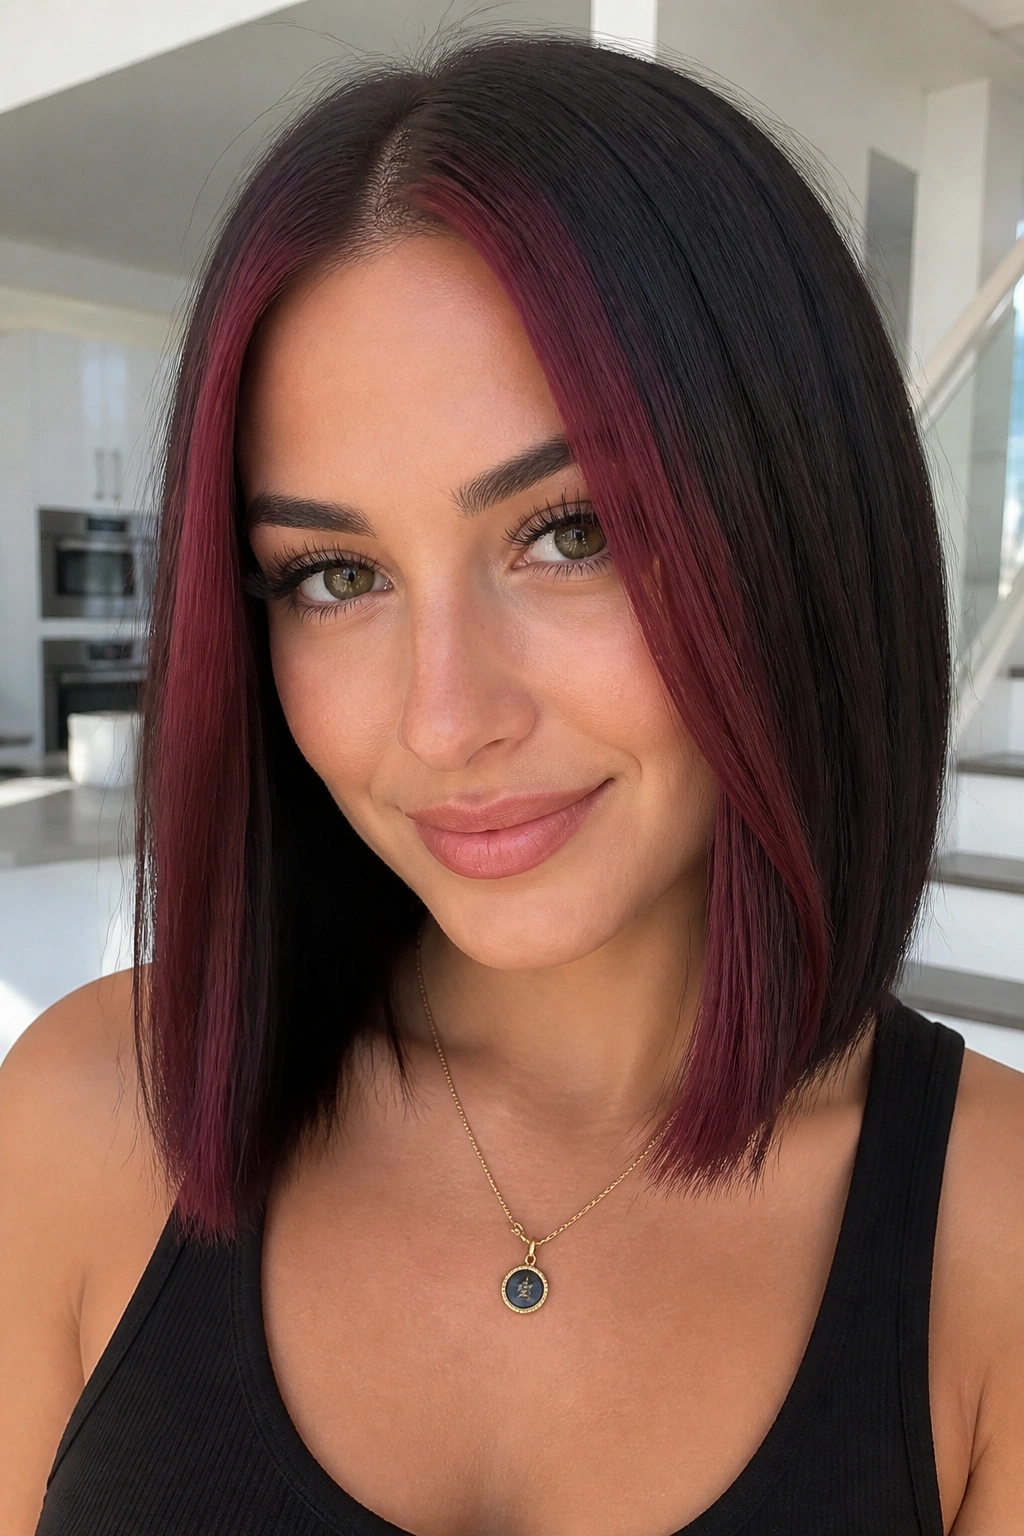
Blunt ends can actually help a round face if the front color is doing something smart. The cut gives the hair a clean lower line, and the dark cherry money piece cuts vertically through the face. Together, they create a neat frame that feels more structured than soft.
This works best on straight or lightly beveled hair. The blunt edge should sit below the chin or just at the collarbone, depending on your neck length. That extra bit of length keeps the roundness from getting boxed in. Then the money piece brings the eye upward and down in one move, which sounds odd but looks good in practice.
I like this when the face itself is soft and the wardrobe leans minimal. The hair becomes the statement. If you curl it too much, the shape can expand at the cheeks, so keep the styling sleek. A pass with a flat iron and a touch of serum is usually enough.
21. Red Babylights on a Curly Bob
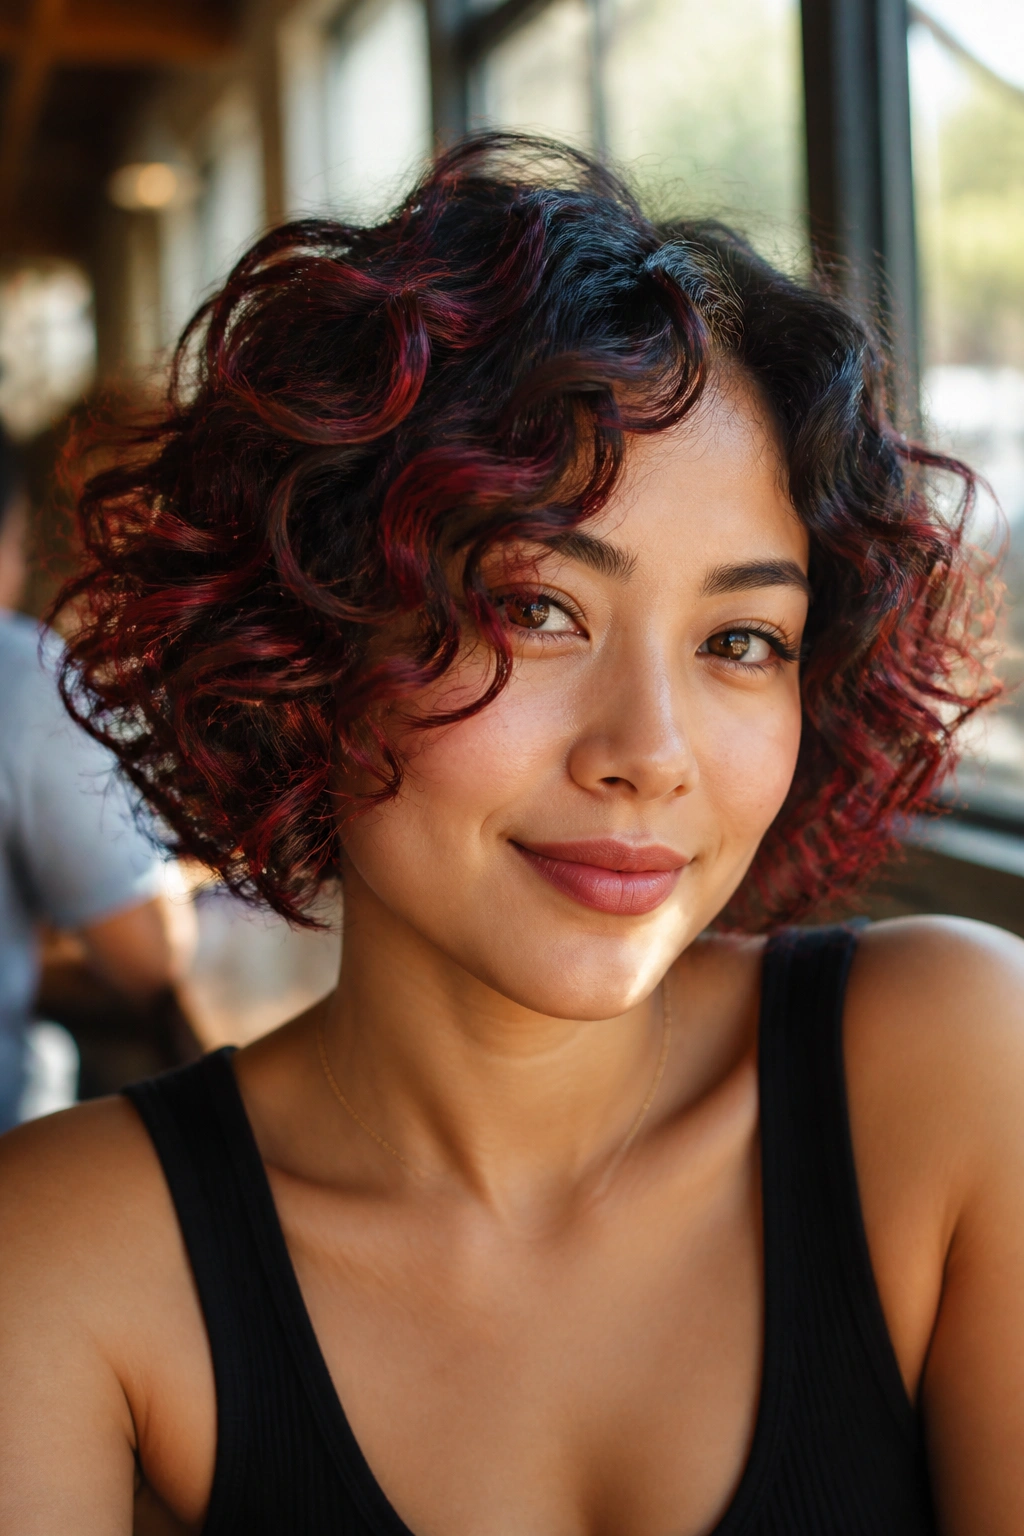
Curly bobs are tricky. They can look gorgeous, but they can also widen a round face fast if every curl gets the same amount of color. Red babylights solve that by adding tiny flashes of pigment to select spirals instead of flooding the whole shape.
The key is placement around the crown and lower perimeter, not the widest middle section. That gives lift without blowing out the sides. If the curl pattern is tight, ask for very fine painting — almost whisper-thin strands. If the curl pattern is looser, the lights can be a little more visible, but still scattered.
How to Use It
- Keep the darkest black near the sides of the face.
- Place the red on the top curl layer and a few lower spirals.
- Diffuse on low heat so the curl clumps stay separate.
- Finish with a light oil, not a heavy cream.
This is a lovely way to make short curls feel dimensional without turning them into a big red cloud.
22. Black Crown Smudge with Crimson Mid-Lengths
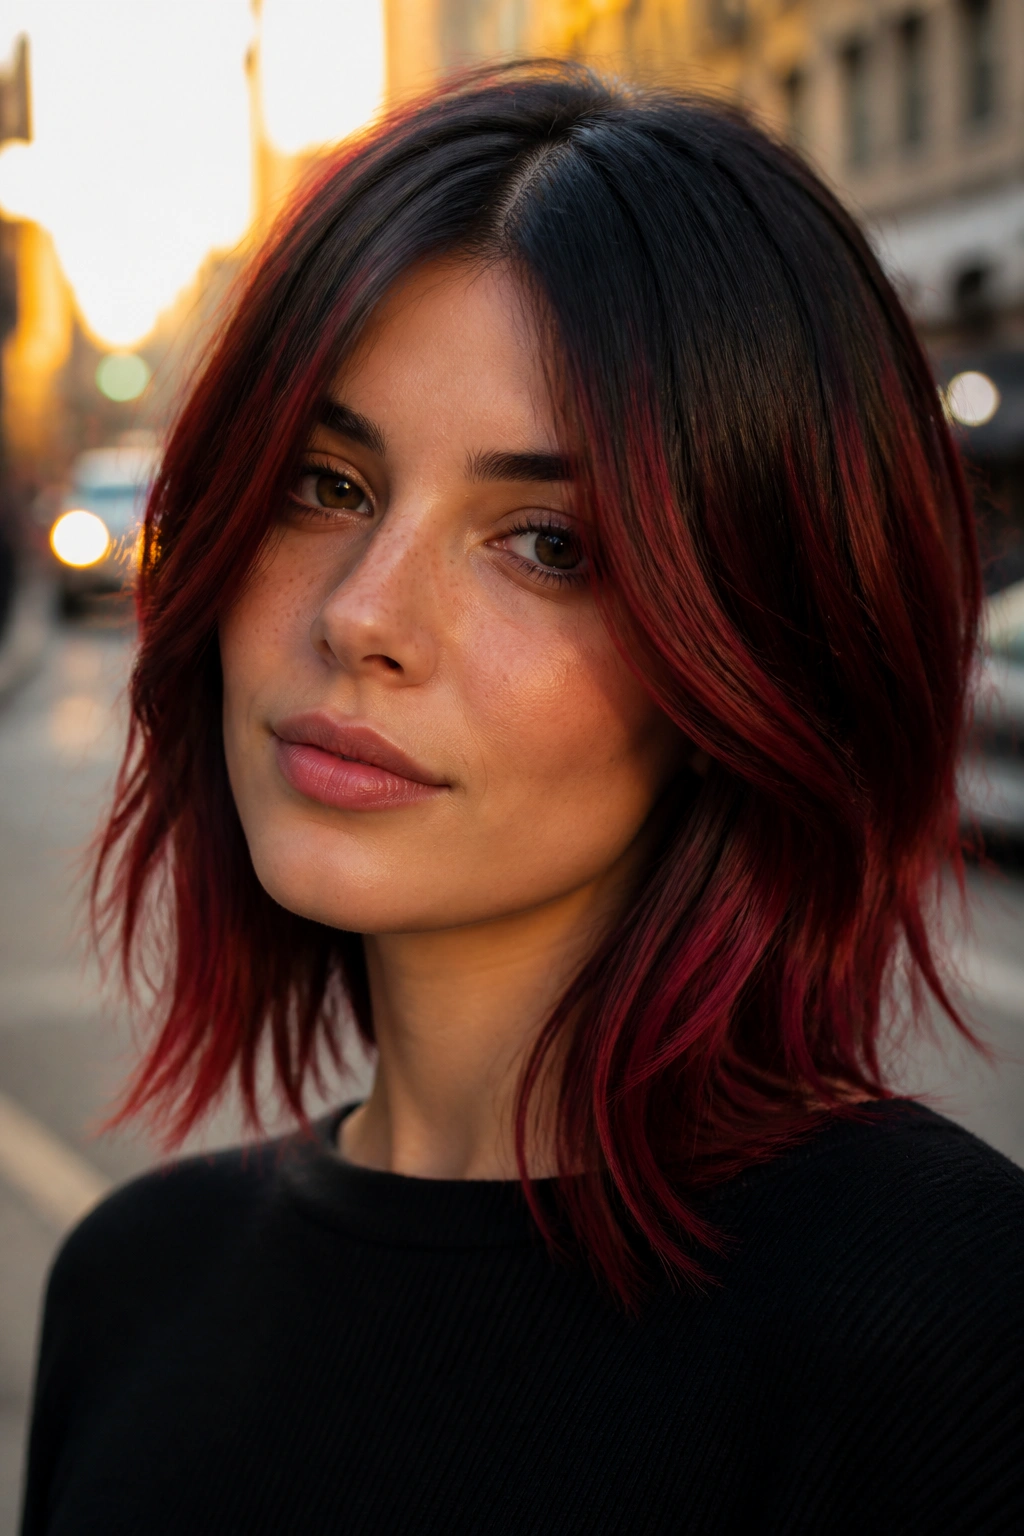
A crown smudge is one of the most useful color tricks for round faces. It keeps the root zone dark and soft, which lifts the eye upward, and then lets crimson take over through the mid-lengths where the hair can hang longer and sleeker. The face gets shape without looking over-contrived.
The smudge should not stop in a harsh line. It needs to melt. That soft transition is what keeps the top of the head from looking heavy. If the crimson starts too high on the sides, the face can widen, so keep the brightest pieces in the front-center and through the lengths.
This look suits medium hair especially well. It has enough length to show the fade, but not so much length that the red disappears. If you like volume at the roots, this is one of the nicer choices because the darker crown works with lift instead of against it.
23. Rose-Red Highlights with Smoky Black Base
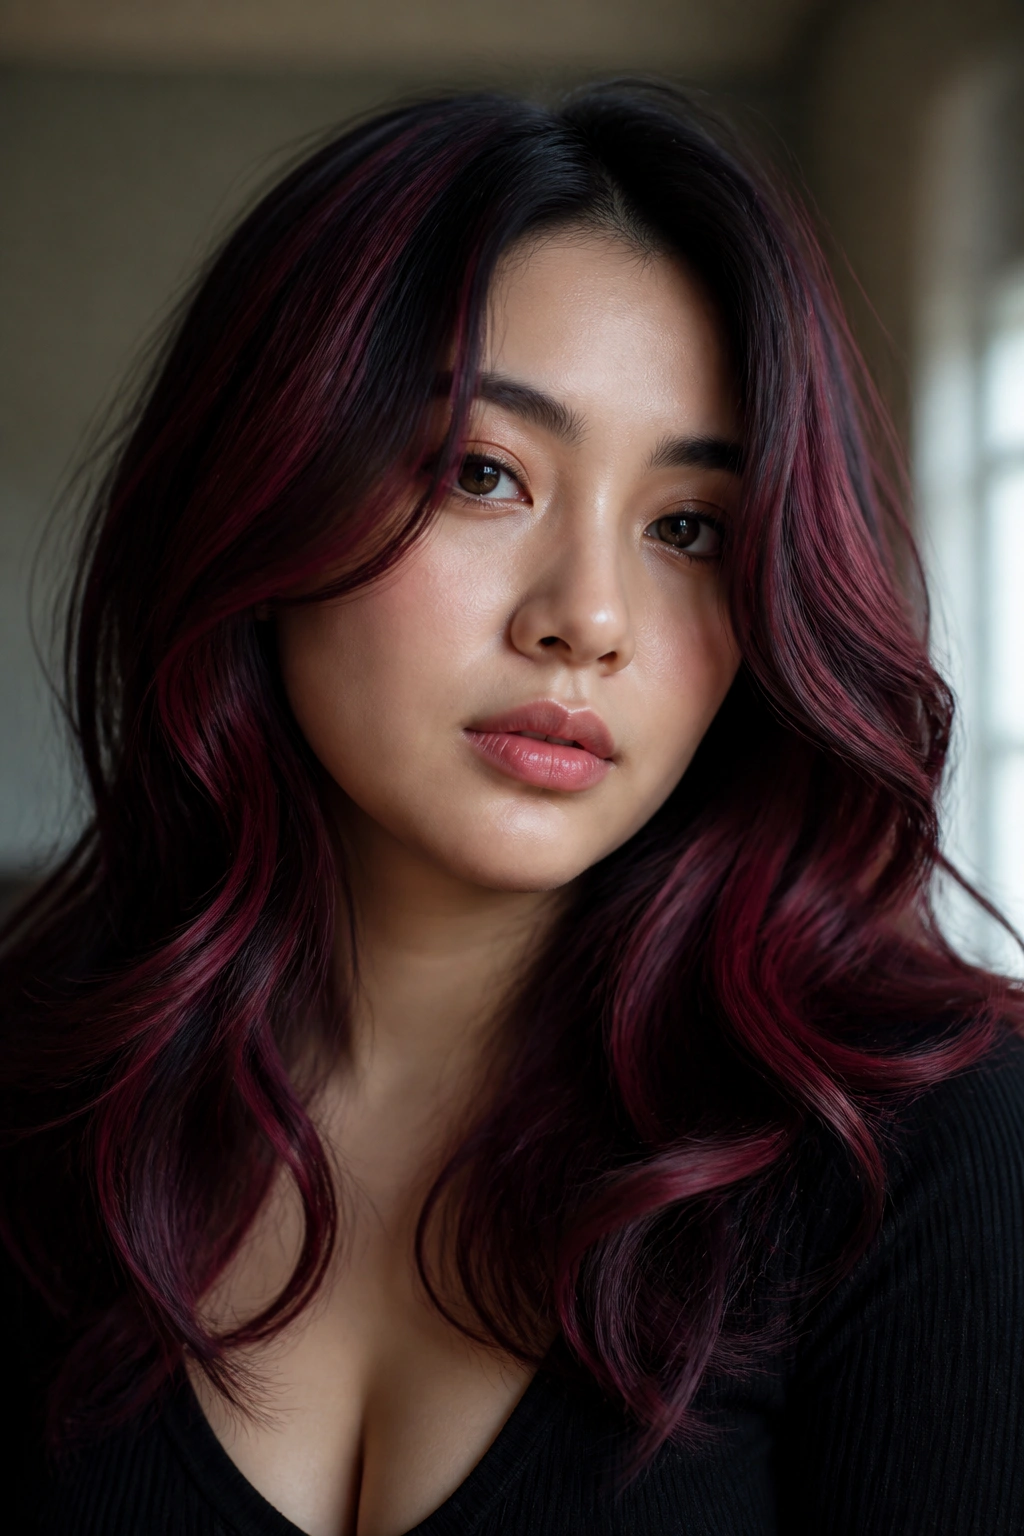
Rose-red is softer than cherry, and that softness can be a gift on a round face. A smoky black base gives it contrast, but not the kind that feels harsh. The effect is moody, elegant, and easier to wear if you live in clothes that don’t scream for attention.
What makes this flattering is the placement of the rose-red, not just the tone. Keep it feathered through the front lengths and lower layers, and avoid stacking it right at the cheekbone. The smoky black should stay visible near the hairline and sides so the face keeps its structure. If you add a wave, keep it loose and elongated.
This is one of my favorite options for cooler skin undertones, though it can work on warmer skin too if the rose leans deeper and less pink. It doesn’t fight the face shape. It just softens it.
24. Fire-Red Panels in a Wolf Cut
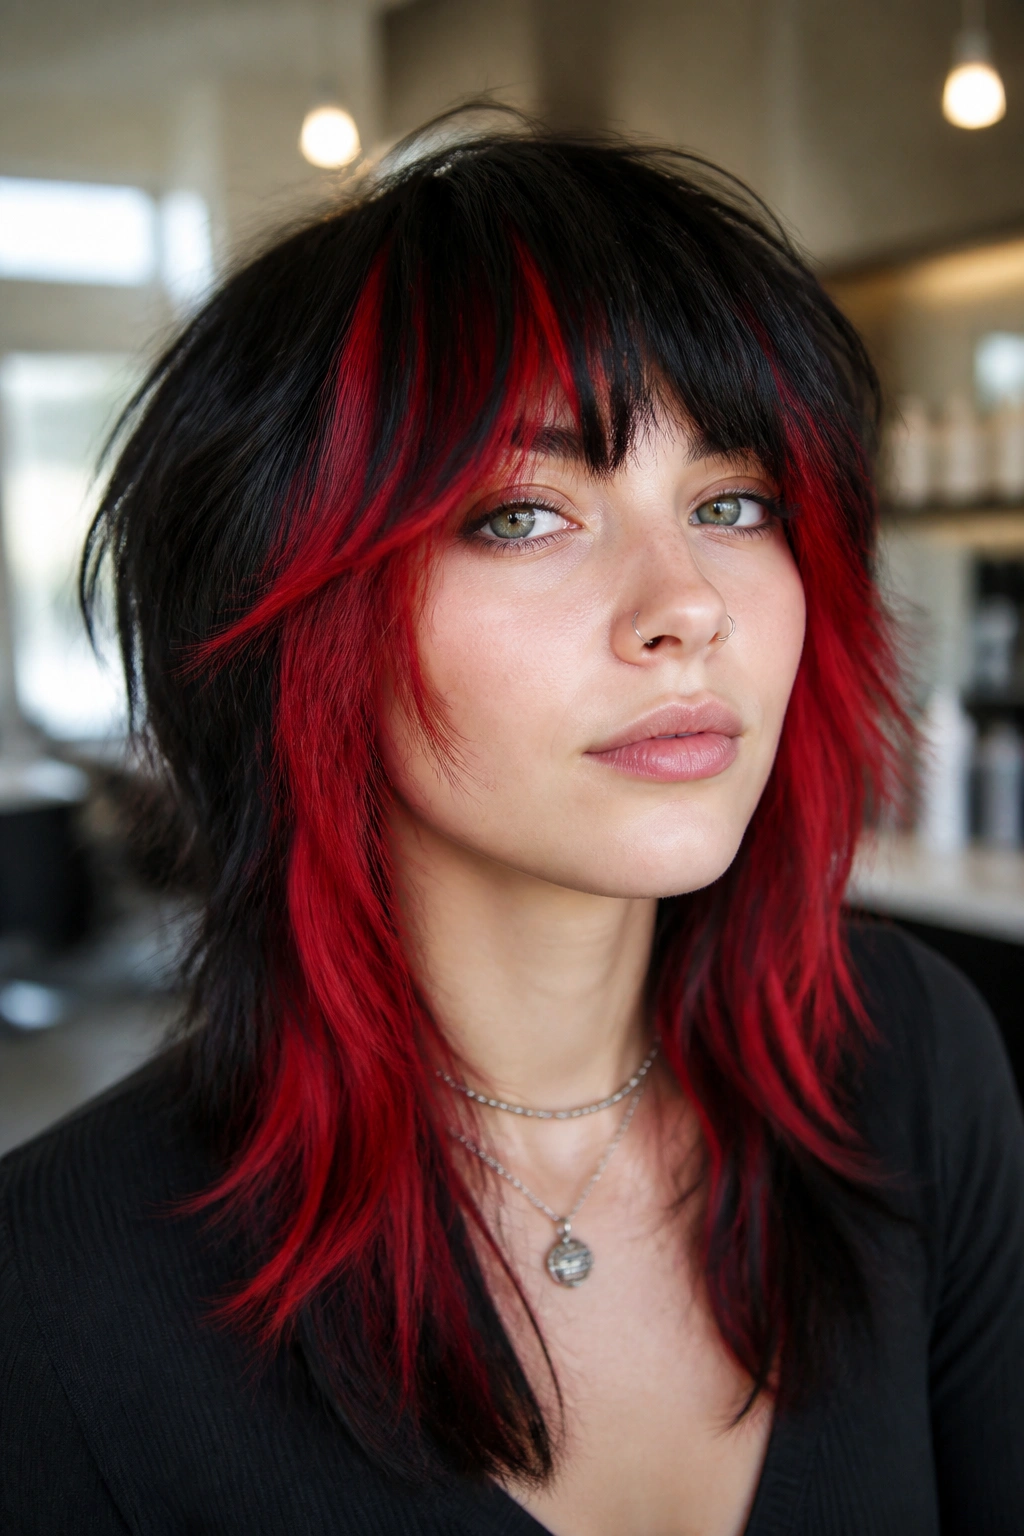
A wolf cut already has built-in shape, which makes it a solid partner for fire-red panels. The layers break up the width, and the red panels can be dropped into the longer pieces without making the face look rounder. That’s the real advantage here.
The panels should live in the outer layers, not all over the head. Keep them vertical, especially near the front. The black base underneath helps the cut look piecey instead of puffy. If the ends are too blown out, the style loses that sharp, slightly messy feel that makes a wolf cut work.
What to Watch For
The face-framing layers need to start lower than you might think. If they start too high on a round face, the width lands right where you do not want it. Keep the shorter pieces airy and the longer pieces visible, and the whole cut reads more angular. That’s the point.
A matte texture spray can help the layers separate. Shiny and fluffy is a hard no here.
25. Plum-Red Lowlights Under Jet-Black Hair
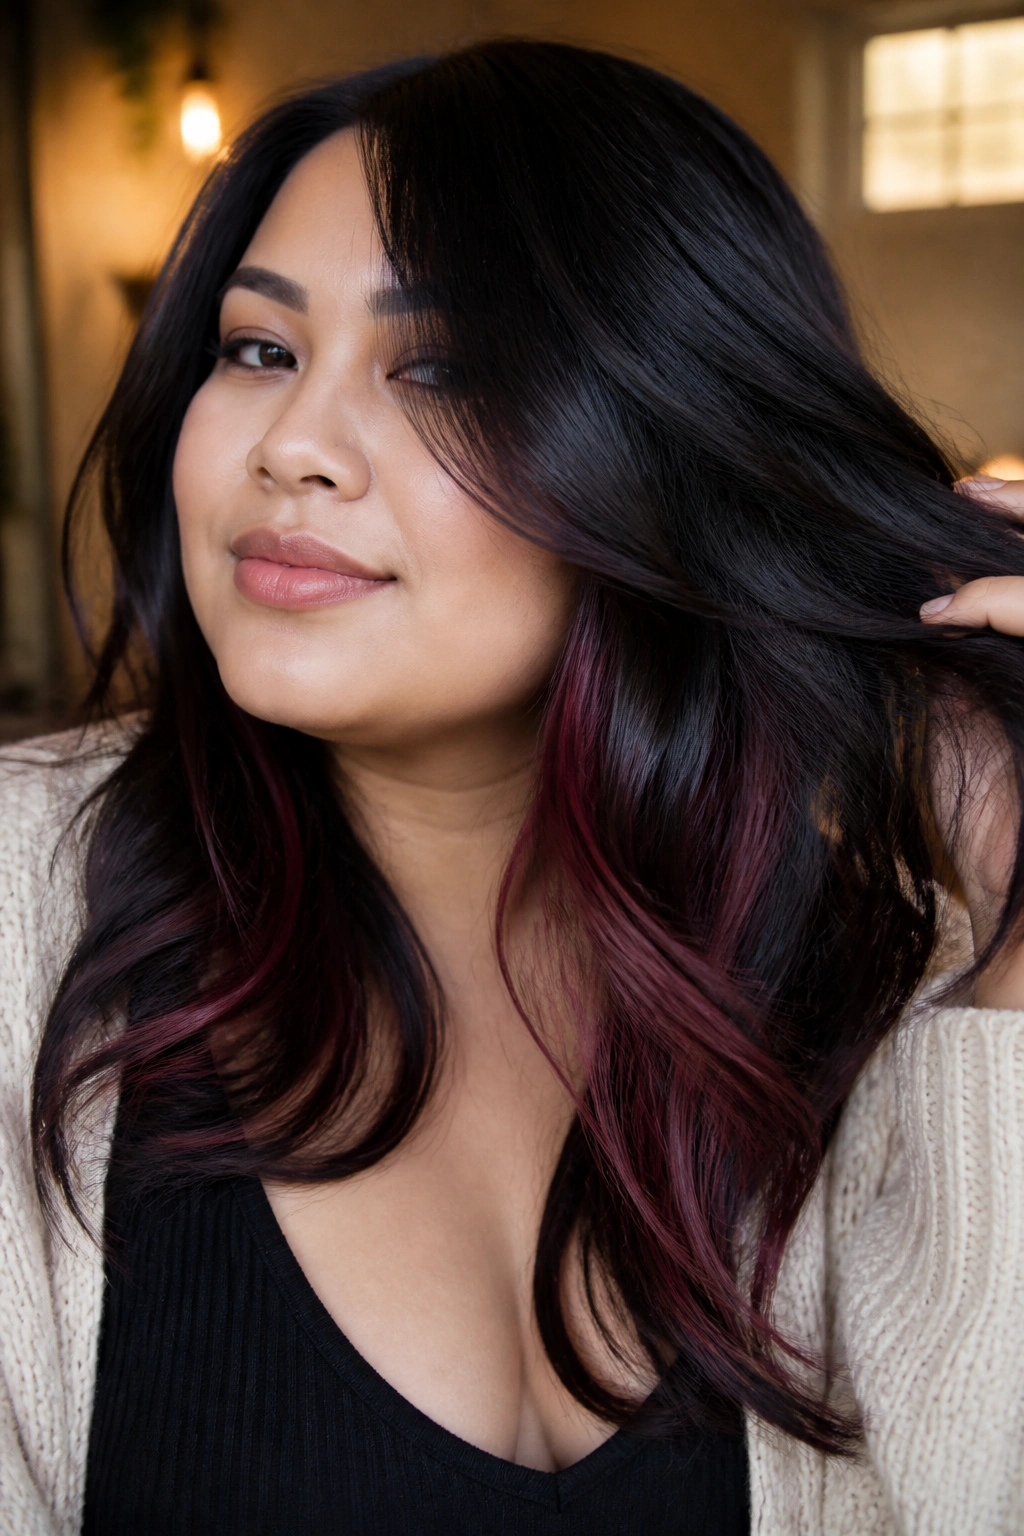
If you want drama that shows up only when the hair moves, plum-red lowlights are a smart bet. They sit beneath the jet-black surface, so the color stays secretive until the light hits it or the hair swings open. On a round face, that hidden placement is useful because it keeps the sides dark and controlled.
This is one of the more low-maintenance looks on the list. Since the black dominates, the regrowth is less obvious, and the plum-red peeks through in layers rather than all at once. That means the face stays framed by darkness, which can make the cheeks look slimmer. It also works well if your hair is naturally thick or coarse, because the lowlights help break up the mass.
I’d wear this with soft bends or even straight. The color has enough depth on its own. If you curl it too tightly, you hide the best part.
26. Scarlet Underlights for Braids
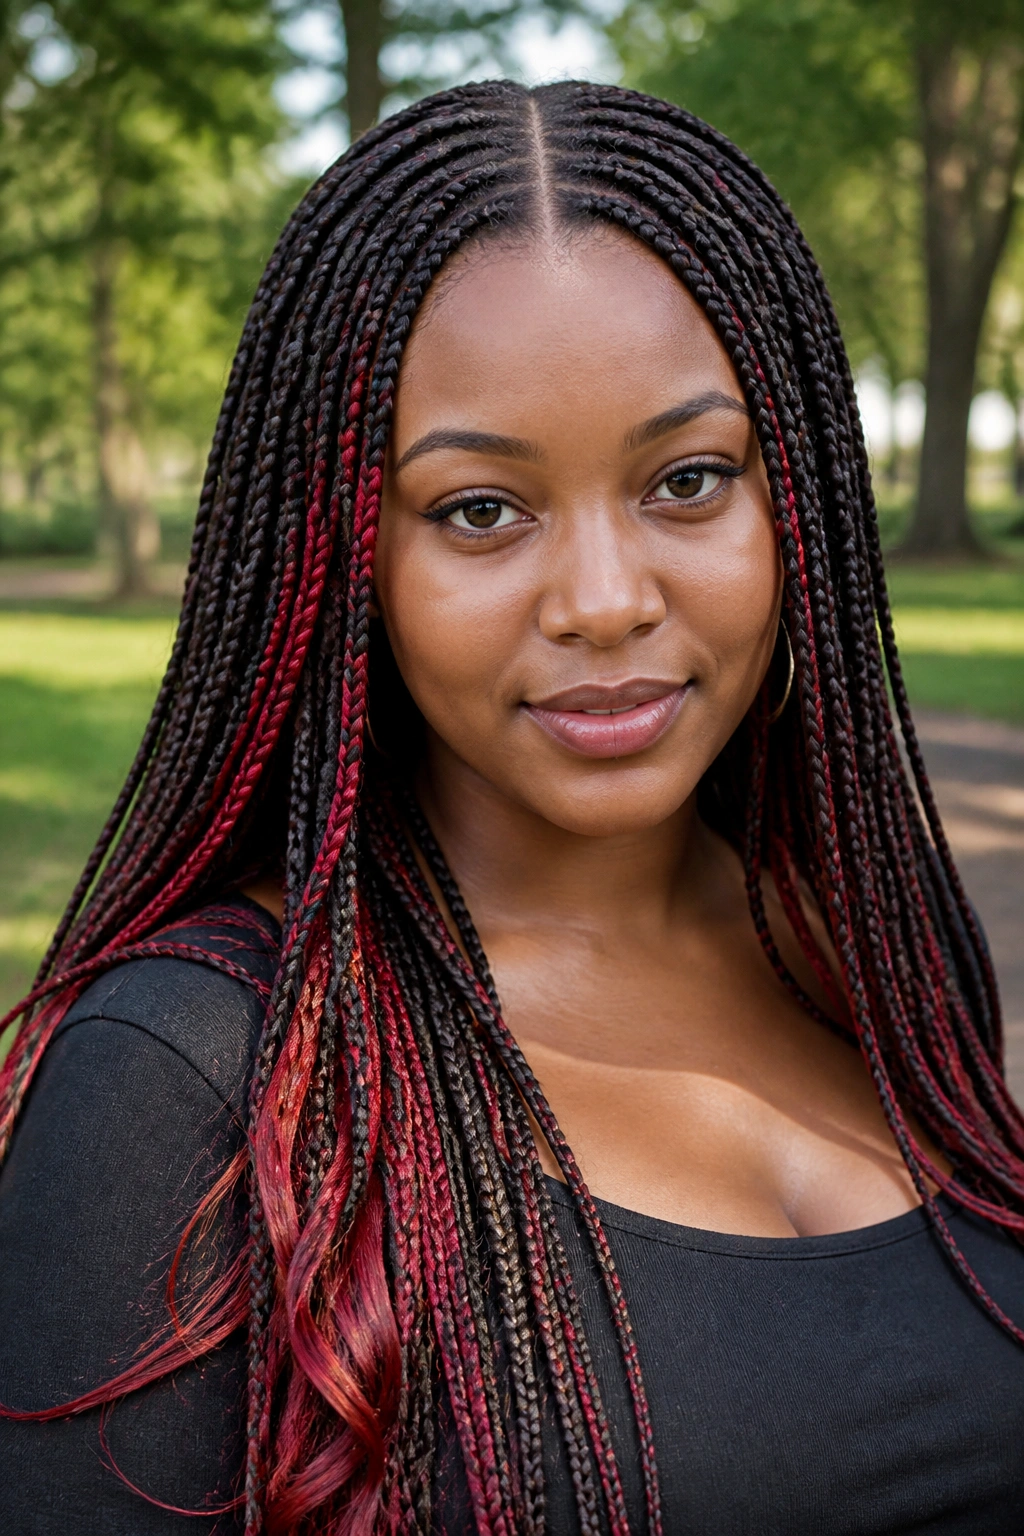
Braids expose color in lines, and lines are your friend on a round face. Scarlet underlights woven beneath a dark base give the braid movement without spreading brightness across the sides of the head. That makes this one a sleeper hit.
The color placement matters more than the braid style. Box braids, Dutch braids, fishtails, or a simple rope braid can all work, as long as the scarlet lives underneath and peeks through the weave. A center part can be nice here, because it gives the braid a clear vertical path. Side braids can work too, but keep the front sections a little sleeker so the face doesn’t get crowded.
This is a good pick if you wear updos often. The color looks tidy when pulled back and more dramatic when loosened. A braid also keeps the red from spreading visually too far at the cheeks, which is the whole challenge with round faces.
27. Deep Wine Contour Highlights Along the Jaw
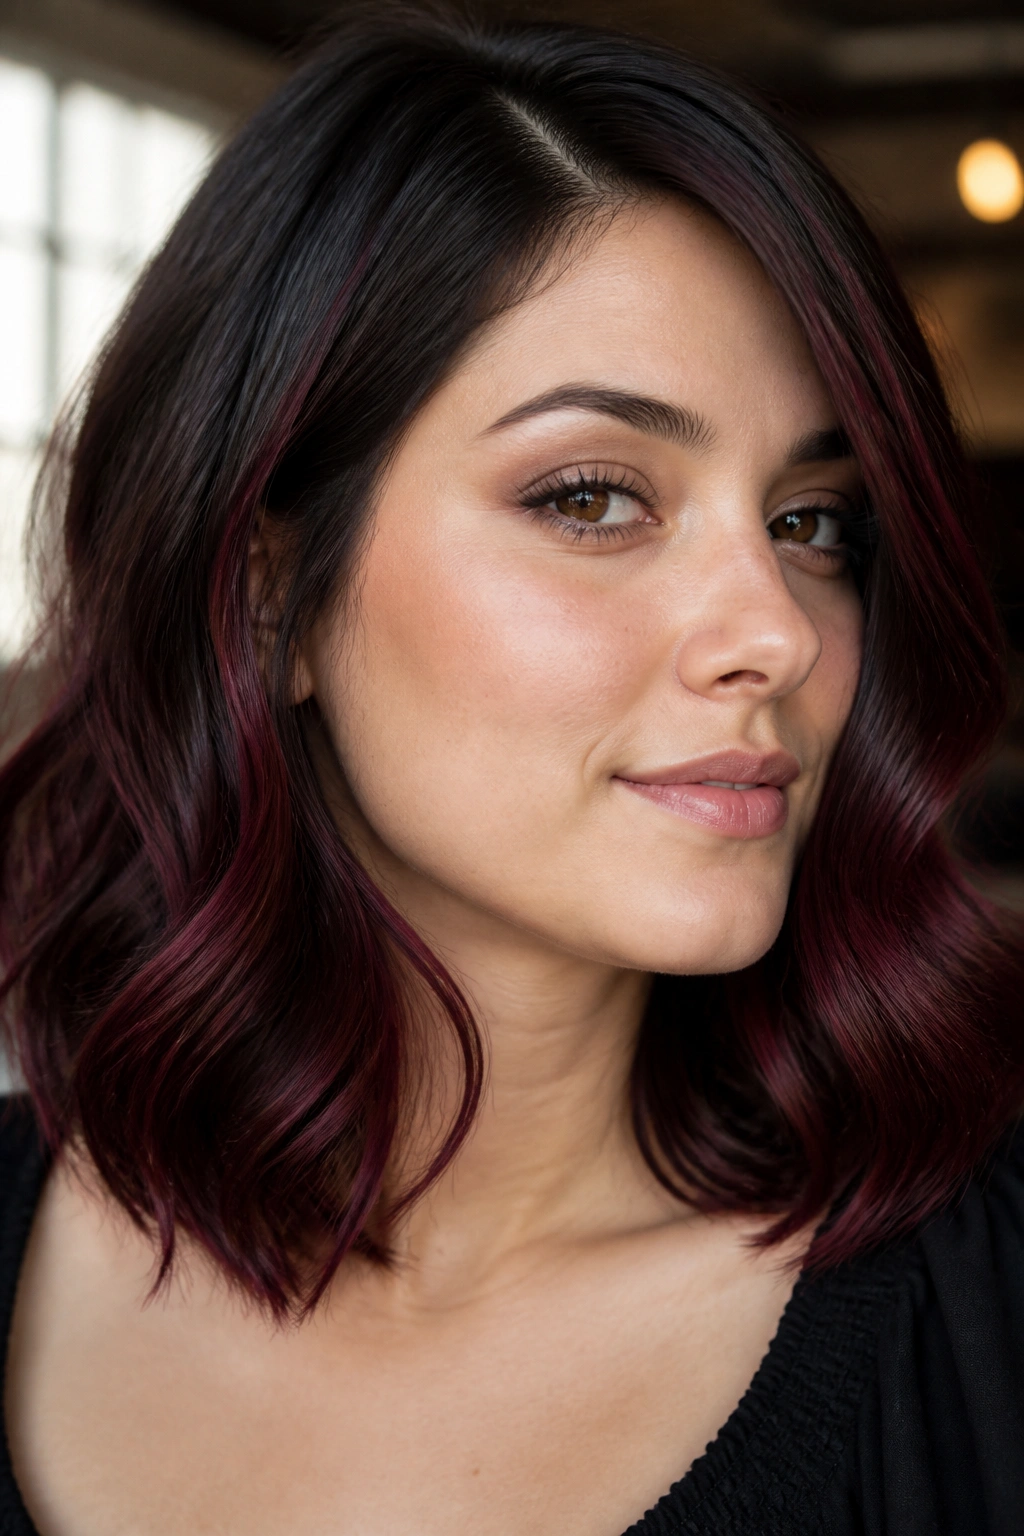
This is contouring, hair-color style. Deep wine highlights placed along the jawline can slim a round face because they create a darker, longer frame around the lower half of the face. The red is rich enough to show movement, but deep enough not to broaden the widest point.
I’d keep these highlights at least 1 to 2 inches below the cheekbone line, then let them trail down through the lengths. That small gap matters. If the color starts too high, the cheeks pick it up and the face can feel wider. Add a side part and a little bend through the front, and the shape gets even cleaner.
This is a flattering choice if you like medium-length layers that hit around the collarbone. The wine tone softens the jaw without making the style look heavy. It’s especially nice with black roots or an espresso base, because the contrast frames the face instead of filling it in.
28. Black-and-Red Gradient with Long Curtain Layers
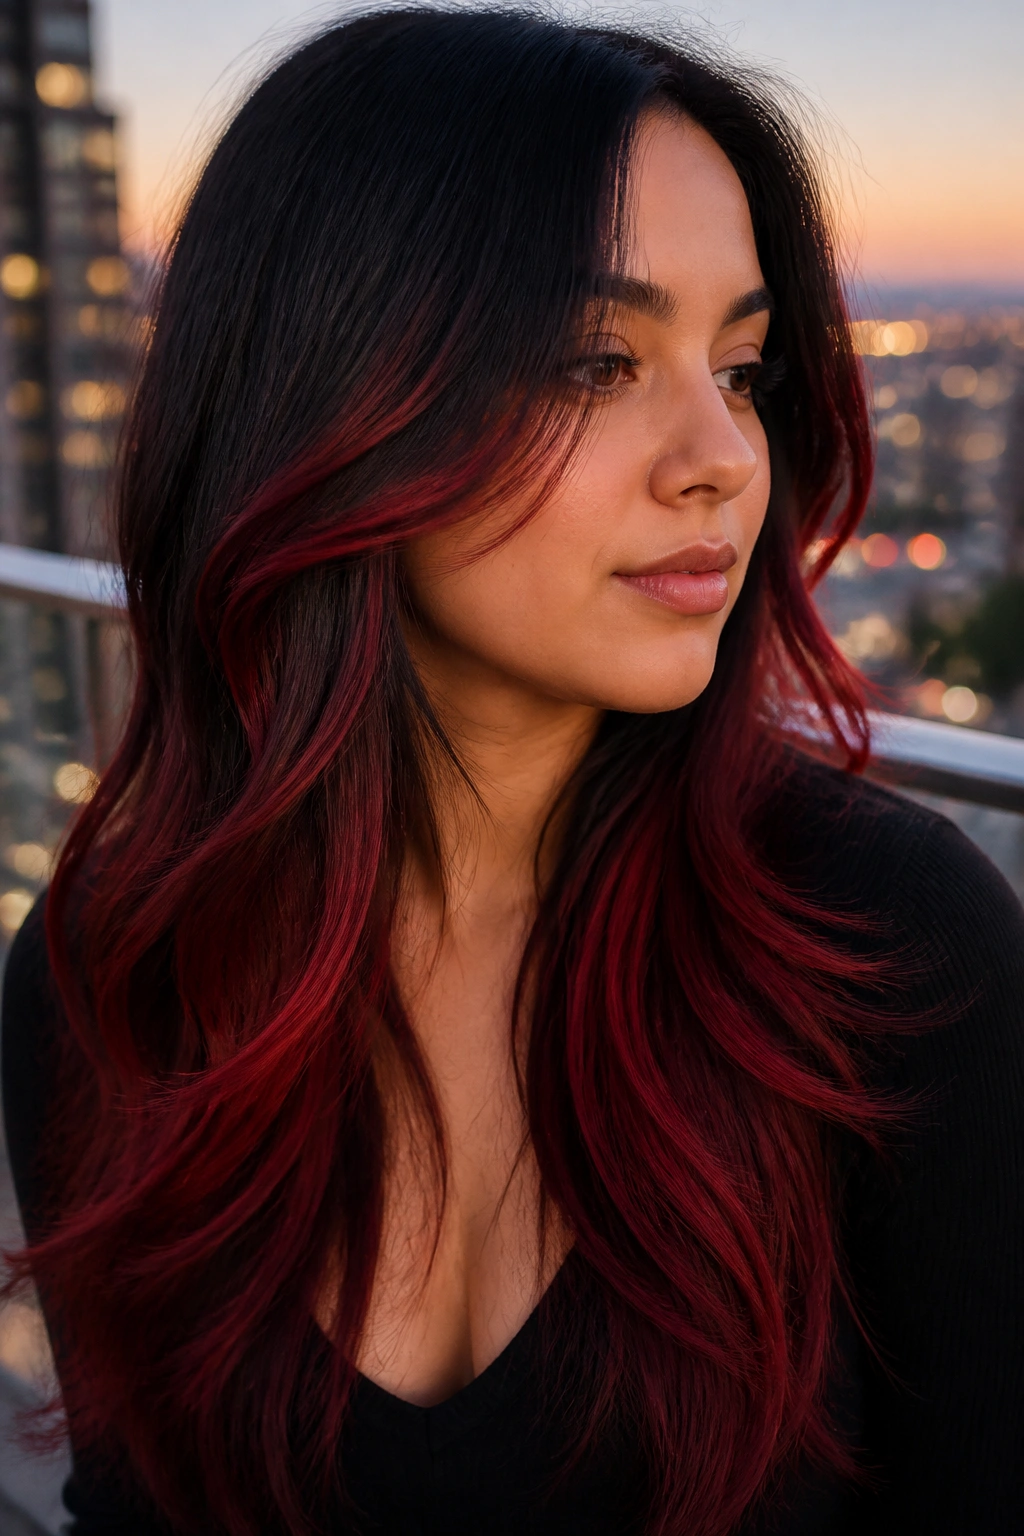
If I had to hand one style to someone who wants red and black without gambling too hard on face shape, it would be this one. Long curtain layers already create a vertical frame around a round face, and a black-to-red gradient adds movement without turning the cheeks into the center of attention. It’s balanced. It’s clean. It works.
The best version keeps the darkest color near the top and outer sides, then lets the red open up through the lengths and around the front pieces that fall below the cheekbone. Curtain layers are useful because they split the hair down the middle and angle away from the face, which naturally adds length. If you want more drama, keep the red richer at the ends. If you want something softer, let the melt stay smoky and deep.
This is also one of the easiest styles to live with day to day. Wear it straight for a long, sleek line. Add loose waves for movement. Tuck one side behind the ear if you want the color contrast to feel sharper. It’s the kind of look that can be polished at work and a little rebellious at night, which is not a bad place for hair to be.
