



There is something inherently defiant about wearing a frohawk. It is a style that commands space, pushing volume vertically while keeping the sides sleek or tight against the scalp. When you have natural hair, you are already working with a texture that defies gravity, so leaning into that rather than fighting it is usually the smartest move you can make. The frohawk isn’t just a hairstyle; it is a structural challenge that forces you to understand your own curl pattern and shrinkage levels.
Some days you want the volume to be the star, and other days you want the intricacy of the sides to catch the eye. The best part about this style is its versatility. You can go from a polished, office-ready look to an edgy, night-out vibe just by changing how you pin the back or define the curls on top. Whether you are working with Type 3 curls that coil naturally or tight Type 4 coils that need a little more persuasion, the mechanics remain the same: controlling the perimeter to allow the center to flourish.
1. Classic Pin-Up Frohawk
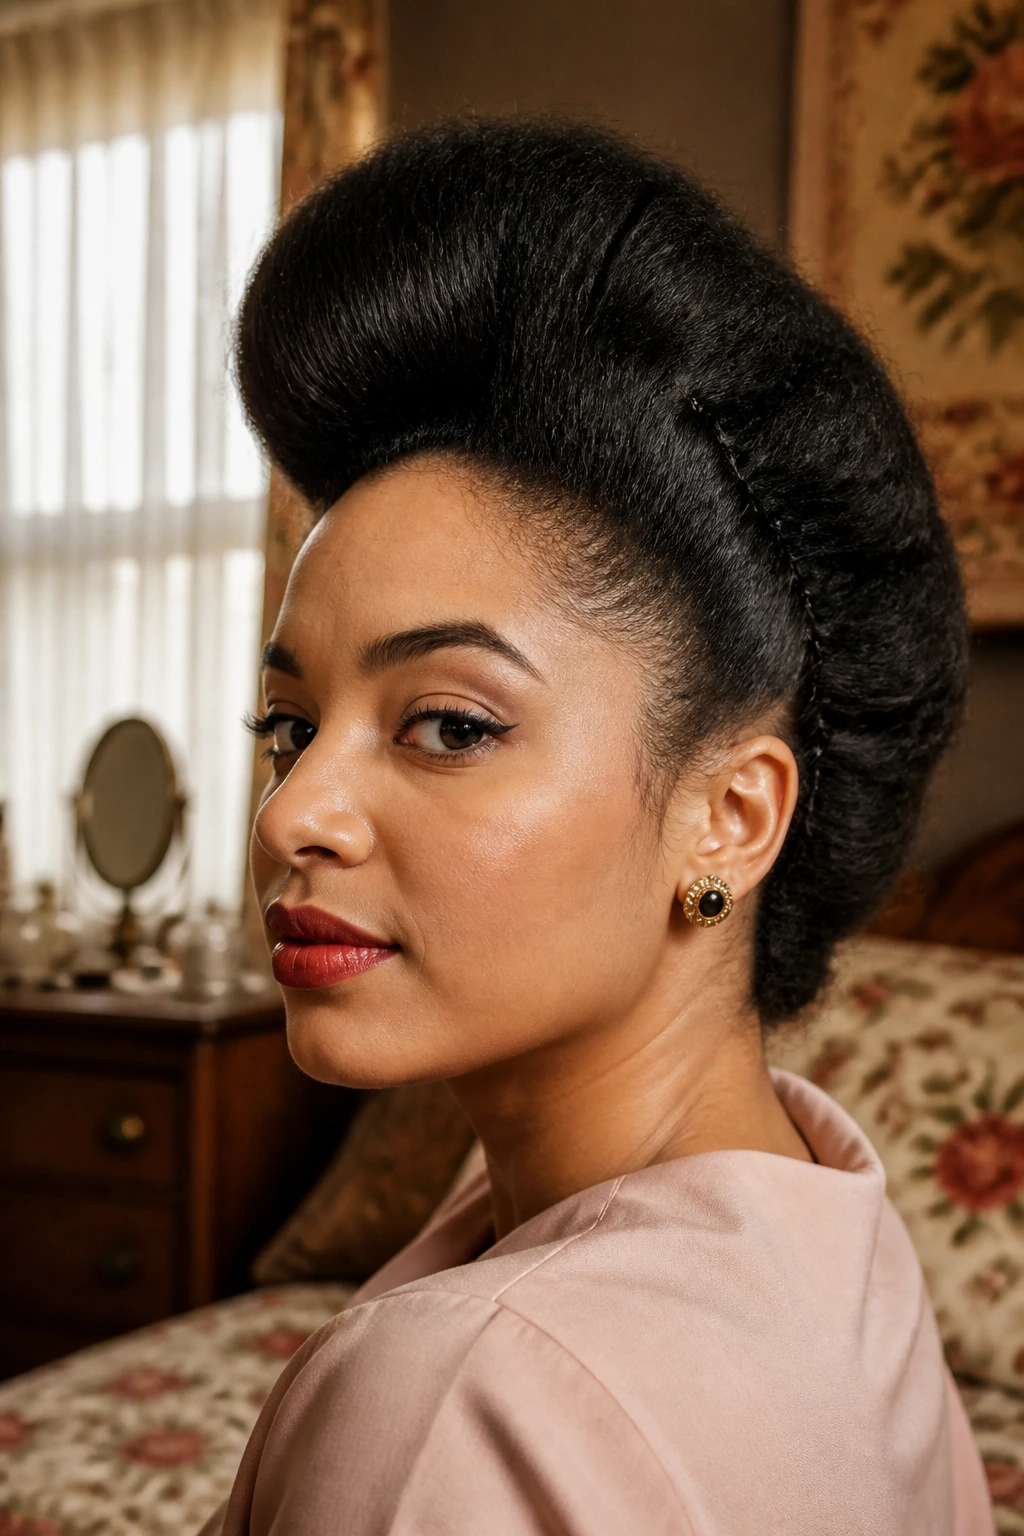
The pin-up frohawk is the foundational version of this style. You are essentially using bobby pins to manipulate your hair into a vertical ridge that runs from the forehead to the nape of the neck. It works best on hair that has been stretched—either through a blowout or a braid-out—because you need the length to create that dramatic height.
Technique for Secure Hold
The trick here is all in how you use your pins. Most people open the bobby pin too wide, which causes it to lose its tension and slide out of thick natural hair. Instead, slide the pin into the hair, then flip it so the wavy side is against your scalp. Use a “lock-and-slide” motion: grab a section of hair, push the pin through, and then reverse the direction to catch the base of the hair.
Essential Tools
- Heavy-duty bobby pins (not the flimsy kind)
- A rattail comb for clean parting
- Edge control gel for the perimeter
- A silk scarf for setting
Pro tip: Do not pin the hair too tight at the root. If you pull the hair taut against your scalp, you risk traction alopecia along the hairline. Keep the base slightly loose so the style feels comfortable for the full day.
2. Braided Side-Sweep
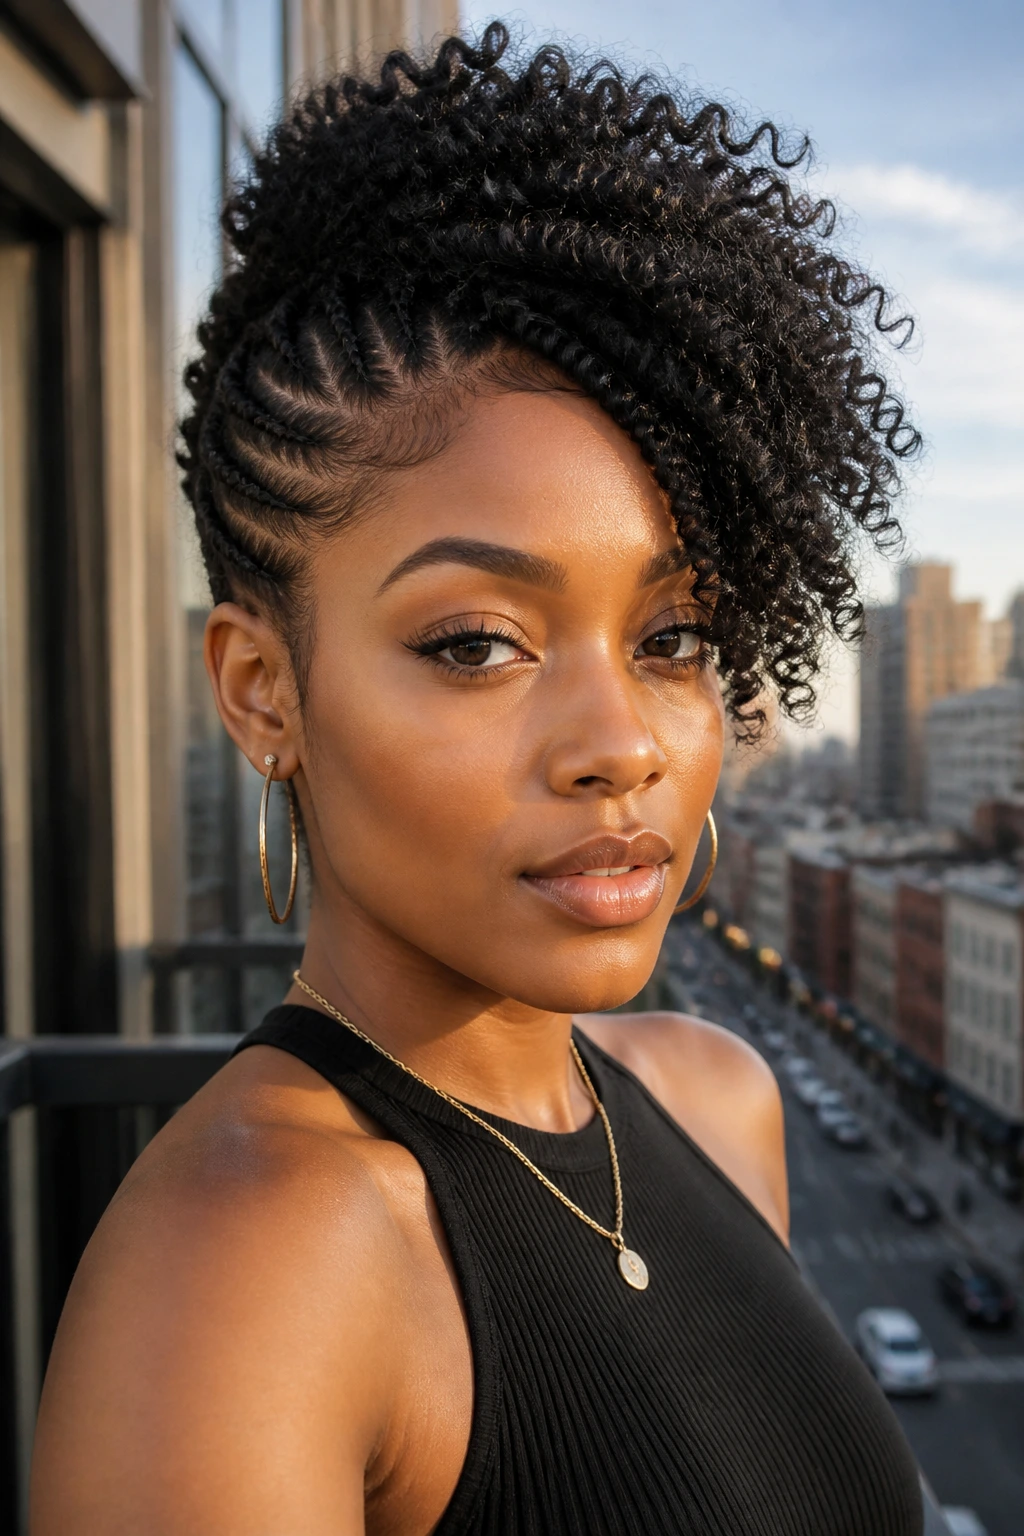
This variation moves the focus away from a strict center ridge and leans into a more asymmetrical, artistic shape. By braiding the sides toward the center, you create a natural “track” for the rest of your hair to sit on. It is arguably the most secure version of a frohawk because the braids act as an anchor for the loose curls on top.
You will want to start by sectioning your hair into three parts: the two sides and the large middle section. Braid the sides in cornrows going from the ear upward toward the center of your head. If your braiding skills are rusty, simple straight-back cornrows work, but diagonal or curved patterns add more visual interest.
Once the sides are secured, let the middle section fall over the braids. If your hair is on the shorter side, use a few hairpins to gather the curls in the middle and pin them in place. The braids take the tension off your hairline, making this a fantastic protective style for weeks where your edges need a break from constant manipulation.
3. Twisted High-Volume Frohawk
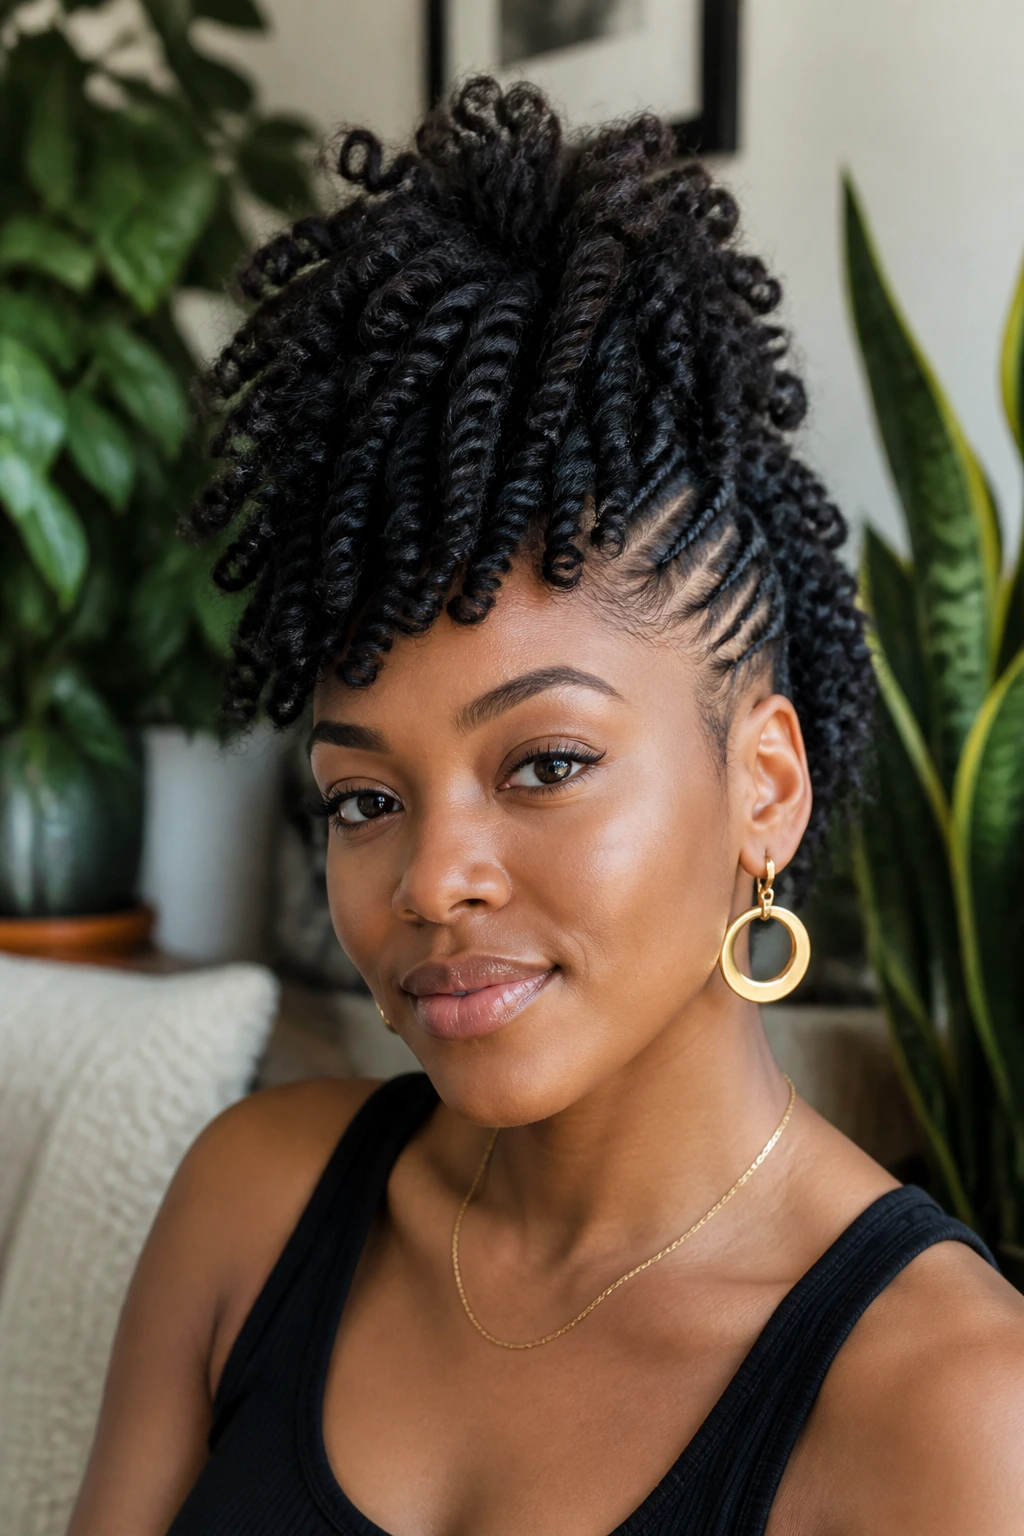
When you have tight coils, a twist-out can provide the definition needed to make a frohawk look intentional rather than messy. This style relies on chunky two-strand twists to build the structure. You aren’t pinning loose hair here; you are pinning coils that have already been set.
Why This Style Lasts
The texture created by the twists is significantly more durable than free-flowing curls. Because the hair is already in a semi-bonded state, it resists humidity better and keeps its shape throughout the day. It also creates a “cushion” effect, where the volume is built up by the twists themselves rather than just by fluffing the hair out.
How to Achieve the Volume
- Twist your hair when it is damp with a setting lotion.
- Allow it to air dry completely—do not rush this.
- Unravel the twists gently, using an oil on your fingers to prevent frizz.
- Pin the twists in the center.
- Use a hair pick at the roots (but not the ends) to boost height.
4. Frohawk with Cornrowed Sides
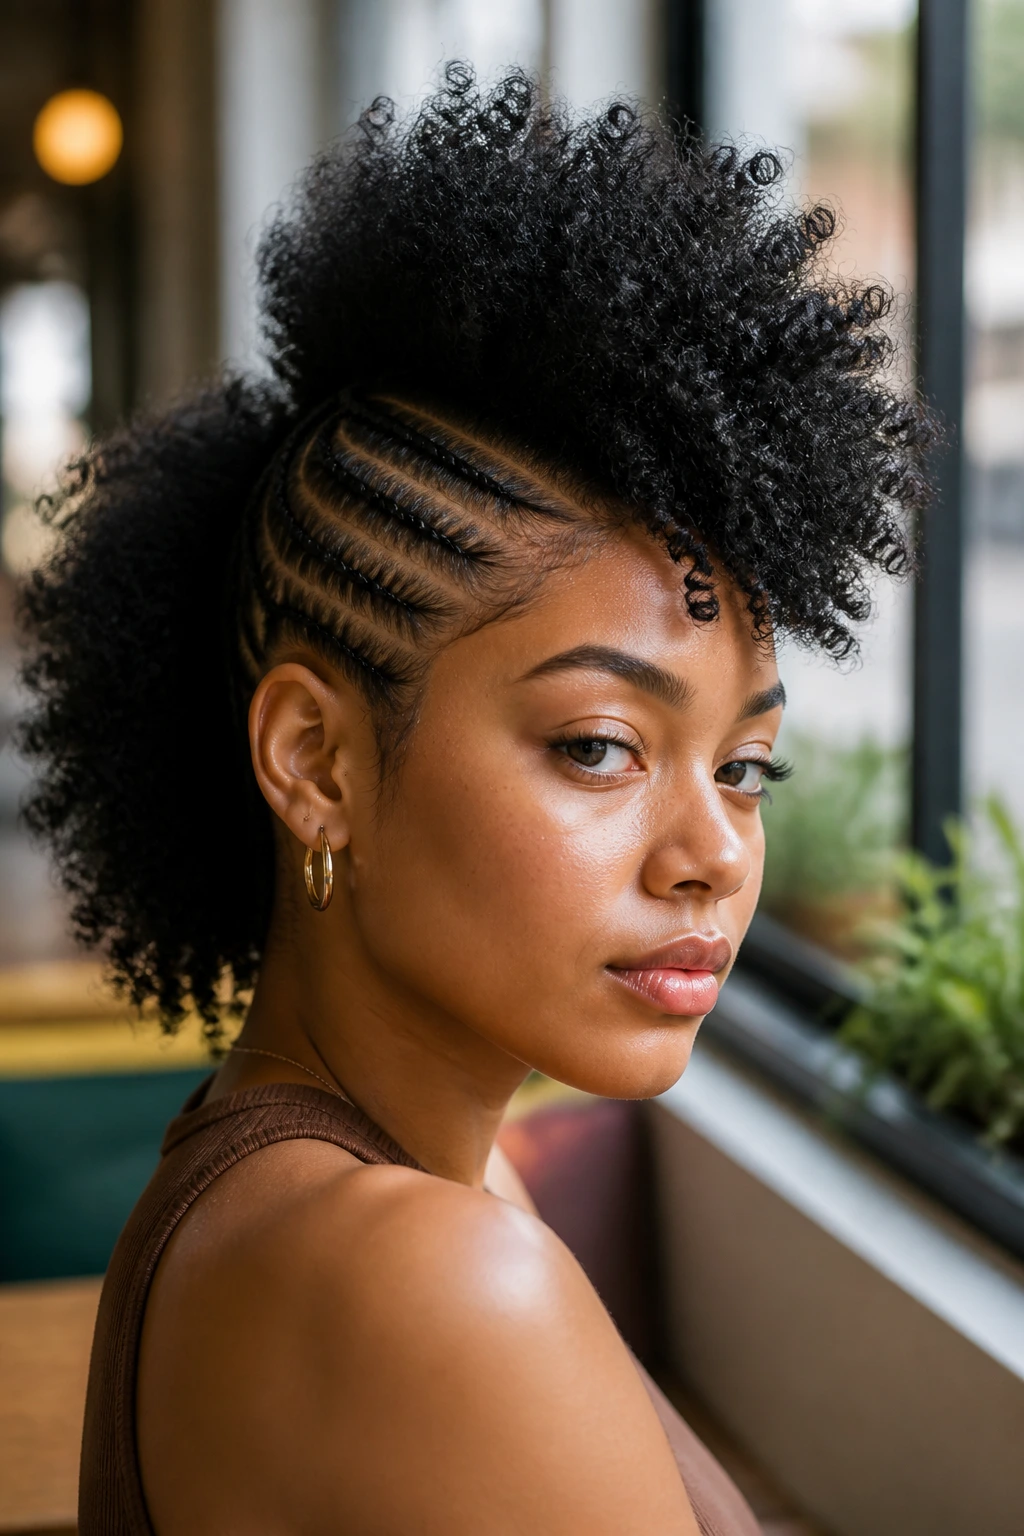
There is a specific kind of contrast that happens when you pair the rigid geometry of cornrows with the untamed fluff of a natural afro. This style is practical and incredibly resilient. You aren’t just styling your hair for the day; you are setting a foundation that can last for a week or more if you wrap it at night.
The sides are braided into cornrows that sit flush against the scalp, pulling the hair taut. This creates a sharp “fade” look without ever needing to touch a pair of clippers. The center section is left loose, or perhaps styled into a series of Bantu knots if you want even more texture. The key to making this look balanced is the ratio. Keep your cornrows tight and the center section oversized. If the center is too flat, the whole look loses its “hawk” energy and just looks like a braid-out. If the center is too big, the braids get swallowed up. Aim for about 60% volume in the center and 40% scalp coverage on the sides.
5. Curly Faux-Hawk with Undercut
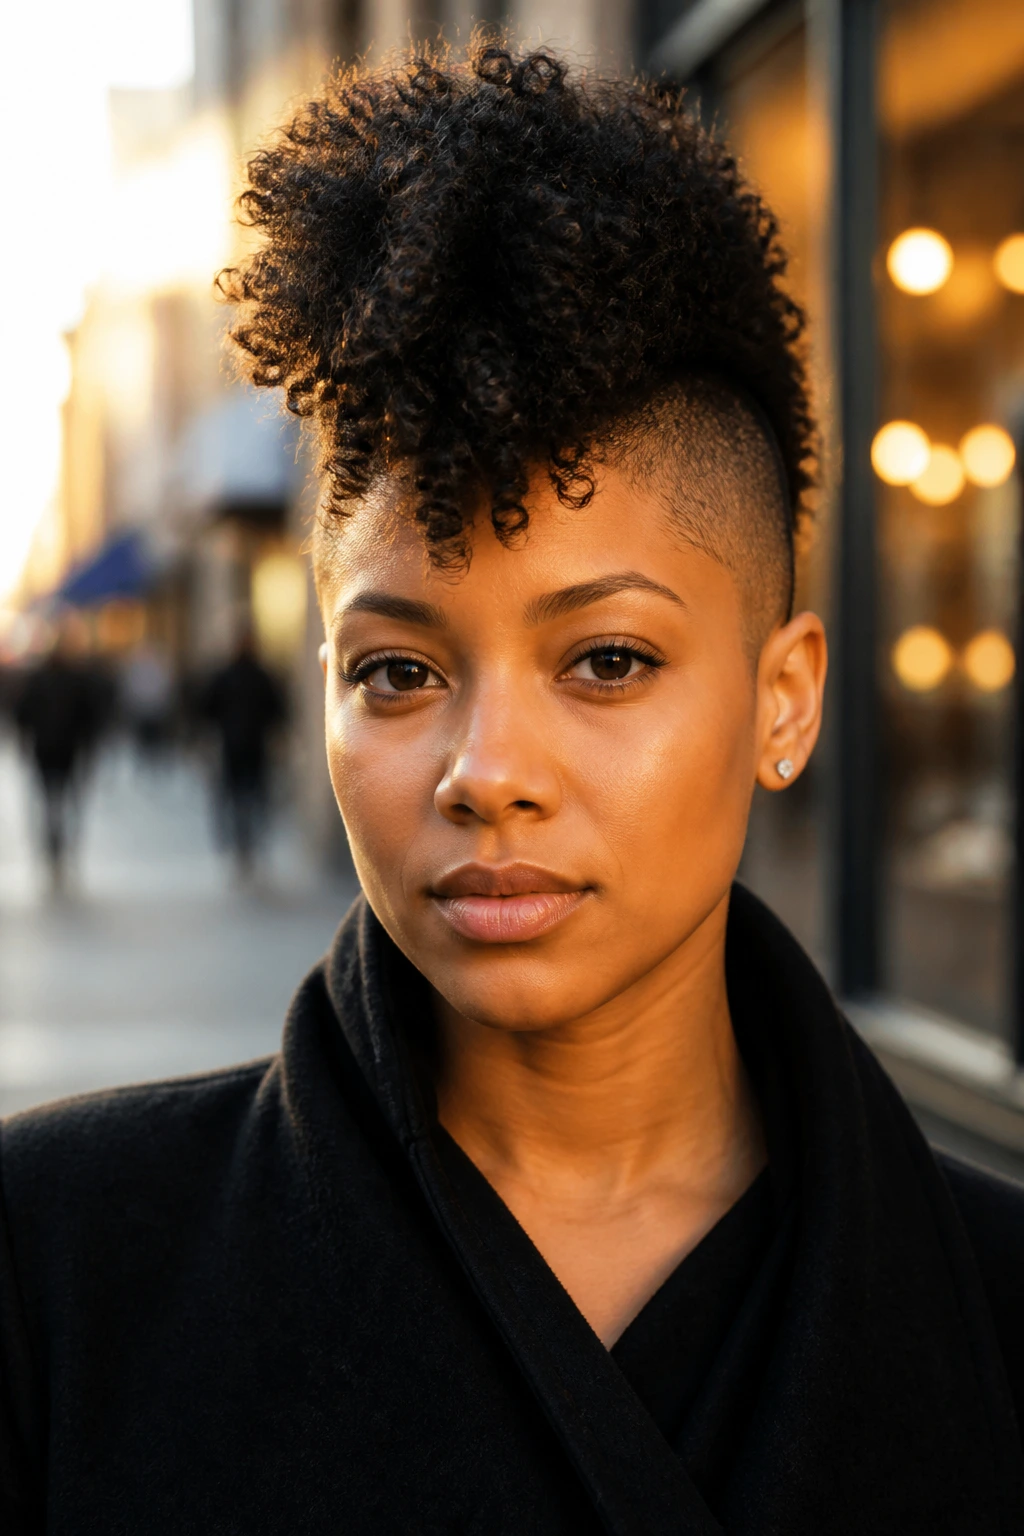
This style is for the bold. You are essentially shaving the sides of your head, or using gel to mimic the look of a shaved side if you aren’t ready to commit. The focus is entirely on the vertical column of curls running down the center. It requires very little styling time in the morning because the perimeter is already taken care of.
The contrast between the skin-tight sides and the lush, curly canopy in the center creates an elongated silhouette that is very flattering for rounder face shapes. If you are using gel to fake the undercut, choose a high-hold, clear formula that won’t flake when it dries. Apply the gel in thin layers, brushing the hair upward toward the center, and use a blow dryer on a cool setting to set it instantly. This prevents the hair from sagging throughout the day.
6. The Sleek Gel-Down Frohawk
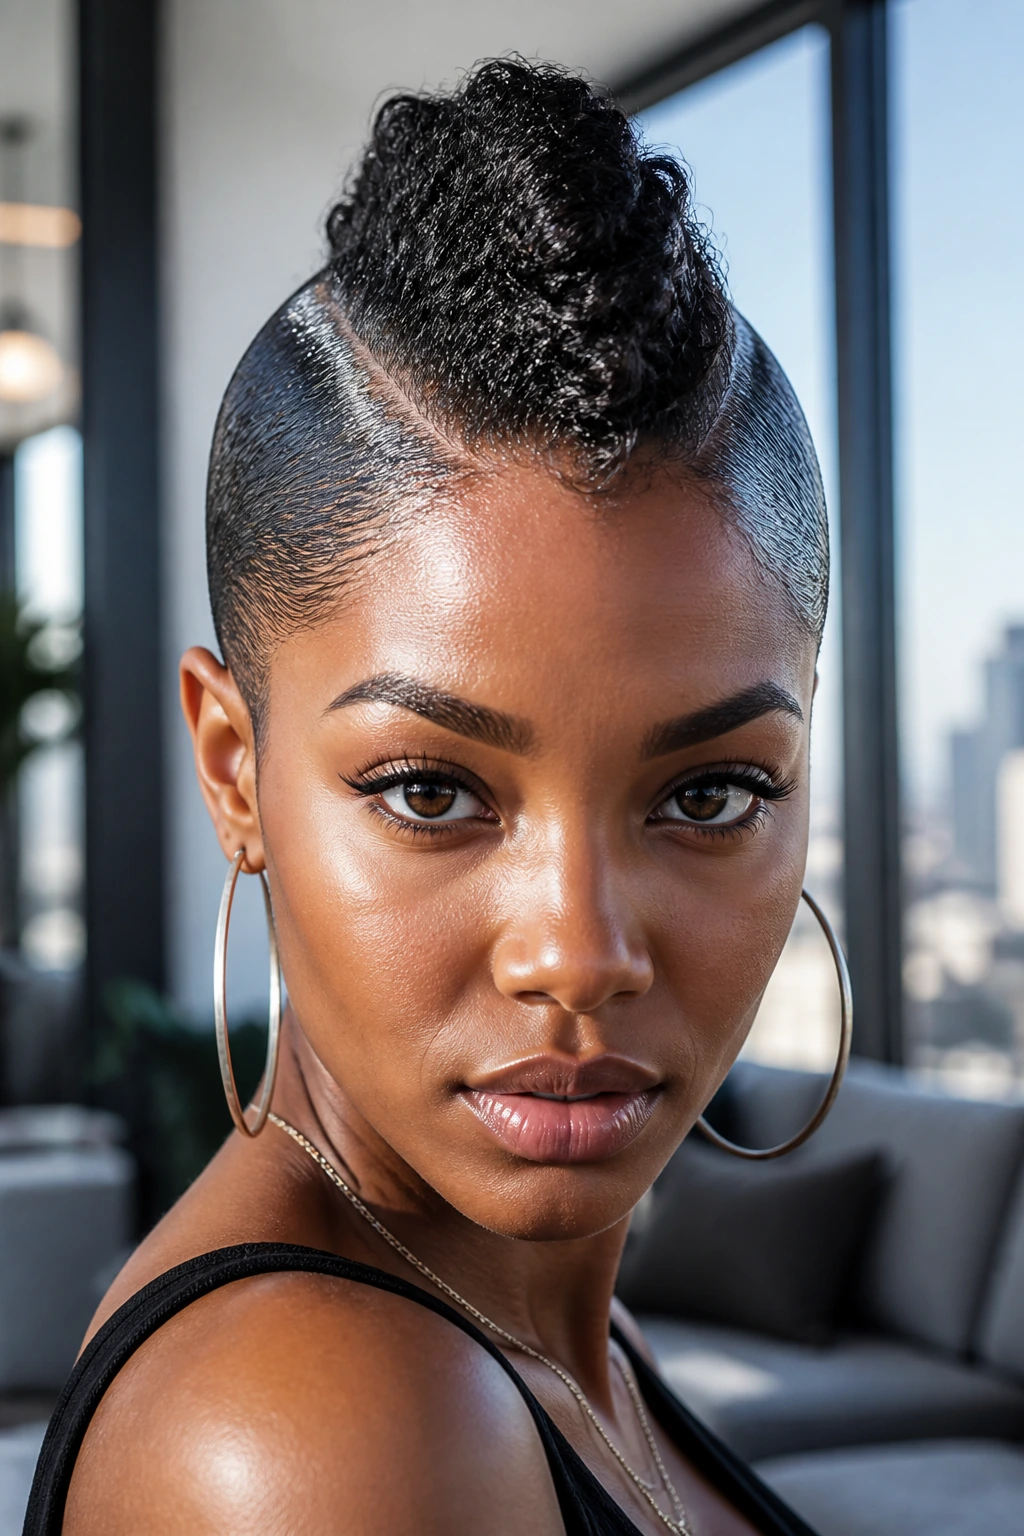
Unlike the voluminous frohawk, this version is all about precision and shine. You are pinning the hair very close to the scalp, creating a dramatic, streamlined ridge that looks more like a high-fashion runway look than a casual daily style. It mimics the effect of a Pompadour but with natural texture.
It is drastically different from the “fluff” styles because the hair is not meant to move. You will need a firm-hold styling cream or a pomade mixed with a little water. Smooth the hair from the sides toward the center, using a boar bristle brush to eliminate any bumps. This style looks best on hair that is slightly damp, as it allows the product to penetrate and smooth the cuticle down before it sets.
7. Afro-Puff Frohawk
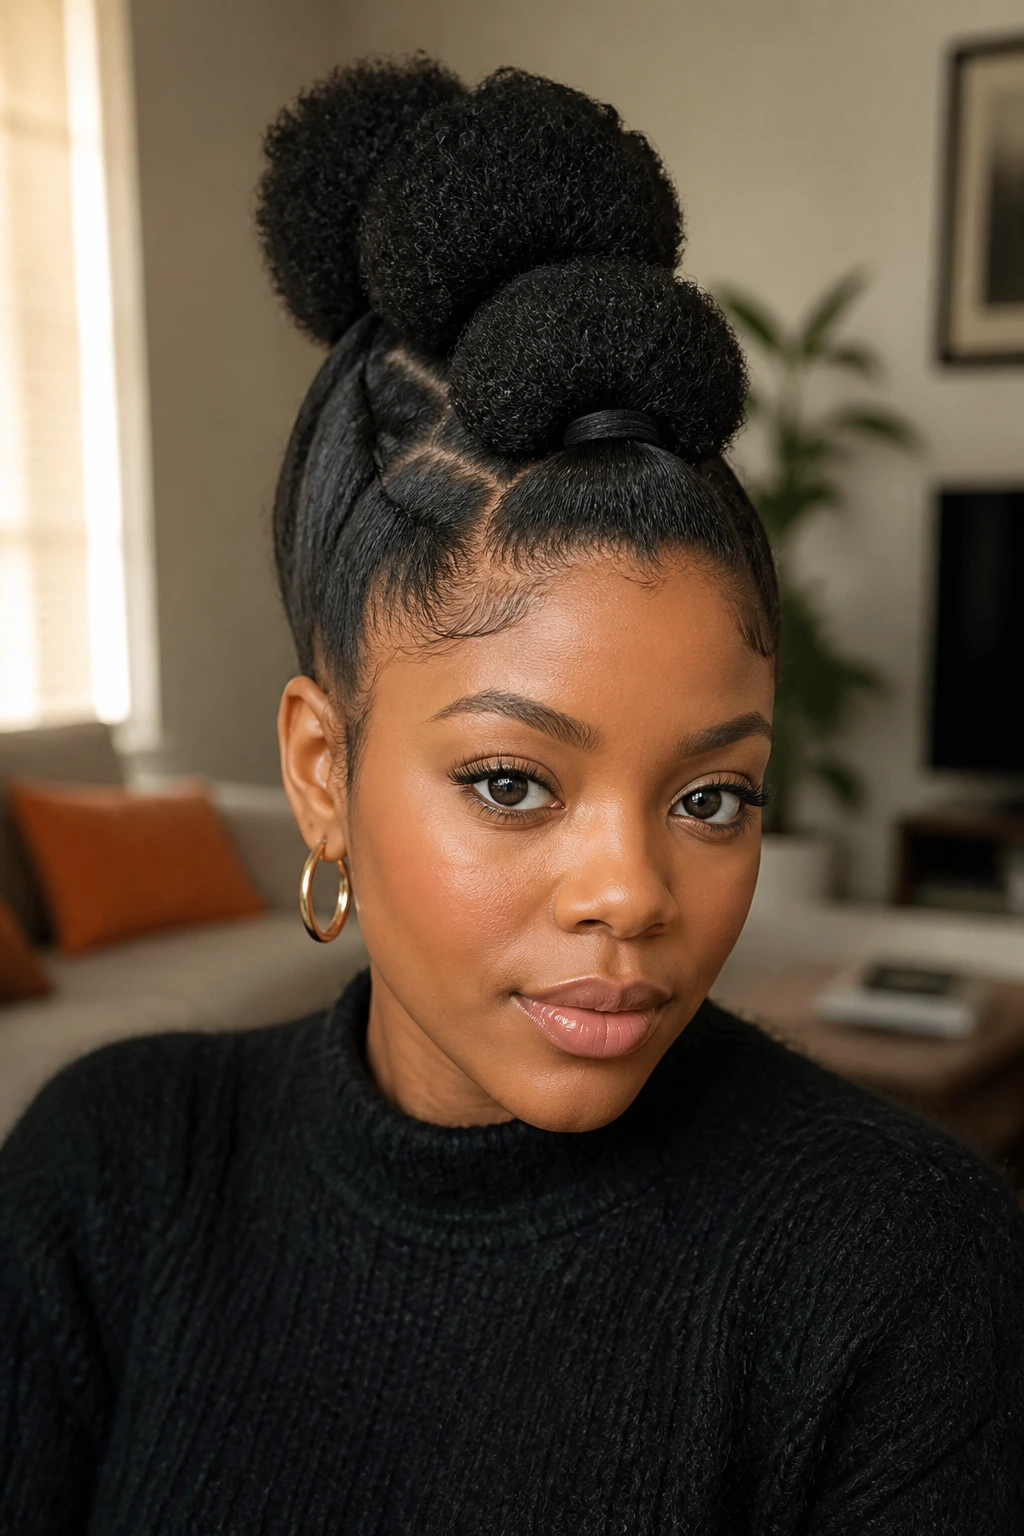
Sometimes, you just need to get your hair out of your face. The afro-puff frohawk is the ultimate “low-effort, high-impact” solution. You are essentially creating a row of 3 or 4 puffs down the center of your head, secured by small elastic bands.
It works exceptionally well on Type 4 hair that has high shrinkage. You aren’t trying to stretch your hair out to make it look longer; you are embracing the compact, dense nature of your coils. Use black or brown elastics that match your hair color, and wrap a small strand of hair around each base to hide the elastic. This small detail elevates the look from “gym hair” to “intentional style.”
8. Frohawk with Bantu Knots
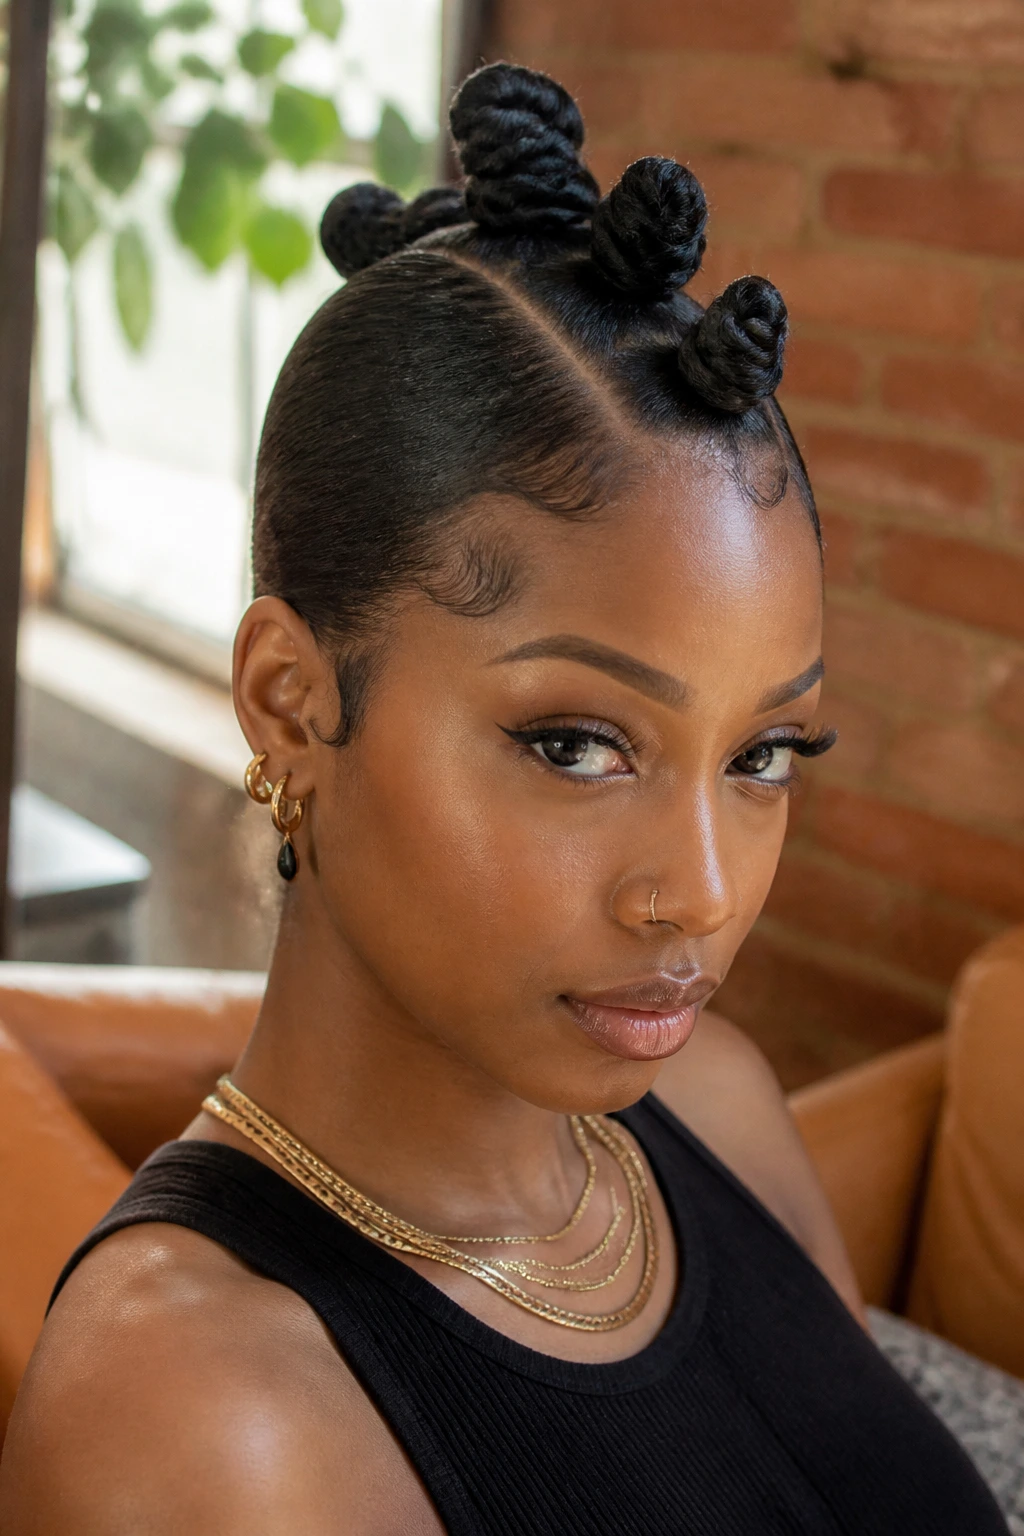
Bantu knots are a protective style on their own, but when arranged in a vertical line along the center of your head, they transform into an edgy, tribal-inspired mohawk. This is a great way to protect your ends while keeping your style looking sharp.
Start by parting the center of your head into 5 or 6 sections, depending on the length of your hair. Twist each section into a knot. You can keep the sides of your head slicked down with gel to make the knots pop. The beauty of this style is the texture you get underneath; when you finally take the knots down, you have a perfect, defined curl pattern that you can fluff into a standard frohawk for the next few days. It’s a two-for-one style.
9. Short Tapered Frohawk
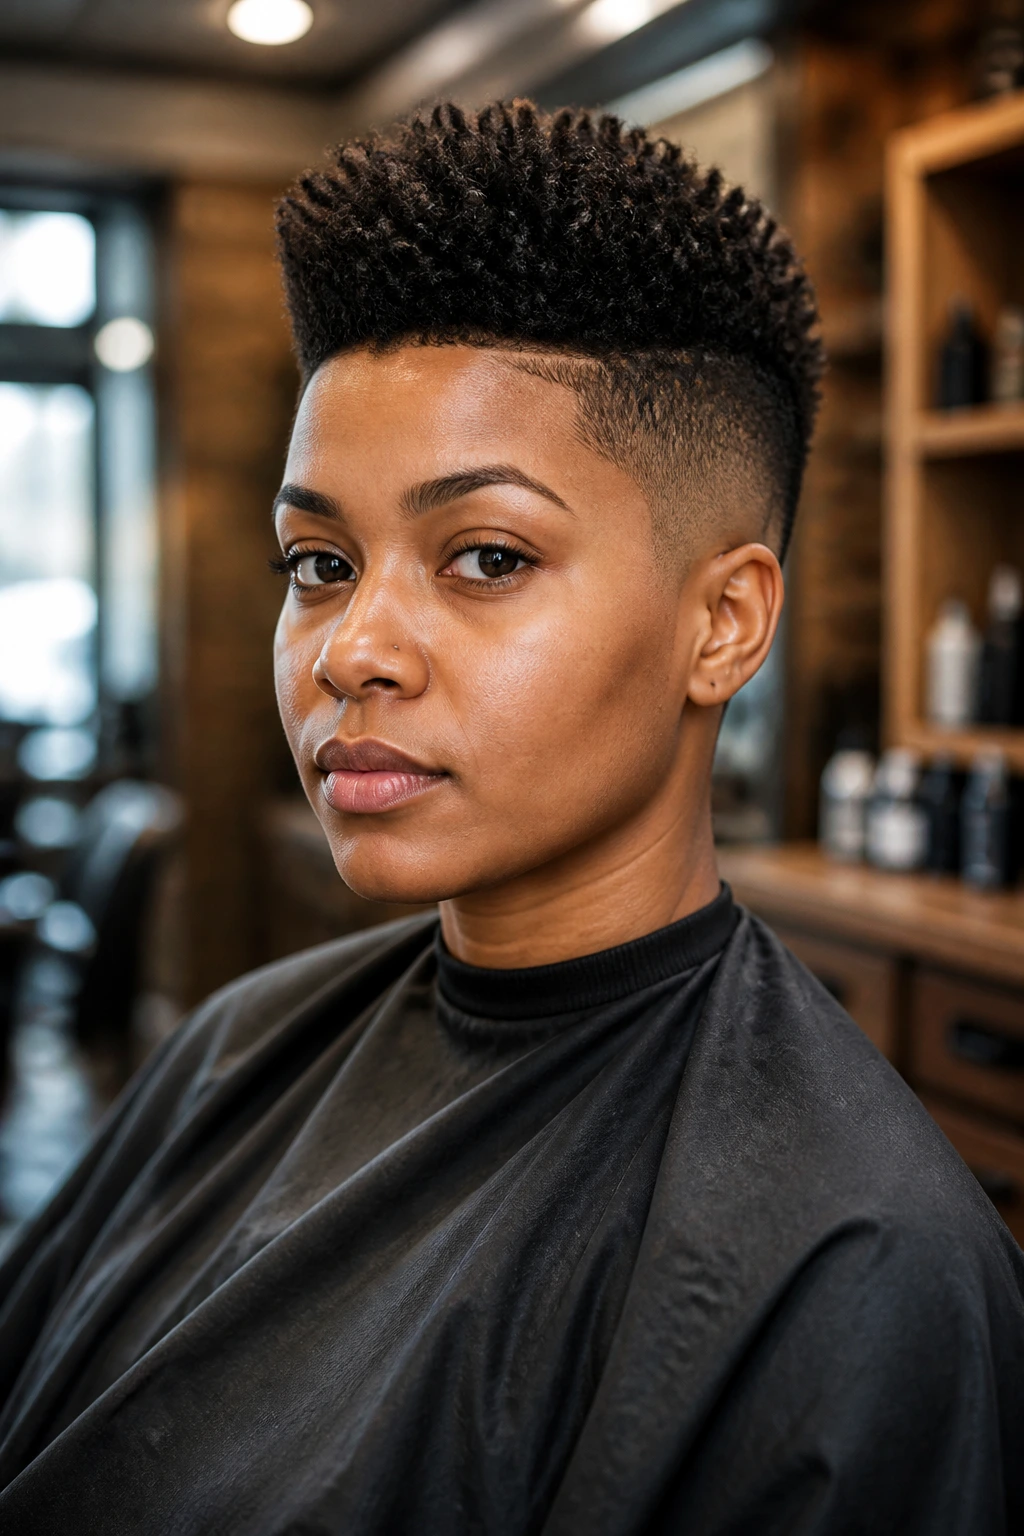
If you are in the “awkward stage” of growing out a short cut, the tapered frohawk is your best friend. It highlights the natural shape of your hair without needing extra length. You can use a bit of wax or texturizing cream to define the individual coils.
Why It Works for Short Hair
With longer hair, the weight of the frohawk can cause it to collapse if not pinned correctly. Short hair, however, has less weight, meaning it holds its vertical shape naturally. Focus your attention on the sides. You want the sides to be significantly shorter than the top. Use a detailer or a small comb to keep the nape and sideburns clean. This framing is what gives the style its sophisticated edge.
10. Two-Strand Twist Frohawk
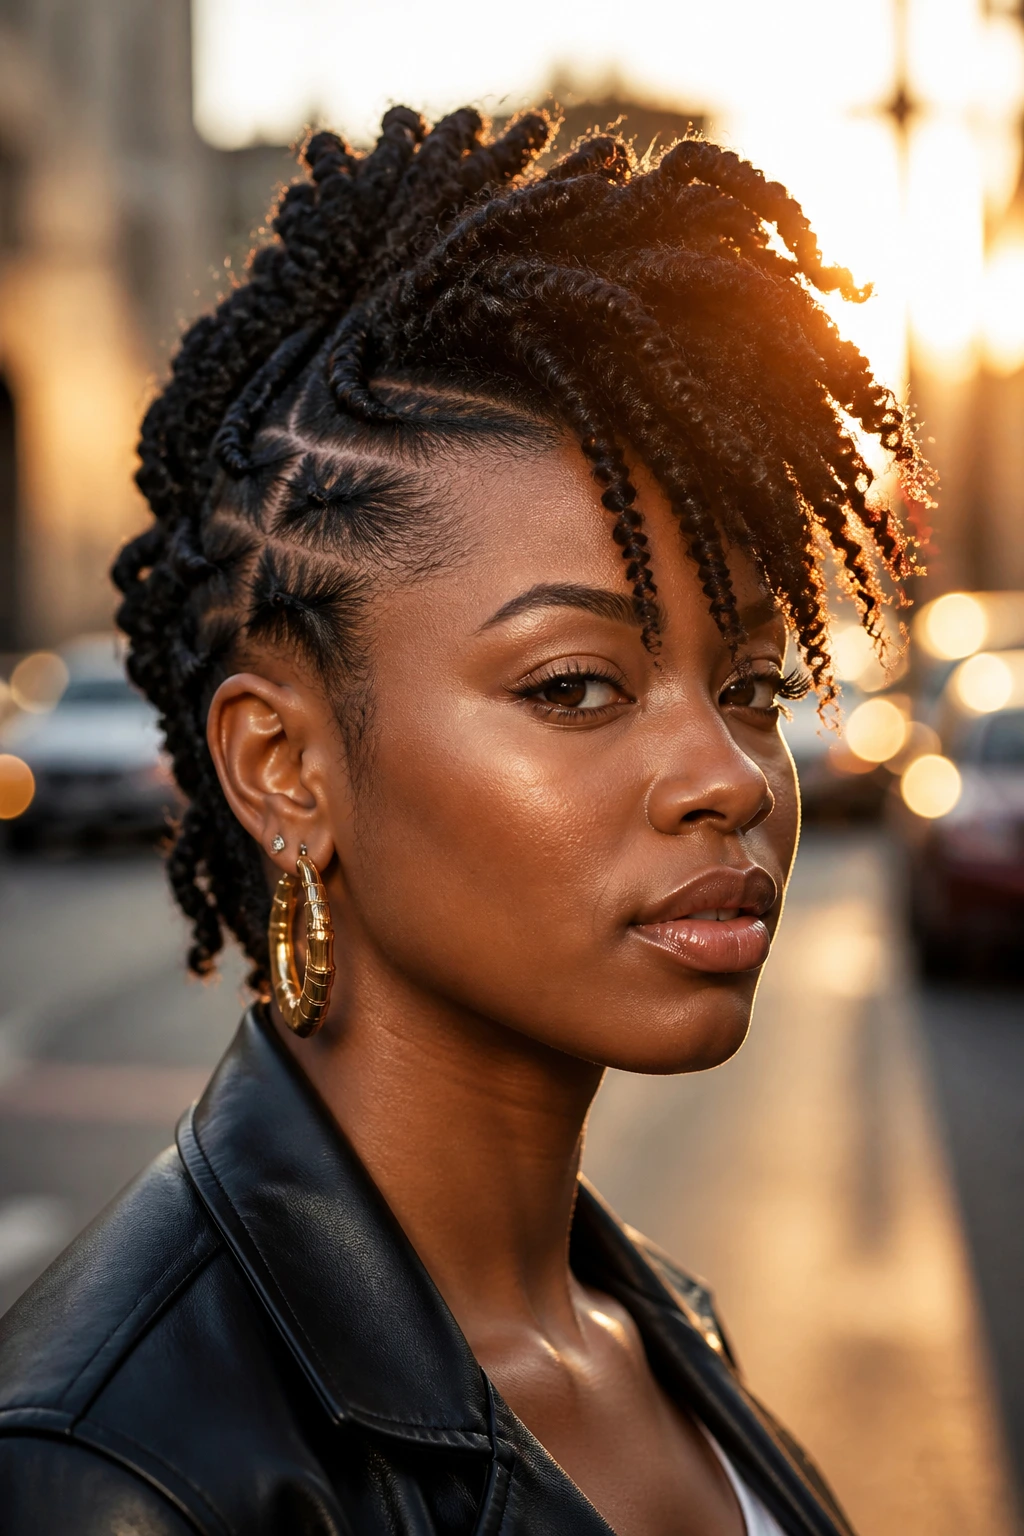
This is the “old reliable” of the natural hair world. It’s not flashy, but it’s consistent, clean, and protects your hair from breakage. By twisting the hair first and then pinning the twists into a mohawk shape, you are creating a style that is incredibly easy to maintain.
To get the best result, install your twists with a bit of twisting butter. Once they are dry, gather them toward the center. Don’t pin them too tightly; let them have a bit of bounce. You can leave the ends of the twists loose if you want a bit of “swagger” at the top of your head, or tuck them under if you prefer a neater look. This style also allows for easy access to your scalp, so if you need to oil your hair, you don’t have to ruin the style.
11. Frohawk with Flat Twists
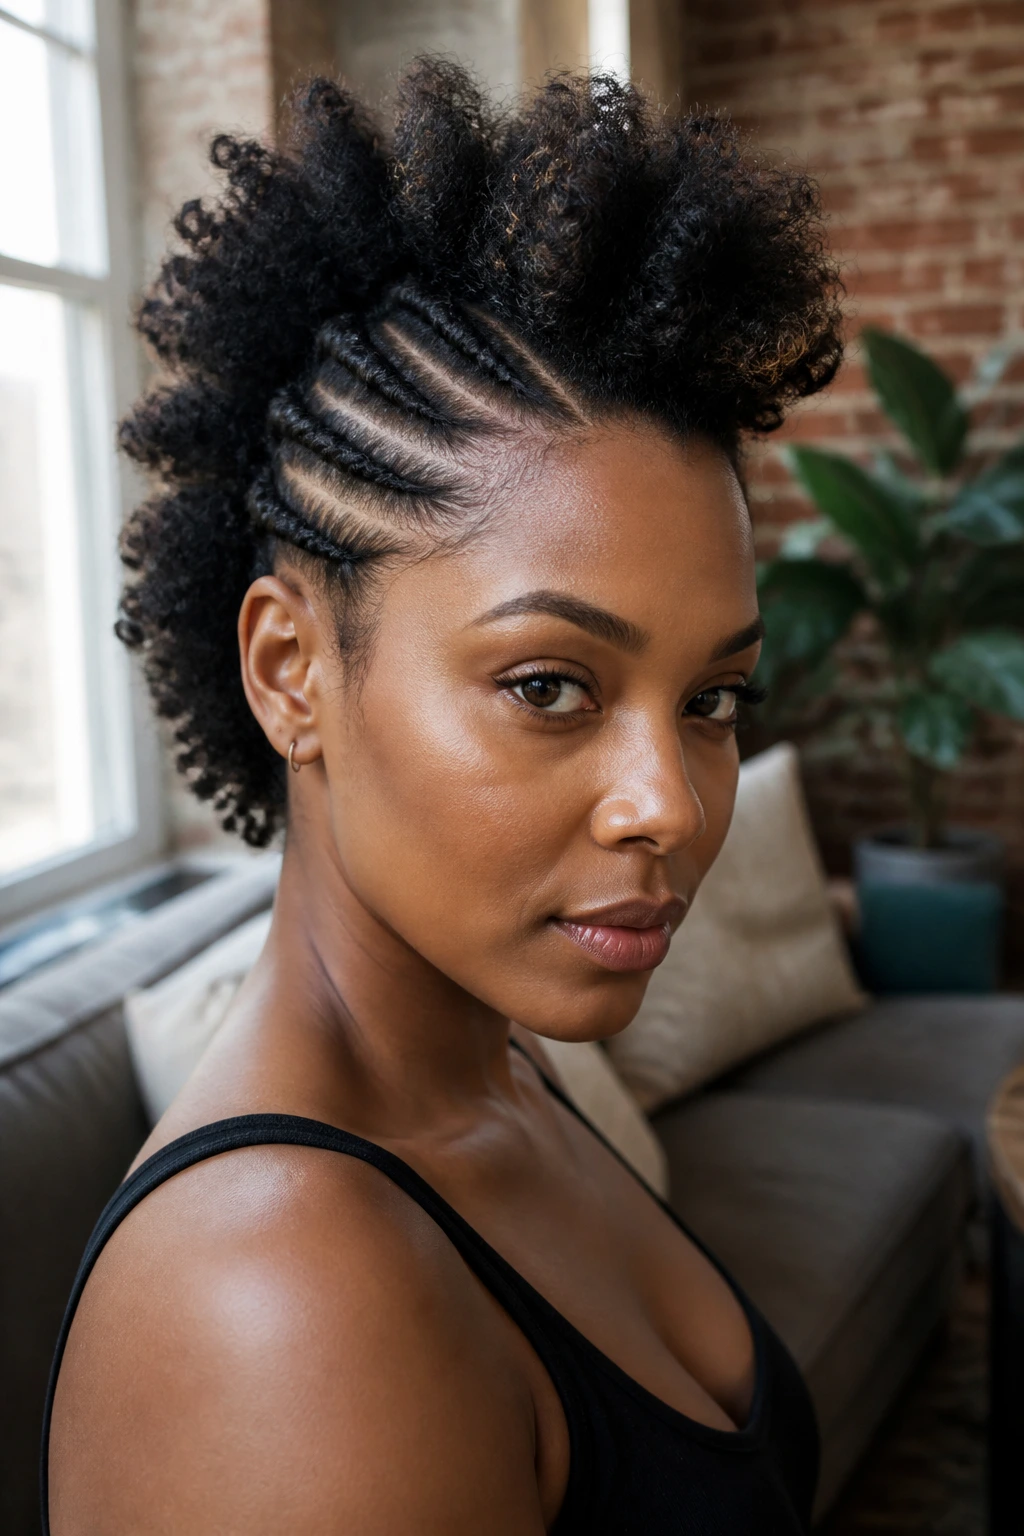
Flat twists are essentially the protective, easier version of cornrows. They don’t require the same level of braiding tension, making them a great option if you have a sensitive scalp. By flat-twisting the sides and allowing the center to remain loose, you get that classic mohawk silhouette with half the effort of traditional braiding.
The direction of the twists matters more than anything else here. You want to twist the hair at an angle, starting from the hairline and working toward the center. This creates a radiating pattern that draws the eye upward. Make sure the parts are clean—if the parts are messy, the “hawk” looks accidental. Use a rat-tail comb to ensure every part is straight.
12. The Mohican-Inspired Frohawk
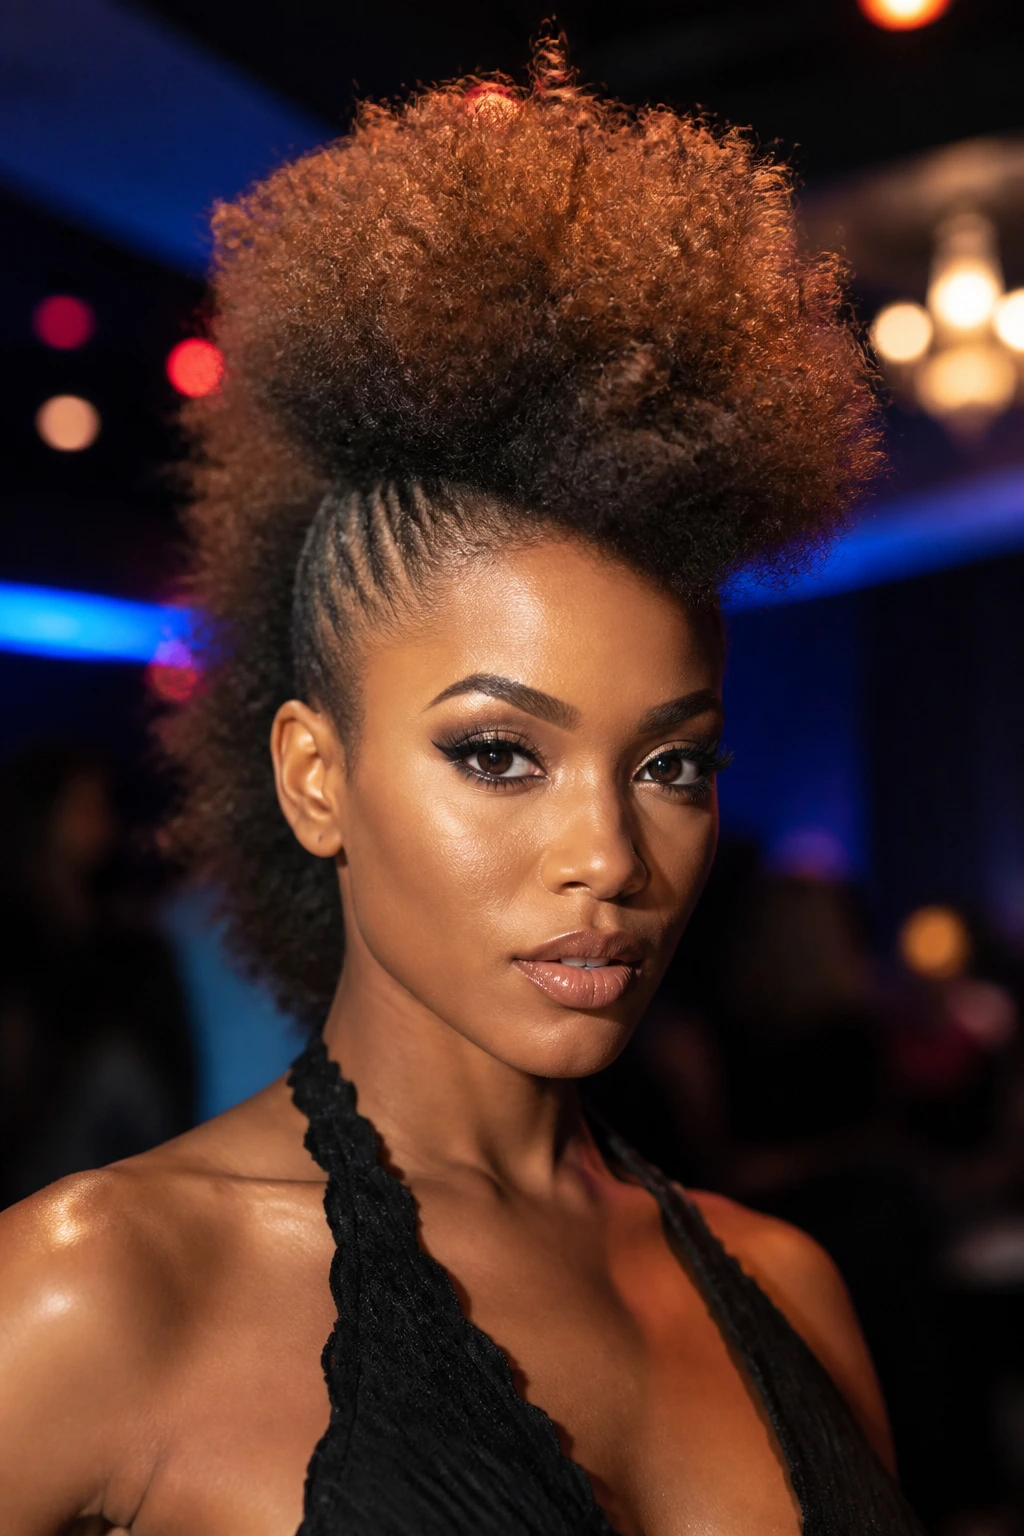
This style is about drama. You aren’t just creating a ridge; you are creating a peak. It is heavily influenced by the punk aesthetic, which means you should feel free to use accessories. Think gold rings, silver cuffs, or even colored hair wax.
The height here is everything. You need to use a comb to tease the roots of your hair (gently) to create a base for the volume. Then, use a volumizing spray—a light mist, not a heavy lacquer—to lock it in. This is a style meant for an event or a night out. It is not necessarily a “stay-in-all-week” style because the teasing can cause tangles if left in too long. Enjoy it for 24 hours, then gently detangle.
13. Frohawk with Locs
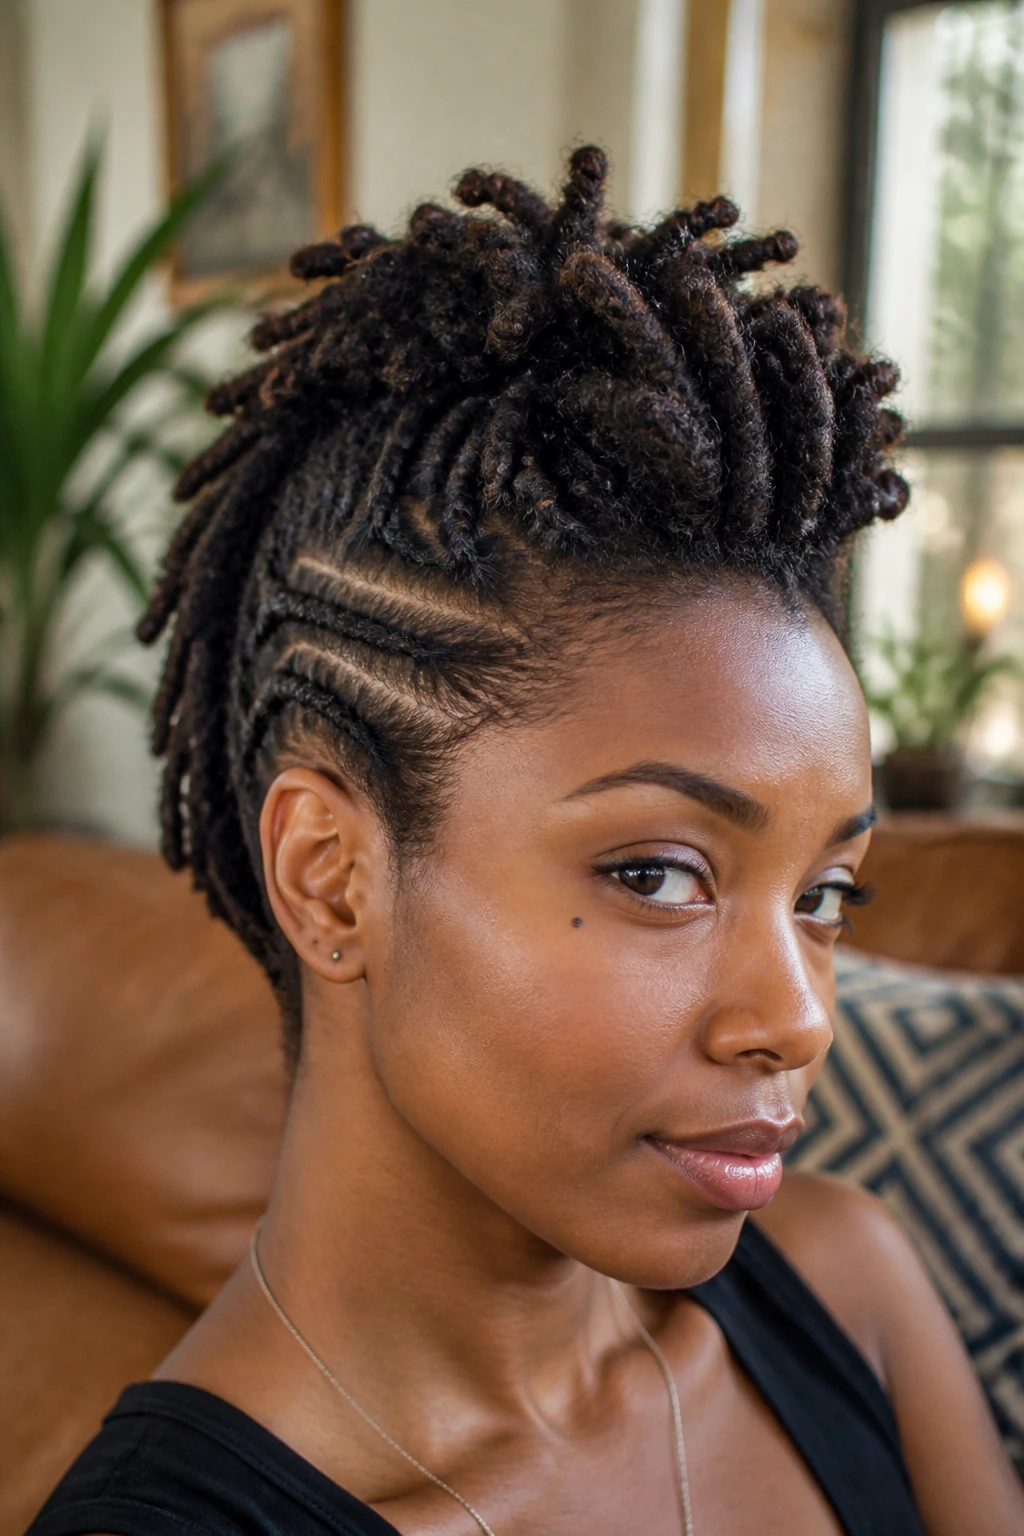
If you have locs, a frohawk is one of the easiest styles to achieve because your hair already has weight and structure. You don’t need bobby pins for this; you need hair ties or large decorative clips. Simply gather the locs toward the center and secure them.
The weight of the locs provides a natural drape. You don’t have to fight to keep the hair vertical. If the locs are very long, you can loop them over themselves in the center to create a thicker, more substantial ridge. Be mindful of the tension at the hairline. Locs are heavy, and pulling them too tight into a mohawk shape can lead to thinning edges over time. Keep the base of the style relaxed.
14. Curly Mohawk with Beaded Accents
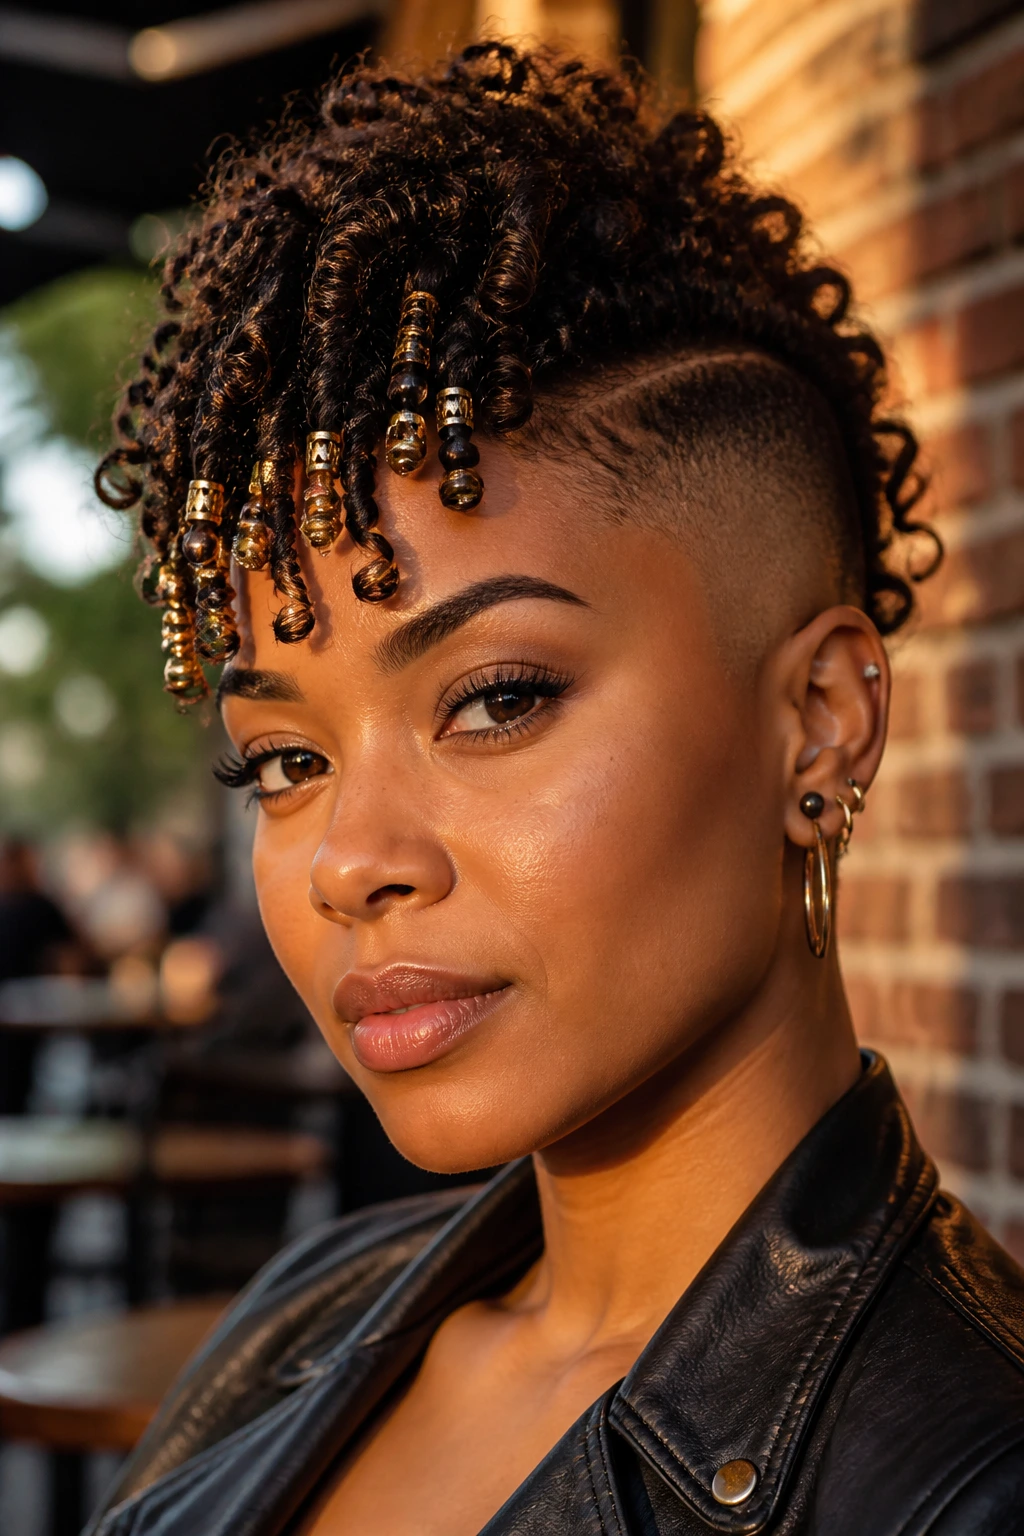
Adding accessories can turn a standard style into a signature look. Beaded accents at the ends of your curls or on the cornrows along the sides add a tactile element that makes the style feel intentional and finished.
When selecting beads, consider the weight. If you have heavy wooden beads, use them sparingly. If you have plastic or acrylic beads, you can be a bit more generous. Threading them onto the ends of your curls in the center section gives the hair a bit of downward pull, which can actually help with the frohawk shape by weighing the curls down just enough so they don’t look wild, but keep them bouncy.
15. The “Sky-High” Frohawk
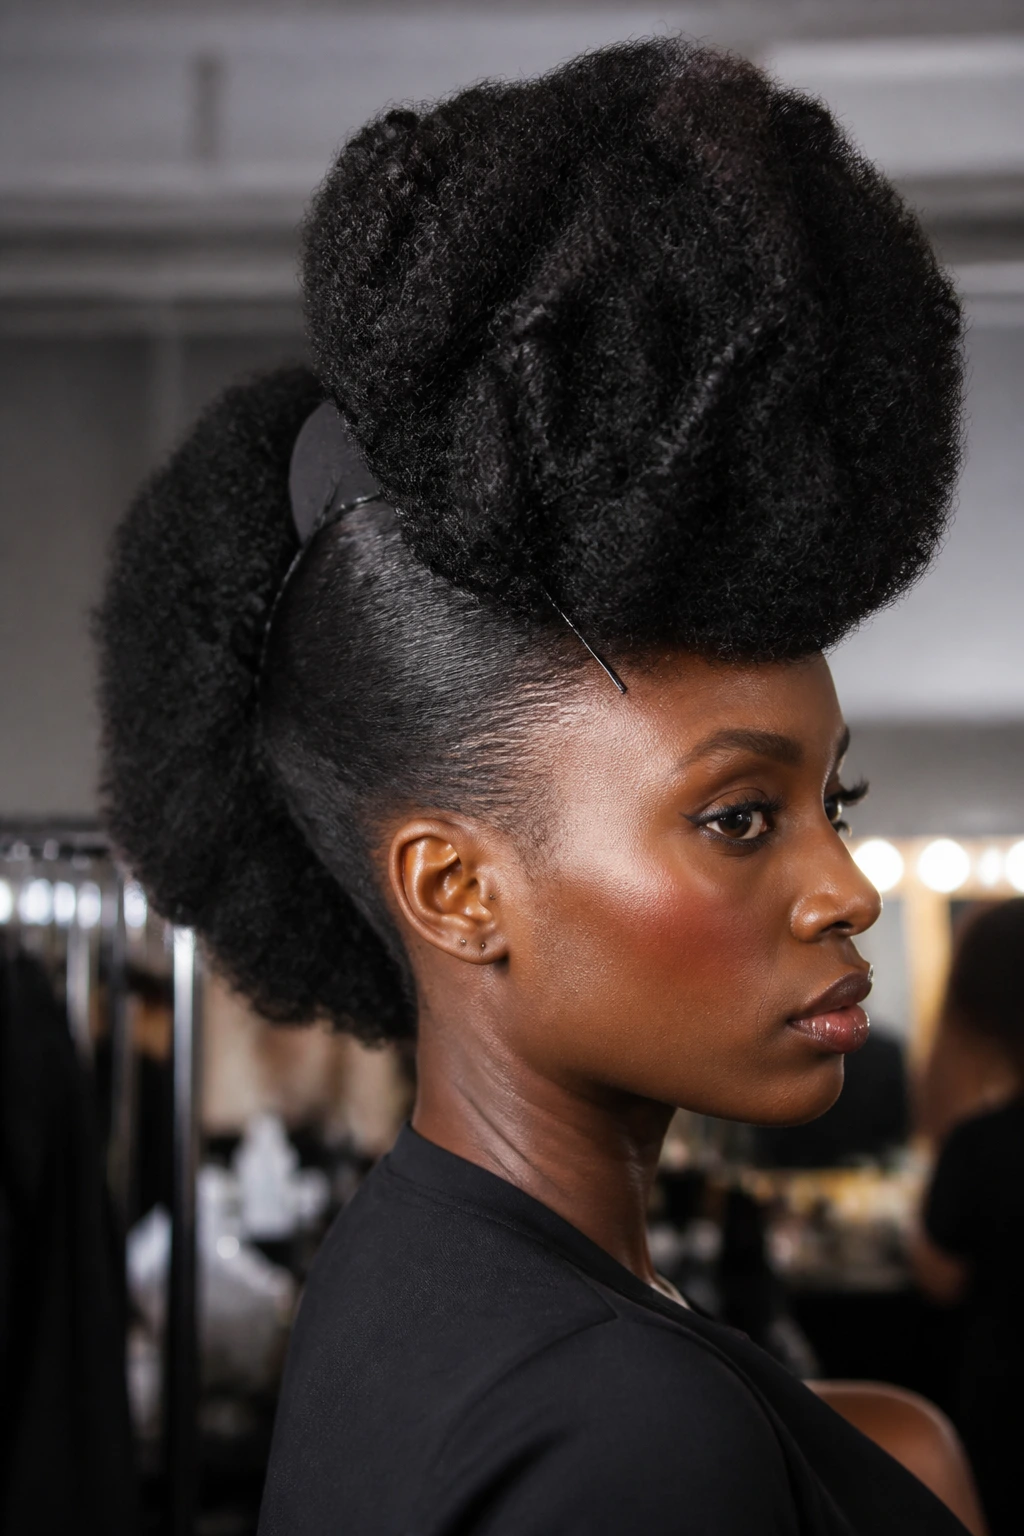
For those who want maximum altitude, you need a base. This style involves creating a “foundation” in the center of your head using a wig cap or a hair donut, then pinning your natural hair over it. It is the secret trick of stylists everywhere who need to create massive volume.
This is not a style for the faint of heart. It is structurally complex and requires a fair amount of prep. Once the base is anchored to your head using pins, you essentially drape your hair over it, pinning as you go. The result is a perfect, consistent shape that doesn’t rely on the density of your own hair. It is a fantastic option if your hair is thin or if you are dealing with hair loss and want a full look.
16. Defined Coil Frohawk
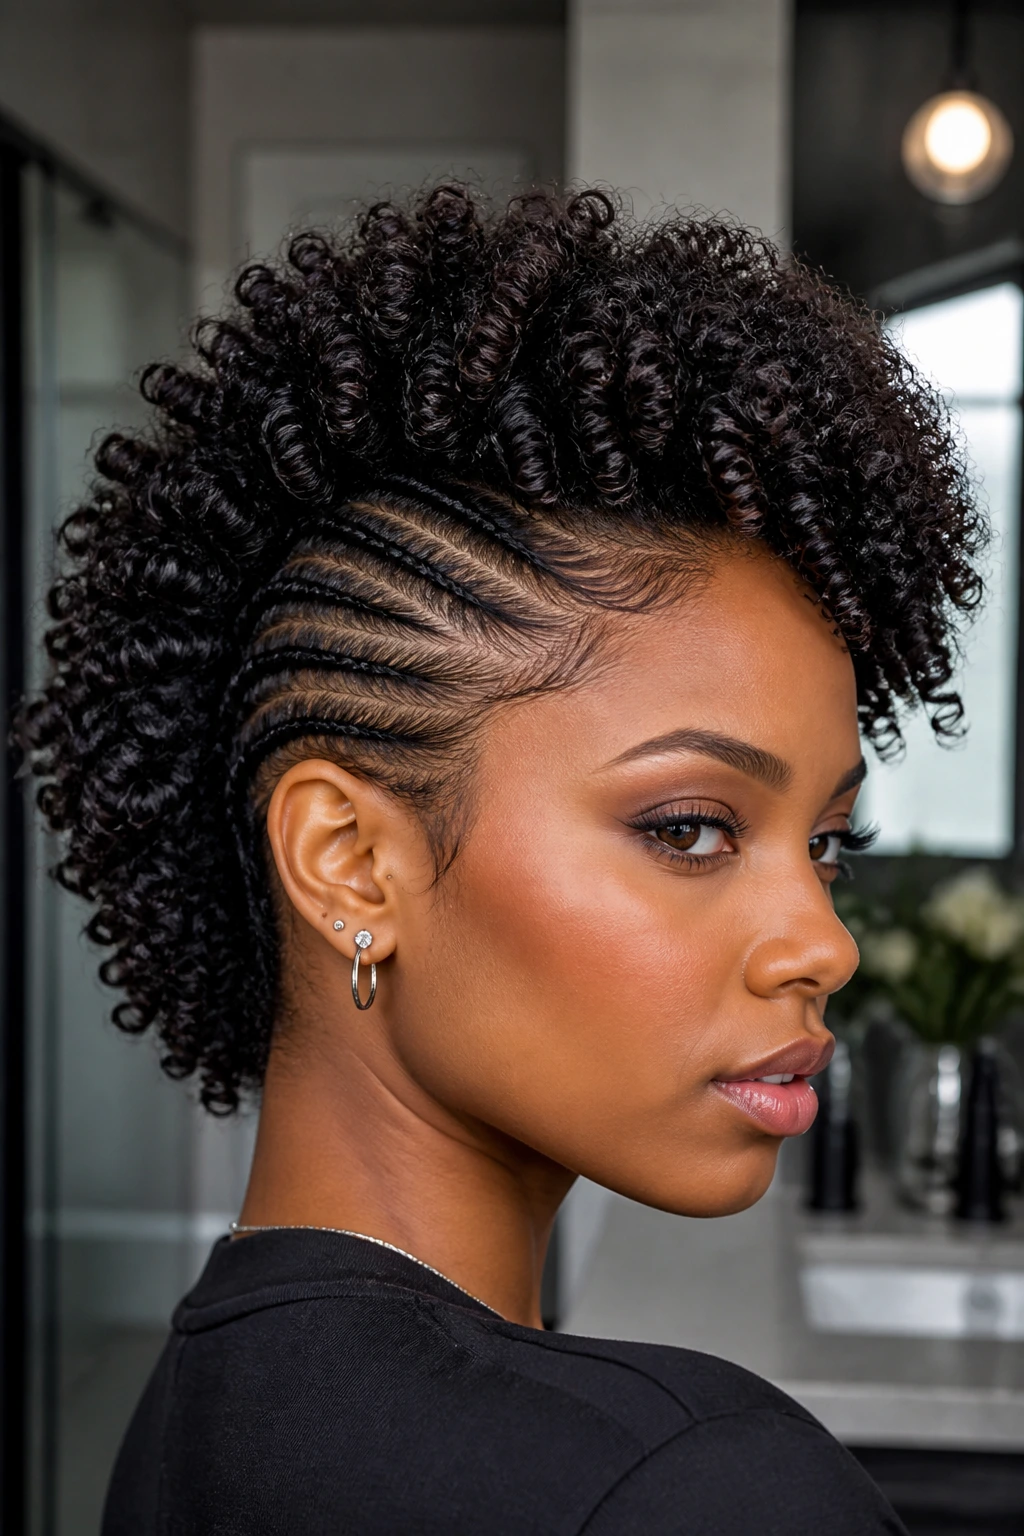
If you prefer a highly groomed, “shingled” look, this is your best bet. You are focusing on individual curl definition using a gel or curl cream and a fine-tooth comb. You create distinct, separated coils rather than a fluffy afro texture.
To achieve this, apply your product to soaking wet hair. Use a comb to pull the product through every single strand. As you create the frohawk shape, you aren’t brushing the hair; you are placing each curl exactly where you want it. This style looks incredibly high-end. It’s perfect for weddings or formal occasions where you want your hair to look polished and uniform. The only downside is the time required—this is a “slow beauty” style that takes patience.
17. The Bohemian Frohawk
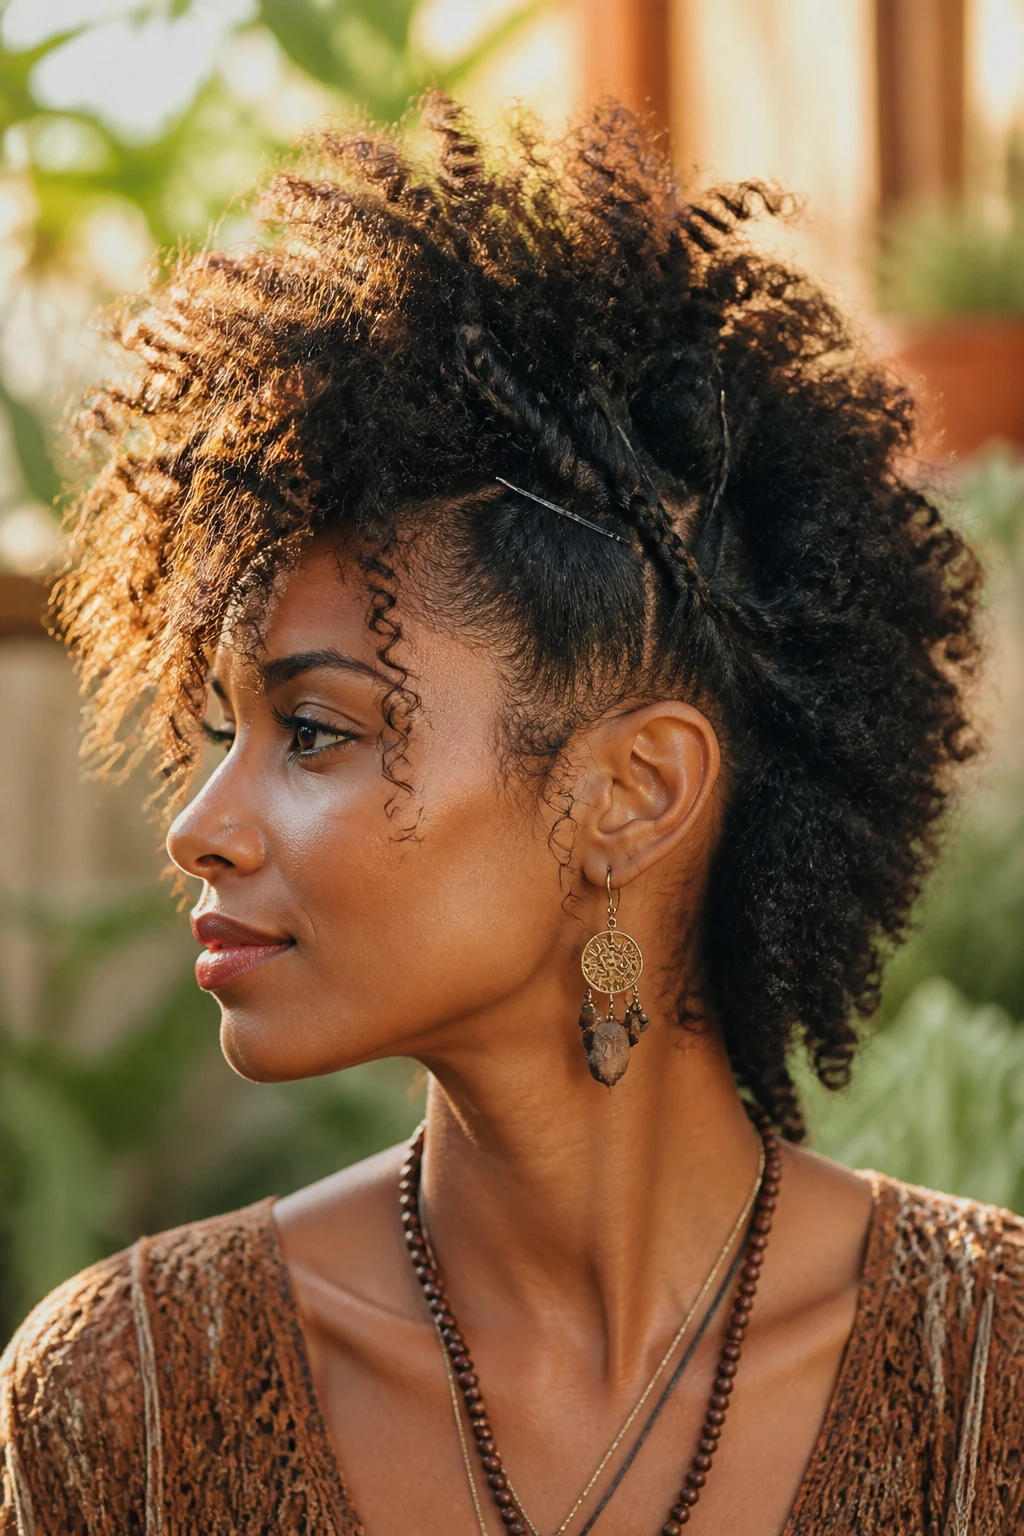
The bohemian frohawk is the messy, “I-woke-up-like-this” version of the style. It is intentionally undone. You are pinning the hair, but you are leaving flyaways and loose tendrils everywhere. It isn’t about structure; it’s about vibe.
To pull this off, you need to rely on the natural texture of your hair. Do not use heavy gels. Use a light sea salt spray or a curl refresher. Pin the hair loosely. Let the hair around your ears and the nape of your neck fall free. This style works best with statement earrings, as the loose hair frames the face and creates a soft, romantic silhouette rather than the sharp, aggressive shape of a traditional hawk.
Final Thoughts
Styling a frohawk is an exercise in knowing your hair’s limits and its potential. There is a learning curve, especially when it comes to pinning, but once you master the tension, it becomes the most reliable style in your rotation.
Stop worrying about perfection. The beauty of curly natural hair is that it changes. A frohawk that looks tight and sculpted at 9:00 AM will look soft and expansive by 5:00 PM. That is not a failure of the style; that is the nature of your hair. Own the shape, keep your edges moisturized, and don’t be afraid to use a few extra bobby pins—they are the unsung heroes of this entire aesthetic. Your hair is dynamic, and your styling should be just as adaptable.
