



The braided mohawk is more than just a hairstyle; it is a architectural feat that commands attention. For those with natural hair, this style offers the perfect intersection of protective styling and bold self-expression. By keeping the sides slicked down or intricately braided and the center elevated, you create a silhouette that highlights your bone structure while keeping your strands tucked away from the elements. Whether you are prepping for a high-profile event or simply want a low-maintenance look that lasts for weeks, these styles provide the versatility to transition from professional settings to weekend vibes without missing a beat.
Texture, density, and length are the three factors that will determine how your mohawk turns out. Natural hair—from 3C coils to 4C kinks—thrives when it is organized into cornrows or twists. The tension created by the braiding process provides a clean base for the elevated center, which can be styled as a loose fro, defined twists, or extensions. Before you begin, ensure your hair is properly detangled and deep conditioned. A braid is only as good as its foundation, and starting with dry, brittle hair is a recipe for breakage rather than a protective style. Let us explore the variations that work best for natural hair textures.
1. The Classic Stitch-Braided Mohawk
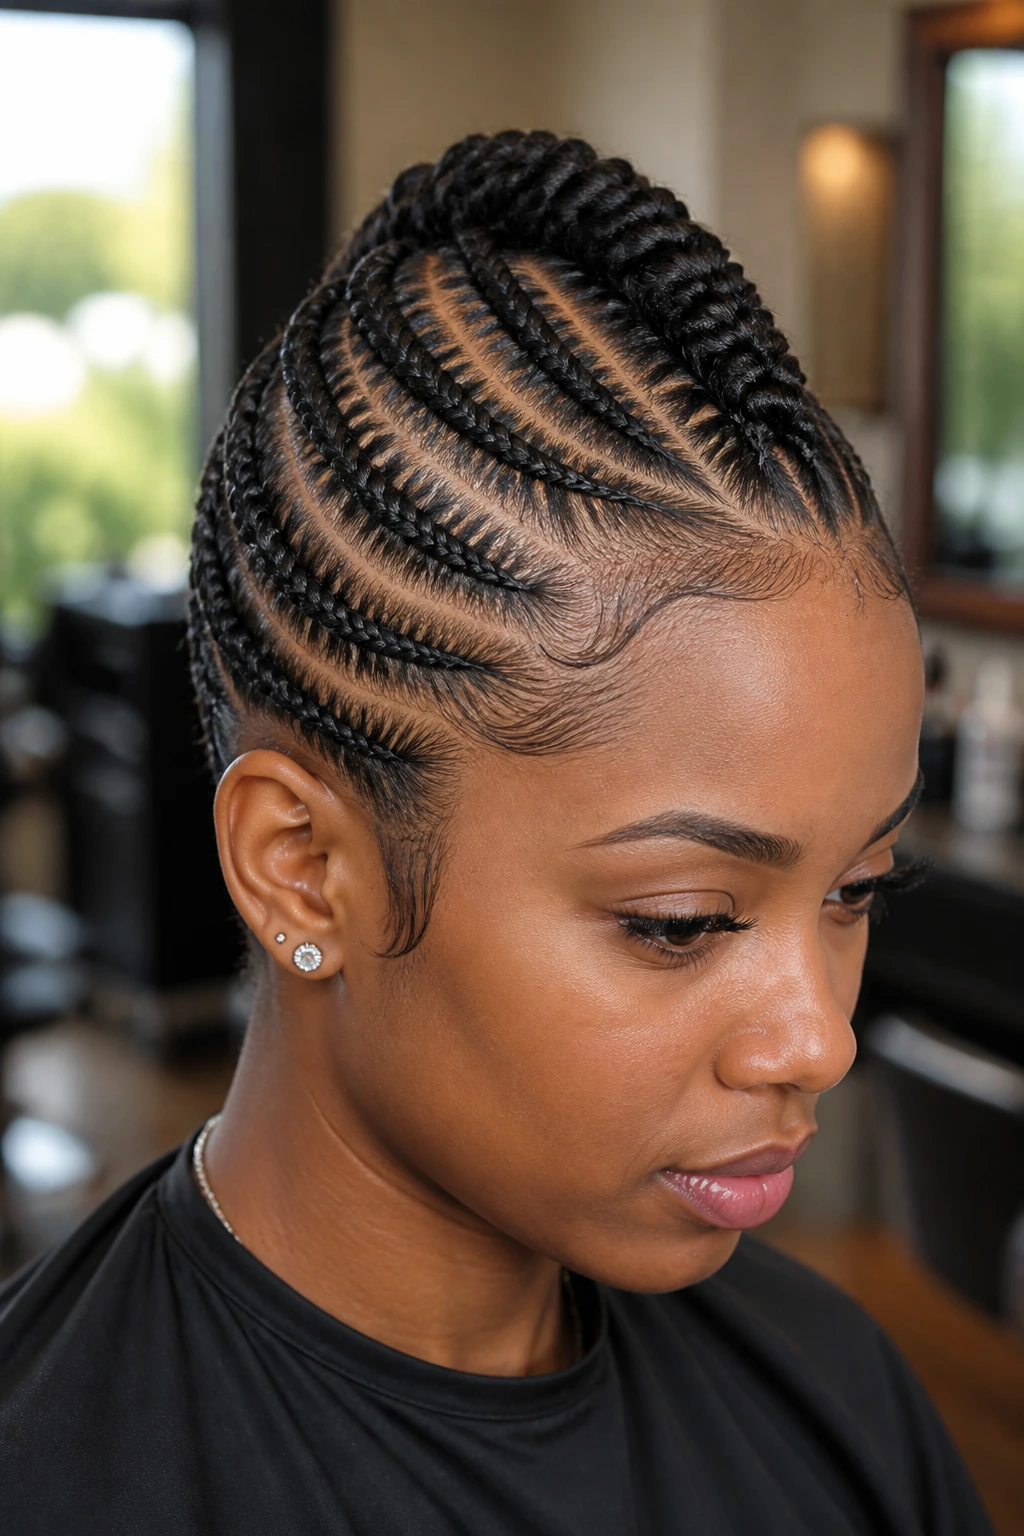
Stitch braids are the gold standard for clean, precise lines. This style involves using the tip of a rattail comb to create horizontal or diagonal lines across the scalp, resulting in distinct, uniform rows that lead up to the center. For a mohawk, the braiding starts from the ear line and works toward the middle, leaving a strip of free hair or extended braids down the center.
Why It Works for Natural Hair
The stitch technique creates a lot of tension, which is excellent for keeping thick, unruly hair in place for extended periods. Because the braids are physically “stitched” into the scalp, they resist fraying and fuzziness much longer than standard cornrows. You will want to use a generous amount of edge control or braiding gel to get that sharp, clean look.
Tools to Keep Handy
- Fine-tooth rattail comb (essential for those clean parts)
- Firm-hold braiding gel (look for something that doesn’t flake)
- Small hair clips to section off the hair as you work
- Edge brush for the baby hairs
Pro tip: Do not pull too tight around the hairline. The aesthetic is sleek, but your edges need to remain intact. If you feel actual pain, you are pulling too hard.
2. The Curly Frohawk with Braided Sides
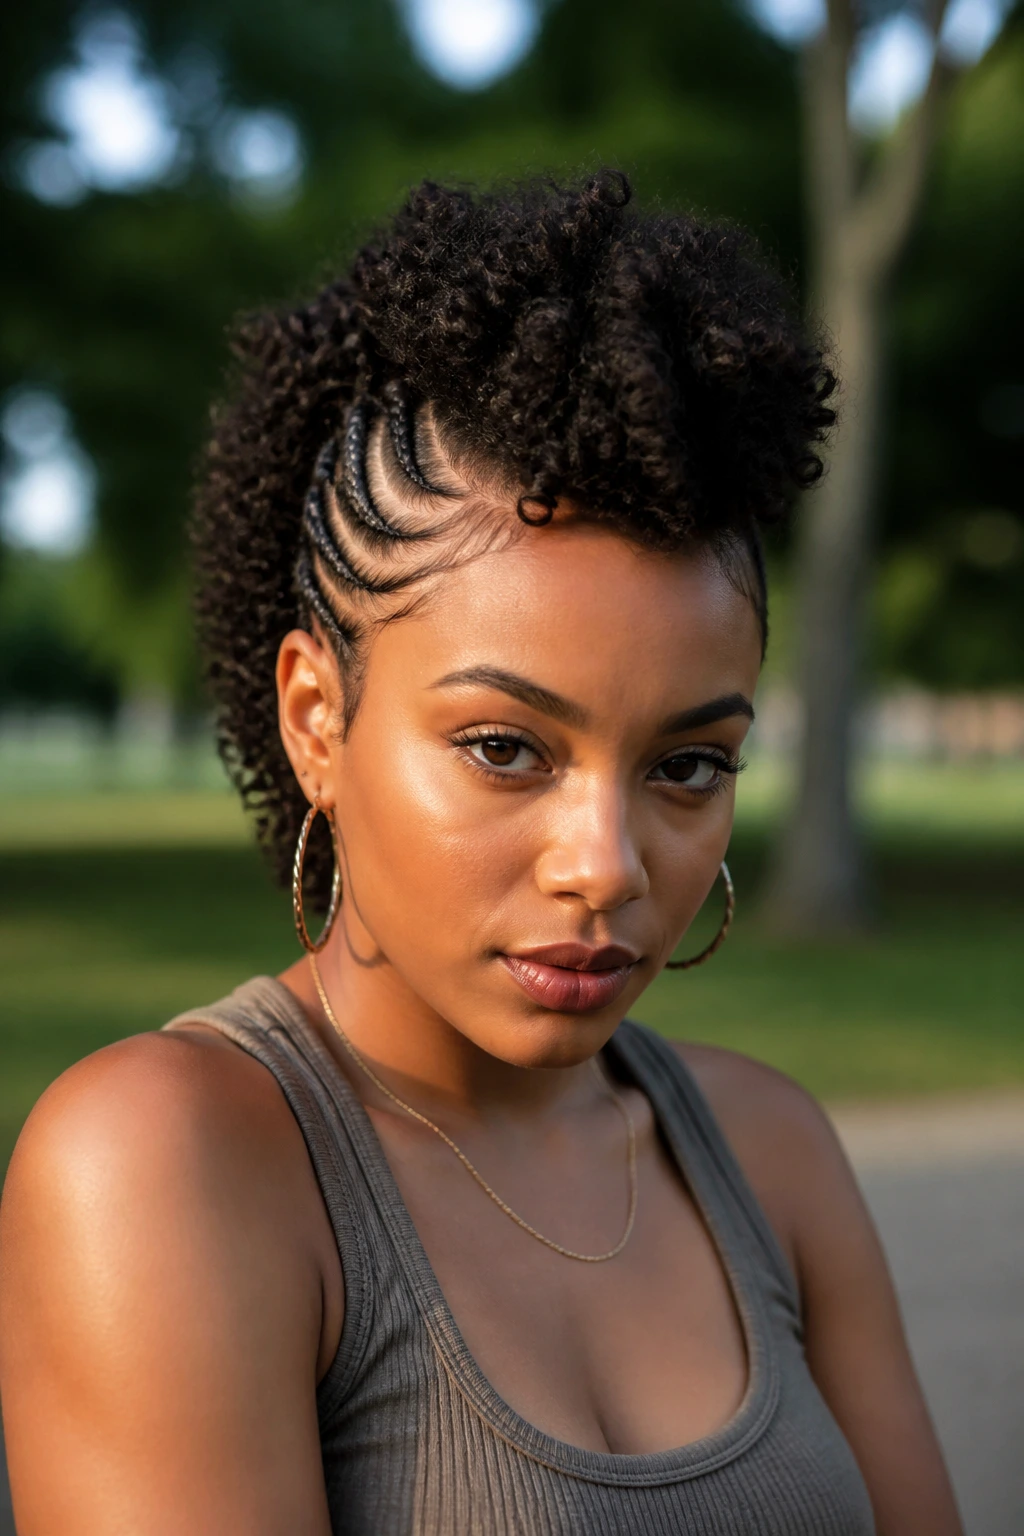
If you love the volume of your natural curls but want the edge of a mohawk, this is the solution. The sides are braided into tight cornrows, while the middle is left free or defined using a twist-out or perm-rod set. It gives you the drama of an afro with the structure of a protective style.
Achieving the Center Volume
The key here is definition. After braiding the sides up, apply a curl-defining cream or mousse to the damp center section. Use a pick to lift the roots for maximum height. Because the sides are secure, the center section will look larger by comparison, enhancing that iconic mohawk shape. This is an excellent way to wear your natural texture while keeping the perimeter neat and manageable.
Maintenance Note
Sleep with a satin bonnet that is large enough to cover the center curls without flattening them. The braided sides will stay neat for a week or two, but the center curls may need refreshing with a little water and leave-in conditioner every few days.
3. The Goddess Braided Mohawk
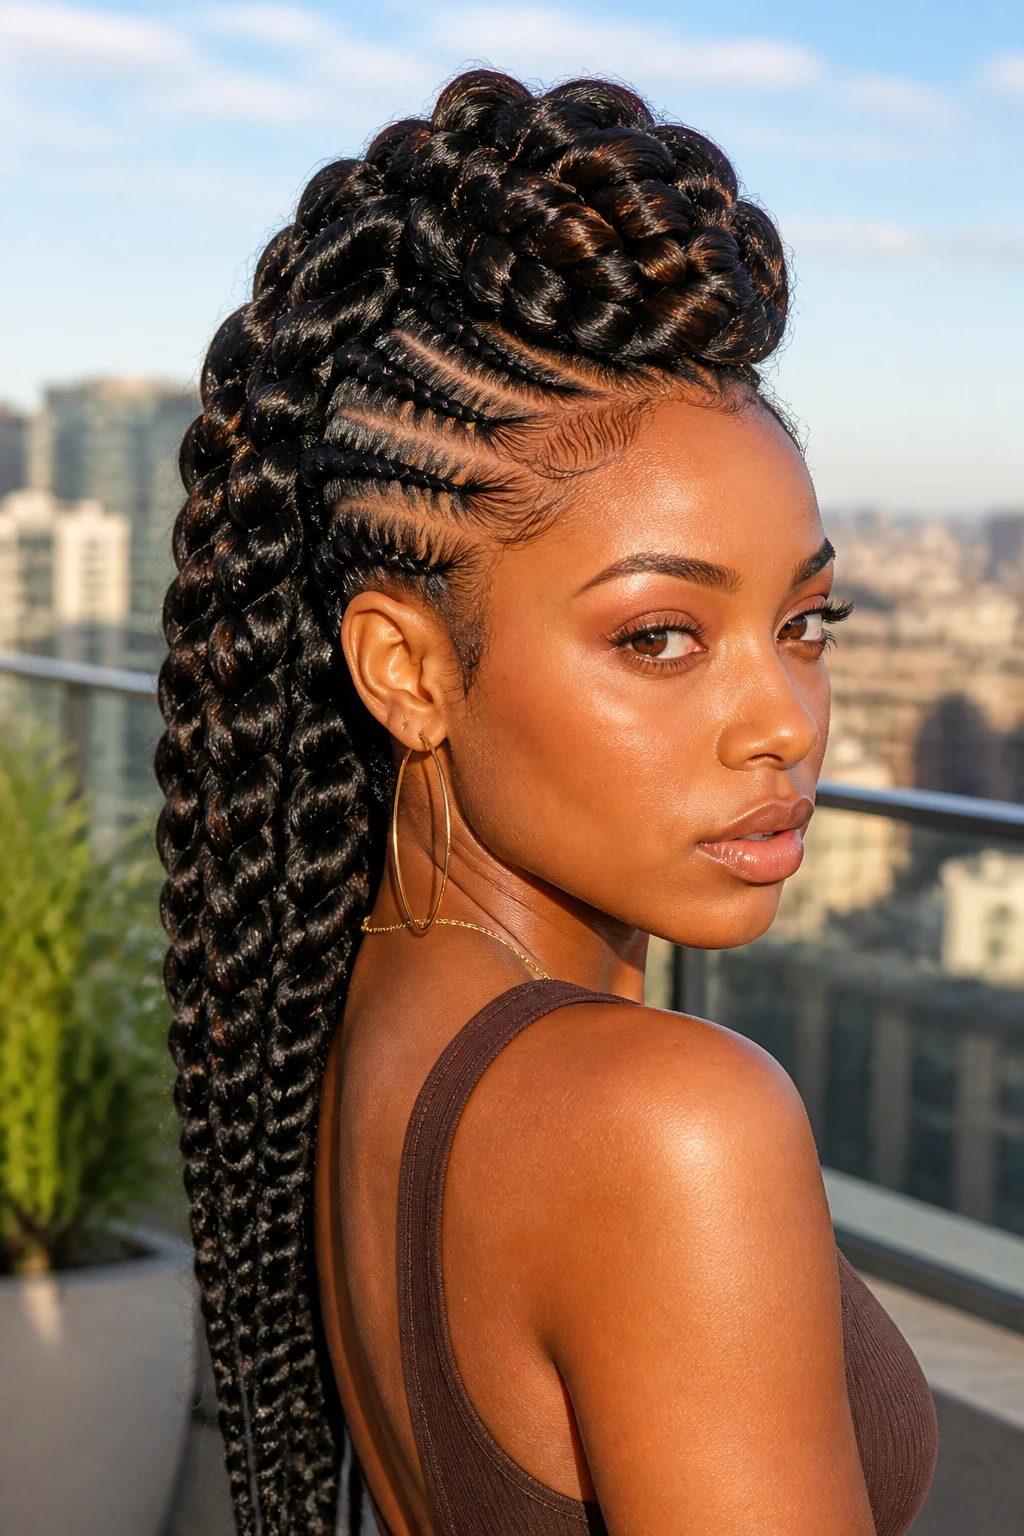
Goddess braids are larger, feed-in cornrows that provide a softer, more romantic look. Unlike the micro-stitch braids that look very sharp and defined, goddess braids add volume to the scalp itself. This style is incredibly comfortable and puts less stress on the hair follicles because the braids are chunkier.
Why It Looks So Polished
The larger braid size means you spend less time in the stylist’s chair. You can incorporate synthetic braiding hair to add length or thickness to the center section. Many people choose to add a few loose curls at the ends of these braids to give the style a flowing, bohemian vibe.
How to Prevent Frizz
Since these braids are thicker and often incorporate added hair, they can get fuzzy if you sleep on them without protection. Using a silk pillowcase is mandatory here. If you notice flyaways, use a light mousse and tie your hair down with a silk scarf for 15 minutes before heading out.
4. The Twisted Mohawk Updo
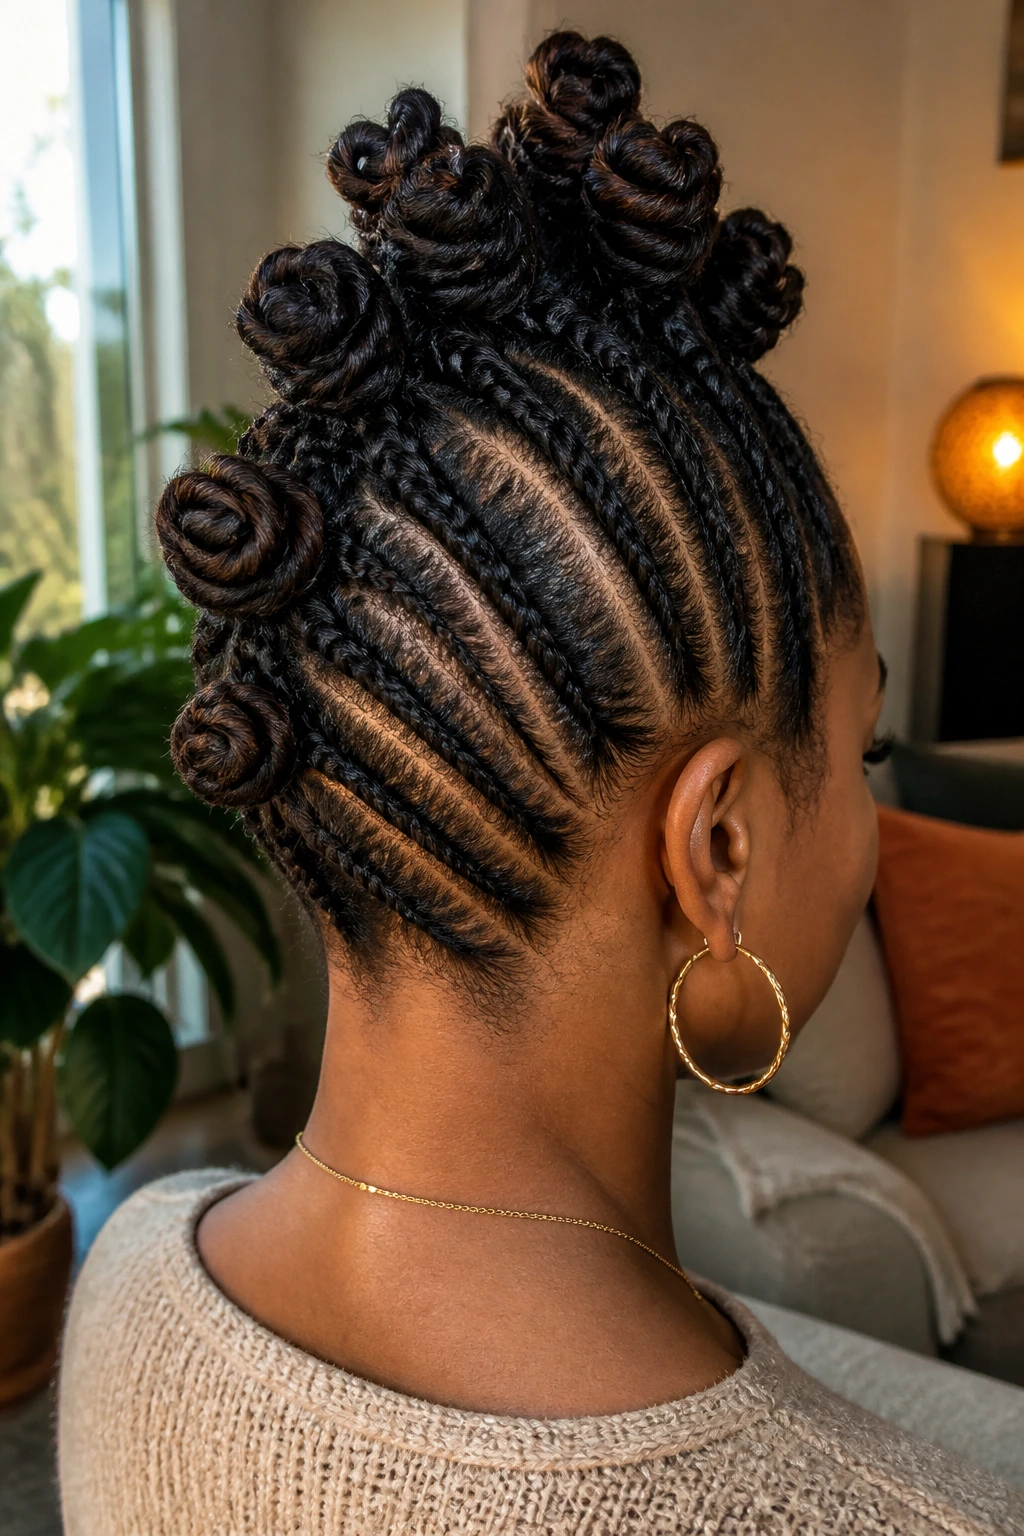
Sometimes you do not want to deal with cornrows at all. Two-strand twists are a fantastic alternative. By creating rows of flat twists on the sides of the head, you can gather the ends into a center mohawk, securing them with bobby pins. This creates a soft, textured look that feels much more approachable than braided rows.
Why This is a Favorite for Beginners
Flat twists are significantly easier to master than cornrows. If you are doing your hair yourself, this is the style to practice first. You do not need to worry about perfect parts because the twist itself provides volume that masks any irregularities in the sectioning.
The Finishing Touch
For the center mohawk, twist the remaining hair into Bantu knots or simply let them hang as chunky twists. You can accessorize with gold cuffs or wooden beads to dress up the look. Because this style uses your own hair, it is a great low-tension option that avoids the weight of synthetic extensions.
5. The Mohawk with Bantu Knots
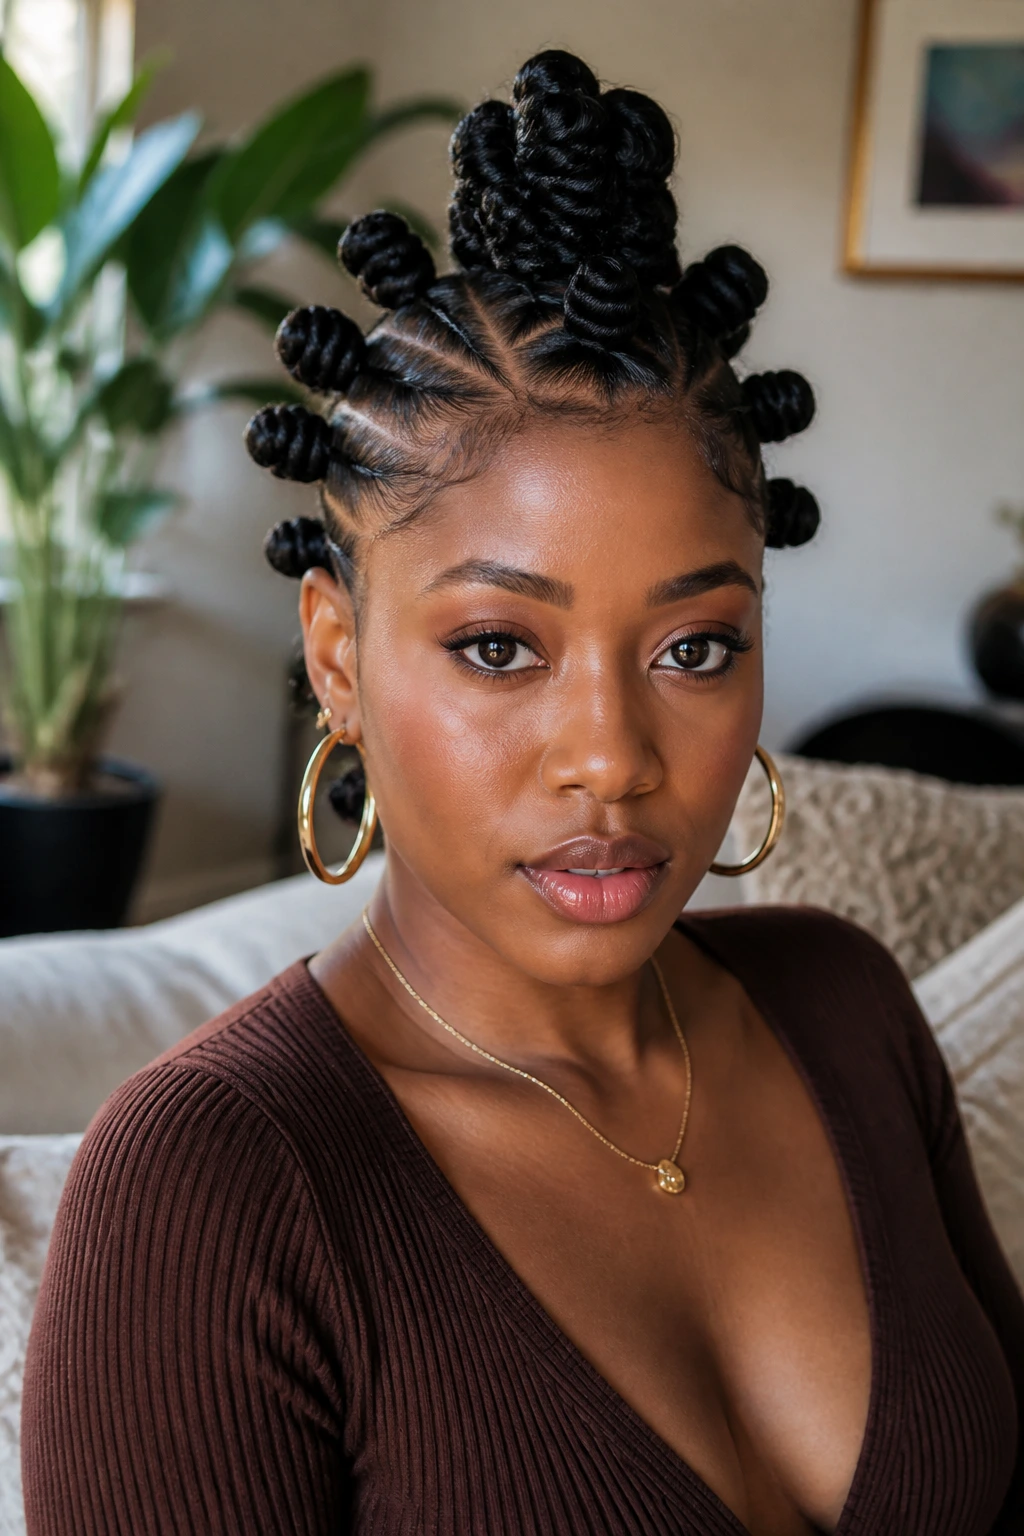
Bantu knots arranged in a mohawk formation offer a playful, sculptural aesthetic. You create rows of knots running up the sides of the head, while the center features larger, more prominent knots or a braided trail. This style is often seen as a cultural homage and works incredibly well with 4C hair that holds a knot structure easily.
The Secret to Smooth Knots
The hair must be detangled thoroughly before you begin. If there is a knot in your hair before you tie the Bantu knot, the tension will cause breakage. Use a butter-based leave-in conditioner to give the hair slip and hold. When wrapping the hair, be consistent with your direction—twisting all knots in the same direction makes the final style look intentional and uniform.
How Long It Lasts
Bantu knots can last for up to two weeks if wrapped in silk at night. The longer you keep them in, the tighter the resulting curl pattern will be when you eventually take them down. This style essentially gives you two looks: the knots themselves, and a gorgeous, tight twist-out once they are unraveled.
6. The Braided Mohawk with a High Bun
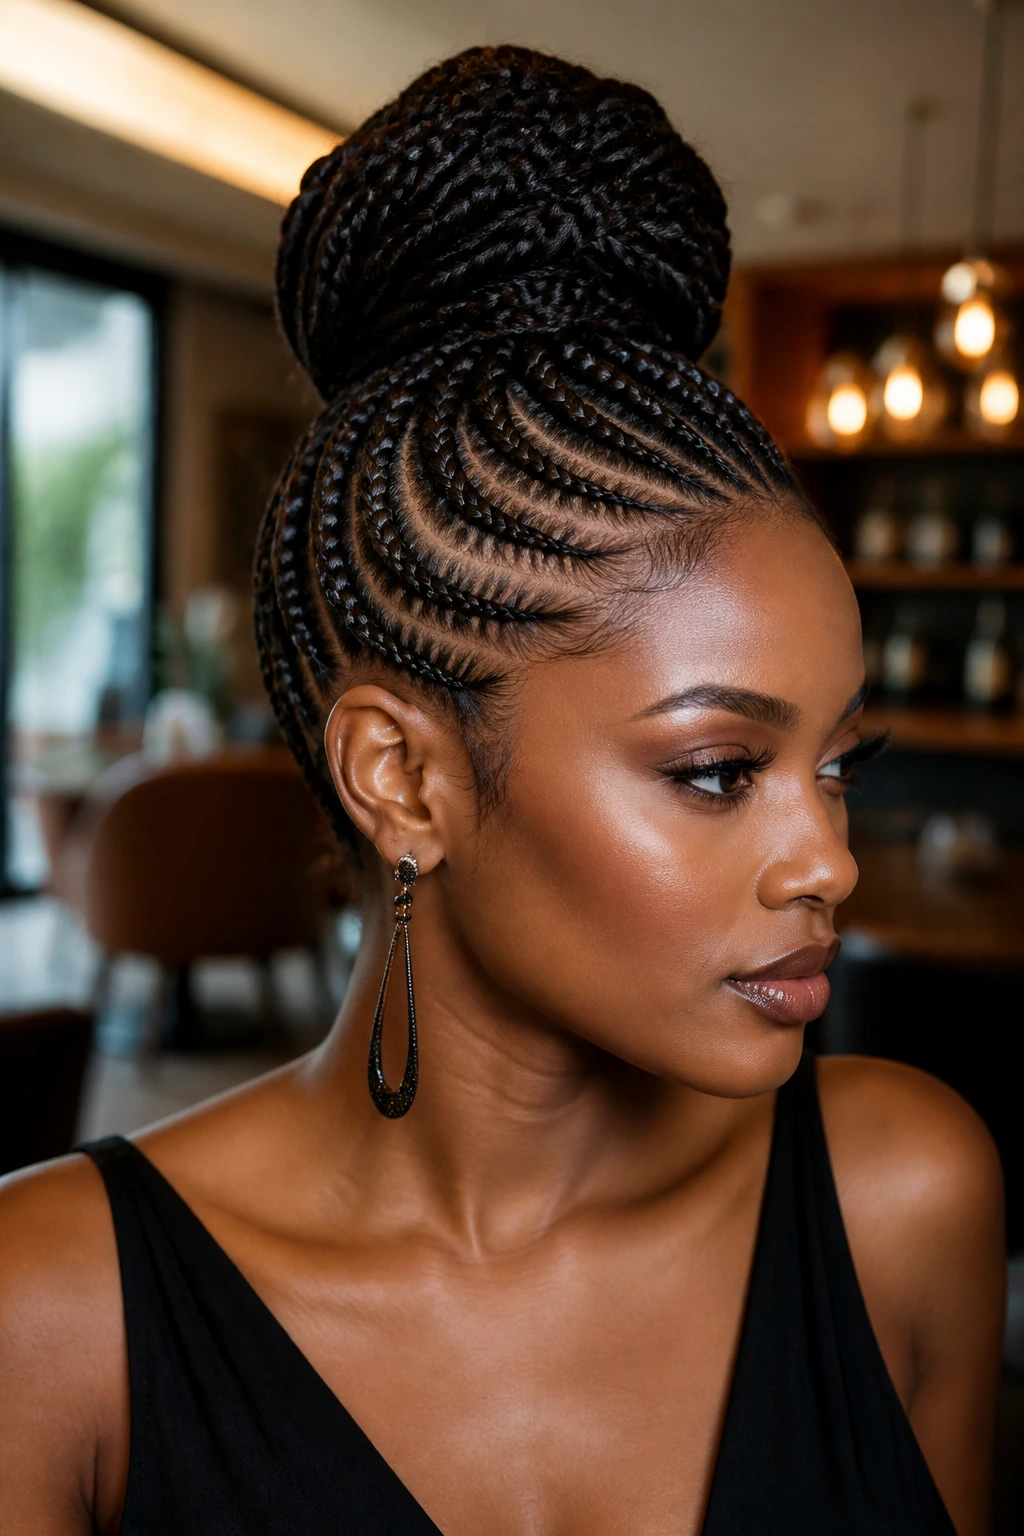
This version takes the mohawk concept and elevates it to a formal level. The hair on the sides is braided upward toward the center, but instead of the center being a trail of hair, all the braids and loose hair are gathered into a single, high bun at the crown of the head. It is essentially a braided mohawk that culminates in a topknot.
Who Should Choose This
If you have work events, weddings, or formal parties on your calendar, this is the style to pick. It keeps your hair completely off your neck and face, emphasizing your jawline. The braided detail on the sides adds visual interest that a plain sleek bun would lack.
Handling the Ends
If you have natural hair that is not long enough to form a thick bun, use a drawstring ponytail extension. Secure your natural hair in a small bun, attach the drawstring piece, and wrap a small section of the extension around the base to hide the attachment point.
7. The Mohawk with Fulani-Inspired Braids
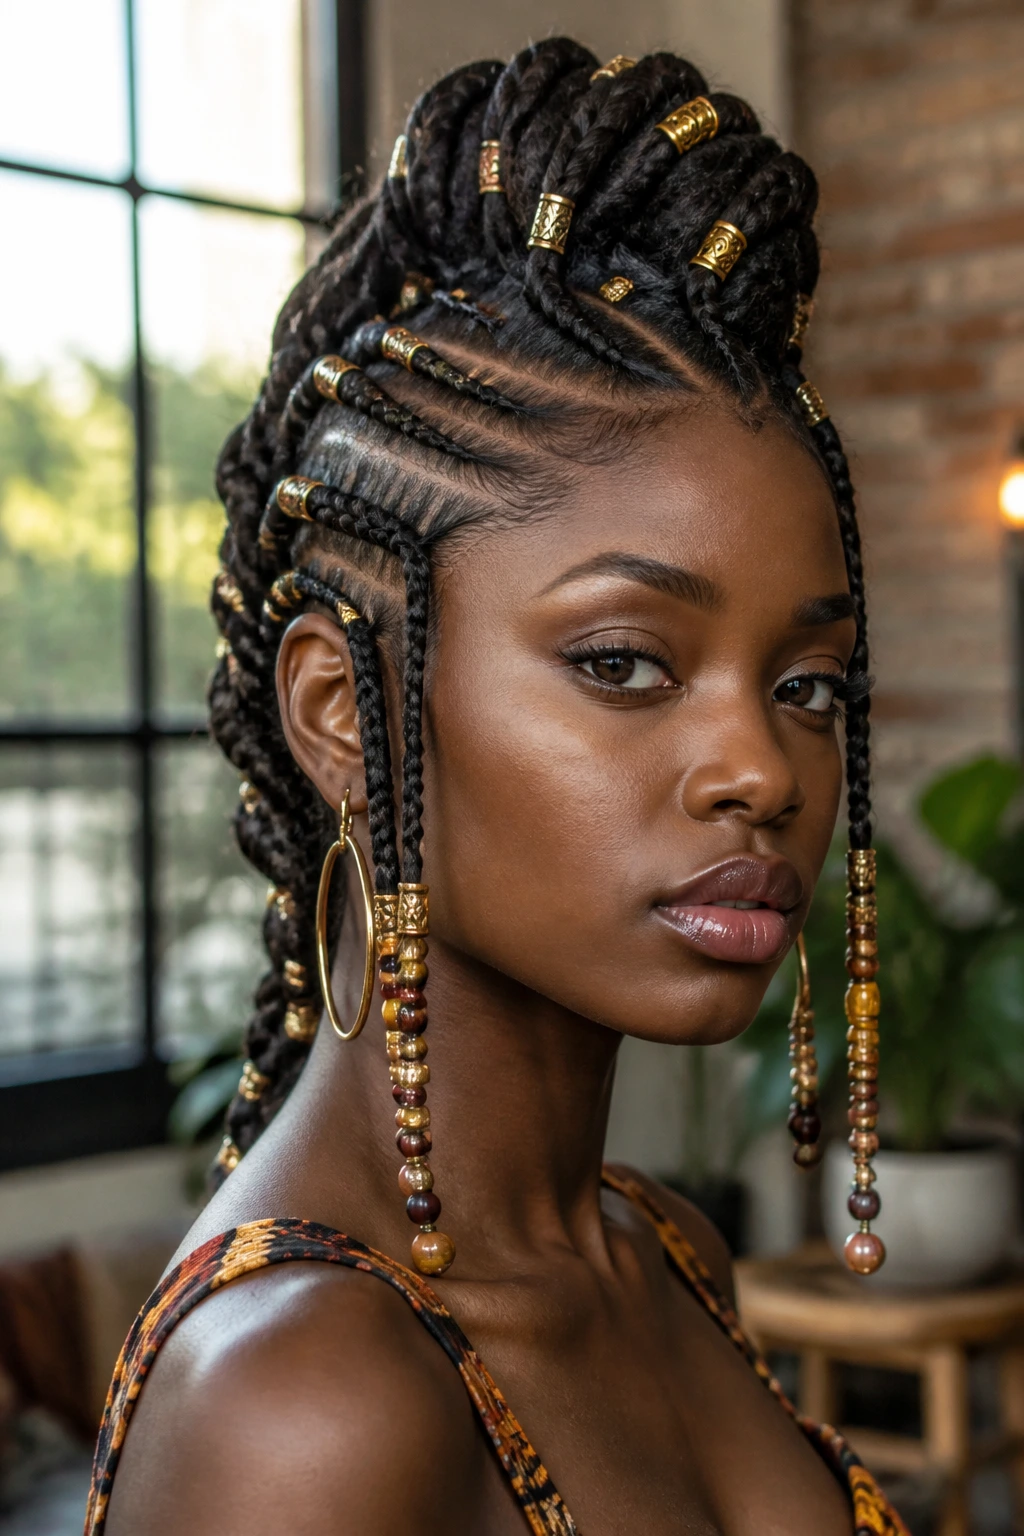
Fulani braids are characterized by a center part, braids going forward, and often, accessories like beads or gold rings. Adapting this to a mohawk means braiding the sides up toward the center and placing decorative gold cuffs or colorful beads along the length of the braids.
The Power of Accessories
The accessories are not just for show; they define the aesthetic. Gold cuffs against dark natural hair create a striking contrast. You can place them at the base of the braids or spaced evenly along the length. This style feels very grounded in tradition but looks modern and edgy in a mohawk configuration.
A Warning on Weight
Be mindful of how many beads or metal cuffs you add. Too many can create significant weight, which pulls on the hair roots and leads to headaches. Stick to 1-2 accessories per braid unless you are very accustomed to the weight.
8. The Mohawk with Flat Twists
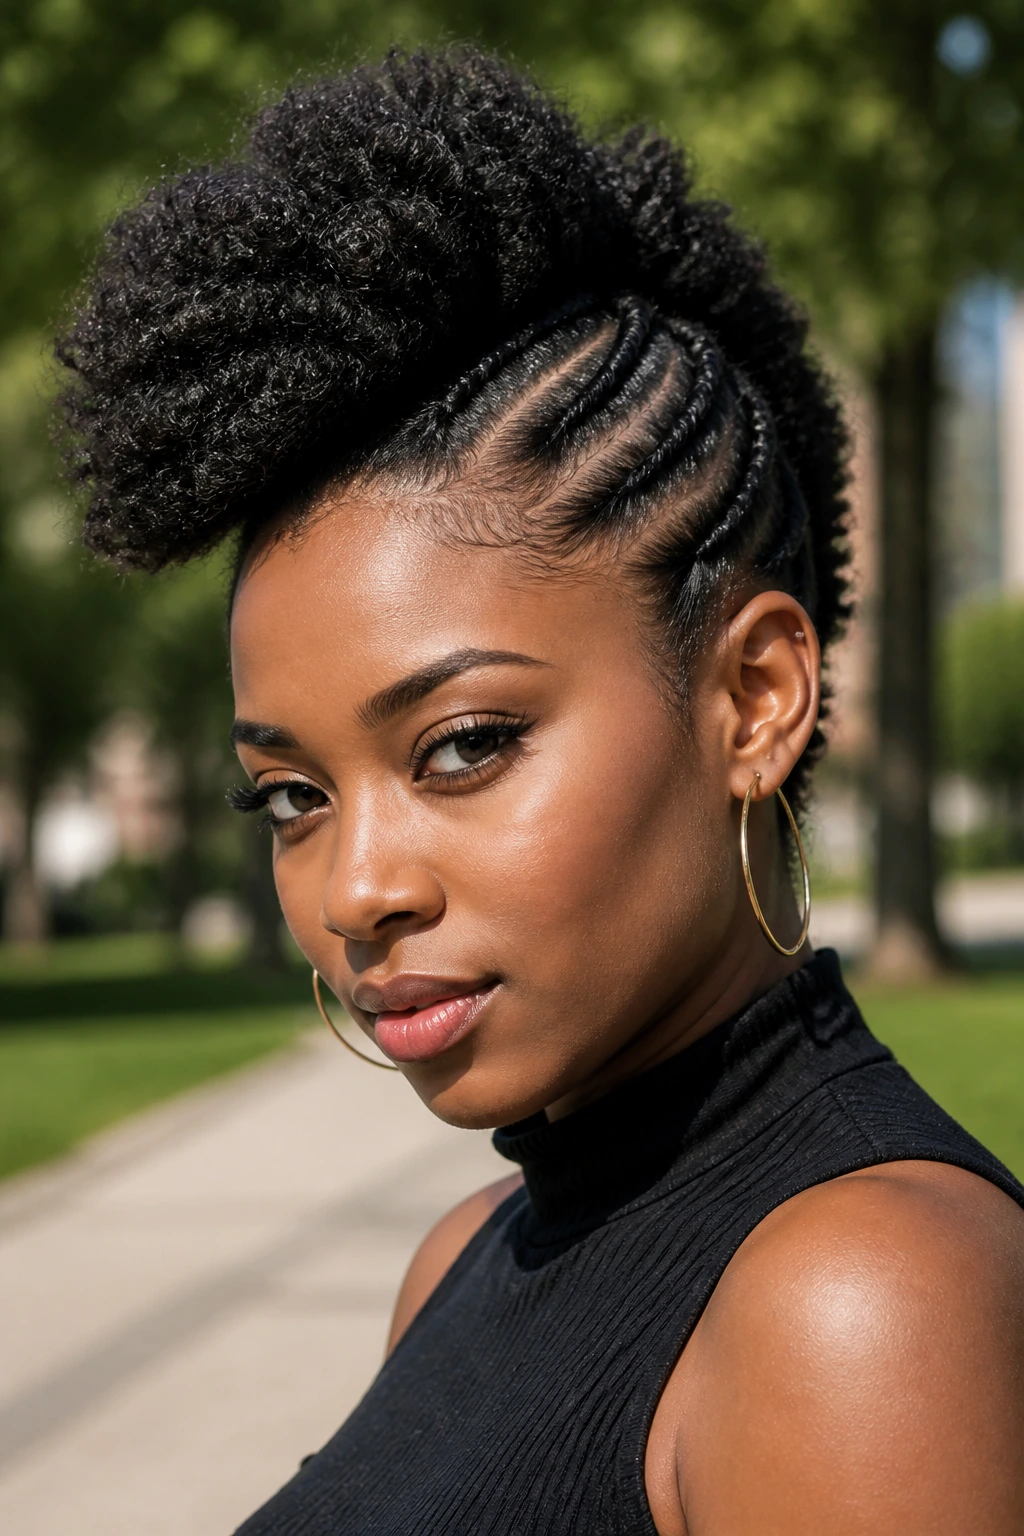
Flat twists are a classic protective style that mimics the look of cornrows without the tightness. By creating flat twists on the sides of the head that lead to the center, you achieve a beautiful, ridged texture. This is a very “neat” style that works perfectly for those who prefer a cleaner, less intricate look than tight braids.
Why Texture Matters
Flat twists are generally softer to the touch than braids. Because the hair is twisted rather than braided, it retains more moisture. This is a great protective style for winter months or dry climates where you need to keep your hair tucked away but still want to be able to apply oils easily to the scalp.
Styling the Center
Since the flat twists on the sides provide the structure, the center section can be anything. A perm-rod set, a bantu-knot-out, or even just a simple afro puff all work harmoniously with the flat-twisted base. It is a very versatile “base” style.
9. The Mohawk with a Shaved Undercut
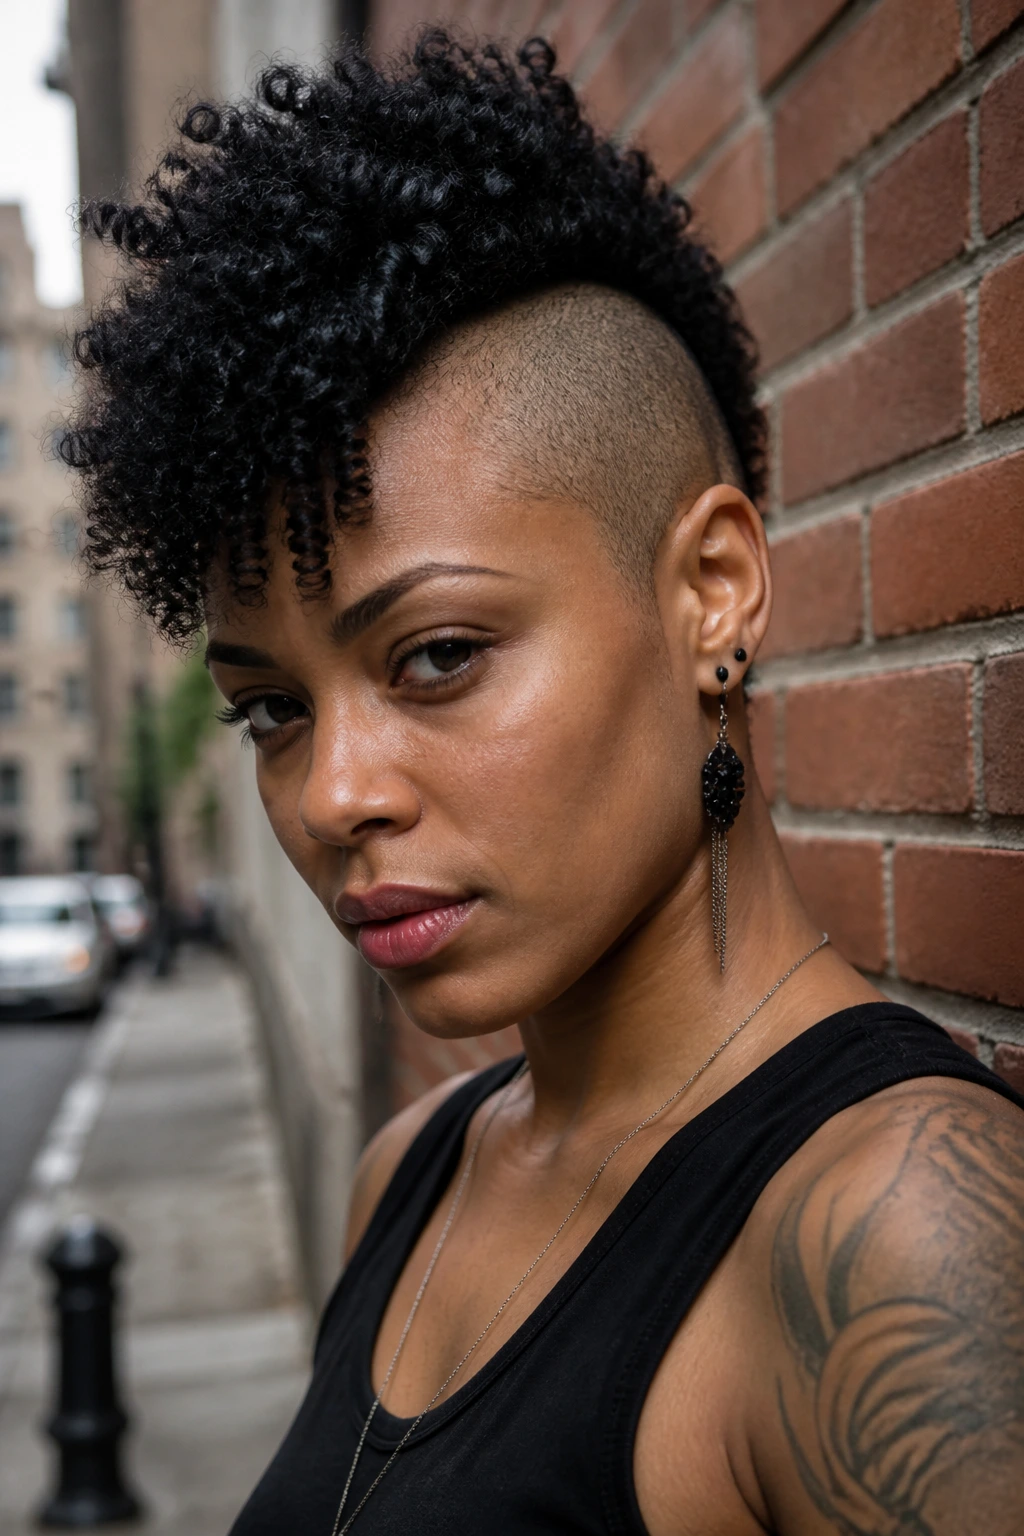
For the truly bold, a shaved mohawk provides the ultimate contrast. You physically clipper the sides of your hair or keep them very short, leaving a strip of natural hair through the center. This removes the need for braiding the sides entirely, saving you hours of styling time.
The Commitment Factor
This is a high-commitment look. You will need to maintain the shave every few weeks to keep the lines sharp. However, the styling options for the center strip are endless. You can braid it, twist it, or pick it out into a glorious, high-volume afro.
Managing the Center
Because you have so little hair on the sides, the center strip becomes the absolute focal point. Ensure you are using high-quality products to define the curls or coils in that center strip. You want it to look intentional, not just like a patch of hair left behind.
10. The Mohawk with Heart Braids
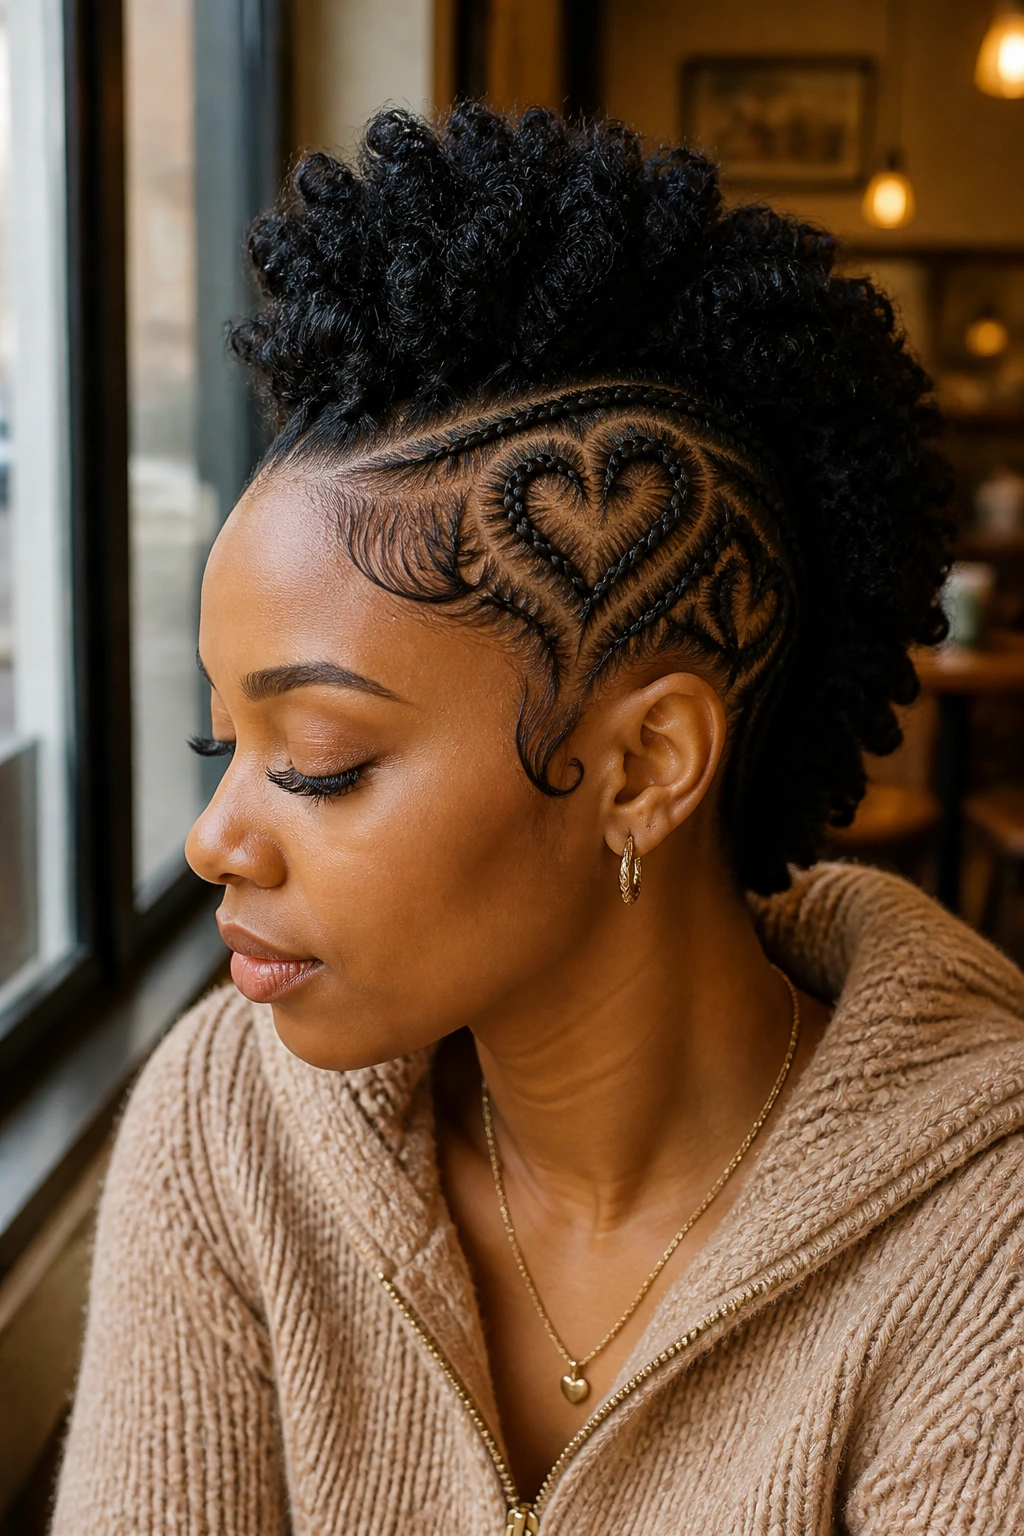
Heart braids involve carving out specific hair sections in the shape of a heart, usually on one or both sides of the mohawk. It requires a steady hand and a good rattail comb. This style is often reserved for special occasions because of the time and precision required to get the shape right.
The Precision Required
You must have a mirror behind you or have someone assist you with the sectioning. The secret to a perfect heart braid is the “curve.” Start with two curved parts that meet at a point. When braiding, follow that curve exactly. If your braid is too straight, the heart will look like a V-shape.
Scaling It Down
If a large heart feels like too much, try smaller hearts near the hairline. It’s a subtle detail that shows off your personality without needing to dominate the entire style.
11. The Mohawk with Senegalese Twists
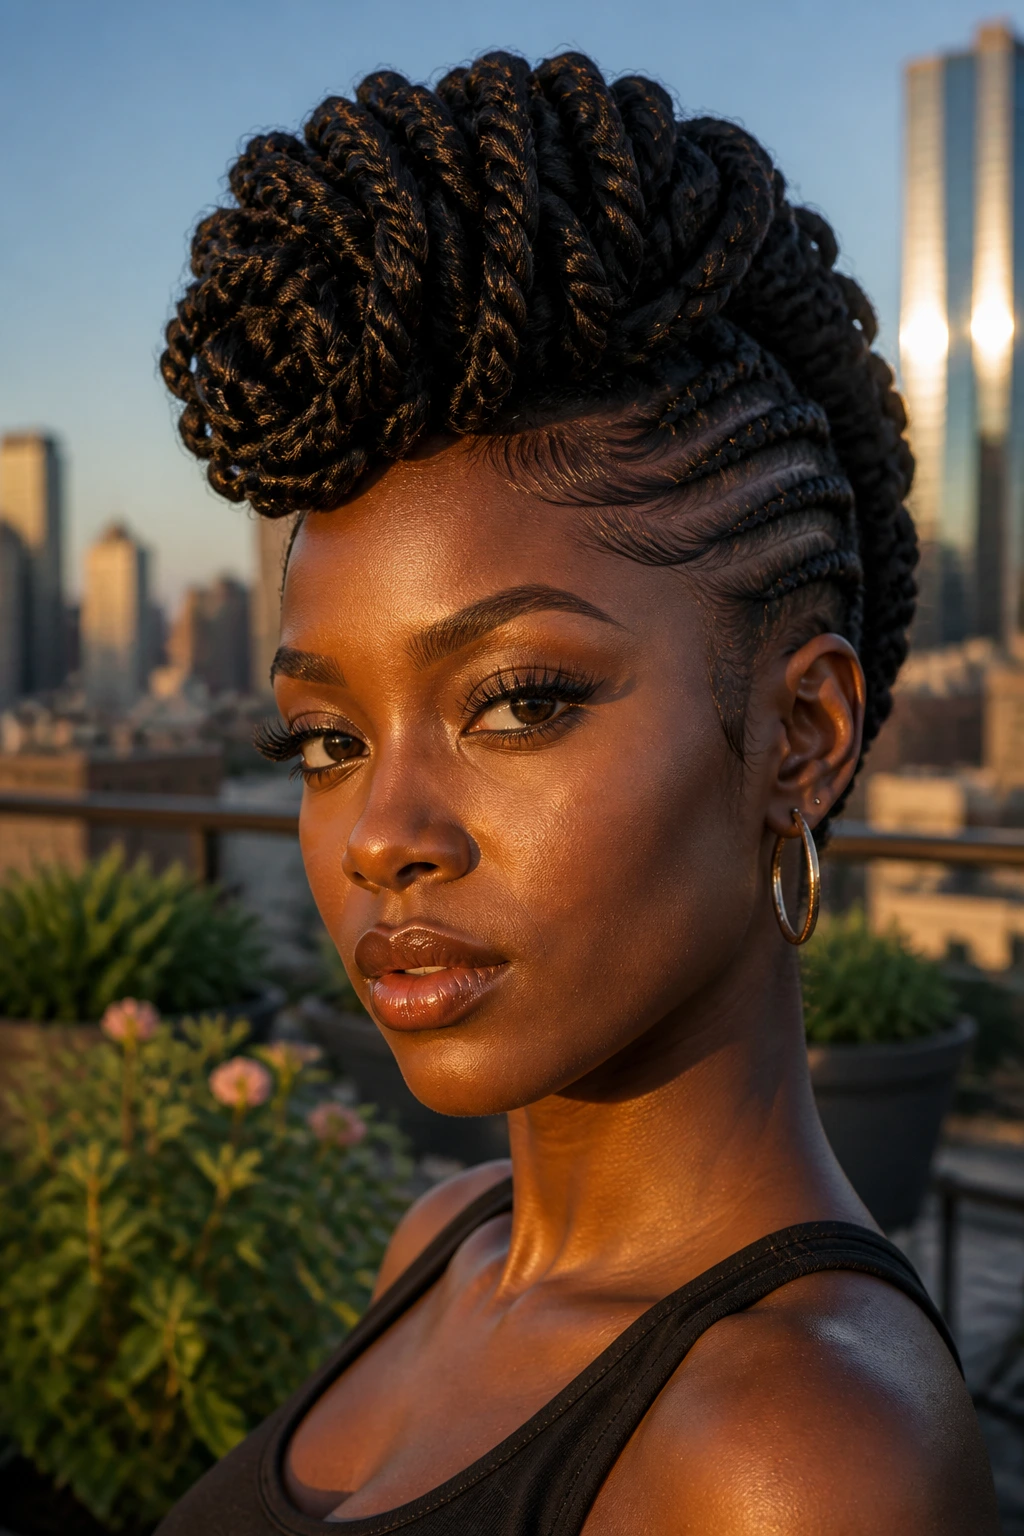
Senegalese twists are rope-like extensions that can be quite heavy but look incredibly elegant. By installing them in a mohawk pattern, you get the height and drama of a full braided style without the micro-braiding maintenance.
Why This Style Lasts
The twists are essentially maintenance-free. Because they are individual extensions, they tend to look better the longer you wear them. The “boho” effect of slightly frizzy twists is actually a desirable look. You don’t need to worry about scalp maintenance as much as you would with cornrows because you have easier access to your actual scalp between the twists.
Choosing the Right Hair
Select high-quality synthetic hair that is lightweight. Senegalese twists can get heavy quickly, and you do not want that weight hanging off your natural hair follicles for four weeks. Opt for a pre-stretched, matte-finish hair for the most natural appearance.
12. The Mohawk with Bubble Braids
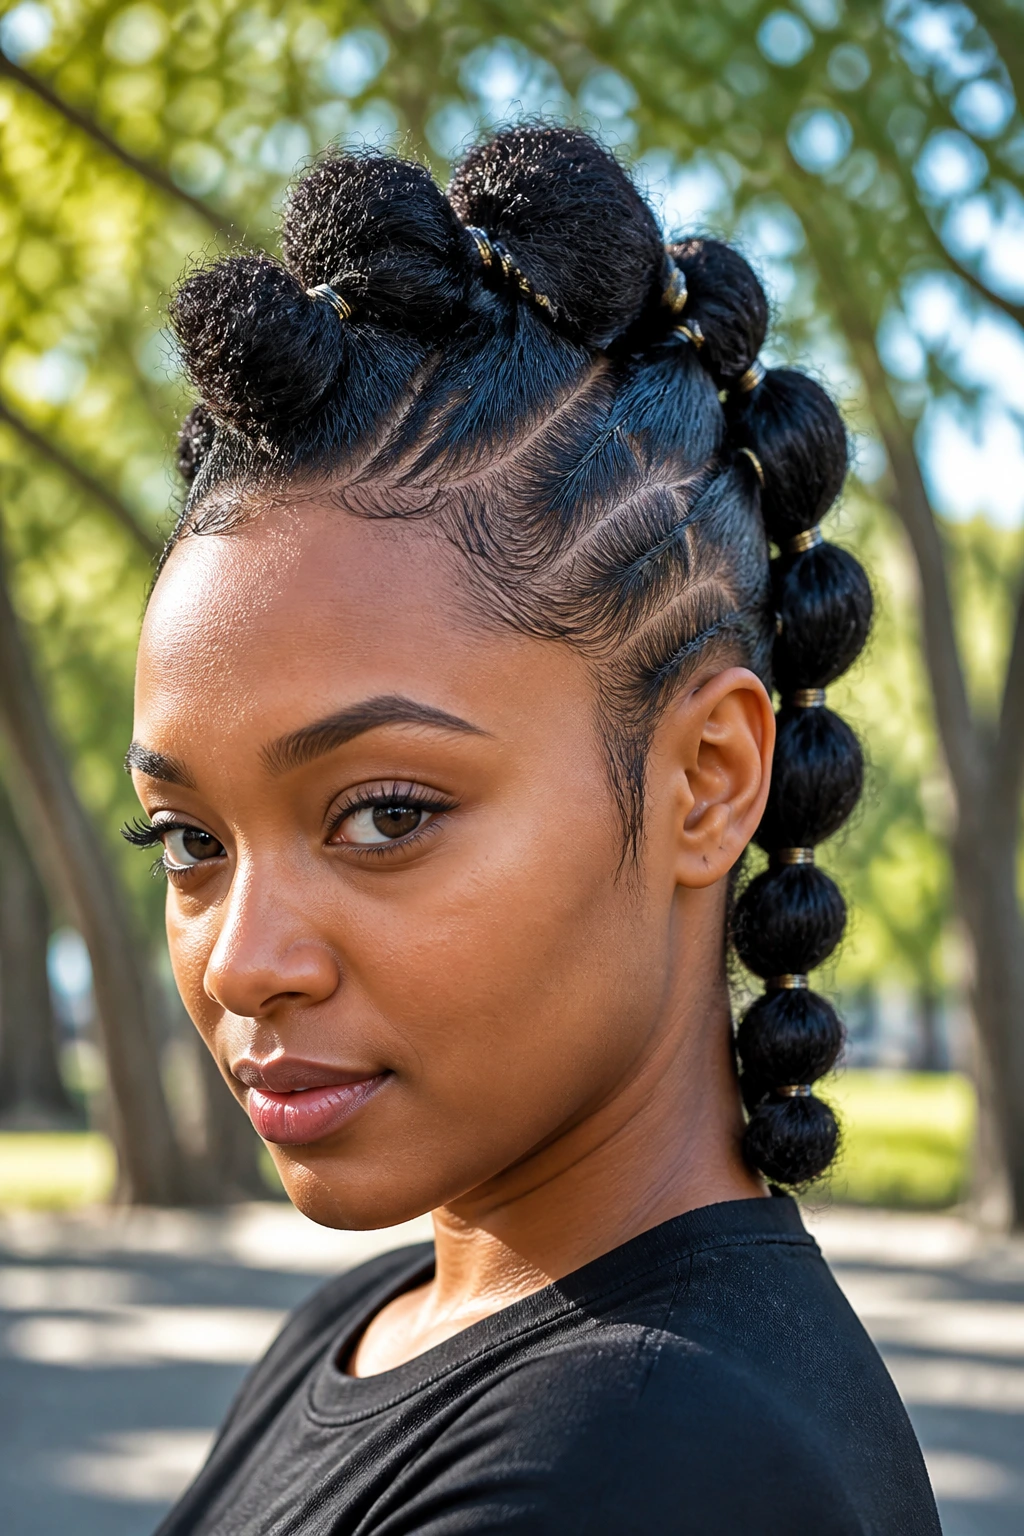
Bubble braids have made a huge comeback. Instead of traditional cornrows, you use clear or colored rubber bands to create segments of “bubbles” along the sides of the head. It’s a fun, youthful take on the mohawk that is very easy to achieve at home.
The Technique
The secret is to use tiny, durable elastic bands. Divide the hair into sections, secure the first one, then add another band a few inches down, pulling the hair between the bands to fluff it out into a “bubble.” It creates a rounded, continuous line that looks great in a mohawk formation.
Avoid Breakage
Rubber bands can be brutal on natural hair if you are not careful. Always coat the bands in a little oil before sliding them onto the hair, or use coated fabric elastics to minimize friction. When it is time to take the style down, never rip them out—use a small pair of scissors to carefully cut the bands.
13. The Mohawk with Locs
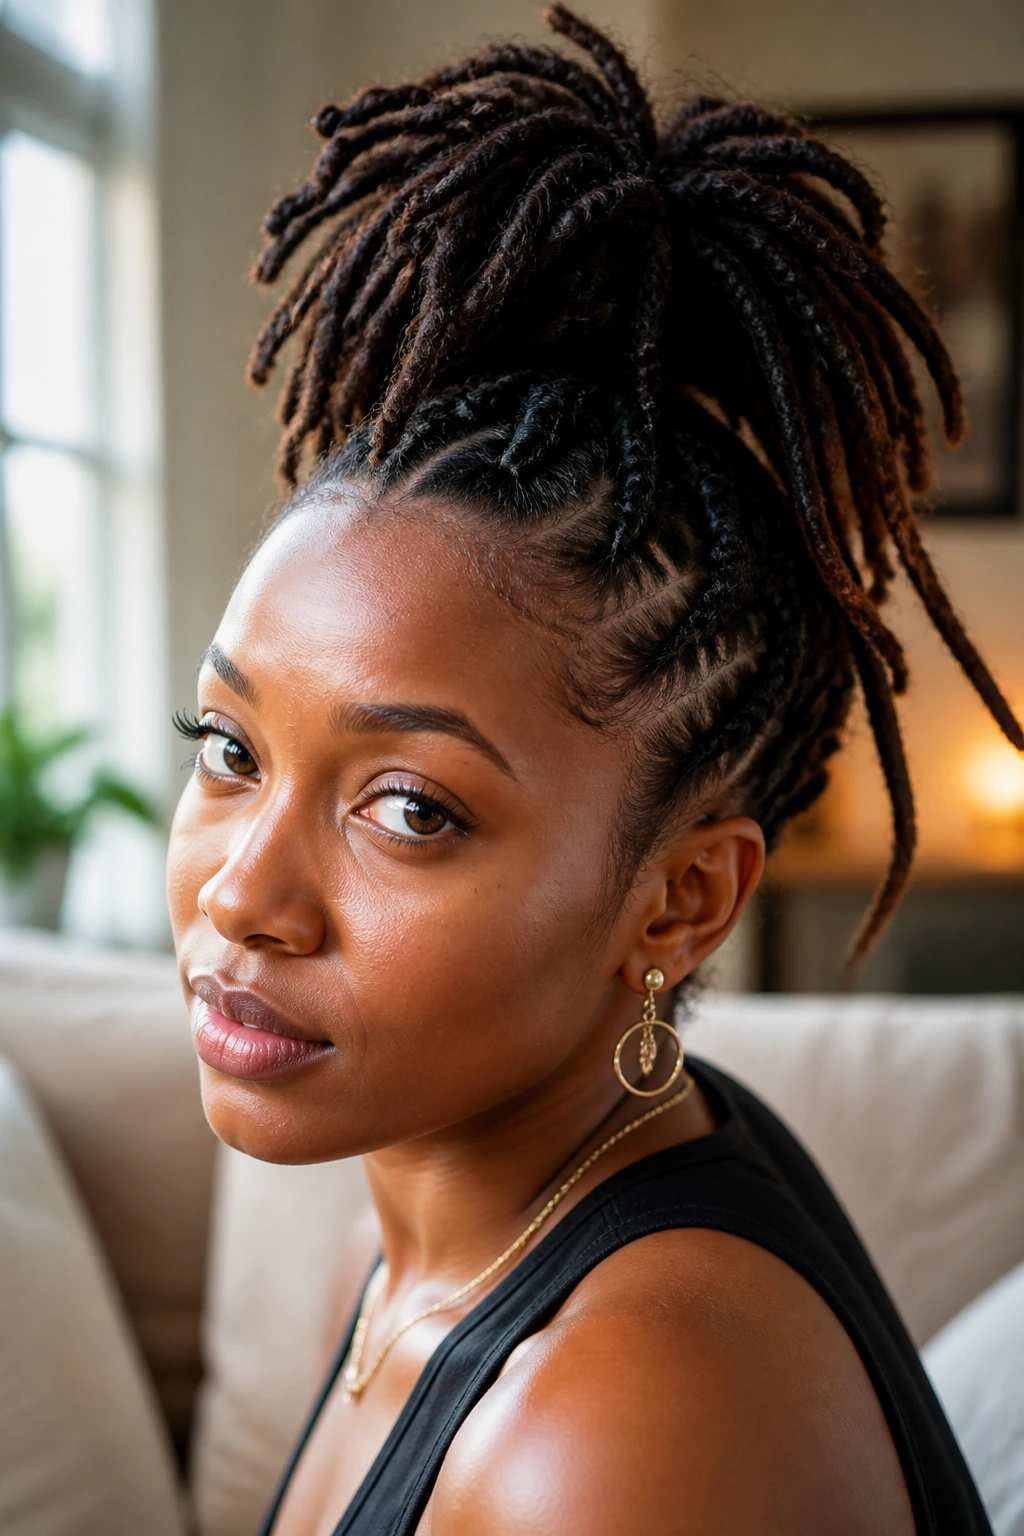
If you already have locs, you don’t need extensions. You can create a mohawk by pinning the sides of your locs up and pulling them toward the center. This is a very common styling trick for people with mature locs who want a change of pace without altering their hair permanently.
How to Style
Use large hairpins or metal combs to secure the locs on the sides. You don’t want to pull them so tight that they damage the root; instead, focus on sweeping them up and securing them firmly. The weight of the locs themselves will help keep the shape once pinned.
Styling the Middle
You can gather the center locs into a high ponytail, a loose bun, or let them hang over the forehead for a stylized, asymmetrical look. This style is incredibly low-maintenance and actually looks better as the locs get a bit of “new growth” frizz.
14. The Mini-Twist Mohawk
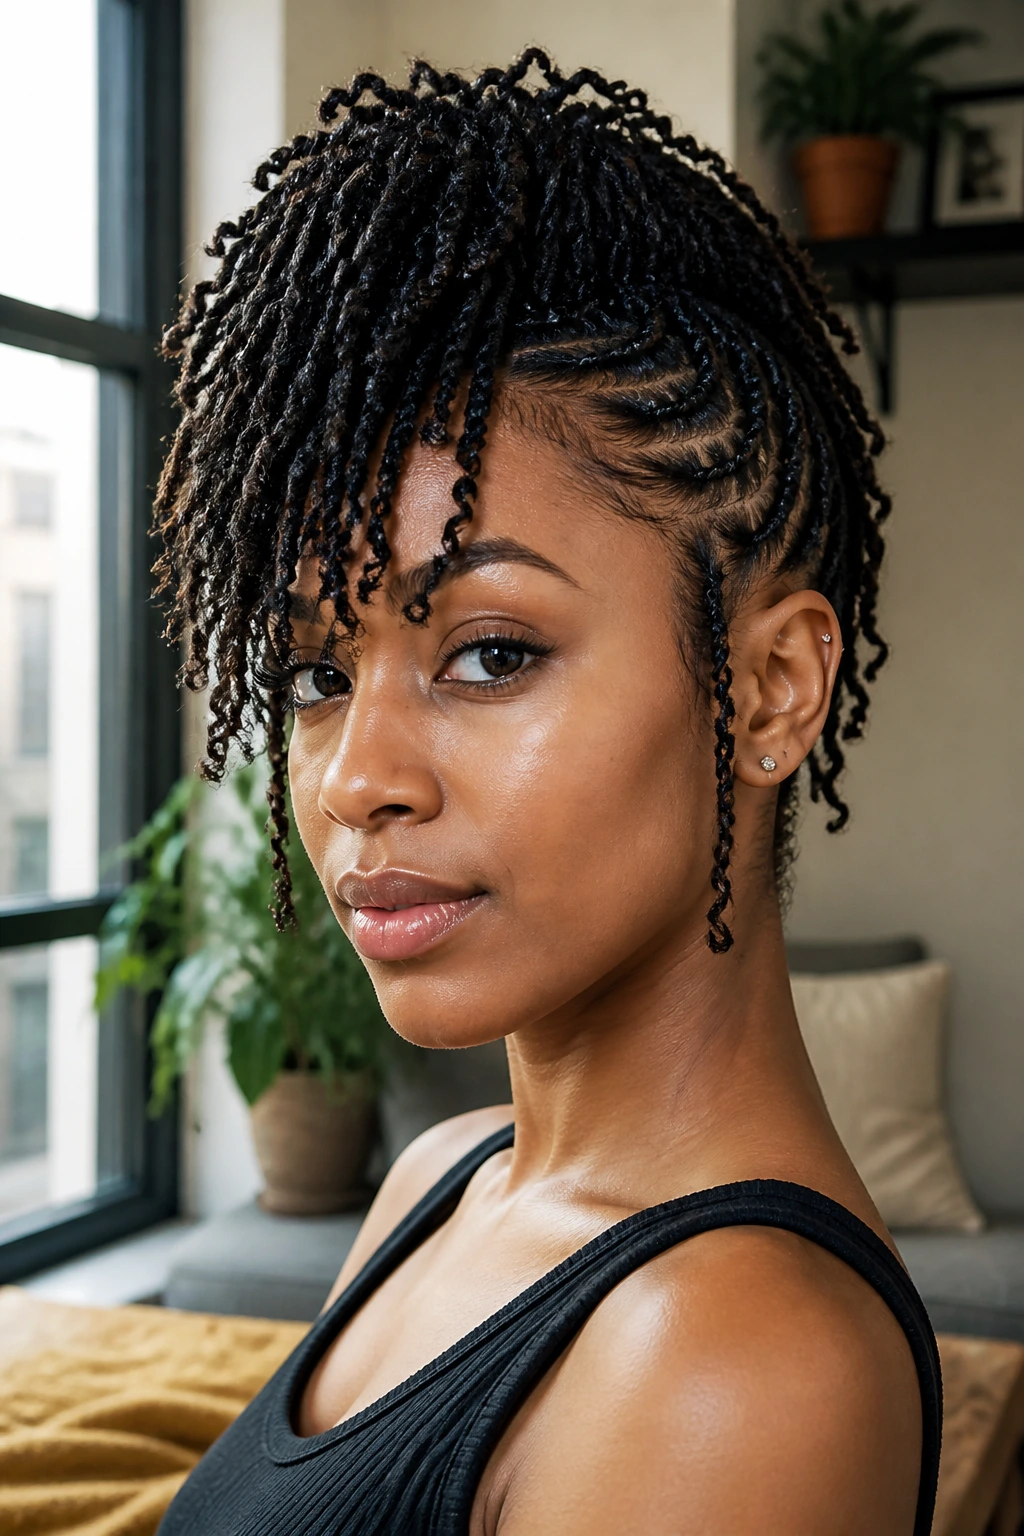
For those with fine-textured natural hair, mini-twists are a godsend. They look like locs but are fully temporary. By styling your mini-twists into a mohawk—pinning the sides up and letting the center cascade down—you get the protection of twists with the versatility of a short-term style.
Why It’s Great for Growth
Mini-twists are one of the best styles for hair retention. You are keeping your ends tucked away and your hair moisturized for weeks. When you finally take the twists down, you will likely see significant length retention because the hair has been undisturbed.
Care Routine
Since your hair is in twists, you can easily spray the roots with water and a light oil mix every few days. The scalp stays clean, and the hair stays hydrated. Just be gentle when unraveling them—use a little oil on your fingertips to prevent the hair from snagging as you untwist.
15. The Mohawk with Box Braid Edges
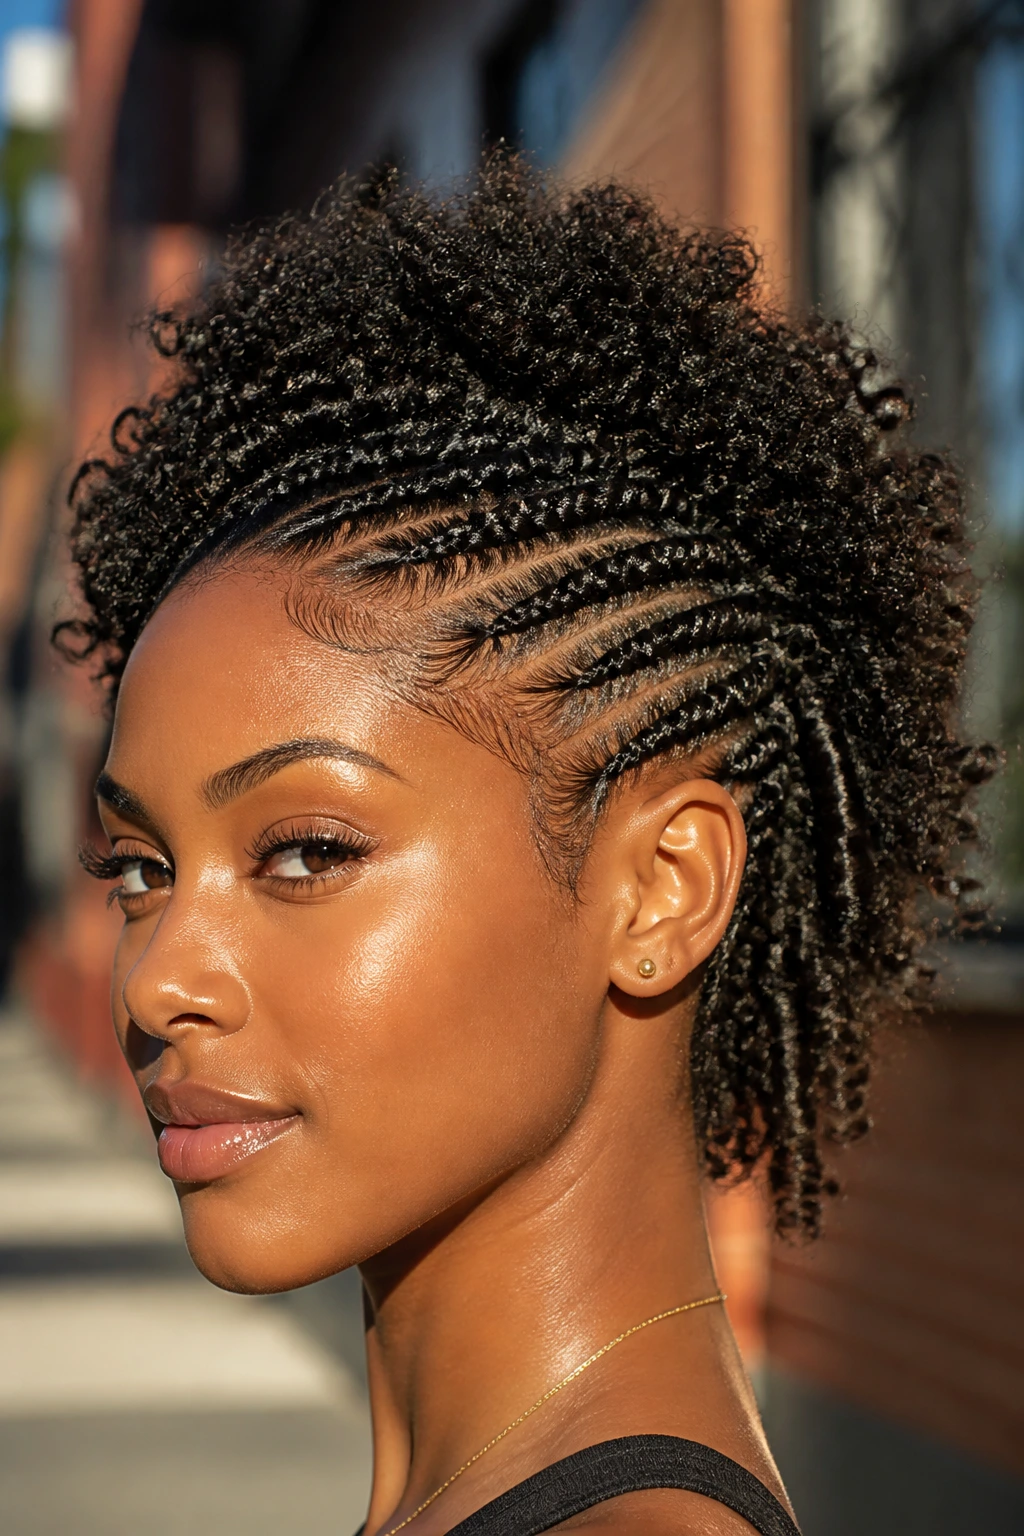
Sometimes you want the ease of box braids, but the standard all-over style feels too heavy. You can do box braids around the perimeter and sides of your head, leading into a center mohawk, while leaving the center as a twist-out or defined coils.
Achieving the Transition
The challenge is ensuring the transition from the box braids to the loose hair in the center looks seamless. Use a small amount of edge control to smooth the roots where the box braids begin, so there isn’t a messy gap between the braided section and the loose center.
The Benefit of Perimeter Braiding
This protects the most fragile parts of your hair—the edges and the nape—while giving you the freedom to wear your loose, natural curls in the center. It is the best of both worlds.
16. The Mohawk with Micro-Braids
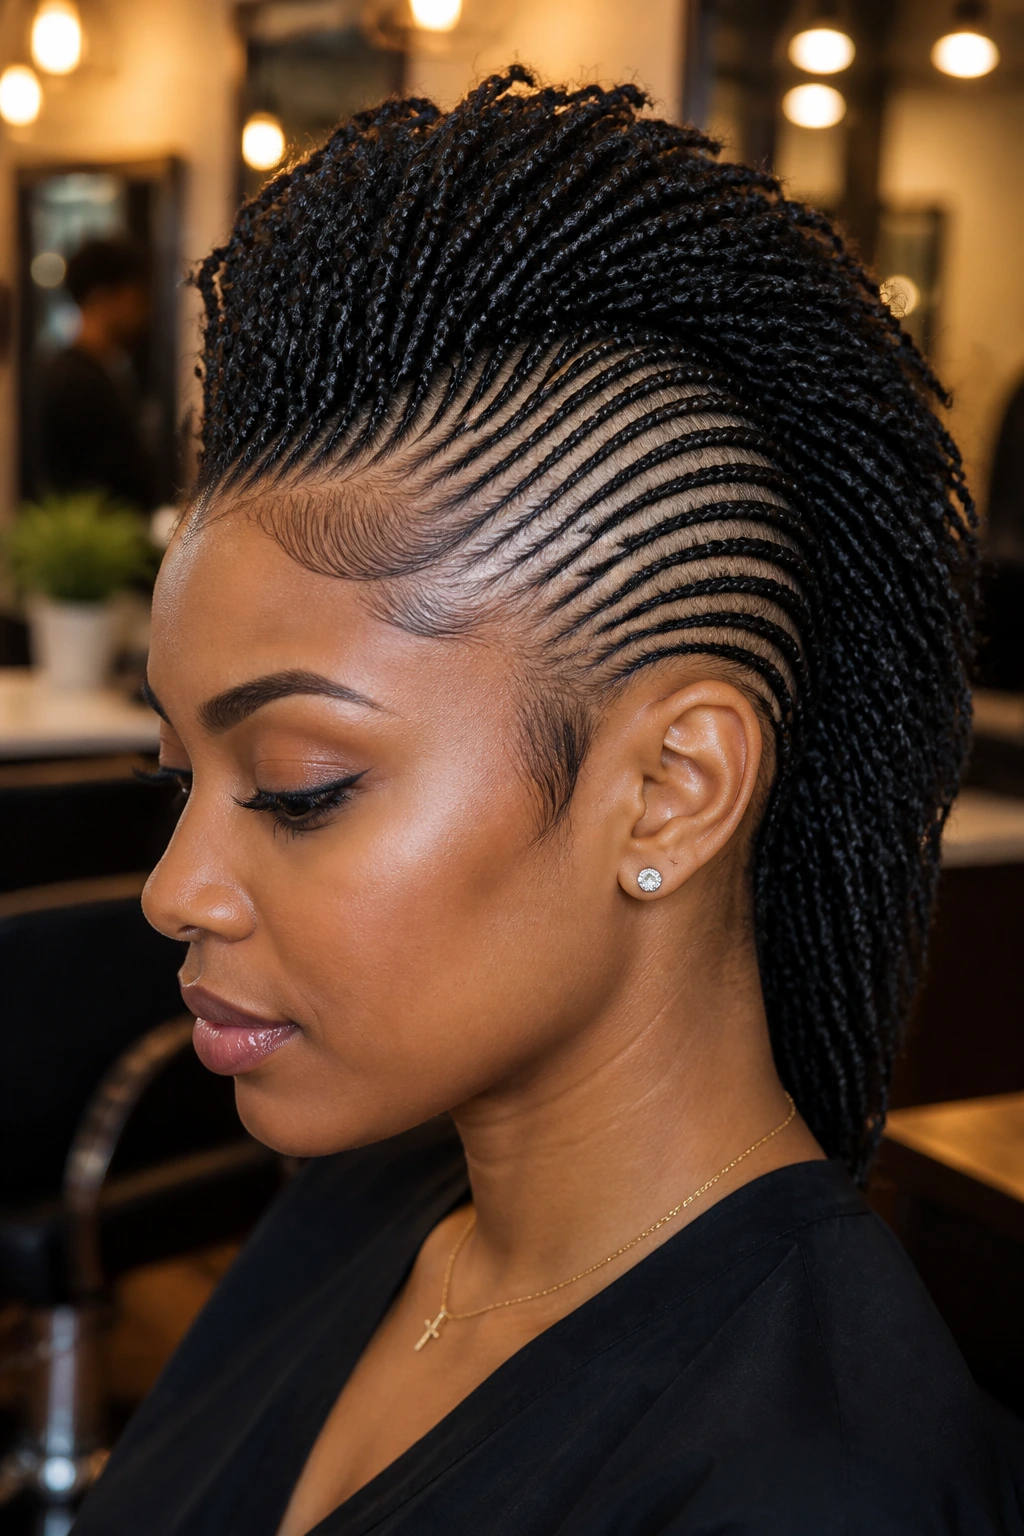
Micro-braids provide the ultimate level of detail. Because the braids are so small, you can create intricate designs on the scalp that resemble art. A mohawk made of micro-braids is essentially a canvas.
The Time Investment
Be prepared to spend a significant amount of time on this style. It is not a quick look. However, the payoff is a style that lasts for weeks and looks incredibly polished. The small braid size also allows for maximum movement—the hair behaves more like flowing fabric than stiff cornrows.
Scalp Health
With micro-braids, your scalp is very exposed. Use a soothing scalp oil with tea tree or peppermint oil to prevent itching. Since the braids are small, it is very easy to get your fingertips to the scalp to massage the oil in, which helps promote growth.
17. The Mohawk with Zig-Zag Parts
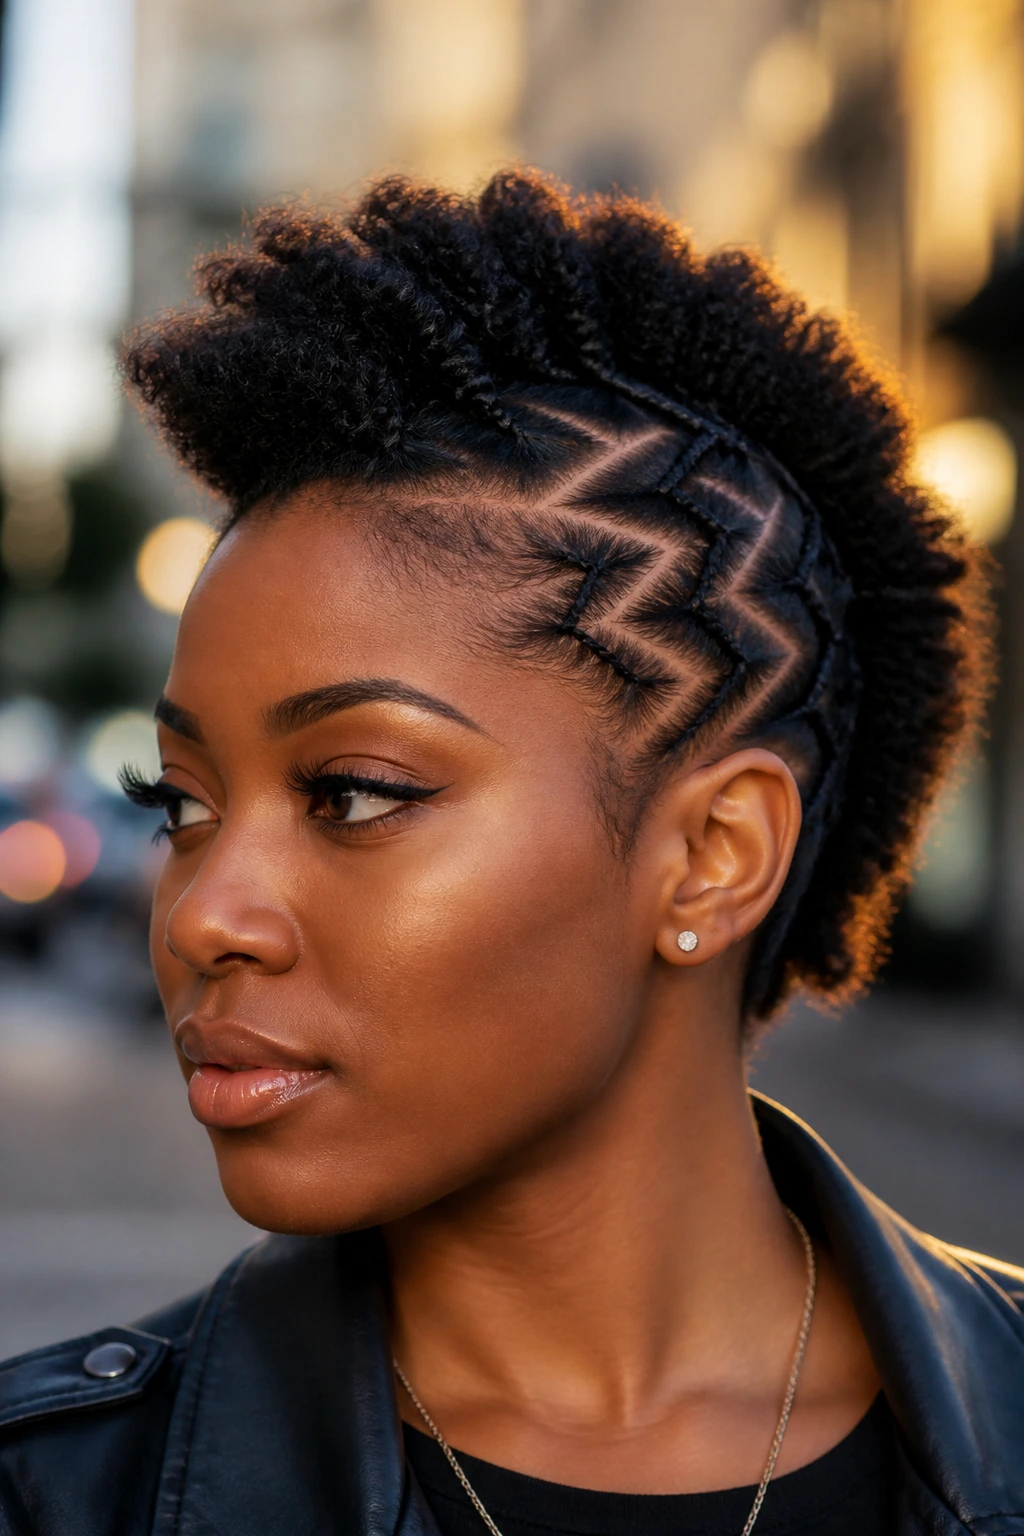
If you are tired of straight parts, zig-zags are the answer. Instead of clean, parallel lines for your mohawk sides, you create sharp, angular zig-zags. This breaks up the visual monotony and makes the hair look much more dynamic and edgy.
How to Create Sharp Lines
The key is using a metal-tipped rat tail comb. Plastic tips are often too thick and will cause the lines to look fuzzy. Drag the metal tip in a deliberate motion, holding the hair taut as you part it. If you slip, simply use a little bit of gel to smooth the hair back and start the part again.
Who It Suits
This style looks fantastic on people with shorter, thicker hair, as the zig-zag parts manage to tame the volume while adding a distinct style element. It’s an “architectural” look that speaks for itself, so you don’t need heavy accessories.
18. The Mohawk with Modern Accessories
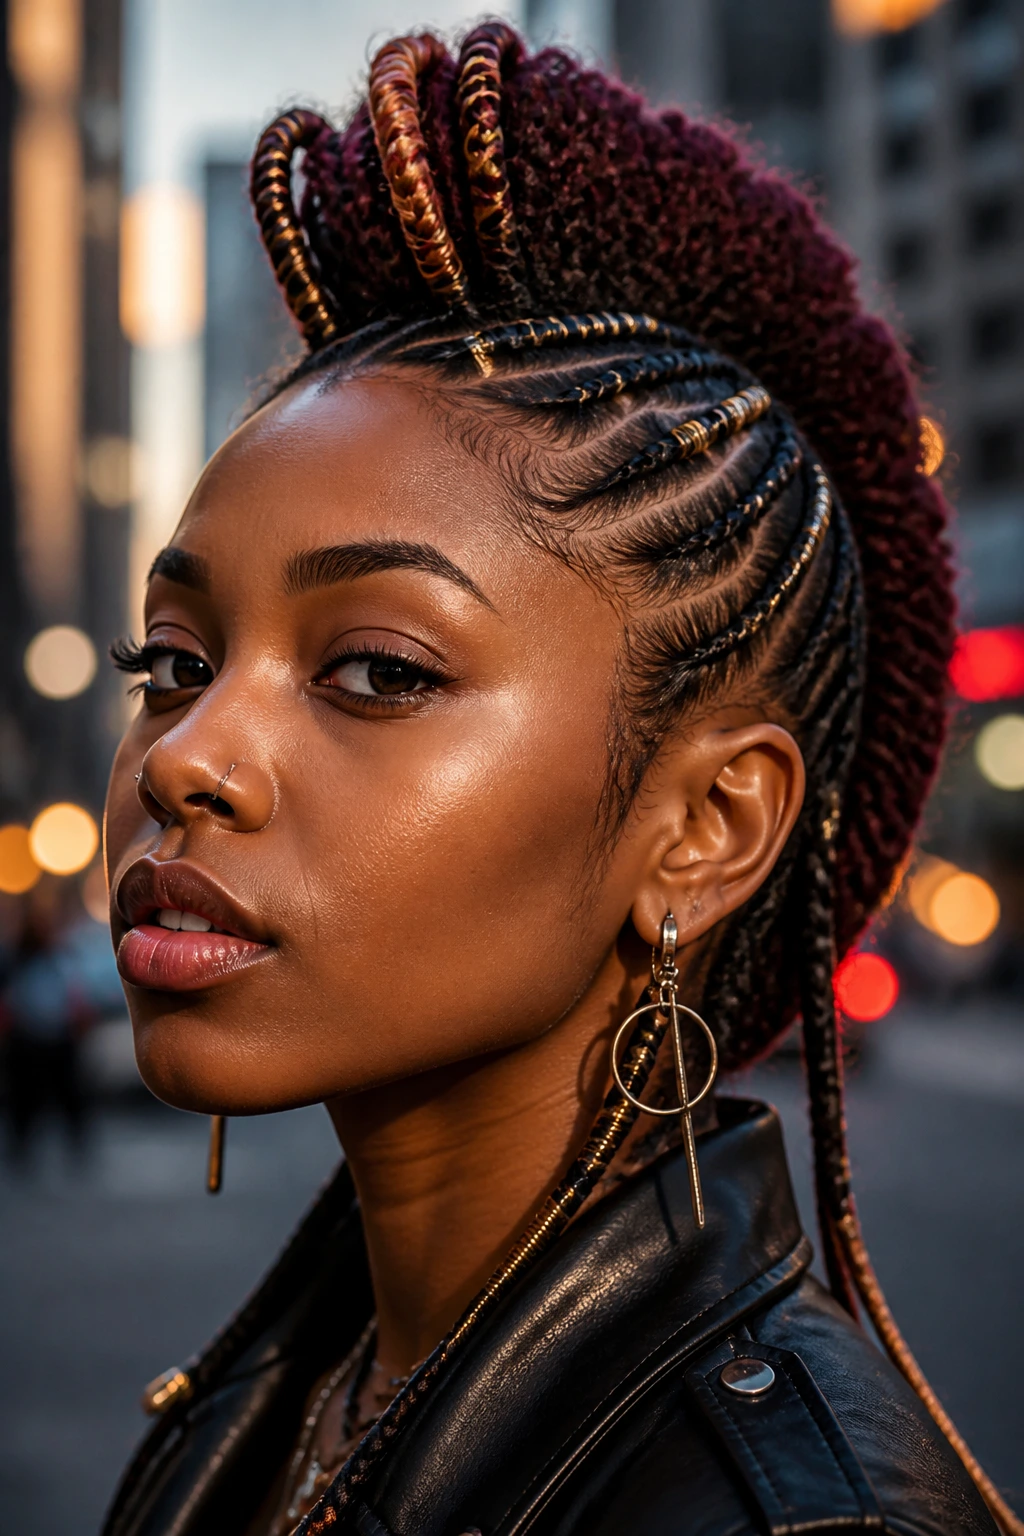
Sometimes the braid pattern is simple, but the accessories are what make the mohawk pop. Think oversized hoops, colored yarn wraps, or metallic strings woven directly into the braids. This is about taking a standard mohawk base and customizing it until it feels uniquely yours.
Yarn and String
Weaving colored yarn or metallic gold/silver string into a few braids along the mohawk adds a pop of color without needing to dye your natural hair. It’s a great, temporary way to change your look for a vacation or a festival.
Placement
Don’t overdo it. If you put accessories on every single braid, it becomes distracting. Choose two or three “feature” braids and decorate those heavily, leaving the rest of the hair sleek and clean. This creates a balanced look that highlights the accessories rather than being overwhelmed by them.
Essential Preparation and Scalp Care
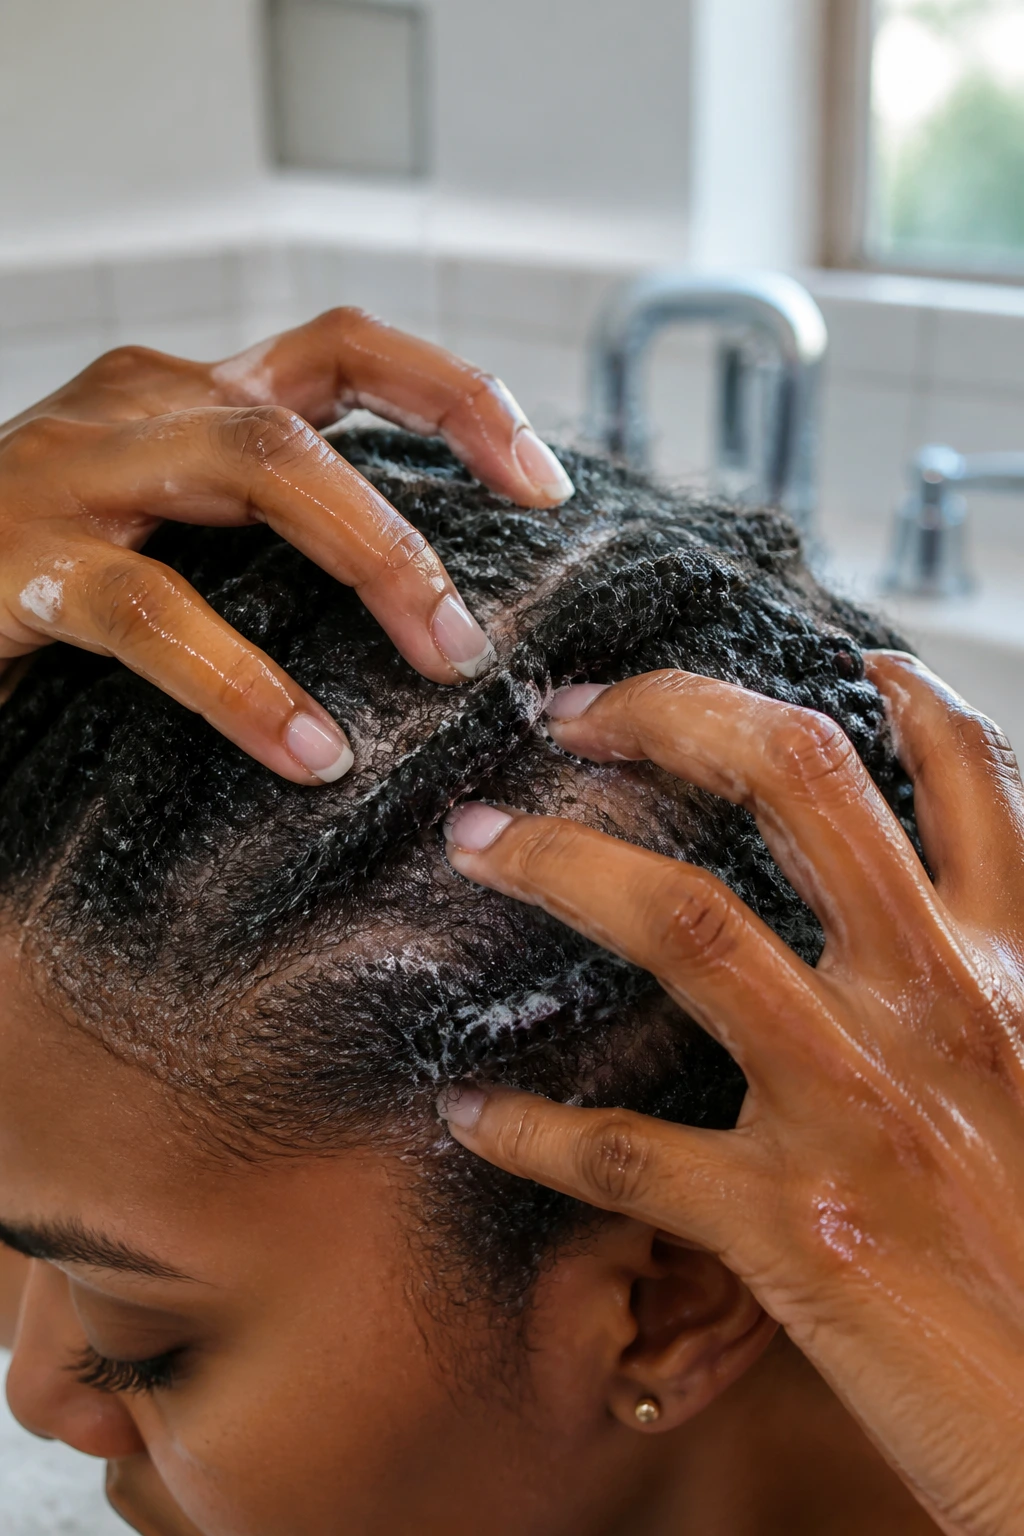
Regardless of which braided mohawk style you choose, your scalp is the engine of the entire look. Braiding puts tension on your hair follicles, and if your scalp isn’t healthy, you’re just inviting breakage. Always start with a clarifying shampoo to remove any buildup from previous products. Follow up with a deep conditioning treatment to ensure your hair is elastic and strong.
When your hair is braided, it is common to experience itchiness. Keep a spray bottle filled with a mixture of water, a drop of peppermint oil, and a tiny bit of glycerin. This mixture is refreshing and helps soothe the scalp without creating a greasy mess. Never scratch your scalp with a comb—use the pads of your fingers to gently tap the scalp if it feels itchy.
Taking down your braids is just as important as putting them in. Never rush this process. Use a conditioner or a detangling spray to saturate the braids before you begin to unravel them. As you remove the extensions or unpick the braids, gently detangle your natural hair. You will have a lot of shed hair—this is normal, as you have been holding onto that shed hair for weeks. Be patient, take your time, and give your hair a break before installing another protective style.
Final Thoughts
The braided mohawk is a masterclass in versatility. It manages to be both a protective style that retains length and a bold fashion statement that defines a look. The key to success lies in the prep work—properly detangling, keeping your parts clean, and ensuring you don’t add excessive tension to your hairline.
Whether you lean toward the precision of stitch braids or the soft texture of flat twists, remember that this style should work for you, not the other way around. Choose a variation that fits your lifestyle, your schedule, and your personal aesthetic. Once you master the foundation of a good mohawk, you will find that it becomes a go-to style, a reliable silhouette that always makes you feel put together, edgy, and ready for whatever comes your way.
