



There is a specific kind of freedom that comes with committing to a Mohawk. It isn’t just a haircut; it is a declaration of space. When you shave the sides or braid them tight against the scalp to expose the temple, you are stripping away the traditional framing of the face. You are centering your texture, your height, and your silhouette. For Black women, the Afro Mohawk—or “Frohawk”—is a particularly powerful expression. It balances the precision of barbering or braiding with the untamed, organic beauty of textured hair.
Whether you are looking for a permanent cut that requires a barber’s steady hand every few weeks or a protective style that gives you the look without the commitment, the versatility here is unmatched. It is not about fitting into a box; it is about choosing exactly how much of your hair you want to reveal and how much structure you want to impose on those coils and curls.
Choosing the right variation often comes down to your hair density, the health of your scalp, and how much time you are willing to dedicate to morning maintenance. Some of these styles thrive on a bit of bedhead, while others demand perfect edge control and frequent retwisting. Let’s walk through the different ways you can construct a Mohawk that works for your unique hair journey.
1. The Classic Tapered Frohawk
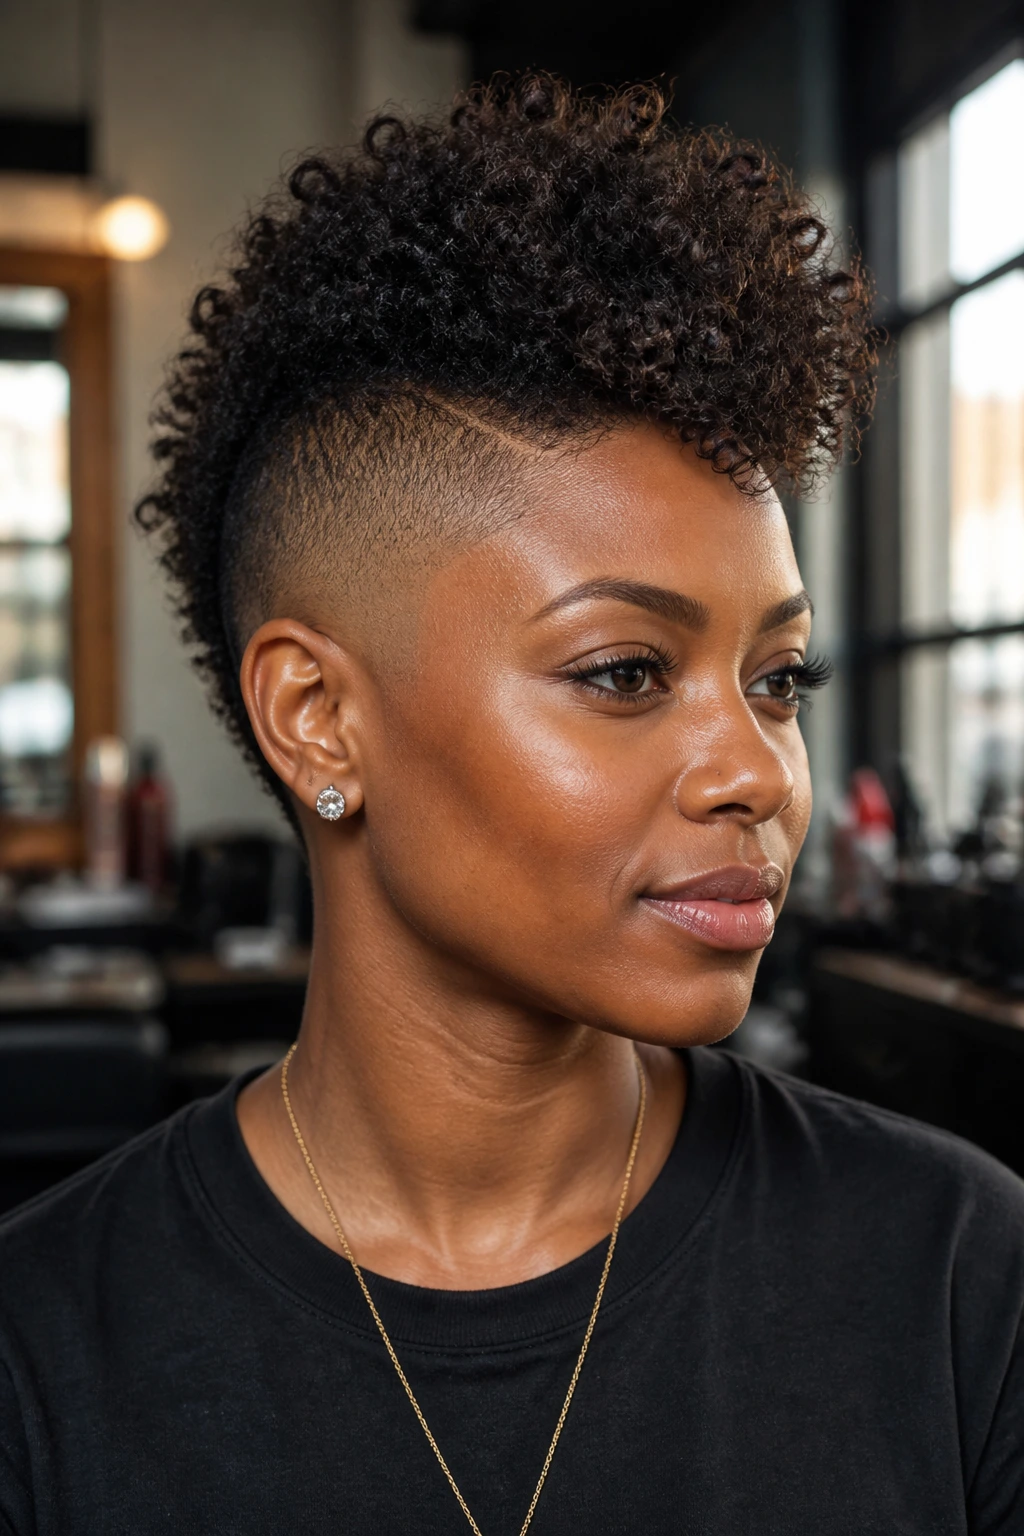
This is the standard-bearer. If you want the sharpest look, this is where you start. The classic tapered frohawk relies heavily on the barber’s skill. You need a clean, skin-tight fade on the sides that gradually increases in length as it moves toward the center strip of hair.
Why It Works for Natural Texture
The taper creates a visual gradient that makes your natural hair stand out more. By shaving the sides extremely short, you provide a high-contrast backdrop that allows your natural curl pattern—whether it is 3C, 4A, or 4C—to take center stage. The shape is aggressive but manageable because the bulk of the hair is concentrated in the center, making daily detangling a much smaller job than it would be with a full afro.
Maintenance and Barber Visits
You cannot fake the longevity of a taper. Because the sides are faded so close to the skin, you will likely need a touch-up every two to three weeks to keep that line sharp. If you let it grow out for too long, the silhouette loses its intentional shape and starts to look a bit overgrown.
Pro Tip: Always carry a small spray bottle with water and a leave-in conditioner. Because the center hair is exposed on all sides, it tends to dry out faster than a standard afro. Keep it hydrated to maintain that “popping” curl definition.
2. The Braided Side Mohawk
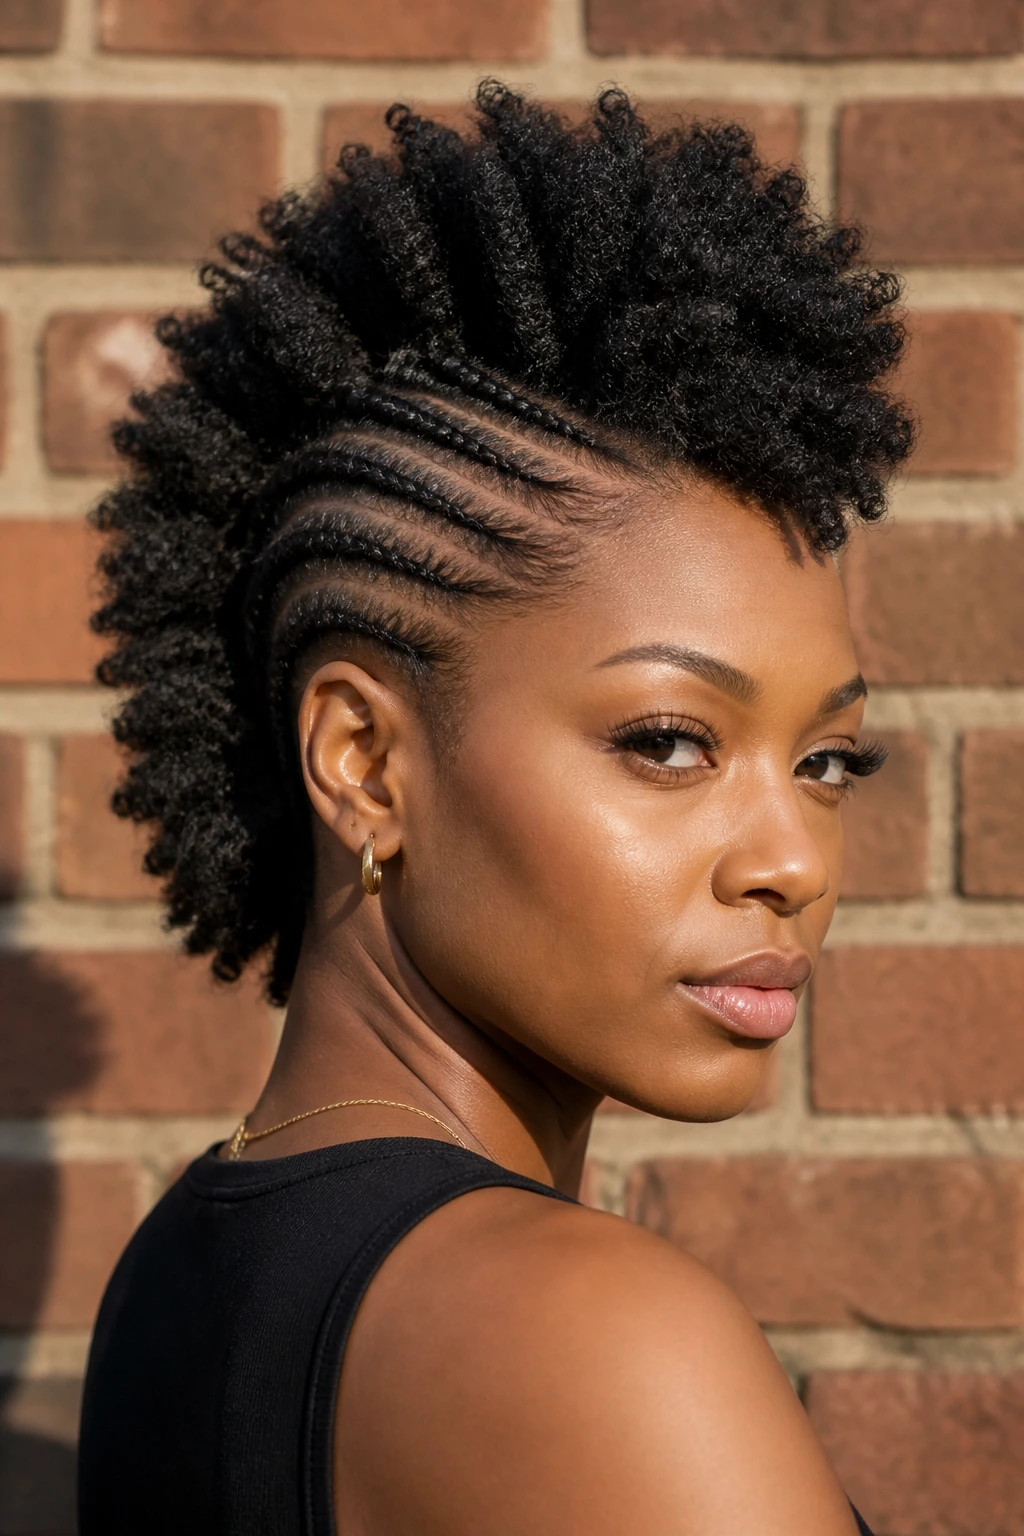
If the idea of clippers and a permanent fade makes your stomach drop, the braided side Mohawk is your best friend. This style gives you the structural drama of a Mohawk without removing a single inch of hair. You simply create cornrows or flat twists on the sides of your head, pulling all the hair toward the center to create that signature elevated crest.
Creating the Foundation
The beauty of this style is in the tension. You need to pull the side hair taut to mimic the sleekness of a shaved head. Using a high-quality edge control or a twisting butter, you can slick the sides down into intricate patterns. The braids act as a canvas; you can do simple straight-back cornrows, or you can get creative with zig-zags or geometric shapes.
Styling the Center
The center section remains loose, afro-textured, or curled. Some people prefer to leave it in a “fro,” while others will install Marley hair or crochet pieces into the center to add more height and volume. This gives you the option to play with length even if your natural hair is currently in a short or medium stage.
3. The Twisted Natural Mohawk
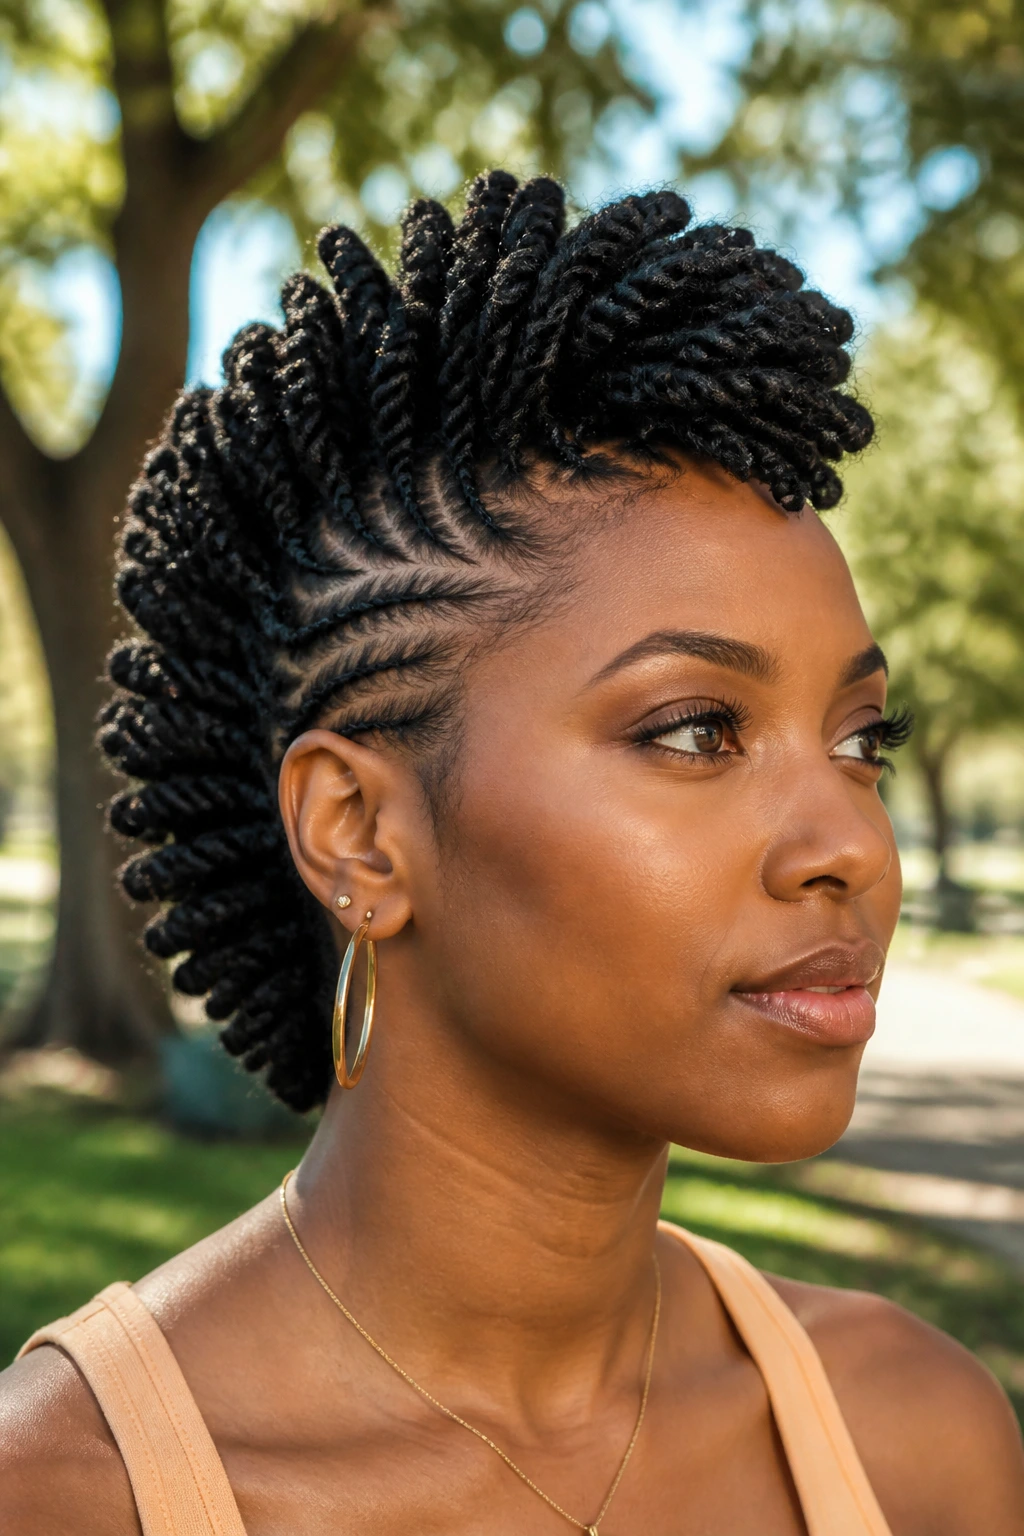
For those who love the look of defined coils, the twisted Mohawk is a go-to. This style is entirely about texture manipulation. You aren’t just wearing your hair out; you are actively styling it into two-strand twists or comb coils that are then pinned or directed upward toward the middle of the scalp.
The Role of Product
You will need a medium-to-high hold styling cream or gel that doesn’t flake. Apply it to damp, freshly washed hair. Section the hair into small, manageable rows. Twist each section from the root up. If you are doing this on a shorter fro, your twists will naturally stick up, which is exactly what you want for the Mohawk shape.
Dealing with Shrinkage
Shrinkage is often the enemy of a Mohawk, but here, it is a tool. Because you want the hair to stand up, the natural contraction of your hair helps maintain the “hawk” shape without needing a massive amount of pins. As the twists dry, they will stiffen and hold their form. You can leave them as twists for a more defined look or undo them after a day to achieve a voluminous, crinkly Mohawk.
4. Curly Mohawk with Shaved Sides
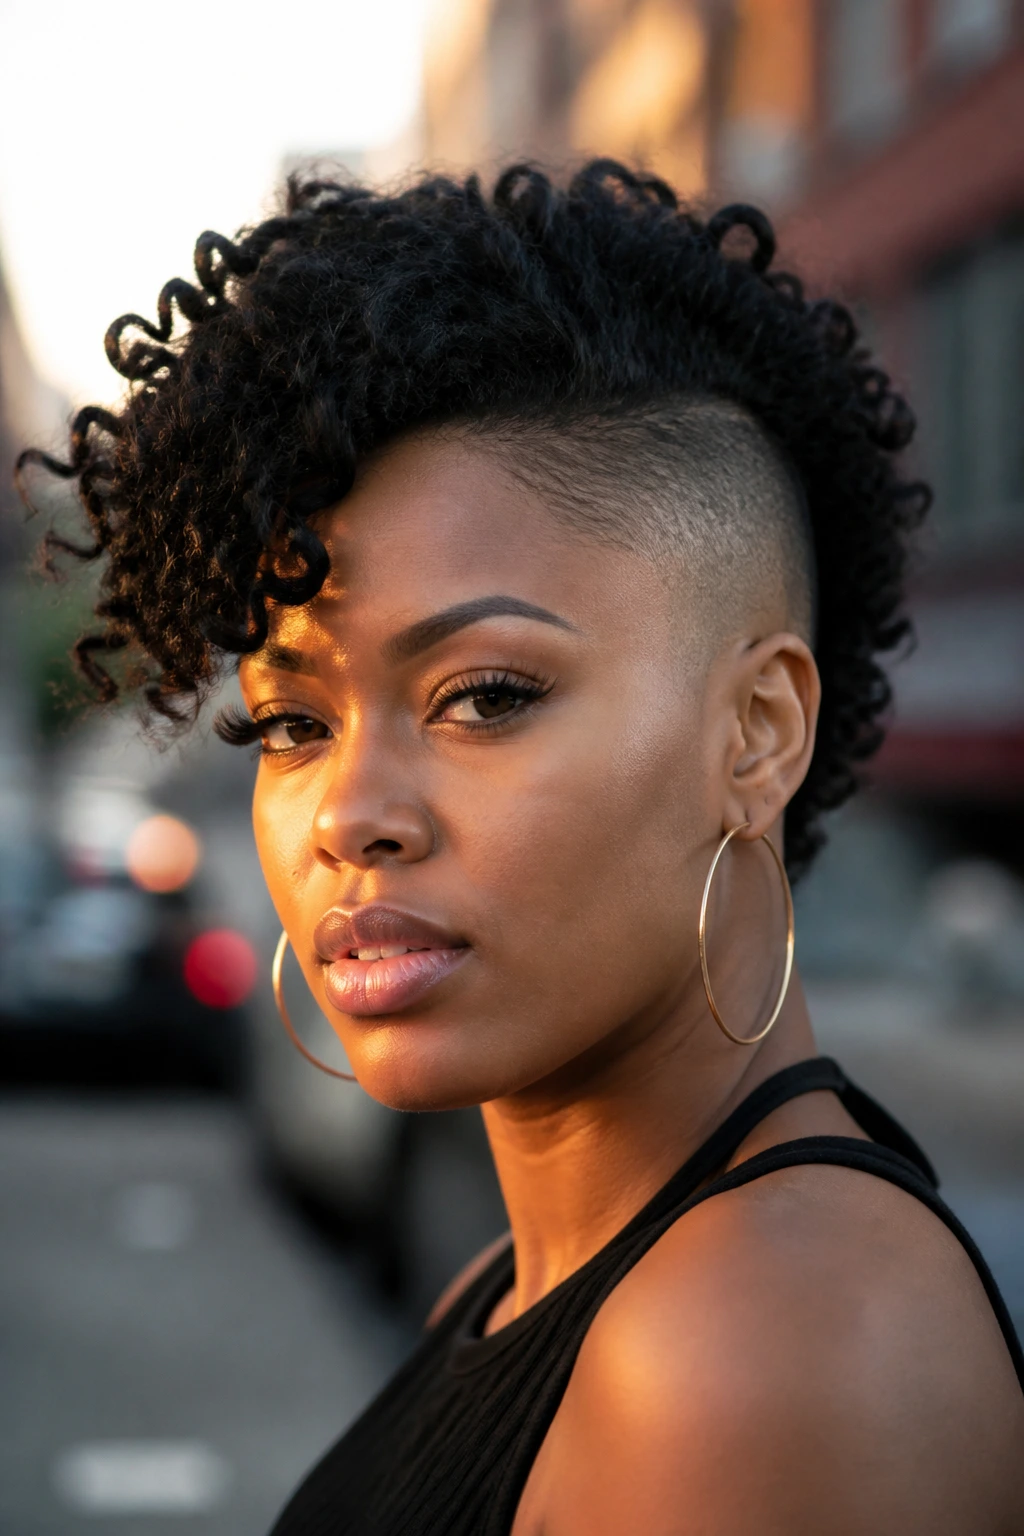
This version leans into the contrast between hard lines and soft curves. It is the modern punk aesthetic reimagined for natural hair. You have the clean, shaved sides—perhaps with a skin fade or a #1 guard—and then you have long, luscious, defined curls sitting right on top.
Choosing the Right Cut
The secret here is the “landing strip.” How wide do you want the center section to be? A narrower strip of hair creates a more dramatic, high-fashion silhouette. A wider strip, often called a “fro-hawk” rather than a true Mohawk, offers a bit more volume and is easier to style on a daily basis.
The Definition Factor
Use the “shingling” method to define your curls on the top section. Apply a moisturizing curling custard while the hair is soaking wet. Use your fingers to separate each curl clump. The more definition you have on top, the cleaner the Mohawk looks. If your curls are frizzy, the whole look tends to lose its “edge” and becomes just a messy afro.
5. Faux Hawk with Flat Twists
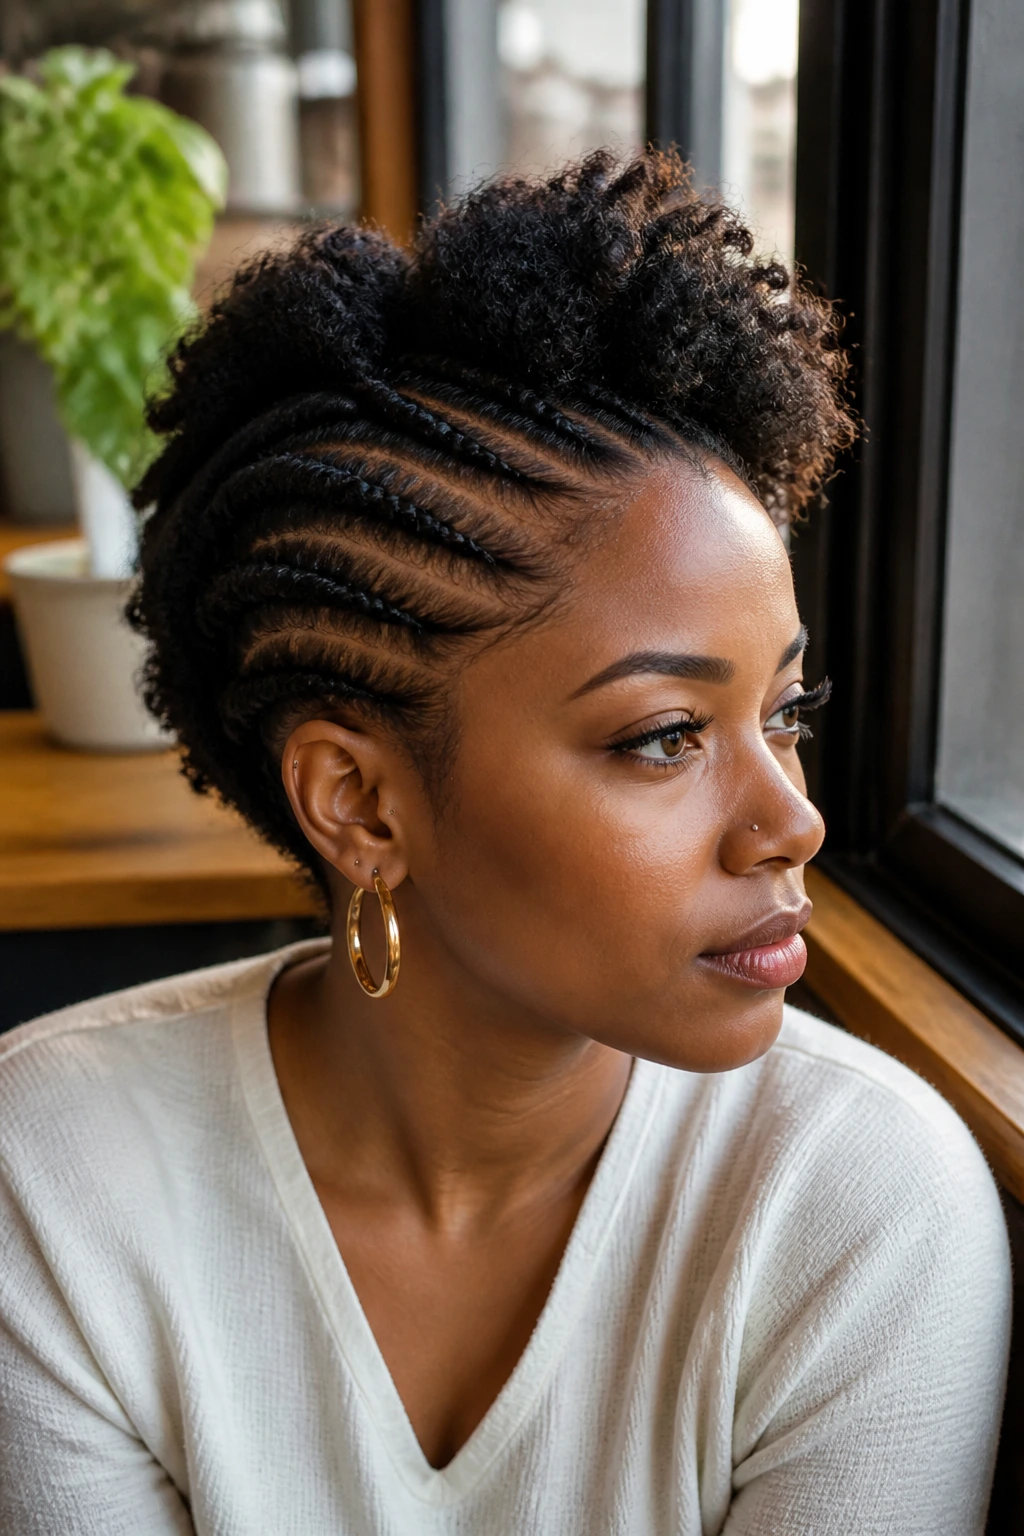
This is essentially the “grown-out” Mohawk. You are using flat twists to create the illusion of a shaved side without using any protective styling tools or excessive tension. It is a protective style in its own right, as it keeps your ends tucked away and your scalp relatively accessible.
Executing the Flat Twist
Start by parting your hair into three or four horizontal sections across your head. Twist the sides toward the center. Instead of just pinning them, you can tuck the ends of the twists under each other. The hair in the middle can be twisted, braided, or left out as a small puff.
Why This is Ideal for Growth
If you are transitioning from relaxed to natural hair, this style is a lifesaver. It hides the line of demarcation where your relaxed ends meet your new growth. You get to keep the Mohawk silhouette while your hair is in a fragile state, and you aren’t putting stress on your edges with clippers or super-tight braids.
6. Short TWA (Teeny Weeny Afro) Mohawk
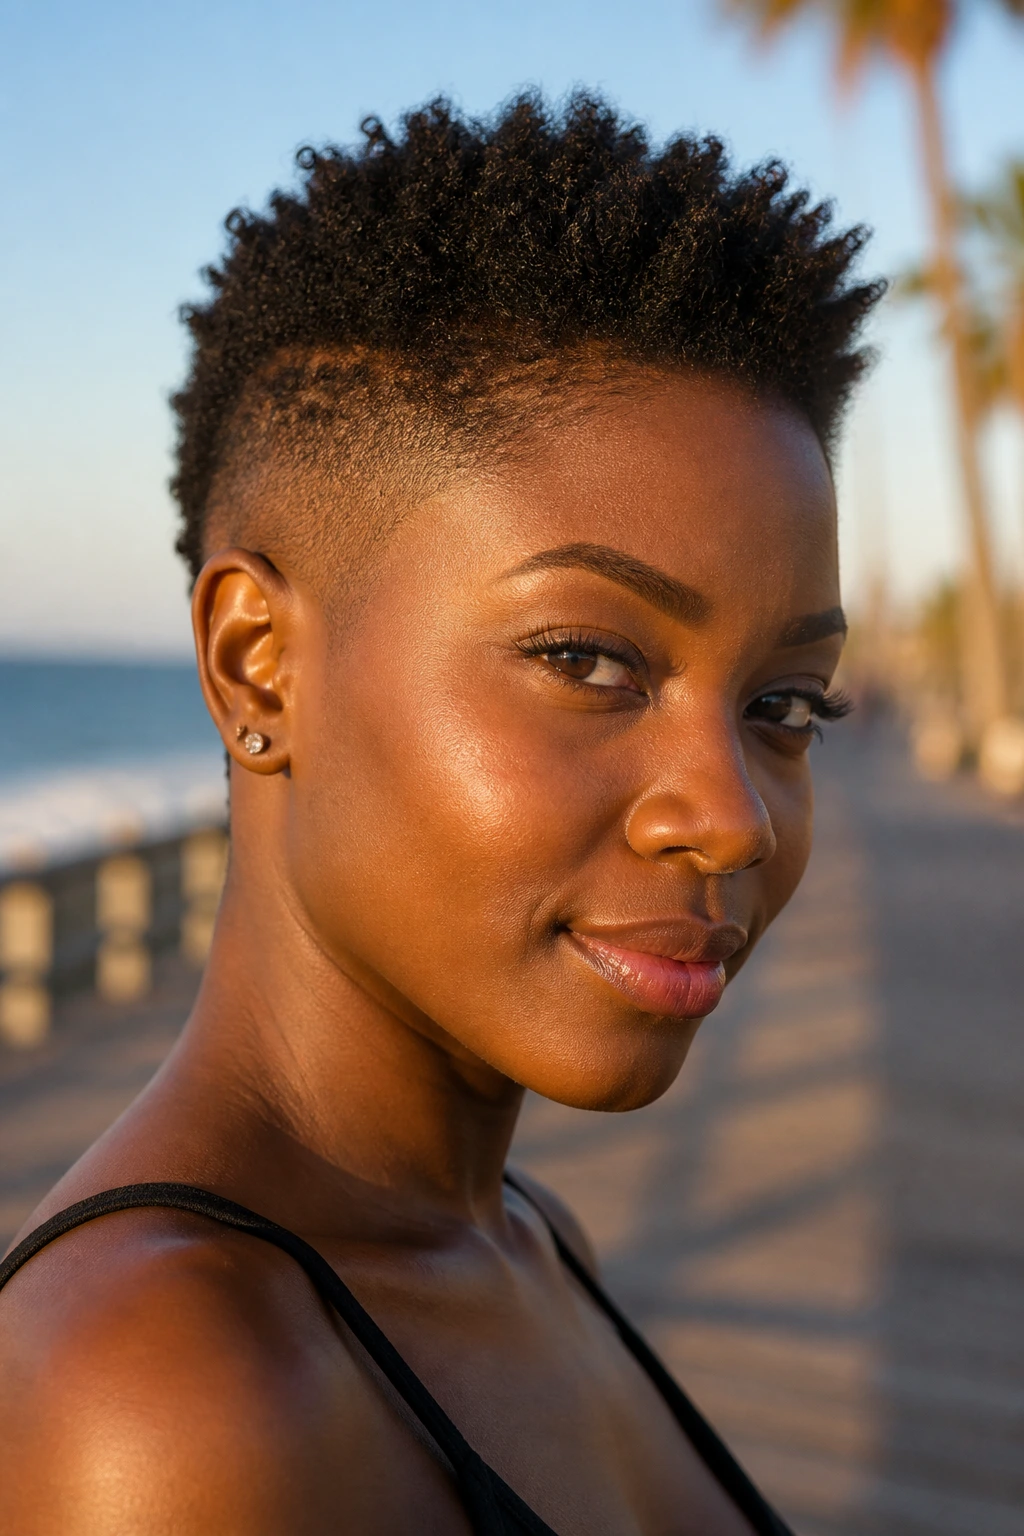
There is something undeniably chic about a TWA Mohawk. It is low maintenance, edgy, and looks fantastic with minimal product. You don’t need a lot of hair to pull this off; in fact, the shorter the hair, the easier it is to control the shape.
Sculpting a Small Fro
With very short hair, you can use a small amount of pomade to push the sides up and toward the center. You don’t necessarily need to shave the sides, although a fade definitely helps the shape. If you prefer not to cut, just use firm-hold gel to slick the hair at the temples and behind the ears, then use a pick to fluff the center into a neat, rounded arch.
The Power of Accessories
Because the hair is short, you have a blank canvas for accessories. A small earring in the tragus, a bold gold hoop, or even a cuff in your hair can elevate this look. It’s minimalist but strong.
7. Updo Mohawk with Coils
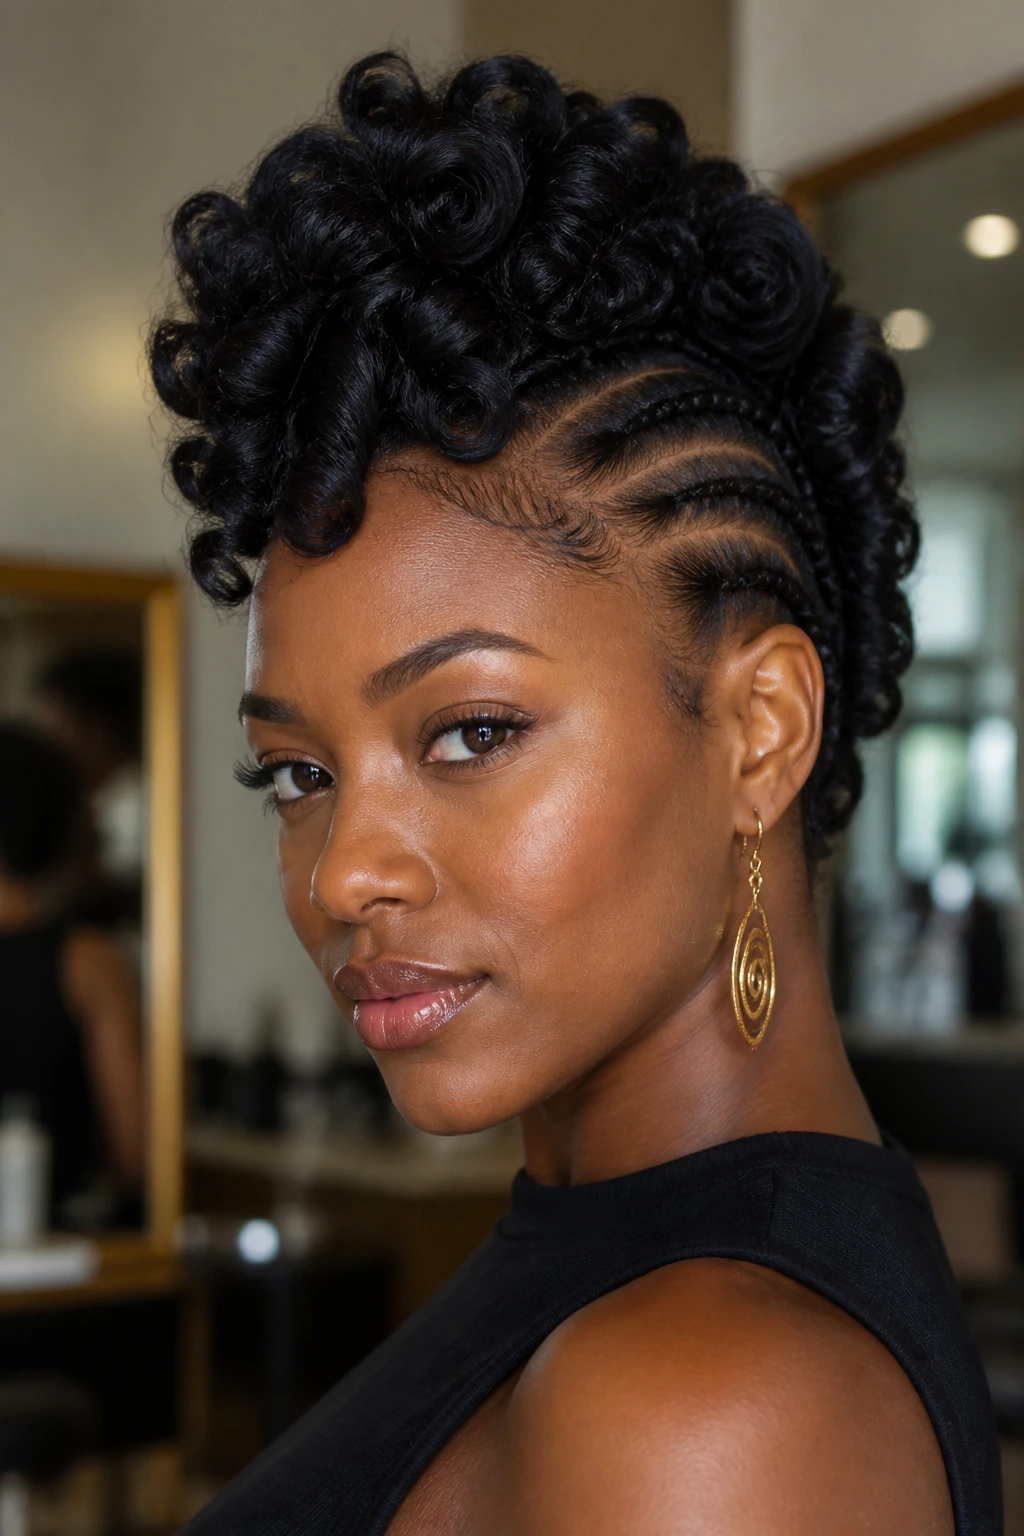
This is a formal version of the Mohawk. It is perfect for events where you want to look polished but still want to show off your natural texture. You are essentially taking your hair and turning it into a series of finger coils, which are then pinned upward.
The Finger Coil Technique
Finger coils require time and patience. You need to use a rat-tail comb to section your hair and a twisting gel to roll each section around your finger. Start from the nape of your neck and work your way up, pinning each row of coils toward the center of your head.
Achieving the Height
To get the height, use hidden bobby pins to pull the outer edges of your coils toward the middle. You are building a mountain of texture. The end result is a cohesive, sculptural shape that looks different from every angle. It is labor-intensive, but the longevity of finger coils is excellent—they can last for a week or more if you sleep with a satin bonnet.
8. Mohawk with Cornrows and Beads
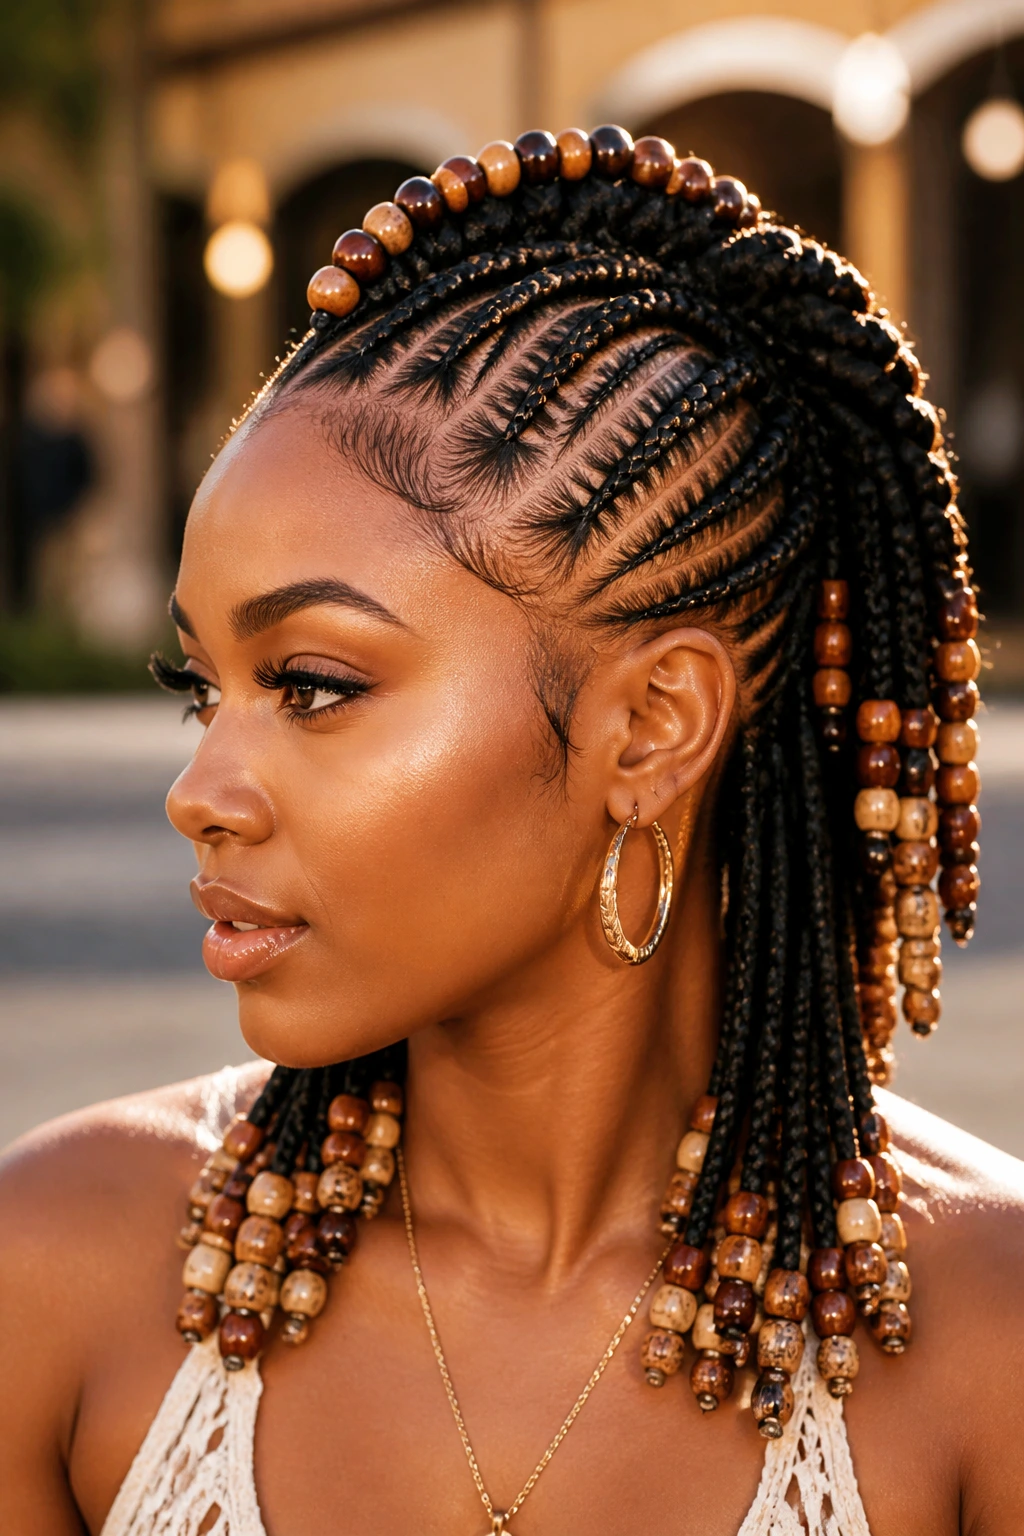
This style taps into the rich history of braiding in Black culture. The Mohawk shape is achieved by braiding the sides upward into the center. What sets this apart is the addition of beads at the ends of the braids or even threaded through the middle section.
Selecting Your Beads
The material of the beads changes the vibe completely. Clear glass beads give a sophisticated, reflective look. Wooden beads add an earthy, natural element. Metallic beads—like gold or copper—bring a regal, almost ancient feel to the hairstyle. Don’t be afraid to mix and match sizes.
Styling the Center
If you have enough length in the center, you can braid those sections too, allowing the beads to cascade down the middle of your head like a crown. If your center hair is shorter, keep it as a loose, voluminous afro, but add a few braided strands with beads to tie the whole look together.
9. Curls on Top with Fade
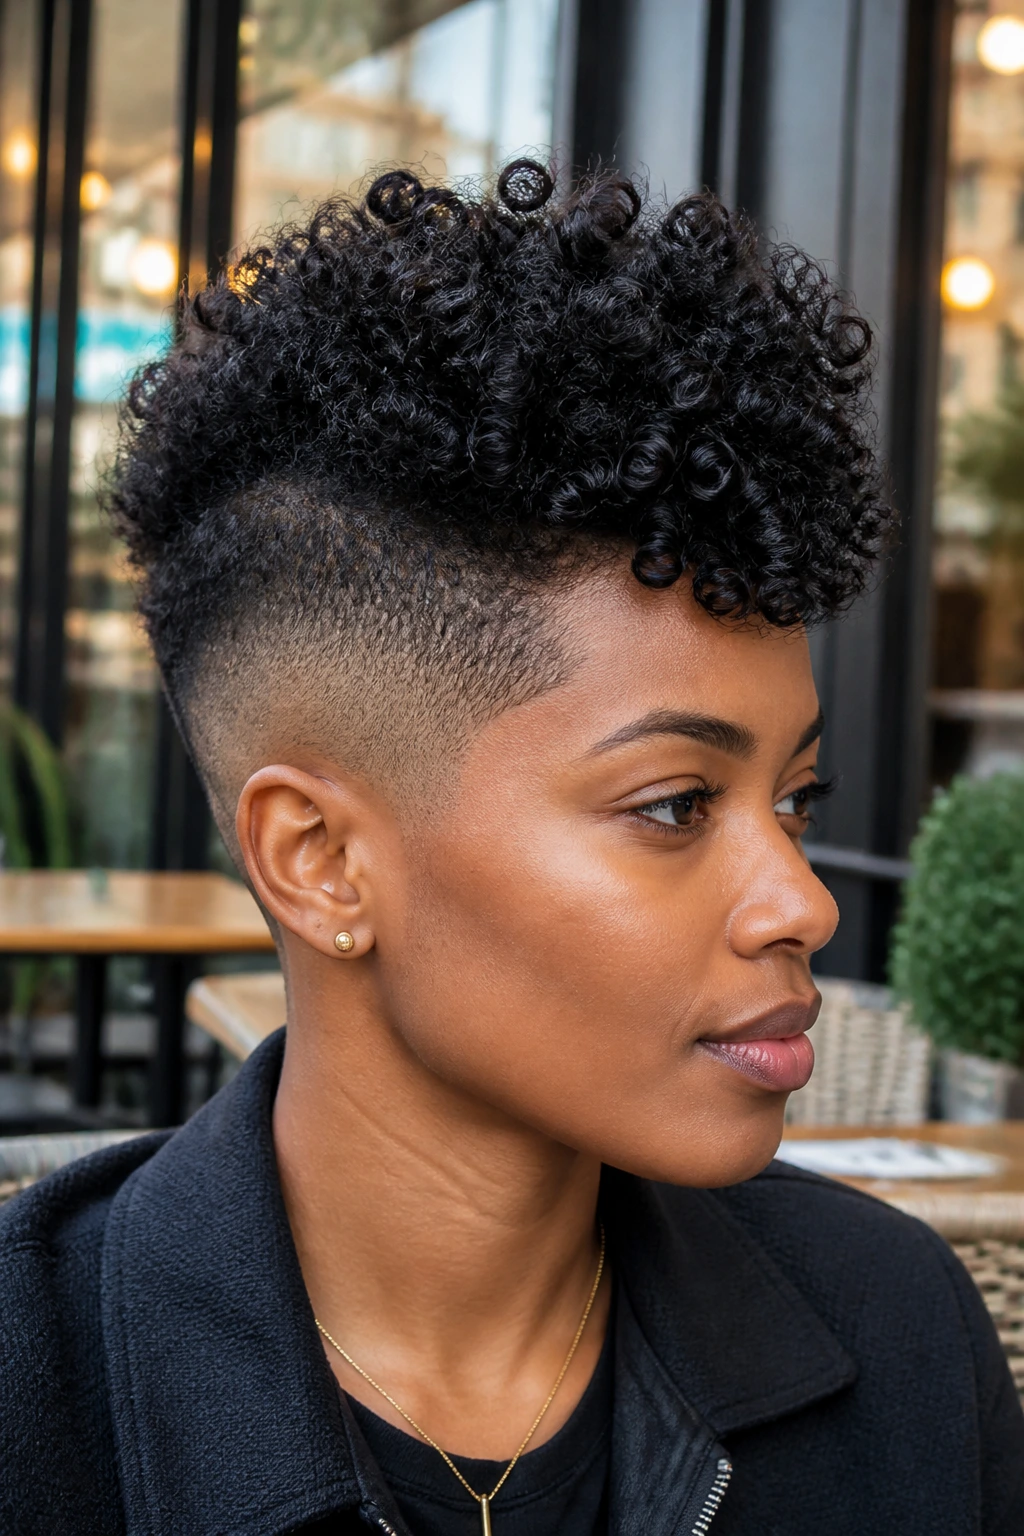
This is the quintessential “cool girl” haircut. It combines a very tight, precise fade with a large, curly, or coily top. The contrast is the point. You want the fade to be dark and crisp, while the hair on top is light, airy, and full of volume.
Understanding Your Fade
You need to talk to your barber about the transition. A “taper” keeps some hair at the hairline, while a “skin fade” goes all the way down to the scalp. For this look, a skin fade often provides the cleanest contrast. The sharp edge of the hairline against the softness of the curls is a stunning visual.
Product Application
Avoid heavy oils. They will make your fade look greasy and weigh down the curls. Stick to water-based leave-in conditioners and light-hold gels. You want your curls to have movement, not look like a hard, crunchy block. When you wash your hair, make sure you are conditioning the top thoroughly while being careful not to let products build up on your scalp on the sides.
10. Jumbo Flat-Twist Mohawk
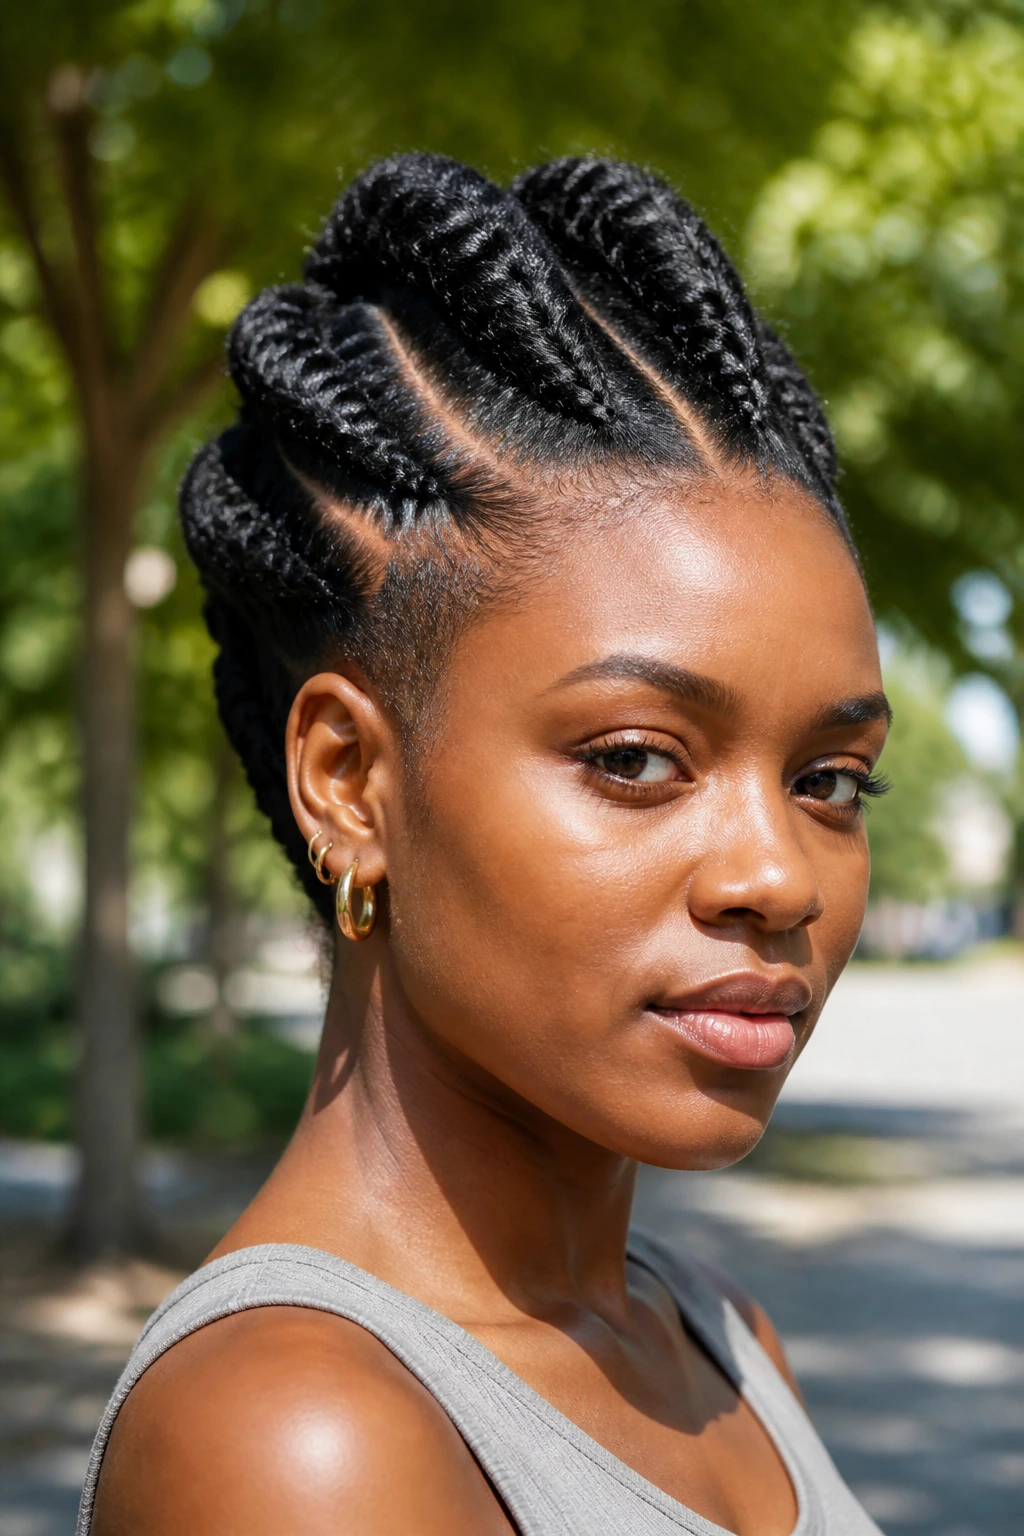
If you want a Mohawk that looks huge and imposing, jumbo flat twists are the way to go. This isn’t about dozens of tiny braids; it is about three or four massive, chunky twists that pull the hair toward the center.
Creating Structure
The key to jumbo twists is “clean parting.” You need straight lines. Use a rat-tail comb and a bit of pomade to clear the part so that the scalp is visible. This creates a clean, intentional “mohawk” line. The twists themselves should be braided loosely at the base but tightened as they approach the center to keep the Mohawk shape secure.
The Volume Trick
Once the sides are twisted, the center section can be left in its natural state, or you can add extra braiding hair to the twists themselves. Adding a small amount of synthetic braiding hair gives you more material to work with, allowing you to create massive, thick twists that look fuller and more symmetrical.
11. High-Top Mohawk with Designs
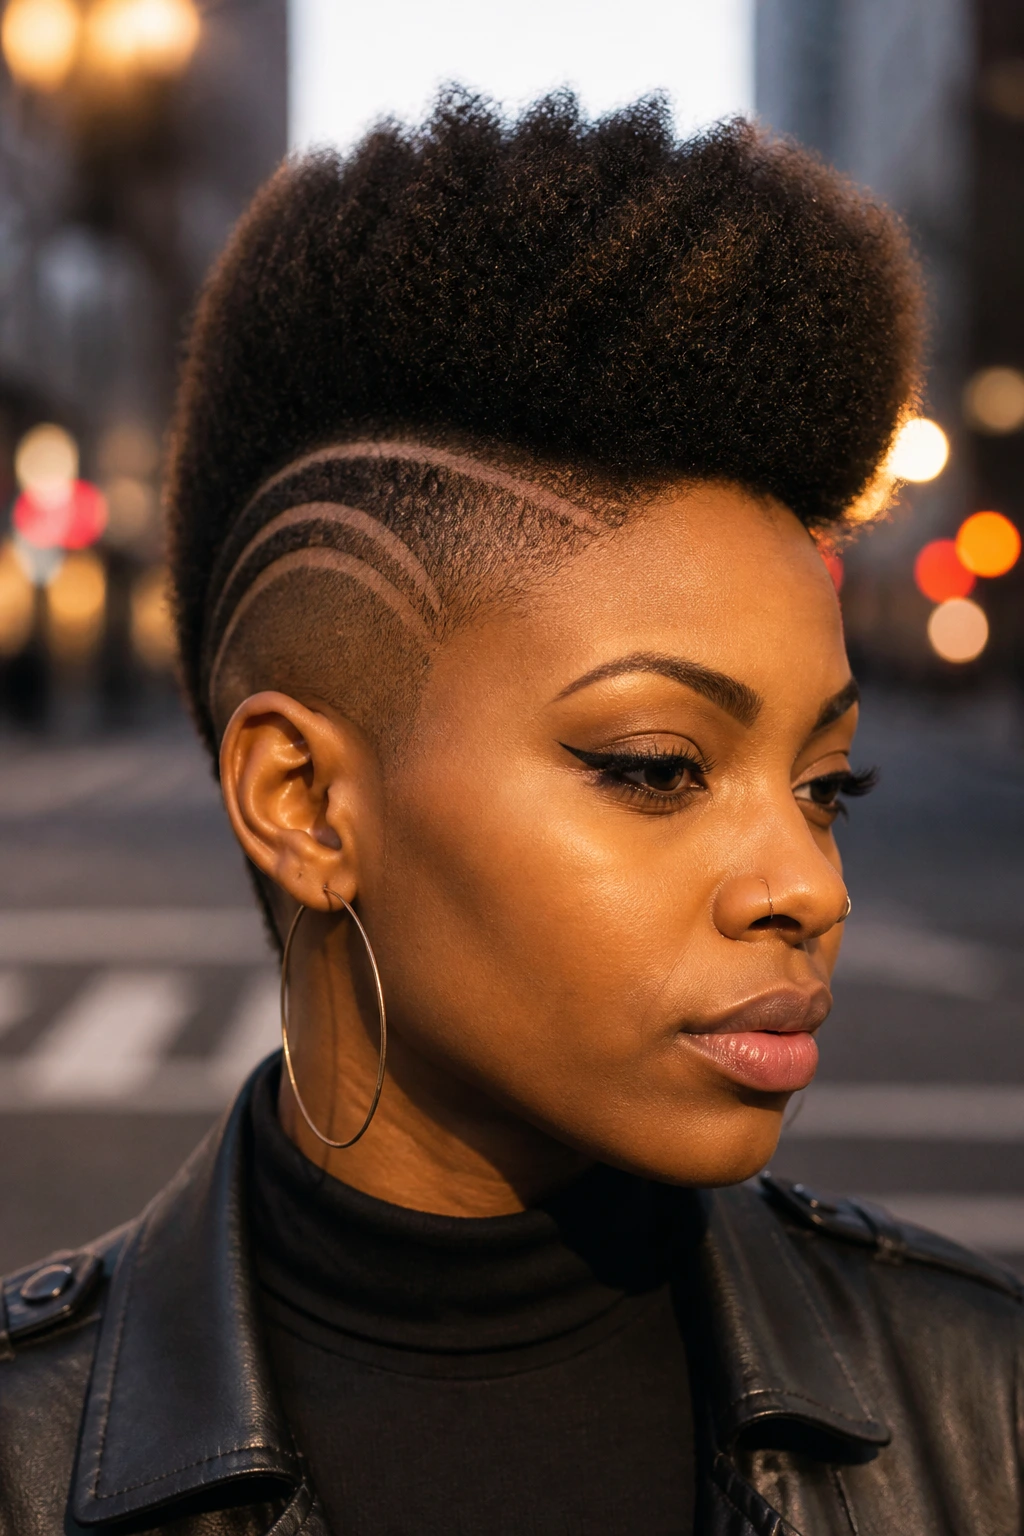
This takes the traditional Mohawk and adds a layer of artistry. It’s not just about the cut; it’s about the scalp as a canvas. You are combining a high-top fade or a wide Mohawk strip with razor-etched designs on the sides.
The Barber’s Art
This requires a very skilled hand. You are essentially asking your barber to draw with a razor. Common designs include geometric lines, zig-zags, stars, or even floral-inspired patterns. The key is to keep these designs subtle. If they are too thick, they can look clunky; thin, precise lines are always more elegant.
Maintaining the Detail
Designs grow out quickly. If you get a shape-up or a design, you are looking at a weekly or bi-weekly maintenance schedule. If you don’t go back to the barber, the lines blur, and the design loses its impact. Only commit to this if you have a barber you see regularly.
12. Mohawk with Locs
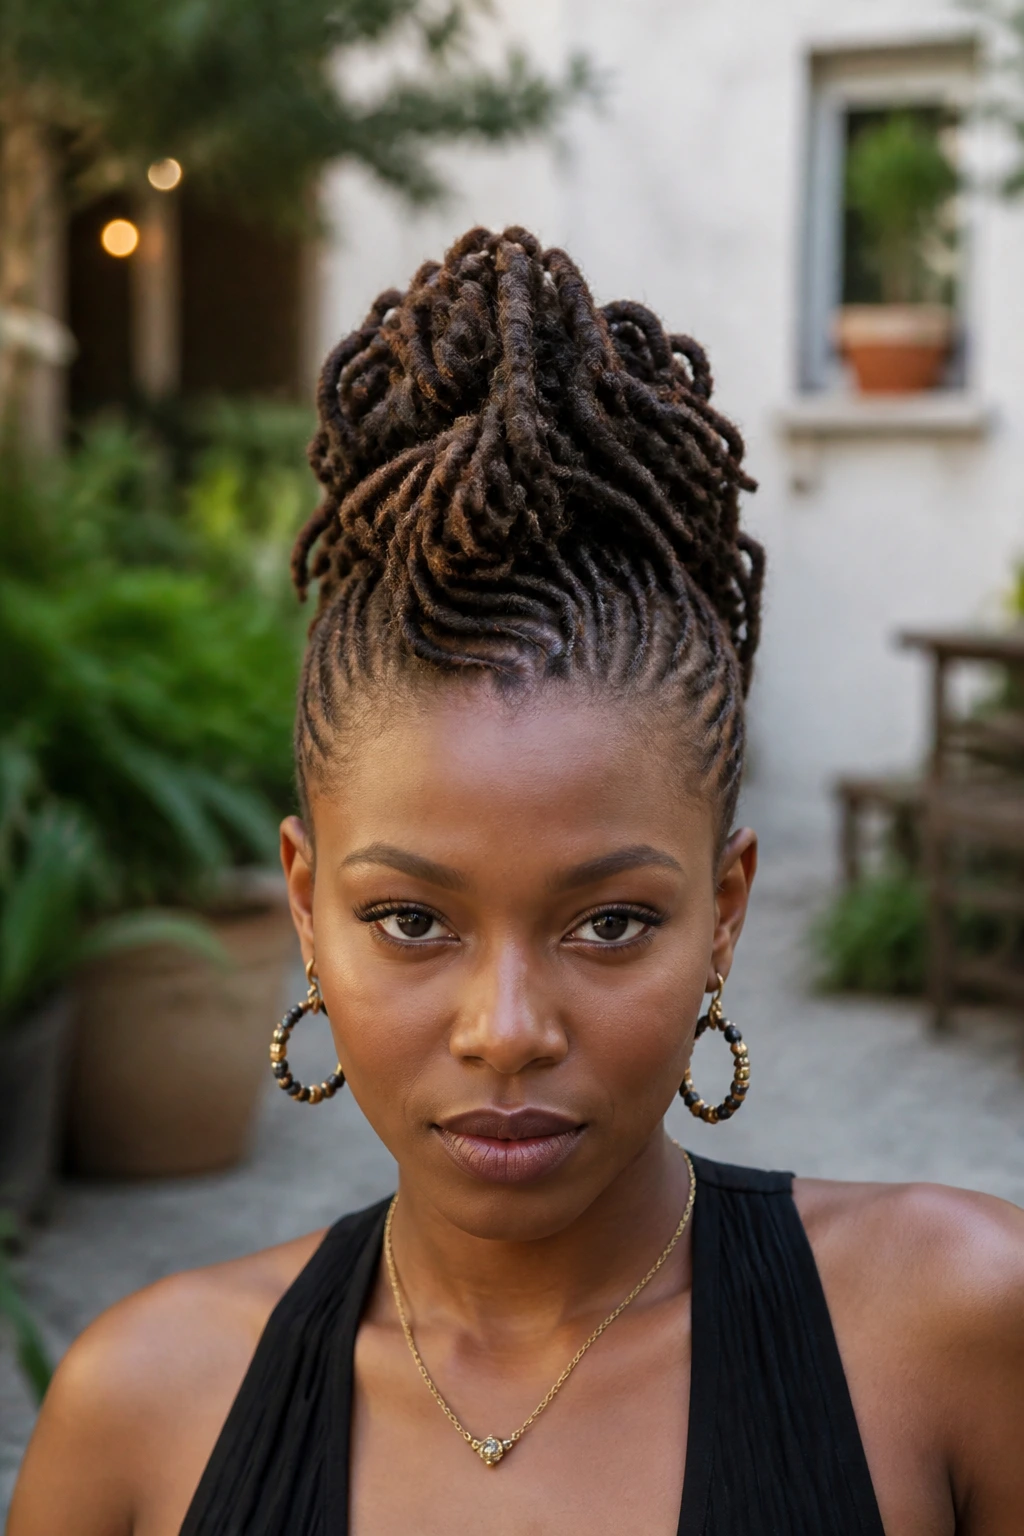
Locs are beautiful, but they can be heavy. A Mohawk is actually a genius way to style locs because it takes the weight off your neck and puts it in an upright, vertical position. It also prevents the locs from constantly hanging in your face.
Styling Techniques
You don’t need to shave your sides to do a Mohawk with locs. You can simply gather the locs from the sides of your head and pin them toward the middle. If your locs are long, you can wrap them into a high bun or let them spill over the top like a fountain.
Weight Distribution
The biggest issue with a loc Mohawk is the tension on your hairline. If you pull the side locs too tight, you risk traction alopecia. Use pins to secure the locs to the scalp, not to each other, to distribute the weight evenly. This keeps your hairline safe while achieving that edgy Mohawk silhouette.
13. Bantu Knot Mohawk
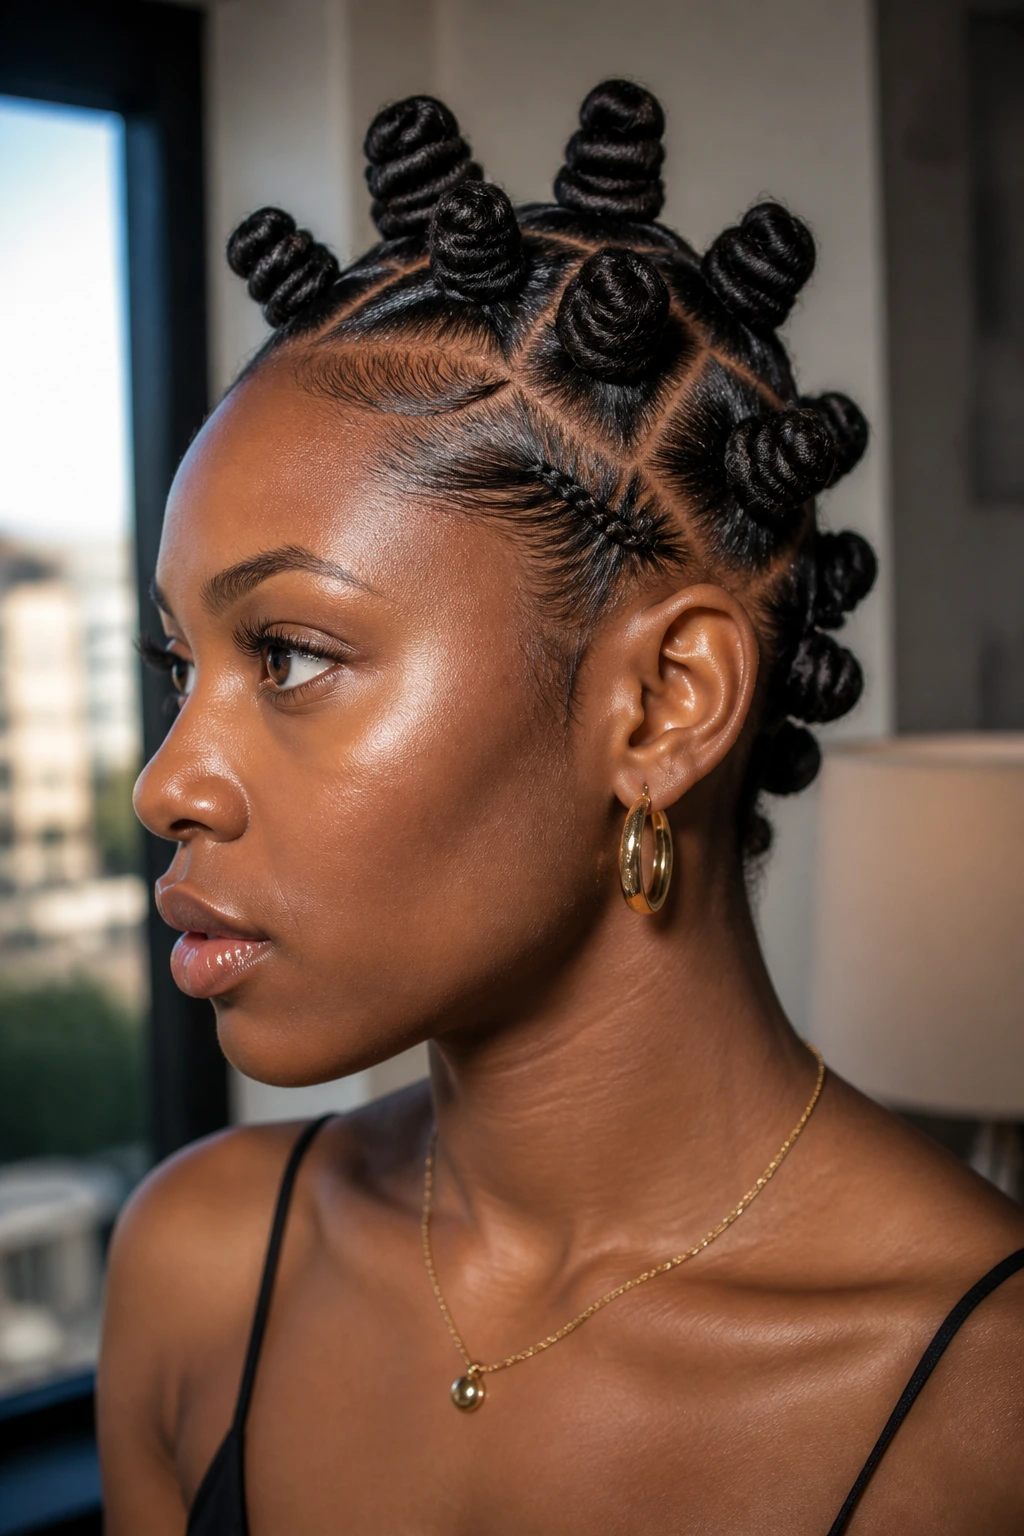
Bantu knots are a classic protective style, but arranging them in a Mohawk formation transforms them into something entirely modern. You create a line of knots running from your forehead down to your nape, with the sides slicked back.
Creating the Knots
Use small, square parts to create uniform knots. The size of the knots will dictate the look. Smaller knots look more intricate and delicate; larger knots look bold and sculptural. You can keep the knots tight to the scalp or let them sit a bit higher.
The Sleek Sides
To contrast the knots, use a firm-hold gel to slick the hair on the sides of your head. You can leave the hair loose or pull it into sleek, small cornrows underneath the knots. This style is incredibly practical because it keeps your hair completely off your face and lasts for days.
14. Mohawk with Curly Extensions
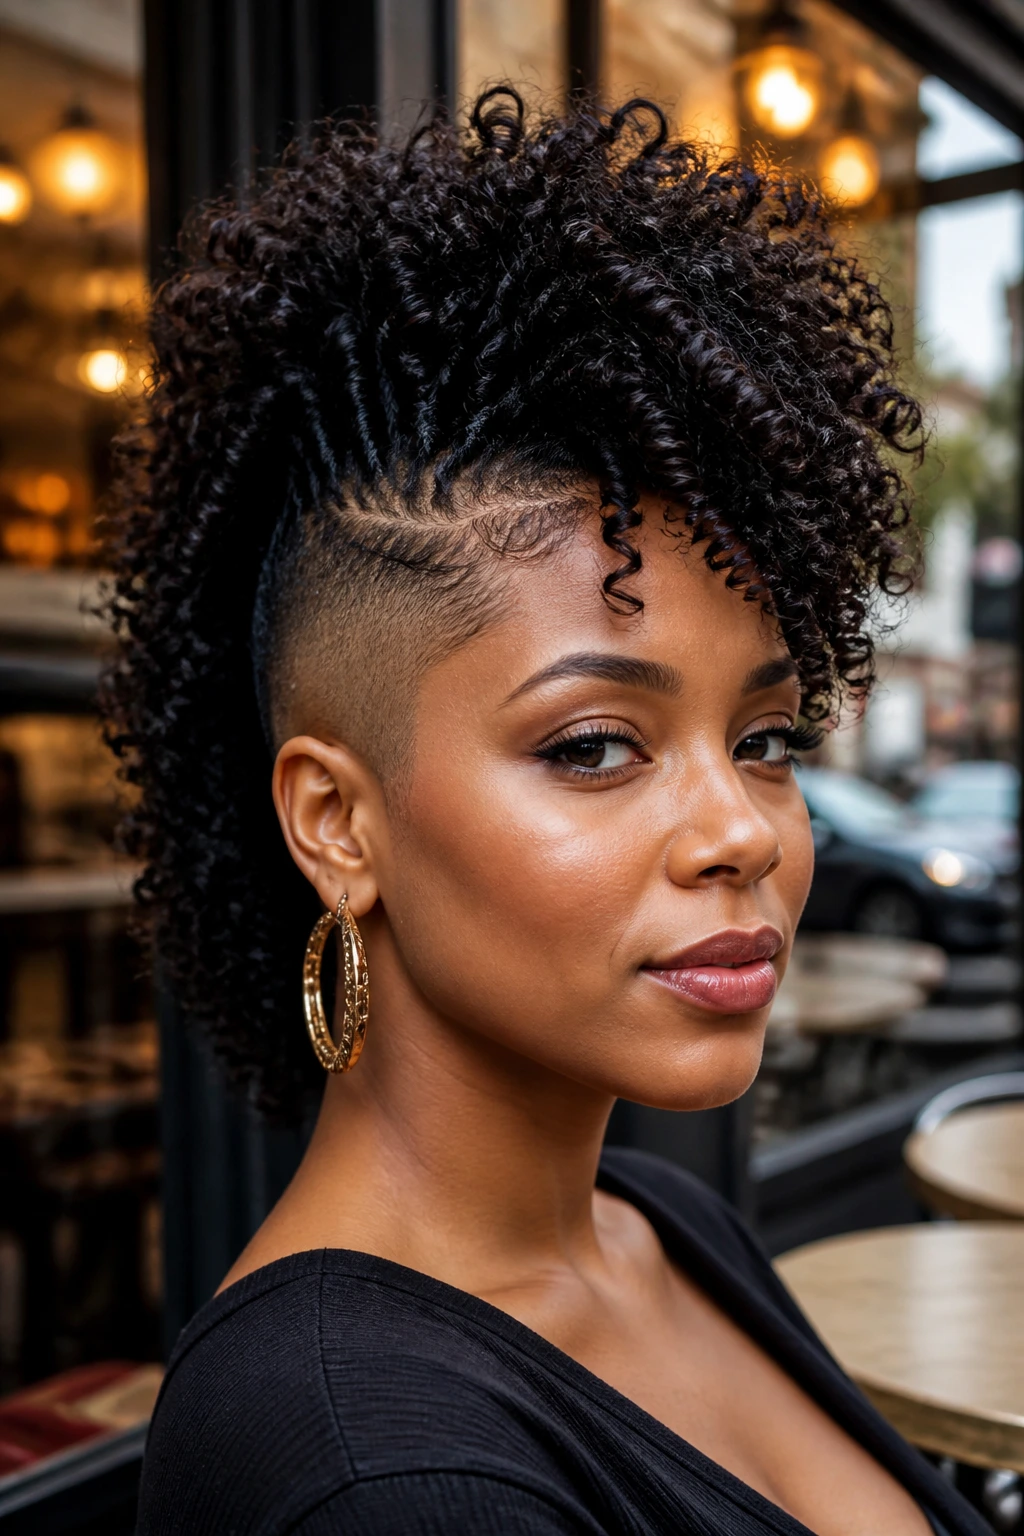
Sometimes, your natural hair length just isn’t enough to get the volume you want for a Mohawk. That is where extensions come in. You can use crochet braids or sew-in extensions to add length and curls to the center of your head.
The Crochet Method
This is the easiest way to do it. You cornrow your natural hair back toward the center, leaving the Mohawk shape open. Then, you use a latch hook to install curly braiding hair into those cornrows. The hair will naturally stand up, and because it is pre-curled, you don’t have to do any styling yourself.
Texture Matching
The most important part is matching the texture of the extensions to your natural hair. If you have 4C hair and you buy extensions that are straight, the look will be obvious. Look for extensions that are “kinky-curly” or “deep wave.” You want a seamless transition between your natural edges and the extensions.
15. Slicked-Back Sides Mohawk
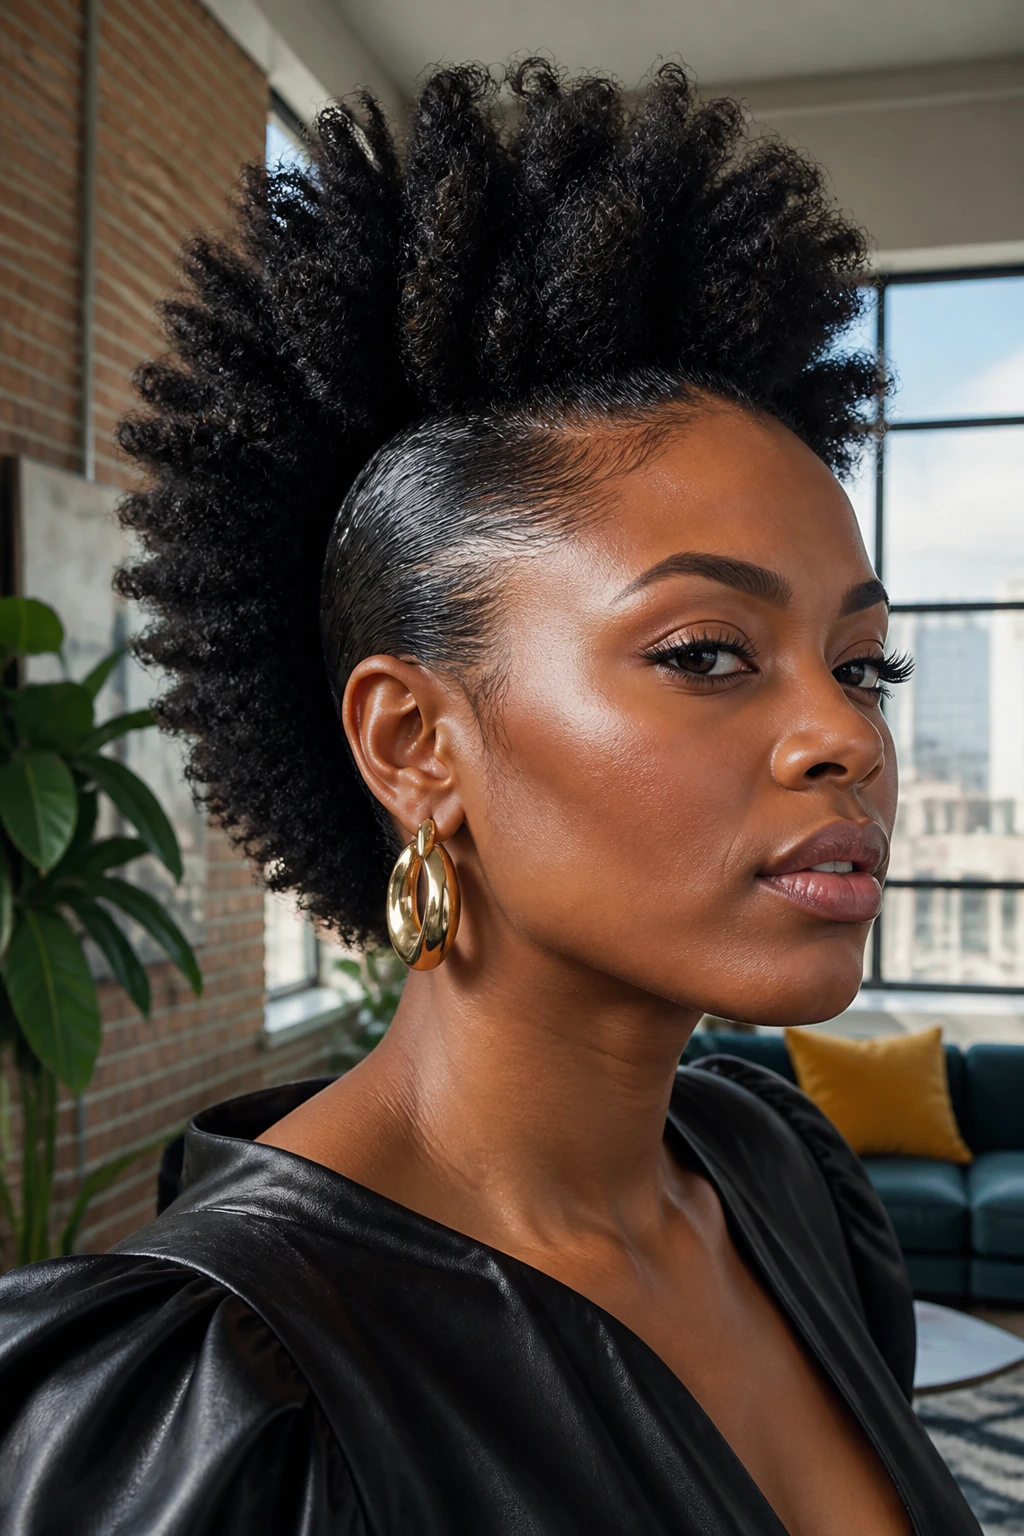
If you want a sleek, high-fashion Mohawk, this is the one. You aren’t cutting your hair, but you are creating the illusion of a fade using a lot of gel and, if necessary, a headscarf to set the hair in place while it dries.
The “Slick” Process
Apply a liberal amount of high-shine pomade or edge control to the sides of your head. Use a boar-bristle brush to smooth the hair from the hairline up toward the center. This creates that high-shine, high-contrast look that mimics a fade.
The Set
The secret to this style is the “set.” After you have slicked the sides up, wrap your head in a silk or satin scarf for at least 30 minutes. This presses the hair flat against your scalp, ensuring that it doesn’t frizz up or move once you are out the door. The center should be big, fluffy, and natural—the contrast between the flat, shiny sides and the big, matte center is what makes this look work.
16. Mohawk with Micro Braids
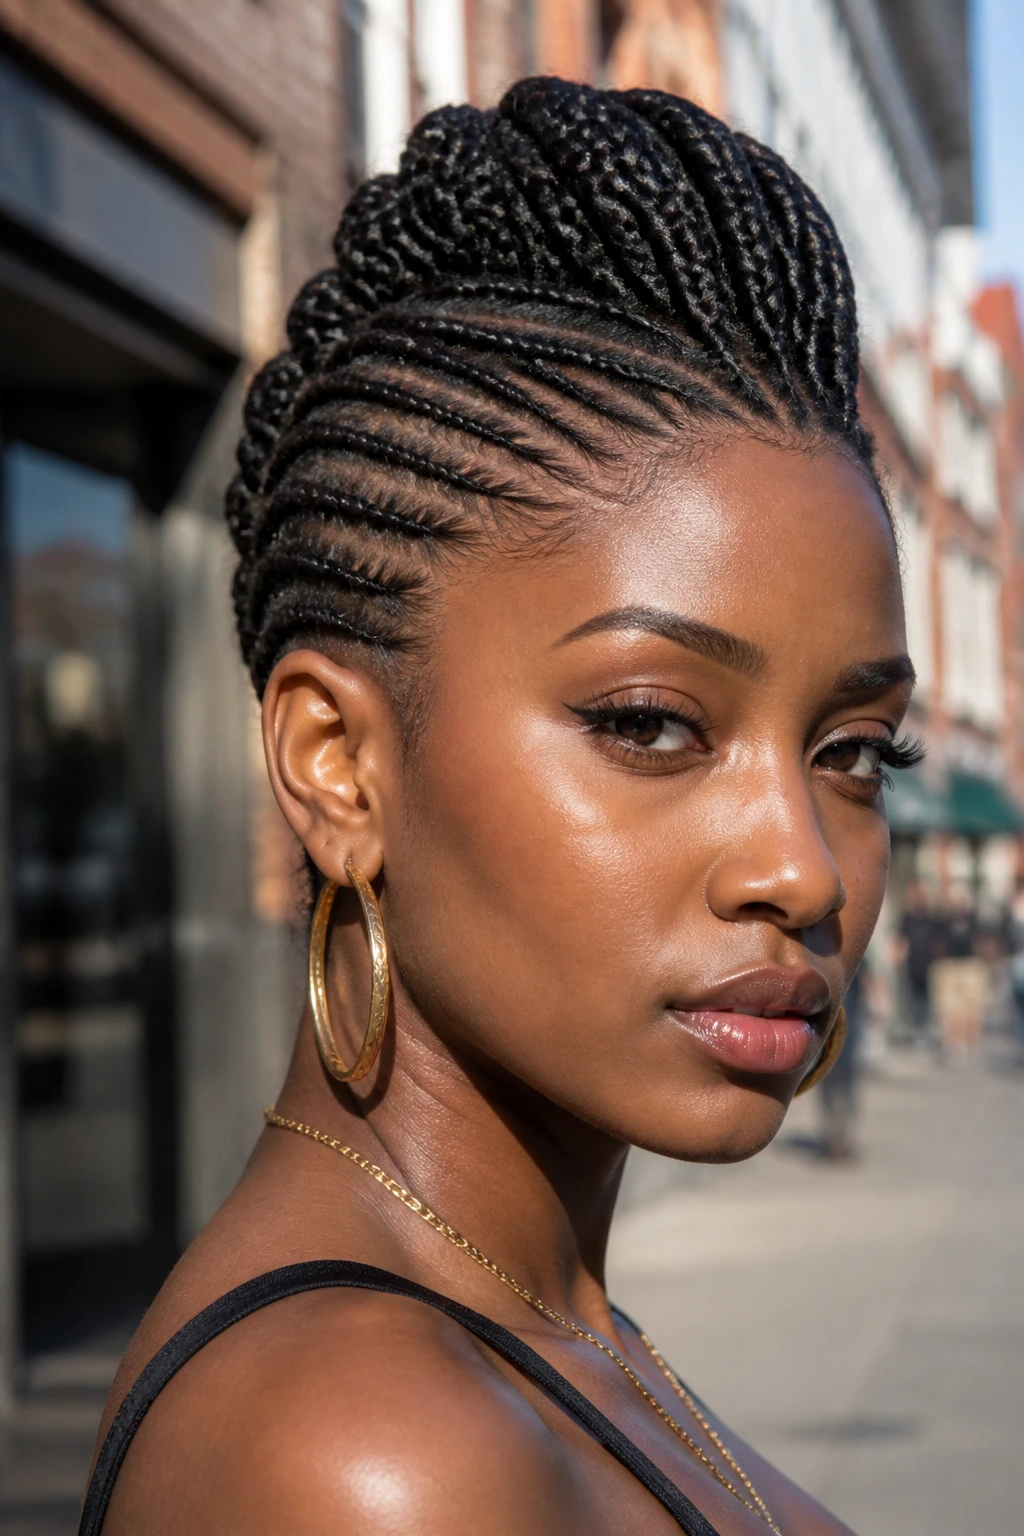
Micro braids are thin, delicate, and time-consuming, but the result is unparalleled in terms of texture. A Mohawk made of micro braids is light, fluid, and incredibly versatile.
Braiding Technique
You need to braid the sides of your hair upward toward the center. The braids should be very small—”micro”—to ensure they lie flat against your head. This gives you that smooth, “fade-like” appearance. The braids in the center can be long and left to hang, or you can bunch them together into a high ponytail or bun.
Protection
Because micro braids are so thin, they can be heavy at the root. Make sure your braider isn’t putting too much hair in each section. You want the style to feel light. If it feels like your head is being pulled, the braids are too heavy, and you are putting your hairline at risk.
17. Mohawk with Space Buns
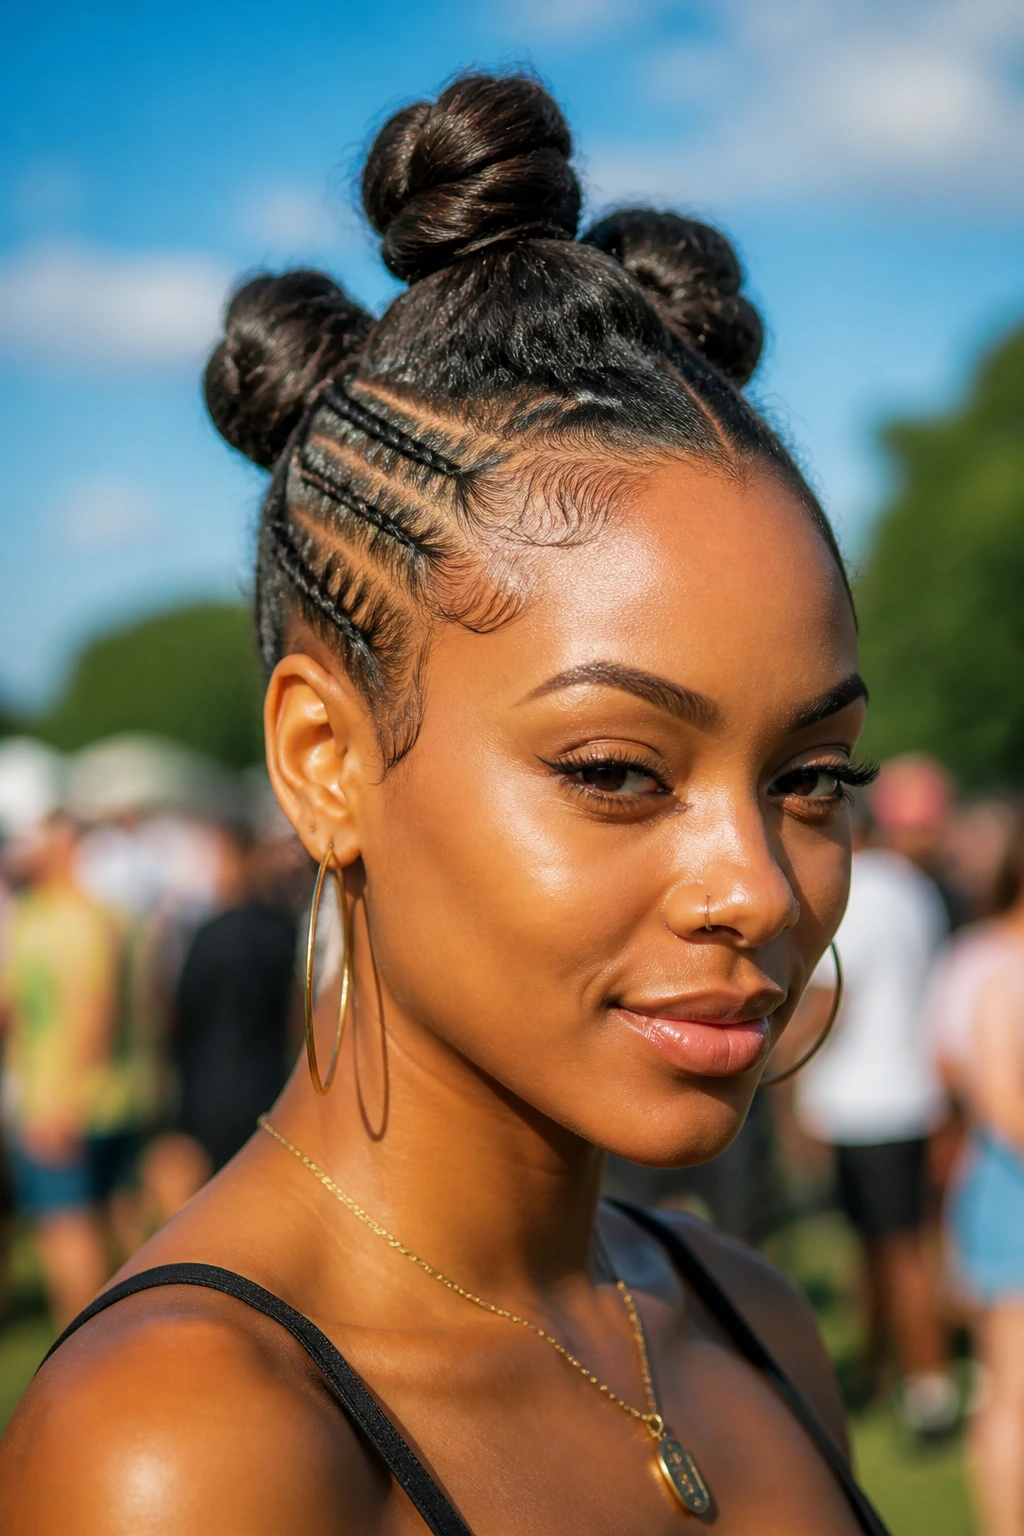
This is a playful, youthful take on the Mohawk. Instead of having a single strip of hair, you create two or three “buns” or “puffs” arranged in a vertical line down the center of your head.
The Puff Arrangement
Section your hair into three parts: front, middle, and back. Pull each section up into a puff or a bun. You can use hair donuts if you need extra volume. The goal is to have three distinct spheres of hair running from your forehead to your nape.
The Edges
Since the buns are the focus, your edges need to be impeccable. Use a toothbrush and edge control to swoop them. This framing adds a polished finish to an otherwise fun and quirky hairstyle. This look is perfect for casual settings or festival styles where you want something that stands out but doesn’t require a salon visit.
18. Mohawk with Dyed Tips or Color
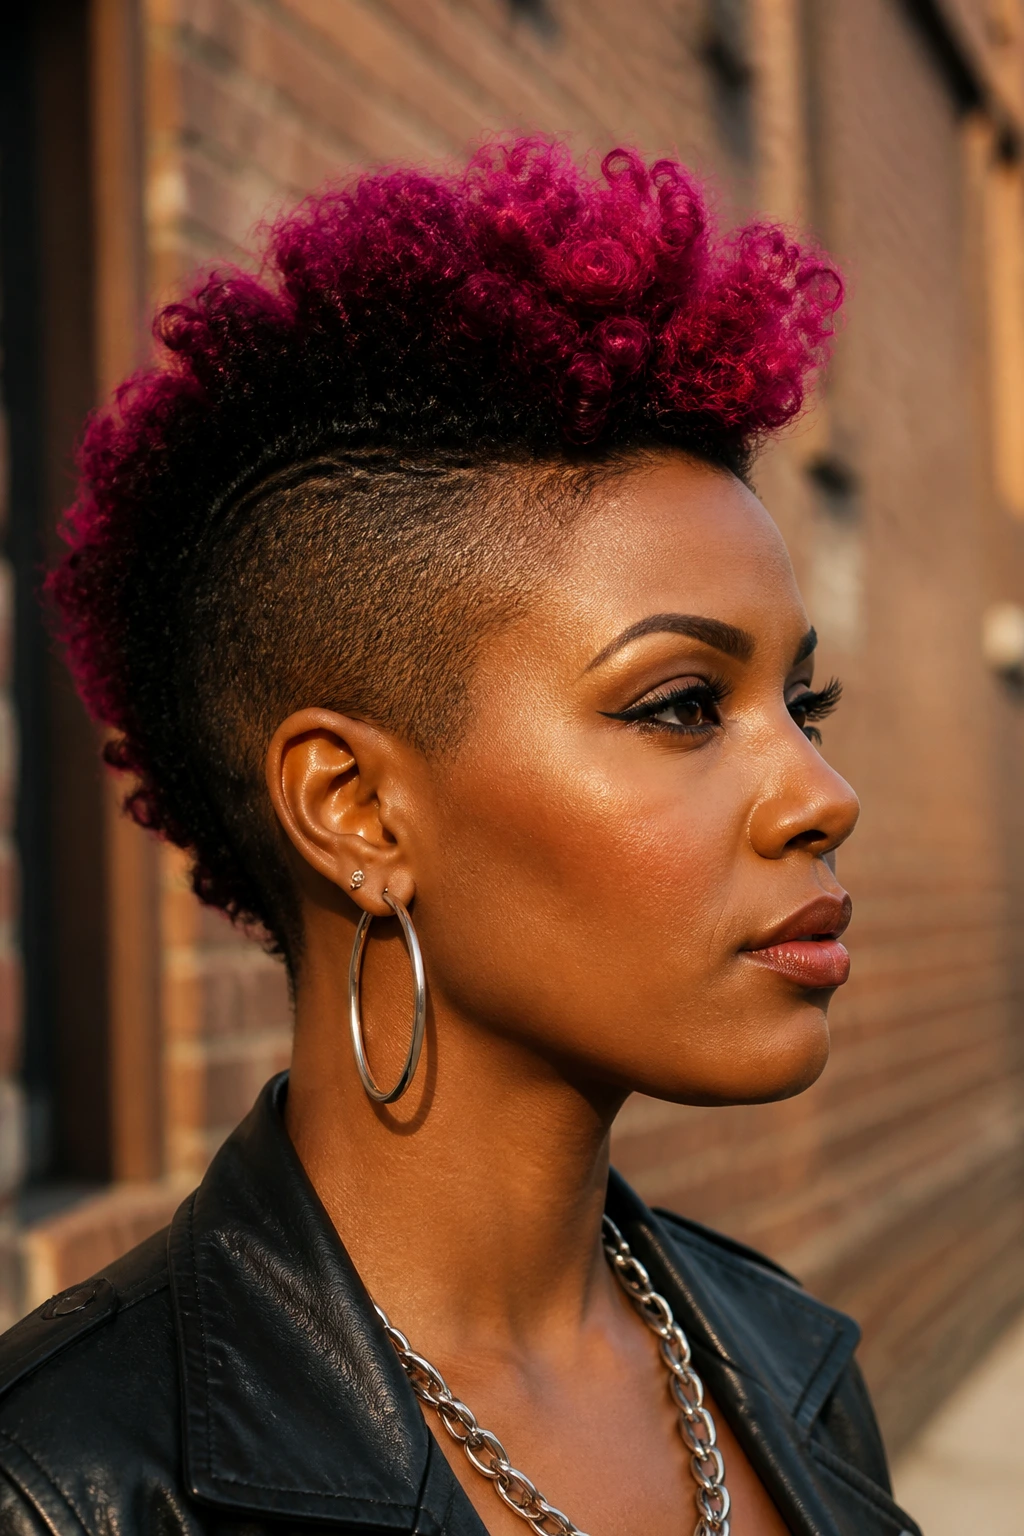
Color can totally redefine a Mohawk. Because a Mohawk concentrates hair in one area, adding color to that area makes the hairstyle look much more intense and intentional.
Choosing the Color
You don’t need to dye your whole head. Try “tipping”—dyeing just the ends of your curls. If you have a TWA, you can dye the entire top section. Platinum blonde against dark hair is a classic, high-contrast look. Vibrant reds, deep purples, or even bold blues can show off your personality.
Damage Control
Dyeing natural hair, especially textured hair, can cause damage. The chemicals can loosen your curl pattern if you aren’t careful. Always prioritize deep conditioning treatments before and after coloring. If you aren’t ready for the commitment of bleach, try hair wax—it is a temporary, pigmented wax that you can apply to your hair and wash out at the end of the day. It gives you the full-color effect with zero long-term damage.
Final Thoughts
The Mohawk is a style that demands a certain level of confidence. It isn’t a “blend in” haircut. By pulling your hair up and away, you are exposing your profile, your neck, and your features. For Black women, specifically, it acts as a celebration of texture. Whether you opt for the clean, precise lines of a barber-cut fade or the intricate, woven patterns of a braided design, you are making a deliberate choice to let your hair serve as the focal point of your appearance.
Before you sit in the chair, be honest with yourself about your lifestyle. If you hate hair appointments, avoid styles that require a barber’s touch every two weeks. If you love variety, opt for the braided or twisted versions that can be changed out on a whim. The “perfect” Mohawk isn’t the one you see in a magazine; it is the one that fits your hair texture and your maintenance routine. Own the silhouette, keep your scalp healthy, and don’t be afraid to experiment with the shape. It is, after all, just hair—and you can always grow it back.
