



The mohawk is no longer just a relic of mid-century punk rock rebellion. It has morphed into a sophisticated, highly customizable silhouette that works with just about every hair texture under the sun. Whether you have tight 4C coils, loose waves, or fine, straight strands, pulling your hair toward the center creates an immediate focal point that is both striking and remarkably versatile. The “natural” aspect is key here; this is about celebrating the hair you were born with, whether that means working with your shrinkage, embracing your volume, or simply finding a shape that requires minimal heat manipulation.
People often assume a mohawk requires a razor-sharp fade or an aggressive, spiked-up shape. That is just one tiny corner of the map. True natural styling for this cut is more about tension, placement, and the way you frame your face. Some of the most compelling versions are created with nothing more than a bit of hair tie, some bobby pins, and a decent leave-in conditioner. It is a silhouette that highlights your cheekbones and jawline in a way that longer, loose styles rarely do. Let’s look at how to pull this off properly.
1. The Tapered Fro-hawk
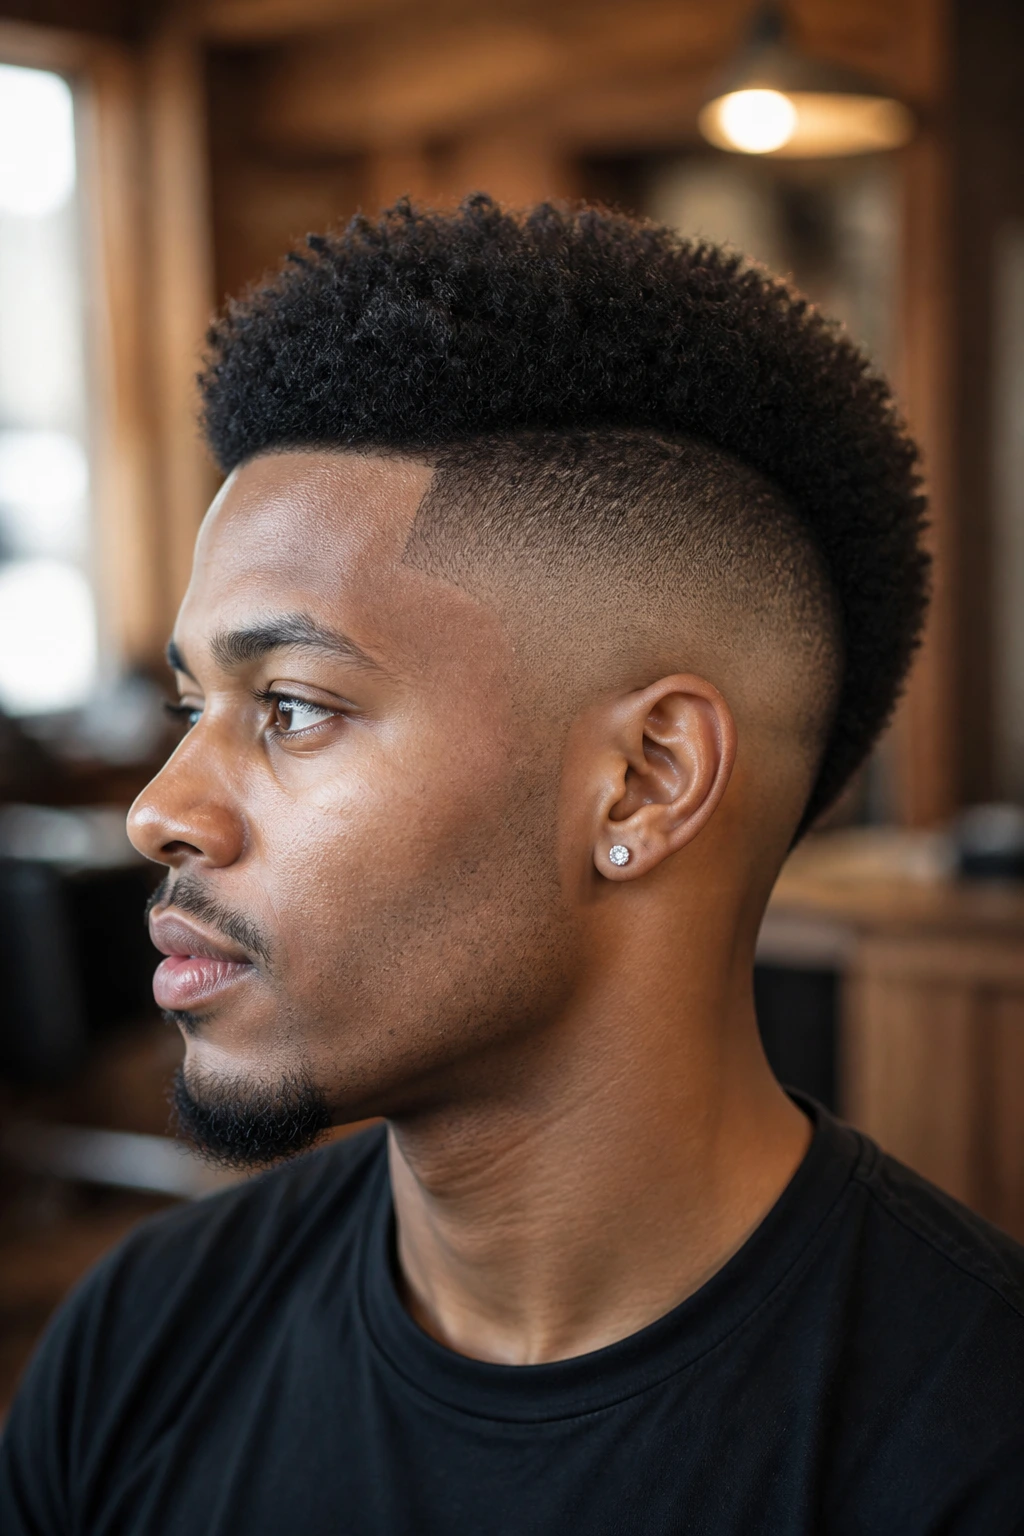
This style is the gold standard for anyone with kinky or coily hair who wants to transition into a shorter style without losing the drama of their natural texture. The core of this look is the fade or taper on the sides, which creates a sharp contrast to the volume sitting on top. When you head to the barber, specify that you want the sides taken down to skin or a low number guard, keeping the weight heavily concentrated on the crown.
Why This Style Works
The contrast is the secret ingredient. By removing the bulk on the sides, you force the eye upward, making the hair on top appear thicker and more defined. It is a low-maintenance powerhouse because you are only responsible for styling the center strip.
Tips for Keeping It Sharp
- Barber Frequency: Because the fade is the star, you will need a touch-up every two to three weeks to keep the lines crisp.
- Moisture is Mandatory: Since the top is exposed, it dries out faster. Use a water-based leave-in conditioner daily.
- Edge Control: Do not neglect the hairline; a tiny dab of edge control gel keeps the transition from the fade to the fro looking intentional rather than fuzzy.
One final note: If you have high porosity hair, seal that leave-in conditioner with a light oil like jojoba to keep the definition from collapsing into a frizz-ball by noon.
2. The Slicked-Back Side-Part
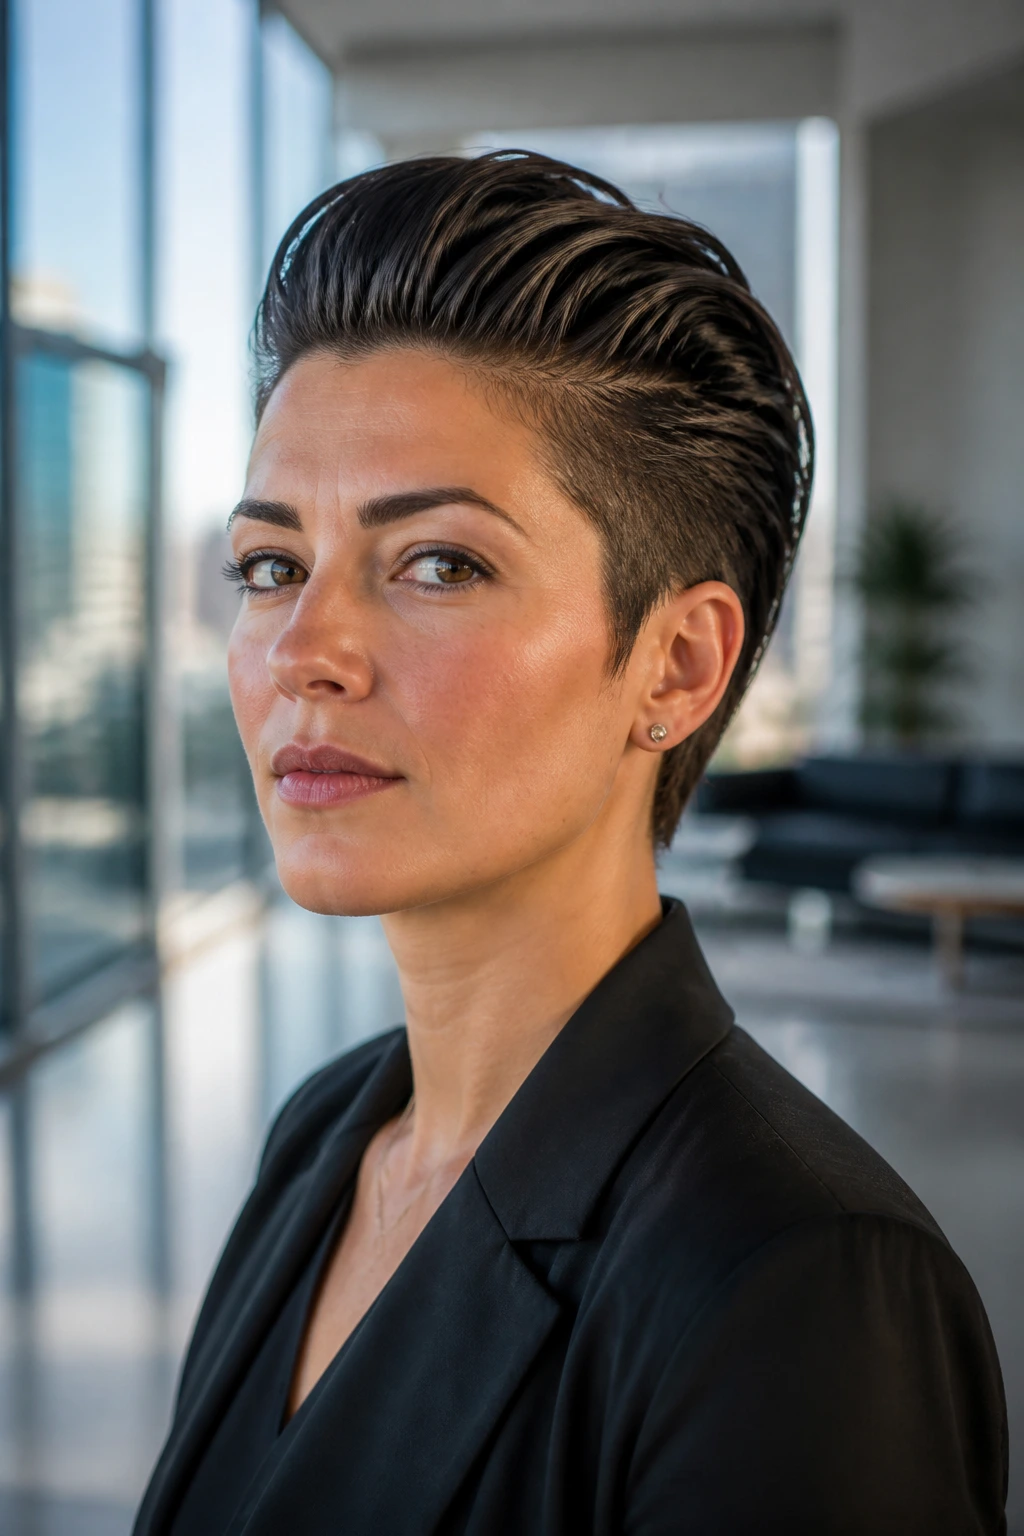
If your hair is on the straighter or wavier side, or if you simply prefer a sleeker aesthetic, the slicked-back side-part is a sophisticated take on the mohawk. You are essentially using pomade or high-hold styling cream to push everything from the sides toward the center. It creates a seamless, aerodynamic look that feels expensive and intentional.
Unlike a traditional, rigid spike-up mohawk, this version is about softness and flow. You want the hair to have some movement while still being firmly placed. Start with damp hair and apply a generous amount of styling cream. Use a fine-tooth comb to work the hair from the temples toward the middle of the scalp. Once you have the shape established, use a bit of hairspray to lock it in, but avoid the “helmet head” look. You want it to look firm, not frozen. This style works exceptionally well for formal events or professional settings where you want to show a bit of edge without going full-blown punk.
3. The Sculpted Coil Mohawk
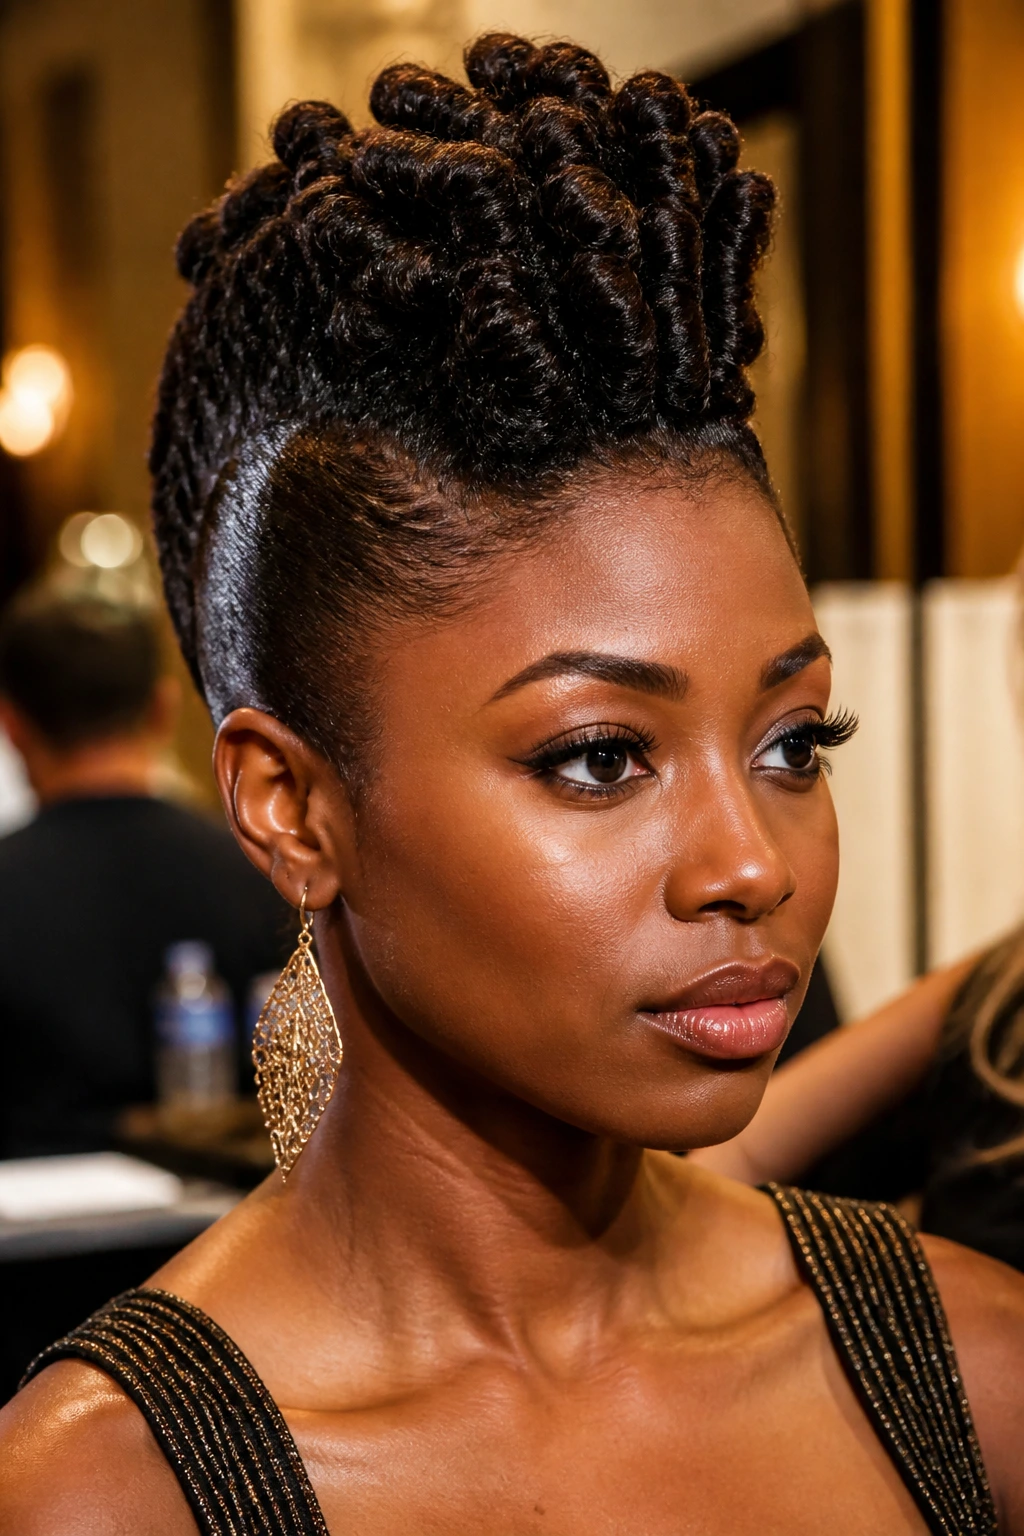
This variation is pure art. Instead of just letting your coils sit, you are actively shaping them into tight, defined sculptures. This works best for Type 4 hair textures. You are going to need a reliable, strong-hold gel that doesn’t flake—avoid the cheap stuff that turns white as soon as it dries.
The Execution Process
- Sectioning: Start by parting the hair along the sides, creating a clean line from the nape of your neck to the hairline.
- Smoothing: Use a boar-bristle brush to pull the sides upward and toward the center.
- Coiling: Take small sections of the hair on top and use a styling rod or simply your fingers with a bit of gel to create uniform, distinct coils.
- Drying: Sit under a hooded dryer or use a diffuser attachment to set the shape.
The result is a structured, architectural style that looks like it took hours, even if you’ve developed the muscle memory to do it in twenty minutes. It is a fantastic option for weddings, galas, or any time you want your hair to serve as a statement piece.
4. The Soft Pixie Mohawk
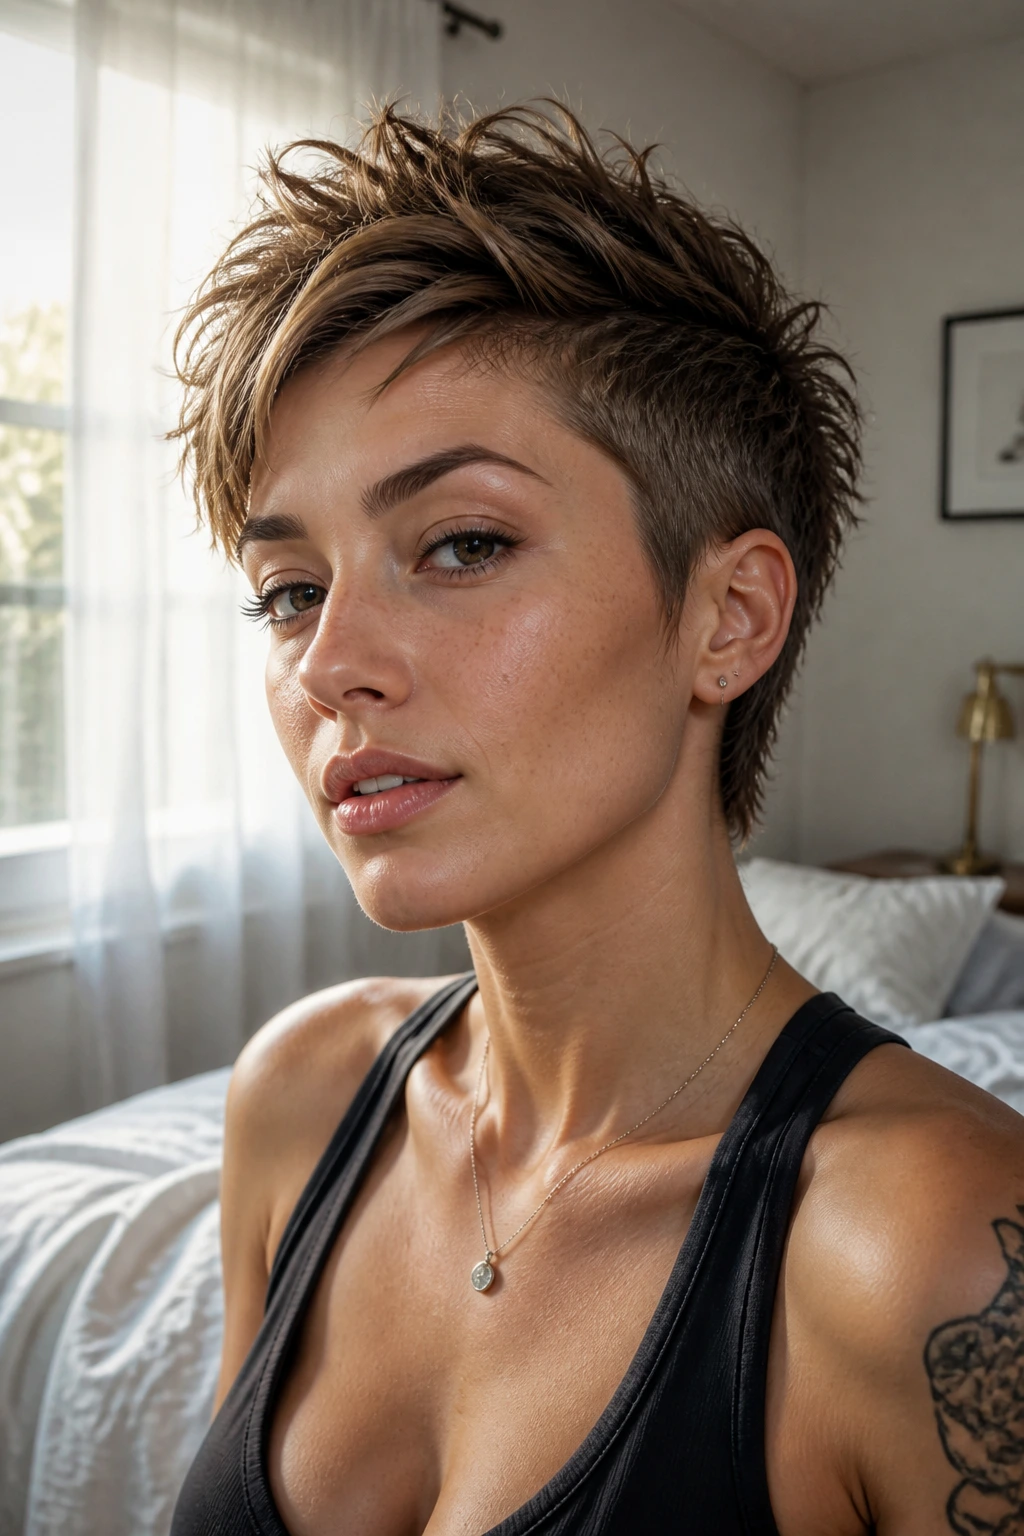
Sometimes you want the vibe of a mohawk without the severity. The soft pixie mohawk is essentially a layered haircut where the top is kept slightly longer than the sides, but the transition is blended rather than stark. This is the “I woke up like this” version of the style. It relies heavily on the cut itself—you need a skilled stylist who understands how to layer hair to create natural volume without needing to backcomb it into oblivion.
Texture spray is your best friend here. Because the hair is softer and less structural, you want a product that adds grip and grit. Spray it into your roots while your hair is slightly damp and blow-dry using your fingers to pull the hair toward the center. It’s messy, it’s effortless, and it looks better the second day when the natural oils have had a chance to settle into the strands.
5. The Braided Side Mohawk
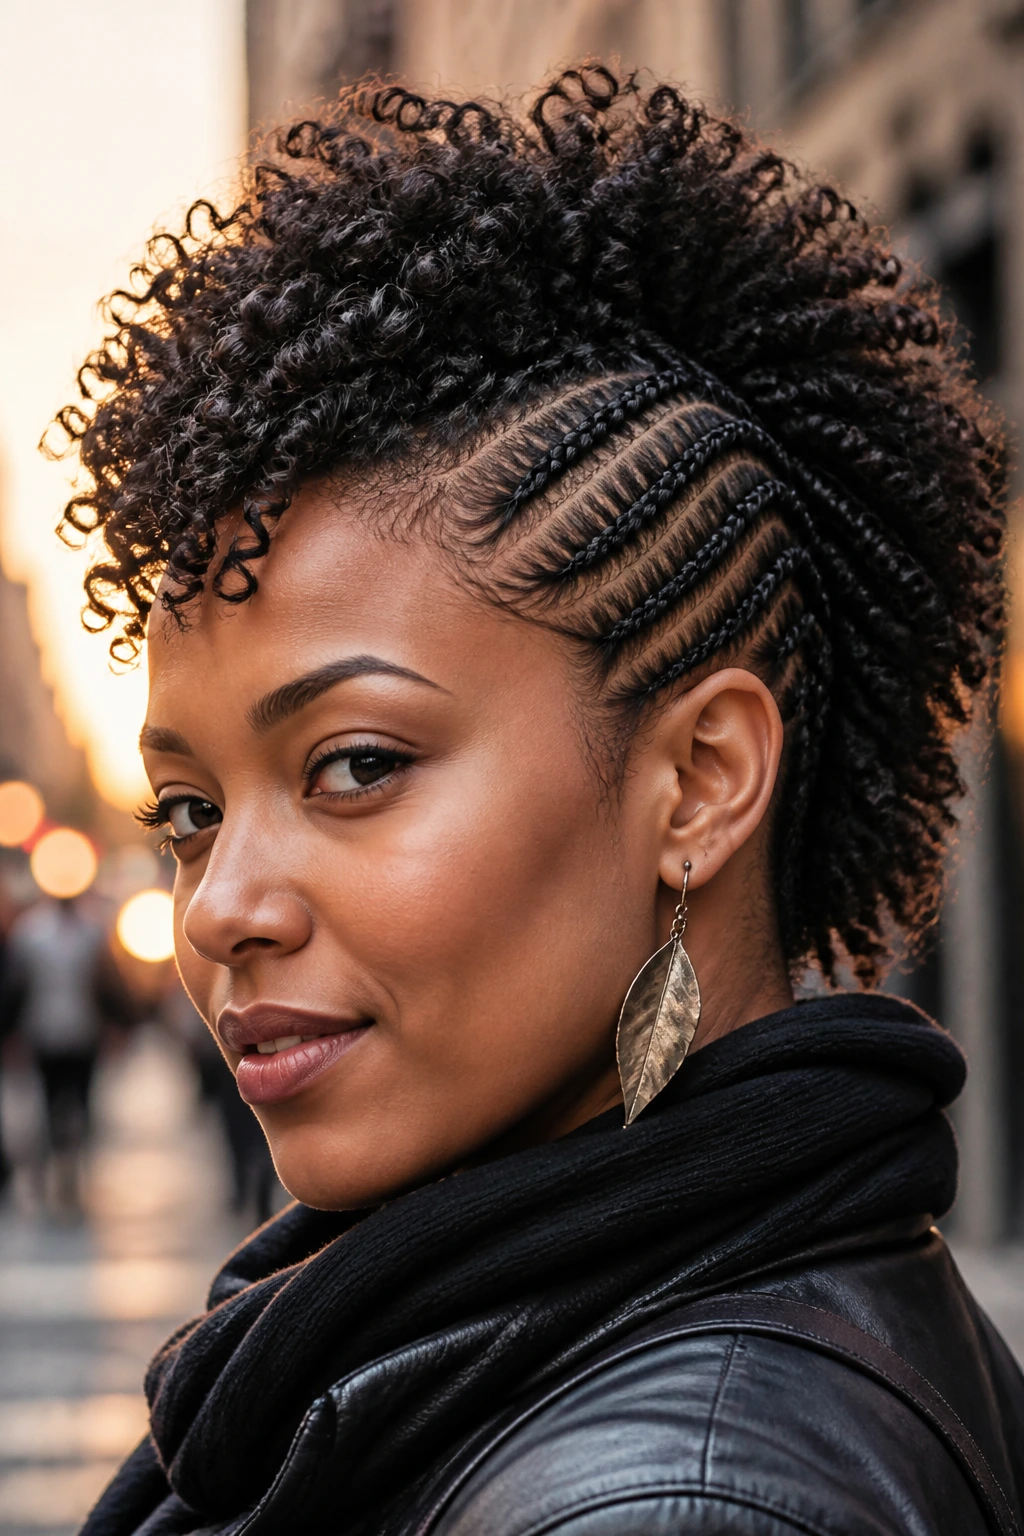
If you aren’t ready to take the clippers to your hair, the braided side mohawk is the ultimate “faux-hawk” solution. You create the illusion of a fade by cornrowing the sides tightly against your scalp, starting from the ear and moving toward the center. The remaining hair in the middle is left free to show off your natural curl pattern.
This is a protective style, which makes it perfect for those times when you want to give your hair a break from daily manipulation. It keeps the hair at the scalp protected and tucked away while allowing the center to be styled as a fro, a series of twists, or even just loose curls. The durability of this style is unmatched—if you wrap it properly at night, it can easily last two weeks. Just be careful not to braid the sides too tightly; you want tension, not a headache.
6. The Pompadour Mohawk
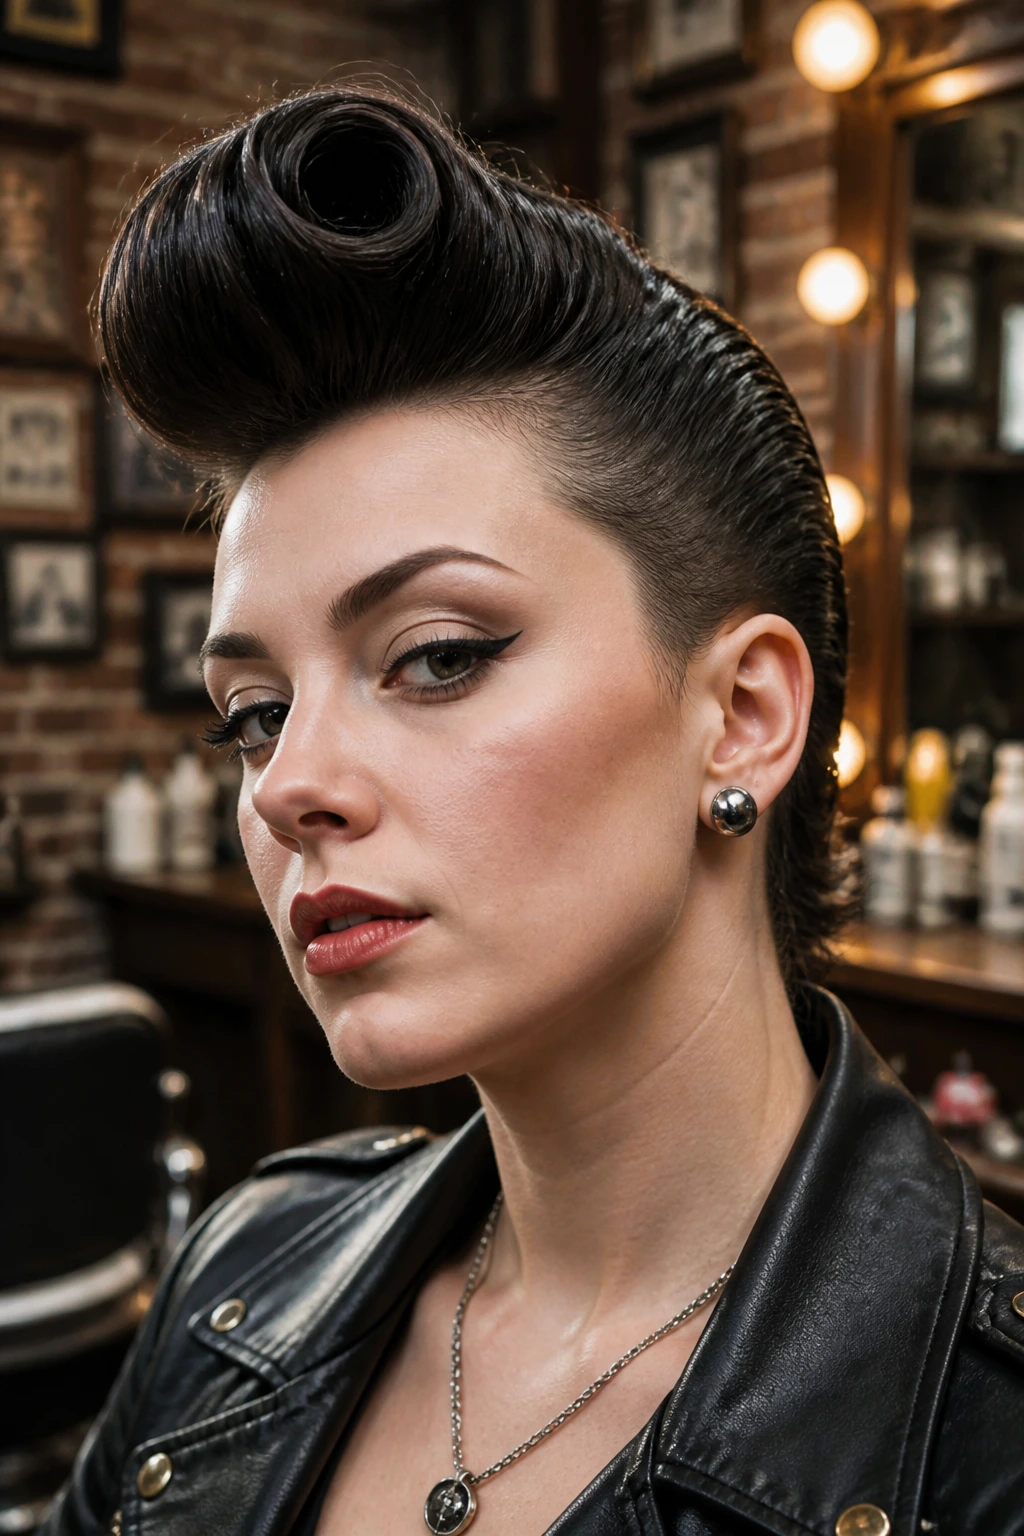
Think of this as the rockabilly cousin of the mohawk. It features a voluminous, rolled-up section at the front that tapers off into a flat strip toward the back. It is vintage-inspired, bold, and requires a bit of dexterity to achieve that perfect, gravity-defying roll.
You will need a pomade with some shine and a solid hold. Start by gathering the front section of your hair—the “bangs” area. Roll it over your fingers, pushing it slightly forward to create height, and pin it securely in place. The rest of the hair along the mohawk line should be sleeked back or pinned neatly. This style is incredibly flattering because the height of the roll elongates the face. It’s dramatic, it’s sophisticated, and it commands attention the moment you walk into a room.
7. Finger-Coil Mohawk
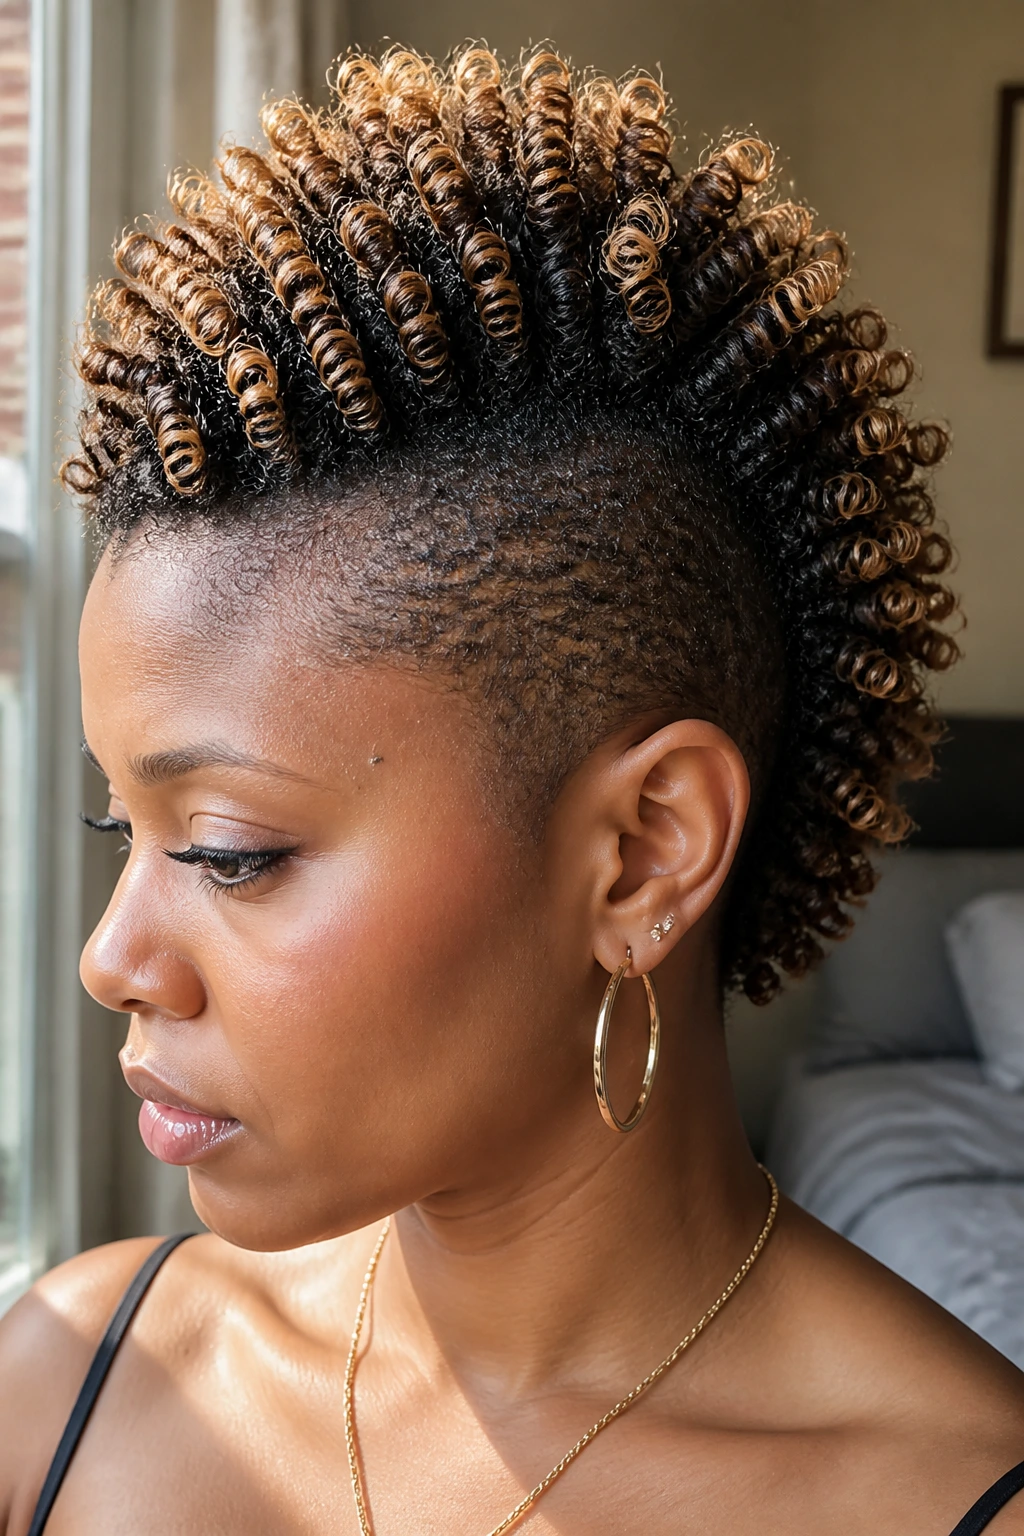
Similar to the sculpted coil version, the finger-coil mohawk relies on manual definition. The difference is in the size and spacing of the coils. For this style, you want smaller, tighter coils that cover the entire center strip of your head. This looks spectacular with a nice ombré color job, where the roots are dark and the ends are a lighter hue—it really highlights the intricate pattern of the coils.
Maintenance is key here. Because you’ve touched every single coil, they tend to unravel if you don’t sleep with a silk or satin bonnet. Do not try to rush this style. If you start rushing, the coils will look uneven and frizzy. Put on a podcast, grab a mirror, and take your time. It’s a meditative process that pays off with a hairstyle that looks polished for days.
8. The Pinned-Up Mohawk (The “No-Cut” Option)
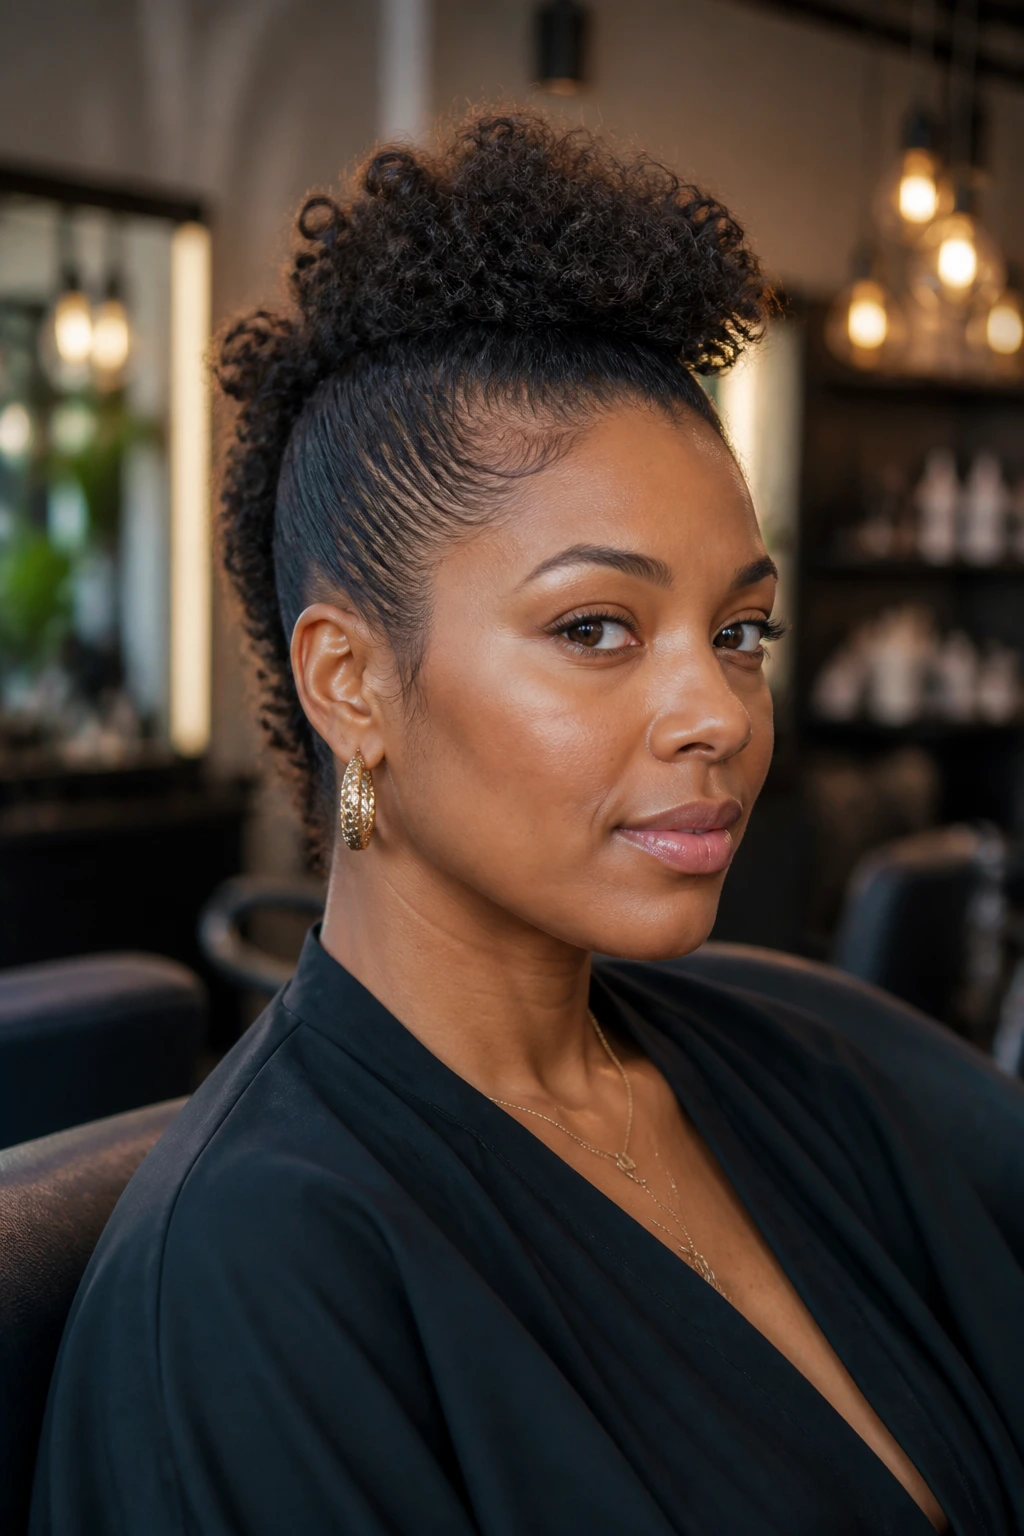
This is the cheat code for anyone who fears commitment. You don’t need a single pair of scissors for this look. The strategy is to pull all the hair toward the center and use a series of bobby pins to secure it.
Step-by-Step Execution
- Prep: Apply a moisturizing cream to your hair so it remains pliable.
- Tension: Gather the hair from the left side and the right side of your head.
- Anchoring: Pull these sections toward the center strip and secure them with bobby pins placed vertically. The pins should be hidden beneath the hair.
- Volume: Once the sides are flat, fluff the center strip to create the height and width you want.
If you have very thick hair, you might need those larger, heavy-duty pins rather than the standard ones, which will just bend under the weight. This is a great way to “test drive” a mohawk shape for an evening to see if you like the profile before heading to the barber chair.
9. Two-Tone Faded Mohawk
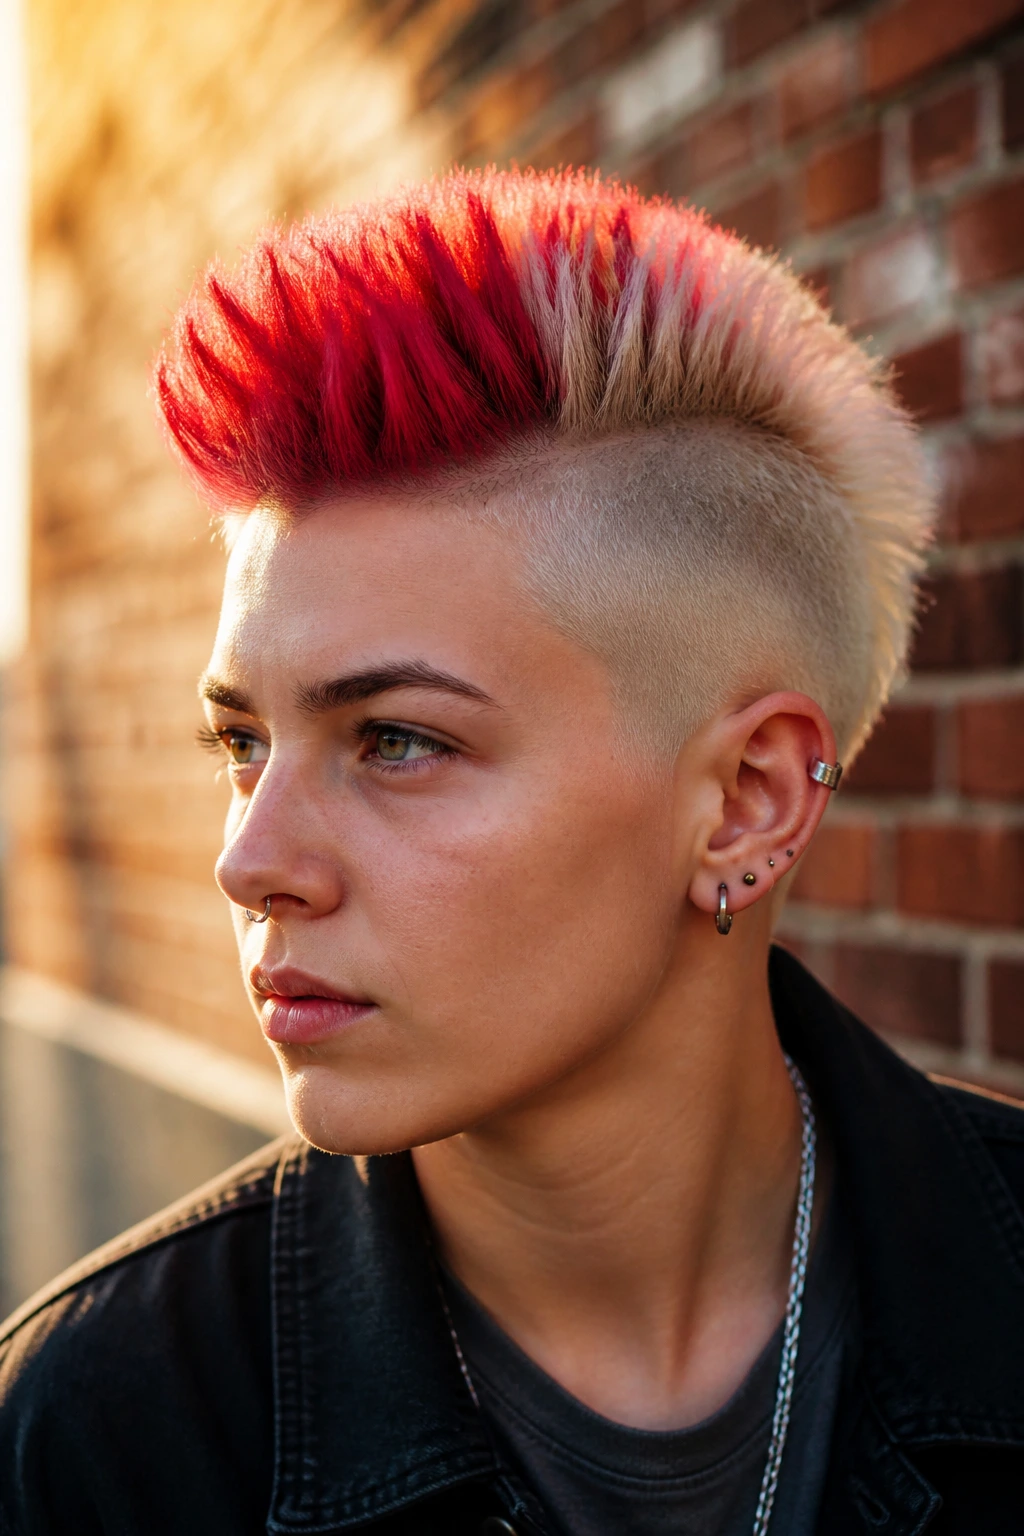
This is about color and cut working in tandem. When you have a mohawk, the center strip of hair acts like a canvas. Why not use it? Adding a vibrant color—platinum blonde, fire engine red, or even a soft pastel—to just the mohawk strip creates a massive visual impact without you having to bleach your entire head.
The fade on the sides keeps the color from becoming overwhelming. Because the sides are clipped short, you don’t have to worry about color maintenance for that area. It keeps the hair healthier too, since you’re only processing the hair on the crown. If you choose to go this route, invest in a color-depositing shampoo to keep the vibrancy alive. Washing with hot water is your enemy here, so try to rinse with cool water to seal the hair cuticle and keep the pigment from fading prematurely.
10. Twisted Root Mohawk
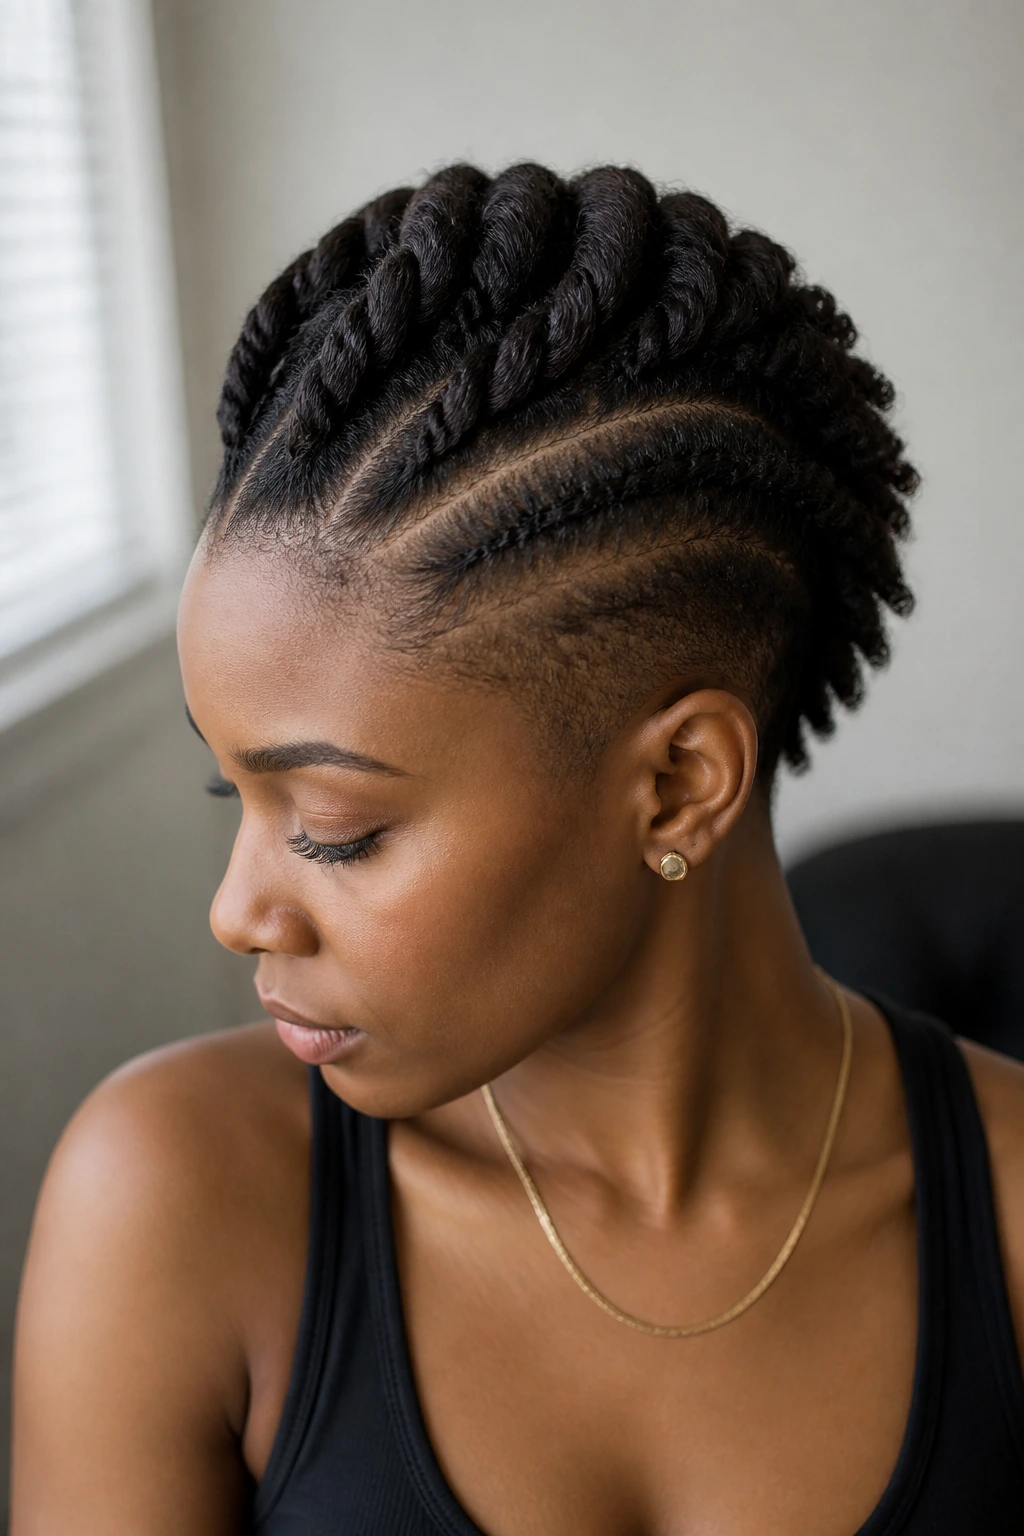
For those with natural hair who want something more structured than a loose fro, the twisted root mohawk is a fantastic choice. You use two-strand twists along the center strip, but you keep the roots very tight and neat.
This style provides excellent definition. When you take the twists down after a few days, you get a beautiful, textured braid-out look that can last for another week. It’s a two-for-one style. The crucial part is the parting; make sure the section for your mohawk is perfectly centered. A crooked part is the fastest way to make a deliberate style look like a mistake. Use a tail comb and a mirror—take the time to get the lines straight.
11. Short Shaggy Mohawk
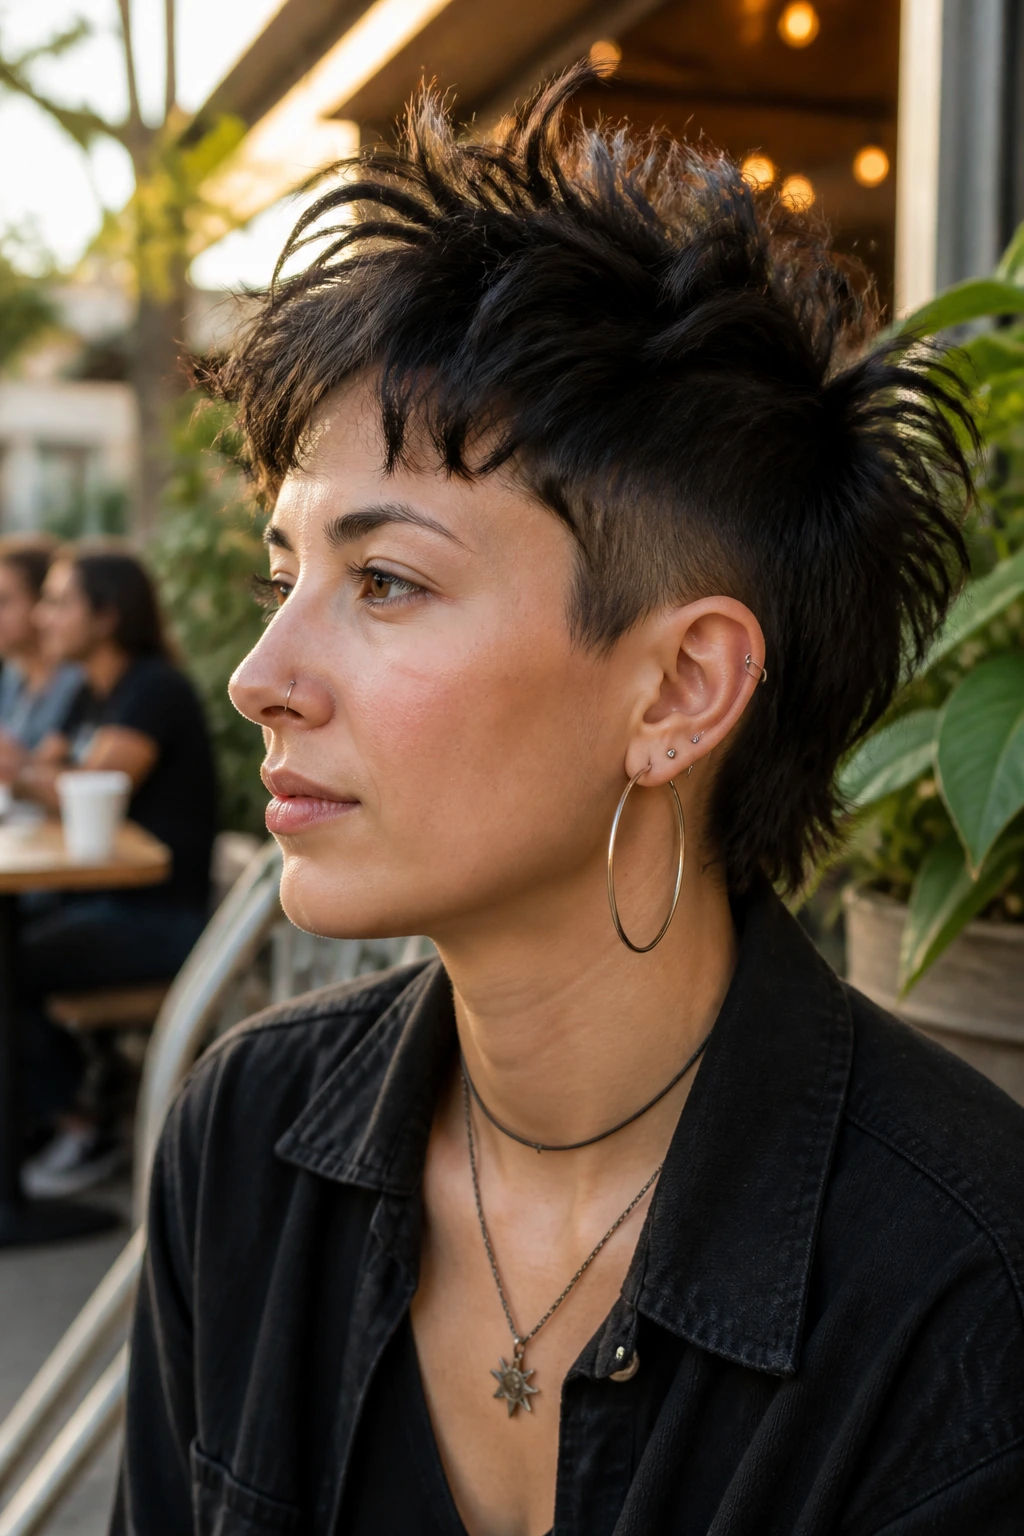
This is for the person who hates the “perfect” look. It’s chaotic, textured, and very cool. Think of it as a mullet’s more stylish, confident sibling. The top has long, jagged layers, while the sides are short but not necessarily buzzed to the skin.
You want to use a salt spray or a texturizing paste here. Don’t try to make every hair go in the same direction. The beauty of the shaggy mohawk is its randomness. Use your fingers to piece out specific strands, twisting them slightly to add definition. It is very low-maintenance—if it gets messed up during the day, it just looks more “lived-in,” which is exactly the aesthetic you are going for.
12. Tight Fade with Mohawk Top
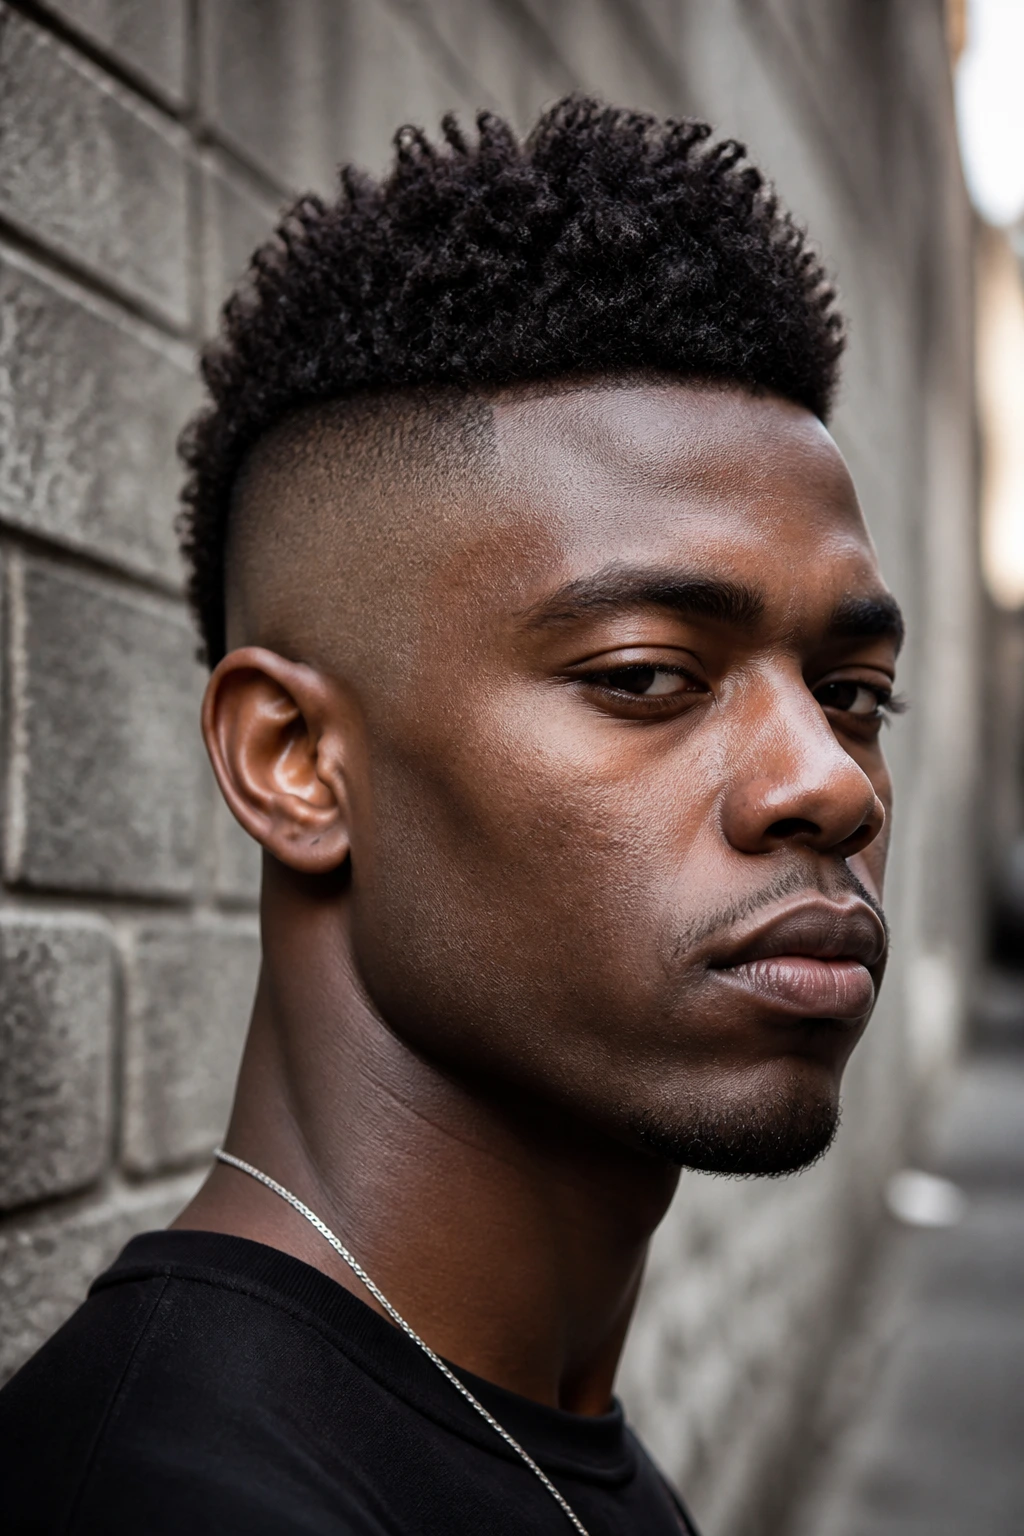
This is the most aggressive and traditionally “edgy” style on the list. It’s a high-and-tight fade that meets a defined, structured top. This look is fantastic for framing the face and drawing focus immediately to your eyes and bone structure.
Why It’s Effective
The extreme contrast between the near-bald sides and the dense top strip is visually arresting. It requires a high level of confidence to pull off, but it is also incredibly practical. You spend zero time styling the sides, and the top is usually short enough that it doesn’t require a lot of product. If you have a round face, this look is particularly good at adding angles and elongation.
Maintenance Tips
- Barber Visits: The skin fade grows out quickly. Expect to be back in the chair every ten to fourteen days if you want to keep that “just-cut” sharpness.
- Scalp Care: Since more of your scalp is exposed, don’t forget sunscreen if you spend time outdoors. A sunburned scalp is nobody’s idea of a good time.
13. Wet-Look Sleek Mohawk
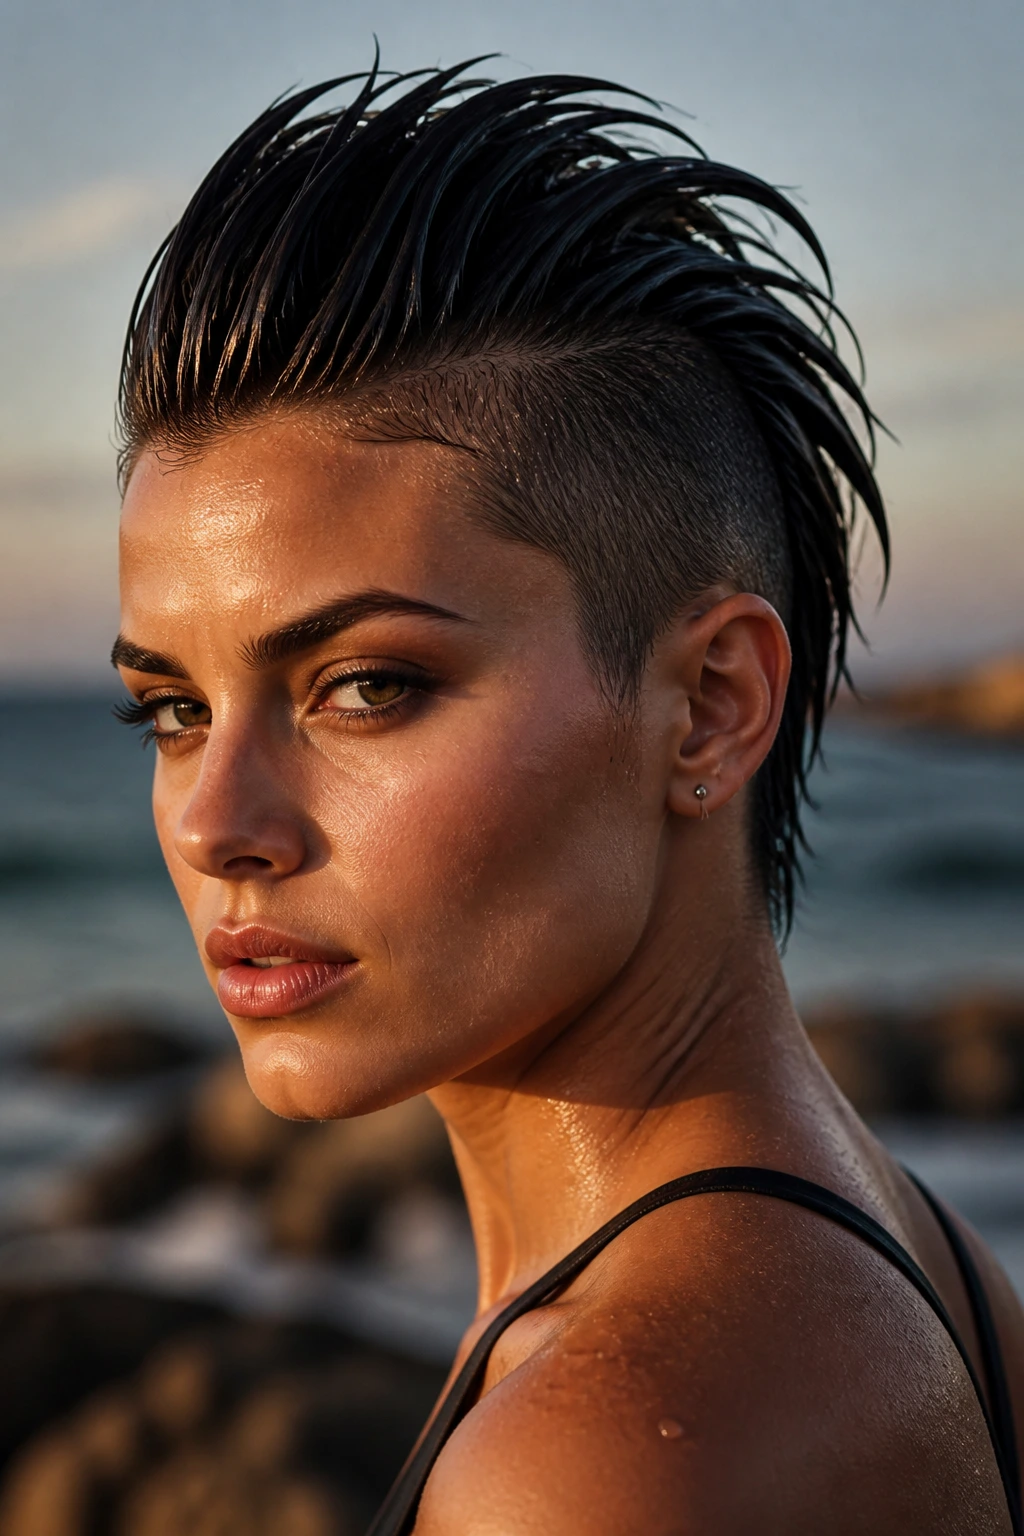
The wet-look is a classic editorial choice, but it can be a little tricky to master. The goal is to look like you just stepped out of the ocean, not like you dumped a bottle of grease on your head.
Use a high-shine pomade or a specific “wet look” gel. Start by saturating your hair with water—this is non-negotiable. Then, apply the product from roots to ends, using a wide-tooth comb to distribute it evenly. Don’t run your fingers through it afterward; you want the texture of the comb to remain visible in the hair. This is a high-glamour style that pairs perfectly with bold makeup or simple, high-neck clothing that allows the hair to be the main event.
14. Bantu Knot Mohawk
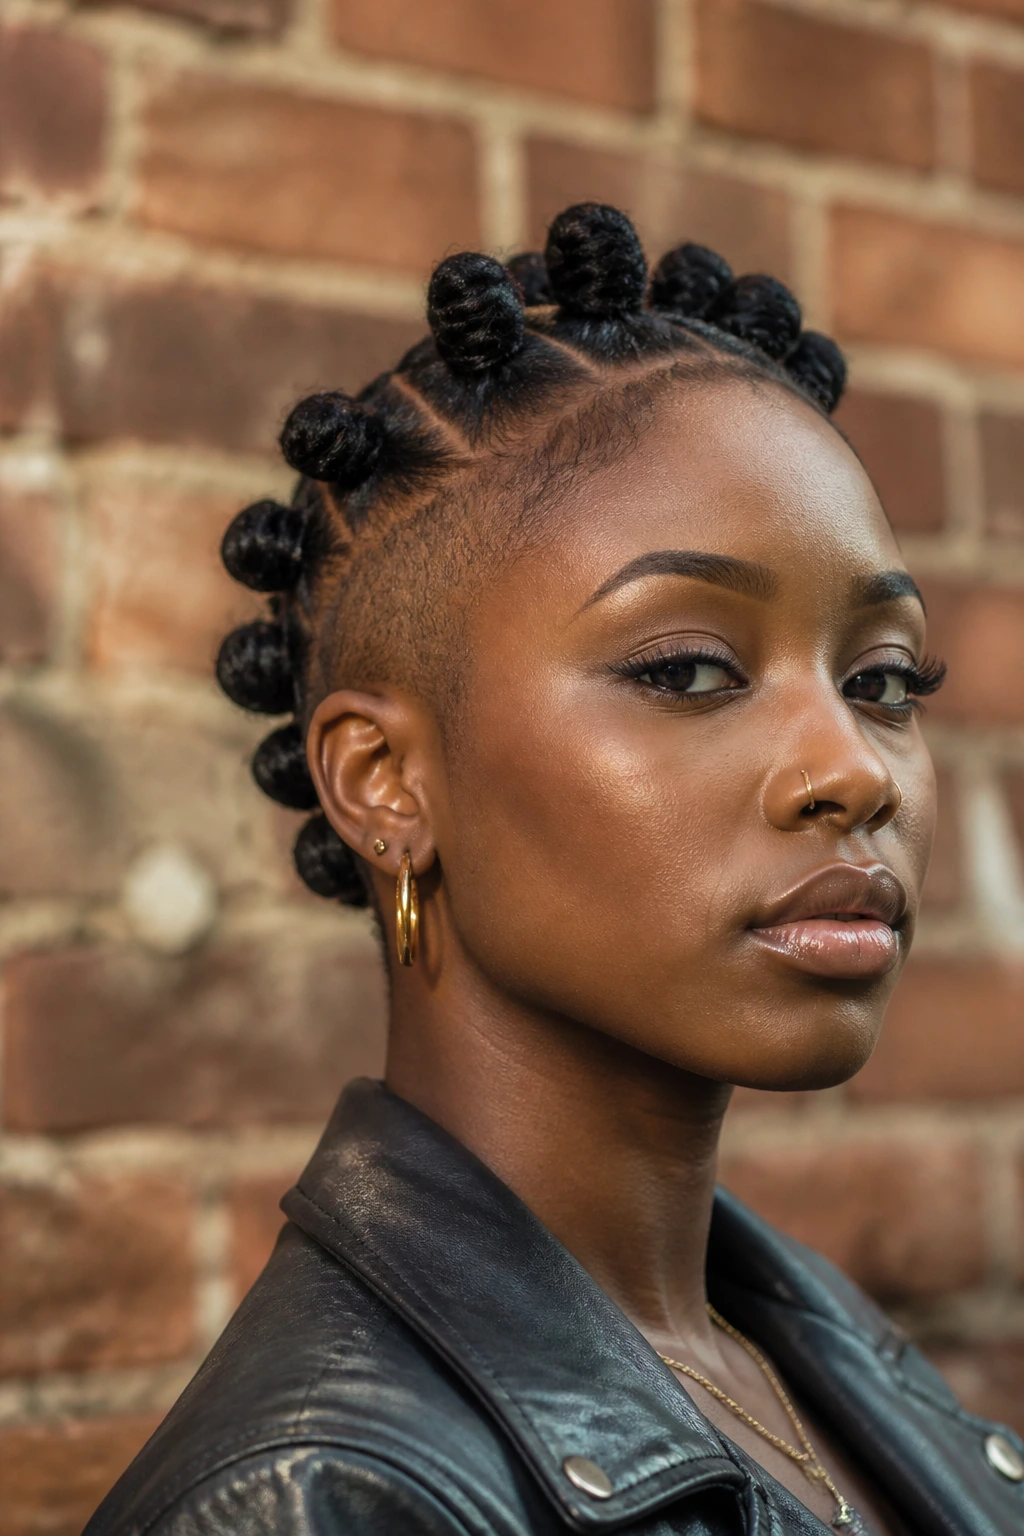
Bantu knots are a beautiful, traditional style, but putting them all over your head can be a time commitment. A Bantu knot mohawk gives you the best of both worlds: the iconic, sculptural knots run in a single, tight line down the center of your head, while the sides are tapered or faded.
This is an excellent option for natural hair because it stretches the hair beautifully. When you take the knots down, you are left with perfectly defined curls that have incredible volume. It is a protective style that is also a standalone look. Use a bit of holding spray to keep the knots tight, and make sure to wrap your head at night so the friction from your pillow doesn’t cause them to frizz.
15. Textured Crop Mohawk
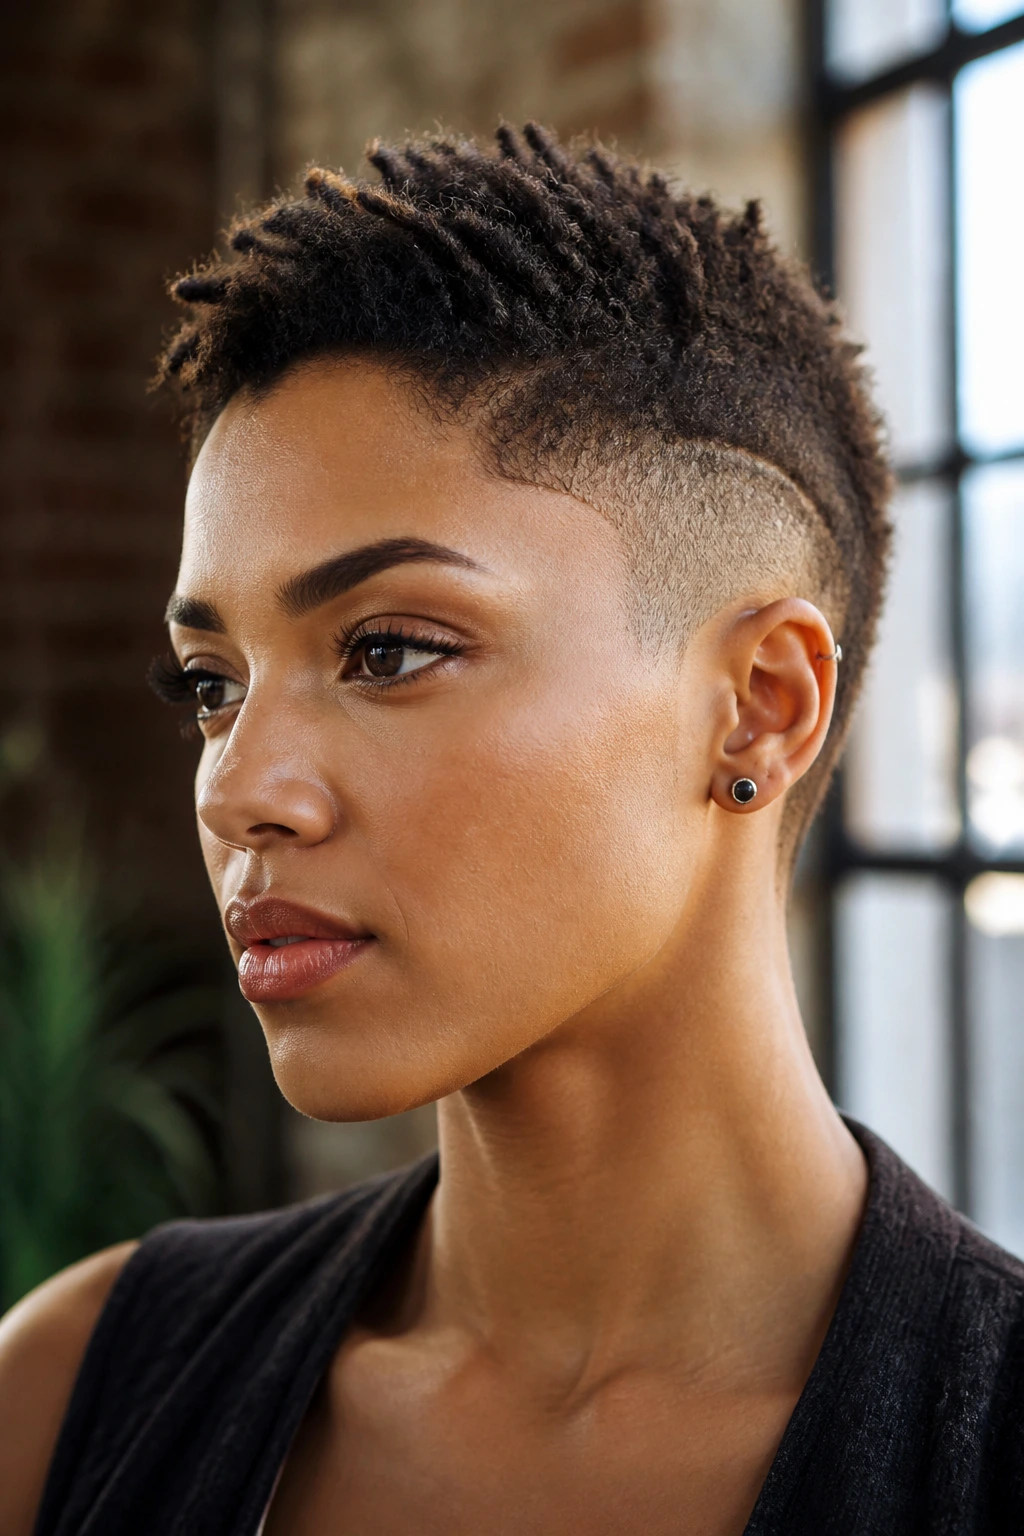
If you prefer a more “masculine” or utilitarian aesthetic, the textured crop mohawk is the way to go. This is very short, often featuring a bit of a fringe at the front that is styled upward. It’s not about long, flowing hair; it’s about a tight, condensed shape that sits close to the skull.
You need a matte clay for this. Avoid anything with a shine, as that will make the hair look oily rather than textured. Work a pea-sized amount of clay between your palms until it’s warm, then rake it through your hair, pulling the strands toward the center and slightly up at the front. It is a quick, five-minute style that lasts all day, even in wind or humidity.
16. Flat-Twist Mohawk
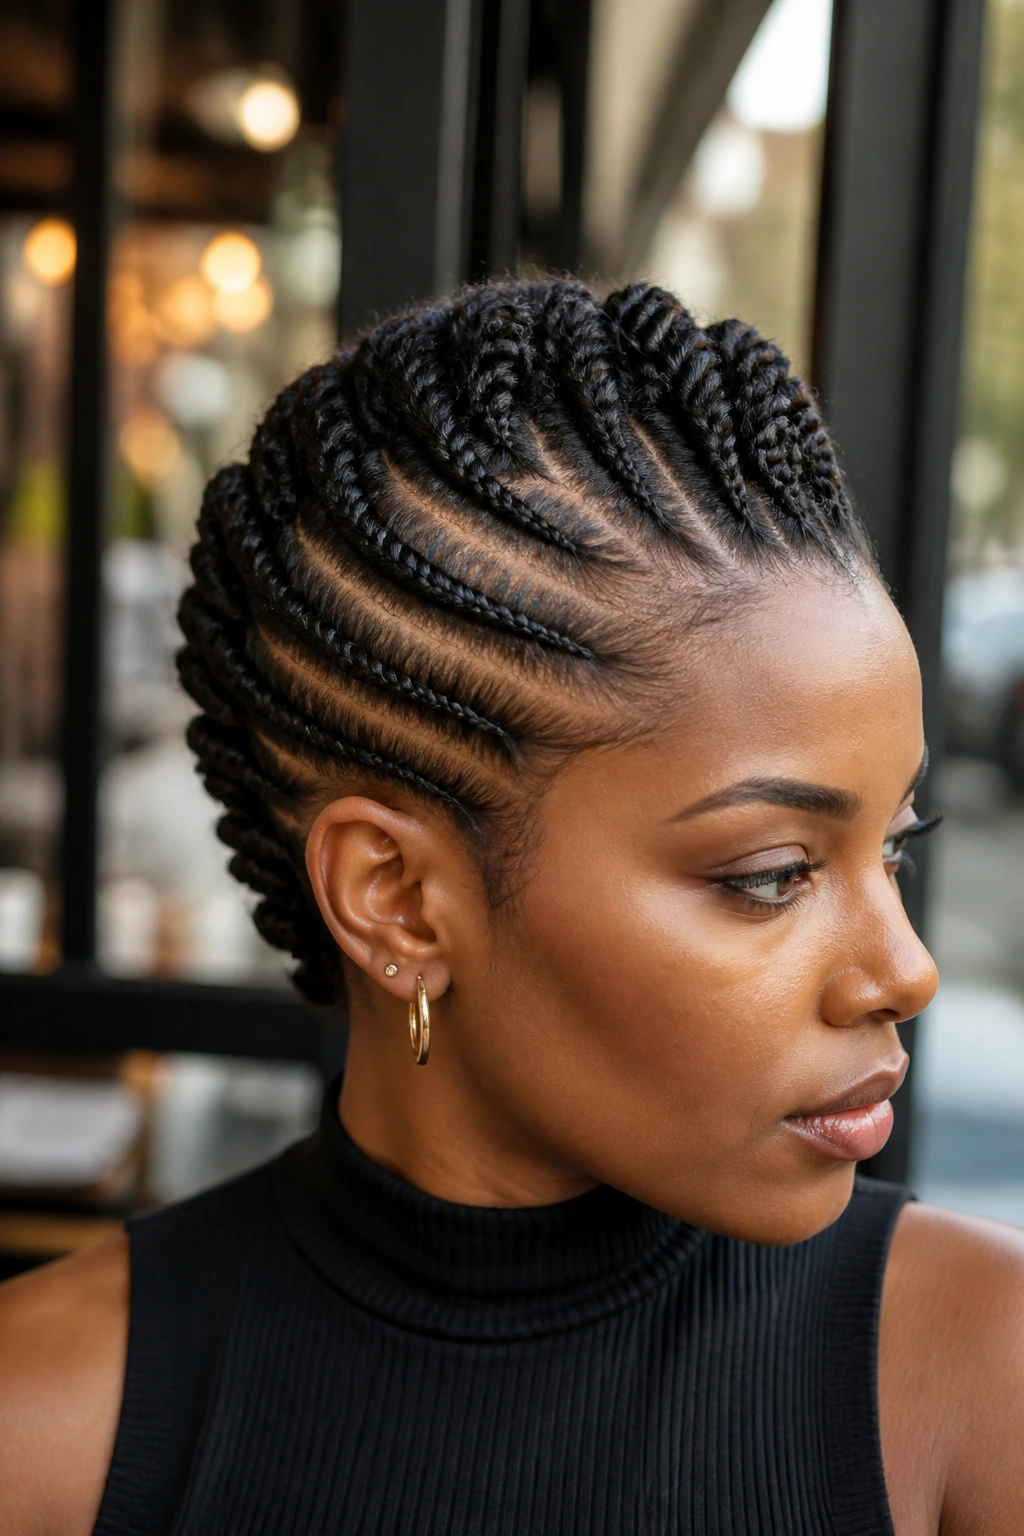
Flat twists are a gentler alternative to cornrows. They sit flatter against the scalp and offer a distinct, rope-like texture that looks very sophisticated. By creating a mohawk of flat twists, you get a clean, geometric design that highlights your natural hair pattern without the need for extensions or heavy tools.
This style is perfect for transitioning. It keeps the hair laid down and protected, which prevents breakage. You can twist the hair in small sections, making the pattern on the sides a design element rather than just a plain fade. It takes some patience to get the twists tight and uniform, but once it’s done, you can basically leave it alone for a week. Just apply a light oil to your scalp to prevent dryness and itching.
17. The Undercut Spiky Mohawk
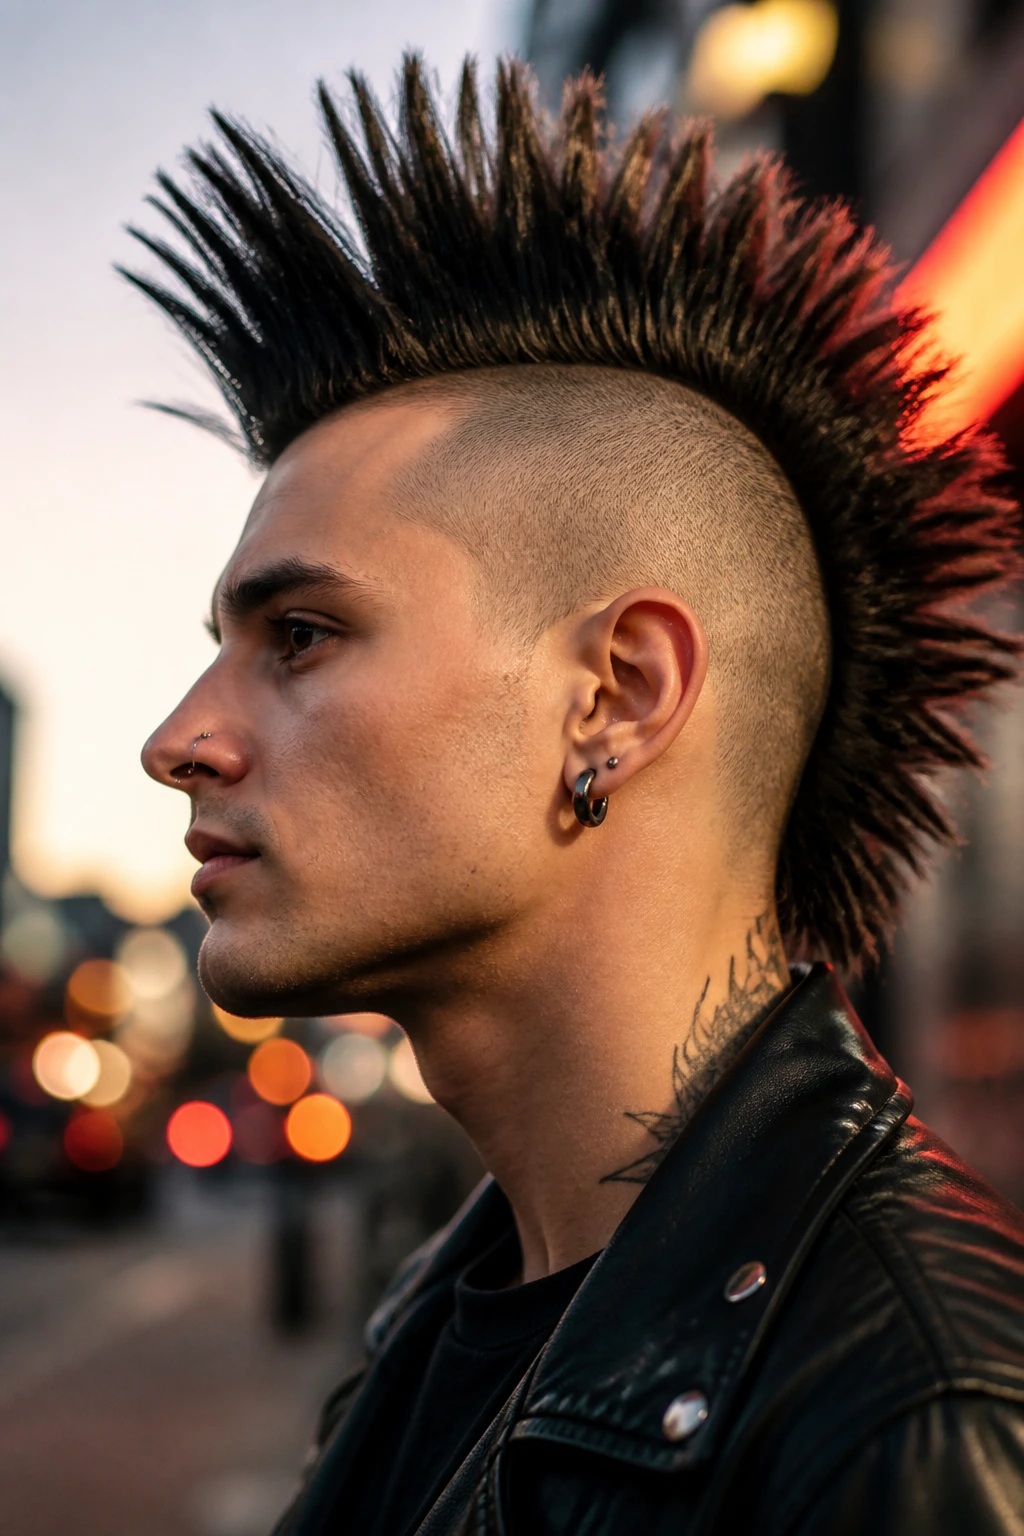
Yes, you can have spikes with natural hair. This style uses an undercut on the sides—often with a design shaved in—and longer hair on top that is teased and pinned to create a spiky, punk-inspired shape.
This isn’t about using stiff, cheap hairspray to glue your hair into a tower. It’s about using product to create hold and texture. Use a strong-hold wax and your fingers to manipulate small sections of hair, twisting them at the ends to give them that spiky appearance. It looks great on anyone who wants to embrace a bit of alternative flair. It’s a fun, expressive style that says you don’t take your hair—or life—too seriously.
18. Loose Curl Mohawk
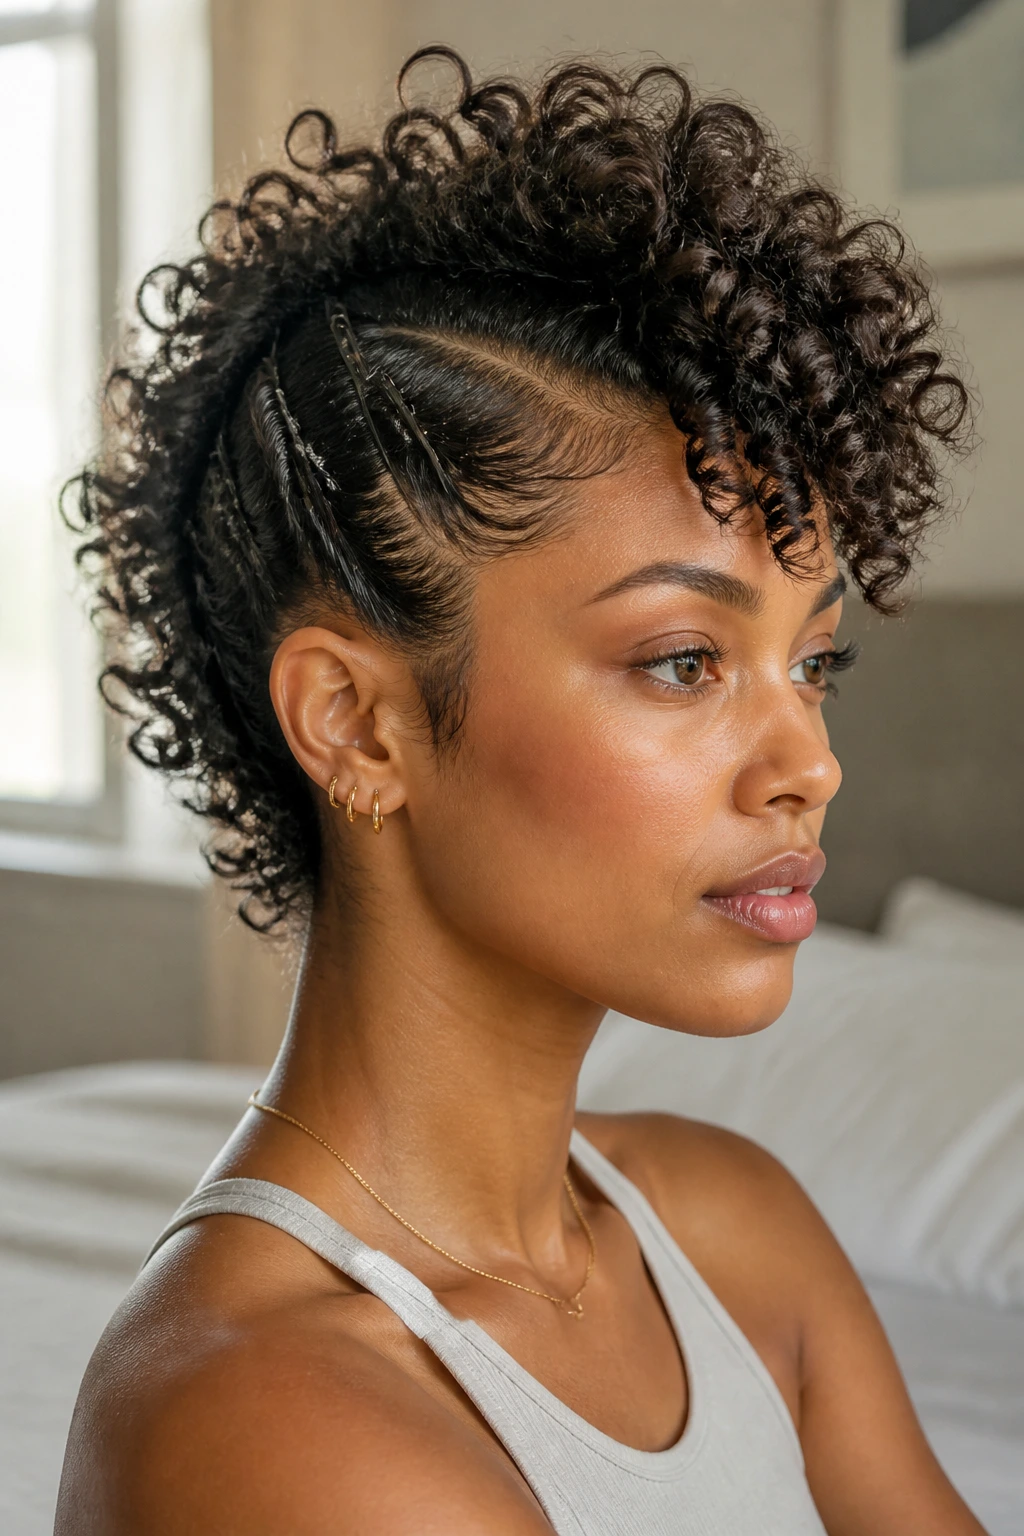
If you have a looser curl pattern, a tight, stiff mohawk might not work for you because the hair doesn’t have the density to stand up on its own. Instead, embrace the softness. Let your curls fall naturally toward the center.
You can use bobby pins to gently guide the hair toward the middle, but don’t pull it so tight that you lose the curl definition. This style is romantic and soft. Use a curl-defining cream instead of a gel. You want the hair to move, to bounce, and to frame your face with volume. If it gets a bit unruly, that’s actually better. A loose, slightly messy mohawk looks intentional and chic.
19. The “Faux-hawk” with Bobby Pins
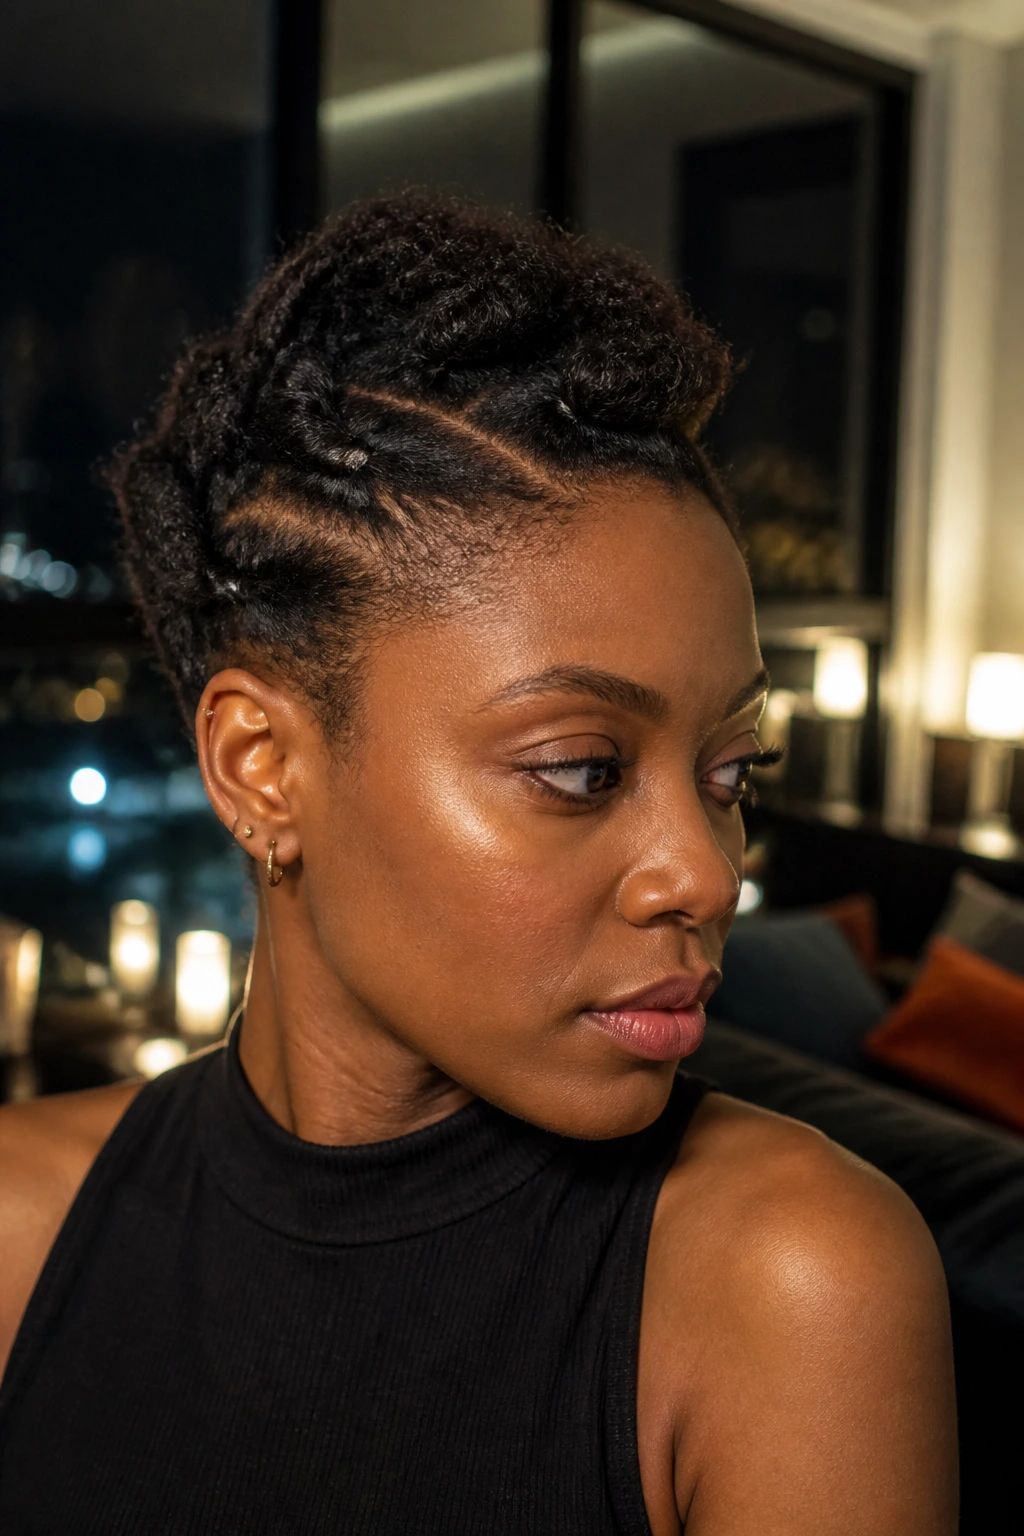
We touched on the “no-cut” idea earlier, but let’s talk about the minimalist version. This is for when you have medium-length hair and just want to switch up your look for a night without the commitment of the bobby-pin-heavy structure.
Simply part your hair into three sections: left, right, and center. Pull the left and right sections toward the center, twisting them once or twice to add security, and pin them at the back of the head. Don’t worry about perfect lines. The messier it is, the more modern it looks. This is the perfect “last minute” hairstyle when you need to look put-together in under three minutes.
20. Defined Wash-and-Go Mohawk
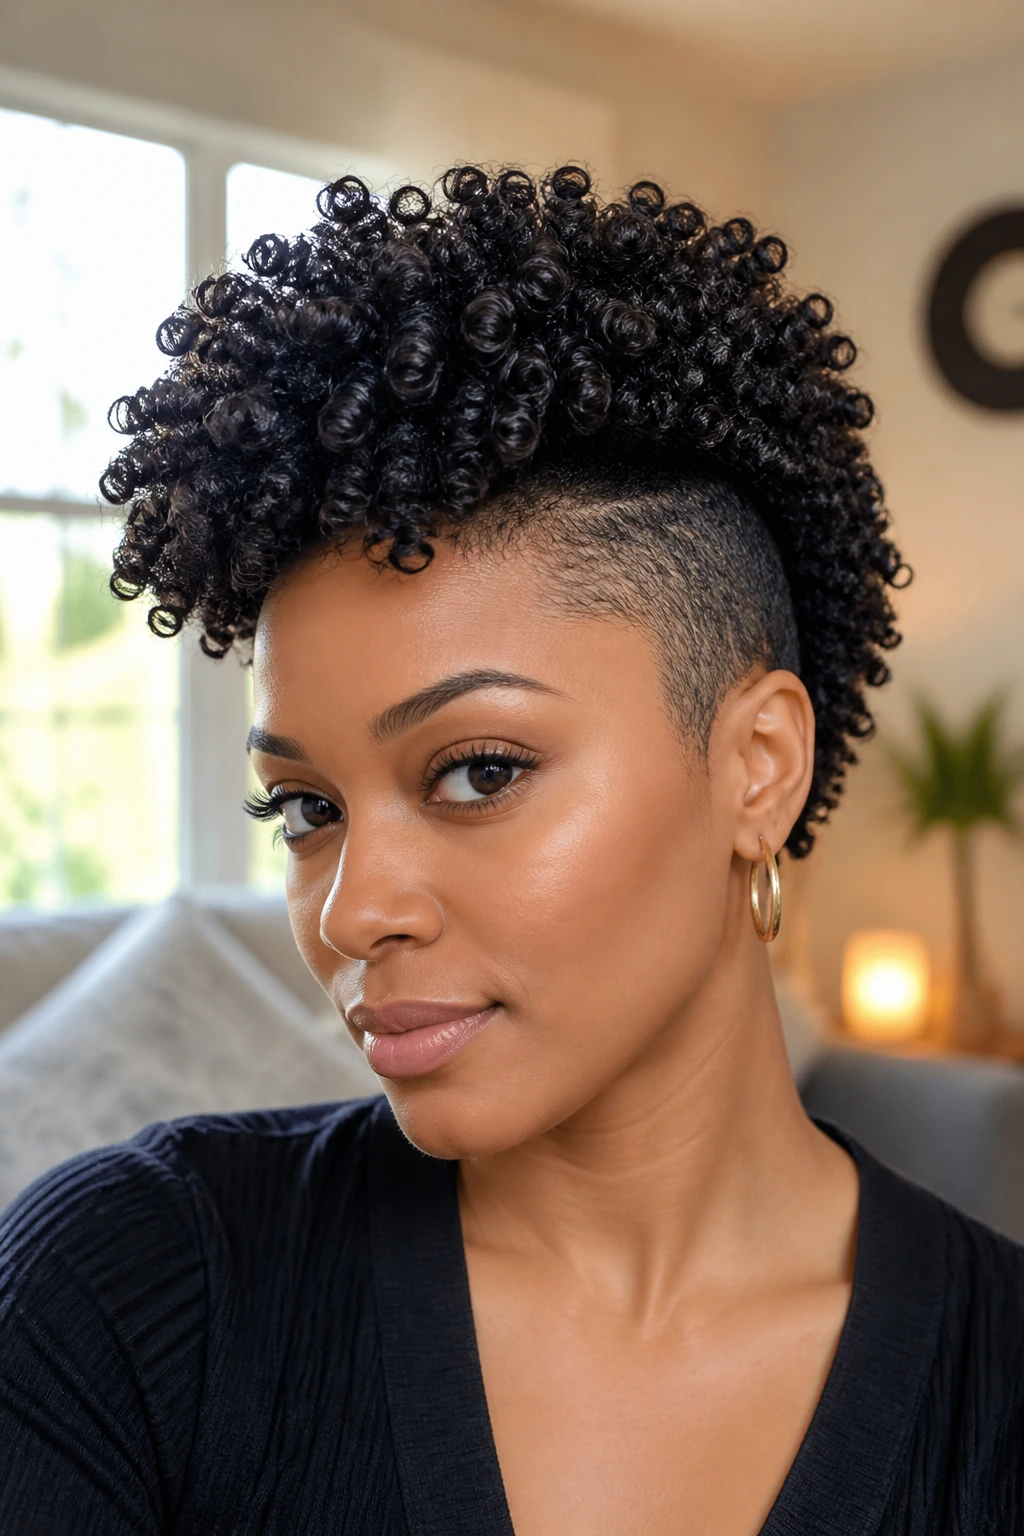
Finally, we have the most natural method of all. No pins, no braids, no twists. Just your natural hair, a great cut, and some product.
The Foundation
This style relies entirely on the shape of your haircut. You need a barber or stylist who understands how to cut your hair specifically for a mohawk shape. When your hair is wet, apply your favorite leave-in conditioner and a defining gel. Use a diffuser to dry your hair, gently pushing it toward the center as you go.
This style is honest. It shows your actual curl pattern. It’s not trying to be anything other than what it is. If you want to elevate it, add some gold hair cuffs or a few decorative bobby pins near the temples. It’s the ultimate expression of confidence—wearing your hair exactly as it grows, just with a little extra shape.
Final Thoughts
Choosing a mohawk style for short hair isn’t just about picking a silhouette that looks good in a picture; it’s about understanding the relationship between your hair texture and the gravity you’re working against. Whether you go for the sleek, pomade-heavy look or the loose, natural fro-hawk, the key is execution.
Don’t be afraid to experiment with your products. What works for a braided style will likely be too heavy for a loose curl style. Pay attention to how your hair reacts to different gels, creams, and waxes. And remember: the best version of this cut is the one that feels like an extension of your own personality. If you feel confident in it, it will look intentional, even if you’re still learning how to perfect the technique. Start with the simpler, no-cut styles if you’re hesitant, and then work your way up to the fades and the sculptural coils as you get more comfortable with the shape. Your hair is the ultimate accessory—have some fun with it.
