



A round face can wear a lot of hair color, but hazelnut brown highlights for round faces work best when they pull the eye downward instead of outward. That sounds picky. It is.
I like hazelnut for this job because it sits in that useful middle space between chestnut, caramel, and soft espresso. It has warmth, but not the kind that turns brassy after a few washes. On darker hair, it reads as depth first and light second, which matters when the goal is shape, not just brightness.
The biggest mistake is putting the lightest pieces right at cheek width. That can make the widest part of the face louder, and nobody needs that. Place the light at the temples, below the cheekbone, or down through the collarbone area, and the whole cut starts to look longer and cleaner without getting harsh.
Some of the looks below are quiet and polished. Others lean a little bolder. All of them use placement, not just color, to flatter a round face — and that is where the difference lives.
1. Cheekbone-Skimming Hazelnut Money Pieces for Round Faces
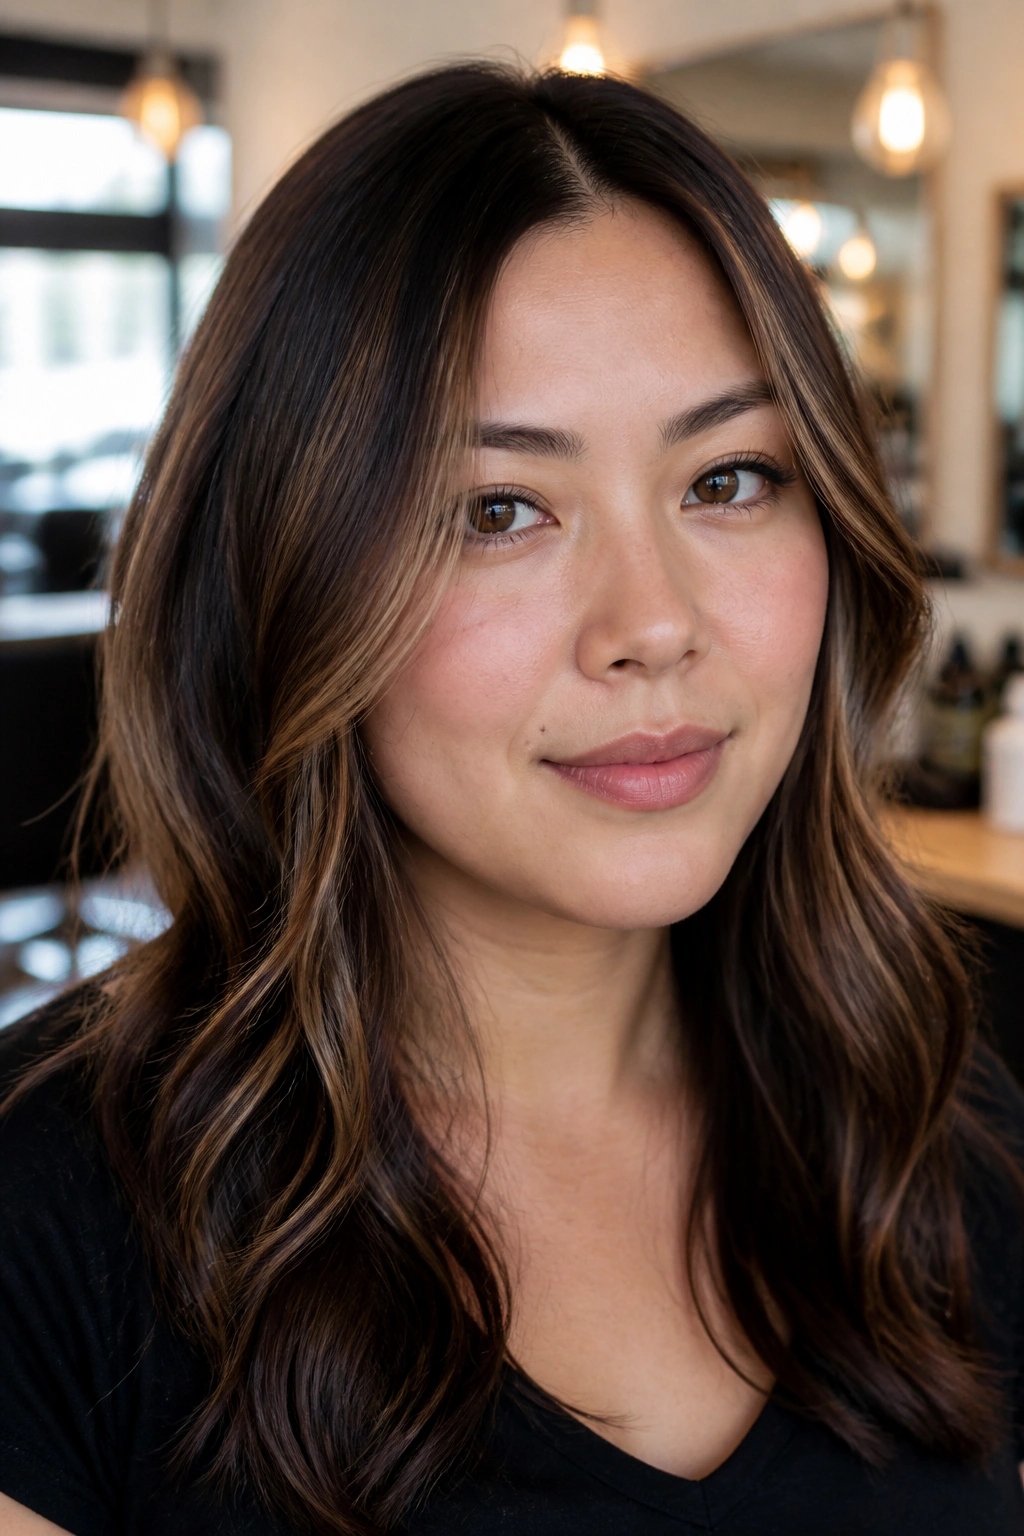
These are the pieces that make people look twice, but they work because they’re restrained. A hazelnut money piece should skim the cheekbone, not sit on top of it like a neon sign. When the front strands start a little lower and taper toward the collarbone, the face reads longer almost immediately.
Why This Placement Works
The trick is width control. Keep each face frame narrow — about ½ inch on finer hair, up to ¾ inch on thicker hair — so the light feels vertical instead of broad. Ask your colorist to leave a soft root shadow and bring the brightest point just below the cheekbone, then soften the ends with a neutral hazelnut gloss.
- The front pieces should be 2 shades lighter than the base, not 4 or 5.
- The root area should stay soft so the grow-out doesn’t look choppy.
- The ends can carry more warmth because that helps the eye move downward.
- A tiny bit of bend in the hair shows the placement better than pin-straight styling.
Skip the bright stripe at cheek level. That one detail changes everything.
2. Soft Root Shadow Hazelnut Balayage
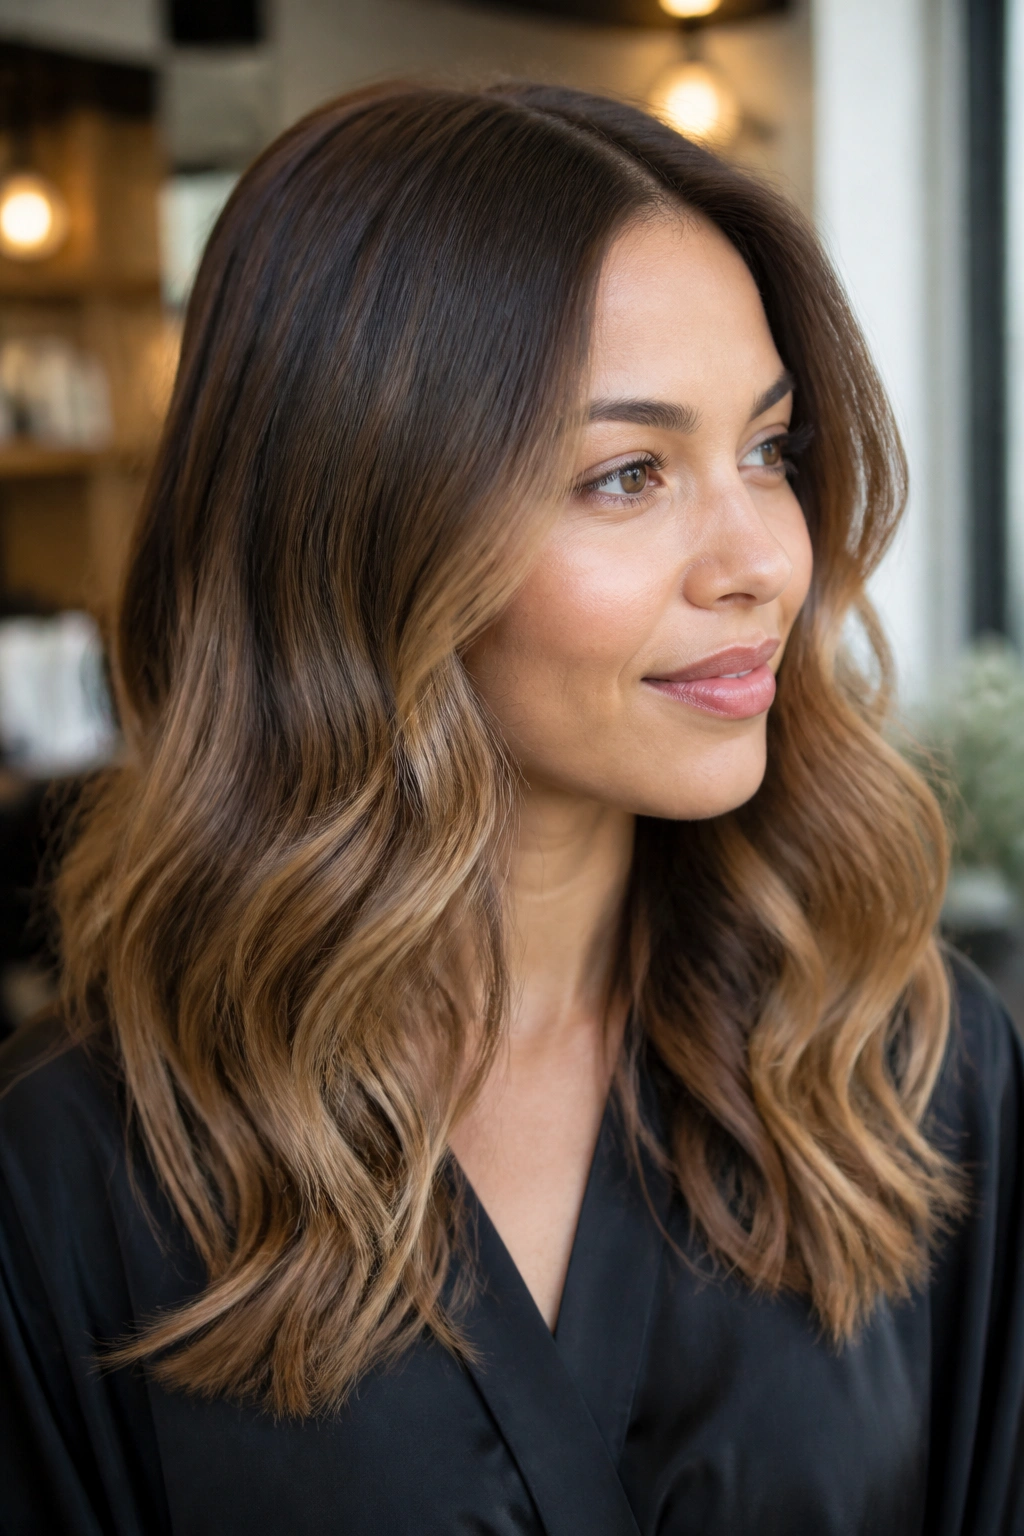
A soft root-shadow balayage is the least fussy hazelnut look in the bunch, and it may be the most flattering. The root stays deeper, especially at the temples, so the head doesn’t look wide at the top. Then the hazelnut light begins a few inches down and fades out toward the ends.
That spacing matters. If the highlights start too high, they can spread light across the broadest part of the face. When they begin lower — around the mid-lengths or even closer to the chin on longer hair — they draw the eye down. The effect is subtle, but in the mirror it makes a real difference.
I like this look on people who don’t want to sit in the salon every month. It grows out quietly, and the shadowed root keeps the color from turning flat. A loose wave helps a lot here, because the bends show the difference between the darker top and the softer hazelnut ends.
Best for: shoulder-length cuts, long layers, and anyone who wants dimension without streaks.
3. Micro-Babylights Over a Chocolate Brown Base
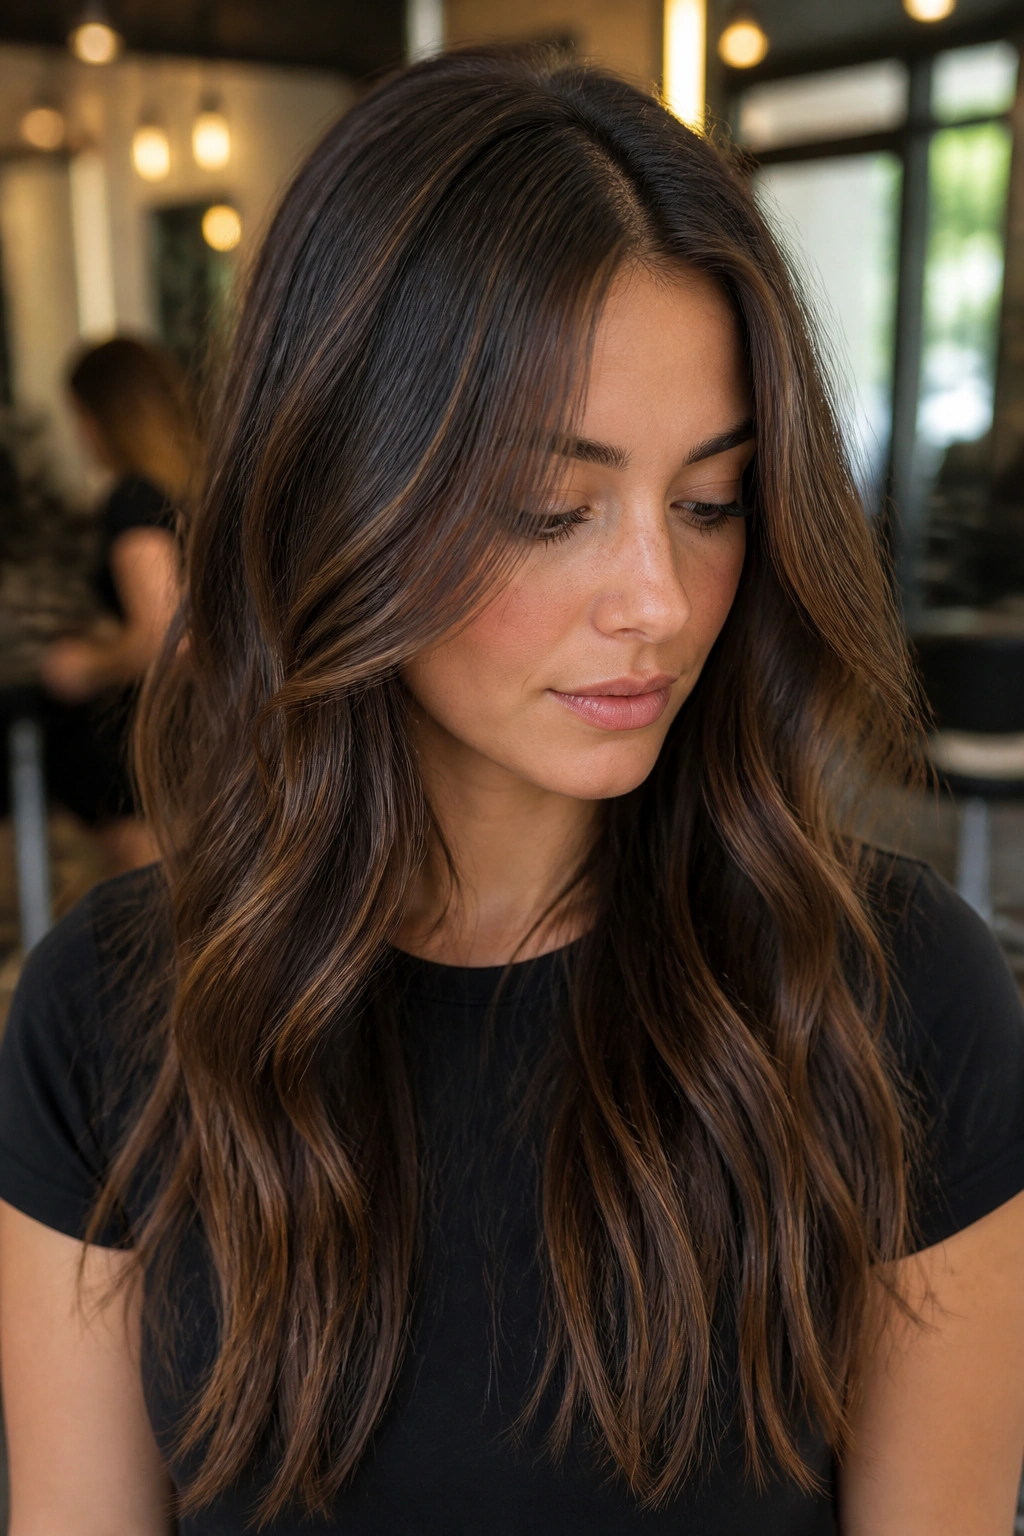
Why do babylights work so well on a round face? Because they break up the color without creating a hard line. Tiny hazelnut ribbons scattered through a chocolate brown base give you movement, but not the chunkiness that can push a face wider.
The best version uses very fine slices — almost threadlike in the top layer. A good colorist will keep the concentration higher around the part and temples, then feather it out through the crown. That keeps the lift where it helps most and avoids a stripe across the cheeks.
How to Ask for It at the Salon
Tell them you want micro-weaves, not chunky foils. Ask for a hazelnut toner with neutral warmth, since too much gold can look orange on dark brown hair. If your hair is fine, babylights are especially useful because they make the surface look fuller without screaming for attention.
The maintenance is gentle too. A gloss every 6 to 8 weeks keeps the tone soft, and the grow-out stays tidy. That is one of the reasons I keep coming back to this style for round faces: it changes the shape without asking for a dramatic commitment.
4. Curtain Bang Highlights That Start Low
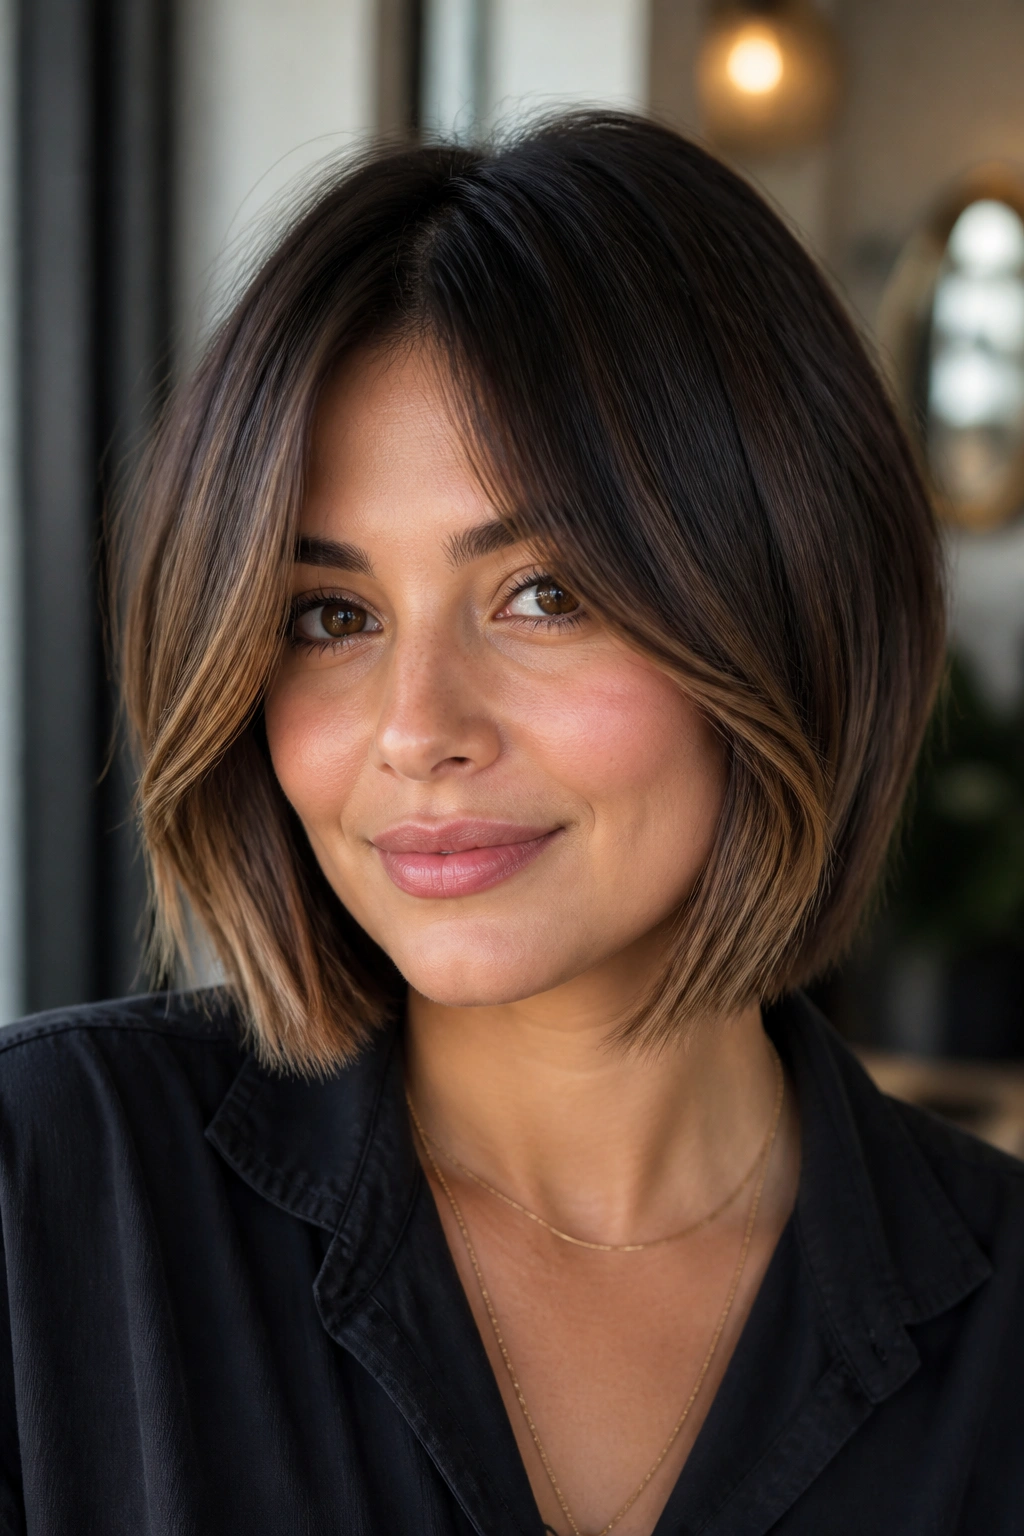
Picture a chin-length bob with curtain bangs and a bright front piece starting right at the eyebrow. Too wide, right away. Now picture the same cut with hazelnut ribbons that begin closer to the cheekbones and drift down through the bang edges. Much better.
That lower start point matters on round faces because curtain bangs already create width around the upper face if they’re too blunt. Soft hazelnut highlight around the outer edges keeps the bang area airy. The eye follows the lighter strands down and out, which is the direction you want.
- Keep the brightest section on the outer third of each bang.
- Let the light taper before it hits the widest part of the cheek.
- Use a round brush or blow-dry brush to bend the ends away from the face.
- Avoid a blocky money piece directly under the brow.
The smartest version of this look feels loose, not obvious. The bang should move, not announce itself.
5. Shoulder-Length Hazelnut Ribbons
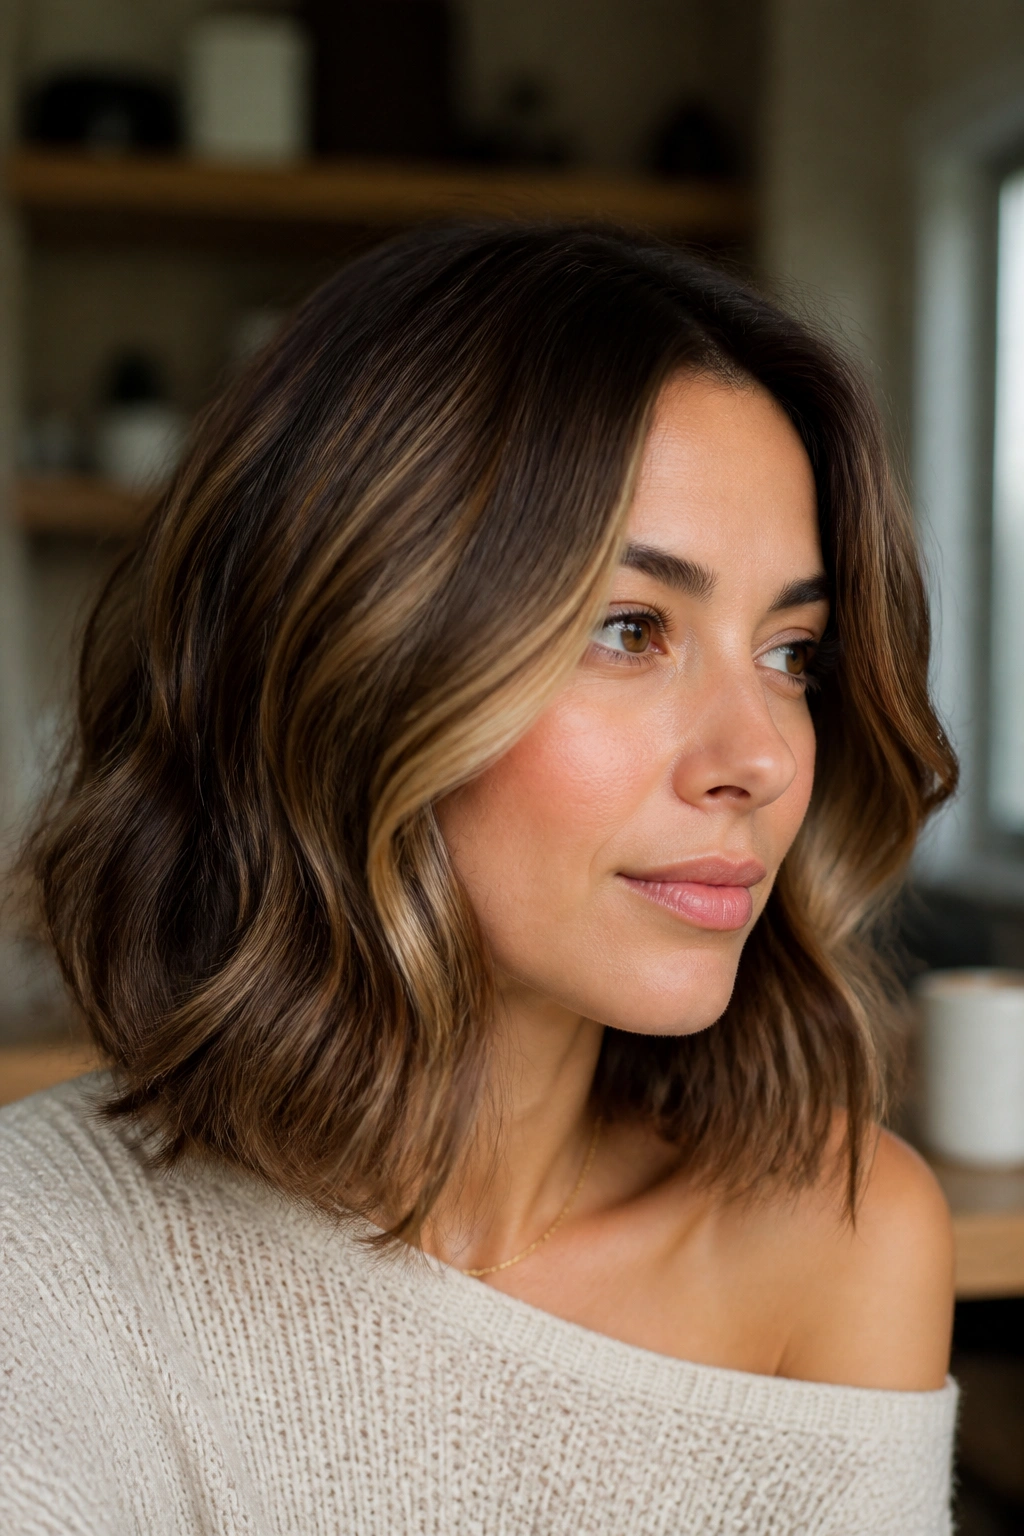
Shoulder-length hair can be tricky on a round face because the cut sits right near the part of the face that needs the most visual narrowing. Hazelnut ribbons solve that when they’re spaced out with intention. I like them best on a lob with a soft bend, where the color runs in narrow lanes instead of one big bright panel.
The real win here is rhythm. Place a lighter ribbon near the temple, another just below the cheekbone, and a softer one through the mid-lengths. That staggered placement keeps the eye traveling instead of stopping at the cheeks. It also works well if your hair has some wave, because the bends spread the light in a more interesting way.
One thing I would avoid: packing too much brightness on the surface of a blunt lob. That can make the cut feel boxy. Keep the underlayers a shade deeper, and let the hazelnut live mainly in the pieces that swing forward.
This is a good “wear it every day” option. It looks polished when blown out and easy when air-dried.
6. Cool Beige-Hazelnut Veils
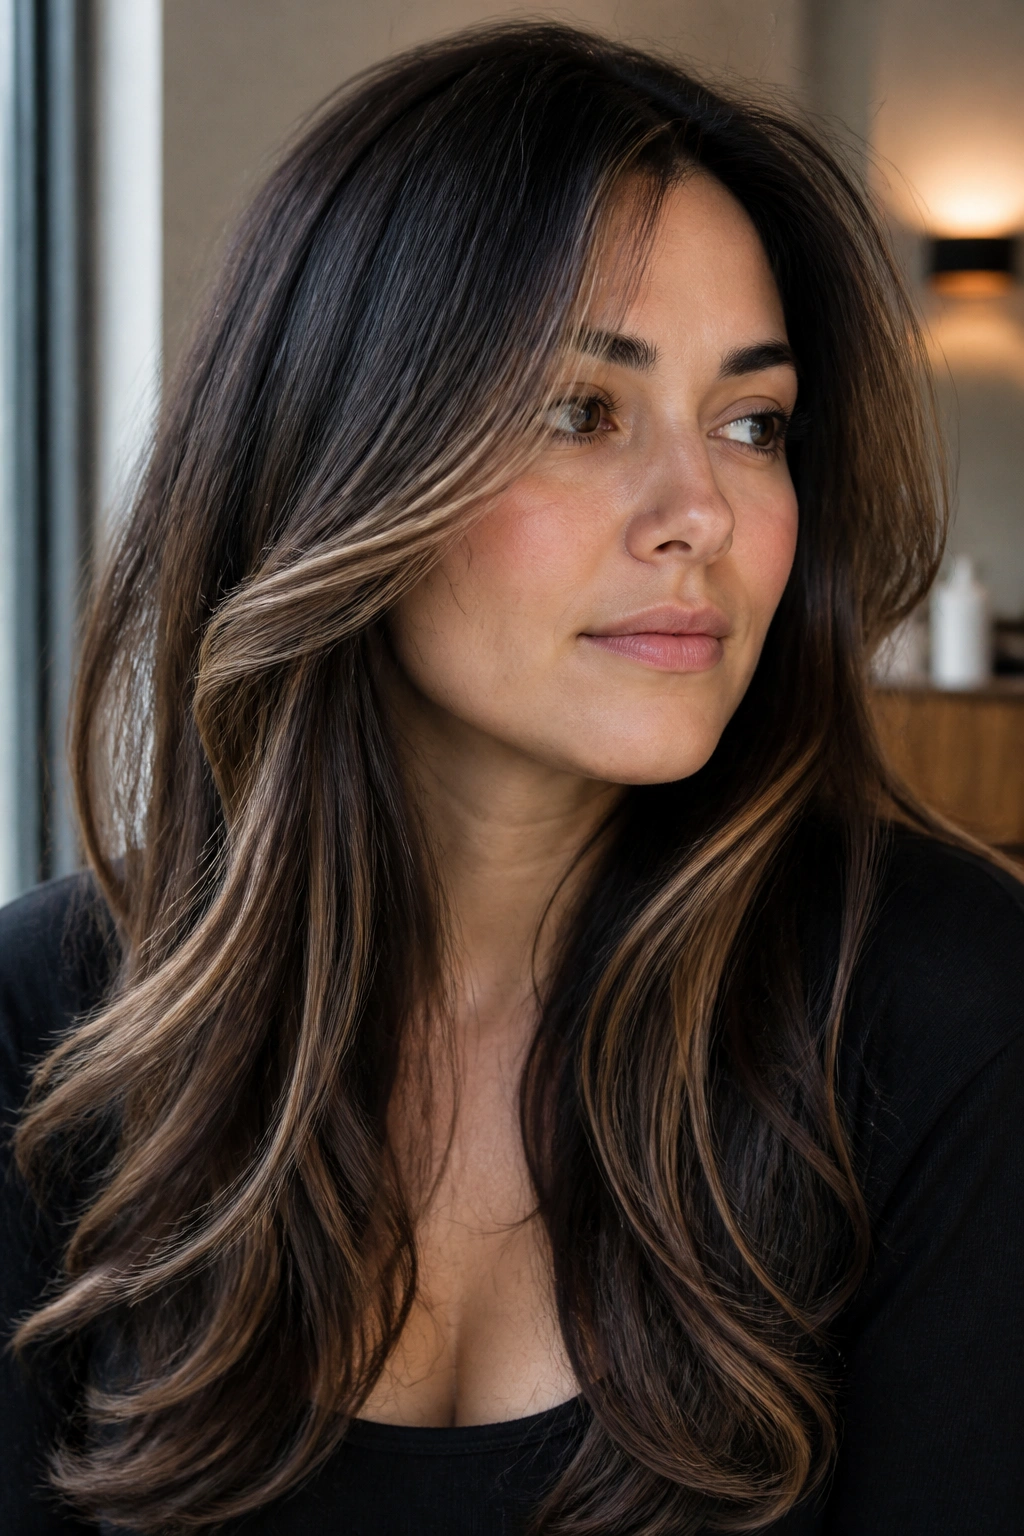
Unlike warm caramel, a cool beige-hazelnut blend stays quieter around the face. That matters if your skin runs pink, rosy, or neutral-cool, because a gold-heavy highlight can fight your undertones and make the face look wider or redder than it is.
This version uses a softer, smokier beige over a dark brown base. The result is not icy. It’s more like the color of toasted hazelnut shells with a little ash folded in. That cooler edge helps sharpen the outline of the face without adding bright contrast at the cheeks.
I would choose this look for someone who likes brown hair but wants more dimension than a single-process color. Ask for thin veils, not a wide balayage panel, and keep the face frame narrow. If the front pieces get too warm, the whole look can drift into copper, which is a different mood altogether.
Best for: cooler undertones, dark espresso bases, and low-contrast color lovers.
7. Temple-Lift Hazelnut Highlights for Round Faces
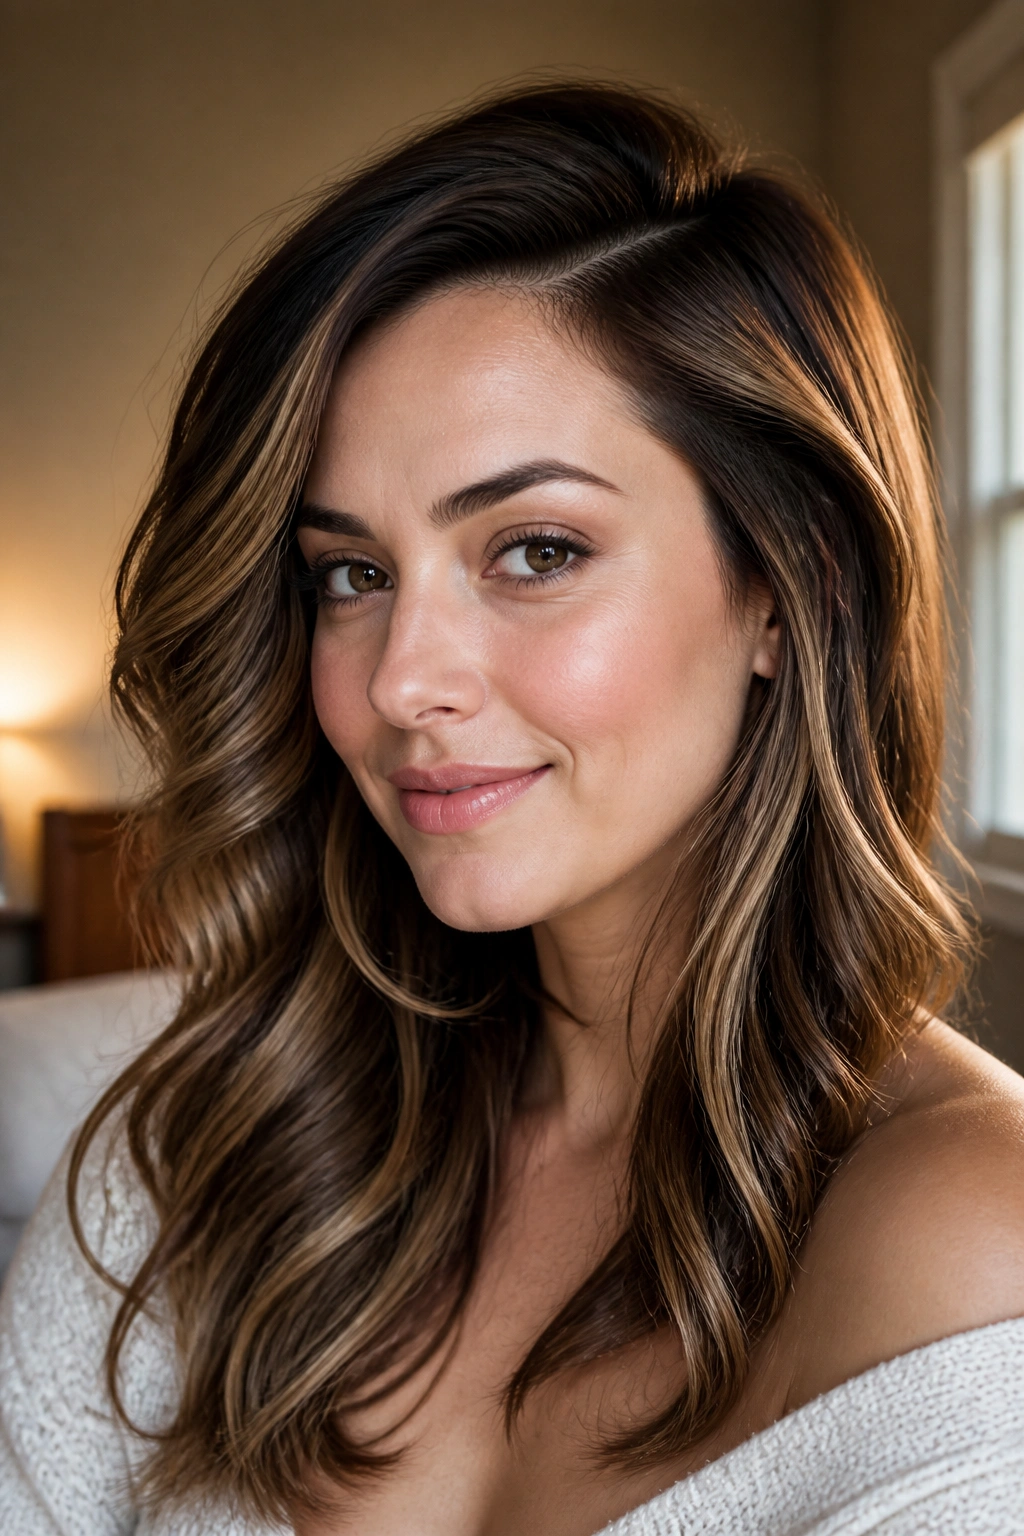
A deep side part changes the whole game. It adds an angled line across the top of the head, which breaks the symmetry that often makes a round face look broader. Add hazelnut highlights at the temples, and you get lift where it counts.
Where the Light Should Sit
The brightest strands belong on the heavier side of the part, starting at the temple and sliding down toward the jaw. Keep the opposite side softer so the shape does not spread evenly across the face. That unevenness is the point.
- A side part should sit about 1 to 2 inches off center.
- The lightest pieces should stop above the cheek’s widest point.
- A soft wave gives the highlights a diagonal line instead of a flat stripe.
- A root melt keeps the look from turning puffy at the crown.
This is one of those styles that looks even better in motion. Tuck one side behind the ear, and the face instantly seems longer. Small change. Big payoff.
8. Hidden Underlayer Hazelnut Panels
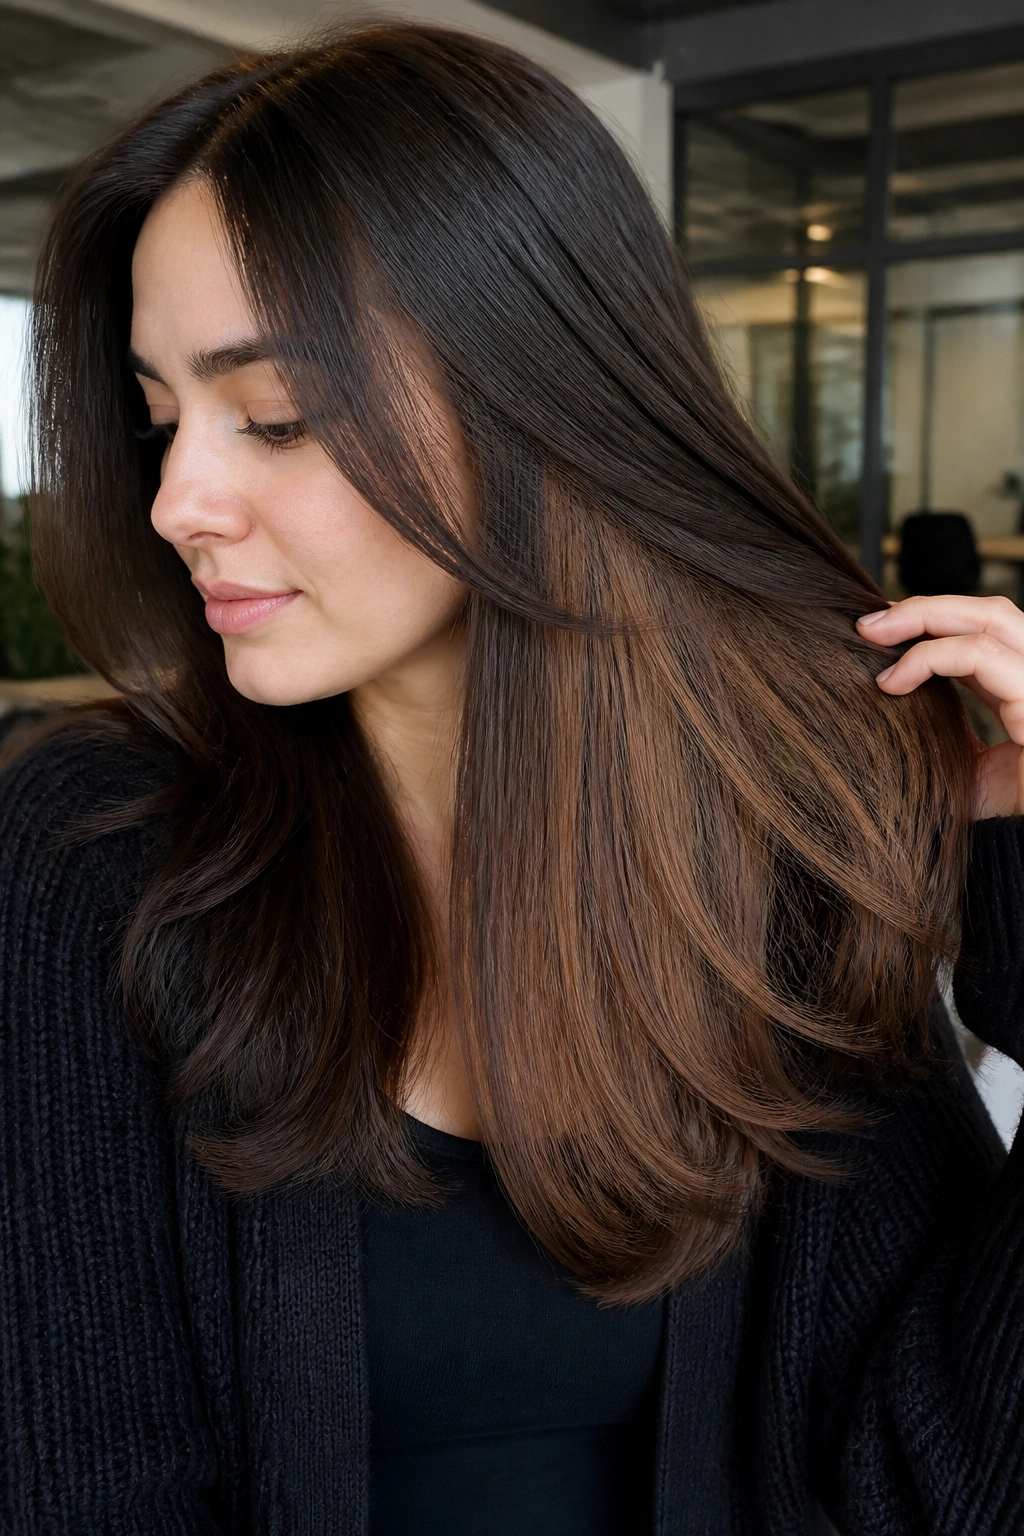
This is the sneaky one. Hidden underlayer highlights give you color that shows up when the hair swings, curls, or gets tucked behind the ear, which makes the look feel more alive than it does in a straight mirror shot.
For round faces, that hidden placement is a gift. The light sits lower on the head, so it doesn’t crowd the cheeks. It peeks out through the ends and lower layers instead of sitting front and center. That keeps the top of the face calm and lets the shape open up near the jaw.
I like this approach on straight or slightly wavy hair, especially when the cut has layers. The underlayer can be a shade lighter than the surface hair — hazelnut over deep brown works well — and you only see the contrast when the hair moves. It is office-friendly, but not boring.
If you want a low-key version of highlights that still gives dimension, this is the one I’d point to first. It has range. It also hides grow-out better than most brighter looks.
9. Curly Contour Hazelnut Highlights
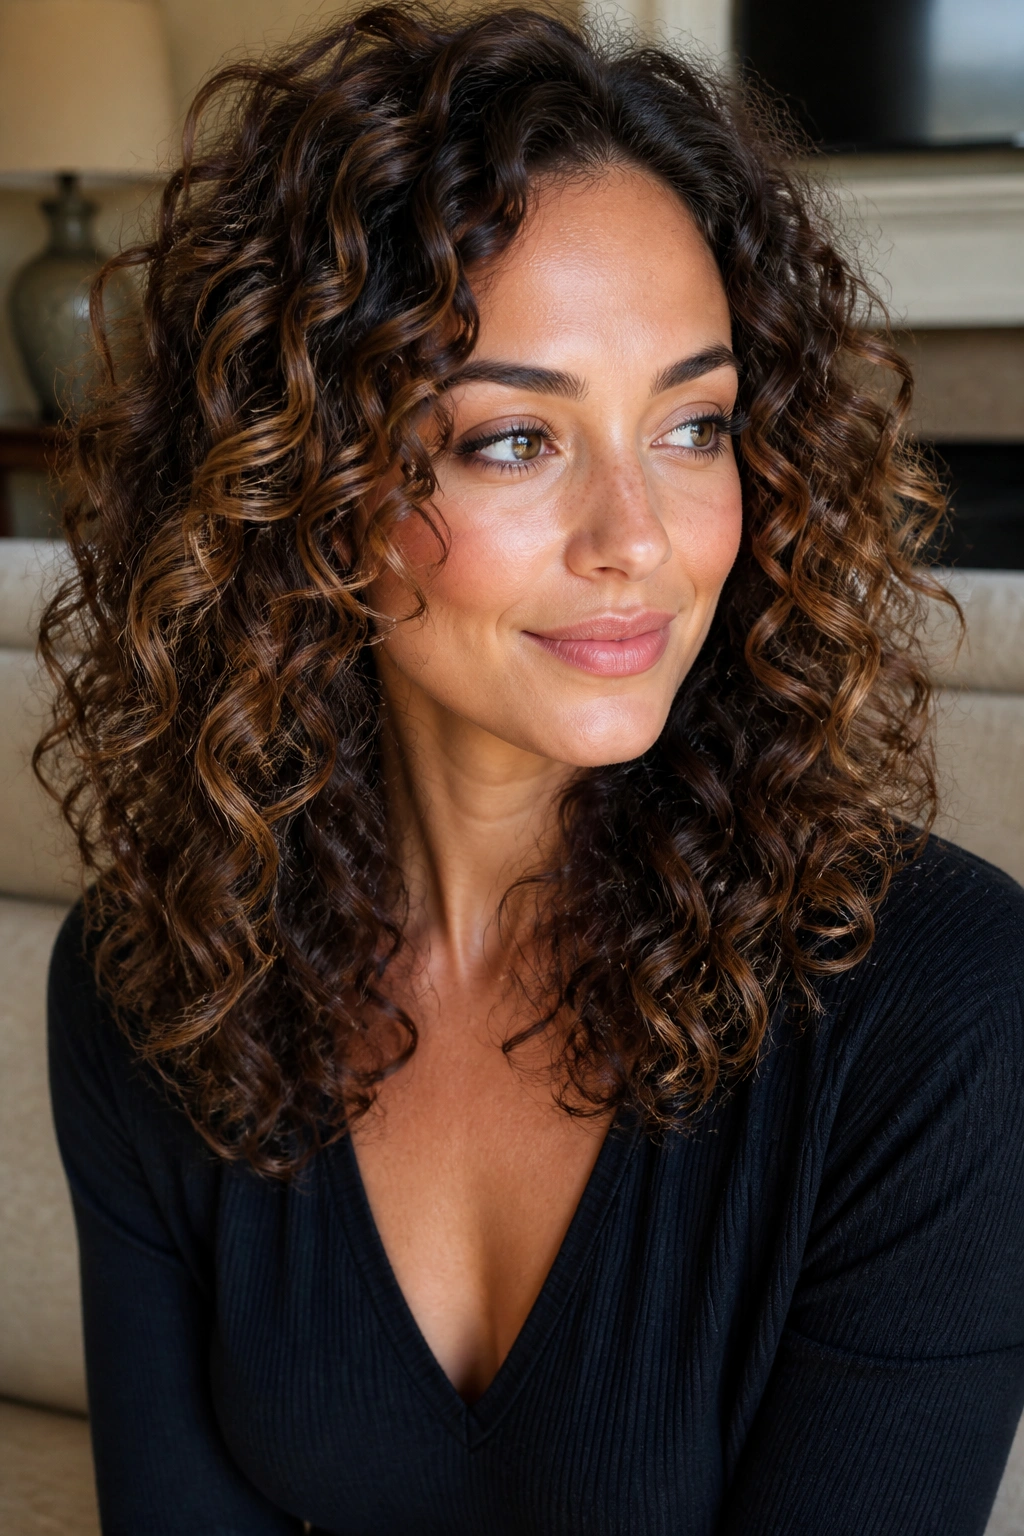
What happens when curls get the right highlight placement? The face stops reading as one round shape and starts reading as a stack of curves with depth. That’s a huge difference, especially if the curls cluster around the cheeks.
The key is to paint the outside edge of the curl family, not every coil. Hazelnut highlights should live on the outer curve of the ringlet, around the temples, cheekbones, and lower layers. Leave the innermost parts deeper so the curl pattern keeps its shape. If everything is bright, the hair gets puffy fast.
How to Work With Curl Pattern
Use larger sectioning than you would on straight hair. A stylist who understands curls will place the light where the curl naturally springs forward, not where the hair looks flat in a foil. That keeps the finish dimensional instead of stripey.
I love this look because it gives round faces a little contour without turning the curls stiff. The result feels soft, but the shape is better defined. That’s the sweet spot.
10. Collarbone-Melt Hazelnut Balayage
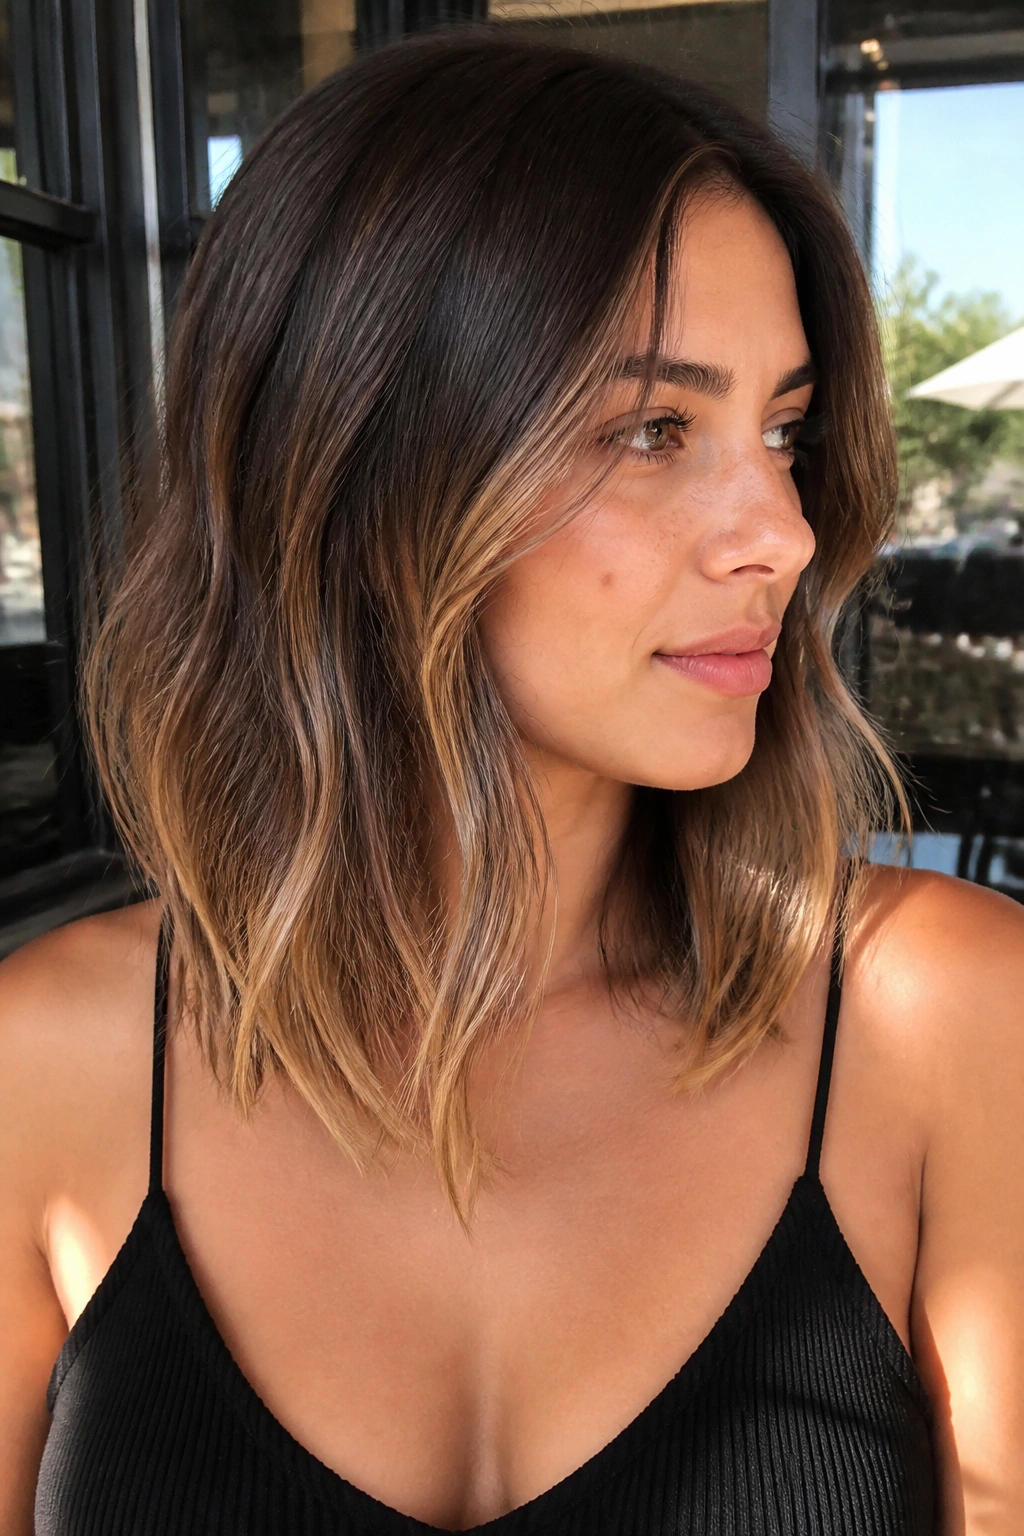
A collarbone-length melt is one of the easiest ways to make a round face look longer. The name says it all: the color should travel downward, from a deeper root through hazelnut mid-lengths and into lighter ends that sit near the collarbone or below.
That downward motion matters more than people think. If the light hangs out around the cheeks, it expands the face. If it drops toward the collarbone, the eye follows it lower, which visually stretches the whole cut. Long layers help too, because they stop the ends from sitting like one heavy block.
- Keep the root at least 1 to 1½ inches deeper than the mid-lengths.
- Let the hazelnut show most strongly in the lower half of the hair.
- Choose soft bends or loose waves to show the melt.
- Leave the very ends the lightest, but not blonde enough to look disconnected.
This look feels polished in a blowout and still holds up if you air-dry it. That’s rare enough to mention.
11. Warm Hazelnut Accents for Golden Skin
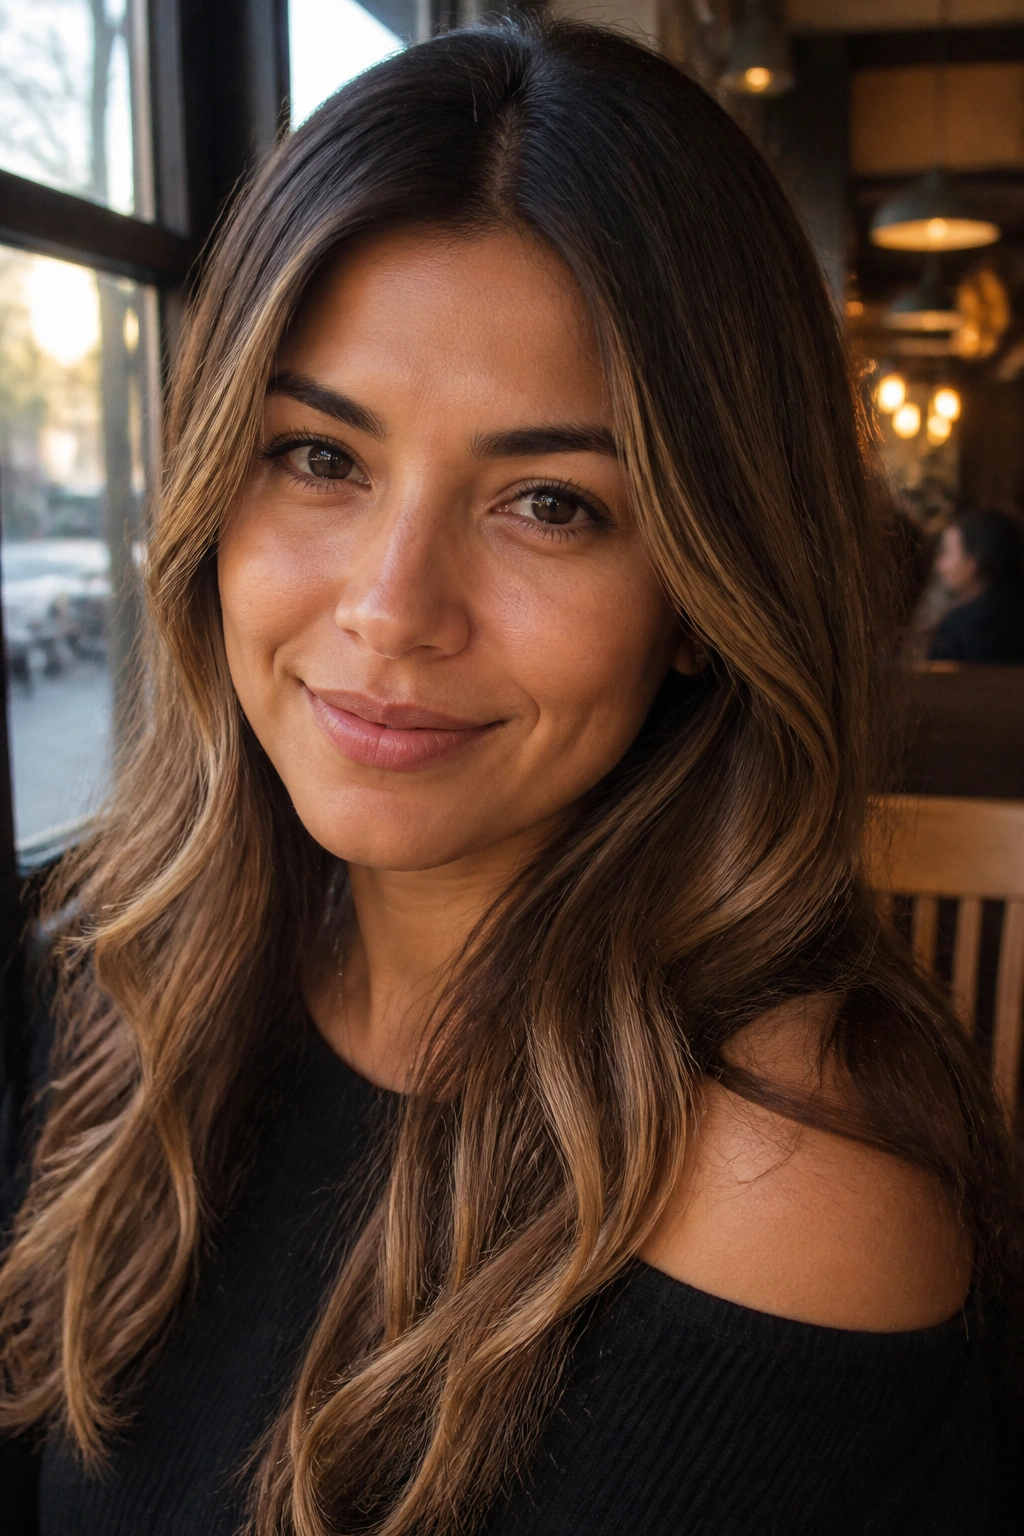
If your skin already has golden or olive notes, warm hazelnut can look incredibly natural. Not orange. Not copper. Warm hazelnut sits in the softer zone — the kind of brown that looks like it belongs next to your skin instead of competing with it.
The trick is restraint. A few warm accents near the front, especially below the cheekbone and through the ends, are often enough. Too much gold around the temples can make the face look fuller, so I’d keep the brightest warmth lower and let the top stay closer to the base shade.
This is one of those looks that benefits from a gloss more than a stark highlight. A beige-gold glaze can make the hair look richer without adding obvious stripes. If your base is dark brown, a warm hazelnut ribbon through the mid-lengths gives the cut movement and keeps it from feeling heavy around the cheeks.
It’s easy to overdo warm tones. Don’t. A little goes a long way here.
12. Smoky Hazelnut Veils for Cooler Undertones
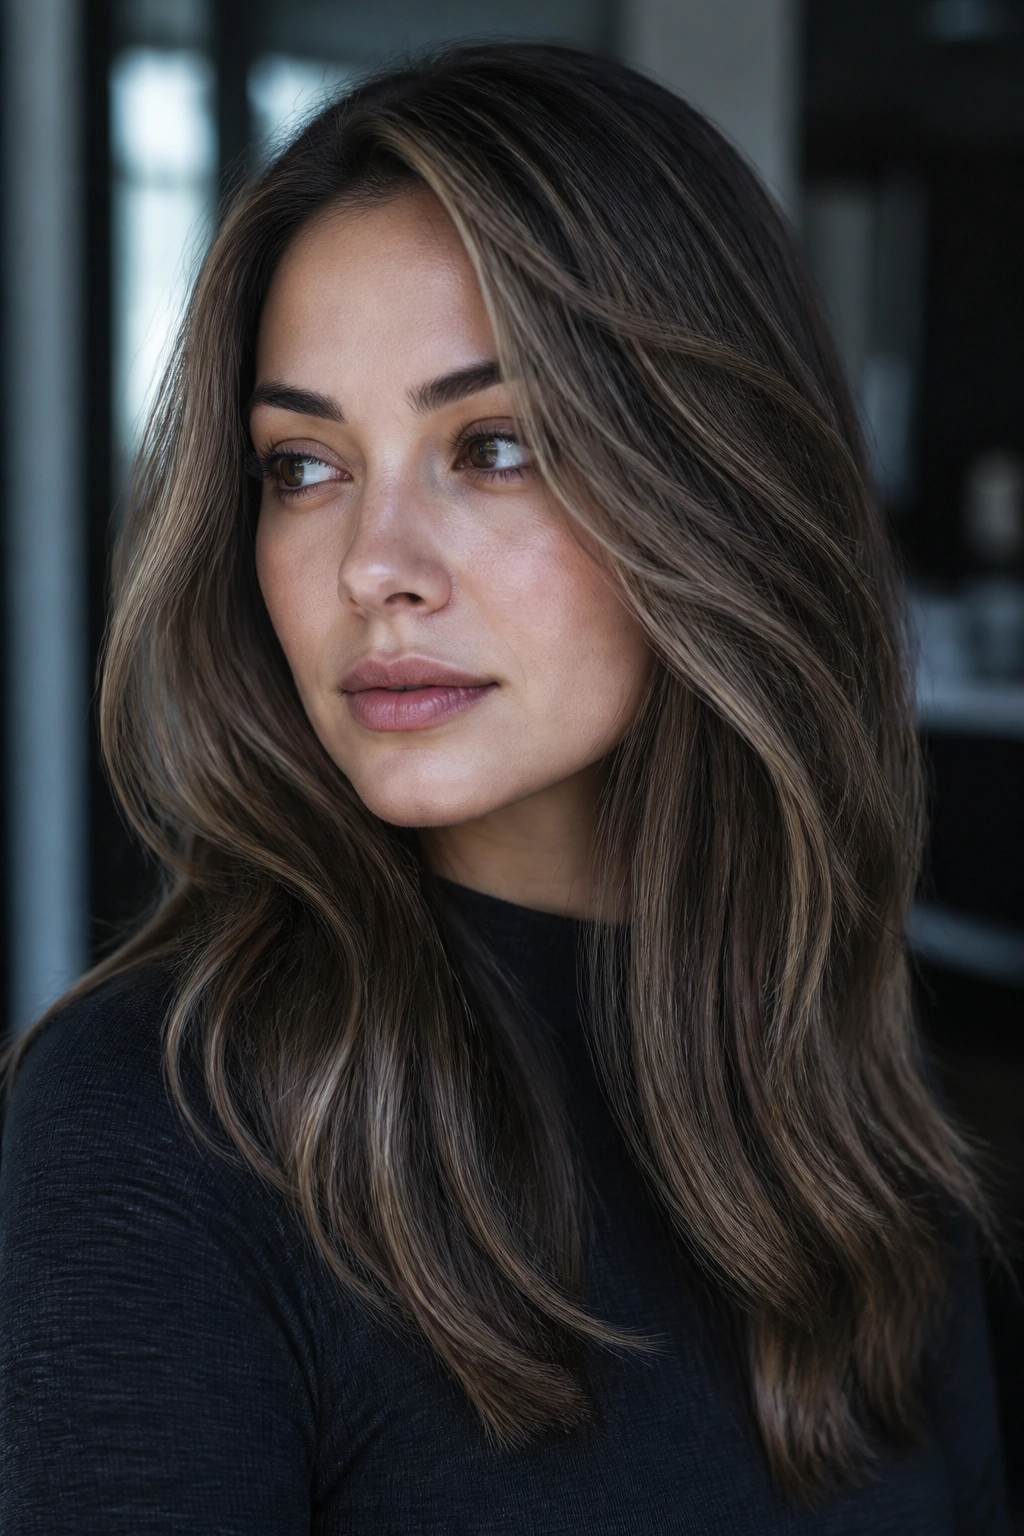
Cooler undertones usually look better in hazelnut that leans smoky rather than golden. That’s the main difference between this and the warmer version above. Instead of brightening the whole face with gold, smoky hazelnut gives the hair a soft shadow that makes the roundness less obvious.
I’d choose this if your natural hair is espresso, dark chocolate, or deep brown and you want dimension without any copper edge. Thin veils around the front and upper sides are enough. Add espresso lowlights if the hair needs more depth; that contrast helps the highlights sit back instead of spreading across the widest part of the face.
The nice part is how grown-up this looks. It doesn’t read as flashy. It reads as controlled. And if you style with a side part or loose bend, the smoky highlight catches the curve of the hair rather than the curve of the cheeks, which is exactly the point.
Best for: neutral-cool skin, dark bases, and anyone who wants softness over brightness.
13. Ear-Length Hazelnut Frames for Round Faces
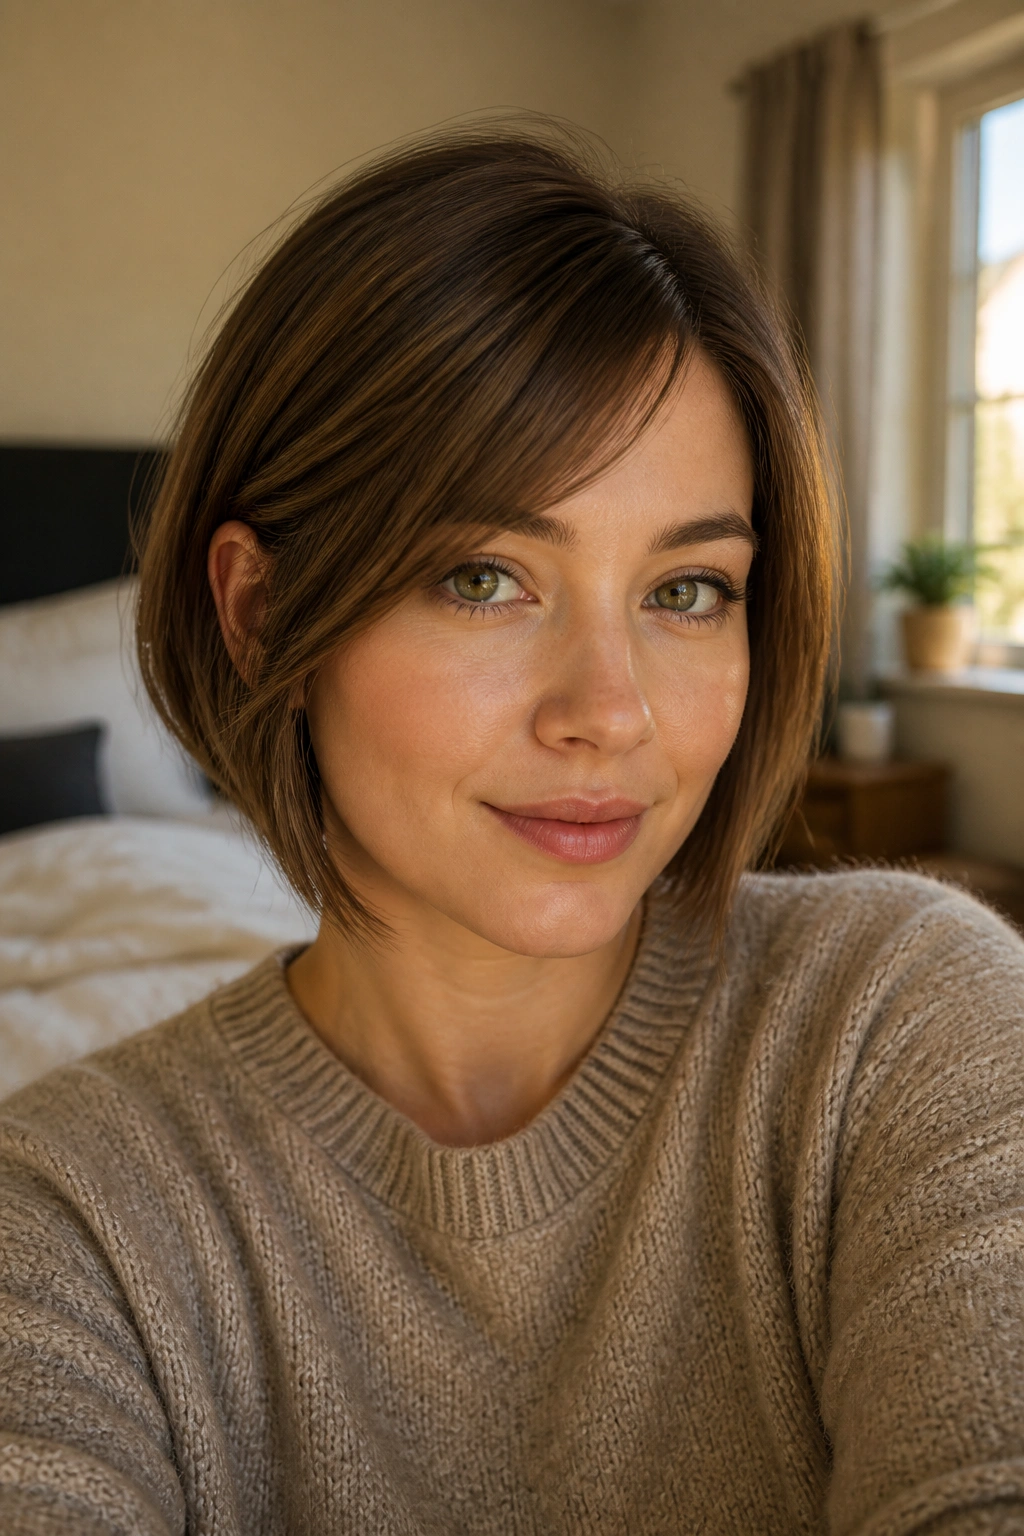
Short hair can scare people with round faces, and I think that fear is overblown. The real issue isn’t short length. It’s where the light stops. If the brightest hazelnut pieces end around the ear and taper toward the jaw, short cuts can look sharp and modern instead of wide.
A bob or pixie with a soft face frame needs precision. Keep the front pieces narrow and let them sit a touch below the ear opening. That creates a vertical line beside the cheek, which is more flattering than a broad blond panel sitting right on the fullness of the face. A side sweep helps too, especially if the fringe is long enough to graze the brow.
What to Watch For
- Don’t brighten the whole front edge.
- Leave a bit of depth at the roots, especially near the crown.
- Keep the hazelnut on the outer layers, not buried too deep.
- Blow-dry the front pieces forward first, then curve them back slightly.
This is a strong option if you want short hair but still want shape. It has attitude without looking hard.
14. Chunky But Controlled Hazelnut Ribbons
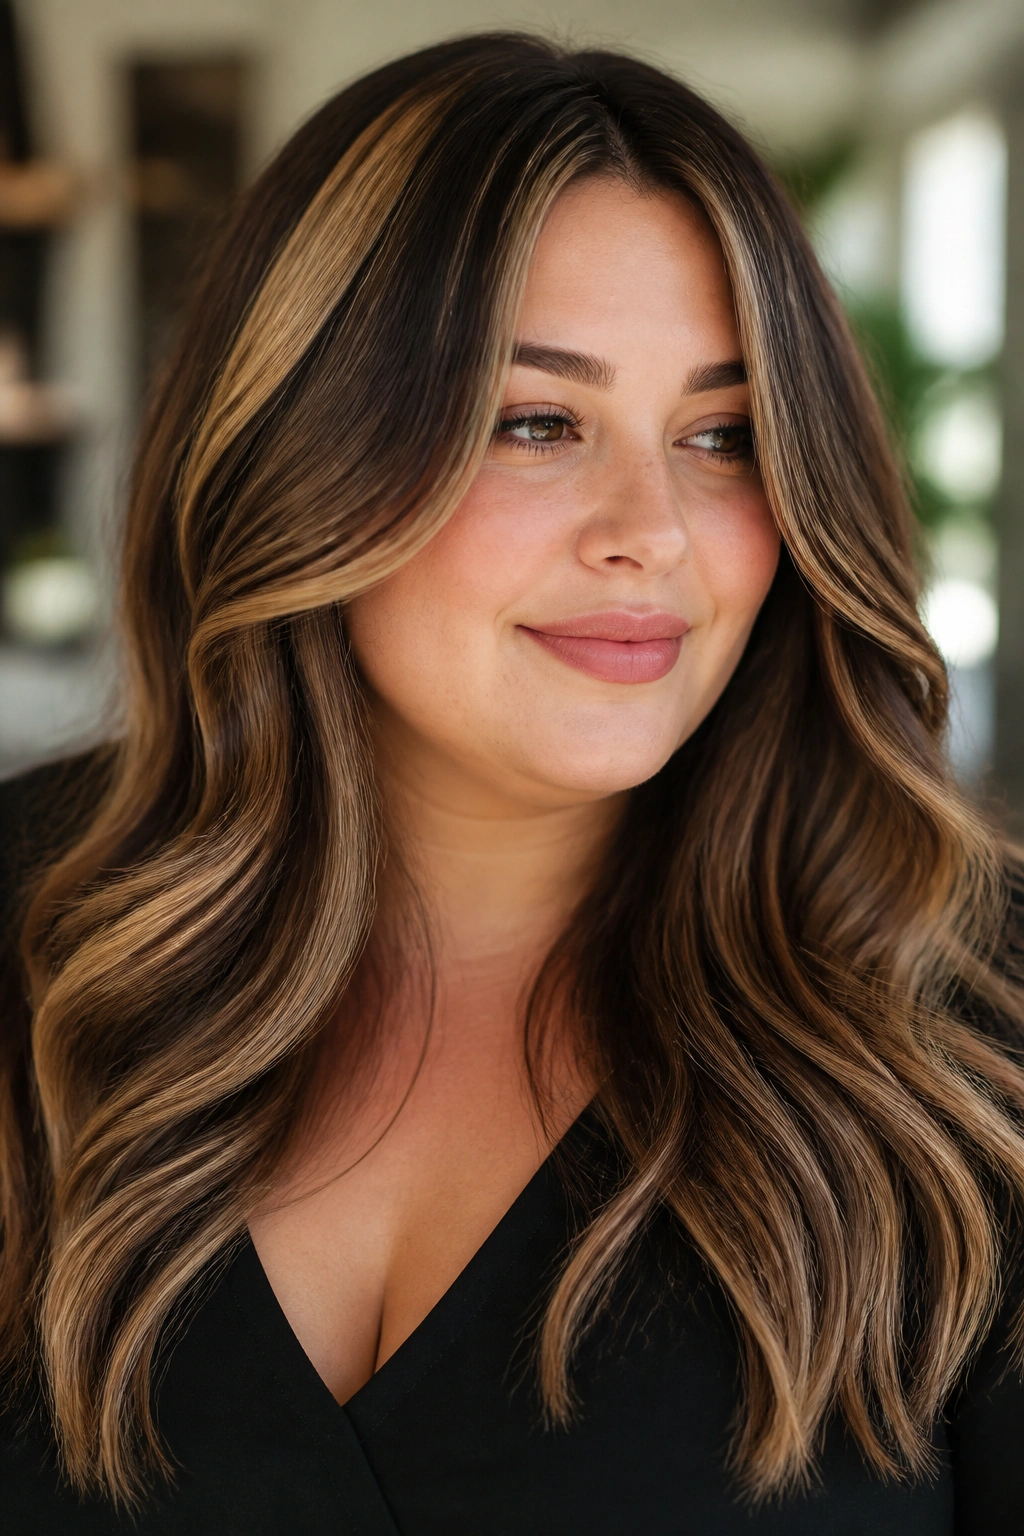
Thick hair can handle wider ribbons, and sometimes it needs them. Tiny babylights can disappear in dense strands, leaving the color muddy. Chunky-but-controlled hazelnut ribbons give the hair enough contrast to show movement while still staying soft around the face.
The control part matters. I’m not talking about zebra stripes. Use a few wider ribbons — around ¾ inch to 1 inch — but keep them separated by deeper brown panels. That spacing gives the style rhythm. On a round face, the wider ribbons should travel vertically through the layers, not sit in one broad block at the cheeks.
This works especially well on blowouts and smooth waves. The thicker the hair, the more those ribbons can catch the shape of the cut. If the hair is coarse, a slightly warmer hazelnut helps the light read clearly without needing a pale blonde tone.
I’d pick this if your hair tends to swallow subtle color. It has more presence, and it still flatters the face when the placement is disciplined.
15. Feathered Ends with Dimensional Hazelnut
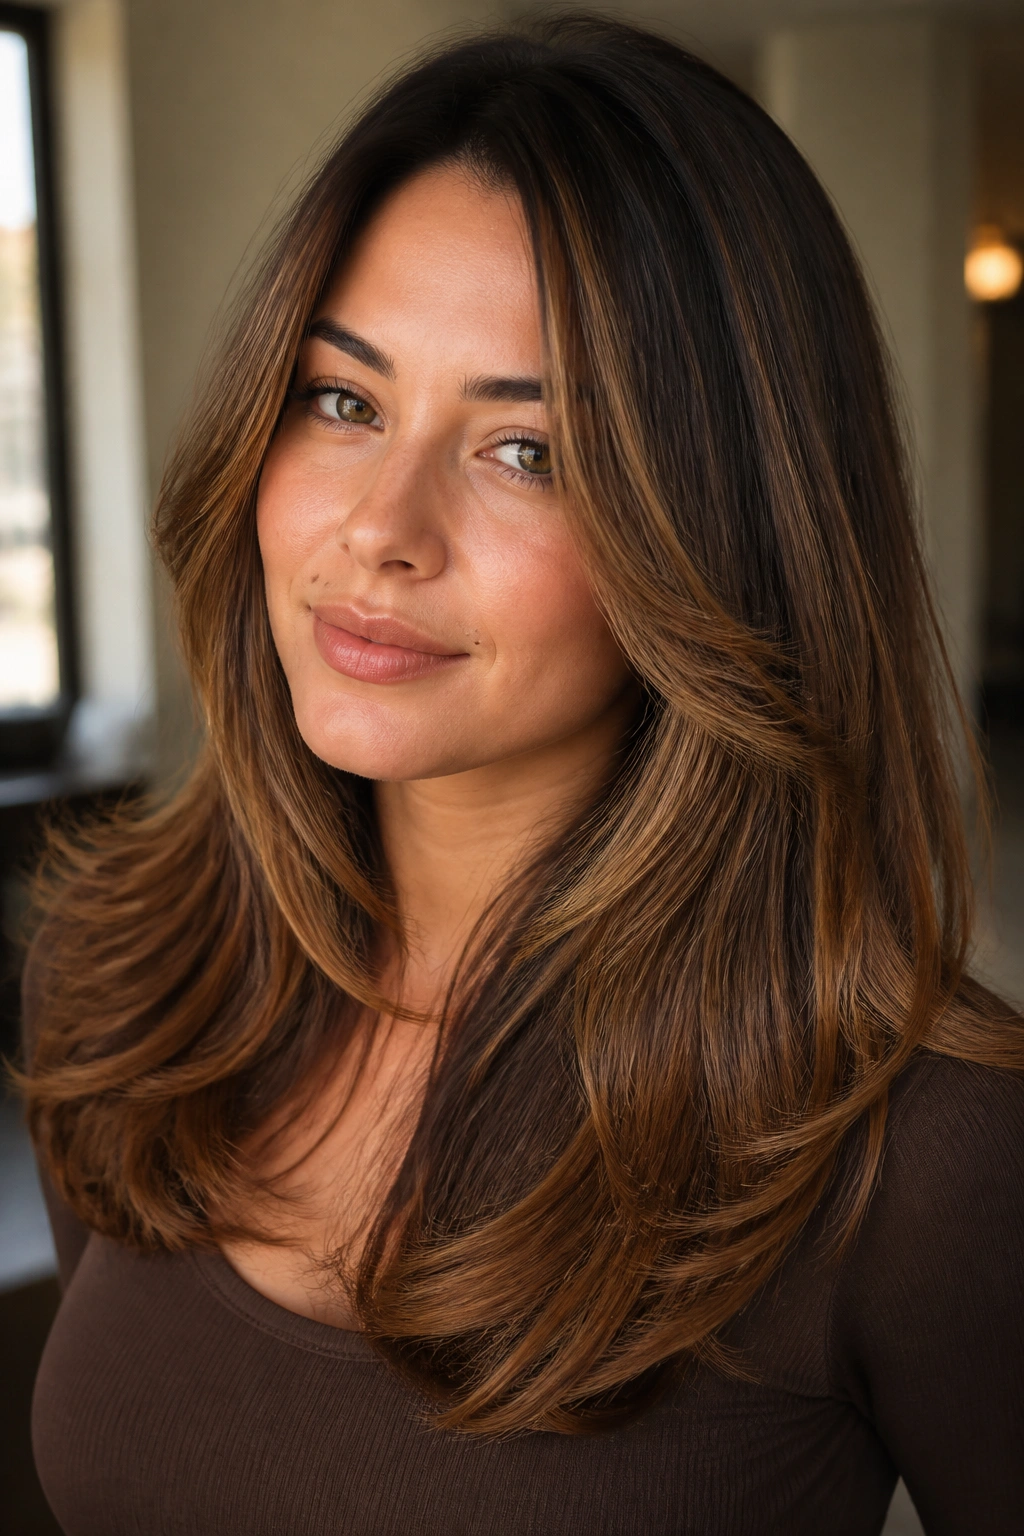
Feathered ends can do a lot of quiet work. If the top of the hair stays deeper and the light builds mainly through the last 3 to 4 inches, the eye follows the color downward and the roundness at the cheeks matters less.
That’s why this look is so good on layered cuts. The feathering keeps the ends soft, and the hazelnut dimension stops the shape from looking blunt. You do not want a heavy color block at the bottom. You want movement. A little separation between the layers makes the haircut feel lighter and the face read longer.
A Small Styling Note
Use a 1-inch iron or a bend brush to flip the ends away from the face. That gives the highlight a little extra air. If the ends are too straight and heavy, the whole style can sag. Feathering keeps it moving.
This is one of those looks that grows out well because the lighter pieces are already low. It is a patient style. Not flashy. Better for it.
16. Soft Auburn-Hazelnut Lifts Around the Hairline
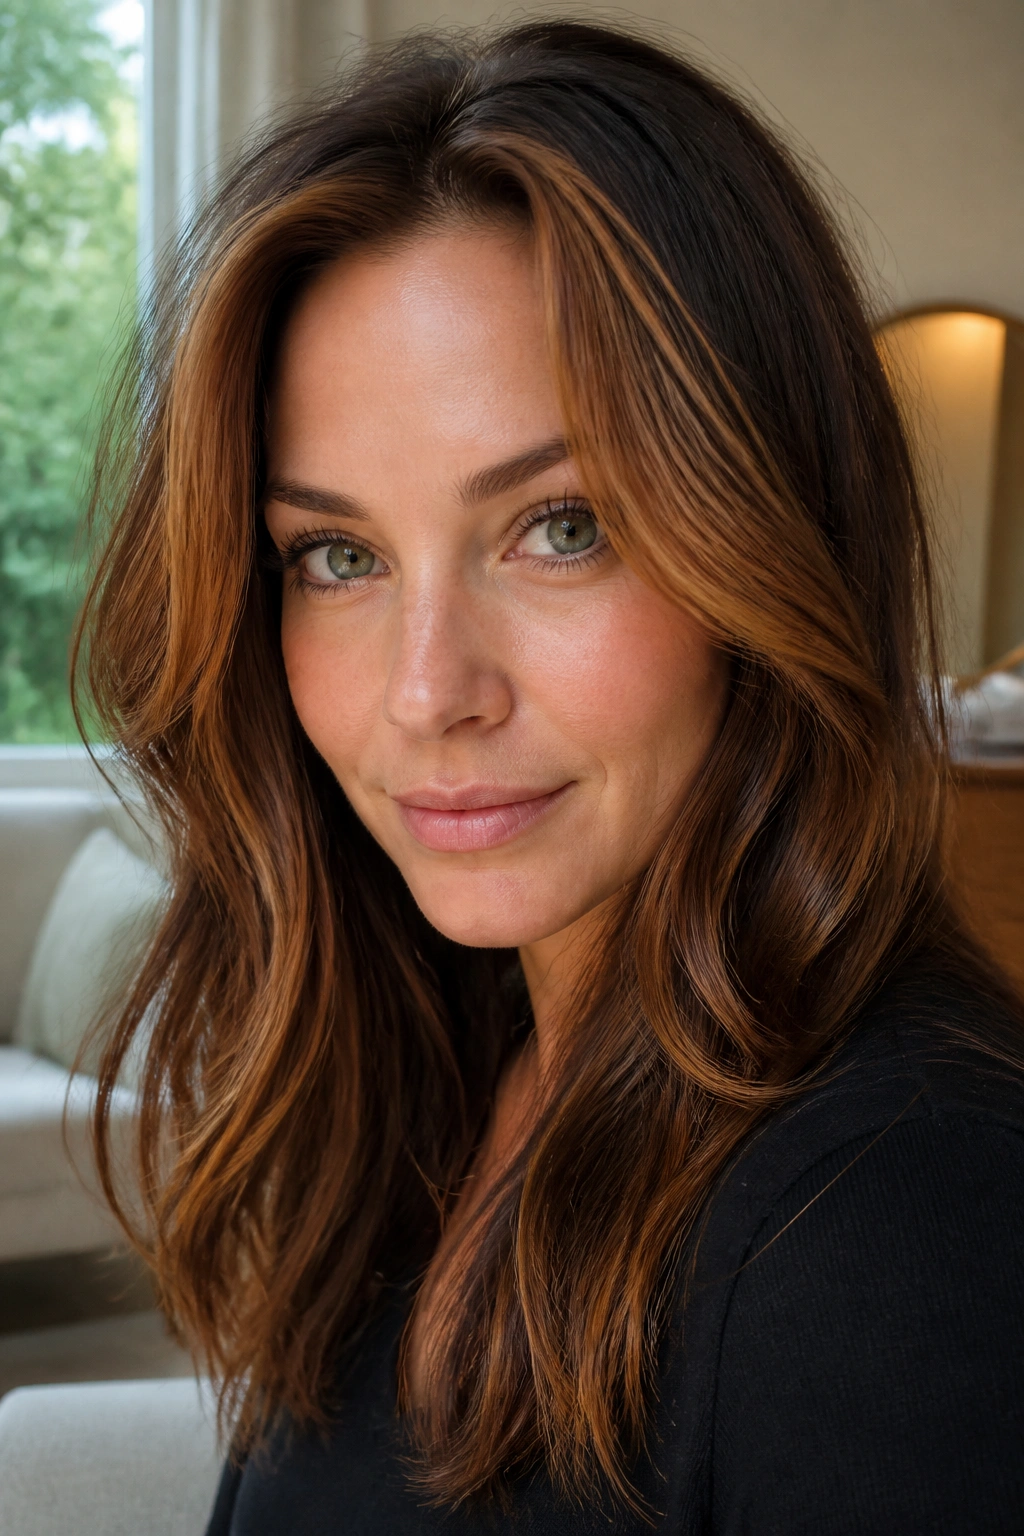
A small hint of auburn can be useful when the base color feels flat. Around the hairline, a warm hazelnut with a whisper of auburn gives the face a little life without pushing it into bright red territory. That warmth can be especially nice on neutral or golden skin.
I would keep the auburn confined to the front and the very outer layers. You want the warmth to frame the face, not wash over the whole head. The mid-lengths can stay more neutral hazelnut, which keeps the style from getting too loud. If the highlights start to feel too orange, a beige toner reins them back quickly.
This is not the right move if you hate warm tones. Fair enough. But if your hair tends to look dull in winter light or under indoor bulbs, a small auburn lift around the hairline can make the whole cut look more awake. It also works well with side parts and loose waves.
The best version feels like a whisper of spice, not a color change that announces itself.
17. Low-Contrast Glossed Hazelnut Dimension
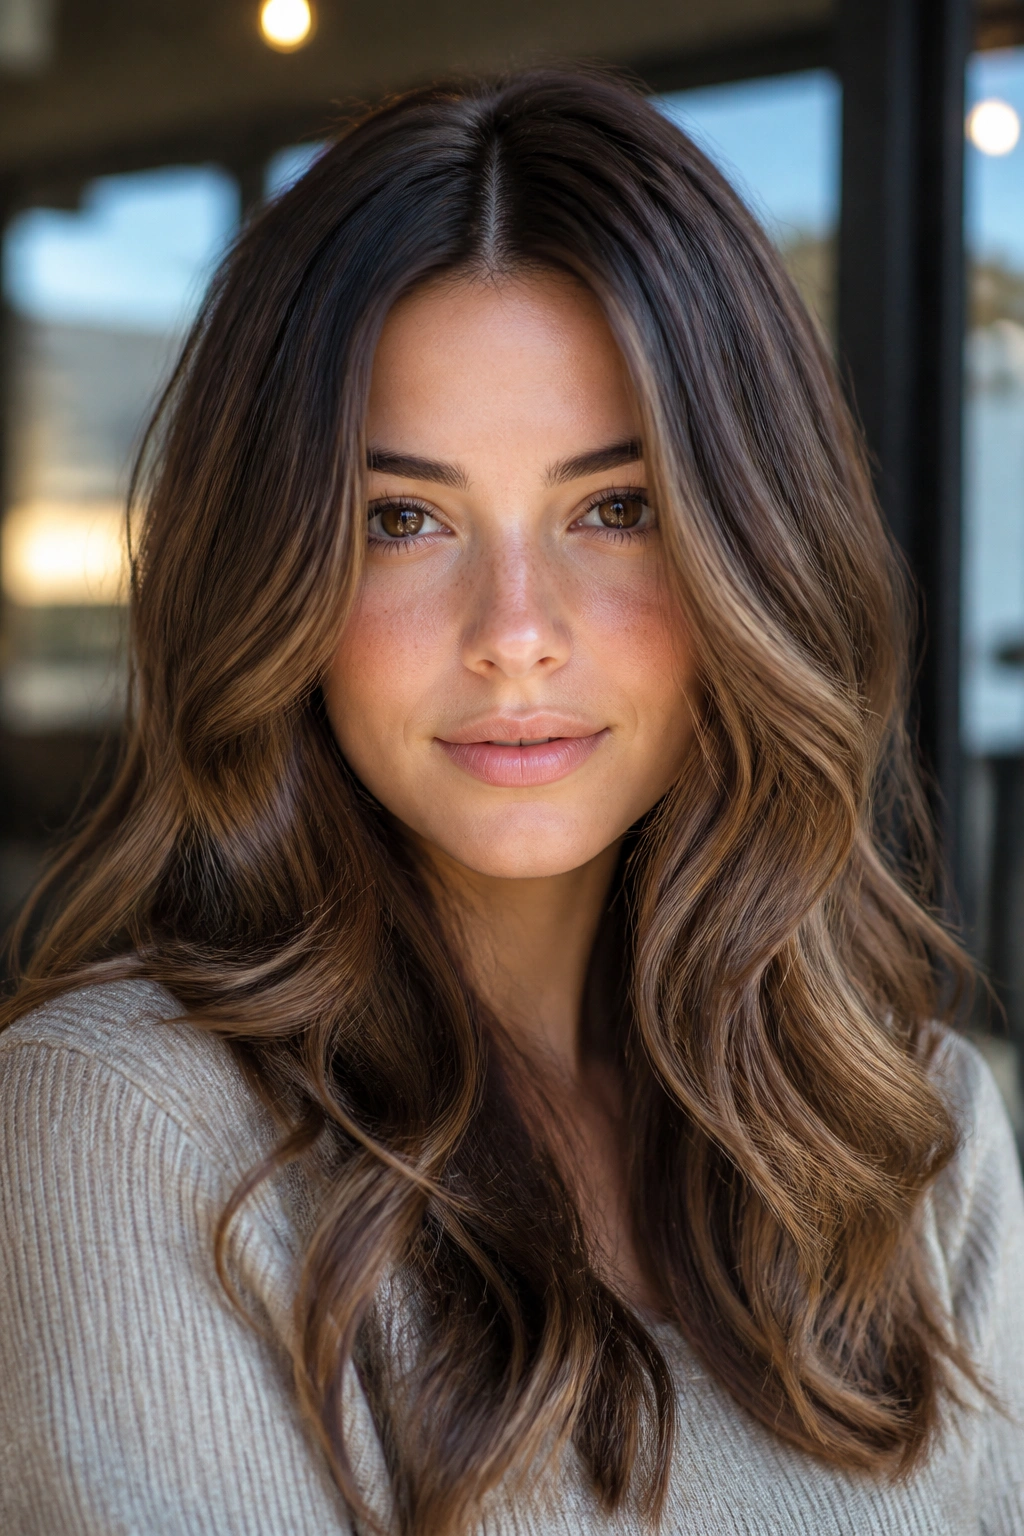
Can a low-contrast highlight still change the shape of a round face? Yes, if the gloss does half the work. This version keeps the hazelnut pieces only one or two levels lighter than the base, then uses gloss to make the shift look polished instead of streaky.
That low contrast is what makes it so wearable. You get movement at the temples, a little lift through the mid-lengths, and softer ends — all without the obvious striping that can make a face look broader. It’s a smart choice if you hate harsh regrowth or if your hair is fine enough to look thinner with too much contrast.
Unlike bright blonde highlights, this stays calm in daylight. It also photographs in a cleaner, softer way because the color shift is gradual. I’d ask for a neutral hazelnut toner and a shine glaze that keeps the brown rich rather than flat.
Best for: subtle color lovers, busy schedules, and anyone who wants their hair to look like its own best version.
18. Diagonal Hazelnut Sweep for Round Faces
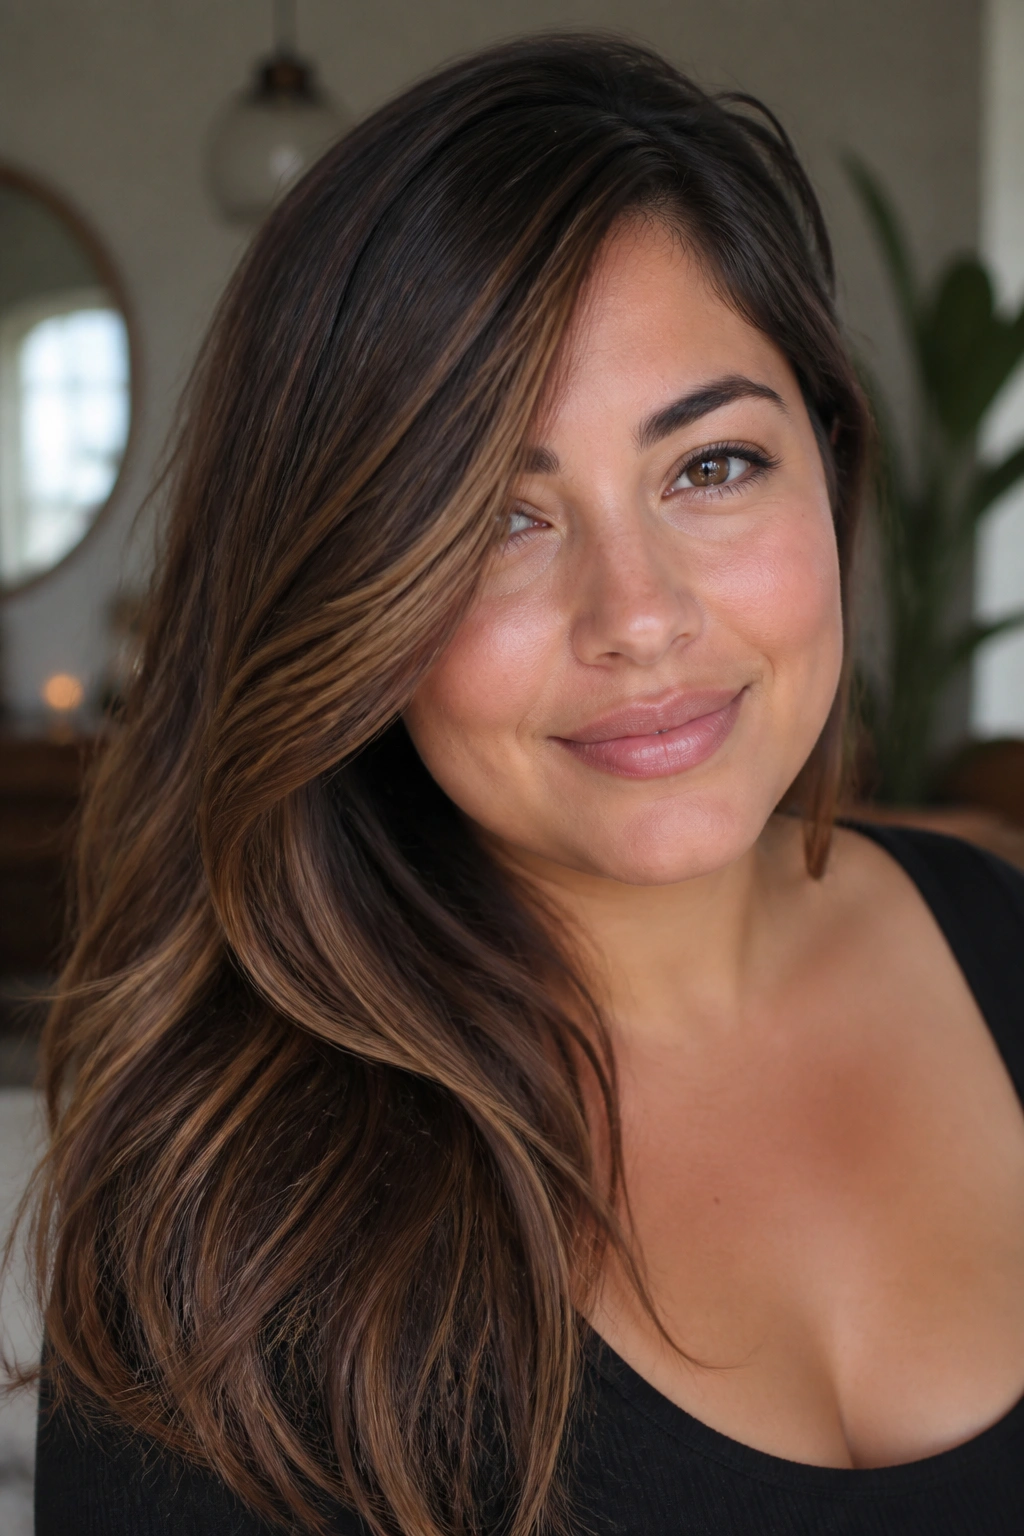
If you only borrow one idea from this whole list, make it the diagonal. Straight-across color bands tend to widen a round face. Diagonal hazelnut sweeps — starting near the temple and drifting toward the collarbone — do the opposite. They break the circle.
That shape can be built into almost any cut, from a long bob to layered hair past the shoulders. The light travels in a line the eye naturally follows, which is why the face seems longer before anyone can quite explain why. You can keep the sweep soft and narrow, or make it a little bolder if the base is dark enough to hold the contrast.
- Start the brightest point at the temple or upper cheek, then angle down.
- Keep the end of the sweep lighter than the middle.
- Add a soft bend at the ends so the line doesn’t look rigid.
- Leave enough root depth that the crown stays calm.
This is the style I’d choose for someone who wants the most face-shaping effect without going blonde. It’s clean, flattering, and easy to live with. And when the diagonal is right, the whole cut feels longer in a way that never looks forced.
