



Curly hair doesn’t reward brute force. It rewards shape, timing, and a little restraint. The hairstyles for curly hair that hold up best are the ones that work with the curl pattern instead of flattening it, which is why a style can look easy from the outside and still take a fair bit of know-how to get right.
That part matters more than people admit. Curl density, shrinkage, porosity, and length all change how a style sits on the head, so a style that looks perfect on one person can fall apart on another in half an hour. A wide-tooth comb, a microfiber towel, and a good gel or mousse are not small details here — they decide whether your curls clump neatly or puff out by lunch.
I care most about styles that can survive a commute, a desk chair, and a little humidity without turning into a full rewrite. Some curl looks are all about definition. Others are about volume. A few are the sort of styles you put on when you want your hair off your neck and still want it to look like you meant it.
Start with the easiest place to win: a style that works on nearly any curl pattern and teaches you the basic rules of curved hair without asking for perfection.
1. Wash-and-Go
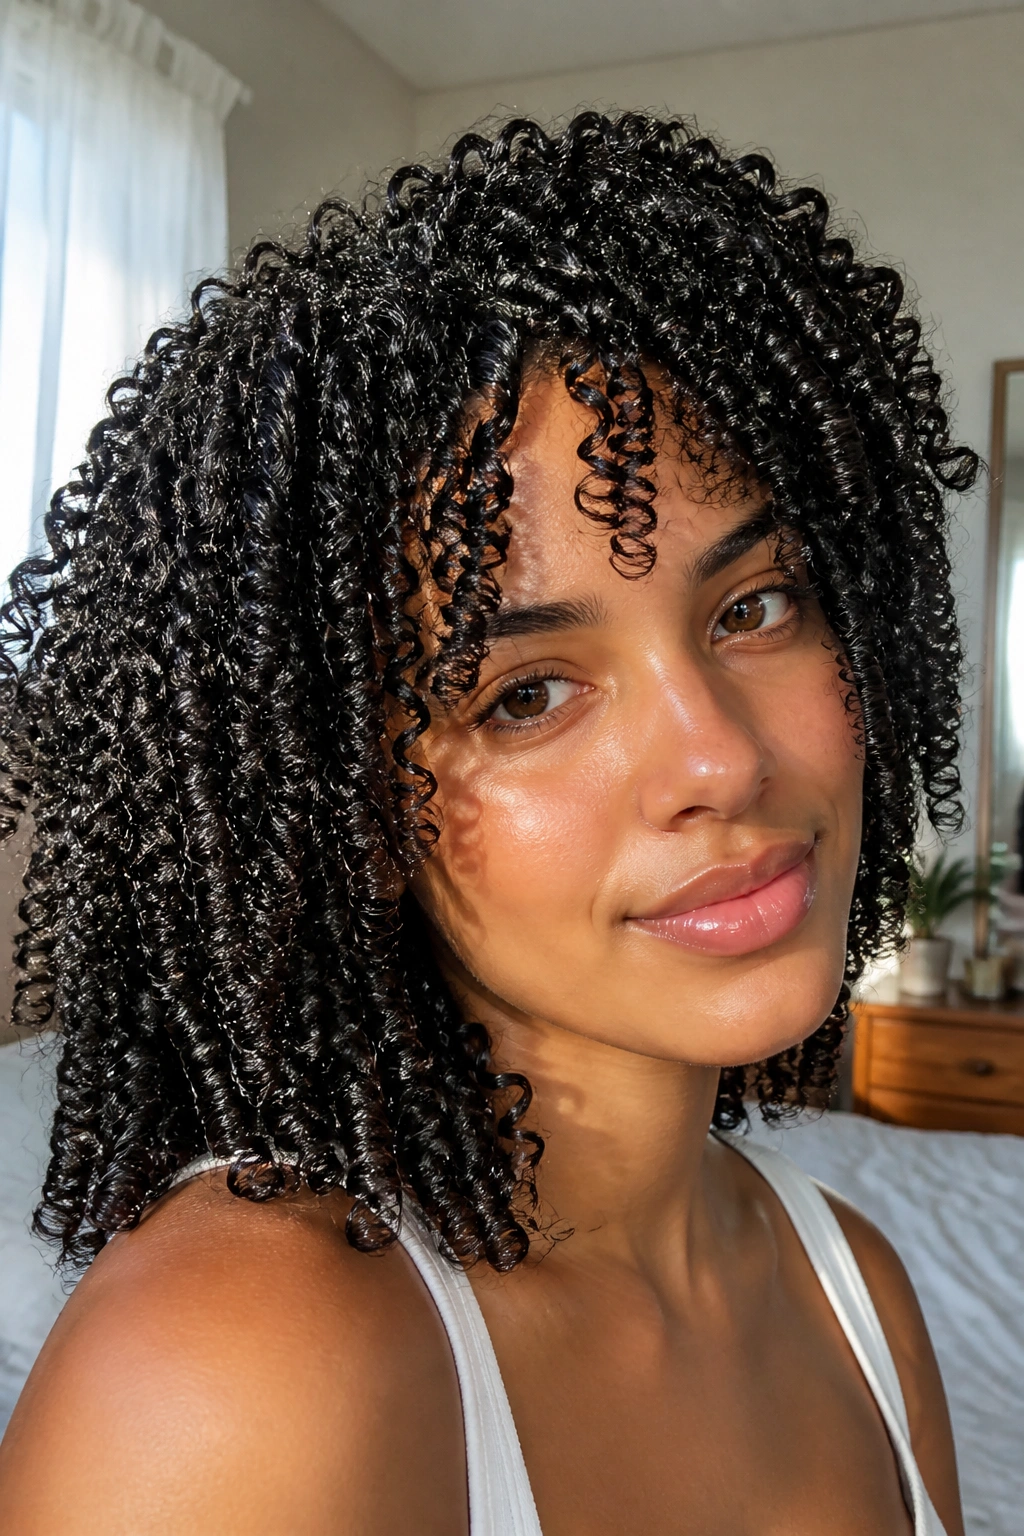
A good wash-and-go is still the cleanest, smartest curly style when you want your own texture to do the talking. It looks simple from a distance, but it depends on the details: water, leave-in, curl cream, gel, and patience. Skip one of those, or rush the drying, and the whole shape goes fuzzy.
How to Keep the Clump
Work on soaking-wet hair if you want definition. Rake your leave-in through in small sections, then smooth curl cream over the top and seal it with a gel that can hold a cast. Scrunch once, maybe twice. Then stop touching it.
A diffuser helps if you need speed, but air-drying gives the softest finish. Either way, the key is letting the curls dry in place until they feel crisp on the outside and springy underneath. That “cast” is not a mistake. It is your shield.
- Best for curl patterns that already form neat spirals or coils
- Easier to refresh with water and a little mousse on day two
- Needs a product combo that gives slip and hold
- Works best when sections are small enough to keep clumps intact
Pro tip: break the cast with dry hands and a drop of oil only after the hair is fully dry, or you’ll get frizz before the style has even had a chance.
2. High Puff
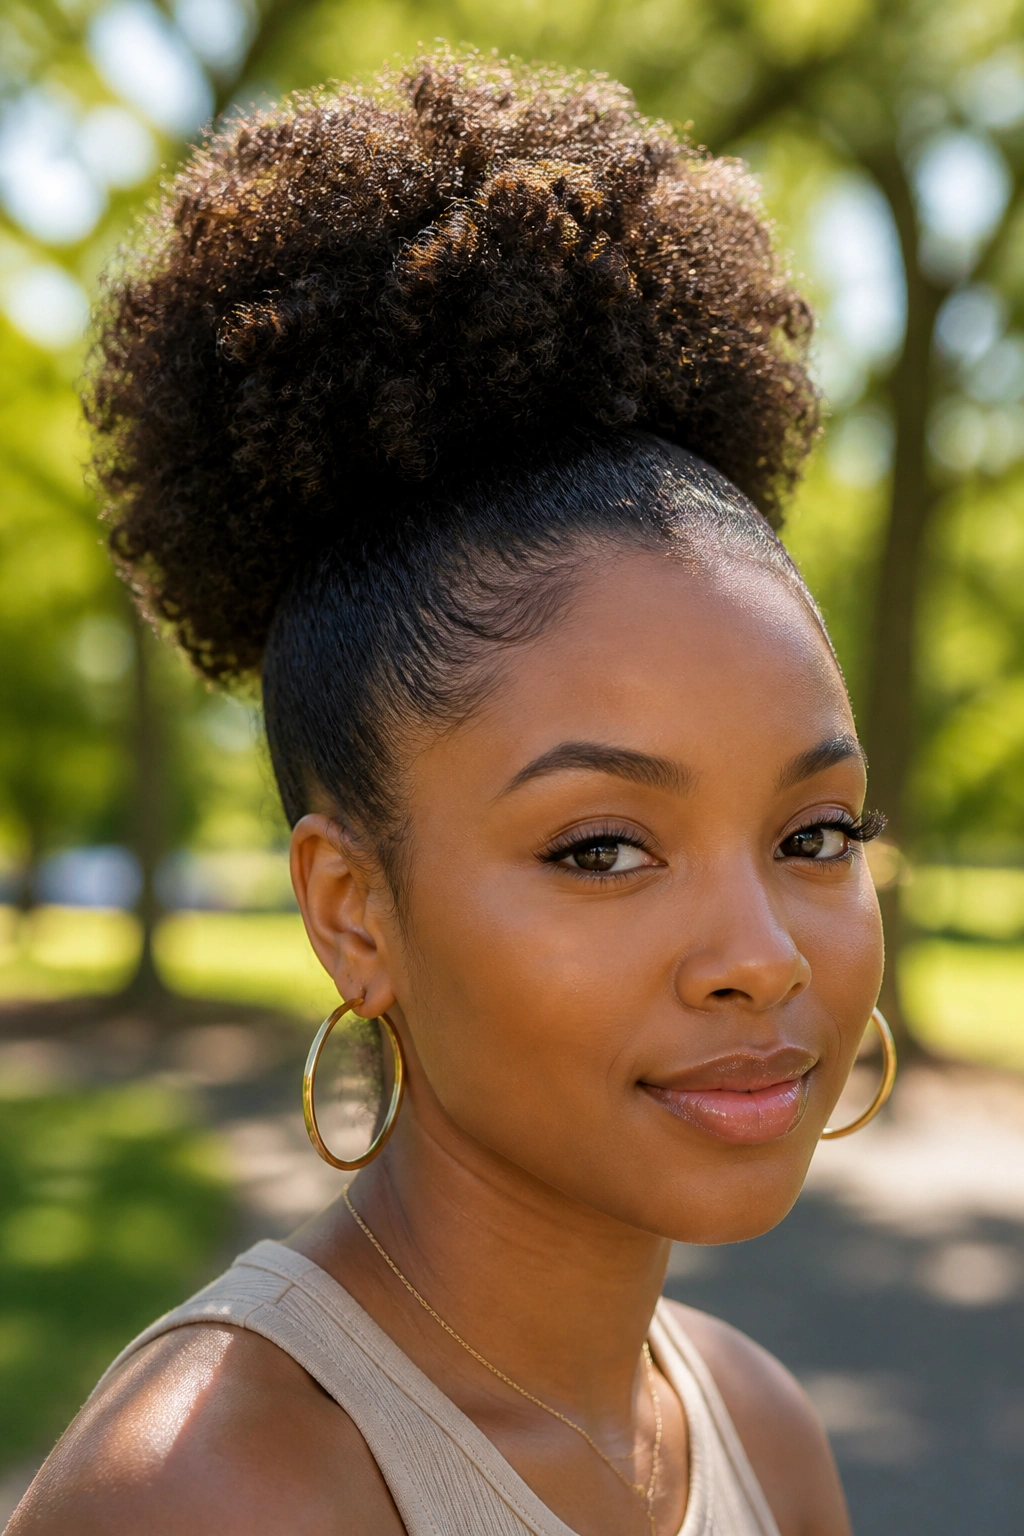
Need your curls off your face in one move? The high puff is the answer most people reach for, and for good reason. It lifts the hair up and forward, shows off volume, and leaves the ends free to do whatever the curl pattern wants.
The trick is tension. Too tight, and the base starts to hurt before lunch. Too loose, and the puff slides down the head by afternoon. I like a snag-free elastic or a wide puff cuff, because both hold the shape without digging into the hairline.
A high puff works best when the perimeter is smooth and the crown stays full. Brush only the very front and sides, not the whole head. Leave the rest alone. That keeps the curl pattern alive instead of turning the style into a flat helmet.
If your hair is denser, set the puff a little higher than you think you need. The volume reads better that way, and the shape has more lift. If your curls are finer, a little root fluff with a pick after the puff is secured can make the whole style look fuller without adding products.
3. Half-Up, Half-Down
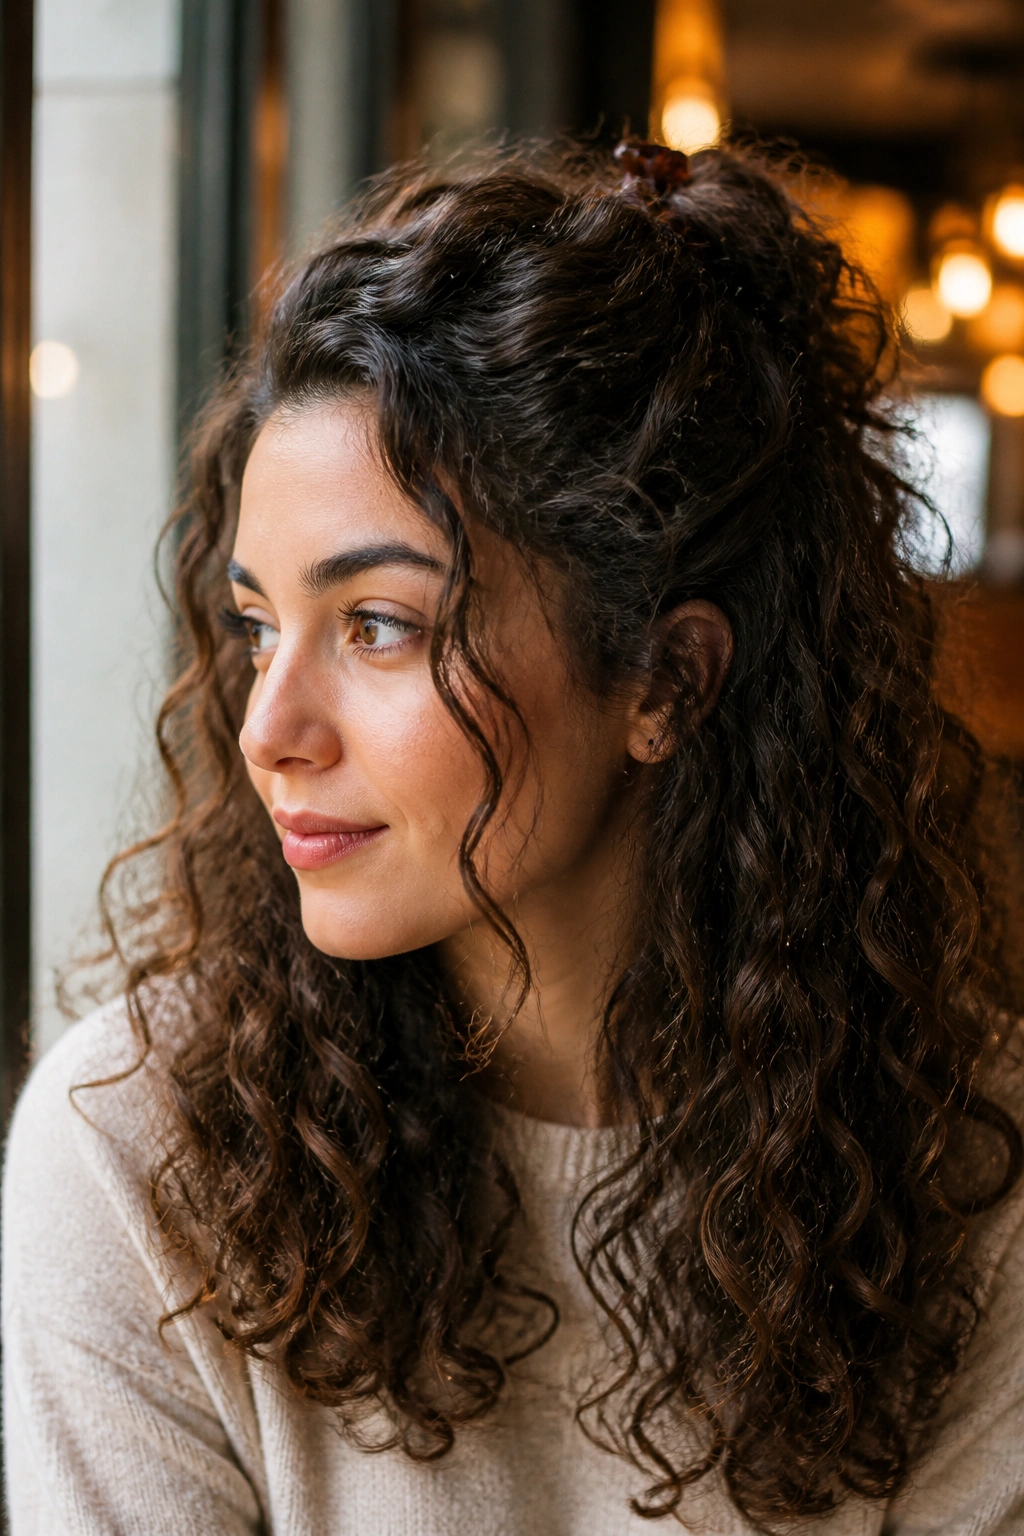
If your curls behave beautifully around your face but collapse at the crown, this style is a relief. Half-up, half-down gives you the softness of loose curls and the control of a pulled-back top section, which is why it stays in rotation for everything from errands to dinners.
Why It Works
You are dividing the work. The top section handles structure, and the bottom section gets to stay free. That means less tension on the whole head, less flattening at the roots, and more room for the curl pattern to keep its bounce.
Part from temple to temple, or take a diagonal section if you want the front to look softer. Use a small claw clip, a silk scrunchie, or two bobby pins crossed at the back. The goal is a hold that disappears into the hair rather than a band that bites into it.
Best Placement
Higher placement gives a more playful shape. Lower placement feels calmer and works better if your curls are long enough that the top section still leaves some volume at the back. A tiny spritz of water and a pea-sized bit of gel on the top section keeps the flyaways from running the show.
This one is useful on second- or third-day curls, too. The top half hides the rough spots. The bottom half keeps the style from looking overdone. Easy. Clean. Done.
4. Twist-Out
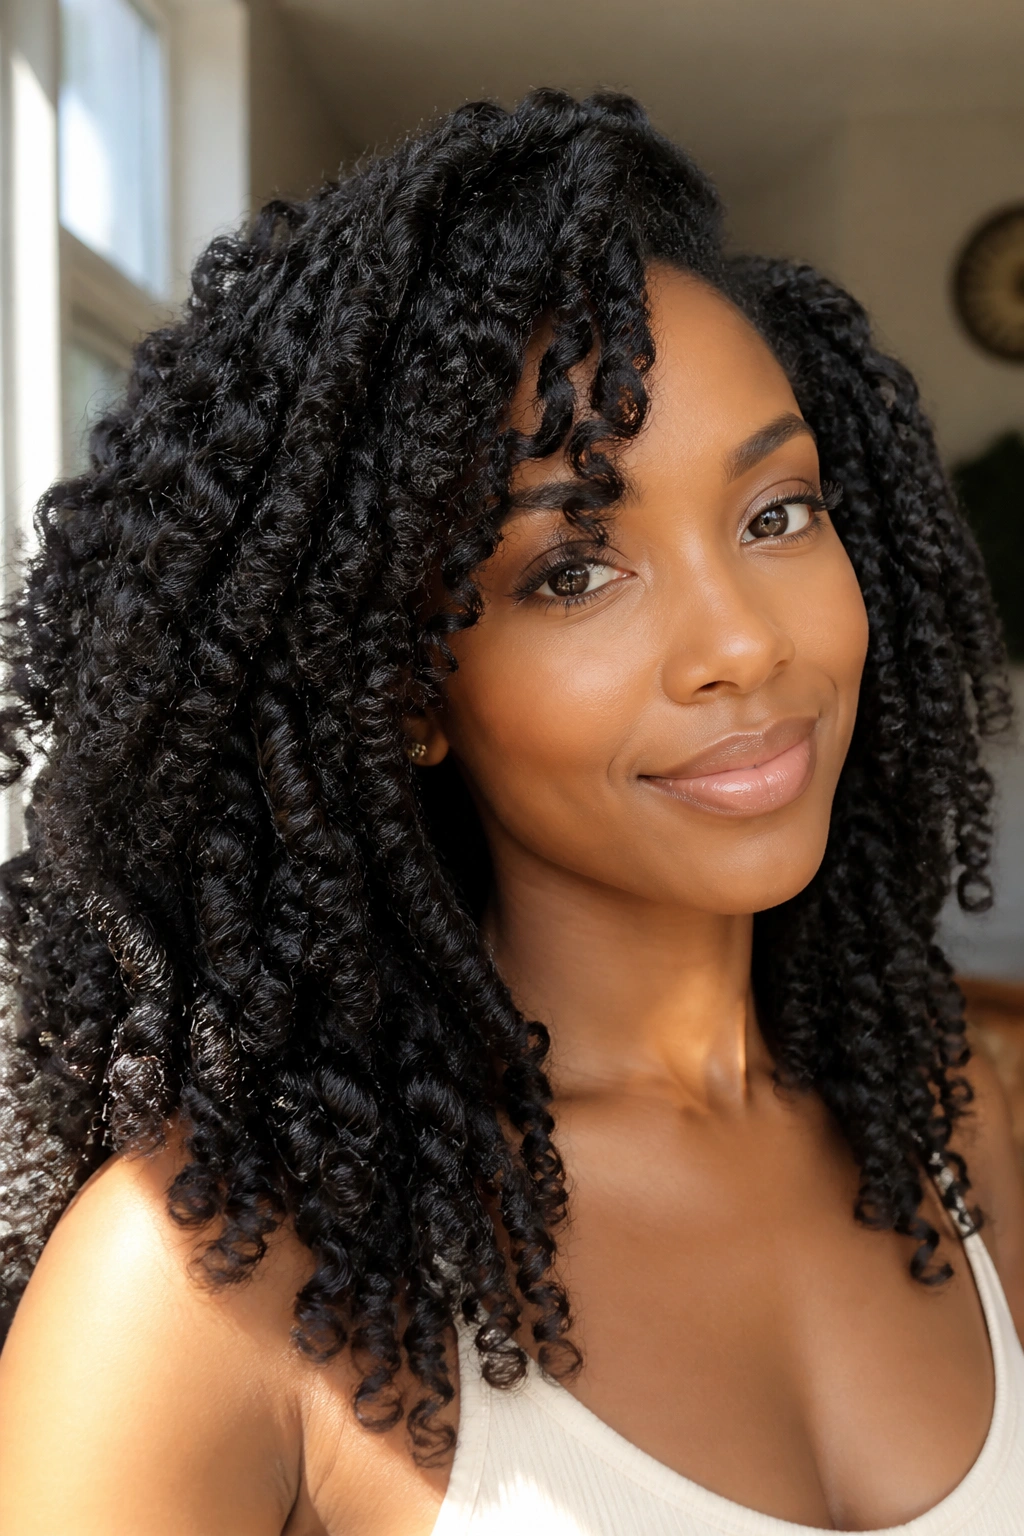
A twist-out is not a shortcut. It is a setting style that pays you back later, and that part gets ignored all the time. You twist damp hair with cream or butter, let it dry completely, then unravel the sections into soft, stretched definition.
The size of the twists changes everything. Smaller twists give you more definition and tighter texture. Bigger twists create chunkier waves with more movement. If you want the style to last, make sure the hair is fully dry before taking it down — even one damp section can pull the whole look down.
What I like about a twist-out is the balance. It gives you shape without making the hair stiff, and it works well on curls that need a little stretch at the roots. A soft hold mousse over the top before twisting can help, especially if your hair frizzes the minute the air changes.
Unravel with oiled fingers, not rough hands. Separate only what naturally wants to split. That is where the shine and the softness come from.
5. Braid-Out
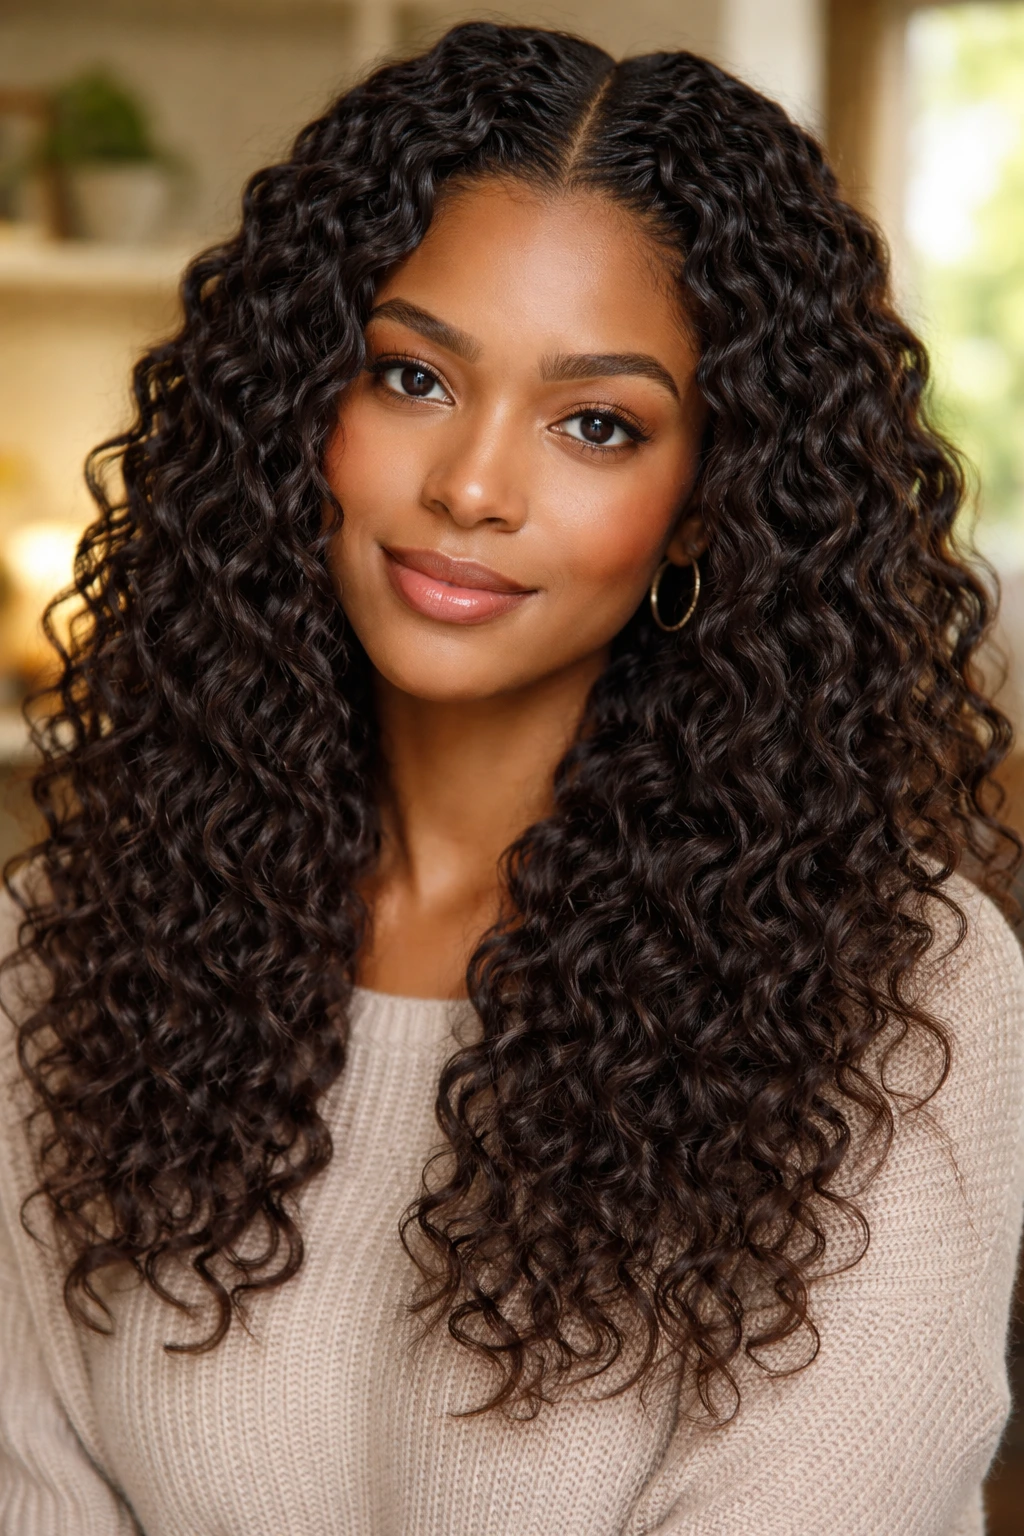
Freshly taken down, a braid-out has a slightly firmer, zigzag wave than a twist-out. That’s the whole charm of it. The style gives you stretch, but it keeps more structure near the root, so the shape reads full rather than puffy.
What Makes It Different
Braids compress the hair more than twists do. That means your pattern starts out tighter, then opens into a broader wave once you take it down. Smaller braids create a more defined result, while larger ones lean softer and looser. If your hair tends to swell, braid-outs often hold shape a little better than twist-outs.
I like braid-outs on hair that needs a cleaner finish for a few days. The style sits neatly under scarves, hats, and winter collars without collapsing as fast as looser curl styles. Just do not braid wet hair so tightly that the scalp starts to complain.
How to Wear It
Use a lightweight cream and a setting foam, then braid in even sections. Sleep on a satin bonnet or pillowcase. In the morning, separate the braids only once the hair is dry from root to end.
The finish can be soft or dramatic depending on how much you separate. Less separation means more definition. More separation means bigger hair. There is no wrong answer there, which is part of why braid-outs keep showing up in real life, not just on mood boards.
6. Pineapple Puff
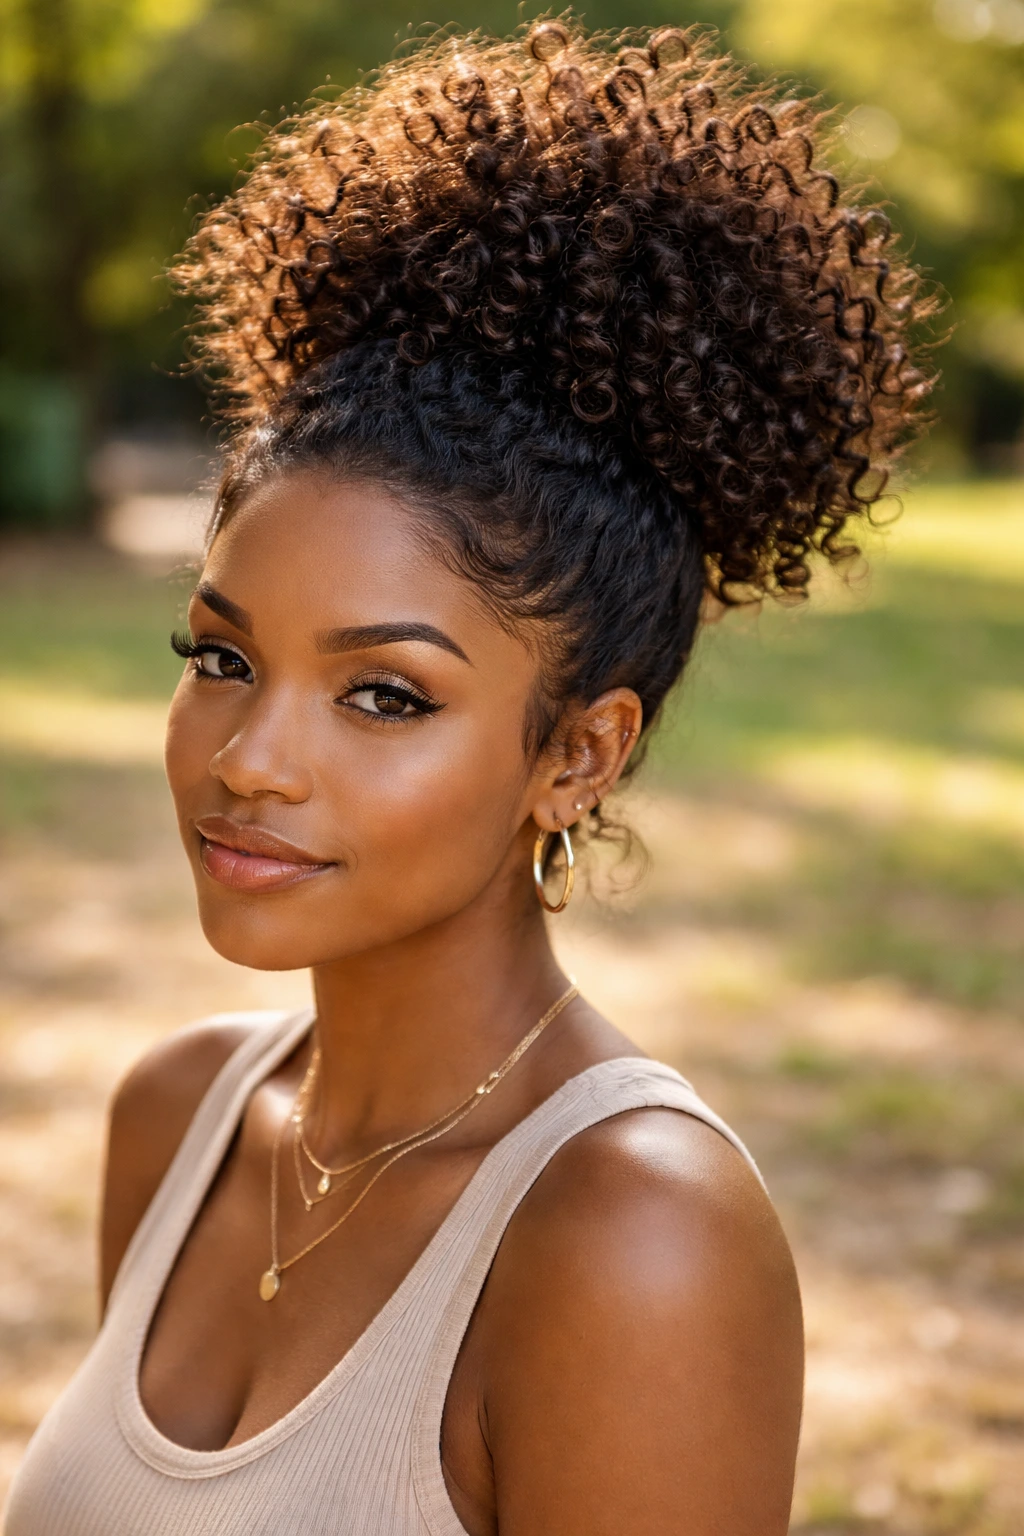
A pineapple puff is what happens when you take the high puff and make it looser, higher, and a little more playful. Unlike a low puff, it keeps the curls gathered at the crown while letting the ends spill forward or to one side, which helps preserve length and shape at the same time.
It is one of those styles that pulls double duty. At night, it protects a wash-and-go. During the day, it turns into a fast style that still looks intentional. The elastic sits high enough that the back isn’t crushed against your neck, which is a small mercy on warm or busy days.
Use a soft band or puff cuff and keep the tension light. You want the curls to stack, not squeeze. If the front needs help, smooth only the hairline with a little gel and a toothbrush or edge brush. Leave the rest alone. That rougher texture is the point.
This style works especially well when your curls are a little stretched from the previous day. Freshly set curls can be too springy and puff up in every direction. Day-two hair usually gives the pineapple a better outline.
7. Low Puff
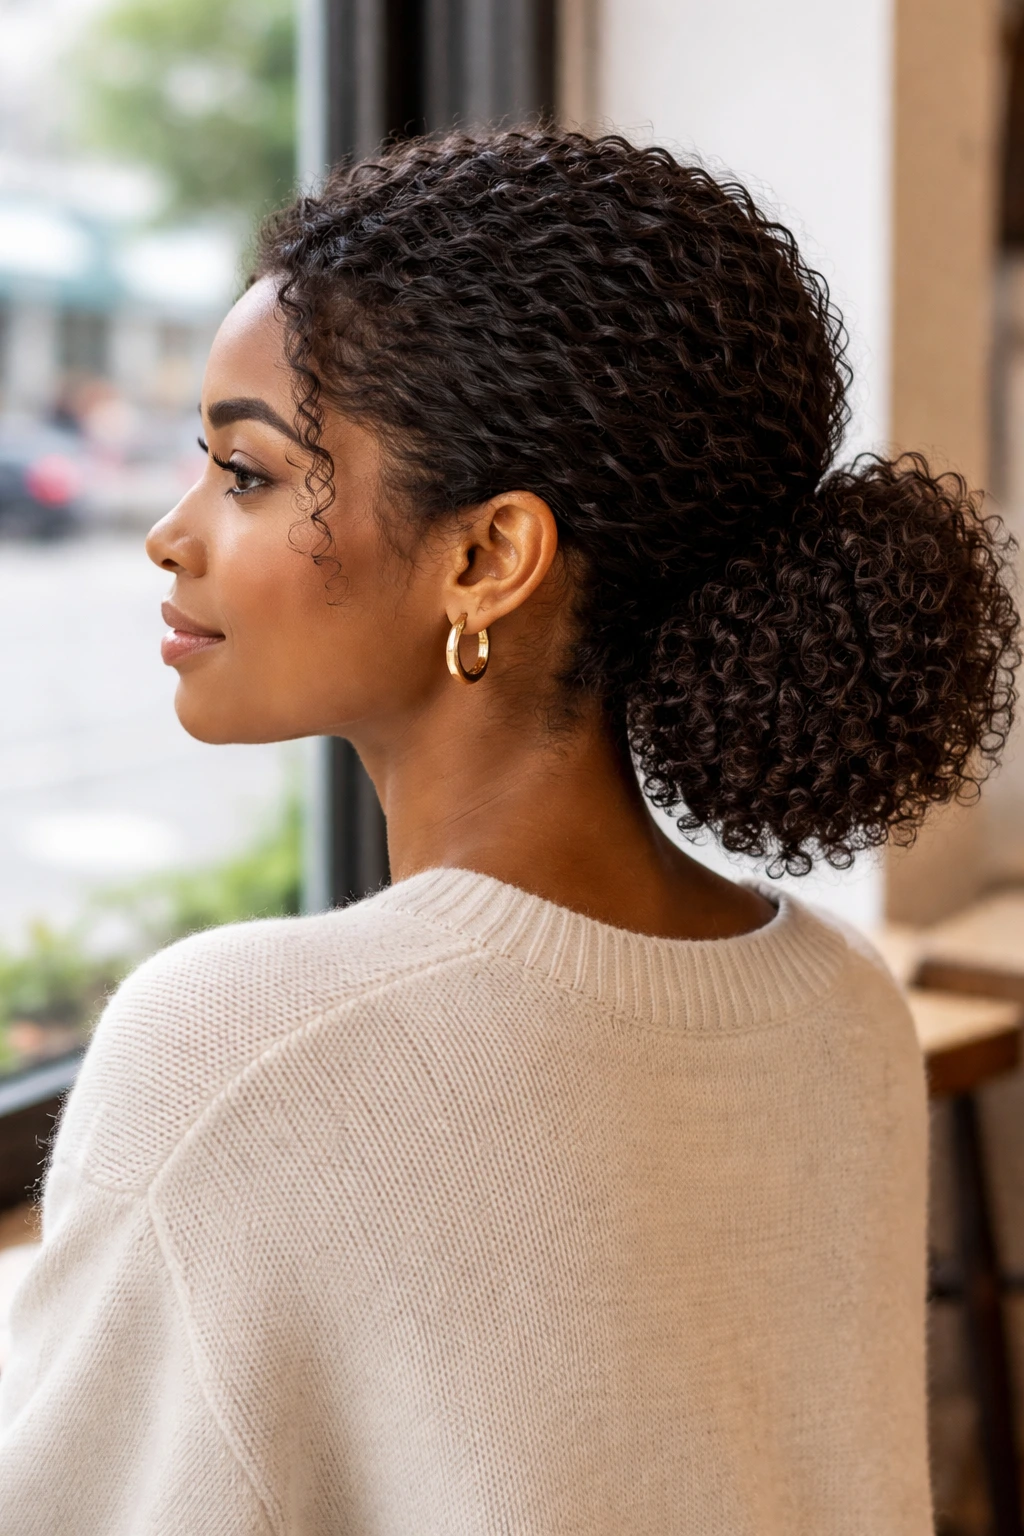
Three minutes. One band. A lot less fuss than people expect. The low puff is the quieter cousin of the high puff, and it makes sense on days when you want your curls gathered at the nape instead of lifted at the crown.
When to Choose It
- When your hairline needs a break from high tension
- When you want to show off length without a full ponytail
- When the weather is damp and you want less surface area for frizz
- When the ends need to stay together instead of getting spread out
The shape is simple, but the finish matters. Smooth the sides only where they need help, then gather the puff low and secure it with a band that won’t snag. If your hair is thick, do not force all of it through one tight elastic. Use a puff cuff or two bands layered gently.
A low puff reads softer than a high one. It also puts less strain on the edges, which is a quiet win nobody talks about enough. If you’ve ever ended the day with a headache from an over-tight style, you already know why this one earns its spot.
8. Bantu Knot Set
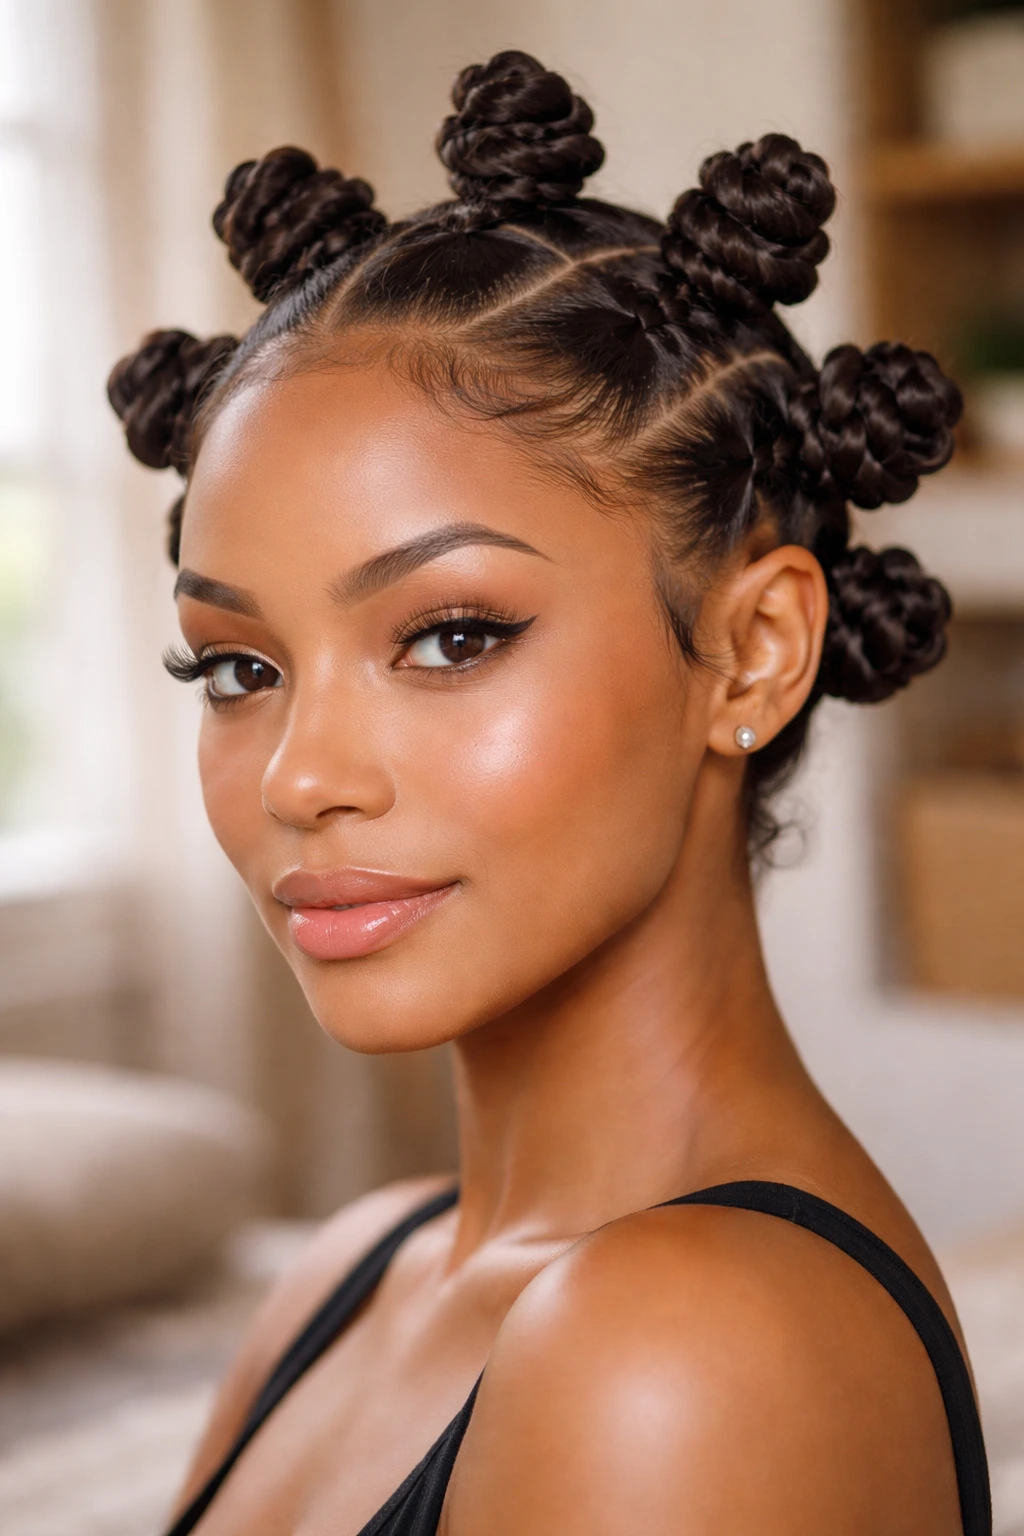
Bantu knots do two jobs at once, and that is why they’re so useful. You can wear the knots themselves as the style, or you can take them down later for a defined curl set with a bit of spring at the ends.
Why It Holds So Well
Each knot twists the hair around itself, which encourages a compact, even pattern as it dries. That works beautifully for coily hair and for curls that need more control at the root. The sections should be small enough to coil cleanly but not so tiny that the process becomes a headache.
Apply a creamy leave-in and a light gel, then twist each section from root to end before wrapping it into a knot. The base should feel secure, not strained. If the scalp hurts, the section is too tight.
How to Wear It
You can keep the knots neat and sculptural, or you can loosen them slightly for a softer silhouette. A satin scarf at night helps the edges stay tidy. If you plan to take the set down, wait until the hair is fully dry — inside the knot, not just on the surface.
That one detail changes the result more than most people think. Damp centers make the finish fluffy in the wrong way.
9. Two-Strand Twists
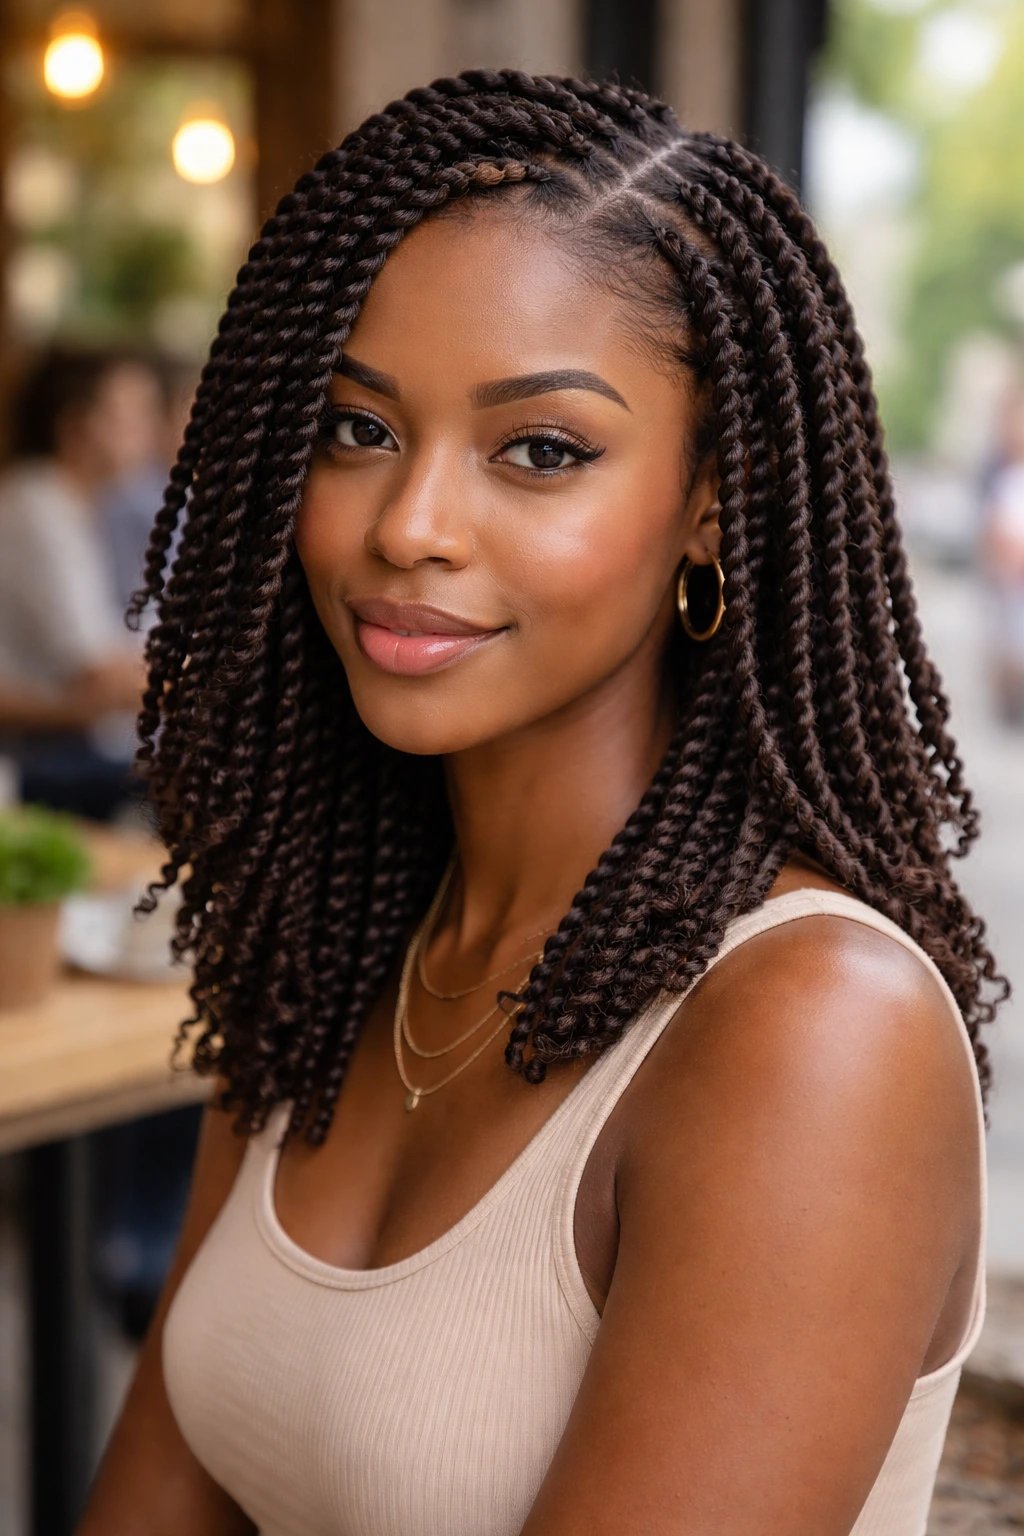
Two-strand twists are one of those styles that look calm but do a lot of work under the surface. They protect the ends, reduce tangling, and can double as a twist-out later if you decide to take them down.
The neatest version starts with damp, detangled hair and a product that gives enough slip to keep each section smooth. Twisting in the same direction from root to tip matters. So does sealing the ends. If the ends unravel, the whole style looks unfinished, and the wear time drops.
I reach for two-strand twists when the hair needs a break from constant manipulation. The style is gentle on the scalp, especially if the sections are medium-sized and not pulled too tight at the base. It is also one of the better options when you want to tuck away the ends without losing all sense of texture.
The look can be polished or casual depending on how clean the parts are. That flexibility is part of the appeal. It’s practical first, pretty second, and that order is exactly why it works.
10. Flat-Twist Crown
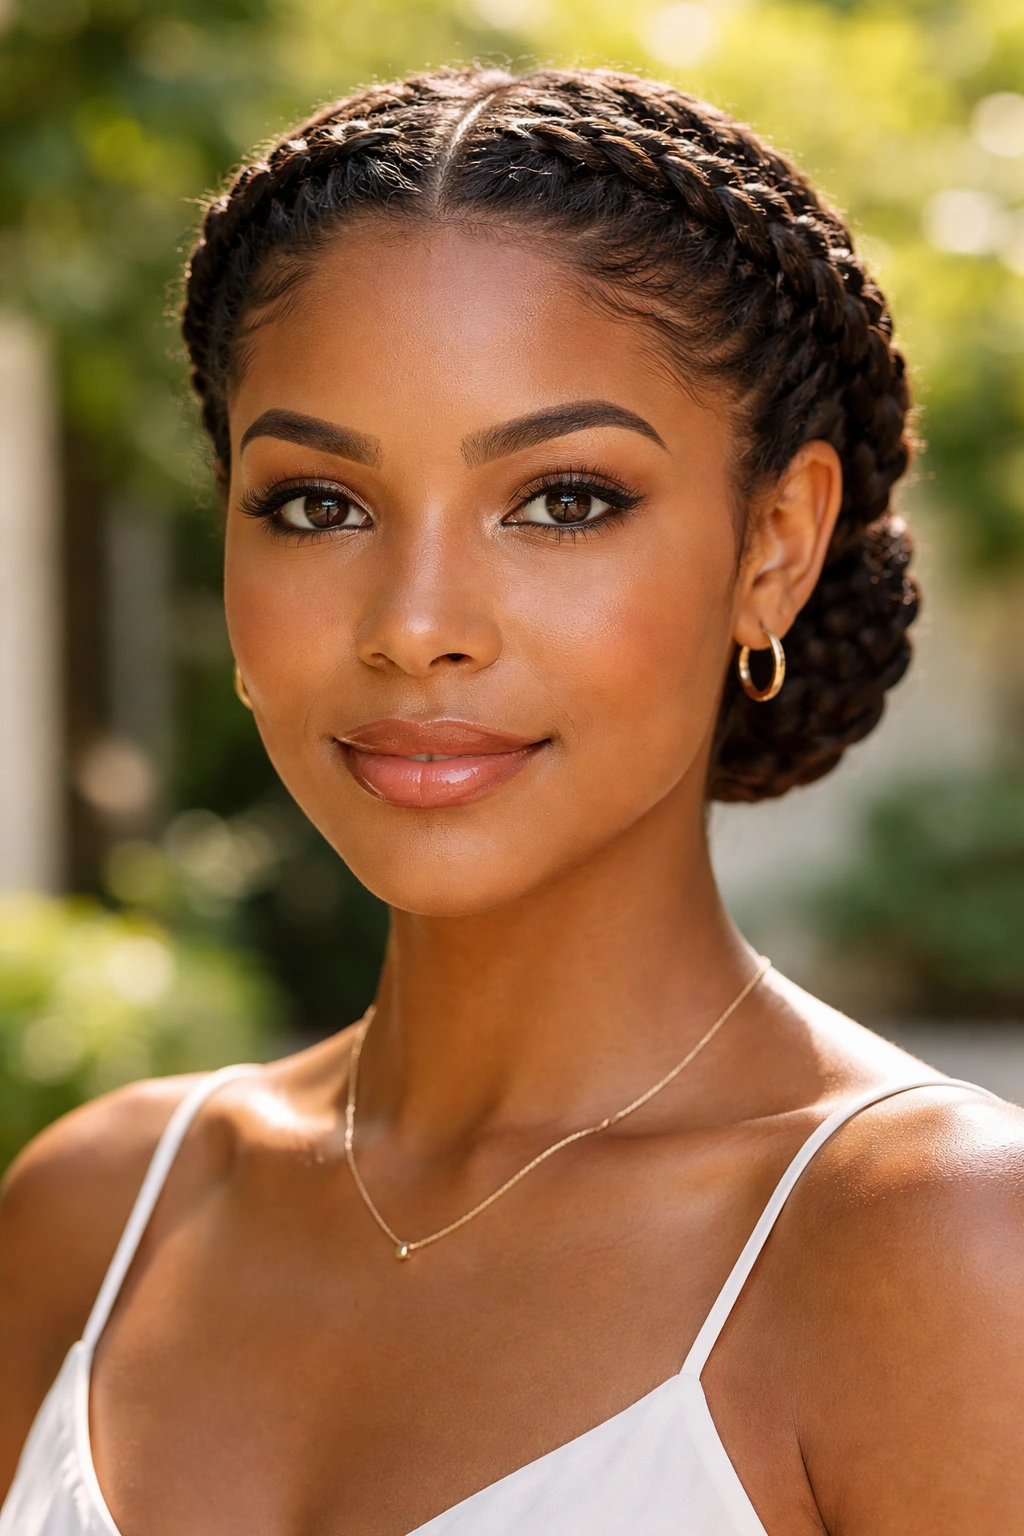
A flat-twist crown looks more elaborate than it is. Most of the work is in the parting and the direction of the twists, not in complicated handwork. The result wraps around the head like a headband, which keeps the face open and the hair out of the way.
What to Watch For
- Keep the twists close to the scalp so the crown lies flat
- Use smaller sections near the temples, where hair can puff out fast
- Pin the ends under the back section instead of leaving them loose
- Mist the front lightly before twisting so the hair bends without snapping
The style suits medium to long curly hair especially well. It also works on coily textures that hold a flat twist without slipping apart. If the hairline is delicate, avoid pulling the front sections too hard. A crown that feels good to wear will look better by the end of the day.
This is one of those styles that can read bridal, work-ready, or plain practical depending on what you pair it with. A little gloss on the crown makes it look more finished. Nothing fussy. Just clean lines and a shape that stays where you put it.
11. Space Buns
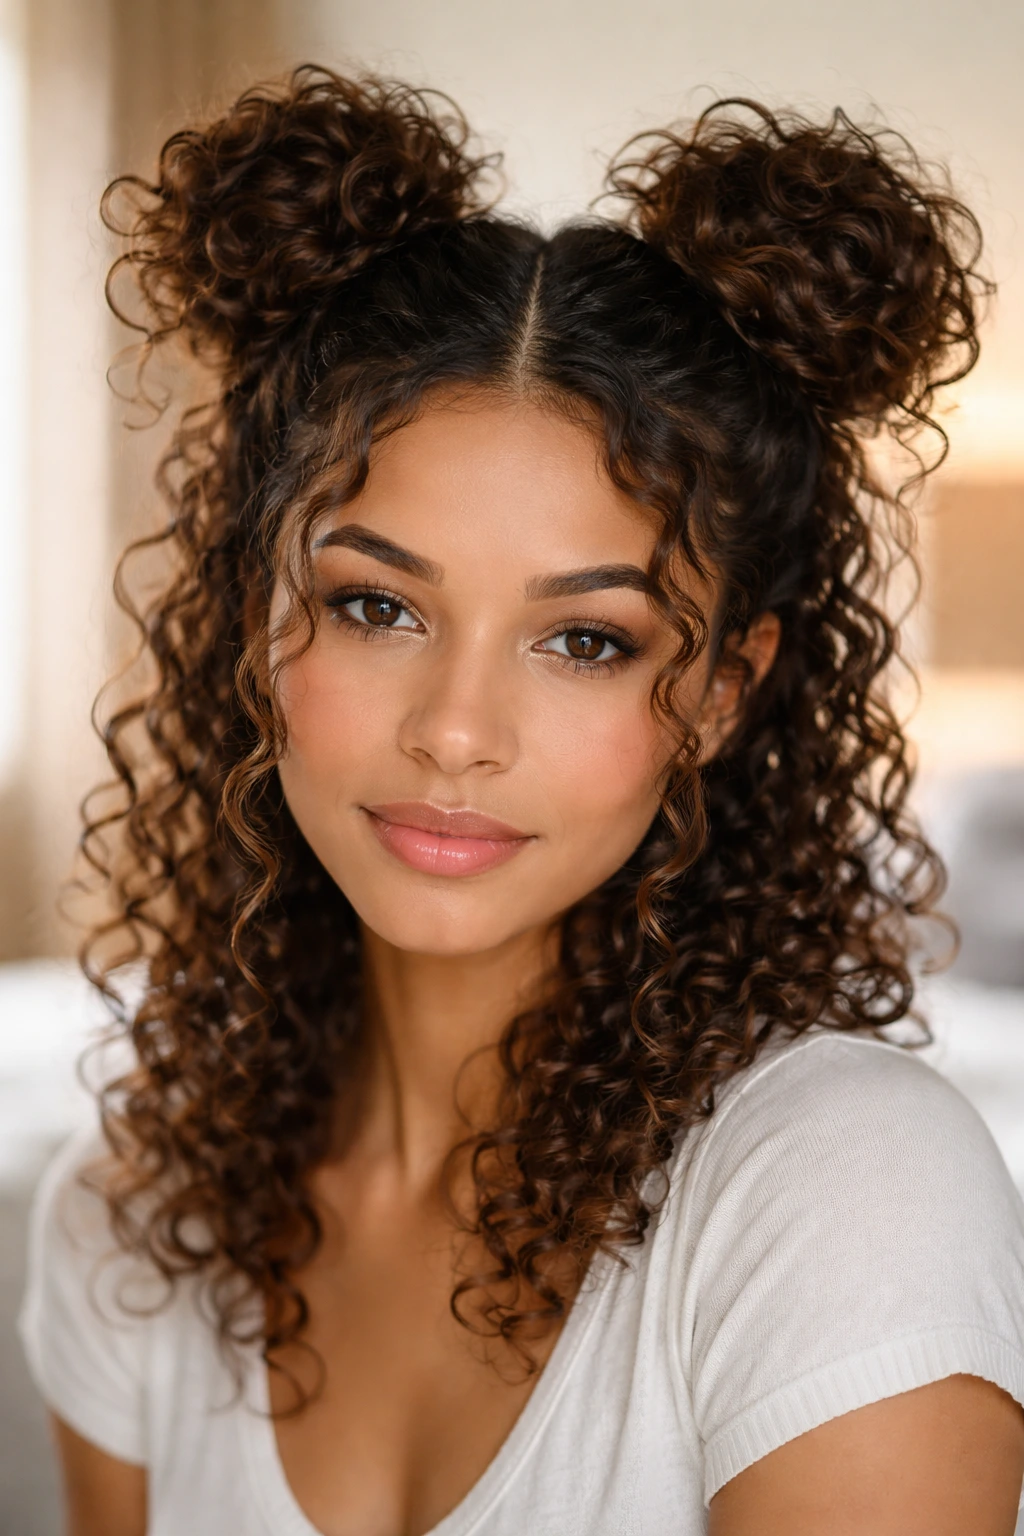
Space buns can be sweet, sharp, or a little chaotic in the best way. The style splits the head into two sections and piles each one into a bun, which means the curls get lifted, tucked, and framed instead of hanging loose.
The parting does a lot of the visual work here. A clean center part gives the style symmetry. A slightly off-center part makes it feel softer and less cartoonish. I like leaving a few curls out around the hairline, because a fully pulled-back version can feel severe on curly hair.
The buns themselves do not need to be perfect. In fact, perfect buns can look stiff on textured hair. A looser wrap, with the ends left a little messy, usually reads better. Secure each side with a soft band first, then wrap the hair around itself and pin it in place.
This style is good for curls that need control but not flattening. It keeps the neck free, which matters more than people think, and it gives a strong shape even if the rest of the hair is on day three.
12. Curly Bob
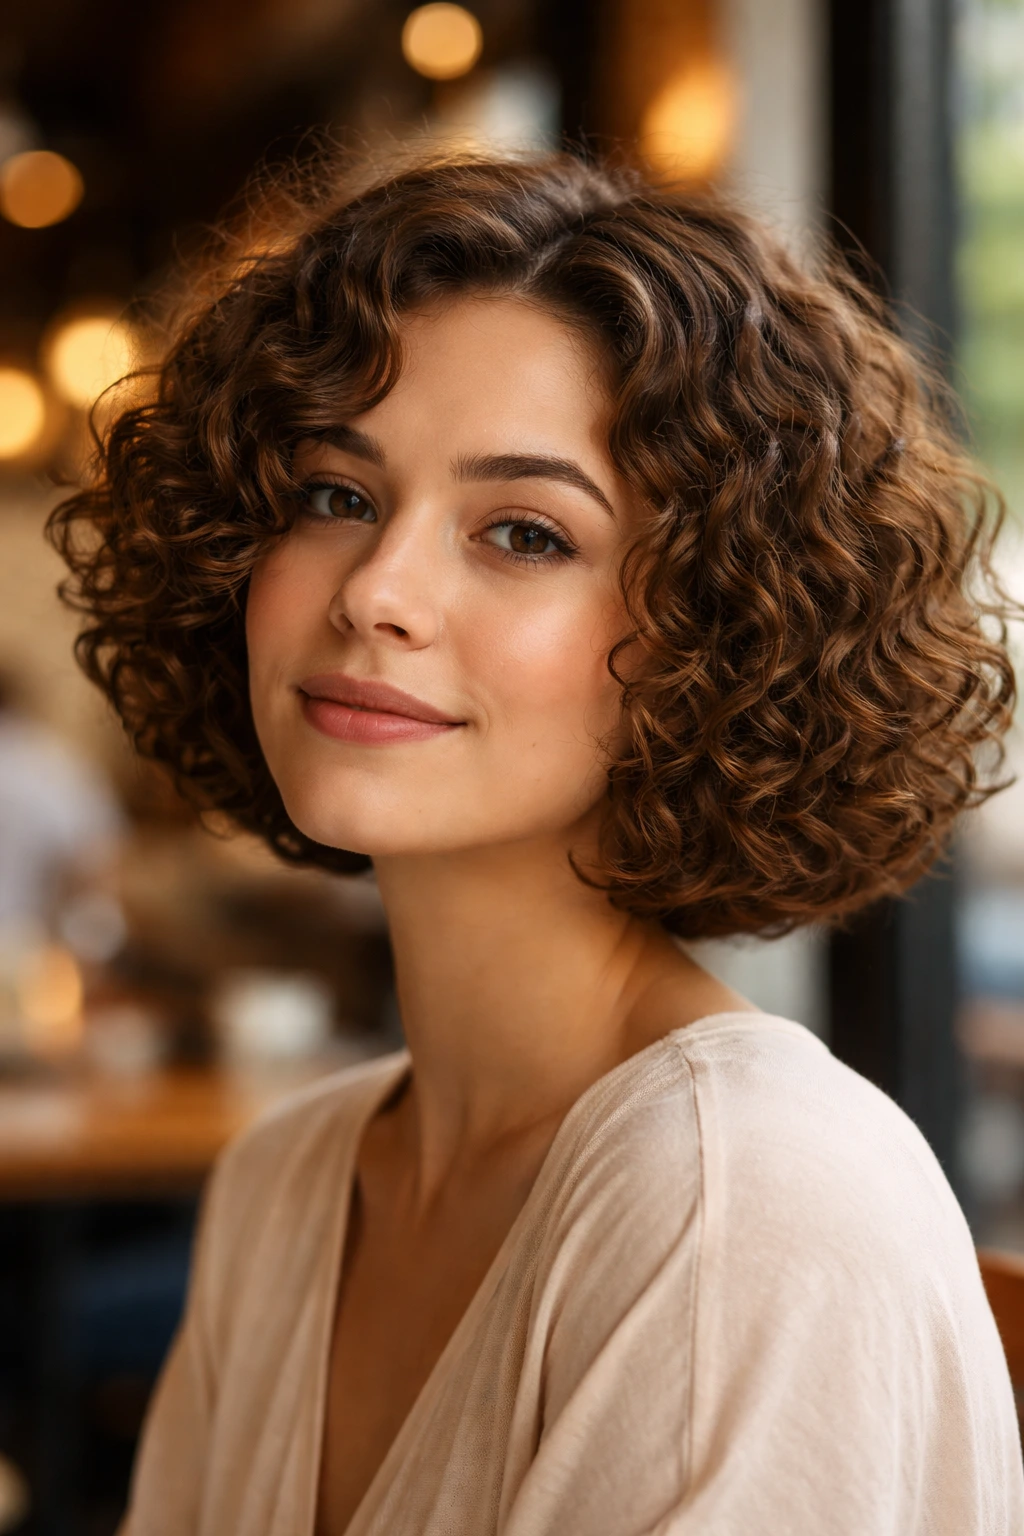
A curly bob works because it changes the weight of the whole head. Once the length sits around the jaw or just above the shoulders, the curl pattern gets more room to bounce instead of being dragged down by extra length.
Shorter curly cuts can look fuller without adding product. That is the part most people notice after the fact. The silhouette comes from the cut, not from teasing or over-styling. A dry curl-by-curl cut helps, because wet curls often shrink in surprising ways and can end up shorter than planned.
The bob is sharpest when the ends are shaped with intention. Too much stacking at the back can turn the style into a triangle. Too little shaping can leave the front heavy and the sides awkward. A good curly bob has curve, not bulk.
If your curls are loose, a diffuser at the roots can give the cut a cleaner line. If they are tight, air-drying may be enough. Either way, the bob keeps the focus on the shape of the curl, which is why it never really goes out of place.
13. Curly Shag
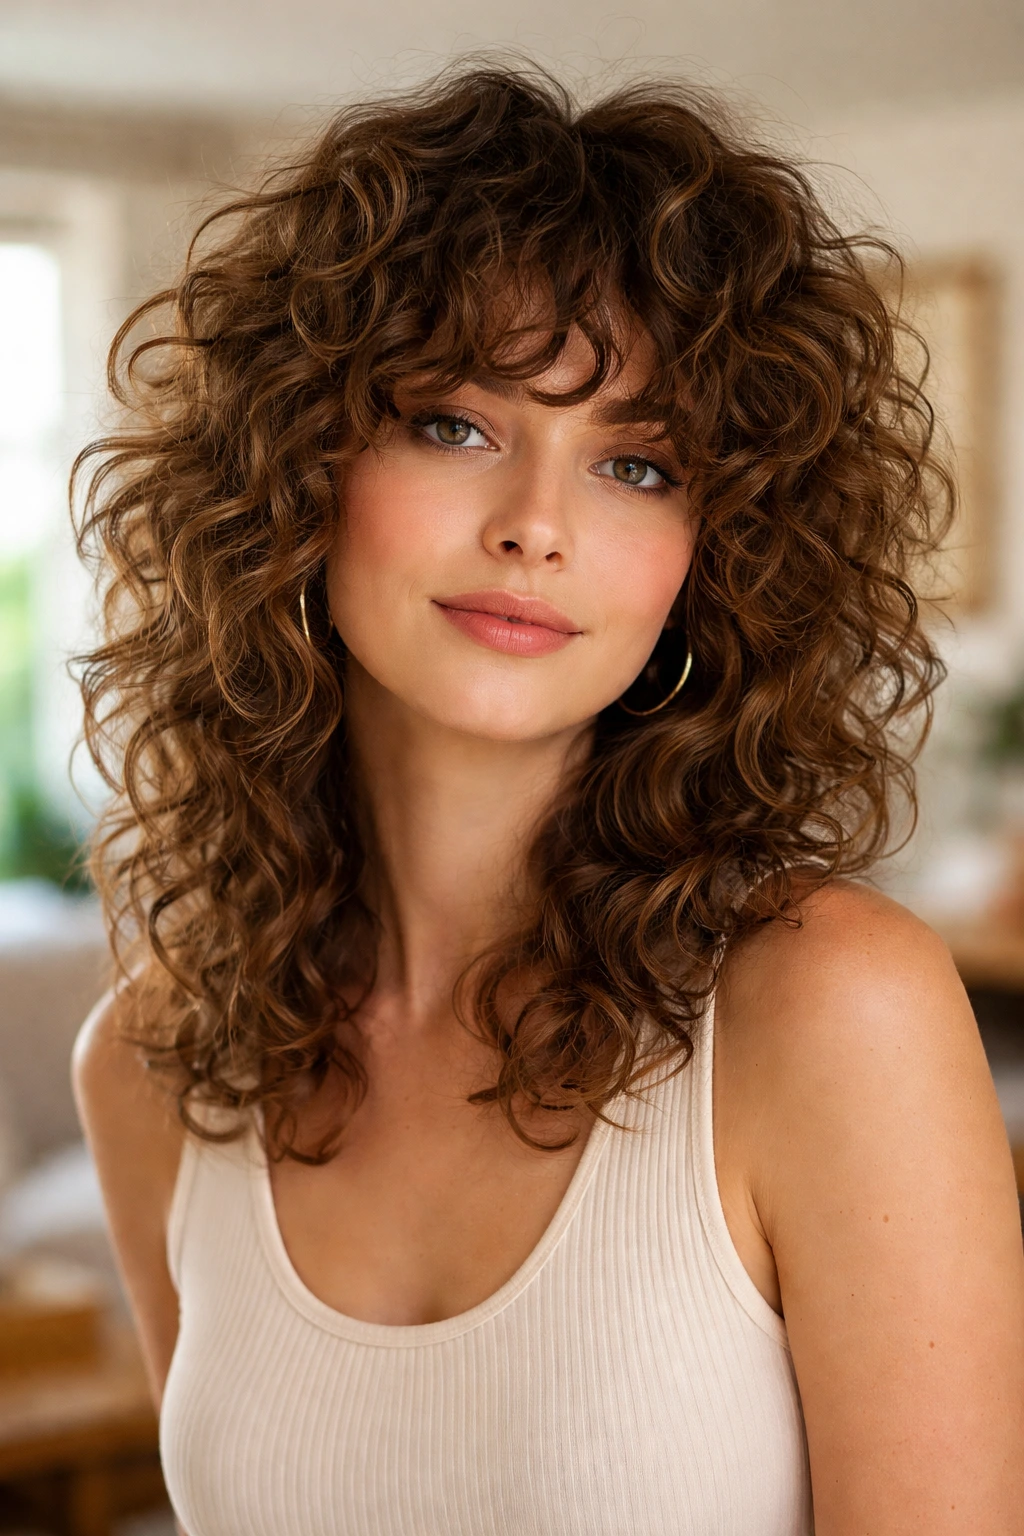
A curly shag is what happens when layers stop being timid. The shape adds movement at the crown, lightness through the sides, and a fringe or face frame that keeps the style from collapsing into one heavy mass.
Why It Works
The layers break up weight. That matters a lot on dense curly hair, where too much length can drag the curl pattern down and make the ends look flat. A shag does the opposite. It lifts the top, opens the middle, and lets the curl pattern show from more than one angle.
The haircut often looks better with a little volume at the root, so a diffuser and a root clip can help. A mousse with a bit of hold is useful too. Not because you need stiff hair, but because the style needs the layers to stay separated enough to show the shape.
What to Ask For
- Keep the face frame soft, not choppy
- Ask for layers that respect shrinkage
- Avoid over-thinning the ends
- Leave enough length in the front for the curl to spring naturally
A shag is not for someone who wants one clean, neat outline. It is for someone who likes motion. Big difference.
14. Curly Bangs
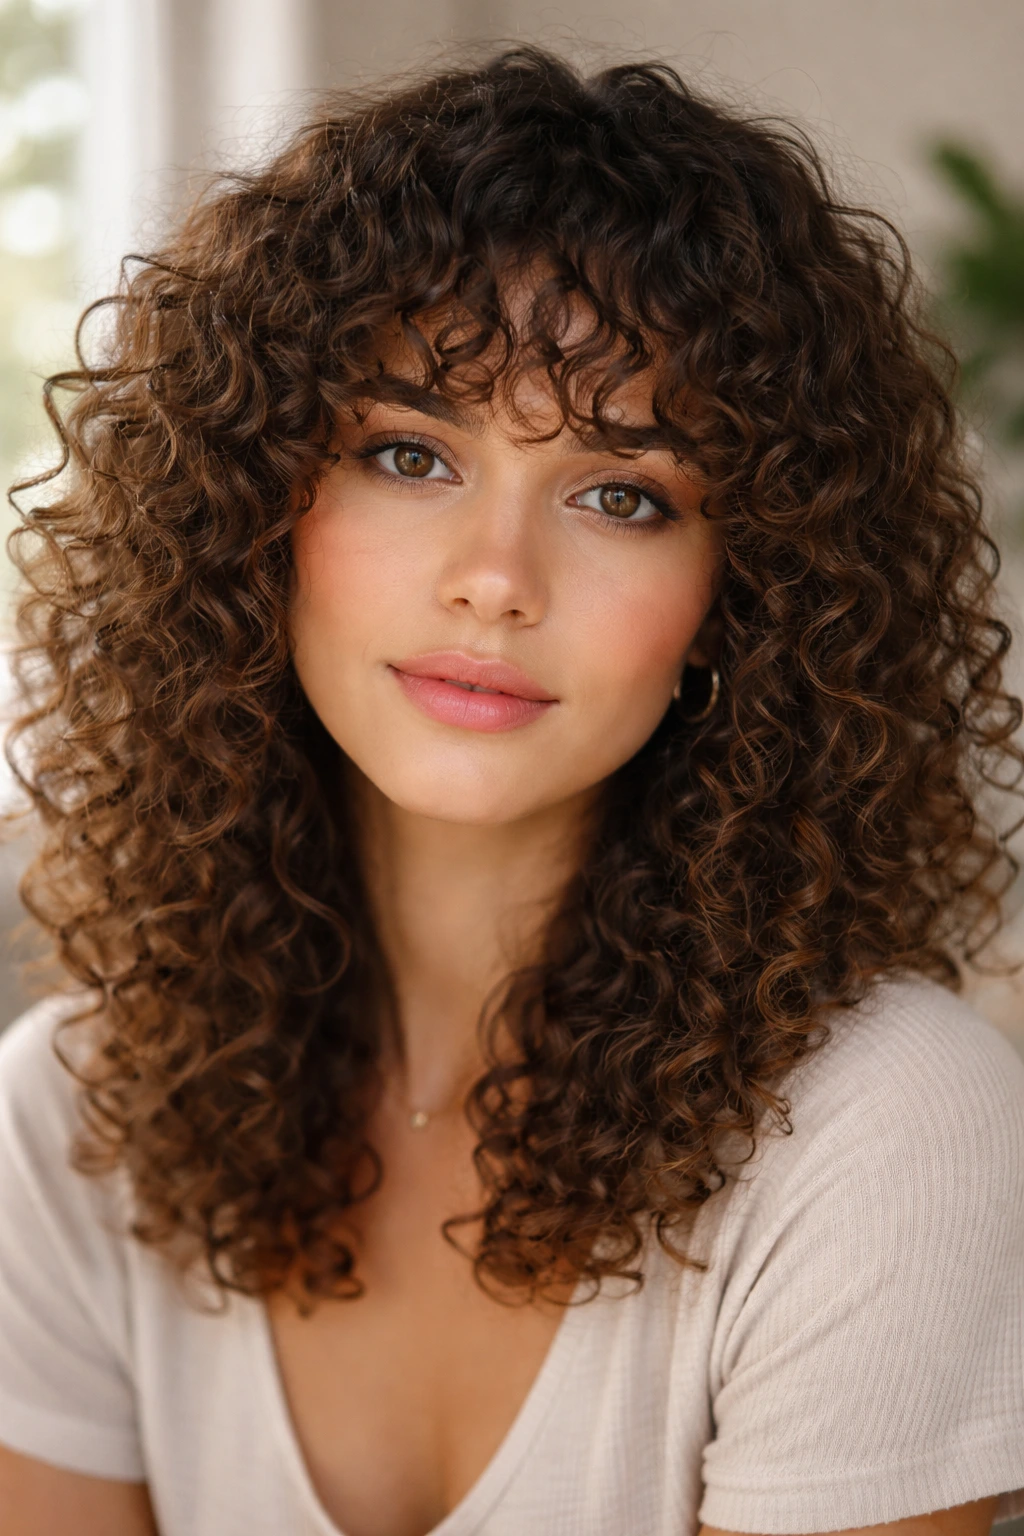
Can curls wear bangs without turning into a triangle? Yes, but only if the fringe is cut with shrinkage in mind. Curly bangs need extra length at the start, because they spring up more than straight hair does once they dry.
The best version sits a little longer than feels safe in the chair. That is not a mistake; it is insurance. A dry cut helps because the stylist can see where the curls actually land instead of guessing from wet strands that will tighten later.
I like curly bangs when the face needs more framing without a full haircut. They can soften a strong jaw, bring the eyes forward, and make a simple bun or puff look finished. They also need less daily styling than straight bangs, which is a small but welcome tradeoff.
Keep the fringe separate when you refresh the rest of the hair. A fine mist of water and a dab of curl cream are usually enough. If the bangs start sticking together in odd little hooks, you used too much product.
15. Curly Pixie Cut
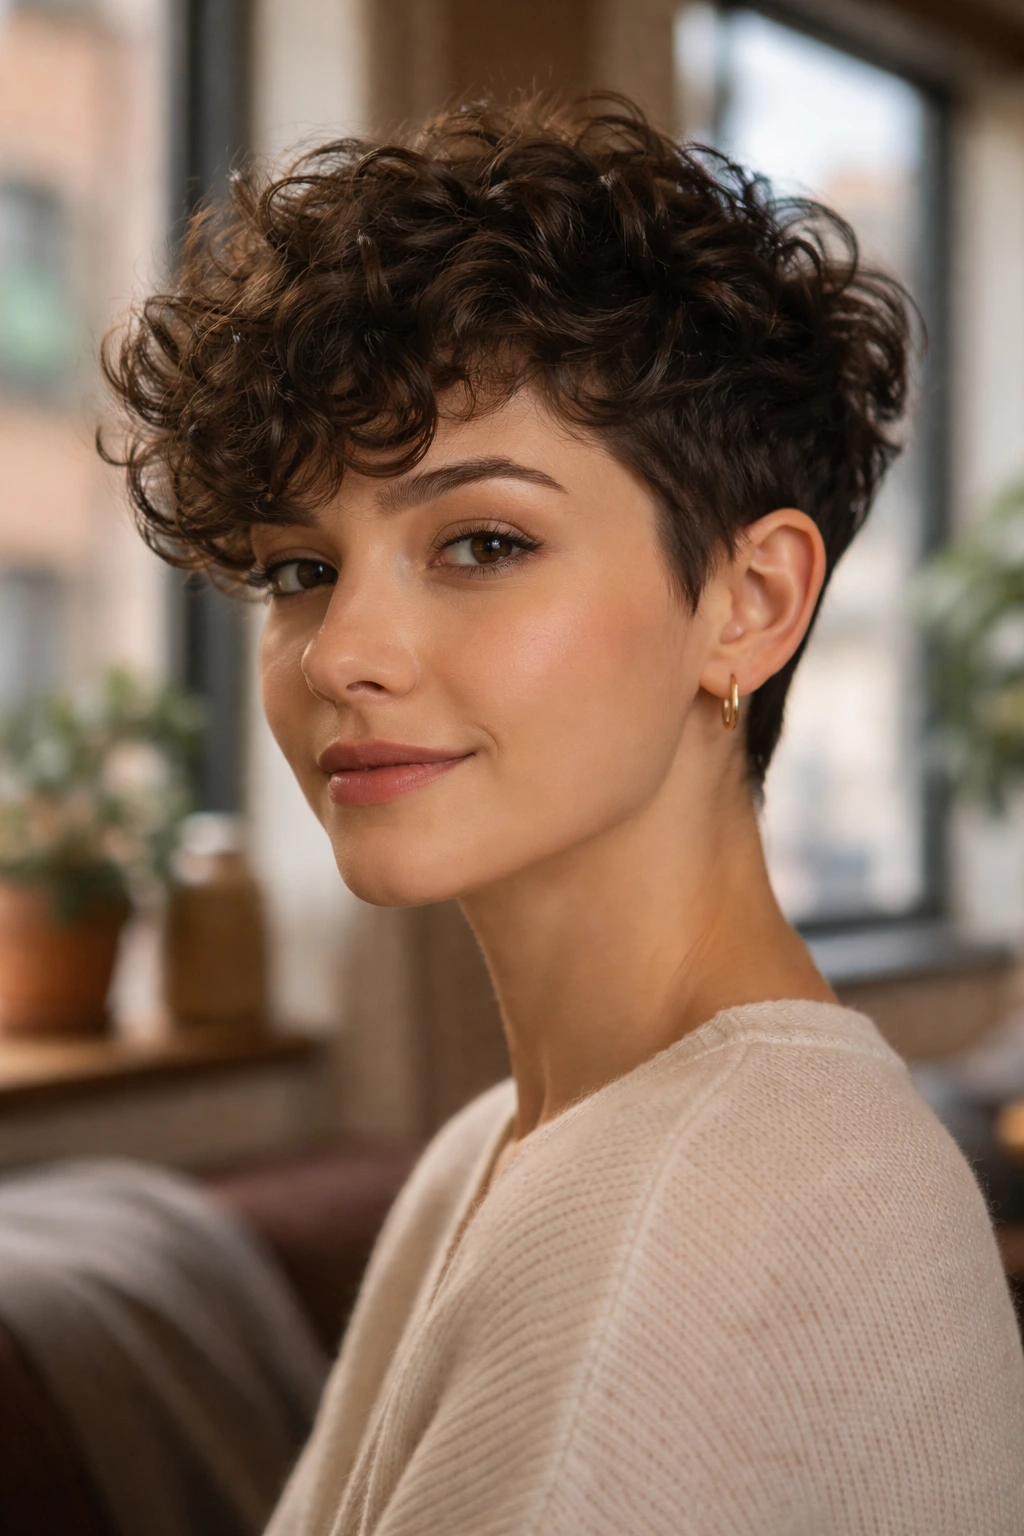
Short curly hair is not a compromise. It is a shape of its own, and the pixie cut proves it. The style keeps the sides tight or tapered while leaving enough length on top for the curl to show texture and lift.
The best pixie cuts for curls are cut with the pattern in mind, not against it. That usually means a little more room at the crown and enough softness around the temples that the head shape still looks balanced. If the top is too short, the curl can spring up into a fuzzy cap. If it is too long, the style starts to lose the point.
This cut needs less daily handling than many long styles, but it does need regular shaping. A tiny bit of curl cream or styling gel on damp hair is often enough. More than that can weigh the top down and make the cut look narrower than it should.
There is also a nice honesty to a pixie on curly hair. Nothing is hidden. The texture is the whole story.
16. Layered Shoulder-Length Cut
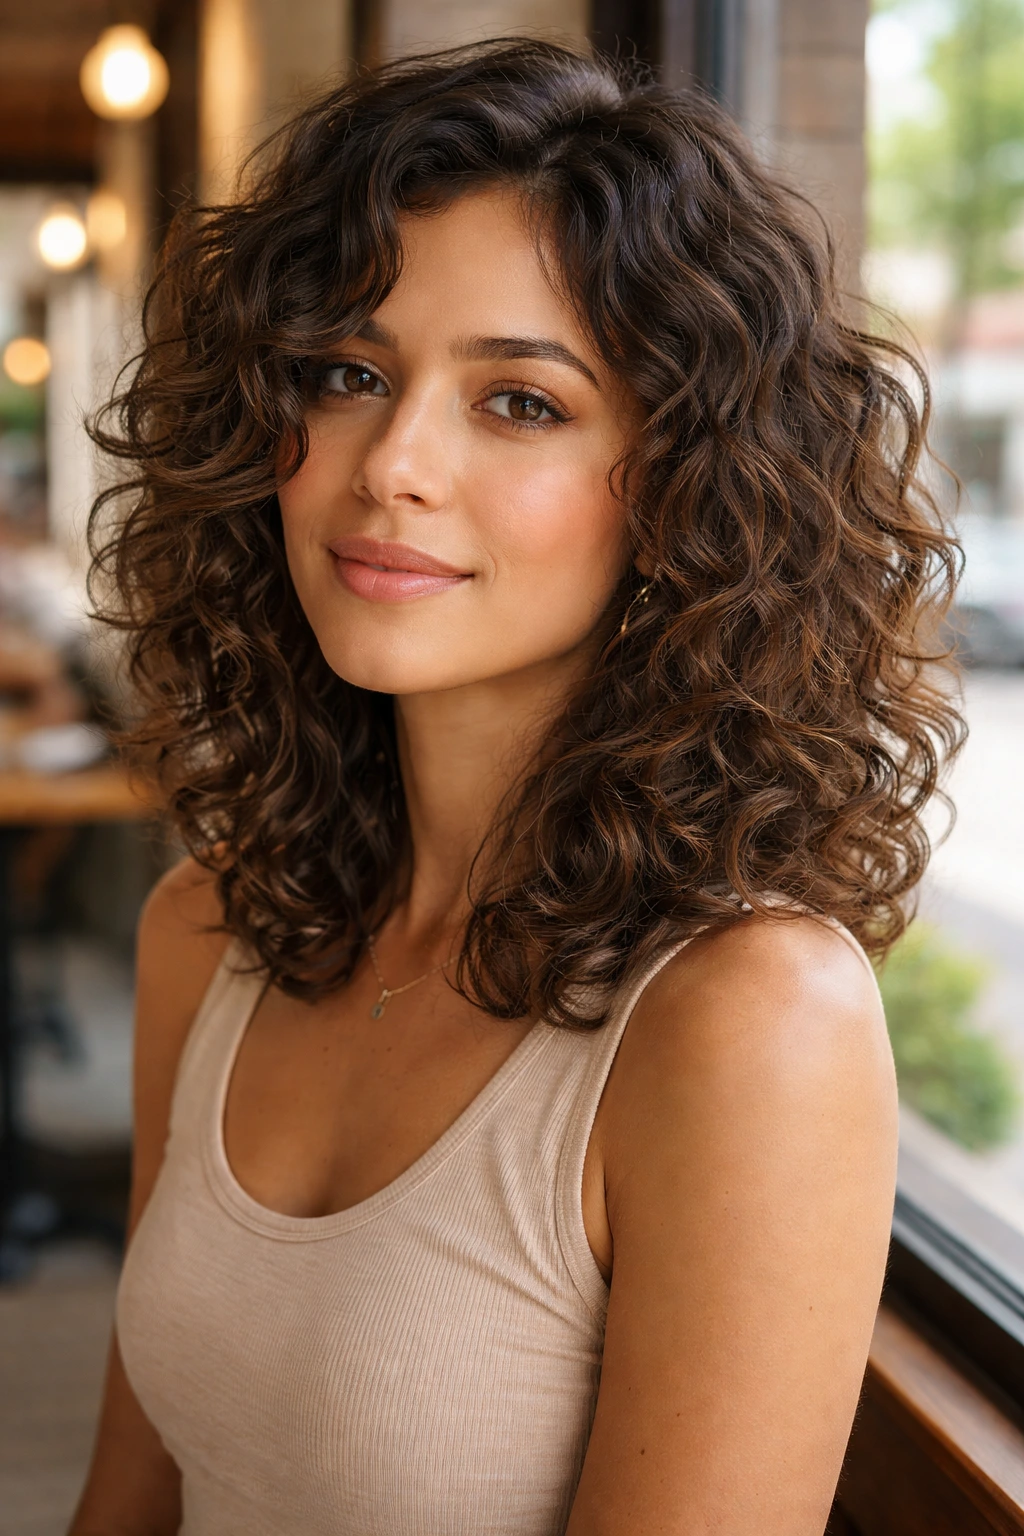
Shoulder-length layers are the workhorse of curly hair. They keep enough length for ponytails and buns, but they remove enough weight that the curls can lift instead of dragging.
Why People Keep Coming Back to It
The shape is forgiving. A shoulder-length cut can be worn down, clipped back, or pinched into a half-up style without fighting the structure of the hair. It also handles shrinkage better than a blunt cut, especially when the ends would otherwise bunch up and puff.
A dry finish matters here, too. If the hair is cut wet, the final shape can be off by several inches once it dries. That is how people end up with shoulder-length hair that lands at the chin. Not ideal.
Small Details That Help
- Ask for layers that start below the cheekbone if you want the front to stay long
- Keep the top slightly lighter than the bottom to avoid a triangle shape
- Use a diffuser only at the roots if the curls already hold their form
- Refresh with water and foam, not heavy cream, when the hair feels flat
It is not the flashiest cut in the room. It may be the most useful one.
17. Cornrows with Curly Ends
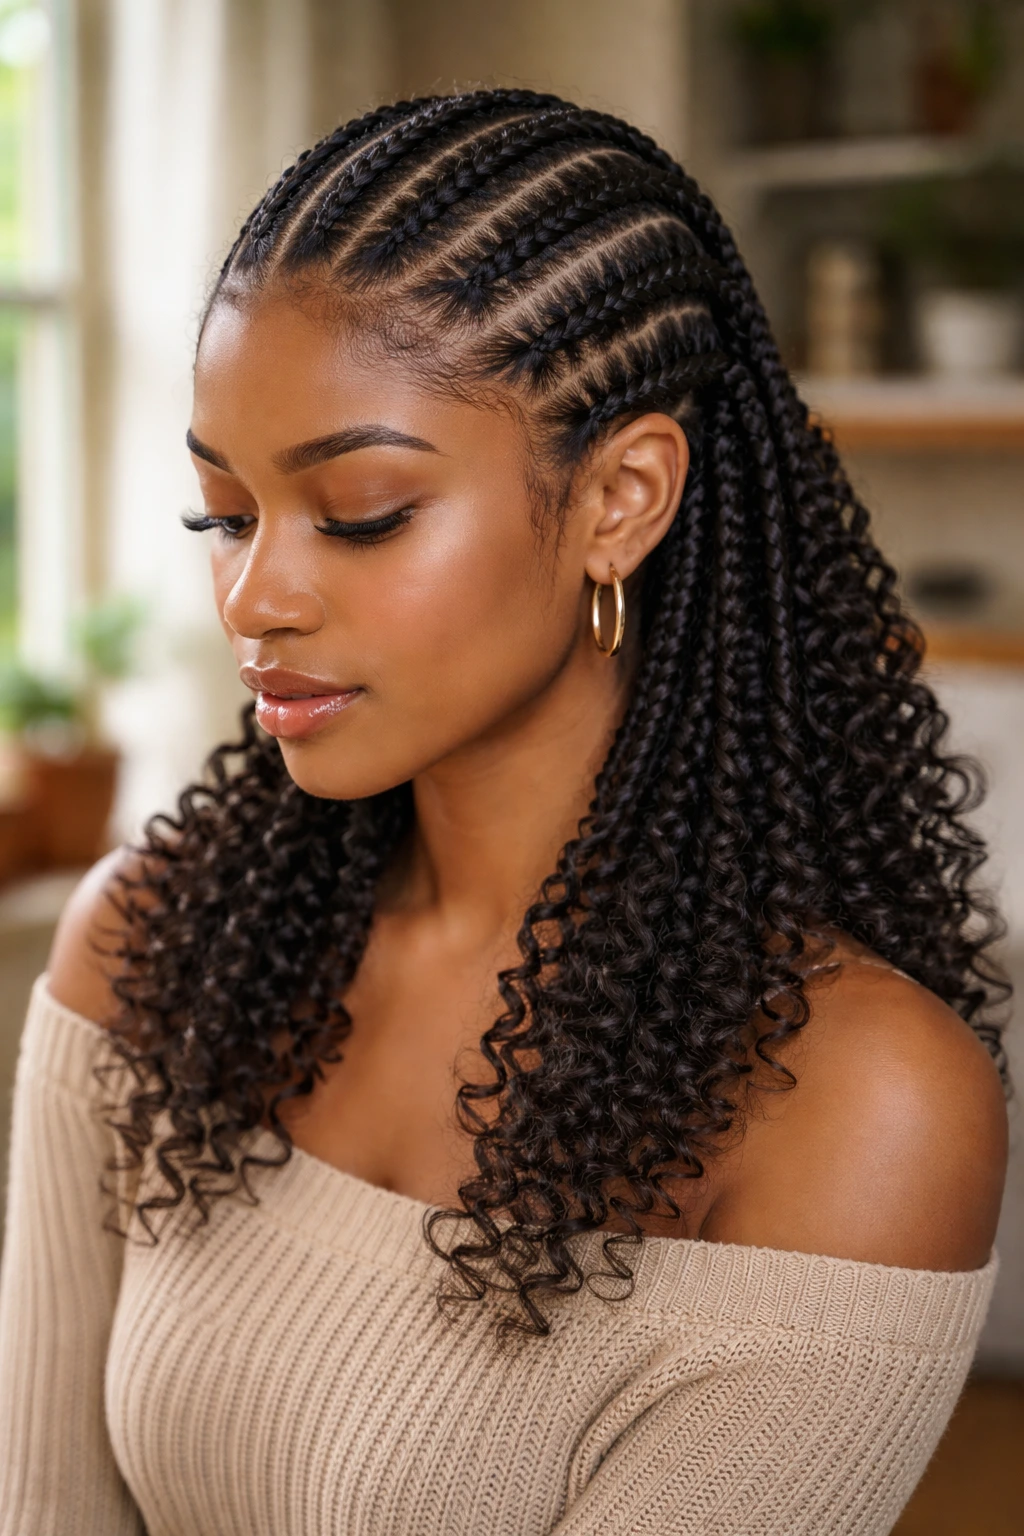
Cornrows with curly ends give you a clean scalp shape at the top and texture at the bottom, which is a nice mix when you want protection without losing all movement. The braided base keeps the roots tucked in, while the loose ends still show the curl pattern.
The parting needs to be neat, because the scalp is part of the style here. Uneven lines show fast. So do braids that are too tight at the edges. A little tension is enough; too much turns a protective style into a problem.
I like this style when the hair needs to stay contained for a few days but still look soft once the braids fall past the shoulders. The curly ends can be dressed up with a bit of mousse, or they can be left fluffy for a more relaxed feel. Either way, the contrast does the work.
A satin bonnet at night helps the braid pattern stay fresh. A tiny amount of oil on the scalp can help if the skin gets dry, but don’t saturate the roots. Greasy scalp and neat braids do not mix well for long.
18. Sleek Low Bun
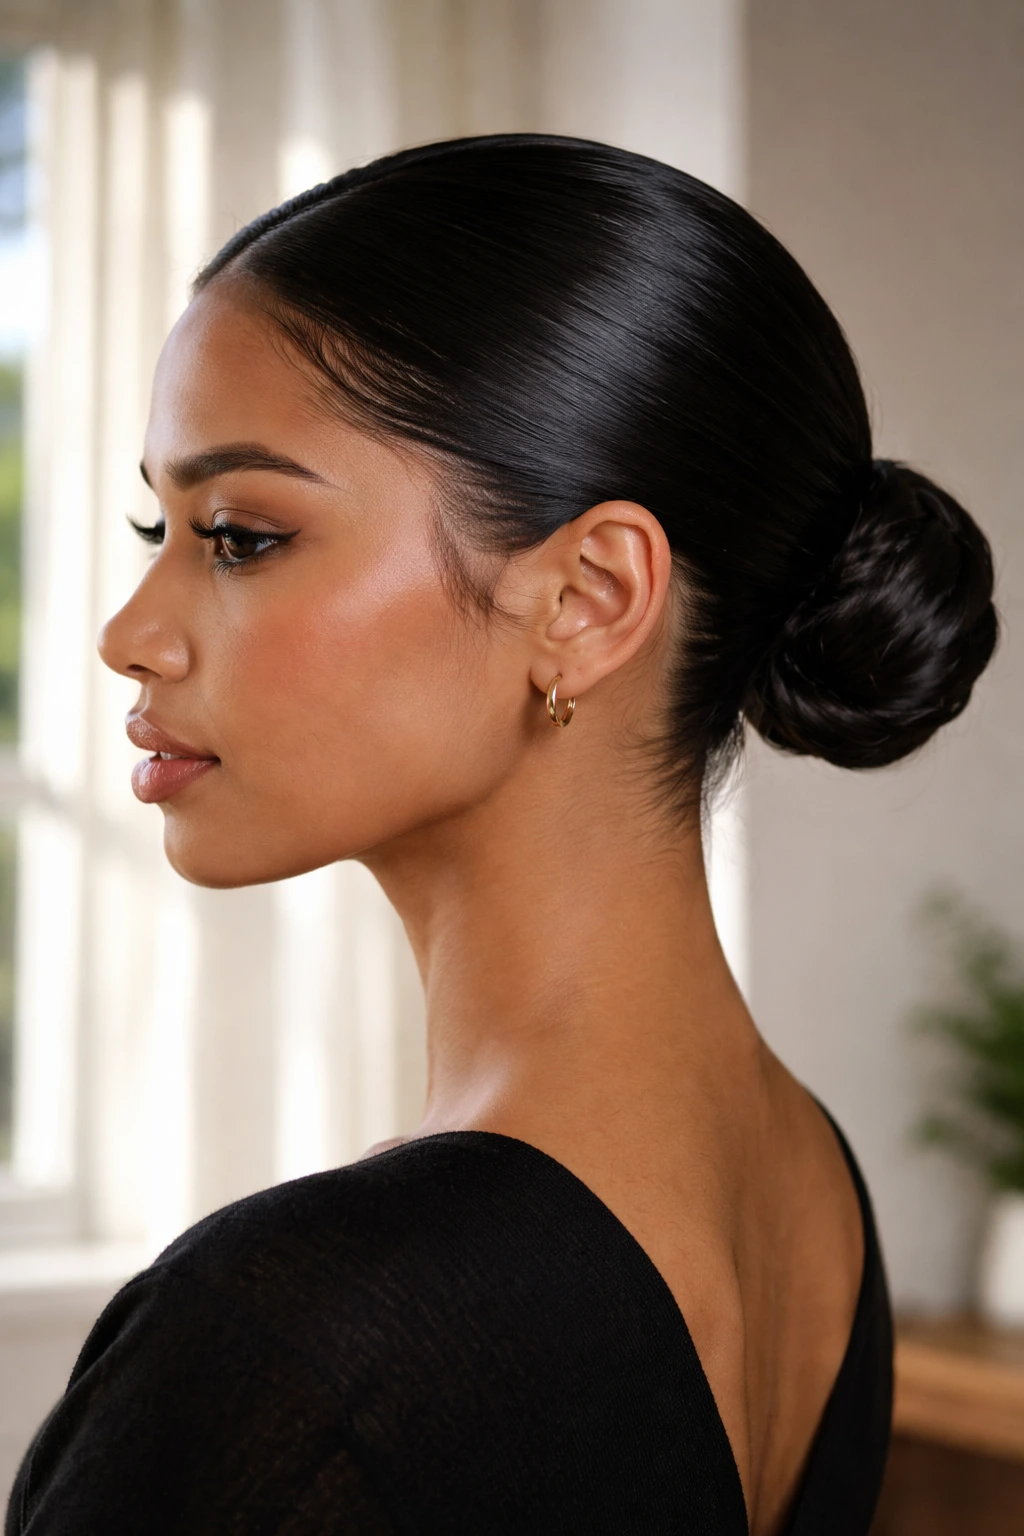
A sleek low bun is the no-nonsense answer when you want curly hair to look controlled. It gathers the hair at the nape, smooths the surface, and leaves the bun itself compact instead of fluffy.
Unlike a low puff, this style is about polish first. You are not trying to preserve every curl. You are trying to create a clean line from forehead to nape, which means gel, a good brush, and a little patience around the hairline. The trick is to smooth the outside without flattening the whole head into a helmet.
This is one of the few styles where a little set time pays off. After brushing the hair into place, a silk scarf wrapped around the head for 10 to 20 minutes helps the gel settle and keeps the sides from rising again too fast. That one pause often makes the difference between “sleek” and “trying to be sleek.”
The bun itself can be twisted, coiled, or folded under. Keep the tension light at the base. That part matters more than the shape of the bun.
19. Claw-Clip Twist
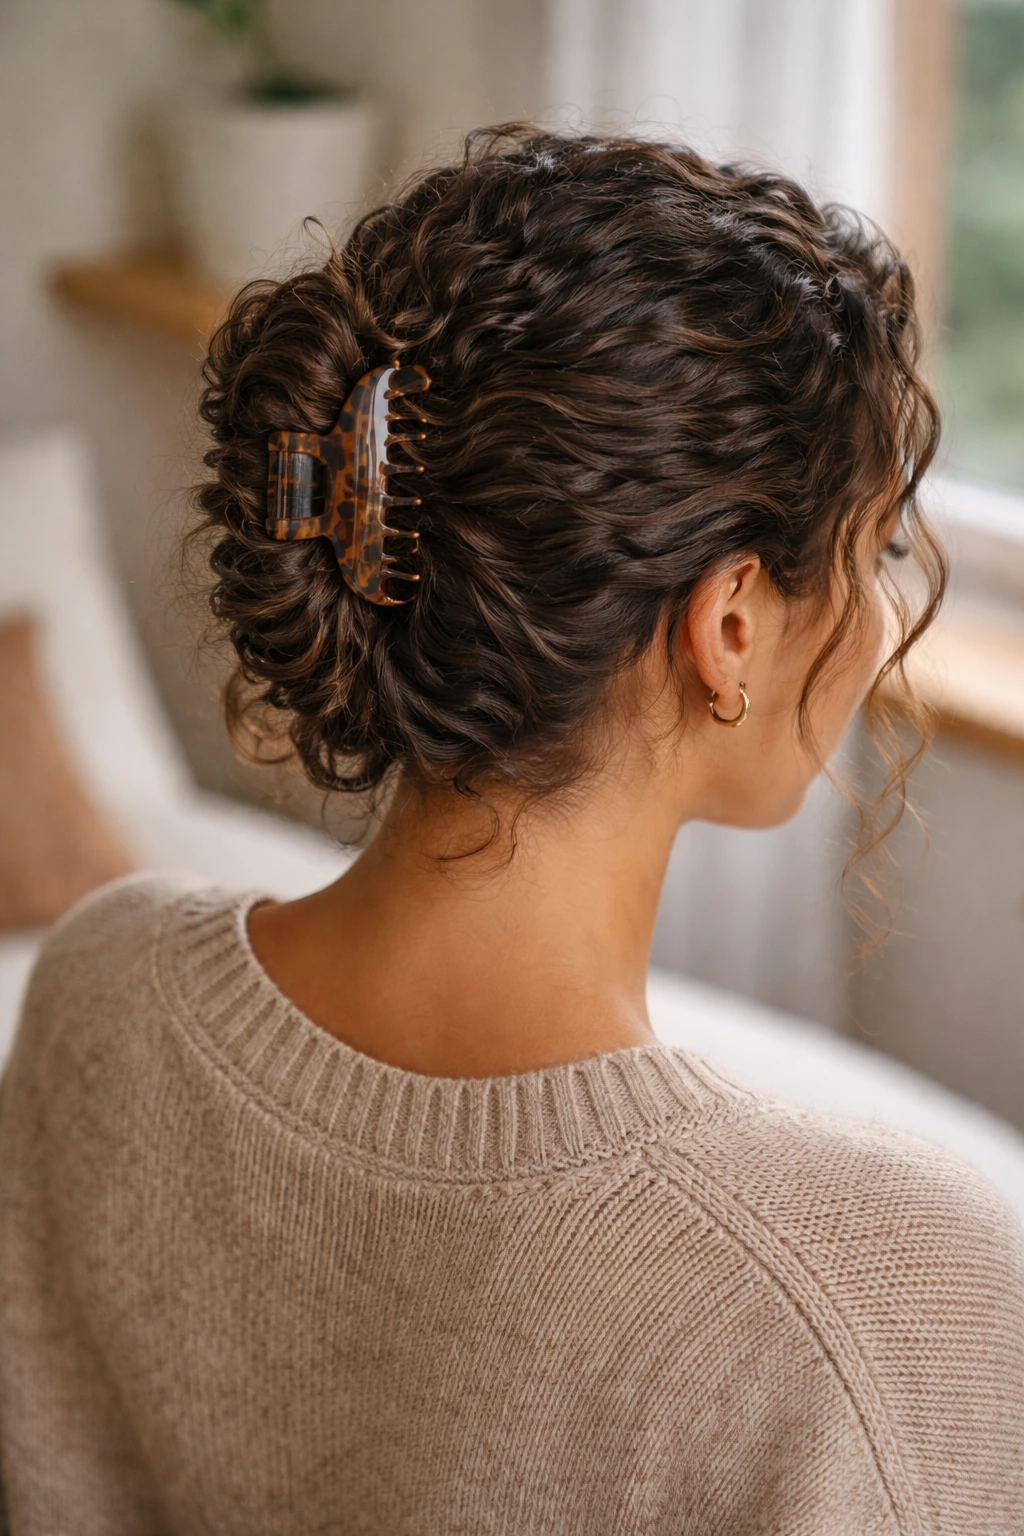
A claw-clip twist is one of the easiest ways to get hair up fast without a tight elastic leaving a dent. You gather the curls, twist them once or twice, and clip them in place so the ends sit loosely or tuck under the clip.
Why It’s So Handy
The style works because it lets the hair support itself. The clip holds the twist, but it does not compress the whole head the way a band can. That makes it useful for thick curls that need room, or for hair that has already spent too much time in buns and ponytails.
Choose a clip with enough teeth to hold your density. Tiny fashion clips look cute and fail in ten minutes on heavy hair. Bigger clips spread the grip out and cause less slipping. If the top layer keeps sliding, rough up the roots slightly with dry texture spray or a touch of mousse.
Good Times to Wear It
- Midday errands
- Desk days when you still want shape
- Second-day curls that need lift at the crown
- Hair that is almost clean but not enough for a full wash
There is nothing fancy here. That is the point. It’s a practical style with a cleaner finish than it gets credit for.
20. Faux Hawk
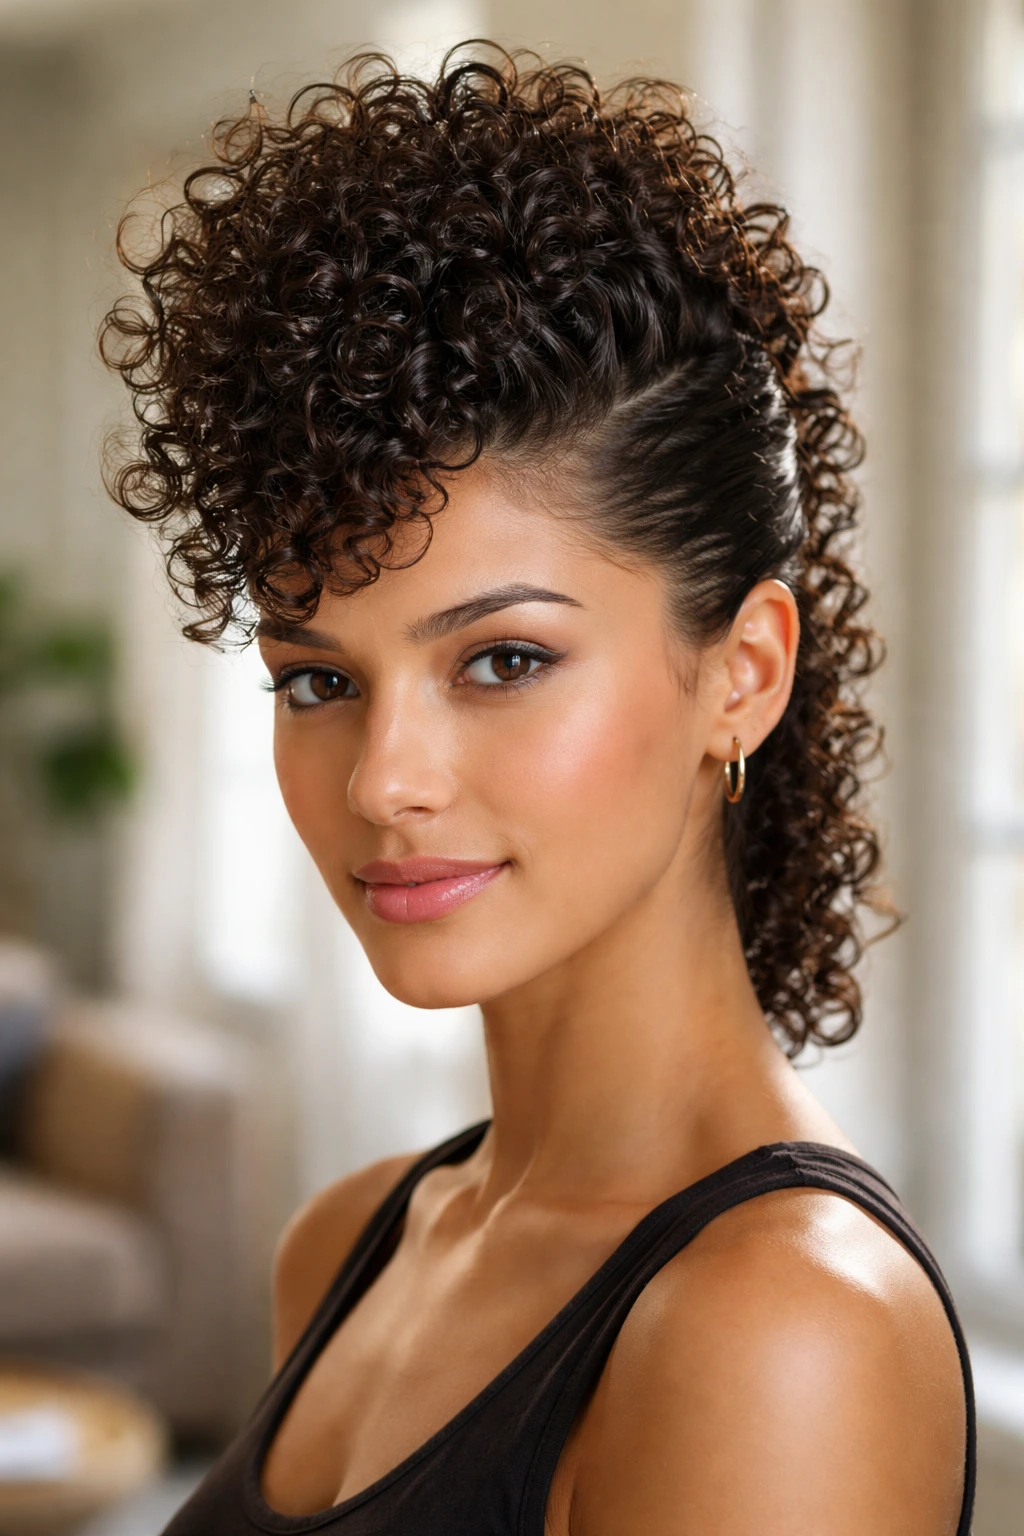
A faux hawk gives curly hair a sharp center shape while pinning or smoothing the sides back. The result feels bold without needing a full cut, and it works especially well when the curls have enough body to build height down the middle.
The middle strip does most of the work. Keep it full. The sides can be pinned, twisted, or slicked close with gel, depending on how dramatic you want the line to look. A few hidden bobby pins usually hold better than one visible clip that keeps slipping out.
This style is good when you want the face open and the silhouette a little unexpected. It reads strong on coily hair and softens up beautifully on looser curls. A diffuser helps the center section keep lift, but dry hair is fine too if you have enough natural volume.
What I like about it is that it feels deliberate without being precious. If a curl falls loose, it usually improves the shape instead of ruining it. That is a rare thing.
21. Side-Swept Curls
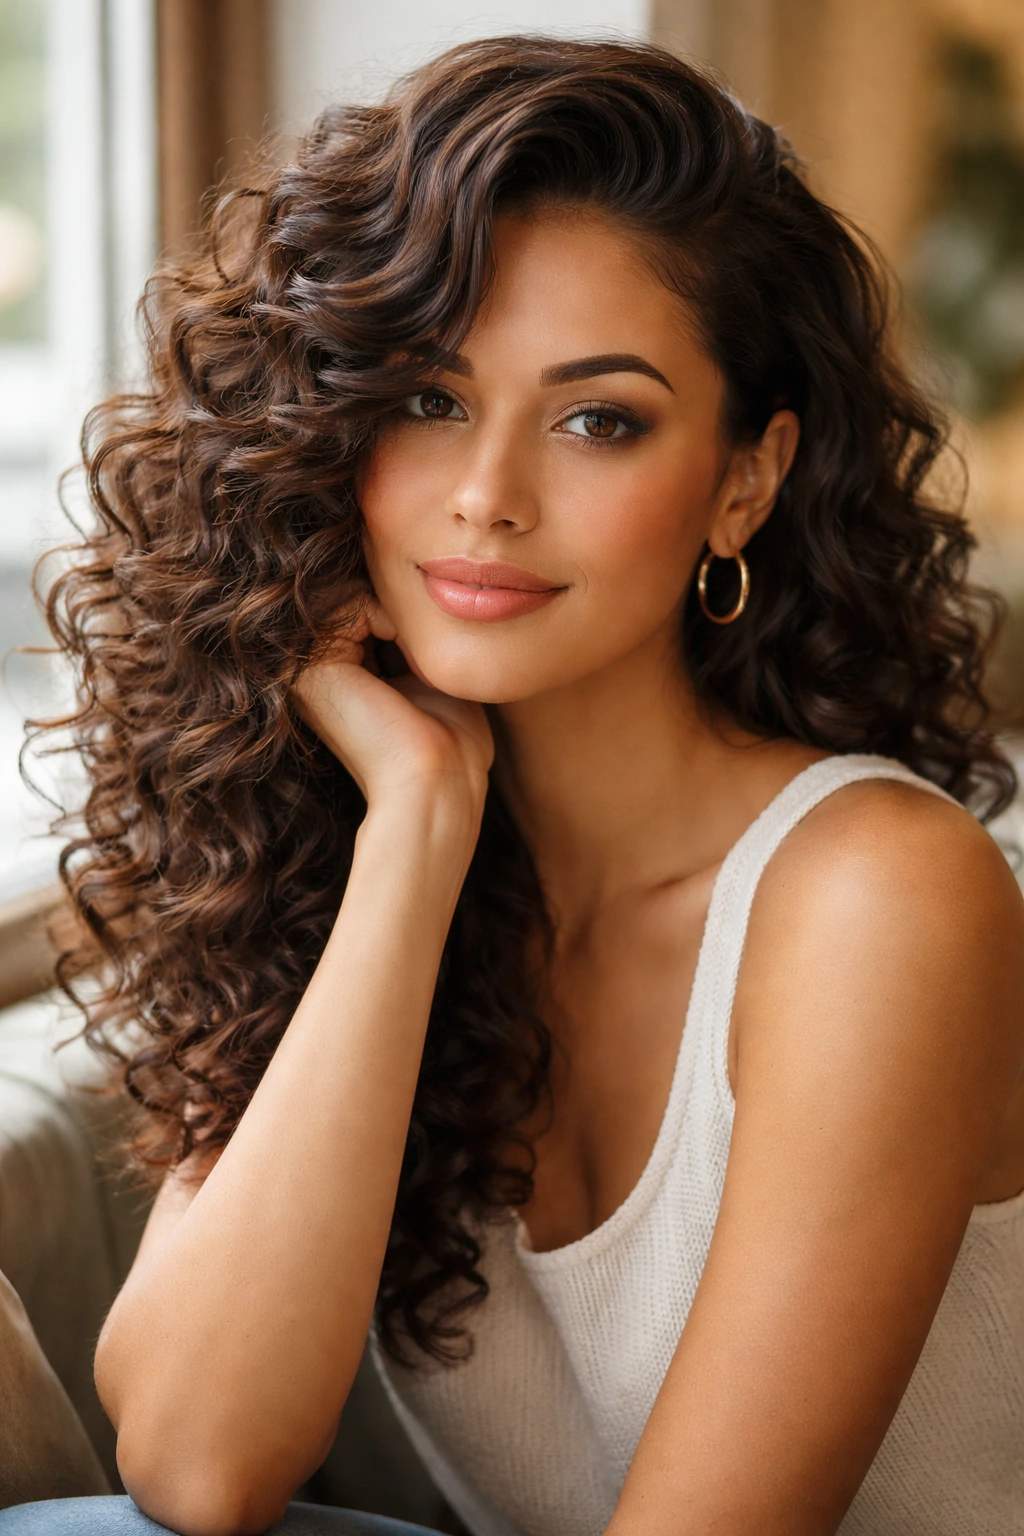
Want a softer version of a formal style without spending all morning in the mirror? Side-swept curls do the job. A deep side part shifts the mass of the hair to one side and gives the face a little asymmetry, which can be useful if the natural curl pattern is heavy through the center.
The part is the whole story here. Make it clean, then let the curls fall. If one side needs help staying in place, pin the heavier side behind the ear with one or two flat bobby pins and hide them under the top layers. That keeps the style from puffing out in a strange spot.
A light mousse works well because it adds memory without turning the curls crunchy. This style looks good when the ends are defined, but it also tolerates a softer finish if you want movement. The important part is that the front stays open enough to show the shape of the face.
I reach for side-swept curls when the rest of the outfit is doing a lot. The hair does not have to shout to make a point.
22. Rope Braid Pigtails
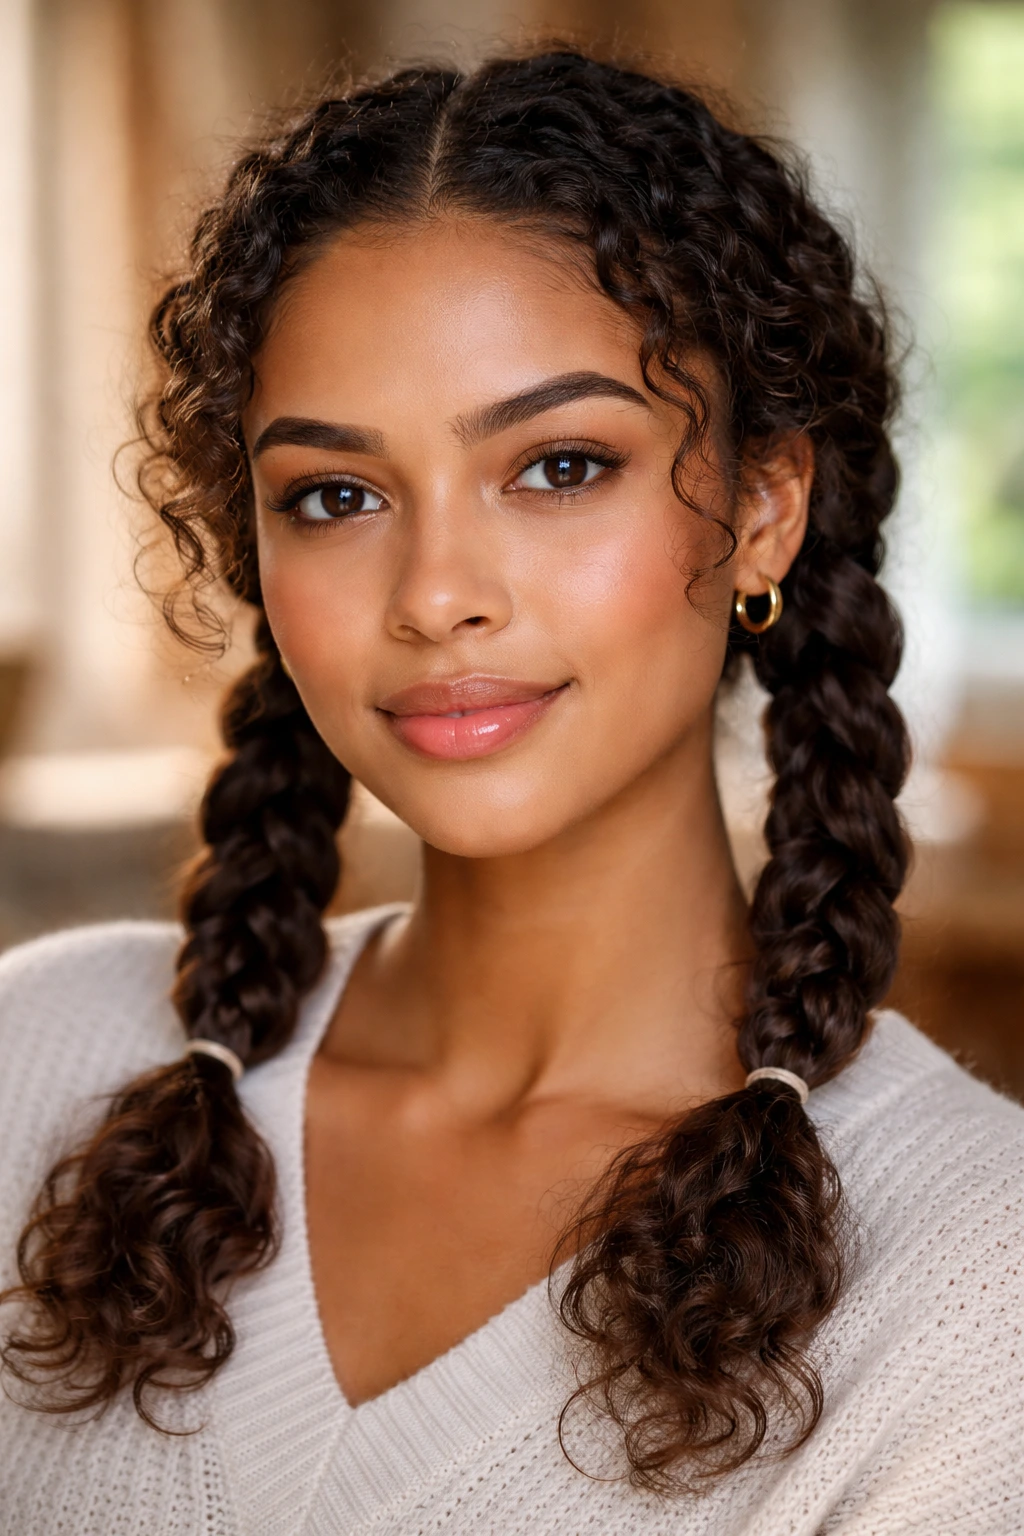
Rope braid pigtails are easier on curly hair than they sound. You divide each side into two sections, twist them around one another, and secure the ends. The twist creates a neat rope effect without needing the cleaner finger control that a three-strand braid asks for.
The Small Things That Matter
- Start on hair that has a bit of slip so the sections stay smooth
- Twist each side in the same direction before crossing them together
- Keep the tension even from root to end
- Tie the ends with a soft elastic so they do not fray
The style works well when curls are stretched a little, because the rope shape shows better on hair that is not at full shrink. It can feel playful on longer curls and more polished on shoulder-length hair. If you want it softer, tug a few small pieces loose around the face.
Rope braids also make a good base for a later take-down. The hair opens into gentle waves without a lot of fuss. Simple, but not boring.
23. Dutch Braid Crown
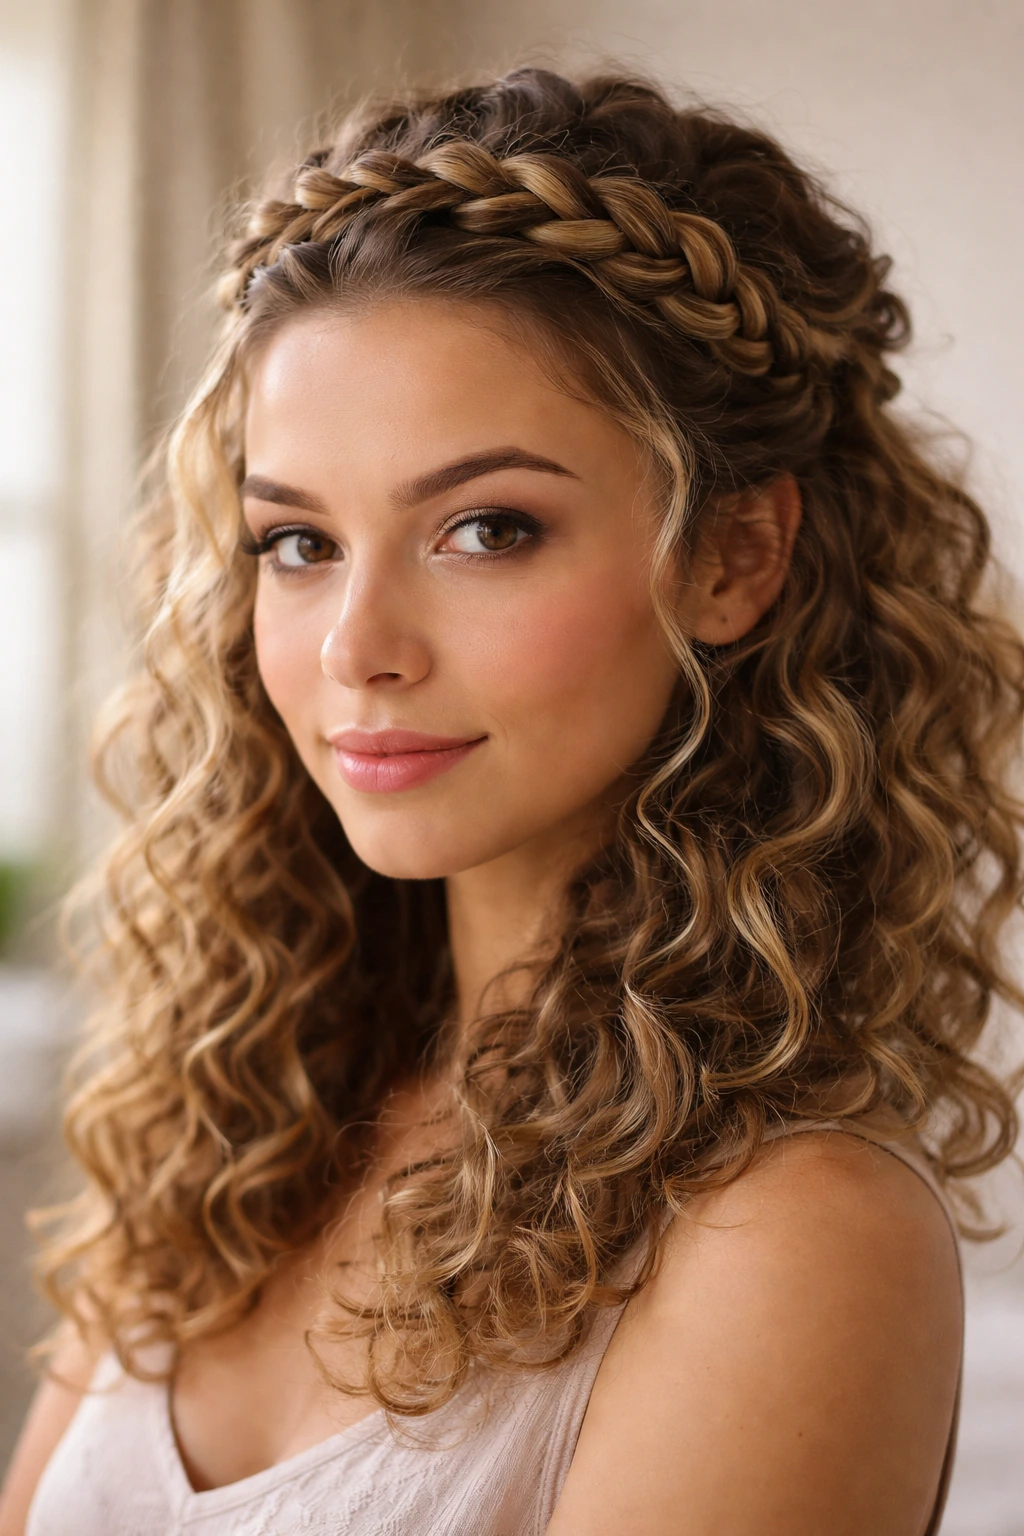
A Dutch braid crown sits on top of the hair rather than sinking into it, and that small lift gives the style a fuller outline than a flat braid. On curly hair, it can look almost sculpted — in a good way — because the braid frames the head while the remaining curls stay visible.
The braid starts near one temple and wraps around the hairline. Keep the sections even so the crown does not pinch in one spot and puff in another. If the curls are very dense, a little light gel through the front sections helps the braid stay neat without making the whole head stiff.
What I like most is how this style handles mixed textures. If the front is looser than the back, the braid can smooth the contrast. If the back is tighter, the crown gives a cleaner frame for the curls underneath. It does a lot of quiet work.
Finish by tucking the tail under the braid or pinning it out of sight at the back. Loose tails can spoil the shape fast. A few curls left free around the ears make the style feel less rigid.
24. Messy Top Knot
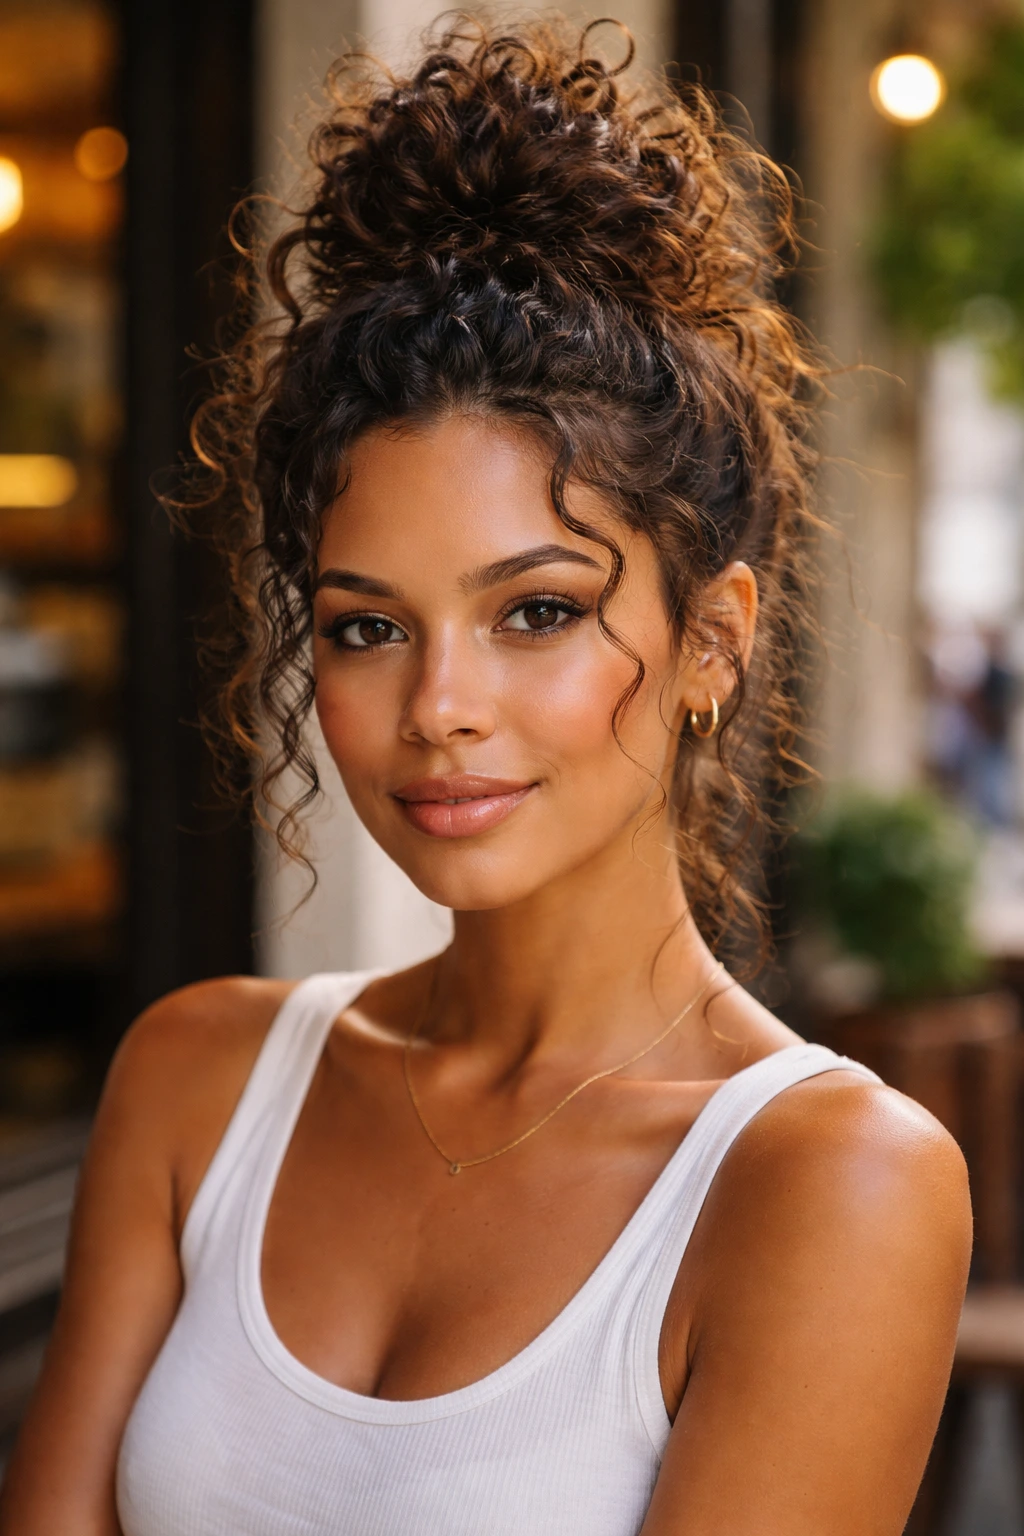
A messy top knot is what many people reach for when the day is moving faster than the hair can. It piles the curls high, twists or folds them into a knot, and leaves a few ends loose on purpose so the shape doesn’t look too controlled.
Compared with a high puff, the top knot tends to feel more contained. The hair is wrapped into itself rather than simply gathered, which means you get less spread and a little more polish. That also means you should not pull the base too tight. The knot should sit securely without fighting your scalp.
This style is excellent on second-day curls, especially when the roots are a little flat but the ends still have some shape. A dry texture spray at the crown can help the knot hold. If the hair is longer, twist the lengths before wrapping them so the bun doesn’t slide apart halfway through the day.
A messy top knot is not trying to be perfect. That is why it works.
25. Finger Coils
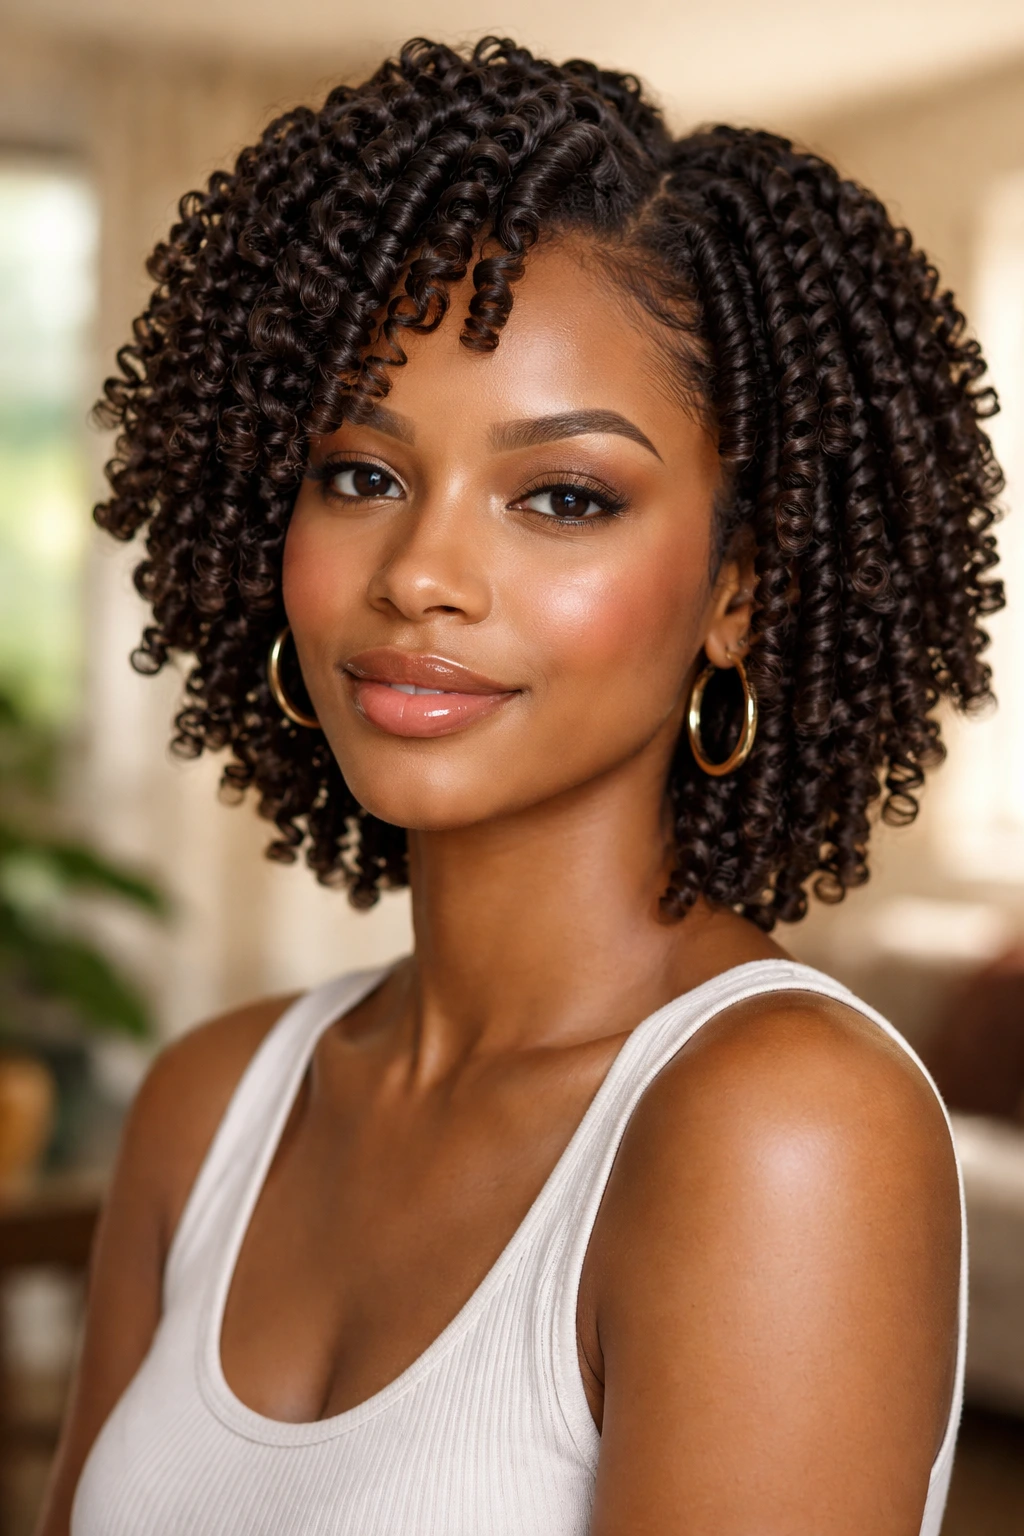
Finger coils are one of the most definition-heavy styles for curly and coily hair. Each small section gets wrapped around a finger until it forms a neat spiral, which creates a polished look that can last longer than loose styling if you protect it at night.
Why People Put Up With the Time
Because the result is tidy in a way few other styles are. The coils sit separately, so the shape reads clean even on tighter curl patterns that normally prefer more shrinkage. That makes finger coils a strong choice for shorter cuts, tapered shapes, and anyone who wants each curl to show on purpose.
Use a small amount of gel or cream on each section. Too much product makes the coil gummy. Too little and it frays before it dries. The section size matters, too. Bigger sections give you a softer spiral; smaller ones give you a tighter, more uniform finish.
How to Make It Faster
- Work in rows so you do not miss sections
- Keep a spray bottle nearby to rewet hair that starts drying out
- Use a tail comb for clean parting
- Let the coils dry fully before touching them
This is a style with a time cost, no question. But the finish is worth it when you want precision.
26. Stretch Twist Bun
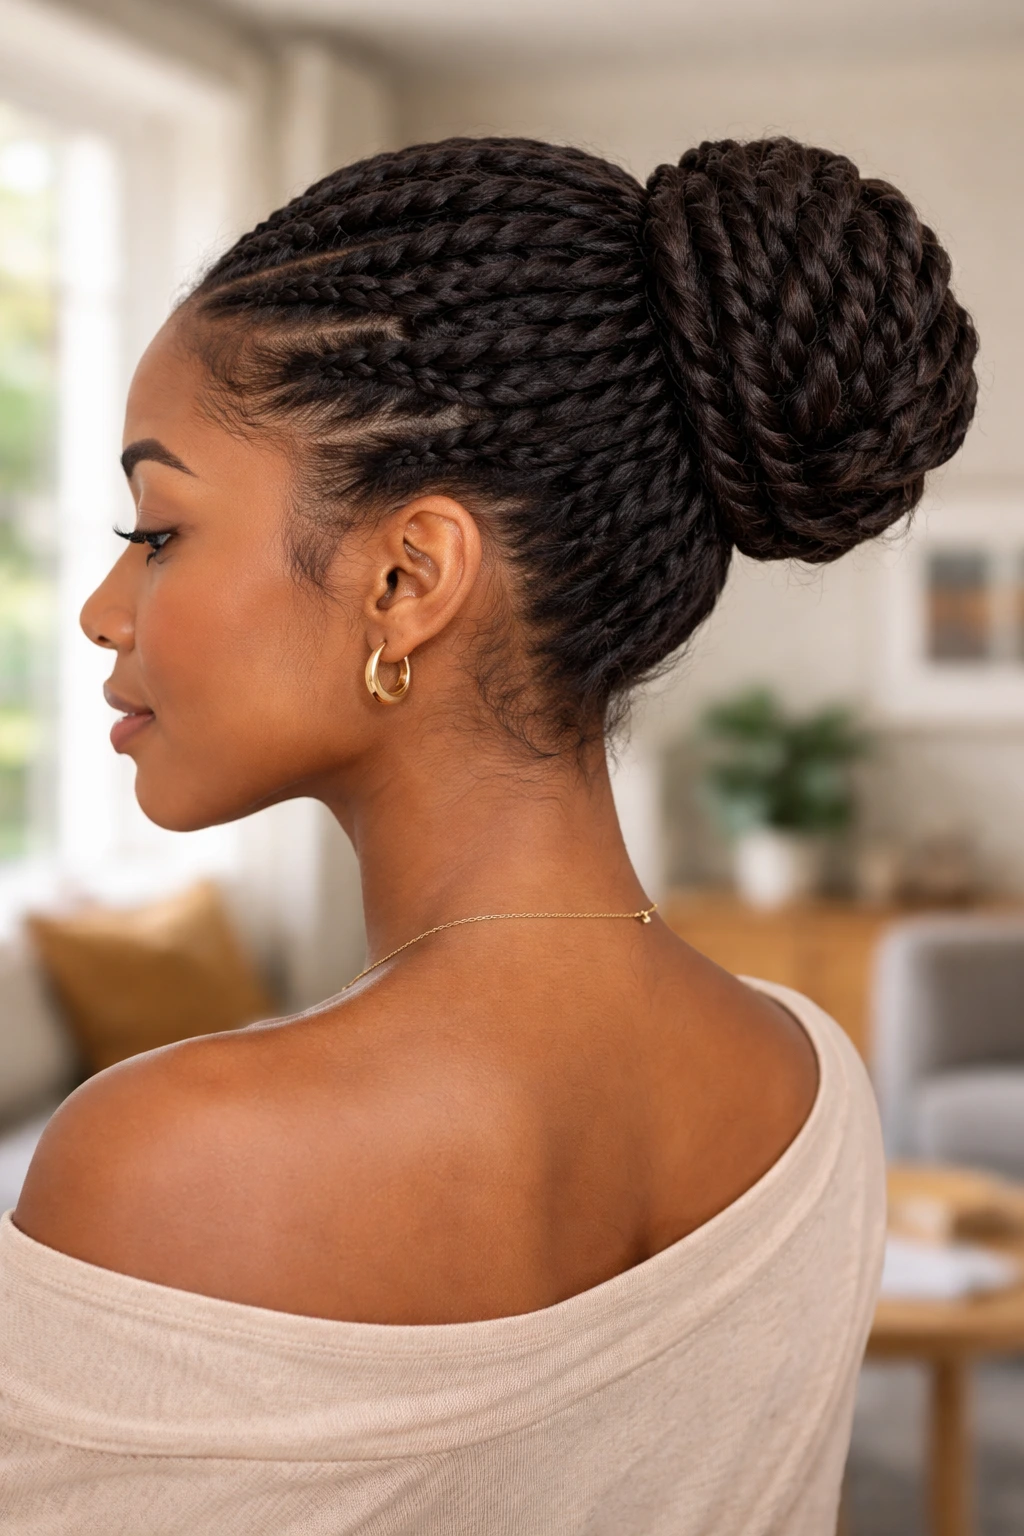
A stretch twist bun is a smart move when you want to keep shrinkage from swallowing the length. The hair is first stretched a little — with twists, banding, or gentle tension — then gathered into a bun that sits fuller and longer than a standard coil-up style.
The stretch changes the outline. Instead of a compact knot at the back of the head, you get a smoother bun with more visible length and less frizz around the base. That makes it useful on hair that has a strong shrink pattern and tends to bunch up in small shapes.
You can make the style as neat or as loose as you like. A smoother version uses gel and a brush at the crown. A softer version keeps more texture around the sides and lets the bun itself look a little airy. I tend to prefer the second one, because it holds the hair without turning the whole head shiny and stiff.
A satin scarf for a few minutes after styling can help the front settle. That is usually enough. No drama, no extra machinery.
27. Curly Ponytail with a Wrapped Base
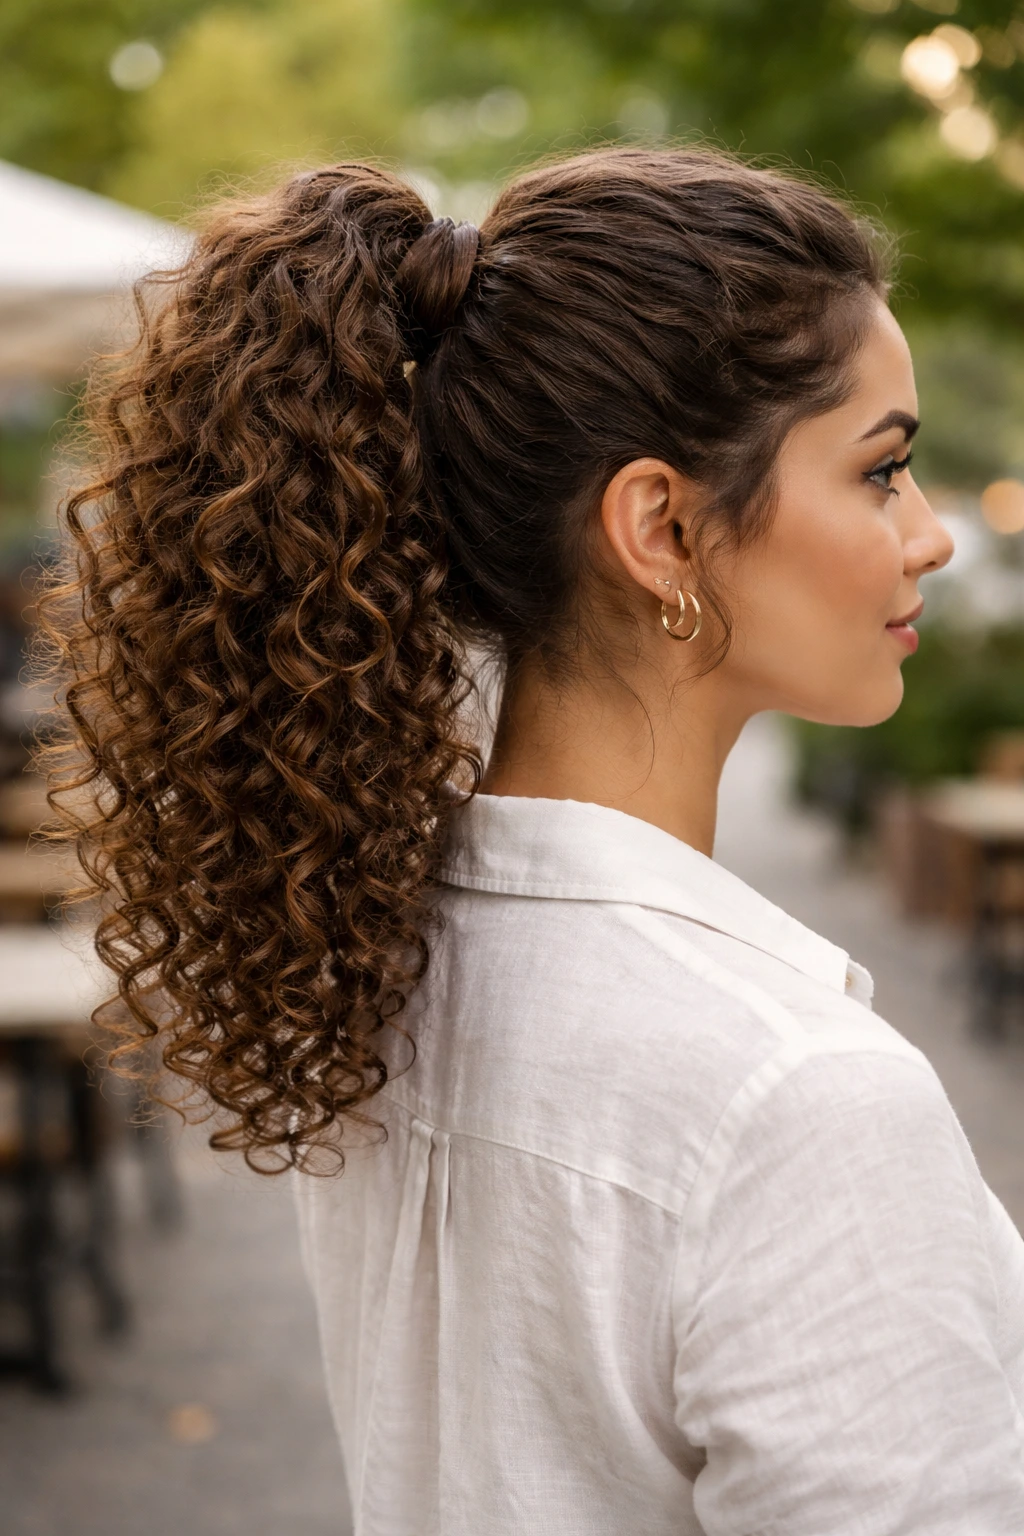
A curly ponytail with a wrapped base is one of the easiest ways to make a ponytail look finished instead of accidental. You gather the curls, secure them, then wrap a small section of hair around the elastic so the band disappears into the style.
The base matters more than the tail. If the roots are too rough, the ponytail will look rushed no matter how pretty the ends are. Smooth the top with a brush or your hands, depending on how much texture you want to preserve. Then tie it low, mid-height, or high, depending on the shape you want.
I like this style because it respects the curls instead of forcing them into a straight line. The ends can stay defined and free while the base reads tidy. If the ponytail is high, a little root lift around the crown keeps it from looking too tight. If it is low, a soft side part can make the whole thing feel less severe.
It is a good style for thick hair that needs to stay contained but not flattened. That balance is harder to find than it sounds.
28. Rounded Afro
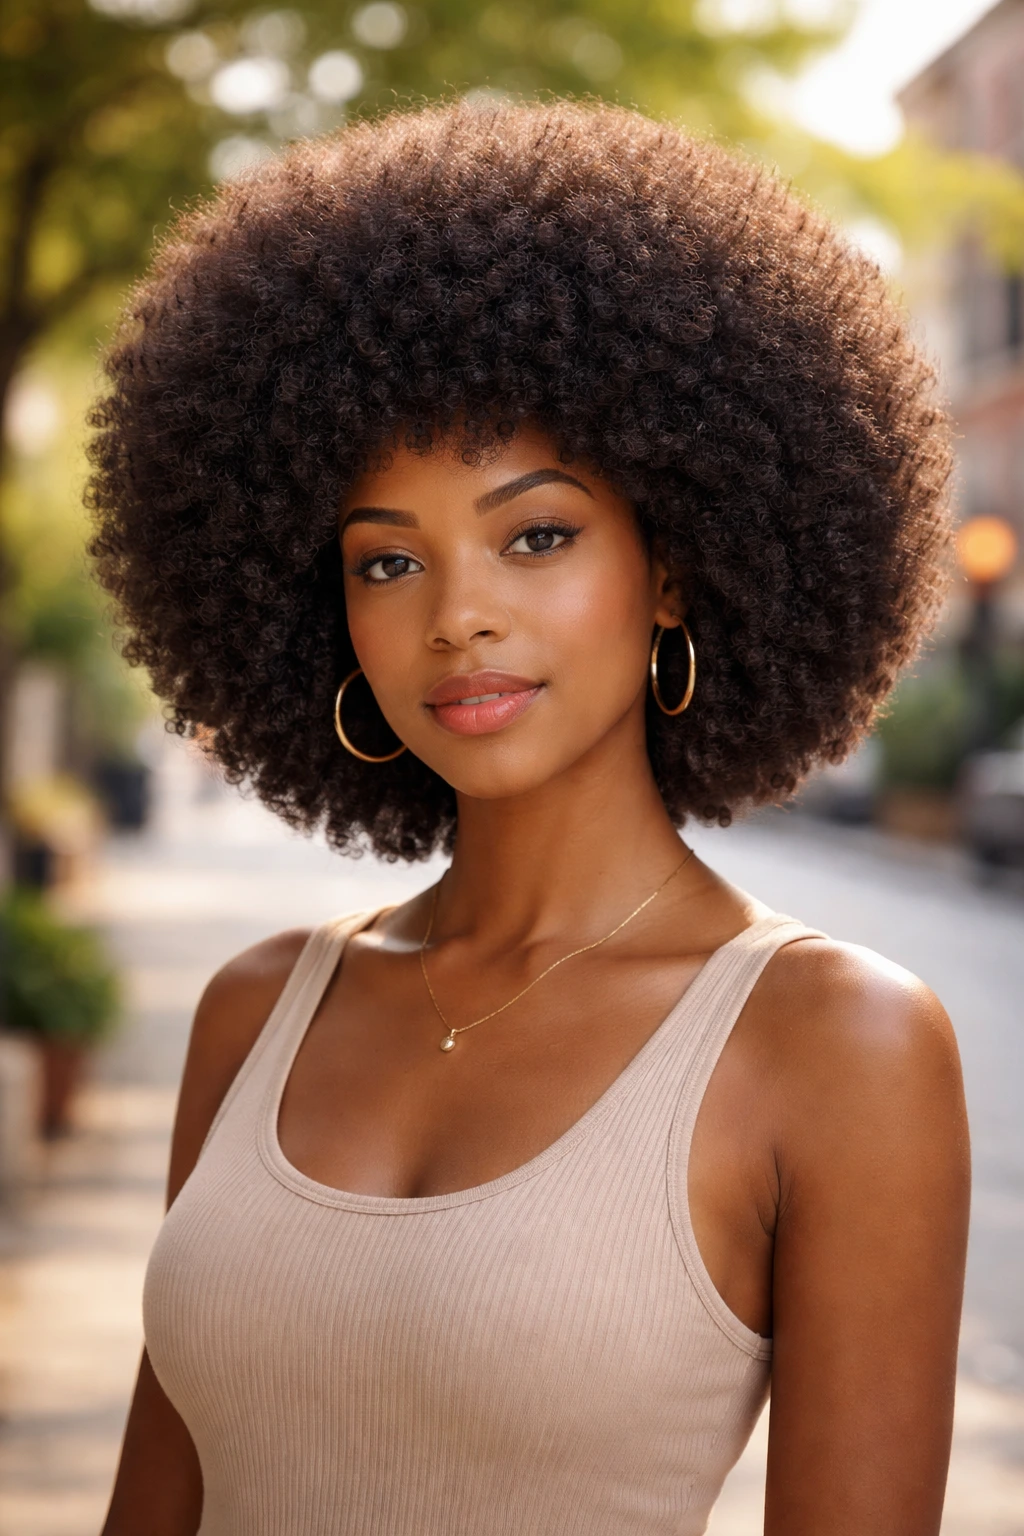
A rounded afro is not just a haircut. It is a shape decision. The goal is a balanced silhouette that feels full at the sides and lifted at the top without turning into a flat circle or a boxy outline.
The shape depends on the pick-out, the trim, and the way the hair is dried. If the roots are a little compressed, a pick at the crown can help. If the sides stick out too far, careful shaping with a trim keeps the outline round instead of wide. The best version has movement, not bulk.
This style works beautifully on coily hair because it lets the texture be the feature, not the obstacle. A little sheen from a light oil or butter on the outer layer can help the shape look finished, but the real work comes from the cut and the balance. That part is not glamorous. It matters more than glamour.
When a rounded afro is done well, it has a presence that does not need decoration. Still, a pair of earrings, a strong lip color, or a clean neckline can make the whole look land harder. Sometimes the hair does all the talking. This is one of those times.
