



A deep side part can rescue curls that feel flat, wide, or a little too polite. Side curls for curly hair work because they give the texture a direction. That sounds simple, and it is — but the payoff is huge when your hair has volume on top and not enough shape around the face.
The trick is not forcing every curl to behave. It’s giving the front a clear anchor point, then letting the rest fall where it wants to fall. On a good curl day, the part line matters almost as much as the product sitting in your hands. On a rough curl day, it matters even more.
I’ve always liked side styles for curly and coily hair because they do two things at once: they create movement, and they make the front look intentional. A clean side part, a pinned sweep, or a braid that disappears into the back can change the whole mood of a style without making it stiff.
And that’s the fun part. You do not need a rack of tools or a salon chair to pull it off. A rat-tail comb, a few pins, a little patience, and the right amount of hold are usually enough. The first look starts with the cleanest trick in the book: a deep side part.
1. Deep Side Curls with a Clean Part
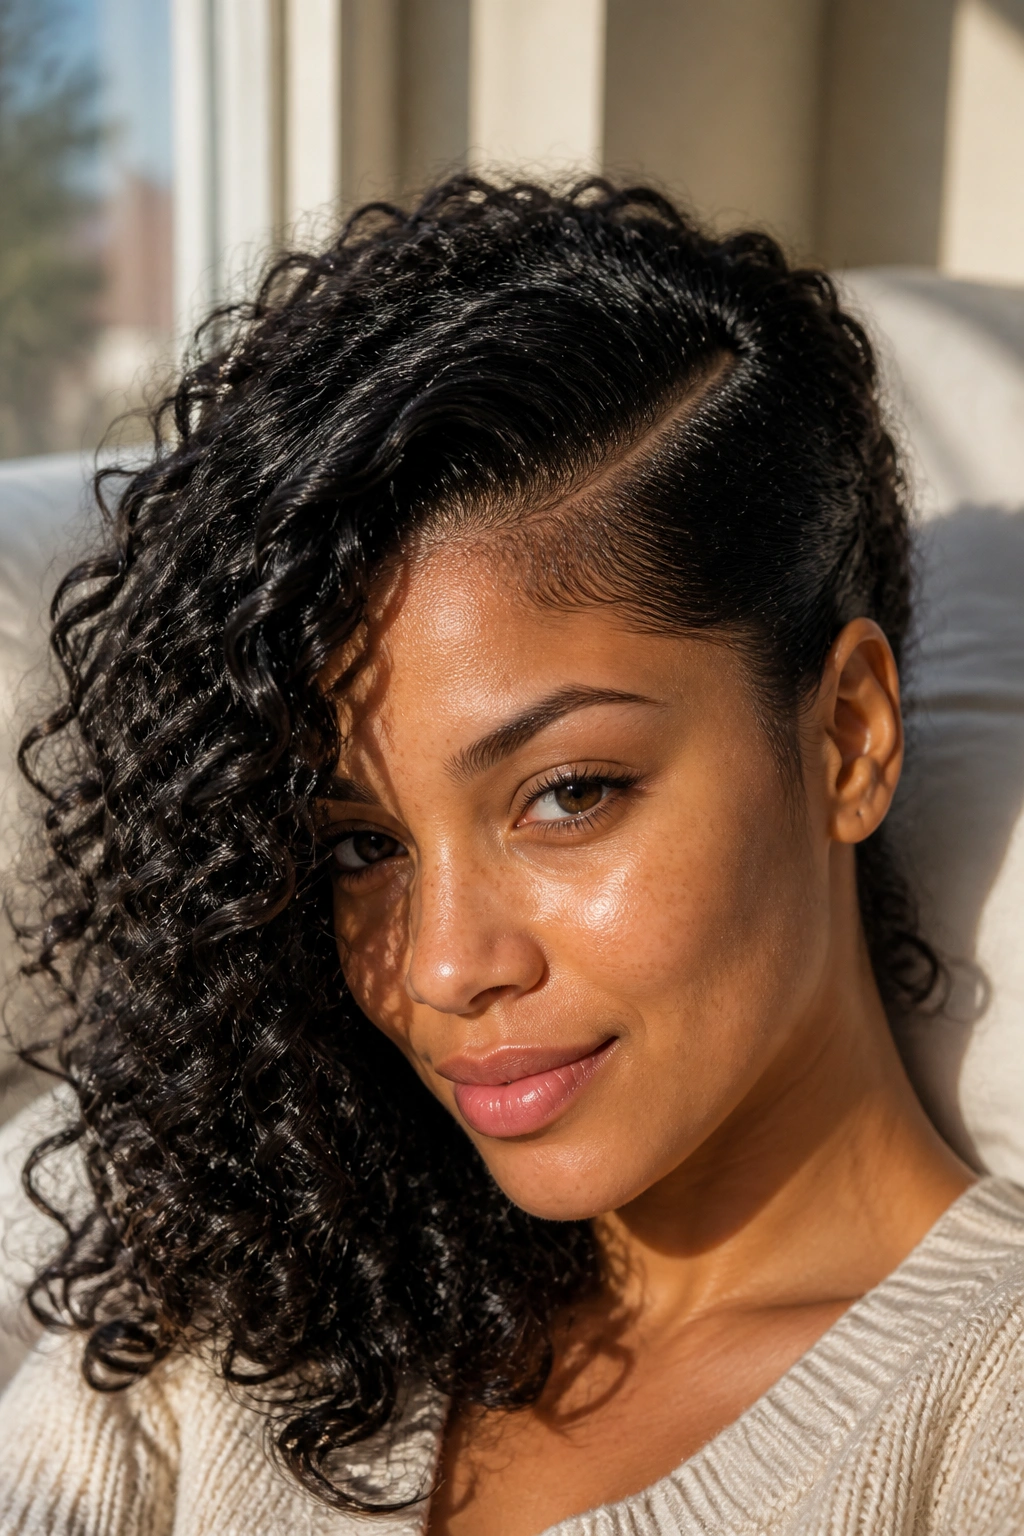
A deep side part is the easiest way to make curly hair look shaped instead of random. It pulls one side forward, builds height at the crown, and gives the curls a clear path to follow. If your hair tends to puff out evenly on both sides, this small shift makes a bigger difference than people expect.
Why the Part Line Matters
The line itself should look deliberate. A zigzag part can be useful when you want softness, but a straight deep part gives the style more edge and keeps the front from looking messy. Use a rat-tail comb on damp hair, trace the part from the hairline back toward the crown, and press the roots down with your fingers for a few seconds so the line holds.
A deep part works especially well when curls are medium to long and have enough weight to drape. Shorter curls can still do it, but they need a little root support or they spring right back to center. A touch of mousse at the roots, then a light gel on the top layer, keeps the front from drifting all day.
Quick facts:
- Best for curl patterns from loose spirals to tight coils.
- Works on wash-and-go sets, twist-outs, and braid-outs.
- Looks strongest when one side has a little more volume than the other.
- Needs a clean finish near the hairline, not a hard shell.
Pro tip: set the part while your hair is still damp, then clip the heavier side away from your face for 10 to 15 minutes so the curve settles.
2. Side-Swept Puff with Loose Ends
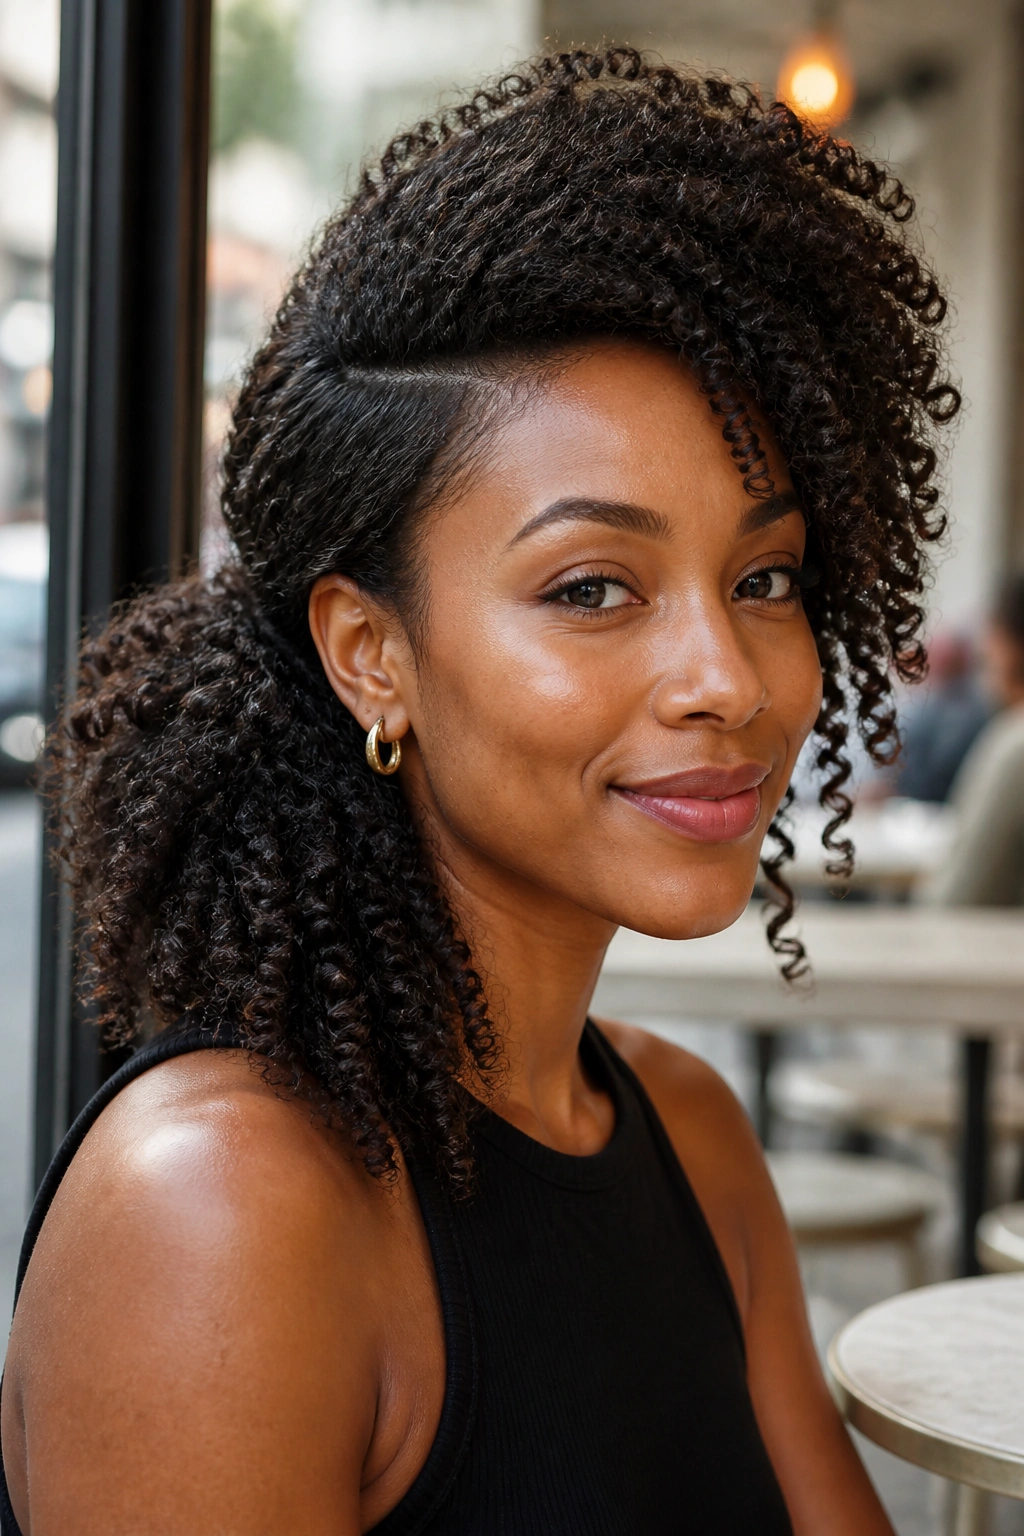
A side puff looks higher effort than it is. That’s the whole appeal. You gather the curls low or mid-height on one side, let the ends keep their shape, and suddenly the style feels polished instead of thrown together.
The reason it works is balance. The puff gives you control at the root, while the loose ends keep the texture visible. That mix matters on curls that have a lot of shrinkage, because the style still shows length without making you stretch every strand flat. A satin scrunchie helps here; regular elastics can snag and make the puff look wrinkled at the base.
Keep the front smooth, but not slick. A little gel at the temple and a soft brush over the edges is enough. If you overdo the edge control, the style starts to look stiff, and that ruins the easy shape.
It’s a good choice for busy mornings, but it also behaves at night events. Fast. Comfortable. No drama. And if your hair has a tighter coil pattern, this is one of the few side styles that can look full without fighting shrinkage.
3. Side Finger Coils for Shorter Curls
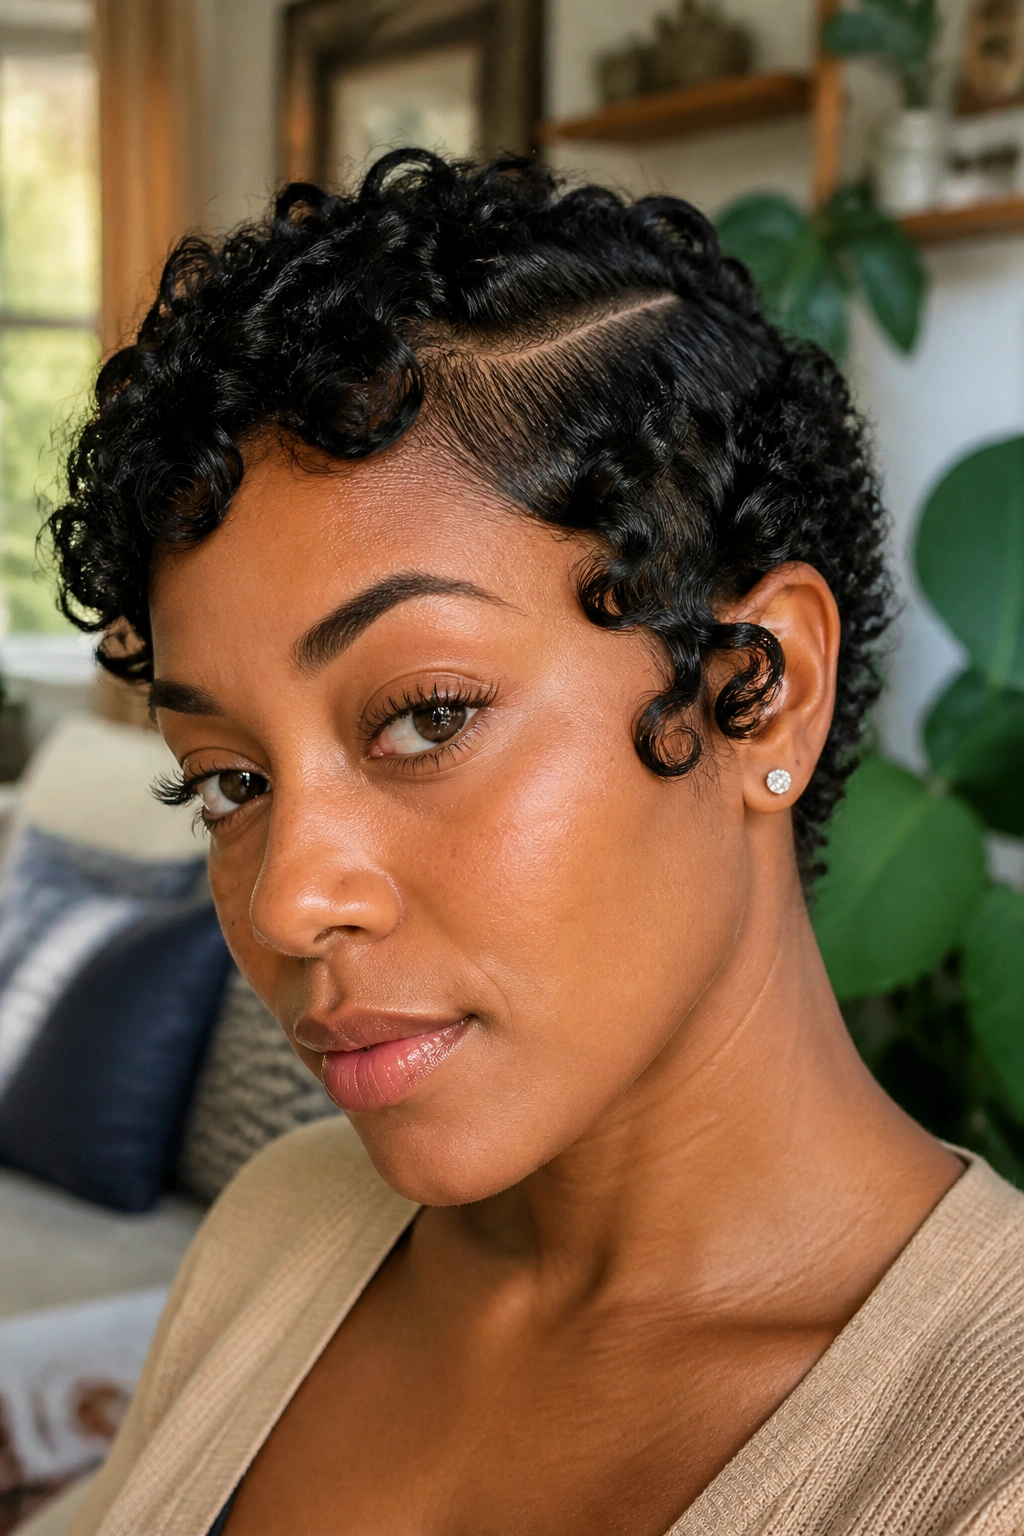
Why do finger coils work so well on a side style? Because they let you decide exactly where the curl clumps sit. That matters on short natural hair, tapered cuts, and pixie-length curls, where a deep side sweep can disappear if the strands are left loose.
Start with damp hair and a small amount of leave-in, then add a pea-size amount of curl cream or gel to each section. Wrap each piece around your finger in the direction you want it to fall, then release it gently. If you want the look to lean left, coil the front pieces toward the left. If you want it to skim the cheekbone, angle the coil just a little forward before letting it spring back.
How to Keep the Shape Crisp
Let the coils dry all the way before separating them. That part matters. Pulling them apart too soon makes the front fluff out in a way that looks unfinished, and you lose the side curve you were trying to build. A hood dryer or diffuser helps if you’re short on time, but air-drying gives the cleanest curl pattern.
This style is neat, but not hard. It’s one of those looks that reads as careful because each coil has a job. That’s why it photographs well, sure, but more importantly it holds up on real hair that has to last through a full day.
4. Braided Side Crown with Curly Length
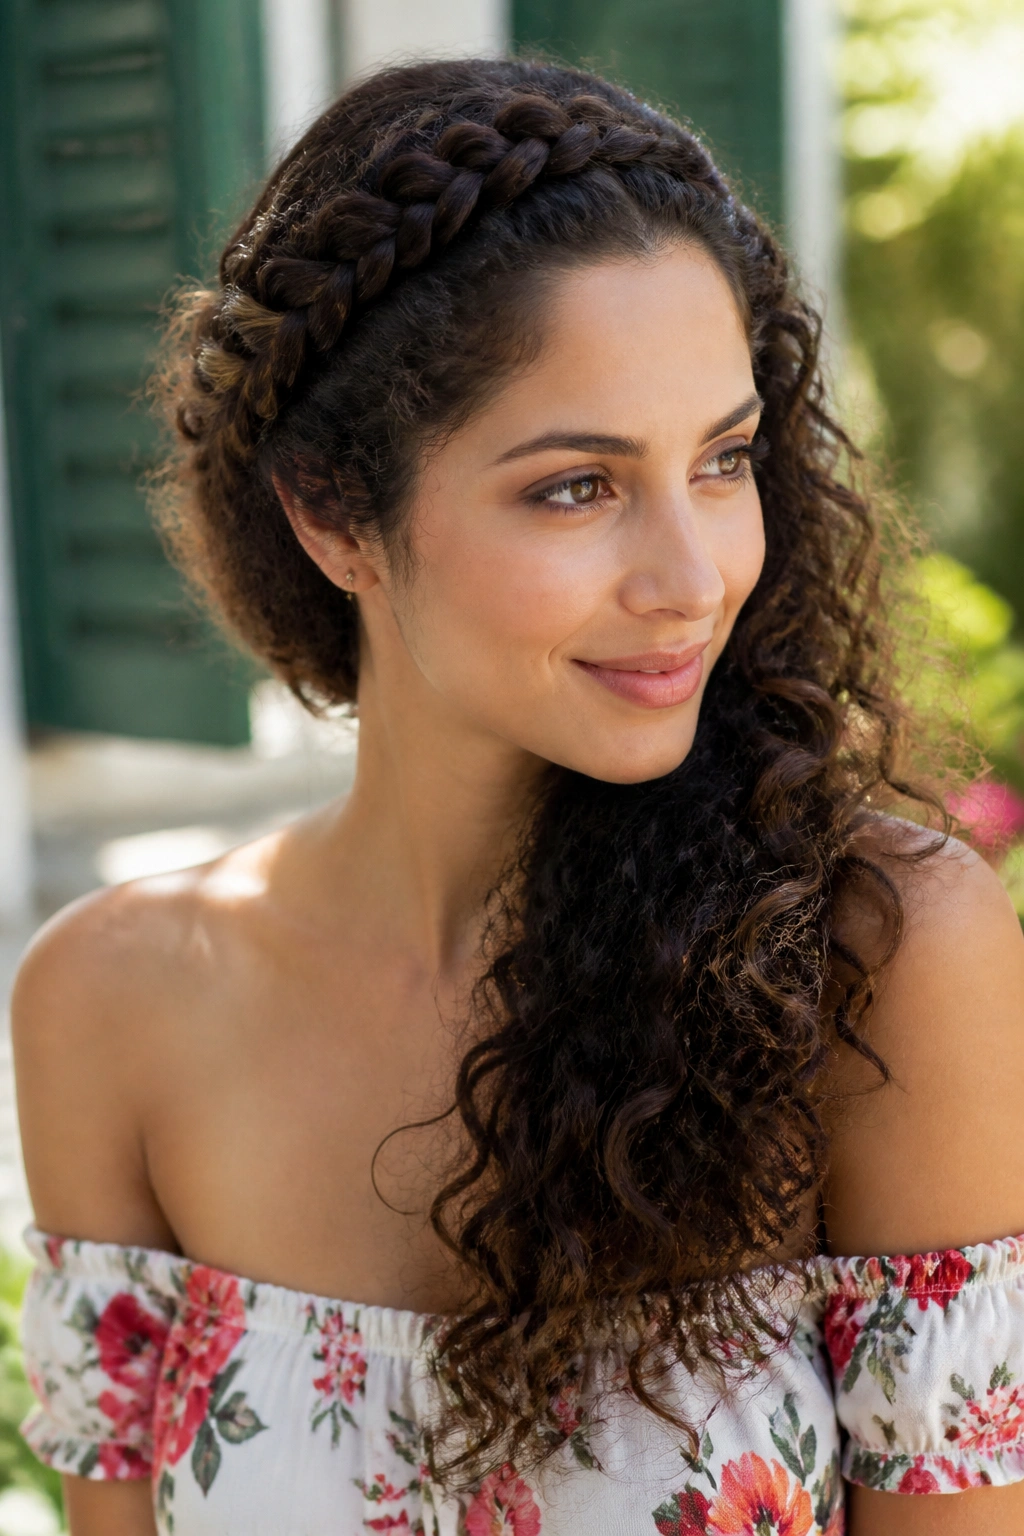
Picture this: you want your curls off your face, but you do not want a full updo. A braided side crown solves that problem fast. It pulls a braid across the hairline, tucks the front away, and leaves the rest of the curls free to spill over one shoulder.
The braid does the heavy lifting. It anchors the front section so the loose curls do not keep collapsing into your eyes, which is especially helpful on layered cuts. I like this look on medium and long hair because the braid gives the style structure while the curls still keep the softness.
What Makes It Work
- Start with a 1-inch to 1.5-inch front section.
- Braid toward the side you want the curls to fall.
- Pin the braid under the top layer with 2 to 4 bobby pins.
- Mist the loose curls with a light-hold spray so they keep their shape.
If you braid too tight, the front can look pulled and stiff. Too loose, and the whole thing slips by lunch. The sweet spot is snug enough to hold, relaxed enough to leave a little lift at the roots.
5. Low Side Bun with Curly Tendrils
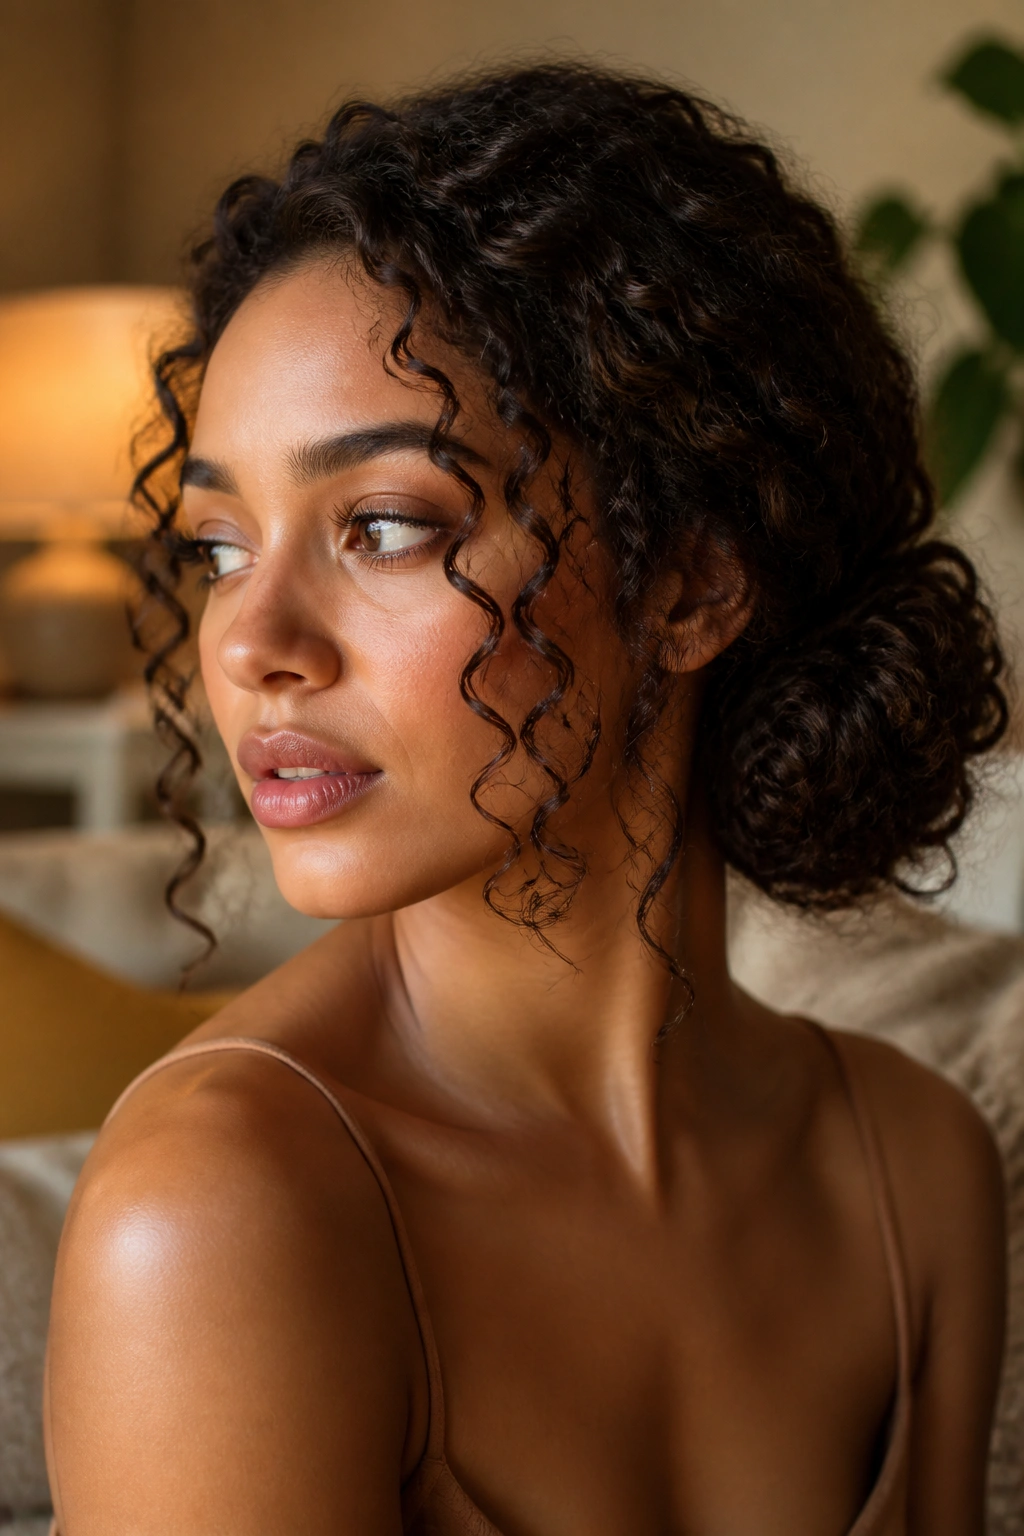
A low side bun is the one I reach for when curls need to look calm, not busy. It sits near the nape or just behind one ear, which keeps the silhouette soft and lets a few spirals frame the face. That little bit of looseness is what keeps the style from feeling severe.
This works best when the curls have some stretch. Fresh wash-and-go hair can do it, but a day-old twist-out usually behaves better because it has a touch more grip. Gather the hair to one side, twist it into a loose bun, and pin the base with U-pins instead of shoving in a dozen tiny bobby pins. You want security, not a metal cage.
The tendrils matter. Pull out two or three curl pieces near the temple and one near the jawline, then shape them with a fingertip and a dab of gel. If they are too frizzy, mist them lightly and twirl each piece around your finger once or twice.
This is one of those side curls styles that can look formal without trying too hard. It works for weddings, interviews, dinner, or any day you want your hair to stay in one place and still look like hair, not a helmet.
6. Side Braid-Out with Soft Volume
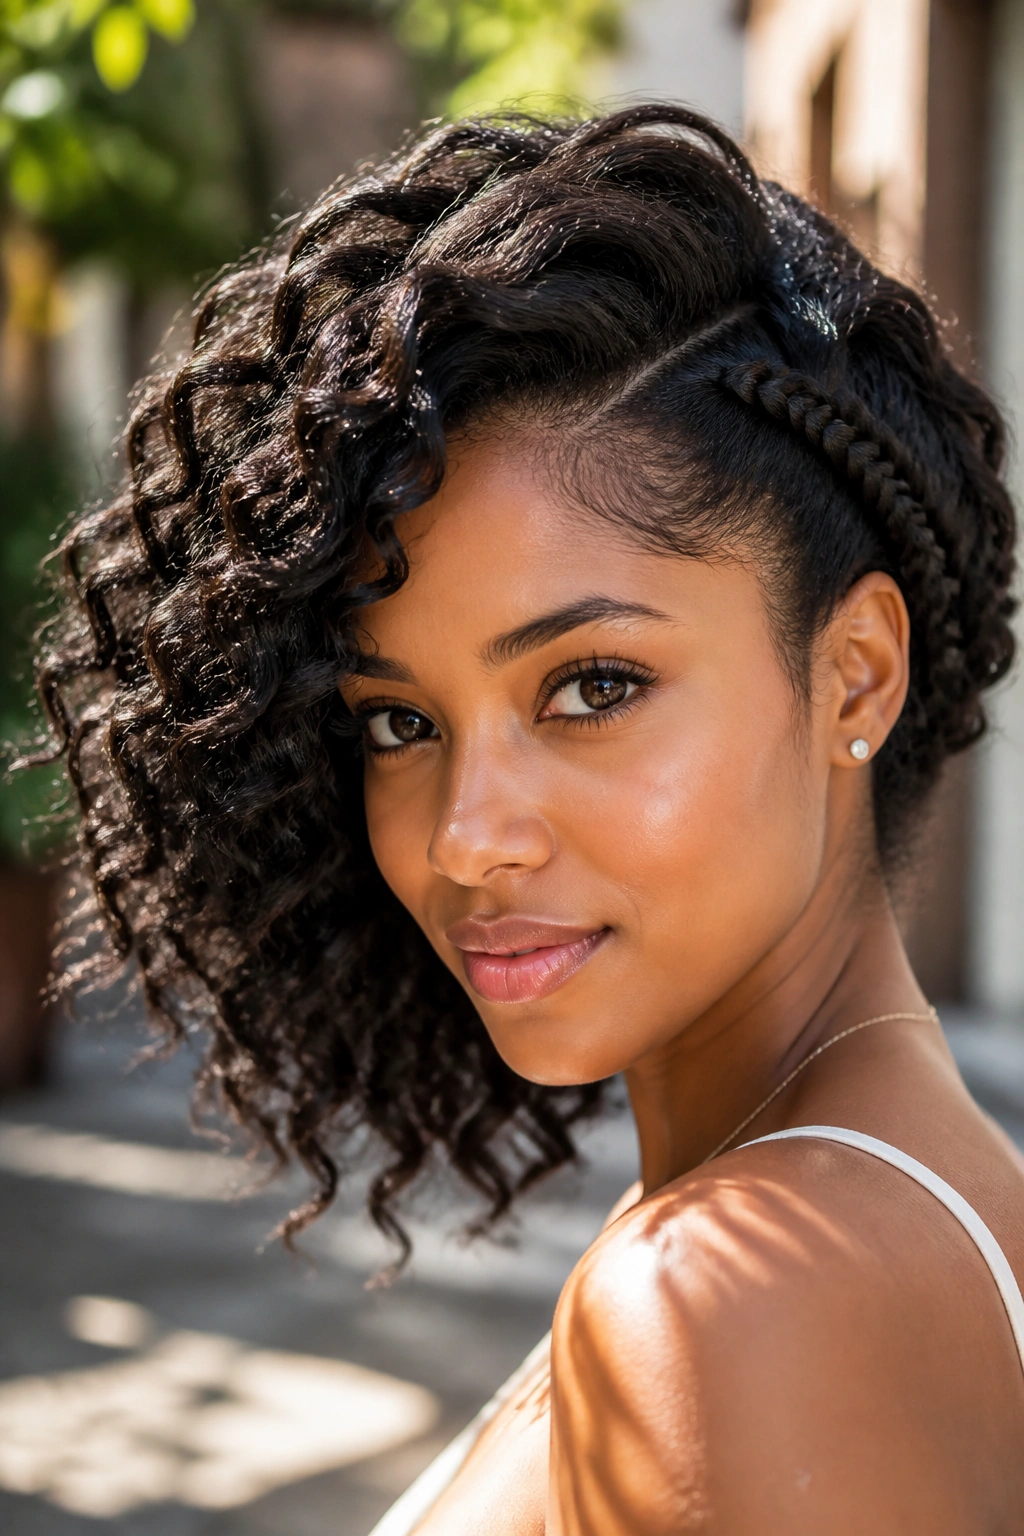
A braid-out gives side curls a wider, softer bend than a twist-out does. That difference sounds small, but you notice it right away in the finished shape. Braid-outs create broader ridges, which means the style lands with more body on the side instead of hanging in narrow spirals.
That makes it useful for people who want movement more than strict definition. Type 3B through 4A hair usually loves this look, especially if the strands are medium density and can hold a set overnight. Use medium braids — not tiny ones — if you want the pattern to feel loose and touchable. Small braids can make the side look too segmented.
Unlike a twist-out, this one has a slightly more open texture, which is nice when your hair is layered or shoulder-length. If your curls are already thick, the braid-out keeps them from looking too packed at the root.
I like this style on humid days because it has a bit of built-in looseness. It will frizz some, sure. That is the point. The frizz makes the side sweep look lived-in instead of overworked.
7. Half-Up Side Ponytail for Curly Hair
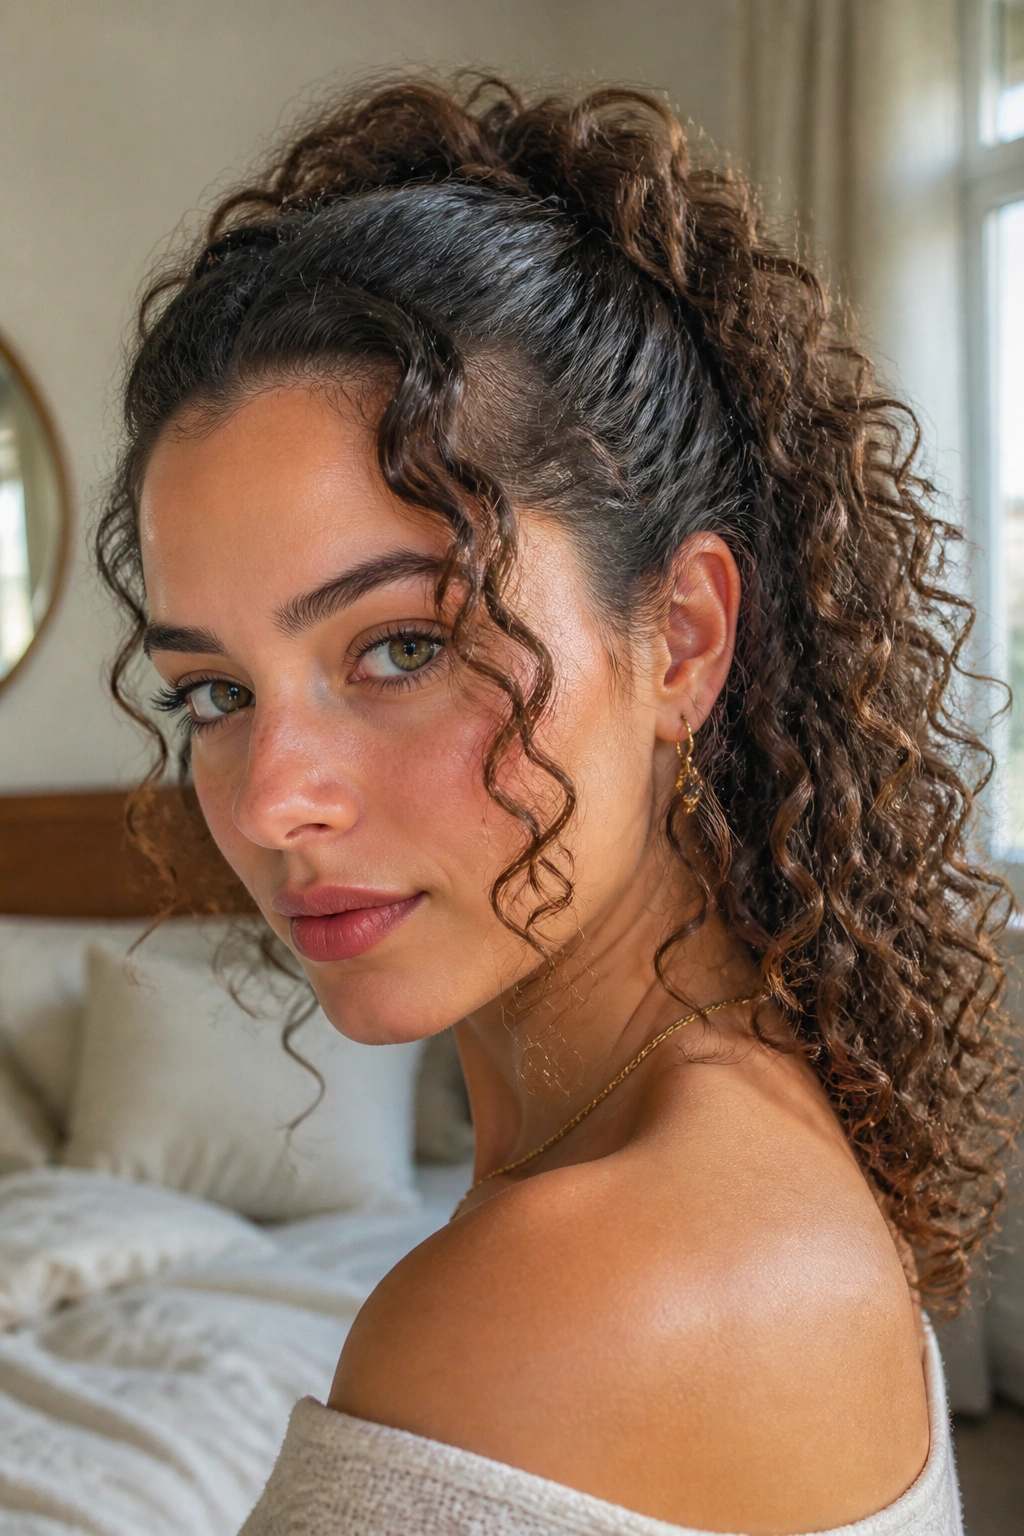
A half-up side ponytail is one of the easiest ways to move curls out of the face while keeping length on display. It lands somewhere between casual and put together, which is why it works for school, errands, and nights out without needing a costume change.
Where to Place the Elastic
The sweet spot is just above the ear or slightly behind it, depending on how much side volume you want. Higher placement gives lift and a little bounce. Lower placement keeps the style softer and more grown out. Use a snag-free elastic, then wrap a curl around the base to hide the band.
This one works well on second- or third-day curls because the top section already has a bit of shape. If the crown looks flat, mist the roots first, then clip the section for 10 minutes while you get dressed. That tiny pause helps the front remember where to sit.
Quick facts:
- Best on shoulder-length hair or longer.
- Uses less tension than a full ponytail.
- Lets the ends stay curly and visible.
- Works with wash-and-go, flexi rod sets, or stretched curls.
Pro tip: pull the top section toward the opposite side before tying it off; that creates a little lift at the crown instead of a flat bump.
8. Curly Bob Flipped to One Side
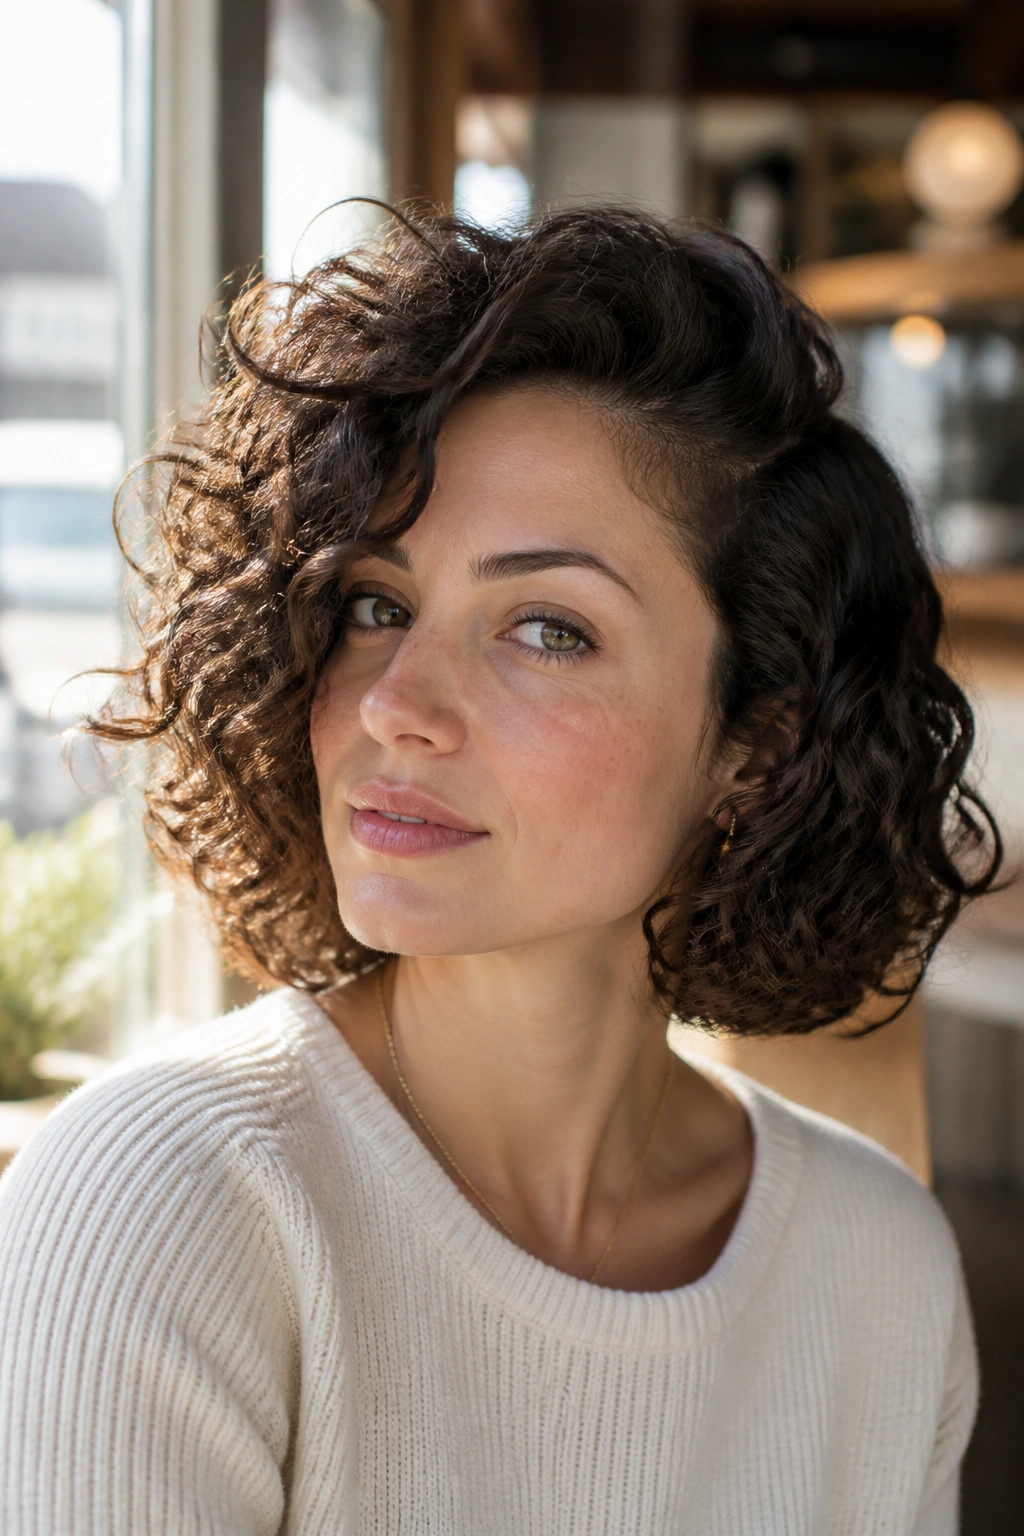
A bob doesn’t need much help. A side flip gives it shape fast. If your curls hit the jaw, chin, or shoulders, shifting them all to one side can make the cut look fuller and less boxy.
What I like here is how little product it takes. A small amount of mousse at the roots, a diffuse dry with your head tilted to the side, and maybe a clip at the crown while the hair cools — that’s often enough. You are not trying to force every curl into a pattern. You are just training the front to lean.
The side flip also helps finer curls look denser, because the weight of the hair stacks on one side instead of spreading out evenly. That one-sided fullness is flattering, especially if the cut has layers around the face.
If your bob sits above the shoulders, keep the part clean and the ends soft. Too much oil at the roots will make the hair slide back to center, and then the whole point disappears. Clean lines, light hold, done.
9. Side Flat-Twist Halo
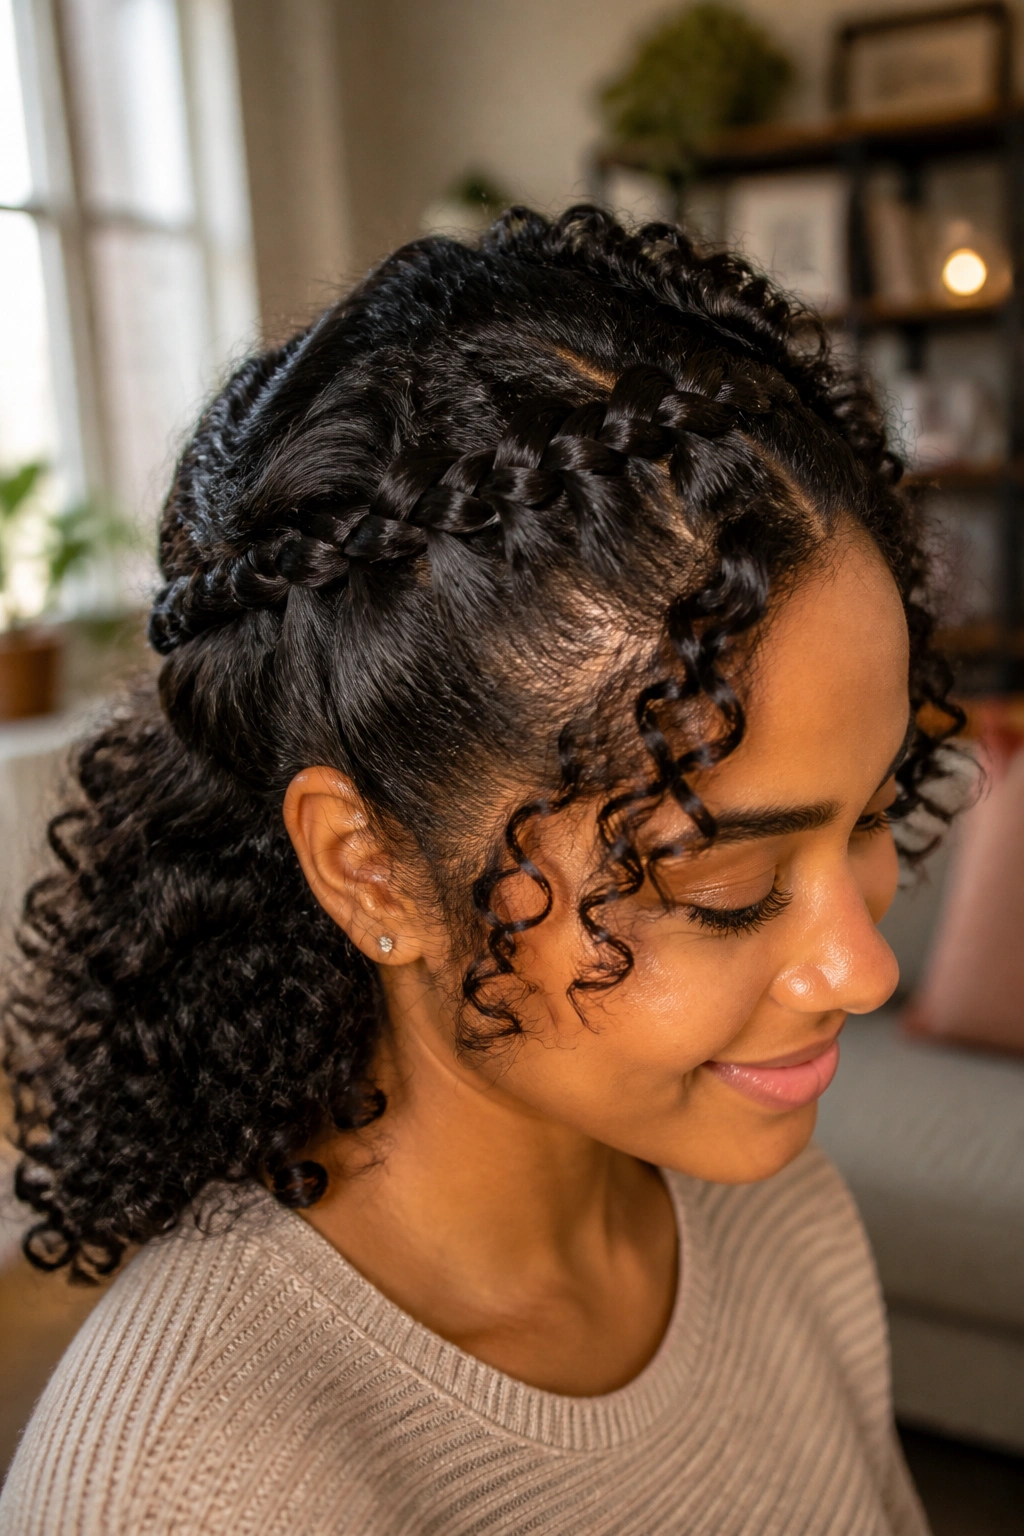
Why choose a flat-twist halo over a regular headband look? Because a flat twist sits closer to the scalp and keeps the front from puffing up in random places. It also gives the curls a direction without flattening the whole crown.
Start one twist at the hairline, near the side you want to feature, and work it across the top toward the opposite temple. Keep the sections small and even so the twist stays smooth. If your hair is very thick, part the front into two horizontal rows before twisting; that makes the shape easier to manage and stops the twist from bulking up in one spot.
Best Products and Pin Placement
Use a little leave-in and a cream with slip so the strands glide between your fingers. A dab of edge control at the hairline can help, but only if the product does not flake when it dries. Pin the end of the twist behind the ear with two crossed bobby pins so it stays put.
This is a strong option for protective styling because it keeps the front tucked while the rest of the hair can stay loose or be tucked into a bun. It’s tidy, yes, but it still leaves enough curl showing to feel soft.
10. Side Cornrow Feed-In into Curls
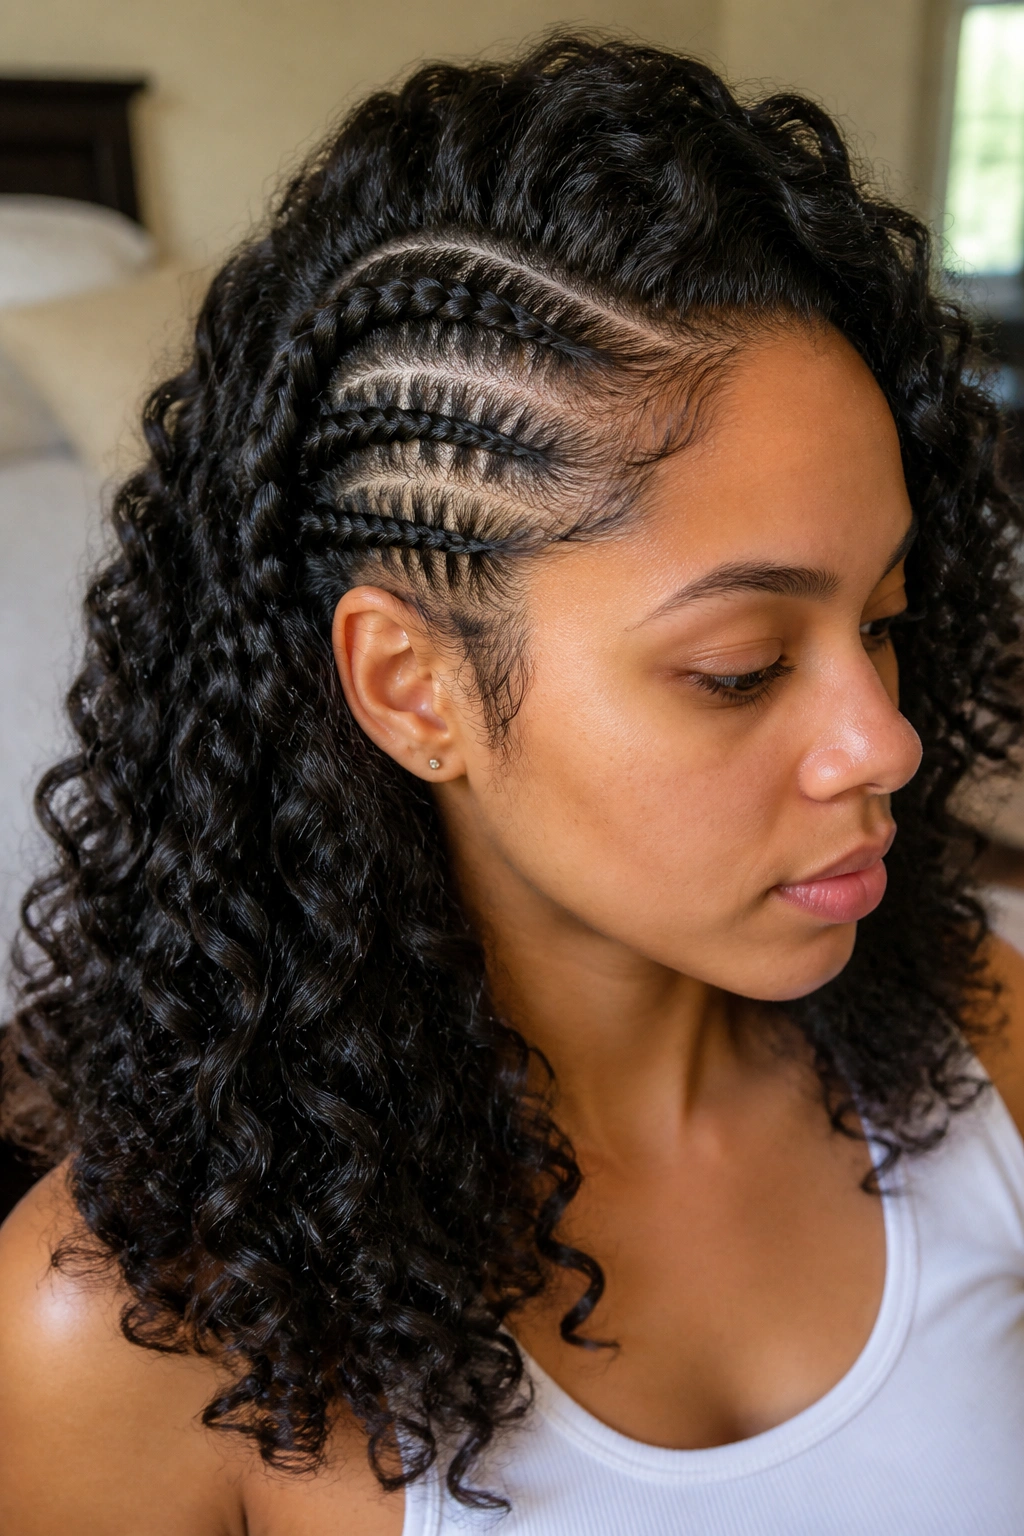
A side cornrow feed-in style is for the days when you want your hair to stay where you put it. The braid acts like an anchor, and the loose curls at the end bring the softness back in. That combination makes the style hold up better than a loose side tuck when the day gets long.
This works best on detangled, moisturized hair. If the hair is dry at the root, the braid will snag, and the finish gets messy fast. Feed in small amounts of hair as you braid along the side, keeping the tension snug but not sharp. You should feel control, not a tugging headache.
Key Details That Matter
- Use a rat-tail comb to keep the part clean.
- Add hair in small sections every 1/4 inch or so.
- Finish the ends with flexi rods if you want defined curls.
- Sleep with a satin scarf so the braid line stays smooth.
The style can go sleek or casual depending on how much curl you leave out at the end. If you want more drama, keep the curls longer and fuller. If you want something cleaner, tuck the ends into a pinned curl cluster.
11. Asymmetrical Twist-Out with Side Volume
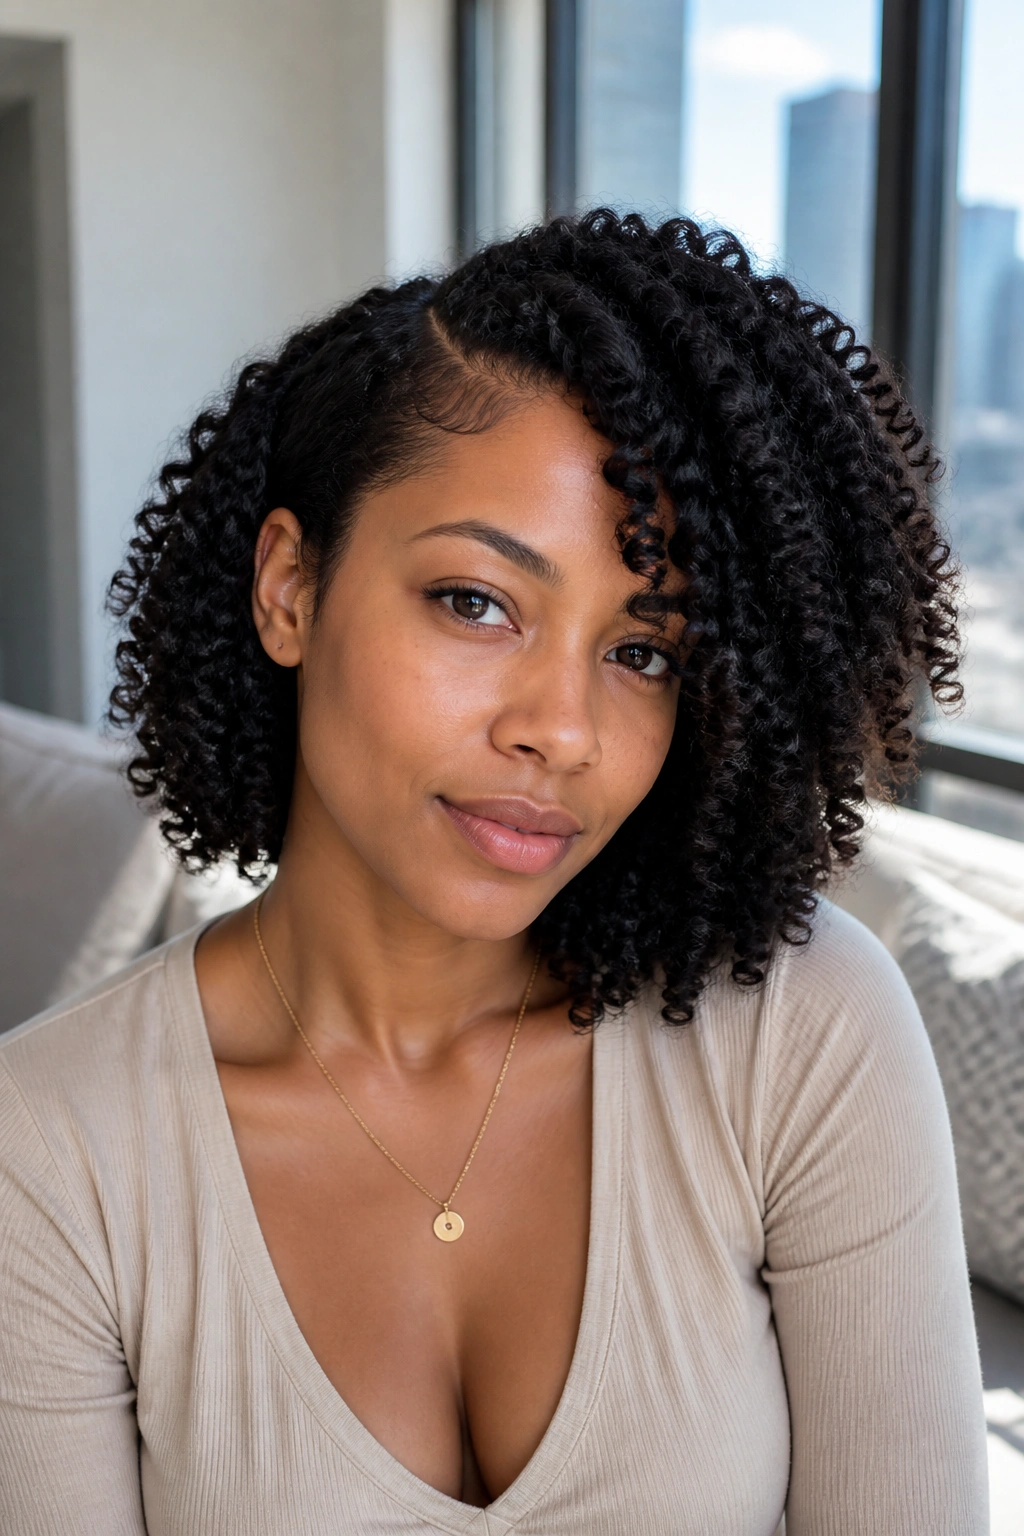
An asymmetrical twist-out gives you that lopsided, sculpted feel that side curls are known for. One side can sit flatter, while the other side blooms out with extra volume. That imbalance is the point. It creates shape without needing a lot of accessories.
Set the twists with the direction in mind. On the fuller side, use slightly larger twists so the curls open up wider. On the sleeker side, keep the sections smaller and smoother. Once the hair is fully dry, separate the twists in the same direction they were twisted. Pulling them apart too aggressively turns the style frizzy before it even has a chance.
The best thing about this look is how forgiving it is. If one side looks too flat, fluff the roots with a pick and stop there. You do not need to make both sides match perfectly. That would kill the whole asymmetrical effect.
This style works especially well on medium to long curly hair because the length gives the side sweep room to fall. Shorter hair can do it too, but the shape reads more cropped and less dramatic. Both are good. Just different.
12. Side Tuck with Decorative Pins
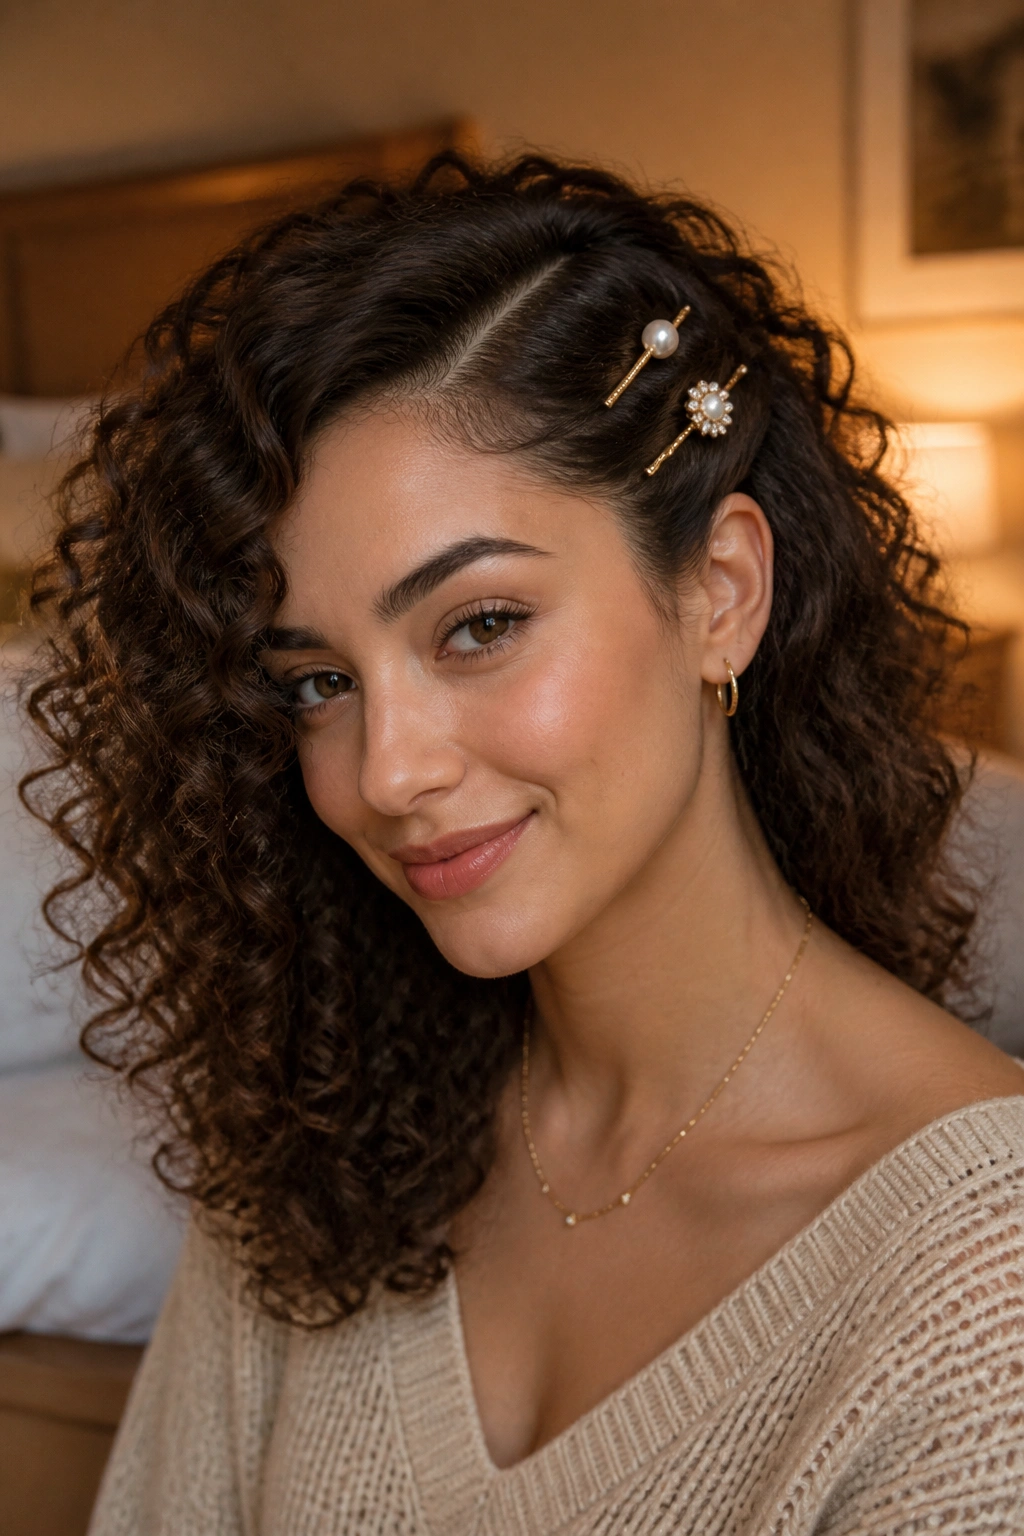
A side tuck keeps the curls visible while shifting enough hair away from the face to change the whole mood of the style. Unlike a full updo, it leaves the texture in plain sight. That is the nice part. You still get the curl pattern, but the shape feels cleaner.
This is one of my favorite looks for layered hair, because the shorter pieces around the front can be tucked while the longer pieces stay loose. Use 3 to 5 U-pins or small bobby pins in a row, then slide in one decorative pin at the visible side near the temple. That little shine point is enough. You do not need a whole rack of jewelry stuck in your hair.
Best of all, it works on hair that is between wash days. The curls do not have to be perfect. They just need enough bend to tuck and hold. If a section keeps popping loose, twist it once before pinning so the tuck has more grip.
This is the style I’d choose when I want side curls to look neat but not formal. It behaves in a way that feels easy to wear, which is half the battle with curly hair.
13. Side-Swept Faux Hawk for Coily Hair
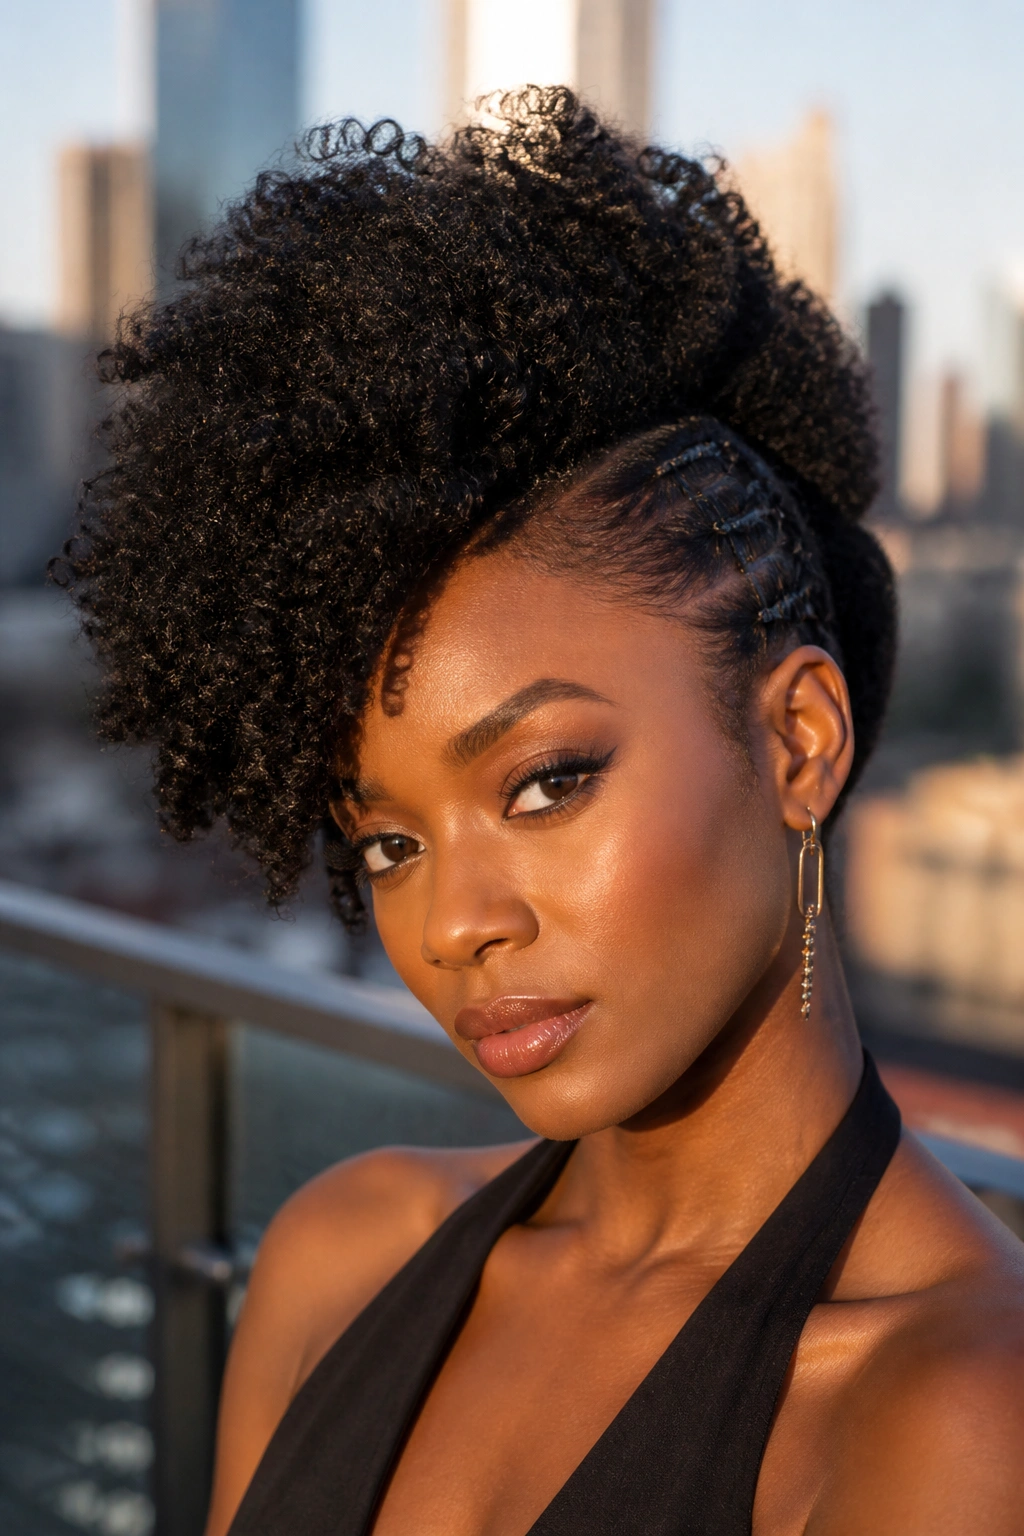
A side-swept faux hawk looks bold, but it is not as hard as people think. The sides get pinned or braided back, while the center and top are lifted and directed toward one side. That creates a strong curve through the hair instead of a straight line down the middle.
What Builds the Shape
The shape comes from contrast. Smooth the sides with a light gel or cream, then use bobby pins or tiny braids to push them back. At the top, pick the roots upward and to the side so the curls stand with a little height before they sweep across. If your hair is coily, this creates a nice ridge without flattening the natural texture.
Quick facts:
- Works well on 4A to 4C hair.
- Needs a firmer hold near the sides.
- Looks best when the top has some lift.
- Can be dressed up with cuffs or one strong clip.
Pro tip: don’t press the top flat. The whole style depends on that lifted strip of curls at the crown.
This one is good for nights out, concerts, and any day you want side curls to feel a little louder. Not loud in a messy way. Loud in the sense that people notice the shape right away.
14. Diffused Side Volume and Root Lift
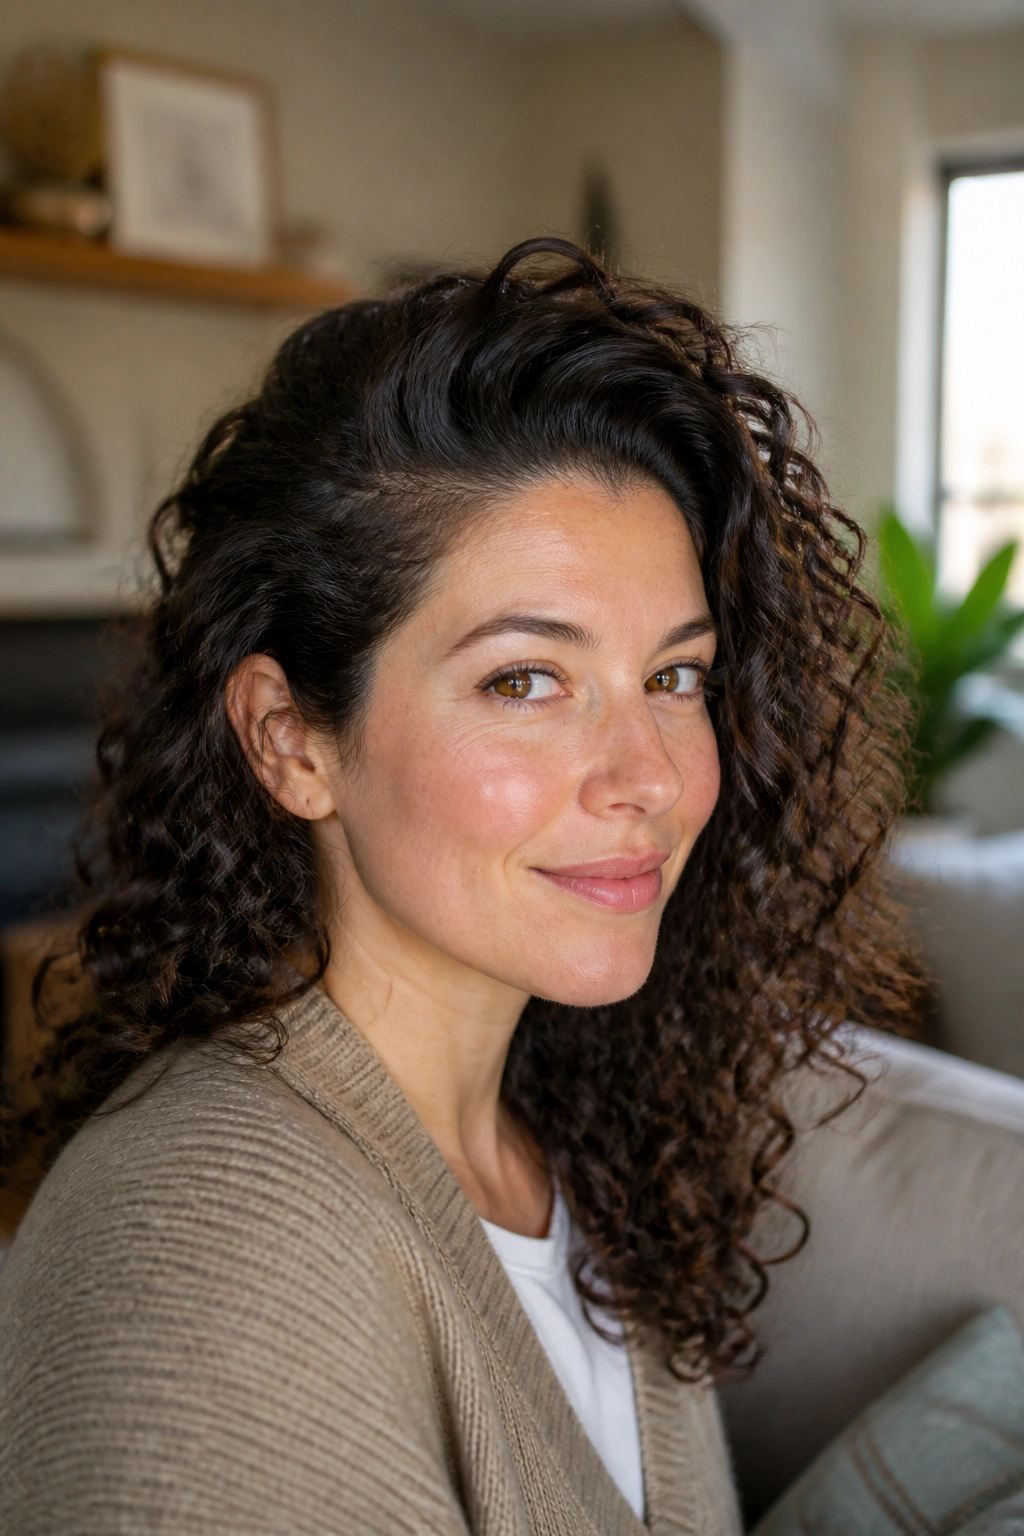
If your curls collapse on one side, the diffuser is part of the fix. Air-drying alone can leave the roots too soft, and once that happens, the side part starts drifting back to center. A diffuser gives the crown a little structure before the curls lose their shape.
Flip your hair to the side with the part you want, then dry on low heat with the bowl of the diffuser cupping the roots. Move slowly. If you blast the hair with too much heat, you end up stretching the curl pattern and drying the ends before the roots are set. That leaves you with a puffier top and limp ends, which is not the goal.
A clip at the root on the heavier side can help while the hair cools. Just one or two clips is enough. Let them sit for a few minutes, then remove them gently so you do not leave dents. The curl should feel set, not crunchy.
This approach is perfect for wash day when you want a side style with lift that lasts. It’s plain, but it works, and sometimes plain is the smarter call.
15. Side Fringe with Curly Bangs
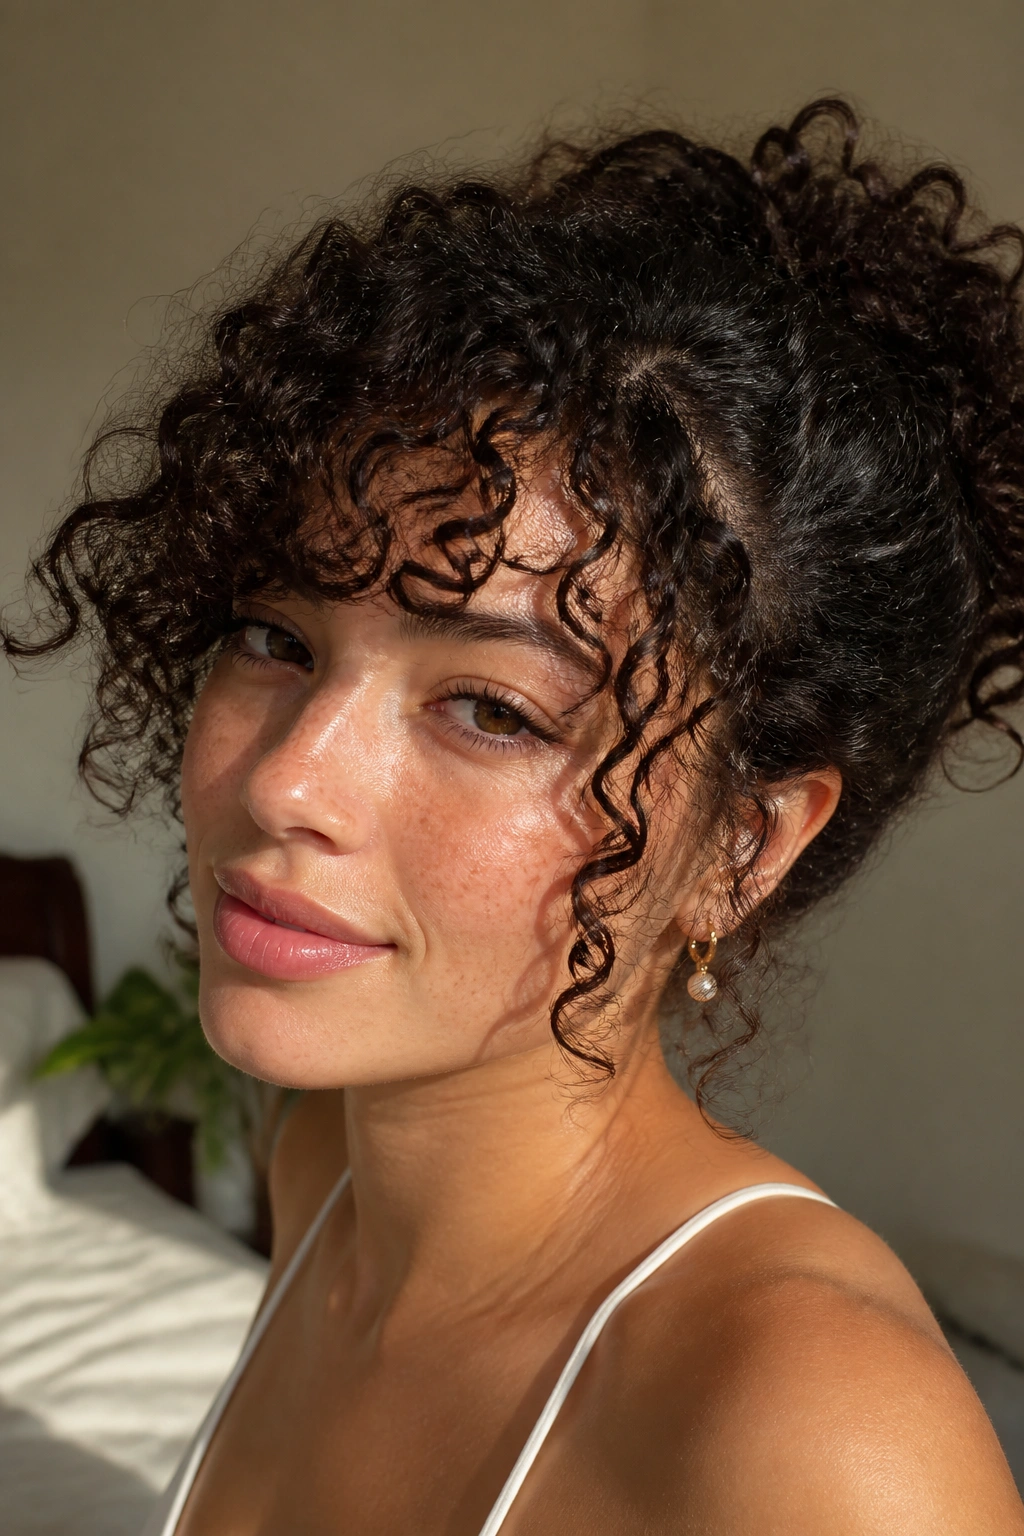
Why do side bangs work better than straight-across bangs on curls? Because curly hair shrinks unevenly, and a side fringe gives you room to shape that shrinkage instead of fighting it. A straight line across the forehead can look choppy fast, especially on tighter curl patterns.
A side fringe falls softer. It can be long enough to brush the cheekbone or short enough to sit just above the brow, depending on how much face framing you want. If you are cutting it, do it dry or have a stylist trim it dry. Curly bangs lie about their length when they’re wet, and that joke gets old fast.
How to Wear It
Use a small amount of cream or light gel on the fringe, then finger-coil the front pieces toward the side you want them to land. If the curls puff too much at the root, pin them down for 5 to 10 minutes while they cool. That sets the curve without making the front look pasted down.
This is a strong choice if you want side curls that feel face-focused. It softens the forehead, brings attention to the eyes, and leaves the rest of the hair free to do its thing.
16. Two-Twist Side Cascade
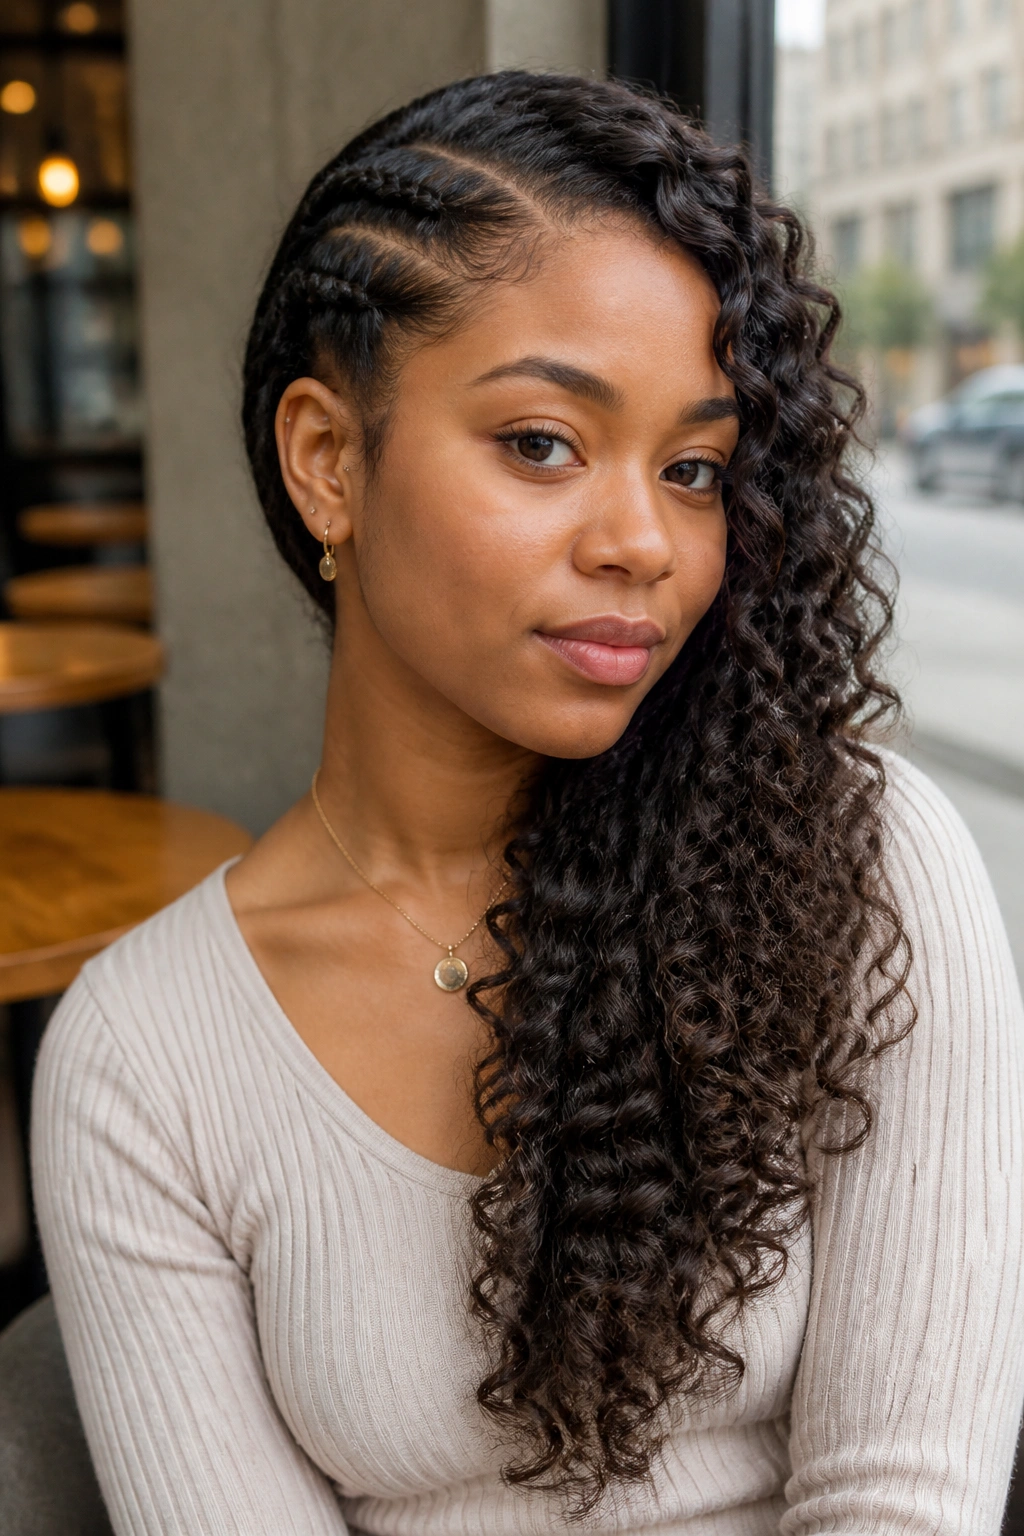
Two flat twists can do more than a single braid when you want a side cascade. They create a cleaner path from the hairline to one side, then let the curls spill from that point in a way that looks organized without being stiff.
I like this for busy days because it stays put better than loose pinning. Start with two sections at the front, twist them back toward the same side, and pin them behind the ear or at the crown, depending on how much lift you want. The loose curls then fall around the shoulder in a soft line instead of spreading out everywhere.
Key Details
- Works well on hair that has been stretched a bit.
- Needs about 2 to 4 pins to secure the twists.
- Looks cleaner when the twists are the same thickness.
- Can be worn with a scarf at night and revived in minutes.
The style gives the hair a built-in shape, which helps if your curls are thick and tend to grow outward instead of downward. It’s one of those styles that looks calm even when the hair underneath is full of life.
17. Side Clip Glam Curls
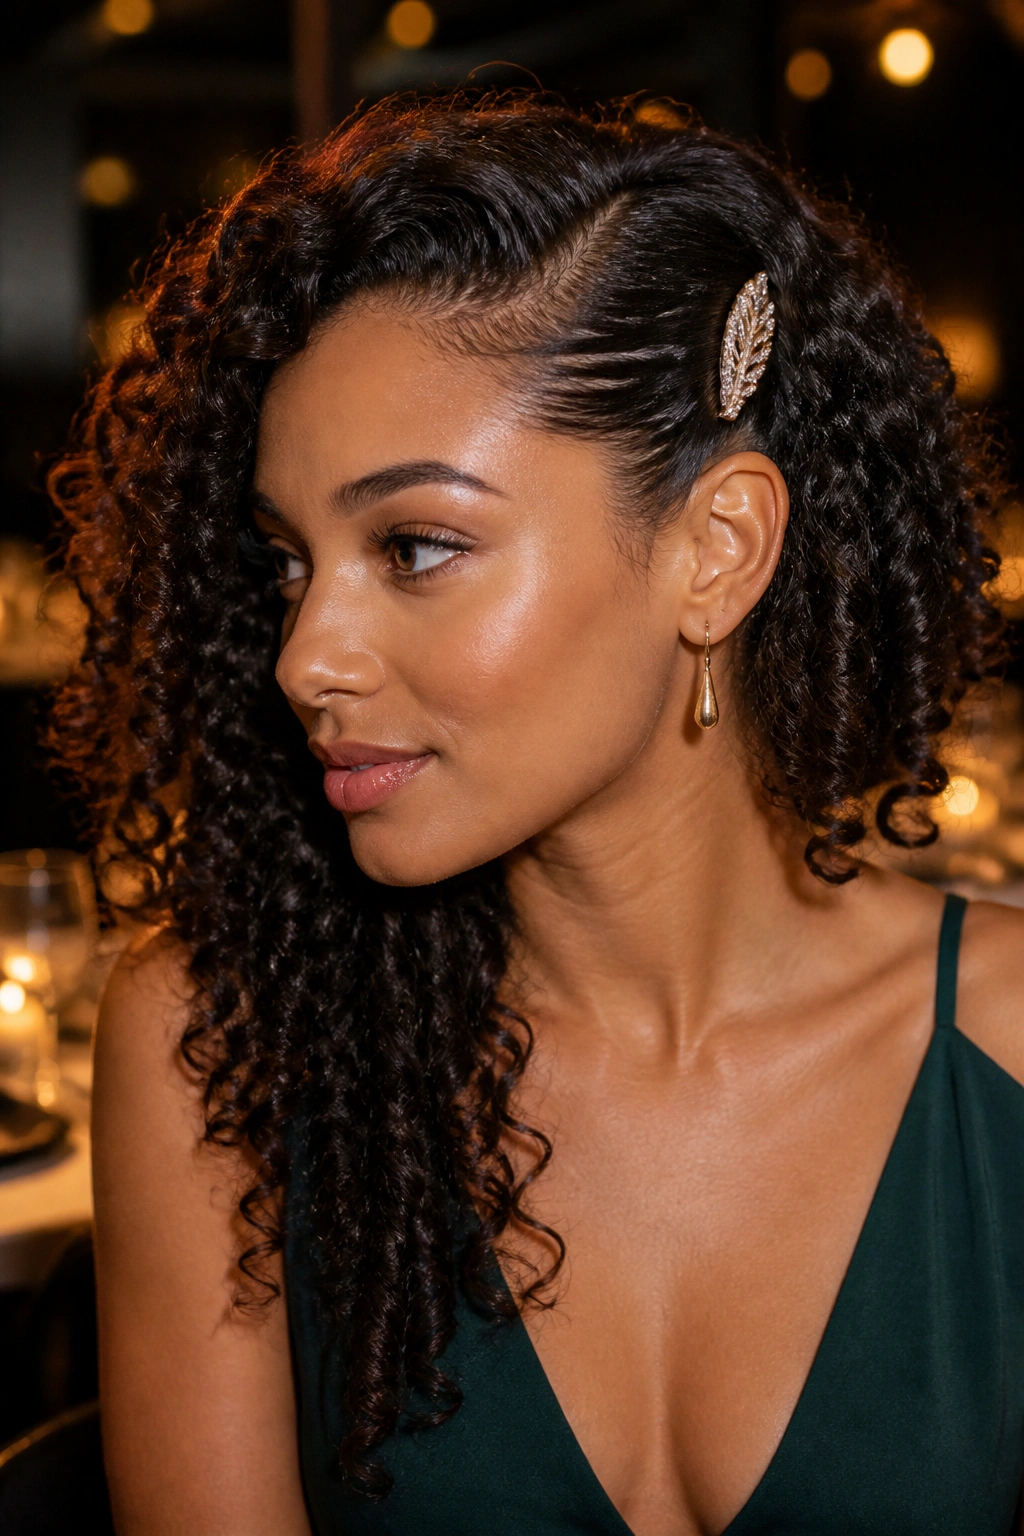
A side clip can look tiny, but it changes the whole balance of a curly style. One strong clip at the temple or just above the ear stops the top layer from spreading wide, which makes the curls fall with more direction. Two clips can work too, but three is usually too much unless you’re doing something very dramatic.
This style is best when the curls are fully dry and fluffed. If you clip damp hair, the dents can stay in place and the curls at the front lose their spring. A decorative clip should feel like a finish, not a rescue.
What I like here is the contrast: the clip is neat, while the curls stay loose. That tension keeps the look from reading as basic. You can use a pearl barrette, a metal snap clip, or a textured claw, depending on how dressed up you want it to feel.
If you’re wearing it to a dinner or event, tuck one curl behind the ear and leave the rest loose over the opposite shoulder. Small move. Big effect.
18. Deep Side Sweep for Long Curls
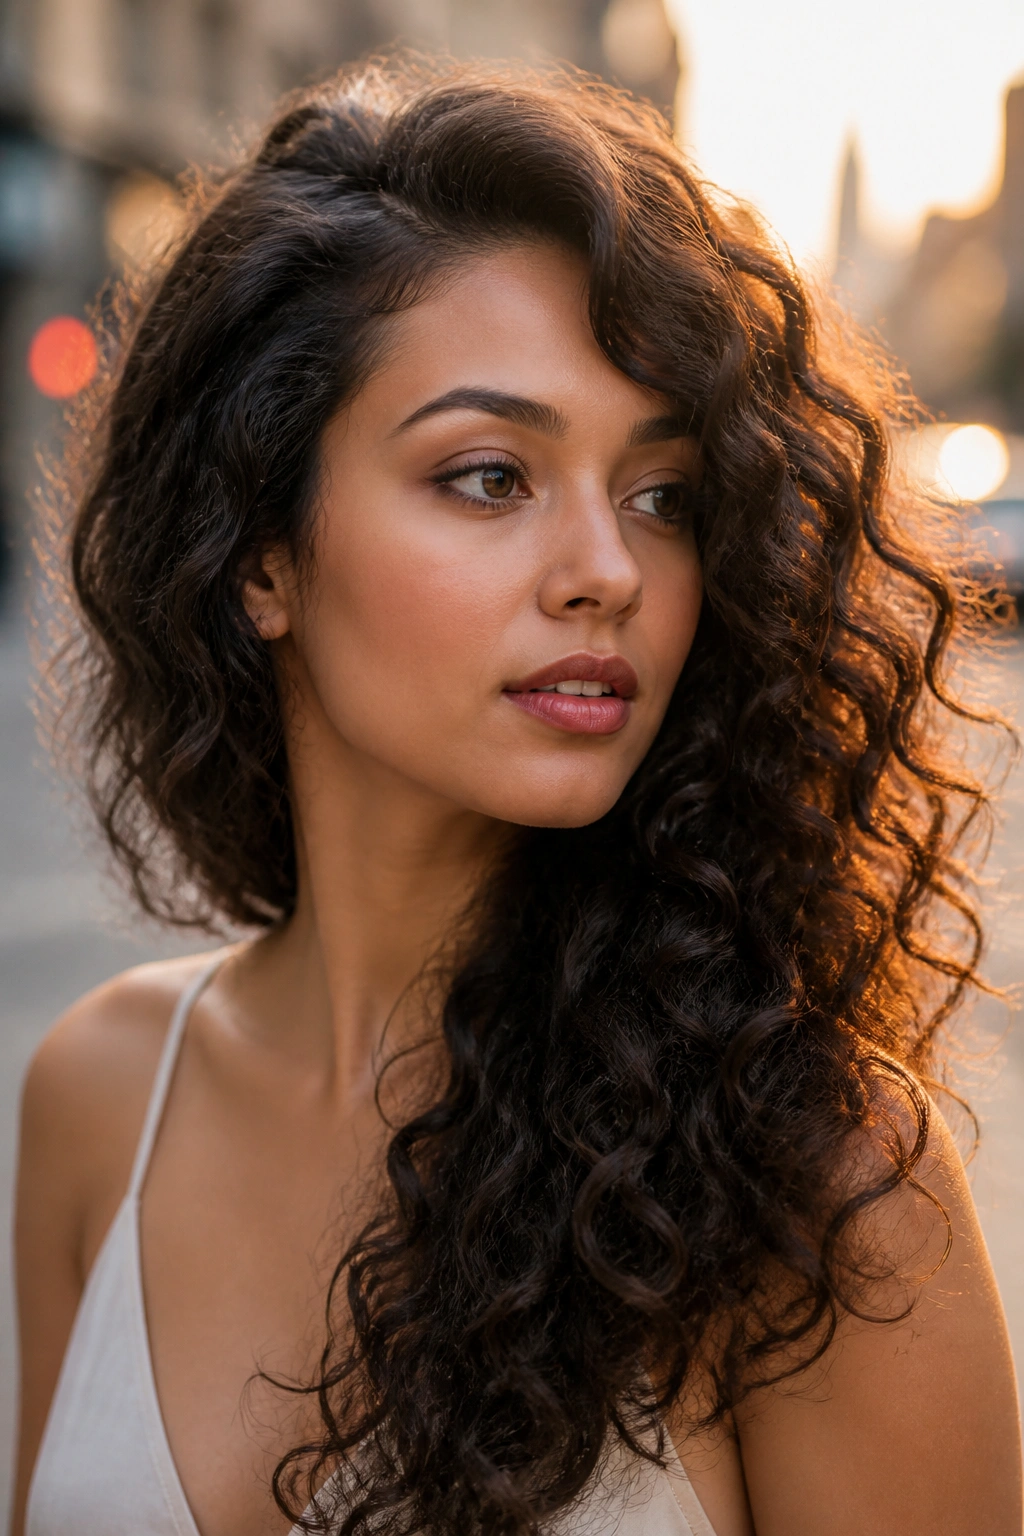
A deep side sweep changes the shape of long curls in a way a center part never will. A center part tends to divide the hair evenly, which can make long curls look heavy on both sides. A deep side sweep breaks that line and gives one side more visual weight.
This is especially nice on layered cuts, because the shorter front pieces can frame the face while the longer back pieces drape over one shoulder. A small amount of mousse at the roots and a curl cream on the lengths usually does the job. If the curls are heavy, clip the front up for a few minutes while they set. The lift at the part is what keeps the sweep from collapsing.
The style works even better when the ends are defined. Long curls can get stringy if they’re overloaded with oil, so keep the finish light. A little shine is enough. You want movement, not slickness.
I reach for this look when I want the hair to feel full on one side and easy on the other. It’s a simple shift, but it changes the whole outline of the face.
19. Side Knot with Loose Spirals
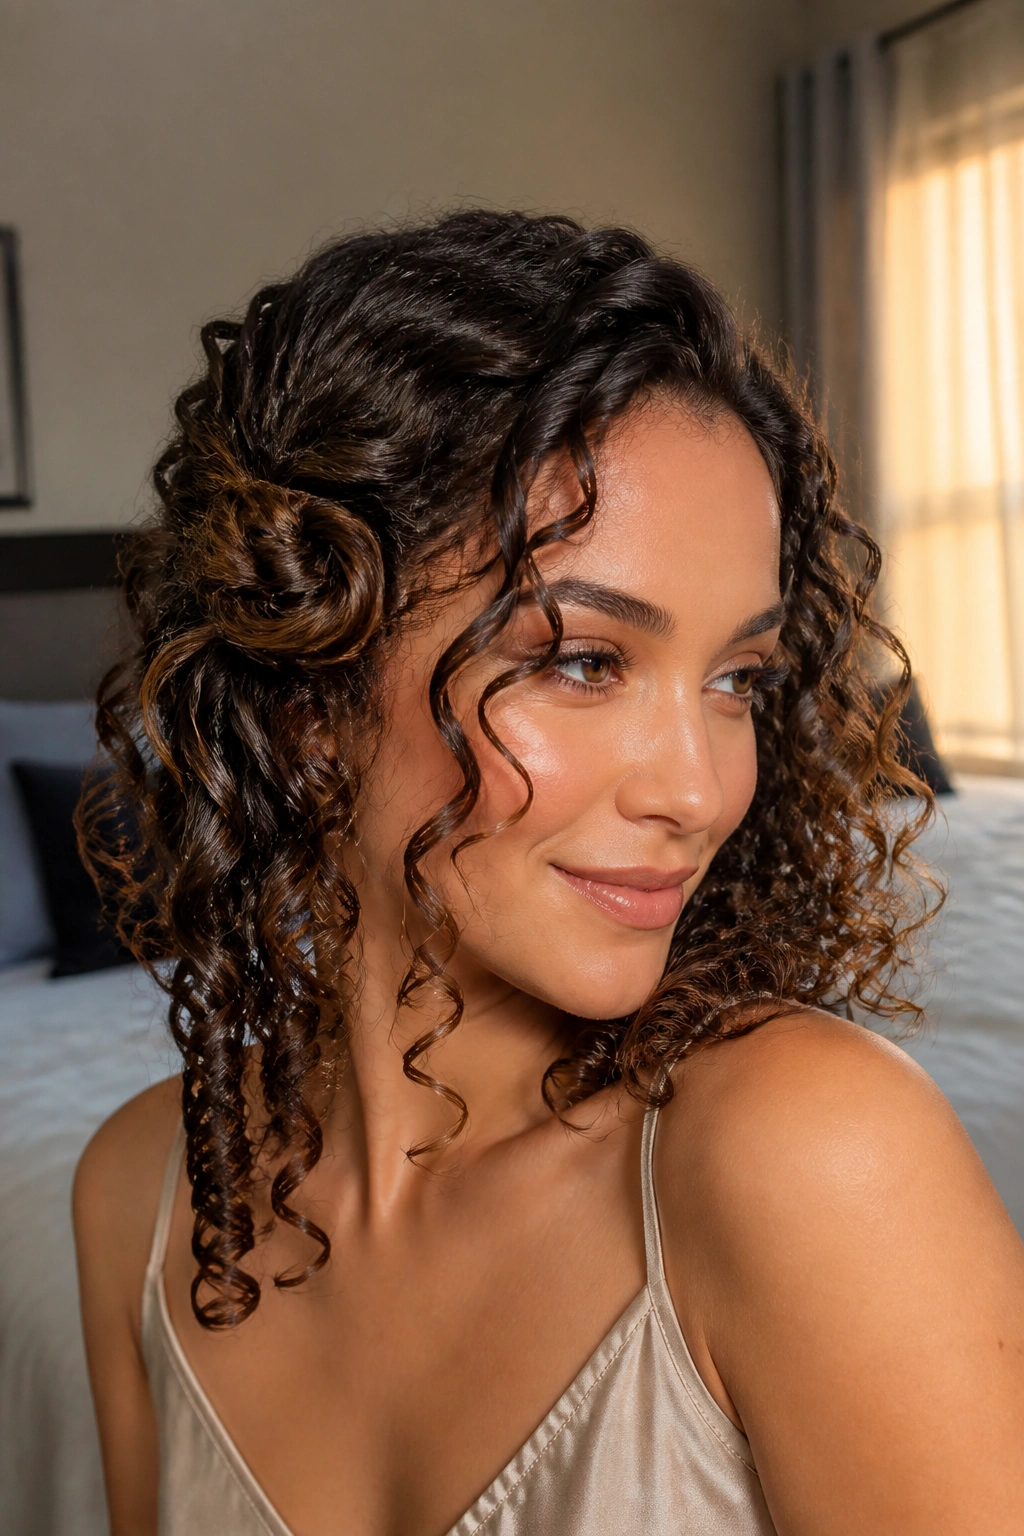
A side knot is a nice middle ground between an updo and a loose style. You twist or knot one thicker section off to the side, pin it low, and leave the surrounding curls free. The result feels relaxed but still controlled.
Why It Works
The knot gives the style a visible anchor point. The loose spirals soften the shape so it doesn’t look too formal. That balance matters on curly hair, especially when the pattern has a lot of bounce and you want some of that bounce to stay on display.
Quick facts:
- Best on medium-length curls with some stretch.
- Needs 4 to 6 pins if the hair is thick.
- Looks better when two or three face-framing pieces are left out.
- Holds longer if the knot is built from slightly damp hair.
Pro tip: twist the knot in the direction your curls naturally want to turn. Fighting the curl pattern makes the bun slip faster.
This style is quiet in the best way. It doesn’t shout, but it looks done. For a lot of curly hair days, that’s the sweet spot.
20. Soft Side Curls for Coily Hair
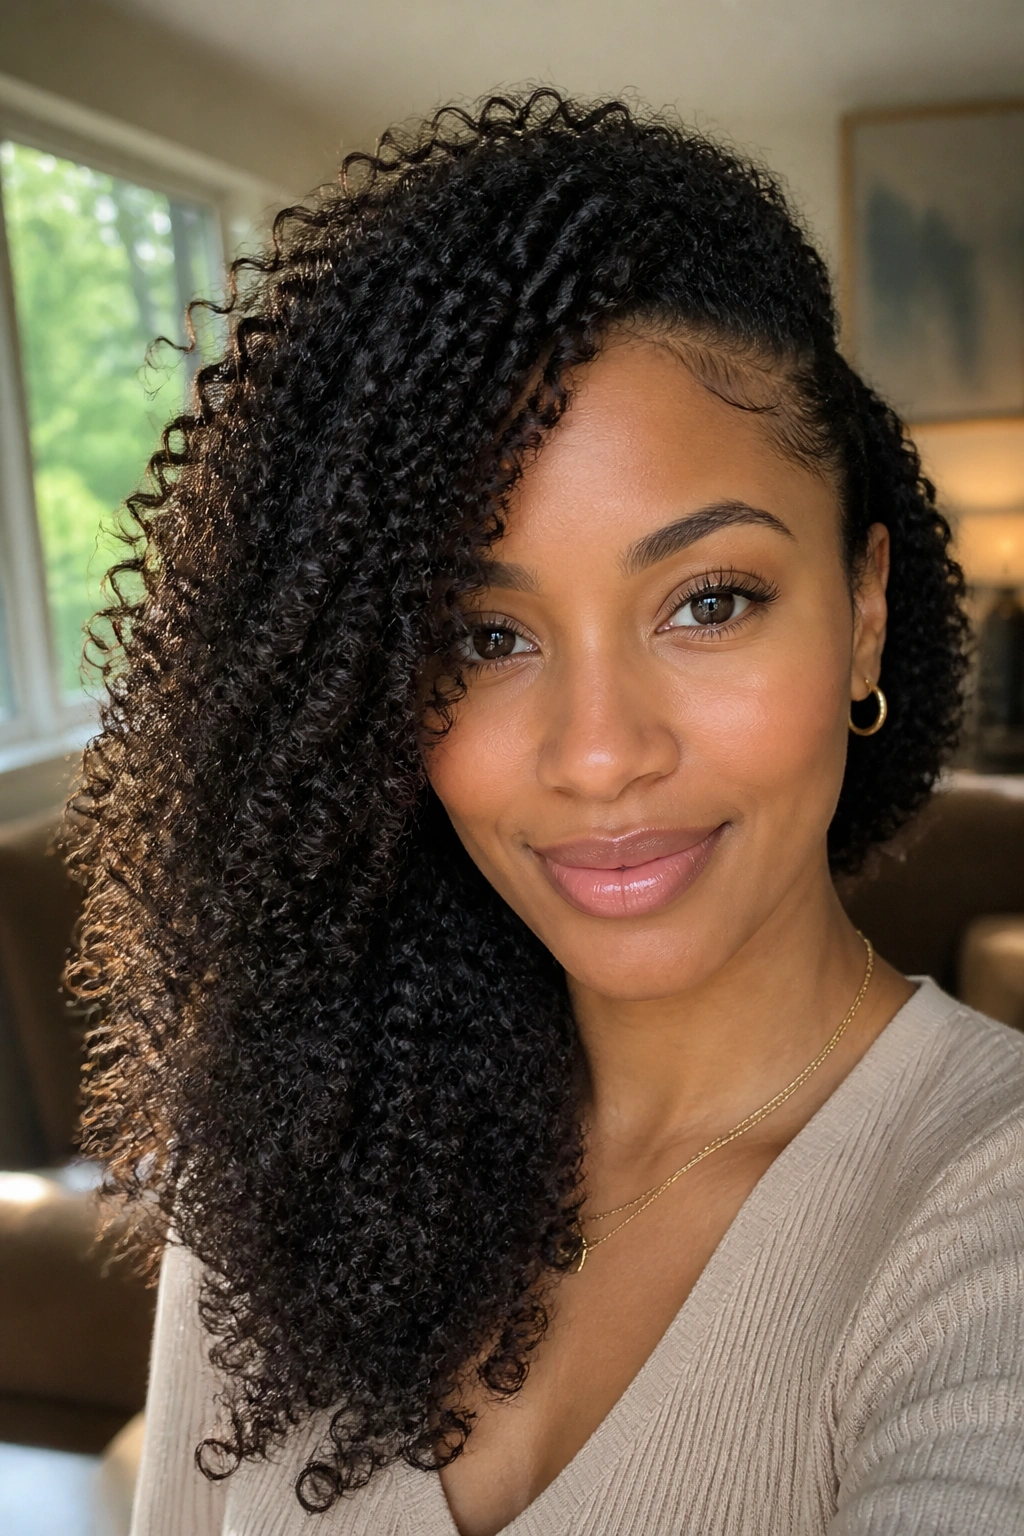
Coily hair often looks strongest when the side part is supported, not forced. A soft side sweep lets the natural shrinkage do its thing, while a few well-placed pins or twists guide the shape to one side. That means you get lift, fullness, and a little polish without flattening the texture that makes coily hair look alive.
This works beautifully with stretched twist-outs and braid-outs. Let the hair dry fully, separate the curls gently, then direct the fuller side over the shoulder with a light oil on your fingertips. If you need extra hold, use two pins at the back and one at the temple. That is usually enough. More than that can make the style feel over-controlled, and coily hair rarely looks better when it’s pressed too hard.
I also like this style because it ages well across the day. The curls loosen a little, the side shape softens, and the whole look ends up feeling richer instead of messier. That is not a failure. It’s the point.
If you only try one or two side curls for curly hair, start here or with the deep side part. Both give you shape fast, both work with real texture, and both leave room for your hair to look like itself.
