



Curly hair has a funny way of looking best when it is allowed to move. Push it too hard into a shape it doesn’t want, and it swells, frizzes, or collapses at the roots. Give it the right cut, the right part, or the right updo, and suddenly the same head of hair looks fuller, softer, and far more put together.
That’s why hairstyles for curly hair are not really about forcing control. They’re about working with curl pattern, density, and shrinkage so the style still looks good after lunch, after humidity, and after you’ve taken your earrings off at the end of the day. A style that looks neat for ten minutes and then goes limp is not a win. Neither is a style that fights the texture until the hair looks tired.
The good options tend to do one of three things: they show off definition, they build shape at the crown, or they make the texture itself the main event. Sometimes they do all three. A shoulder-length wash-and-go can look effortless when the layers are right. A high puff can save the whole morning. A twist-out, if you set it carefully, can carry you for days without turning into a fuzzy halo.
What matters most is picking a style that matches the way your curls actually behave, not the way you wish they behaved on a humid Tuesday. Some styles love loose 2C waves. Others make tight coils look clean and sculpted. A few are fast, a few are fussy, and one or two are worth the extra mirror time. Let’s get into the ones that earn their keep.
1. Shoulder-Grazing Wash-and-Go
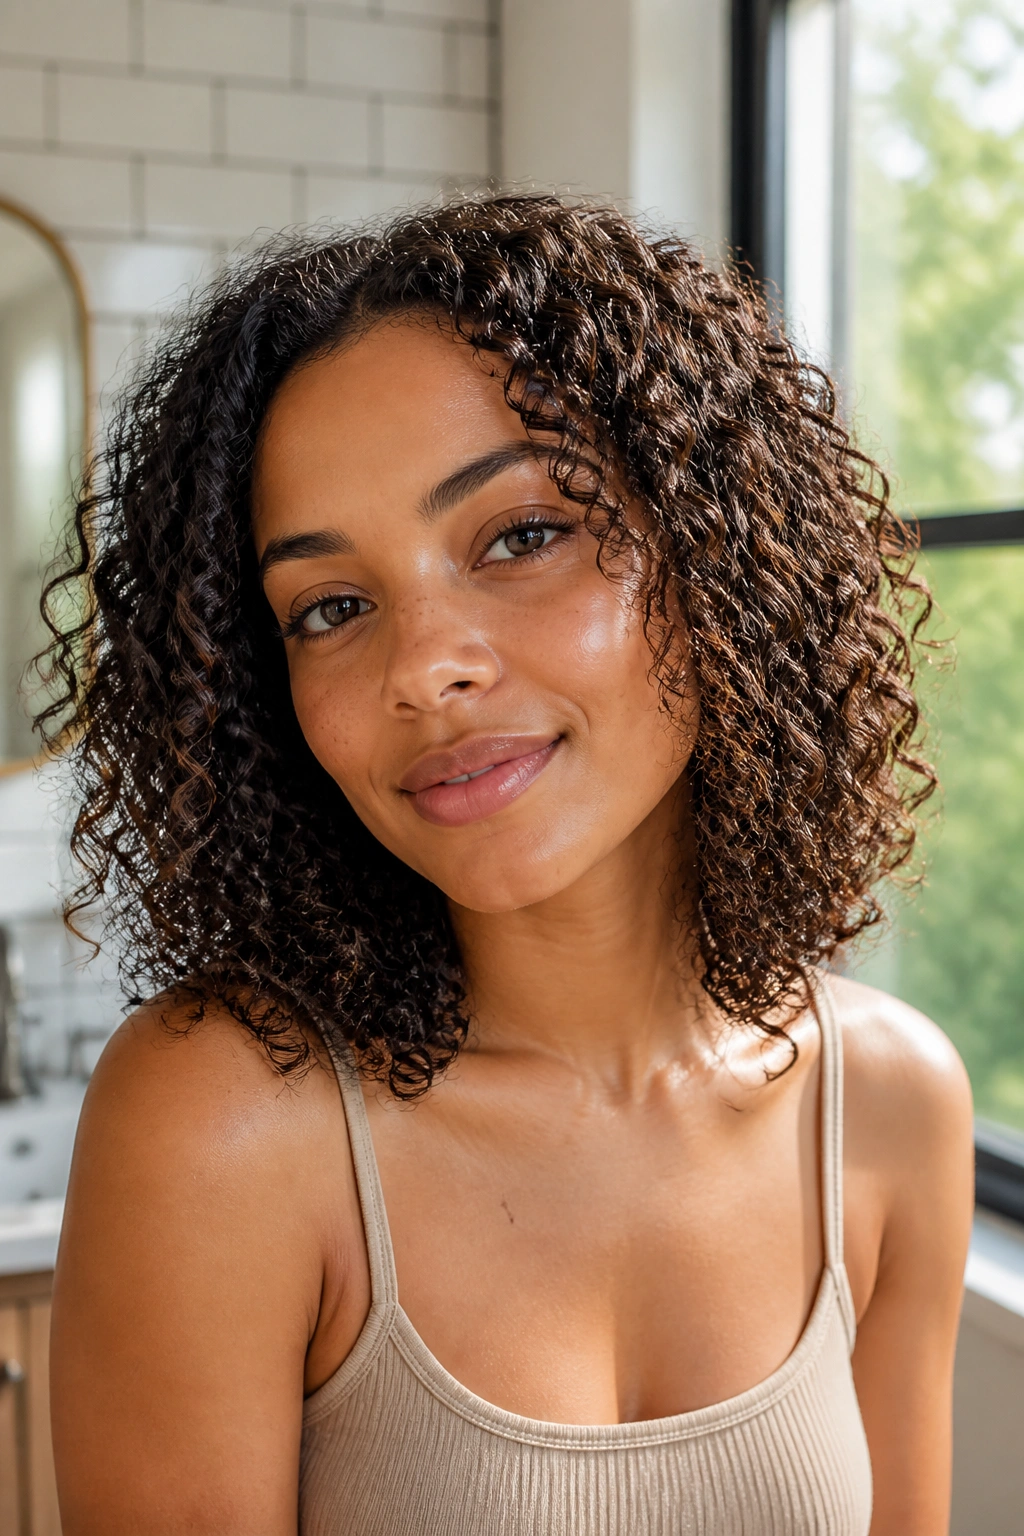
A good wash-and-go is still the most honest curly style there is. You clean, condition, define, and let the texture do the talking. On shoulder-length hair, the shape usually lands in that sweet spot where the curls have room to spring without getting heavy at the ends.
The trick is not using too much product. Start with a leave-in, then add a curl cream or gel in small sections, using your fingers or a Denman brush to encourage clumping. If the roots are flat, clip them up while the hair dries. That one move gives the style more lift than people expect.
This look works best when the cut has a little layering. One blunt line can make curls pile up in a heavy block. A few soft layers let the curls fall in a cleaner outline, which matters more than people think.
2. Layered Curly Bob
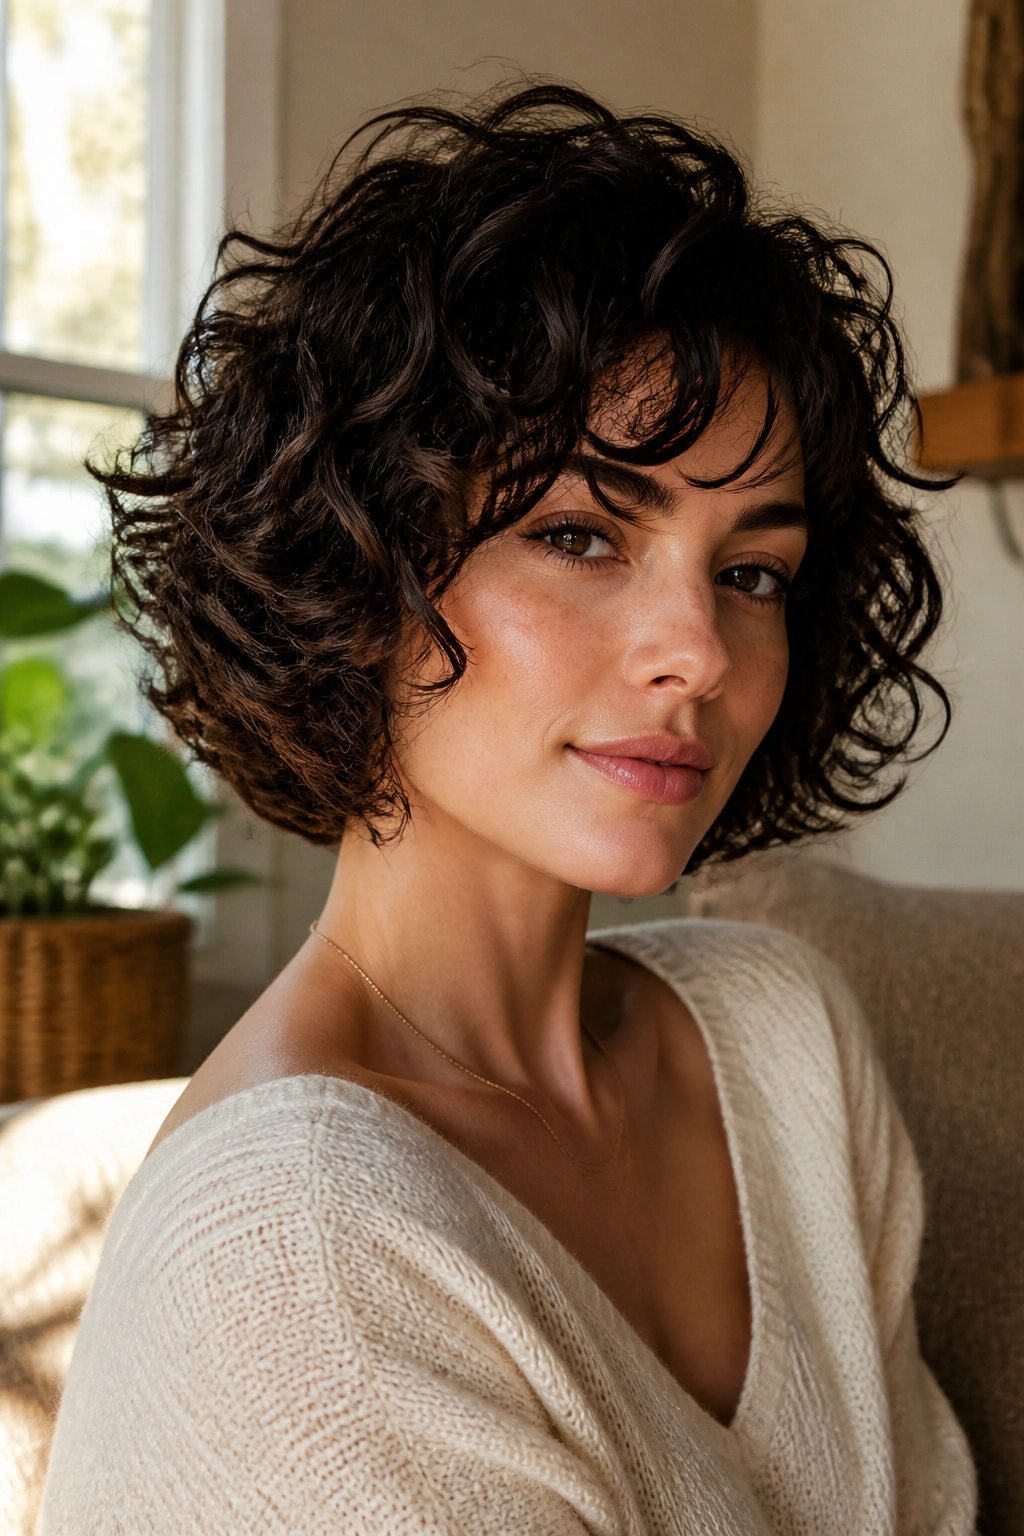
A layered curly bob gives curls room to breathe. Without layers, a bob can turn into a triangle or a little helmet, depending on density. With layers, the shape opens up and the ends stop competing with the top.
This is one of the easiest curly cuts to style well. You do not need fancy tools. A diffuser, a leave-in, and a light gel are often enough if the haircut is already doing half the work.
Why the layers matter
Layers shorten some curls and leave others longer, which helps the shape sit around the jaw instead of ballooning outward. That matters a lot on thick hair, where the weight can pull everything down by noon.
If your curls are fine, keep the layers softer and longer. Too much internal thinning can make the bob feel stringy. On denser textures, a stylist can remove bulk without destroying the outline.
3. Curly Shag with Face-Framing Layers
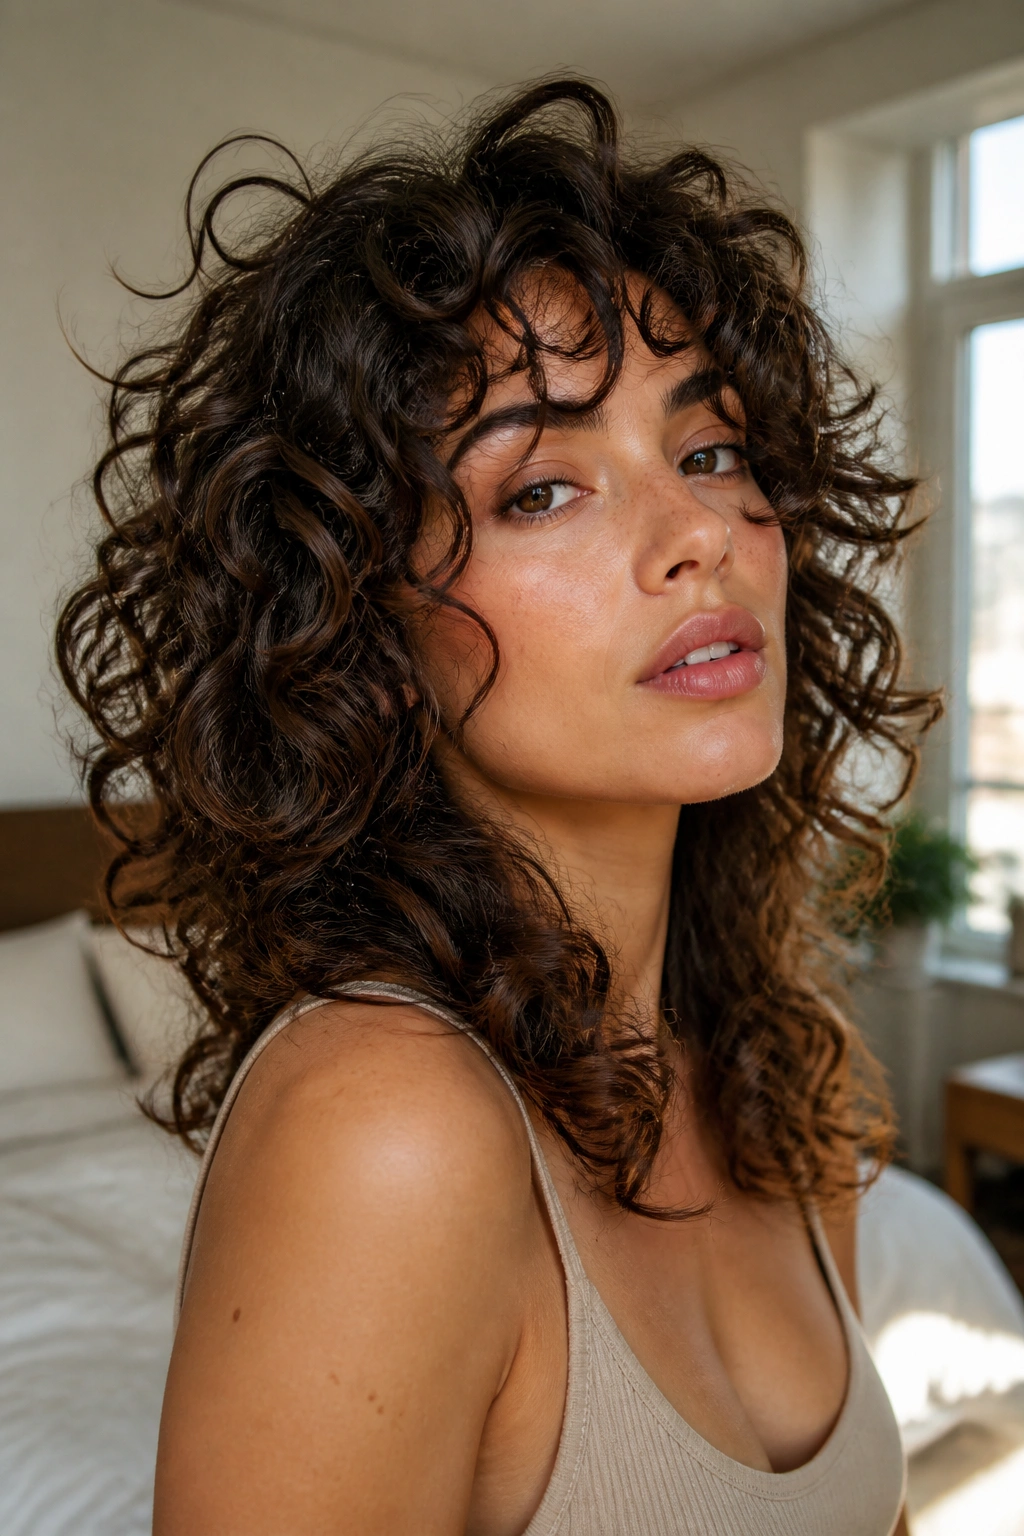
A shag is one of those cuts that looks a little wild in the best way. It thrives on movement, which means curly hair gets to keep its bounce instead of being flattened into one smooth shape.
The face-framing layers are the part I like most. They bring the eye up and make the curls around the cheekbones and jaw feel intentional, even when the rest of the style is loose and a little messy. That messiness is the point.
You’ll want to scrunch in your styler and diffuse gently so the layers separate in a soft, airy way. If you rake too hard, the curls can lose their clumps and the cut starts to look broader than it should. This style likes a bit of edge. It does not need perfection.
4. High Puff
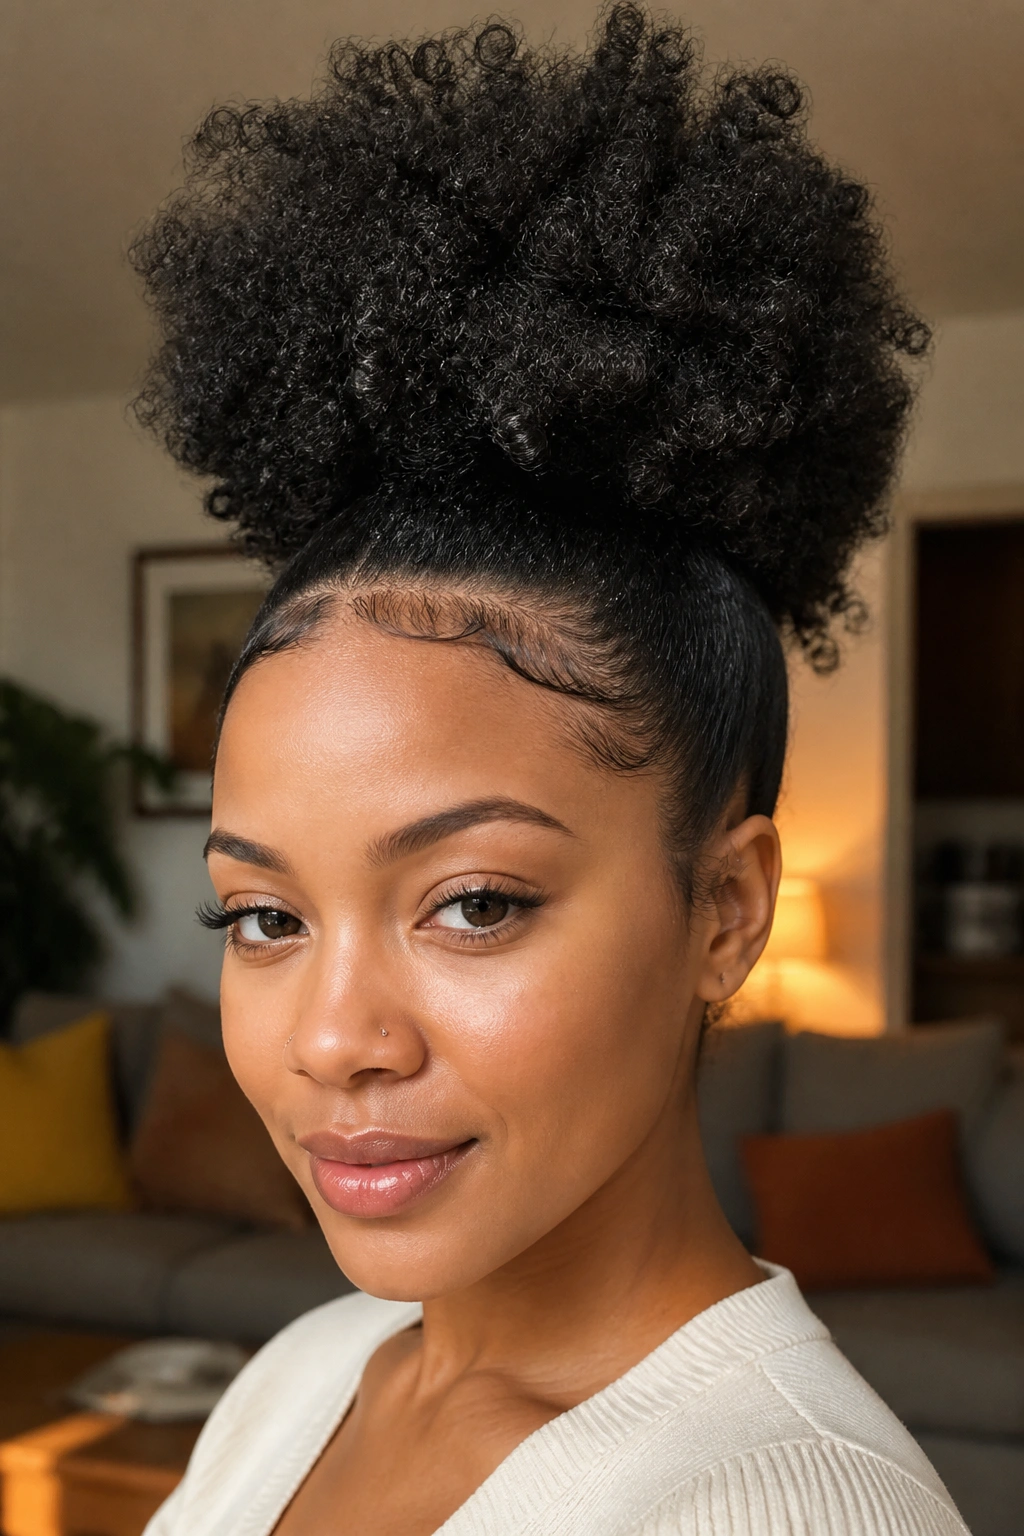
A high puff is the curly equivalent of a clean white shirt. Simple. Sharp. Done right, it fixes the whole look in about two minutes.
Gather the hair toward the crown with a soft brush or your hands, smooth the sides with a little water or leave-in, and secure it with a stretchy band that won’t snag. The puff itself should sit high enough to show length, but not so high that it starts to look like a stem.
- Use a satin scrunchie or a snag-free elastic.
- Smooth the edges with a little gel, not a heavy layer.
- Fluff the puff after it’s secured so it doesn’t sit flat.
- Leave a few curls loose at the front if you want a softer line.
It’s quick, it lifts the face, and it keeps the ends protected. Honestly, that’s a hard combination to beat.
5. Low Pineapple Ponytail
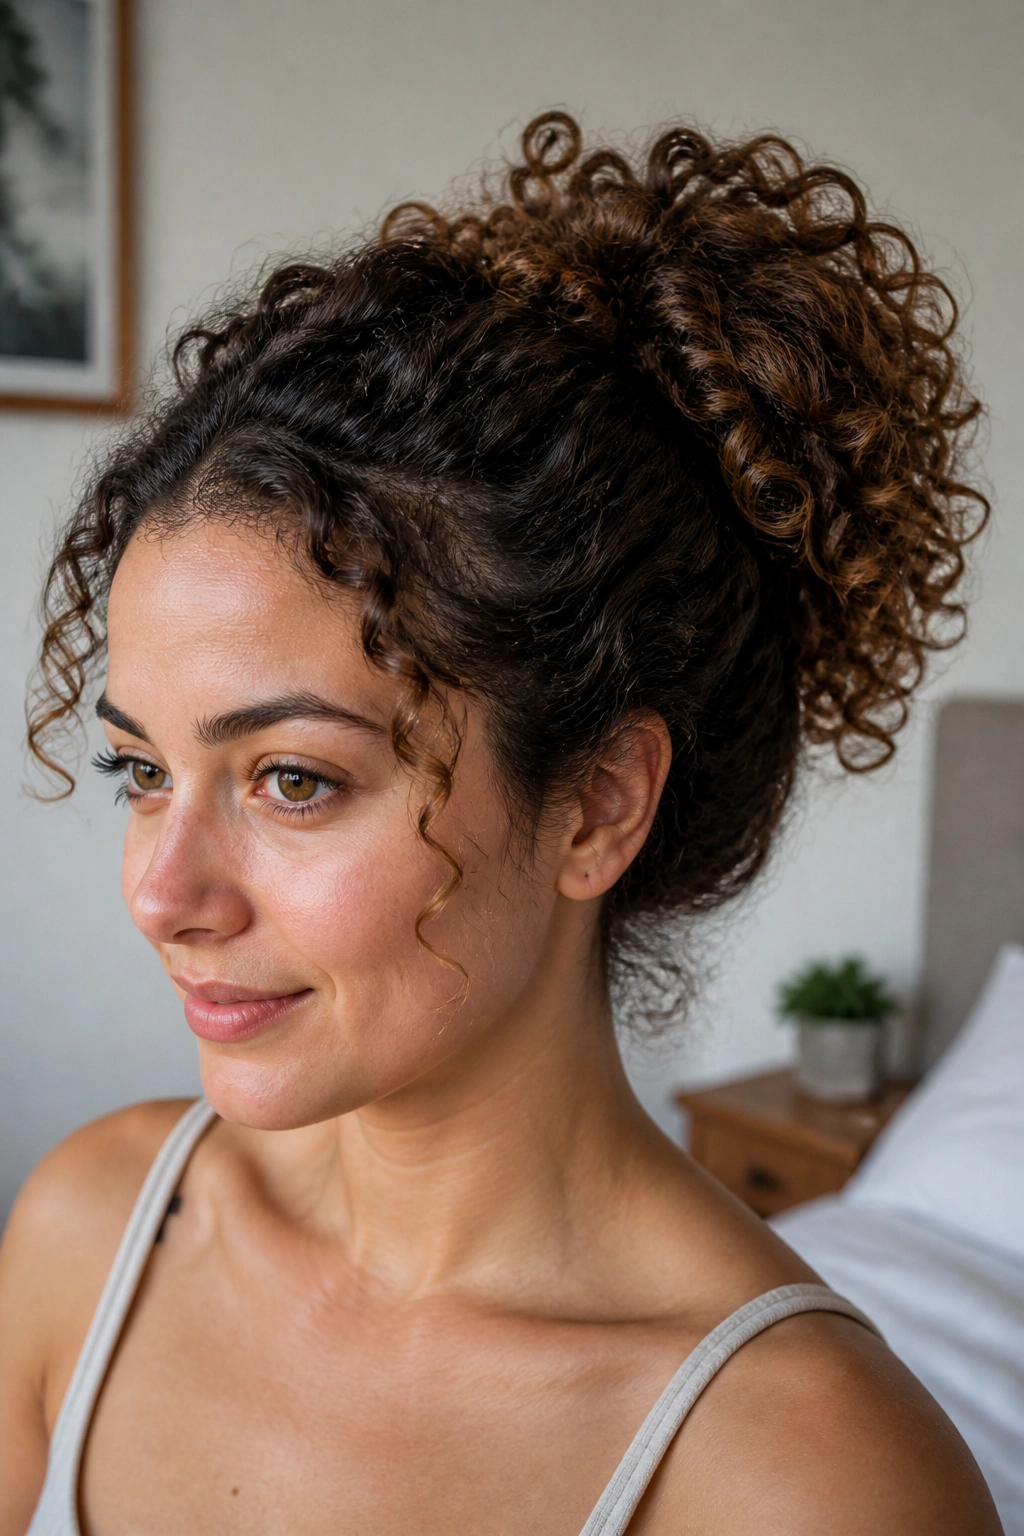
The low pineapple is a sleeper favorite. It keeps curls gathered loosely at the top or upper back of the head, which preserves shape without smashing the pattern.
Unlike a tight ponytail, this style leaves the curls room to sit naturally. That makes it a good choice when you want a polished look but do not want the tension of a slick style. Use a soft elastic or a satin scrunchie, and don’t pull the base so tight that the hairline starts to look strained.
It’s especially handy on second- or third-day curls. The texture already has some personality, and the pineapple shape lets you keep it. If the front has gone a little flat, flip it over for a few minutes before tying it off. Strange little trick. Works.
6. Half-Up Half-Down with Defined Curls
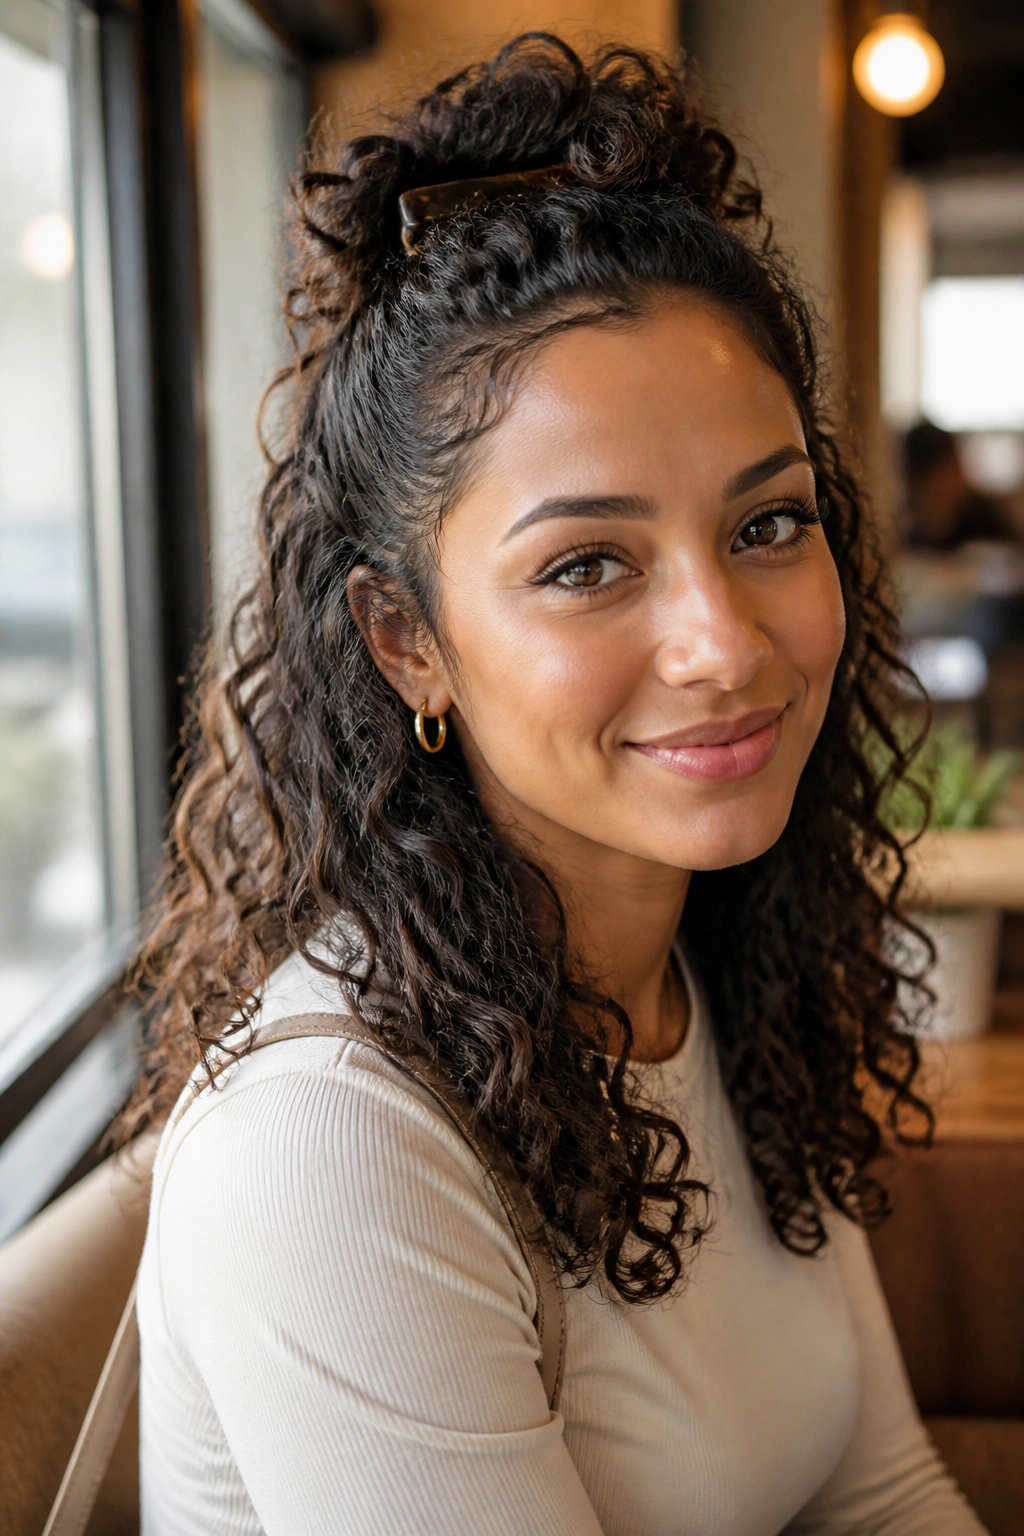
Half-up styles are good because they do two jobs at once. They keep hair out of the face, and they let the length and curl pattern stay visible.
The best version is not a random top section yanked back with a bare elastic. Separate the top half cleanly from ear to ear, then secure it with a clip, bow, or small scrunchie that matches the mood. Leave the bottom curls defined, not brushed out. That contrast is what makes the look feel finished.
If the hair is dense, pin the top section a little higher so it does not disappear into the lower mass. If it is finer, make the top half a touch looser so the style doesn’t look thin. Small adjustments matter here more than people admit.
7. Space Buns on Curly Hair
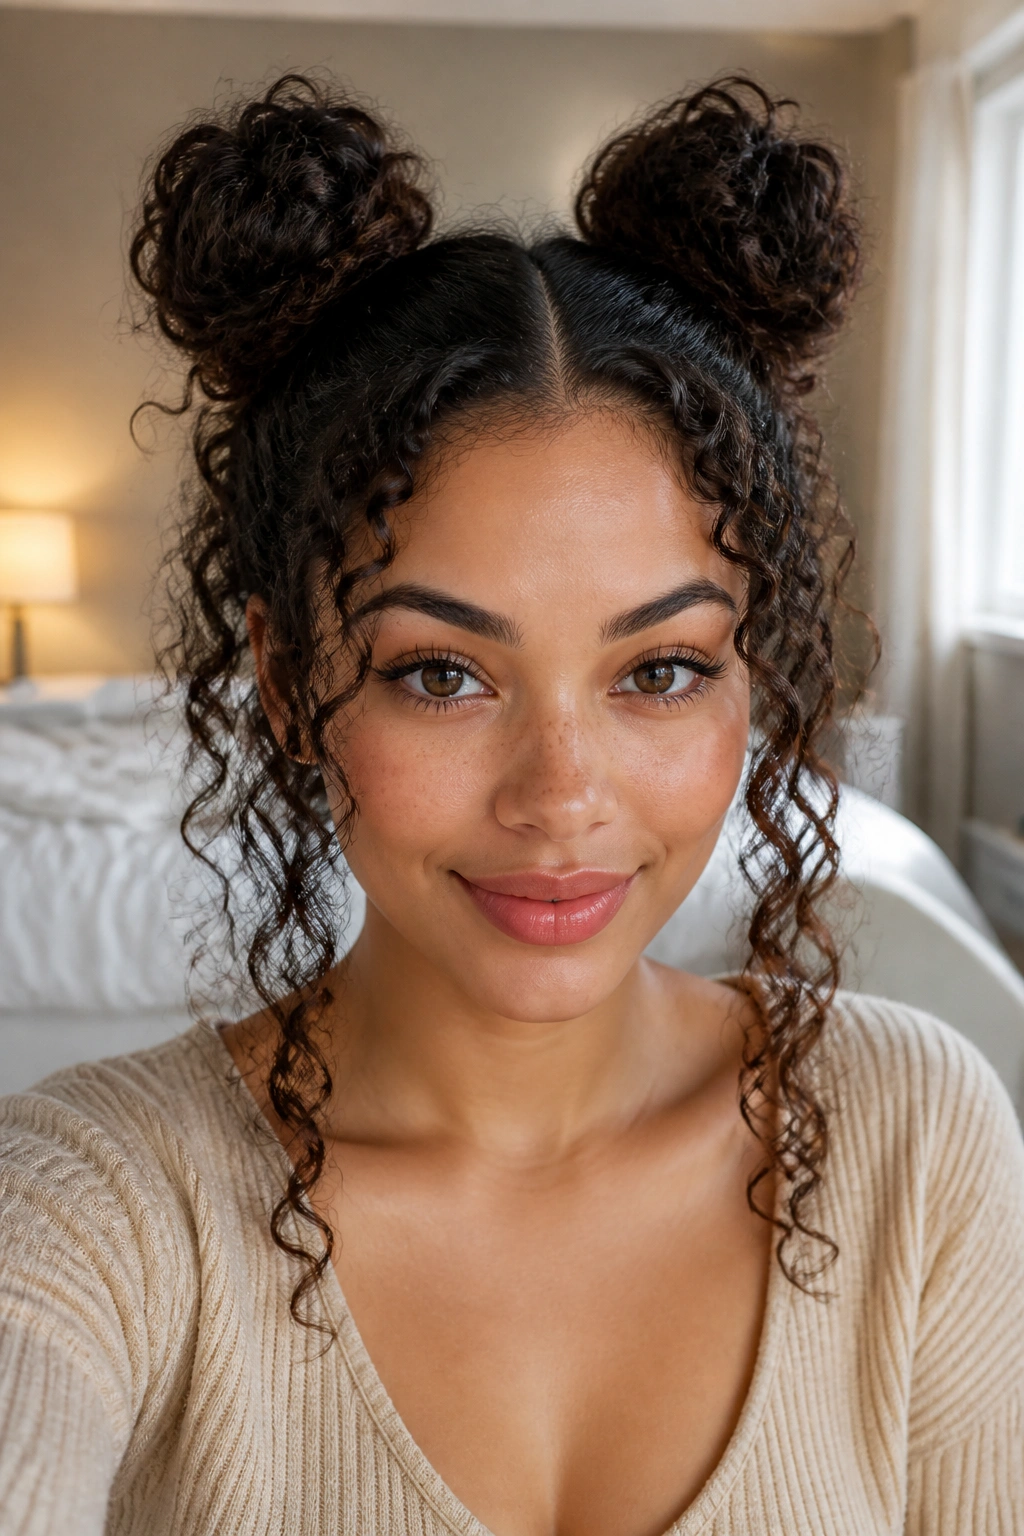
Space buns can look playful or precise, depending on how you handle the parting. Start with a center part, then divide the hair into two equal sections and secure each side into a puff or bun. The smaller and tidier the base, the sharper the overall look.
How to keep them from looking messy in a bad way
A little texture at the crown helps. Too much frizz at the roots makes the style look rushed, while too much gel can make it feel stiff. Aim for a middle ground: smooth the base, leave the ends softly curled if they’re not tucked in, and let the buns keep a bit of fullness.
This style works on medium to long curls, and it’s especially useful when you want your hair off your neck but still want some shape on top. It’s not delicate. That’s part of the charm.
8. Sleek Side Part with Volume
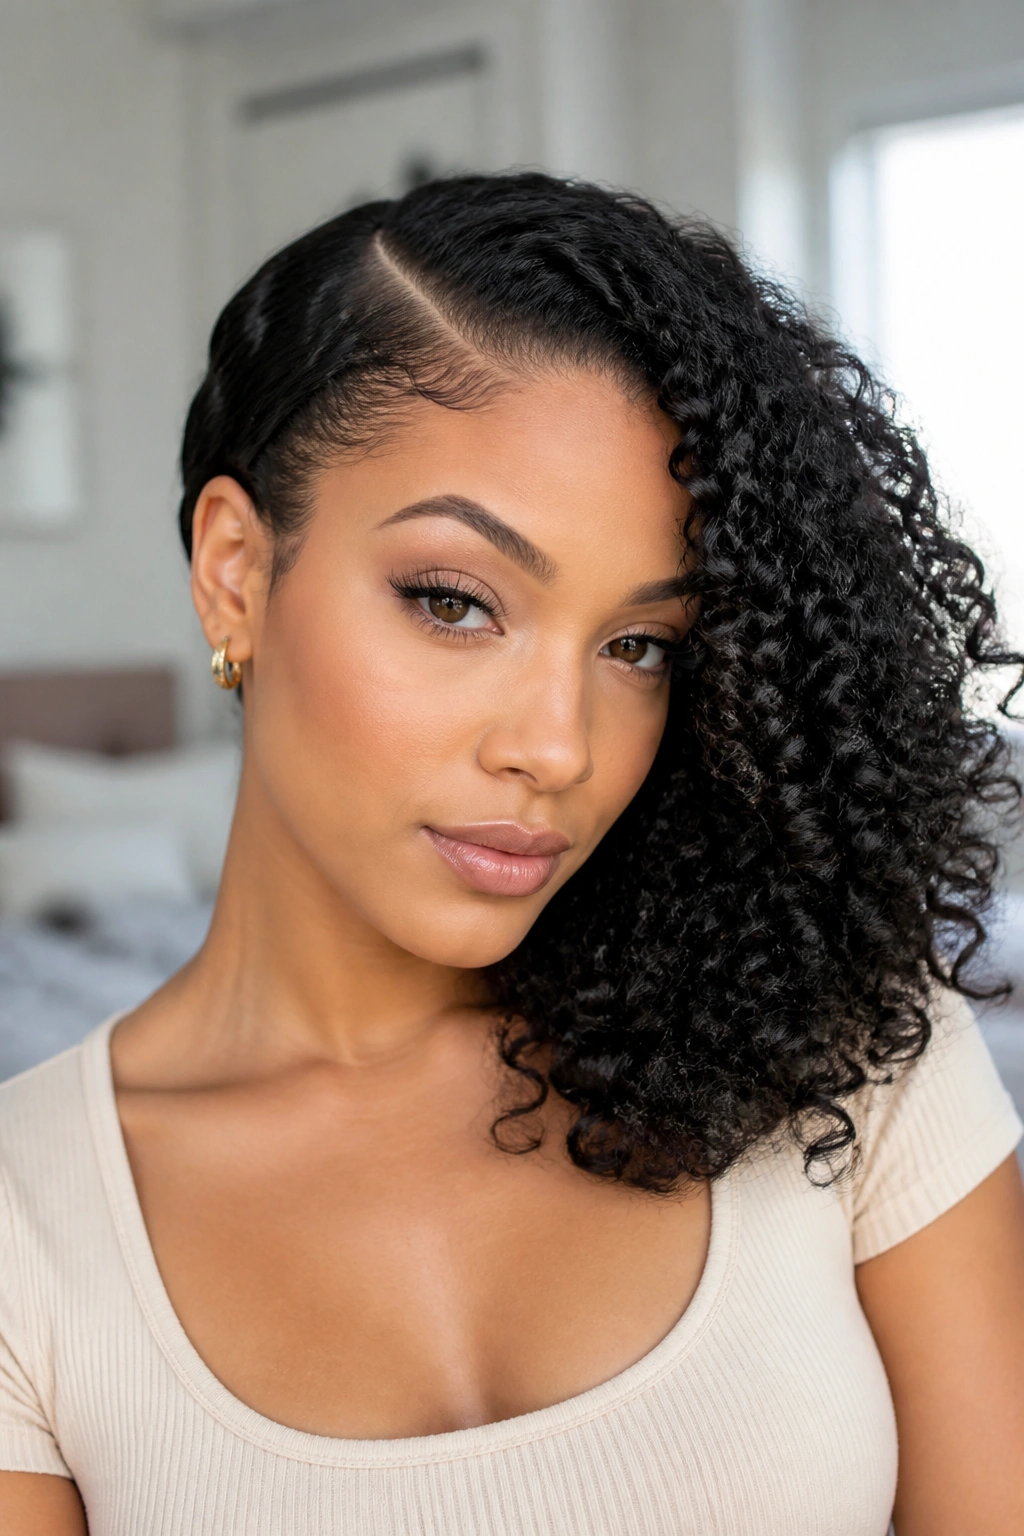
A deep side part changes curly hair fast. It shifts the weight, adds drama without much effort, and gives one side more lift than the other.
The roots on the flatter side need a little help. Use a comb to place the part, then smooth the front section with a touch of gel or mousse. The rest of the curls can stay loose and full. That contrast between sleek and fluffy keeps the style from looking like a regular down style with a part thrown in.
I like this on medium-length curls because the side sweep shows off the face without hiding the texture. It also helps when one side of your hair behaves better than the other. We’ve all had that side. No need to pretend otherwise.
9. Curly Bangs and Shoulder-Length Layers
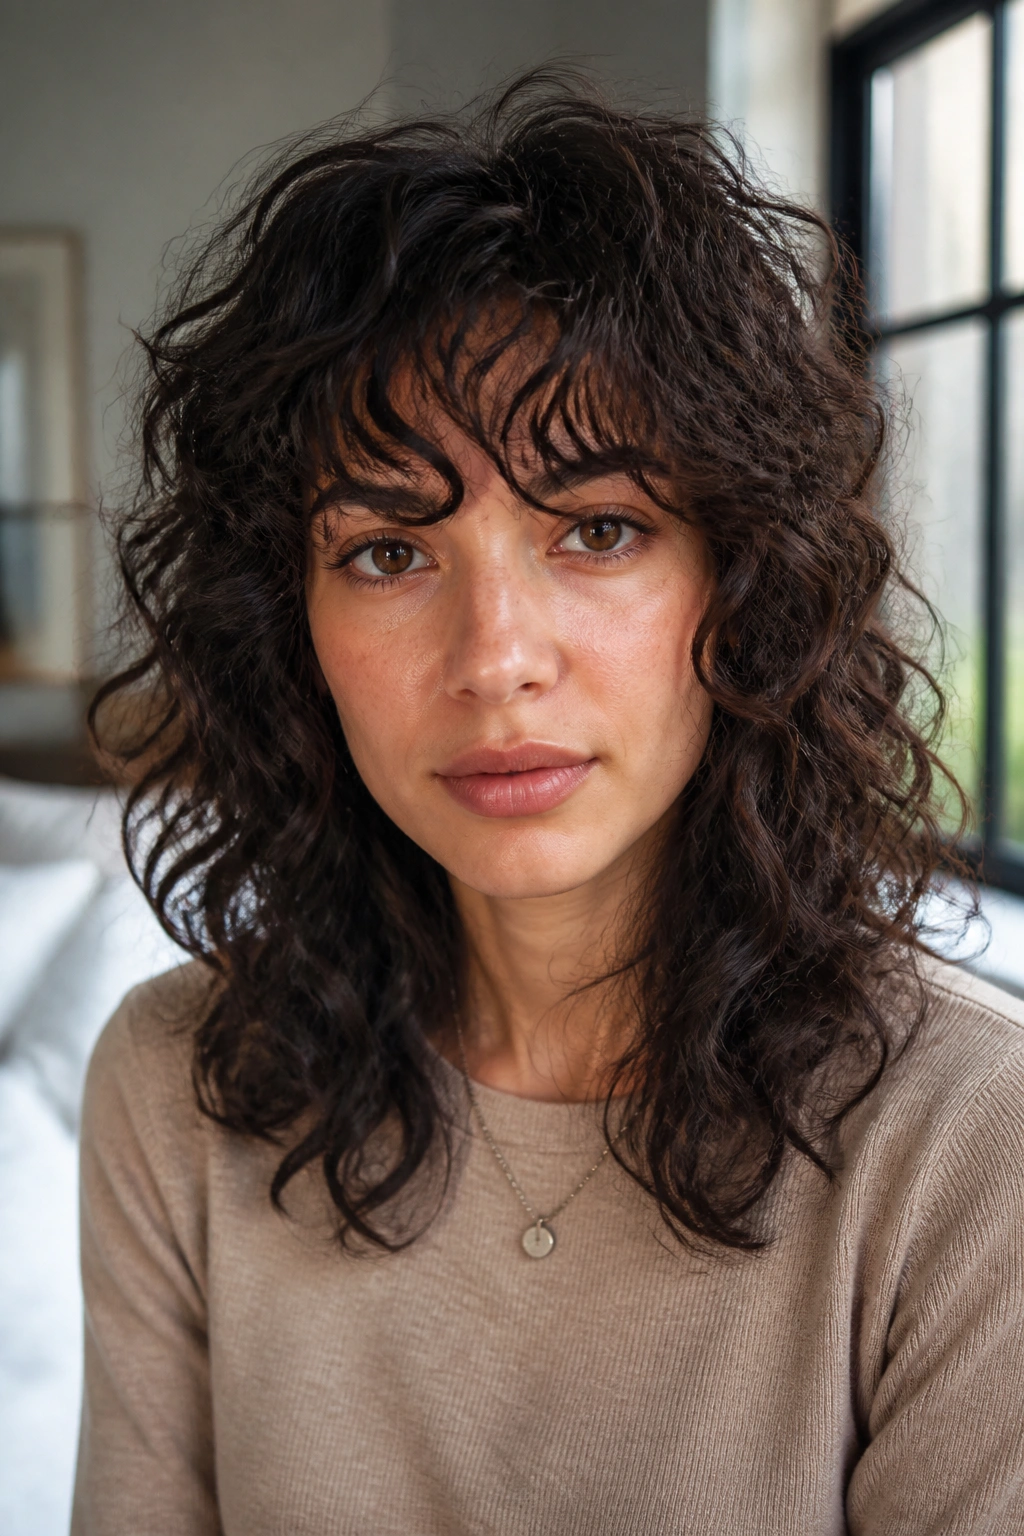
Curly bangs are not a joke cut. They need real shaping. Done well, they make the whole face look more open and they stop shoulder-length hair from feeling too safe.
The key is length. Curls shrink, sometimes a lot, so bangs should usually be cut longer than you think. Ask for dry cutting if possible, and make sure the fringe blends into the face-framing layers instead of sitting like a separate piece of hair.
This style is especially good if your curls have a lot of spring at the front. The bangs soften broad foreheads and bring attention to the eyes. They also make a plain cut feel much more lived-in.
10. Curly Pixie Cut
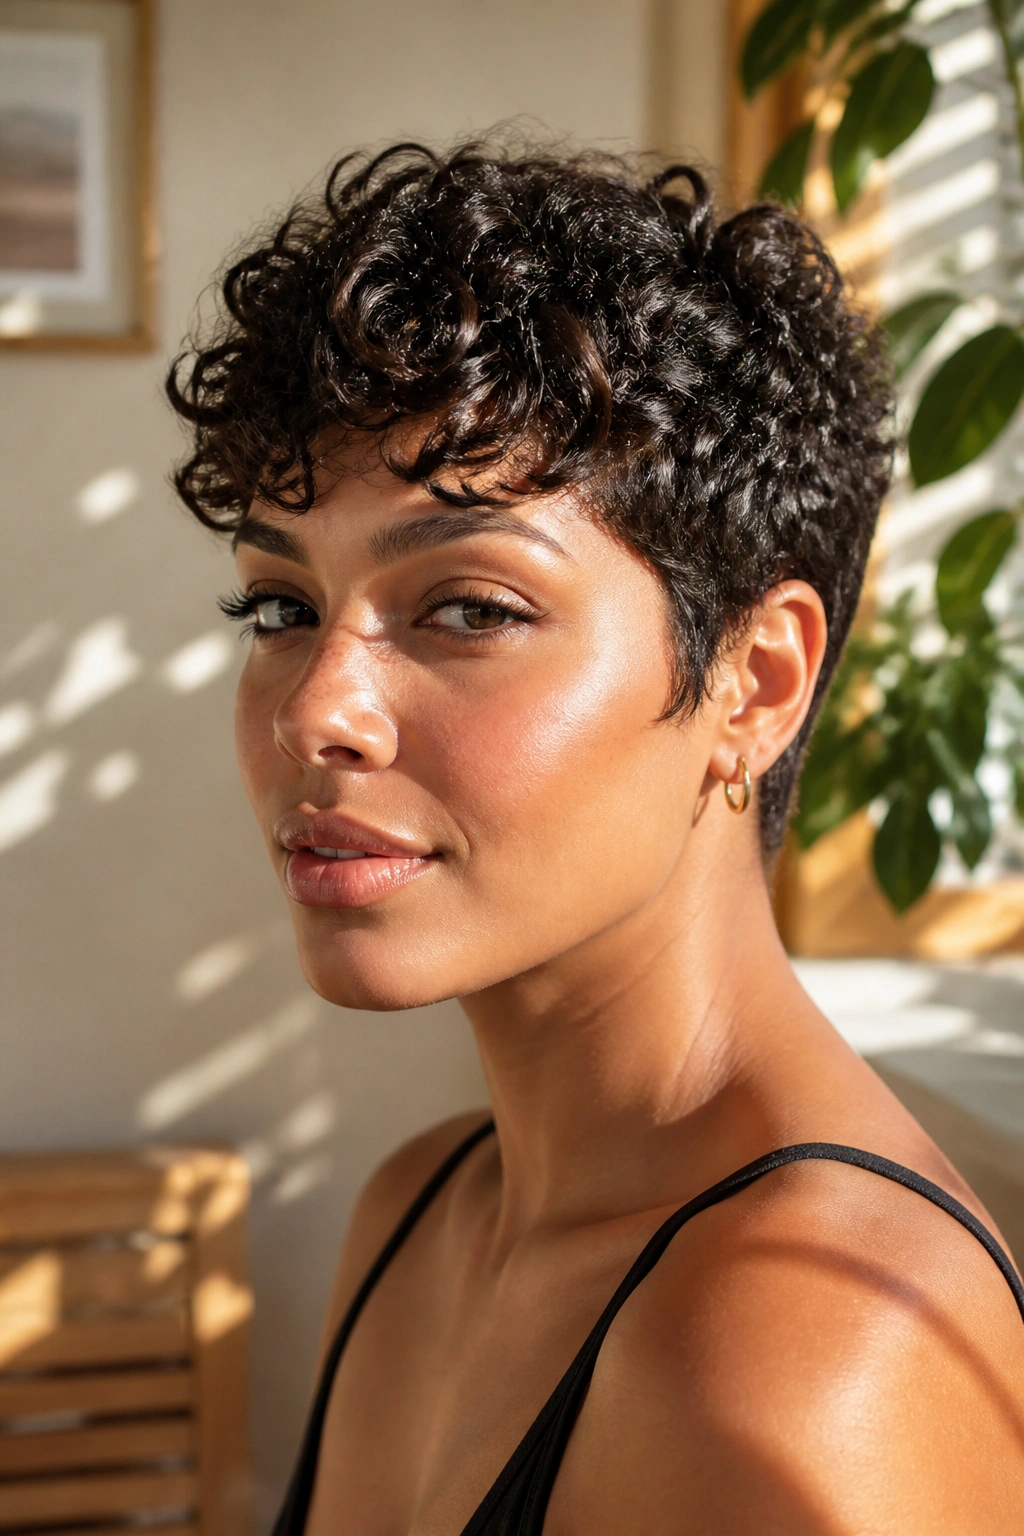
Short curls can be a relief. A curly pixie removes weight, shows off texture, and makes the curl pattern look crisp instead of buried under length.
The danger is over-thinning. Too much texturizing can leave the top fluffy in a bad way and the sides patchy. A better pixie has some softness around the temples and enough length on top for the curls to coil naturally.
Keep styling simple. A little cream, a dab of gel, and finger shaping are usually enough. The style does not need a lot of convincing. It needs a clean cut and a little moisture. That’s it.
11. Twist-Out with a Deep Side Part
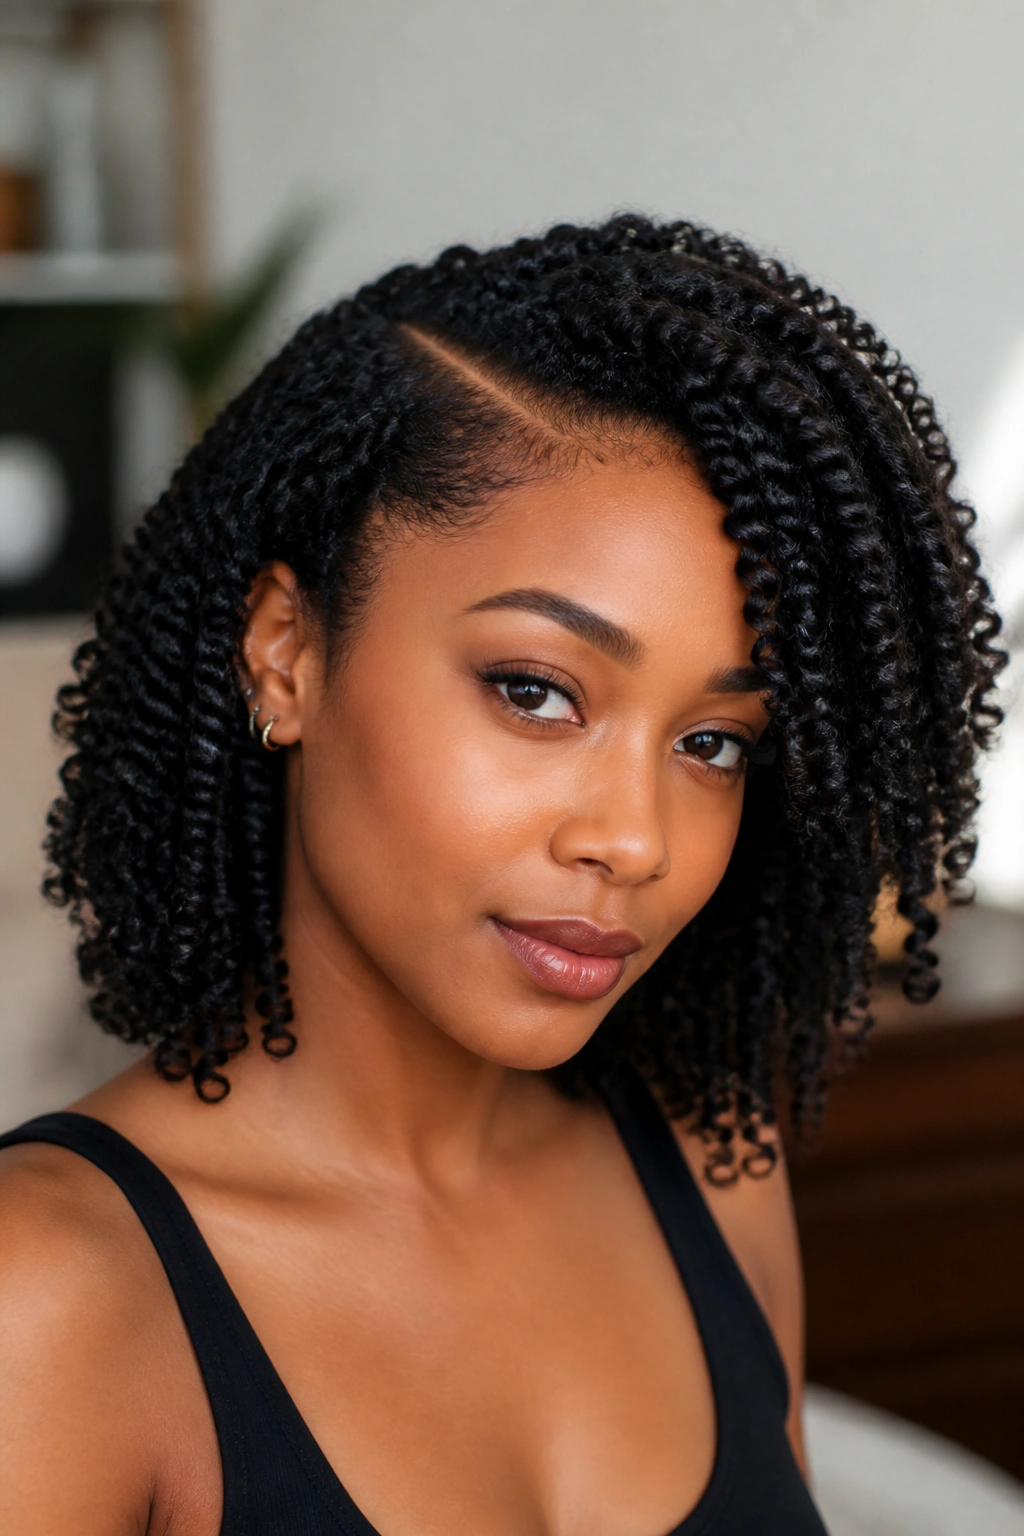
A twist-out is one of the best curly styles when you want definition without losing too much fullness. You set damp hair in two-strand twists, let it dry fully, then separate the twists gently.
The part changes everything
A deep side part adds shape immediately. It gives the twist-out a little sweep and helps the front sit in a more deliberate line. If the hair is very dense, the part also stops the style from looking too round at the top.
Use a lightweight butter or cream before twisting, then seal the ends well so they do not fray. A twist-out that is even slightly damp when undone will puff up faster than you want. Dryness matters here. More than people think.
12. Braid-Out with Soft Waves
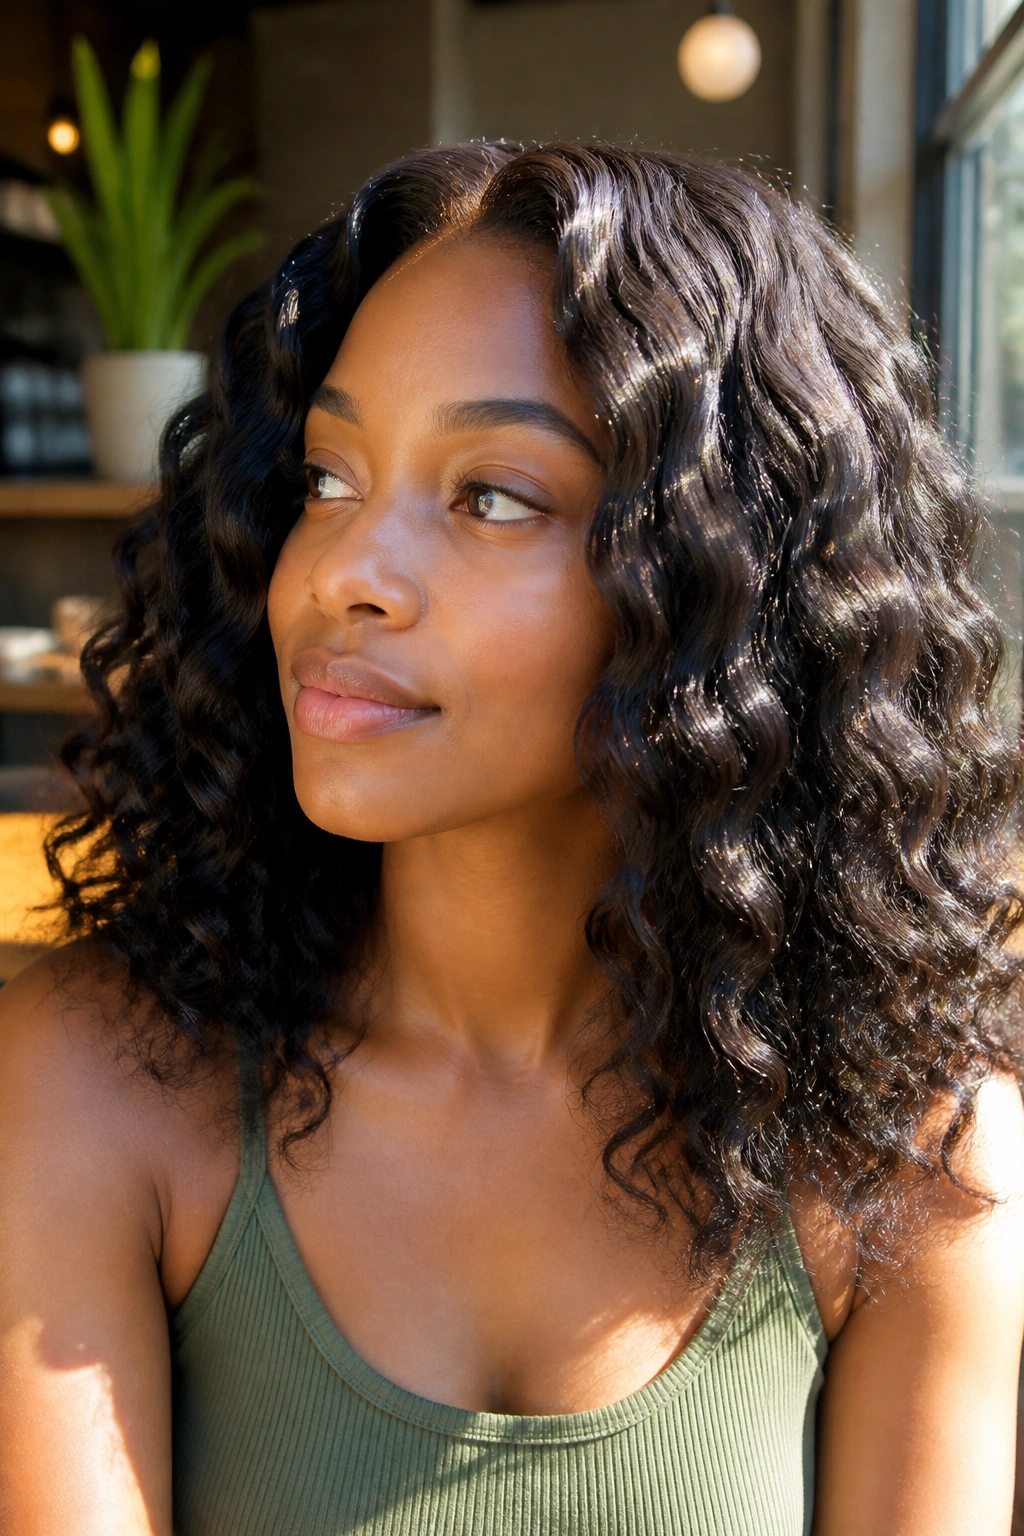
A braid-out gives a looser, softer finish than a twist-out. The curls stretch a bit more, which can be a nice change if your hair tends to shrink into a tight shape the minute it dries.
This style loves clean sections and patient drying. Braid too big and the pattern gets fuzzy. Braid too small and the style can look overworked. Medium-sized braids usually hit the best balance, especially if you want a wave that looks natural rather than crimped.
It’s a good choice for people who like volume but want a slightly more relaxed texture. The finish feels softer around the face, and the wave pattern can last well if you separate the braids gently instead of pulling them apart like you’re in a hurry.
13. Braided Crown Updo
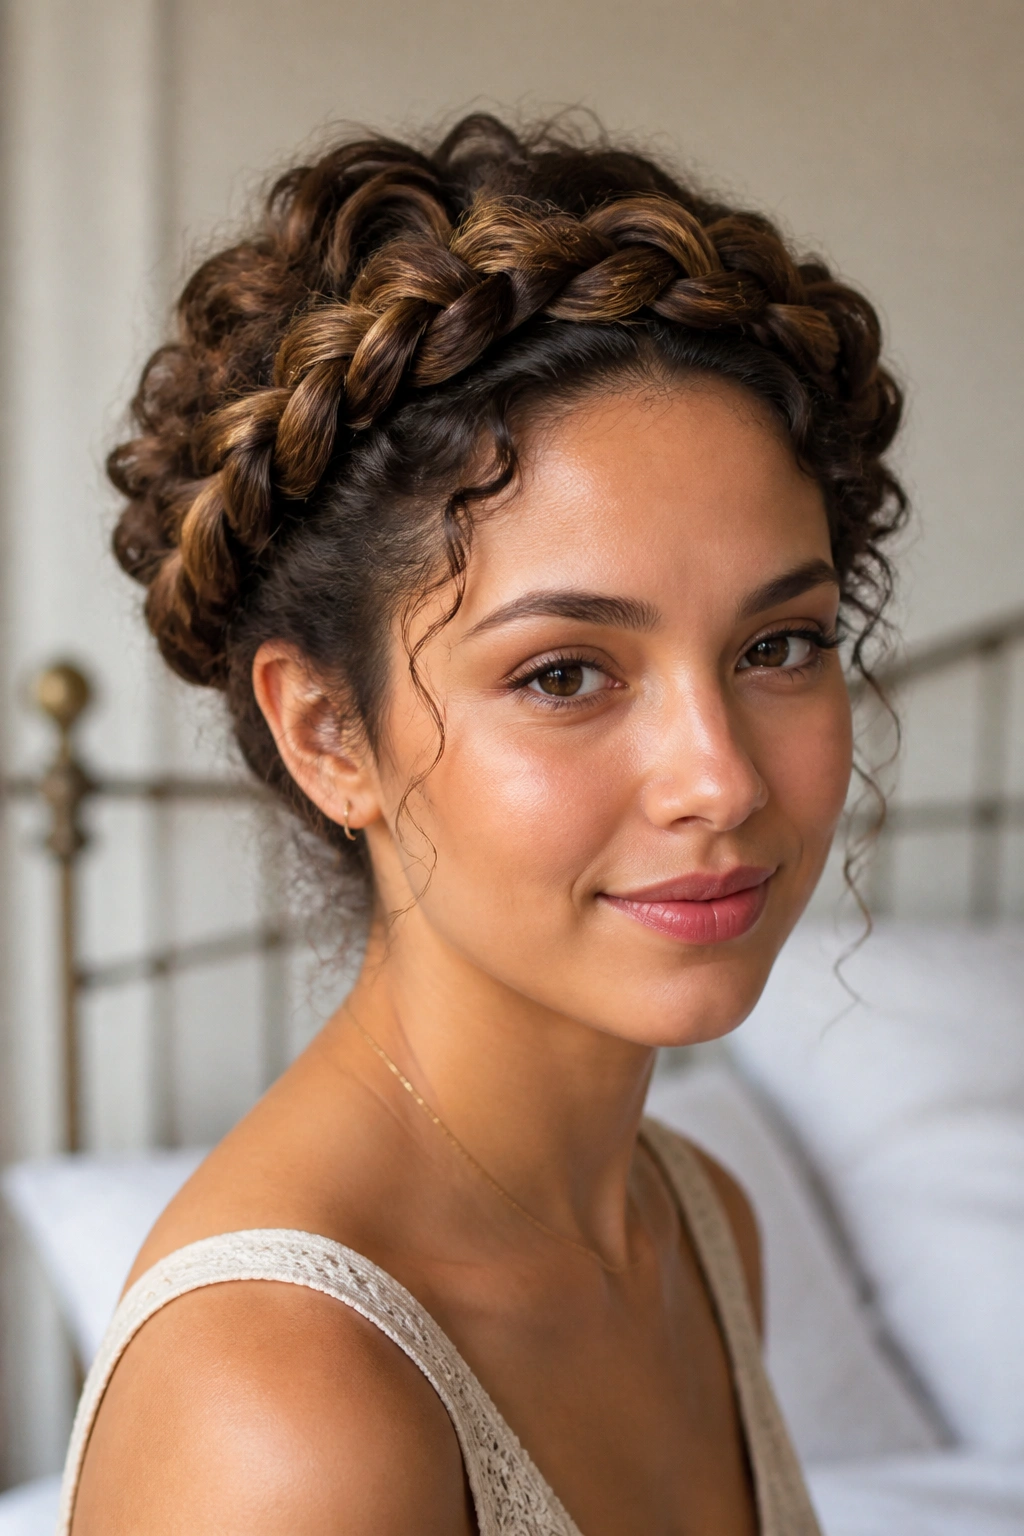
A braided crown has a formal feel without turning curly hair into a stiff event style. It wraps the braid around the head like a halo, leaving the rest of the texture tucked in or gathered low.
The style works best when the front section is smooth and the braid is neat. A loose crown can look charming, but if the braid is too slack, it starts to look unfinished. Pin it close to the head with bobby pins that match your hair as closely as possible.
This is one of those styles that can rescue a slightly old twist-out or a curl pattern that has lost shape. The braid does the visual heavy lifting, which is useful when the curls need a break.
14. Claw Clip French Twist for Curls
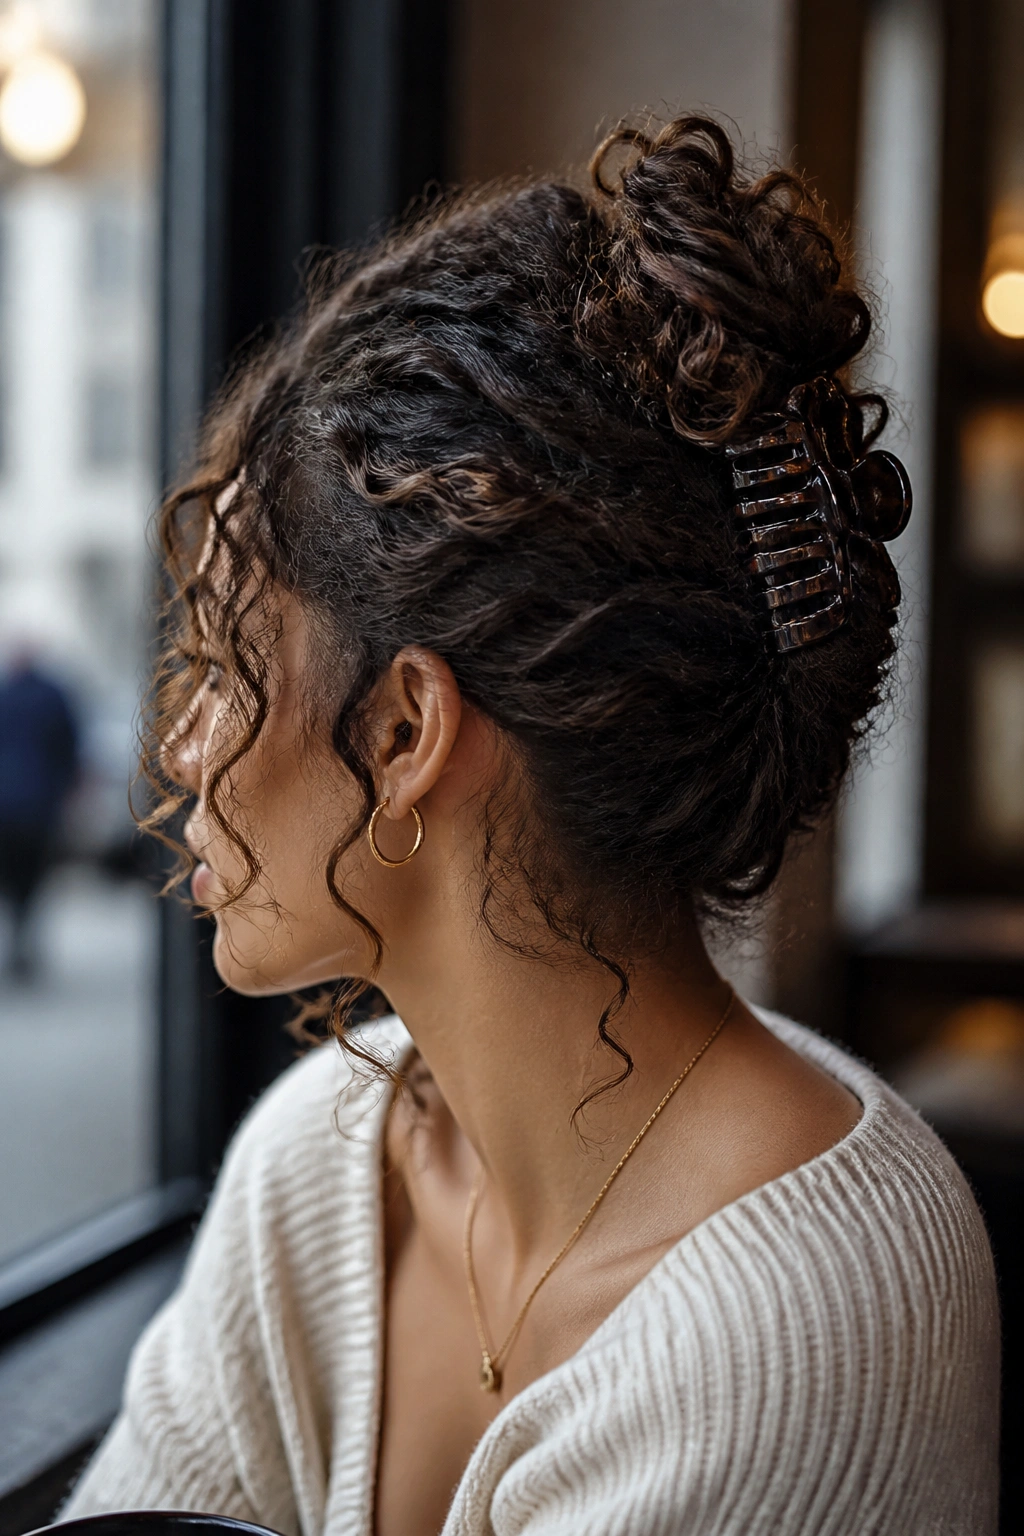
The claw clip has earned its place. On curly hair, it gives you a fast updo without the same pulling and dents you get from tight elastics.
Gather the hair low, twist upward, and let the ends fan out or tuck them in depending on how neat you want it to look. The French twist version works especially well when the hair has enough length to fold over the clip. If the hair is shorter, a smaller clip and a looser twist will sit better.
I like this style because it looks intentional even when it takes less than a minute. That’s a rare thing. It also lets some curls stay visible, which keeps the whole look from feeling too buttoned-up.
15. Low Curly Bun with Tendrils
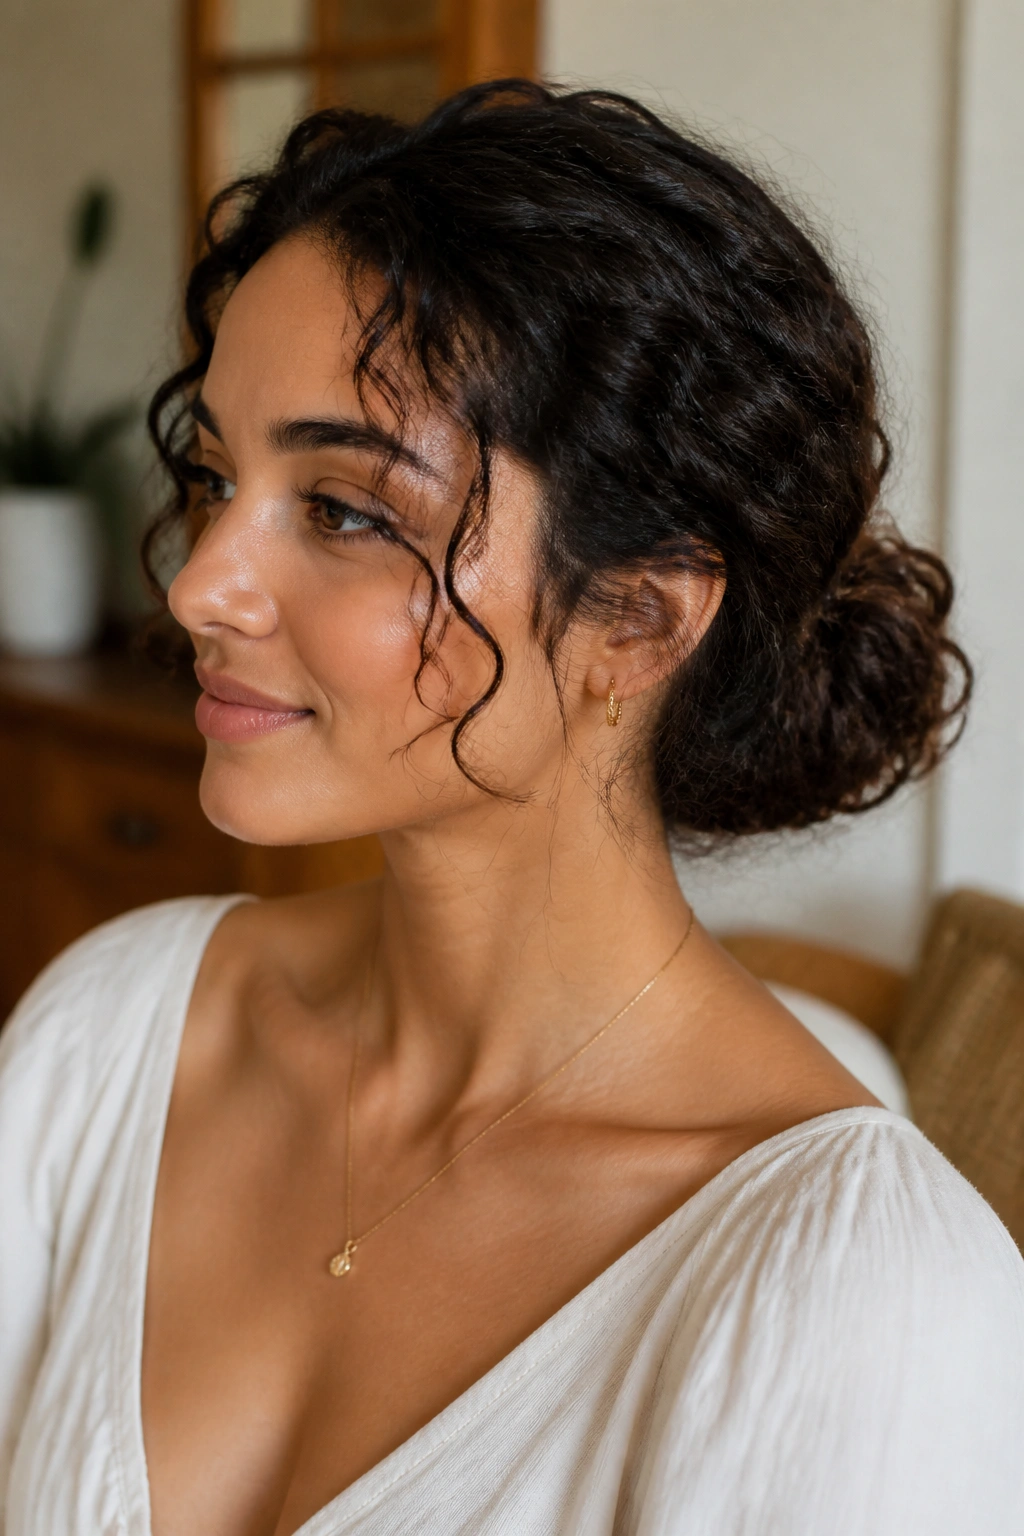
A low bun can go from plain to elegant the moment you leave out a few curls at the front. Those tendrils soften the face and stop the style from looking severe.
The bun itself should sit near the nape, not midway up the back of the head. That lower placement keeps the shape sleek while still letting the natural curl texture show at the hairline and ends. If your hair is very thick, twist the length before wrapping it into the bun. It holds better that way.
This is a good style for dinners, interviews, or any day you want the hair out of the way without sacrificing character. Simple, but not boring. There is a difference.
16. Faux Hawk with Sides Pinned Back
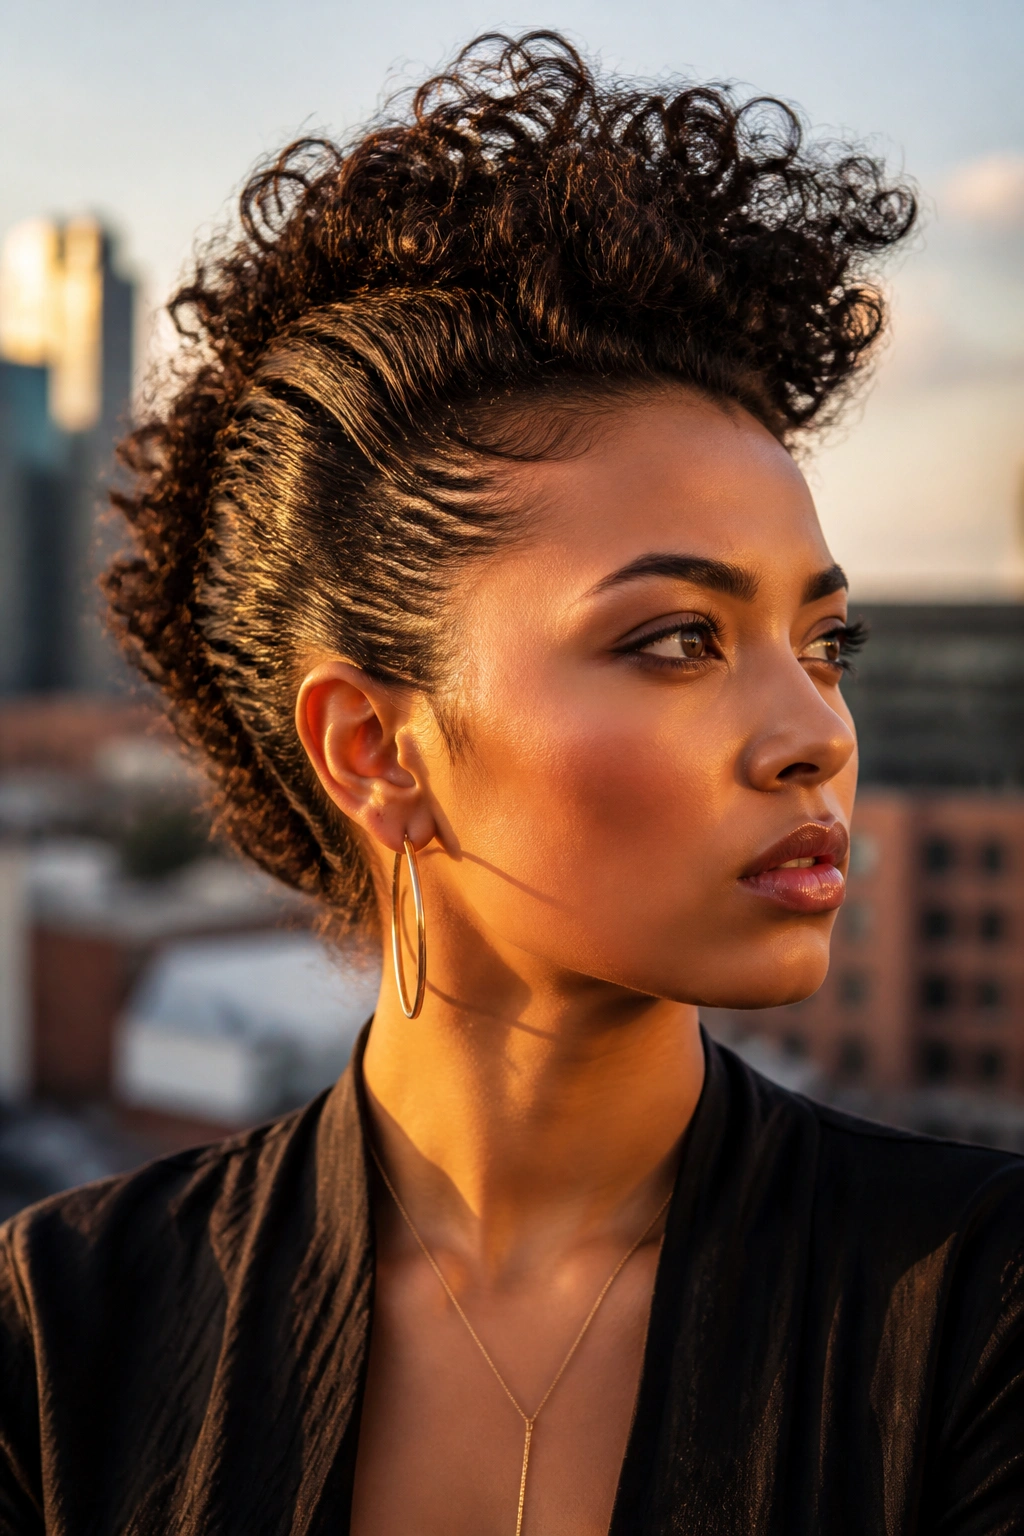
The faux hawk is a little bolder, and that’s exactly why it works. You pin or slick the sides back, then let the top and center section rise in a ridge of curls.
What makes it different from a plain updo
A regular pinned-back style can flatten the whole head. A faux hawk keeps height in the middle, which makes the curls look more sculpted and adds a nice profile from the side. If your hair is dense, this shape can be dramatic in a good way. If it’s finer, use clips and pins to build the illusion of fullness.
The style does need some structure. Mist the sides lightly, smooth them back, and secure them well before fluffing the top. Otherwise the shape starts to spread out too soon.
17. Mini Twists on Natural Hair
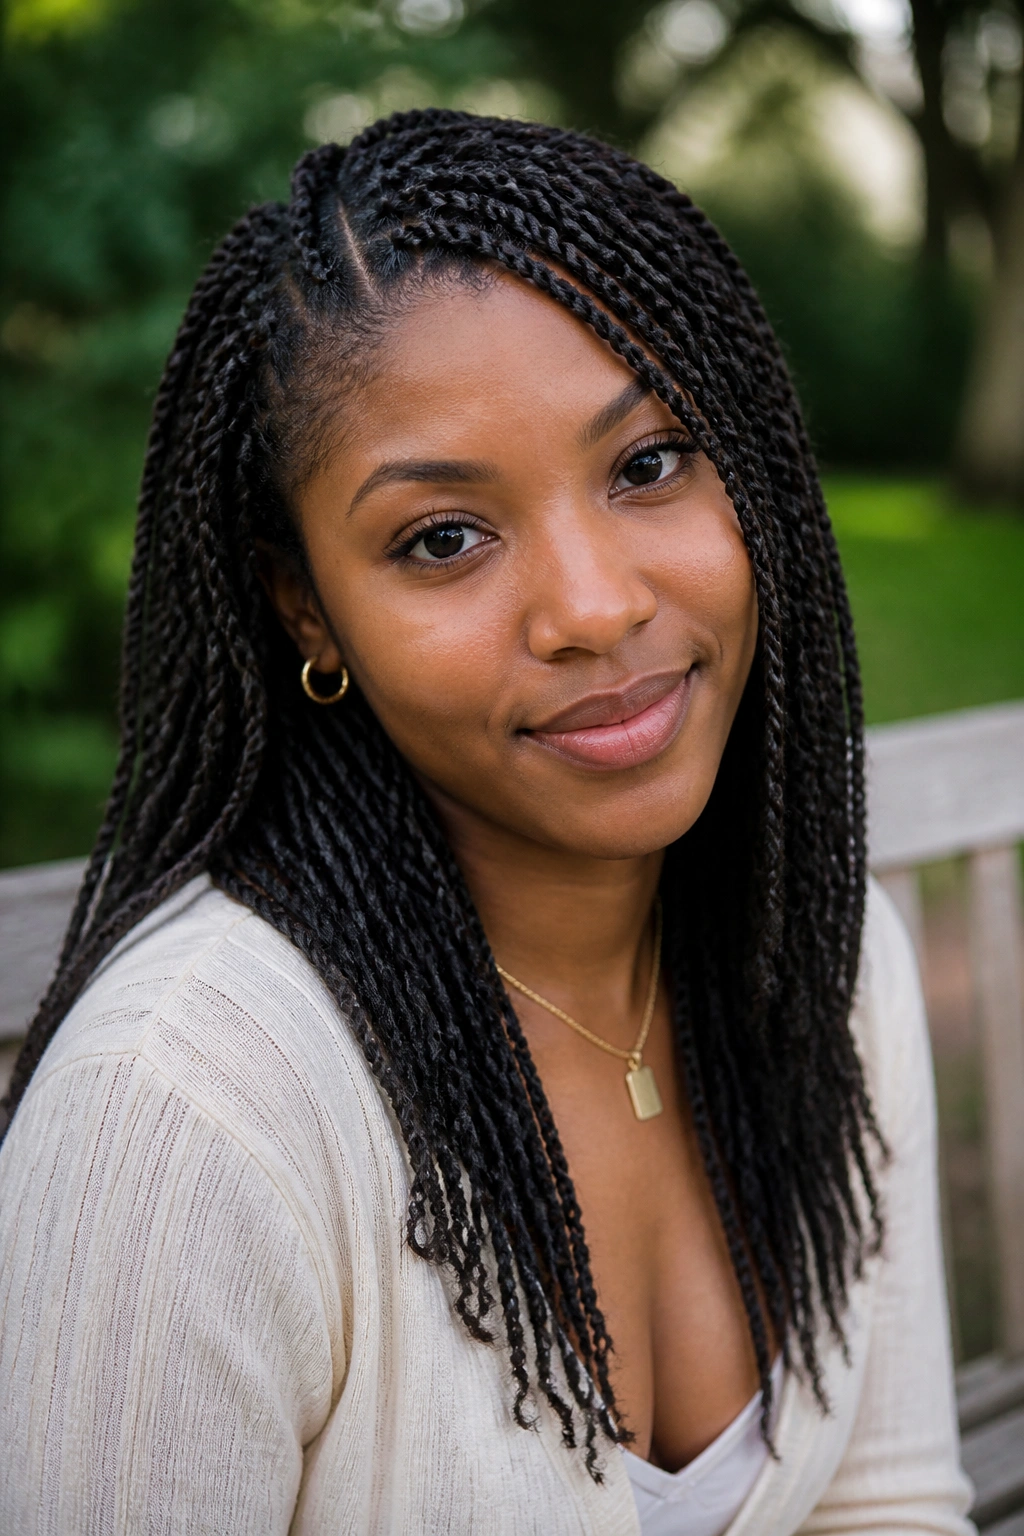
Mini twists are one of the most useful low-manipulation styles for curly and coily hair. They’re protective, they last, and they give you a neat shape without heat.
How to get them to look tidy
Start on moisturized hair, then section it evenly so the twists match from side to side. Uneven parts can make the whole head look patchy, even if the twist technique is solid. Use a cream or butter that gives slip, then twist from root to end with consistent tension.
The nice thing about mini twists is that they can be worn down, pinned up, or gathered into a bun. They also stretch the hair a bit, which makes detangling easier later. They are not quick to install, though. No one should pretend otherwise.
18. Flat-Twist Updo
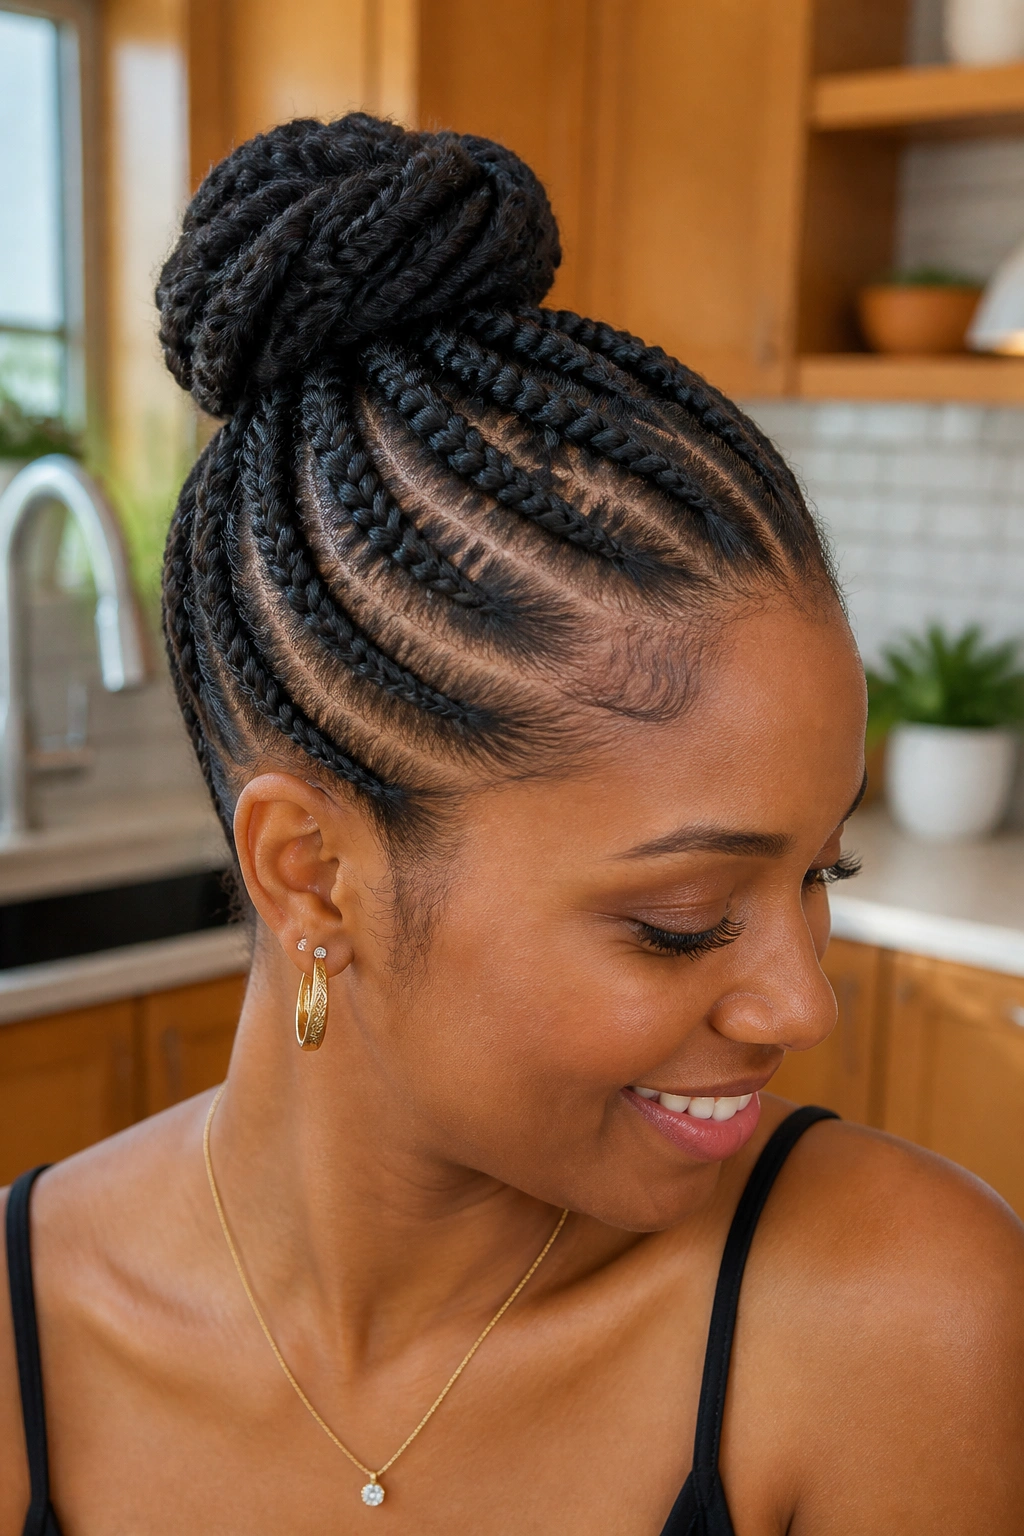
Flat twists hug the scalp and keep the style close, which makes them a strong choice when you want shape without a lot of bulk.
A flat-twist updo can sit at the crown, wrap into a bun, or tuck into a rolled finish at the nape. The sectioning matters more than the twist itself. Clean parts make the style readable; messy parts make it look like you quit halfway through. Harsh, maybe. True, though.
Use enough product to smooth the hair, but not so much that the twists feel slippery and slide apart. A setting lotion or gel with some hold can help. This one is good for hot weather, active days, or any time you want your scalp to stay calm and your ends protected.
19. Curly Ponytail with Wrapped Base
A curly ponytail sounds plain until you wrap a small section of hair around the base. That one detail cleans up the whole style.
The pony can sit high, mid-height, or low, but the base should stay smooth. After securing the ponytail, take a small strand, wrap it around the elastic, and pin it underneath. The finish looks far more polished than a visible band.
This style gives you length, motion, and face-framing lift all at once. If the curls are already defined, you barely need any extra styling. If the roots are dry or flat, a little water-based mist and a touch of gel at the hairline will help the shape hold together.
20. Scarf-Wrapped Puff
A scarf can change a puff from simple to styled. Tie it around the base, let the knot sit to the side or front, and suddenly the look feels more considered.
This is one of my favorite low-effort options because the scarf does two jobs. It adds color and it also smooths the transition between the puff and the hairline. Choose a silk or satin scarf if you want less snagging, especially on textured edges.
The puff itself can be full and messy or shaped and rounded. Either way, the scarf gives the eye a resting point. That is useful when the curls are doing a lot of their own thing.
21. Defined Finger Coils
Finger coils are slow, yes. They’re also clean, neat, and fantastic when you want each curl to stand on its own.
Take small sections, apply a curl cream or gel, and twirl each one around your finger until it forms a tight coil. The size of the section controls the look. Pencil-thin coils read as detailed and compact. Slightly larger coils feel softer and fuller.
This style is especially good on shorter curls or on hair that needs definition after a rough stretch. It takes patience, and the payoff is shape that stays visible for a while. If you separate the coils too soon, they fray. Let them set first.
22. Halo Braid on Curly Hair
A halo braid wraps around the head like a frame, which is why it flatters so many curl patterns. The braid creates the shape, and the curls can spill out in the back or stay tucked inside.
How to make it hold
Work with slightly stretched hair if possible. Freshly washed curls can be slippery, and a halo braid needs grip. Use a tail comb to make clean part lines, then braid close to the scalp so the crown feels secure. Bobby pins should disappear under the braid, not poke out along the edges.
This style is a little romantic, a little practical, and much easier to wear than it looks. It’s especially good when you want the face open and the length protected.
23. Shoulder-Length Curly Lob
A curly lob sits in that useful middle zone between a bob and longer hair. It gives curls enough length to hang, but not so much weight that the style loses shape.
The cut itself matters more than the styling. A blunt lob can feel heavy, while a few strategic layers keep the curls from stacking into one big line. If the hair tends to expand, ask for a shape that removes bulk around the sides, not just the ends.
A lob is easy to switch between down styles, pinned-back looks, and half-up shapes. That flexibility is why I rate it so highly. It does not try too hard. It just works with the hair you already have.
24. Messy Curly Top Knot
A top knot is the style you reach for when the hair needs to be up and out of the way, but you still want texture to show.
Pull the curls toward the crown, twist them loosely, and pin or wrap them into a knot that stays soft around the edges. The knot should look airy, not compressed into a tiny ball. Leave a few curls free near the temples or nape if you want it to feel less severe.
This one is practical on day three, day four, or on any morning when the mirror is not your friend. It also gives the face a lift, which can be nice if your curls have gone flat at the sides.
25. Wet-Look Defined Curls
Wet-look curls are glossy, sculpted, and a little dramatic in the best way. The style depends on a strong hold gel or custard applied to very damp hair, then left to set without too much touching.
The finish is not fluffy. That is the point. The curls should look dense, shiny, and separated enough to show off the pattern. Use a wide-tooth comb or brush to distribute product, then scrunch and let the hair dry fully. If you break the cast too early, the shine fades and the shape loosens.
This style is especially striking on dense curls and coils because it turns definition into the main event. It can feel a little formal, a little editorial, and honestly a little addictive once you see how clean the curl pattern looks.
Final Thoughts
The best curly styles are the ones that respect the hair’s own shape. Some days that means a puff with a scarf. Some days it means a bob with soft layers, or a twist-out that took patience and a good drying routine.
What matters is not forcing every curl into the same mold. Curly hair has range. Let it show.
And if a style needs three extra clips, a little gel at the hairline, or ten more minutes under the diffuser, fine. That’s part of the deal. The right look usually asks for a small bit of care, then pays it back the whole day.
