



Black curls have range, and people still talk about them as if they only do one thing. They don’t. A good style can sit soft, stand tall, stretch out, or hold a tight coil pattern with almost no extra drama, and that matters even more with black curls for curly hair, where the difference between flat and finished can come down to a half-inch of root lift.
The styles that last are usually the ones that respect shrinkage instead of fighting it. That means clean parts, enough moisture, and a hold product that matches the curl pattern instead of smothering it. Too much cream can flatten the root. Too little can leave the ends fuzzy and dry. Both problems are easy to create and annoying to fix.
I like styles that still make sense after a commute, a scarf, a nap, or a windy walk to the store. Some of these looks take ten minutes. Others need a patient dry-down and a little more hand work. All of them can look deliberate, which is the real trick with curly hair: making texture look chosen, not accidental.
The styles here run from short and sharp to long and soft, with plenty in the middle. Pick the ones that match your curl density, your patience, and how much styling you actually want to do on a Monday morning. The first one is the style that teaches almost everything about curly hair at once.
1. Defined Wash-and-Go Curls
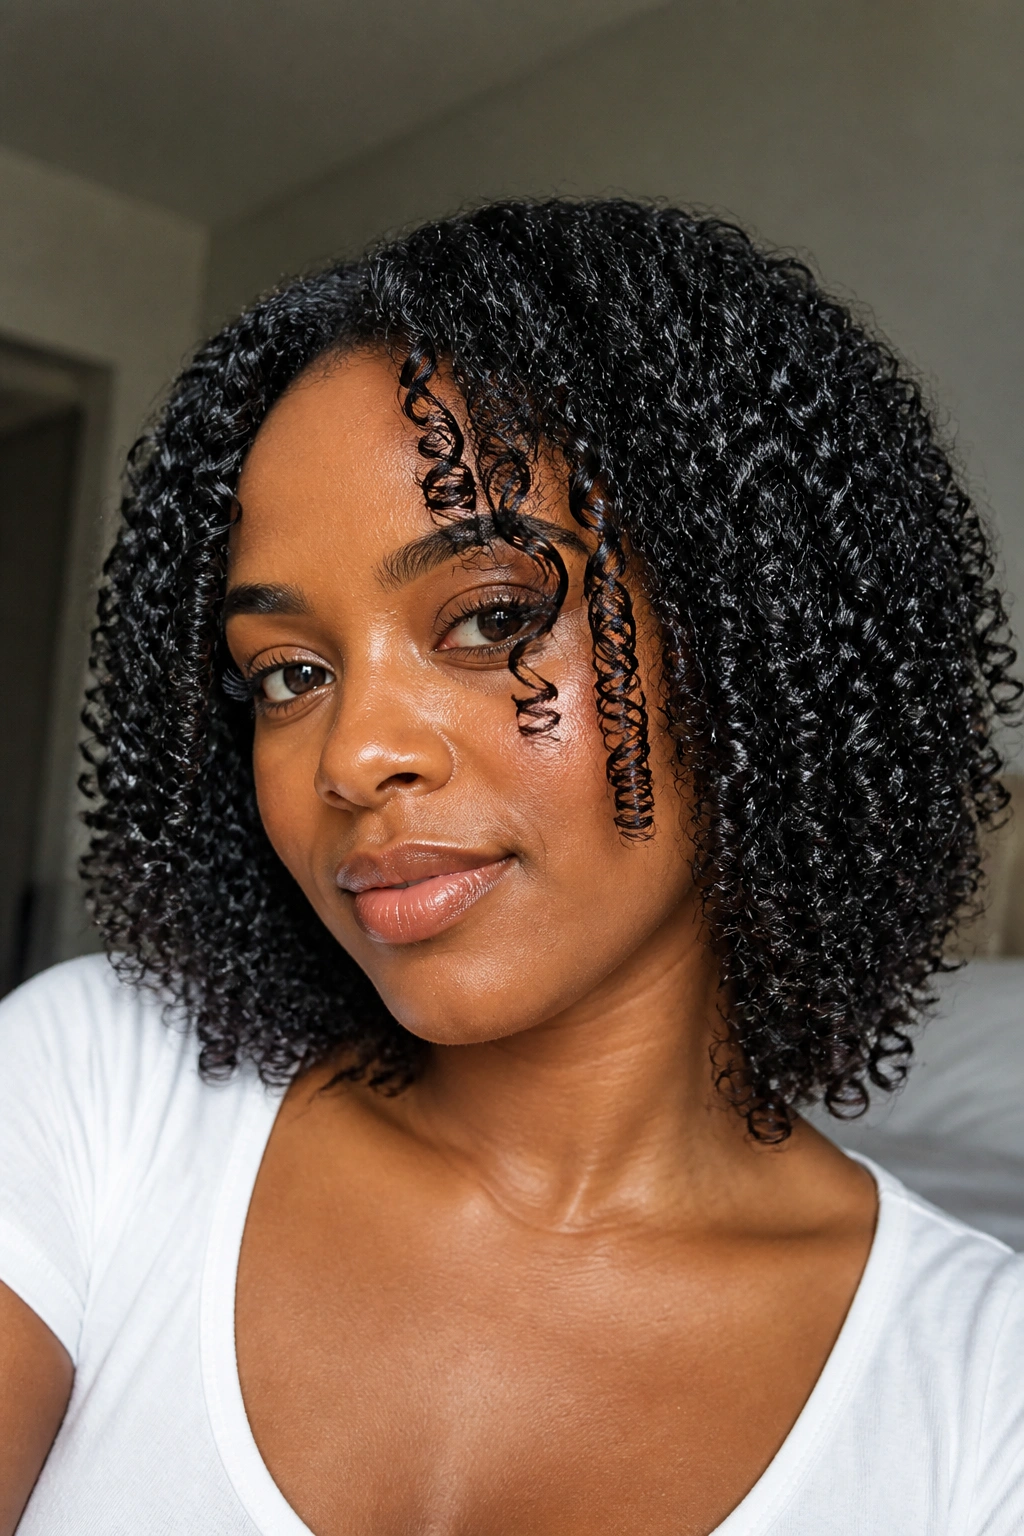
A defined wash-and-go is the cleanest way to show what your curl pattern actually does. If your curls clump easily, this style can look polished with very little manipulation. If your strands are more stubborn, it still works — you just need to treat the roots and ends like they belong to the same plan.
Why It Works
The best wash-and-gos start on soaking wet hair, not damp hair that is already starting to frizz. Water helps the curl clump together before product even enters the picture. After that, a leave-in and a strong or medium-hold gel can lock the shape in place while the hair dries.
A lot of people make this style harder than it needs to be. They rake, smooth, scrunch, poke, and then wonder why the curl cast looks patchy. The cleaner move is simple: section the hair, apply product evenly, then leave it alone until it’s dry enough to break the cast.
Quick Style Notes
- Use small sections if your hair is dense or tightly coiled.
- Apply gel from root to ends, then smooth once with your hands.
- Dry with a diffuser on low heat, or air-dry without touching the hair.
- Fluff only after the hair is fully dry and the cast feels crisp.
Tip: If your roots go flat fast, lift them with a pick at the very end, not during styling.
2. A Tapered Afro That Shows Off Shape
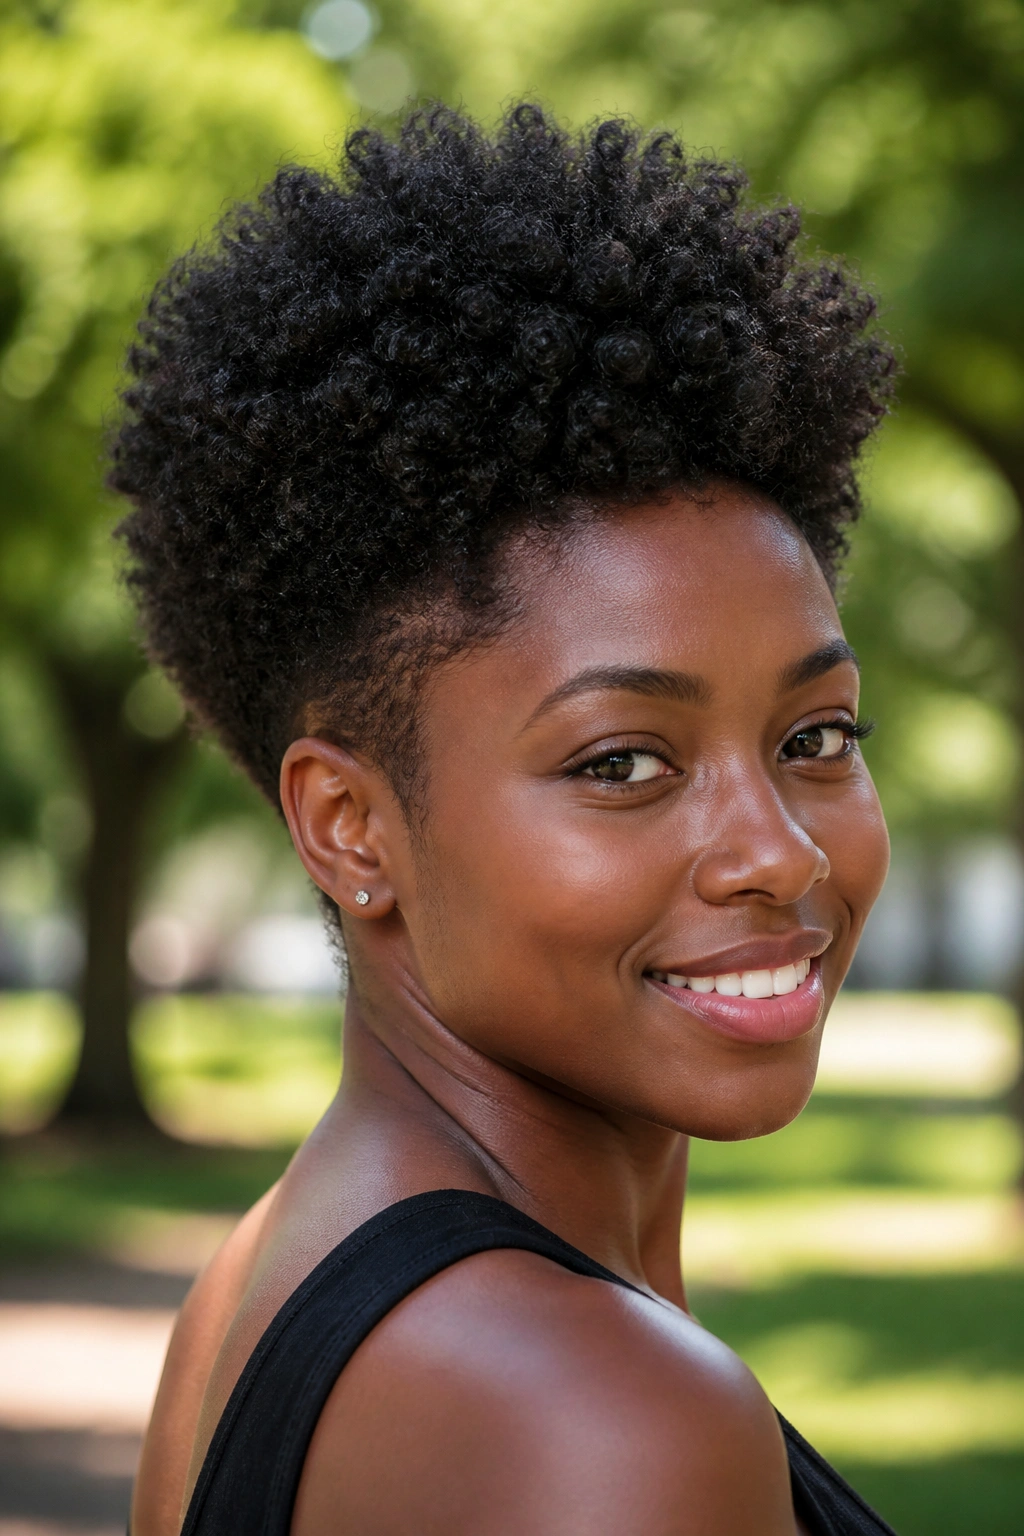
A tapered afro is one of those cuts that looks like it has attitude before you even touch it. Shorter sides and back keep the shape neat, while the top holds the bulk and the texture. It is a strong choice if you want black curls to frame the face instead of hanging everywhere at once.
The big win here is shape control. When the sides are tapered close, the eyes go straight to the crown and cheekbones. That makes the whole look feel balanced, even when the curls are dense or uneven in length. You do not need a pile of product for this cut, either. A light cream, a little foam, and a pick at the roots usually do the job.
I also like that it cuts down on daily fuss. You can wake up, mist the top, add a bit of moisture, and go. Of course, it does ask for regular shaping, because a tapered afro grows out fast around the ears and nape. Worth it, though. Absolutely worth it.
3. Soft Twist-Out Volume
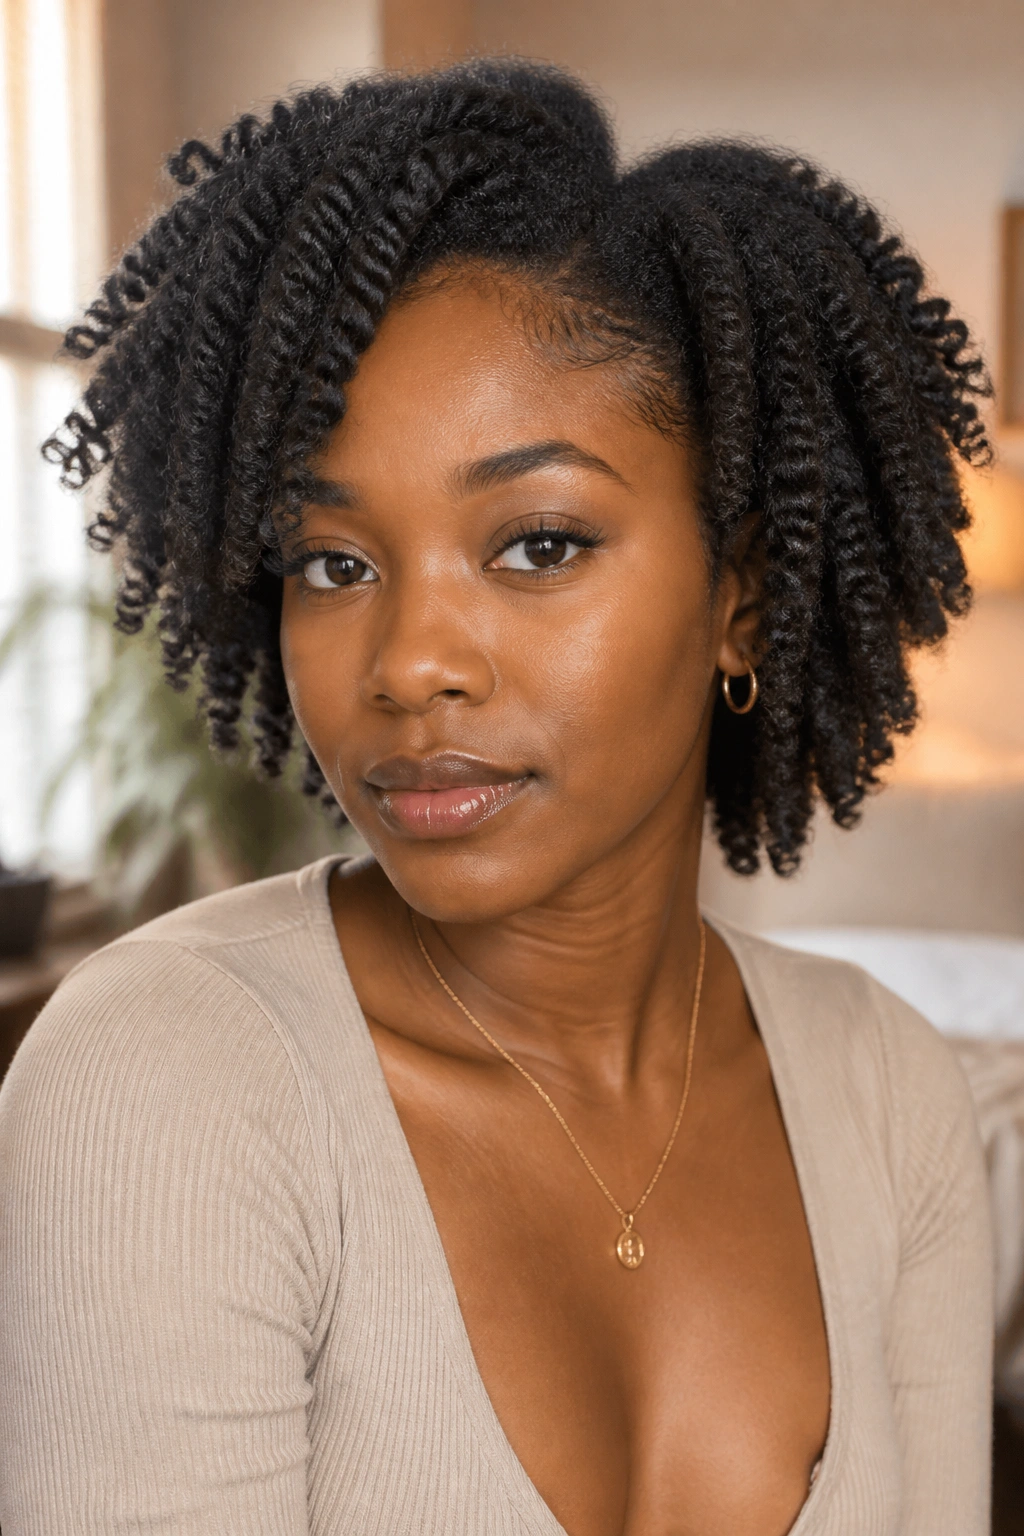
Why do some twist-outs look plush and others turn into a cloud of frizz? The answer is usually in the size of the twist, the amount of product, and whether the hair was truly dry before unraveling. A twist-out rewards patience more than almost any other curly style.
If you want a softer finish, make medium-size two-strand twists on damp hair, not soaking hair. Coat each section with leave-in and a styling cream or foam, then smooth the ends with a little oil so they do not snag. The twist should feel snug, but not so tight that it dents the pattern.
How to Get the Most From It
Let the twists dry all the way through. That part matters more than people want to hear. Unraveling early gives you frizz at the root and limp ends at the same time, which is a bad trade.
Separate each twist only once, then fluff the roots with your fingers. If you keep pulling apart the strands, the style turns fuzzy fast. A good twist-out has body, shine, and that soft, stretched look that still shows the curl pattern underneath.
4. Stretchy Braid-Out Waves
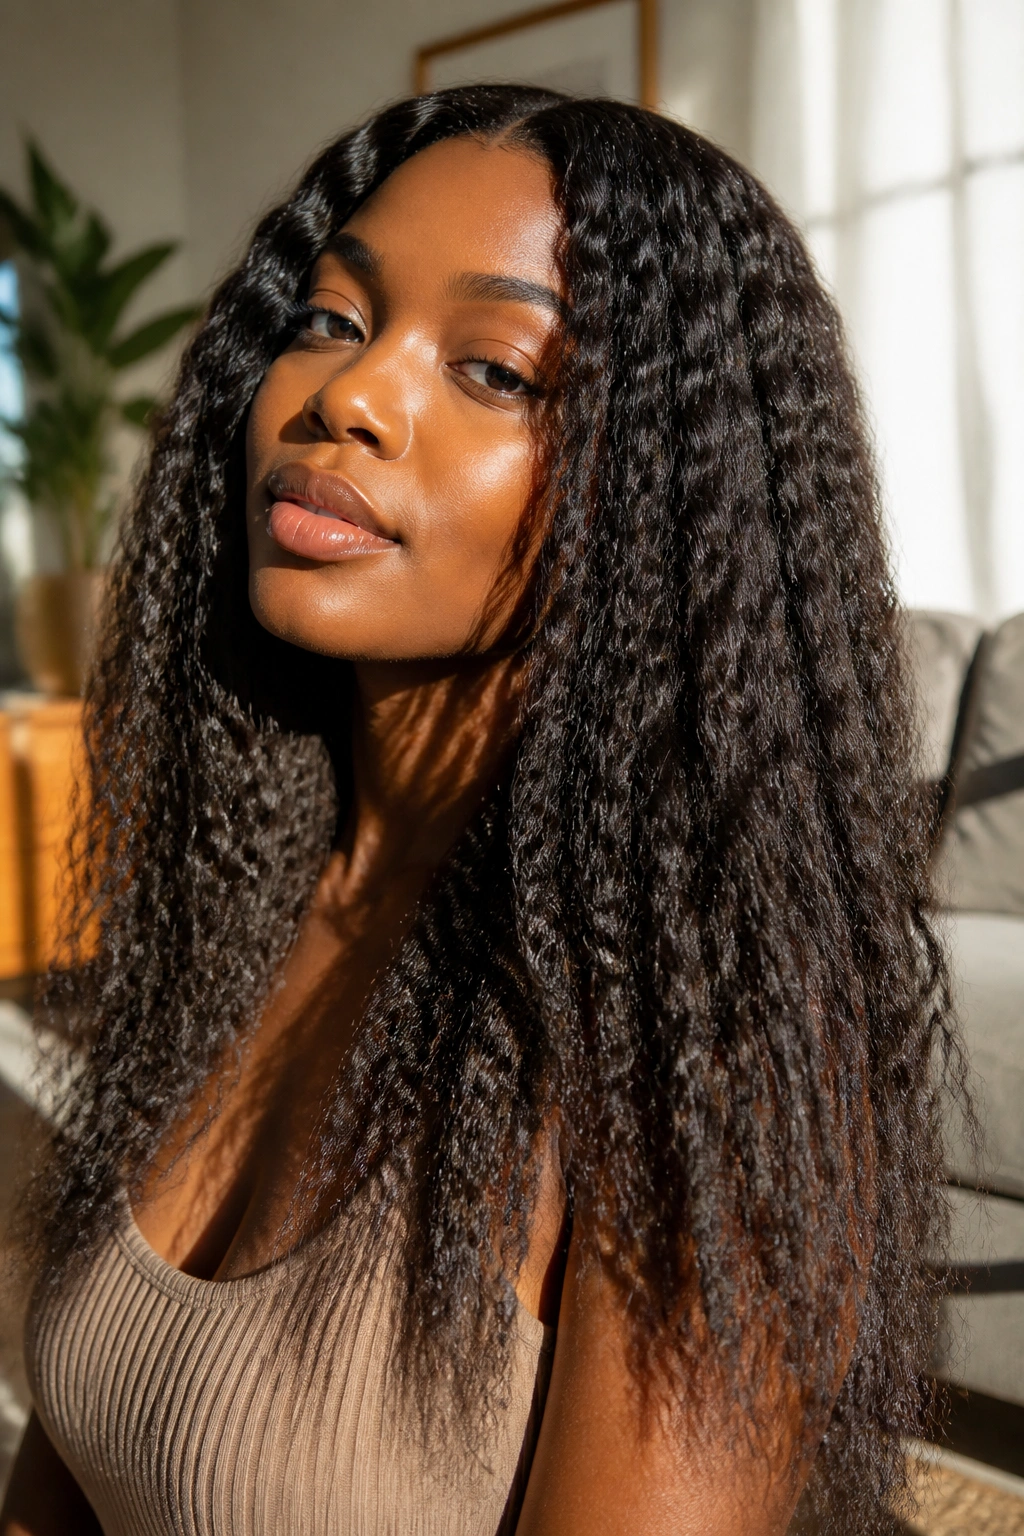
I still remember the first braid-out that looked good before I separated it. The braids were neat, the ends were tucked, and when I took them down the next morning, the hair had this long, ridged wave that looked styled without trying too hard. That is the braid-out’s real strength: stretch.
Braids pull the hair straighter than twists do, so this style is a smart pick if shrinkage makes your curls feel too short or too compact. It also works well when you want more length on display without blowing the hair out first. Keep the sections medium-sized if you want a softer wave; smaller braids give a tighter pattern.
- Start on clean, detangled hair with enough slip.
- Braid while the hair is damp, not dripping.
- Smooth the ends and seal them with a tiny bit of oil.
- Wait until the hair is fully dry before taking it down.
The shape lands somewhere between a wave and a curl, and that in-between look is what makes it useful. It gives you texture without the puffiness that can creep in with a loose twist-out.
5. High Puff With Clean Edges
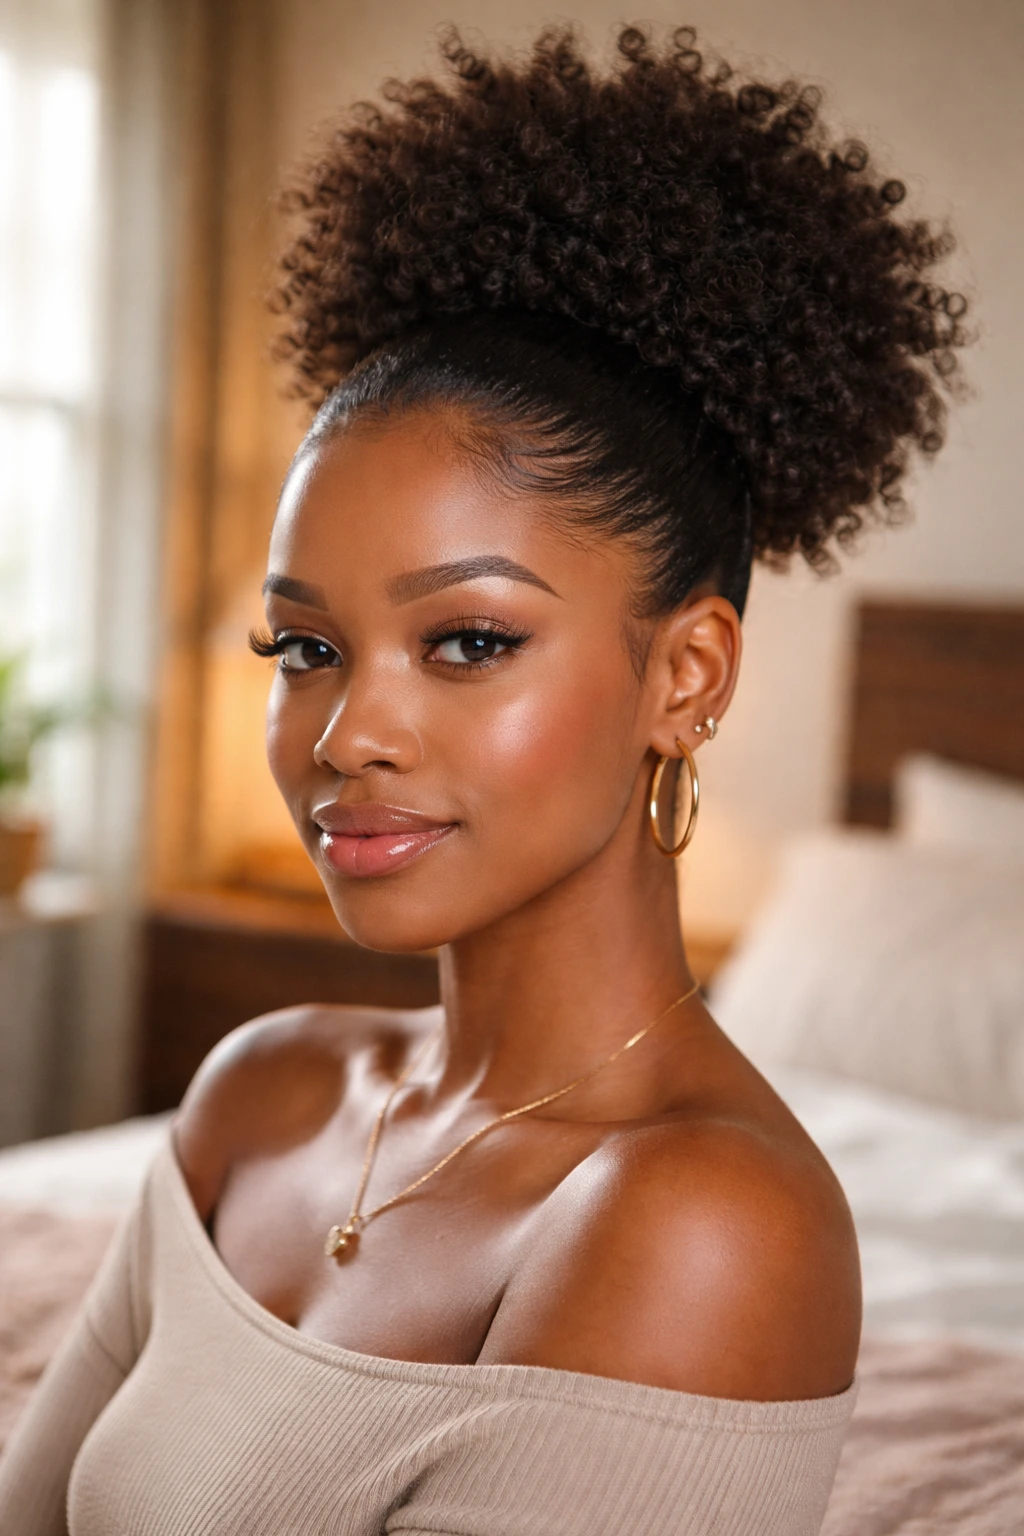
A high puff is the kind of style that looks easy because it is easy, and I mean that as a compliment. Pull the curls up, smooth the sides, fluff the crown, and suddenly the hair has height without looking overworked. It is one of the quickest ways to make natural texture feel intentional.
This style shines when the hair is second- or third-day curly and the root area needs a reset. You do not need perfect definition from root to tip. You need a good gather point, a satin scrunchie or stretchy band, and enough moisture to keep the puff soft instead of dry.
Messy roots are not the problem here.
The better high puffs keep the sides smooth but not slicked down to the point of tension. If you have edges, lay them lightly. If you do not, skip the drama and let the puff be the statement. A little root lift at the crown helps a lot. So does a small curl pick at the top once the band is in place.
6. Pineapple Updo for Second-Day Curls
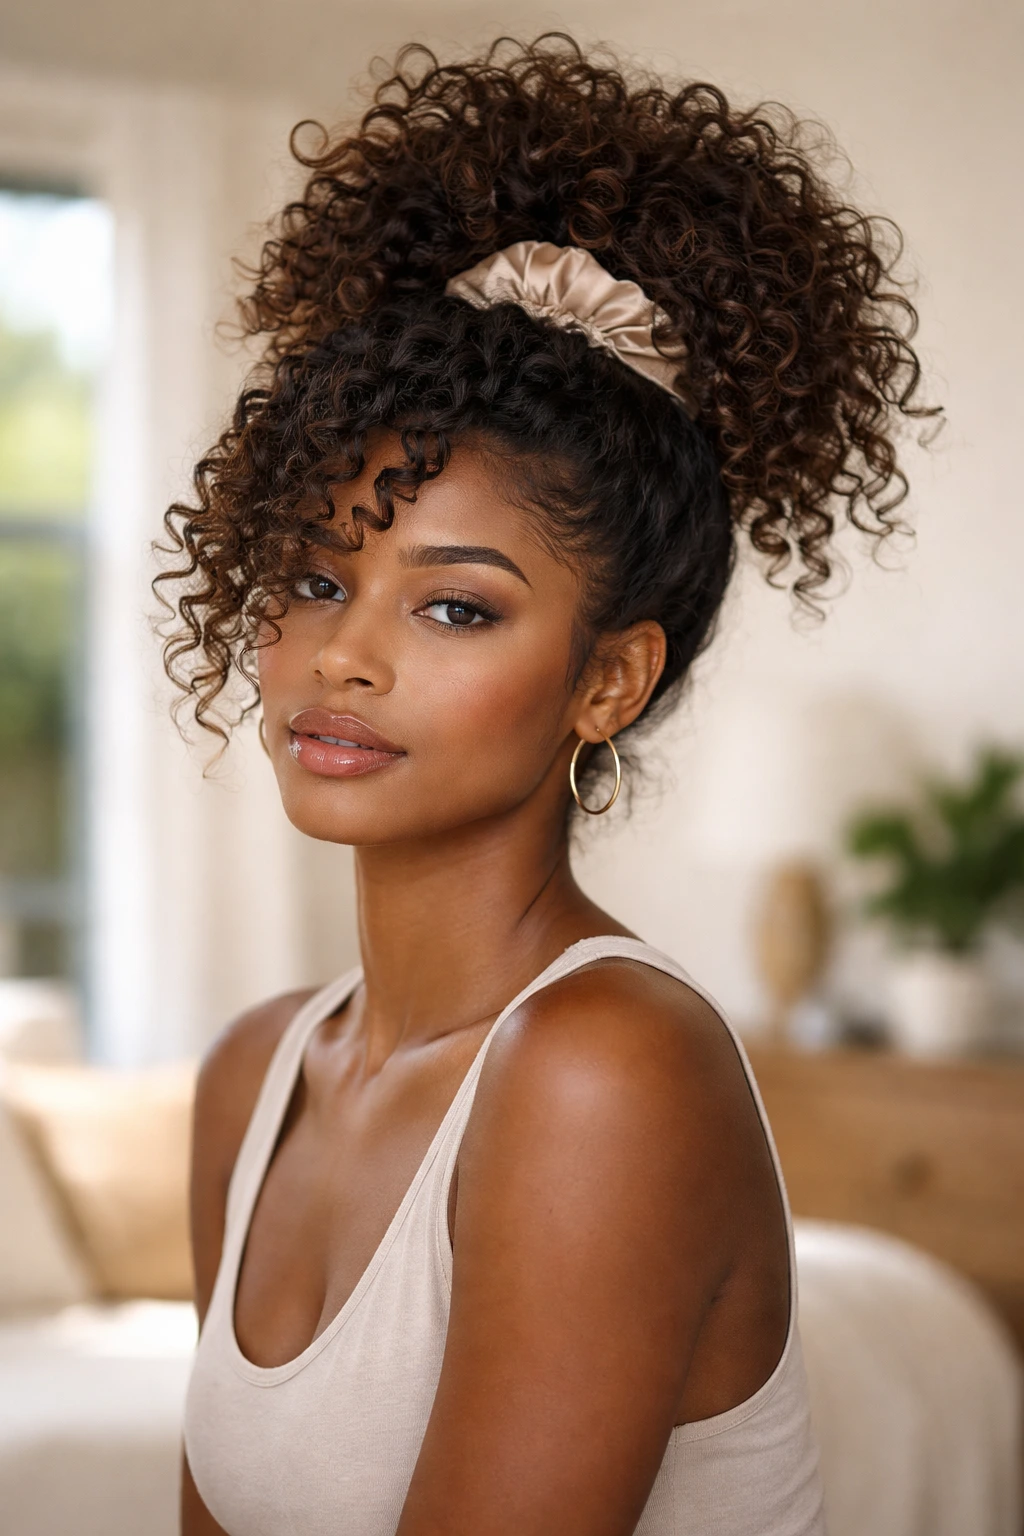
A pineapple is not trying to be a finished evening style. That’s why I like it. Compared with a high puff, it keeps more of the curl pattern loose and less compressed at the back, which makes it one of the better choices for preserving curls between wash days or getting out the door quickly.
The gather point sits high on the head, usually with a soft satin scrunchie or a loose band that will not leave a hard dent. The curls hang forward and outward, almost like a halo with more height. It works especially well on medium to long hair, where the ends can spread without getting crushed.
The downside is obvious. If you need a style that stays neat all day in a humid room, the pineapple can lose its shape sooner than a puff or a twist-up. But for a casual day, a gym run, or sleep styling, it earns its keep fast.
7. Two-Strand Twist Bob
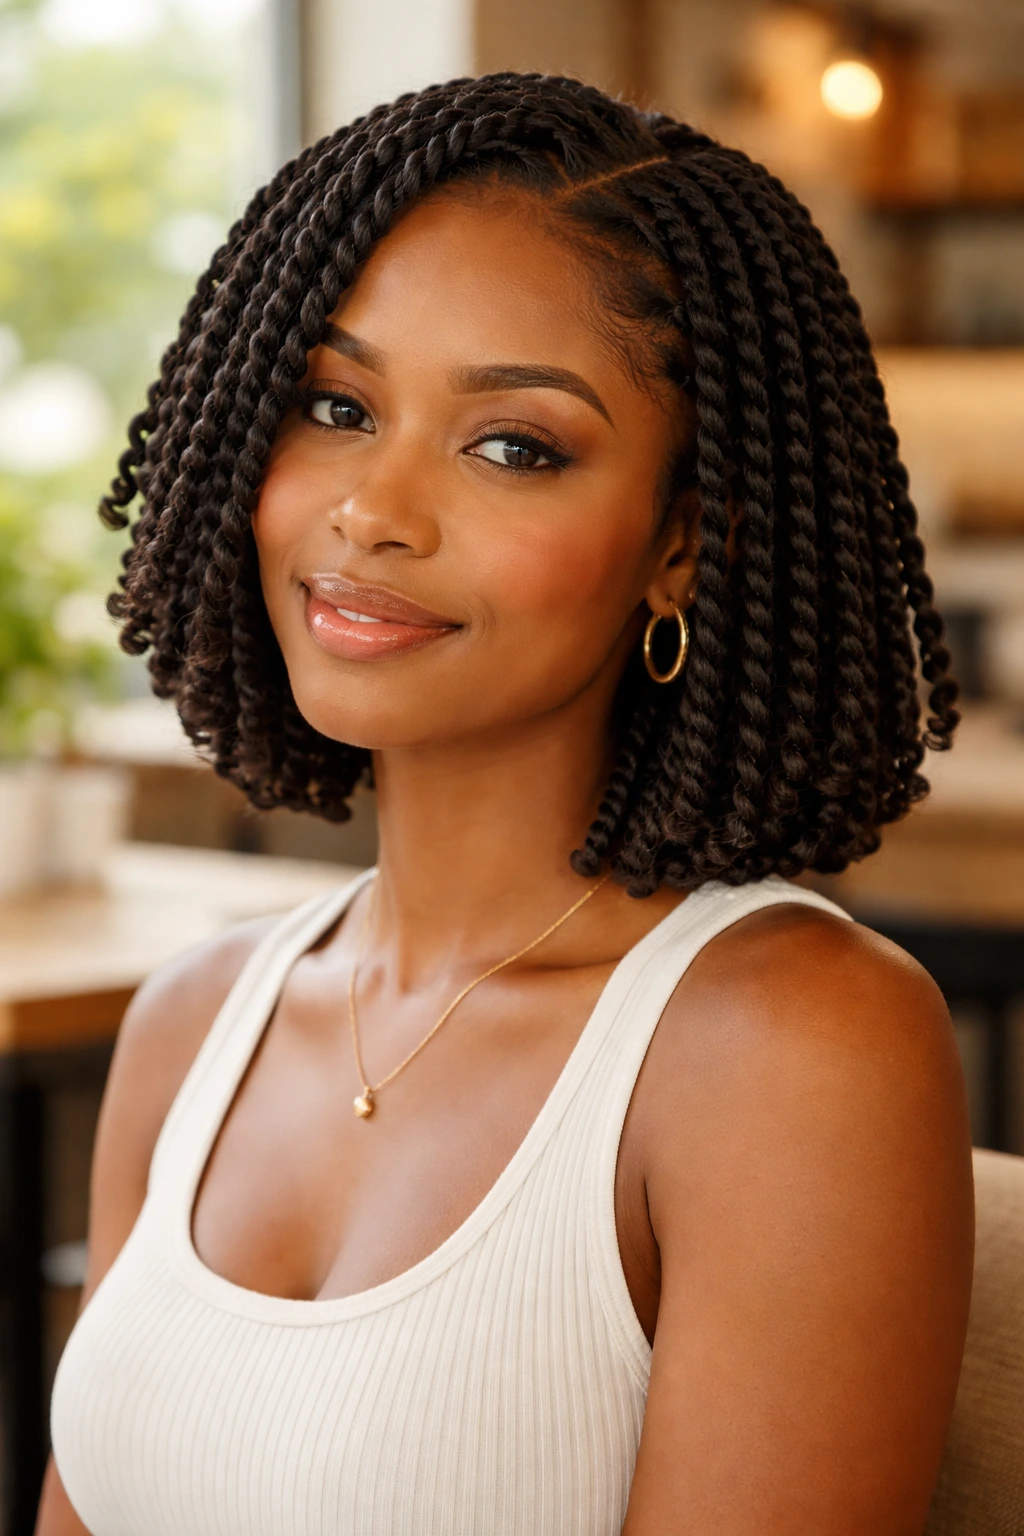
A two-strand twist bob has a neatness that longer twists just can’t match. The shorter length keeps the silhouette tidy, and the ends tend to curl under in a way that feels finished rather than heavy. If you like structure, this is a good one.
What Makes It Work
The parting matters more than people expect. Clean, even sections make the bob look intentional, while random parts make it look bulky. I prefer medium twists here, because tiny twists can feel busy and large ones can slide apart before they dry.
Useful Details
- Best length: chin to shoulder, where the shape reads clearly.
- Best parting: square or brick-layered sections for fullness.
- Best finish: a light oil on the fingers before separating.
- Best for: curls that need stretch without heat.
A twist bob also gives you options. Wear it full, pin one side back, or separate it more for volume. That flexibility is half the appeal.
8. Flexi-Rod Spiral Set
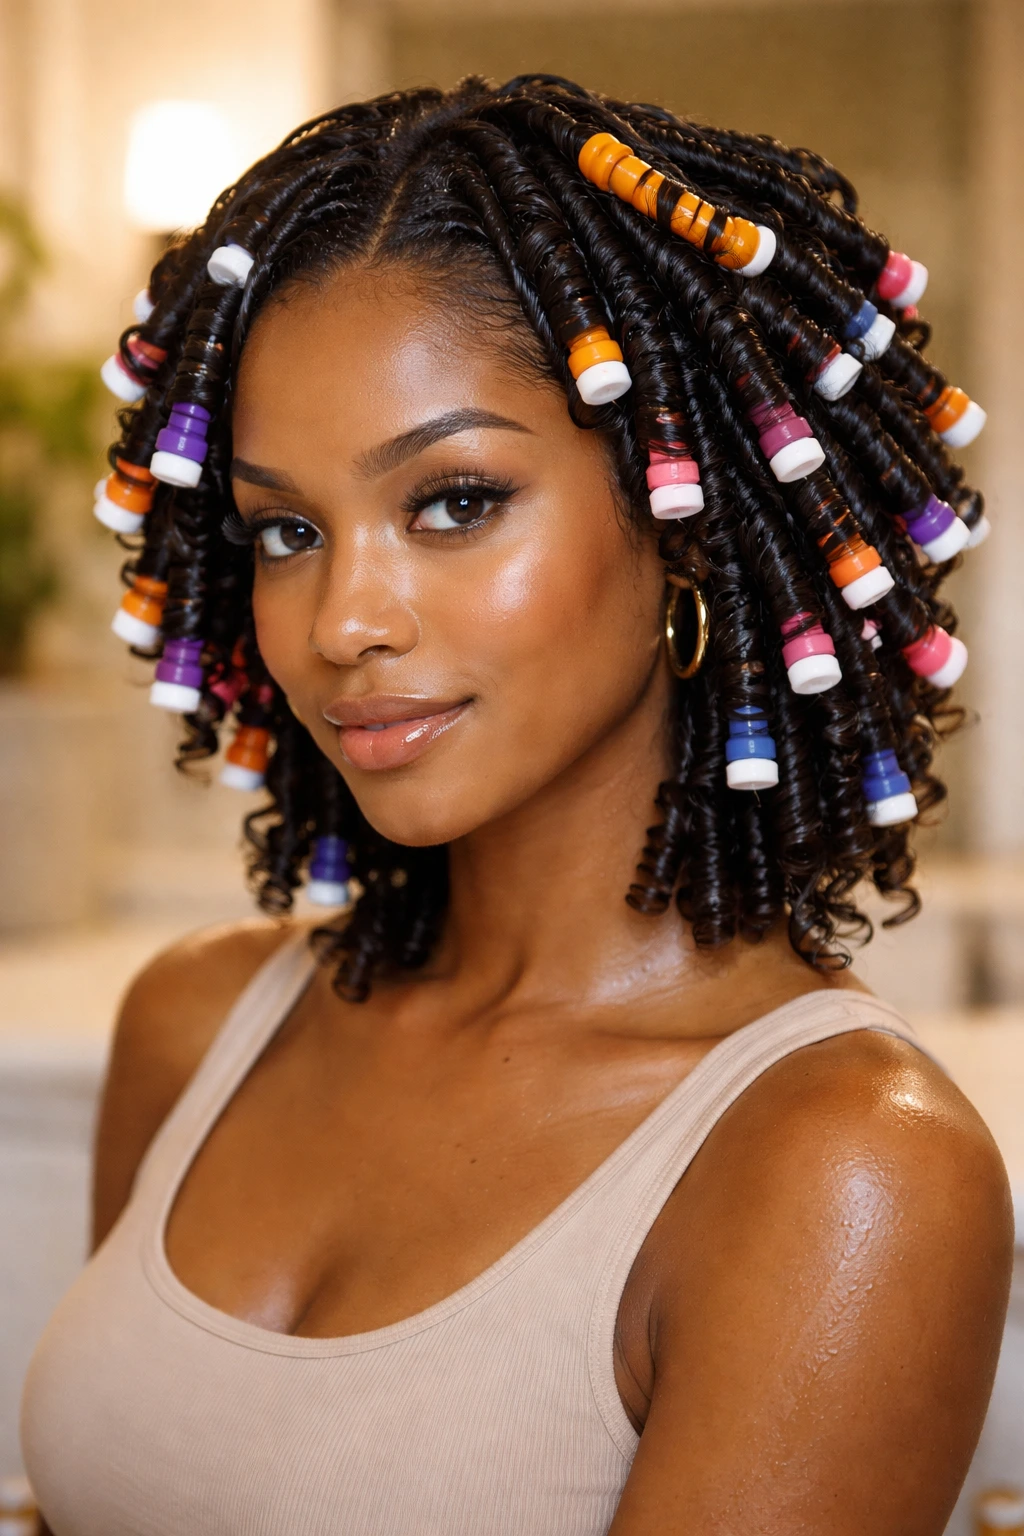
A flexi-rod set gives some of the smoothest spiral definition you can get without a hot tool. The hair wraps around the rod, dries in that shape, and comes off with a springy curl that looks polished from root to tip. It is one of those styles that makes people ask who did your hair, even when you did it yourself in a bathroom mirror.
The key is damp hair, not wet hair. If the hair is too wet, the rods take forever to dry and the roots can stay soft in a bad way. If it is too dry, the hair will not mold properly around the rod. The sweet spot is hair that feels moist but not dripping.
A smaller rod gives tighter spirals. A larger rod gives longer, looser curls with more bounce. That choice changes the whole mood of the style, so it is worth thinking about before you start rolling.
9. Finger Coils With Glossy Definition
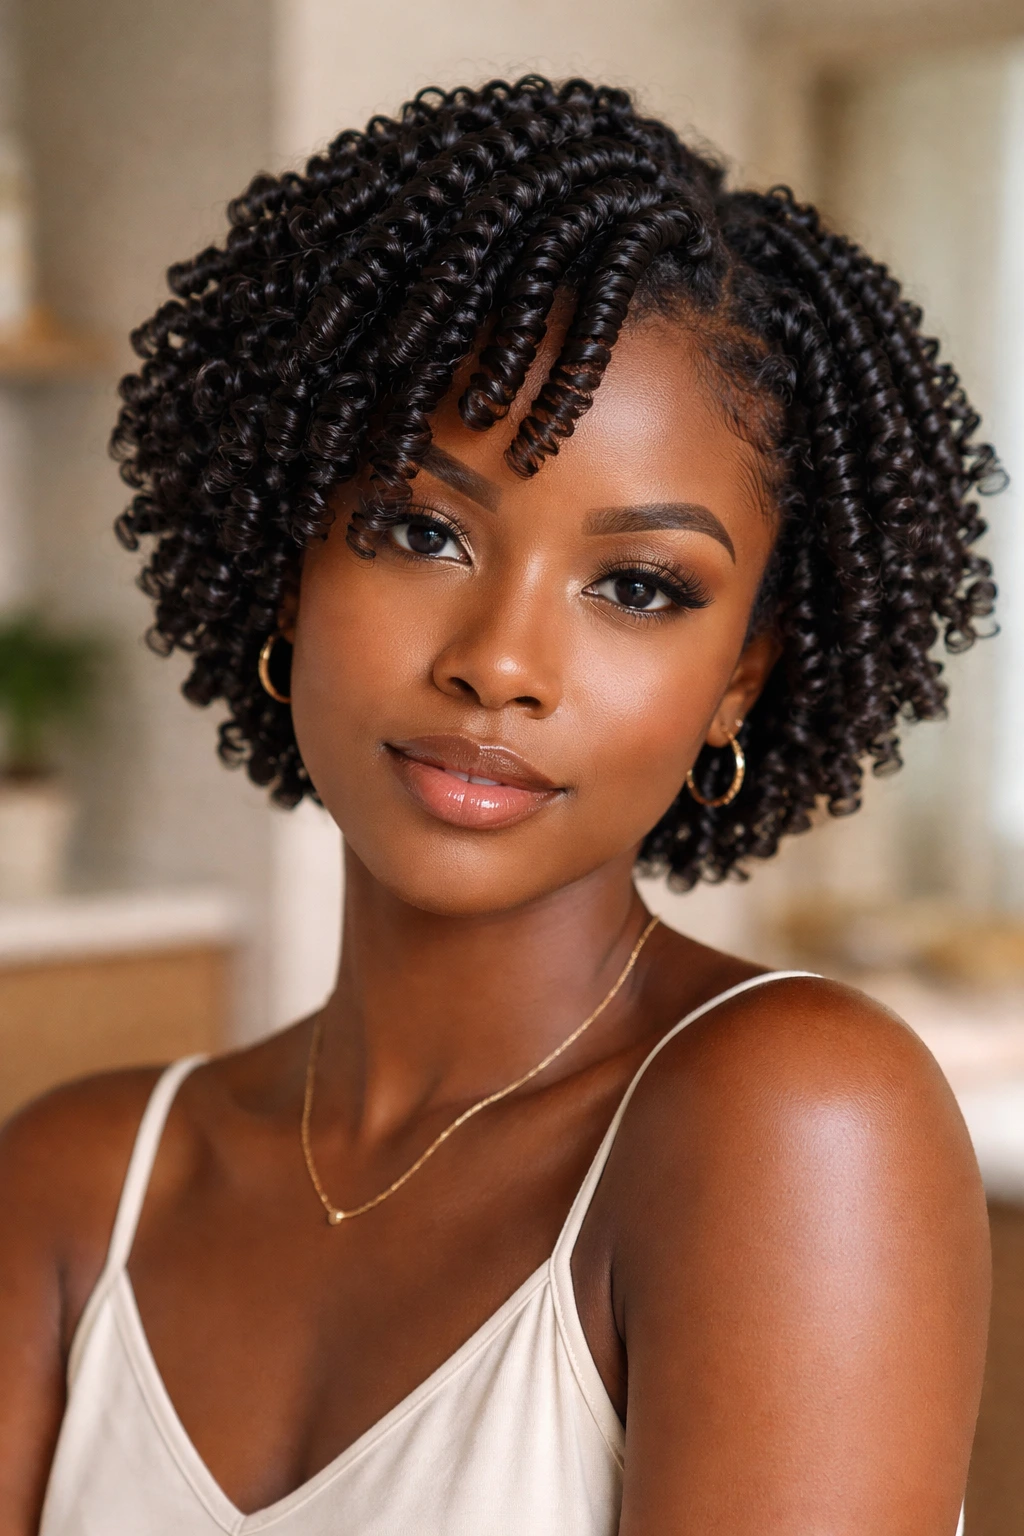
Why do finger coils look so crisp? Because every coil is shaped by hand. There is no hiding behind a pattern or a diffuser trick. Each curl is intentionally wound, which makes this style especially satisfying on short to medium hair.
The process takes time, and I will not pretend it does not. You separate the hair into tiny sections, add a little cream or gel, then twist each piece around your finger until it forms a coil and springs back on itself. The finished look can be tight and shiny, or a little softer if you separate the coils gently once they dry.
How to Keep Them from Frizzing
Do the coiling on hair that is damp enough to shape but not so wet that the product slides off. A fine-tooth comb helps if the section is uneven, but use it lightly. Heavy combing here can make the curls lose their clean edges before they even set.
Finger coils work especially well when you want definition without a lot of puff. They do ask for patience, though. No shortcut really replaces careful sectioning.
10. Bantu Knot-Out Texture
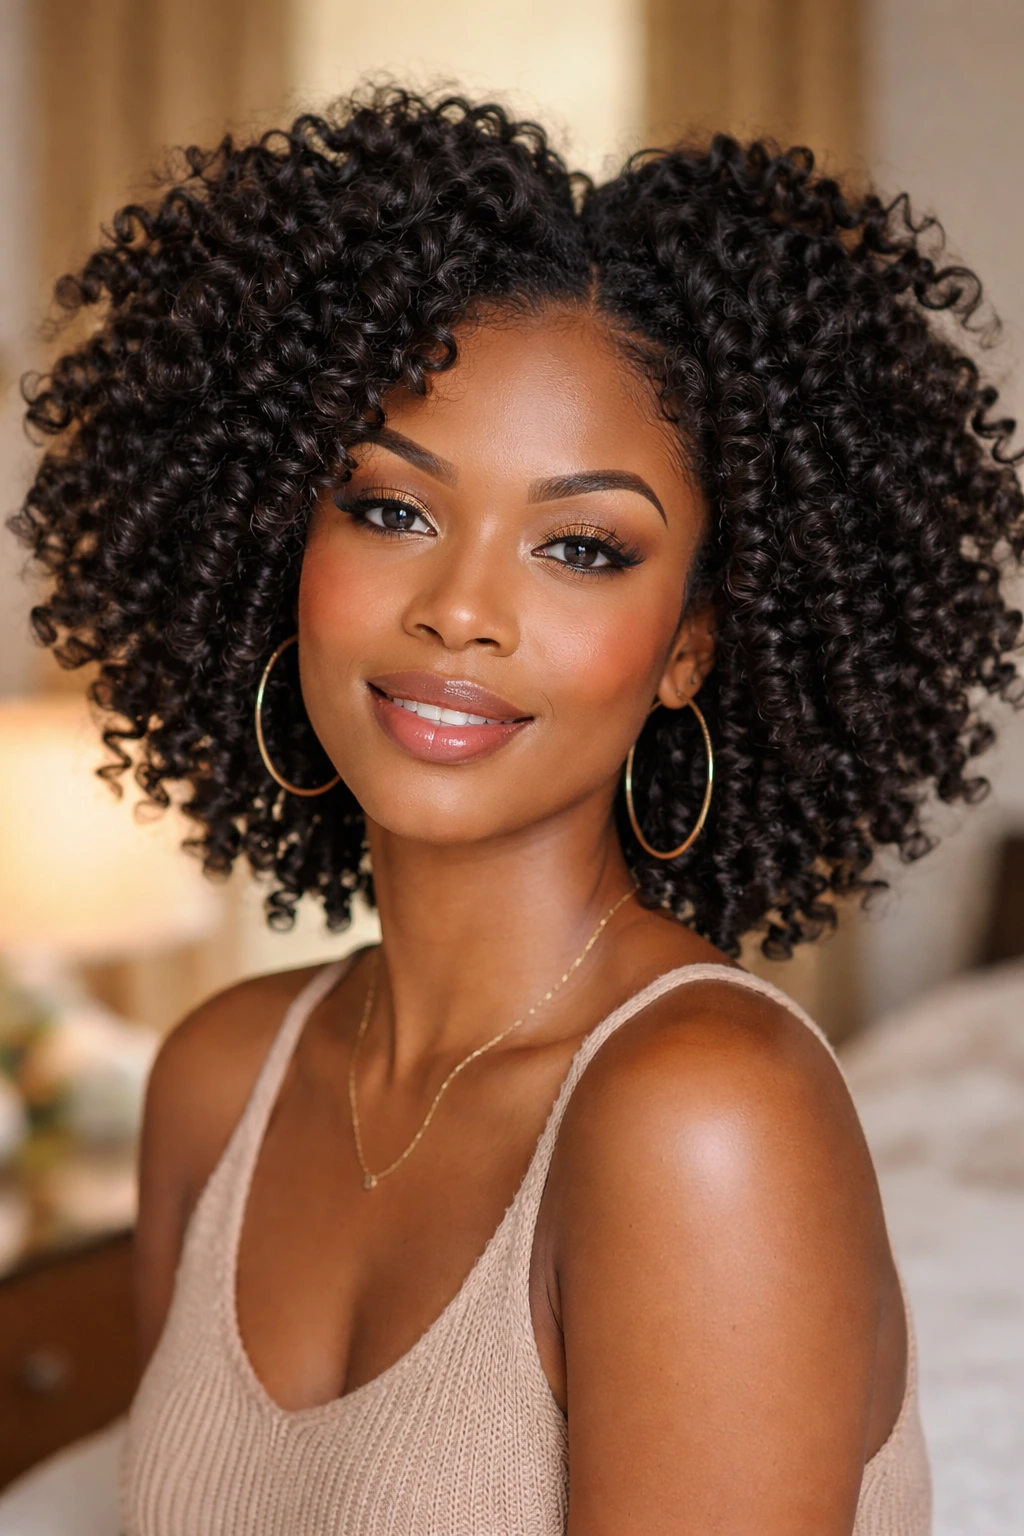
There is something fun about taking out a set of Bantu knots and finding soft, springy texture underneath. The knots themselves look sharp and sculpted. The take-down gives you curls with a little more attitude than a standard twist-out.
This style is especially useful when you want a tighter curl pattern without heat. Each knot should be the same general size so the result looks even, though a little variation is fine if you want the style to feel less rigid. Use a product with enough slip to keep the strands smooth while you wrap them.
- Make the sections small if you want tight coils.
- Twist the hair before wrapping it into a knot for extra hold.
- Let the knots dry completely — half-dry knots are a recipe for frizz.
- Separate carefully with oiled fingertips.
The final texture lands somewhere between a curl and a coil, and that’s the charm. It has bounce, a little width, and a playful shape that photographs nicely without looking stiff.
11. Curly Shag With Layers
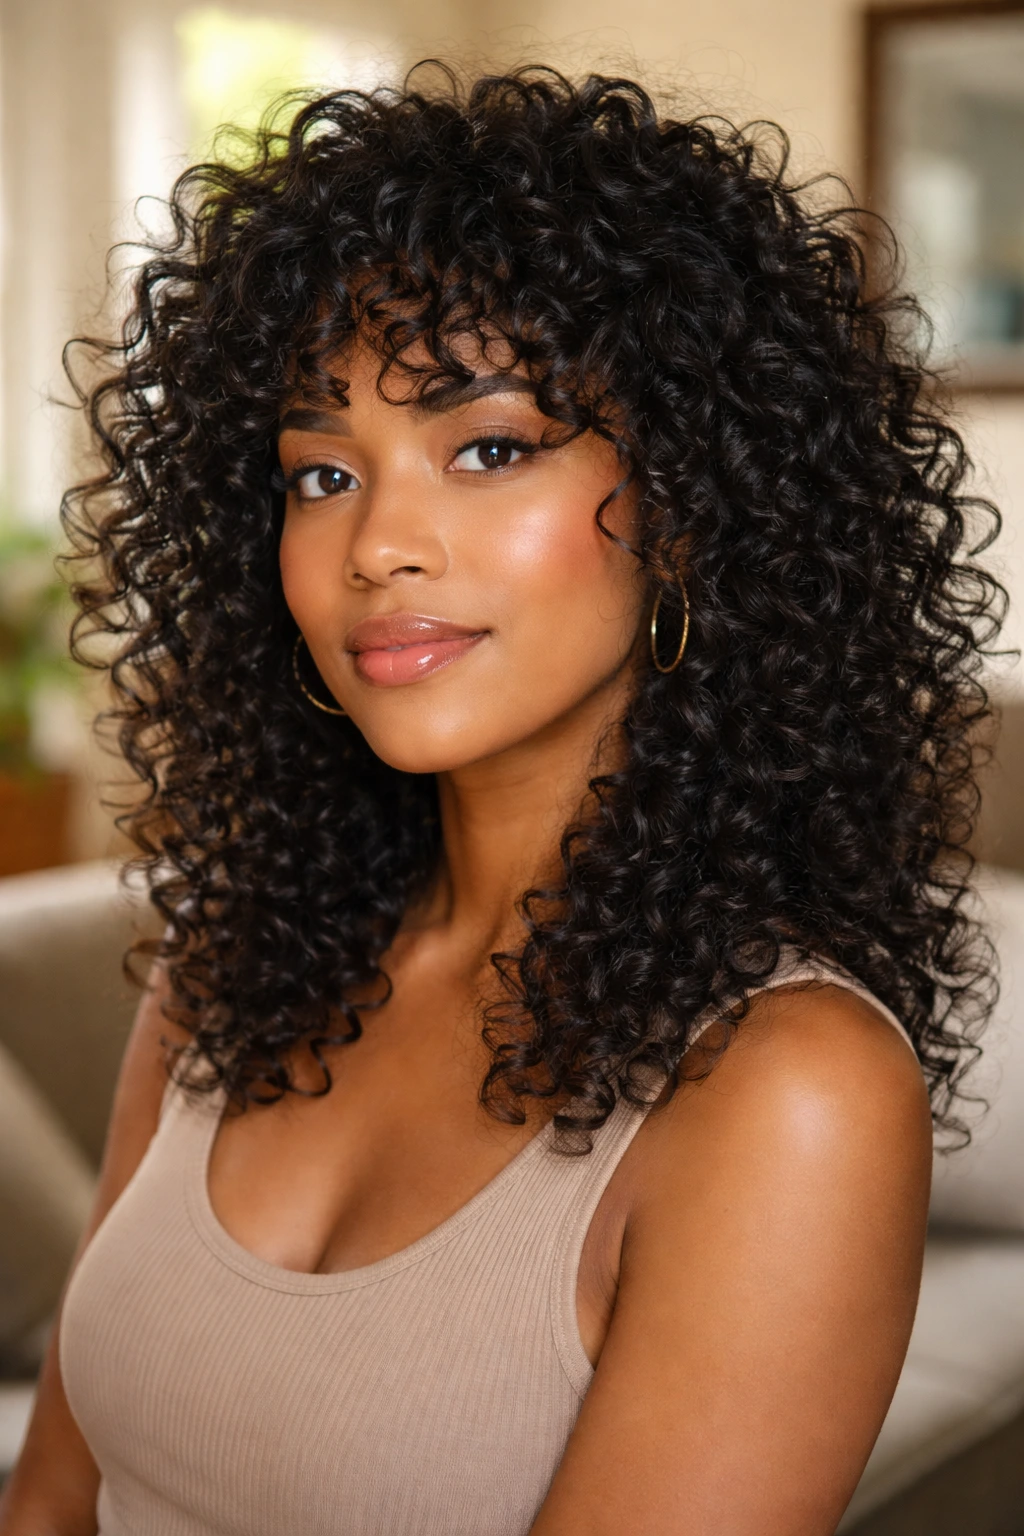
A curly shag is one of the few haircuts that can make dense curls look lighter without taking away the texture people actually want to see. Layers do the work here. Shorter pieces near the crown lift the top, while longer pieces keep the shape from turning into a triangle.
I like this cut on hair that has some natural bend or coil but needs help moving. The shag gives the curls room to fall in pieces instead of one heavy block. That means more lift, more swing, and less of that helmet effect that blunt cuts can create on thick curls.
The smart move is to have this cut shaped while the hair is dry, or at least mostly dry, because shrinkage can change the look a lot. A stylist who understands curly hair will read the curl pattern instead of cutting a straight line and hoping for the best. That part matters. A lot.
12. Layered Lob With Bounce
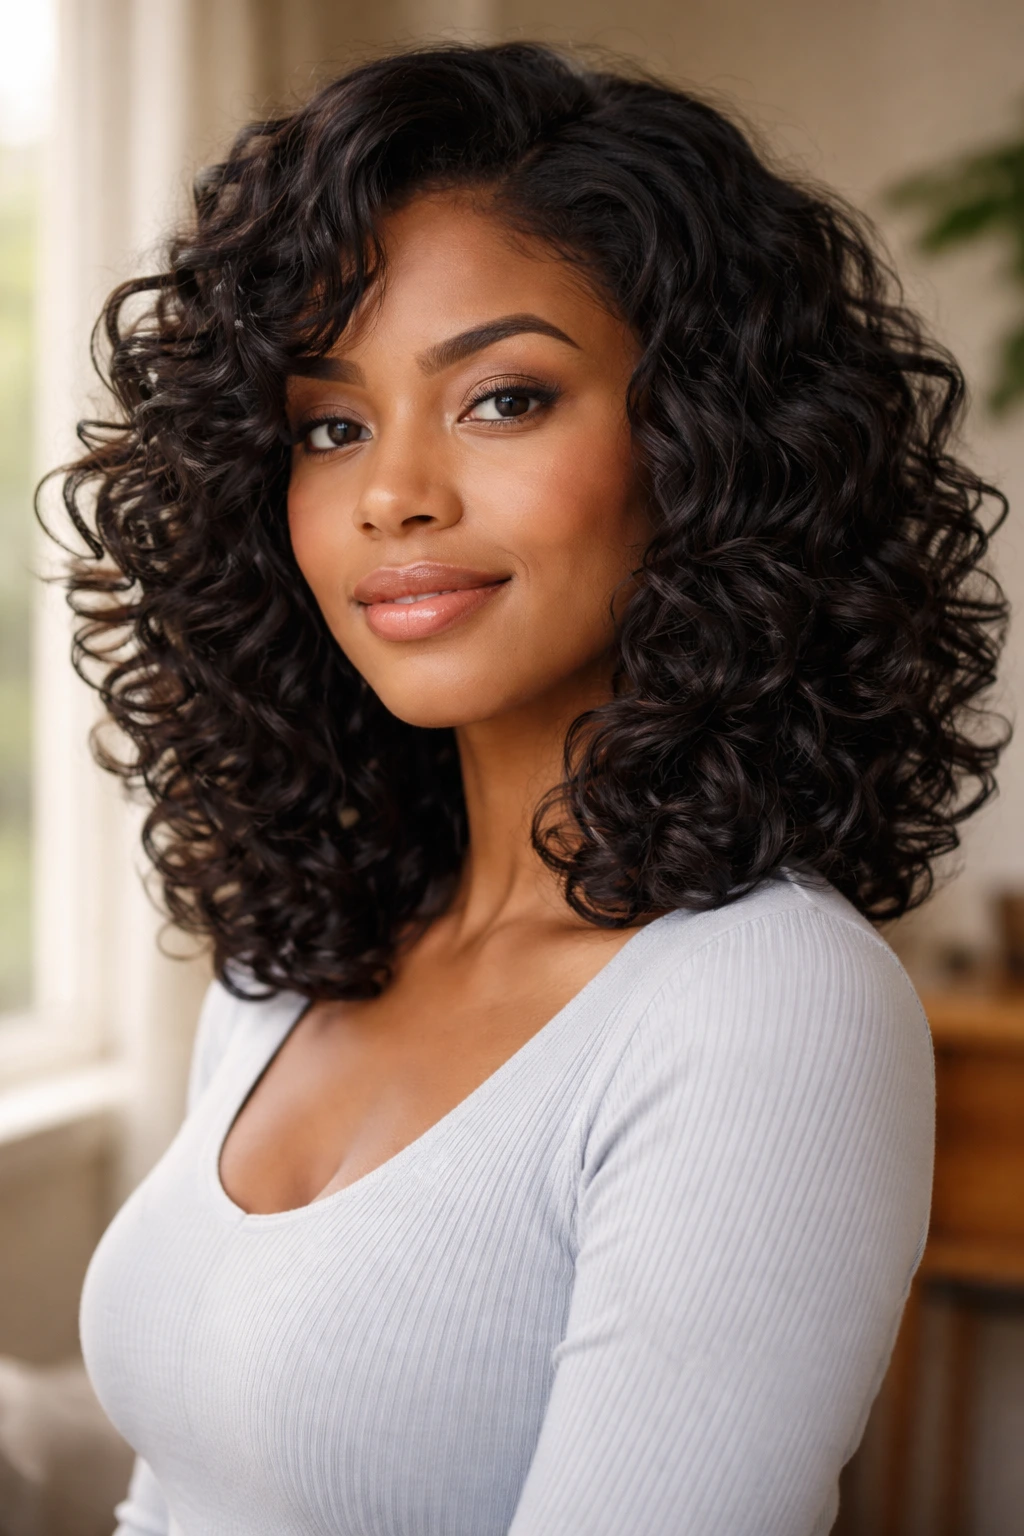
A layered lob sits in a sweet spot between short and long. It still gives you movement, but it does not hang so far down that the curls lose shape at the ends. Compared with a one-length bob, the layers stop the silhouette from puffing out like a square.
This cut works especially well if you want something easier than very long curls but less severe than a blunt bob. The collarbone length gives the curls room to swing, and the layers keep the shape from feeling too heavy on the sides. If your curls are thick, that matters even more.
I would pick this over a blunt cut when the goal is soft volume with less bulk. If you like a fuller outline and you do not mind a little extra shaping on wash day, the layered lob is a solid choice. If you want a sharp, geometric line, look elsewhere.
13. Side-Part Curls and Decorative Clips
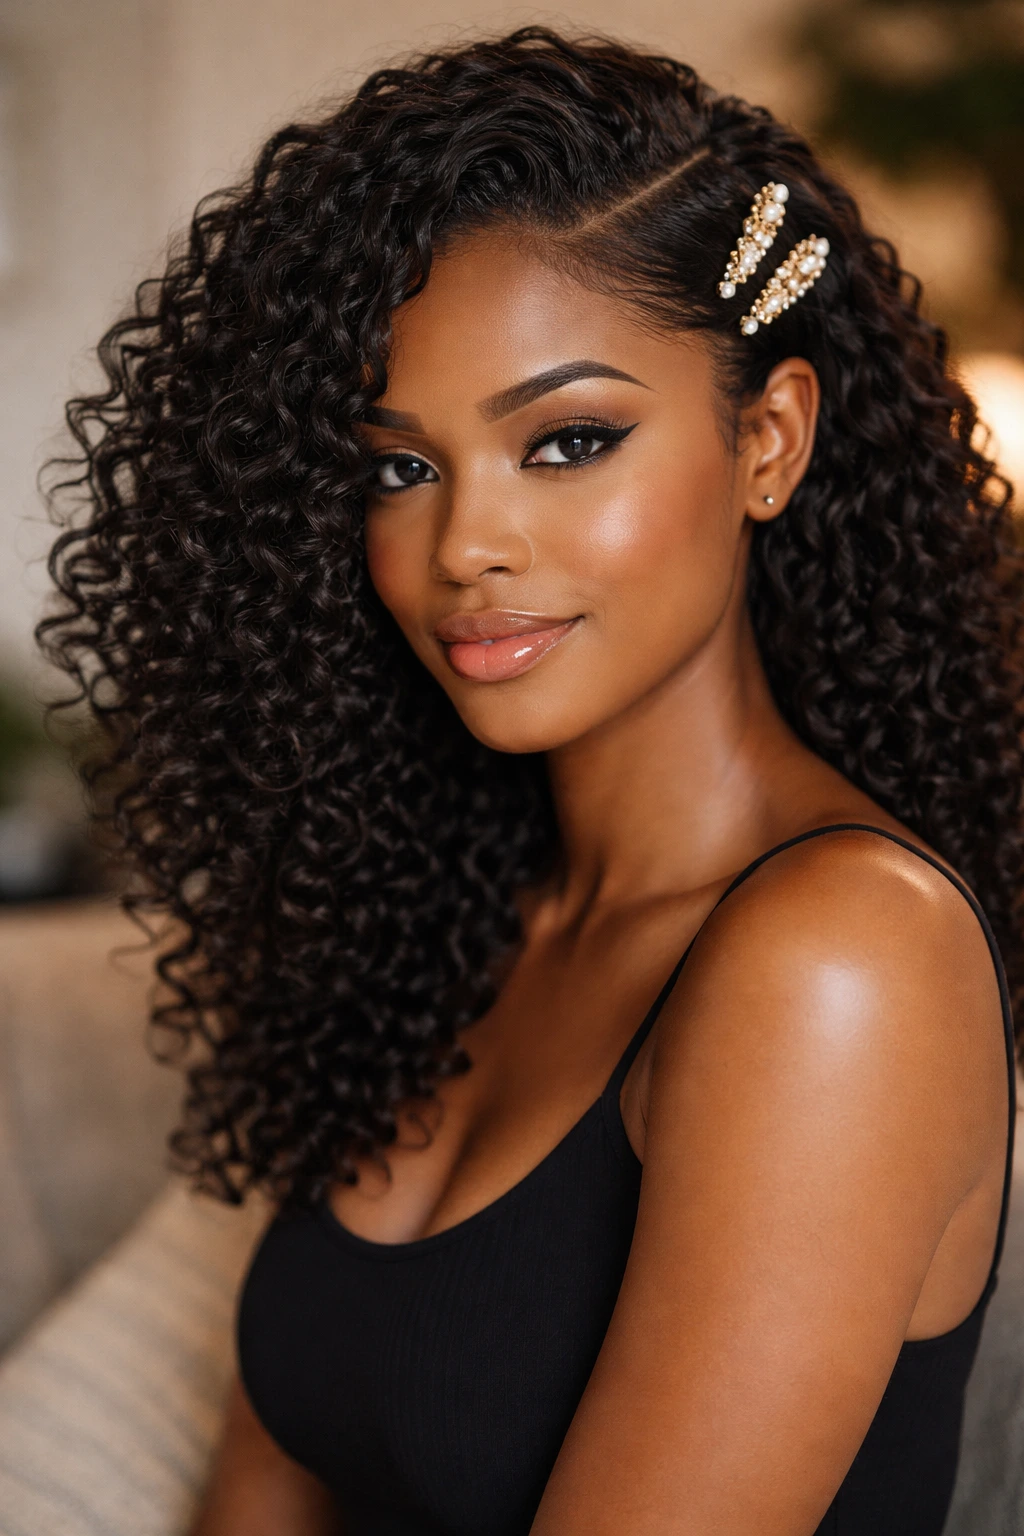
A deep side part can change the whole mood of curly hair with almost no effort. Suddenly the curls have a sweep, a little asymmetry, and a face-framing shape that feels more styled than plain center-parted volume. Add one or two clips, and the look gets even cleaner.
Why the Part Matters
The side part shifts weight. That is the whole trick. More hair sitting on one side creates instant drama, while the smaller side gives the face breathing room. If the root area is flat, the part also helps create lift where the hair naturally wants to fall away.
How to Wear It
- Place the part where the hair still has some root movement.
- Clip one or two curls back near the temple.
- Use a decorative clip that grips without snagging.
- Finish with a light mist, not a heavy layer of cream.
This is a smart style when you want something dressy but not stiff. It looks especially nice on second-day curls that need a small reset.
14. Half-Up Half-Down Curls
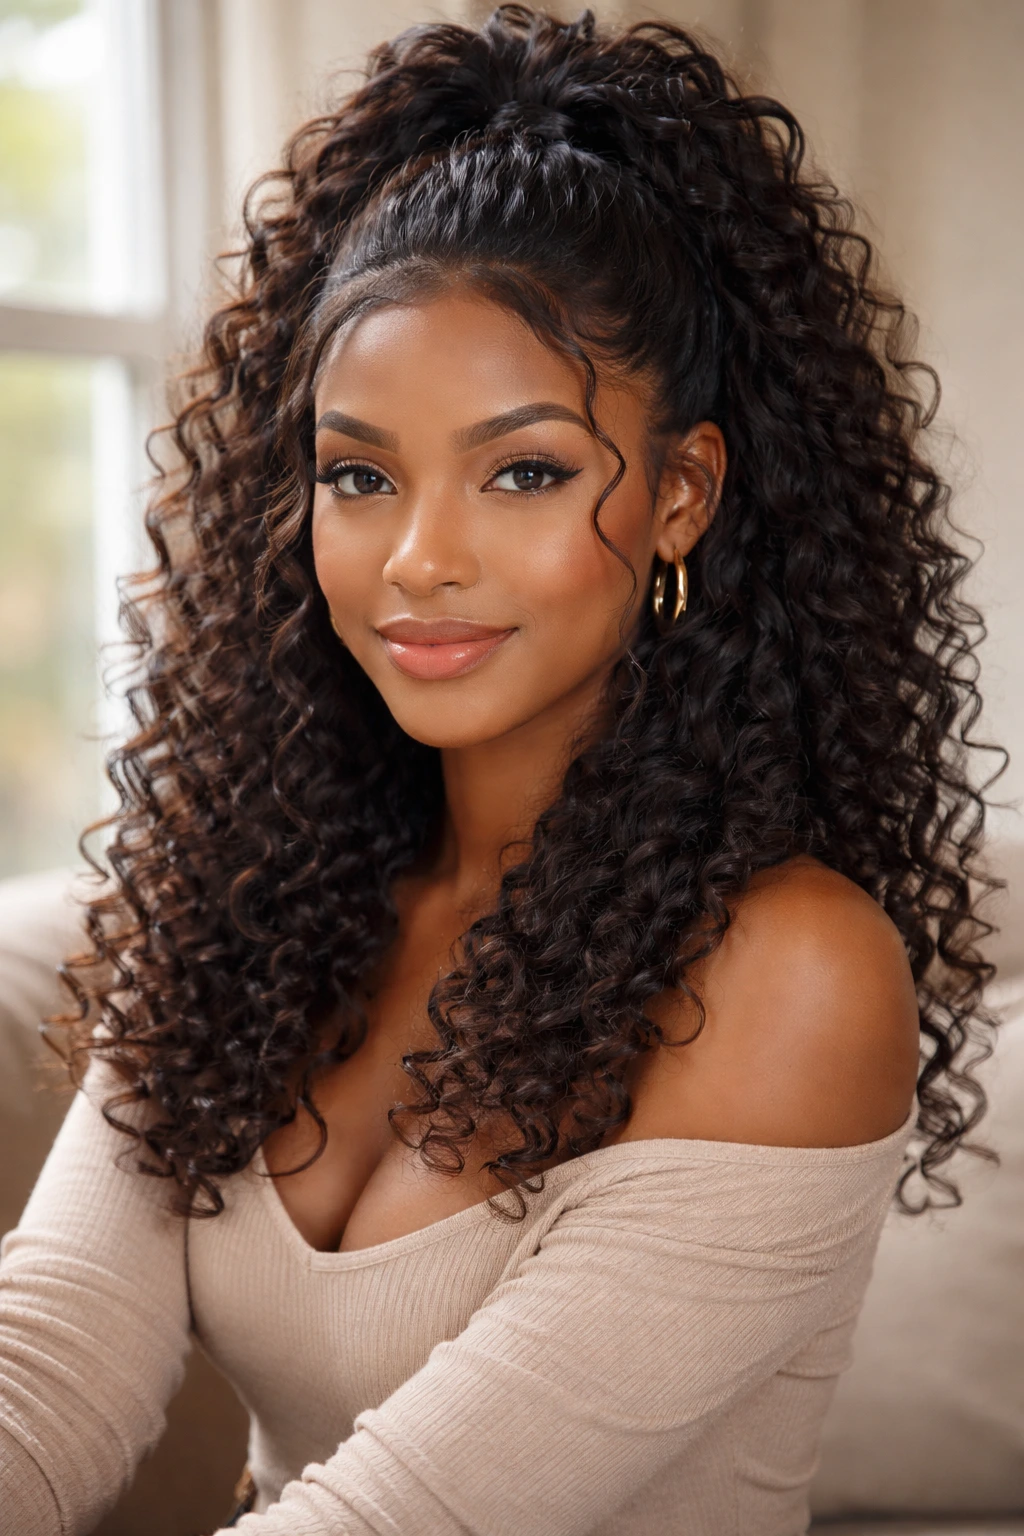
A half-up half-down style solves a very common curly hair problem: the front needs control, but the ends still look too good to hide. Pulling the top section up gives the face a little space, while the back keeps the texture and length on display. It is polished without being precious.
The half-up section can be a puff, a small bun, a knot, or just a gathered crown held with pins. I like it best when the hairline is left soft and the back stays loose. If you slick everything too hard, the style loses the charm that makes it work in the first place.
This is one of the easiest ways to stretch a wash day. It also helps when the root area around the temples gets puffy faster than the rest of the hair. You get structure up top, freedom below, and enough movement to keep the whole look from feeling overmanaged.
15. Crown Flat-Twist Style
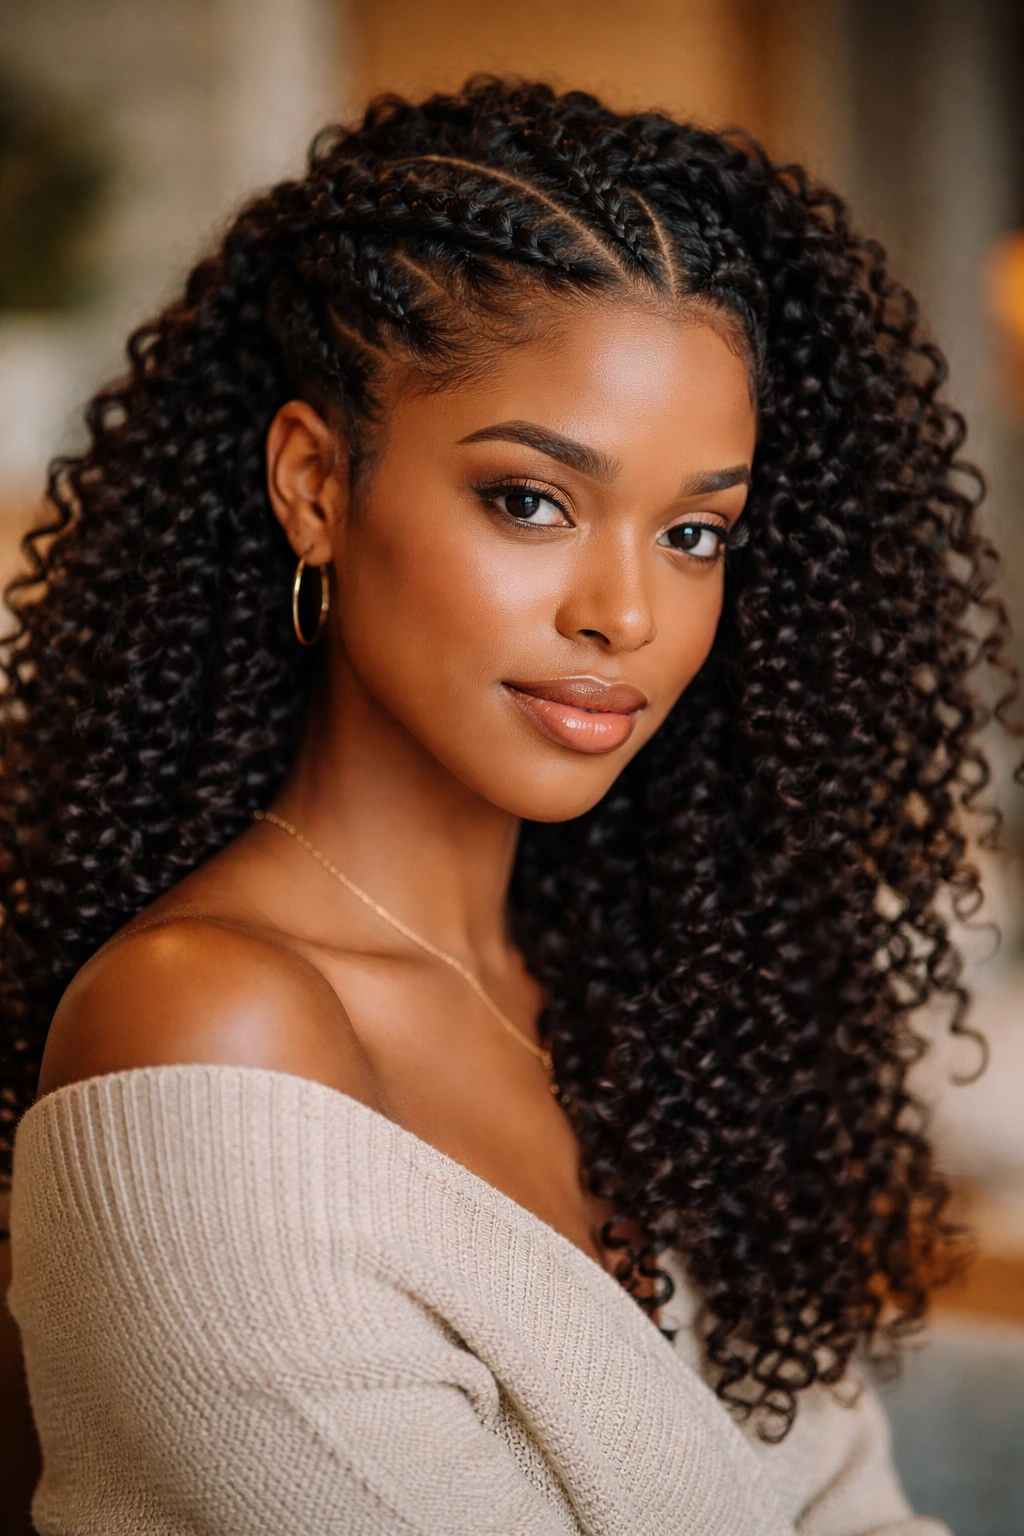
What makes crown flat twists so useful is how neatly they sit against the scalp while still leaving the rest of the hair flexible. The twists travel around the head in a curved line, almost like a built-in headband, and that shape can be as tidy or as loose as you want.
The style works well when you want a protective look that still leaves some curl pattern visible. You can tuck the ends, pin them into a bun, or leave a curled section loose at the back. On longer hair, that contrast looks especially nice because the crown feels controlled while the rest moves.
How to Place the Part
Start the twists where the hair naturally divides cleanly. A jagged part makes the crown look uneven fast. Use a comb tail, keep the sections even, and follow the curve of the head instead of forcing straight rows that fight the shape of your scalp. That small adjustment makes the whole style sit better.
16. Space Buns With Loose Ends
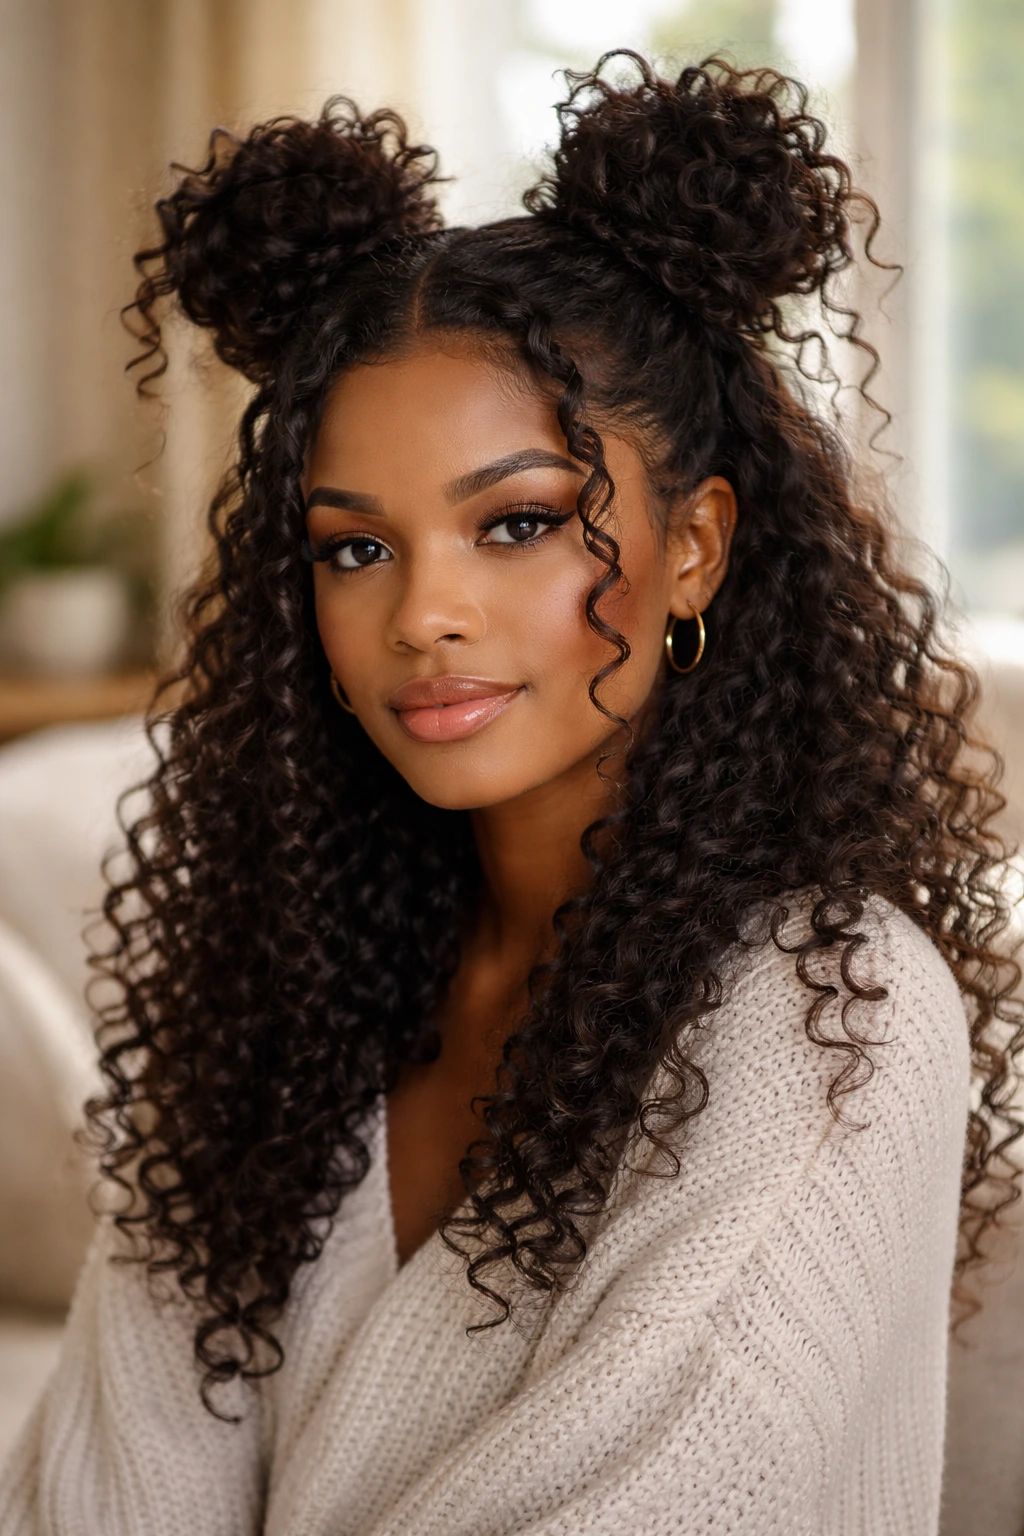
I like space buns because they bring a little playfulness back into curly hair without making it look childish. Two buns at the top, loose curls at the bottom, and suddenly the style has a shape that feels fun but still put-together enough for errands, brunch, or a casual night out.
The secret is not to make the buns too tight. Tight buns can pull the roots and flatten the curl pattern around the crown. Loose buns let the style keep a little softness, which is what keeps it from looking severe. If you leave a few curls free around the face, even better.
- Gather the top half high and split it into two sections.
- Wrap each section loosely into a bun.
- Secure with pins or soft elastics.
- Leave the lower curls out or twist them lightly for shape.
It’s a style that works best when the hair has some texture already. Freshly washed hair can slip around too much. Day-two curls usually behave better.
17. Short TWA With Defined Shape
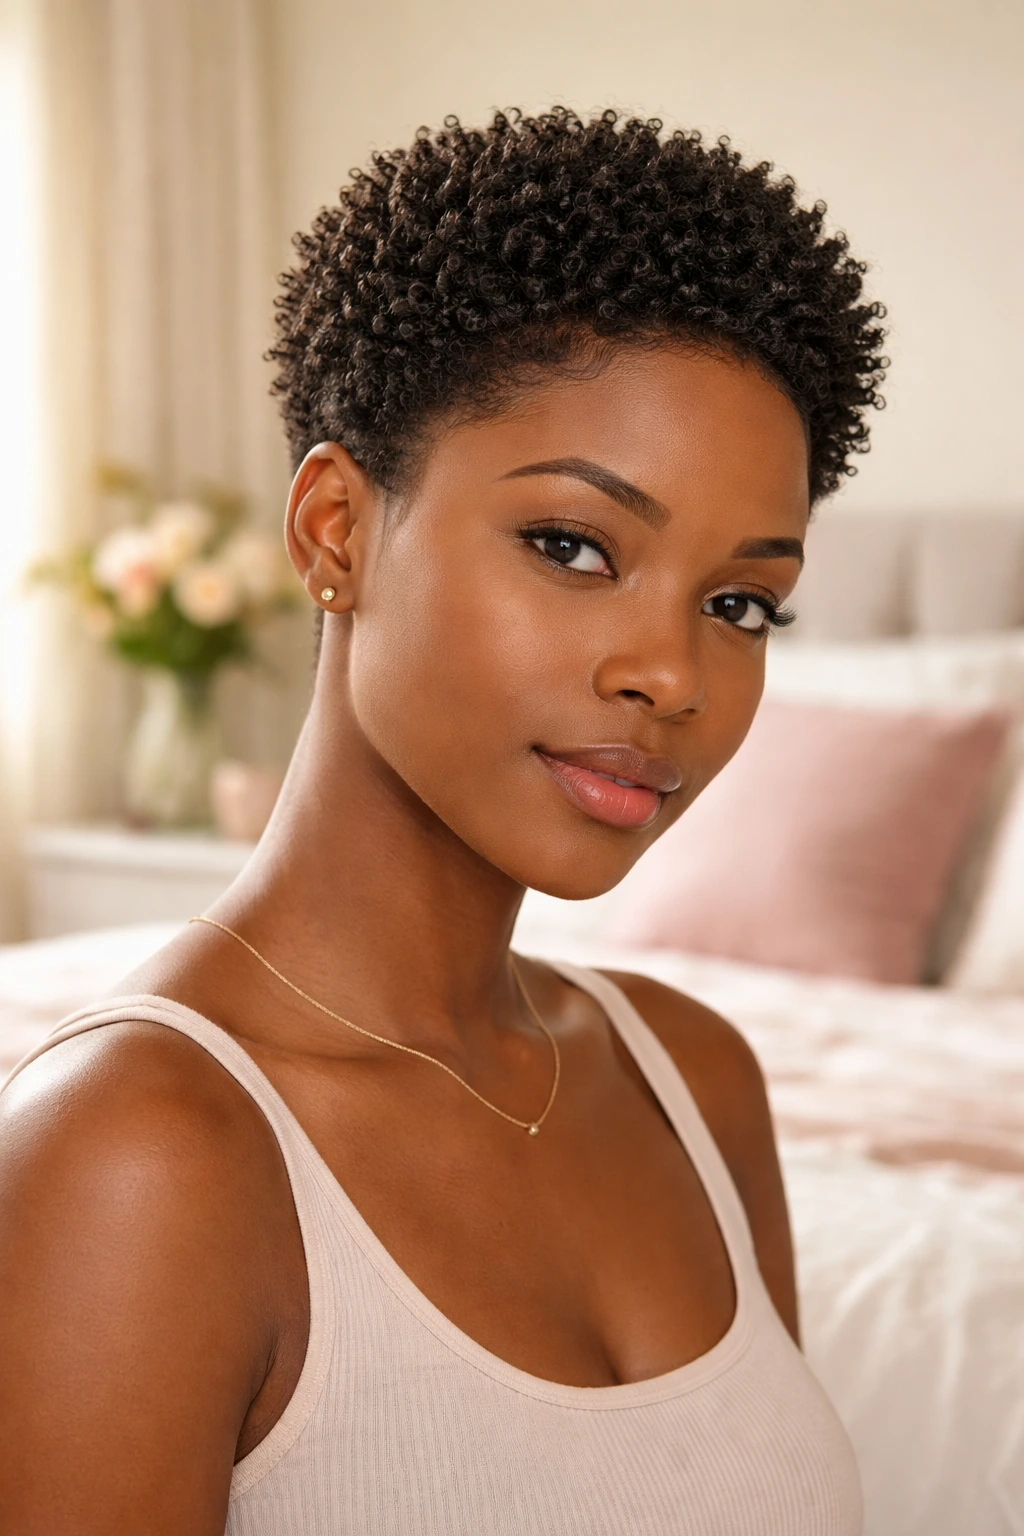
Tiny hair still has shape. A teeny weeny afro, or TWA, can look crisp, sculpted, and full of personality when the curls are cut and styled with intention. I have always liked this length because it strips away the noise. No hiding. No weighing down. Just texture.
A TWA can be worn soft and fluffy, or with enough definition cream to show the curl pattern more clearly. A small sponge, a soft brush, or even fingers can coax the coils into a more uniform direction. If the hairline is shaped cleanly, the whole cut looks sharper immediately.
The nice thing about this length is how little it takes to keep it going. Moisture, a little hold, and regular shaping are usually enough. It is not a style for people who want maximum styling options, but it is excellent for people who like clean lines and fast mornings.
18. Curly Mohawk With Height
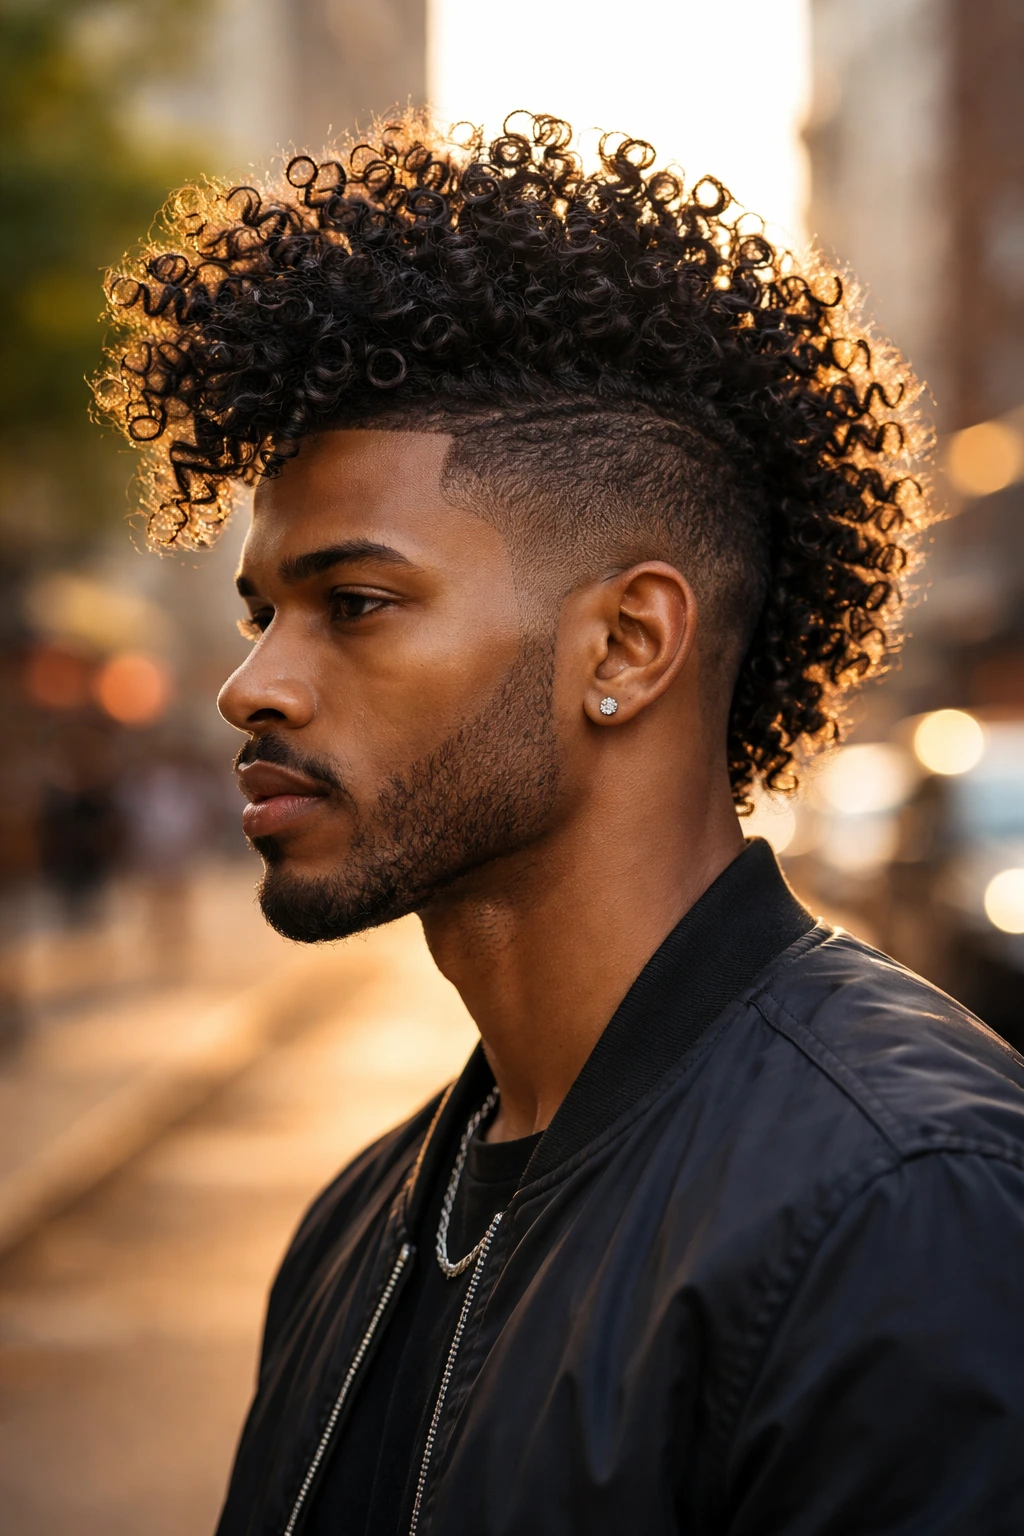
A curly mohawk is sharper than a faux hawk puff, and that difference matters. The sides are cut or slicked tighter, while the center ridge holds the length and volume. The whole look reads louder, more graphic, and a little more fearless.
If you want a cut that shows off the profile of your face and neck, this one does a lot of heavy lifting. It draws the eye upward and down the center, which gives the curls a strong shape even when they’re soft. The trick is to keep the middle section full and the sides clean enough that the contrast makes sense.
This is not the style I would pick for someone who wants the lowest-maintenance option on the list. It asks for upkeep at the sides and a little confidence. But if you want a look that feels modern and crisp, the mohawk earns its place.
19. Faux Hawk Puff
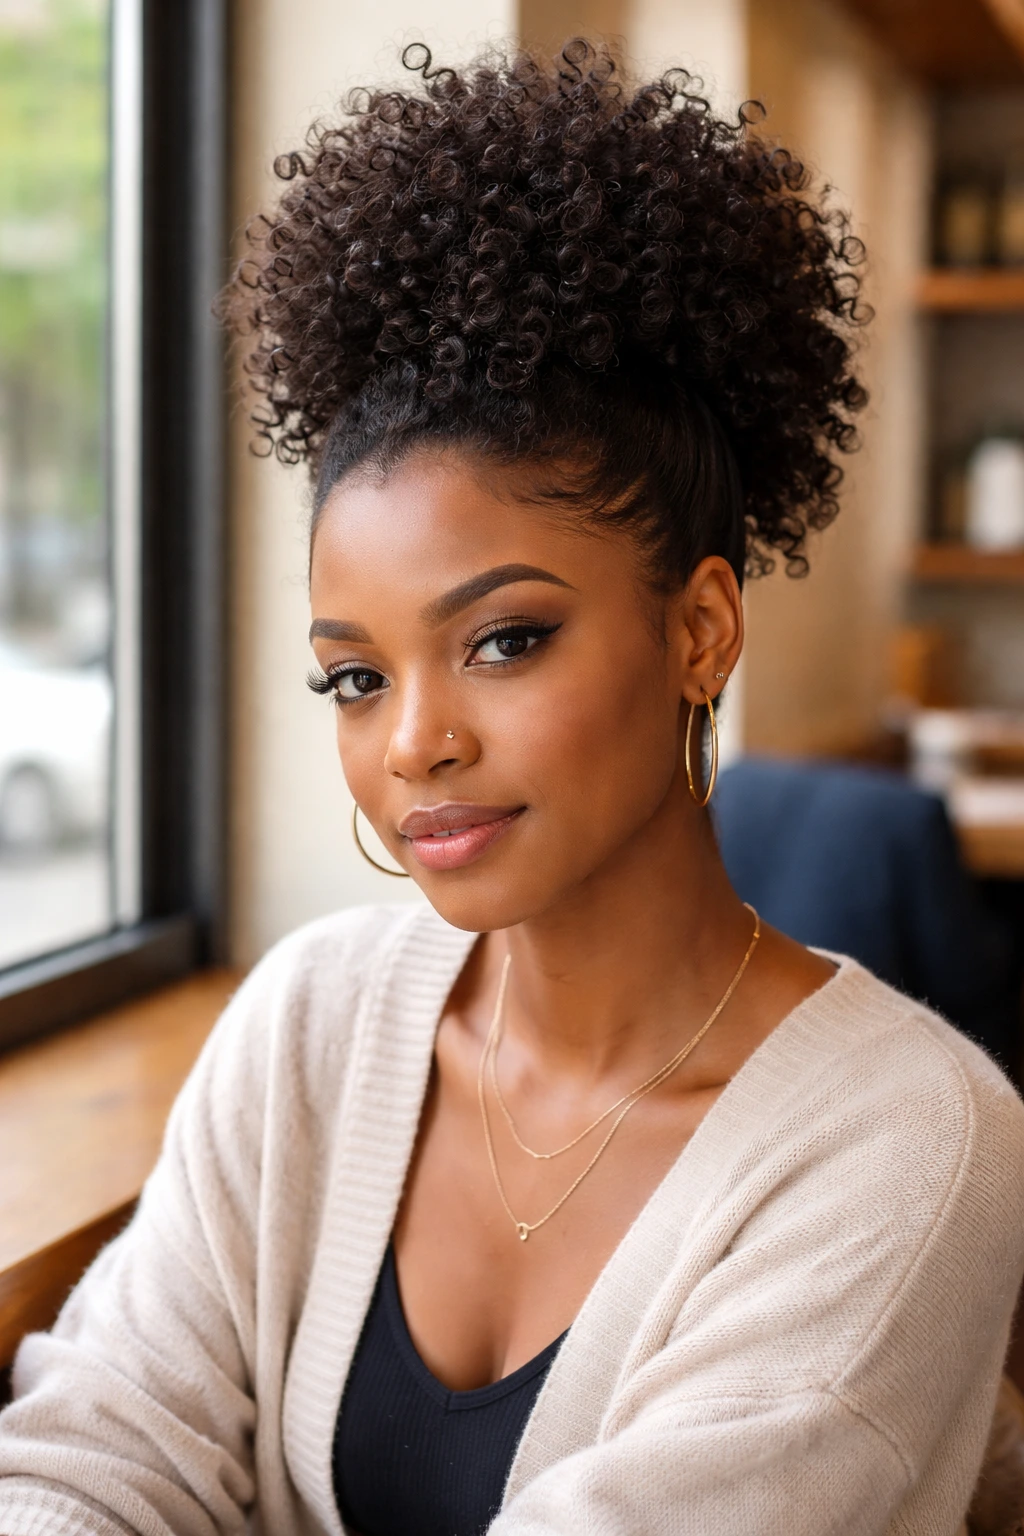
A faux hawk puff gives you the drama of a mohawk without committing to shaved sides or a super-short cut. That makes it a nice middle ground. The hair at the sides is pinned, slicked, or tucked back, while the center stays full and lifted.
What Makes It Different
The style leans softer than a true mohawk. You still get height, but the edges feel less severe. That matters if you want something wearable for everyday life, not only for photos or a night out.
Simple Setup
- Smooth the sides back with gel or a light holding cream.
- Pin the hair along the temples so the center stays free.
- Pick the crown for lift before the final smoothing.
- Keep the puff loose enough that it doesn’t collapse by lunchtime.
This style is especially good when your curls need to look neat but not stiff. It gives shape, height, and a little bit of edge without asking for a haircut commitment.
20. Halo Braid With Free Curls
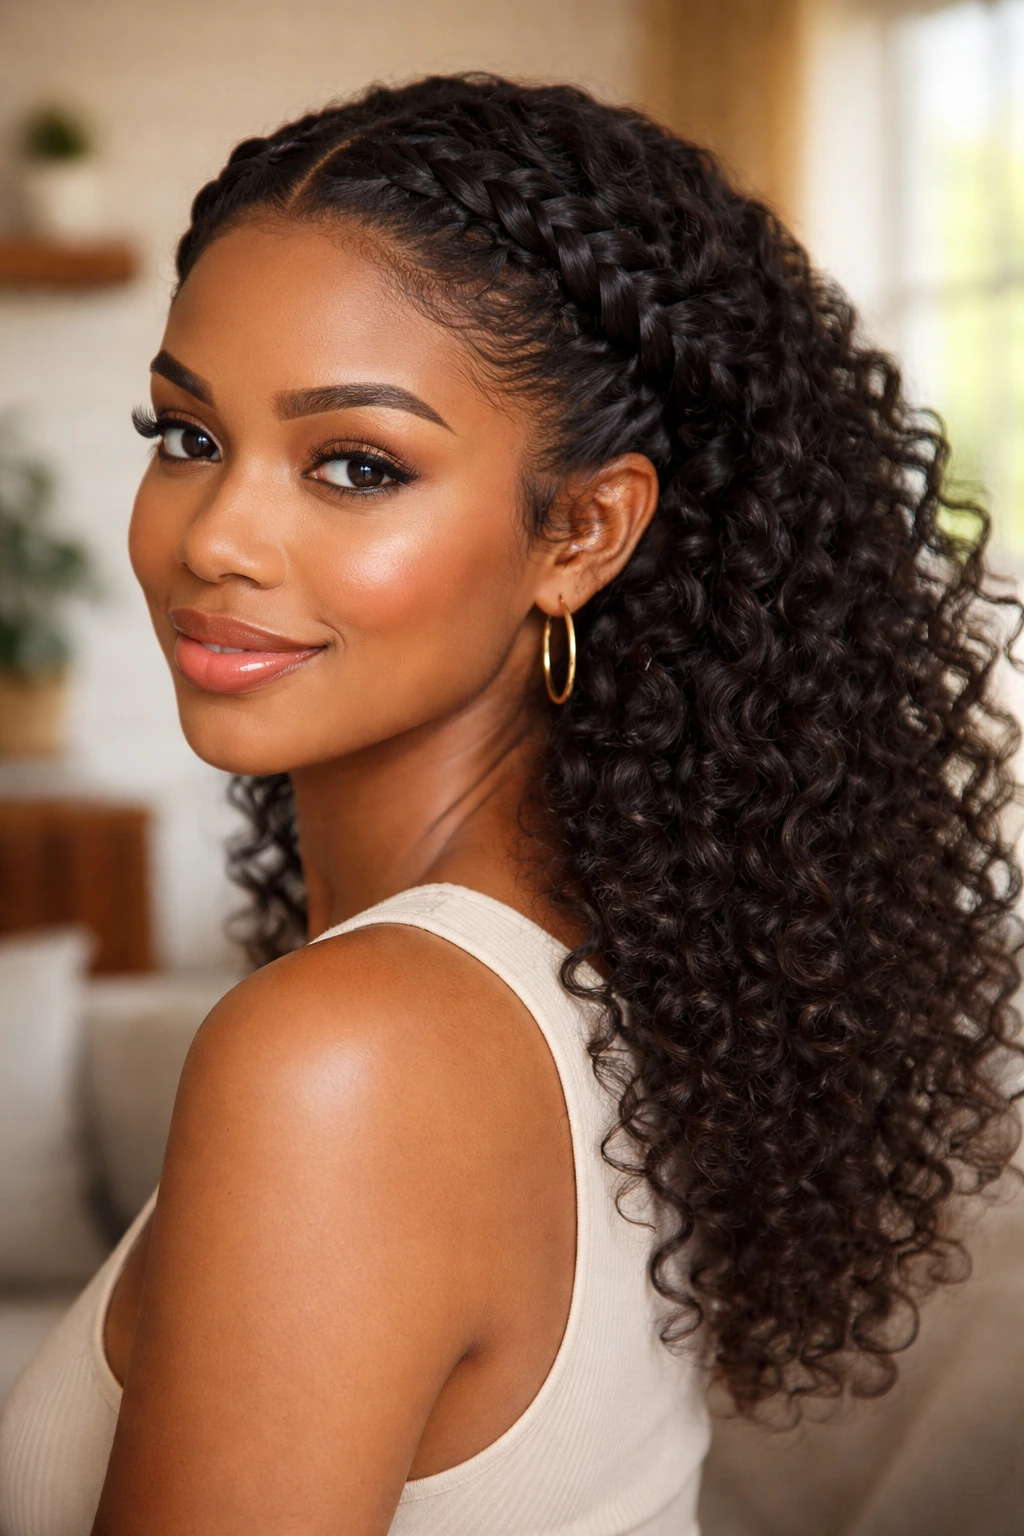
A halo braid can make curly hair look finished in a way that feels almost unfair. One braid wrapped around the hairline gives the style a frame, while the curls that fall free at the back keep it from looking too formal. That contrast is the whole point.
This style works well for events, but it also works for days when you want the front of your hair controlled and the rest left alone. The braid helps keep frizz around the face in check, which is useful if your curl pattern tends to expand outward early in the day.
I like this look because it stays polished even when the back gets a little messy. The braid holds the structure. The curls bring the softness. That balance is rare, and worth using when you want a style that reads intentional without feeling overdone.
21. Asymmetric Bob With One-Side Volume
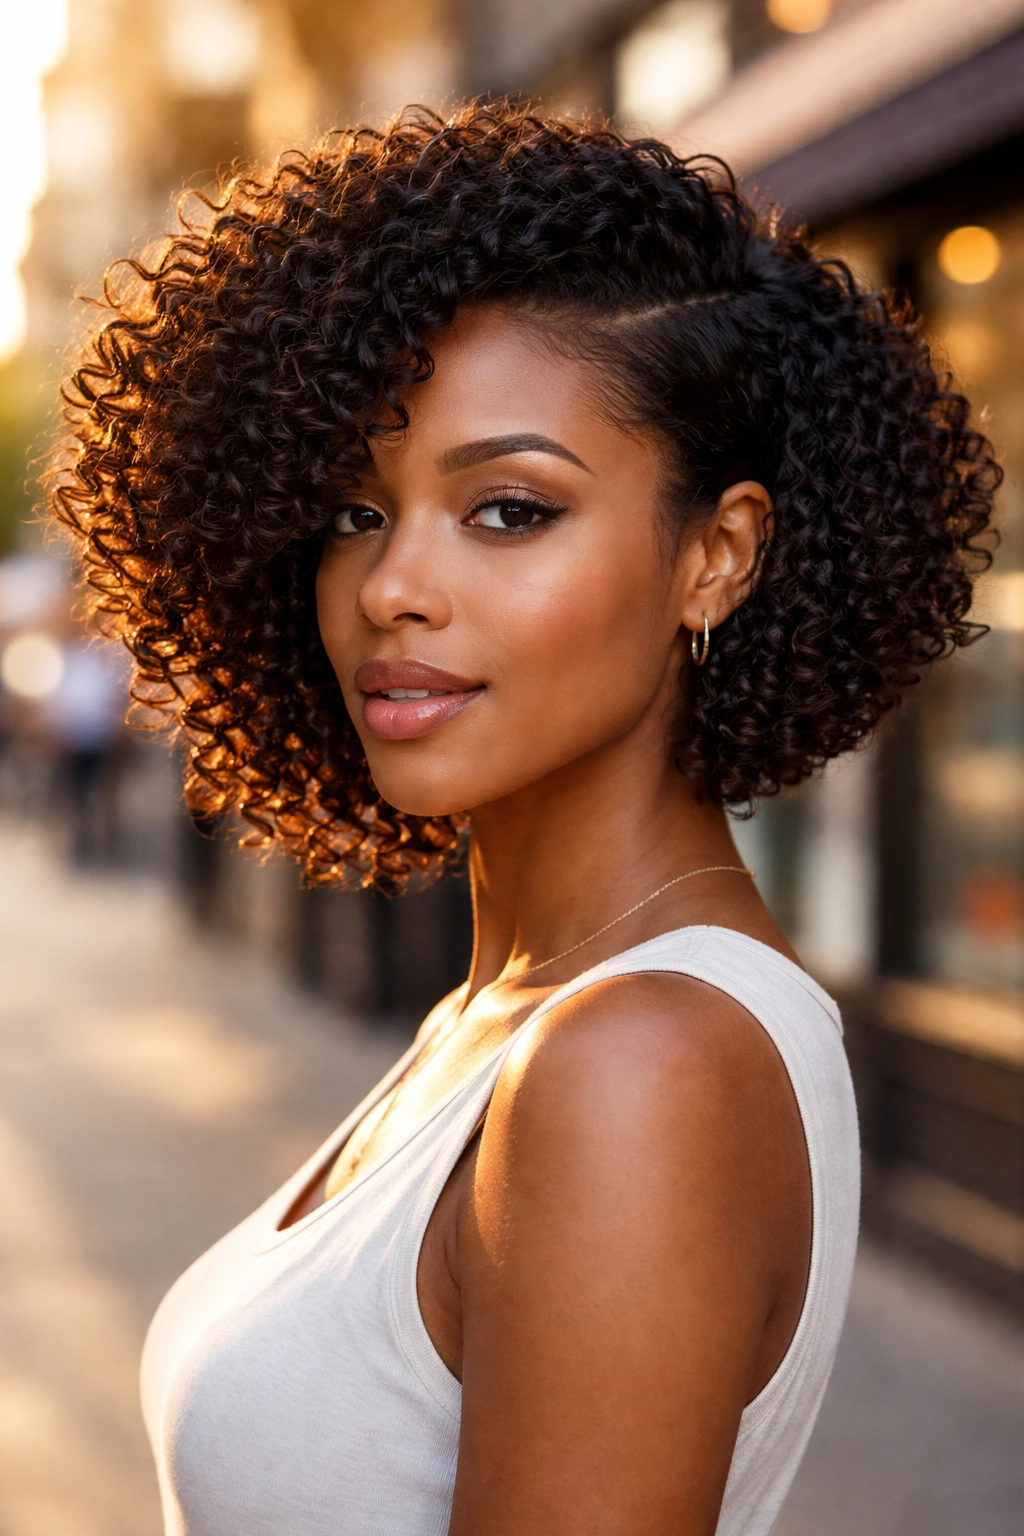
Why does an asymmetric bob feel so fresh? Because it breaks the habit of making both sides behave the same way. One side sits longer, the other side stays shorter, and that imbalance creates movement even before the curls settle.
The cut works especially well on dense curls, where a standard bob can sometimes feel too boxy. With an asymmetrical shape, the volume has somewhere to go. It can sweep across the jawline, sit closer to the cheek, or tuck behind one ear for a cleaner line.
One caution: this cut should be shaped with your actual curl shrinkage in mind. A straight-cut asymmetric bob can look great in the chair and awkward once the hair dries if the curl pattern jumps too high. A dry cut, or at least a curl-aware cut, makes more sense here.
22. Rolled and Tucked Updo
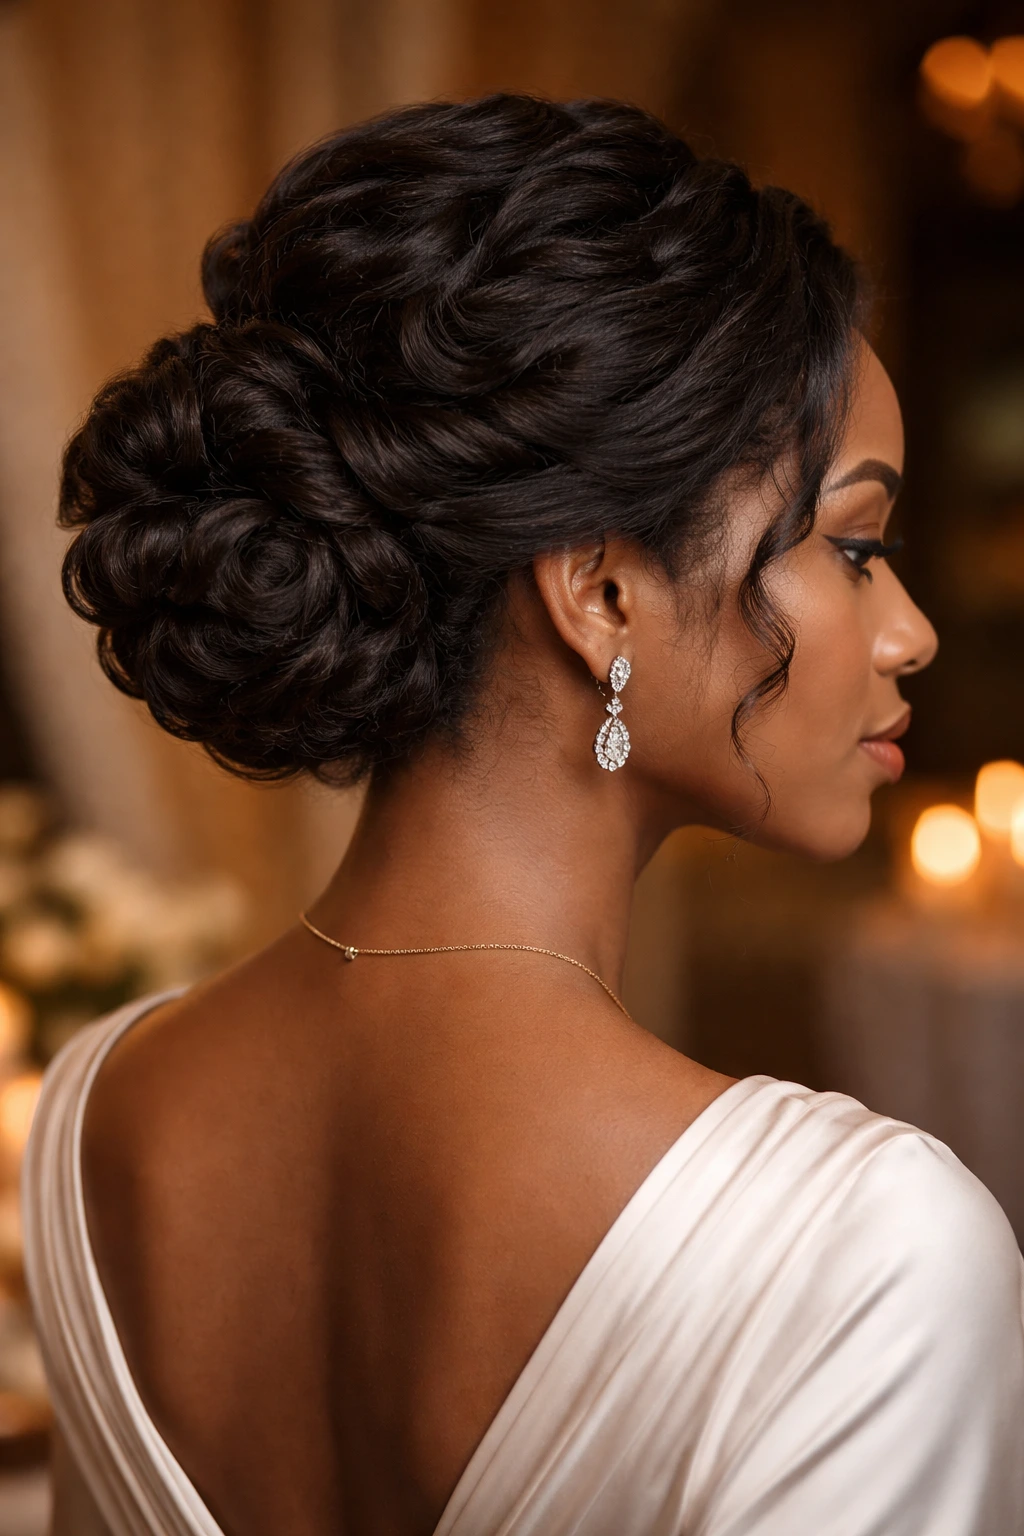
There are days when curls need a rest, and a rolled and tucked updo gives them one without looking lazy. The hair is gathered, rolled inward, and pinned or tucked into shape so the ends stay protected. It is a practical style that still looks neat enough for a dinner or a formal event.
The shape can be low and soft at the nape, or higher and more sculpted if you want a cleaner finish. A little leave-in helps the surface stay smooth, and a few pins placed in the direction of the roll keep the style from loosening too fast.
- Work on stretched or lightly set hair for the cleanest result.
- Use a rat-tail comb to section the hair cleanly.
- Tuck the ends fully so they do not poke out.
- Pin from underneath, not only from the outside.
The style is not flashy, and that is the charm. It lets texture stay present while keeping the length contained.
23. Curly Fringe and Face Frame
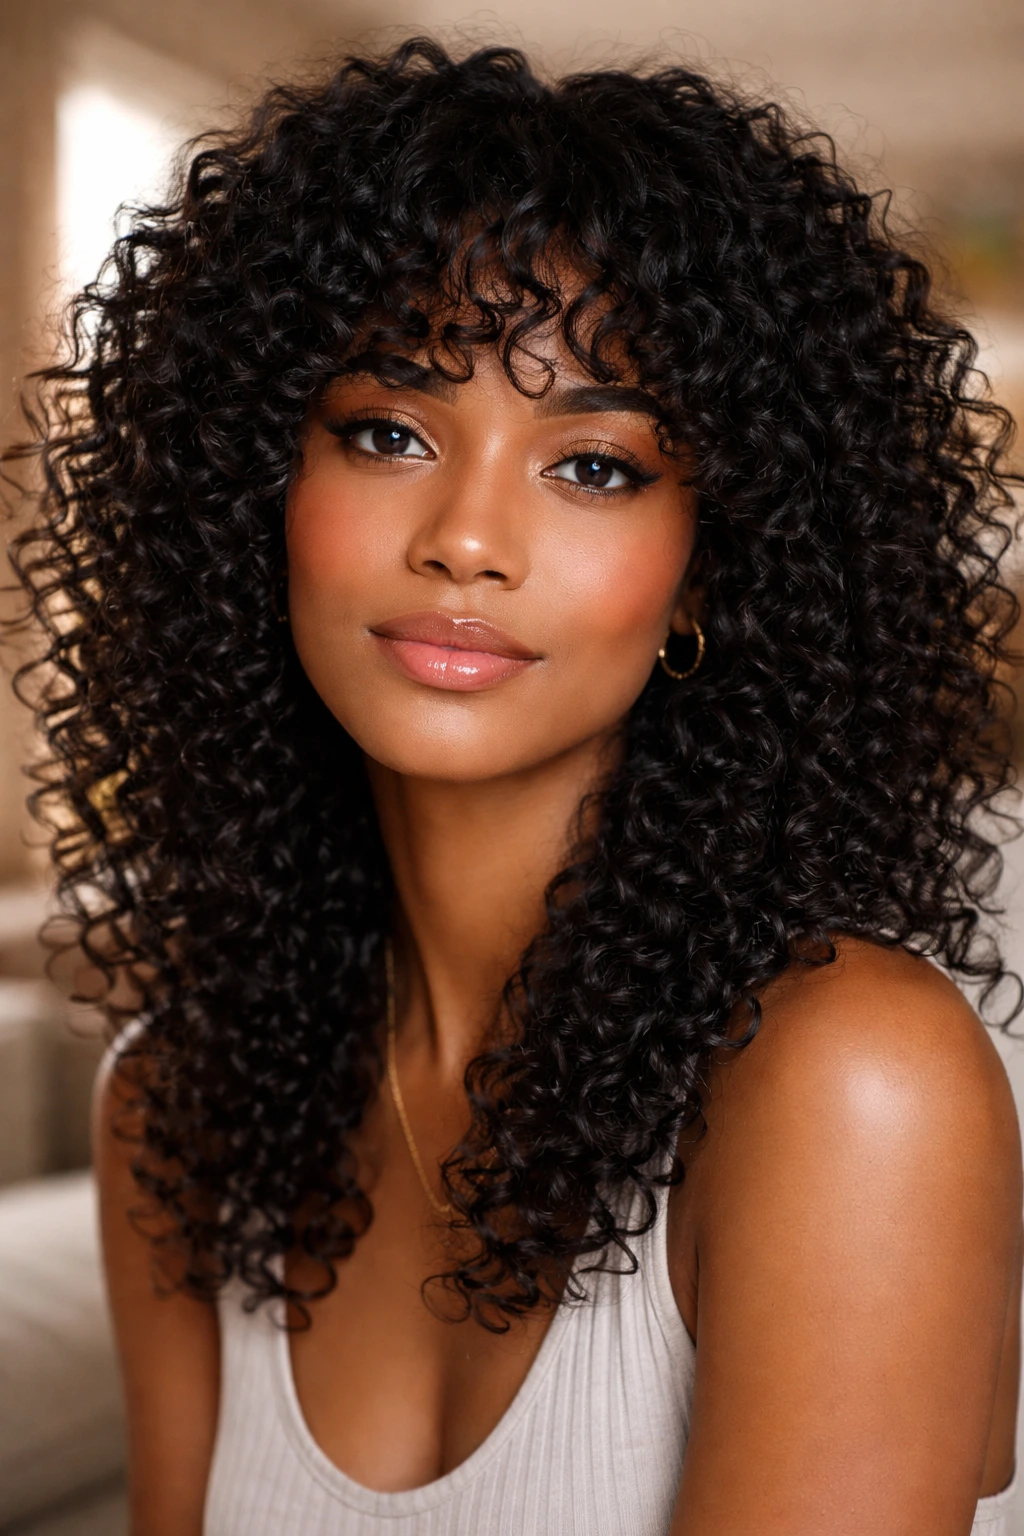
A curly fringe can change your whole face shape, but it is not the kind of cut you want to make casually. Curls spring up. A lot. A fringe that looks perfect when wet can land much shorter once it dries, and that can be flattering or a little surprising depending on the length you asked for.
I like a curly fringe when the front pieces are cut to live around the eyes and cheekbones rather than sitting as a blunt wall. Soft face-framing layers around the sides help the bangs blend into the rest of the curl pattern. Without that, the fringe can look separate and heavy.
The upkeep is real. Bangs grow out fast, and they need a bit more attention on wash day than the rest of the hair. Still, when the cut is right, the fringe brings a softness to black curls that can be hard to get any other way.
24. Long Layered Spiral Curls
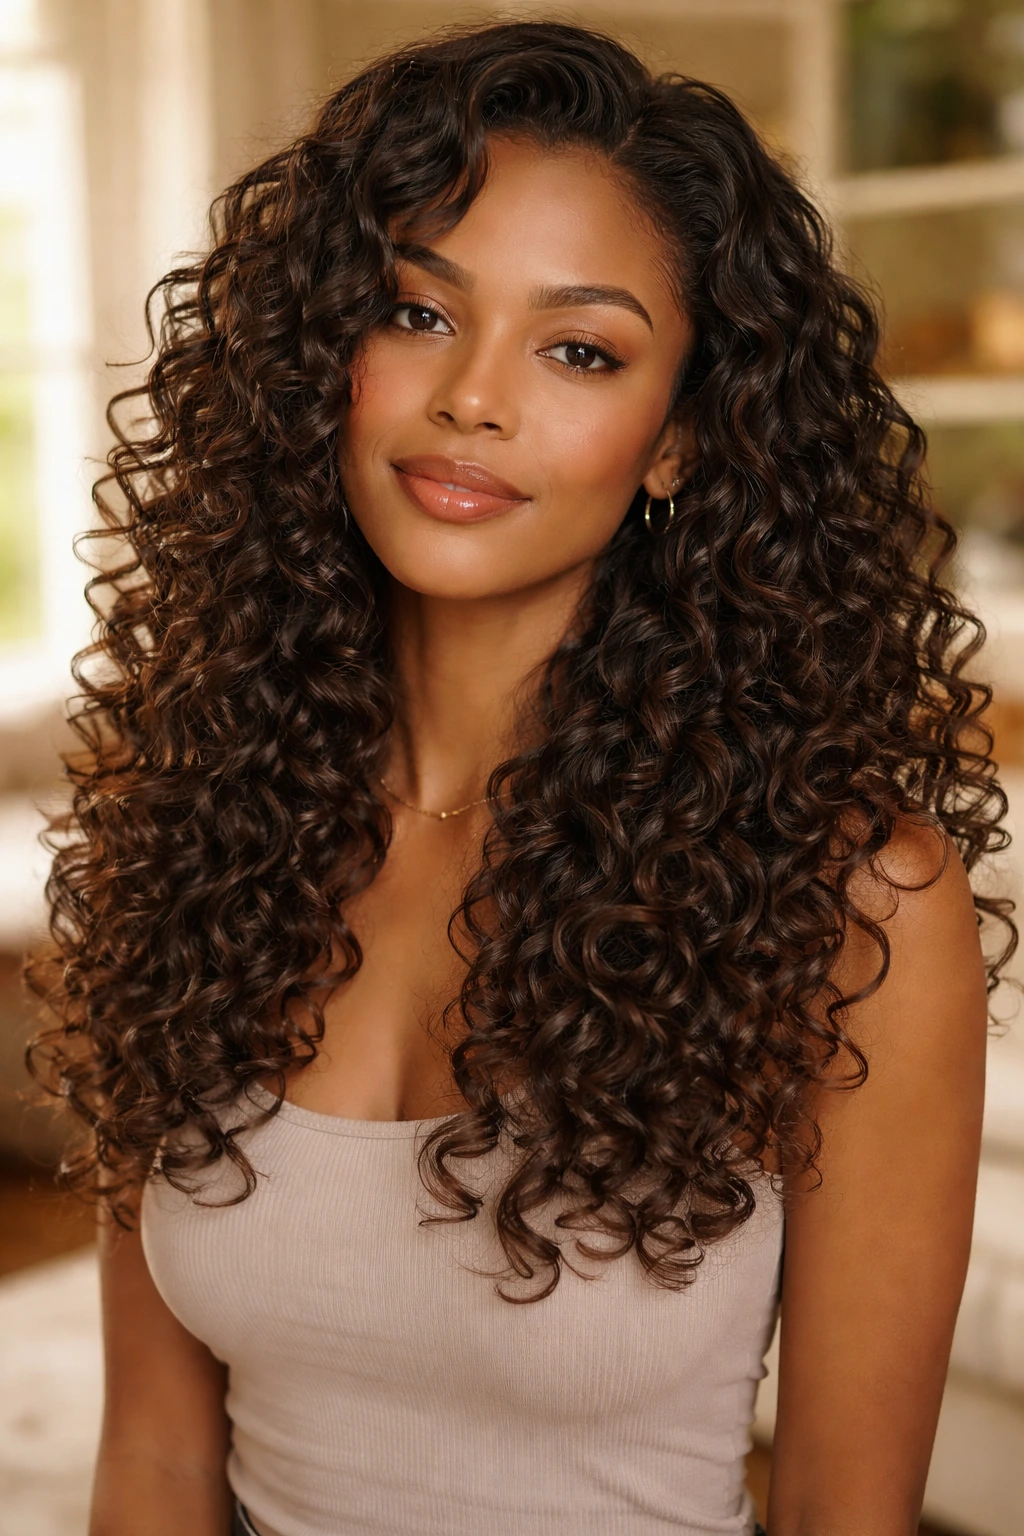
Long curls look glamorous on their own, but long curls with layers are a different animal. The layers stop the hair from hanging like one heavy curtain and let each curl group move more freely. You get length, yes, but you also get bounce.
Compared with one-length long hair, layered spirals usually dry faster and hold shape more cleanly around the shoulders and chest. That matters because very long curly hair can get weighed down at the top while the ends stay springy. Layers fix some of that imbalance.
If you want the length to stay soft instead of bulky, this is the better cut. It gives the curls room to separate a little, which helps the shape stay rounded instead of triangular. A diffuser can make the layers pop even more, but the cut does most of the work.
25. Curly Pixie Cut With Soft Volume
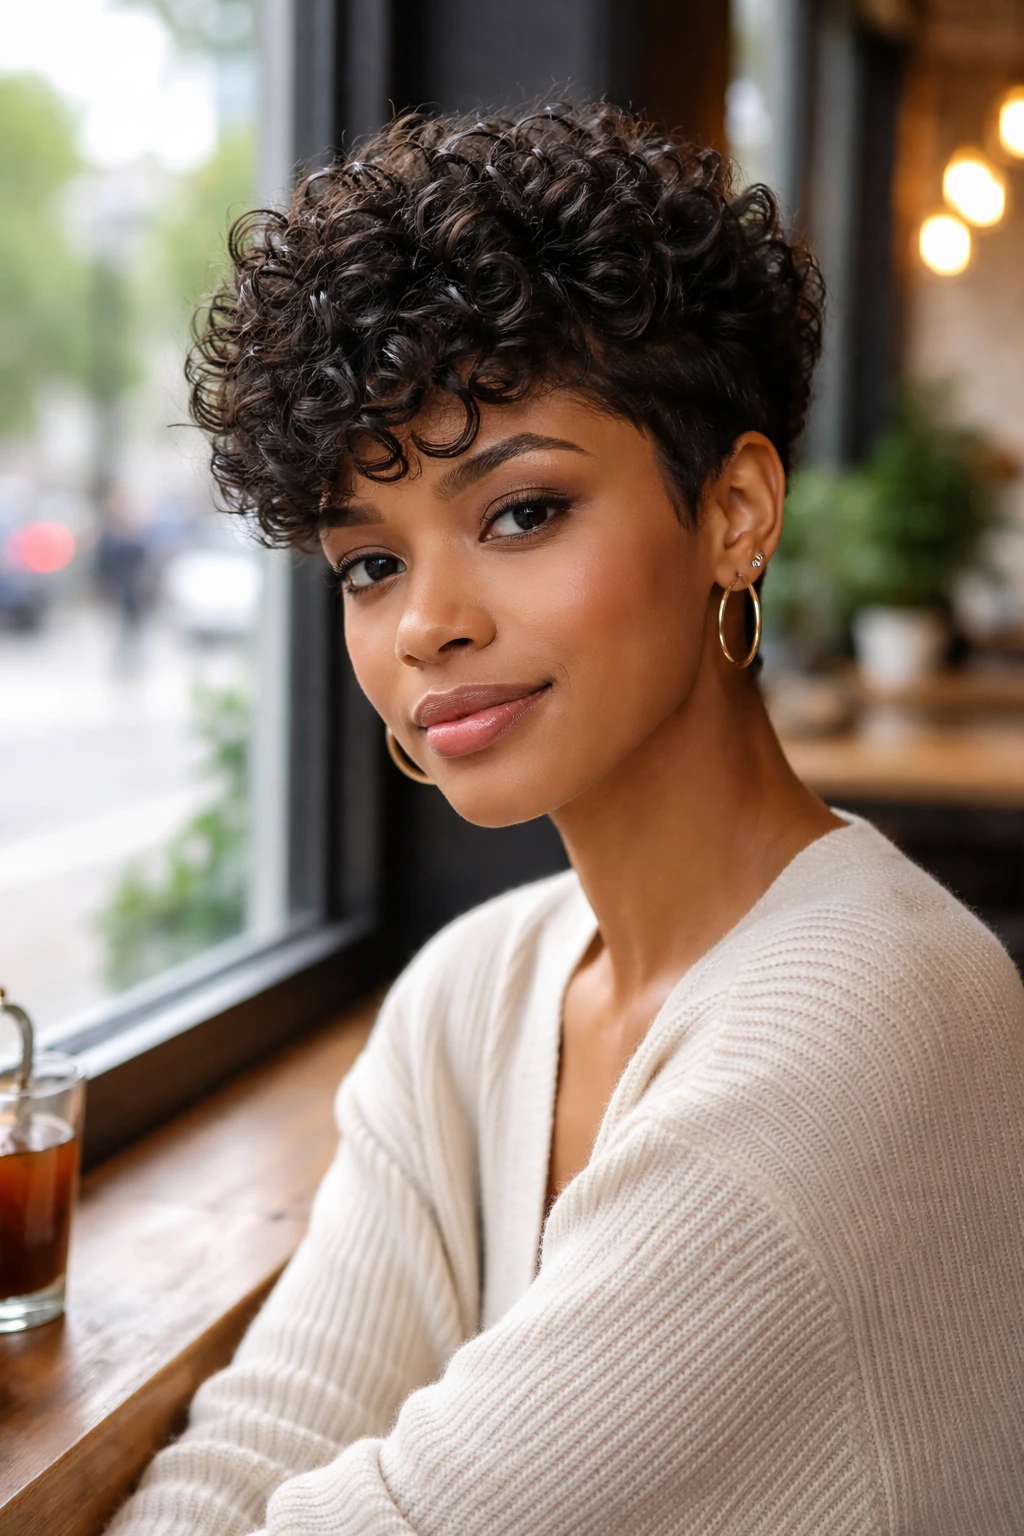
A curly pixie cuts straight through the idea that short hair has to be plain. Leave a little length at the crown, keep the sides tight enough to show the shape, and the result can feel sharp without getting harsh. It is one of the few short cuts that still lets curls have a voice.
What Makes It Work
The crown needs enough length to bend, coil, or flip. If it is too short, the style loses the curly part and turns into a close crop. The nape and sides can stay neat, but the top should have room to move so the texture still reads clearly.
How to Wear It
- Use a light curl cream or foam on damp hair.
- Lift the crown with fingers or a small pick after drying.
- Ask for a soft outline around the ears and neckline.
- Keep the shape trimmed before it starts to lose balance.
A curly pixie is not for someone who wants endless styling options. It is for someone who wants clean shape, real texture, and mornings that do not drag on. That trade feels good when it fits your life.
A good short cut does not hide the curl pattern. It shows it in a cleaner way, and that is often the point.
