



Medium curls for round faces work best when they do one simple job: they pull the eye up and down instead of letting the shape spread side to side. That sounds almost too basic, but it is the whole trick. A curl that lands at the cheekbone can make a face look wider; the same curl, when it falls below the jaw or gets a little height at the crown, changes the whole read of the face.
Round faces usually have soft angles, fuller cheeks, and a jaw that doesn’t interrupt the line much. Curls can either help with that or fight it. The wrong cut gets puffy at the sides and feels boxy fast. The right one gives you movement, lift, and a bit of length without turning the hair into a flat curtain.
There’s also the little matter of shrinkage. Curly hair never lives where you first think it will, and medium length is the sweet spot where that surprise can either look stylish or look like a haircut that shrank on the way home. A dry cut, a smart part, and layers that start in the right place make a big difference.
So here’s the honest version: not every medium curl cut flatters a round face, and that’s fine. The good ones below use shape, direction, and a little asymmetry to make the face look longer without making the hair feel heavy or dated.
1. Shoulder-Grazing Curls with a Deep Side Part
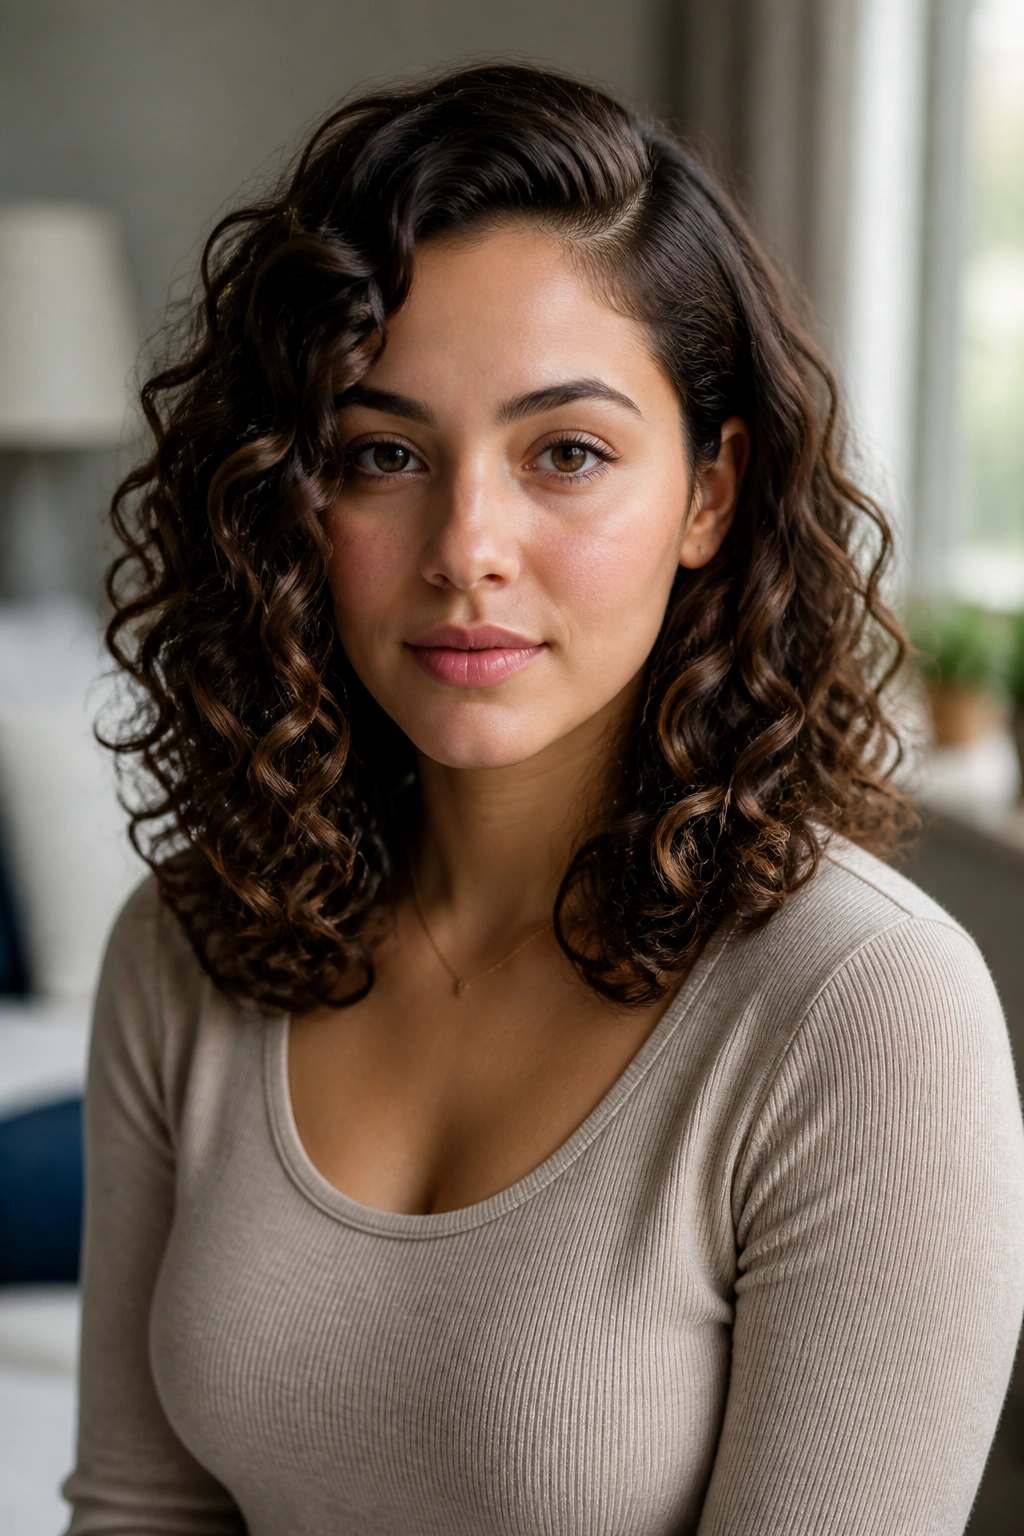
This is the style I reach for first when someone wants easy lengthening without drama. Shoulder-grazing curls sit low enough to move past the widest part of the face, and a deep side part cuts a clean diagonal line that softens fullness at the cheeks.
Why the side part does the heavy lifting
A center section can work, but a side part does more of the visual work here. It shifts volume away from the middle of the face and gives you a little lift on one side, which keeps the style from looking like a round halo.
The cut itself should stay just below the collarbone when the curls are dry. That usually means asking for a shape that’s a little longer in the front and lightly layered through the ends, not a blunt shelf that stops right at the jaw.
- Ask for long layers that begin below the cheekbone
- Keep the front pieces at least 1 to 2 inches longer than the back
- Use a diffuser on low heat for 8 to 12 minutes
- Clip the crown while drying if your roots lie flat
Quick tip: if the part keeps wandering, set it while the hair is damp with a rat-tail comb and one small clip. Sounds fussy. Works fast.
2. Curly Lob with Long, Invisible Layers

A curly lob can be the cleanest answer for a round face because it gives you shape without looking overworked. The best version is never a blunt one. It has soft, long layers that let the curls move instead of stacking up at the sides like a shelf.
The trick is where the longest pieces land. I like them to hit near the collarbone or a touch lower, because that keeps the eye moving down. If the ends stop at the chin, the whole cut can read wider than it is, and nobody wants that.
Invisible layers matter here. You don’t want obvious steps. You want the curl pattern to keep its bounce while the overall outline narrows a little toward the ends. That gives the face a longer line and keeps the style polished without looking stiff.
If you wear your curls loose most days, this is one of the safest cuts to ask for. It looks good air-dried, it behaves under a diffuser, and it does not demand a perfect styling session to work.
3. Face-Framing Curls That Start at the Cheekbones
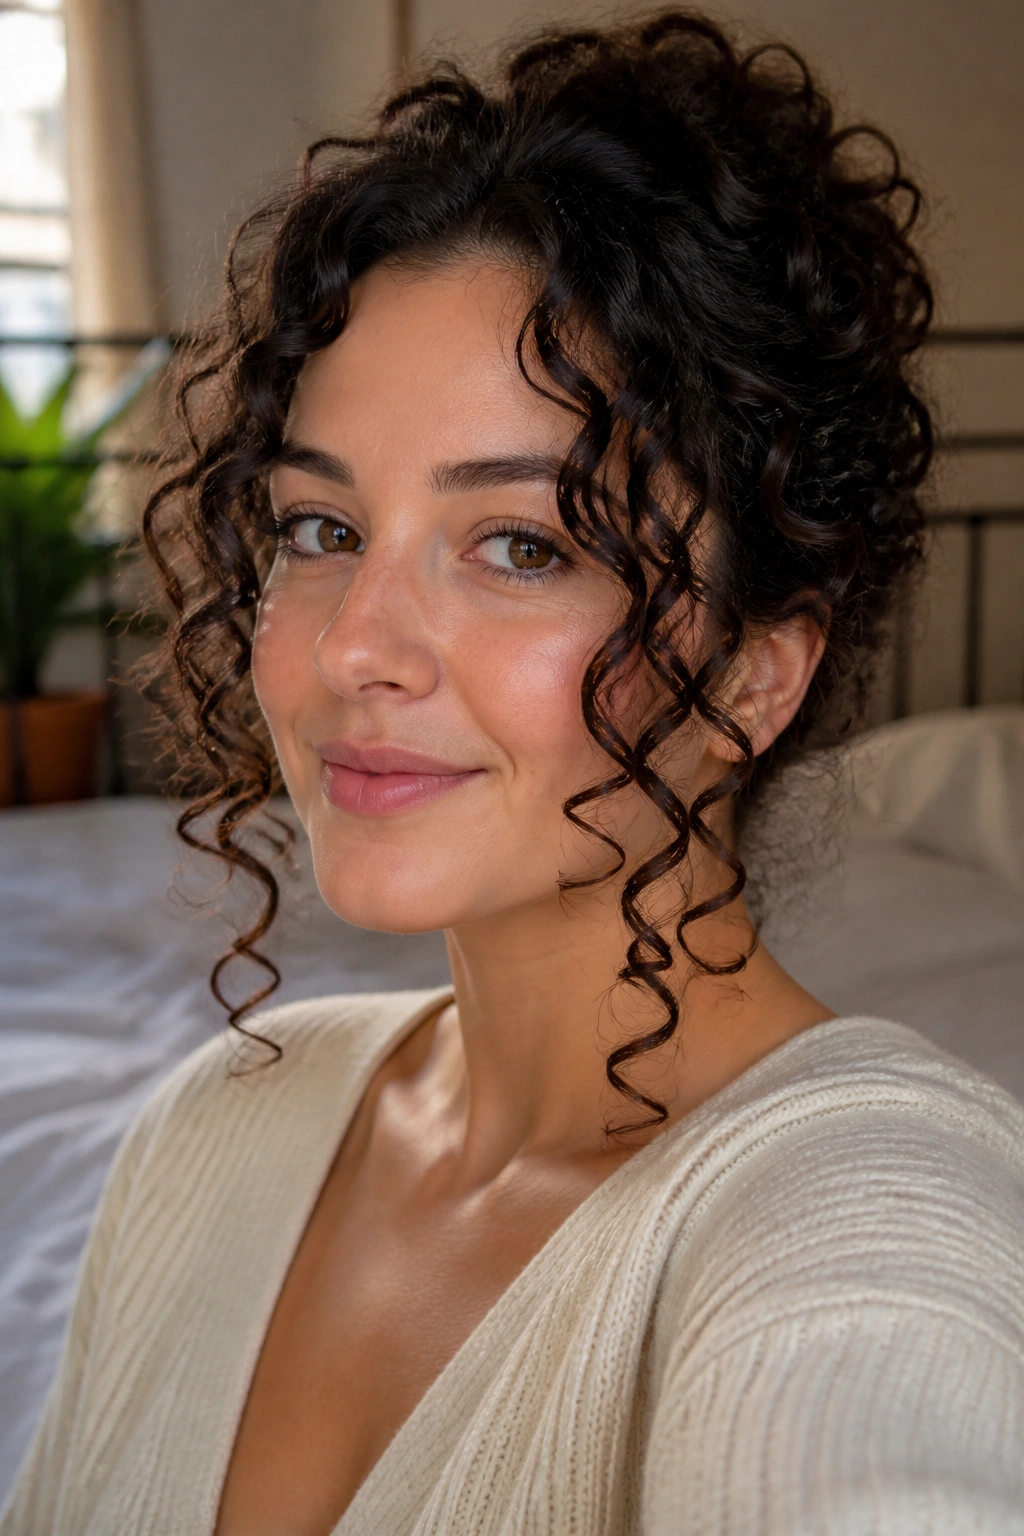
Why do cheekbone-starting layers work so well on round faces? Because they create movement where the face needs it most. Instead of letting the curls flare right beside the cheeks, you start the softest pieces a little lower so the eye sees length first, then fullness.
That small shift changes the whole read of the haircut. The face looks less boxed in. The curls still feel full, but the volume sits in a smarter place.
What to ask for at the salon
- Ask for face-framing pieces that start 1 to 2 inches below the cheekbone
- Keep the longest front curl near the jaw or just below it
- Avoid short side layers that puff out at cheek level
- Ask for the cut to be shaped on dry curls, not just stretched wet hair
This style is especially good if your curls spring tight around the face but loosen farther down. The layers give definition without creating a heavy triangle. And that triangle shape—let’s be honest—is the one thing that can make round faces feel broader than they are.
4. Soft Curly Shag with Airy Curtain Bangs
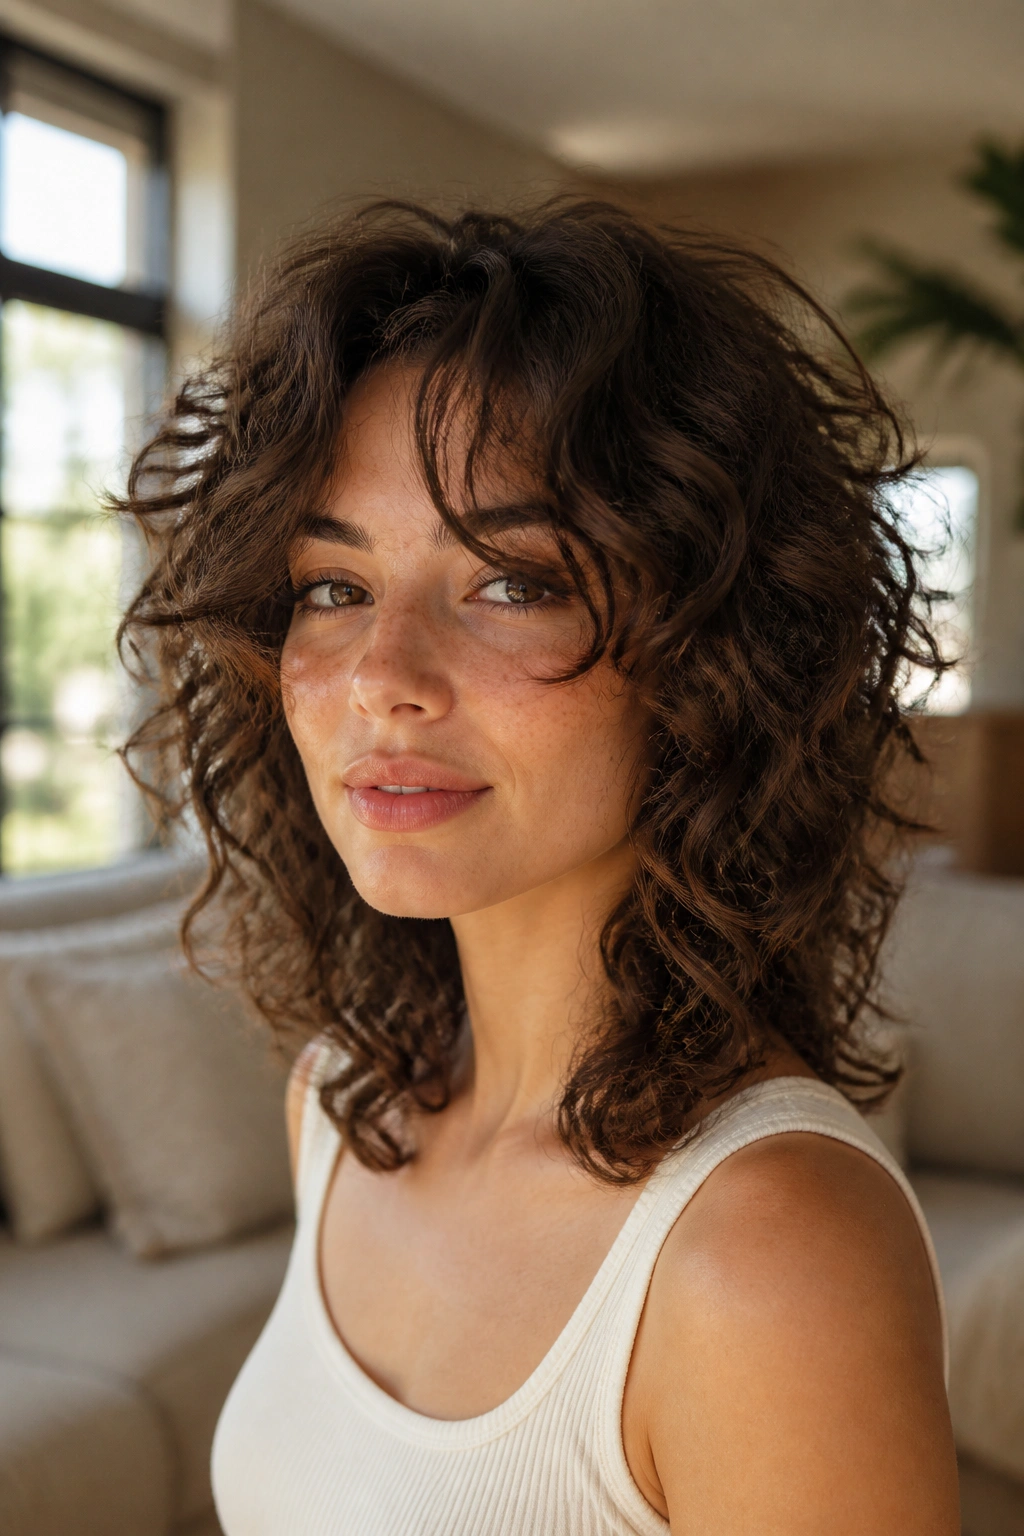
If your curls tend to go big at the sides before they go long, a soft shag can feel like a rescue plan. Not the wild kind. The smarter kind, with loose crown layers and curtain bangs that split away from the middle instead of sitting like a thick block.
What makes it work
The shag takes weight out of the bulk zones. That means the sides do not balloon as much, and the top gets a little lift. For a round face, that’s a useful trade. You give up some length at the crown and get a narrower outline in return.
Curtain bangs help because they open the face without cutting a hard line across it. They should graze the cheekbone and fall into the rest of the cut, not sit like a separate section.
- Keep the bang area soft, not blunt
- Ask for feathered layers through the crown
- Let the longest pieces reach the collarbone
- Style with a light mousse, then scrunch and diffuse
A heavy shag can look messy in a bad way. A soft shag looks lived-in. There’s a difference, and it shows the minute the hair dries.
5. Collarbone Ringlets with a U-Shaped Cut
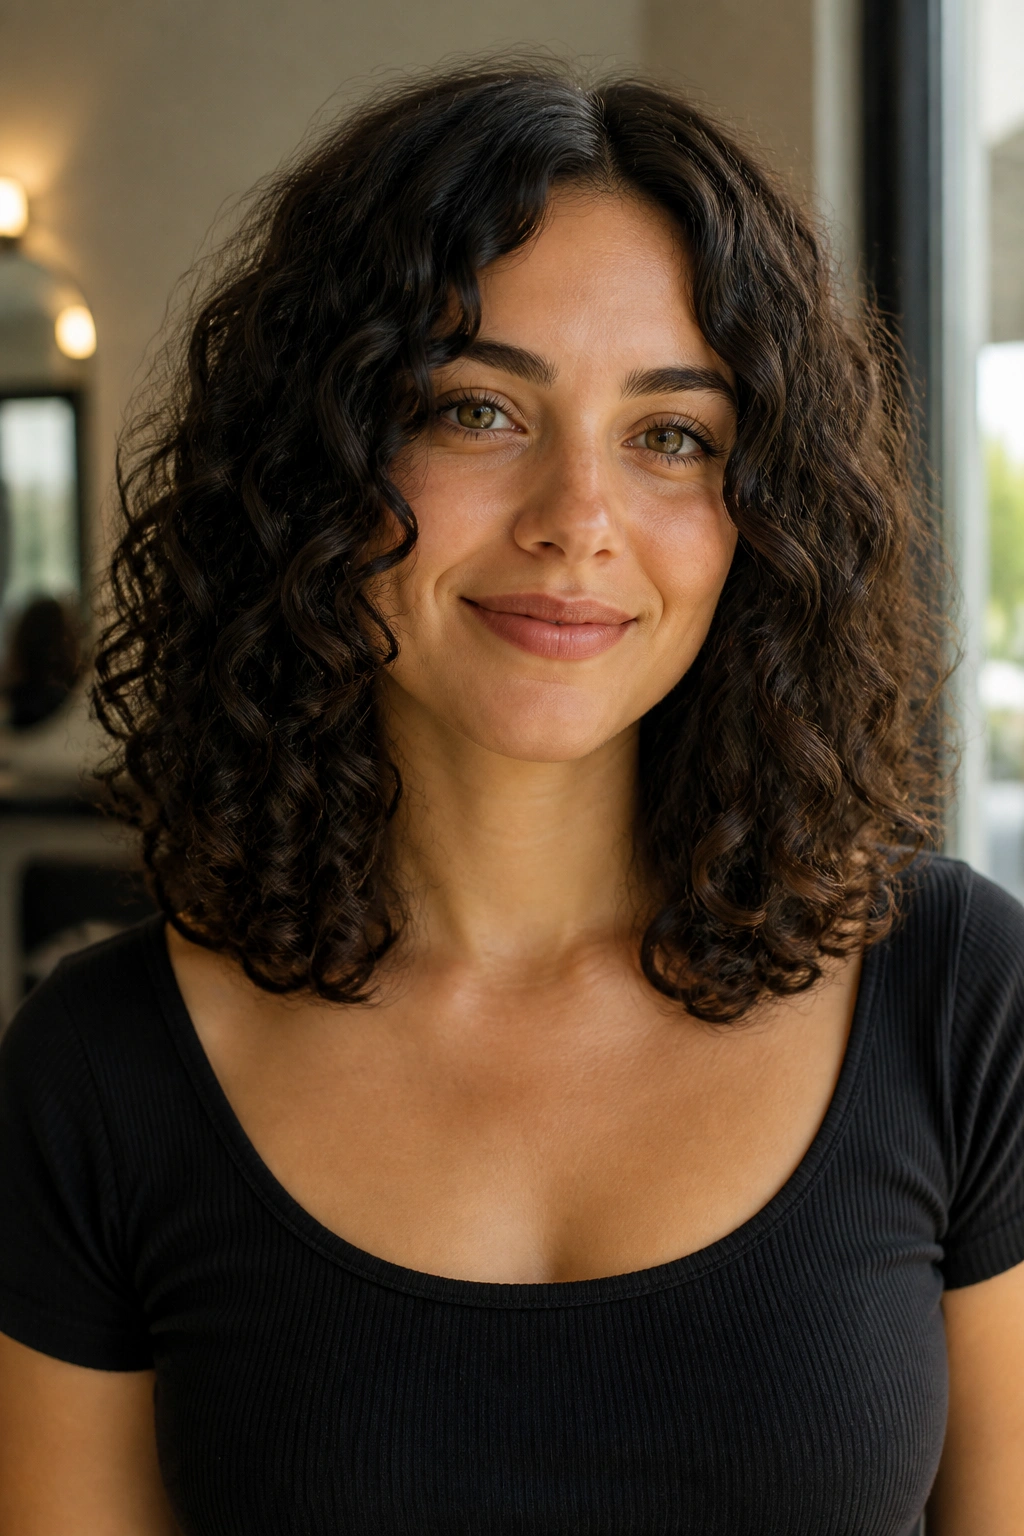
A U-shape is quieter than a shag, but I like it for people who want the face to look longer without a lot of visible layering. The outline dips slightly in the back and stays a little fuller in the front, which gives the curls a long, smooth line.
That line matters. Curly hair can take on a wide shape fast, especially when the bottom is cut straight across. A U-shape breaks that blocky feel and lets the hair fall in a more vertical way.
Shrinkage is the boss here.
If your curls spring up an inch or two after drying, ask the stylist to cut with that in mind. On a round face, you want the dry length to live below the jaw, not flirt with it. The U-shape helps because it keeps the sides from looking heavy while still leaving enough length to frame the face.
I also like this cut for people who want their curls to look soft on day one and still decent on day three. The shape is forgiving. It grows out without turning into a triangle, which is more than I can say for a lot of medium cuts.
6. Asymmetrical Curly Bob That Skims the Jaw
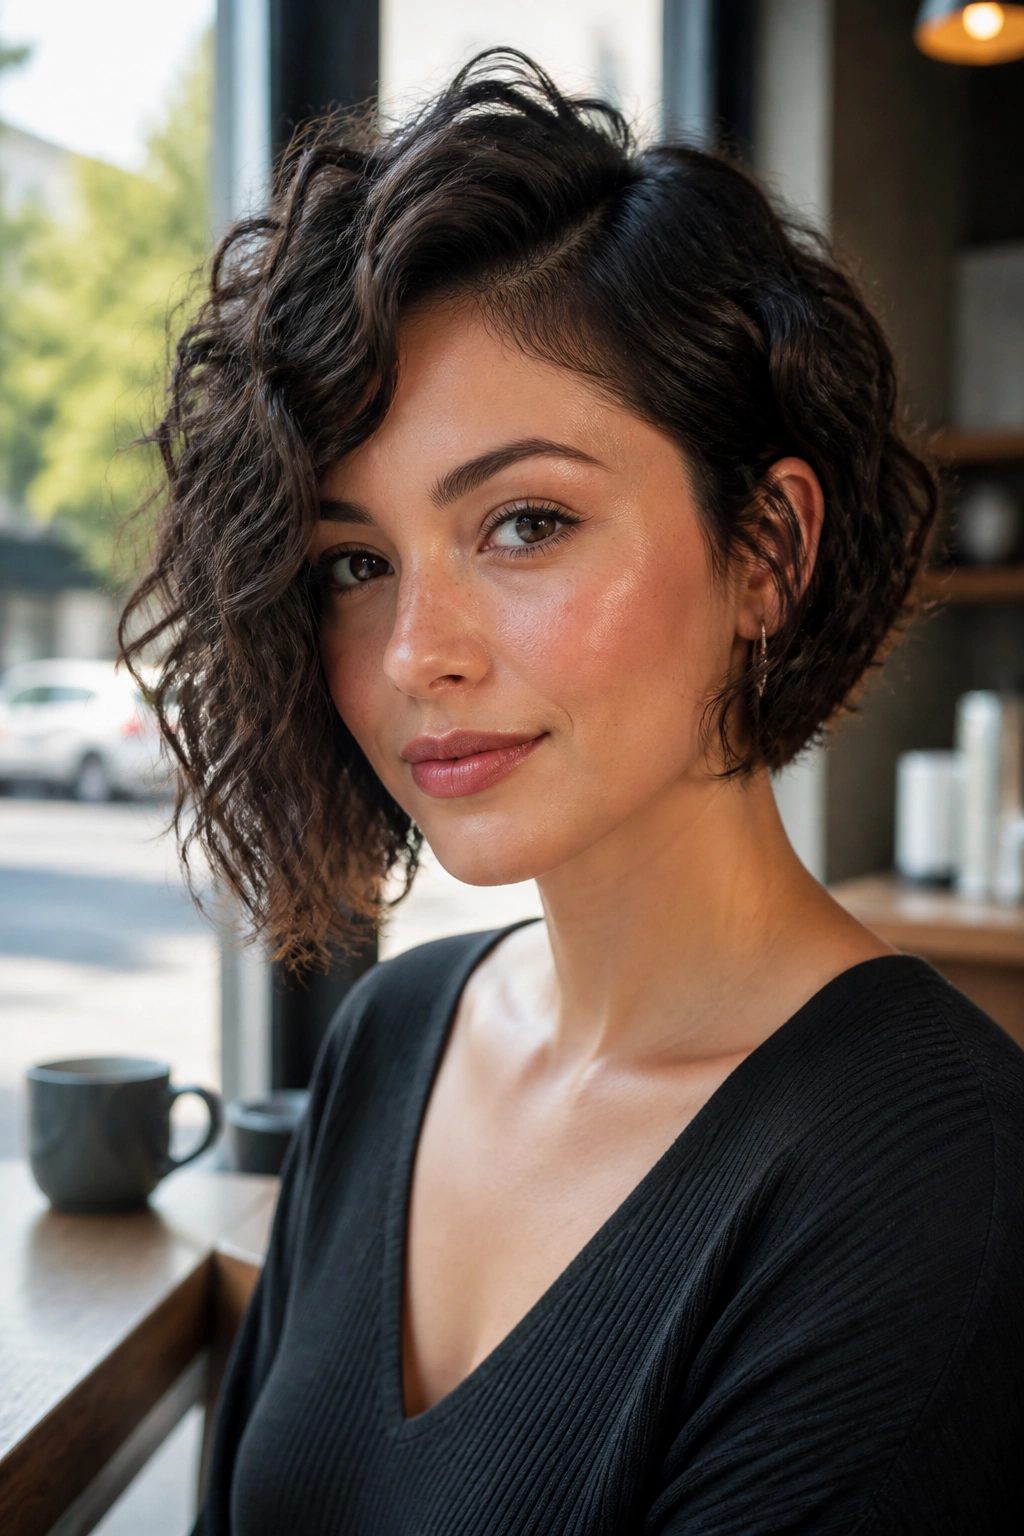
Unlike a blunt bob, an asymmetrical curly bob gives one side a little more length, and that small imbalance is what keeps a round face from feeling boxed in. It’s a smart shape because it adds movement without needing tons of layers or complicated styling.
The shorter side should still stay around the chin, not above it. The longer side can fall closer to the collarbone. That difference doesn’t need to be dramatic. Even an inch or two is enough to stretch the shape visually.
This cut works well when you want structure. It has edge, but not in a hard-edged way. The curls still do the softening, and the asymmetry keeps the whole look from reading too circular.
Best case? One side tucked behind the ear, the other side left loose. That little bit of contrast is the point. It draws the eye down, makes the neck look longer, and gives the curls a place to move instead of sitting in one big puff around the face.
7. Medium Coils with Crown Lift and Tapered Ends
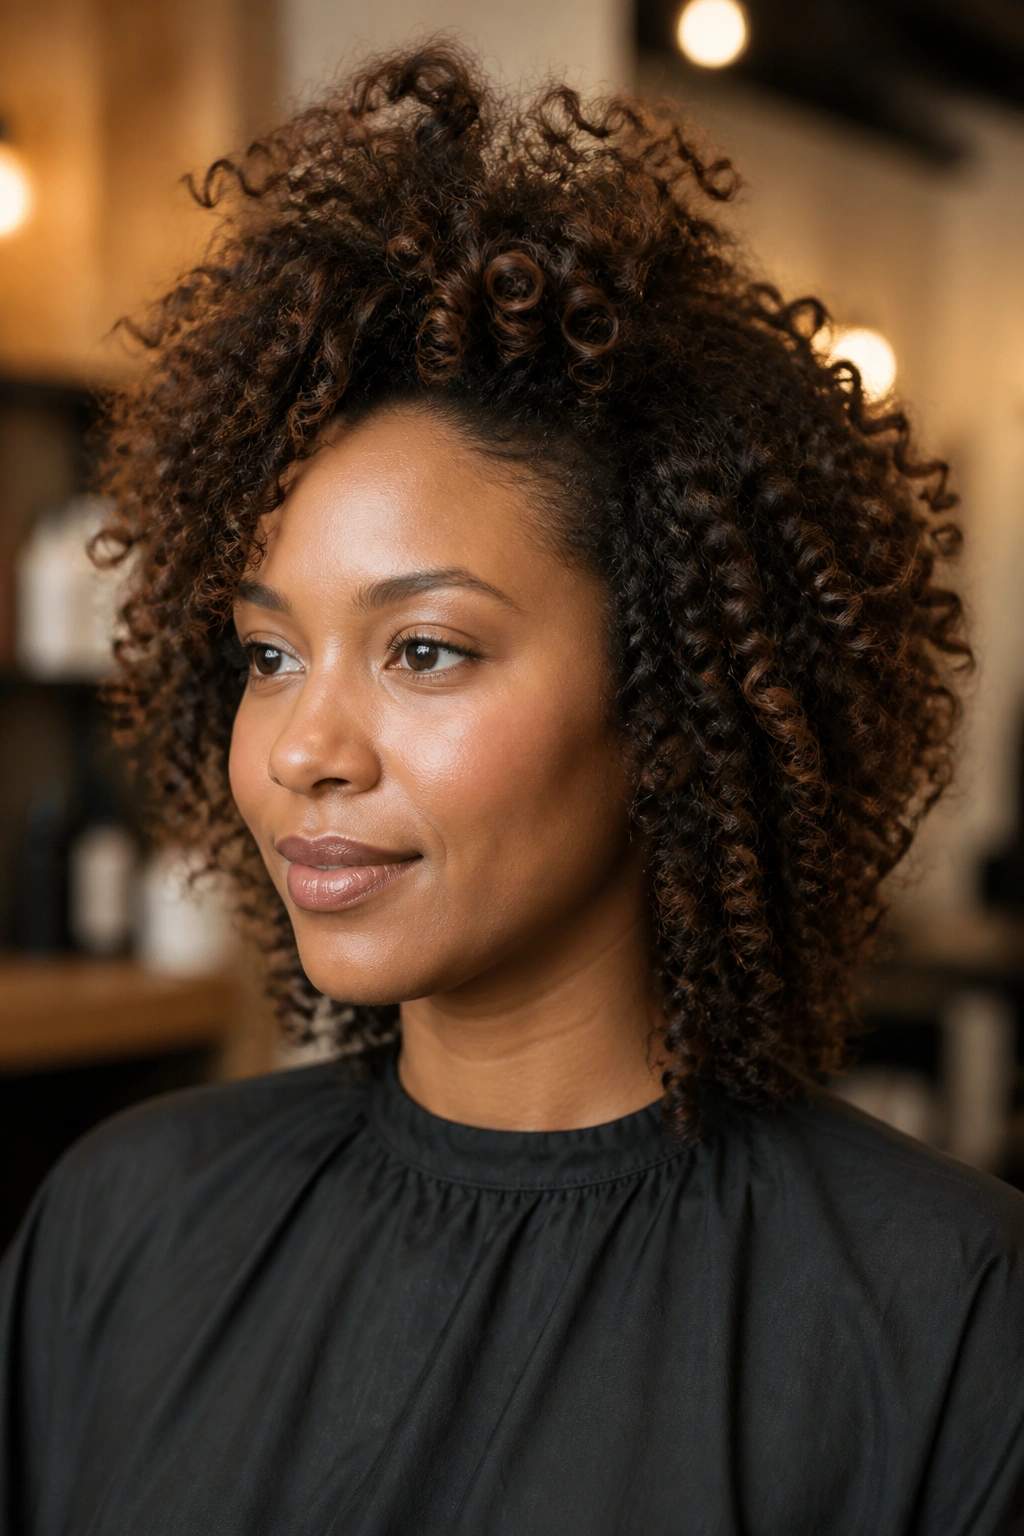
Crown lift changes everything for tighter curls and coils. When the top sits a little higher and the ends are tapered, the face gets more vertical space, which helps a round shape feel less wide.
This is especially useful for 4A, 4B, and 4C textures, where density can build fast near the sides. If the perimeter is too full all the way around, the silhouette goes square before you know it. Tapering the ends keeps the outline cleaner.
Why tapering helps
The bottom of the cut does not need to be razor-thin. It just needs to release some weight so the shape can breathe. A tapered nape, softer sides, and a little extra height at the crown make the whole style feel lighter.
- Keep the crown slightly longer than the sides
- Ask for tapered ends instead of a hard shelf
- Use a pick at the roots after drying, not through the whole curl
- Moisturize well so the shape stays defined, not fluffy
One thing people miss: crown lift is not only about teasing or fluffing. It starts with the cut. If the top has room to sit up, styling becomes easier. If it doesn’t, you end up fighting gravity every single morning.
8. Side-Swept Curly Bangs with Long Layers
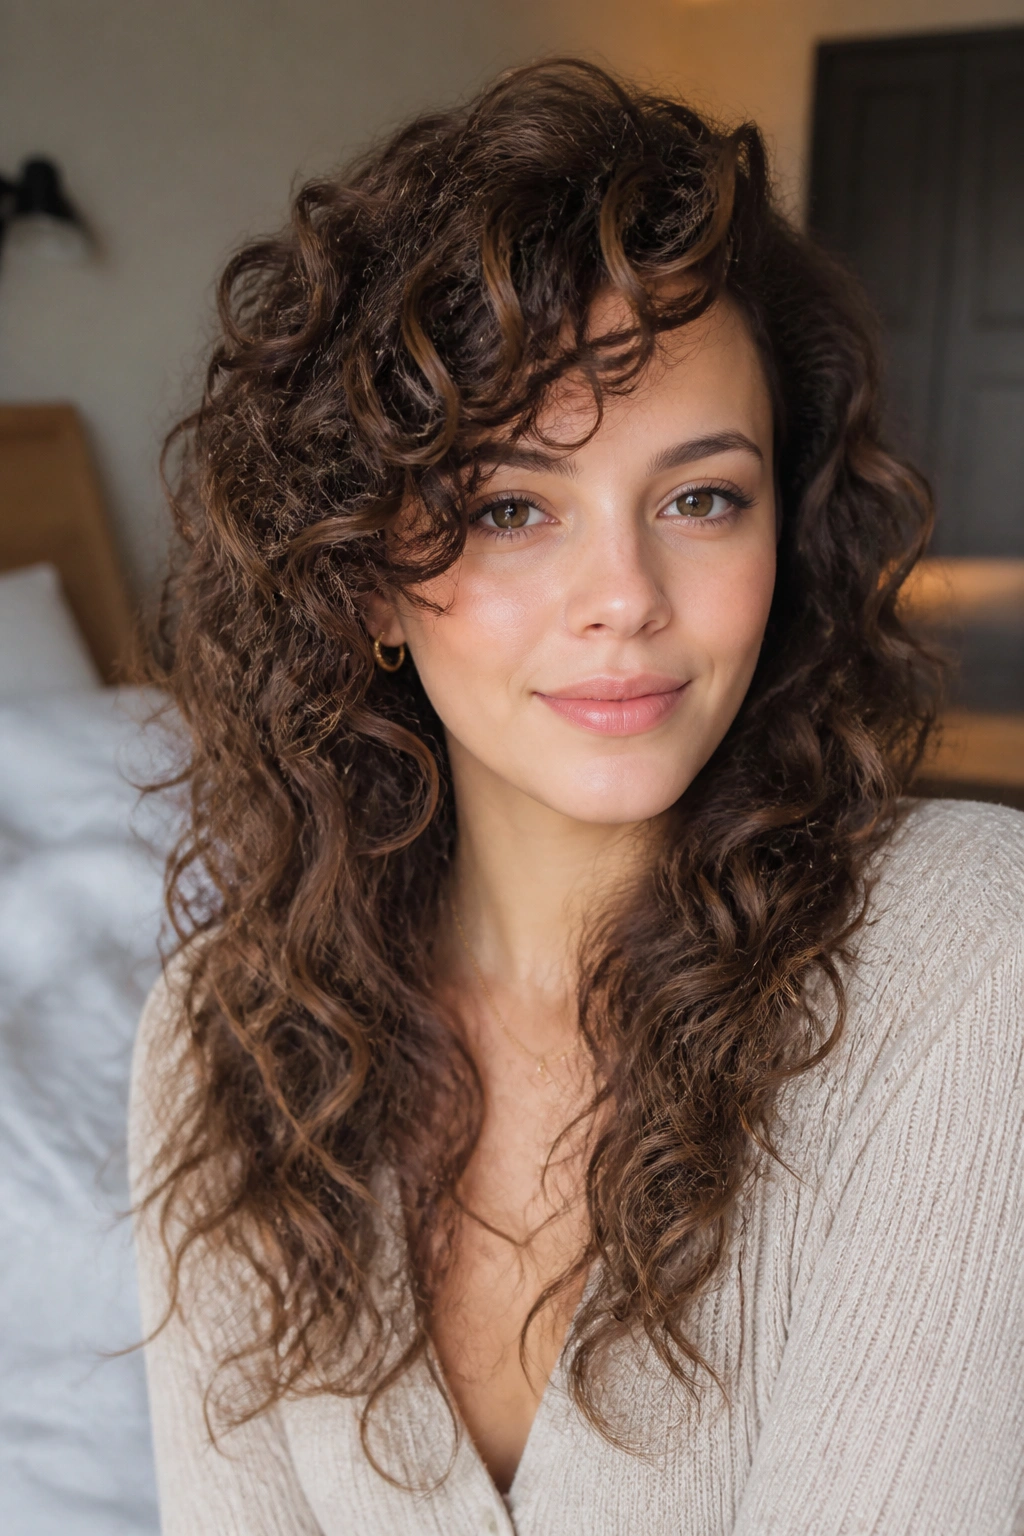
Can bangs work on a round face? Yes, if they sweep instead of stopping straight across. Side-swept curly bangs create a diagonal line, and diagonals are your friend when you want to pull attention away from cheek width.
The bangs should be soft and layered, not thick enough to form a wall. I like them to start near the temple and fall into the longest front curls. That keeps the style from looking chopped off at the forehead.
How to keep them soft
- Dry the bangs with a diffuser pointing down and sideways
- Separate them with your fingers while they’re still damp
- Keep the longest bang piece at or below the cheekbone
- Avoid cutting them too short, because curly bangs bounce up fast
This style has a little attitude, which I like. It also solves a real problem for round faces: it opens the forehead and breaks up the smooth curve of the face shape. That tiny break makes a bigger difference than people expect.
9. The V-Cut for Medium-Length Curls
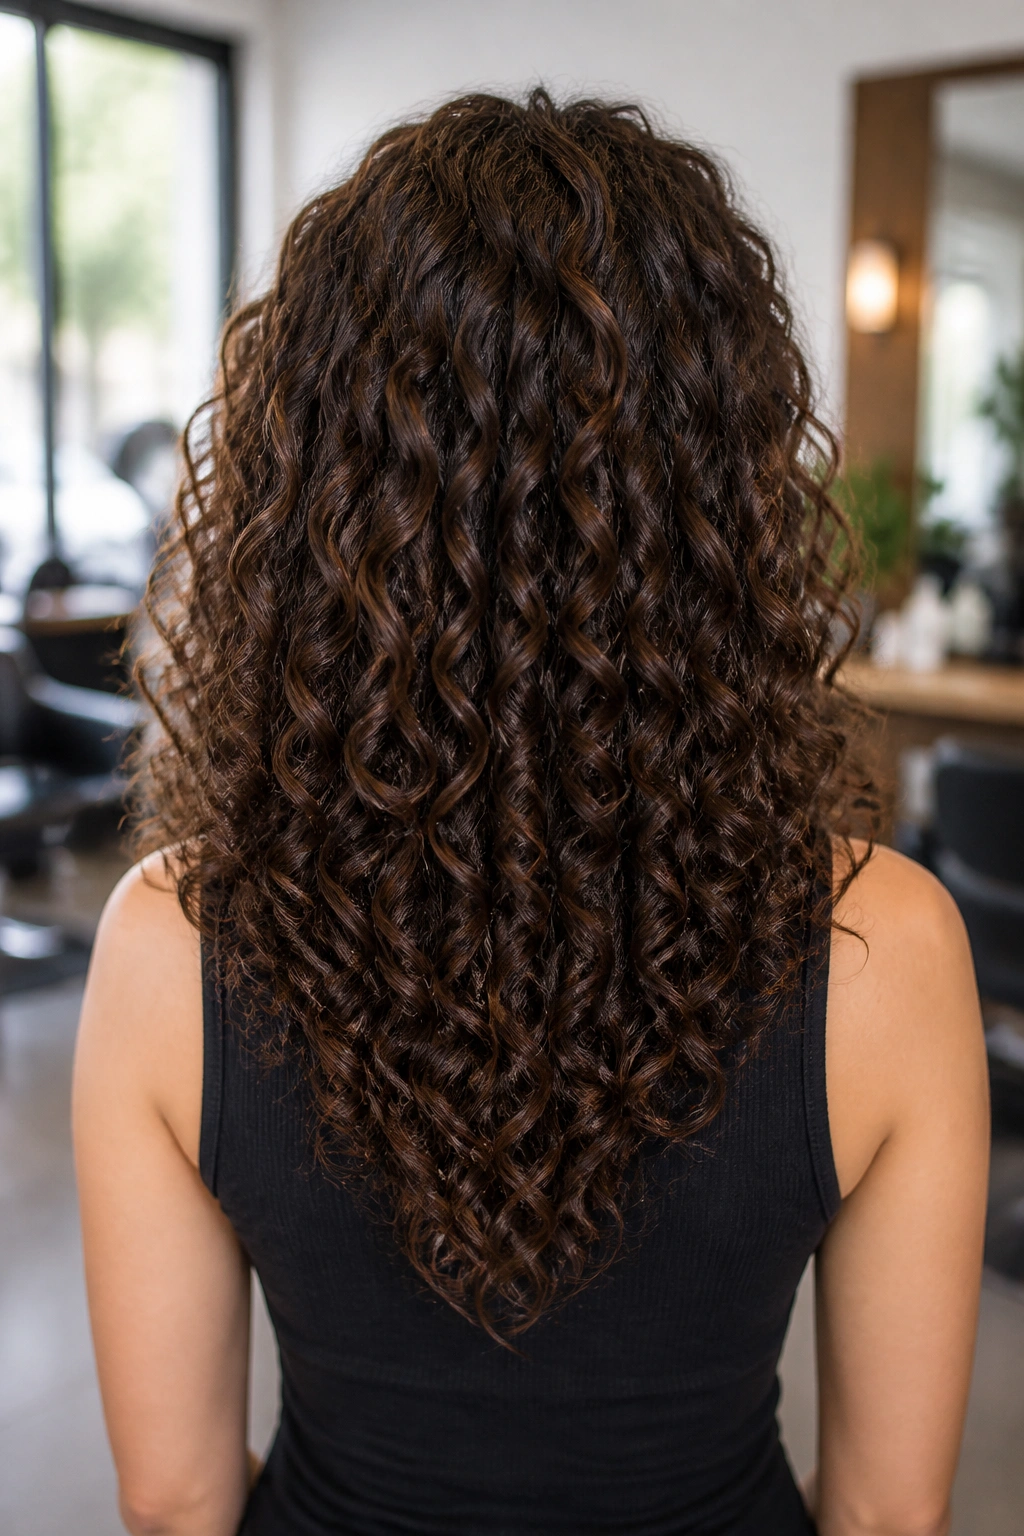
A V-cut sounds subtle on paper, but on curls it changes the way the length falls. Instead of a blunt edge across the bottom, the hair drops a little longer in the center, which gives the whole shape a leaner look.
What makes it different
The sides stay a bit shorter than the middle, so the curls do not all land in the same place around the face. That helps a round face because it builds a downward line instead of a wide horizontal one.
This cut also works well when your hair is thick and tends to sit heavy at the bottom. The V-shape removes some of that weight while keeping the length you want. It’s a nice middle ground if you like visible shape but don’t want the choppier feel of a shag.
For styling, let the center section dry with a little extra definition and keep the side pieces stretched just enough to show the shape. A wide-tooth comb can help in the shower, but don’t overdo the tension. Curls hate being bullied.
If you want the face to look longer without giving up the fullness that makes curly hair fun, this one earns its keep.
10. Medium Wolf Cut with Controlled Volume
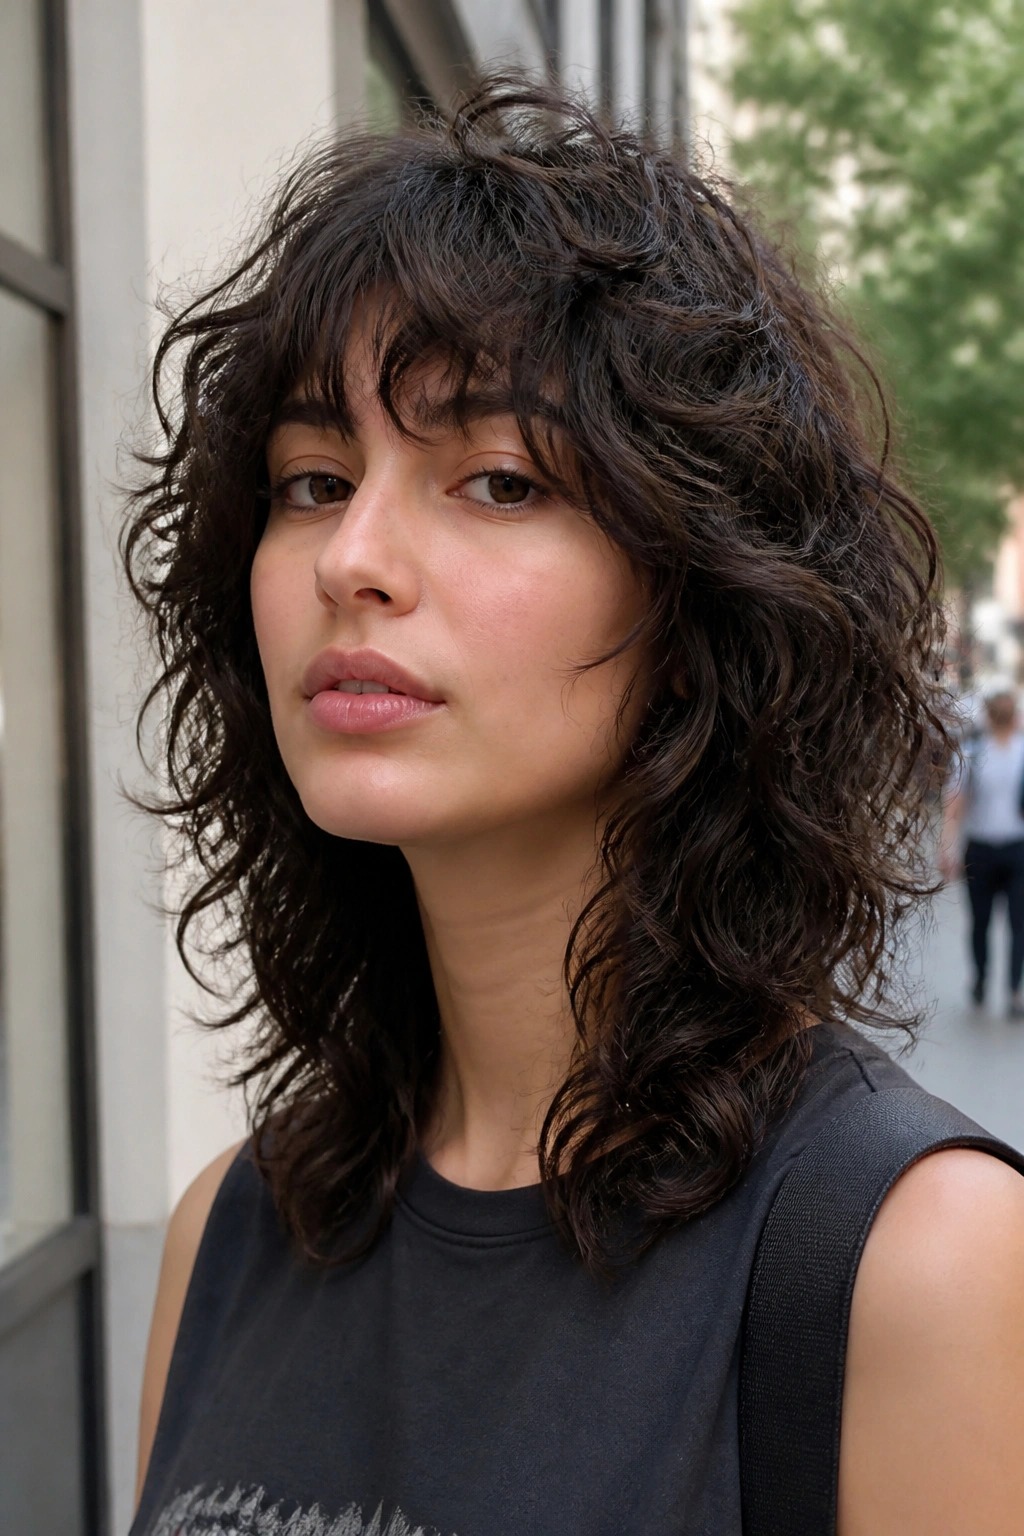
If your curls get bigger at the sides than you want, a wolf cut can help—but only if the crown is controlled. Too much width through the temples and you end up with a mushroom. Nobody asked for that.
The good version keeps the top layers shorter, gives the front a little movement, and leaves the perimeter long enough to keep the face from looking boxed in. It is a sharp cut in the right hands and a mess in the wrong ones, so the execution matters a lot.
What to ask for
- Shorter crown layers with soft blending
- Longer front pieces that fall past the cheek
- A loose fringe, not a heavy bang
- Thinning only where the hair feels bulky, never at random
I like this shape for people who want personality. It has more edge than a lob, more movement than a one-length cut, and enough lift to help a round face without making it look overstyled. The downside is maintenance. You have to keep the layers behaving, or the whole thing loses its line.
Still, when it works, it really works.
11. Defined Wash-and-Go with Clipped Roots
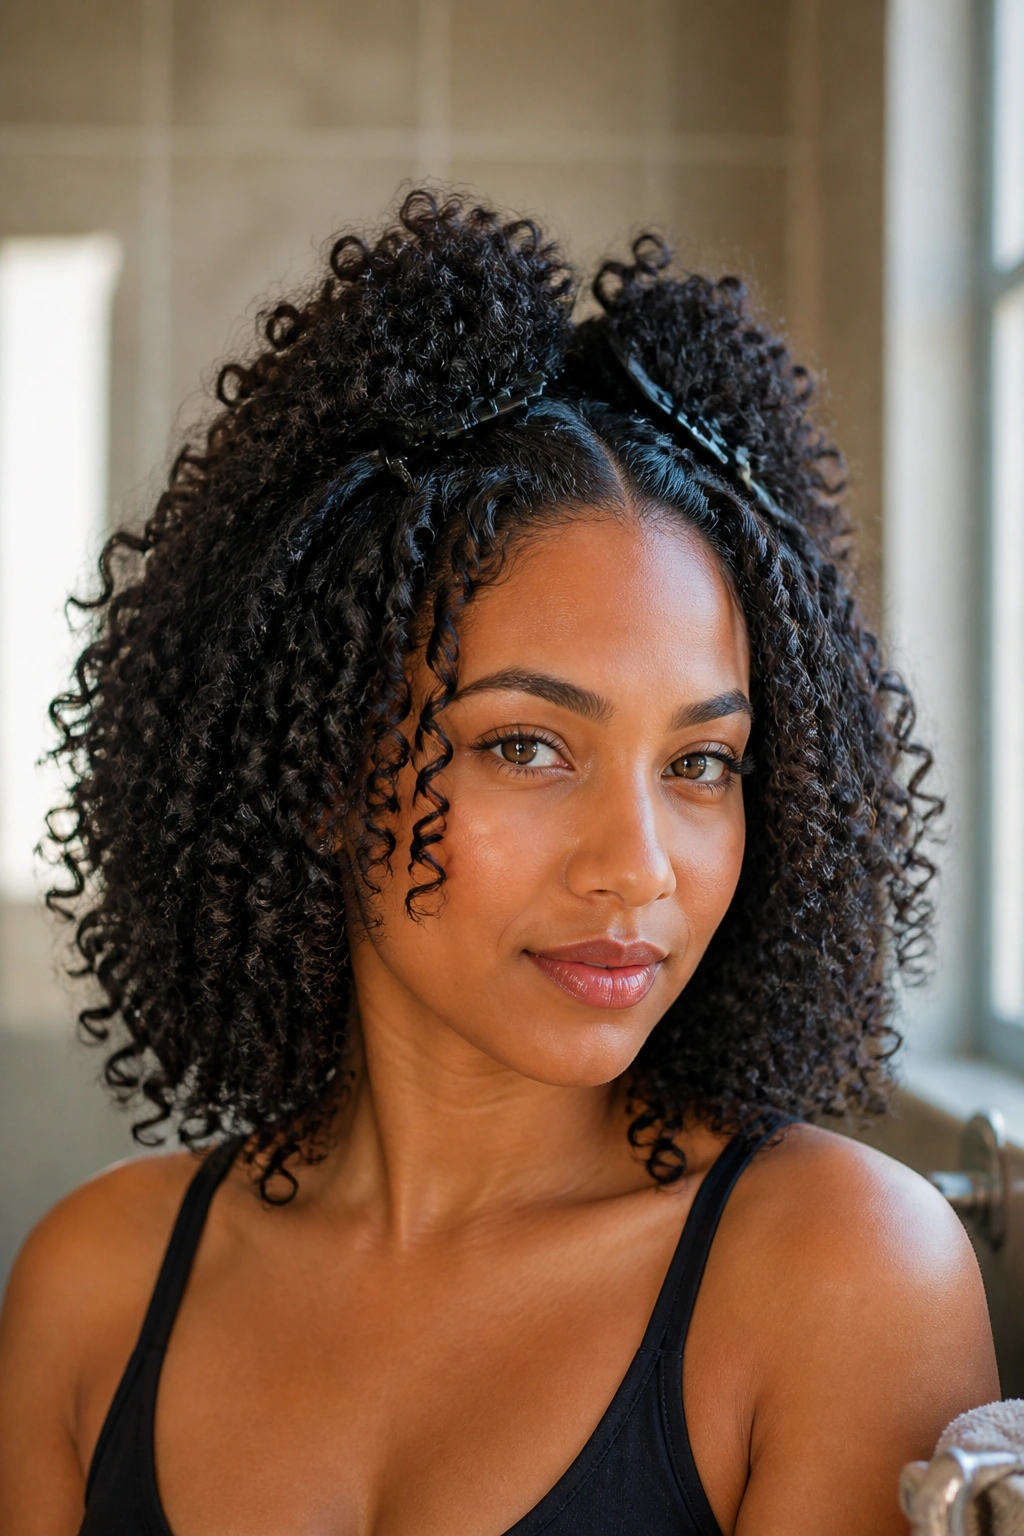
A cut is only half the story. On medium curls, the styling can either sharpen the face shape or flatten it into something wider than it needs to be.
Flat roots widen a face fast.
That’s why a defined wash-and-go with root clipping is such a solid move. While the hair is damp, clip the roots at the crown and along the part, then let the curls dry with some lift built in. It sounds minor. It is not. That extra half-inch of height changes the balance of the whole look.
I like a layered cream-plus-gel routine here: enough slip to define, enough hold to keep the curl pattern from collapsing. Scrunch the product in, clip the roots, diffuse on low, and stop touching the hair once the cast forms. If you keep fluffing it while it dries, the sides spread and the shape gets wider again.
This styling approach is good for round faces because it keeps the volume where you want it—higher up, narrower at the cheeks, and smoother around the jaw. You don’t need a complicated routine. You do need a little discipline.
12. Half-Up Curl Shape with Face-Framing Tendrils
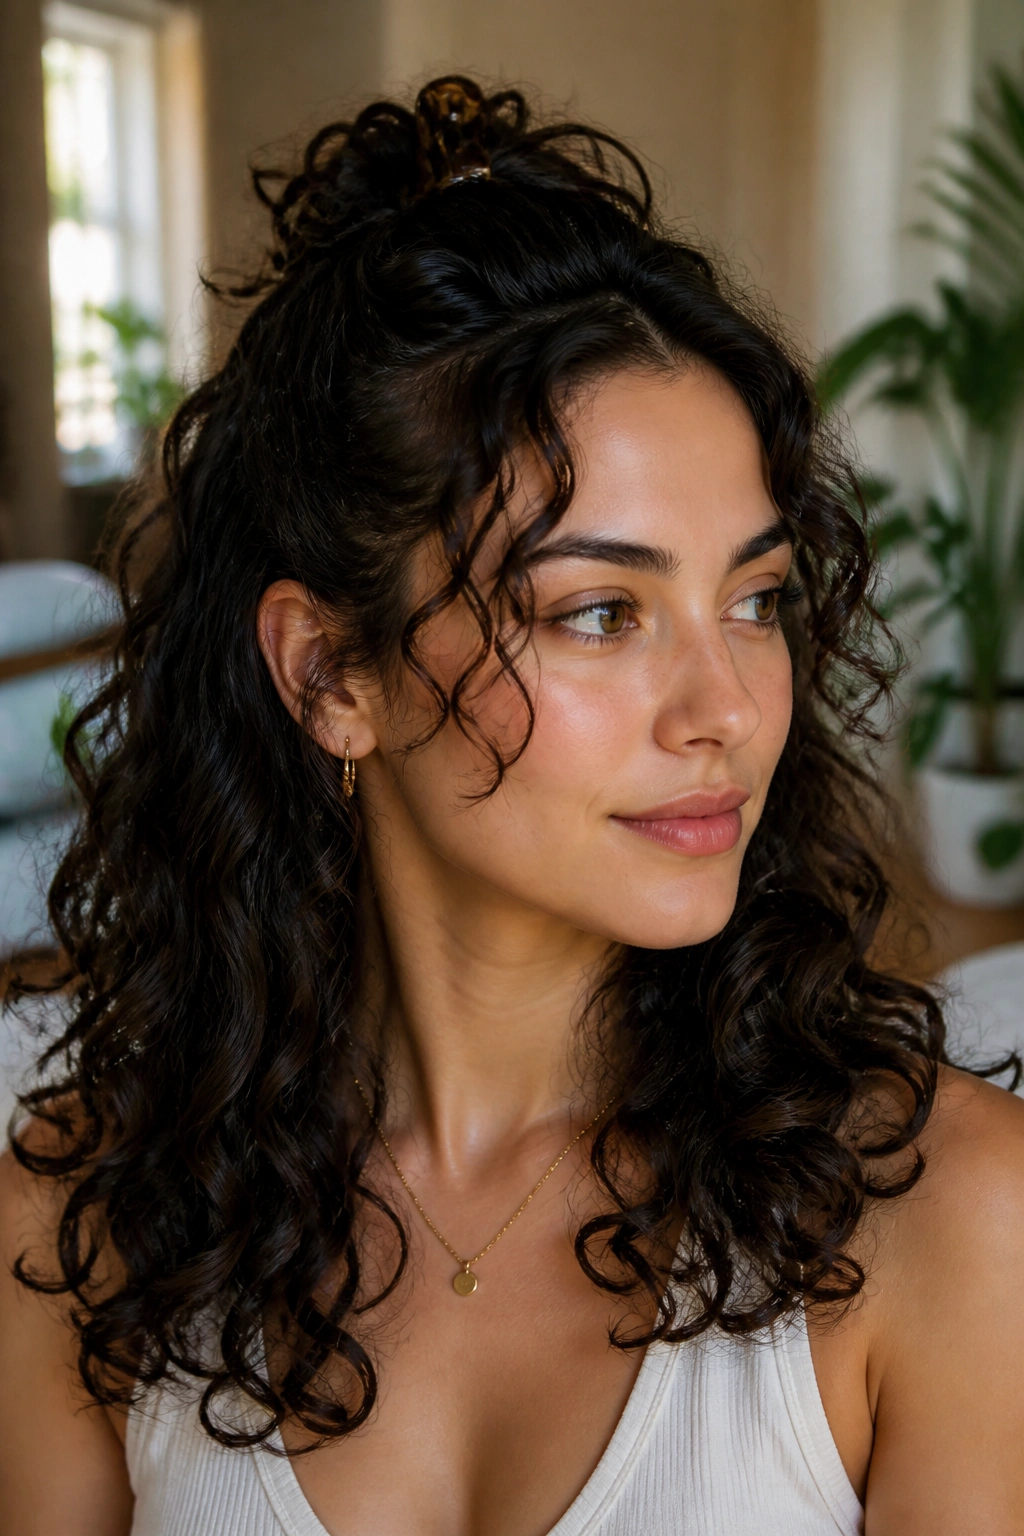
Unlike wearing everything down, a half-up style opens the cheeks and shows more neck, which instantly makes a round face feel a little longer. It’s one of those styles that looks effortless but actually does a lot of quiet work.
The best version leaves out two slim tendrils near the temples and keeps the crown lifted, not pulled tight. If the top is yanked back flat, the face can look wider. If it’s loosened a bit, the whole thing feels softer and more flattering.
How to keep it loose
- Take the top section from temple to temple, not too far back
- Secure it with a clip or soft elastic at the crown
- Leave 1-inch face-framing pieces on each side
- Curl the tendrils away from the face so they open, not close, the cheeks
This is a strong choice for events, but it works on ordinary days too. It keeps hair off the face, shows off the curl pattern, and gives a round face some breathing room. Also, and this matters, it takes about half the time of a full updo.
13. Rounded Afro Shape with Light Layering
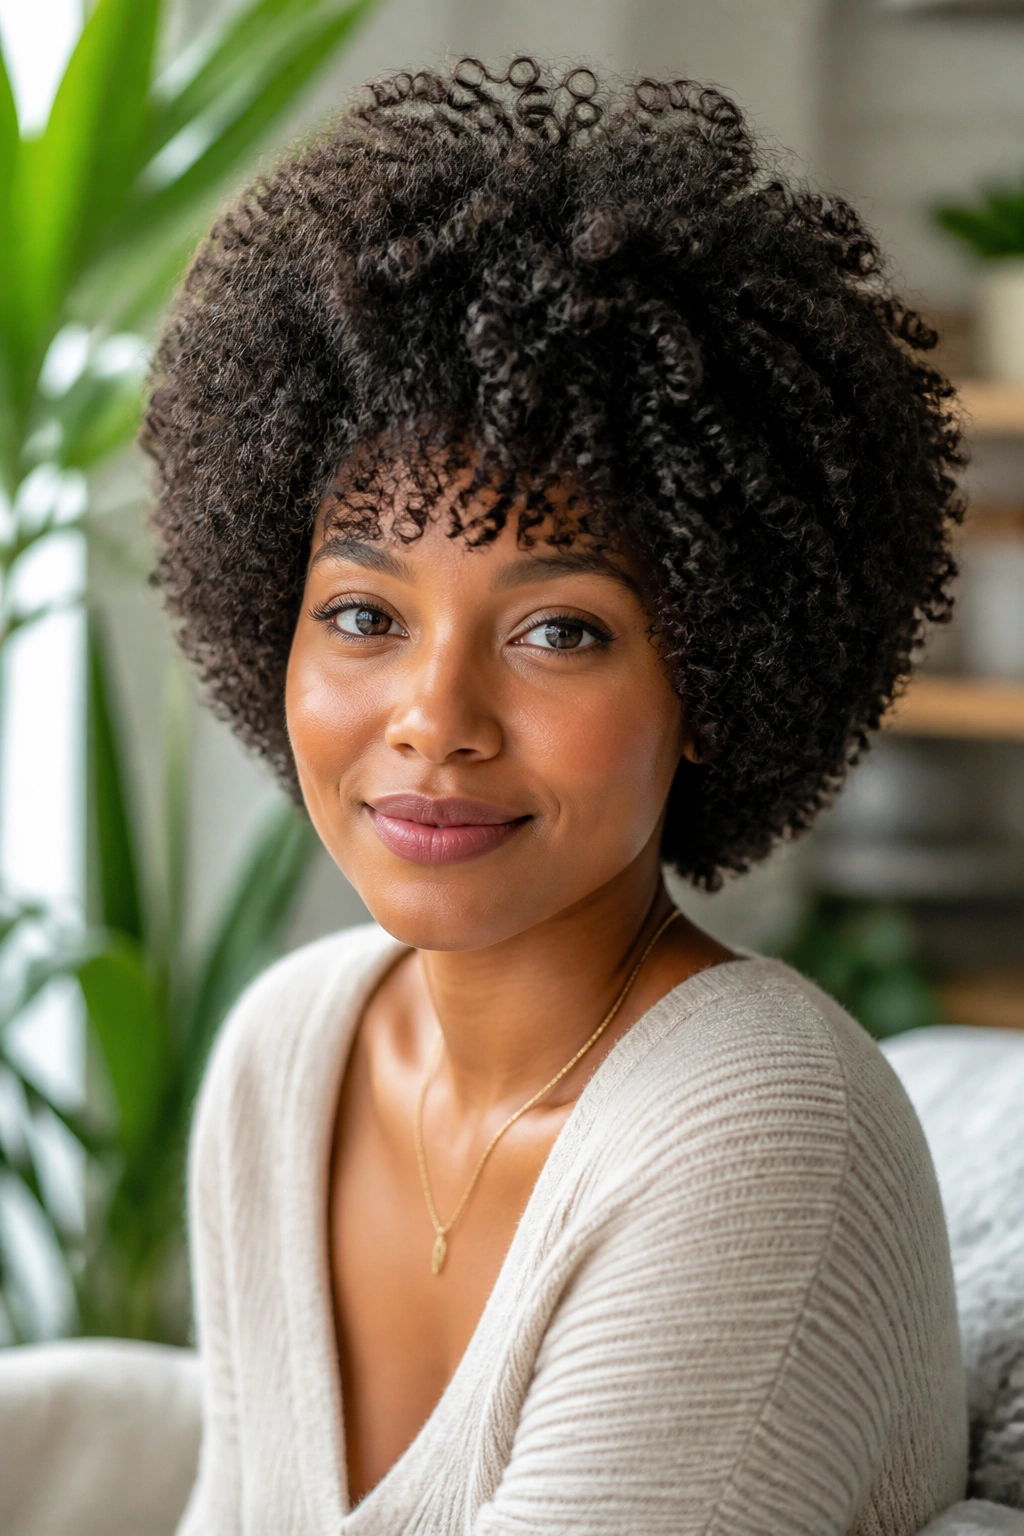
A rounded afro does not have to make a face look wider. If the shape is built with height and soft layering, it can actually bring balance to a round face better than a longer style that hangs too low and too flat.
The trick is to keep the sides shaped, not bulky, and let the top carry a little more height. That gives the eye a vertical path. If the silhouette spreads outward at the cheeks, the face and hair start competing. If the shape lifts upward, they work together.
For tighter coils, moisture matters here more than in almost any other style on this list. Dry curls puff outward and blur the shape. Well-moisturized coils hold a cleaner outline and show the haircut instead of turning into a cloud.
- Ask for light layering around the crown
- Keep the widest point above the cheekbone
- Define the edges near the temples
- Refresh with water and leave-in on day two
I have a soft spot for this one because it does not pretend curls need to be stretched out to be flattering. They don’t. They just need the right shape.
14. Center-Part Curls with Long Vertical Layers
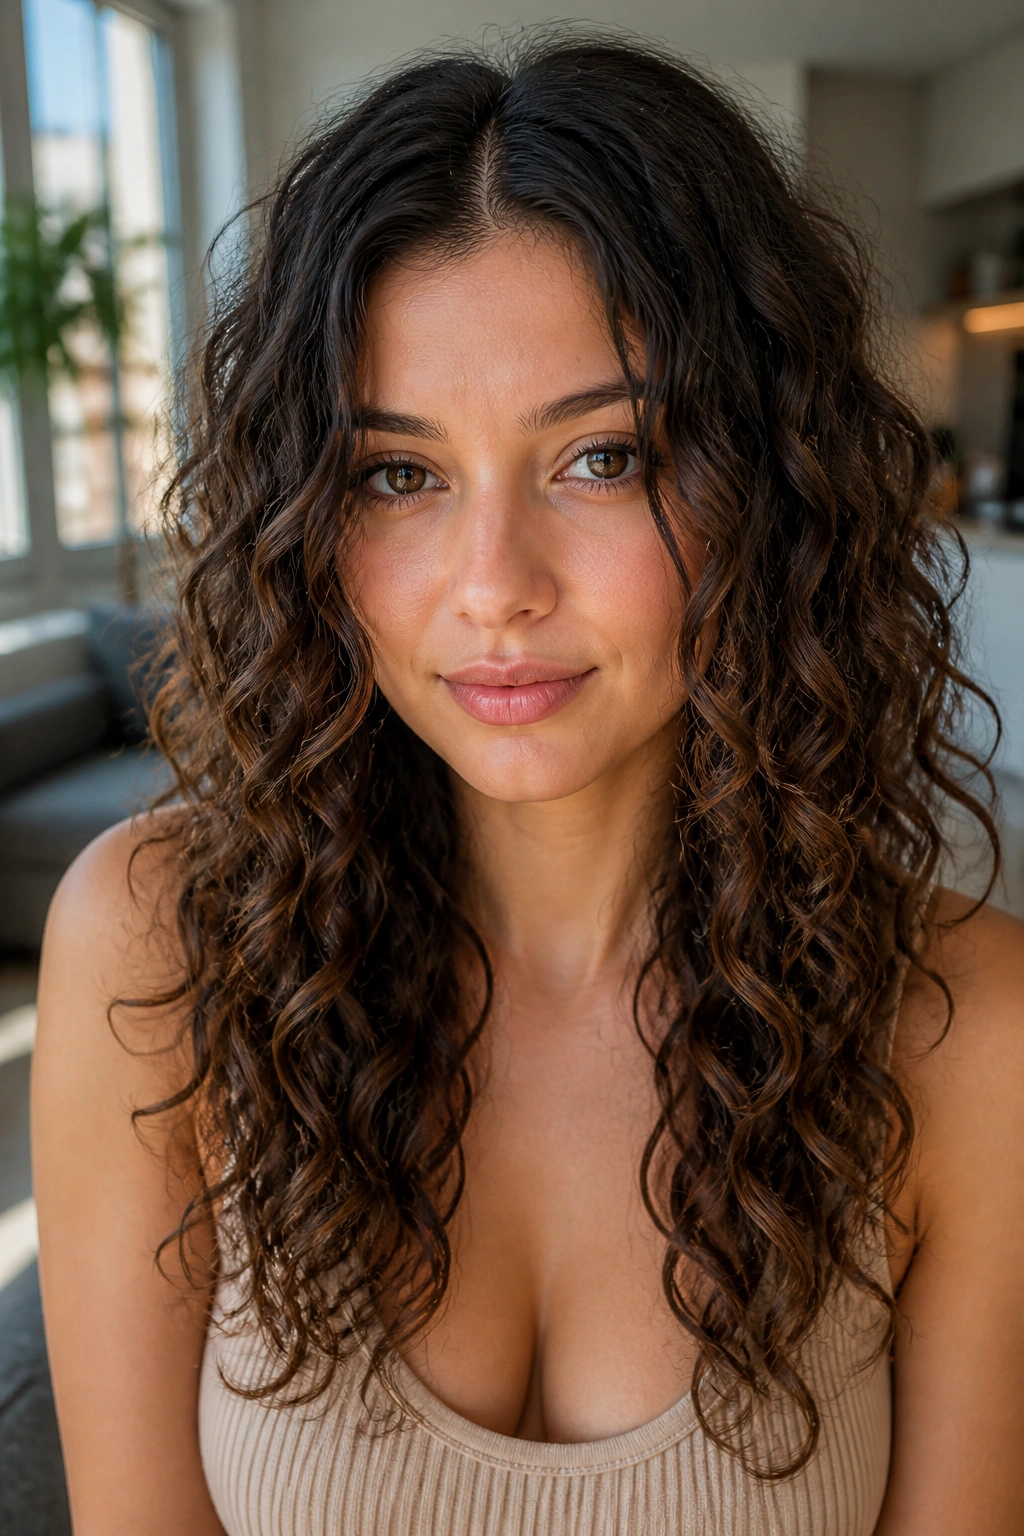
Can a center part flatter a round face? Yes, if the curls are long enough and the layers fall in vertical lines instead of puffing out at the sides. The mistake people make is going center-part plus blunt ends, and that can look too even and too wide.
With the right cut, the center part creates a clean line down the face, while the long layers keep the hair from sitting like two heavy curtains. The longest pieces should hit below the jaw, and the upper layers should be soft enough to move instead of fan out.
Where to build the lift
- Put the biggest volume at the crown, not the cheeks
- Keep side layers longer than you think you need
- Cut the front pieces so they taper toward the collarbone
- Use a diffuser attachment with the hair pointed forward first, then side to side
This is a good option if you like symmetry. It feels calm, neat, and grown-up. The catch is that the shape has to be precise. If the layers are too short, the face looks broader. If they’re long and vertical, the look is clean and flattering.
15. Curly Wolf-Lob with a Tucked Side
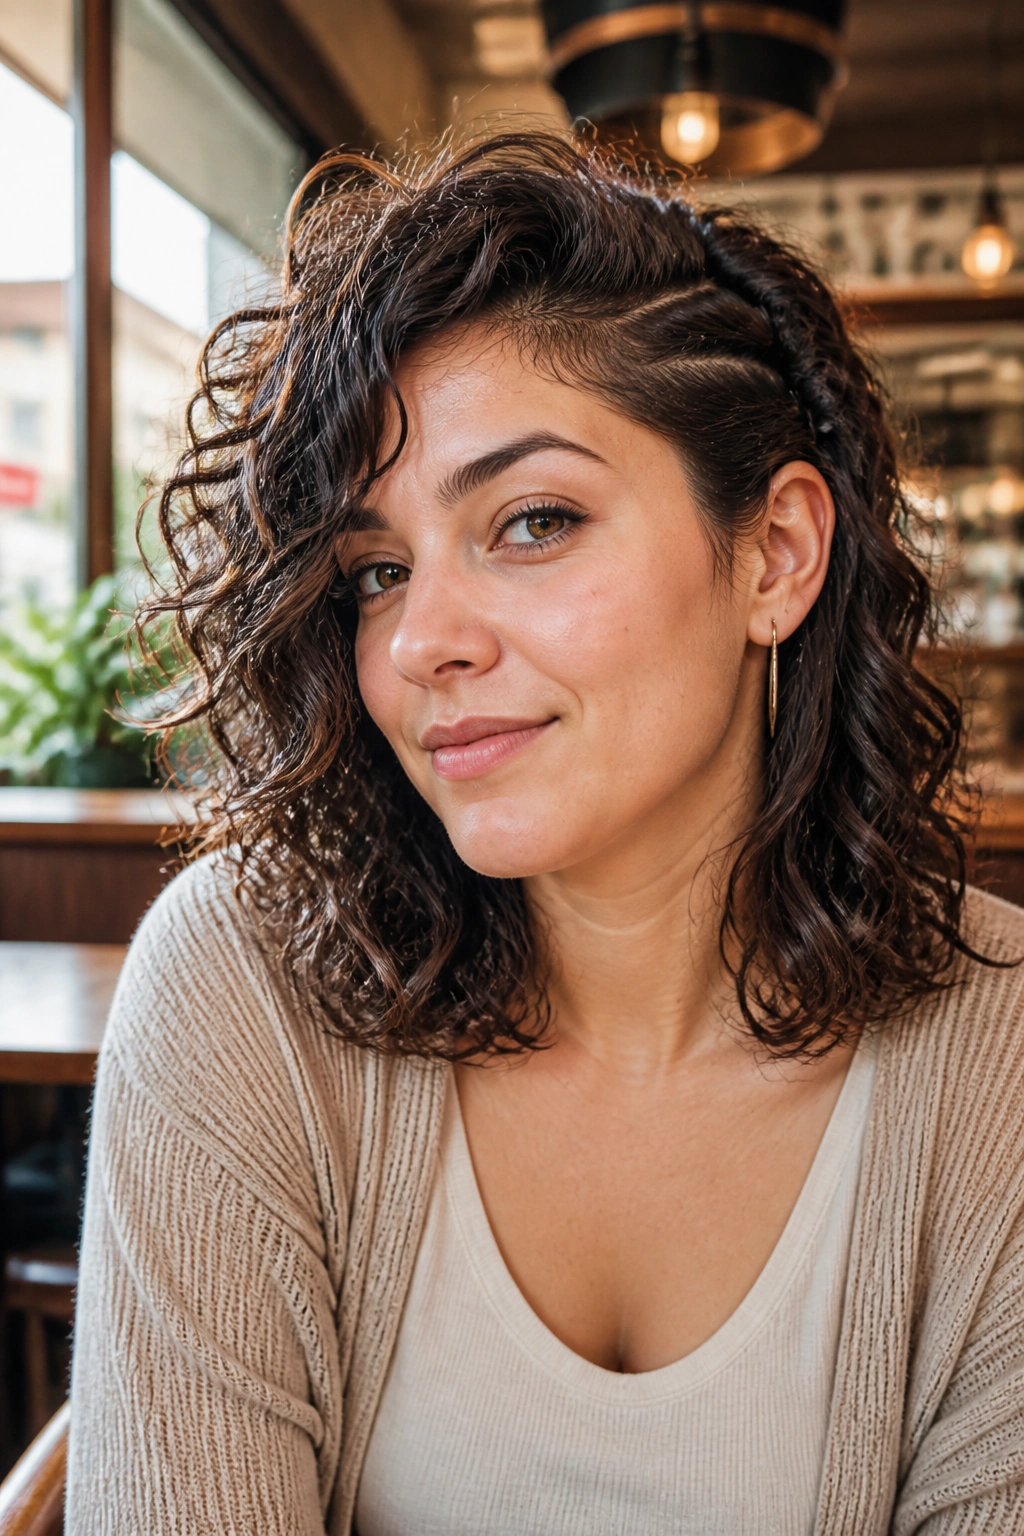
If you want one style that sits between polished and easy, a curly wolf-lob with one tucked side is hard to beat. It has the softness of a lob, the movement of a wolf cut, and just enough asymmetry to keep a round face from reading too wide.
The length should land around the collarbone, with the front pieces a touch longer. That gives you room to tuck one side behind the ear without losing the overall shape. The tucked side opens the cheek; the loose side keeps the curl pattern from feeling too formal.
I like this cut for people who do not want to commit to a heavy shape one way or the other. It has enough edge to feel current, but it still looks good air-dried and on days when styling time is short. If the curls are a little uneven, that actually helps here. The style likes movement.
If you’re choosing just one look to show a stylist, this is the one I’d put near the top of the list. It is forgiving, flattering, and easy to wear without turning every morning into a styling project.
