



A curl can look full in a photo and still fall flat by lunchtime.
That usually isn’t a curl-pattern problem. It’s a shape problem. Too much weight at the roots, a cut that drags everything downward, or a styling routine that coats the hair until it loses air and spring. Voluminous curls need lift where the hair grows out of the scalp, not just shine on the ends.
The tricky part is that curly hair doesn’t all want the same thing. Fine 3A hair can go limp from one heavy cream. Dense 4C hair can hold a huge shape and still look crushed if the sides are pulled tight or the top is left too smooth. The best styles respect that difference instead of forcing every head into the same round silhouette.
The good news: volume is more controllable than people think. A root clip, a side part, the right layer pattern, a careful dry-and-separate routine — those small choices change the whole picture. And when they’re stacked well, the result is hair that looks airy, lifted, and alive, not stiff or teased to death.
1. Root-Lift Wash-and-Go
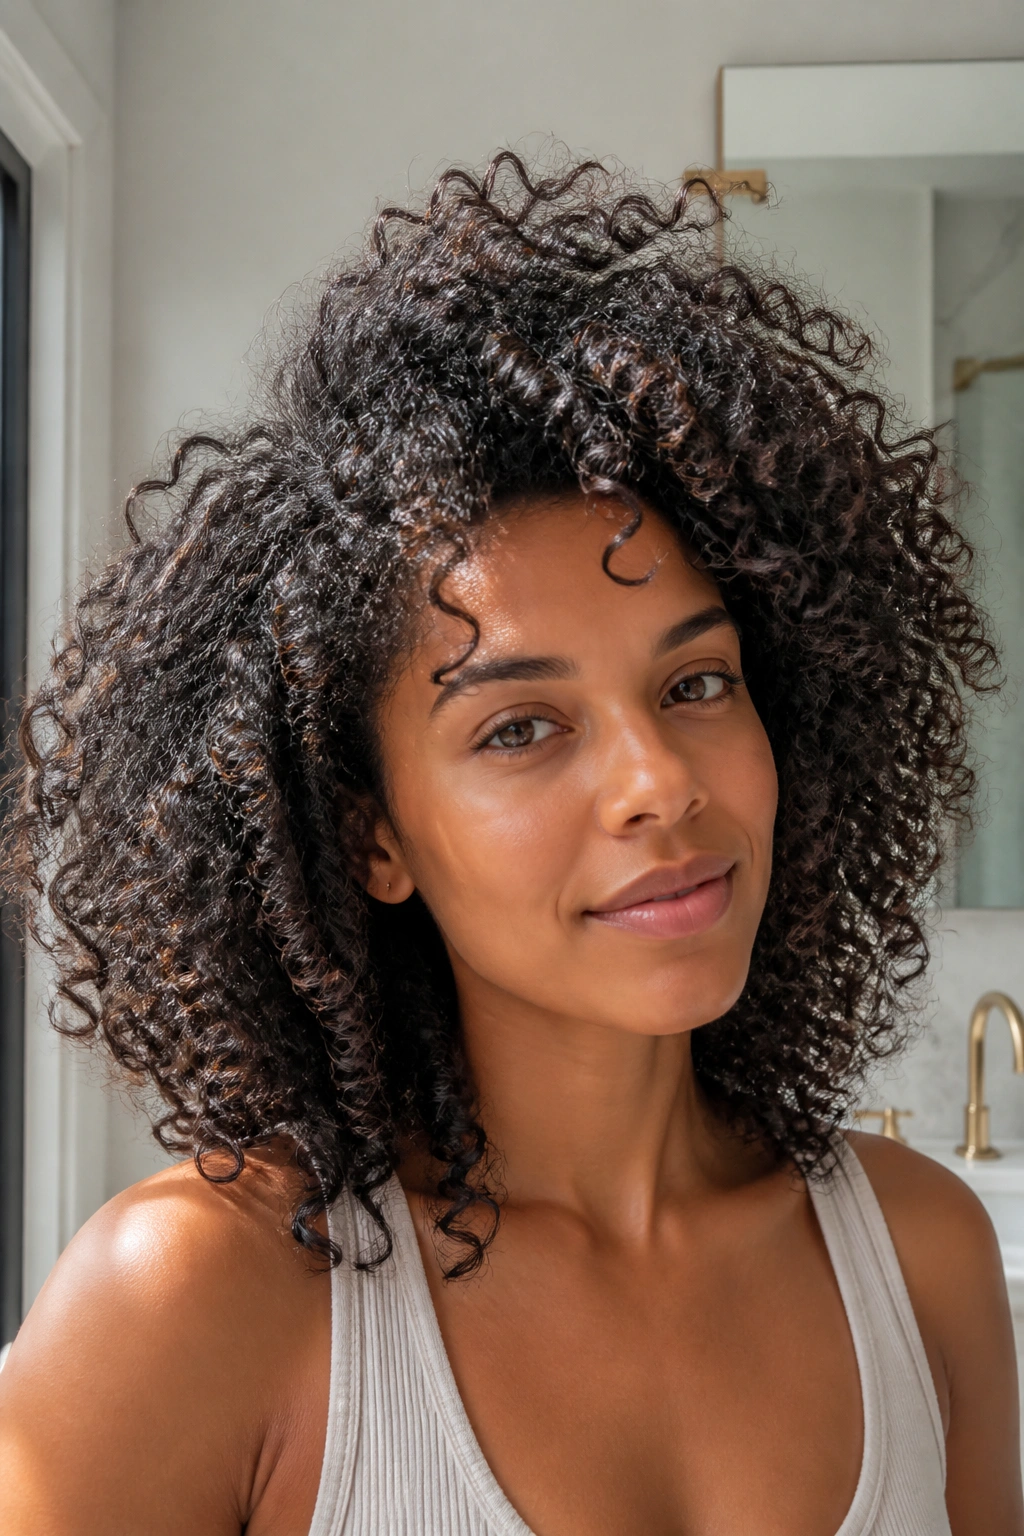
A wash-and-go can still have height. In fact, it’s one of the easiest ways to build voluminous curls without making the hair feel overdressed or overworked.
Why the Root Matters Most
If the root lies flat, the whole style reads smaller. That is the part most people miss. They spend time defining the curl itself, then wonder why the shape looks compact once the hair dries.
The fix is simple, but a little fussy in the best way: apply your styler on soaking-wet hair, keep the product light at the scalp, and set the roots while they’re drying. Root clips at the crown help a lot. So does diffusing with your head tilted, then flipping the hair side to side so the crown never dries in one pressed-down position.
A Few Details That Change Everything
- Use a light leave-in or lotion under a mousse or foam.
- Keep heavy creams away from the first 2 inches near the scalp.
- Clip 4 to 6 small sections at the crown while the hair is damp.
- Diffuse on low heat until the cast sets and the roots feel mostly dry.
- Shake the roots gently with your fingers once the hair cools.
Skip the urge to touch the curls too soon. That’s how you collapse the lift you just built.
2. Deep Side-Part Cloud Curls
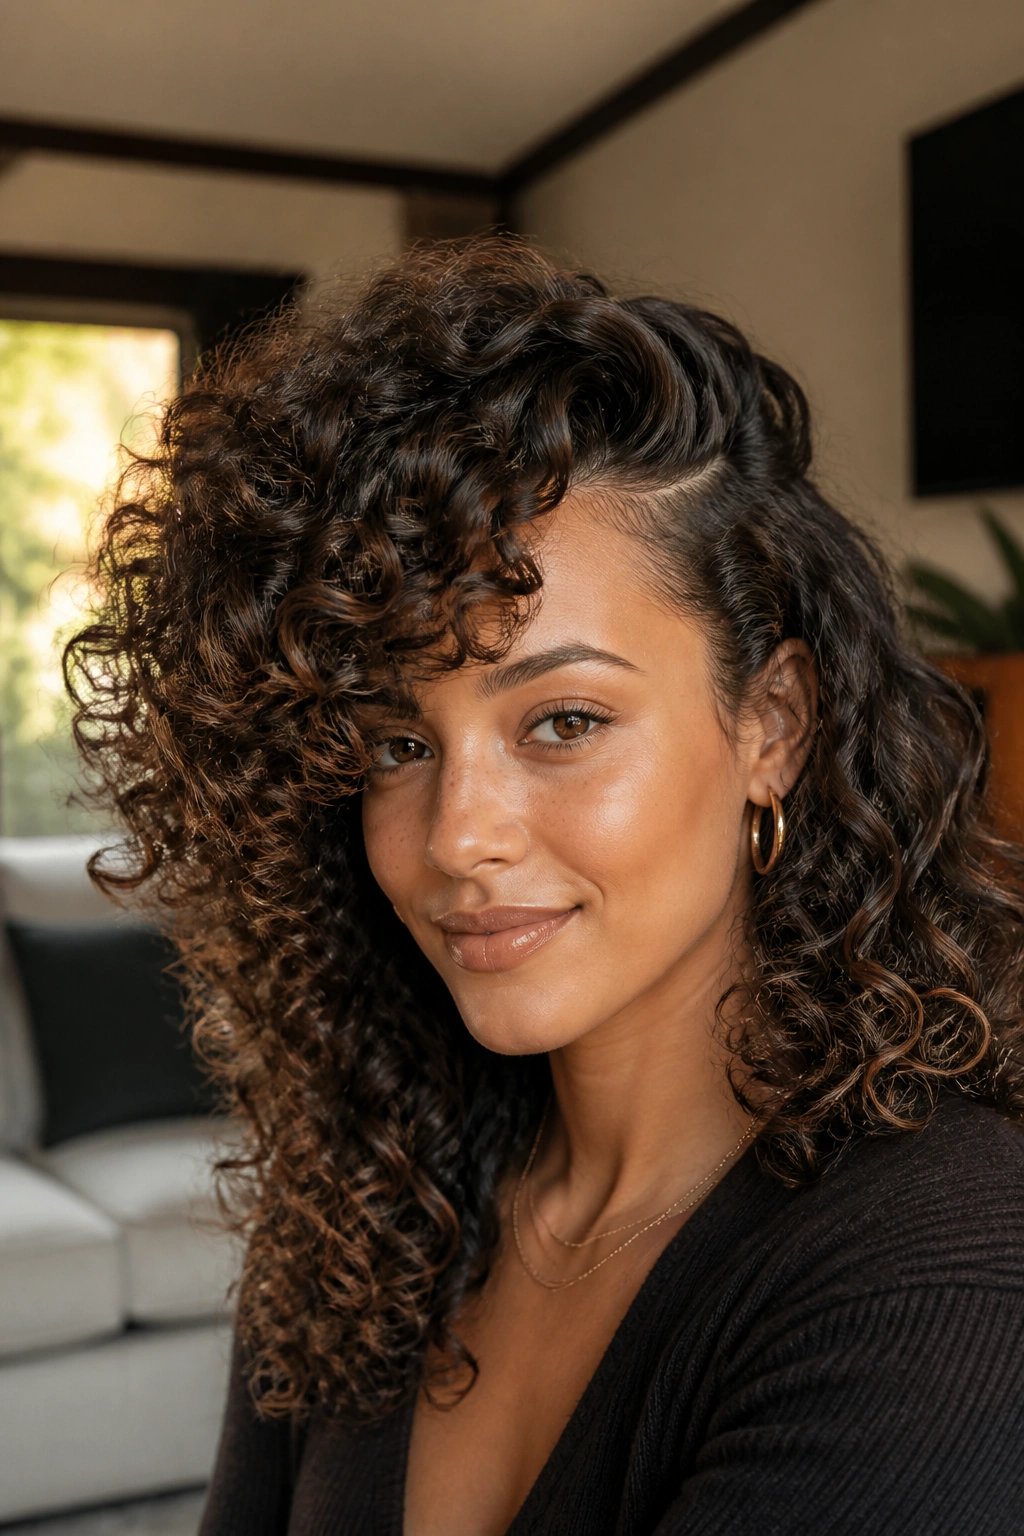
Why does a side part make curls look bigger? Because it breaks the symmetry that usually keeps hair lying close to the head.
A deep side part pushes more hair to one side, which creates instant height on the opposite side and a fuller sweep across the top. It also gives curls somewhere to land instead of hanging straight down from a center line. On round or square faces, that extra diagonal line can make the whole style feel lighter and more open.
The best version is not a dramatic flip that stays stuck in place. It’s a soft part made on damp hair, then reinforced with a rat-tail comb before drying. After that, clip the smaller side at the root for 10 to 15 minutes while the hair sets. The lift around the temple makes the style look bigger than it is.
If your curls are looser, add a tiny bit of mousse only at the crown and front. If they’re tighter, use a pick at the roots once the hair is dry. Not mid-dry. Dry. That distinction matters.
A side part is one of those boring-looking choices that does more work than people give it credit for.
3. Layered Curly Shag
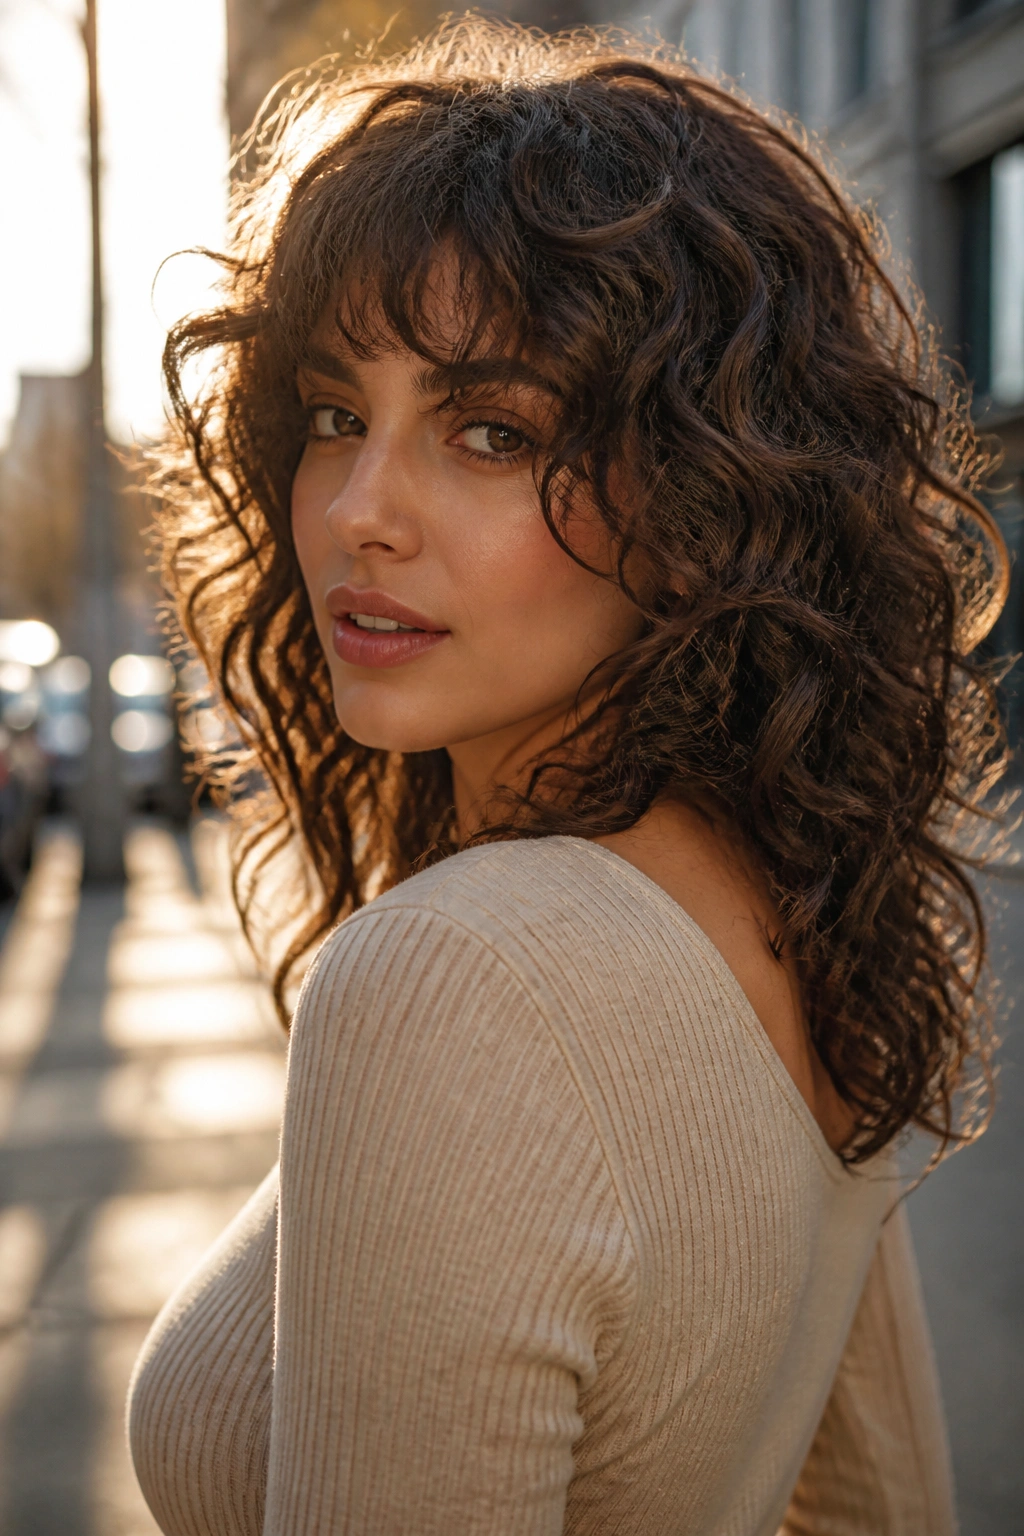
A blunt one-length cut can make thick curls feel heavy by noon. A shag does the opposite.
The magic is in the layers. Shorter pieces at the crown remove bulk where curls pile up, while face-framing layers keep the front from turning into a triangle. The result is that loose, piecey fullness that reads as movement instead of weight. It’s especially good if your hair gets wider at the sides but falls flat on top.
What to Ask For
- Crown layers that start high enough to create lift, not just trim ends.
- Softer face-framing pieces around the cheekbone or jaw.
- No razor-happy thinning through the mids, which can leave curls frizzy.
- Enough length left at the perimeter so the shape still feels full.
A good shag does not mean “messy.” It means the hair has room to breathe. With curl cream and gel applied in small amounts, the layers separate into visible ribbons, and the top gets a little loft instead of sinking into the rest of the cut.
I like this style most on medium to thick curls, because that’s where the shape really shows. Fine hair can wear it too, but the layers need to be less aggressive.
4. Pineapple High Puff with Loose Front Pieces
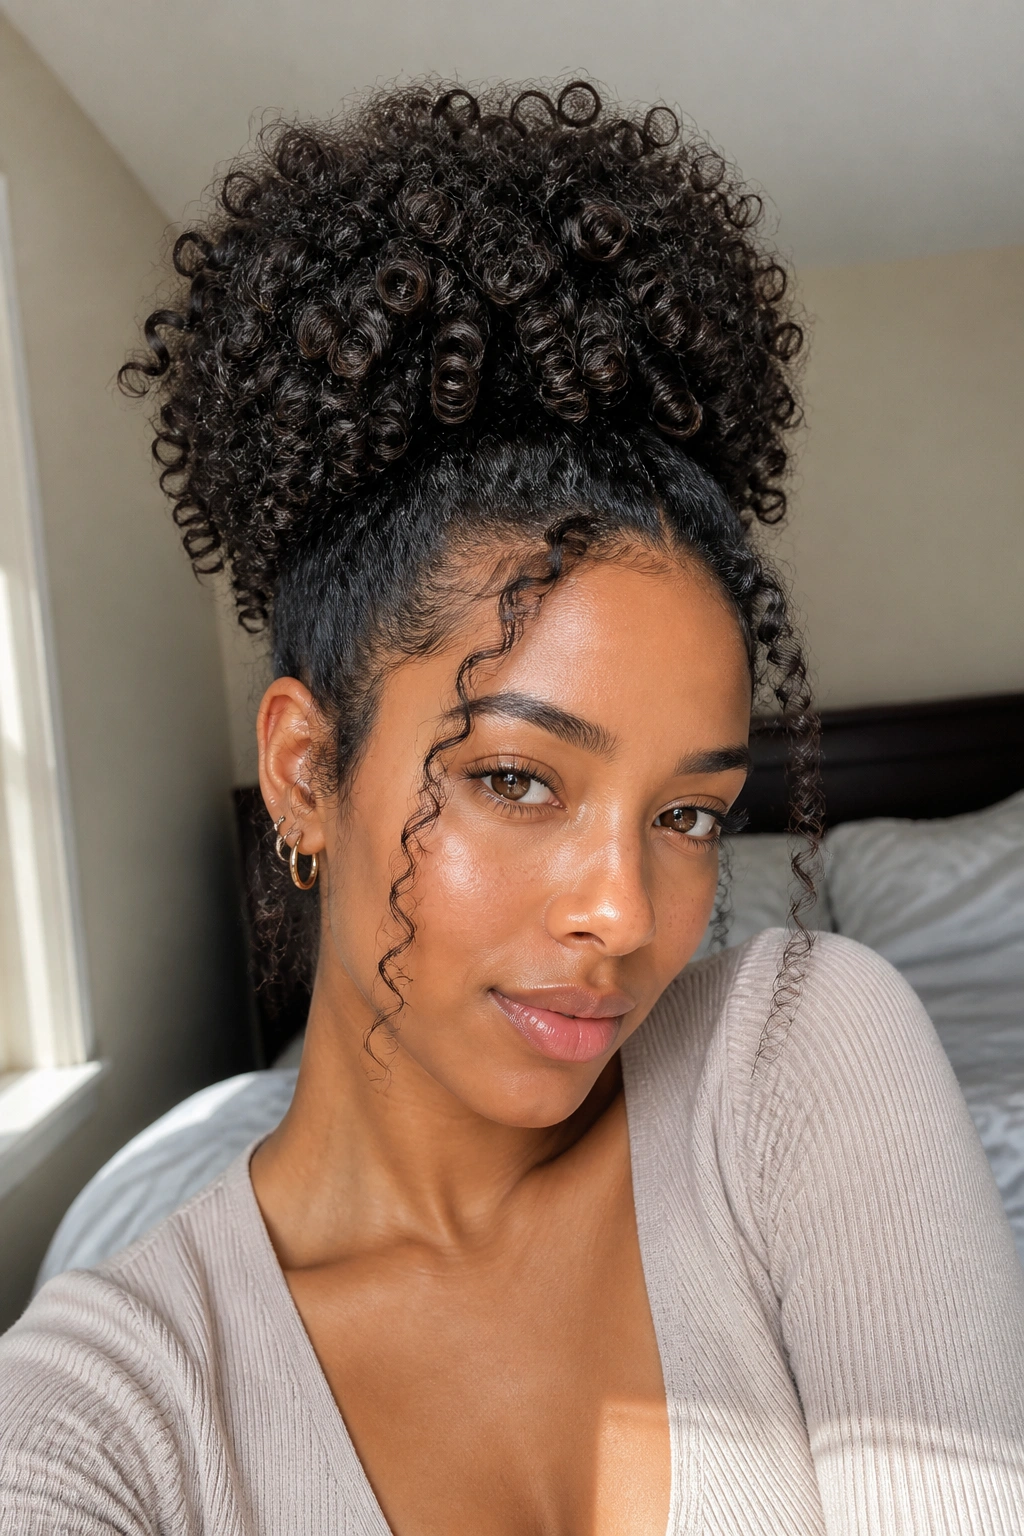
This is the fast answer when you want height without pretending your hair is something it isn’t.
A high puff lifts the mass of the curls right to the crown, which gives an easy vertical line and keeps the sides from widening the face too much. The trick is tension. Too tight and it turns severe. Too loose and it slides down by lunch. A satin scrunchie or a soft stretch band usually gives the best hold without leaving a hard dent.
Leave a few curls out at the front, especially if your hairline is softer or your face likes a little framing. Those pieces break up the puff and make it feel less like a gym style. A small amount of gel on the edges can tidy the line, but don’t flatten the whole front. That kills the shape fast.
This style shines on coily hair because the texture itself builds the volume. Dense curls can make the puff look almost sculptural. Looser curls get a cloud-like shape, which is a nice trade if you like softness more than polish.
And yes, it works best when the hair is stretched just enough to gather cleanly. If the hair is too shrunk up, the puff can end up sitting lower than you meant.
5. Half-Up Crown Lift
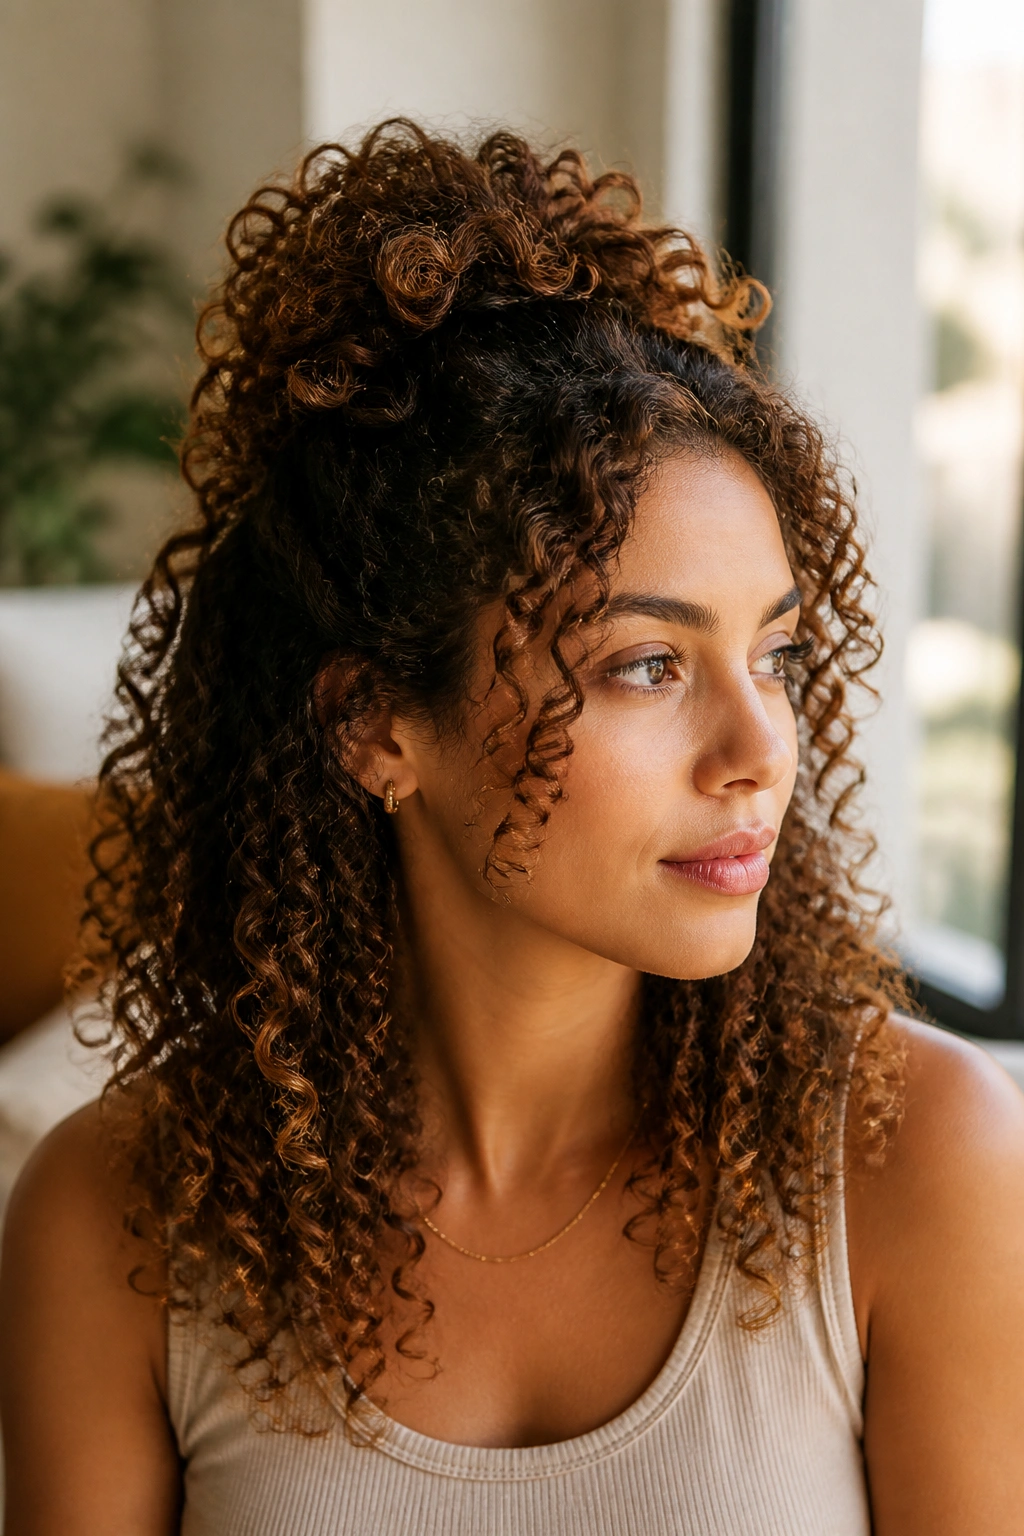
Unlike a full ponytail, a half-up style keeps the bulk where you want it: around the cheeks, the ends, and the outer shape. That makes it one of the easiest ways to keep curls big without losing face framing.
Pulling only the top section back lifts the crown and shows off the curl pattern underneath. The lower half stays loose, so the style still reads as full. It’s a good choice when your hair is shoulder-length or longer and you want the top to feel lighter without pinning the whole thing down.
A clean half-up style starts with sectioning from temple to temple. Gather the top section at the crown, not too low at the back of the head, and secure it with a small elastic or a claw clip. Then gently pull a few curls loose at the top for height. That little puffing motion matters. If you skip it, the look goes flat and tidy in a dull way.
Best of all, this style works on day-two curls. A tiny mist of water and a dab of leave-in on the front pieces is usually enough to wake them back up. I’d skip heavy refresh creams here. They tend to make the top collapse before the rest of the hair has a chance to shine.
6. Diffused Shoulder-Length Shape

A shoulder-length curl cut can look airy or heavy depending on one thing: how it dries.
When the ends skim the collarbone and the crown gets lifted with a diffuser, the whole shape feels bouncy before you even separate a single curl. That’s the appeal. The style gives you enough length to show off spirals, but not so much weight that everything hangs toward the shoulders.
How to Get the Lift
Start with wet hair, not damp hair. Wet strands accept product more evenly, and they hold the cast better. Apply your styler in sections, then use a diffuser on low heat and low airflow. Hover near the roots first, then cup the curls in the bowl for short bursts. Ten to fifteen seconds per section is enough to begin setting the shape.
Once the hair is about 80 percent dry, stop touching it. Let the rest air dry if you can. Then lift the roots with a pick or the tip of a tail comb. Only the roots. If you rake through the mids, you’ll get frizz where you wanted fullness.
What to Avoid
- High heat that roughs up the cuticle.
- Too much curl butter near the crown.
- Drying with the head pinned in one direction for too long.
- Separating curls before they’re fully cool.
This style is a quiet favorite of mine because it looks clean from a distance and soft up close. That’s a hard combination to beat.
7. Finger-Coiled Bob with Airy Ends
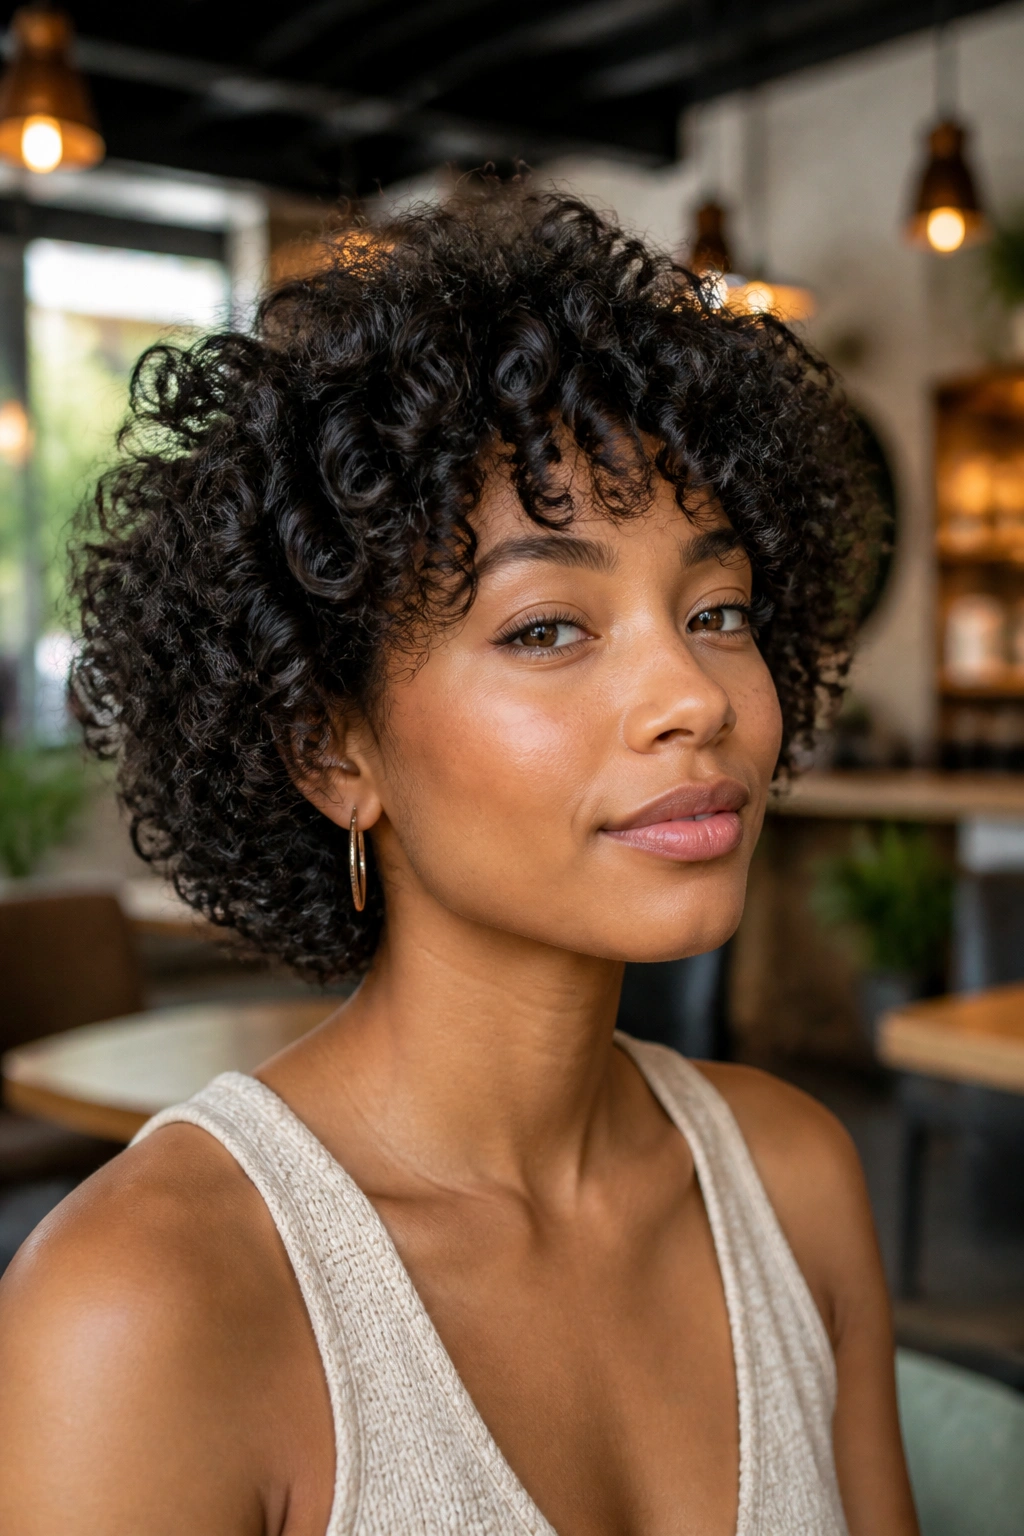
Short curls can flatten fast if every strand is left to its own devices. A finger-coiled bob gives them a little direction, which makes the overall shape look fuller and more intentional.
The point is not to coil every hair on the head. That would take forever and the result can look too rigid. Focus on the top layer, the front, and any spots that tend to fray. The underneath can stay looser. That mix creates depth, and depth is what makes a bob look thick instead of helmet-like.
A lightweight gel works best here. Start with small sections, wrap each one around your finger once or twice, then let it spring back without pulling it straight. Keep the ends a little airy. If they’re too tightly coiled, the bob loses its bounce and starts looking tiny.
Quick Notes That Help
- Use sections about the width of a pencil or a cotton swab.
- Clip the crown while drying so the top doesn’t sit flat.
- Break the cast with a drop of oil only after the hair is fully dry.
- Trim the shape every few months so the ends don’t get stringy.
This style is especially good if you want a neat outline with visible texture. It has polish, but not the stiff kind.
8. Deep Side-Swept Glam Curls
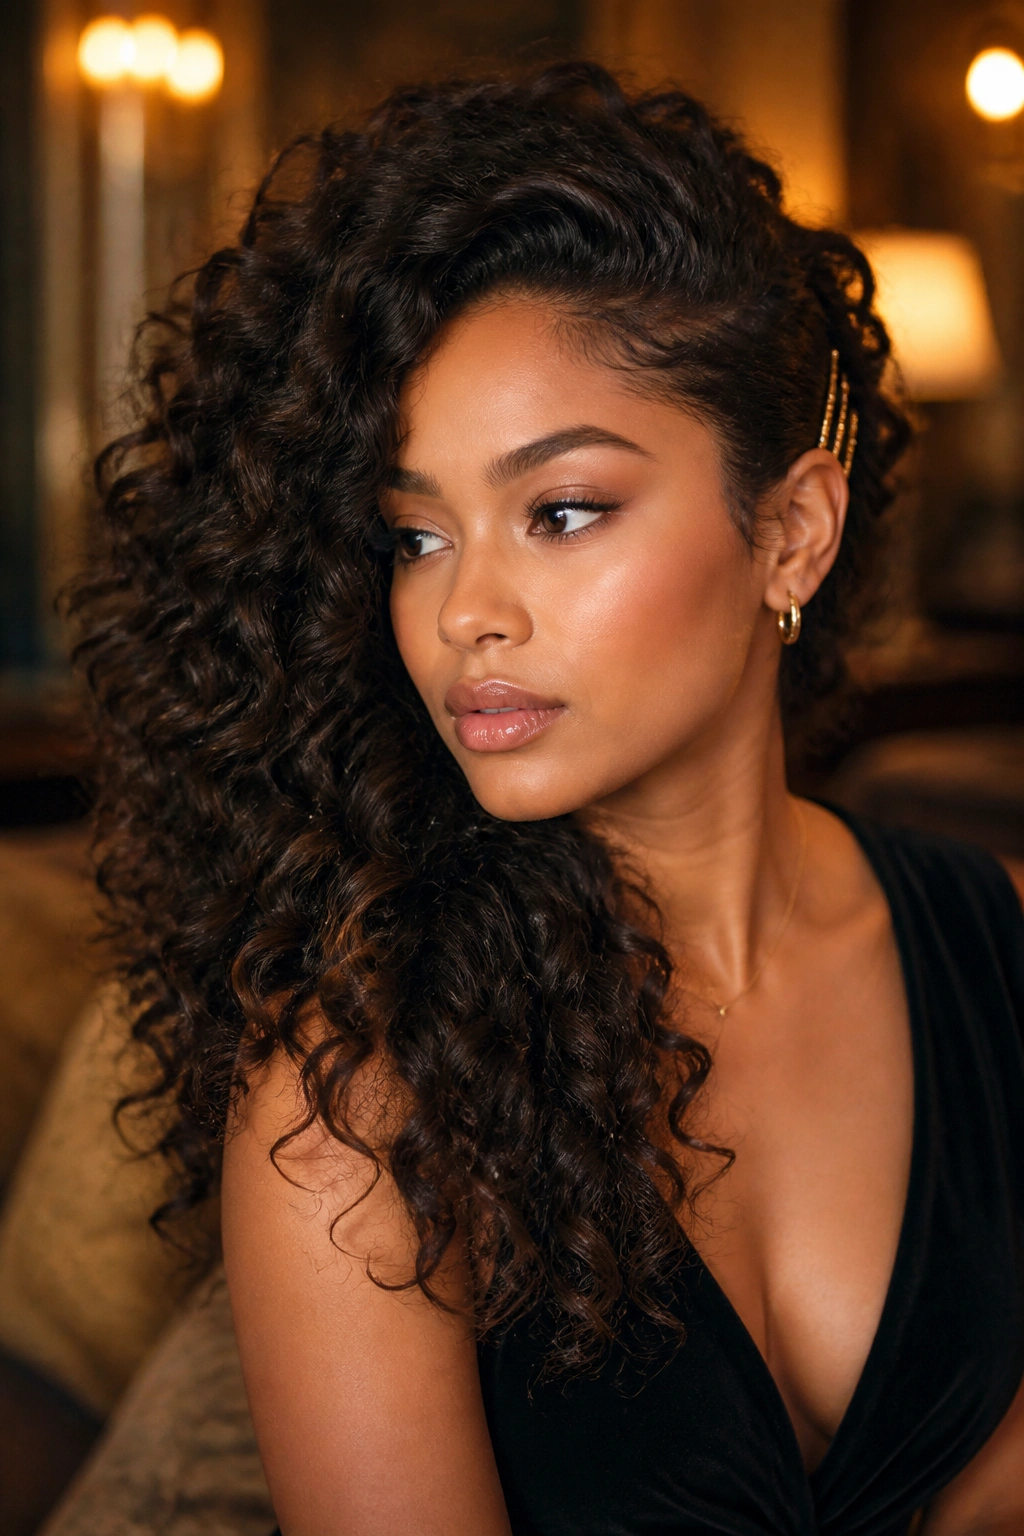
A side-swept curl style is basically a volume trick in formal clothes. It pulls the eye across the head, which makes the hair look wider, taller, and more expensive-looking without needing a single blunt tease.
The front section does most of the work. Set it with a large roller, a flexi rod, or a careful diffuser pass, then sweep it over one shoulder and pin it discreetly behind the ear or at the temple. The rest of the curls can stay loose and fluffy. That contrast — one side controlled, the other side free — is what gives the style its shape.
This looks best when the curls are defined but not crushed into perfect uniform spirals. A little separation reads better under light. Too much definition and the style starts to lose that airy feel. I usually tell people to stop adding product once the curl clumps are formed. More product here often means less movement later.
If you’re wearing this for an event, let the hair cool completely before moving it. Warm curls stretch, and stretched curls sag. That’s the whole battle in one sentence.
9. Curly Curtain Bangs with Big Length
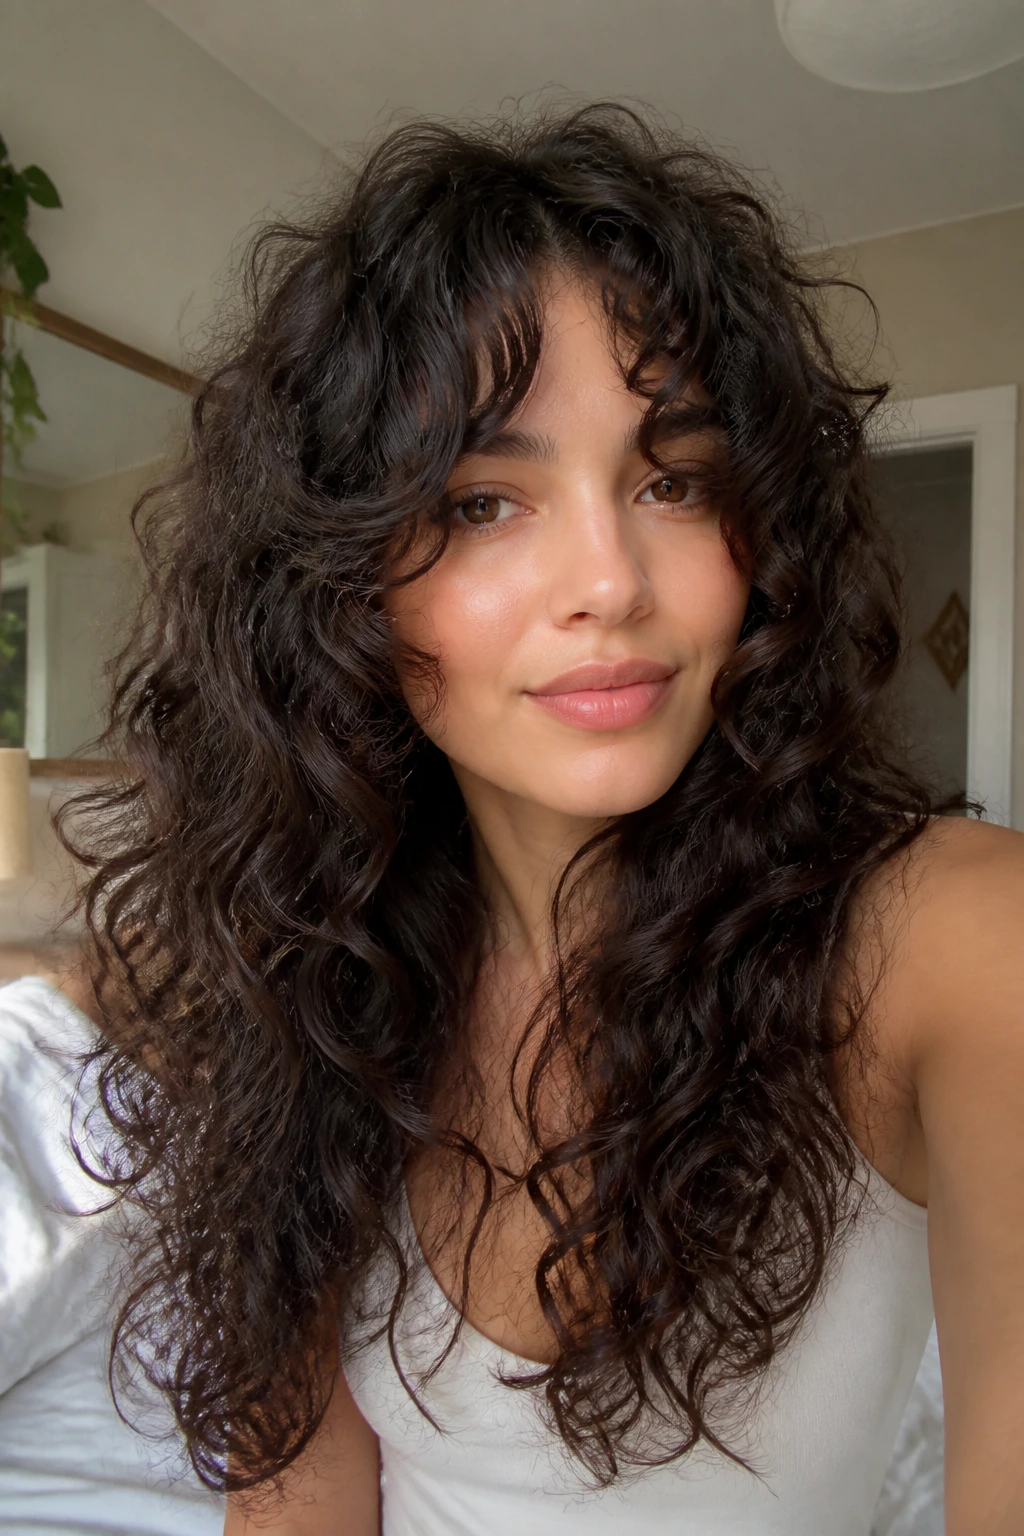
Curtain bangs can make curls feel fuller because they open the face instead of boxing it in.
The long sweep at the front adds movement right where people look first. On curly hair, that’s a big deal. A tight, blunt fringe can eat up space and make the crown seem smaller, but a curtain shape gives the front some breathing room. It also softens the top half of a style that might otherwise look too round.
The cut matters more than the styling here. Curly curtain bangs should usually be longer than straight bangs, because shrinkage will pull them up. Many people like them cut dry, or at least partly dry, so the stylist can see where the curls settle. If the bangs land too short, they spring up and sit in an awkward little shelf.
Keep the styling light. A little leave-in, a touch of mousse, and a quick twist away from the face while drying is usually enough. If the bangs split too much, smooth only the roots with your fingers and let the ends stay soft. That keeps the front from looking stiff.
This is one of my favorite shapes for anyone who wants volume without committing to a full, heavy fringe. It gives you a face frame, not a curtain wall.
10. Twist-Out with Stretched Ends
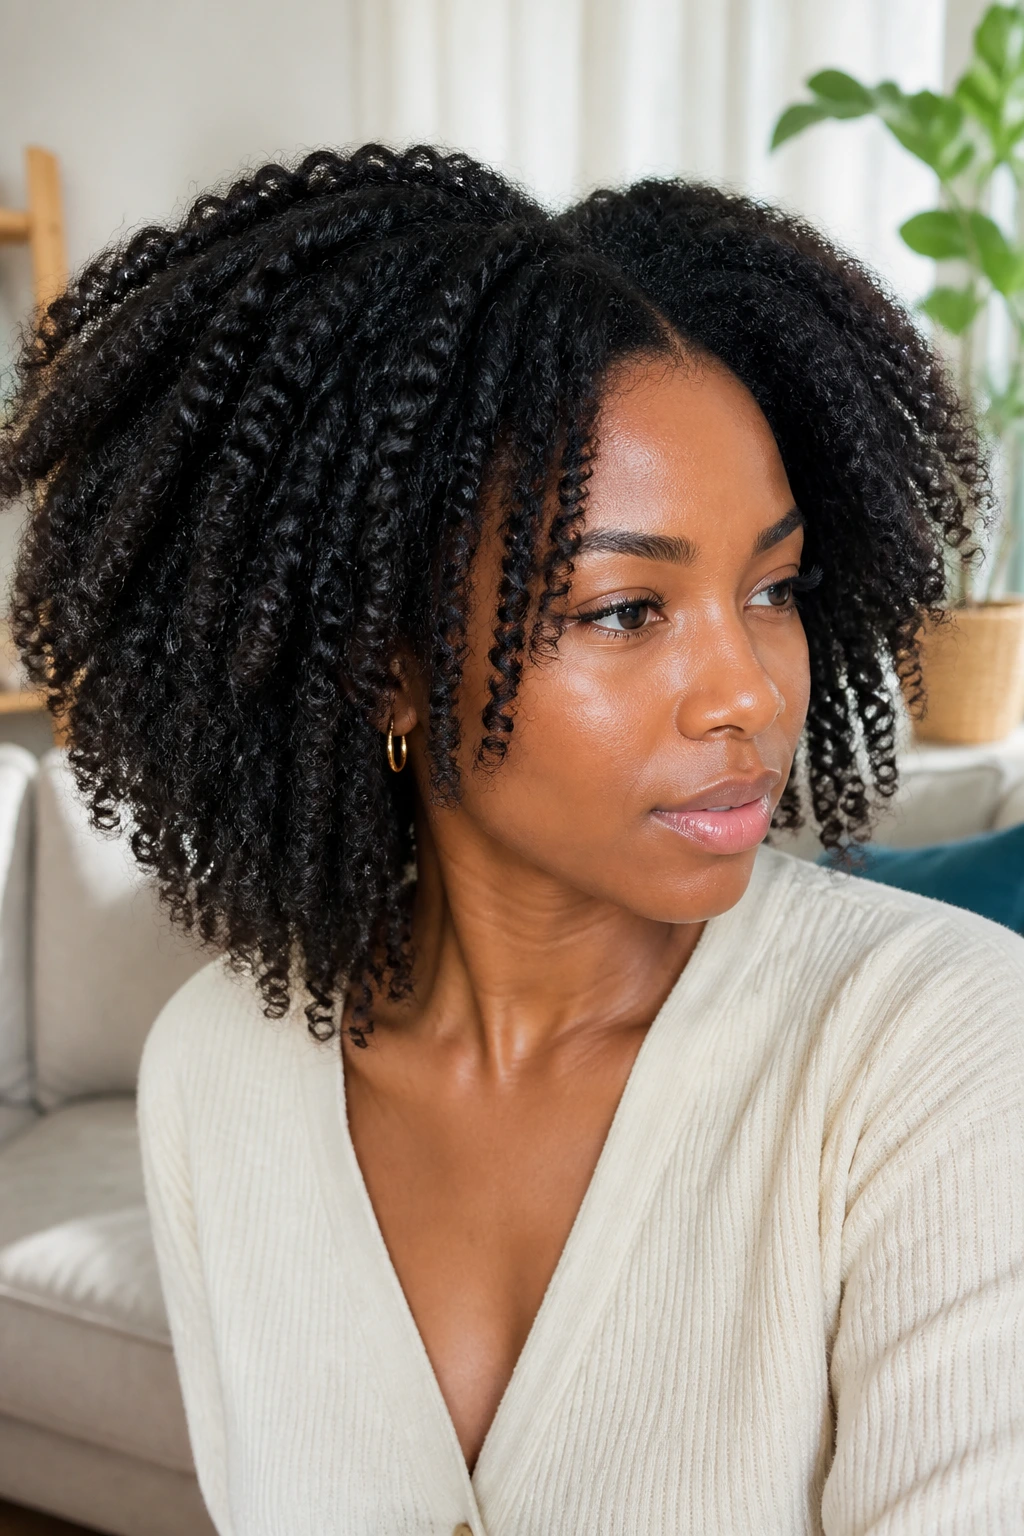
A twist-out gives curls a bigger footprint than a wash-and-go because the hair dries in a stretched pattern before it springs back.
That stretch is the point. It keeps the hair from shrinking straight up and down, so the final style lands wider and fuller. Two-strand twists usually give the best mix of definition and volume, while larger chunky twists make the hair look fluffier and less uniform. If you want a cloudier finish, go bigger. If you want a cleaner pattern, go smaller.
The best twist-out starts on moisturized hair that isn’t soaked. Too much water can make the twists stay damp for hours, which ruins the shape and encourages frizz at the roots. Set the twists evenly, let them dry all the way, then separate them with a little oil on your fingertips. Not too much. A shiny palm is enough.
A twist-out is one of those styles that changes character depending on how hard you separate it. Two or three passes give a softer, bigger look. Ten passes give fluff and frizz, which can be cute, but that is a choice, not an accident.
If you like volume around the sides and crown, twist the top sections a little smaller than the back. That leaves more lift where it counts.
11. Faux Hawk with Fluffed Sides
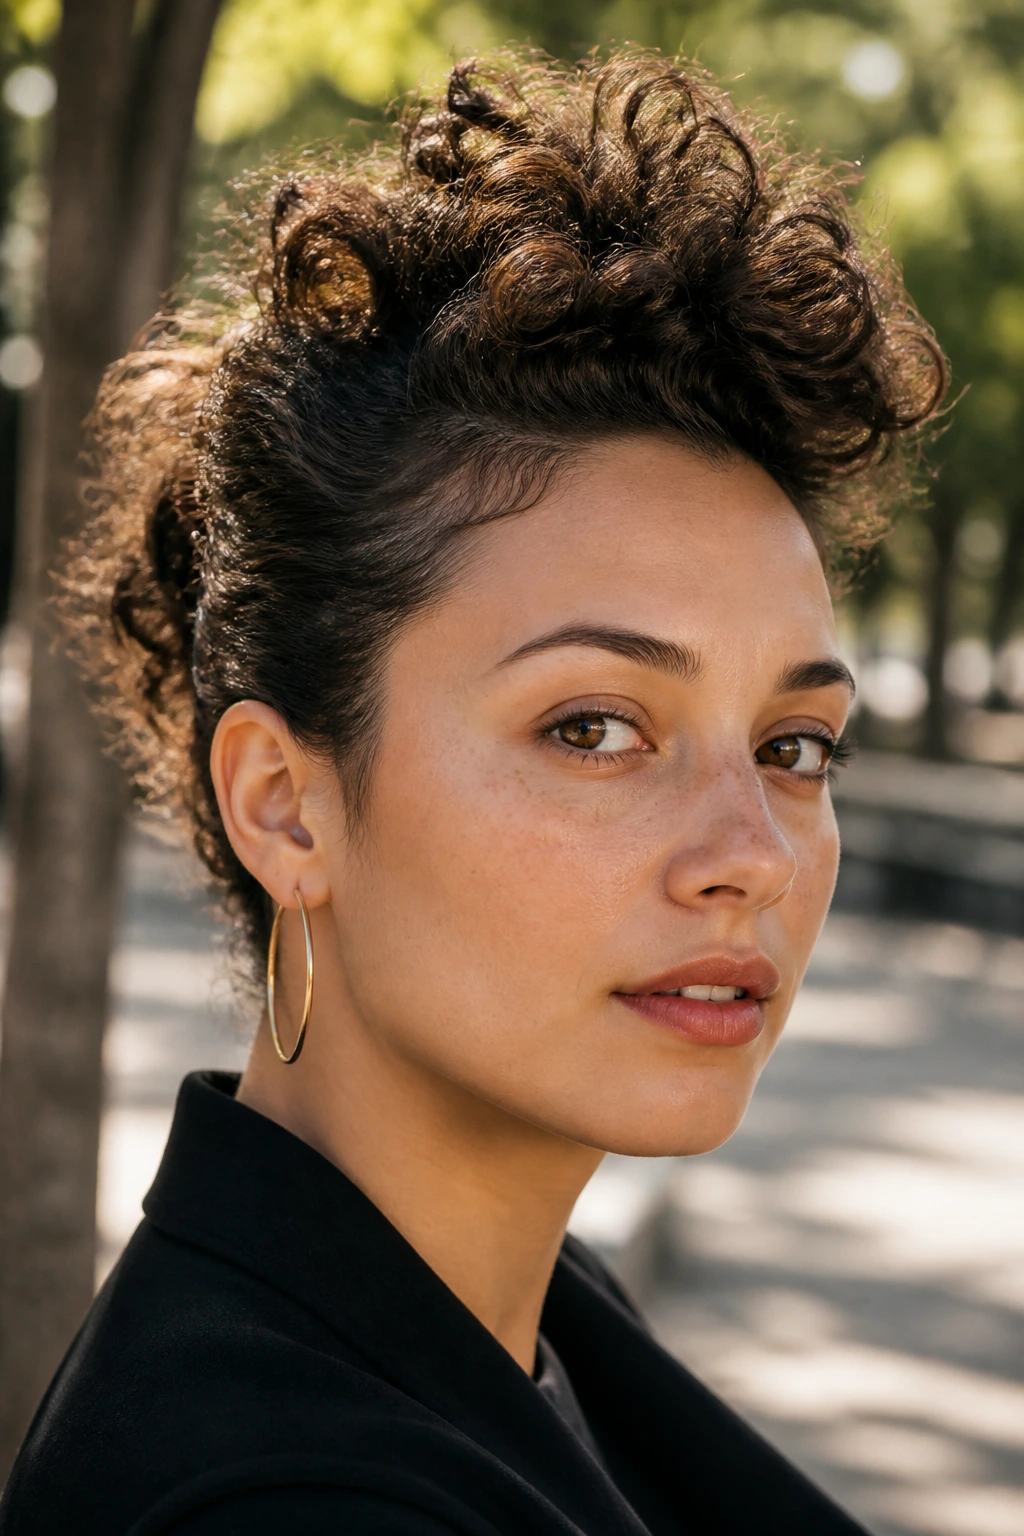
A faux hawk is the loudest volume trick in the bunch, and I mean that in a good way.
Pinning the sides upward and letting the center line stay tall creates instant height. It’s one of the few curly styles that can make the head look longer and fuller at the same time. Coily textures especially hold this shape well because the curls have enough structure to stack without collapsing.
What to Watch For
- Don’t flatten the sides with too much gel.
- Keep the center section loose enough to puff out.
- Use 4 to 6 bobby pins, not 20.
- Set the style on dry or nearly dry hair so the pins stay put.
A faux hawk can look sharp or soft depending on how hard you pull the sides back. A looser version has more volume and feels friendlier. A tighter version looks cleaner and a bit more dramatic. I tend to prefer the looser one because the curls keep their roundness.
This style also saves day-three hair. If the top is a little frizzy and the sides have lost their shape, the faux hawk turns all that texture into an advantage. Strange how that works. Messy hair sometimes makes the best volume.
12. Rounded Long Layers
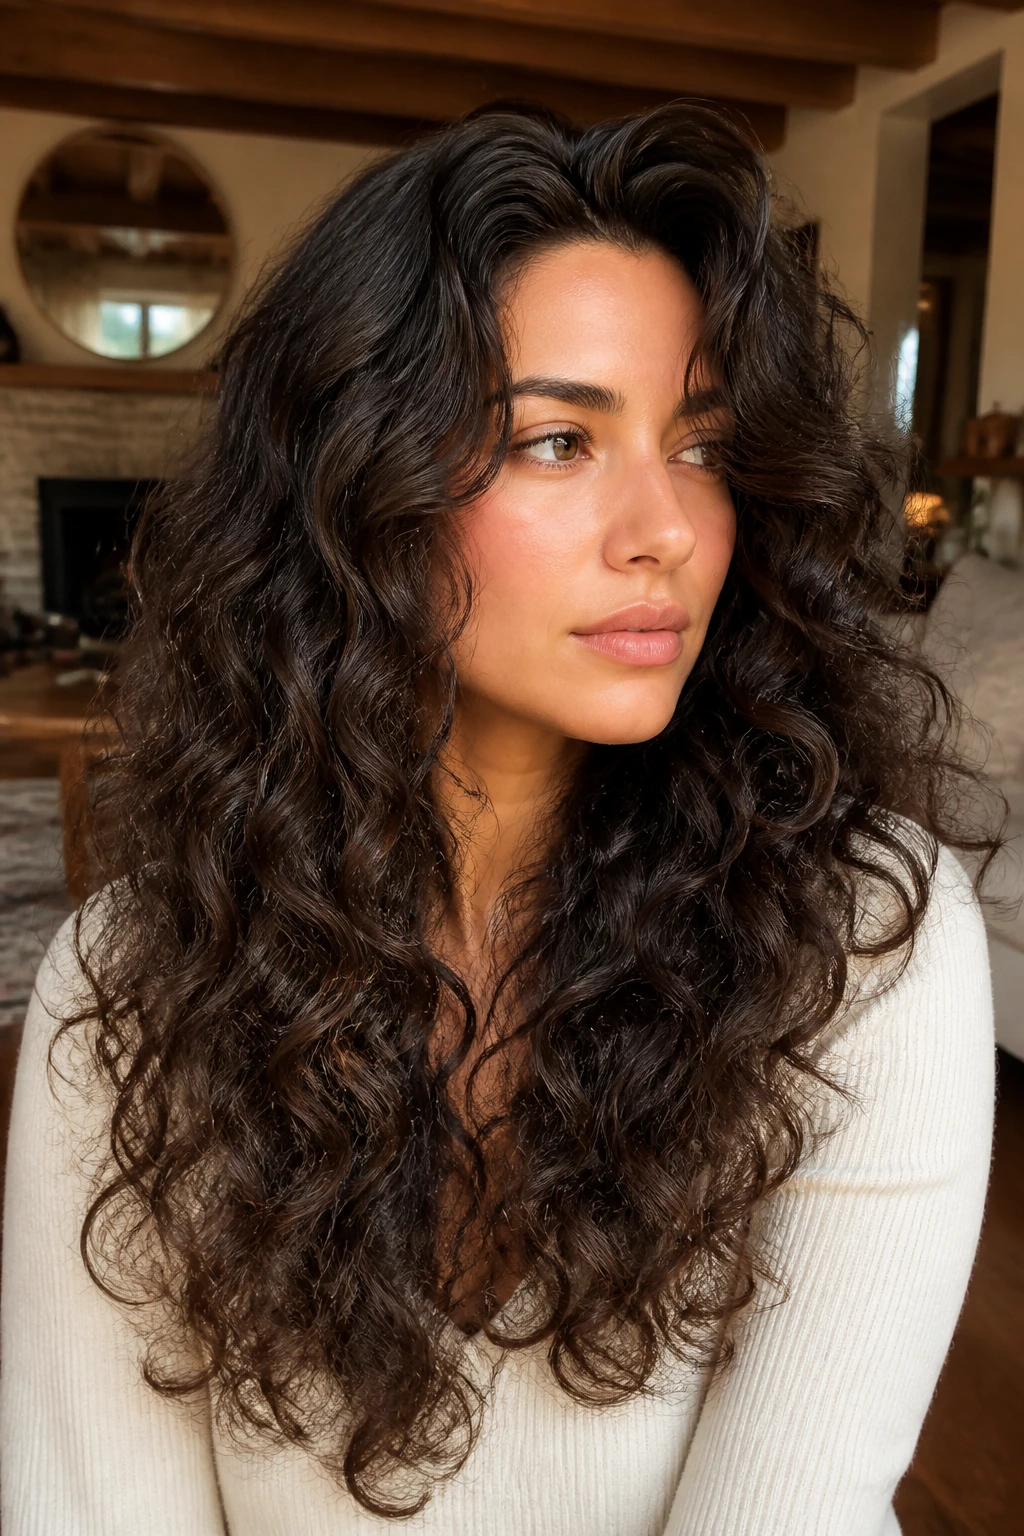
Long layers are the quietest way to make curls look bigger, and maybe the smartest.
Instead of piling all the weight at the bottom, the cut lets the curls stack in soft tiers. That creates a rounded outline from root to end, which is exactly what makes long curly hair look full instead of dragged out. If your hair gets triangular when it grows, layers are usually the fix.
What to Ask Your Stylist
- Layers that begin below the chin for loose curls.
- Slightly higher layering for dense coils that need crown lift.
- Face-framing pieces that connect cleanly into the body of the cut.
- No aggressive thinning with a razor unless the hair is very thick and the stylist knows what they’re doing.
I like rounded layers because they keep length while still making the top feel alive. The hair moves when you walk. That sounds small, but it changes how the whole style reads. Straight across ends can look blunt and heavy. A layered outline looks softer and bigger, even when the actual amount of hair is the same.
Styling is straightforward: diffuse or air-dry, then lift the root with a pick and separate only the outer curls. Don’t over-separate. Rounded layers already do part of the visual work for you.
13. Clipped-Back Face Frame
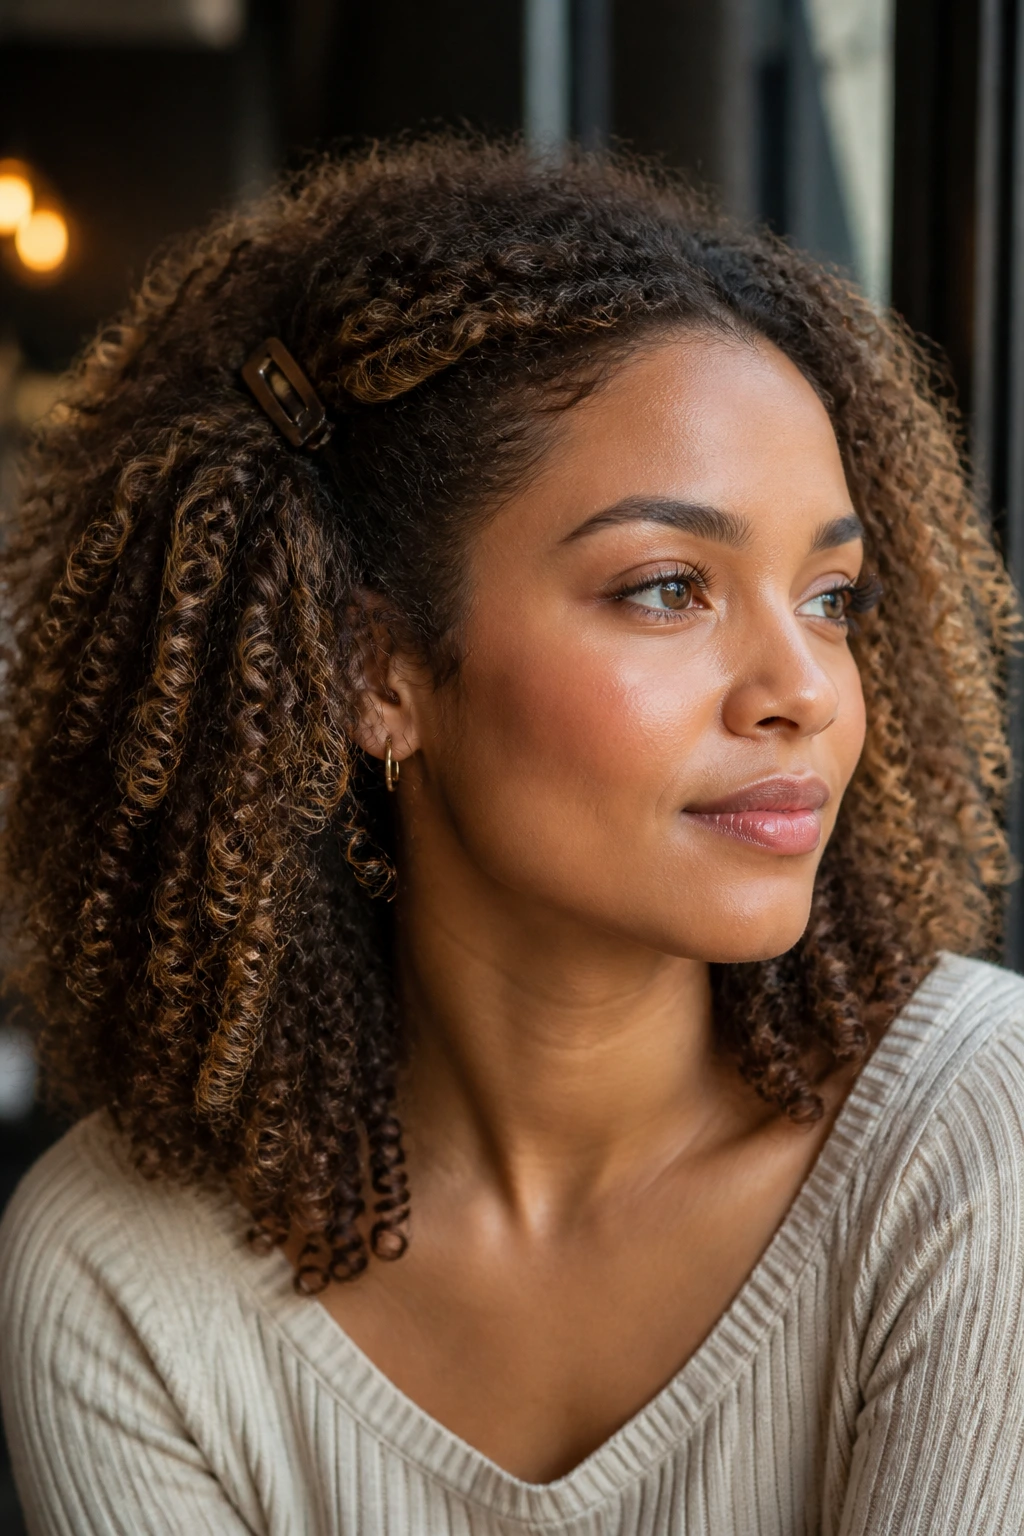
A clipped-back face frame is the simplest style on this list, and it can be the most flattering.
Pulling the front curls away from the face opens up the cheekbones and lets the rest of the hair swell outward. That little bit of clearance makes the hair look bigger because nothing is compressing it against the sides of the head. Decorative clips, slim barrettes, or plain bobby pins all work. The clip itself matters less than the placement.
The sweet spot is just above the temple, where the front curls can lift without exposing too much scalp. Pull too much back and the style gets severe. Leave too much forward and you lose the airy feeling. Somewhere in the middle is where the volume lives.
This style is a lifesaver on humid days because it gives you structure without fighting the curl pattern. If the front pieces frizz a little, they still look deliberate. That’s a nice bonus. Hair does not have to be flawless to look good. It just has to be shaped well.
A clipped-back front also works on almost every length, from chin-length curls to waist-length spirals. That kind of range is rare, and worth keeping in the back pocket.
14. Tapered Coily Cut with Crown Volume
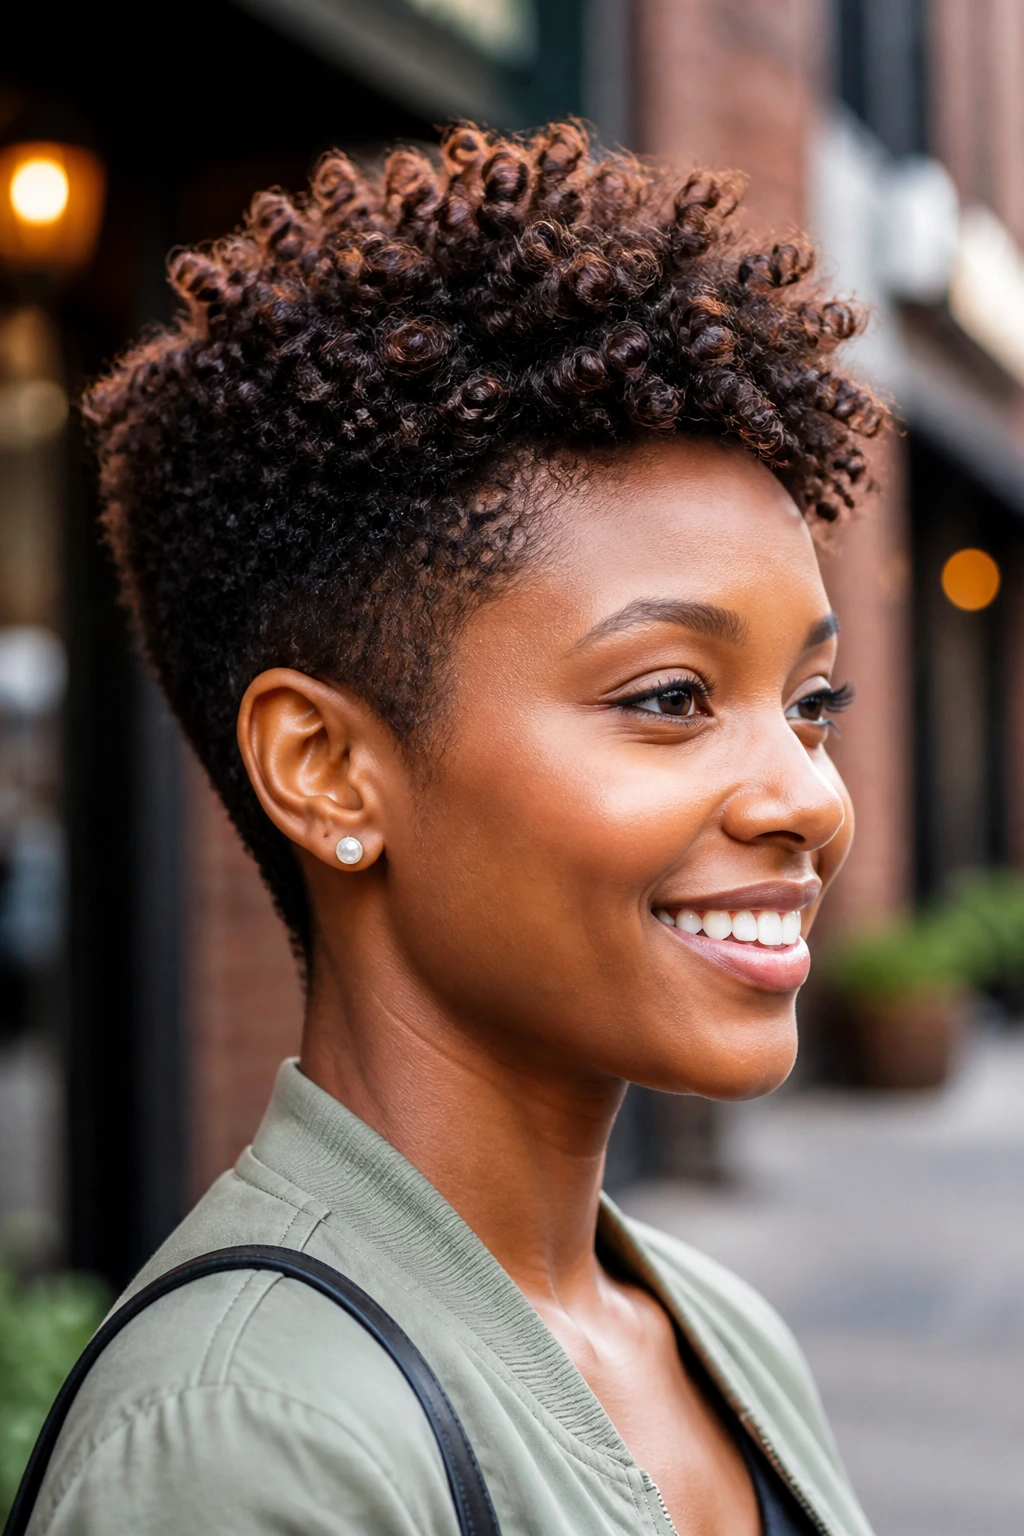
Why do tapered cuts look so full on coily hair? Because they put the height where the texture naturally wants to sit.
A taper keeps the sides and back tighter while leaving the crown longer and fuller. That contrast creates a strong shape without making the head look bulky. On 4A to 4C hair, it can be one of the cleanest ways to show off volume without spending half the morning stretching and fluffing.
The top should stay the star. A little curl sponge, finger shaping, or a pick at the roots is usually enough to build the silhouette. If the cut is done well, you won’t need much product. That’s the part people don’t always expect. Good shape makes styling easier. Bad shape makes everything feel like a fight.
Best Uses for This Cut
- Short natural styles that need height.
- Thick coily hair that feels too wide at the sides.
- Low-maintenance routines that still want visual punch.
- Strong, face-forward shapes with less daily fuss.
I like a taper because it looks finished even on a lazy day. The shape does the heavy lifting. You just keep the top awake.
15. Rounded Cloud Curls
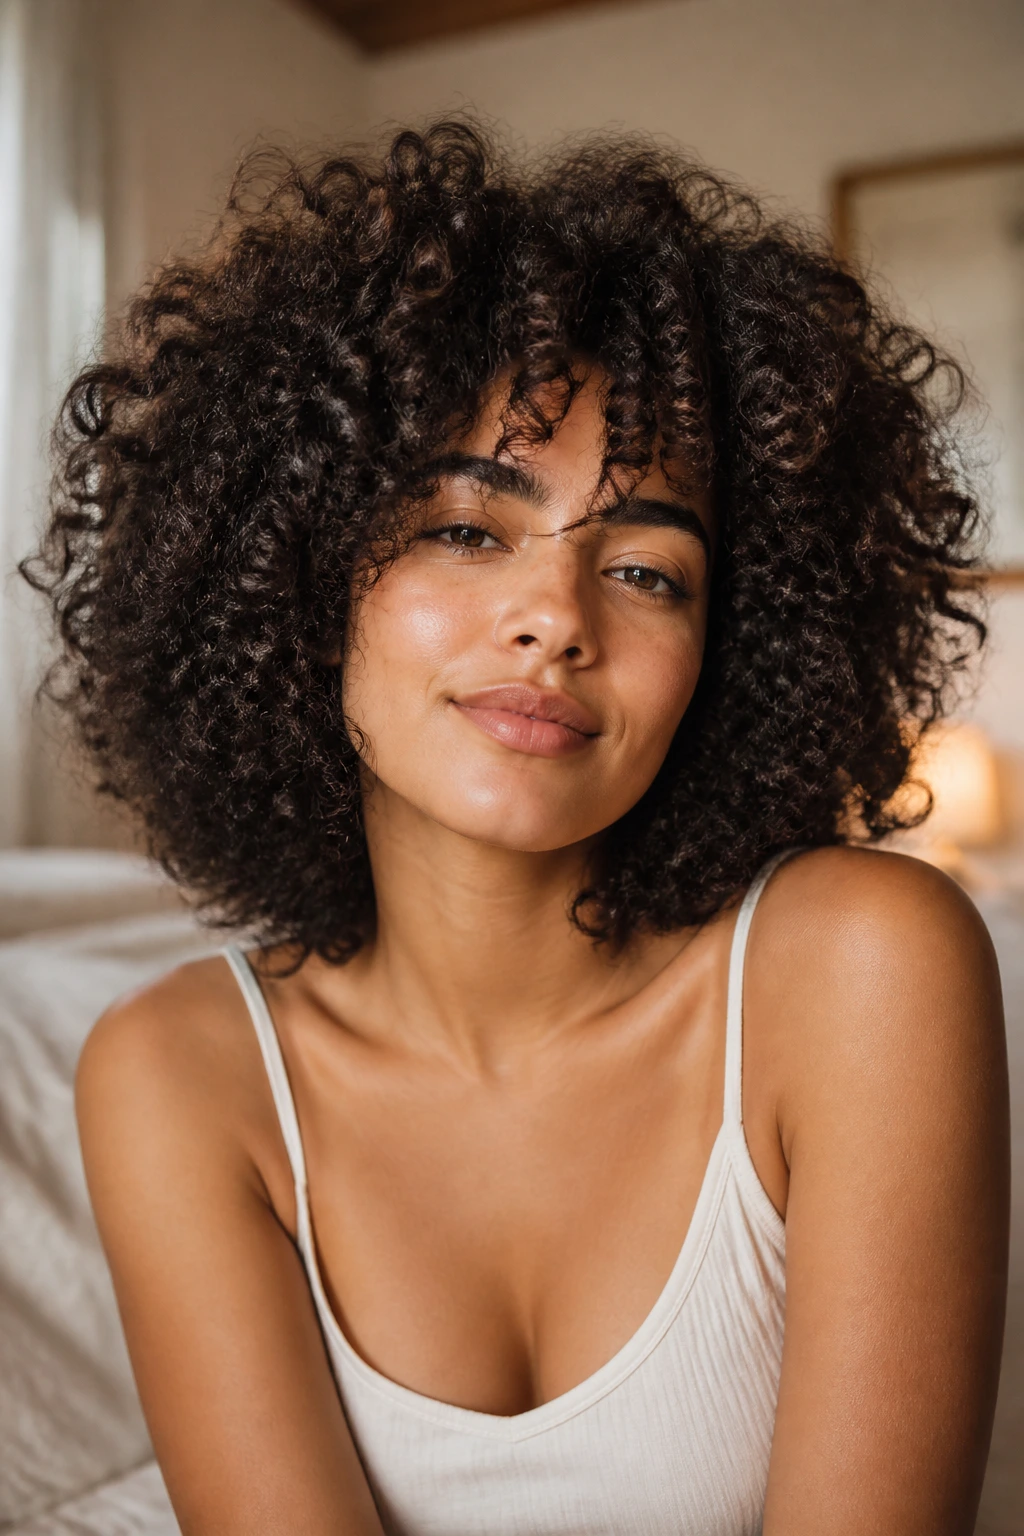
A full cloud of curls works when the shape stays open at the roots and soft at the ends. That sounds obvious, but plenty of people overdo one side of it and lose the whole effect.
The roots need space first. Pick them, clip them, or diffuse them off the scalp until they lift on their own. Then leave the ends alone long enough to keep the curl pattern plush. If you separate the ends too much, the style gets frizzy and wide in a messy way. If you leave them too tight, the hair looks small. The balance sits right in the middle.
This is the style I’d choose when you want big hair that still looks touchable. Not stiff. Not sprayed into place. Just full, rounded, and alive. It works on loose curls, tight coils, and everything between, though the technique changes a little with density. Fine curls need lighter product and more root help. Thick curls can take more structure and still feel airy.
A final pass with your hands matters more than people think. Let the hair cool, separate only the pieces that feel stuck together, and stop before the shape turns ragged. Volume is easier to add than to repair. That is the line I keep coming back to, because it’s true every time.
The best curls do not look forced. They look like they had room to grow.
