



Curly hair rarely needs more product. It needs a shape that makes sense.
That sounds a little blunt, but it’s the truth most curl routines dance around. When curls look flat, wide, crunchy, puffy, or half-defined, the problem usually isn’t the curl pattern itself. It’s the way the style was built around it. A good style for curly and coily hair respects shrinkage, clumping, density, and drying time instead of trying to bully the hair into behaving like something else.
Humidity, friction, and heavy creams can all mess with the finish. So can a rushed detangle, a weak hold product, or a style that looked cute while it was wet and fell apart once it dried. The better curl looks tend to be the ones that understand the hair’s real habits: spring at the ends, lift at the roots, and a little unpredictable volume around the crown.
1. Wash-and-Go Defined Curls
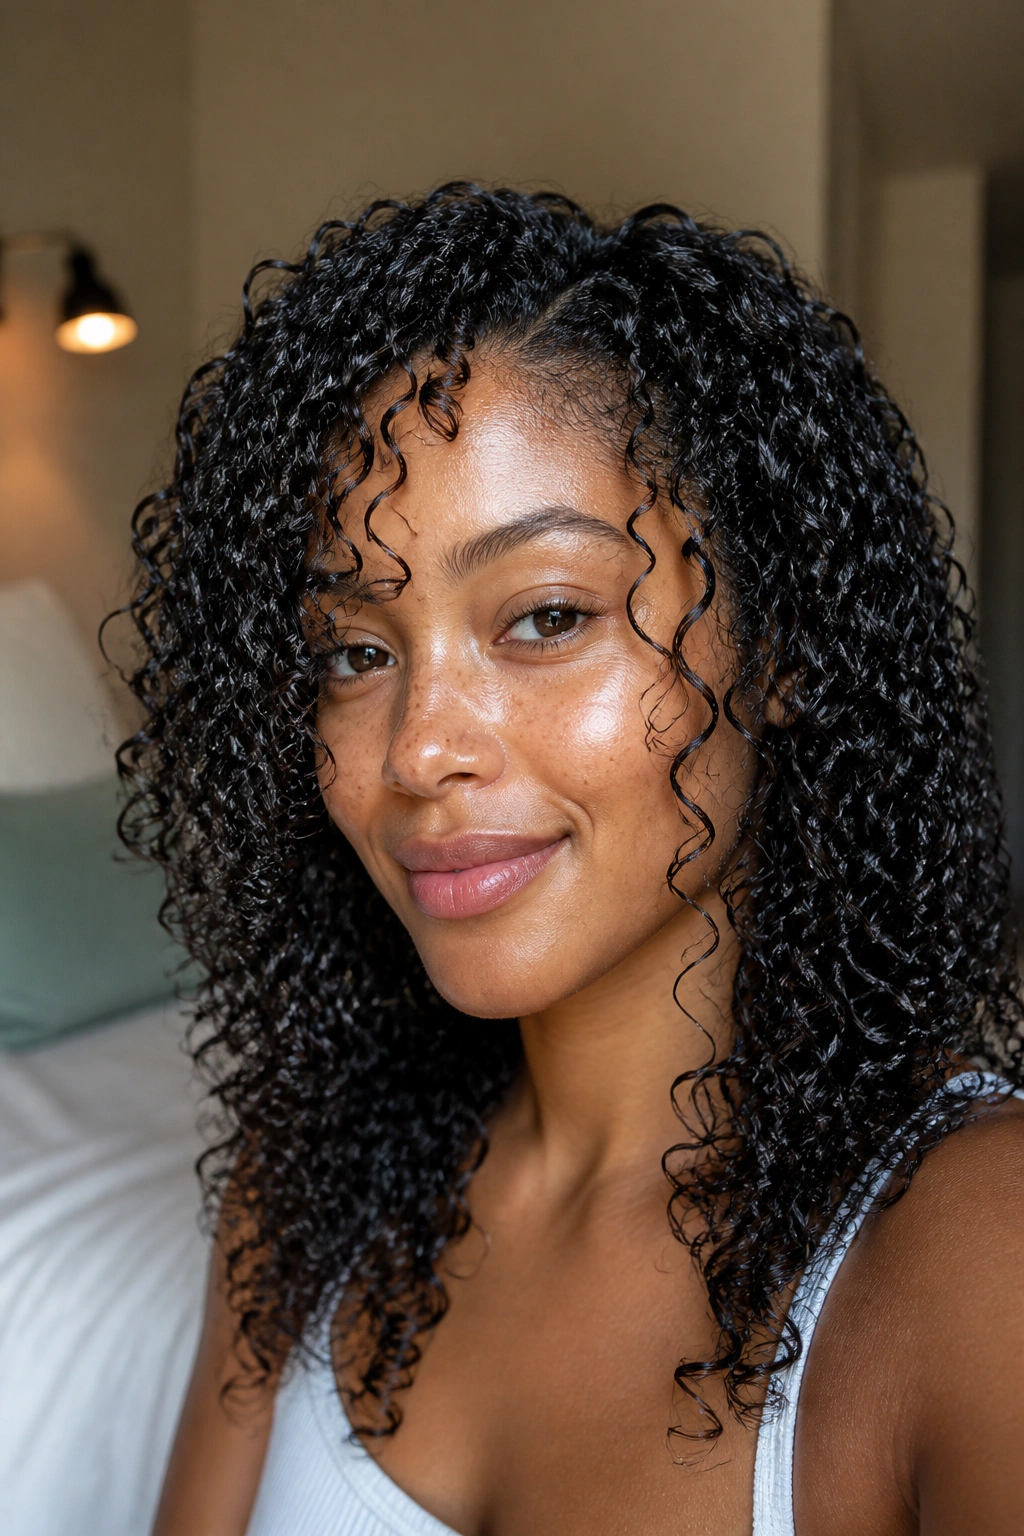
A wash-and-go is still the most honest curl style in the room. You cleanse, condition, add slip, define the curls while they’re soaking wet, and let the pattern do the rest. If your hair already has a clear curl shape, this is the style that lets it show off instead of hiding under extra manipulation.
Why It Works
Definition comes from water and hold, not from force. That’s why the best wash-and-go starts on hair that is damp enough to clump on its own. A leave-in conditioner gives glide, then a gel or strong cream-gel mix helps the curls dry into place instead of puffing out halfway through the day.
The part people skip is sectioning. Don’t try to coat the whole head at once unless your hair is very short. Work in 4 to 8 sections, smooth each one with your fingers or a brush, and stop touching it once the curls are set. The less you disturb it, the cleaner the shape.
Quick Facts
- Best for curl patterns with some natural spring and shape.
- Usually looks best on soaking wet hair.
- Air-drying gives softer volume; a diffuser gives more lift.
- A light touch at the end keeps frizz down.
Pro tip: If your roots dry flat, clip them up for the first 20 minutes. It makes a bigger difference than another spoonful of product.
2. Twist-Out Curls
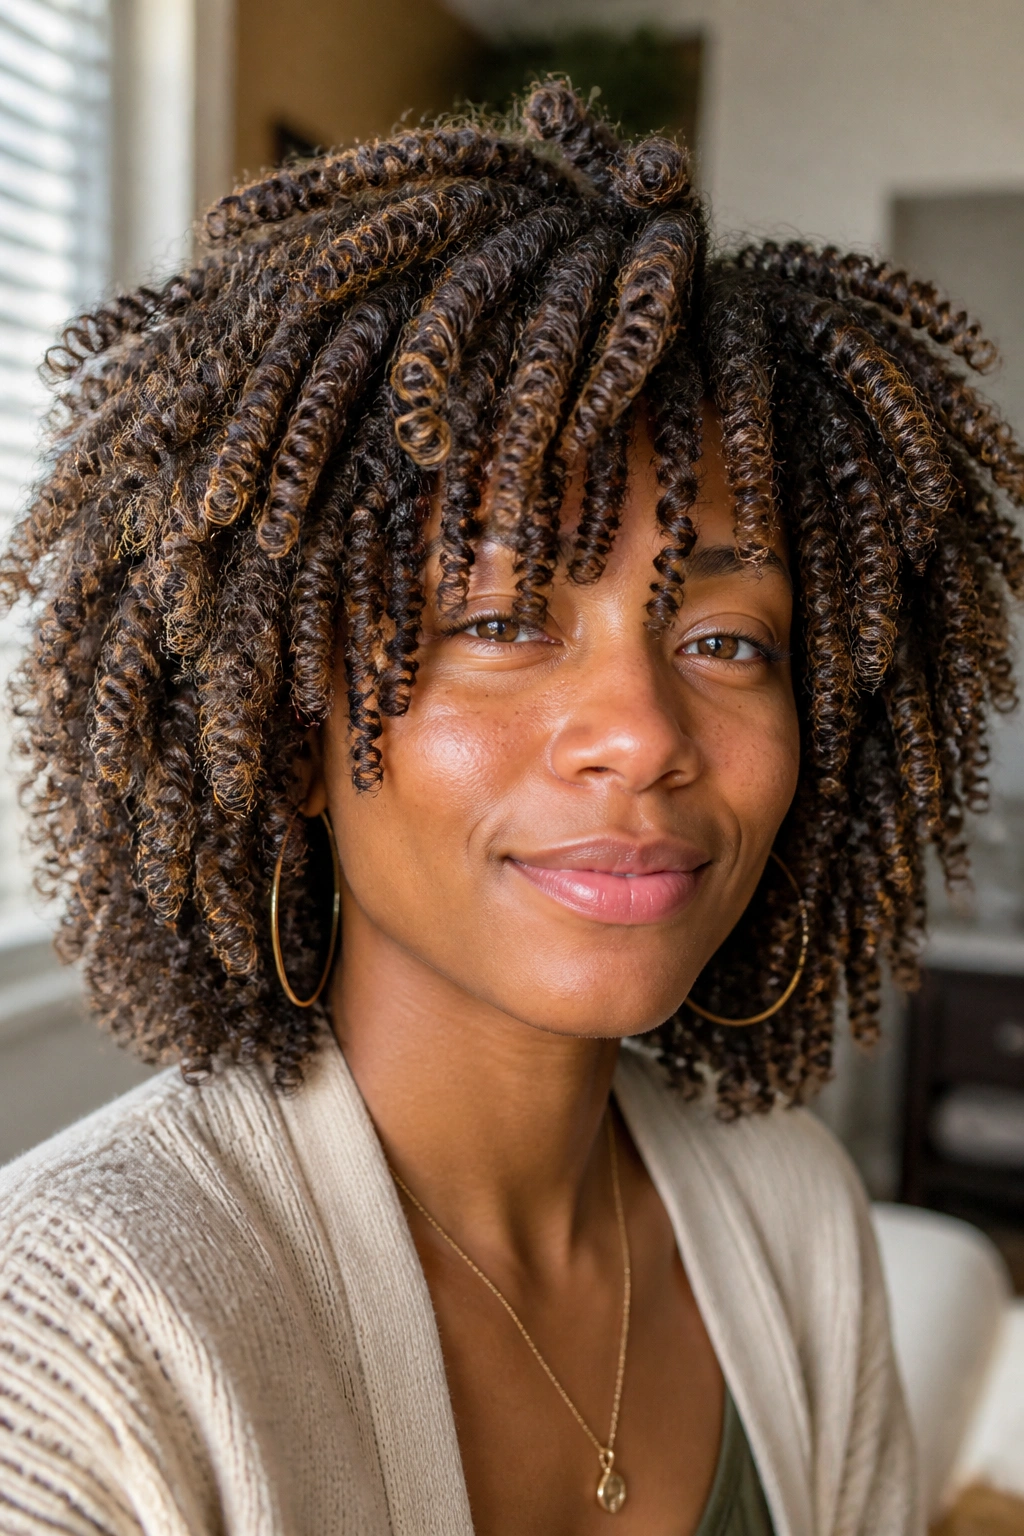
A twist-out is what I reach for when I want the hair to look fuller and more sculpted without making every strand sit in the same tiny pattern. Two-strand twists set the shape, then the unraveling gives you those soft, rope-like curls that people love on curly hair and coily hair.
Start with damp—not dripping—hair. Too much water makes the twists take forever to dry, and half-dry twists are a mess to take down. Use a cream or custard with enough slip to help the sections stay neat, then twist from root to end with firm, even tension.
How to Keep the Shape Soft
Drying is the whole game here. If the twists come down before they’re fully dry, the finish goes fuzzy fast. I’d rather wait longer and get a clean take-down than rush it and spend the next morning pretending the frizz was intentional.
When you separate the twists, coat your fingers with a tiny bit of oil. Not a lot. Just enough to reduce snagging. Then separate only once or twice per twist. People often over-fluff, and that’s how a tidy twist-out turns into a cloud with no shape.
3. Braid-Out Waves
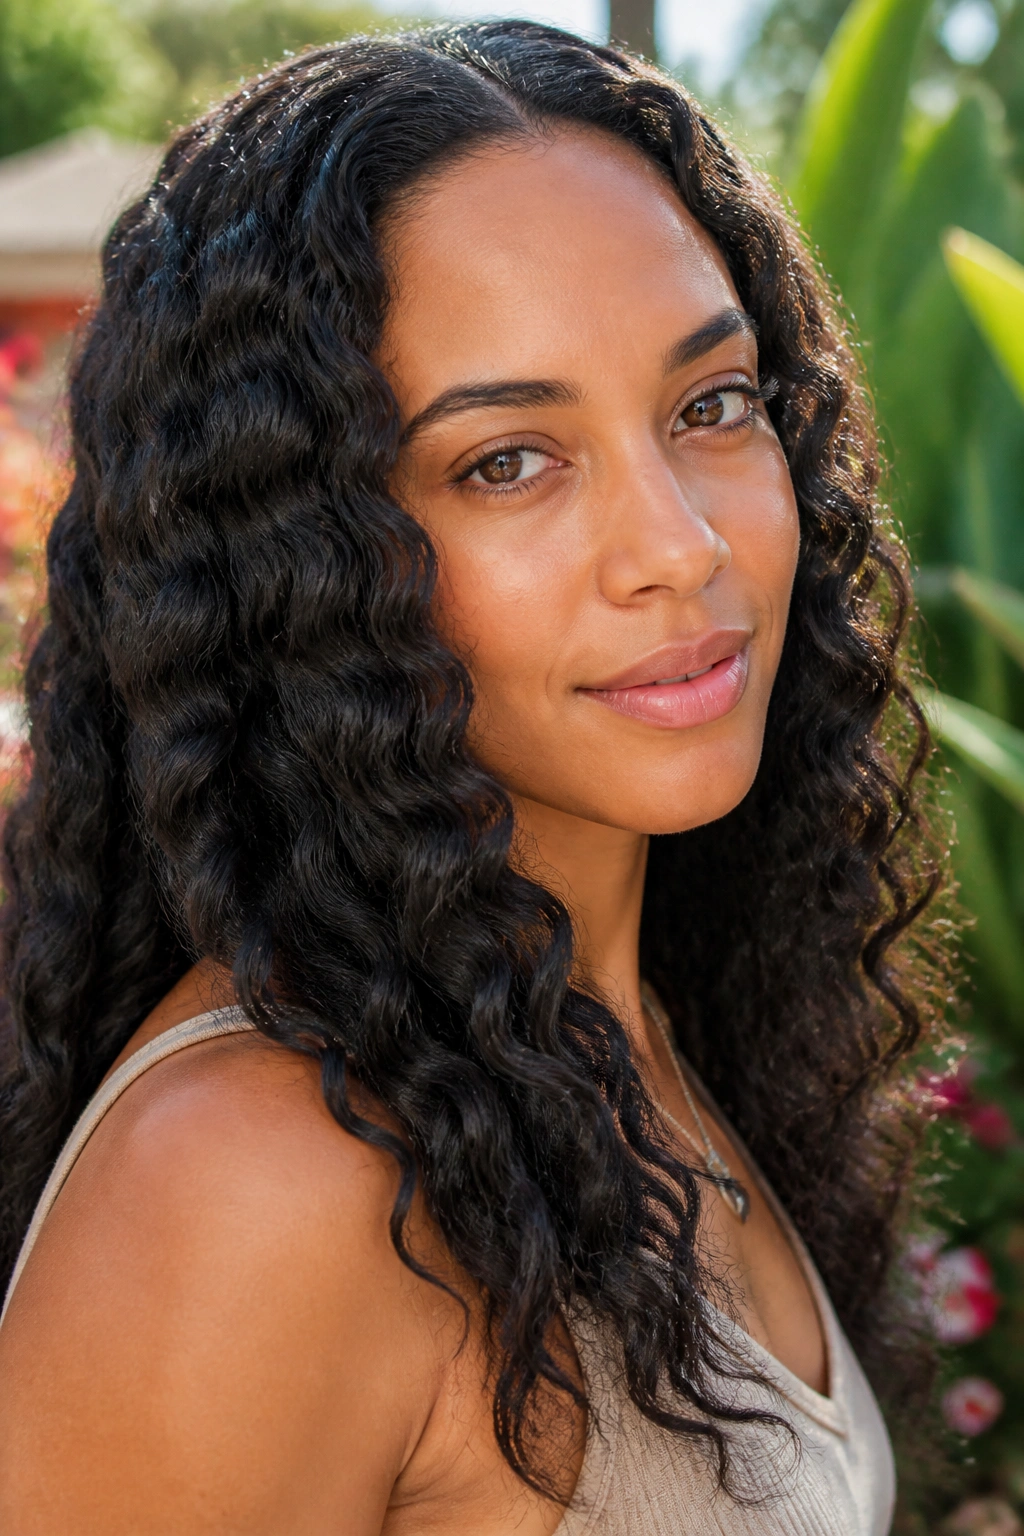
Braid-outs give a looser, stretched finish than twist-outs, which is why they’re useful when you want definition but don’t want the curl to look too tight or too perfect. The texture lands somewhere between waves and spirals, and on thicker curly hair it can look almost plush.
A braid-out also buys you a little more stretch at the roots. That matters if your hair shrinks hard or if the top layers keep folding into themselves. Braid the hair in 6 to 16 sections, depending on density, and keep the braid size consistent so the pattern doesn’t look patchy.
Best Braid Size
The braid size changes everything. Smaller braids give tighter texture. Bigger braids give chunkier, softer bends. If you’re after volume, go a little larger. If you want control and longer wear, go smaller.
Humidity will test this one.
A braid-out usually holds best when the hair is fully dry and the ends are sealed with a small dab of cream or light oil before you braid. That tiny detail matters. Dry, loose ends fray first, and once that happens the whole style starts looking tired.
4. Finger-Coiled Ringlets
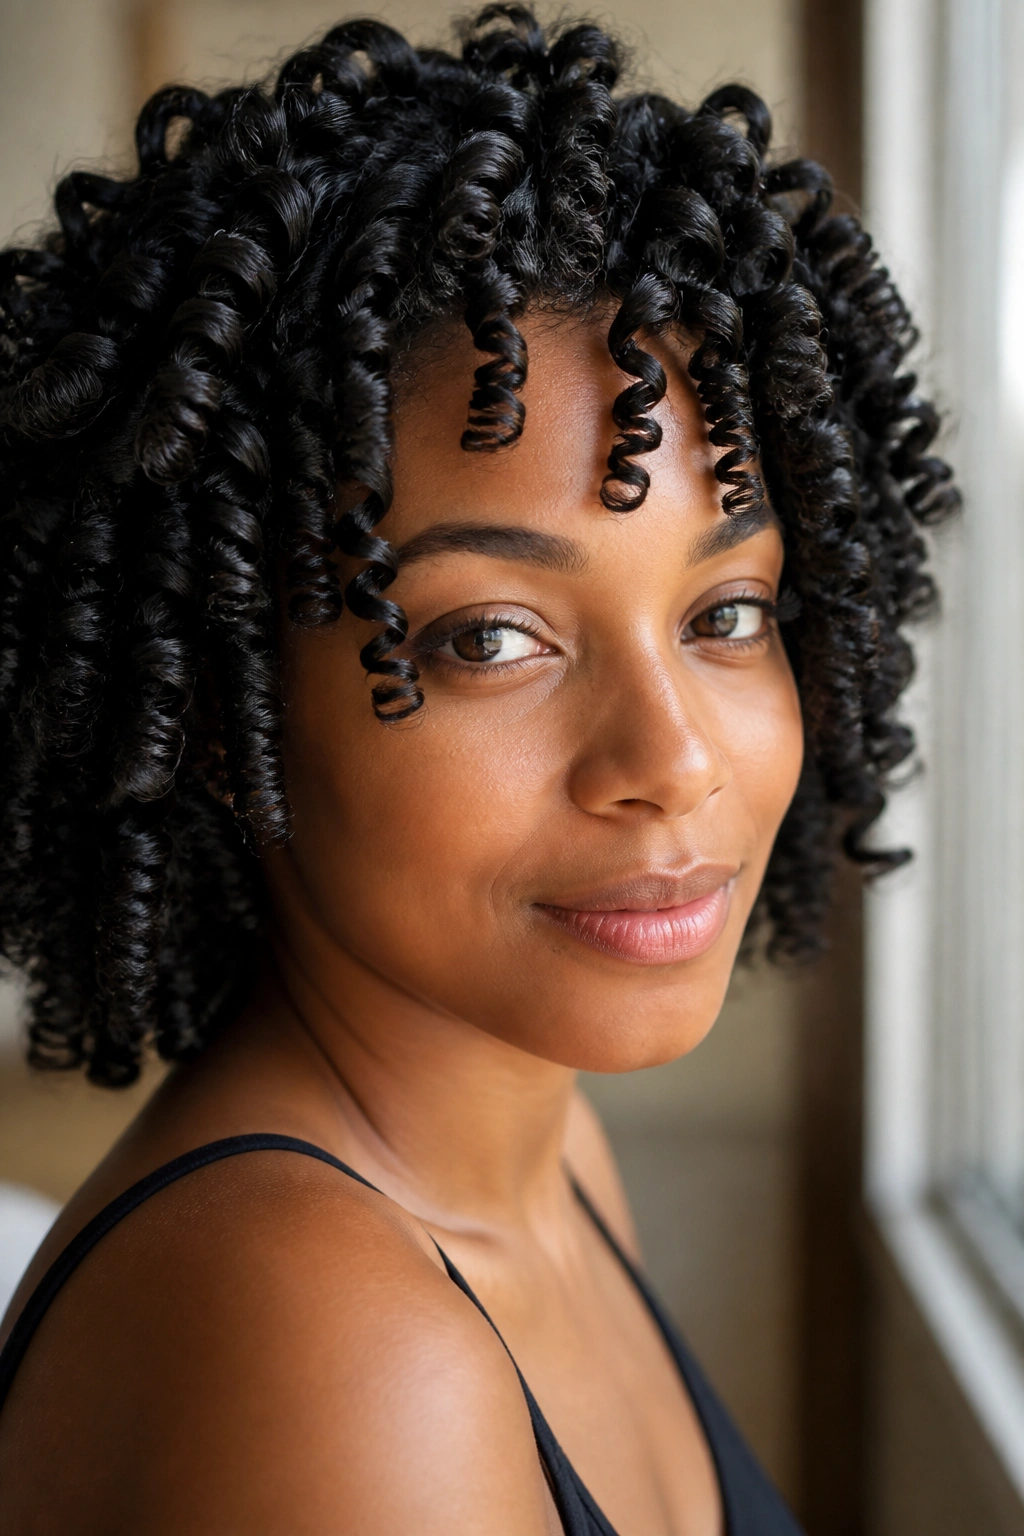
Finger coils are slow. That’s the deal. But when you want polished ringlets, a strong shape around the face, or a style that makes tight curls look deliberate instead of accidental, finger-coiling delivers in a way few other techniques can.
Work on small sections. Small means genuinely small—about the width of a pencil, maybe a little larger if your hair is dense. Smooth a bit of gel or setting foam through each section, then twirl the strand around your finger until it springs into a coil. The coil should hold its own shape before you move on.
One section at a time. No rushing.
What Makes Them Different
Finger coils give you high definition and low guesswork. They’re not the fastest style, and they’re not the one I’d pick if I needed my hair done in twenty minutes. But they’re excellent for short curls, tapered cuts, and anyone who wants a cleaner front hairline without flattening the rest of the style.
The mistake to avoid is overloading the hair with product. Too much gel makes the coils sticky and slow to dry. A thin coating is enough. If the strand feels slick but not wet with product, you’re in the right place.
5. Half-Up Pineapple Puff
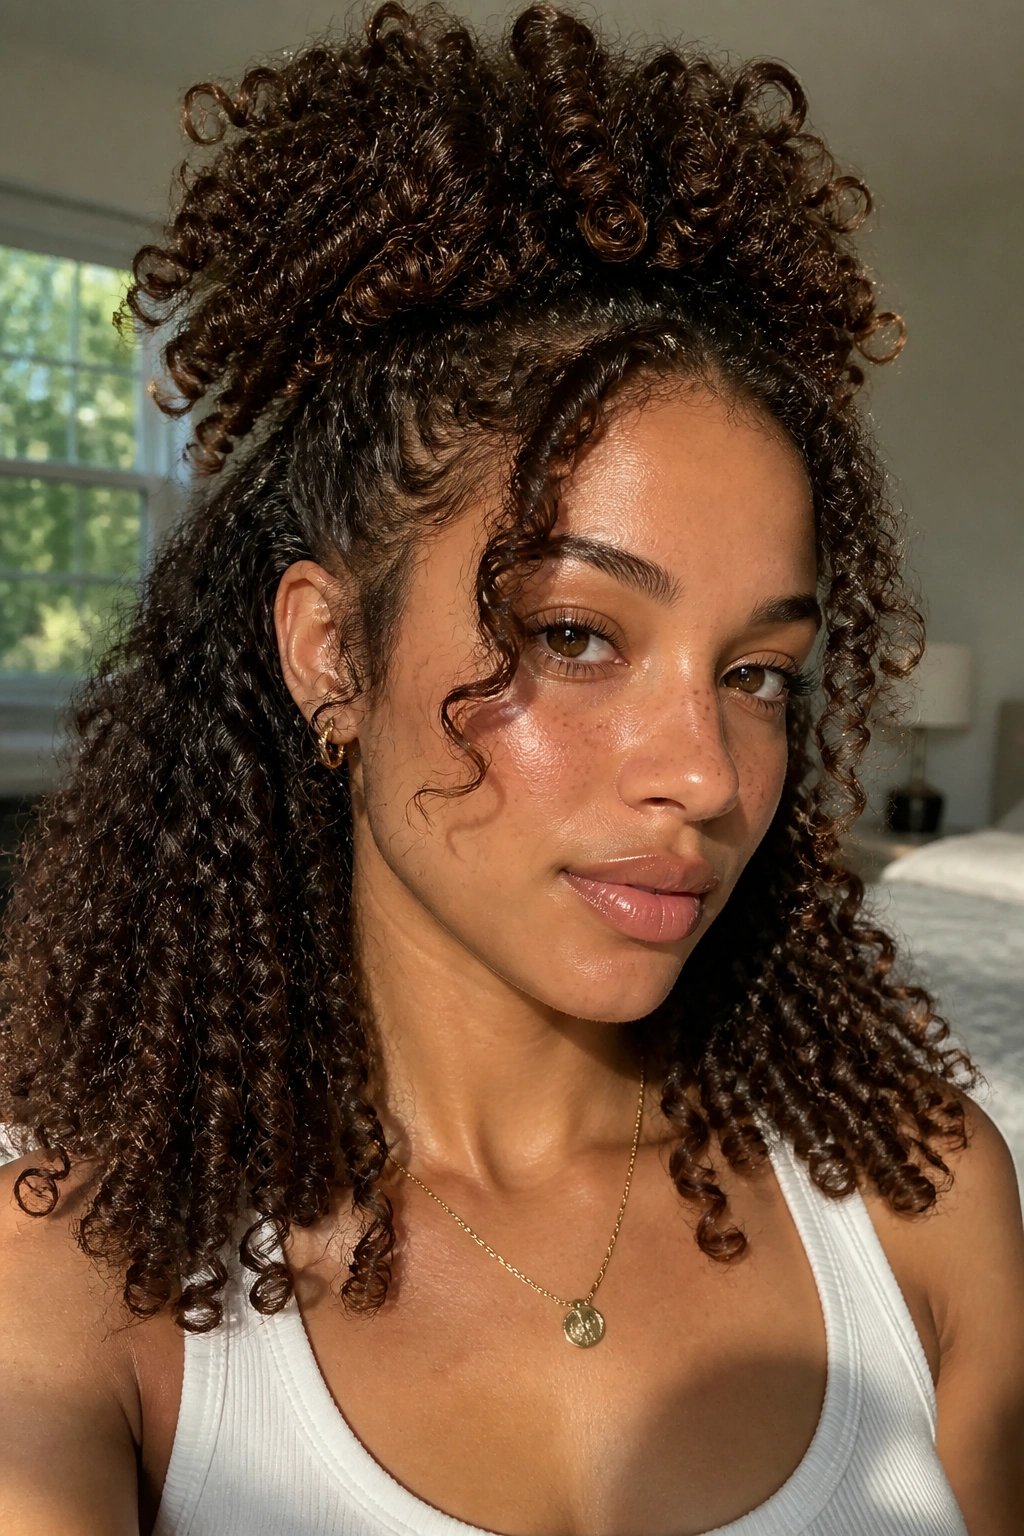
A half-up pineapple puff is one of those styles that solves three problems at once: flattening at the crown, frizz at the back, and the awkward in-between feeling that hits on day-two hair. Pull the top section high and loose, leave the bottom curls free, and suddenly the whole shape looks more intentional.
This is especially useful on medium to long curly hair. A full pineapple can feel too casual for some settings, and a fully down style can lose shape once the roots start collapsing. The half-up version sits between the two. It keeps volume near the top and still shows off length.
What to Leave Loose
The best part is the face-framing pieces. Leave a few curls out at the front and near the temples. They break up the puff and keep the style from looking too severe.
Use a satin scrunchie, not a tight elastic. Tight bands leave dents. And if your hair is very dense, twist the top section once before tying it off so the puff sits higher and doesn’t sag by lunch.
6. Side-Part Volume Curls
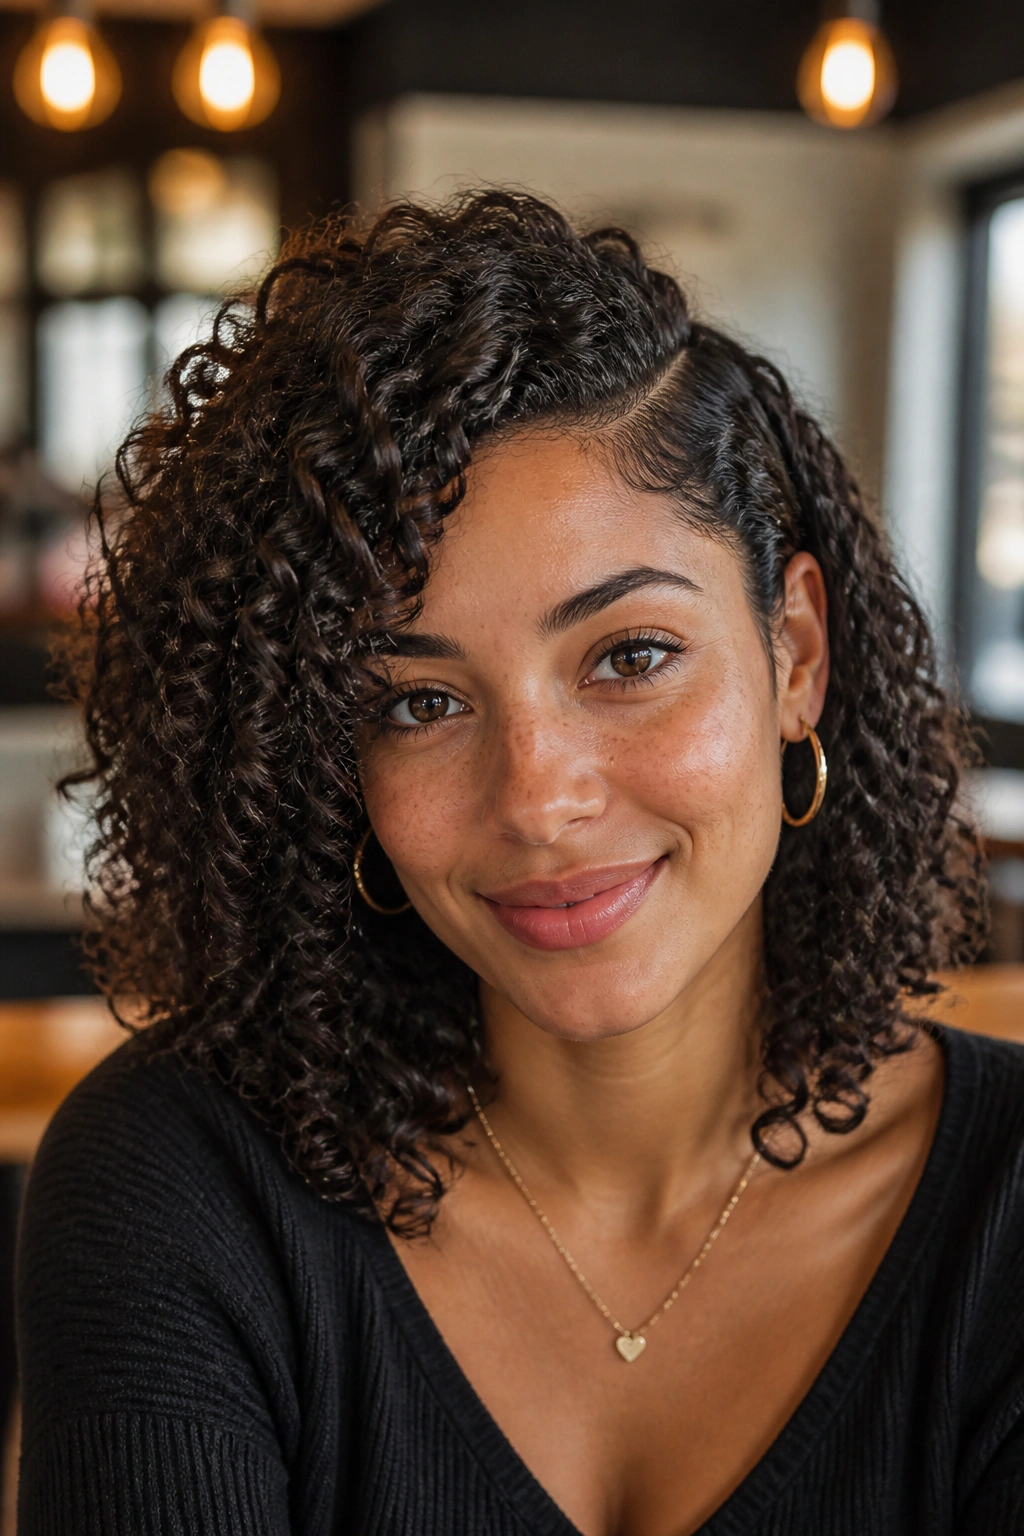
A deep side part can rescue curls that collapsed at the crown or look too symmetrical. It shifts the weight, creates lift on one side, and gives the whole style a more dramatic line without adding any extra work. Sometimes that’s all a head of curly hair needs.
Use the tail of a comb on damp hair, not dry hair, if you want a cleaner part. Then clip the heavier side up for a few minutes while the roots set. That little pause helps the hair remember where you want it to fall.
You do not need a perfect line.
A side part works especially well when the ends are defined and the roots are a little airy. It also helps if one side of your curl pattern is looser than the other. The part gives the eye something to follow, which makes small differences in curl shape feel deliberate instead of uneven.
7. Curly Shag with Rounded Layers
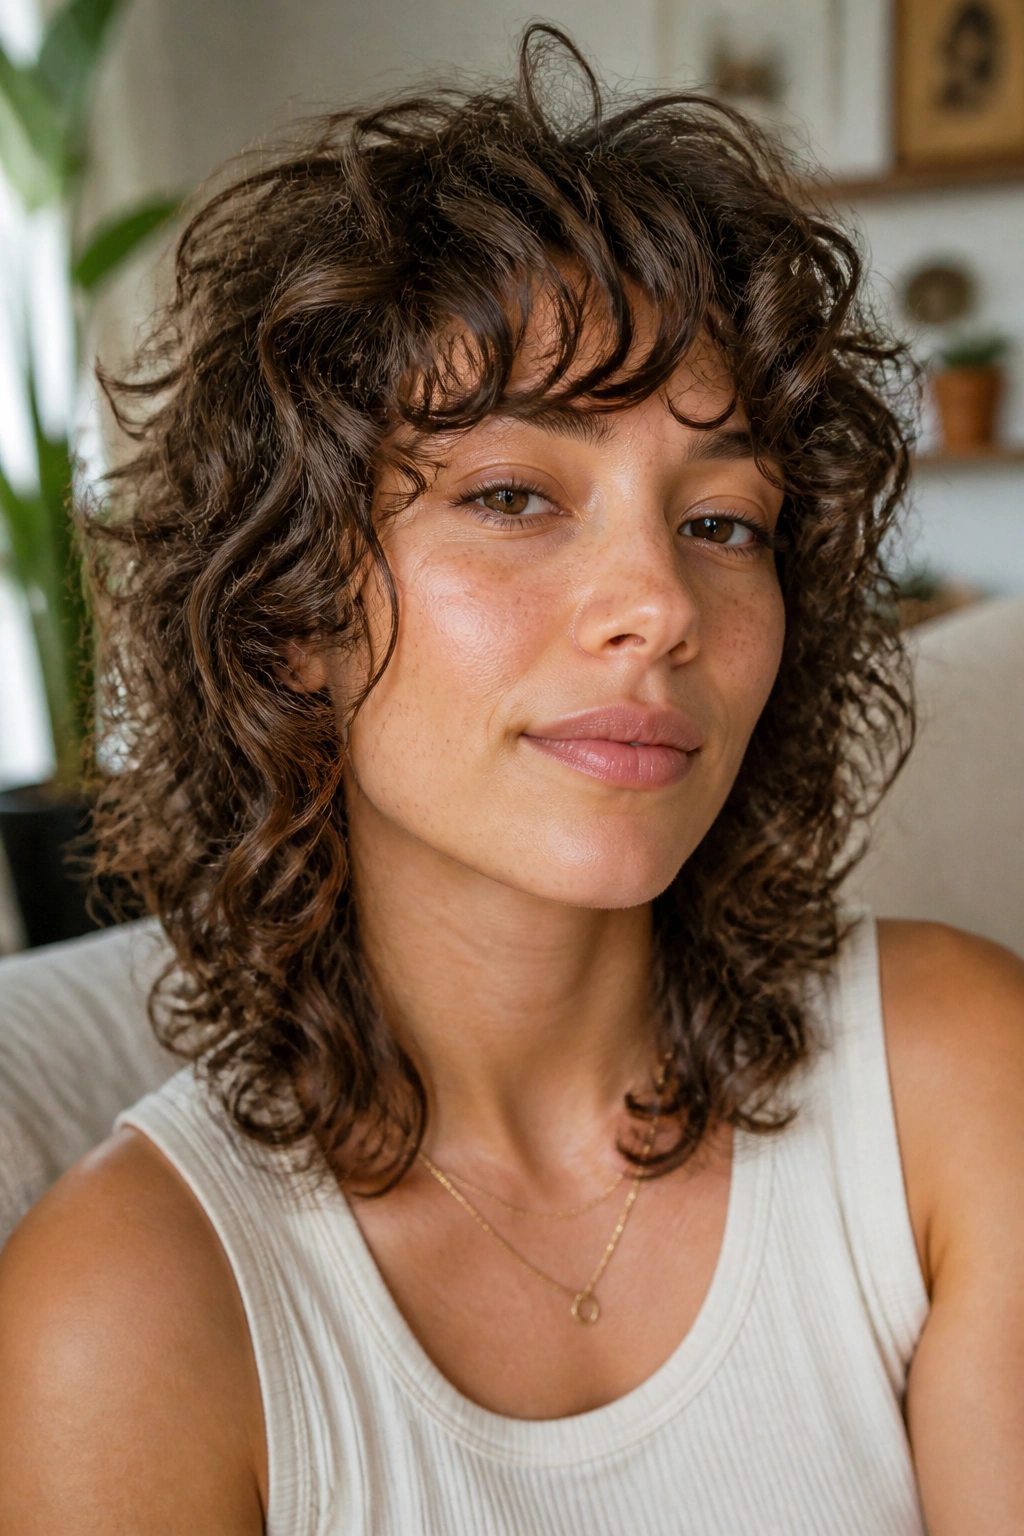
Can a shag really work on curly hair? Absolutely—if the layers are cut with the curl pattern in mind. A good curly shag removes weight in the right places, which lets the curls stack instead of hanging in one thick block. That’s the difference between shape and bulk.
The rounded version is the one I like most on dense curly and coily hair. It keeps the silhouette soft around the sides while still building height at the crown. A dry cut often makes more sense here because the stylist can see how each curl springs and where the bulk actually sits.
Why Dry Cutting Matters
Wet curls lie. They stretch out, then spring up differently once dry. That means a cut that looks balanced on a soaked head can end up lopsided later. A dry cut helps avoid that surprise.
This style is not for people who want low-maintenance uniformity. It thrives on movement. If you like hair with a little edge, some lift, and a shape that doesn’t feel too controlled, a curly shag gives you room to breathe.
8. Clipped-Back Crown Curls
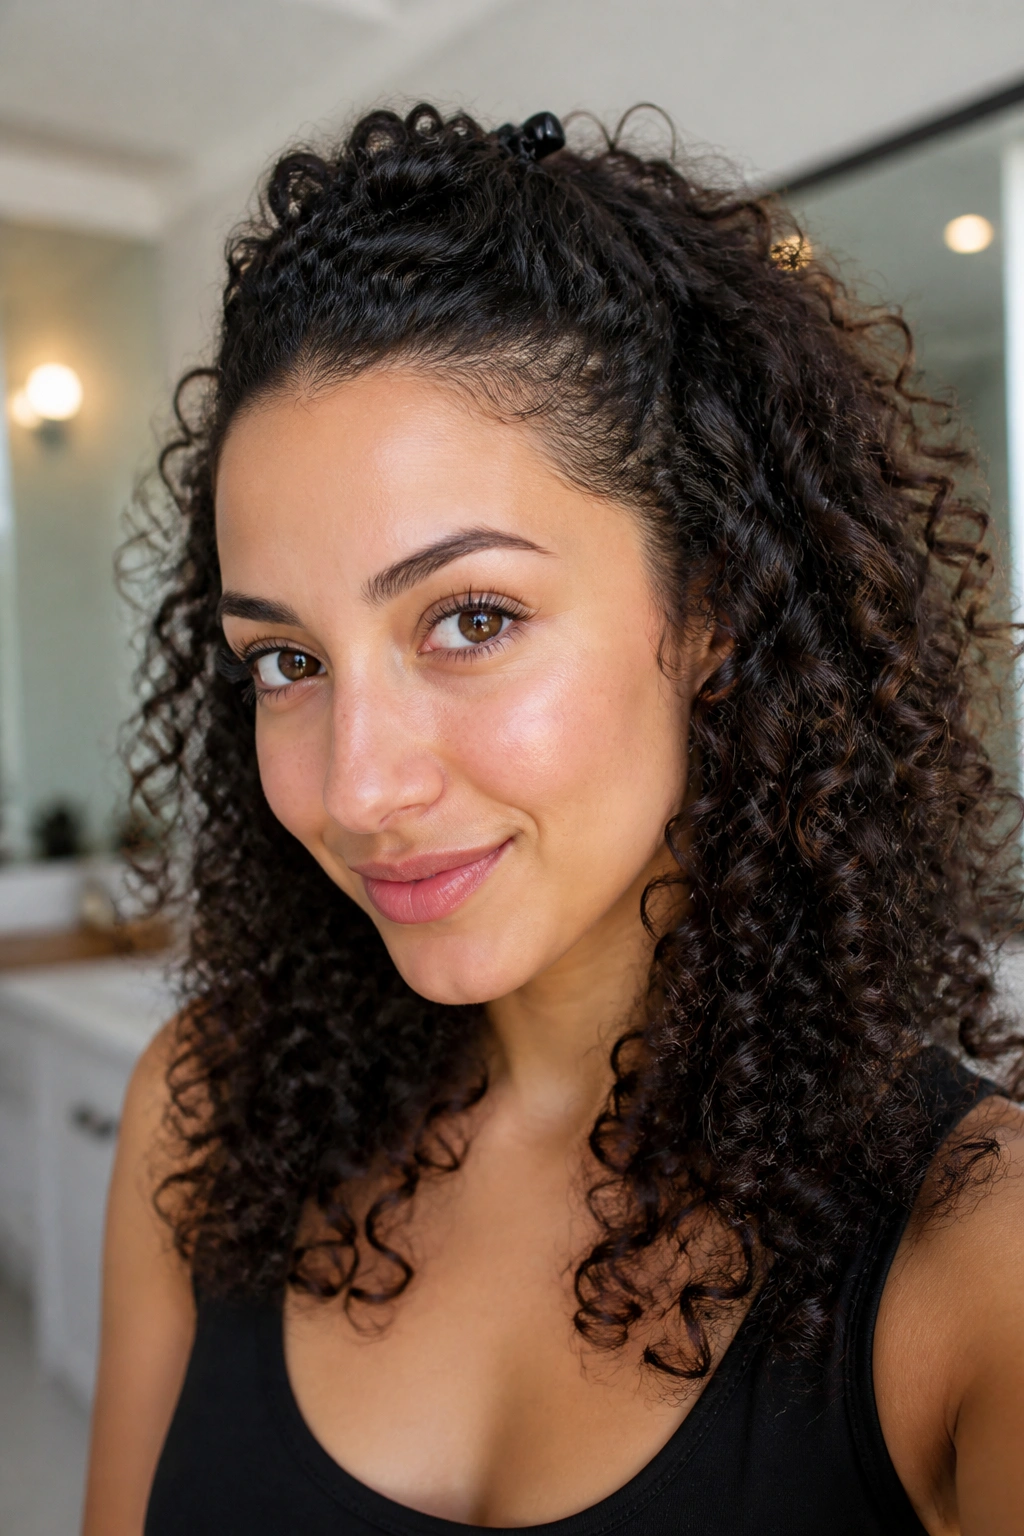
Sometimes the front section is the problem. The rest of the curls behave, and the hairline starts puffing, separating, or getting frizzy in a way that ruins the shape. Clipping the crown back solves that fast, and it does it without hiding the curl pattern.
Use one strong barrette, two bobby pins, or a small metal clip. Pull back only the front inch or two on each side. If you grab too much hair, the style gets stiff. If you grab too little, the clip doesn’t sit flat and slides out.
That tiny middle ground matters.
This style works when you want the curls to stay visible but need the face open. It’s also useful when you’re stretching wash days and the front pieces have gone a bit wild. Let the rest of the hair stay fluffy. The contrast is the whole point.
9. Diffused Root Lift
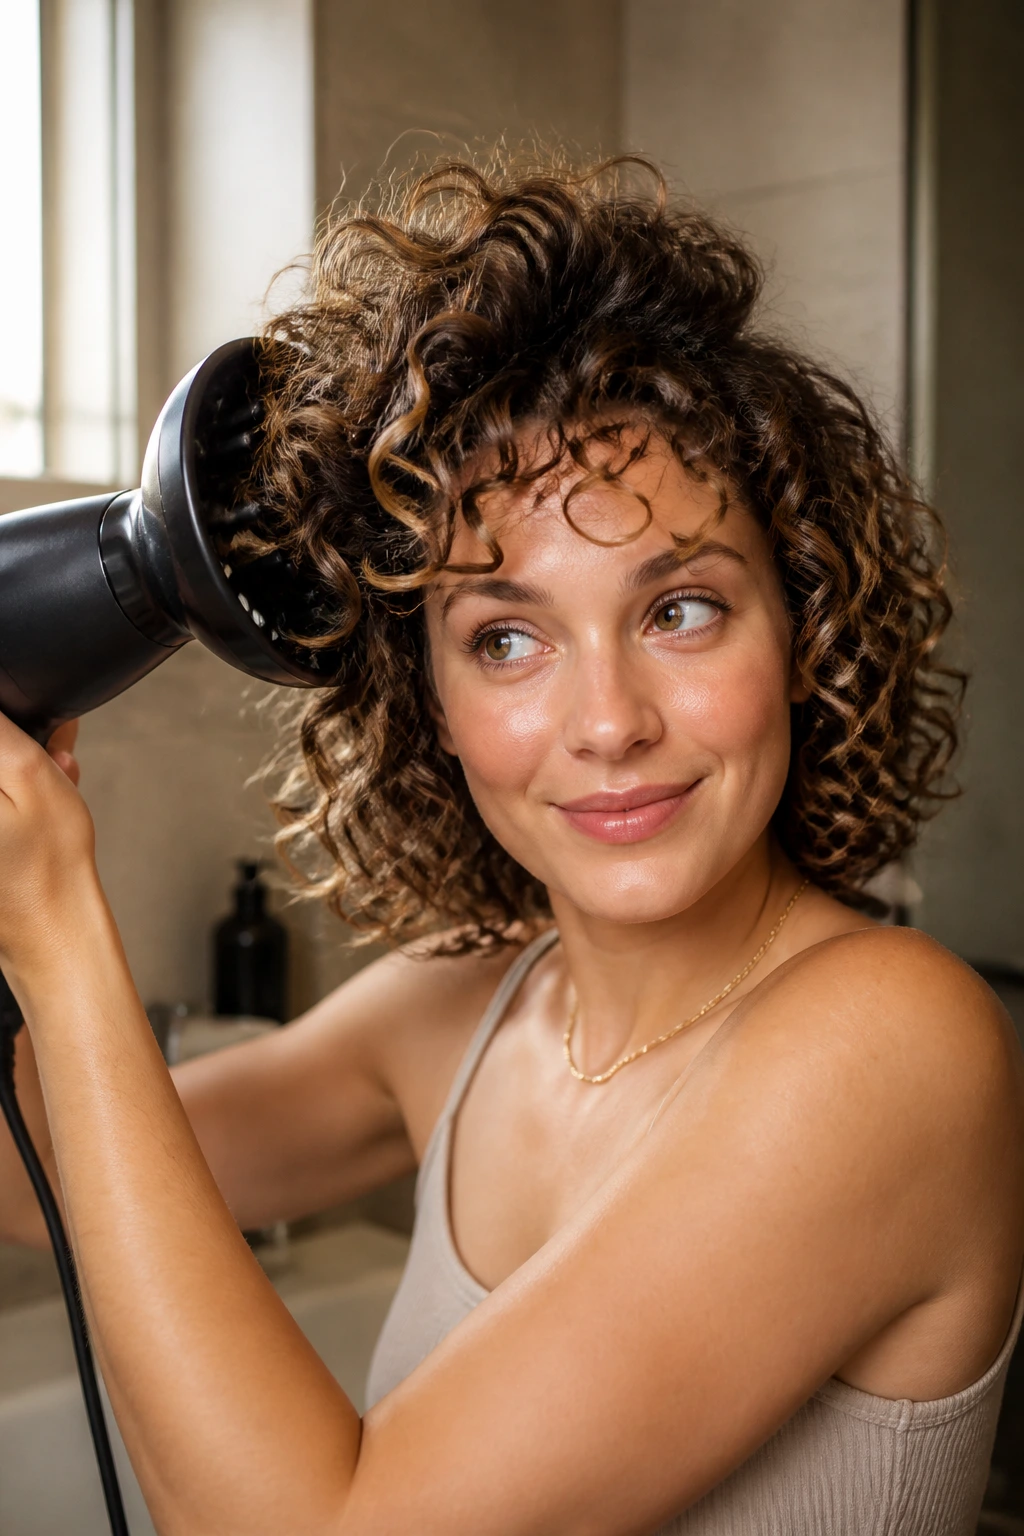
Flat roots can drag down an otherwise great curl pattern. A diffuser fixes that better than most people expect, but only if you use it to lift the roots instead of blasting the hair from a few inches away and hoping for the best. That’s usually where the frizz comes from.
Start on low heat, low speed, and keep the diffuser close to the scalp without moving the curls around too much. Hover at the roots first. Once the top section is about 60% dry, move to pixie-diffusing—cup a section into the bowl of the diffuser, hold it still for a few seconds, then release.
How to Diffuse Without Frizz
Hold the dryer at an angle. Straight-on airflow is rough on curls.
Stop when the hair still feels a little cool and slightly damp in the center. If you chase every drop of moisture out of it, you lose softness. The finish gets crisp in the wrong way, and the curls stop looking like curls. A good diffuser session should lift the crown, keep the clumps intact, and leave you with volume that has some shape to it.
10. Tapered Cut for Coily Hair
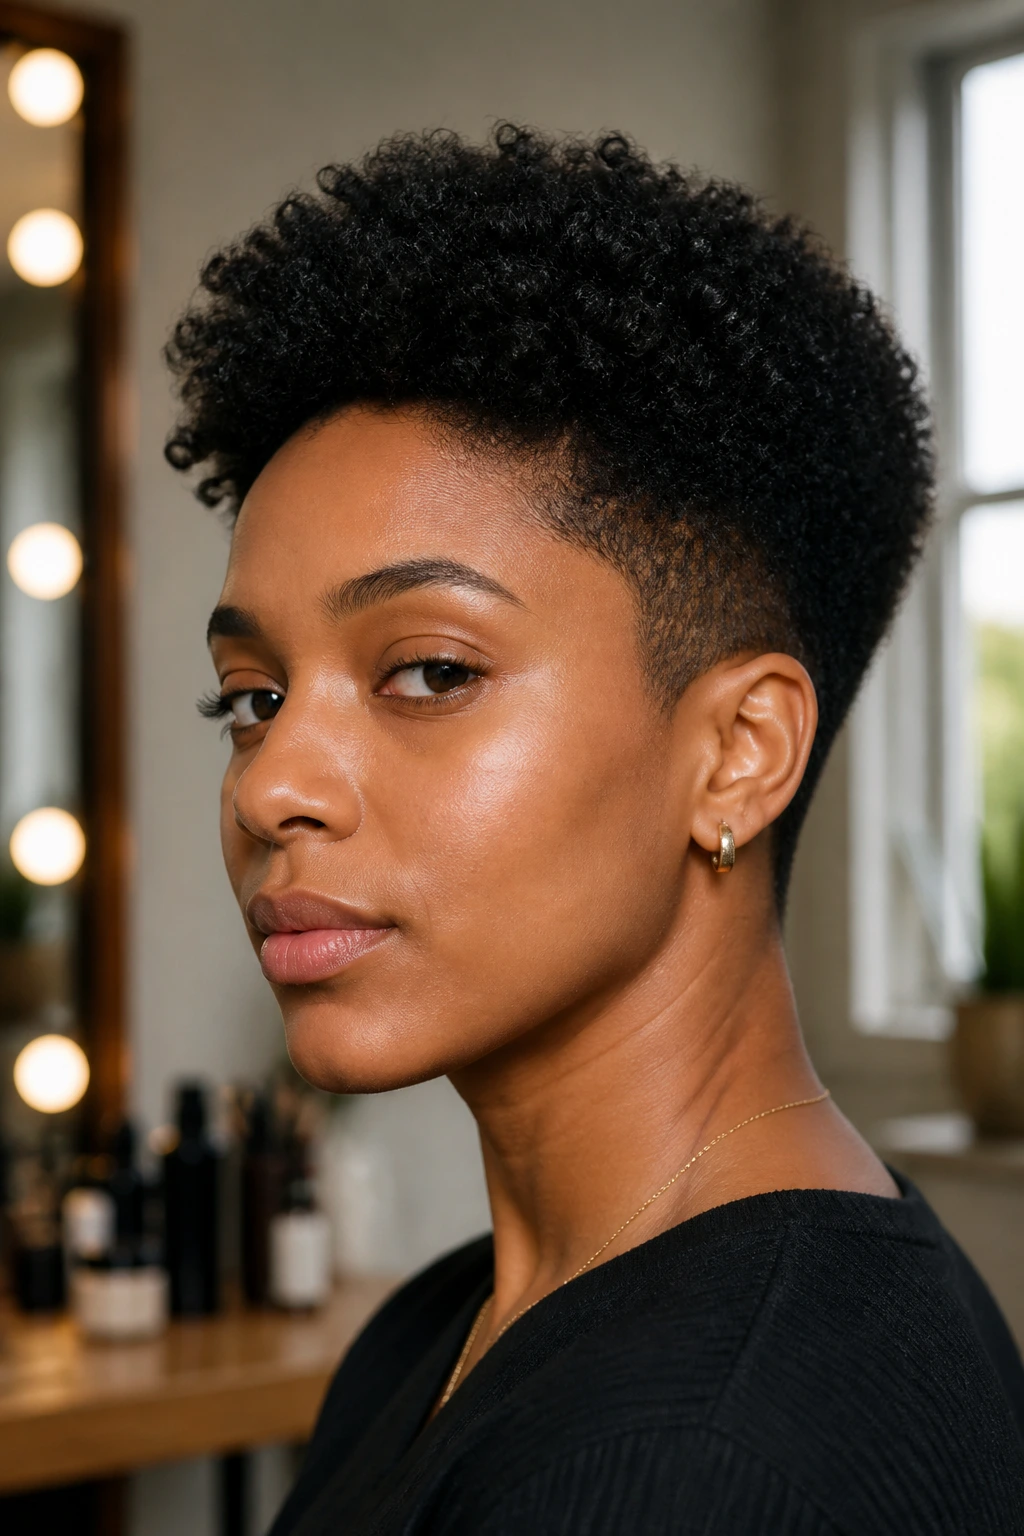
A tapered cut is the blunt truth of curly styling: shape matters more than length. On coily hair, short sides and a fuller top can make the curl pattern look bold, neat, and easy to wear without a long morning routine.
This cut works because it lets the density live where you want it. The top gets height, the sides stay clean, and the nape doesn’t bulk up under collars and scarves. That can be a relief if your hair swallows product and takes forever to dry in a single length.
Not everyone wants that drama.
Who It Suits Best
- People who like strong shape with little daily fuss.
- Coily hair that shrinks a lot and likes standing up.
- Dense textures that get boxy when left all one length.
- Anyone who wants the neckline and ears to feel lighter.
A tapered cut does ask for regular shaping, because the silhouette can blur fast once the sides grow in. Still, the payoff is real. The hair feels lighter, the curls read more clearly, and mornings get easier because the structure is already doing half the work.
11. Mini Bantu Knot Curls
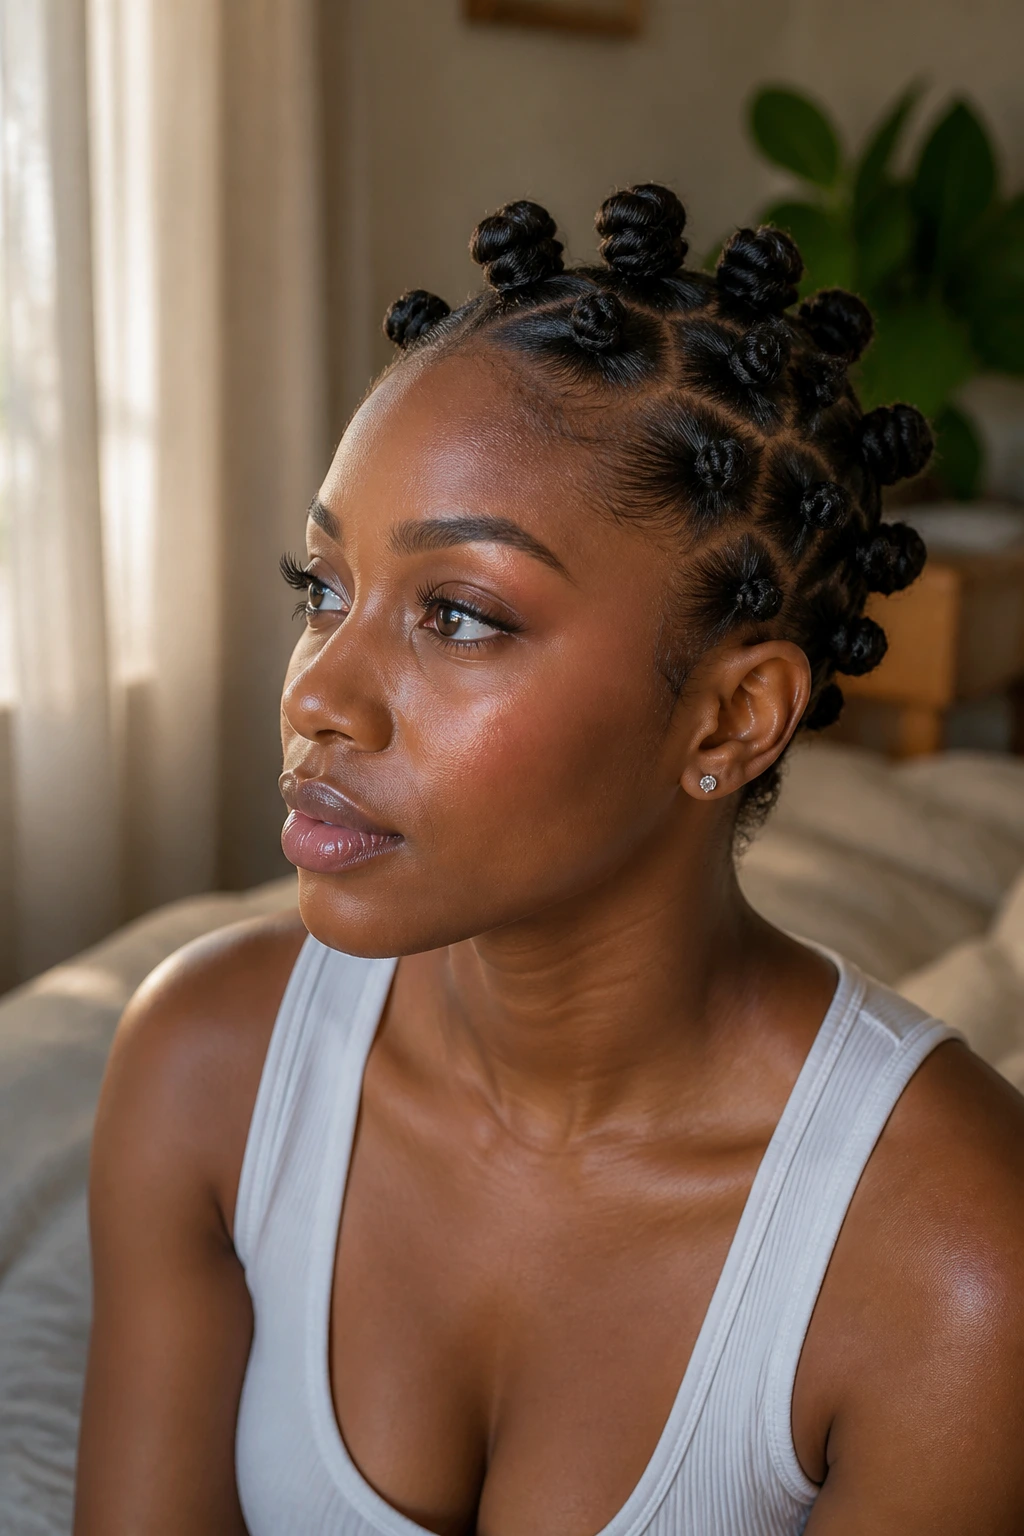
Mini Bantu knots are one of those styles that can live in two worlds. Wear them as a finished look and they look sculptural. Take them down after a full dry and they leave behind tight, springy curls with a clean pattern. That’s a lot of mileage from one set.
Use small, even sections and coil each one until it wraps into a knot close to the scalp. If the hair is dry at the ends, add a touch of cream or water before you twist. The section should feel pliable, not slippery.
Set or Wear
As a set style, the knots need neat parts and firm tension. As a curl-setting style, the main goal is uniformity. If a few knots are looser than the rest, the finished curls will look uneven when you take them down.
Sleep in a satin bonnet or on a satin pillowcase so the knots don’t flatten. If you plan to unravel them, wait until they’re dry all the way through. Damp centers make the style frizz fast, and there’s no fixing that without starting over.
12. Flat-Twist Crown Style
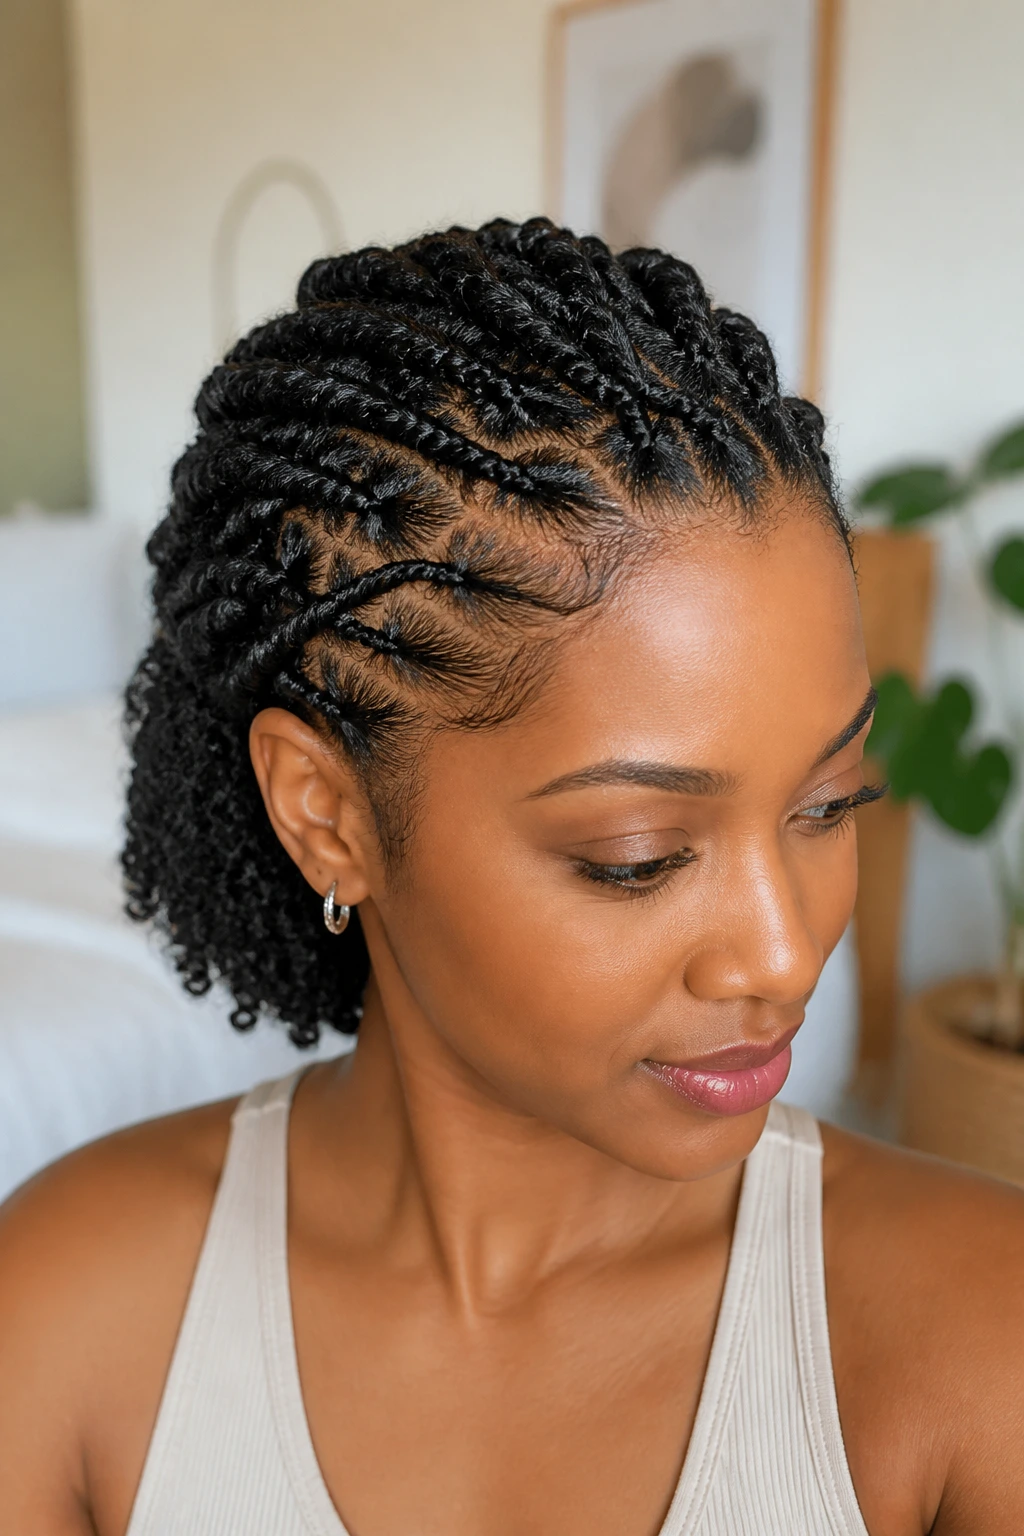
Flat twists across the crown give curly hair a clean, lifted frame without stealing all the texture. The style sits close to the scalp at the front, then allows the rest of the hair to fall loose or gather into a puff. It’s practical, but it still looks considered.
Part the hair into 1-inch to 1.5-inch sections near the hairline and twist flat toward the back. Keep your hands close to the scalp so the twist lies neatly instead of popping up. If you’re using this as a protective style, tuck the ends away and keep the tension gentle around the edges.
How to Part It
The parting pattern changes the mood. A straight center part looks tidy and graphic. A soft side part feels looser. A zigzag part has a little edge, though it does take more care to keep the lines even.
This style is especially useful when the front curls are fine and the rest of the hair is dense. The twist creates structure where the hair needs it most, and the loose back keeps the overall look from feeling too strict.
13. Slicked Edges and Fluffy Length
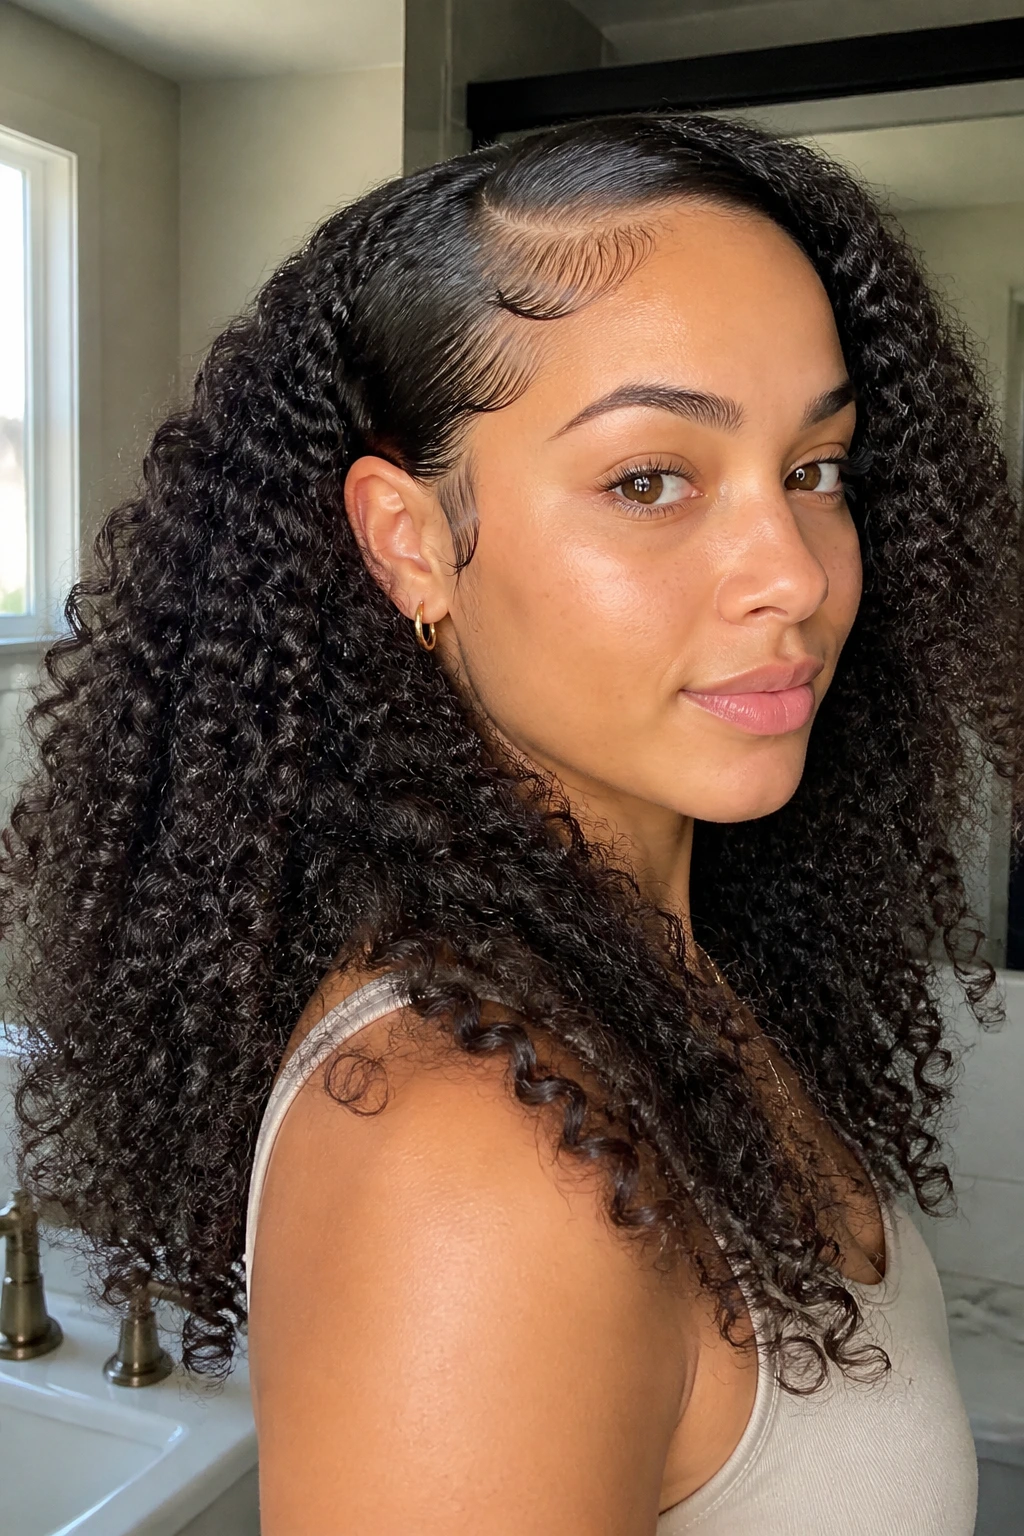
Some curly looks work because of contrast. Smooth the edges, keep the middle soft, and the hair instantly feels more styled. That contrast can be subtle or bold, depending on how much edge control you use and how much of the length you leave alone.
I like this on medium-length curls that already have body. The edges frame the face, while the fluffy lengths keep the style from looking too stiff. The trick is not to drown the hairline in gel. A fingertip amount, brushed along the edges, is usually enough.
Less is more here.
If the edge product starts flaking, you used too much or layered it on top of old residue. Clean the hairline first. Then smooth the edges once, let them set, and leave them alone. The rest of the hair should still move. That movement is what keeps the style from looking pasted on.
14. Scarf-Tied Day Two Curls
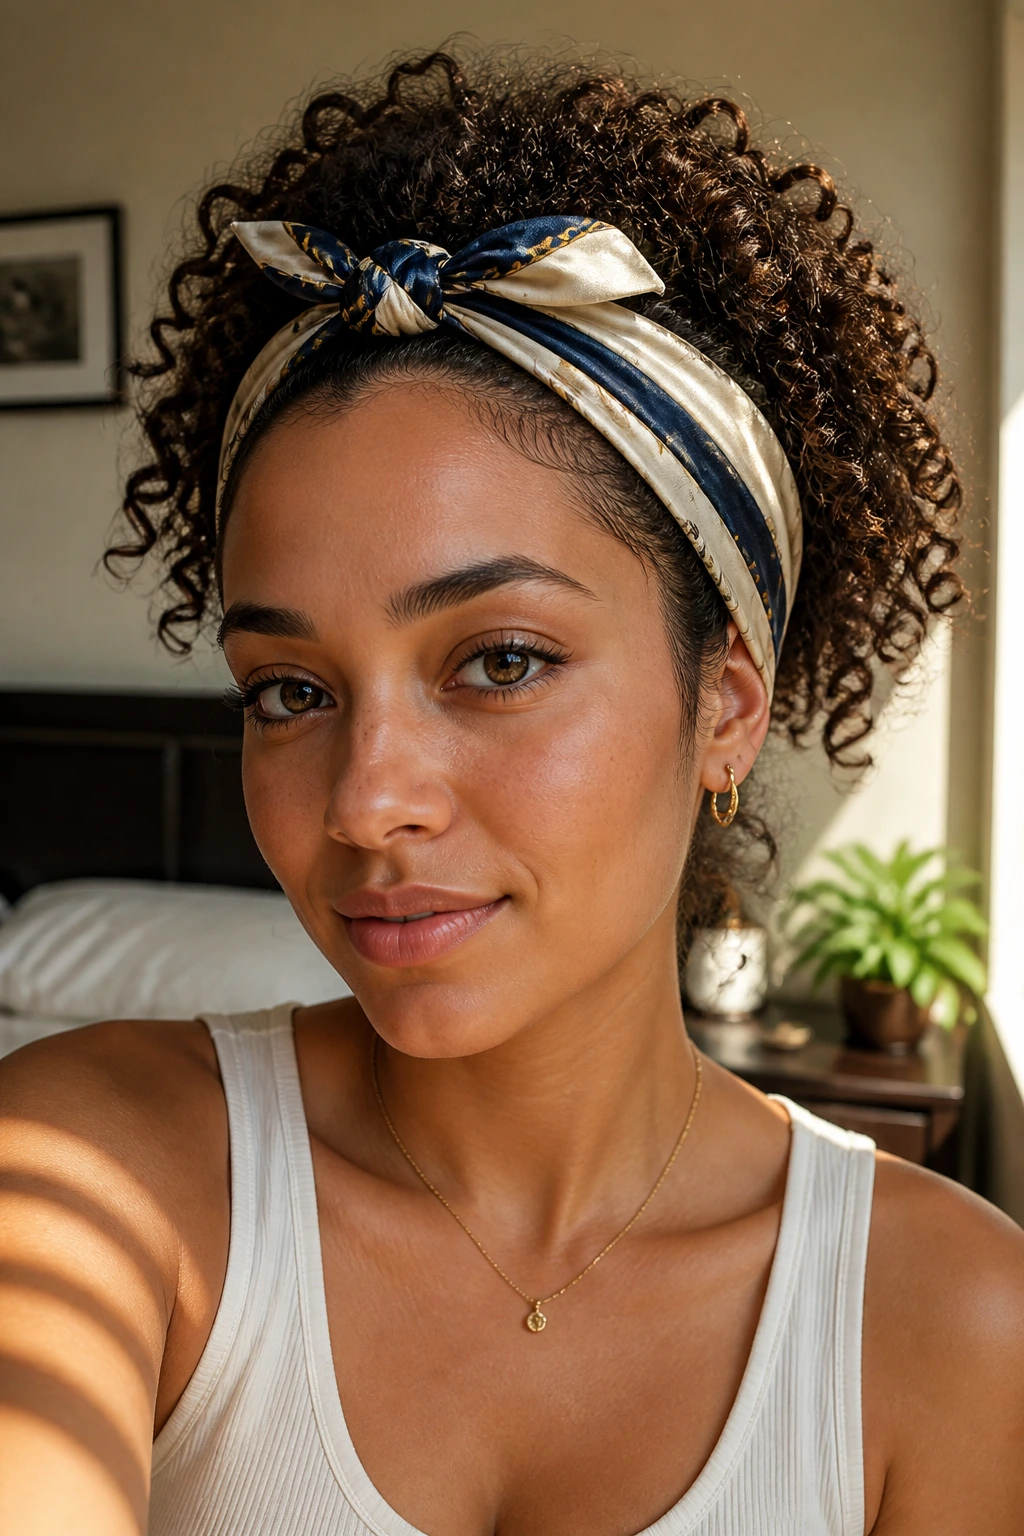
A scarf can save day-two curls faster than a full refresh routine. Tie a silk or satin scarf across the hairline, let the curls spill out behind it, and the style suddenly looks deliberate again. It hides the roughest part of the hair and gives the front a cleaner outline.
This is especially handy when the roots are puffy but the ends still look decent. You’re not trying to rebuild the whole style. You’re redirecting attention. That’s a much smarter move on curly hair than piling on more water and hoping the shape comes back.
What Works Best
- A wide scarf stays put better than a skinny one.
- Silk or satin reduces friction at the hairline.
- Leave a few curls loose near the temples.
- Match the tie to the part, not to the mood.
It’s a small fix, but those small fixes matter. A scarf changes the whole read of the style in seconds, and it doesn’t flatten the curl pattern underneath.
15. Water-and-Leave-In Refresh Curls

What do you do when curls are still good under the surface but the top looks rough? Refresh them with a light mist, not a soak. A spray bottle, a little leave-in, and your hands are usually enough to bring back the curl clumps without restarting the whole routine.
A simple mix works well: about 3 parts water to 1 part leave-in conditioner in a spray bottle. Mist the driest sections first. Then smooth the hair down the shaft with your palms and scrunch the ends upward. If a section still looks fuzzy, add one more light spray. Not ten.
The Spray Mix
This method lives or dies on restraint. Too much water breaks up the pattern and makes the hair swell in places you didn’t mean to touch. Too little leaves the style half-awake and still frizzy. You want the curls damp enough to reshape, not wet enough to collapse.
I’d use this on medium to loose curl patterns and on coils that need a quick reset before leaving the house. It’s a fast fix, and it respects the work already done in the original style. That’s why it beats piling on more product.
16. Stretchy Banding Style
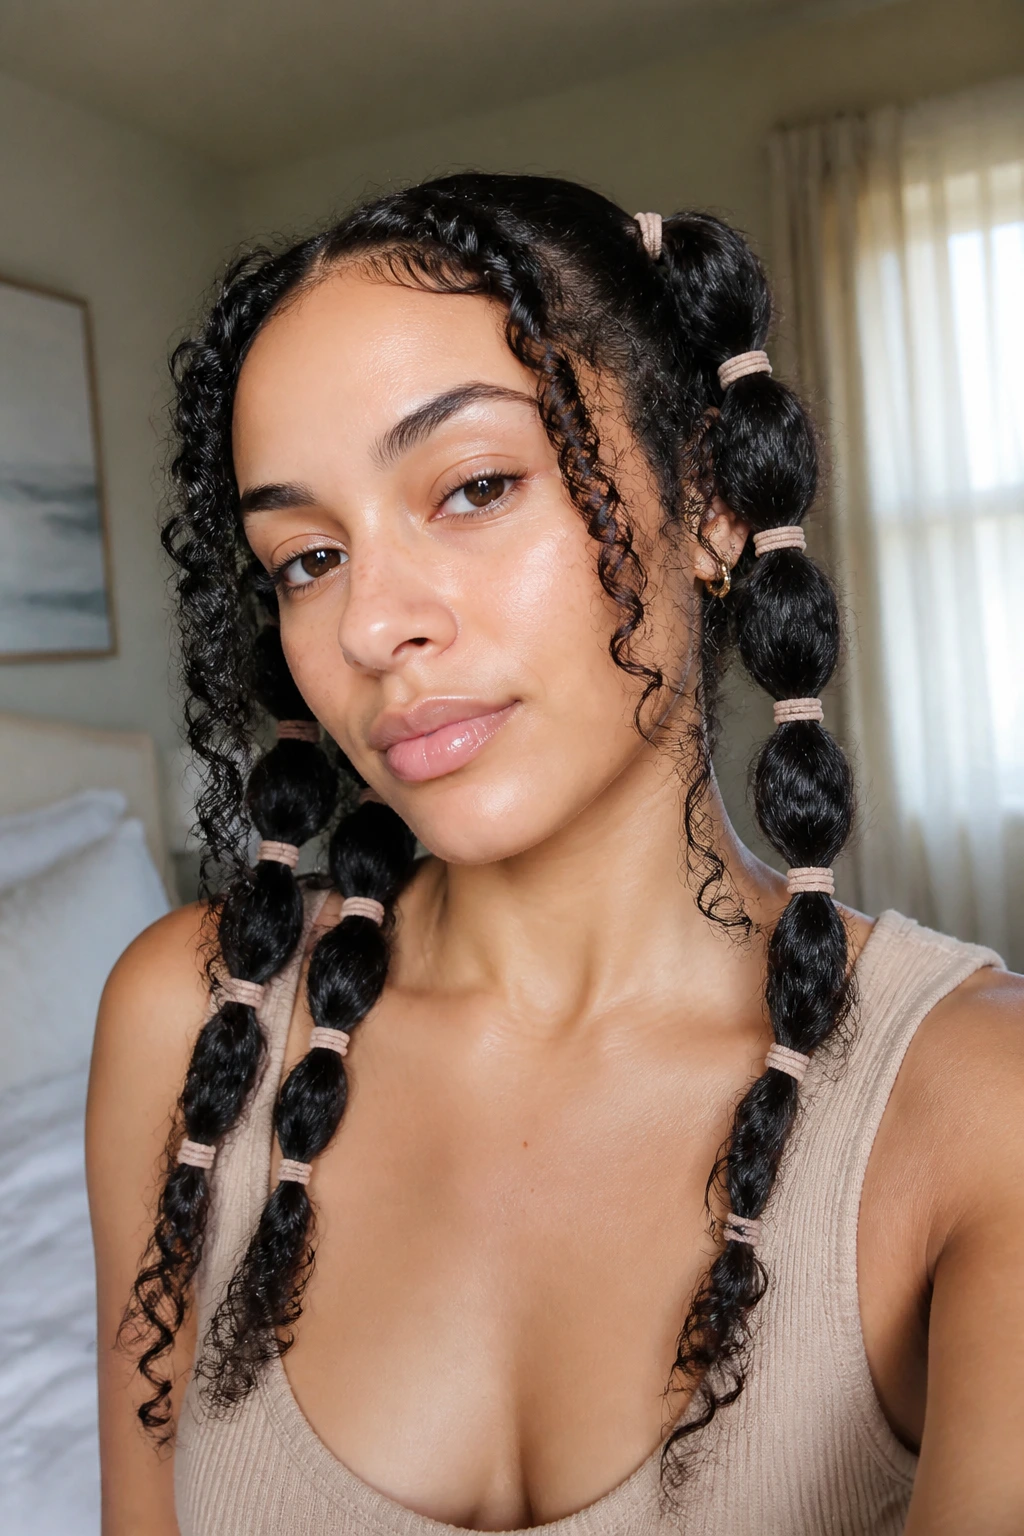
Banding is one of the most useful low-heat techniques for curly and coily hair. You section the hair, wrap soft bands or hair ties down the length, and let the hair dry in a stretched shape. The result is less shrinkage, more visible length, and fewer tangles the next day.
Use snag-free elastics or gentle bands every 2 to 3 inches, depending on hair length. The sections don’t need to be tiny, but they do need to be even. Uneven sections dry unevenly, and that shows up fast when you take the bands out.
What It Solves
Banding helps with shrinkage. It helps with wash-day styling. It also helps if you want to stretch a coily style without heat, which is the whole appeal for a lot of people.
Do not yank the bands off. Slide them gently or cut them if they’re stuck and disposable. Rough removal frays the ends and makes the stretch pointless. Done right, banding gives you length without flattening the curl pattern completely. That’s a rare balance.
17. Curly Fringe or Curly Bangs
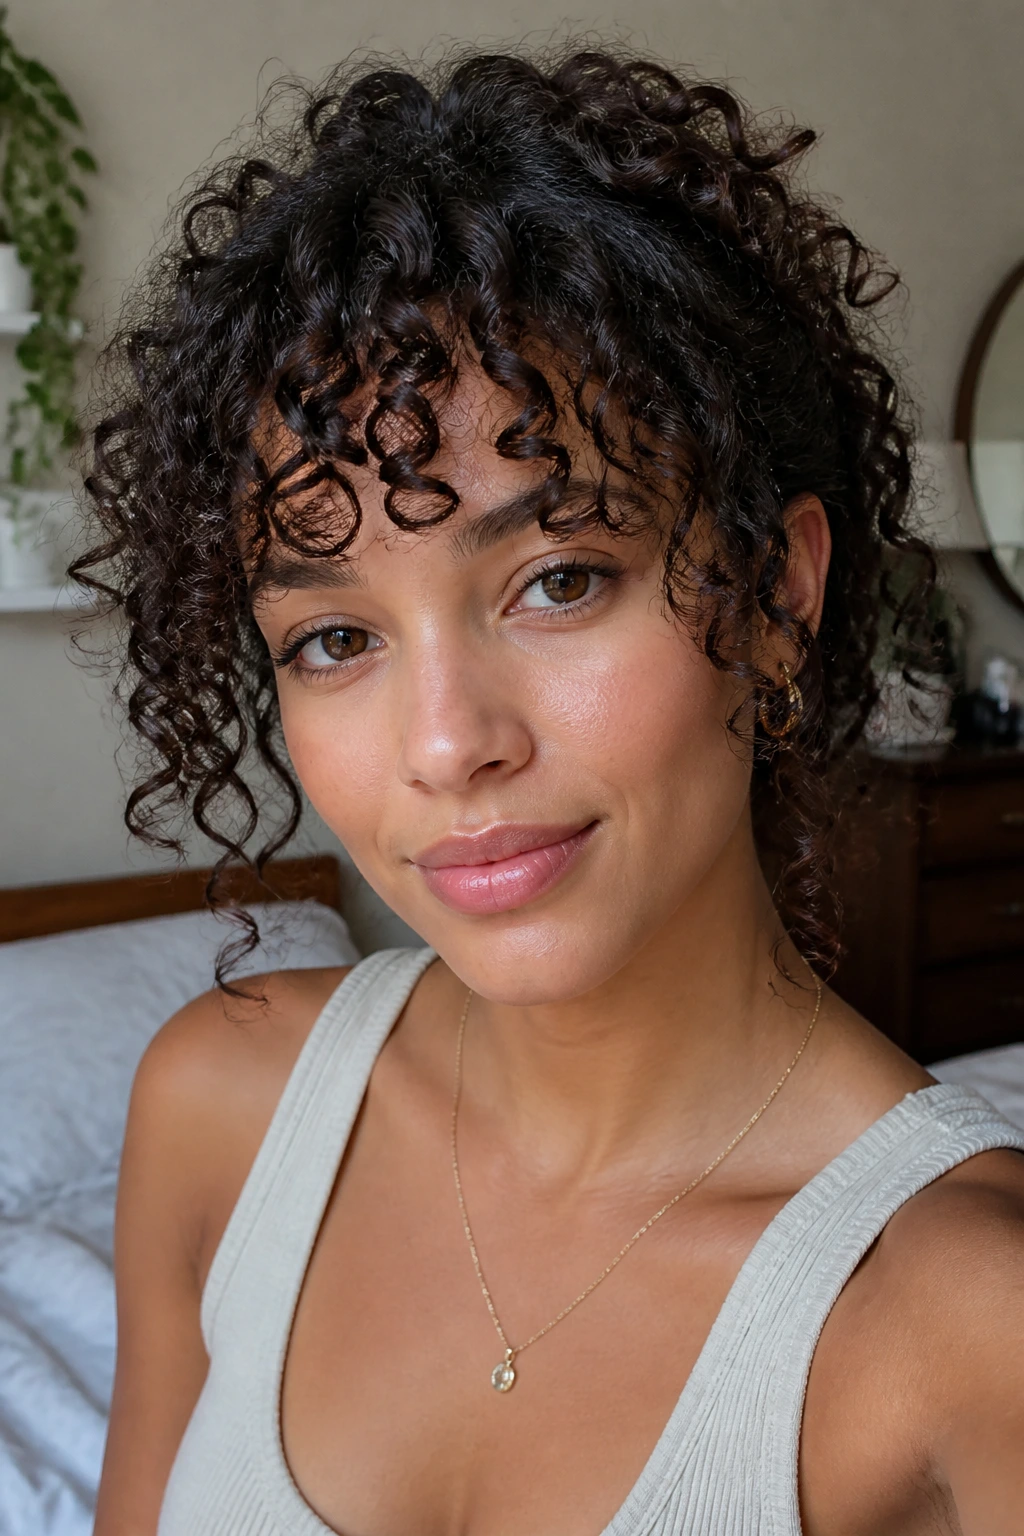
A curly fringe changes the whole face. It pulls the eye upward, softens a heavier cut, and makes the front of the hairstyle feel more alive. On curly hair, bangs are not a tiny detail. They’re a major shape choice.
The biggest mistake is cutting them too short while the hair is wet. Curls jump. They always do. If you want the bangs to land near the eyebrows, they often need to be left longer than that when first cut. Dry cutting gives a better read on where the spring will end up.
What to Tell Your Stylist
- Cut the fringe with the natural curl pattern visible.
- Leave extra length for shrinkage.
- Ask for pieces that sit slightly longer at the sides.
- Keep the thickness in line with the rest of the cut.
Curly bangs can be a headache if the front section is finer than the rest, because they separate easily. Still, when they’re cut with care, they give the face a soft frame that straight bangs rarely match on textured hair.
18. Low Puff with Face-Framing Curls
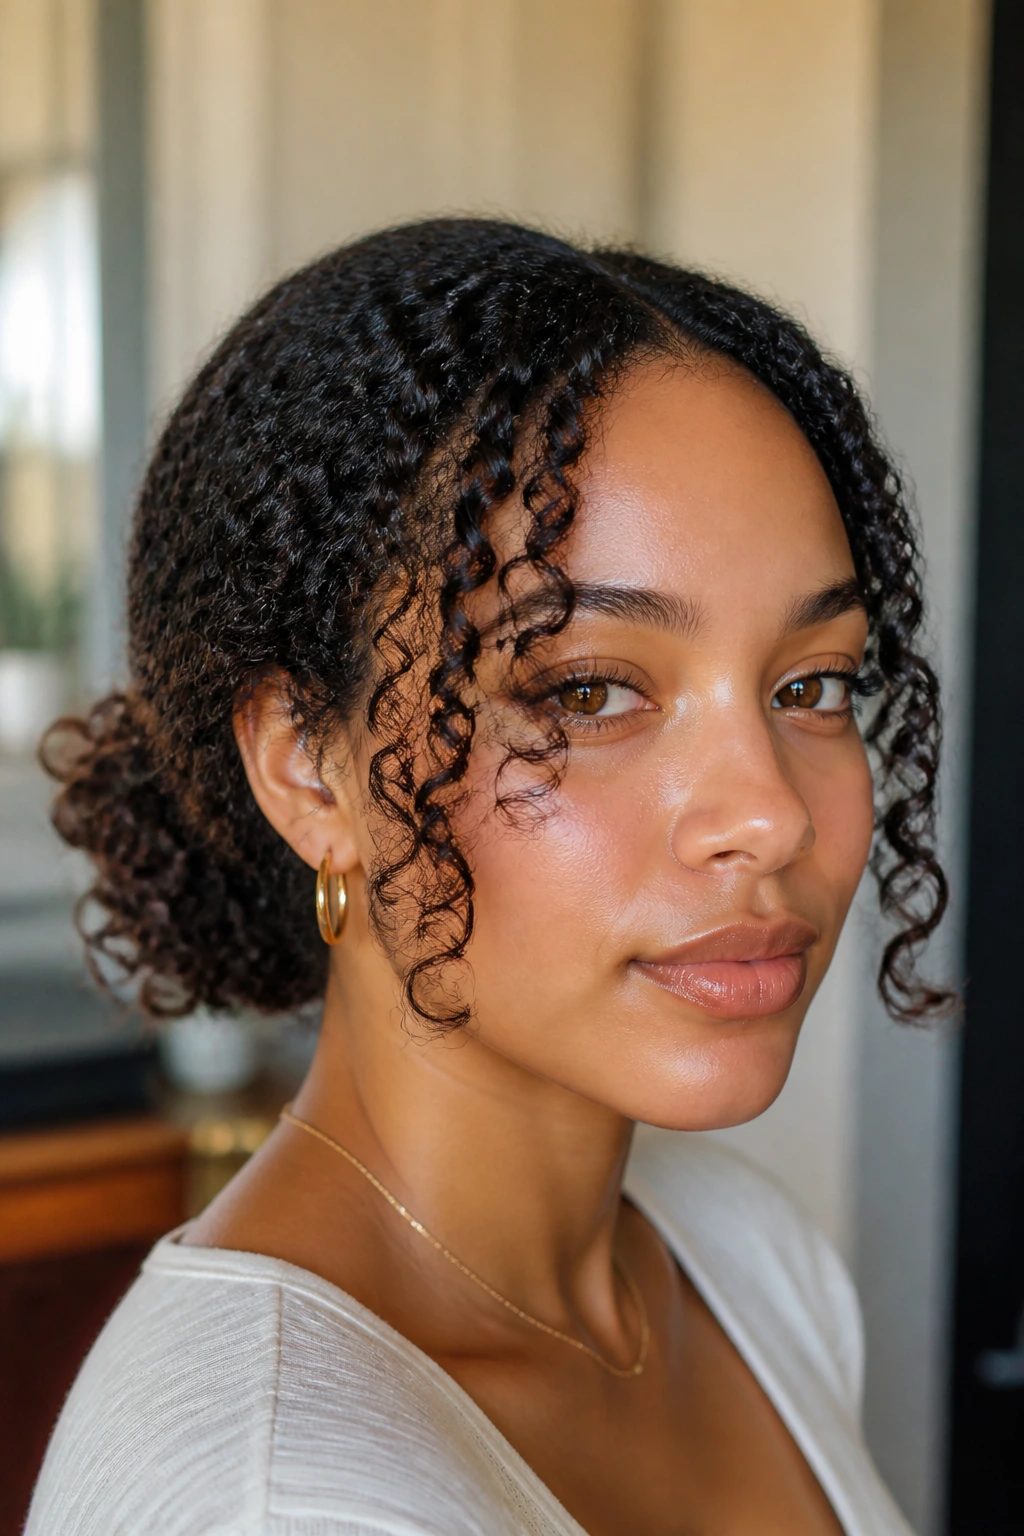
A low puff is the kind of style that looks simple until you notice how well it solves real-life hair problems. It keeps the bulk low, protects the ends, and still lets a few curls hang around the face so the style doesn’t feel severe.
This is the move for mornings when you need the hair off your neck but don’t want a full bun. Gather the hair at the nape, secure it with a soft band, and leave the front pieces loose or lightly shaped. If the front curls are stretched out, refresh just those sections with a spray and a tiny bit of cream.
It’s a practical style, which is why I trust it.
Compared with a high puff, the low version feels calmer and less top-heavy. Compared with a full down style, it takes less maintenance and survives a long day better. That makes it one of the easiest answers when curly hair wants to cooperate but not perform.
Final Thoughts
The best curls for curly hair are the ones that suit the hair you actually have on your head, not the hair you wish would show up. Some days call for definition. Some call for stretch. Some call for a clean front and a messy back, and that’s fine.
A style earns its place when it makes the curls look intentional without turning the routine into a fight. Keep a couple of options in rotation: one for wash day, one for second-day hair, and one that saves you when the crown misbehaves. That small toolkit handles a lot.
And if a style looks good only when you stand in one exact spot under perfect light, I’d be suspicious. Real curly hair has movement. Let it.
