



Curly hair looks best when the shape does some of the work for you. The right textured hairstyles for curly hair keep the curl pattern visible, the crown lifted, and the ends from turning into a puffball by lunch.
That matters more than people admit. A style can be neat and still feel alive, or it can be smooth and somehow look flat the second you walk out the door. Curls have their own rules: shrinkage, density, frizz, and how much hold your strands can take before they go stiff.
A good style should match the haircut, not fight it. A shoulder-length coil can look short one day and full the next; a deep side part, a few pins, or a little stretch at the root can change the whole mood.
So the useful question is not whether curly hair can be styled. It can. The real question is which shape gives your curls room to do what they already want to do.
1. Wash-and-Go Curls with Long Layers
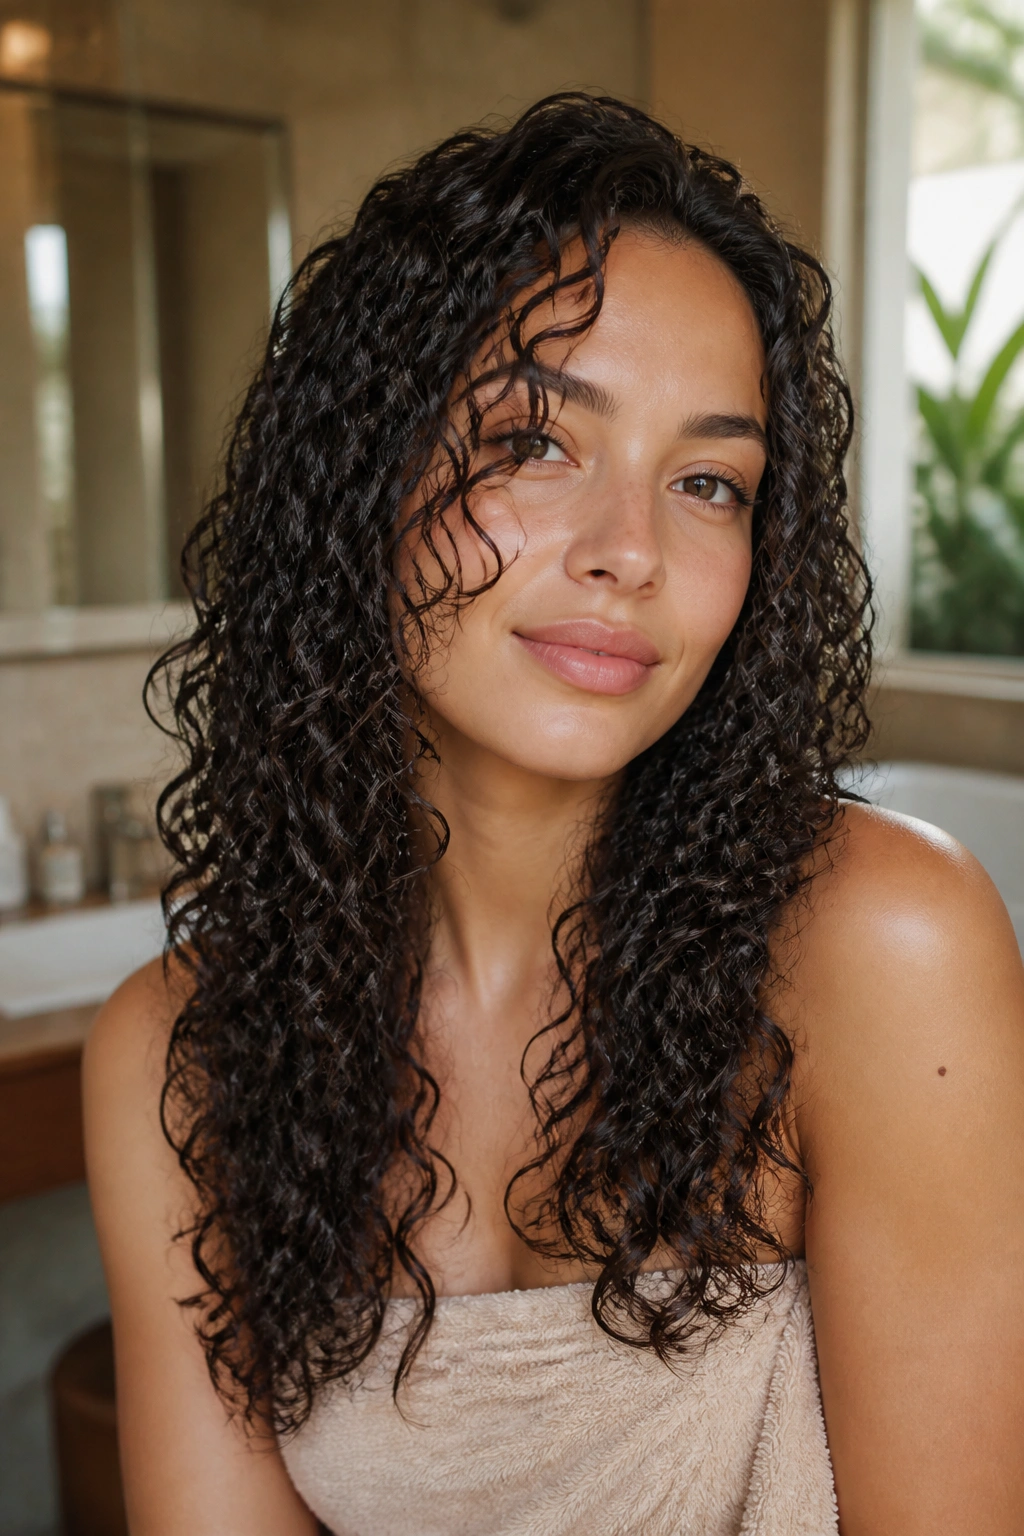
Long layers are the reason a wash-and-go can look polished instead of bulky. When curls are cut with some movement through the mid-lengths and ends, they stack more cleanly and fall in a shape that reads as intentional, not accidental.
This is the style I reach for when the hair already has good definition and the goal is simple: let the curl pattern show up without a lot of fuss. A curl cream plus a strong-hold gel usually does the trick. Work it through soaking-wet hair in sections, then scrunch with a microfiber towel or a cotton T-shirt. If you diffuse, use low heat and low airflow. High heat can rough up the cuticle and make the finish frizzier before the hair is even fully dry.
The part that gets skipped too often: long layers matter more than the product. Blunt ends can make dense curls look triangular. A few face-framing pieces around the cheekbone or jaw softens that edge fast.
A tiny detail, but a useful one. Try not to touch the curls while they dry. Hands-off is boring. It also works.
2. Curly Shag with Soft Fringe
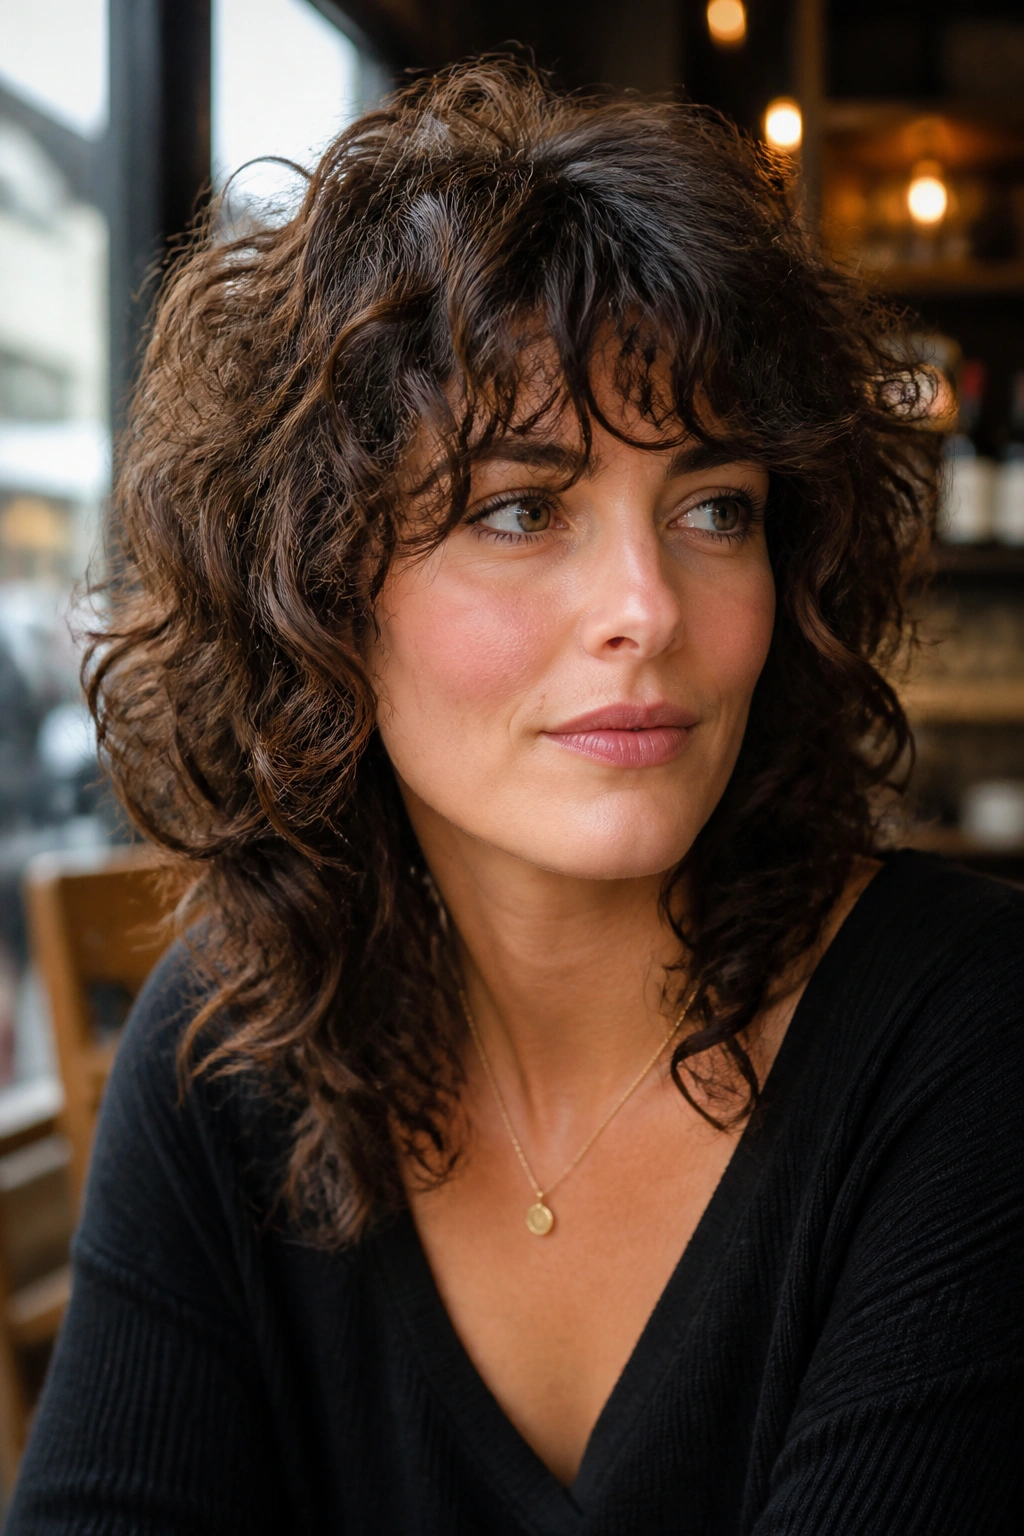
Why does a shag work so well on curls? Because curls already have texture, and a shag gives that texture somewhere to go. The crown gets lift, the sides get movement, and the fringe keeps the whole look from feeling heavy around the face.
Why It Works
The shag spreads the volume around instead of stacking it at the bottom. That’s why it looks so good on medium to thick curls. The layers break up bulk without making the hair look thin, and a soft fringe can pull attention upward if your curls tend to collapse near the temples.
What to Ask For
- Layers that start around the cheekbone or lip line
- A fringe that can dry in a gentle curve, not a stiff blunt line
- Enough length through the back to keep the shape soft
- Minimal thinning at the ends, which can make curly hair look frayed
If you style this cut, diffuse the roots first. That little bit of lift changes everything. Then let the curls set on their own. A shag can look wild in the best way, but it still needs a shape underneath the movement.
3. Chin-Length Curly Bob with Shape
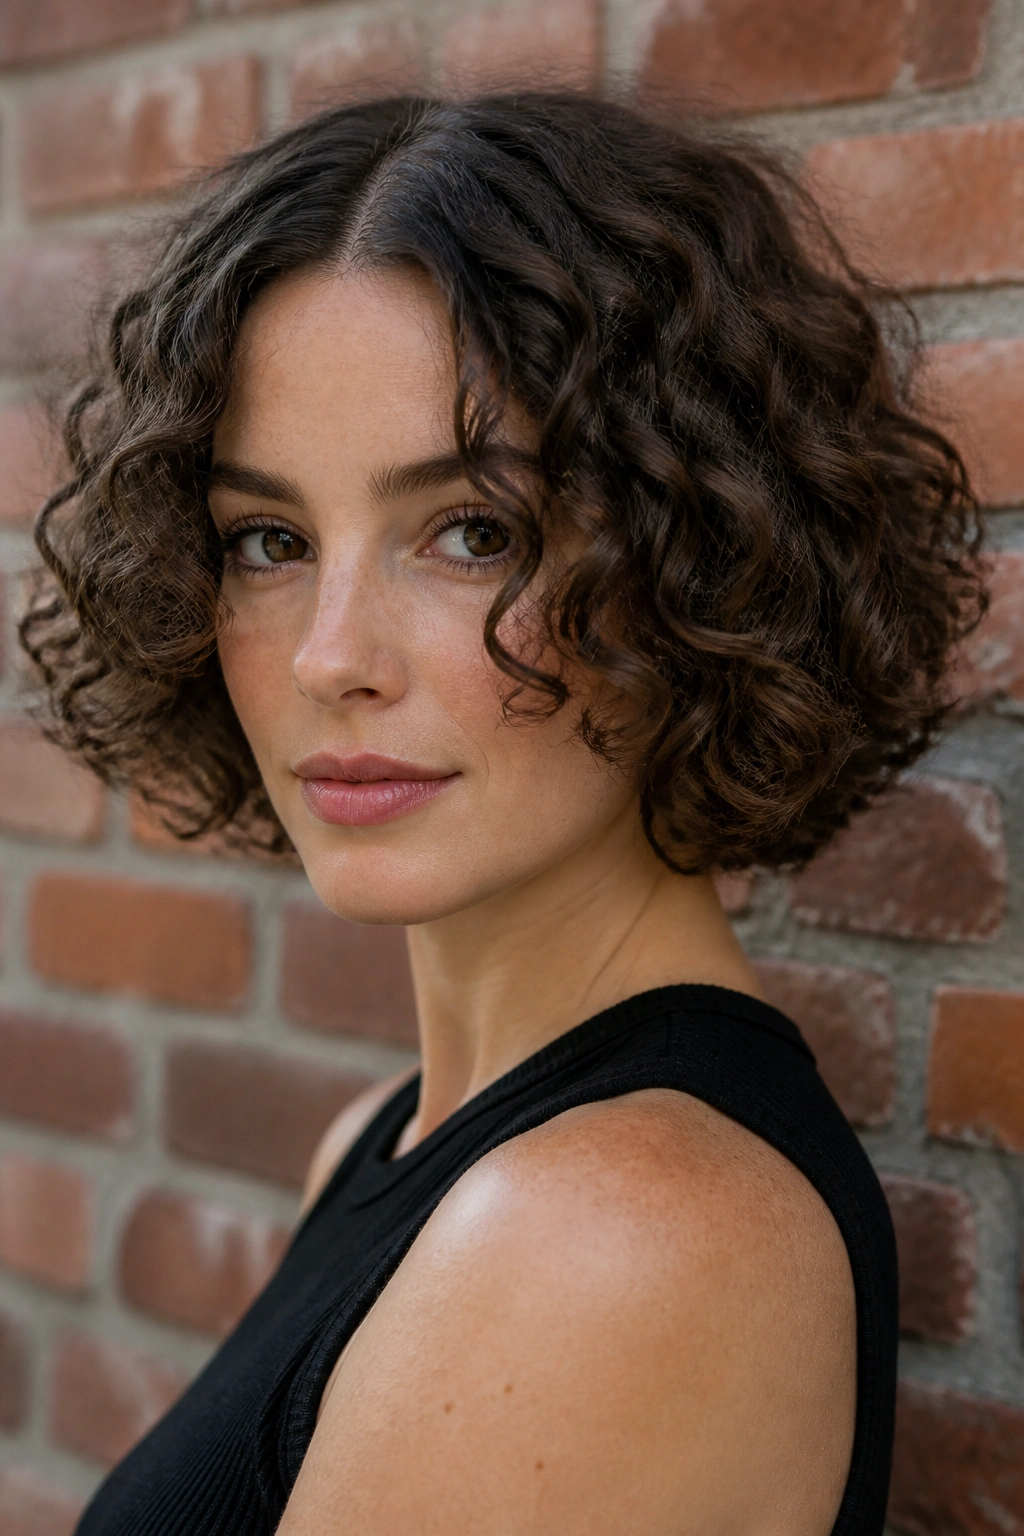
A bob can look boxy fast. A good curly bob does the opposite. It sits at the chin or just below it, then curves around the face instead of building a triangle around the jaw.
The trick is balance. Too much length and the bob loses its point. Too much bulk at the sides and it starts to look like a helmet with a nice curl pattern. I prefer this cut when the curls are springy and the hair is dense enough to hold a crisp silhouette. The shape reads clean, but not severe.
If your hair shrinks a lot, ask for a bob that looks a little longer than you want when wet. That sounds annoying. It saves heartbreak later. A dry curly bob can bounce up 2 to 4 inches, sometimes more, depending on texture and porosity.
A center part gives the style a sharper line. A side part makes it softer. Either way, keep the ends healthy. A bob with rough ends loses its edge quickly.
4. Tapered Cut for Defined Coils
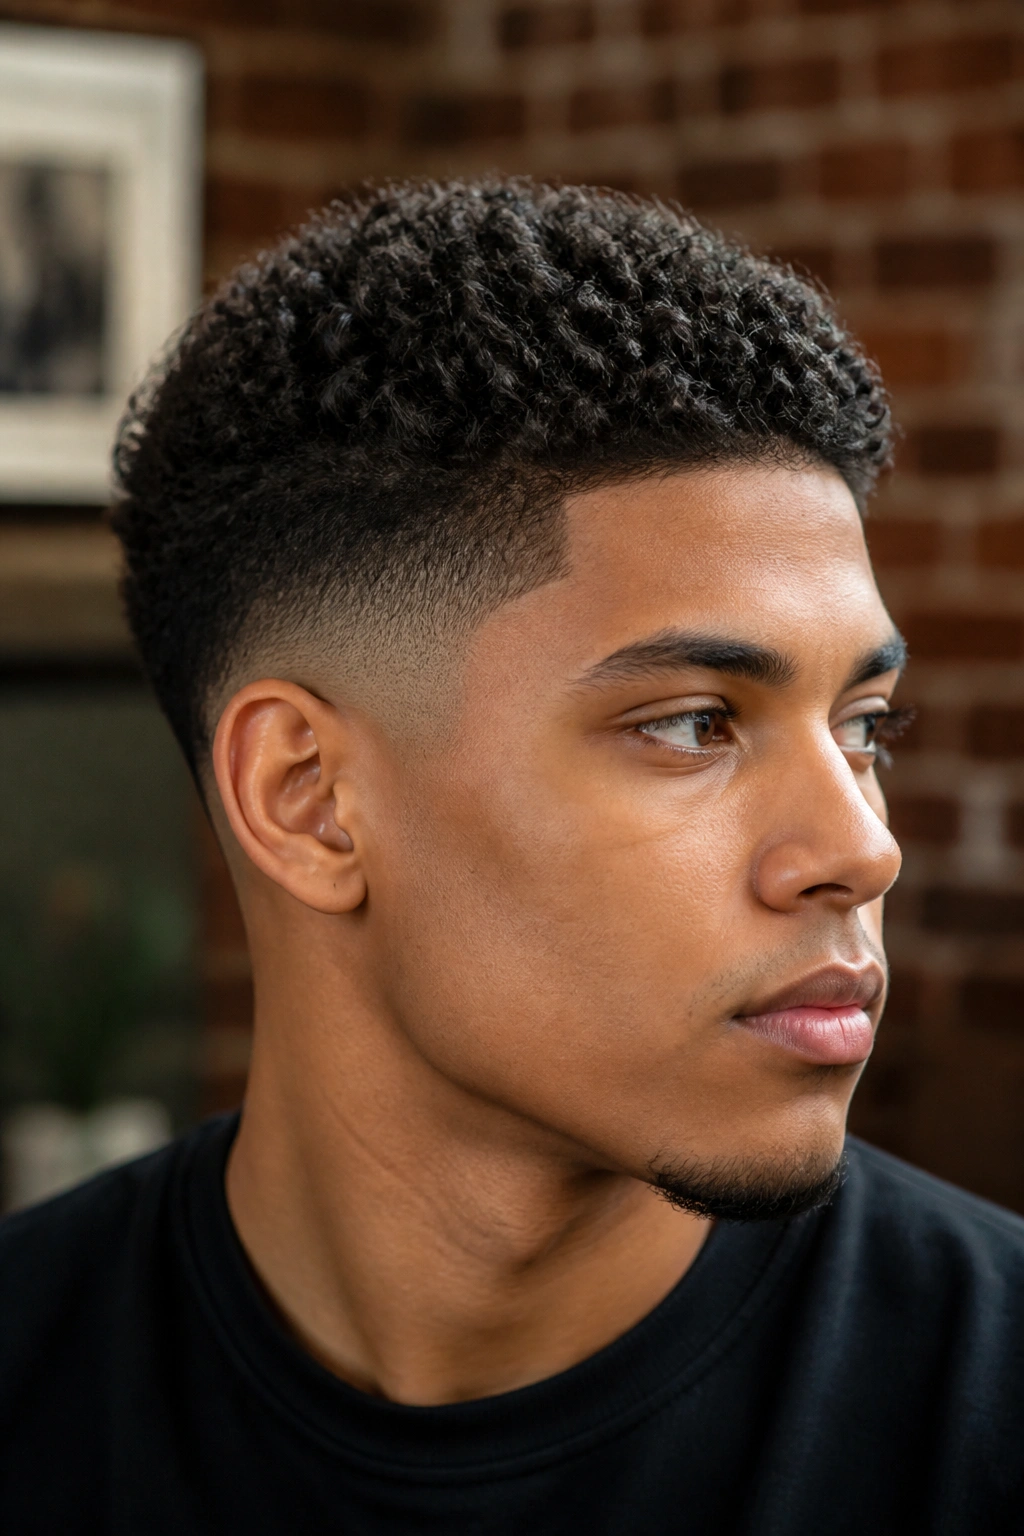
Short coils need shape, not weight. A tapered cut keeps the sides and back close while leaving more length on top, which creates a clean silhouette and makes the curl pattern look deliberate.
This style has a lot of personality. It shows off the natural density at the crown and keeps the neck and jawline open, which is especially nice if your curls feel heavy when they grow out. On tighter textures, the taper can make the top look taller without needing a lot of product. On looser curls, it can add structure where the hair would otherwise puff outward.
A Few Things That Help
- Ask for a soft taper, not an aggressive fade unless you want a sharper look.
- Keep the top long enough for at least one full curl turn.
- Use a small amount of cream first, then gel only where the shape needs more hold.
- Trim the taper regularly so the outline stays clean.
This is one of those styles that looks better as the cut settles in. Freshly cut coils sometimes look a little too tidy. Give them a day or two and they loosen into place.
5. High Puff with Lift at the Crown
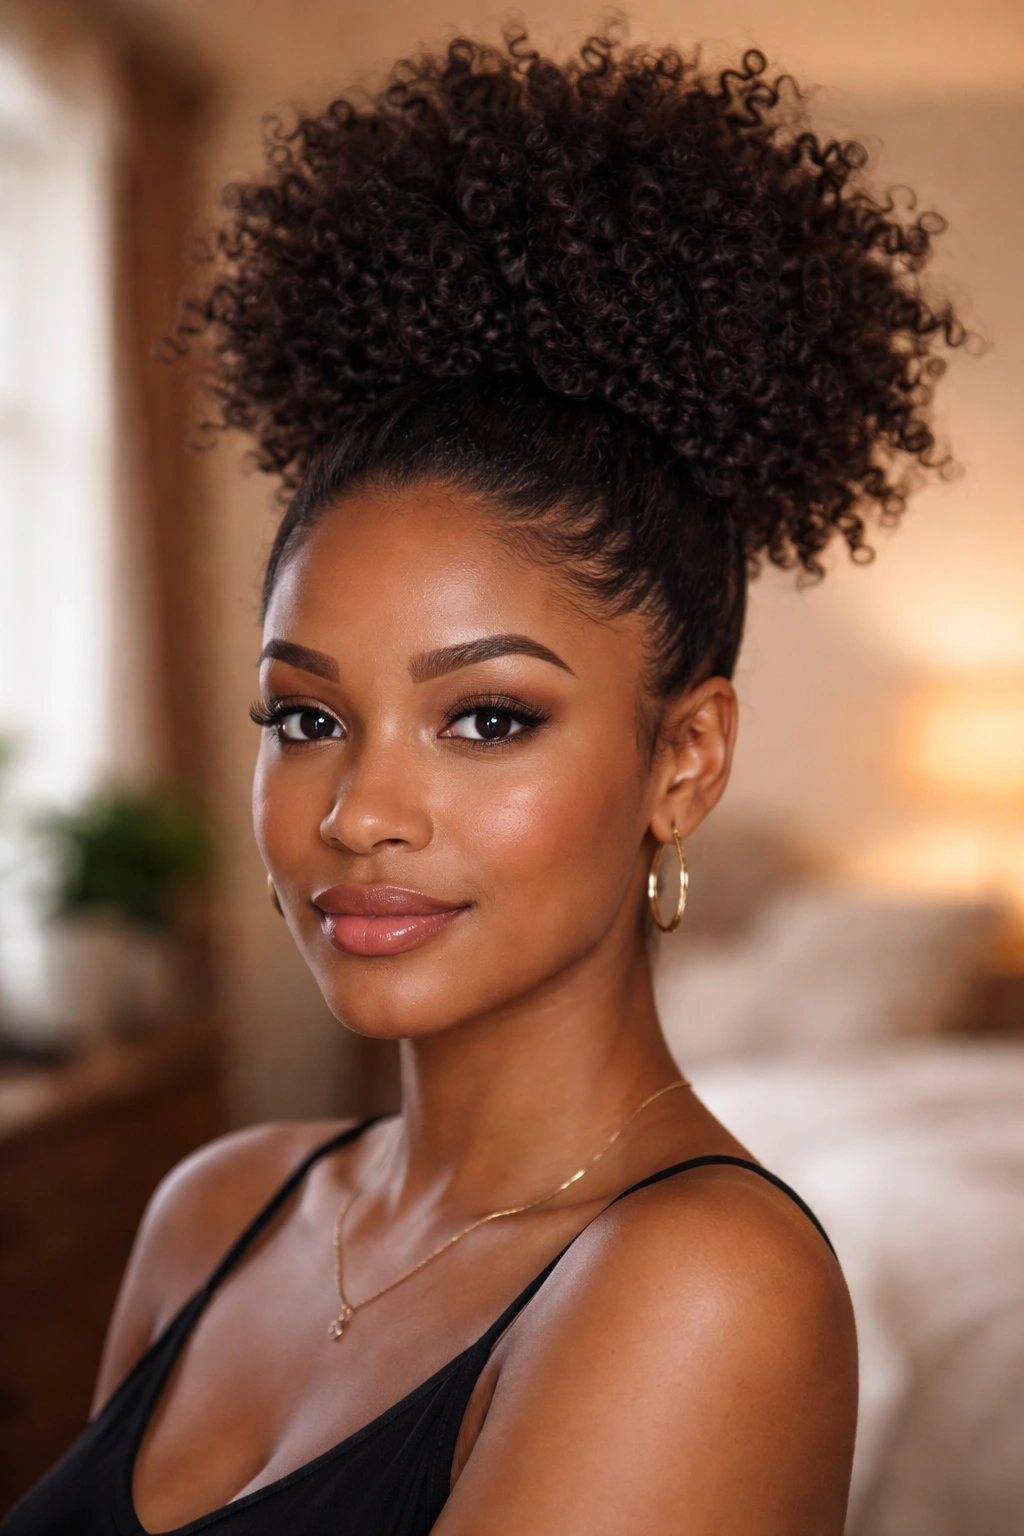
High puff is the cleanest way to cheat volume. It pulls the hair up and away from the face, then lets the curls bloom where they naturally want to bloom. No fighting. No flattening. Just a soft, full shape sitting high on the head.
I like this style for wash-day hair that is past its prime but still has enough body to look good gathered. Use a satin scrunchie or a stretch headband, and do not yank it tight enough to leave a dent. The puff should sit secure, not look strained. If your hairline is delicate, smooth the edges with a small brush and a little gel, but keep the pressure light.
A high puff also gives your features more space. That sounds small. It changes the whole balance of the face. Earrings show better, necklines look sharper, and the curls become the main event instead of an afterthought.
If the puff starts to droop, lift it from underneath and pin the base a little higher. Two bobby pins can fix what a whole extra product layer cannot.
6. Sleek Curly Ponytail with Loose Ends
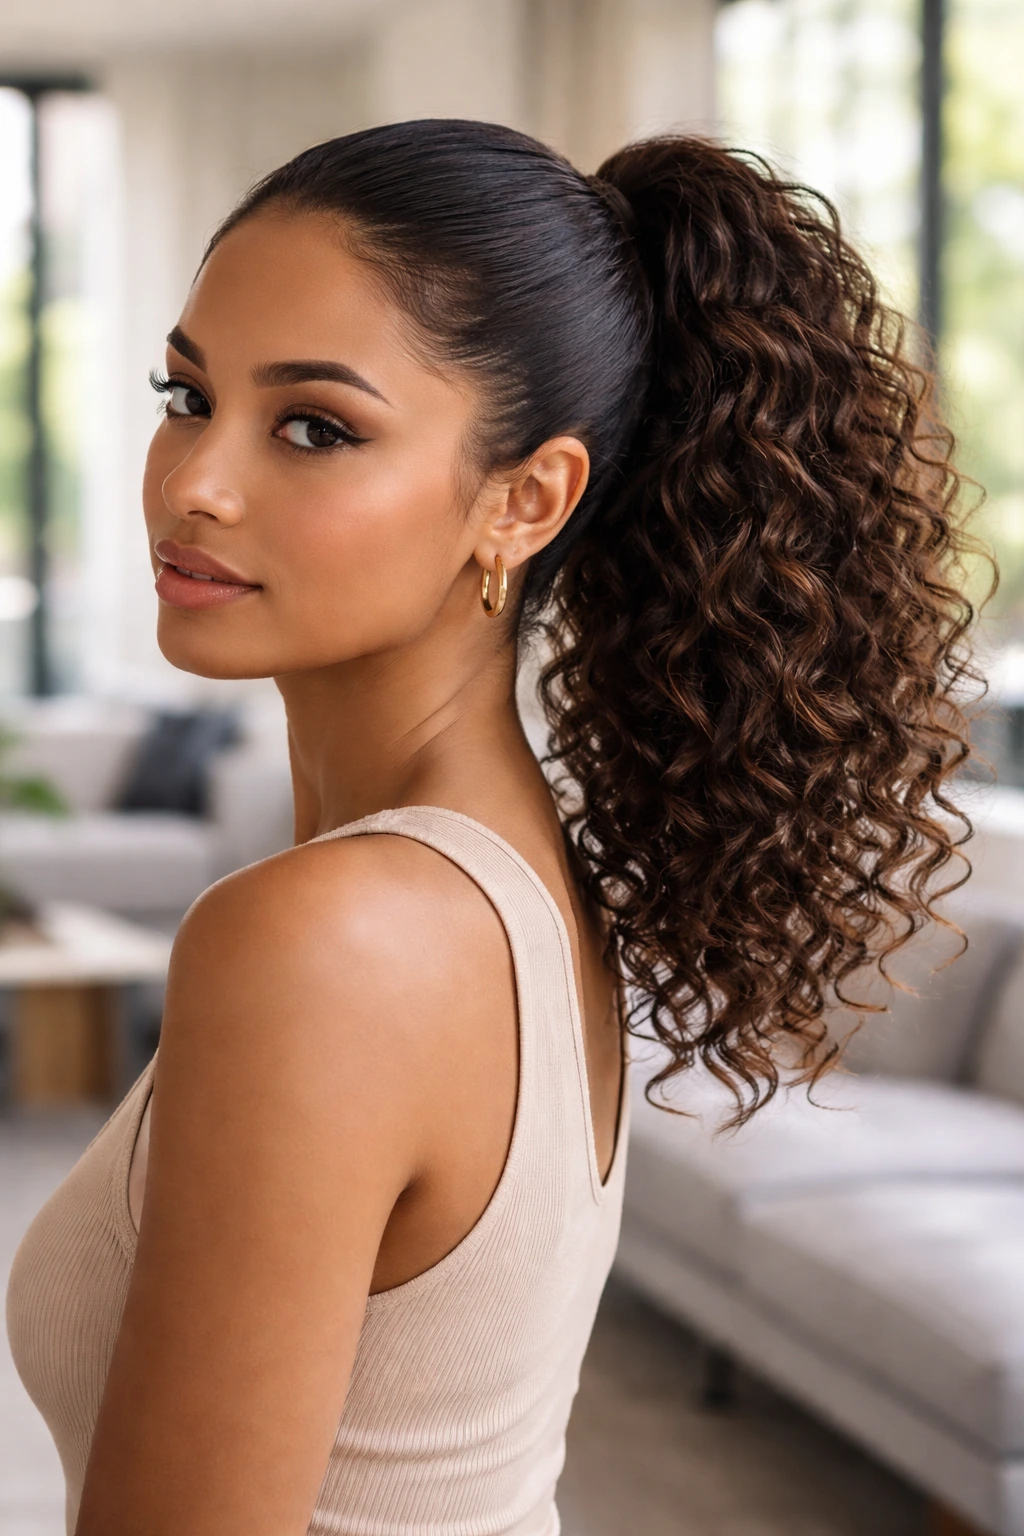
A ponytail does not have to be flat. The best curly ponytail keeps the roots smooth, then leaves the tail full and springy so the style still reads as textured hair, not a gym shortcut.
How to Keep It from Looking Limp
Start with a clean part, whether that is a center part or a deep side part. Then brush the top section back with a little curl gel or styling cream, focusing only on the roots and hairline. The tail itself should stay mostly untouched so the curls keep their shape. If you brush the whole thing, the ponytail turns fuzzy and loses definition fast.
A good elastic matters here. Use one that grips without snapping the hair. If your curls are thick, wrap a small satin scrunchie around the base first, then secure with an elastic over it. That gives you hold and cuts down on tension.
This style works for office days, dinner, and just about anything in between. The ponytail sits clean, but the loose ends keep it from feeling severe. Pull out one or two face-framing curls if the shape needs softness.
7. Half-Up, Half-Down with Crown Volume
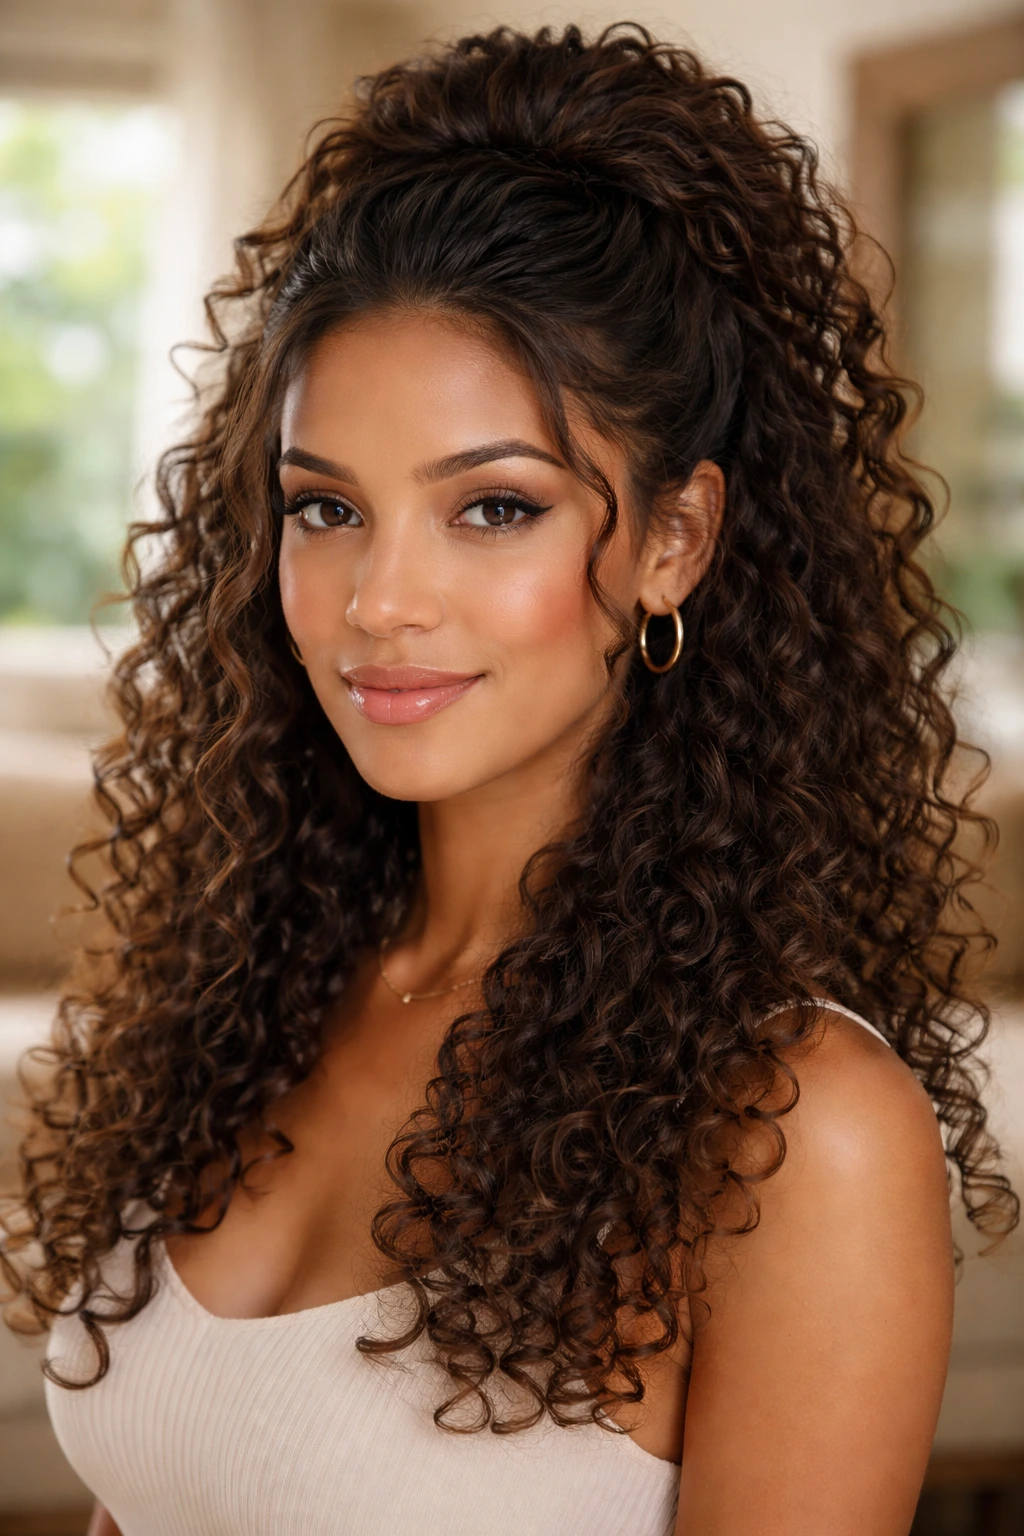
Second-day curls often want a little lift at the crown. Half-up, half-down is the answer when the top needs control and the lengths still look good loose.
The style works because it splits the job in two. The upper section gets pinned or tied back, which keeps the face open and the roots from falling flat. The lower section stays free, so you still get that full curtain of curls through the shoulders. On medium-length hair, it can make the whole head look fuller than a full-down style that has lost its shape.
I usually think of this as a rescue style. Curls that are a bit stretched out on top, a little frizzy at the sides, or slightly misshapen at the back can all look better once the top is gathered. A small claw clip, two bobby pins, or a narrow elastic can do the job. Leave a few curls loose near the temples so the style does not feel too tight.
It is one of those looks that takes five minutes and still looks like you thought about it.
8. Pineapple Updo for Big Second-Day Curls
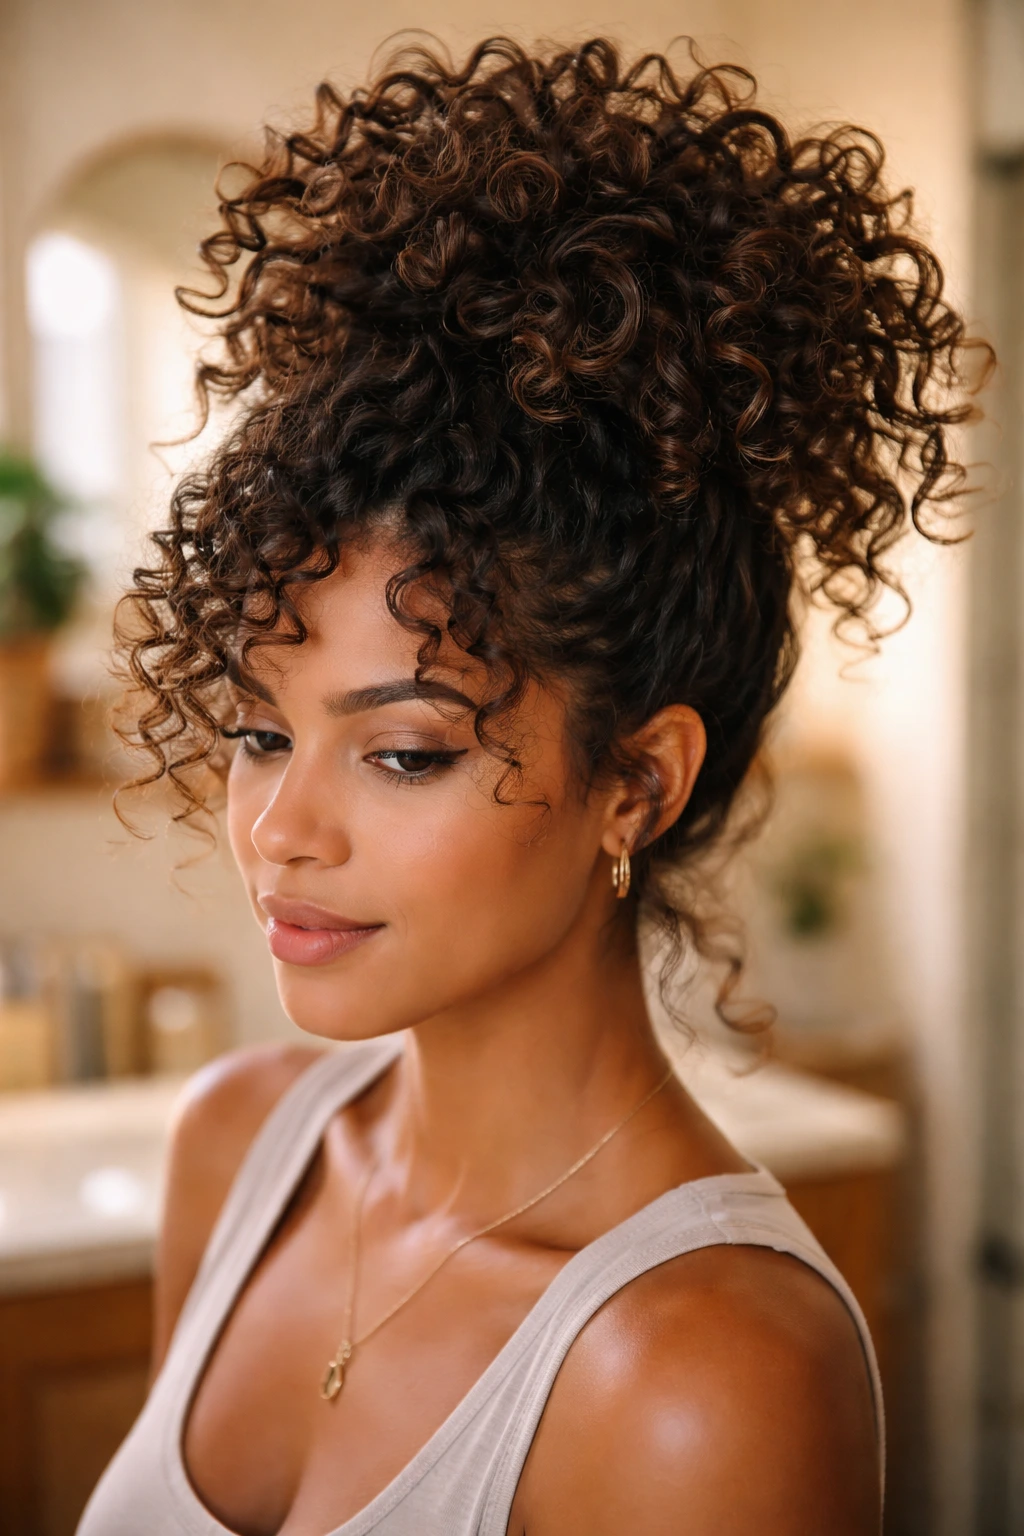
Pineapple hair is not only for sleeping. It makes a pretty good daytime style when the curls at the crown still have shape and the rest of the hair needs to stay out of the way.
The idea is simple: gather the hair high on the head, then let the curls spill forward and outward instead of pulling them tight at the nape. That preserves curl pattern and keeps the ends from rubbing against jackets, chair backs, and whatever else the day throws at them. Use a loose scrunchie or a soft band. If you cinch it too hard, the top goes flat and the whole point disappears.
This looks especially nice on dense curls with a little length. The silhouette becomes big and round, which can be a good thing when you want the hair to feel playful rather than polished. It also hides uneven curl clumps in a way that feels deliberate.
A single curl drop at the front can soften it. No need to overthink that part.
9. Space Buns with Loose Curly Ends
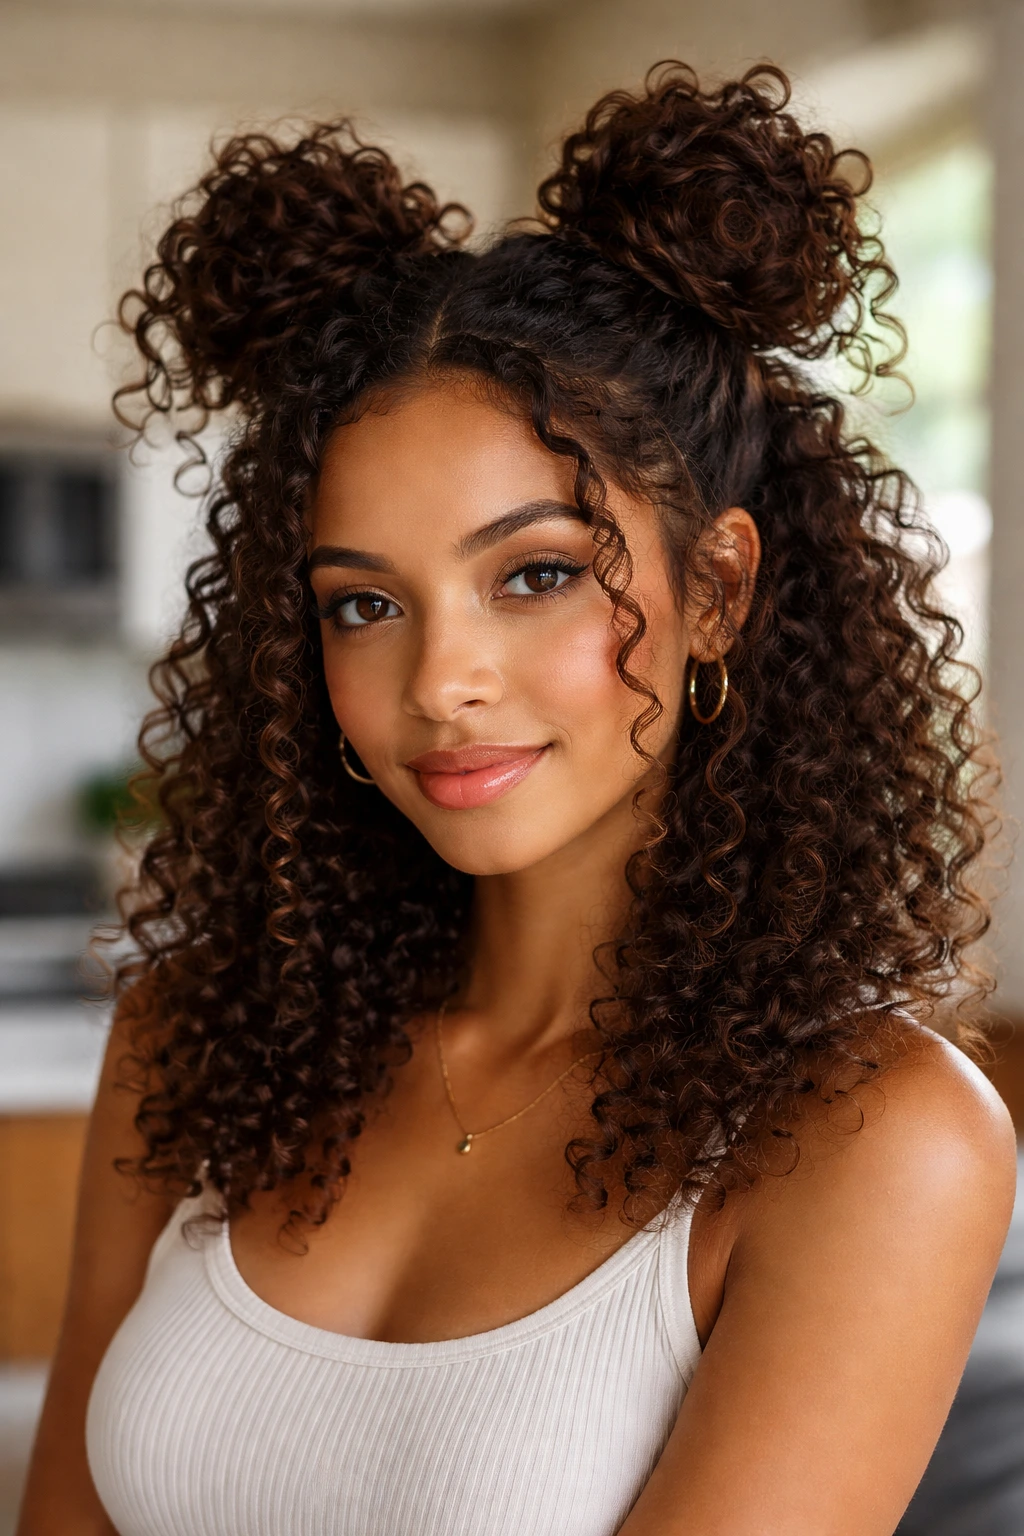
Space buns work because they break the hair into smaller jobs. Instead of asking every curl to behave the same way, you gather two smaller sections and let the texture do its own thing.
This style can look sweet, sharp, or slightly messy depending on how tightly you build the buns. Keep them high and compact if you want a cleaner finish. Leave them looser and pin a few curls free if you want more movement. On shoulder-length curls, the ends can stay out of the bun and act like little ribbons around the face and neck. That detail keeps the style from looking too rigid.
The best part is that space buns are forgiving. One bun can sit a little higher than the other and the style still works. Same with a few flyaways. That is part of the charm, actually. Too much smoothing makes it lose character.
Use a light gel at the roots and a couple of pins per bun. Four pins total is often enough. More than that, and you start fighting the hair.
10. Deep Side Part with Clipped Temples
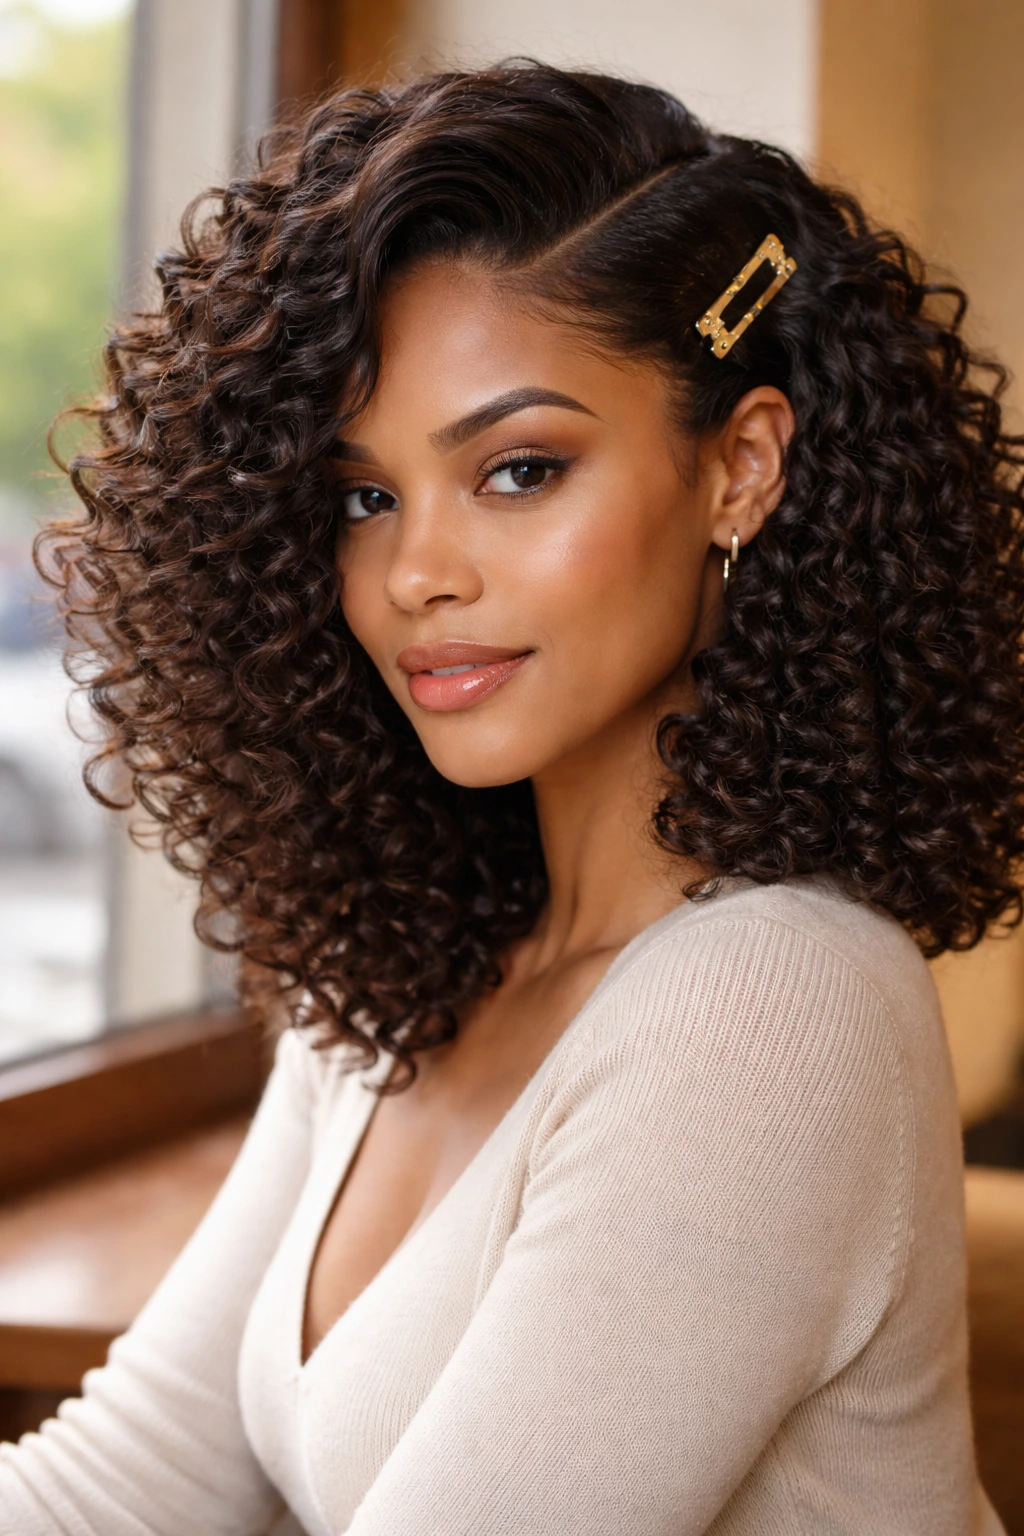
A deep side part can rescue a cut that feels too symmetrical. Shift the hair 3 or 4 inches off center, clip one temple back, and the entire face shape changes.
Why the Part Matters
Curls have a built-in tendency to balance themselves into a round shape. A side part interrupts that balance and gives the eye a clear line to follow. It also creates lift on the heavier side, which can help fine curls look fuller at the roots.
That clipped temple is the part I love most. One small barrette, a snap clip, or a decorative pin can hold the side in place while the rest of the curls fall over the shoulder. It keeps the style from collapsing into the face and gives you a clean contrast between smooth and textured.
If your curls are stubborn, set the part while the hair is still damp. Use the end of a tail comb, press the part down with your fingers, then let it dry in place. Once the root dries in a direction, it stays there longer.
Simple move. Big effect.
11. Twist-Out with Rounded Shape
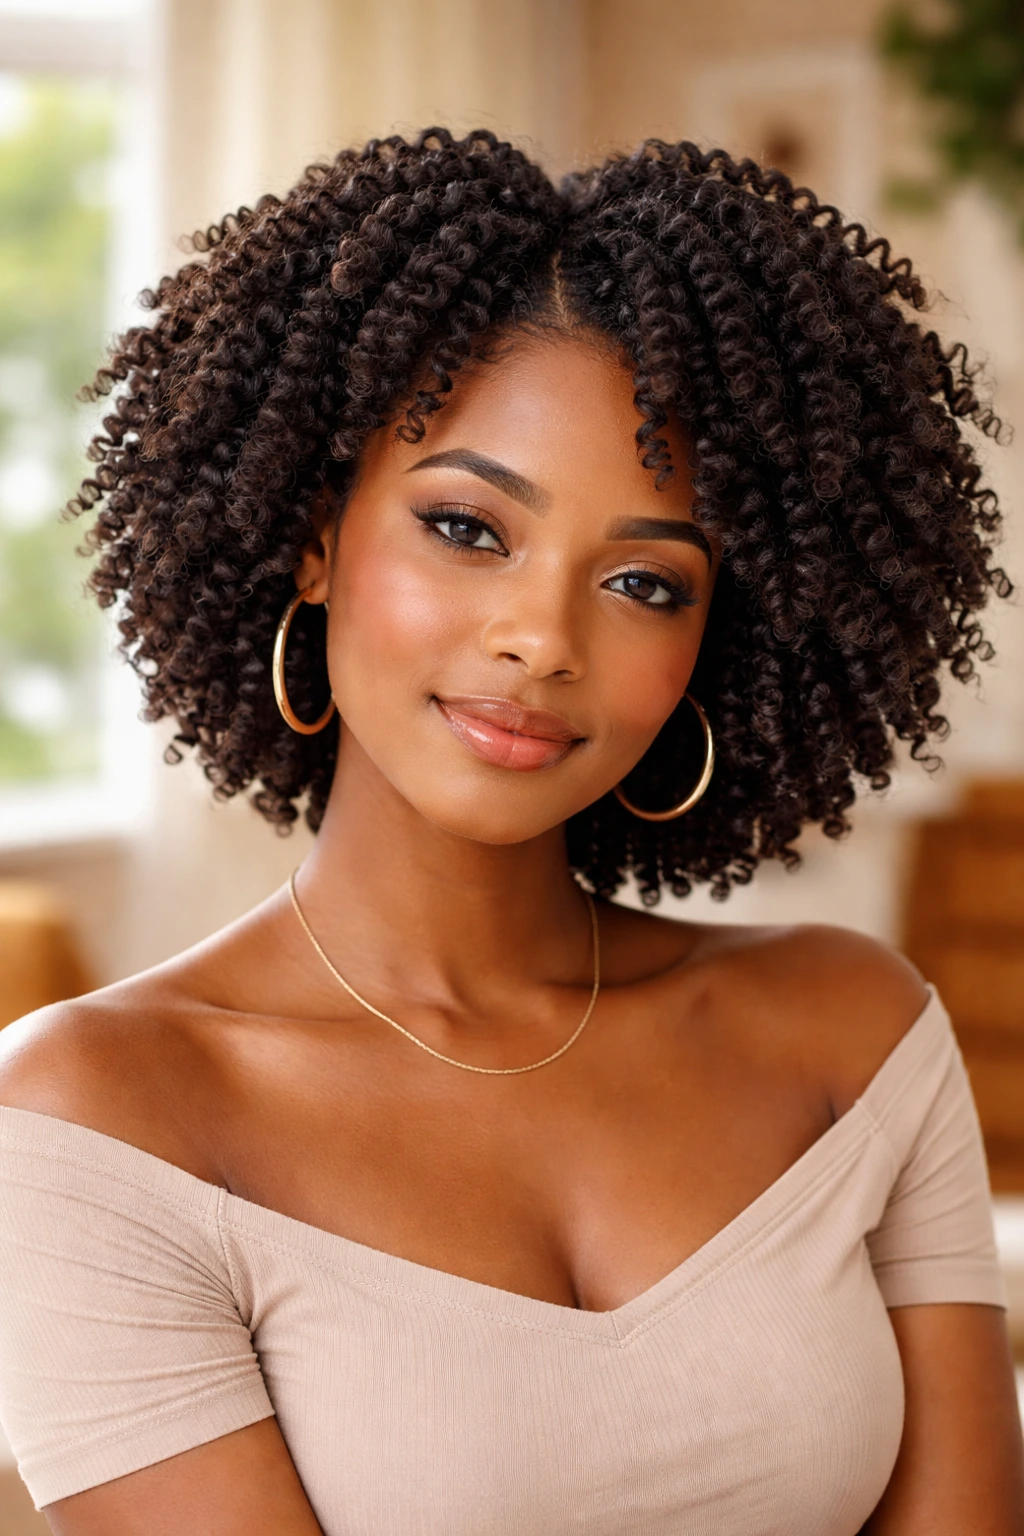
Twist-outs are the style people underestimate. They can look soft, polished, and full of movement when they are done in sections no wider than 1 inch and unraveled only after the hair is completely dry.
The shape starts at the roots. Two-strand twists stretch the curl a little, so the finished style has more length and less shrinkage than a wash-and-go. That matters if your hair contracts hard and you want some visible hang. A small amount of butter or cream helps, but too much product can make the twists sticky and slow the dry time.
What Makes It Work
- Twist on damp, not dripping, hair
- Keep section size consistent so the curl pattern sets evenly
- Seal the ends with a tiny bit of gel
- Unravel with oiled fingertips to cut down on frizz
A twist-out can look fluffy or defined depending on how much you separate it. I prefer one pass through the strands and stop there. Over-picking turns a good style into a cloud. Nice cloud, maybe. Still a cloud.
12. Bantu Knot-Out with Stretched Roots
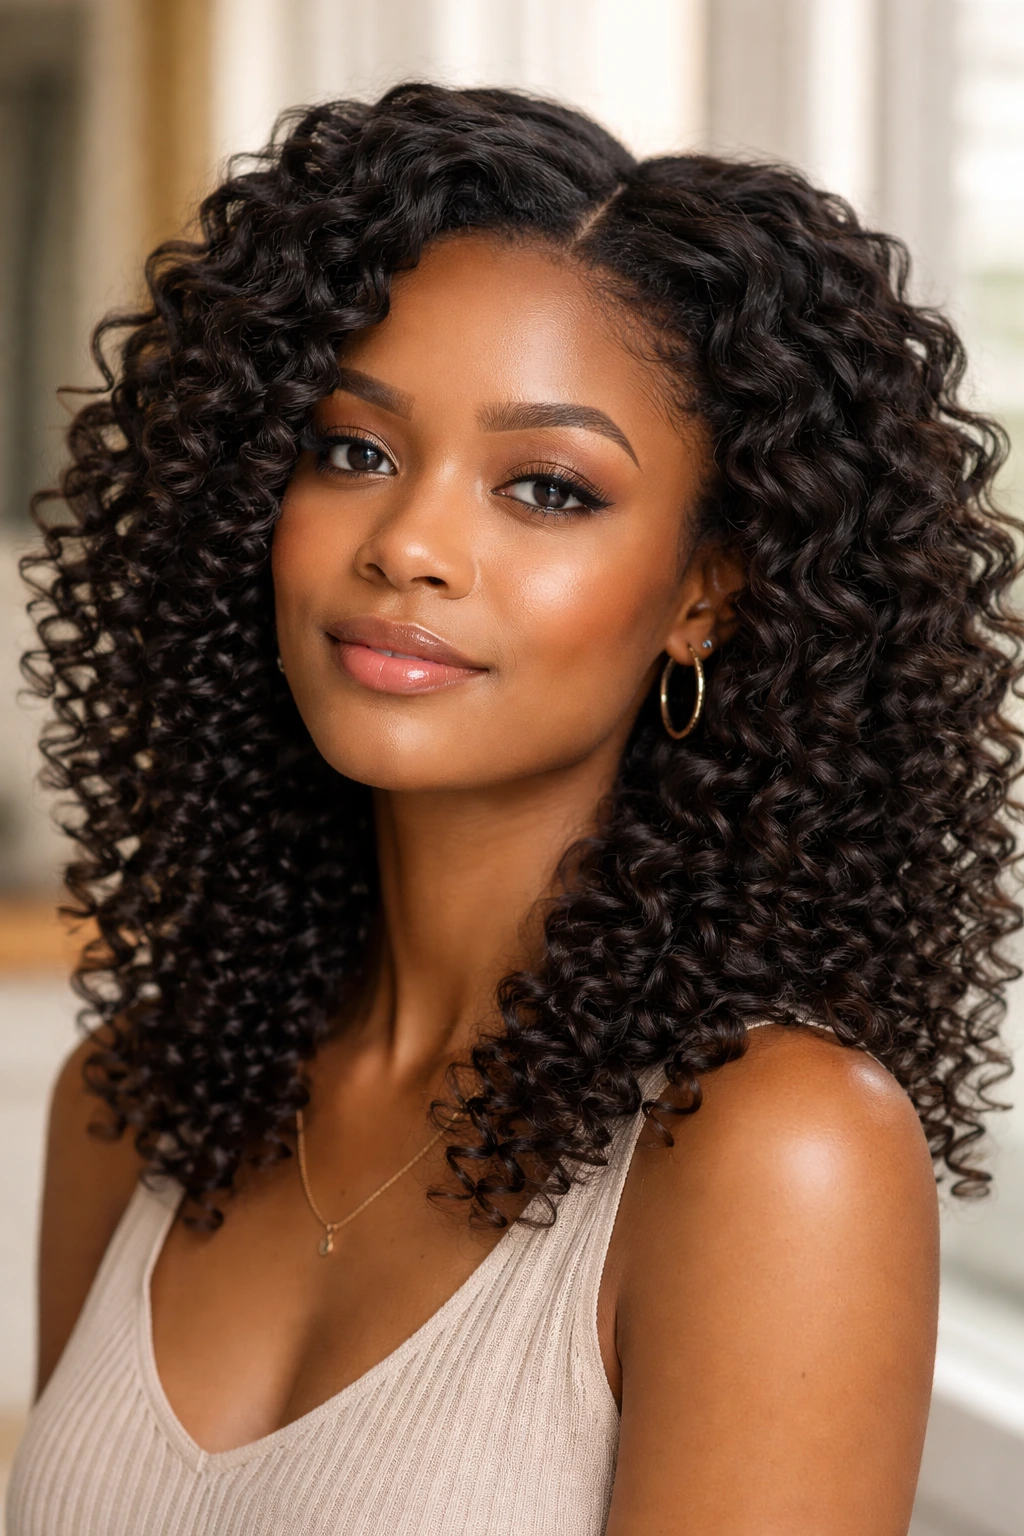
Bantu knot-outs look fussy from the outside. Then you take them down and the hair lands in soft spirals with stretch at the root and a little spring at the ends. That contrast is the whole point.
This style works well when you want definition without a tight curl pattern from root to tip. Each knot compresses the hair into a small coil, and the result after unraveling is a set of shaped curls that sit a bit longer than a plain wash-and-go. It is a smart option for coily textures that need a break from shrinkage.
Do the knots on damp hair. Dry hair can leave the set uneven. Wet hair takes too long to finish and may hold a weird bend at the center of each knot. Aim for that middle zone where the hair feels cool and pliable, not soaking.
A satin bonnet at night helps a lot. So does patience. If a knot still feels damp in the middle, leave it alone. Unraveling too soon is the fastest way to steal the definition you worked for.
13. Two-Strand Twists Worn Long or Unraveled
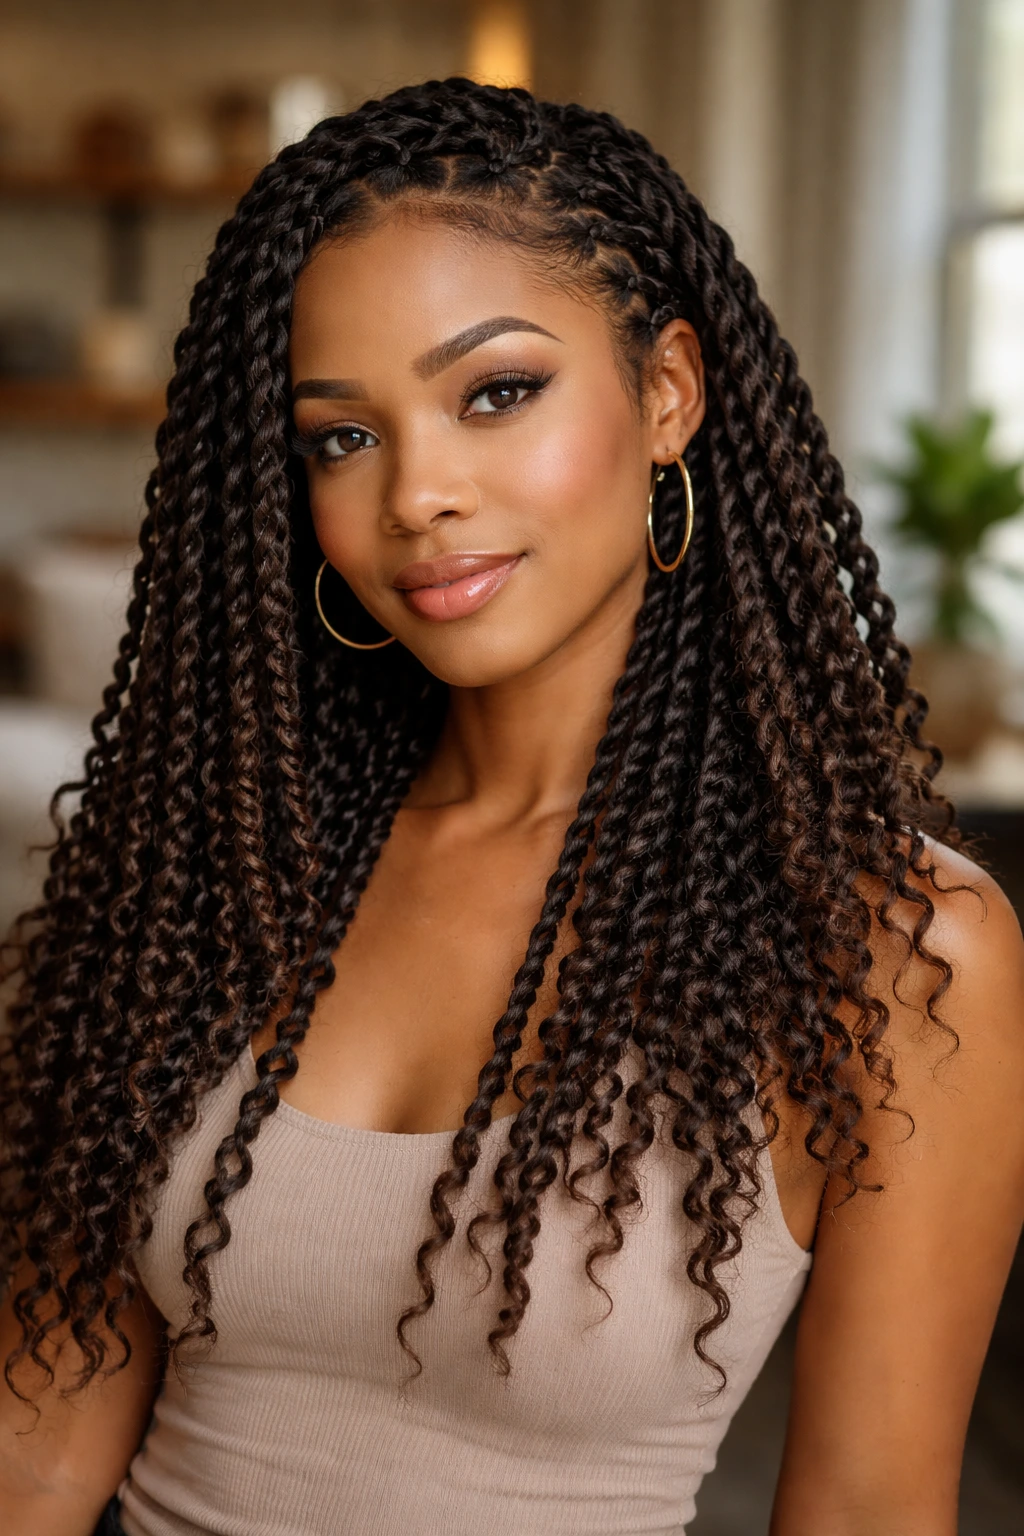
Two-strand twists can wear three different ways, and that is why people keep coming back to them. You can leave them in as a protective style, gather them into a bun, or take them down for a twist-out later.
The beauty of this style is the tension control. Unlike braids, twists usually put less strain on the hair, especially if you keep the section size moderate and do not pull the roots too tight. They also let the texture stay visible, which matters if you do not want the hair hidden under a heavy style.
How to Get a Clean Finish
Start with moisturized, detangled hair. Use a leave-in conditioner first, then a cream or light butter, depending on thickness. Twist in the same direction each time so the set stays even. If the ends are loose, coil them around your finger or use a tiny dab of gel to seal them.
I like this style on hair that needs a break from daily manipulation. It is neat without being severe, and it tends to age well for a few days if you sleep on satin.
14. Braided Crown with a Soft Hairline
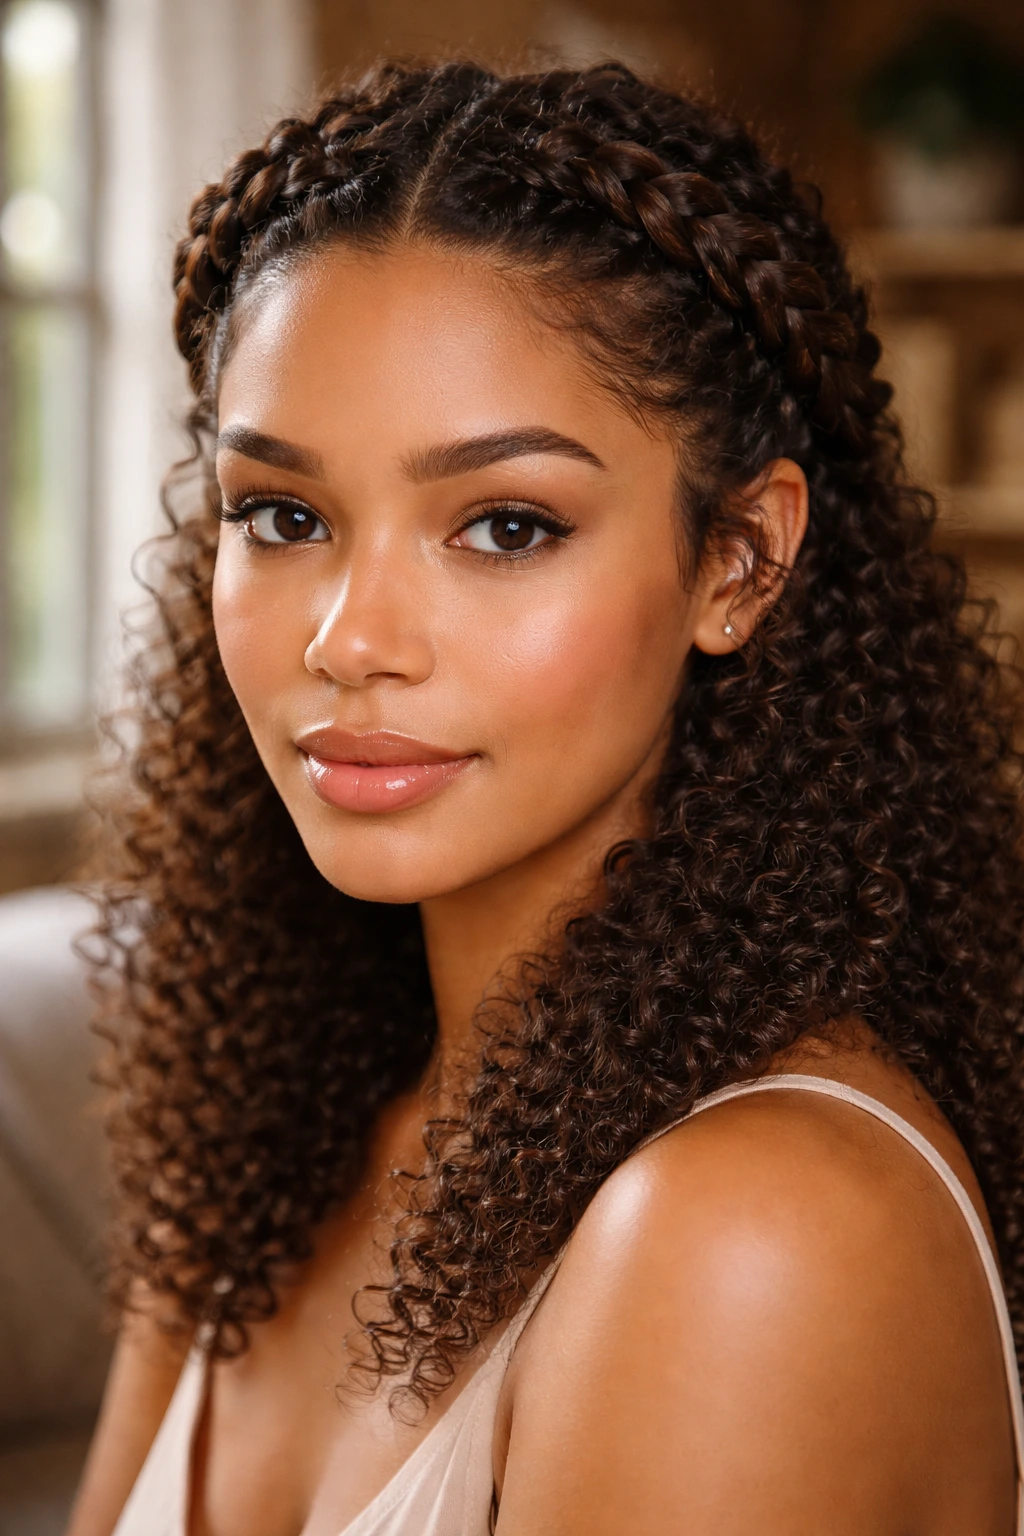
Braided crowns look fancier than they are. That is why I keep them in the rotation. Two braids wrapped around the head can make curly hair look dressed up without needing heat, straightening, or a full day in the mirror.
The key is softness at the hairline. Pull the braids tight enough to stay put, but not so tight that the scalp looks strained. A little puff at the crown is fine. Actually, it helps. On curly hair, a crown braid looks better when the texture around it still has some life.
This style is especially useful for medium-length hair that would otherwise keep falling in the face. Pin the ends under with 2 or 3 bobby pins, then tug the braid loops gently to make them sit wider. That tiny loosening trick makes the braid read fuller and less stiff.
A braided crown can handle a few curls left free at the temples. I prefer that version, honestly. It keeps the style from looking too formal.
15. Halo Braid with Curls Left Out
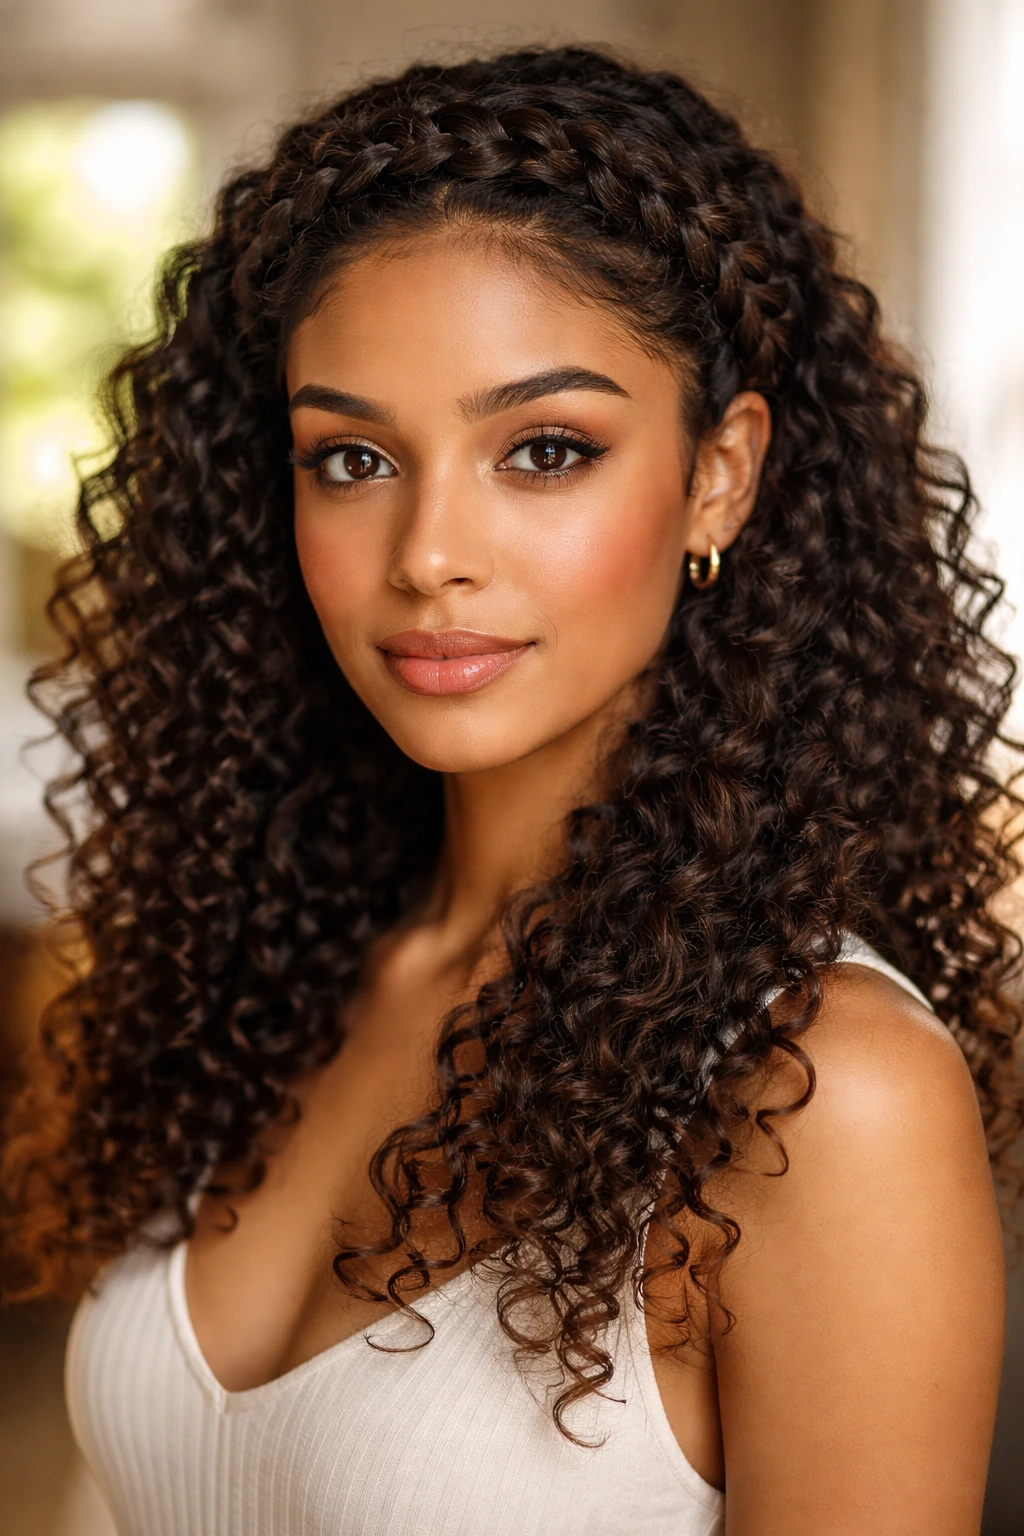
Halo braids and crown braids are not the same thing. A halo braid usually sits a little softer and lower, almost like a band around the head, while the curls below stay loose and visible.
That mix is what makes it so good on textured hair. The braid gives structure. The loose curls keep the style from feeling stiff. If your hair has a lot of volume, this is one of the few styles that can control the top without flattening the whole head. It also makes a strong case for hair that is growing out unevenly. The braid frames the face, and the loose curls fill in the rest.
A Small Detail That Helps
Use a braid that is wide enough to show texture. Tiny, tight braids can disappear into dense curls. A braid that is built from a 1.5-inch section of hair has more body and holds its shape better against a full curl pattern.
This is a good style for events, but it is just as useful on ordinary days when you want your hair off your cheeks and still want movement through the lengths.
16. Curly Faux Hawk with Pin-Secured Sides
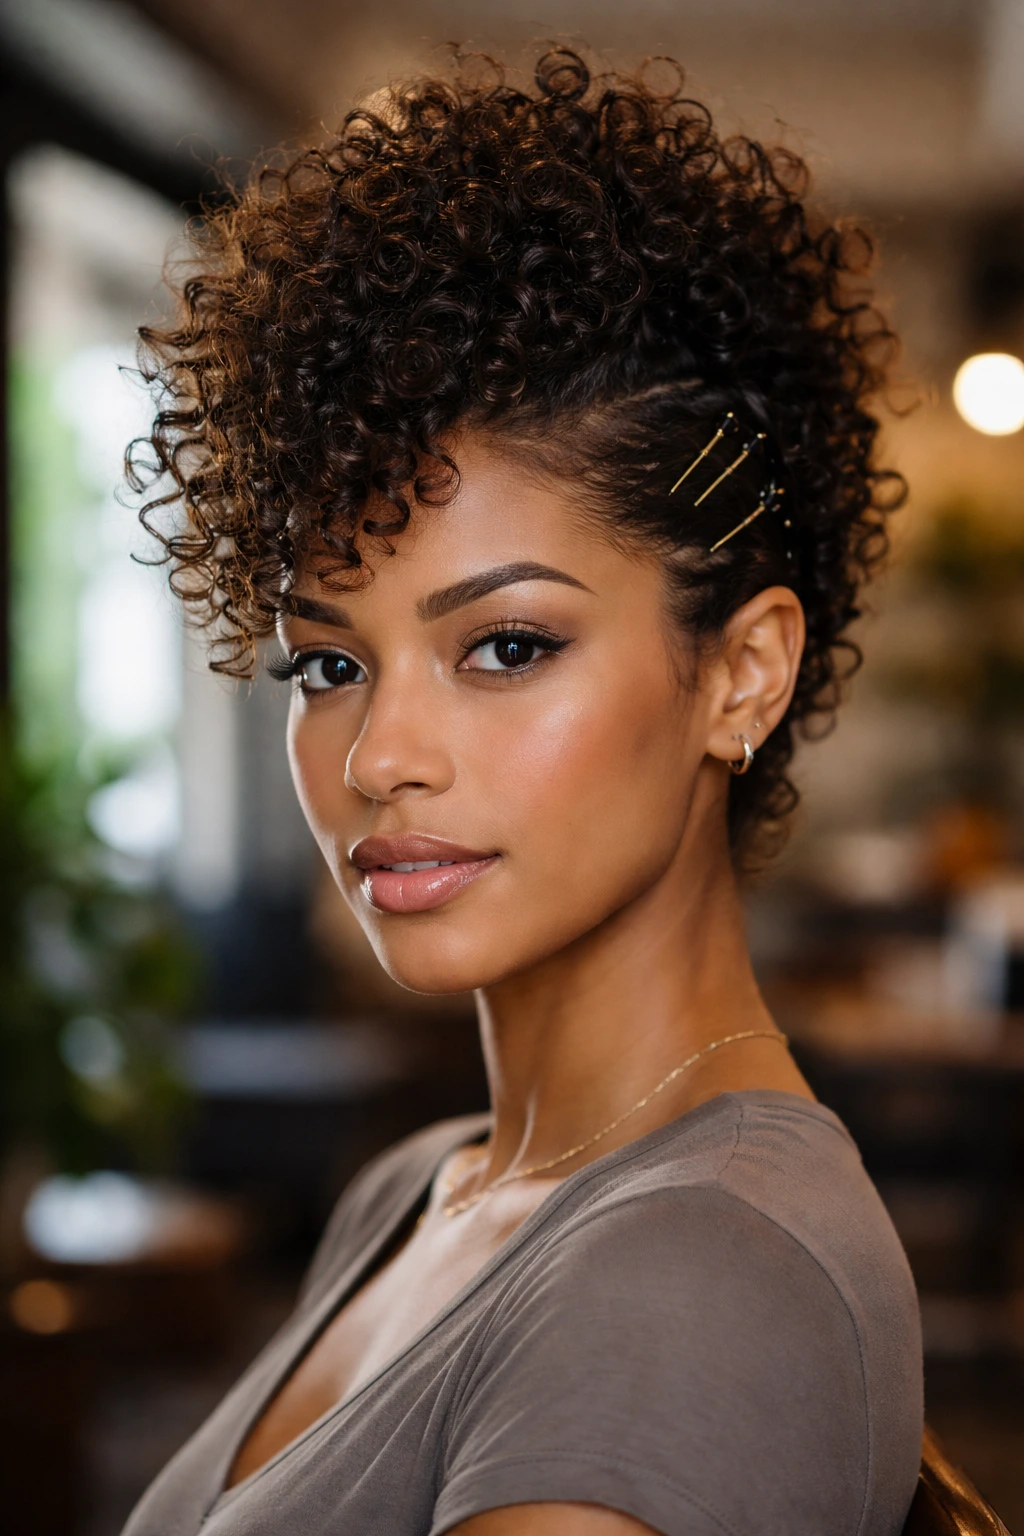
A curly faux hawk gives curly hair attitude fast. The sides get pinned close to the head, and the center section is left high and loose so the curls stack into a narrow ridge.
It works because the eye follows the tallest line. Even if the sides are not perfectly smooth, the shape reads as bold. That makes this style forgiving on hair that has a bit of frizz or uneven curl definition. In fact, a little texture helps. Too much slickness can make the contrast feel stiff.
I like this look when you want height at the center of the head without committing to a full mohawk cut. Use several bobby pins along each side, not just one or two. The weight of curly hair can pull a weak pin out by mid-afternoon. Secure the sides in sections, then fluff the center with your fingers until the shape sits where you want it.
A scarf at the nape keeps the pins from scratching. Useful, and less annoying.
17. Claw-Clip French Twist for Thick Curls
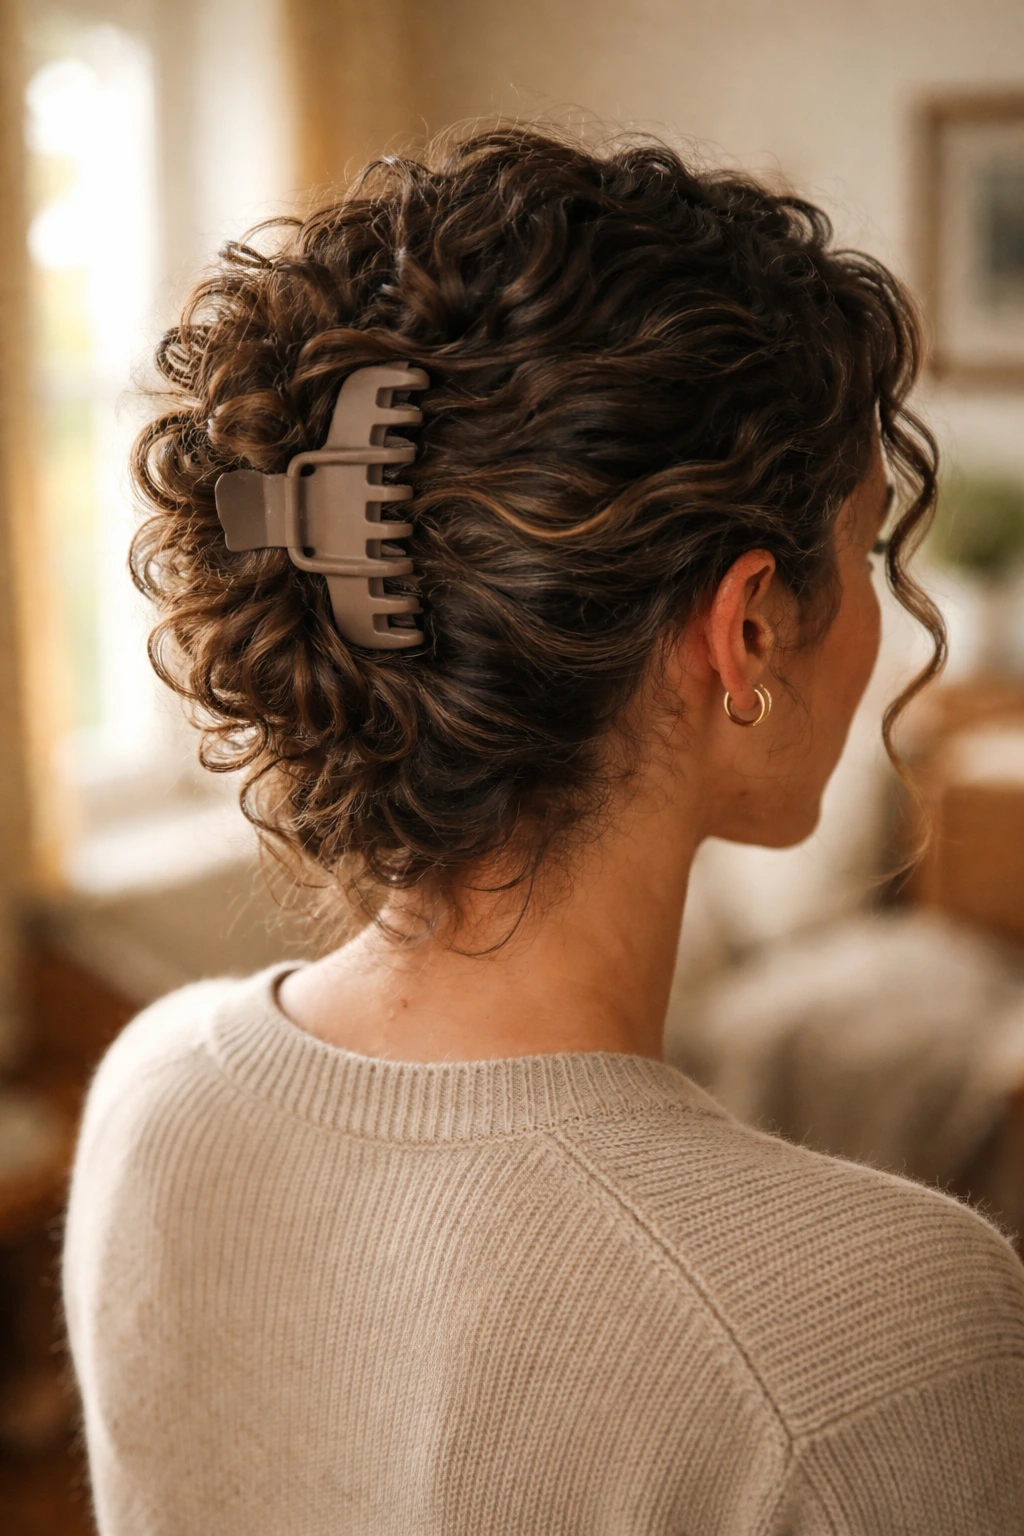
Need a style in five minutes? This is the one. A claw-clip French twist can gather thick curls into a clean vertical fold that looks more composed than a loose bun and less formal than a chignon.
The trick is not to over-smooth the texture before you clip it up. Curl pattern gives the twist grip, and grip is what keeps the clip from sliding. Gather the hair at the back, twist upward, then tuck the ends into the clip so the curl mass supports itself. If the clip is too small, it will pop open. If it is too large, the style can sag. Somewhere in the middle usually works best.
A matte clip tends to hold better than a slick plastic one. The finish matters less than the teeth and spring. You want something that bites the hair without creating a crease line across the middle.
This is the style I like when the hair is a little stretched from sleep but not fresh enough for a full down look. Quick. Clean. No drama.
18. Curly Top Knot with Face-Framing Pieces
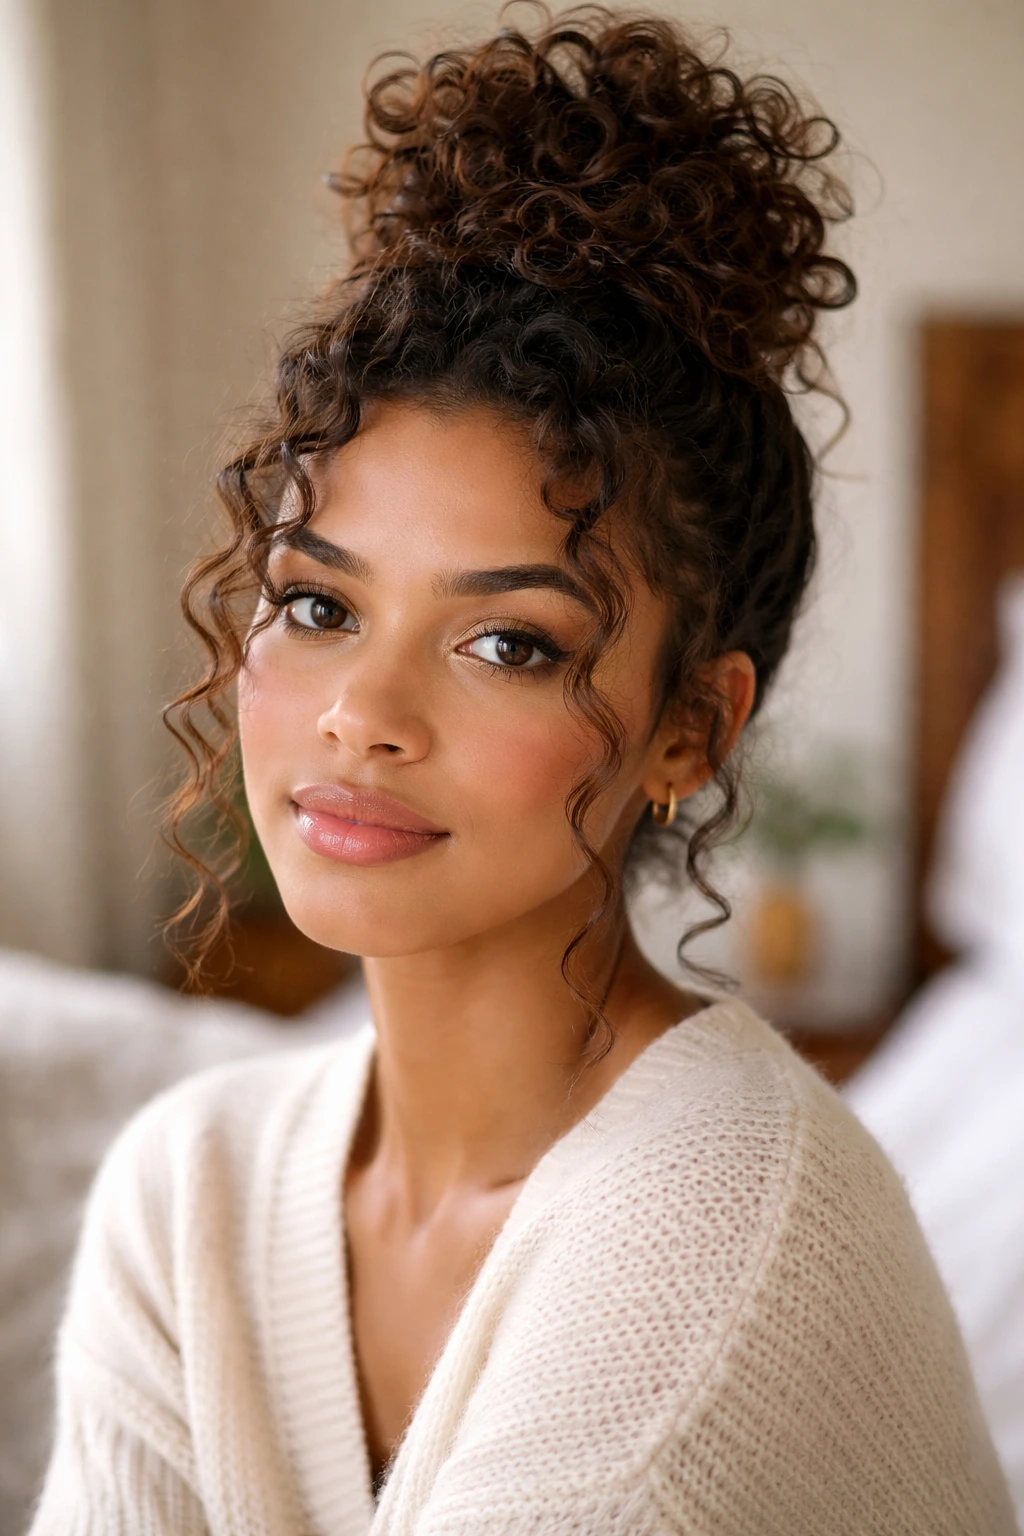
A top knot can look lazy or sharp. The difference is whether you leave the texture visible and let a few curls frame the face instead of scraping everything back into a tight knot.
Gather the hair high, twist it loosely, and pin the knot so it sits with some height. Then pull out two or three curls near the temples or cheekbones. That little bit of softness changes the read from “thrown up” to “styled on purpose.” On dense curls, the knot itself should stay full, not squeezed down flat against the head.
This style is good when the ends are older than the roots. The knot hides a lot. Split ends, inconsistent curl clumps, a dry patch near the back—gone. Still, the top knot should not look like a nap bun. Keep the base neat and the knot secure with 3 or 4 pins.
A touch of edge control around the hairline can sharpen the look, but skip the heavy stuff if your curls are fine. Too much product can make the front look greasy by midday.
19. Cornrows Into Loose Curls
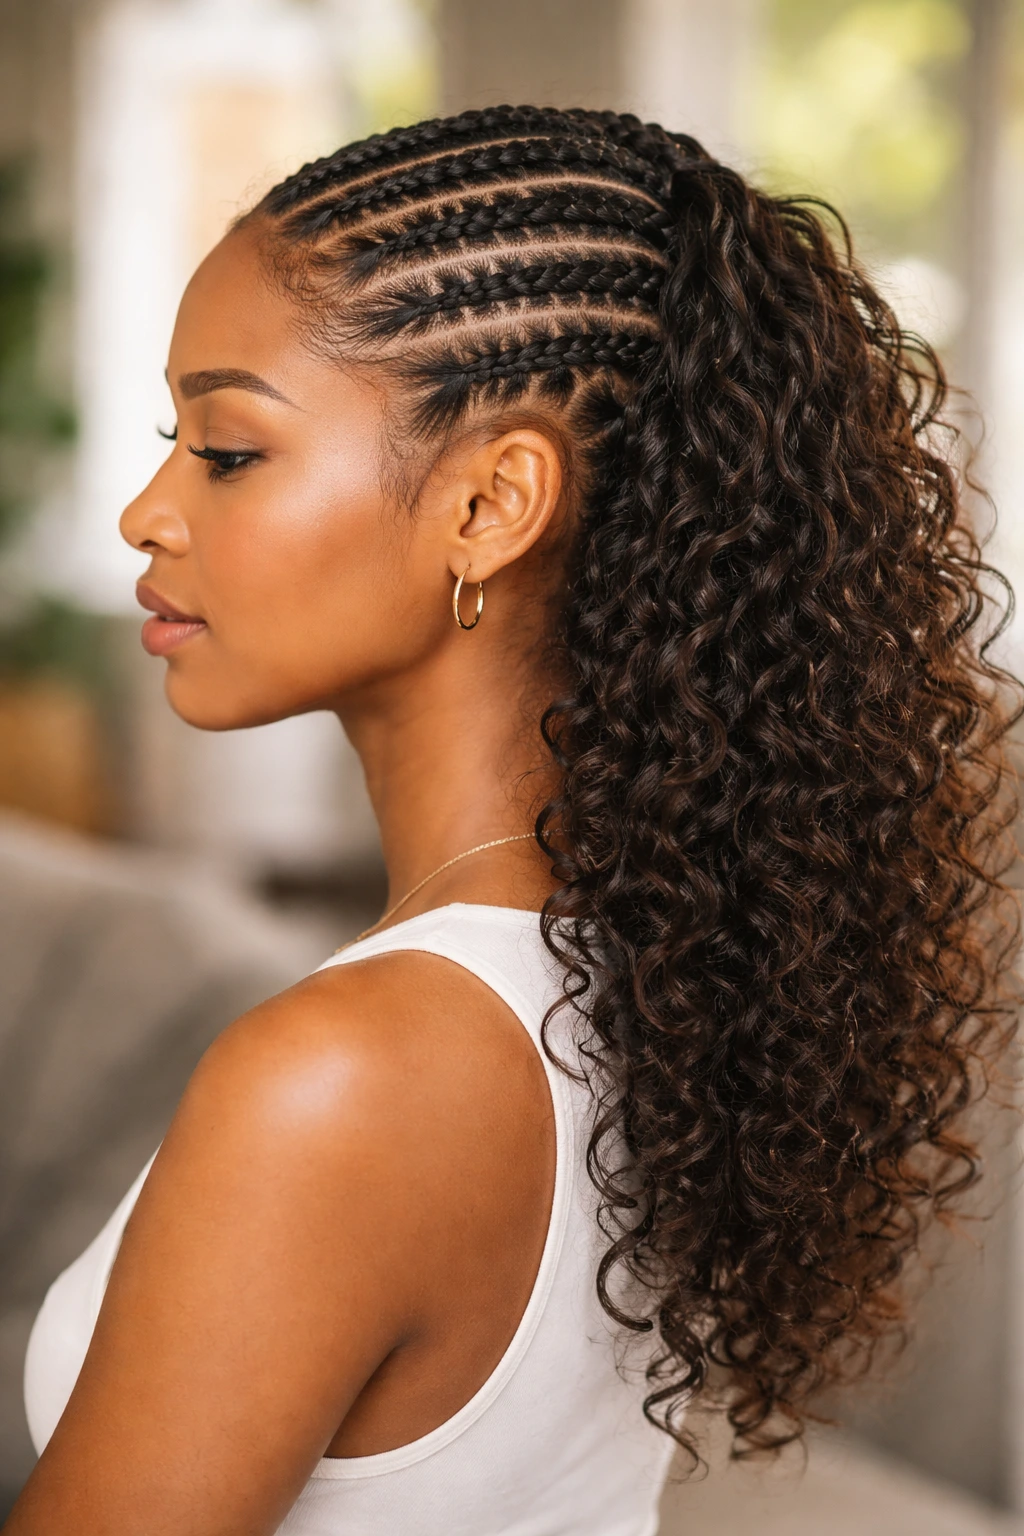
Cornrows into loose curls give you structure first, movement second. That balance is why the style works so well on textured hair. The braids keep the scalp neat and controlled, while the free curls through the back or ends keep the style from feeling too tight.
This is a strong option when you want some of your hair protected and some of it on display. Feed-in cornrows can lead into a ponytail of curls, or they can stop halfway and let the remaining length fall loose. Either way, the contrast between braided lines and open texture is the whole look.
What to Watch For
- Keep braid tension even so the scalp does not feel sore the next day
- Use a light oil or scalp spray if your scalp runs dry
- Let the loose curls be loose; over-brushing ruins the effect
- Tie the braids down with a silk scarf at night to keep the parts clean
I like this style on medium to long curly hair because it gives you two textures in one shape. That little contrast looks rich, and it lasts.
20. Finger Coils for Clean, Defined Texture
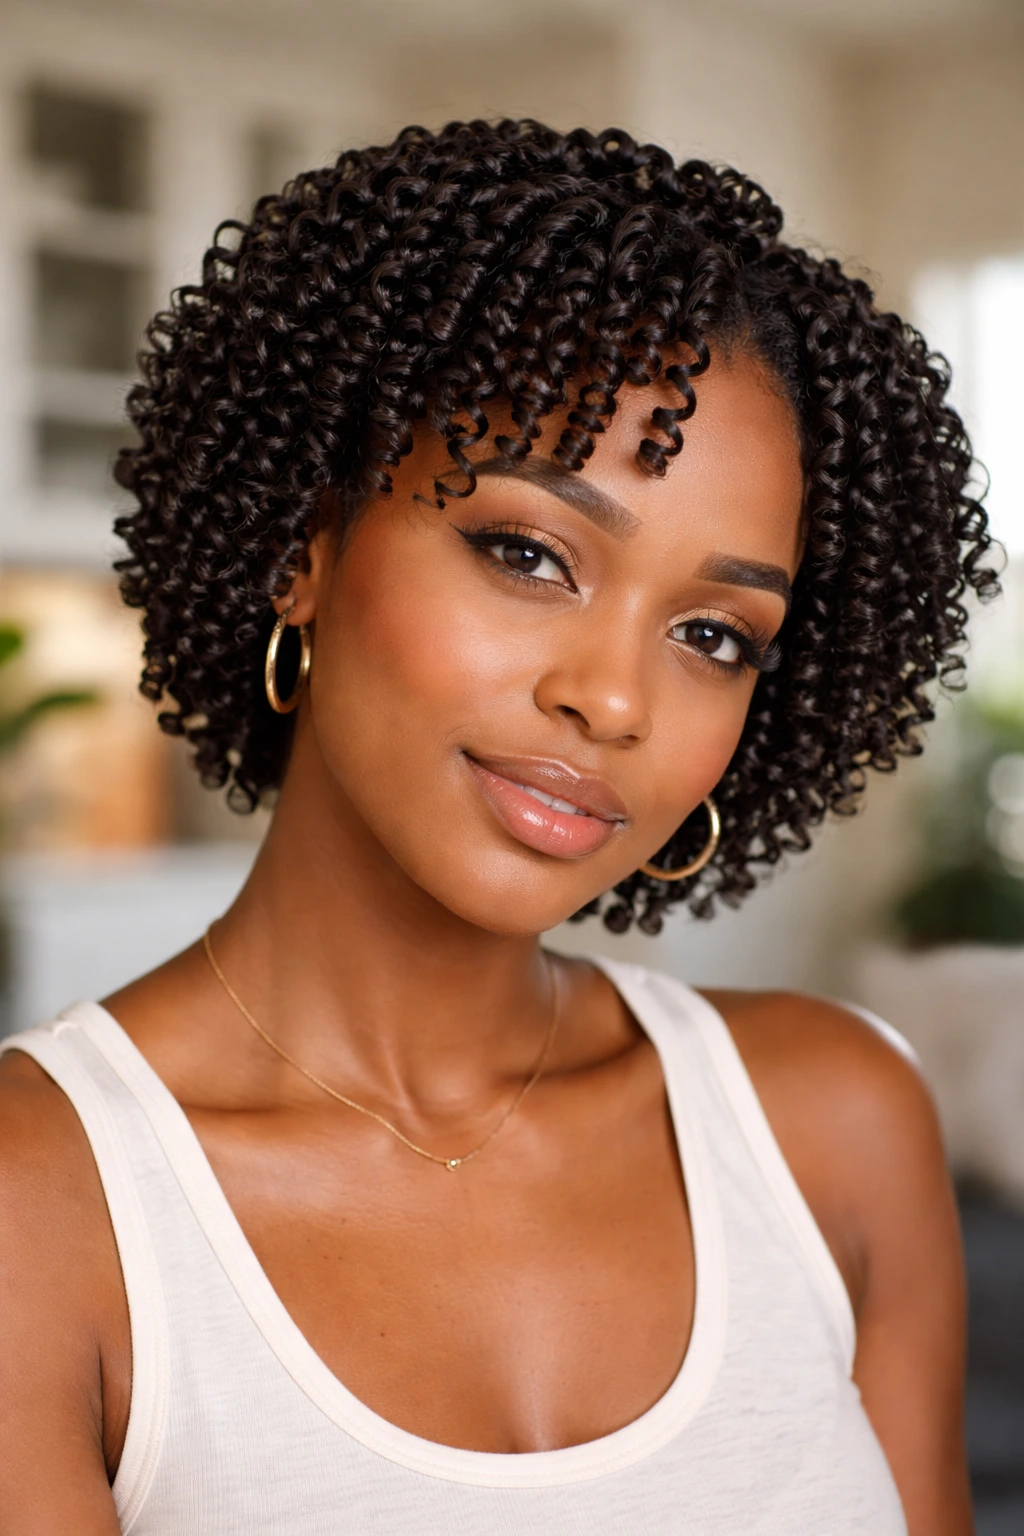
Finger coils ask for patience, but they pay it back. Each coil turns a small section of hair into a neat spiral, and the finished style makes short to medium curly hair look crisp, glossy, and deliberate.
The setup matters. Work on damp hair, apply a lightweight cream or gel, and coil each section around your finger until it springs into place. Sections around 1/2 inch wide give a tighter, more even finish. Bigger sections create looser coils and dry faster, but they can lose definition sooner. Neither is wrong. They just tell a different story.
How to Keep the Coils Looking Sharp
- Separate the hair before it dries fully
- Sleep on satin so the coils do not flatten
- Refresh with a little water and a pea-size amount of gel
- Avoid heavy oils on top of the coils; they can make the finish collapse
Finger coils are especially useful when you want every curl to look intentional. They are neat, yes, but not stiff if you handle them right. The shape ends up polished in a way that still feels textured, which is exactly the point.
Some of the smartest textured hairstyles for curly hair are the ones that leave a little mess on purpose. Too much polish can flatten the life out of curls.
Pick one style that protects your ends, one that gives you speed, and one that makes you feel a bit dressed up. That trio covers most weeks without turning your bathroom into a styling lab.
