



Some curls look better left alone. Others need a little coaxing — a few clips, the right part, a strong gel, maybe ten calm minutes in front of a mirror — before they settle into something worth wearing out of the house.
That’s the part people get wrong about textured hairstyles for curly hair. They treat curls like they’re trying to be straight hair in a costume. They’re not. Curly and coily hair has its own rules: shrinkage changes the silhouette, humidity changes the mood, and a style that looks stiff at the root often falls flat once the day warms up. The best looks work with that movement instead of punishing it.
There’s also a sweet spot most people miss. A style doesn’t have to be complicated to look intentional. Sometimes the smartest choice is a puff with clean edges. Sometimes it’s a twist-out that keeps a little frizz on purpose because frizz reads as fullness, not failure. That tradeoff matters more than perfection ever will.
So here’s the practical part: 30 textured hairstyles that actually make sense for curls, coils, and everything in between, with enough detail to help you choose one that fits your length, time, and mood.
1. Defined Wash-and-Go
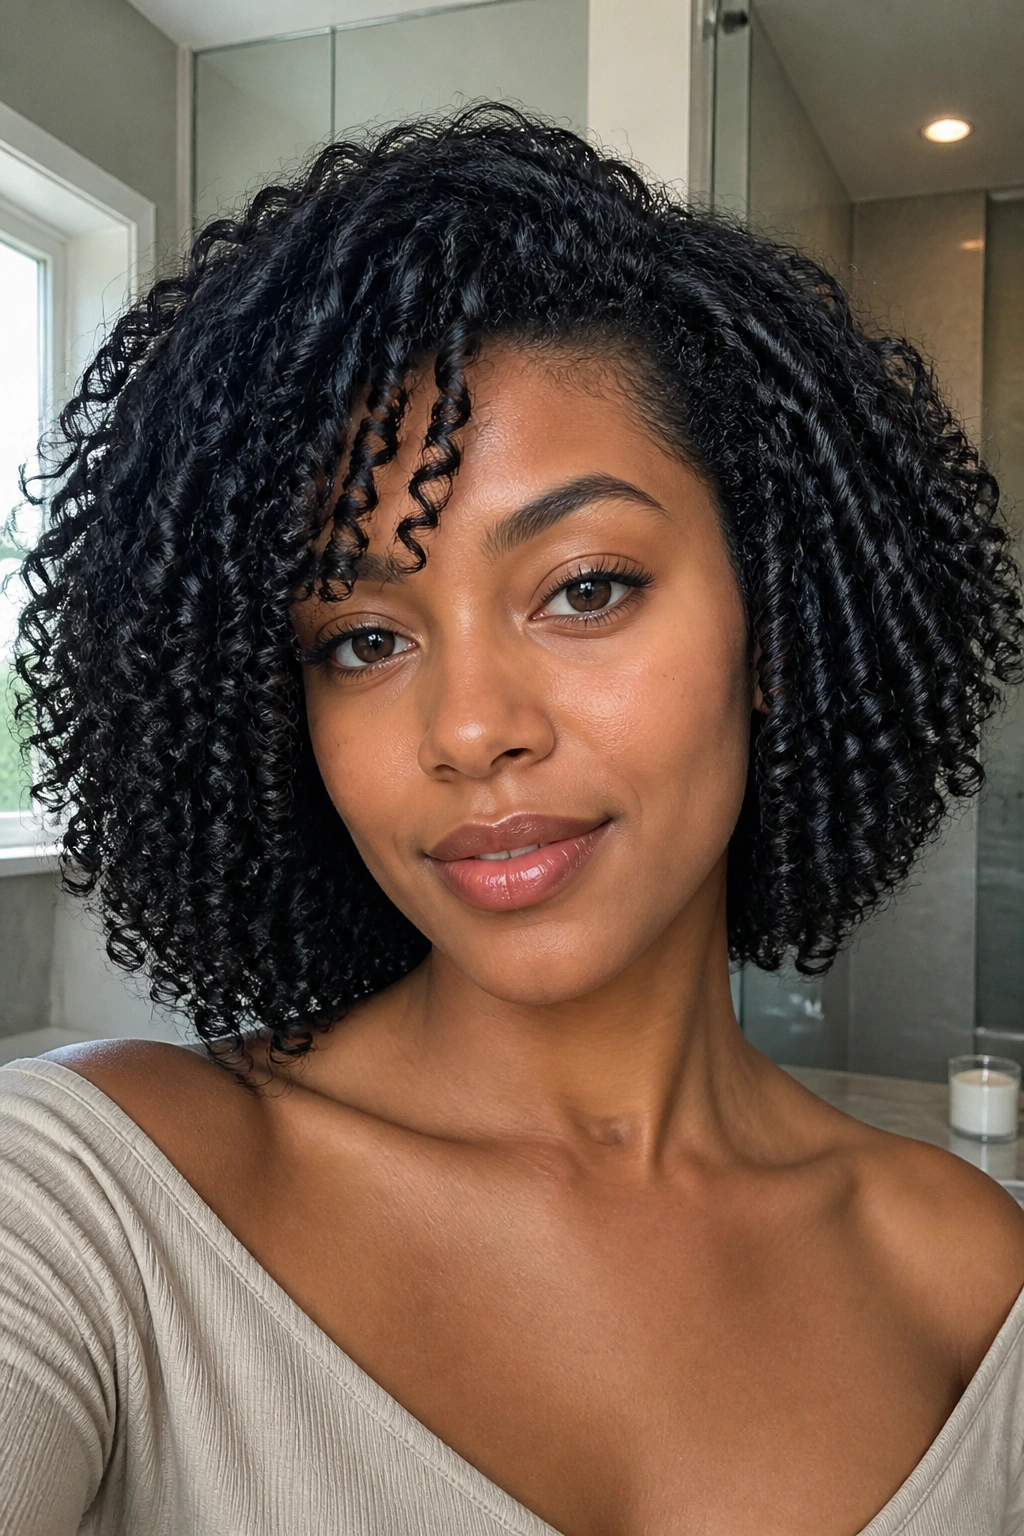
A good wash-and-go is still the most honest curly style out there. You wash, you layer product, you let your own pattern do the talking. Nothing fancy. And when it lands well, it looks expensive in the nicest possible way because the shape comes from your hair, not from overworking it.
Why It Works
The magic is in the product order. Start with leave-in on soaking-wet hair, then add a curl cream if your strands like a little softness, then finish with a gel that gives hold without turning brittle. Scrunch upward, but don’t keep touching it. Once the cast sets, you can break it with a drop of oil or serum.
What I’d Watch For
- Use a wide-tooth comb or your fingers only while the hair is wet.
- Clip the roots at the crown if your curls dry flat.
- Diffuse on low heat if you want more lift.
- Air-dry if you want softer clumps and less frizz.
Best for: people who want shape without stretching or braiding first.
2. Sky-High Puff
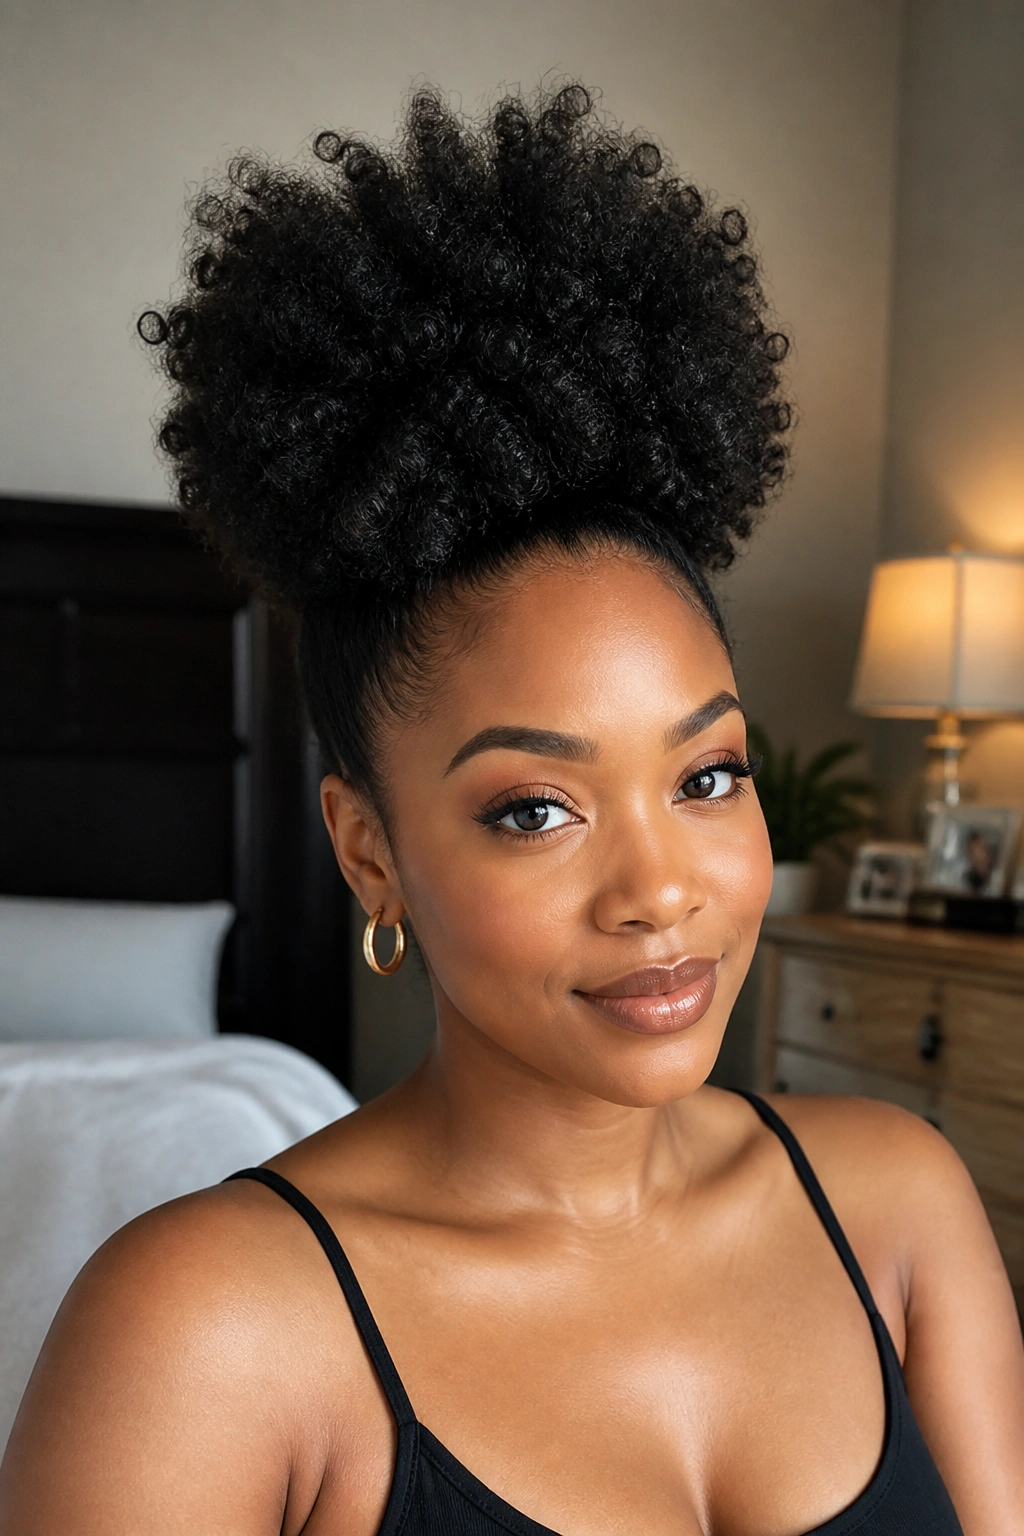
A high puff is not a lazy-day style. Done well, it’s a shape. A real one. It pulls the hair upward, shows off your texture, and makes the face look open without flattening the curls that matter.
The trick is tension control. Smooth the perimeter with a soft brush and a little gel, then gather the puff with a satin scrunchie or thick elastic. Don’t yank it tight enough to leave a headache by noon. Let the puff sit high, then fan it out by hand so it looks full from every angle.
This one shines on second- or third-day hair. The roots have a bit of memory, the curls have less slip, and the whole style holds better. If your edges are delicate, keep the base loose and let the puff do the heavy lifting.
3. Pineapple Updo
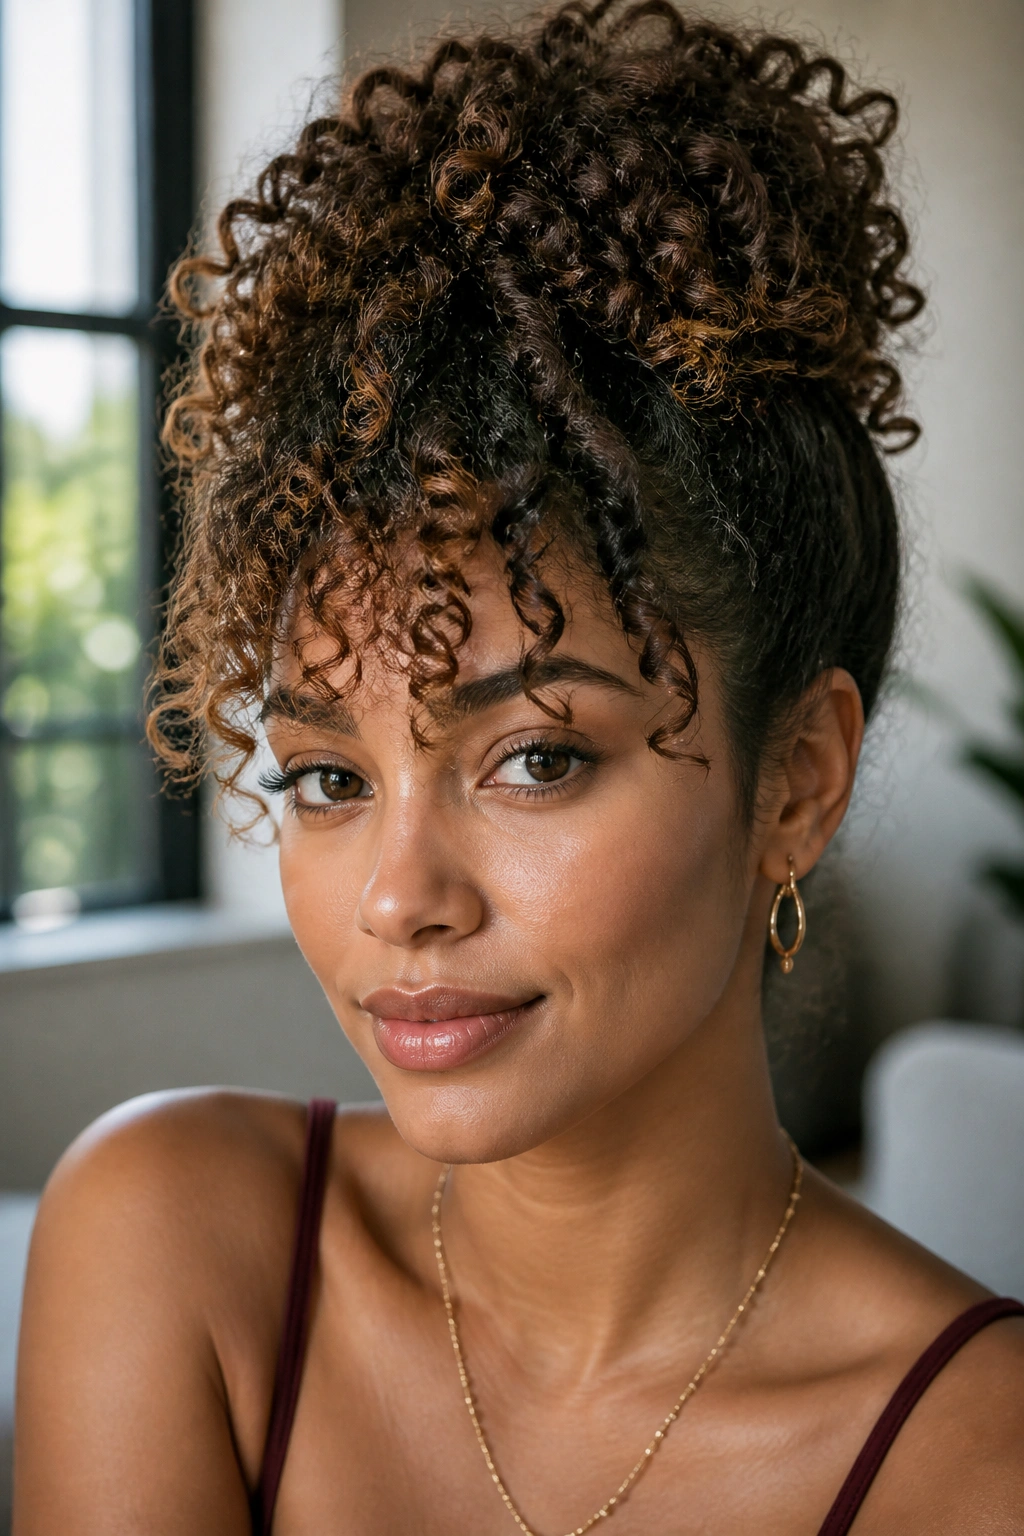
What happens when you need one style that survives sleep, errands, and a long day out? Pineapple. It’s the classic curl-preserving lift, but it works in daylight too.
The shape is simple: gather the hair loosely at the top of the head so the curls fall forward and out. Leave the front soft. Leave the sides soft. The point is height, not tension. For longer curls, a pineapple can look almost sculptural, with the ends spilling over like a bouquet.
How to Wear It Well
A satin scarf at the base keeps the style from puffing out too fast. A few face-framing pieces can make it feel less bedtime, more deliberate. If your curls are long enough, twist the ends before you gather them; that keeps the tail cleaner and stops the shape from turning into a floppy knot.
4. Twist-Out with a Side Part
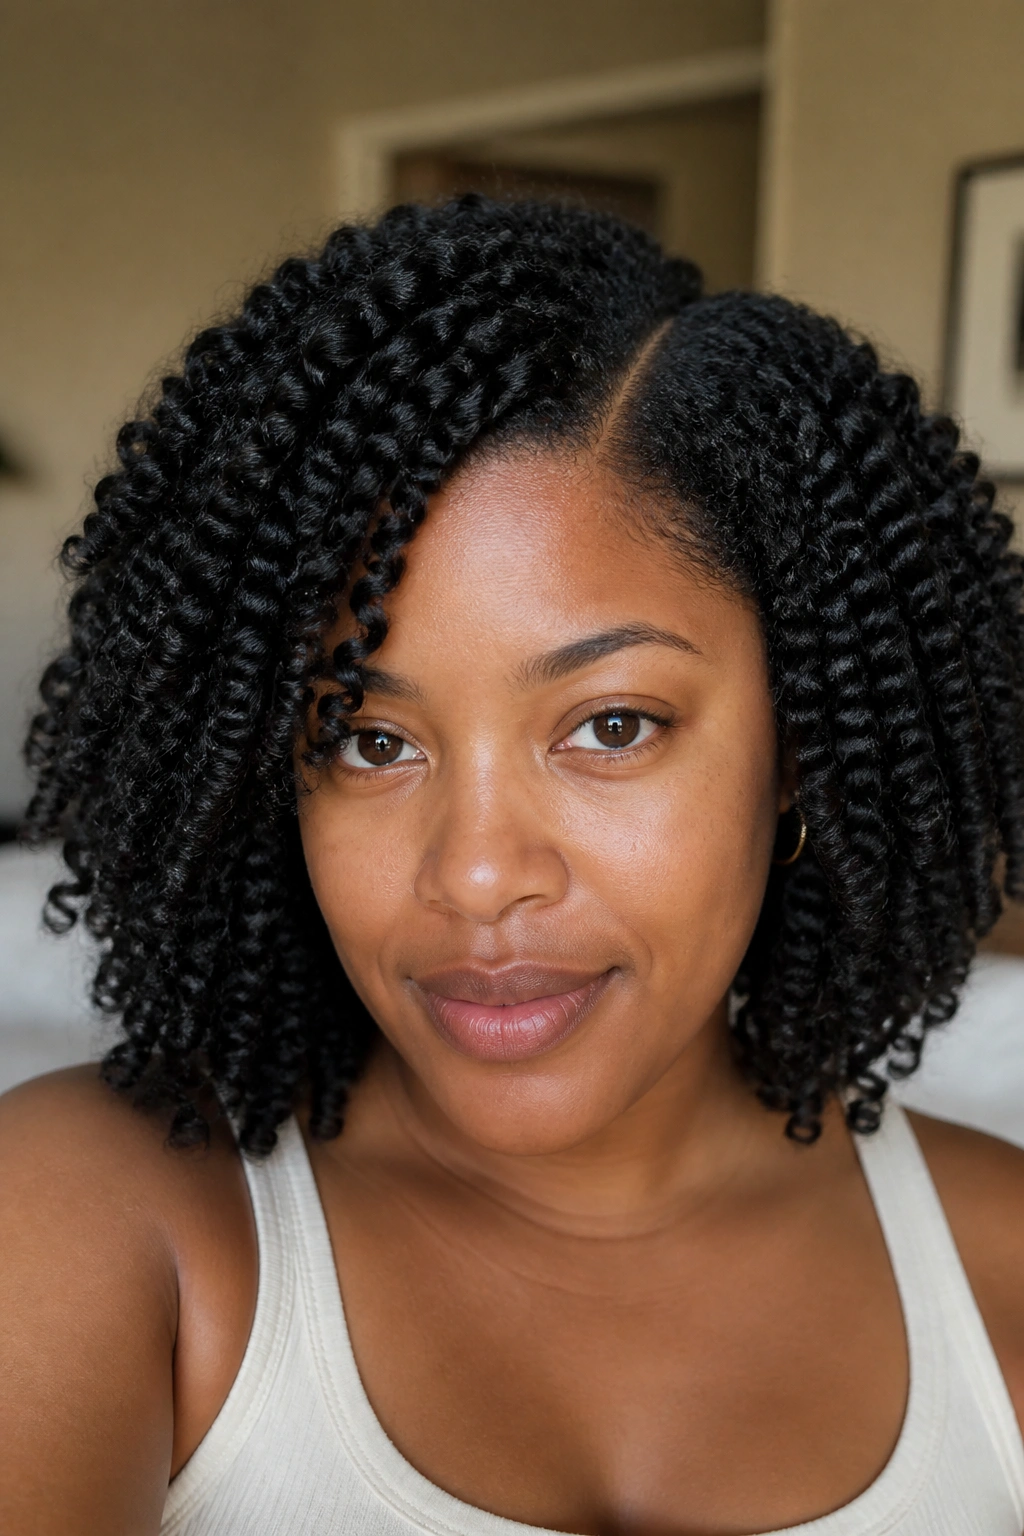
Picture damp hair, a mirror, and ten minutes you wish you had back. A twist-out is for the person who wants stretch, definition, and a little body without heat. It also gives you options. Side part, middle part, deep sweep — all of them change the mood.
Set the hair in two-strand twists on damp, not soaking, strands. Use a cream or butter that gives slip, then seal if your hair needs it. Let the twists dry all the way. That part matters. If you unravel early, the pattern looks fuzzy before it has a chance to finish forming.
- Unwind with oiled fingers.
- Separate only where the curl naturally splits.
- Lift at the roots with a pick if you want more volume.
- Keep a few twists larger at the front for a less uniform finish.
5. Braid-Out with Stretched Ends
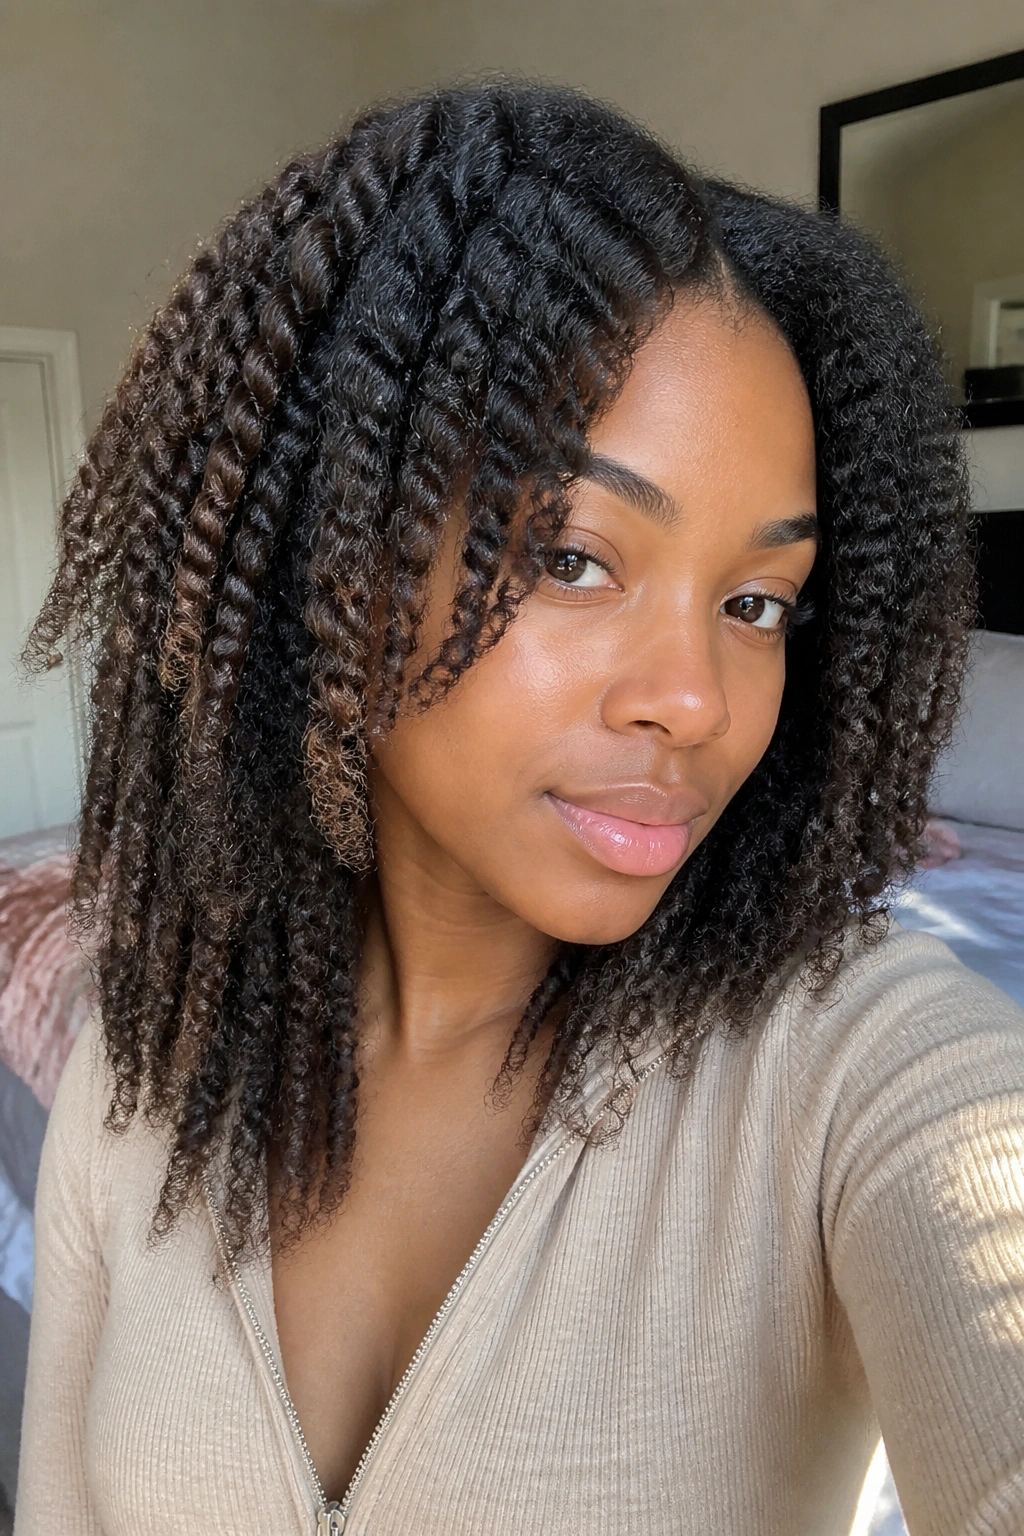
Braids create a different line than twists do. They leave a zigzag pattern, a little more stretch, a little less spring, and that’s exactly why some people prefer them. The result feels softer and longer, especially on tighter coils.
A braid-out works best when the hair is fully dry and the sections are consistent. Too small, and the style can puff up into frizz sooner than you want. Too large, and the braid pattern disappears before the shape settles. Start on slightly stretched hair if your shrinkage is intense. That gives you more length to work with and keeps the ends from bunching up.
I like braid-outs for days when I want the hair to move. They don’t hold the same tight definition as a twist-out, but they do hold a little swing. And that swing is the point.
6. Halo Braid
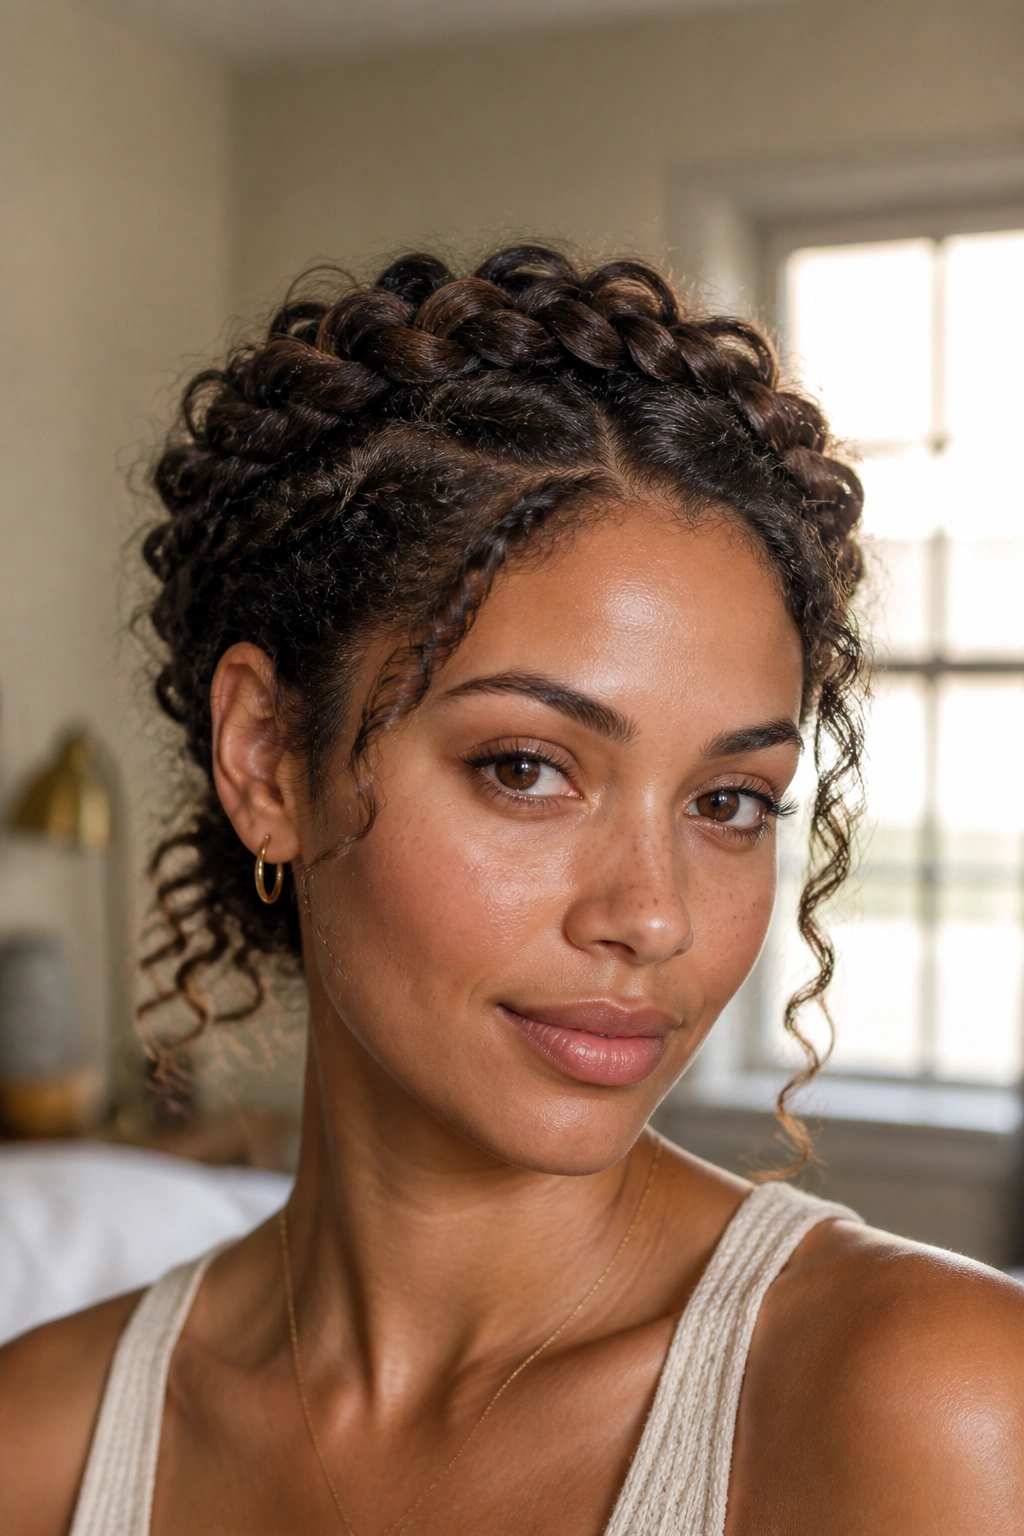
A halo braid does something a ponytail never quite does: it makes the head feel finished. The braid circles the hairline, which gives the whole style a frame and keeps the curls tucked away from the face.
It’s a smart choice when you want polish without stiffness. On long curls, braid the front section from one temple to the other and tuck the ends behind the ear or into the back of the style. On shorter hair, a faux halo created with two braids can get the same effect without requiring extra length.
This style also plays nicely with texture at the back. Leave the rest curly, gather it into a low puff, or tuck it into a soft bun. The front does the formal work. The rest can stay relaxed.
7. Half-Up, Half-Down Stack
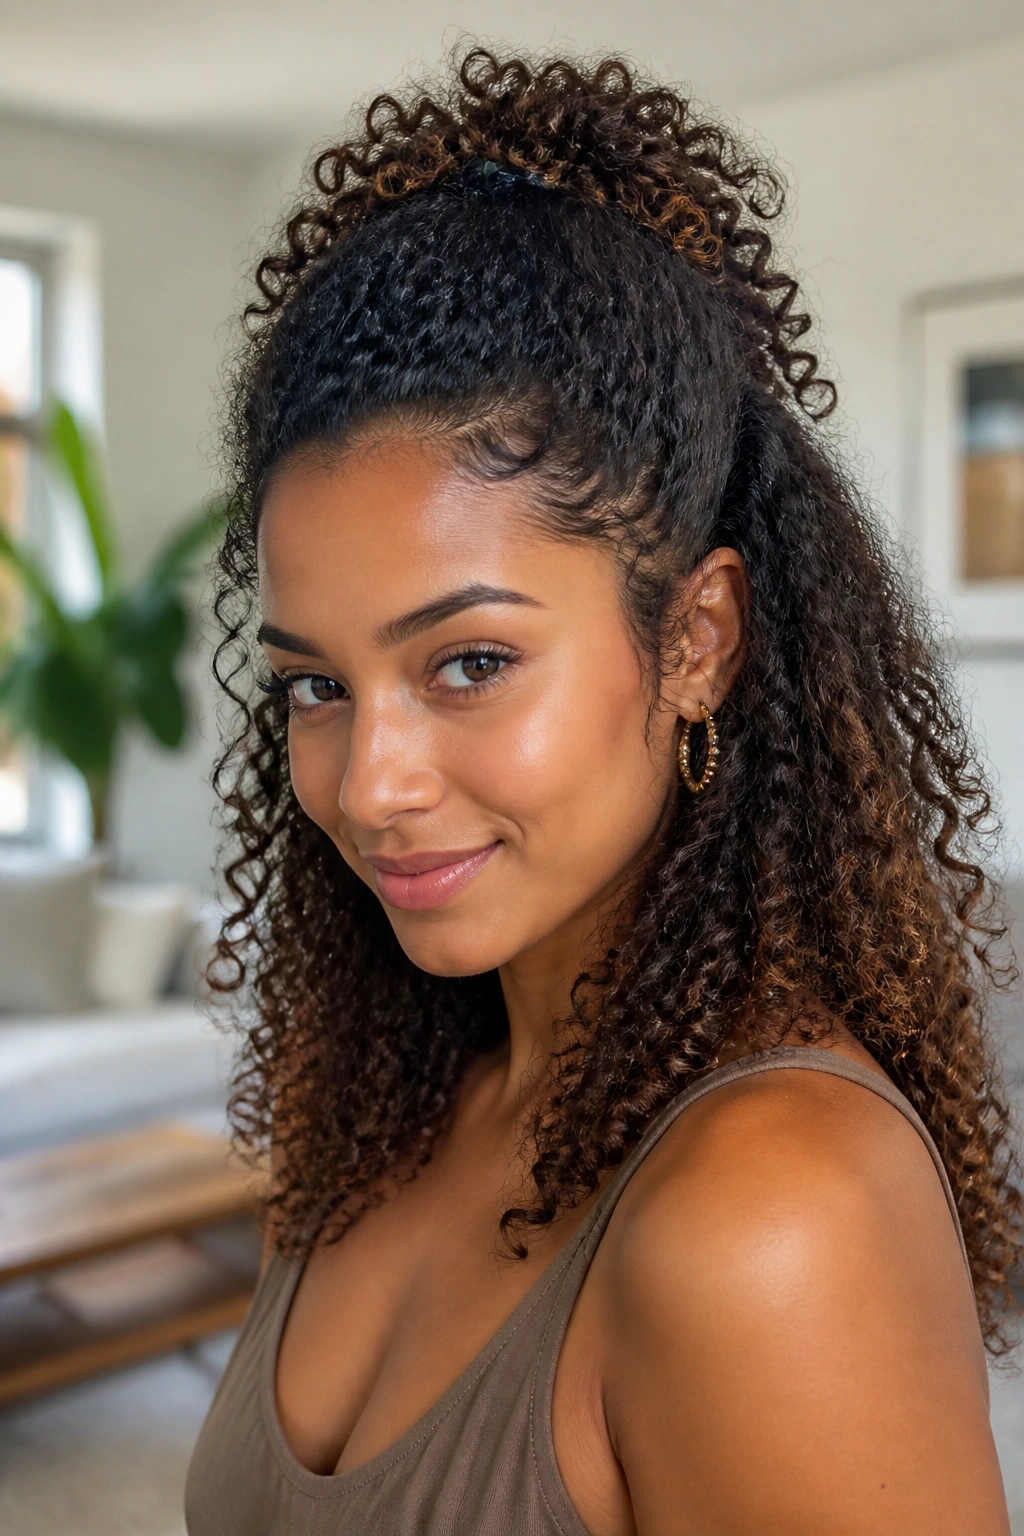
Can you split the difference between polished and loose? Absolutely. Half-up, half-down styles are underrated because they solve a lot of curly hair problems at once. You get lift at the crown, shape around the face, and enough hair down to show off your texture.
The trick is placement. Lift the top section higher than you think, then secure it with a clip, band, or small puff. If the crown is flat, fluff the roots first with a pick. If the ends are dry, leave them alone and let the top half carry the style. That contrast keeps it from looking overworked.
This is also one of the easiest ways to hide uneven curl days. The top half can be sleek or twisted. The bottom half can be fluffy and lived-in. Nobody needs to know the middle.
8. Double Space Buns
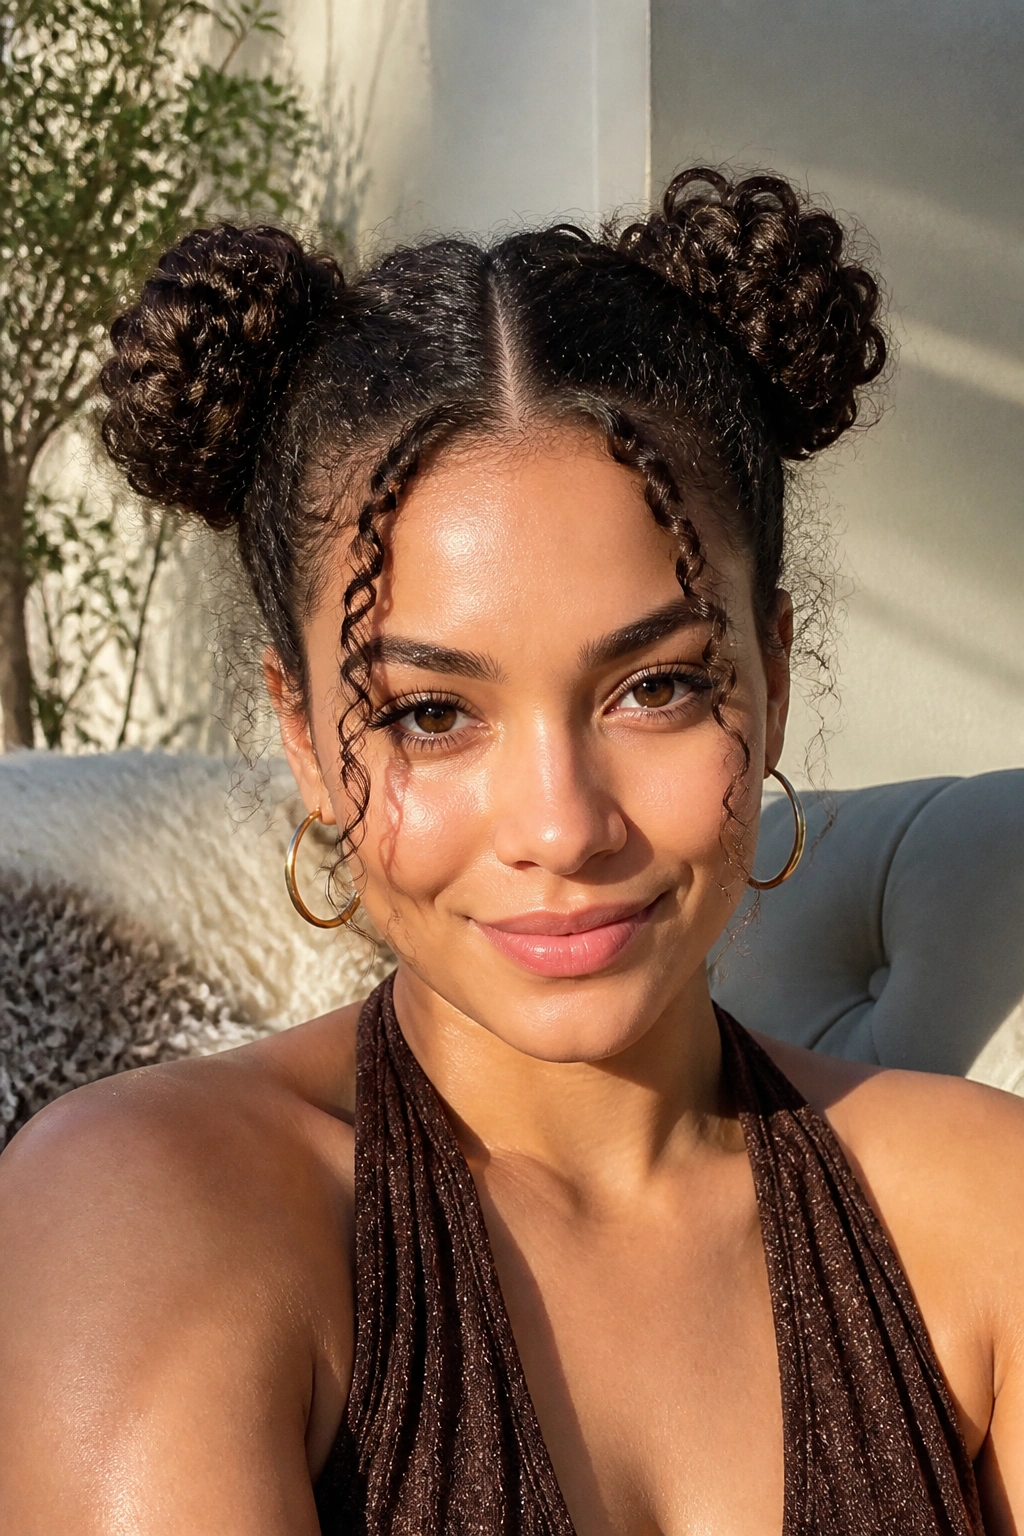
Double buns look playful, but the best ones are built on clean parting and smart tension. Split the hair down the middle, gather each half high, and twist or wrap the sections into buns that sit near the crown.
The parts matter more than the buns. A sharp center part gives the style structure. Softly brushed edges keep it neat. And a few loose curls around the face stop it from feeling too severe. If your hair is long, let the ends of each bun spill slightly instead of forcing them into a tiny knot. That little bit of mess reads as style.
What Makes It Different
- Works well on both stretch and shrinkage.
- Looks best when the buns are slightly uneven in size.
- Can be dressed up with gold cuffs or small clips.
- Keeps the neck free, which is useful when the weather is warm or your day is long.
9. Bantu Knot-Out
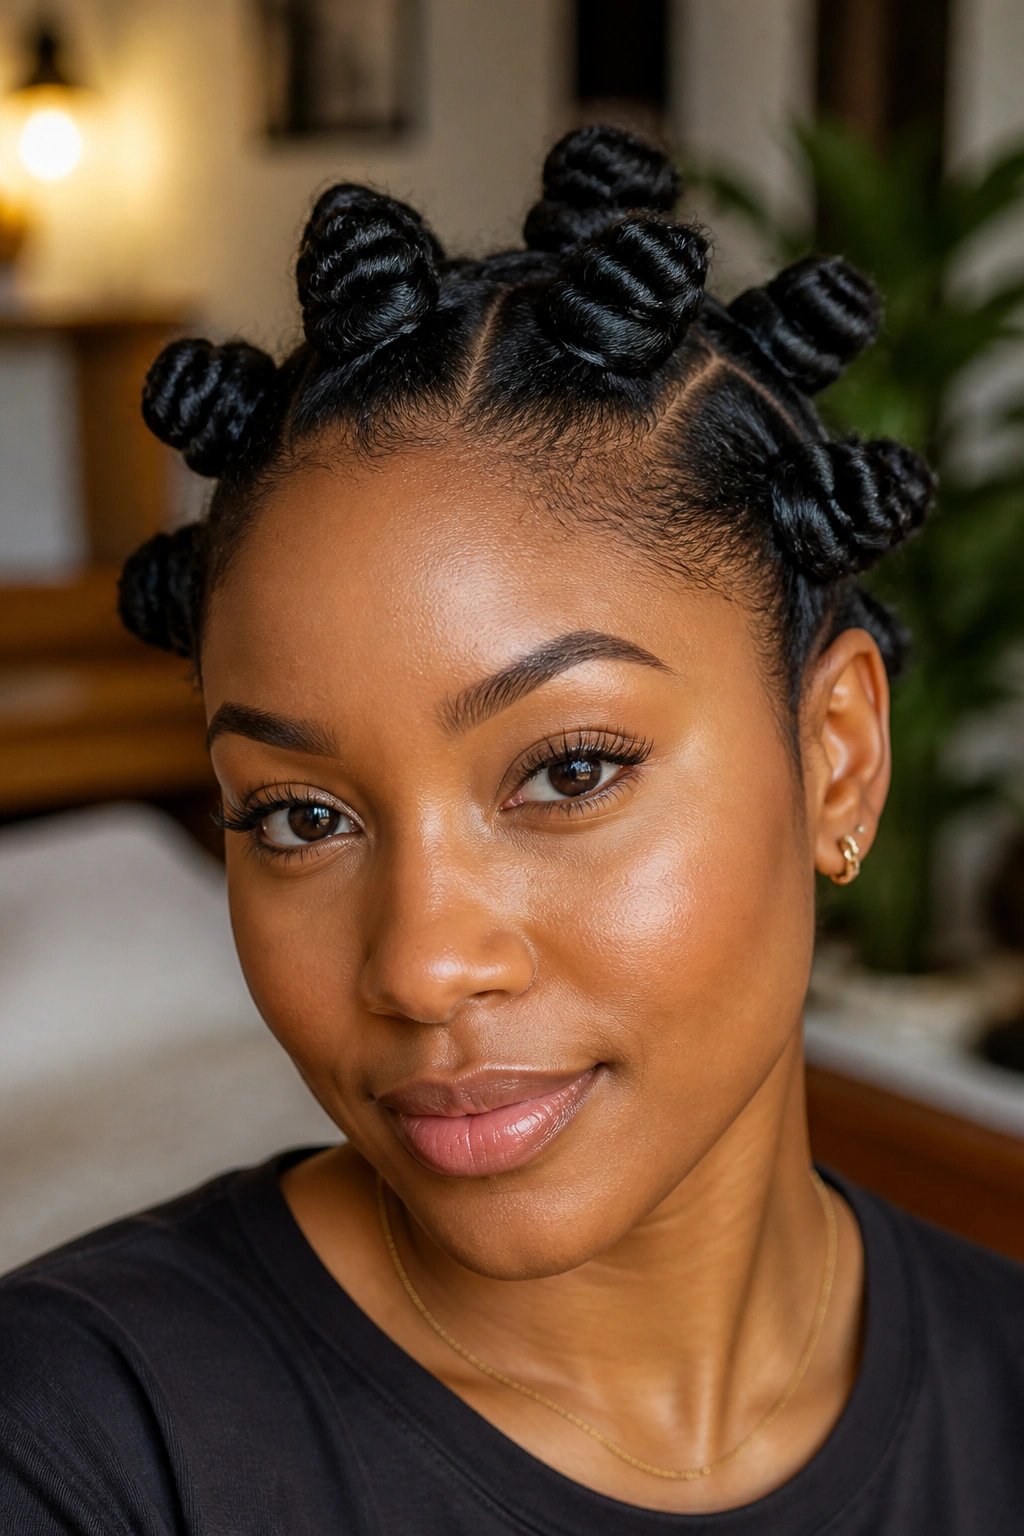
The first time I wore Bantu knots in public, two people asked if I had curled my hair with rods. That’s the whole point. The style itself is a set, and the release is a second look.
Twist each section until it coils tightly on itself, then wrap the coil into a small knot and pin or tuck it down. When the hair is fully dry, unwind gently. The result is springy, defined, and a little glossy if you used the right cream. Smaller knots give tighter spirals. Bigger knots give looser bends.
Don’t rush the dry time. Seriously. Half-dry knots look flat at the base and fluffy at the ends, which is a very specific kind of annoying. Let the set finish, then separate just enough to make the shape feel full.
10. Flat Twist Crown
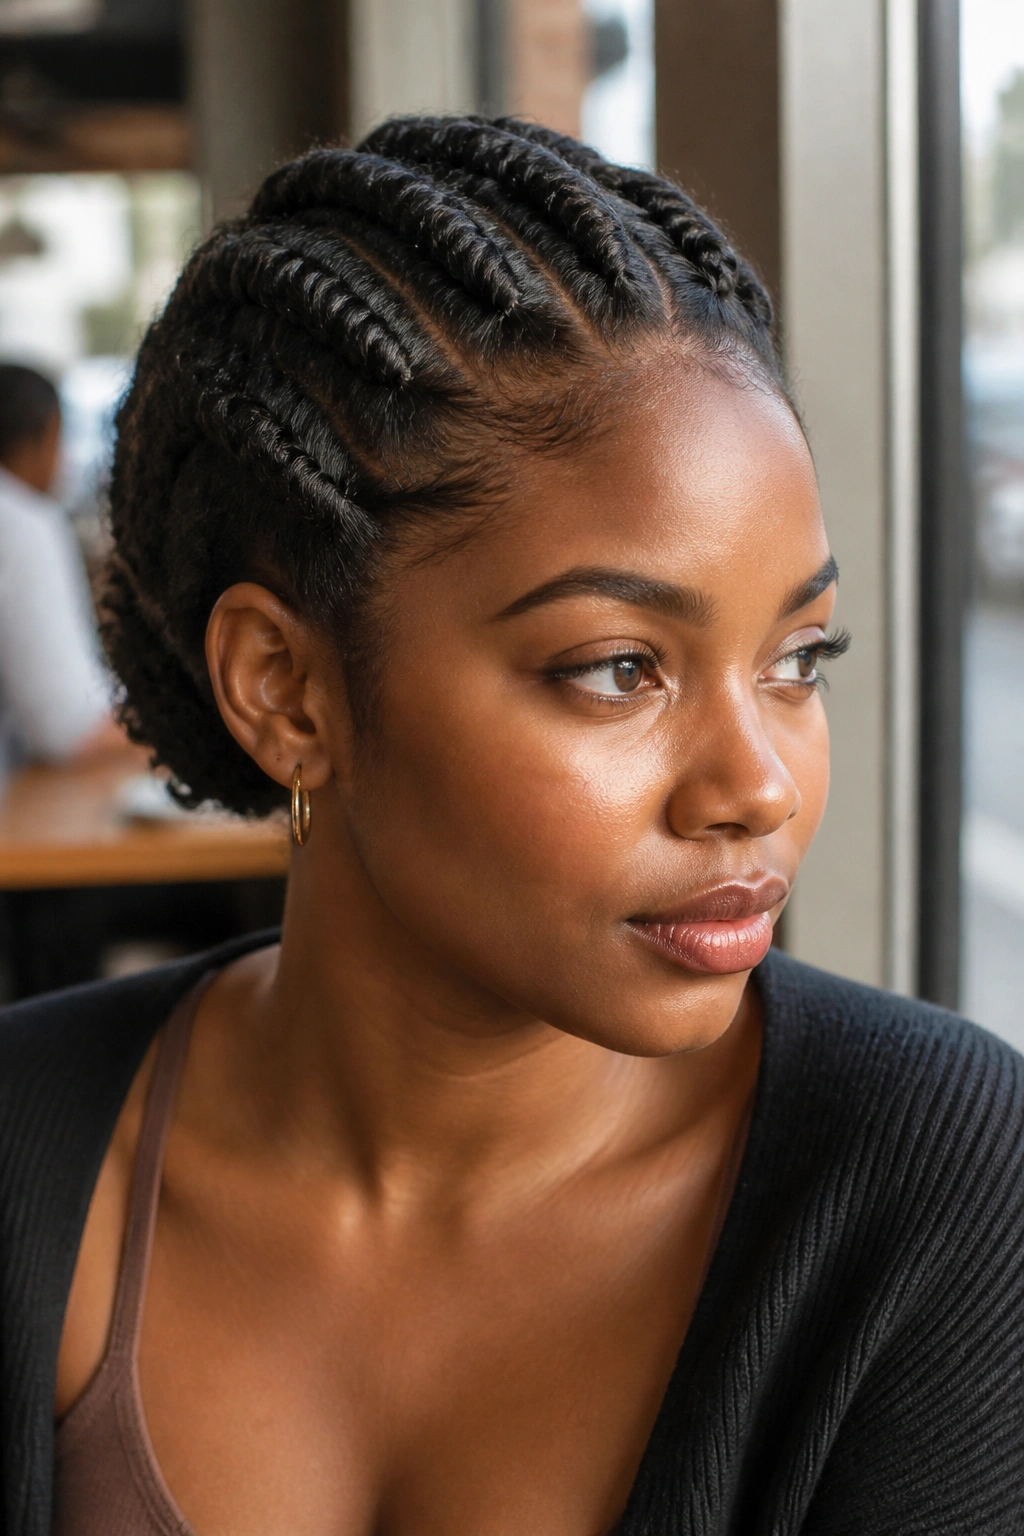
Flat twists are the quiet workhorse of textured styling. They lie close to the scalp, create clean lines, and keep the face open without needing heat or heavy manipulation.
A flat twist crown starts at the hairline and travels around the head like a built-in band. The back can be tucked into a bun, left in curls, or shaped into a low puff. It’s a smart style when you want the scalp to breathe a bit and you don’t want a lot of loose hair sitting on your neck.
Practical Notes
If your hair is very soft, use a little edge control or gel only on the parting. Too much product near the roots can make the twists look gummy. If your hair is coarse, a cream with more slip will help the sections stay neat while you work.
11. Curly Shag with Face-Framing Layers
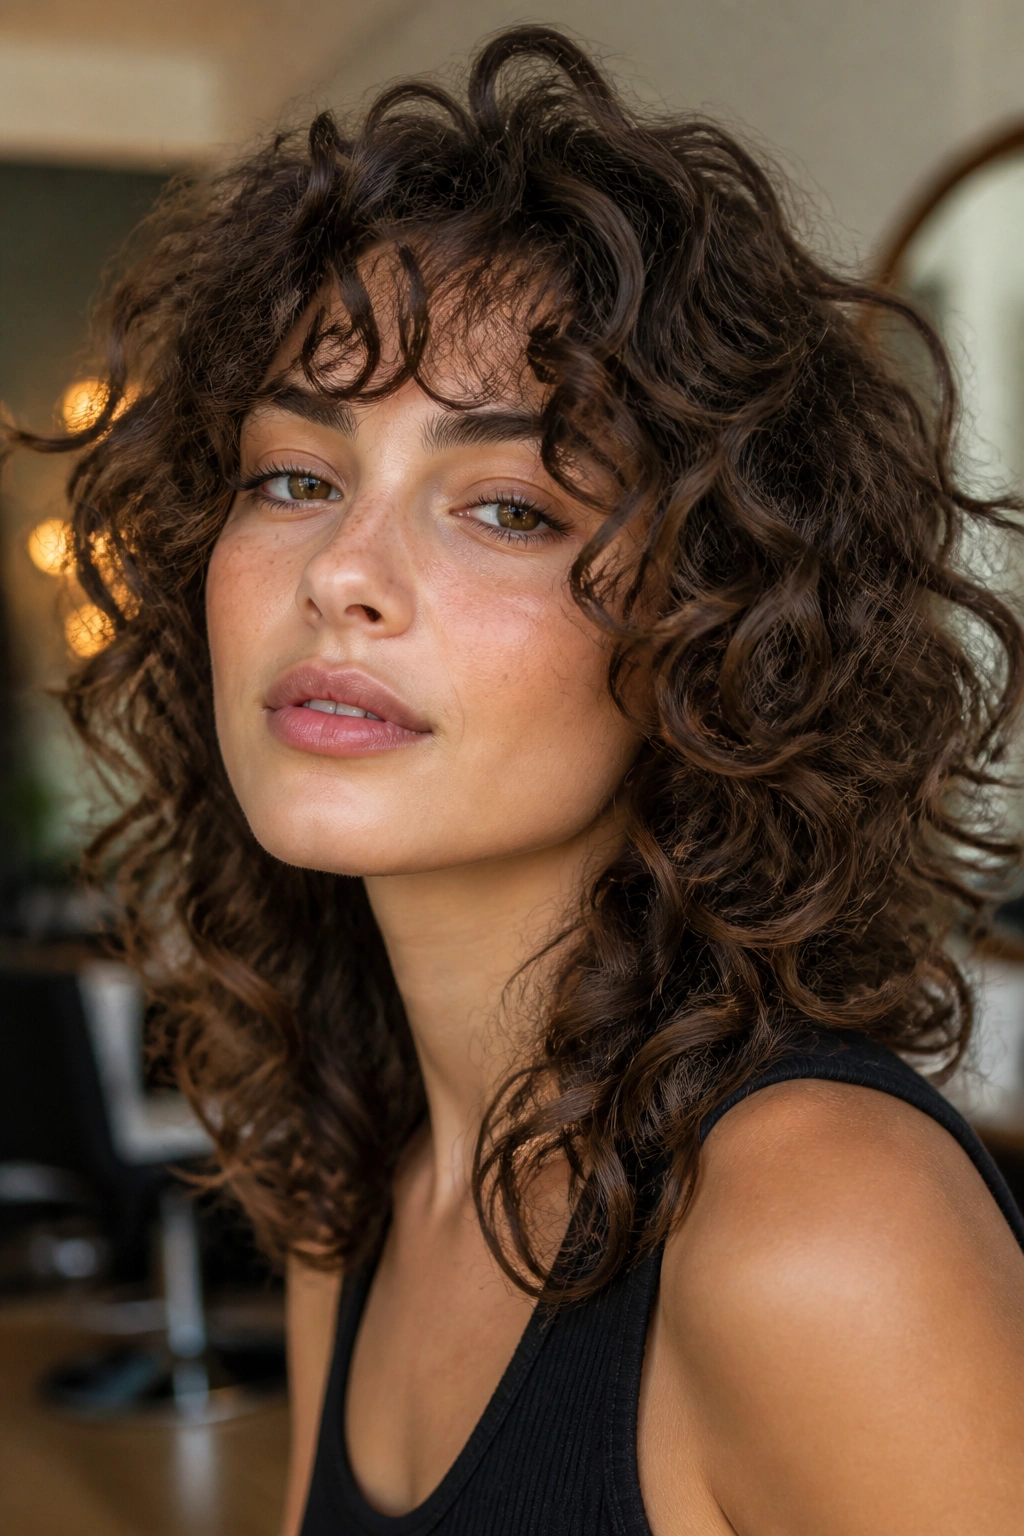
A curly shag lives or dies by the cut. A good one gives you movement at the front, lift at the crown, and enough unevenness that the curls don’t pile into a mushroom shape.
This is the style for people who want shape more than symmetry. Face-framing layers pull the eye toward the cheekbones. Shorter layers at the top stop the style from collapsing. Longer pieces around the jaw keep it soft. The whole thing looks better when it’s a little imperfect, which is a relief if you’ve ever fought a curl pattern that refused to obey.
Diffuser, scrunch, leave alone. That’s the game. If the cut is right, you don’t need to force the hair into a fake outline every morning.
12. Side-Part Curly Bob
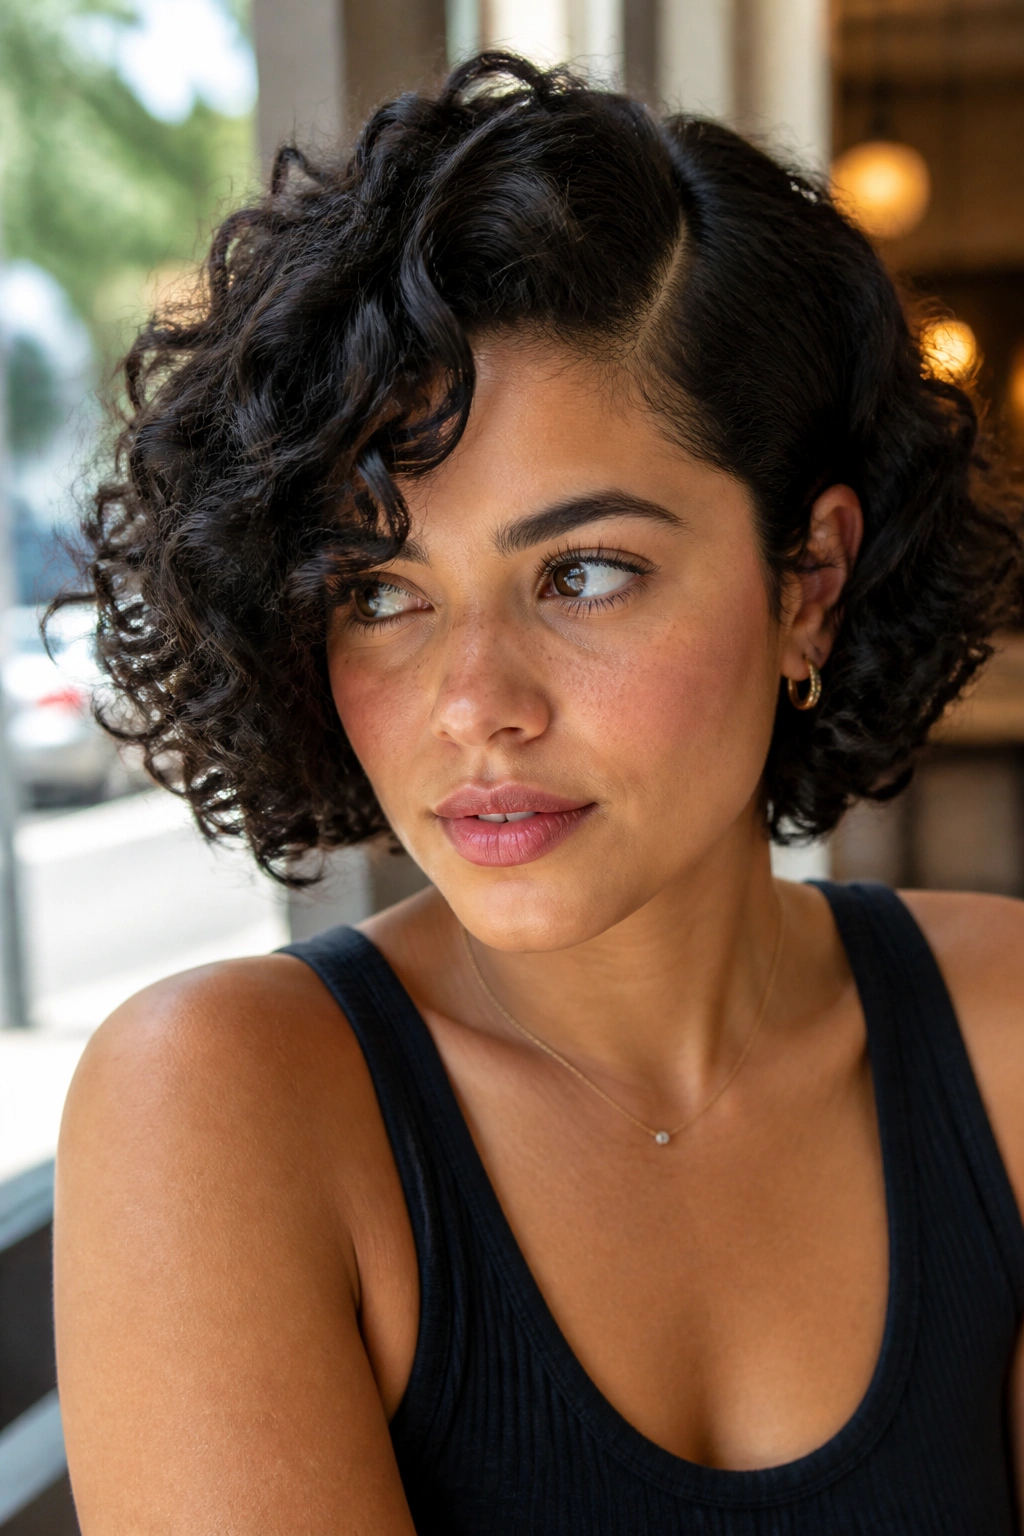
Why does a side-part bob make curls look fuller? Because it shifts the weight. One side falls forward, the other side lifts, and the entire haircut reads as denser even when the actual length is short.
A chin-length bob with a deep side part is especially good for tighter curls that shrink a lot. The side part gives you instant drama without needing a lot of product. If the ends feel blunt, a tiny bit of layer can help the curl pattern stack instead of bell out.
This cut is one of those styles that looks better after a few wears. The curls learn where to fall. The front gets easier. And the shape stops feeling like a haircut and starts feeling like your hair again.
13. Sleek Low Puff
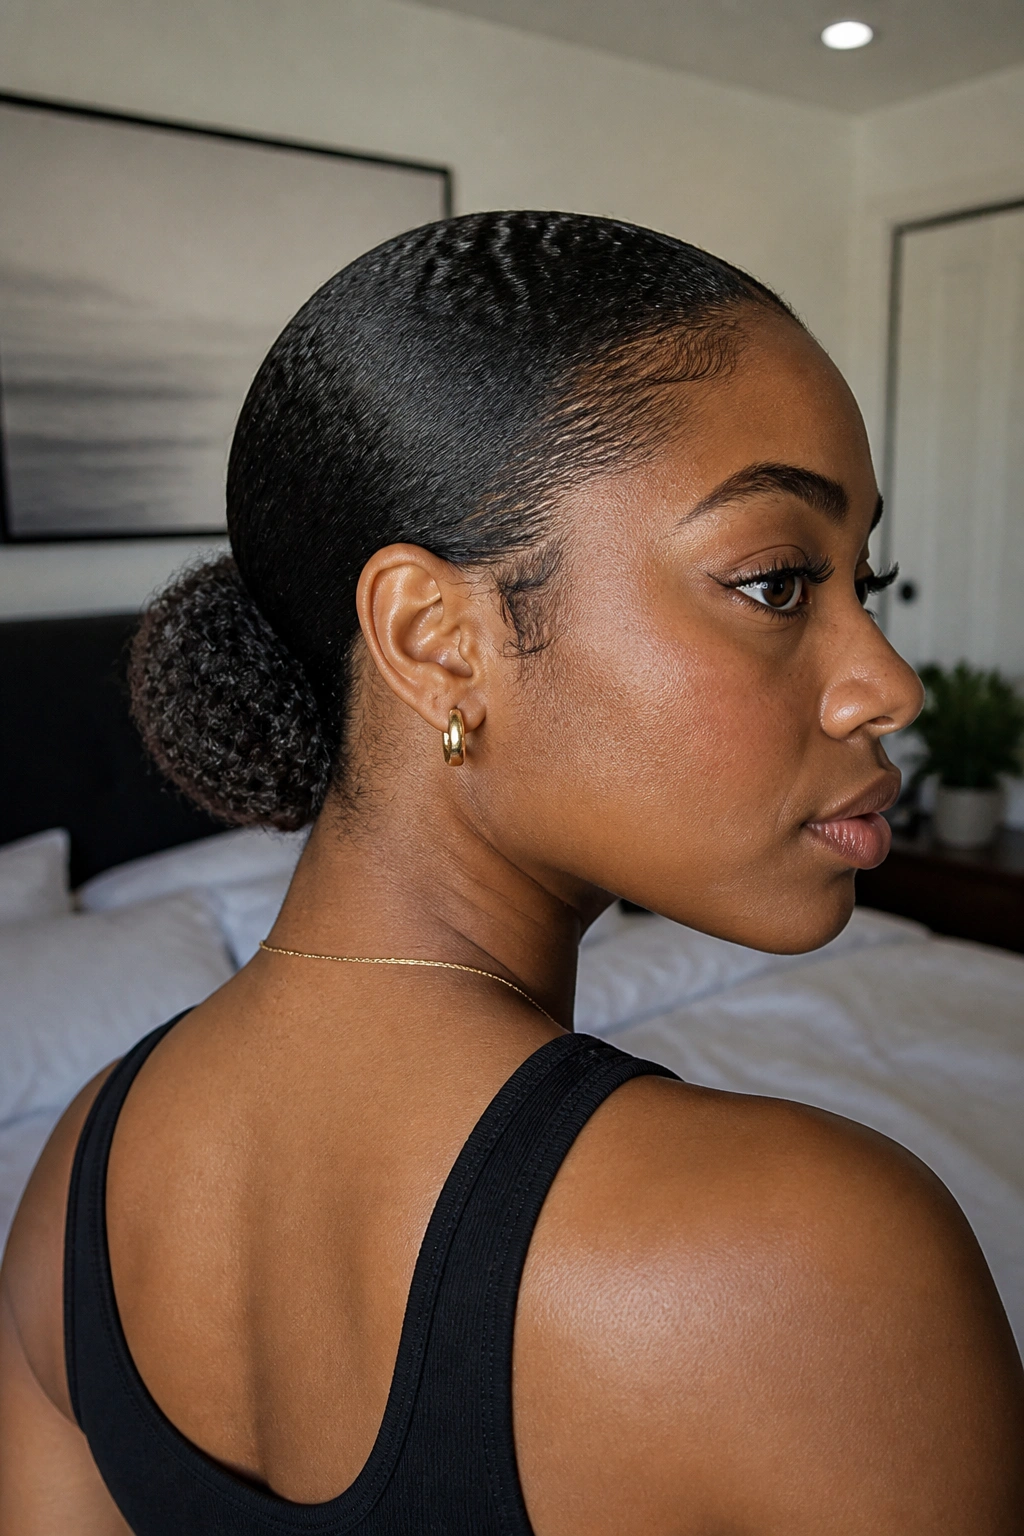
A low puff is the style I use when I want my face and neck to breathe. It sits near the nape, which makes it feel calmer than a high puff and a little more formal than leaving everything loose.
Brush the sides back with a soft bristle brush, smooth the front with gel, and gather the puff low enough that the scalp doesn’t feel pulled. The best version keeps the base neat and the texture full. You do not need to flatten the whole head. That’s a common mistake, and it makes the style look tired before lunch.
A satin scarf for ten minutes can make the roots behave. After that, fluff the puff with your fingers and stop touching it. The more you fuss, the less the shape holds.
14. Mini Twists
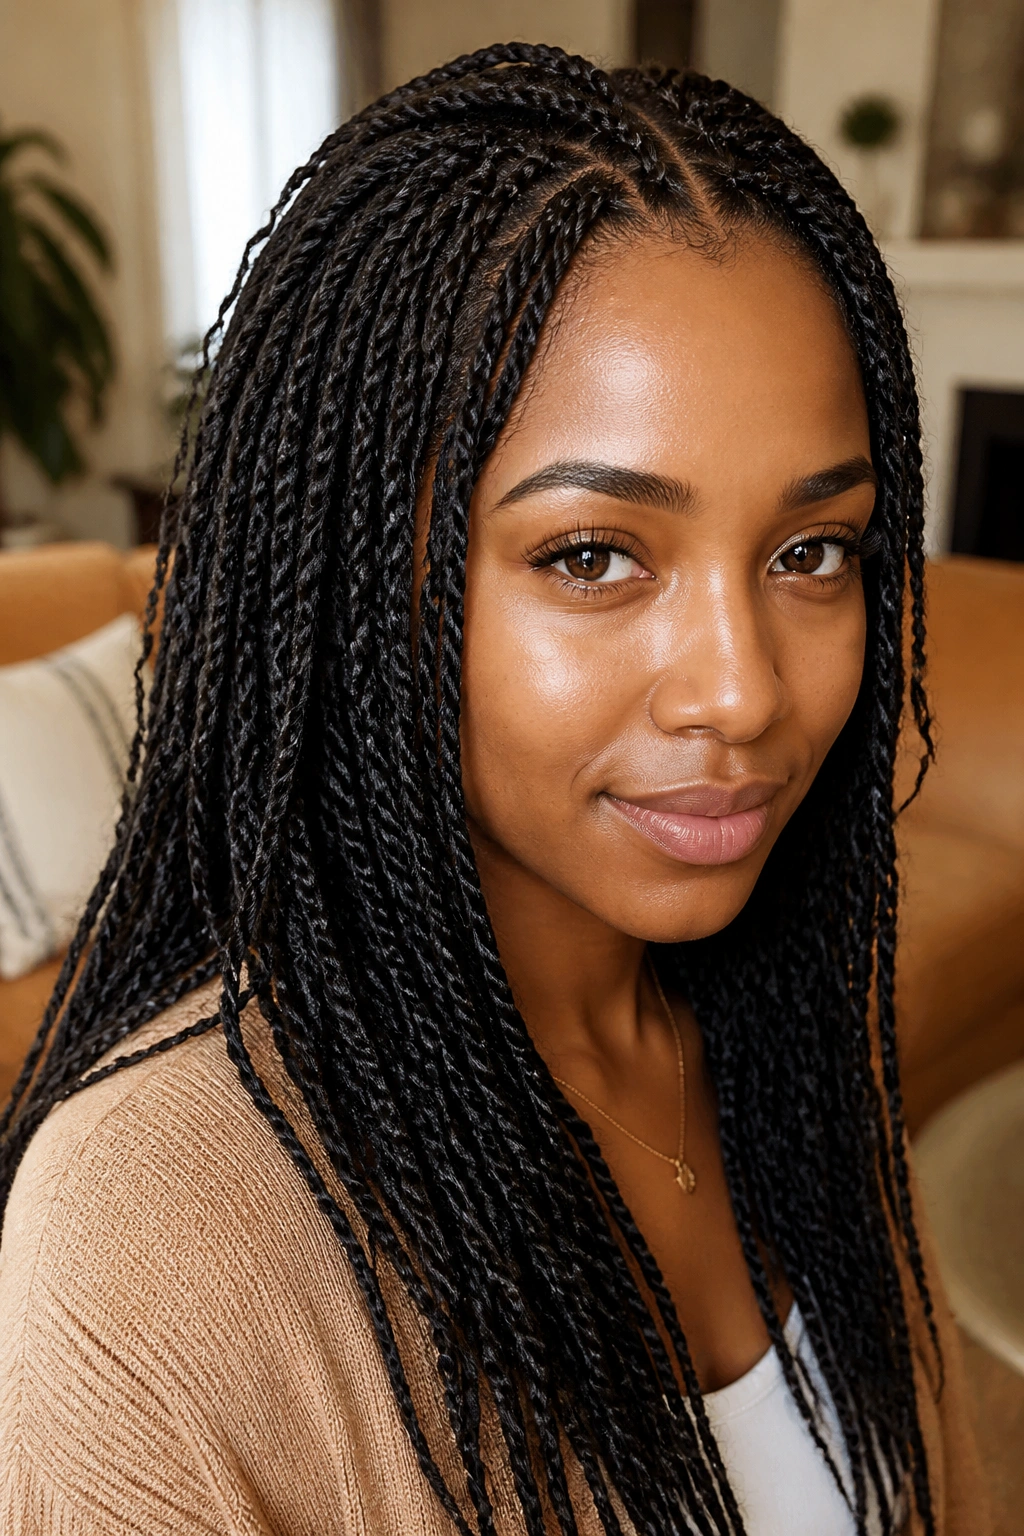
Mini twists ask for patience. They take longer to install, but they buy you time later, which is the trade most people are actually making when they choose a protective style.
Each twist should be small enough to move neatly but not so tiny that your fingers cramp halfway through. Use a creamy product with good slip, part the hair cleanly, and keep the tension gentle at the root. If the scalp hurts, the twists are too tight. That sounds obvious, but it gets ignored all the time.
The beauty of mini twists is how many styles they become afterward. You can wear them down, pin them up, gather them into a low puff, or wrap them into a bun. And when they start to age, they often look better, not worse.
15. Finger Coils
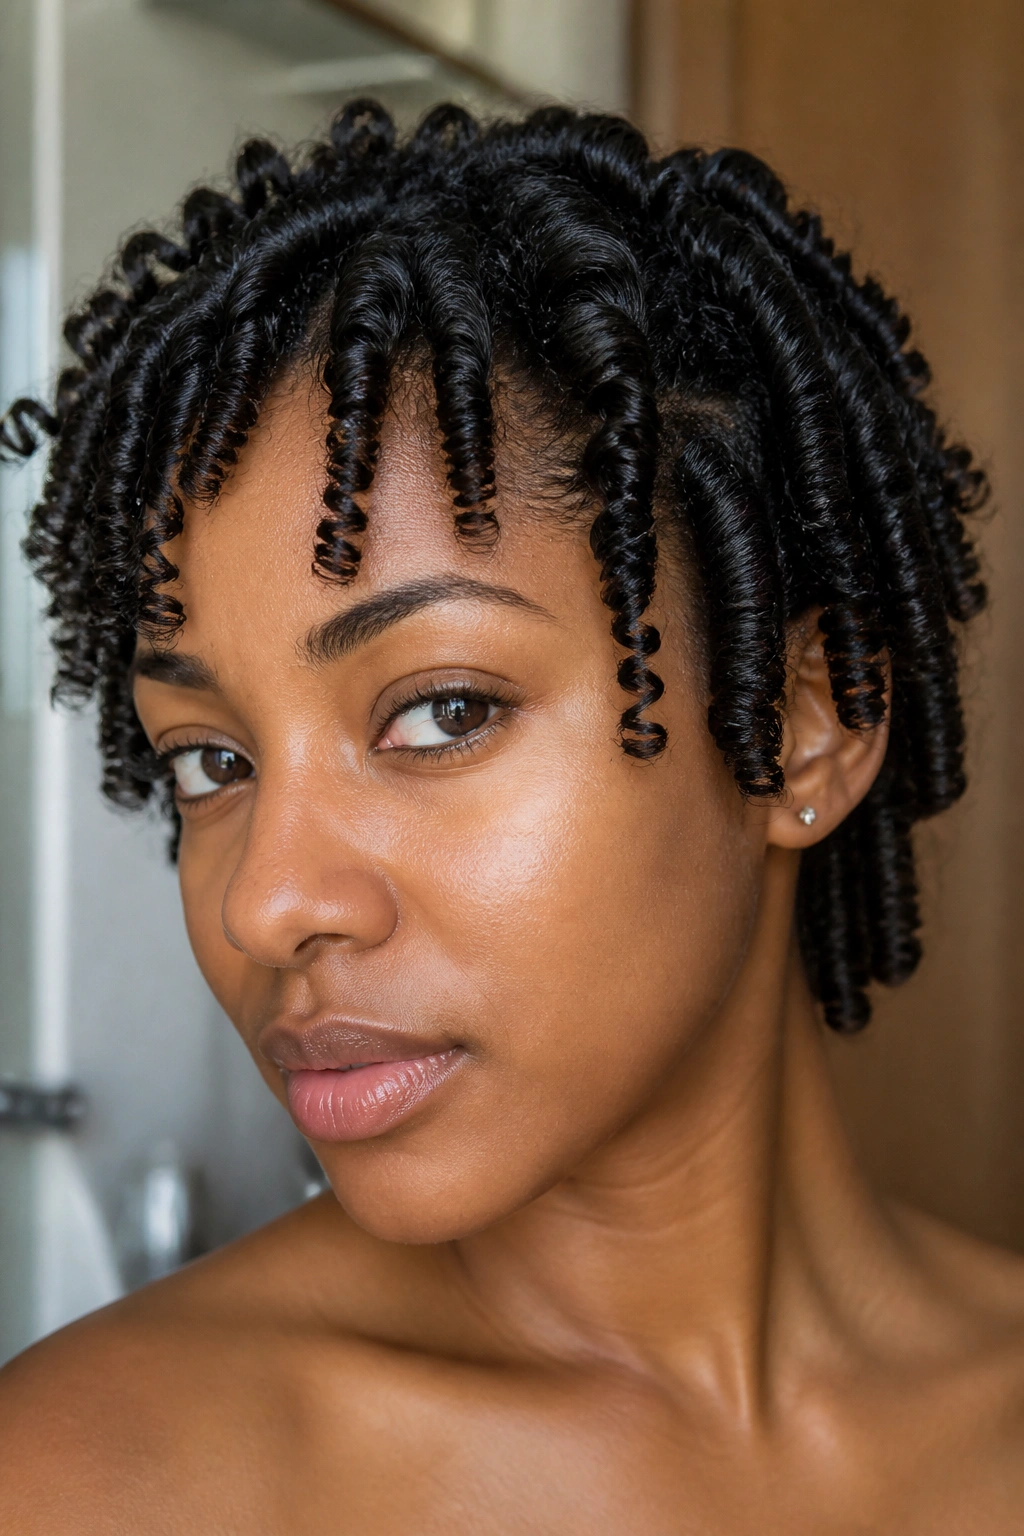
Finger coils are slow, and that is exactly the point. Each coil gives you a defined spiral that can stand alone on short hair or create a dense, polished look on medium lengths.
The method is simple: take a tiny section, coat it with a cream or gel, and wind it around your finger until it springs into shape. Release carefully. If the strand is too dry, it will fray. If it’s too wet, the coil won’t hold. There’s a narrow window, and once you learn it, the style gets easier fast.
How to Get the Most From It
- Start on freshly washed hair.
- Work in small, even sections.
- Let the coils dry before separating.
- Seal the ends with a tiny bit of oil if they feel rough.
This style gives a neat, sculpted finish that wears well for days.
16. Curly Faux Hawk
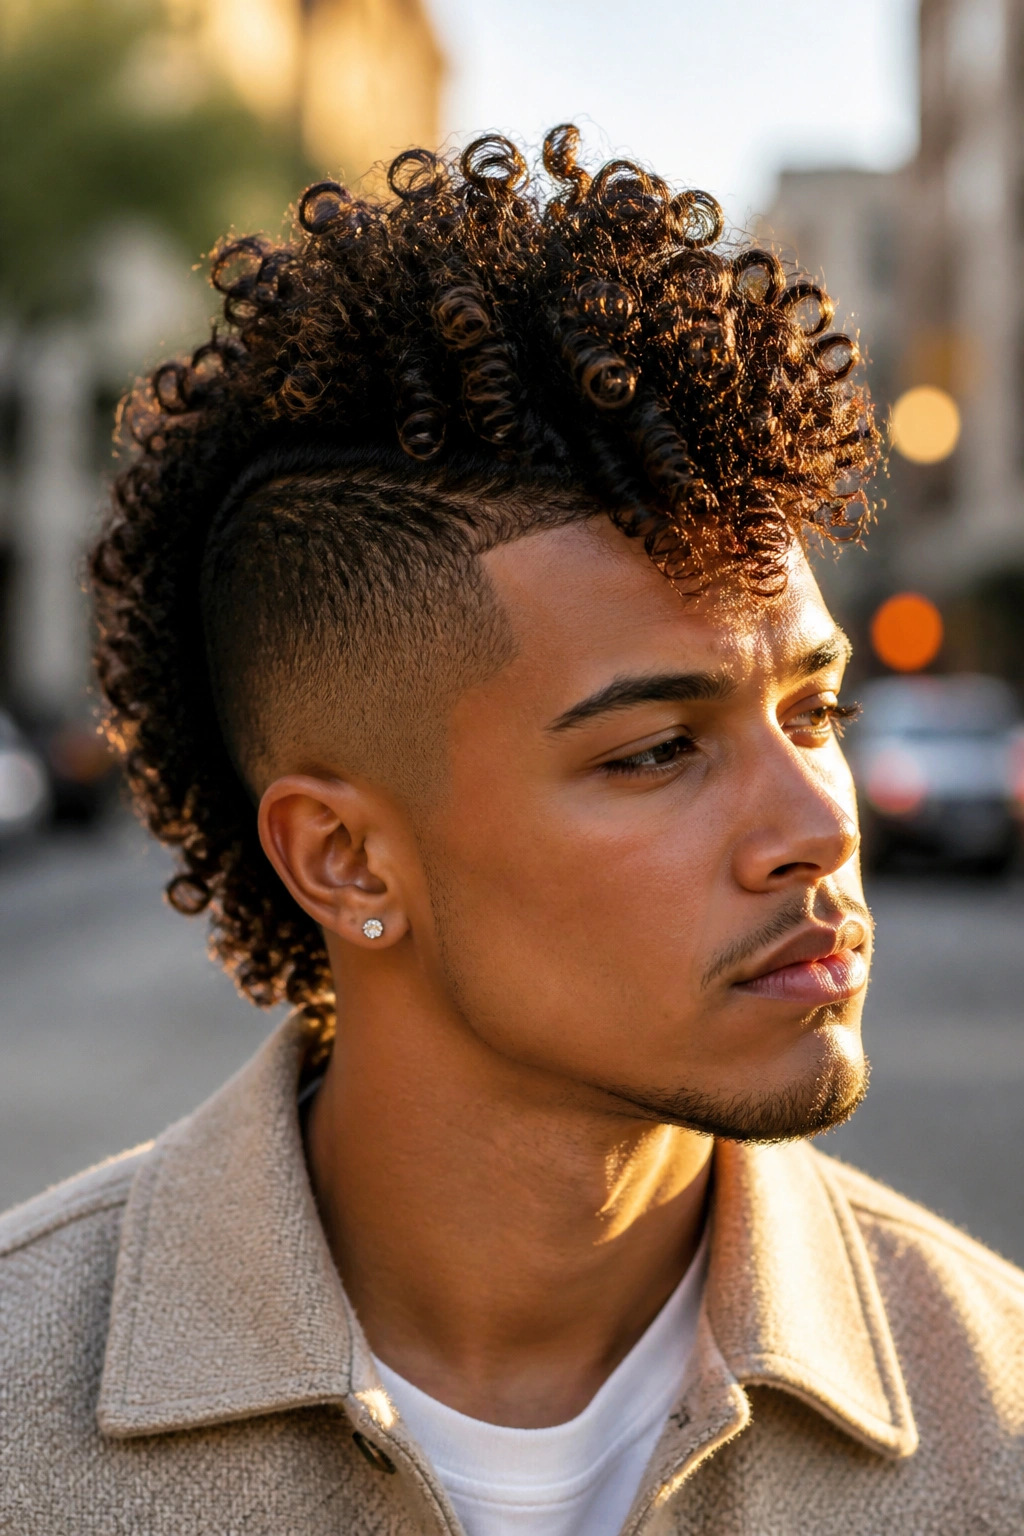
Compared with a pinned-up bun, a faux hawk brings more edge and more movement. The sides are swept or pinned toward the center, while the middle stays full and tall. That contrast is what makes it feel sharp.
You can create it with one large center puff, several pinned sections, or a series of small twists that meet in the middle. The shape works on stretched curls and on tighter coils. What matters is the line. The hair should read narrow at the sides and fuller through the center, almost like a ridge.
This style is good when you want something bold without committing to a cut. It also hides uneven length nicely. If one side is fuller than the other, pin it upward and let the top do the rest.
17. Low Curly Bun
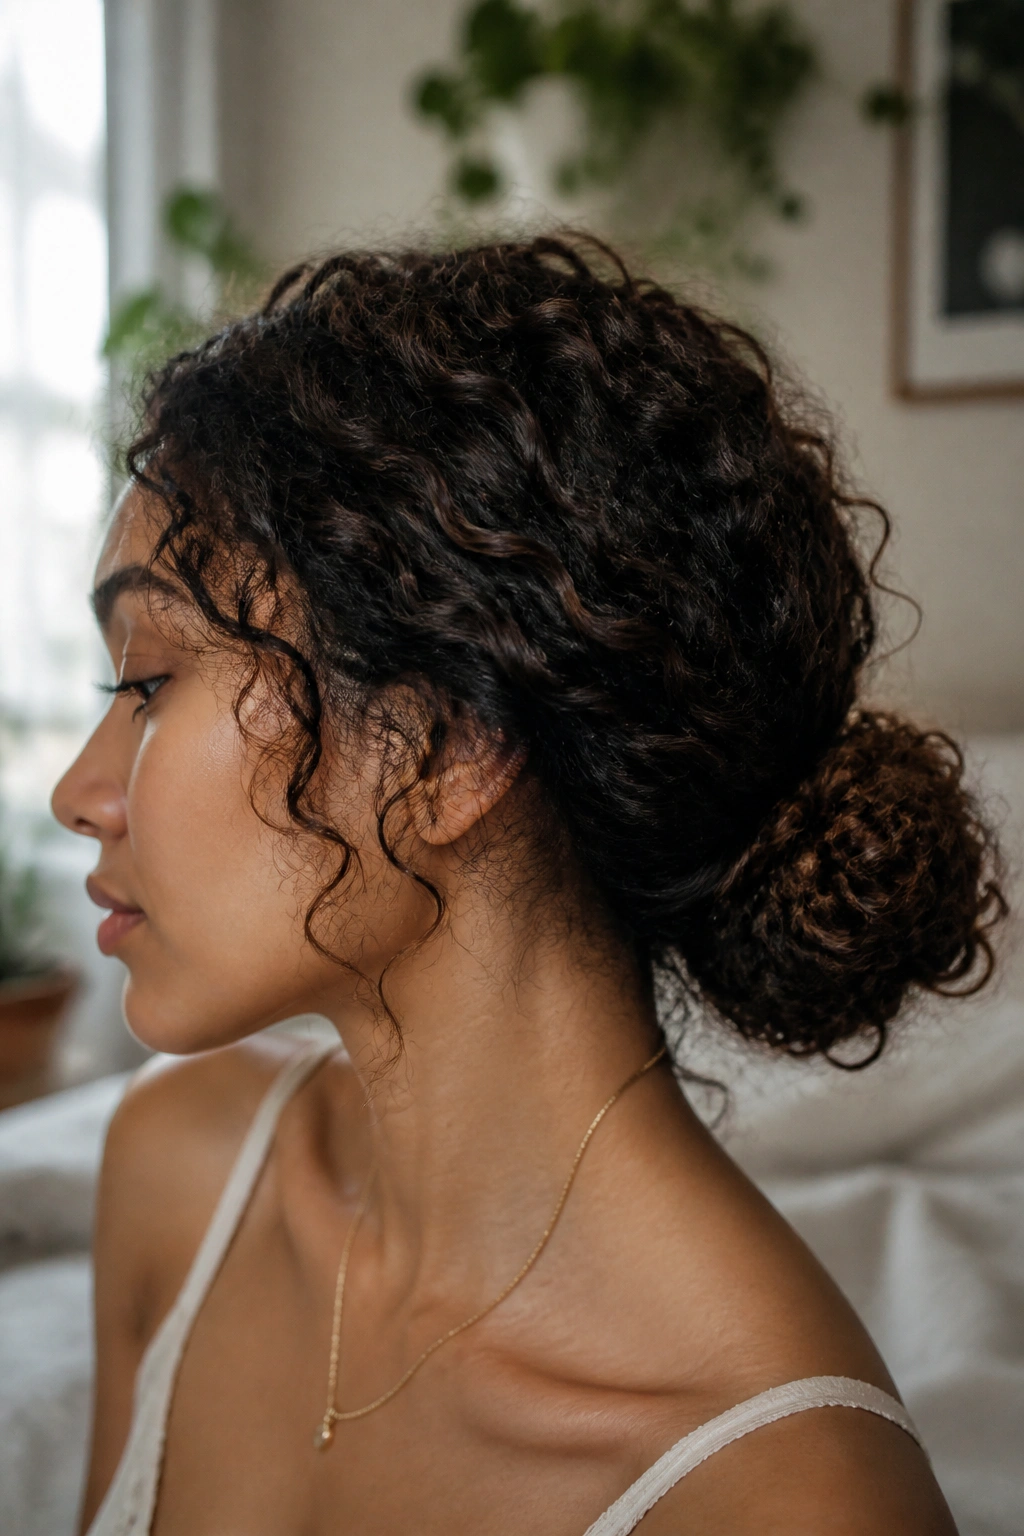
A low curly bun is the style I choose when I need my hair out of the way and still want shape. It sits at the nape, feels tidy, and doesn’t fight the natural bend of the curls.
Leave the bun a little loose. That’s the whole trick. If you squeeze every curl into a tight knot, the style loses its texture and starts to look like a generic bun with a bit of hair escaped. Better to coil the hair, pin it in a round shape, and let a few ends peek out. Those loose pieces make it feel alive.
A low bun also handles day-two hair well. The curls are less slippery, which makes pinning easier. If your hair is very thick, split the bun into two nested sections so it doesn’t bulge awkwardly at the back.
18. Claw-Clip French Twist
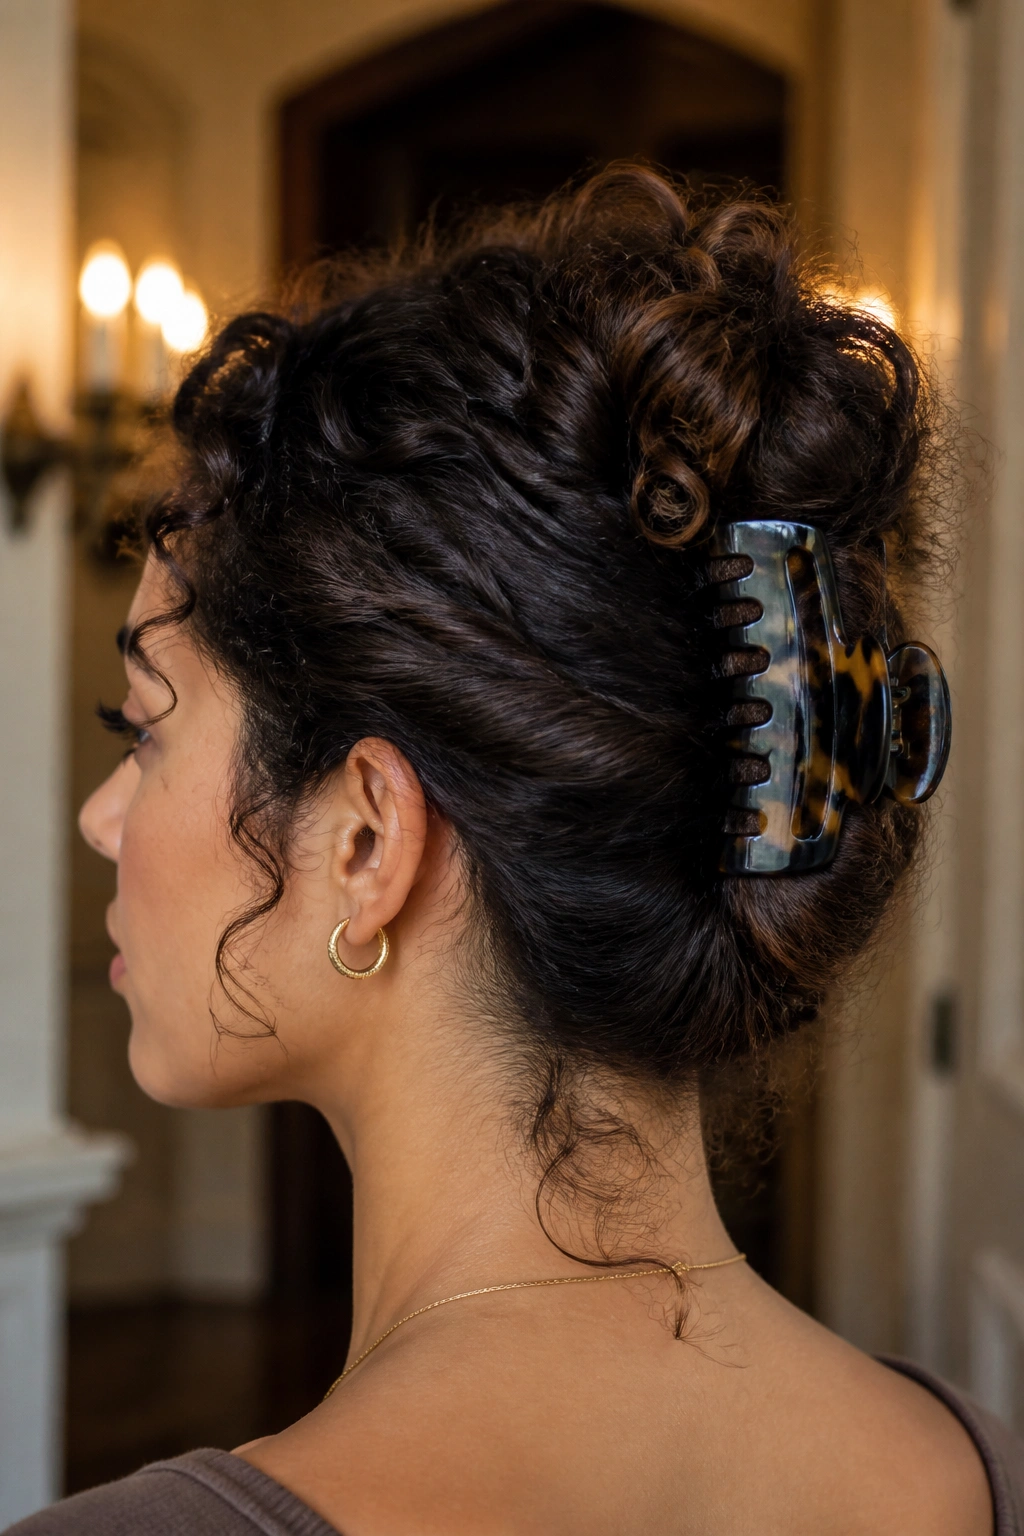
If you own one large claw clip, use it here. A French twist made from curly hair looks quick from the outside, but the real work is in shaping the twist so the clip holds without crushing the texture.
Gather the hair as if you’re making a low ponytail, twist it upward, then fold the length against the back of the head. Secure the twist with a sturdy clip that can grip a lot of hair. The ends can spill at the top or tuck inside, depending on how polished you want it to feel. A few curls around the crown soften the look fast.
This one is useful when you need something that feels neat but not stiff. It also survives transitions well — office, dinner, errands — without needing a full reset between them.
19. Braided Ponytail
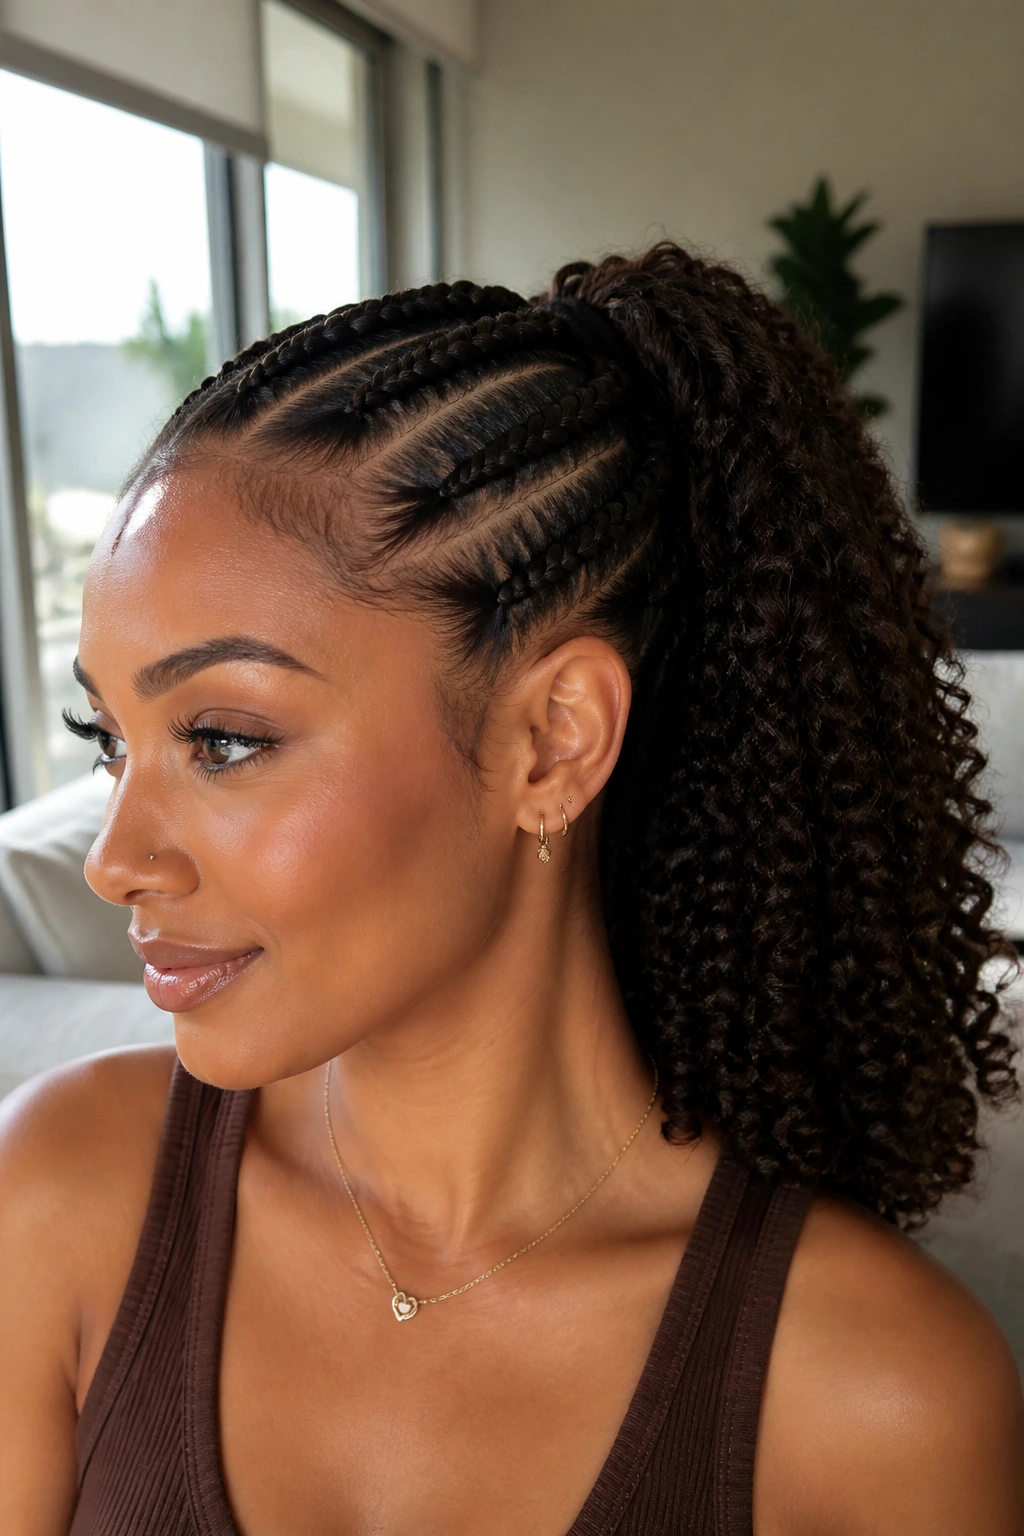
What makes a braided ponytail work on curly hair is the handoff between smooth roots and textured length. The base gives the style order. The ponytail adds movement.
You can braid the front into cornrows or side braids, then gather the rest into a ponytail that stays curly, stretched, or partially braided down the length. If your hair is long, wrapping a small section around the elastic makes the base look cleaner. If you want more fullness, leave the ponytail slightly loose and fan it out with your fingers.
- Keep the root braid snug, not tight.
- Use a moisturizing gel to reduce frizz near the scalp.
- Add a braid cuff or ribbon if you want the ponytail to look finished.
- Refresh the ends with water and a light cream, not heavy oil.
20. Halo Twist with Loose Ends
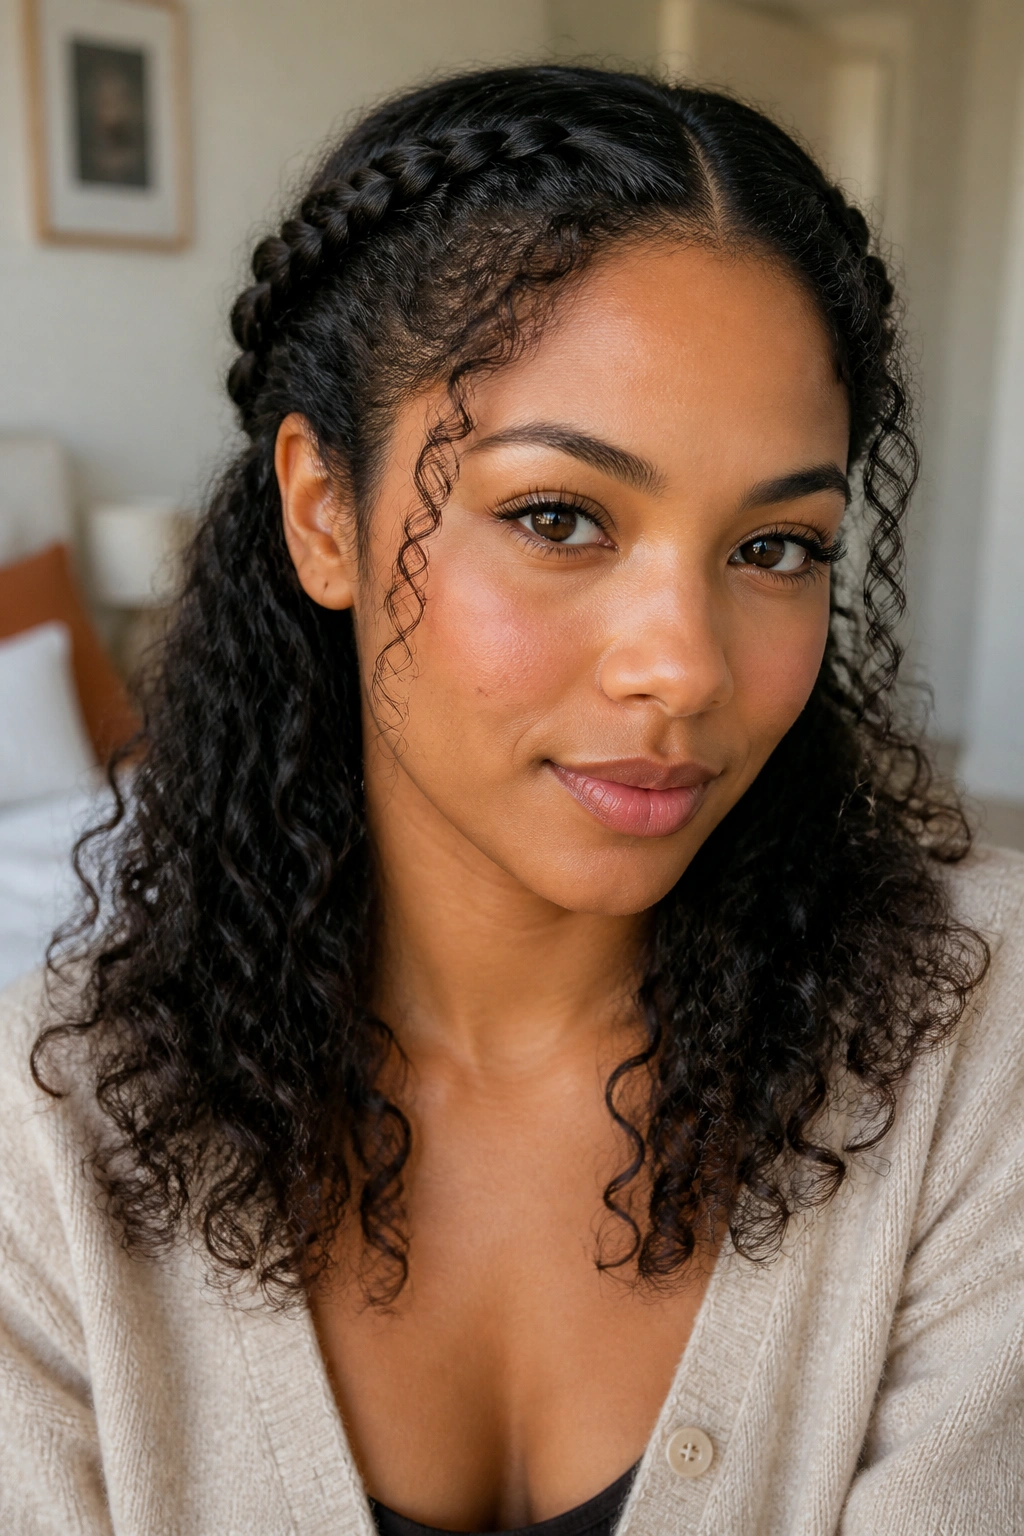
A halo twist sits between a braid and an updo. It frames the head neatly, but it leaves enough curl at the back to keep the style soft.
Start with two flat twists from the temples or one continuous twist around the hairline. Meet them at the back, secure them, then let the remaining hair fall in curls or a puff. The result feels a little romantic without leaning fussy. It also works well when the front of your hair needs more control than the rest of it.
I like this style for days when the hair around the face wants to frizz first. The halo keeps that section in line. The loose ends stop the whole thing from looking too severe. Nice balance. Rare, too.
21. Headband Tuck
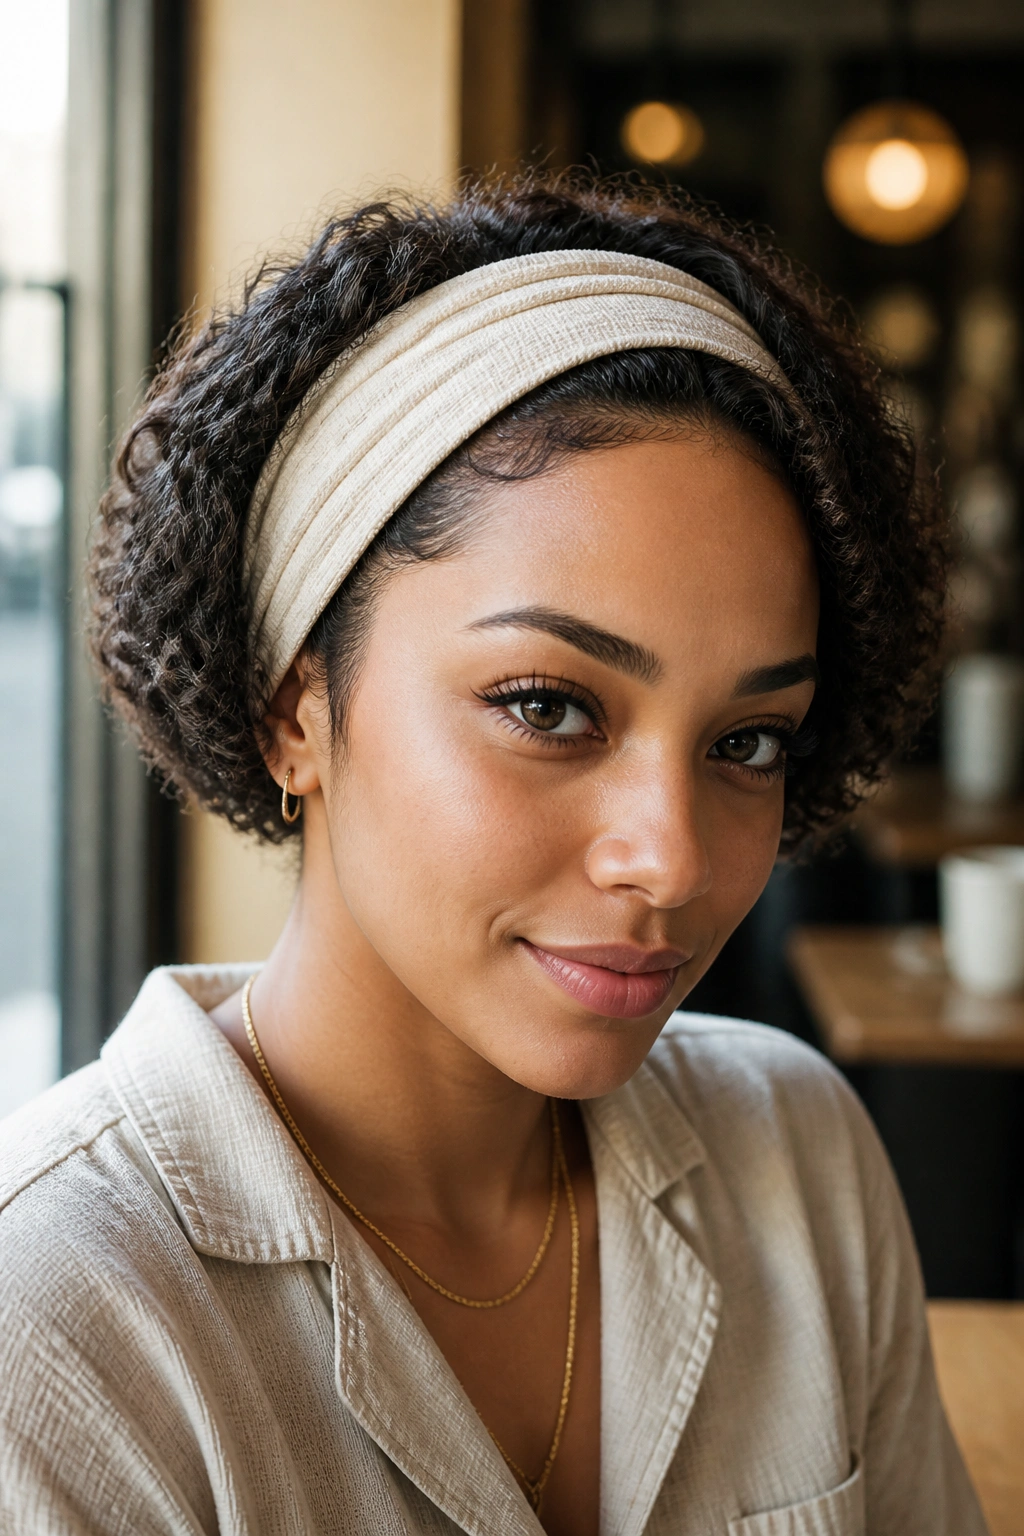
A wide headband can rescue hair that feels too fluffy to cooperate. It also gives you a fake bob shape if your curls are long enough to tuck under.
Place the band over the hairline, then tuck the lengths under and around it in sections. The closer you tuck to the scalp, the shorter the style reads. Leave a few curls loose near the ears if you want it to feel less rigid. This is one of those looks that works especially well on stretched curls because the length stays manageable.
The best headbands are wide, soft, and firm enough to hold shape without sliding. Thin bands tend to dig in or disappear. A cloth band usually wins because it grips better and feels less sharp.
22. Side Puff with Deep Part
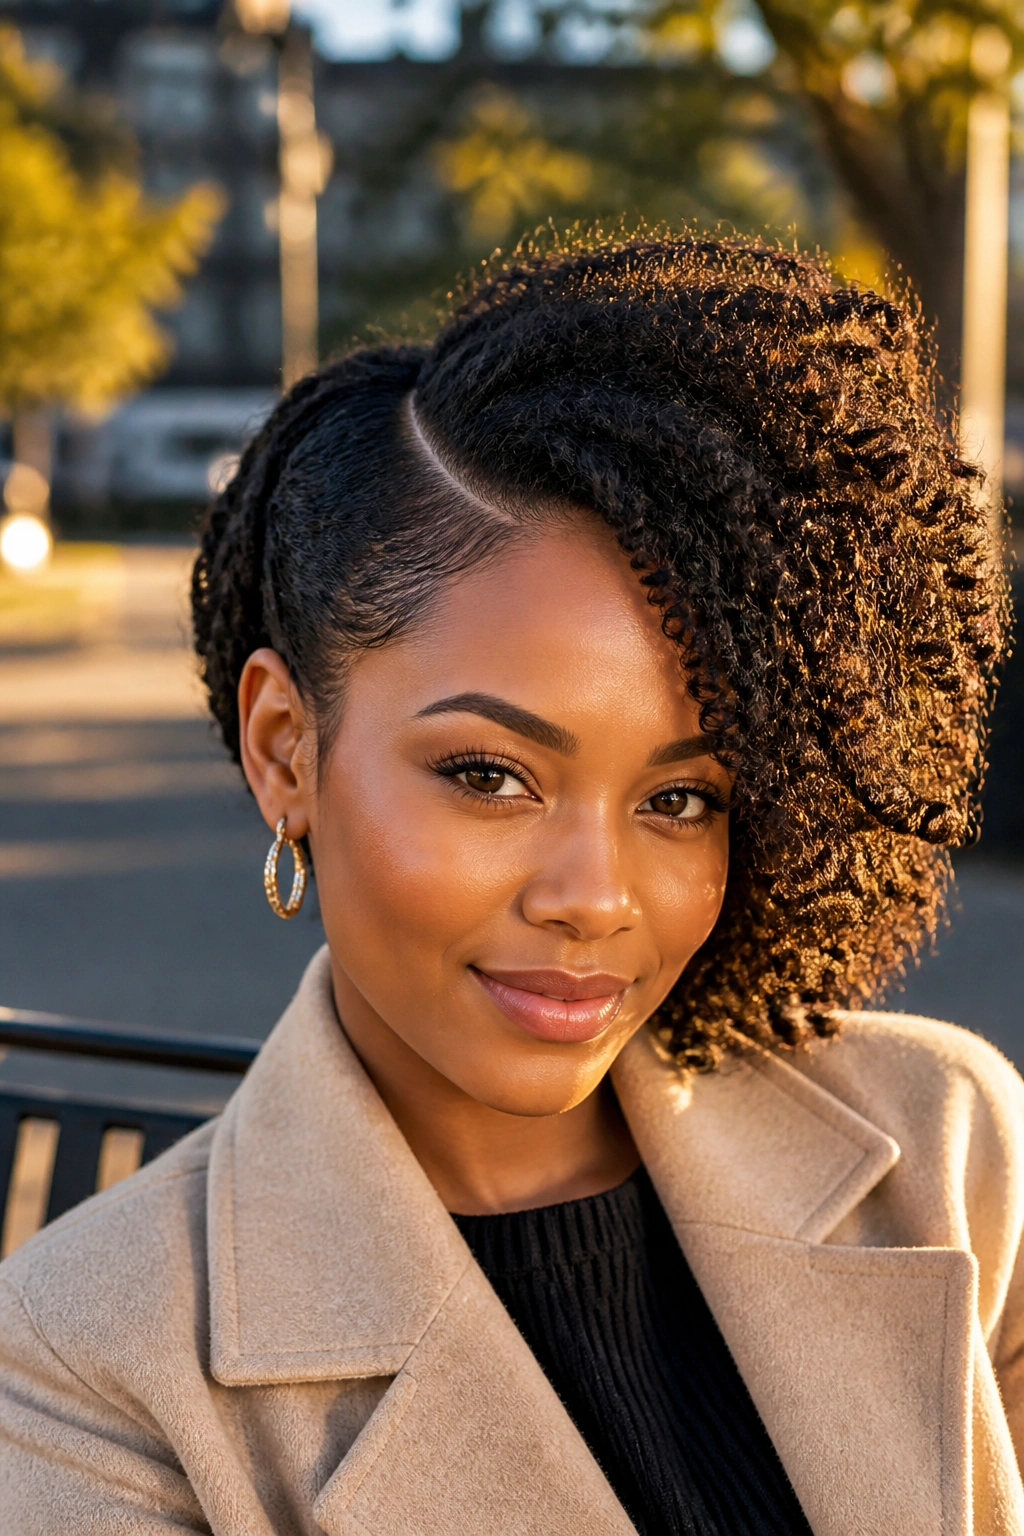
A side puff changes the mood of a whole face shape. The deep part creates direction, and the puff sitting off to one side gives the style a little drama without turning it into a full formal updo.
Brush the chosen side upward and over, then secure the puff low or mid-level on the opposite side. Keep the front smooth, but don’t over-polish the texture in the puff itself. That contrast is what makes the look interesting. If you want extra shape, leave one curl or coil hanging near the cheek.
Quick Details
- Works well with thick hair that has strong volume.
- Looks sharper when the part is clean and straight.
- Benefits from a small amount of gel at the front only.
- Can be dressed up with one statement earring on the exposed side.
23. Tapered Afro
Tapered afros are less about fighting volume and more about choosing where it lives. The sides and back stay shorter. The top keeps its length. That shape makes the curls look intentional even when they’re doing their own thing.
This is a cut-driven style, which means the outline matters more than the styling trick. A light cream, a bit of moisture, and a pick at the roots can bring the top up without making it frizzy. I like how this shape shows off texture at the crown while keeping the edges clean.
It also saves time. Shorter sides need less detangling, less product, and less fuss in the morning. If you want a style that feels bold without asking for a lot of daily handling, this one earns its keep.
24. Curly Ponytail with Wrapped Base
A wrapped-base ponytail looks simple until you try to keep the base clean. The trick is to smooth the root section first, then hide the elastic with a small braid, curl, or flat piece of hair.
You can wear the ponytail high, mid, or low, depending on how much lift you want. A high placement feels sharper. A low placement feels calmer. Either way, the curls at the tail should stay fluffy and free. If you flatten the whole ponytail, it loses the point of being curly.
A wrapped base also makes the style look finished with very little extra effort. That small detail changes the whole mood. It’s the difference between “I threw this up” and “I meant to wear this.”
25. Rolled Chignon
Can a rolled chignon still feel soft? Yes, if you leave enough texture in the roll and don’t pin every strand into submission.
Start by stretching the hair a little, then roll sections inward at the nape and secure them with pins. The shape should sit close to the head but not plastered flat against it. If the hair is very dense, divide it into two rolls and stack them slightly. That keeps the bun from turning into a lumpy knot.
This style works best when the ends are tucked cleanly. A few loose coils around the hairline can soften the look, but too many stray pieces make it feel unfinished. You want clean lines with some life, not a helmet. There’s a difference.
26. Flat-Twist Crown with Curly Ends
Unlike a full halo braid, a flat-twist crown leaves more room for texture at the ends. That’s why it feels a little more relaxed even when the front is neat.
Start with flat twists that travel around the head from one side to the other, then let the back remain curly or gathered into a puff. The crown frames the face, while the ends bring back the volume. That mix works especially well if your hair is dense at the top but looser at the bottom. It balances out fast.
This is a smart pick when you want protection without hiding your curl pattern. The front stays controlled enough for a long day. The back still looks like hair, not a tucked-away afterthought.
27. Curly Crop with Side Pins
Short curls can look sharp with almost no effort, if you place the pins well. A curly crop with side pins uses a short cut, a little parting, and one or two decorative clips to make the shape feel intentional.
The pins should follow the direction of the hair, not fight it. Clip one side back near the temple or stack a pair near the part line. The rest of the hair can stay fluffy, defined, or lightly picked at the roots. Short hair doesn’t need much to read as styled; it needs placement.
This style is especially good when you want to show off earrings, brows, or cheekbones. It keeps the face visible and turns the hair into a frame instead of the whole story.
28. Two-Strand Twist Ponytail
Two-strand twist ponytails sit in that sweet spot between protective and styled. They keep the hair secure, but they still let texture show through.
Twist the front or side sections back toward a gathered ponytail, then leave the tail as twists, curls, or a mix of both. The result feels neat without being stiff. If your hair is layered, this style can help hide shorter pieces that usually slip out of a plain ponytail. If it’s longer, the twists add a little architectural shape.
- Use even parting so the style doesn’t tilt.
- Keep the ponytail low for a softer look or mid-height for more lift.
- Add a ribbon or cuff if the base feels plain.
- Refresh the twists by misting lightly and re-twisting the ends.
29. Defined Wet-Look Curls
Wet-look curls are not for the indecisive. You either want shine and hold, or you don’t. The finish is sleek at the root, glossy through the curl, and a little dramatic in the best way.
Use a strong-hold gel on very wet hair, rake it through evenly, then smooth the top down with a brush before letting the curls set. If you diffuse too aggressively, you’ll break the shine and get frizz sooner. If you leave it alone, the style dries with a clean, crisp outline. That outline is the whole point.
This look works especially well for evenings, events, or days when you want the hair to read as deliberate from across the room. It pairs well with bold earrings and simple clothes because the curls do the talking.
30. Scarf-Wrapped Volume Puff
A scarf-wrapped puff can turn a basic shape into the whole outfit. The scarf frames the puff, adds color or pattern, and keeps the front under control while the curls stay big.
Tie the scarf around the front hairline or around the base of the puff, depending on the look you want. A wide scarf gives more presence. A narrow one feels cleaner. The puff itself should stay airy, not crushed. That’s where people go wrong — they wrap the scarf so tightly that the texture disappears.
This style is a good fix for days when the roots need help but the lengths still look lively. It’s also one of the easiest ways to make a familiar puff feel new without changing the structure much at all.
Final Thoughts
The best textured hairstyles for curly hair do one simple thing: they let your hair keep its character. They may smooth the roots, stretch the length, or pin the sides back, but they do not erase the curl pattern that makes the style work.
If you’re choosing between two looks, pick the one that fits your day first and your hair second. A strong style on a tired scalp is not a win. A simple puff with clean edges, a good twist-out, or a tucked-up bun can carry more presence than anything that took an hour and a half to fight into place.
And if a style feels slightly imperfect, that’s usually fine. Curls move. Coils shift. That movement is part of the appeal, not a flaw to hide.
