



Medium length hair is the forgiving middle ground for half up half down styles. You get enough length to twist, braid, pin, clip, and knot, but not so much that the top section drags the whole look down by lunchtime.
That’s why these styles work so well on shoulder-grazing cuts, blunt lobs, and layers that sit somewhere between the collarbone and the shoulders. They keep hair off your face, show off the shape of the cut, and still leave you with movement through the lengths. A good half-up style should look like you made a decision, not like you grabbed a few pins and hoped for the best.
Hair that slips needs grip. Clean hair often needs a little dry shampoo or texture spray at the crown, and medium-length hair usually holds best when the top section is kept smaller than your instinct says to make it.
Some of the looks below are polished enough for a dinner out. Some are five-minute fixes for a workday. A few are intentionally a little playful, because medium length hair can handle that without collapsing into chaos. The trick is knowing which style gives you lift, which one gives you softness, and which one quietly saves a bad hair day.
1. The Twisted Crown Half-Up for Medium Length Hair
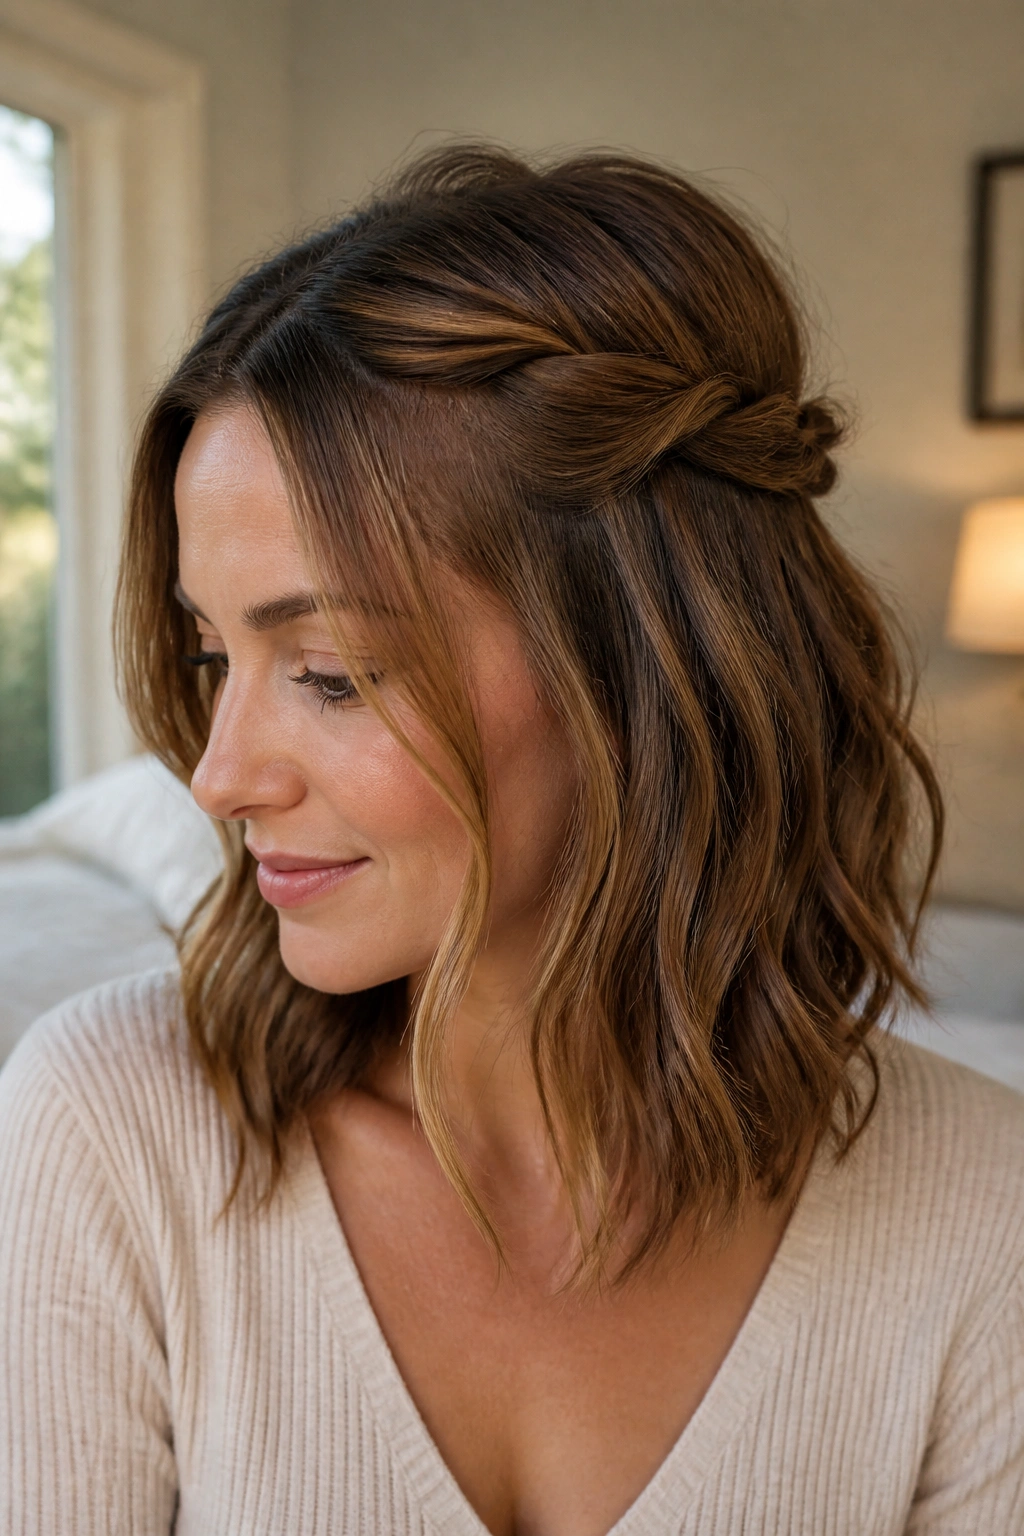
A twisted crown is the style I reach for when I want medium length hair to look finished without looking stiff. It gives you that clean lift at the temples and a soft sweep in the back, which is exactly where a shoulder-length cut tends to look best.
Why it works on medium hair
Take two sections from just above the temples, twist them back toward the crown, and pin them where they meet. On medium hair, the twist sits close enough to the head to stay put, but not so close that it looks flat. If the ends are a little bent or waved, even better. The whole thing reads as relaxed, not fussy.
A lot of people make the mistake of grabbing too much hair from the sides. Don’t. Keep the sections narrow, about 1.5 to 2 inches wide, so the twist stays neat and the lower half still falls freely.
- Use two bobby pins per side if your hair is slippery.
- Give the crown a quick mist of texture spray before twisting.
- Bend the ends with a 1-inch curling iron if they look too straight or blunt.
- Pin the twists in an X shape so they do not slide apart.
My favorite trick: hide the pins under the twist instead of stacking them on top. It looks cleaner and holds better.
2. A Soft Dutch Braid That Stops at the Temples
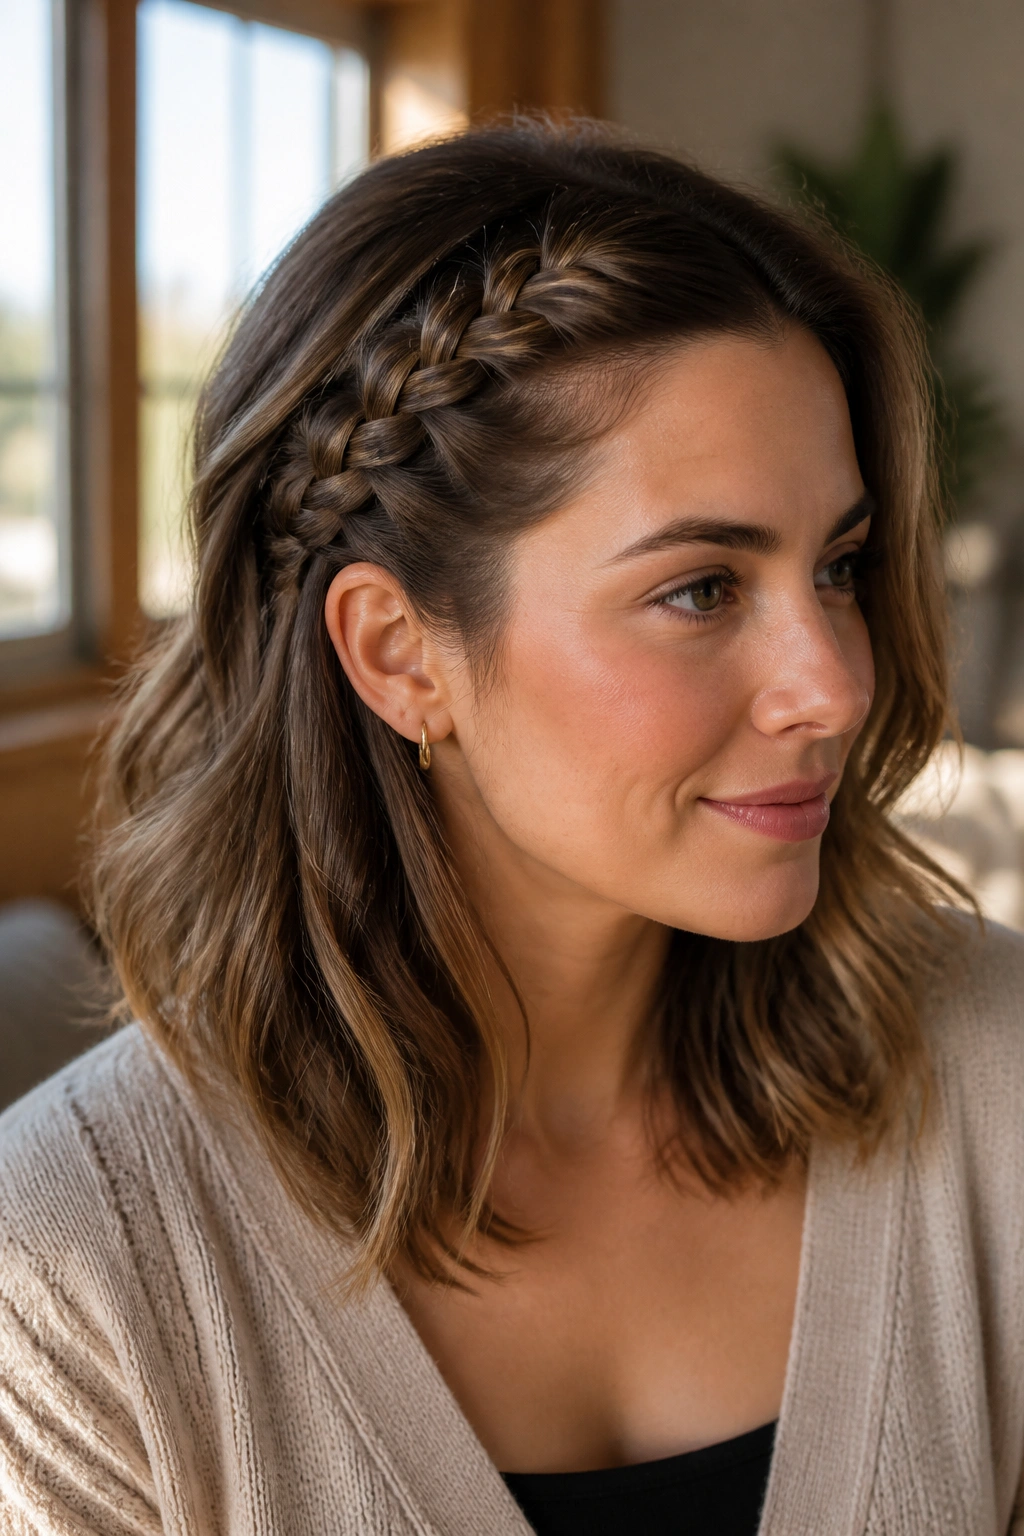
A full Dutch braid can overwhelm medium length hair. Stopping it early keeps the braid readable without turning the whole style into a braid-only look.
That little difference matters. You start at the hairline, braid back along each side for a few inches, then stop around the temples or just behind the ear. The rest of the hair stays down, so the braid becomes an accent instead of the main event. On medium hair, that balance is usually better than trying to force a long, heavy braid down the back.
This style is especially good if your cut has layers around the face. Those shorter pieces can sit under the braid and soften the edge so the style does not feel severe. It also works well on thick hair, because the braid gives structure without needing a huge amount of length.
I like this one when hair is a little gritty from second-day texture. Freshly washed hair can be too slippery, and the braid may puff out before lunch. A light mist of dry shampoo near the roots solves that fast.
If you want a style that looks like effort without looking overworked, this is one of the better bets. Quietly polished. Never boring.
3. The Claw Clip Rollback for Medium Length Hair
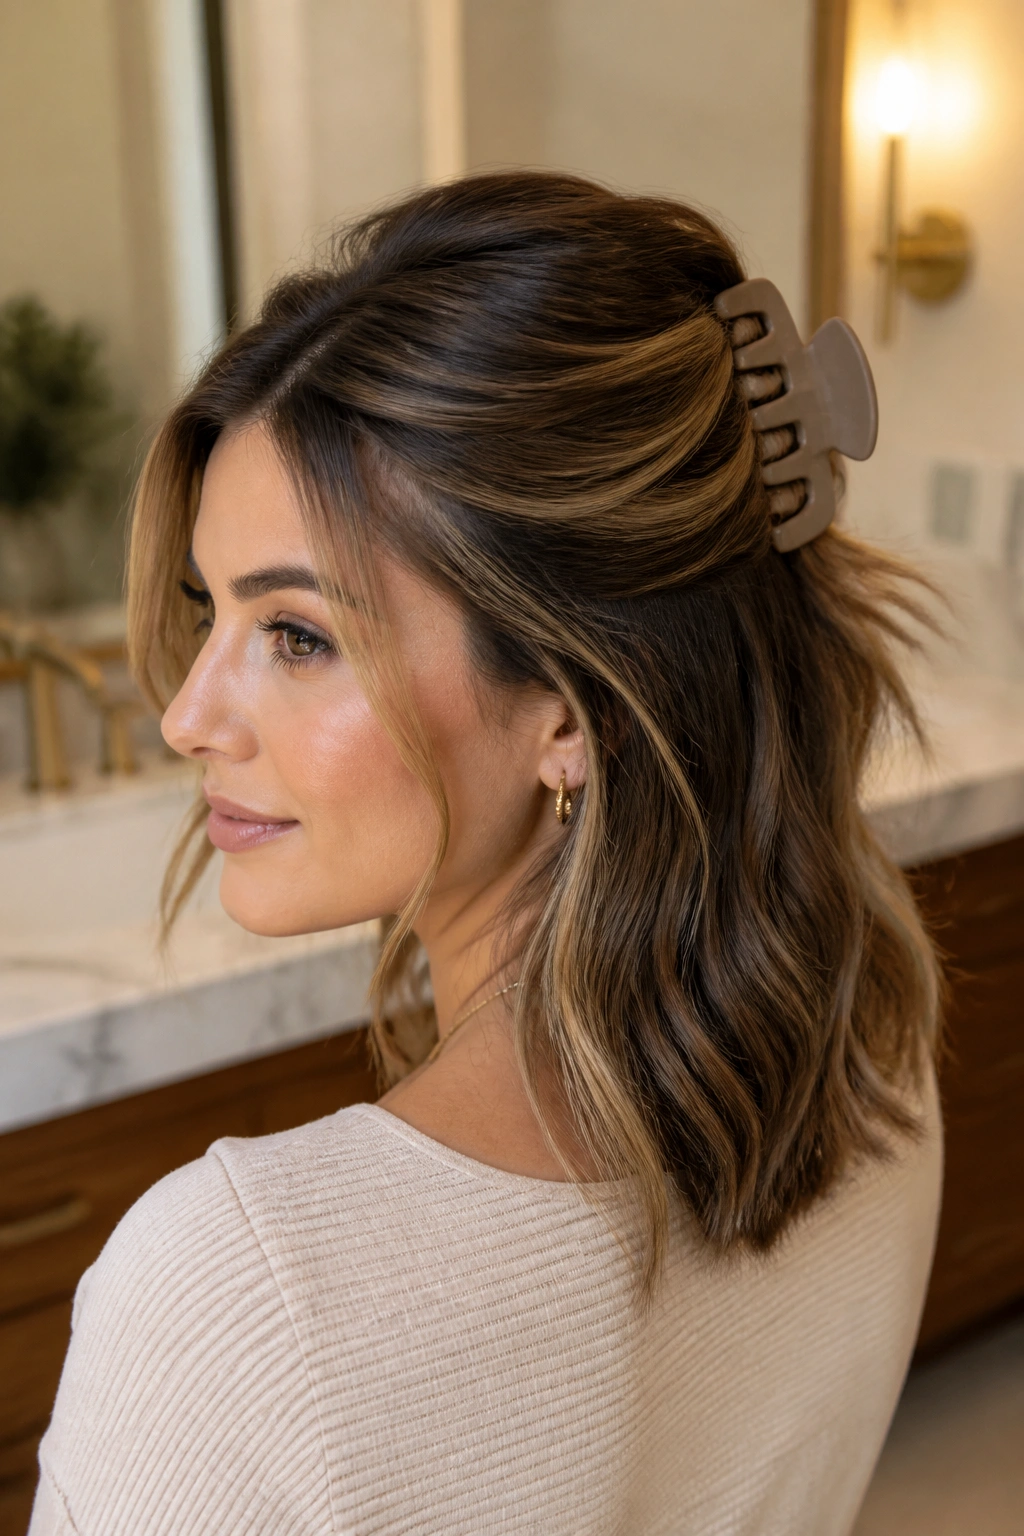
A claw clip can look plain in a bad way, or it can look sharp and intentional. The difference is in the shape of the roll.
Pull the top half of your hair back, twist it upward once, and tuck the twist into a medium claw clip sized around 3.5 to 4 inches. Let the ends spill out a little if your hair reaches the shoulders. That loose end gives the style movement and keeps it from feeling too strict.
This is the fastest style on the list. It takes less than five minutes once you know where the clip sits. Medium length hair is especially good for this because the roll has enough body to stay in the clip without needing a second clip to support it.
If the clip slips, the issue is usually too much silkiness at the roots. A few quick sprays of texture spray at the crown, plus a tiny bit of backcombing under the section, usually fixes it. I do not love giant claw clips on medium hair; they swallow the style and make the head look top-heavy. A medium-sized clip with a matte finish tends to grip better and looks less like you borrowed it from a drawer you do not use.
Nope, this is not the style for a tightly controlled blowout. It is for days when you want your hair off your face and still want the ends to move.
4. The Bubble Half-Ponytail
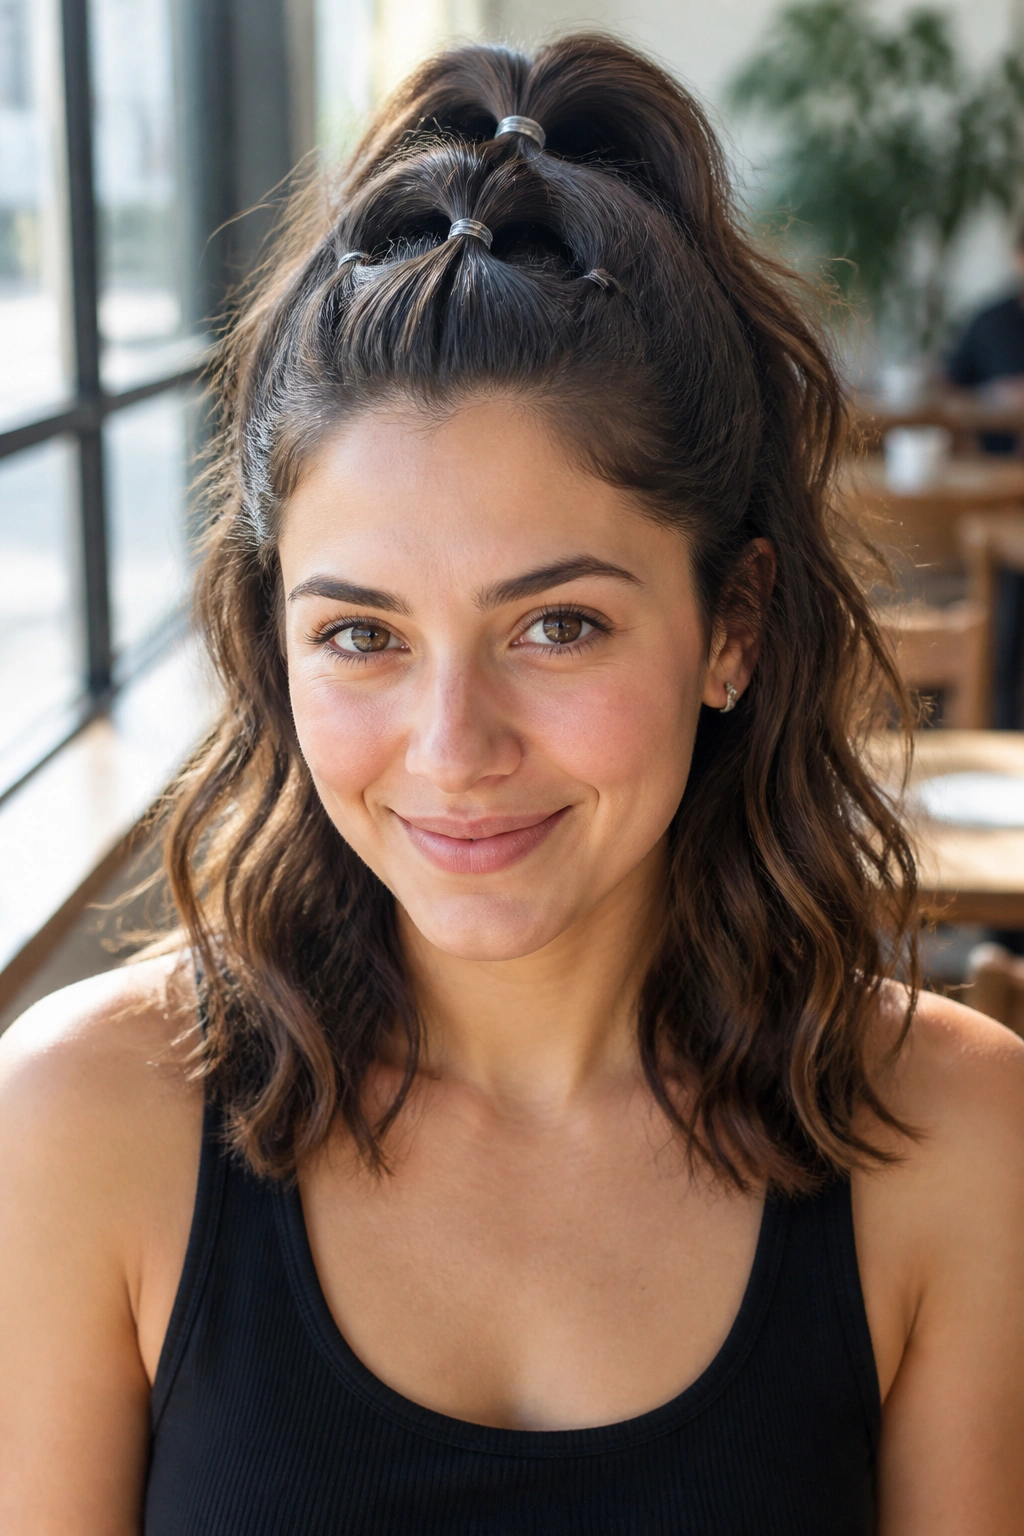
Bubble half-up half-down styles for medium length hair are the answer when you want something playful but not childish. The shape does the work for you. You do not need fancy braiding, and you do not need a lot of length.
Start with a half ponytail at the crown or slightly below it. Secure the tail with clear elastics every 1.5 to 2 inches, then gently tug each section outward until it rounds into a bubble. The bubbles should be full, not stretched thin. If the segments are all the same size, the style looks balanced and clean.
What to watch for
- Use 3 to 5 clear elastics, depending on how long your top section is.
- Keep the first bubble close to the crown so the style has lift.
- Tug each section evenly; one lopsided bubble throws off the whole look.
- Wrap a tiny strand of hair around the first elastic if you want it to look neater.
This works especially well on medium hair with a little wave or bend. Straight hair can still do it, but a touch of texture helps the bubbles hold their shape. If your hair is fine, make the first section smaller so the pony does not sag.
A bubble half-pony has a slightly sporty feel, which is why it works with casual outfits, but it can look polished too if you keep the bubbles compact and the part clean. It is one of those styles that looks more complicated than it is, and honestly, I appreciate that.
5. The Mini Top Knot With Loose Ends
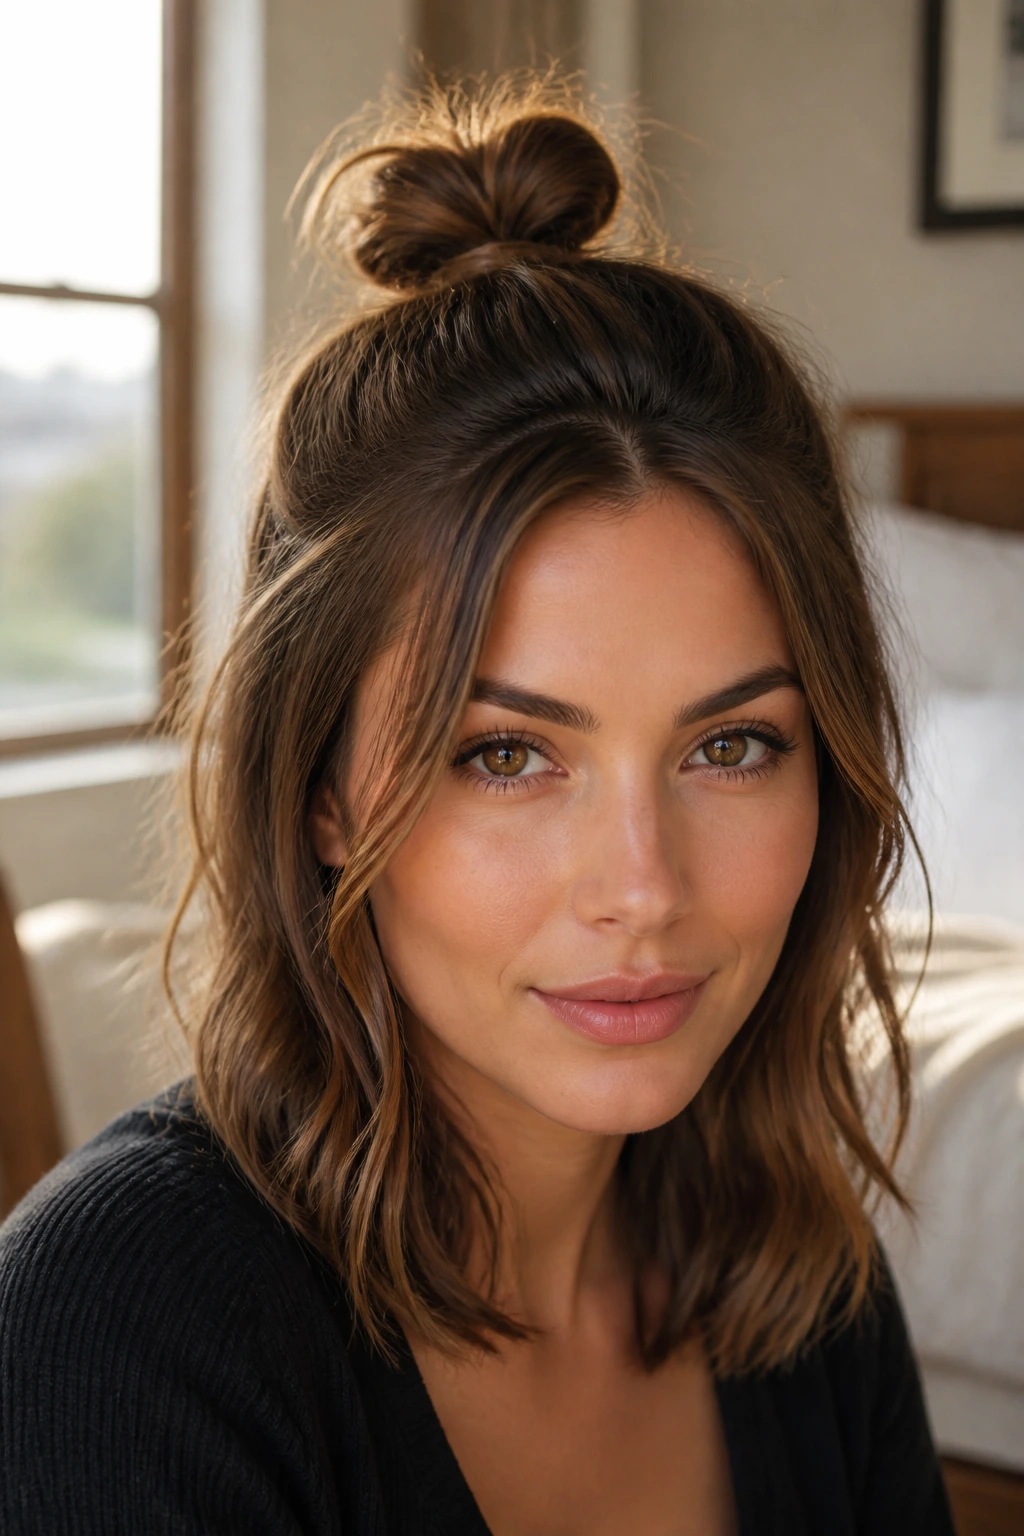
A mini top knot is one of the best half up half down styles for medium length hair when you want volume at the crown and softness everywhere else. It gives height without taking all the hair up, which is a nice trade on shoulder-length cuts.
The key is keeping the knot small. Gather the top third of your hair, twist it once or twice, then coil it into a tiny knot at the crown. Pin it flat with two bobby pins or secure it with a small elastic if your hair is thick. Leave the lower half loose, and let a few face-framing pieces fall where they want to. Fighting those pieces usually makes the style look worse.
This style works especially well on fine hair because the knot creates the illusion of fullness up top. If your hair is thick, keep the knot tighter and lower so it does not turn into a bulky bun sitting on a mound of hair. That is the point where the style starts to look more accidental than styled.
I also like this one for layered hair because the ends under the knot give the whole look some movement. Straight, blunt lengths can do it too, but a quick bend through the lower half makes the contrast nicer.
It is casual, sure. But it is not sloppy when the part is clean and the knot sits centered.
6. The Knotted Half-Up Tie
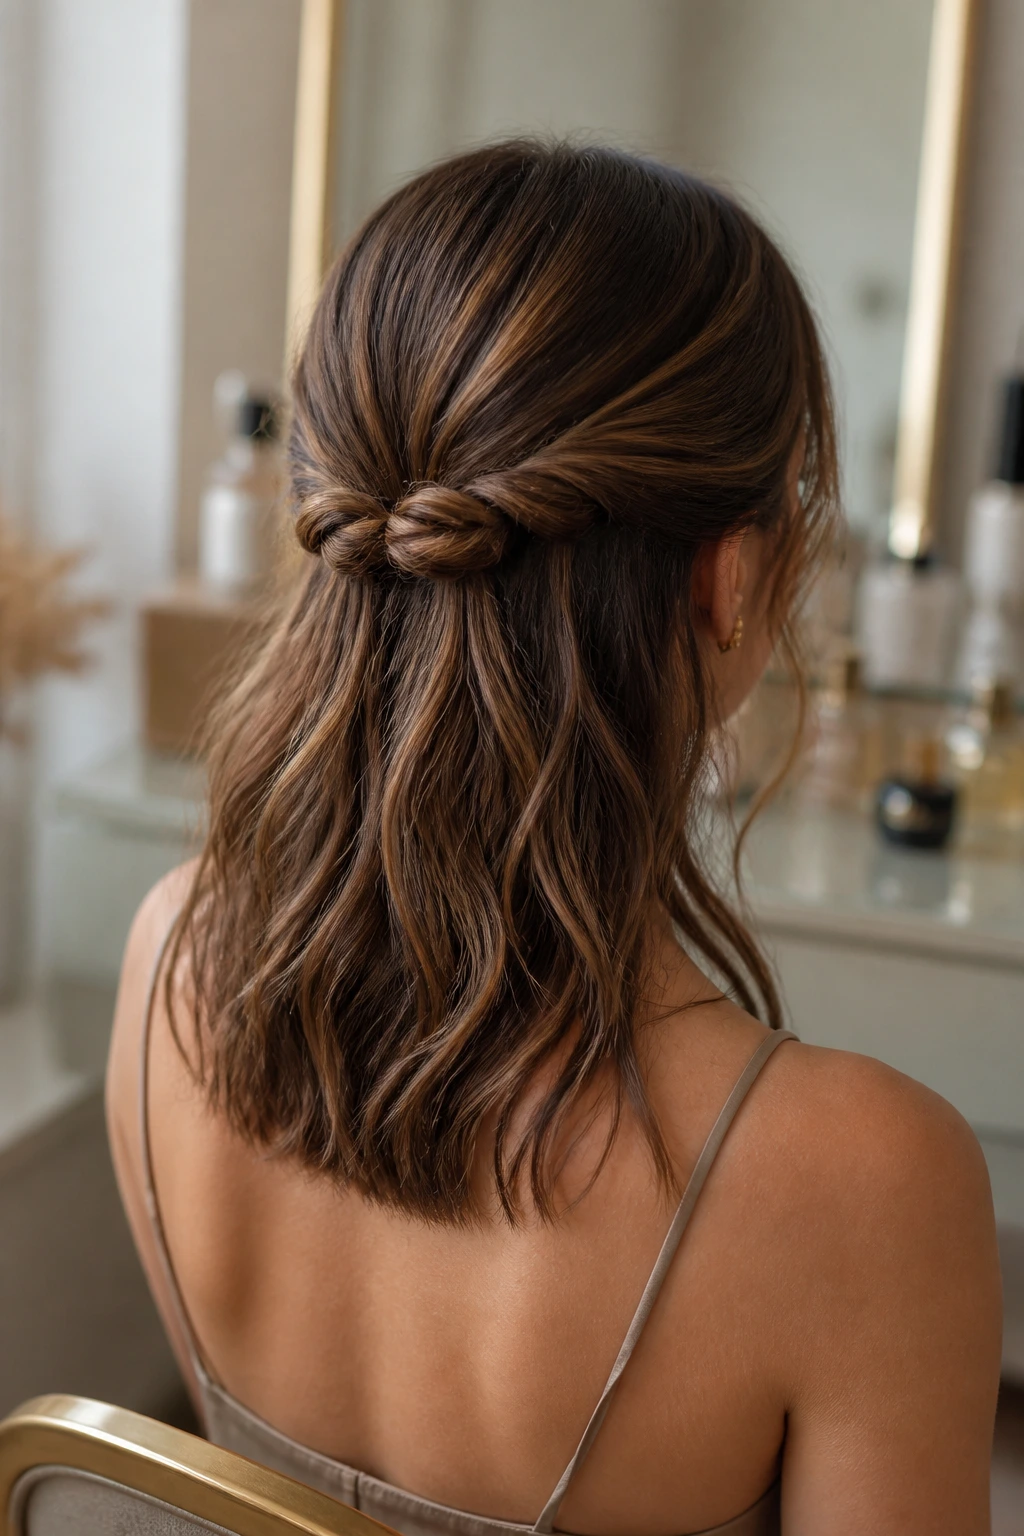
Why does a simple knot often look more deliberate than a braid? Because it sits flat, it shows off texture, and it does not hide the hair under layers of weaving.
Take two small sections from each side of your head, meet them at the back, and tie them once like a loose knot. If your hair is long enough, you can tie a second knot right over the first. If not, one knot and a hidden pin underneath is enough. Medium length hair usually lands in the sweet spot where the knot has enough length to hold but still falls into a neat shape.
How to use it
- Start with sections about 2 inches wide from each side.
- Twist each section lightly before knotting if your hair is very fine.
- Pin the knot from underneath, not through the front.
- Keep the knot low if you want a softer, less formal finish.
This style is good on hair with a little natural bend, because the knot and the loose ends play off each other. On pin-straight hair, it can look a little flat unless you add a soft wave to the lower half. I find it works best when the upper section stays narrow. If you grab too much hair, the knot gets bulky fast.
It is a nice option when you want something that feels a bit special without asking for a curling wand, six pins, and half your morning.
7. The Side-Swept Twist and Pin
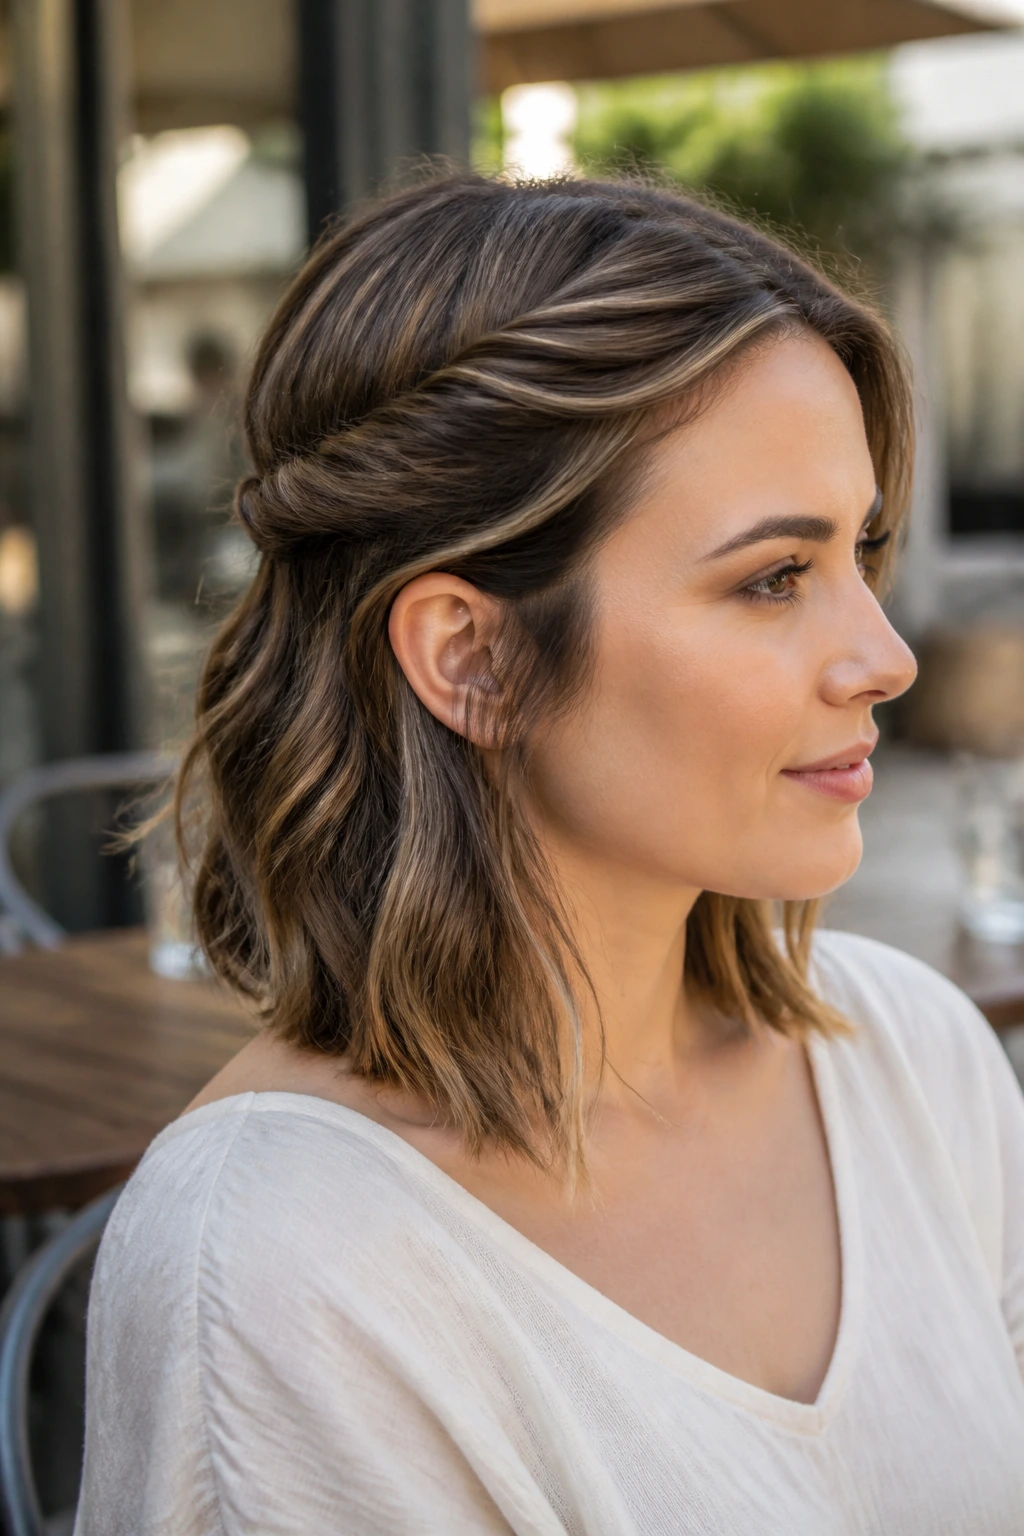
A side-swept half-up style gives medium length hair a softer line than a centered look. If your face shape likes asymmetry, this one is worth keeping around.
Instead of taking hair straight back from both sides, build the style mostly on one side. Twist a section from the heavier side, sweep it back behind the ear, and pin it low at the back of the head. The opposite side stays looser, which lets the lengths fall across the shoulder in a way that feels relaxed but controlled.
This is the style I pick when I want one side of the face open and the other side a little softer. It is also forgiving if your layers are shorter on one side than the other, because the twist hides some of that unevenness.
- A deep side part makes the sweep look stronger.
- Two small bobby pins usually hold the twist better than one large pin.
- Curl the ends away from the face if you want the shape to open up more.
- Tuck one ear back if you want the asymmetry to show up faster.
The best thing about this style is that it does not scream for attention. It just makes the hair sit in a more flattering way, which is often all you need.
8. The Wrapped-Base Half-Up Ponytail

A wrapped-base half ponytail does one simple thing: it makes a basic ponytail look cleaner. That is the whole appeal, and it works.
Gather the top half of your hair into a ponytail at the crown or slightly below it, secure it with a small elastic, then take a narrow strand from underneath and wrap it around the base until the elastic disappears. Pin the end under the ponytail. On medium length hair, the wrap usually covers the elastic nicely without looking heavy.
This is a good choice if you wear your hair straight or with a soft blowout. It looks neat with a blazer, a knit top, or anything that needs hair out of the way without feeling severe. It also works better than a standard half pony on finer hair, because the wrapped base gives the style a little more visual weight.
The one mistake I see often is making the wrap strand too thick. A chunky wrap looks clumsy and makes the base puff up. Keep it narrow, about the width of a pencil. If your hair is slippery, smooth a tiny amount of cream on the strand before you wrap it. Not on the roots. Just the strand.
That small detail changes the whole feel. Plain ponytail, but better.
9. The Braided Halo Accent
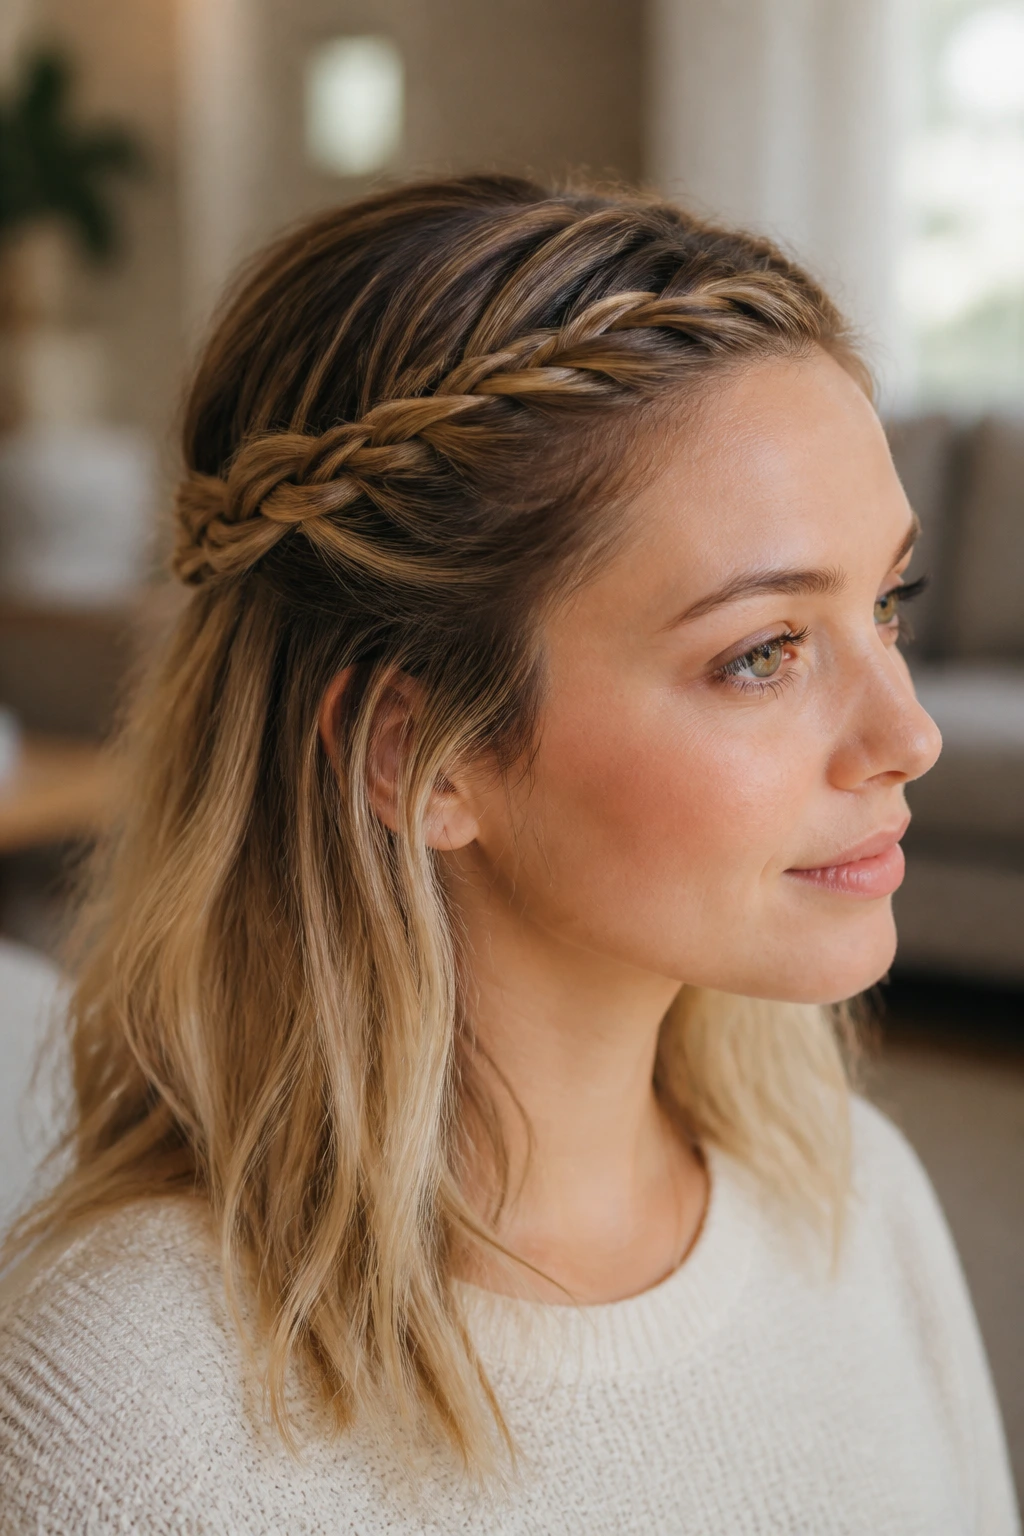
A halo accent braid is not the same thing as a full crown braid, and that difference matters. You are not wrapping braids all the way around the head; you are just using one or two braids to frame the top half of the style.
On medium length hair, that restraint is a gift. A small braid along the hairline or a pair of thin braids meeting at the back gives you texture without eating up too much length. The lower half still falls loose, which keeps the style light.
I like this style on layered cuts because the braid helps hold those shorter front pieces in place. It is also a good fix when the front layers keep falling into your eyes. Braid them, pin them back, and the whole look settles down.
What makes it different
- It uses less hair than a full crown braid.
- It keeps the lower half softer and easier to move.
- It looks good with waves, bends, or even straight ends.
- It can be done with one braid on one side if you want a looser finish.
If your hair is very fine, braid the accent on day-two hair. It grips better and stays flatter. If your hair is thick, keep the braid narrow so it does not push the rest of the style out of shape.
This is one of those styles that looks more expensive than the effort behind it. That is not a bad thing.
10. The Rope-Twist Half-Up
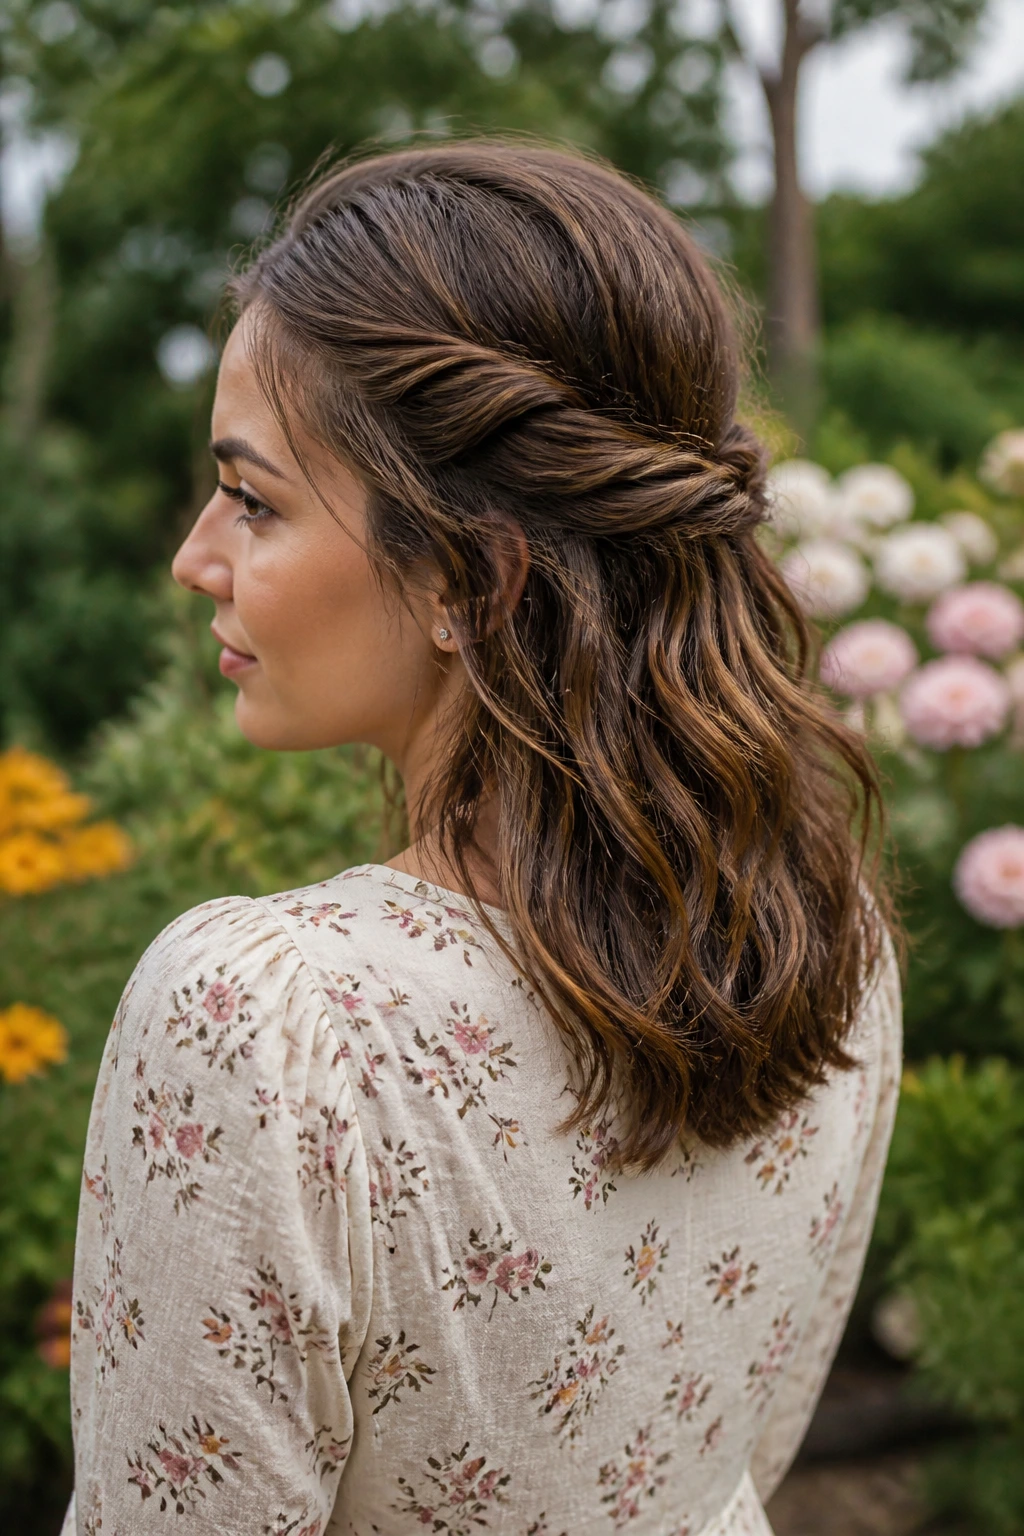
Rope twists are the fastest way to make a half-up style look more detailed than it really is. They also behave well on medium length hair, which is why I keep coming back to them.
Split a section on each side into two pieces, twist both pieces away from the face in the same direction, then wrap them around each other in the opposite direction. That second direction matters. It is what makes the rope twist hold together instead of springing apart. Meet the two sides at the back and pin them where they cross.
This style is a good choice when your hair is slippery and braids keep loosening. Rope twists tend to grip their own shape better, especially if you give the roots a little dry shampoo first. They also lie flatter than a braid, which can be useful when you want to keep the top section close to the head.
Do not twist one side left and the other side right. That is how the style slips apart before you leave the bathroom.
A rope-twist half-up works on straight hair, wavy hair, and even hair that has lost its curl by the end of the day. It is neat without being severe, and it takes far less time than a braid with the same visual payoff.
11. Double Mini Buns at the Crown
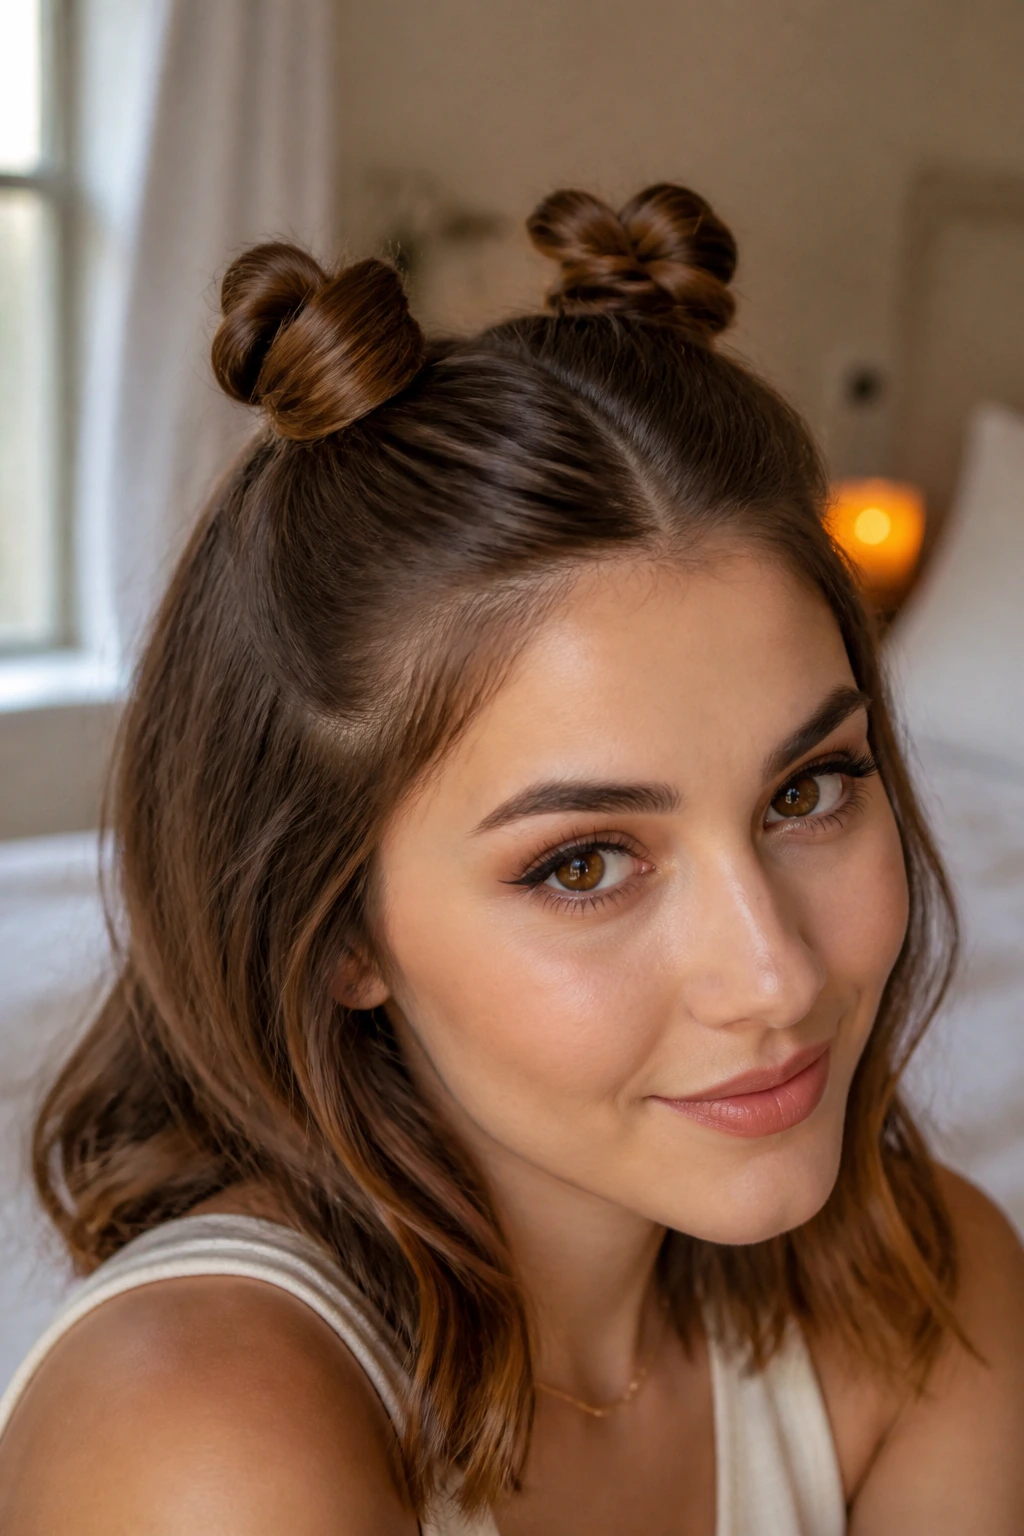
Double mini buns can be adorable in the wrong hands and sharp in the right ones. The difference is scale. Keep the buns small, high enough to show shape, and close enough together that they read as intentional.
Split the top half of your hair into two sections, twist each one into a tiny bun, and pin them where they sit at the crown. Leave the rest of the hair down and let the lower lengths stay loose. On medium hair, the buns stay small enough to look neat instead of cartoonish, which is exactly why this style works better here than on long hair.
This one has a casual feel, but it can still look pulled together if the part is clean and the buns are even. I usually prefer it with a slightly off-center part because it softens the shape. If you wear it dead center, the style can feel a little too stiff unless the rest of the hair has movement.
Thick hair may need extra support, especially if the buns are dense. Two bobby pins per bun usually does the job. Fine hair can get away with one small elastic plus a pin. If your layers are short, let the ends peek out a little. That can actually look better than forcing every strand to disappear.
It is playful. It also keeps the top half controlled, which is a nice combination.
12. The Sleek Center-Part Half-Up for Medium Length Hair
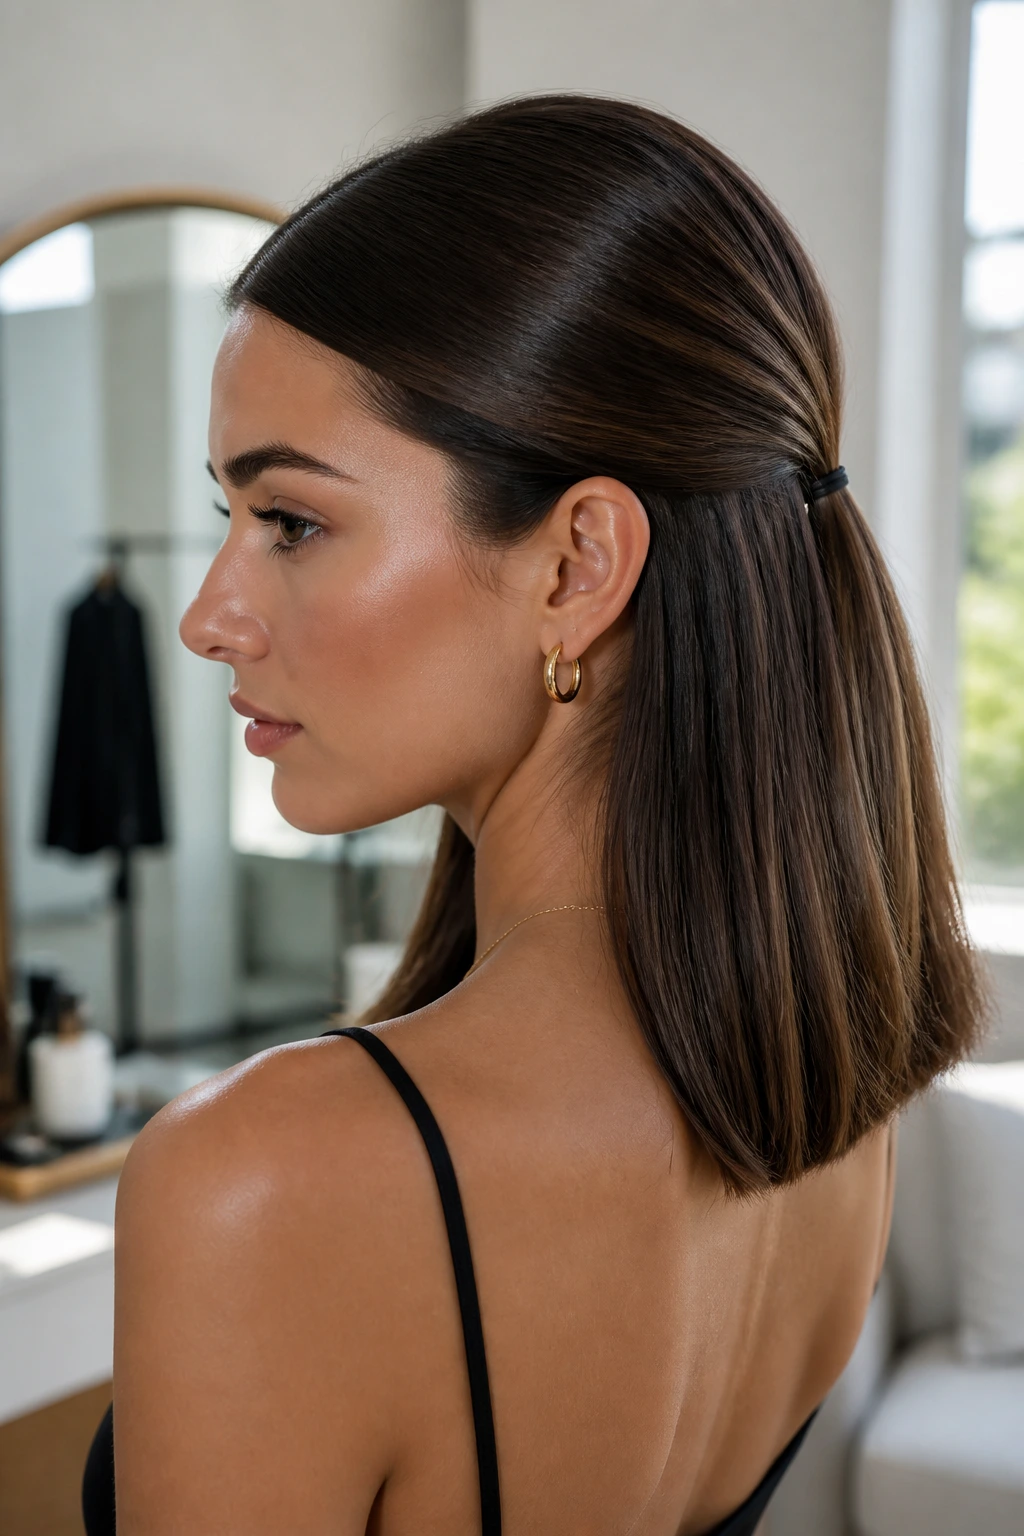
A sleek center-part half-up style is the one I recommend when you want medium length hair to look calm, clean, and intentional. There is nothing fussy here. The strength comes from the part, the smooth crown, and the way the lengths fall straight and tidy underneath.
Brush the hair into a precise center part, take the top section from just above the ears, and secure it low at the back with a small elastic or a slim barrette. The lower half should stay loose, but not wild. If the ends bend a little inward or outward, that is better than dead-straight lines that hang with no shape.
A fine-tooth comb helps flatten the top without making it look stiff. A tiny bit of serum through the mid-lengths and ends can stop flyaways, but keep it away from the roots. Heavy product at the crown makes the style collapse faster than people expect.
This is one of the best half up half down styles for medium length hair if you like clean lines and simple clothes. It sits well with a tailored jacket, a plain dress, or anything that already has structure. On finer hair, it creates the look of polish without needing a lot of volume. On thicker hair, it keeps the top half under control so the whole style feels balanced.
If you only keep one rule in mind for these styles, keep it this: the top section should feel secure, not tight. That is what lets the shape last and keeps medium hair from turning into a puffed-up mess by the end of the day.
