



Straight hair is honest hair. It shows every blunt line, every flat spot, every tiny decision you make with the scissors or the flat iron. That can be unforgiving, sure, but it also means a good shape reads instantly. No camouflage. No blur.
Long hairstyles for straight hair tend to live or die by two things: the shape of the ends and the part. A center part can make hair feel sharp in the good way, while soft layers can add movement without wrecking that clean, polished line. Get either one wrong and the whole style can look a little sleepy. Get it right and the hair does half the work for you.
Some of the strongest looks need almost no heat. A low ponytail with a wrapped base can look deliberate in under five minutes, while a feathered blowout asks for a round brush, a dryer, and a little patience. The point is not to fight straight hair. It’s to use the clean line it already gives you.
25 styles, then. Some are cuts, some are fast styling tricks, and some are the kind of half-up fixes that save a bad hair day when you do not have the energy for anything fussy. The cleanest place to begin is with the most stripped-back version of the look.
1. Glass-Straight Center Part
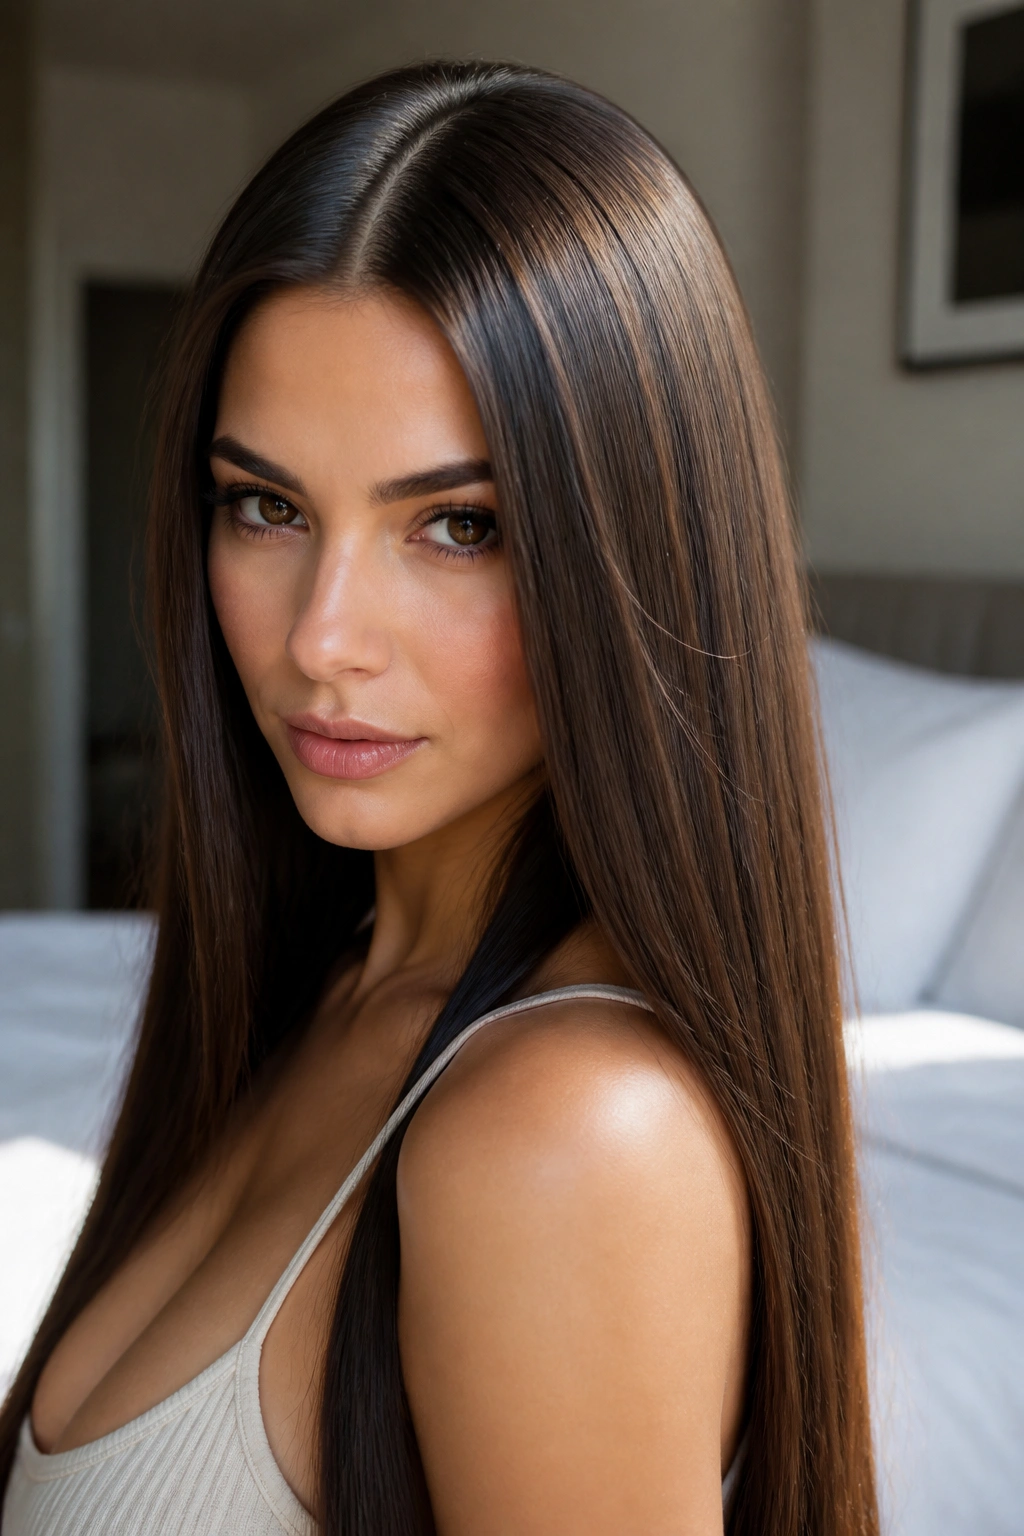
A sharp center part is the easiest way to make long straight hair look intentional. It turns the whole length into a clean line, which is exactly why it works so well when your hair already falls flat on its own. There is no pretending here. The style either looks crisp or it looks unfinished.
Why It Works on Straight Hair
The middle part puts the eyes right on symmetry, and symmetry is doing a lot of heavy lifting here. If your ends are tidy and your roots are smooth, the style reads sleek instead of plain. I like this look most when the hair reaches past the collarbone and the last inch or two has been trimmed clean, not thinned to death.
Use a fine-tooth comb to make the part while the hair is damp, then blow-dry the roots in the direction you want them to stay. A light serum on the mids and ends keeps the shine high without making the hair greasy.
- Best for oval, heart, and long face shapes
- Looks strongest on medium to thick straight hair
- Needs a flat, neat end line
- Works with a middle part or a razor-straight off-center part
One good trim matters more than ten styling products.
2. Blunt One-Length Cut
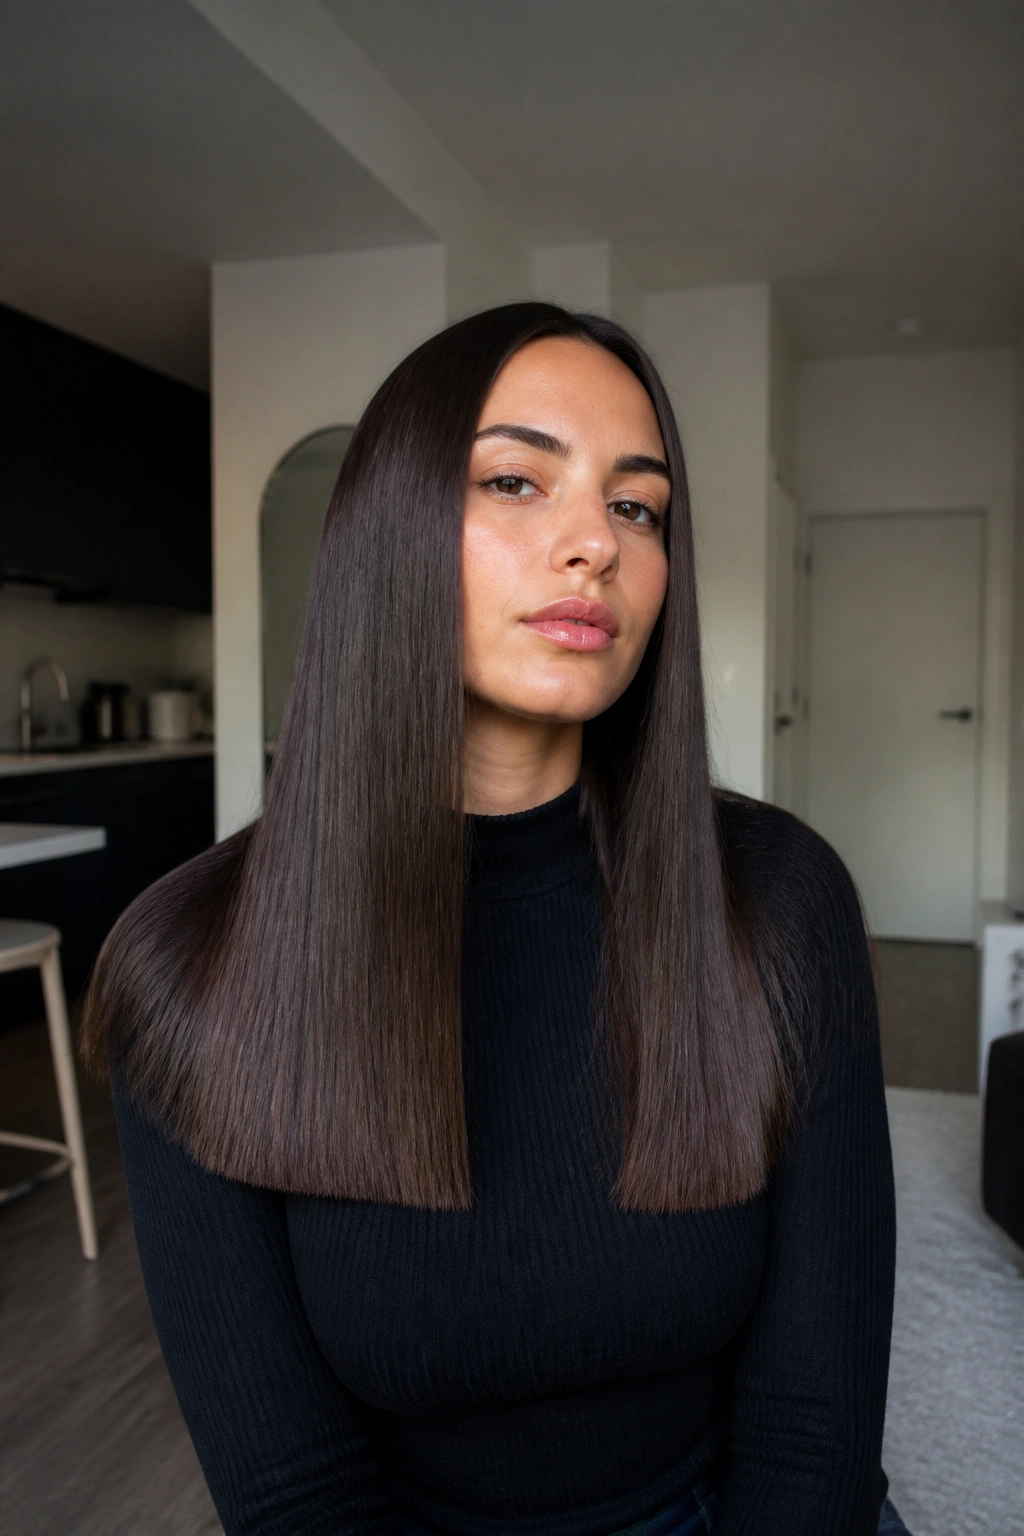
Why does a blunt cut make straight hair look thicker? Because the eye gets one uninterrupted line, and that line makes the hair feel fuller right away. No wispy ends. No broken shape. Just a heavy, clean edge that lands with a little attitude.
The blunt cut is the most confident version of long straight hair, and I mean that in the best possible way. It has almost no built-in softness, so the finish matters. If the ends are ragged or see-through, the whole effect falls apart. If they are even, the hair looks denser than it really is.
How to Wear It
Keep the part simple. A center part gives it a sleek, modern feel, while a shallow side part softens it a little. Either way, this style loves polish.
A few drops of smoothing cream through the mids will keep flyaways down, but don’t flood the roots. Heavy roots kill the shape fast. If you have fine hair, this is the long cut I’d reach for before layers.
3. Soft U-Shaped Ends
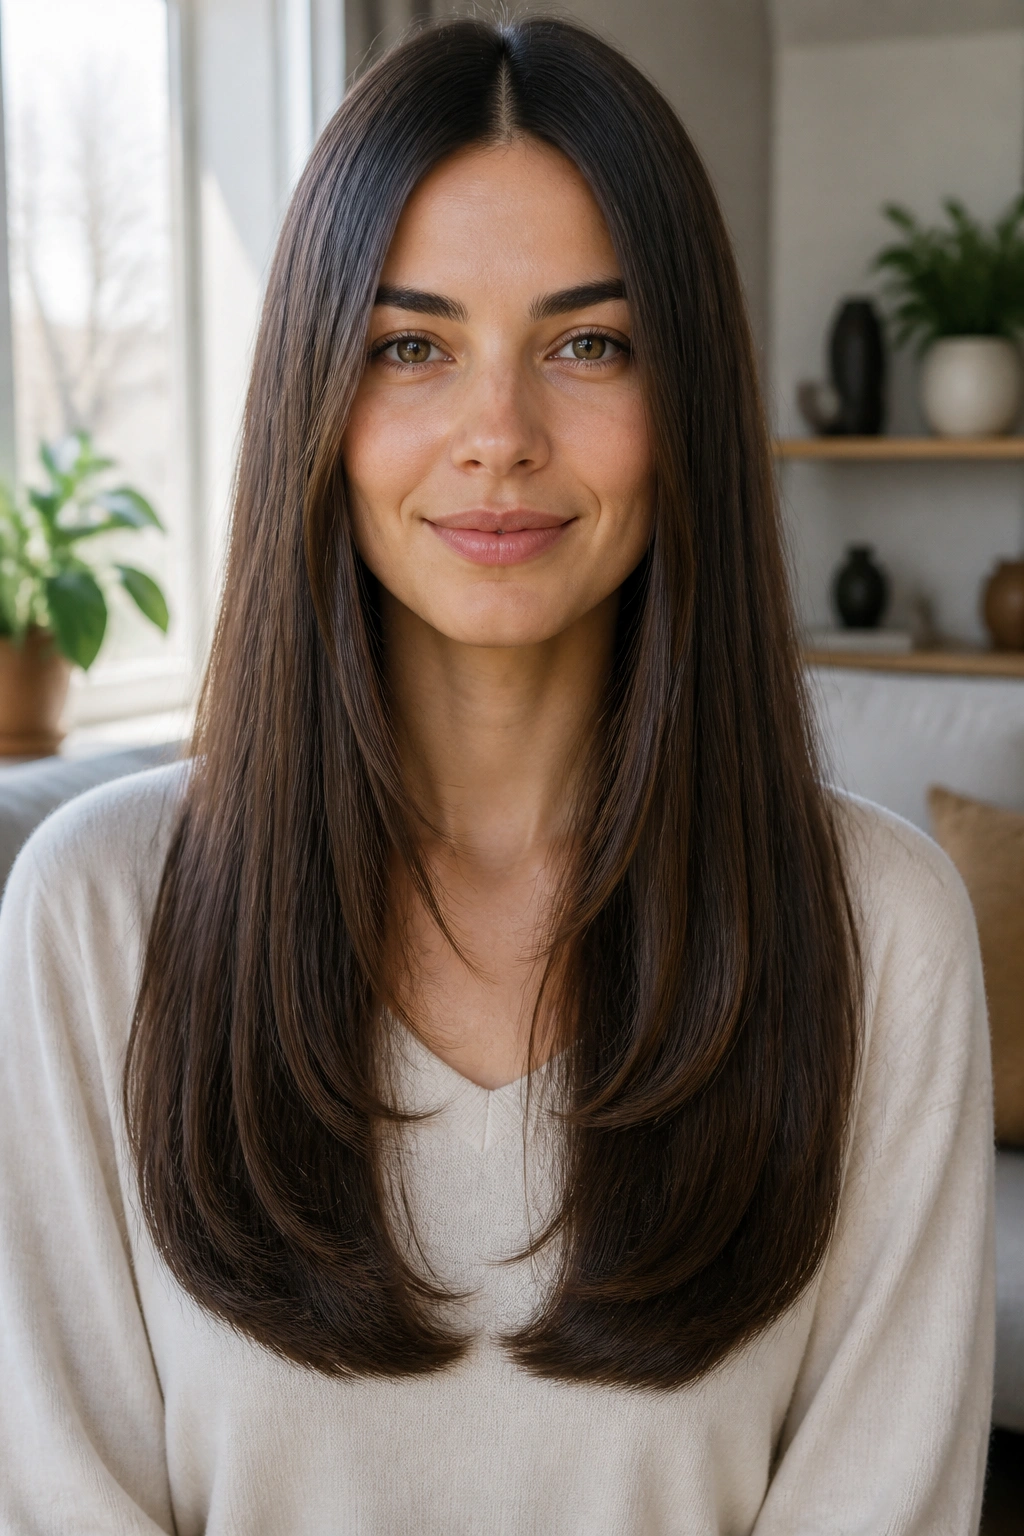
A U-shape is the gentlest way to keep length while avoiding that hard curtain effect at the bottom. The hair falls lower in the middle and slightly shorter at the sides, which gives straight strands a softer finish without making the cut look busy. It’s subtle. That’s the appeal.
I like this shape on hair that is already fairly straight because it keeps the edges from feeling boxy. The curve only shows when the hair moves, which means it never looks stiff. And yes, it still looks long. Very long, if the hair reaches past the ribs.
This cut also plays nicely with a quick blow-dry. The ends already want to sit in a soft arc, so you are not wrestling them into submission every morning. If your straight hair tends to hang in a curtain with no shape at all, this is a better answer than piling on layers.
A little side flip at the front can keep the shape from feeling too neat. Small shift. Big difference.
4. Long V-Cut Layers
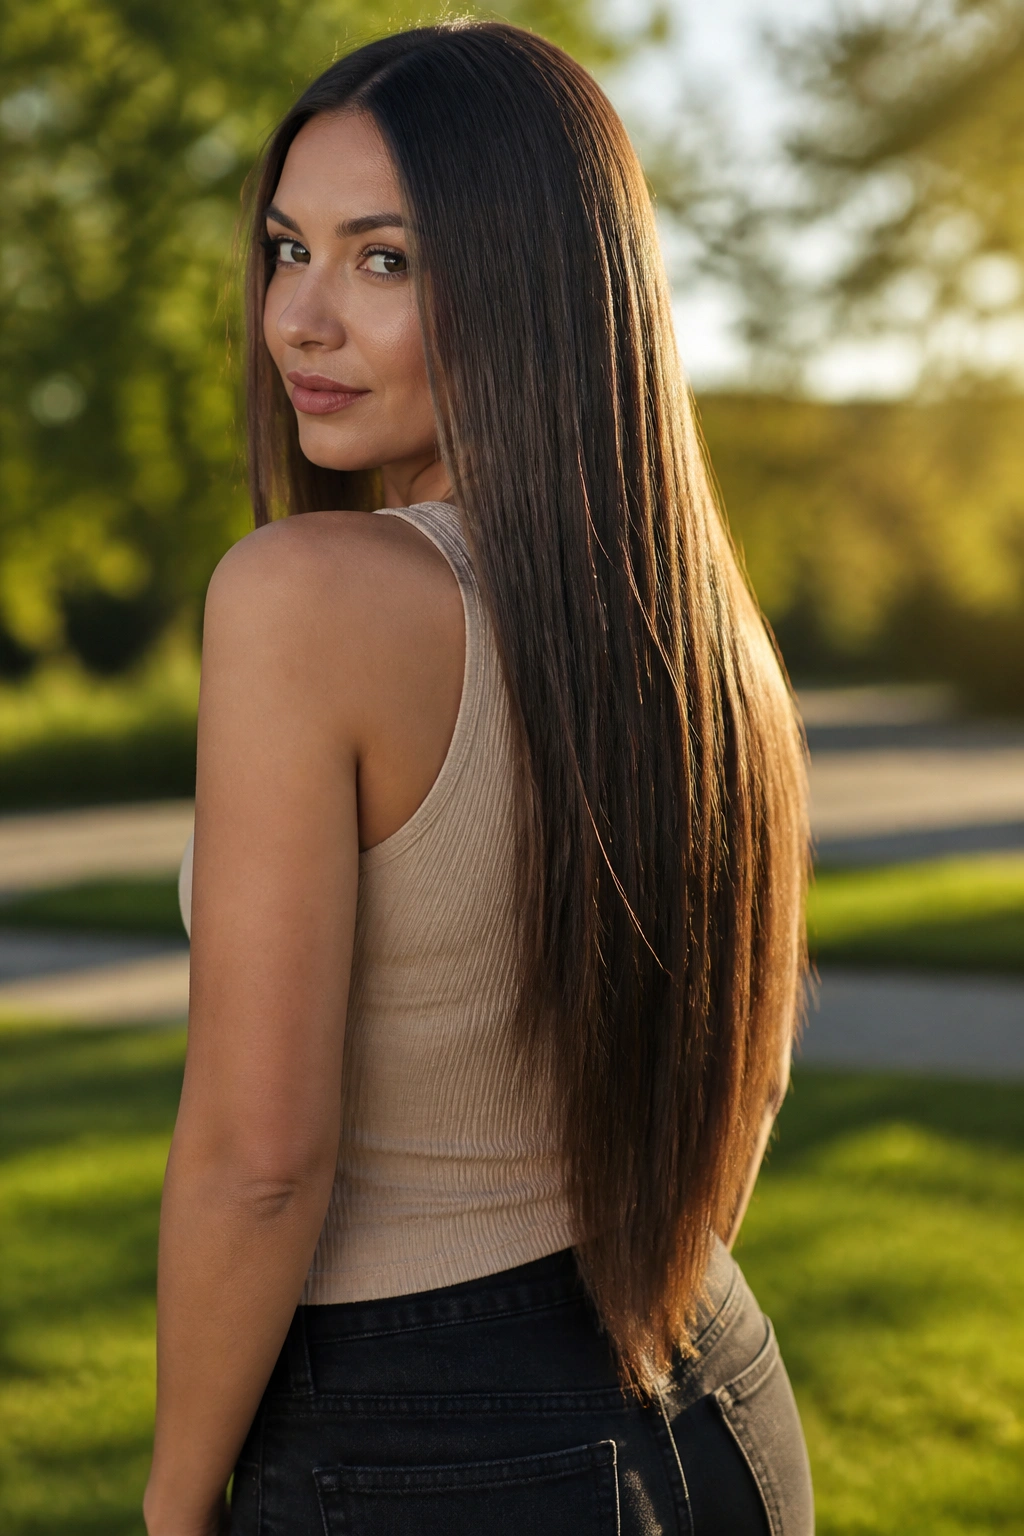
A V-cut gives long straight hair a point at the back, and that point brings drama without needing volume everywhere else. The sides stay long, the back narrows, and the whole shape looks a little more deliberate than a plain hemline. It is one of those cuts that looks best when the hair is worn down and left alone.
This is a smart choice if your hair is thick or heavy. The V shape removes some of that visual weight without chopping the length into obvious steps. You still get the sweep of long hair, but the bottom no longer looks like one giant curtain.
It does ask for upkeep. If the ends start to split, the point loses its clean shape faster than a blunt cut does. So keep the trim regular and the last inch tidy. Straight hair shows damage fast. That’s the deal.
A V-cut also looks strong with a half-up style because the taper shows when the top section gets pulled back. The shape does the talking even when the styling is minimal.
5. Face-Framing Layers Starting at the Cheekbone
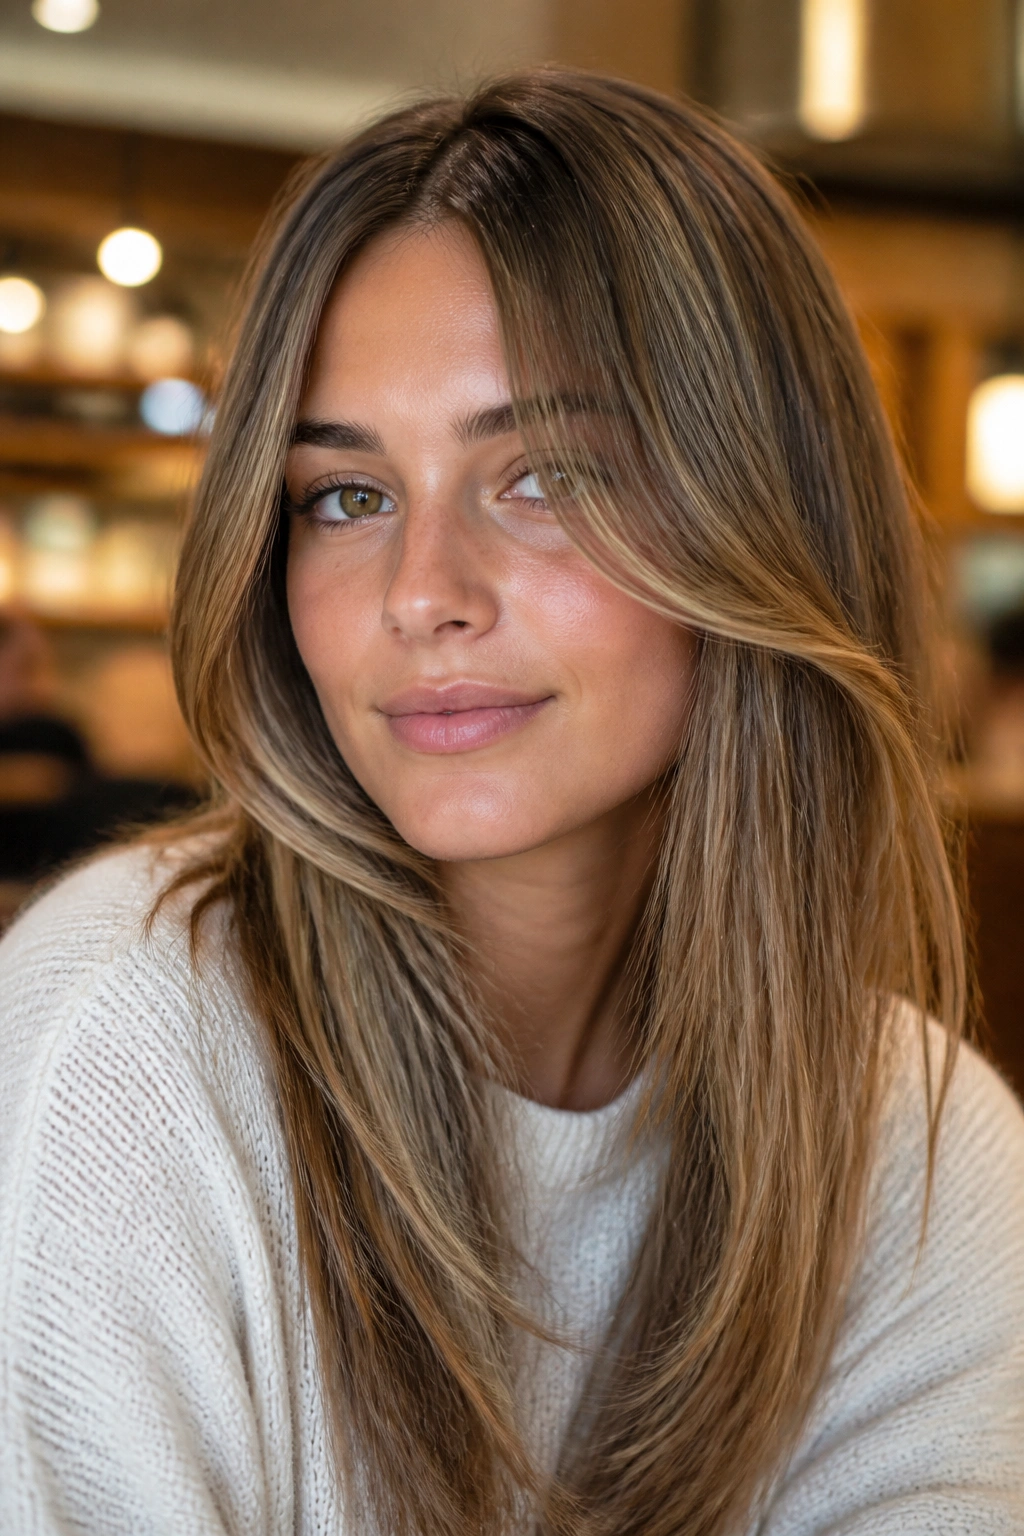
This is the move when you want movement near the face but refuse to give up length. The layers start around the cheekbone or a touch lower, then fall into the rest of the hair without breaking the overall line. It gives straight hair a little swing where it counts.
Unlike a full layered cut, face-framing pieces keep the bottom heavy. That matters. Straight hair can get stringy when the layers start too high, and I would skip that unless your hair is thick enough to handle it. Keeping the shortest pieces near the cheekbone helps the style feel soft instead of choppy.
The look also changes fast depending on how you part it. Middle part, and the face-framing pieces fall like curtains. Side part, and they sweep across the cheek in a more relaxed way.
If your long hair feels heavy around the jaw, this is a cleaner fix than chopping in bangs. Less commitment. Less morning fuss.
6. Curtain Bangs with Long Length
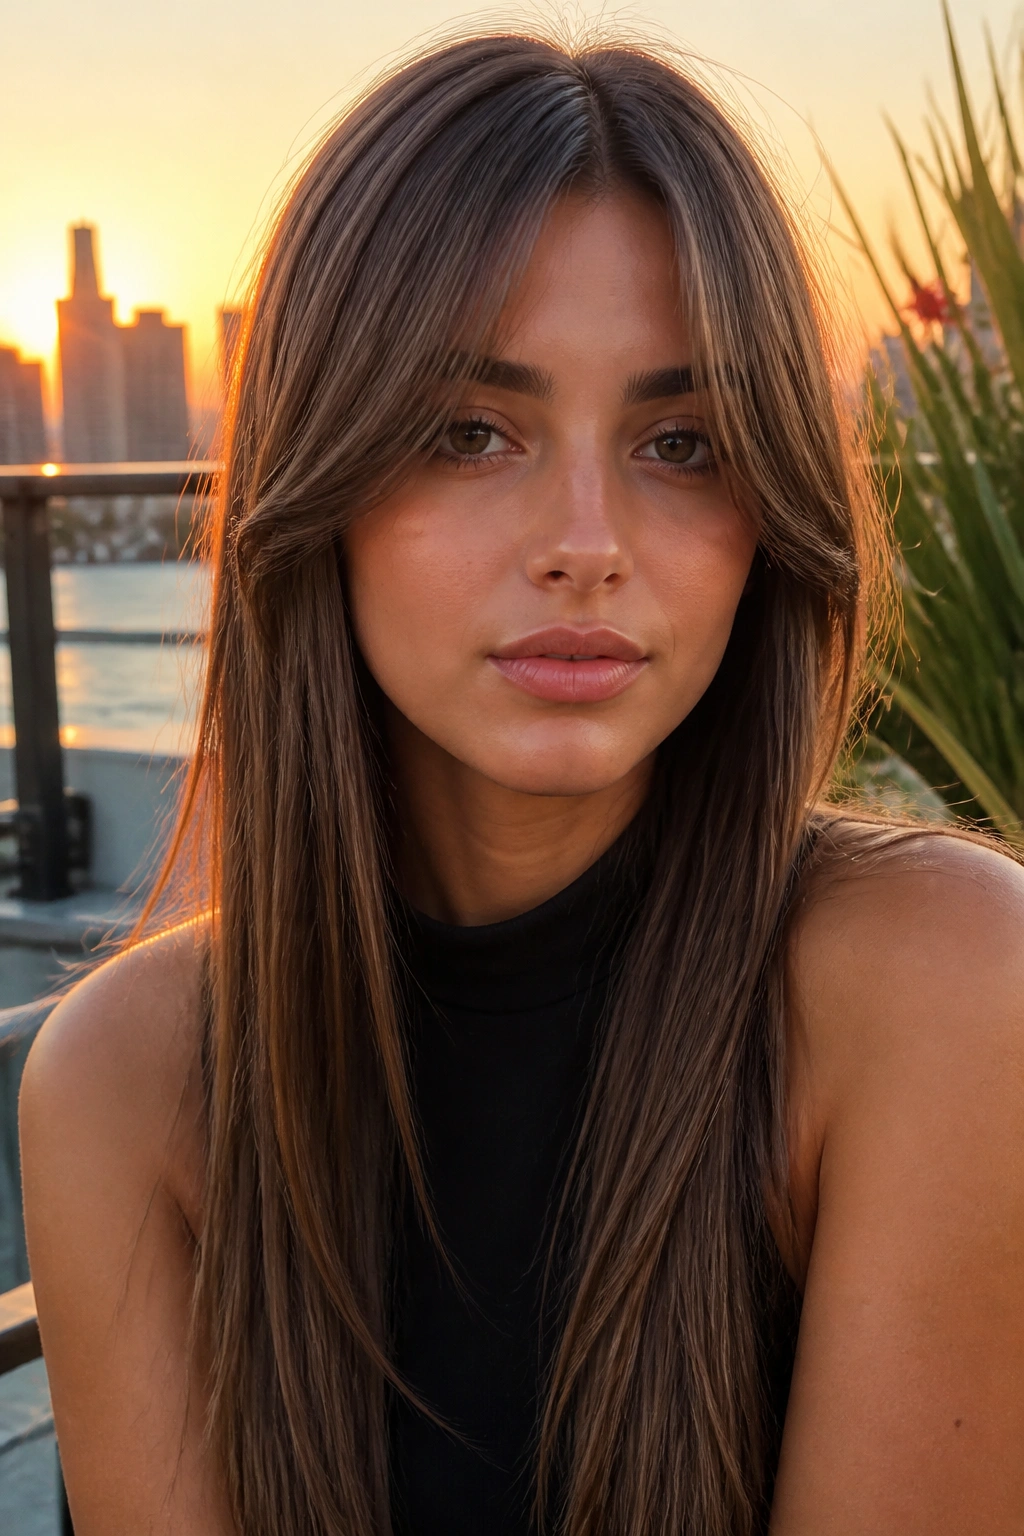
Curtain bangs are the friendliest fringe for long straight hair. They open in the middle, skim the cheeks, and grow out without turning into a disaster. That alone makes them worth considering. Full bangs can be a pain. These usually are not.
What Makes Them Different
The shape matters more than the density. Curtain bangs should look soft and a little split, not carved into a perfect block. On straight hair, they need a little bend from a round brush or a flat iron curve at the ends, or they can sit too flat against the forehead.
I like them best when the rest of the hair stays clean and long. Too many layers around the face and the bang area starts to feel busy. Keep the fringe airy, then let the length stay sleek.
How to Style Them
- Blow-dry forward first, then sweep them apart
- Use a small round brush or a medium-barrel brush
- Finish with a tiny bit of flexible spray at the tips
- Trim them before they grow past the cheekbone if you want the shape to stay open
They are the rare bangs that still behave when you ignore them for a few weeks.
7. Wispy Brow-Grazing Bangs
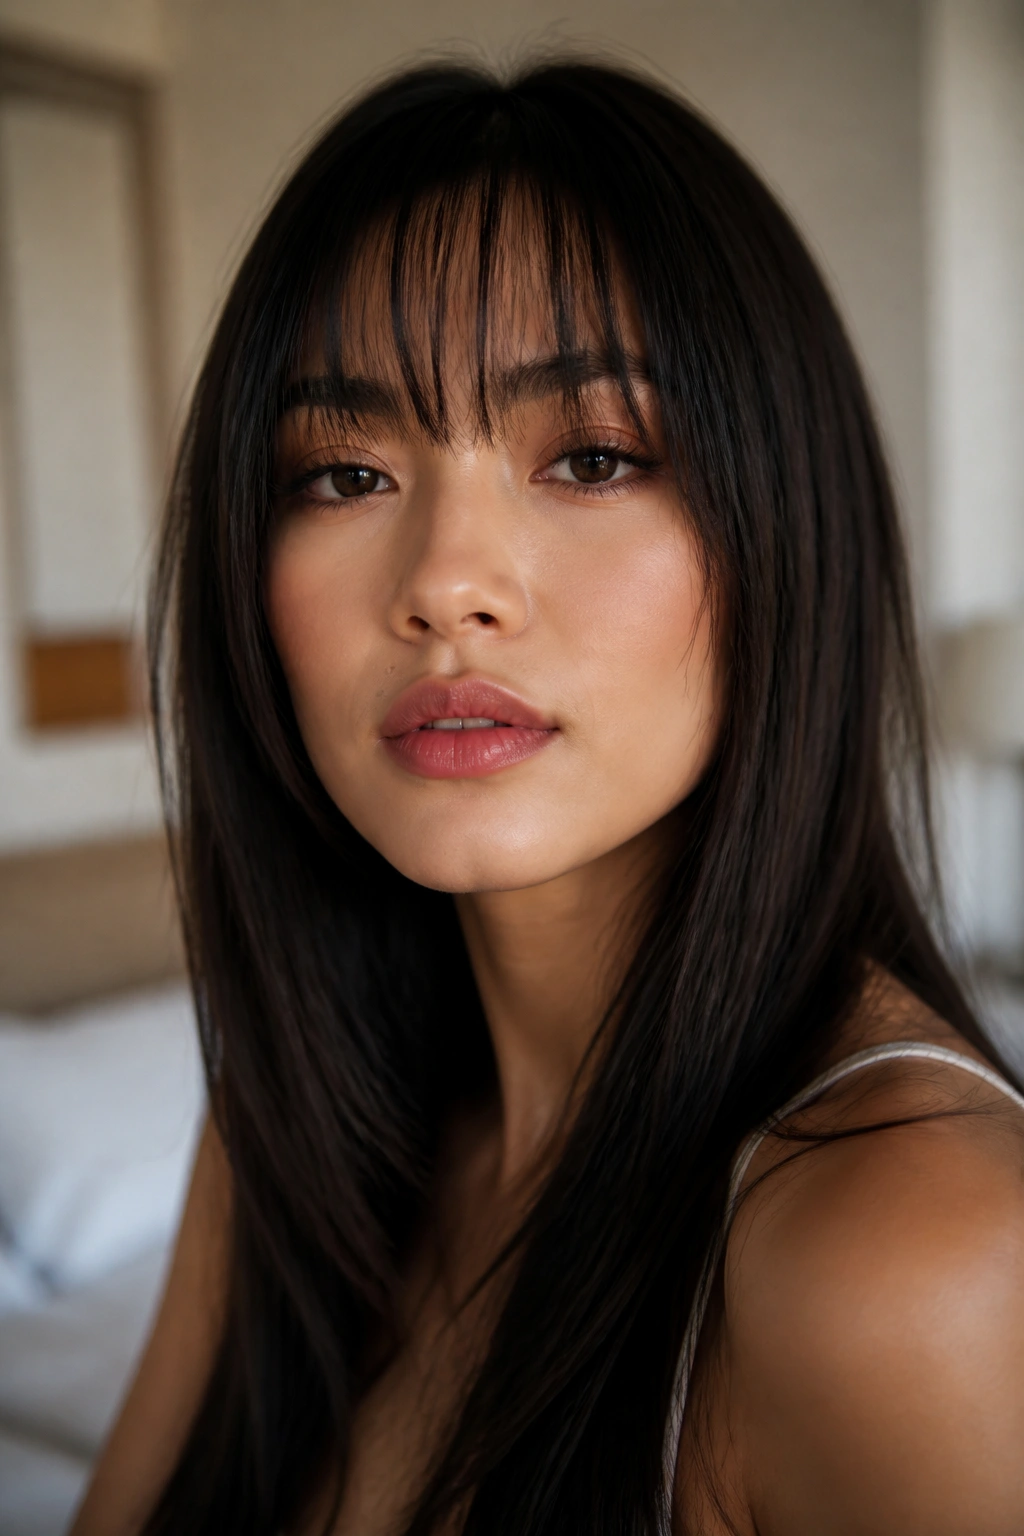
Do wispy bangs work on straight hair? Yes, when you want a softer line than a heavy fringe but still want something visible around the eyes. The trick is keeping them light enough to move. If they get too dense, they stop looking airy and start looking like a bad haircut from twenty years ago.
These bangs sit around the brows or just below them, which gives long straight hair a little edge without swallowing the face. They suit finer hair well because the fringe does not need much bulk to read as intentional. On thick hair, they need careful thinning so they do not come down like a wall.
How to Keep Them Soft
A quick blow-dry with a small round brush is enough. Pull the hair slightly forward first, then bend the ends just enough to keep them from lying dead straight. That tiny curve changes everything.
This style looks best when the rest of the hair stays simple. A sleek ponytail, a low bun, or loose lengths all work. The bangs are the detail; the rest should stay calm.
If you want fringe without a huge commitment, this is the one I’d point to first.
8. Deep Side Part with Sleek Finish
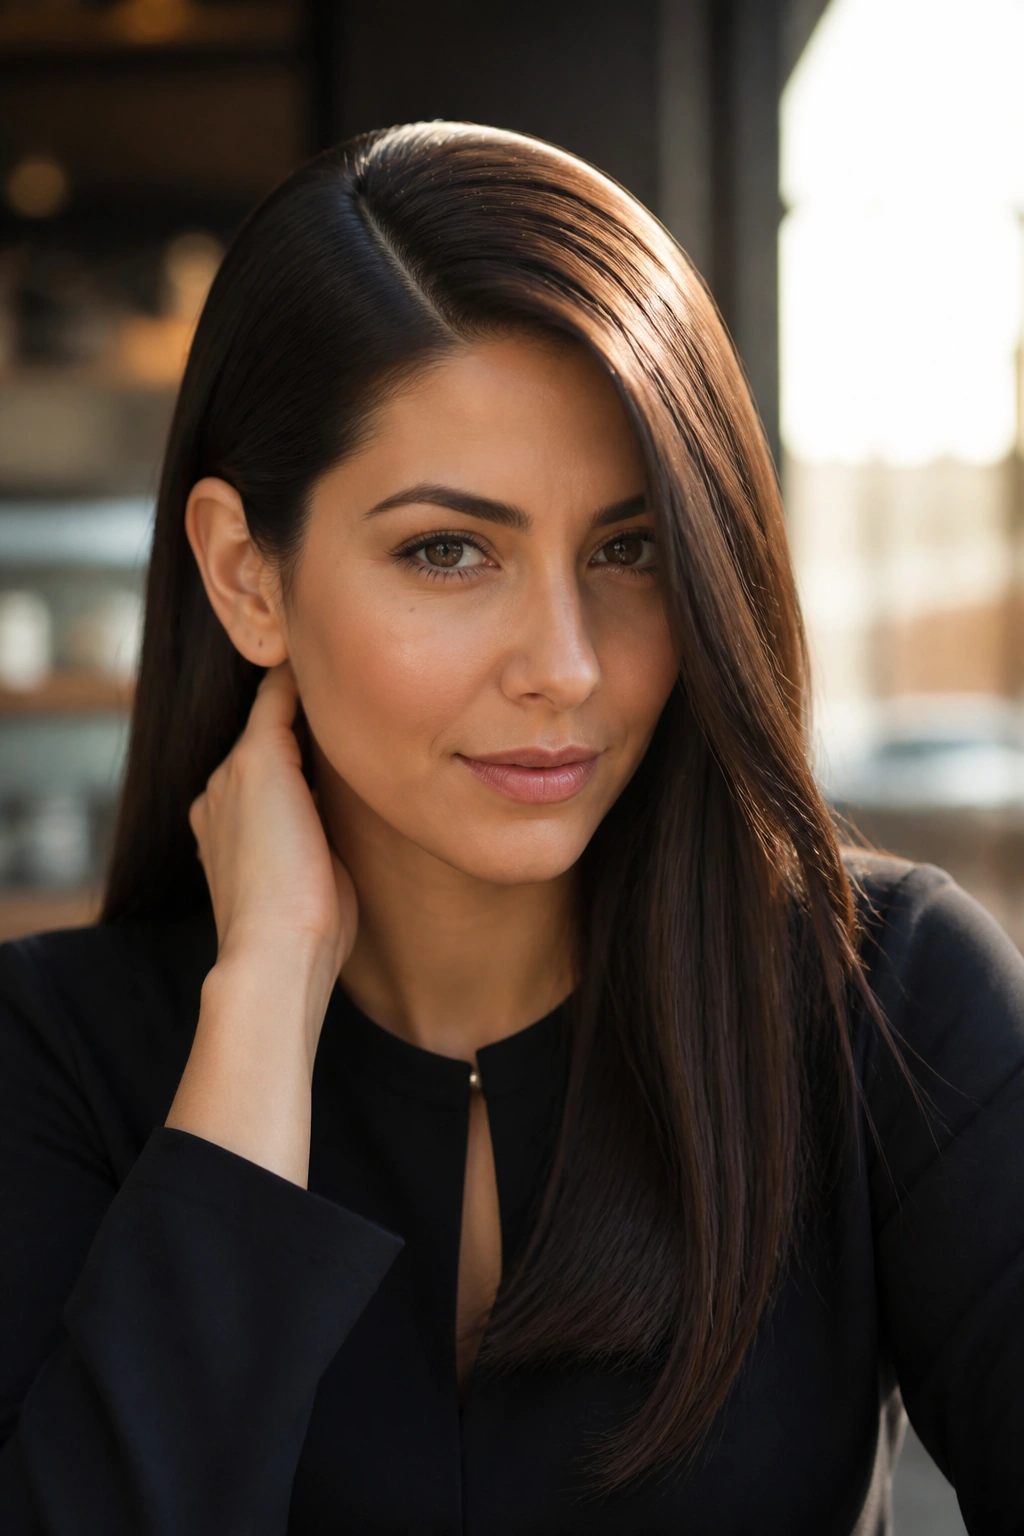
A deep side part can rescue straight hair that feels too flat through the crown. It builds lift at the root on one side and gives the whole style a little sweep, which is enough to change the mood completely. Same length. Different energy.
Think of it as the fastest way to break up symmetry without cutting anything. The hair falls over one temple, the top gets a bit of air, and the face looks softer from the side. A neat blow-dry helps, but the real work comes from placing the part while the roots are still warm.
What to Watch For
- If your hair is very fine, use a root spray at the crown
- If your hair is thick, smooth the top with a boar-bristle brush
- Keep the ends straight so the side part doesn’t turn into an old-school wave
- Tuck the heavier side behind one ear if you want more structure
This style is especially good when you want your hair down but not boring. That’s the real appeal. It’s polished without feeling stiff.
9. Side-Swept Front Section
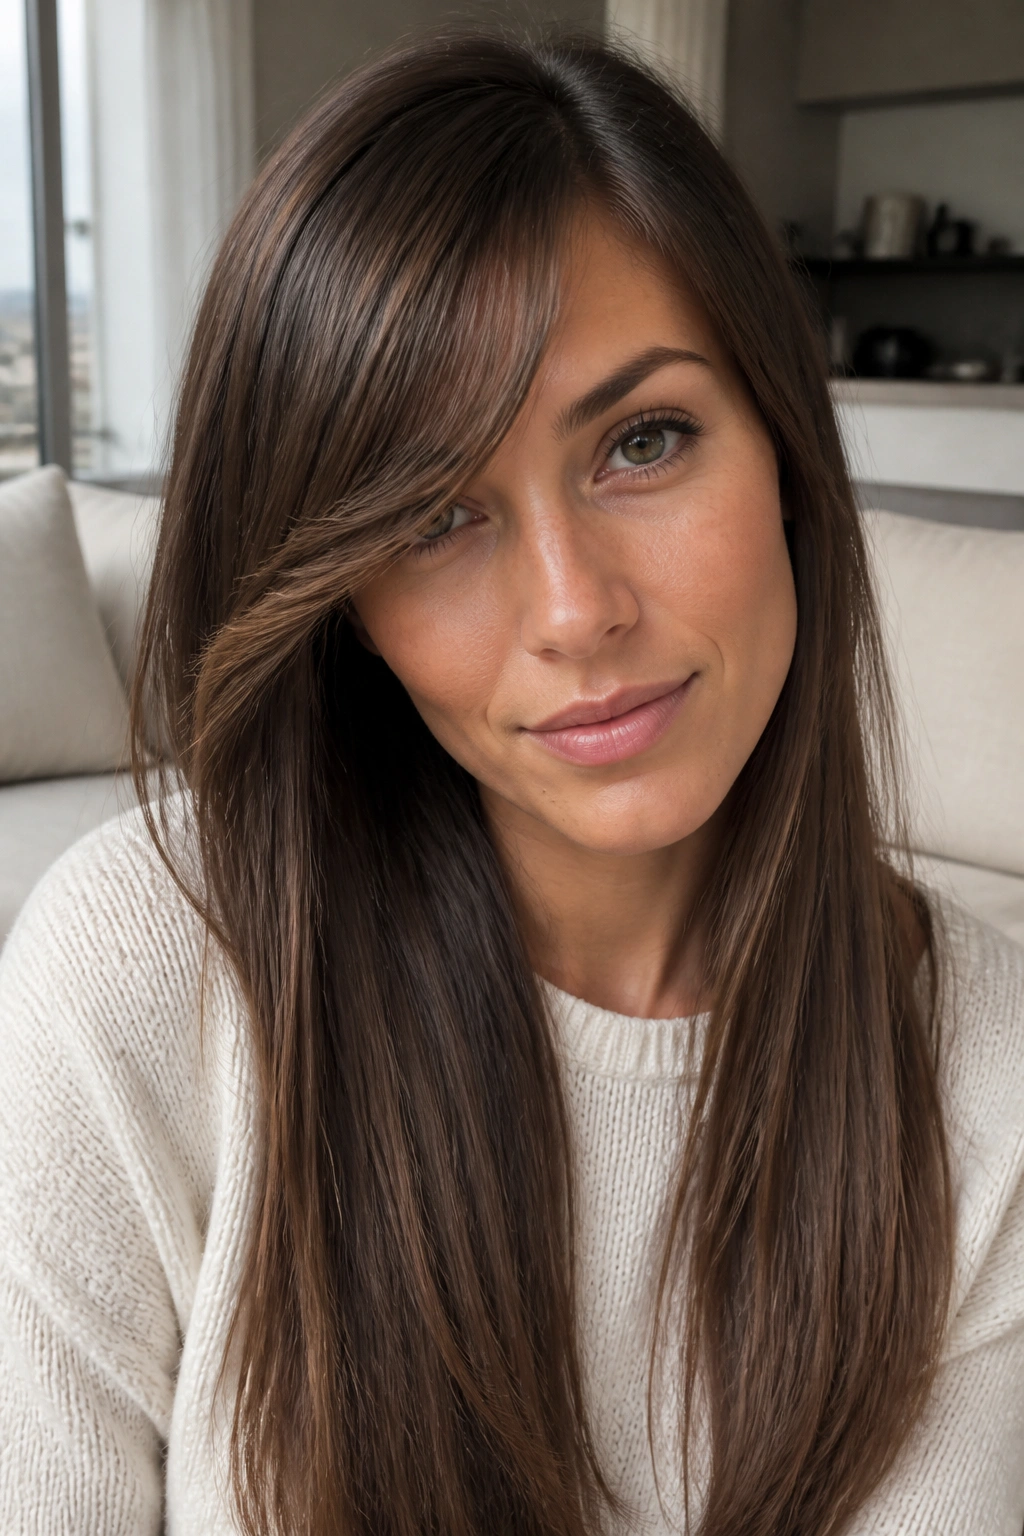
Unlike a full deep side part, a side-swept front section keeps the part more neutral and shifts only the front pieces. That makes it a nice compromise if you want softness near the face but do not want to commit to a dramatic part line.
I like this on straight hair because it creates movement right where people look first. One section drapes across the forehead or cheek, the rest stays simple, and suddenly the whole style feels less severe. It’s a small adjustment. It has a bigger effect than people expect.
This works well for long hair that is worn loose, half-up, or clipped back on one side. A small pin or a hidden bobby pin can hold the front section in place, but I prefer leaving it loose when the hair is very sleek. It looks less forced.
A side-swept front piece also helps if one side of your hair always falls flatter than the other. The imbalance stops being a problem and starts looking like the point.
10. Half-Up Twist
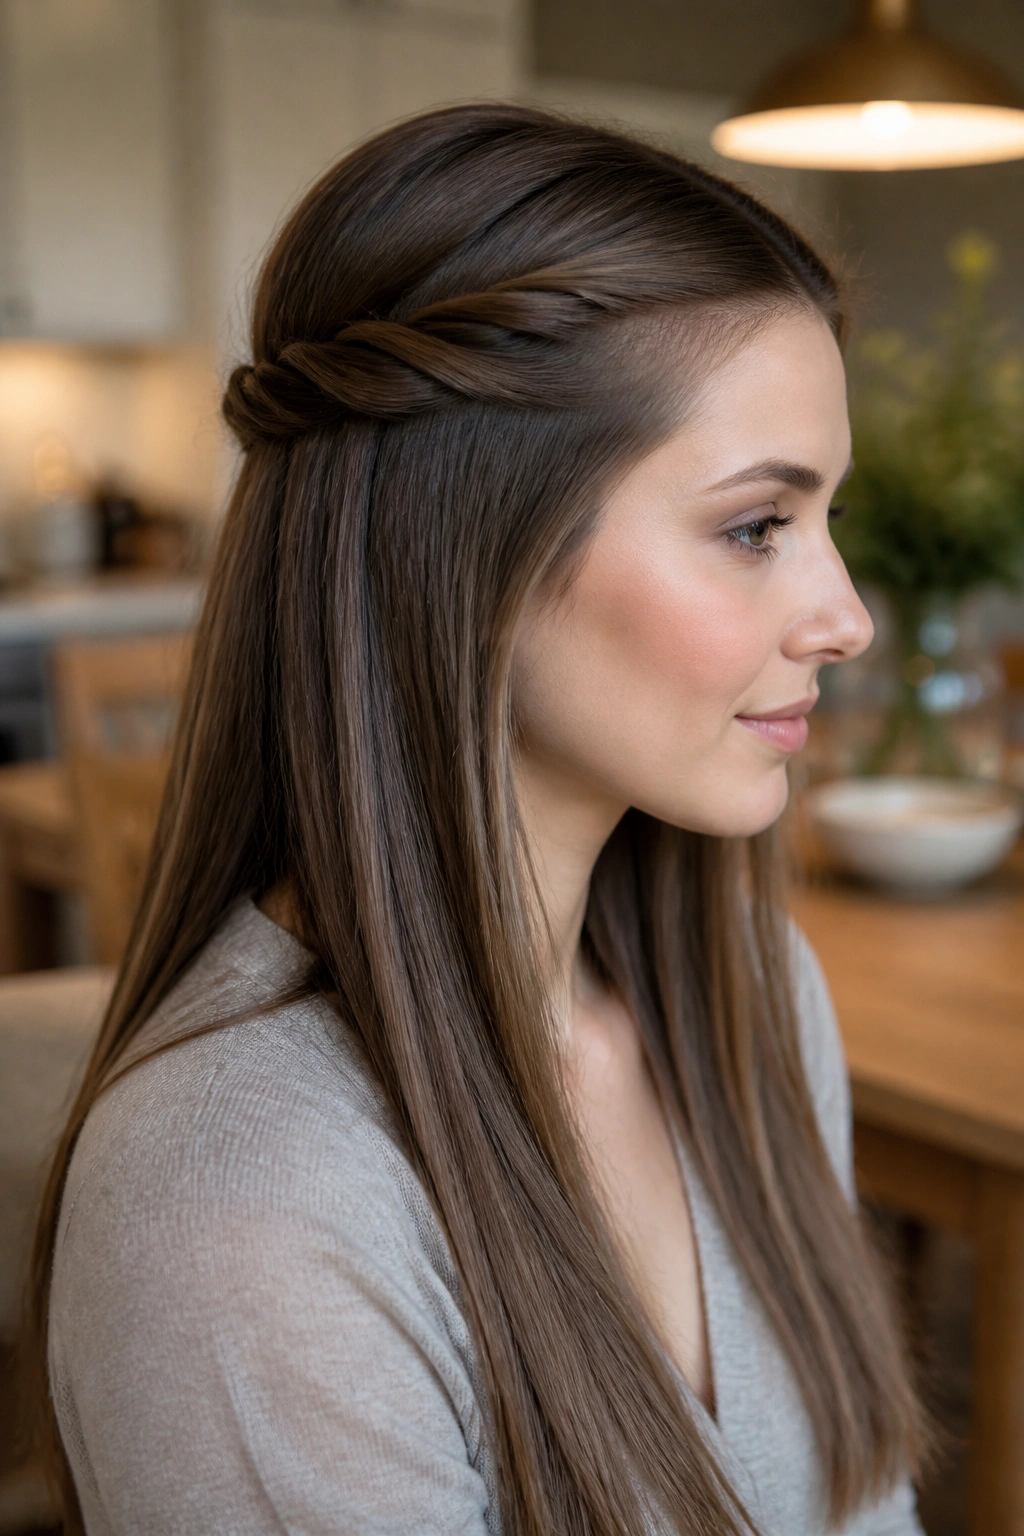
A half-up twist is one of those styles that looks more polished than it has any right to. You take two sections from the temples, twist them back, and pin them together so the length stays loose. Simple. Quick. Still neat enough for a dinner table.
Straight hair makes this style easy because the sections do not snag much while you’re twisting them. If the hair has a bit of grit from dry shampoo, even better. The twist grips better and the pins stay hidden more easily.
What I like here is the balance. The top section is controlled, but the length still hangs free, so the hair keeps its long shape instead of disappearing into an updo. That makes it a strong choice for long straight hair that feels too plain when worn down.
A little volume at the crown keeps the style from looking too school-uniform. Lift the roots slightly before pinning, and do not pull the twist tight. Loose is kinder here.
11. Half-Up Claw Clip
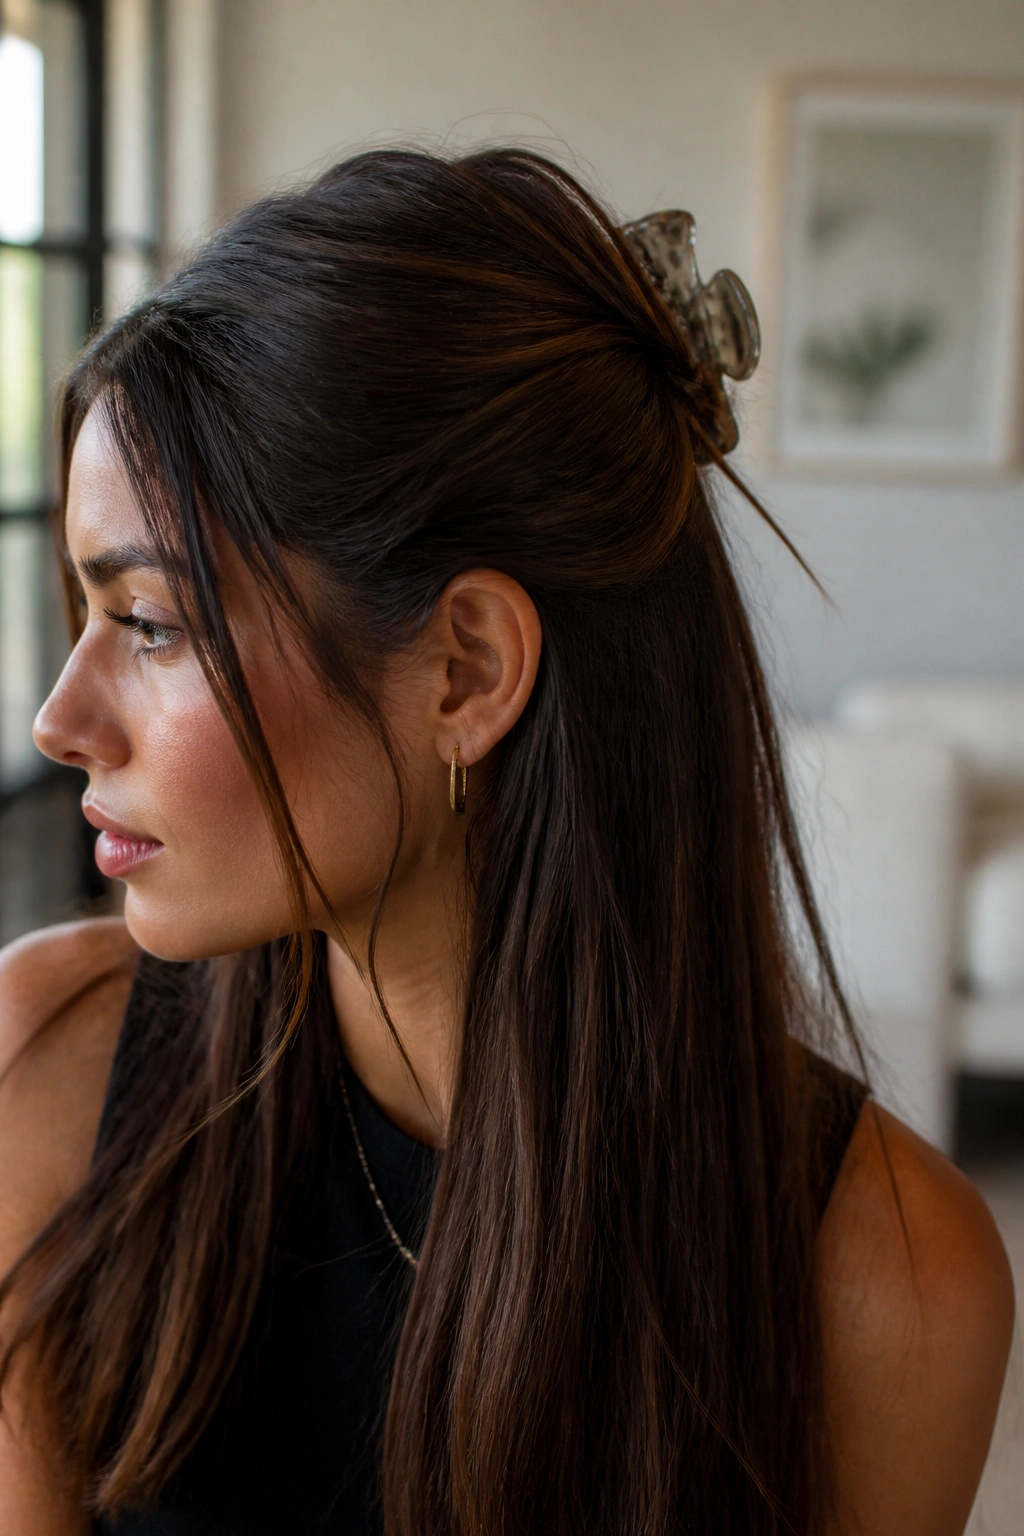
A claw clip can look lazy in the worst way or easy in the best way. The difference is placement. A half-up claw clip on long straight hair should sit high enough to lift the crown and low enough to leave a clean fall of hair underneath. That gives the style shape instead of chaos.
What Makes the Clip Do the Work
The clip should hold the hair without smashing it flat. That’s the whole trick. If you twist the half-up section once or twice before clipping it, the result looks deliberate and a little French-girl-ish without trying too hard.
This style is especially useful on second-day hair. Straight strands that have lost a bit of volume tend to stay put better in a clip than in a ponytail. The clip gives you height, and the loose length keeps the look soft.
Choose the clip size to match the amount of hair. A tiny clip on thick straight hair will slip. A huge clip on fine hair will swallow the style.
The right clip should disappear into the hair, not become the whole story.
12. Low Ponytail with Wrapped Base
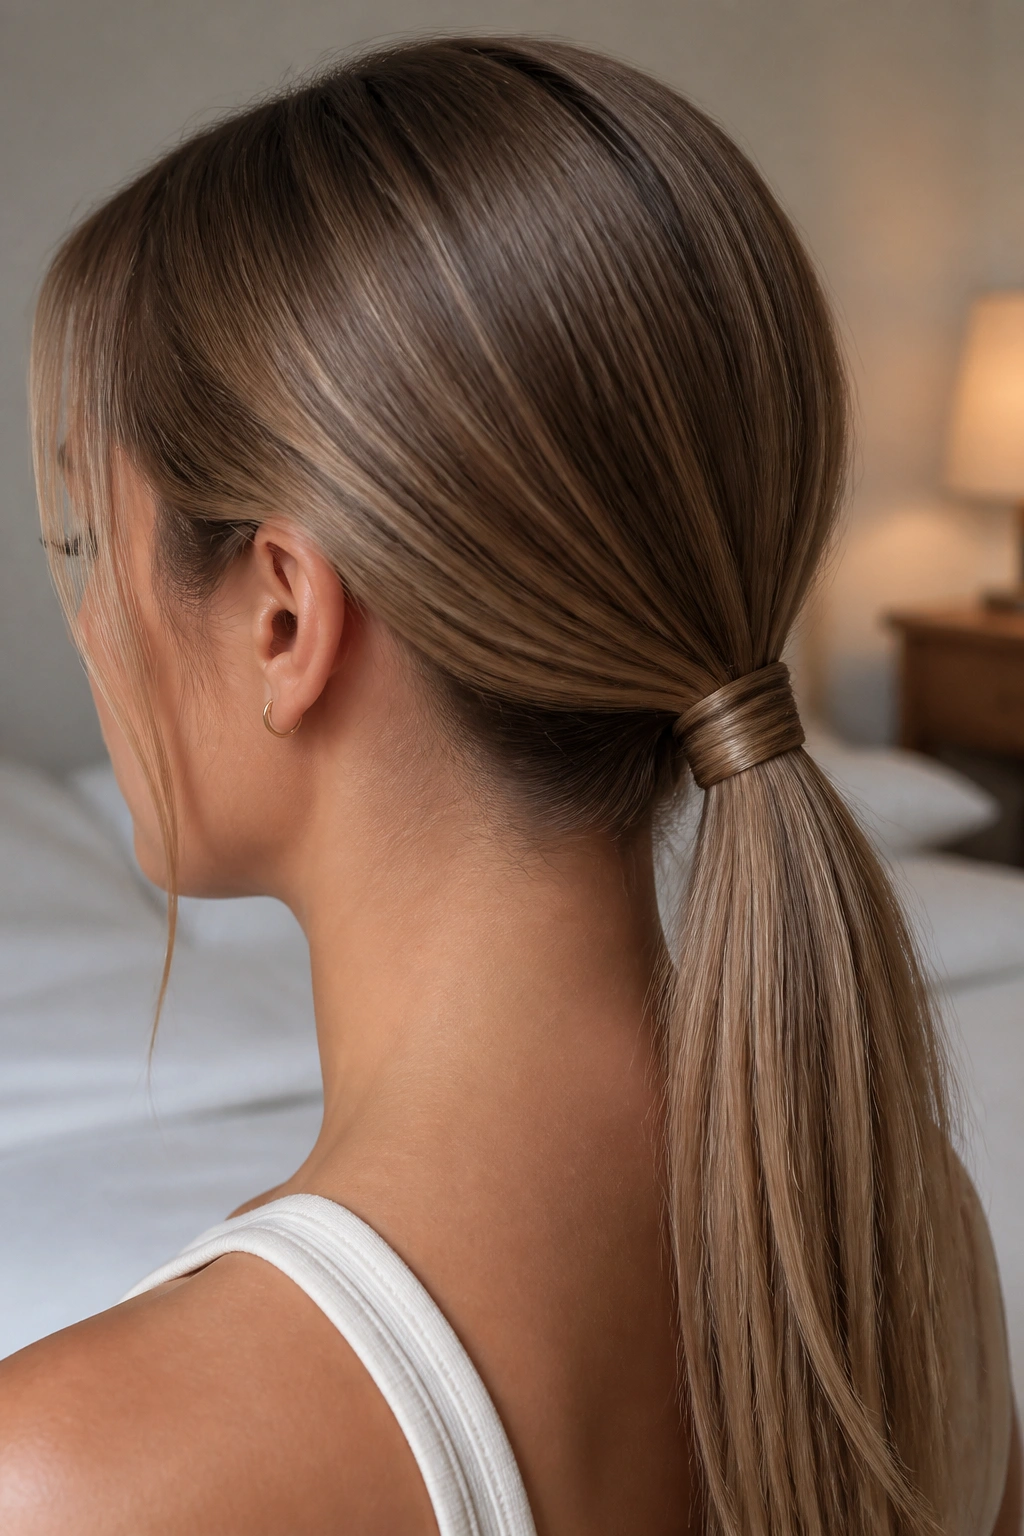
Why do low ponytails never go out of style? Because they clean up straight hair fast and they work at every length past the shoulders. A wrapped base makes the style look much more finished, too. That little piece of hair around the elastic changes the mood from gym hair to actual hair.
The crown should be smooth, but not so tight that it pulls at the temples. That tight, shiny look can be good for a night out, though I think a softer version is more wearable for day-to-day life. Leave a touch of texture at the top if your hair tends to lie flat against the head.
The Small Details That Matter
- Use a snag-free elastic
- Take a 1-inch section from underneath to wrap around the band
- Pin the wrapped section discreetly under the ponytail
- Spray the top lightly so flyaways stay down without going stiff
The beauty of this style is that it looks polished with almost no drama. Straight hair loves it. It’s one of the easiest ways to make long hair look neat without losing length.
13. Bubble Ponytail
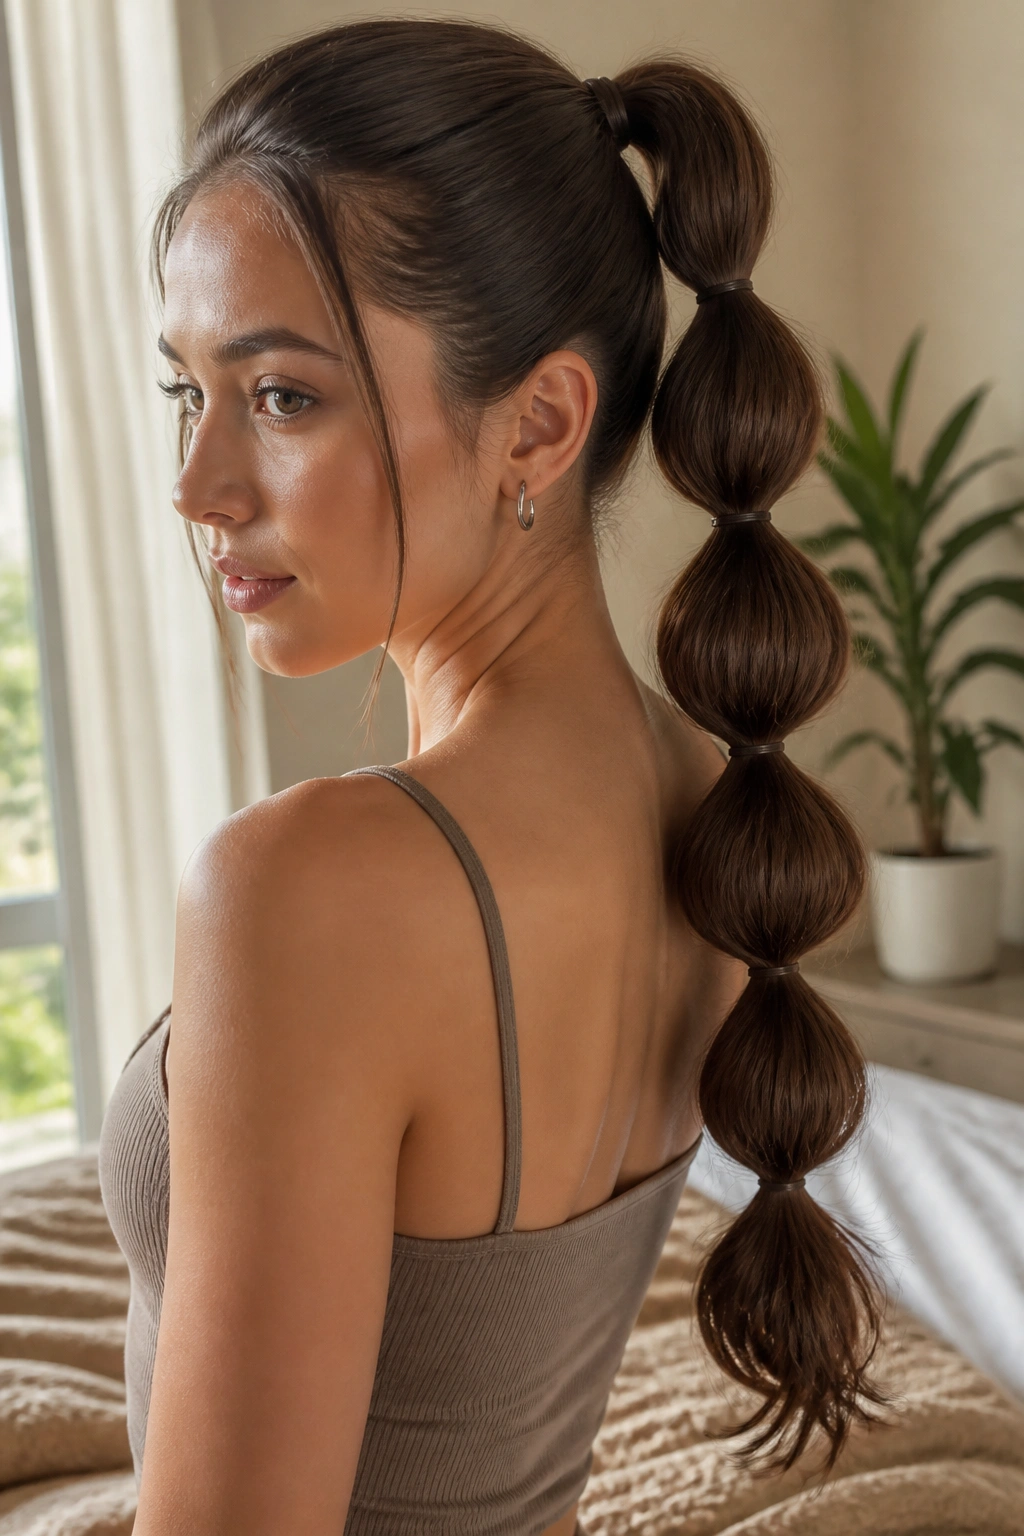
A bubble ponytail is the rare playful style that still works on long straight hair without a ton of texture. All you need are several small elastics spaced every 2 to 3 inches down the ponytail, then a gentle pull at each section to create the rounded “bubbles.” That’s it.
The style works because the straight length gives each bubble a clean outline. Curly hair can do it, too, but straight hair makes the shape easier to read. The result feels a little graphic, a little sporty, and a little more styled than a basic ponytail.
I like this look best when the crown is smooth and the bubbles are fairly even. They do not need to be perfect. In fact, the slightly irregular ones look better in motion. Too perfect and the ponytail starts to look stiff.
If your hair is very silky, rough up each section lightly before you add the next elastic. A whisper of texture spray helps the bubbles hold their shape longer.
14. Loose Three-Strand Braid
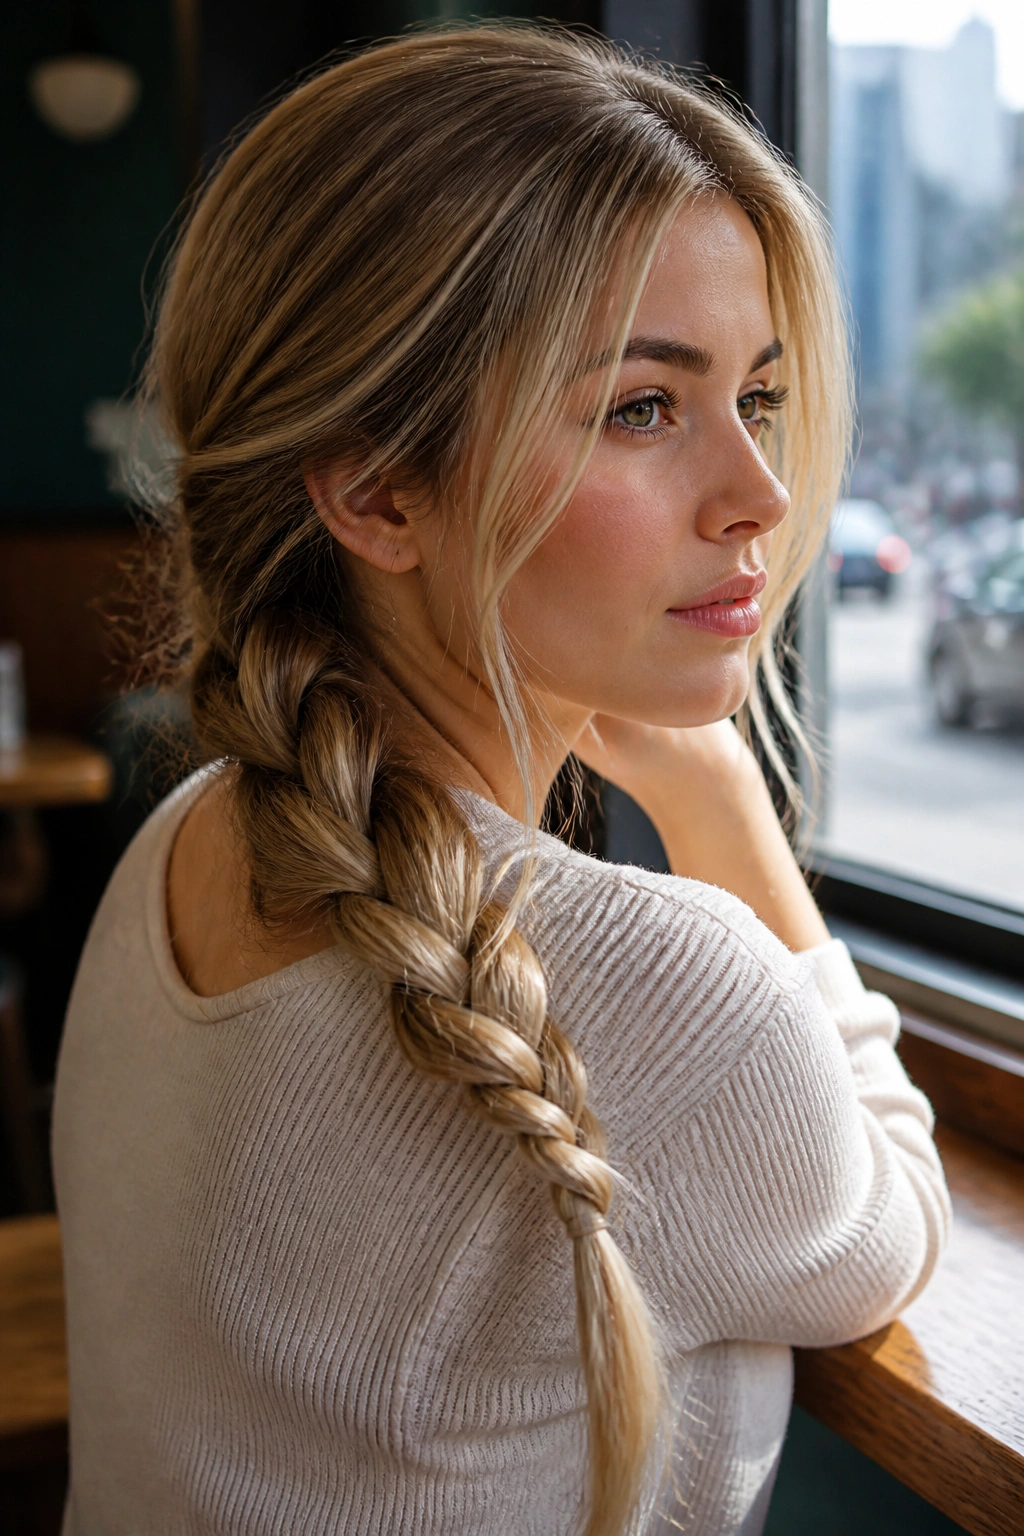
A loose three-strand braid is the plainspoken braid, and I mean that affectionately. It is easy to build, easy to wear, and forgiving if your hands are not great at hair. On long straight hair, it shows off length without asking for much structure.
This braid is strongest when it starts just below the nape and is pulled apart slightly after it’s tied off. That soft pull gives the braid body. Leave a few face-framing strands loose if you want it to feel less formal. Or don’t. The braid can handle a neat finish, too.
It is also one of the safest styles for protecting long hair during the day. Less friction, less tangling, less hair falling across your face every five minutes. That practical side matters more than people admit.
I’d reach for this braid on days when the hair is clean but not cooperating. It does the job without pretending to be more complicated than it is.
15. Fishtail Braid
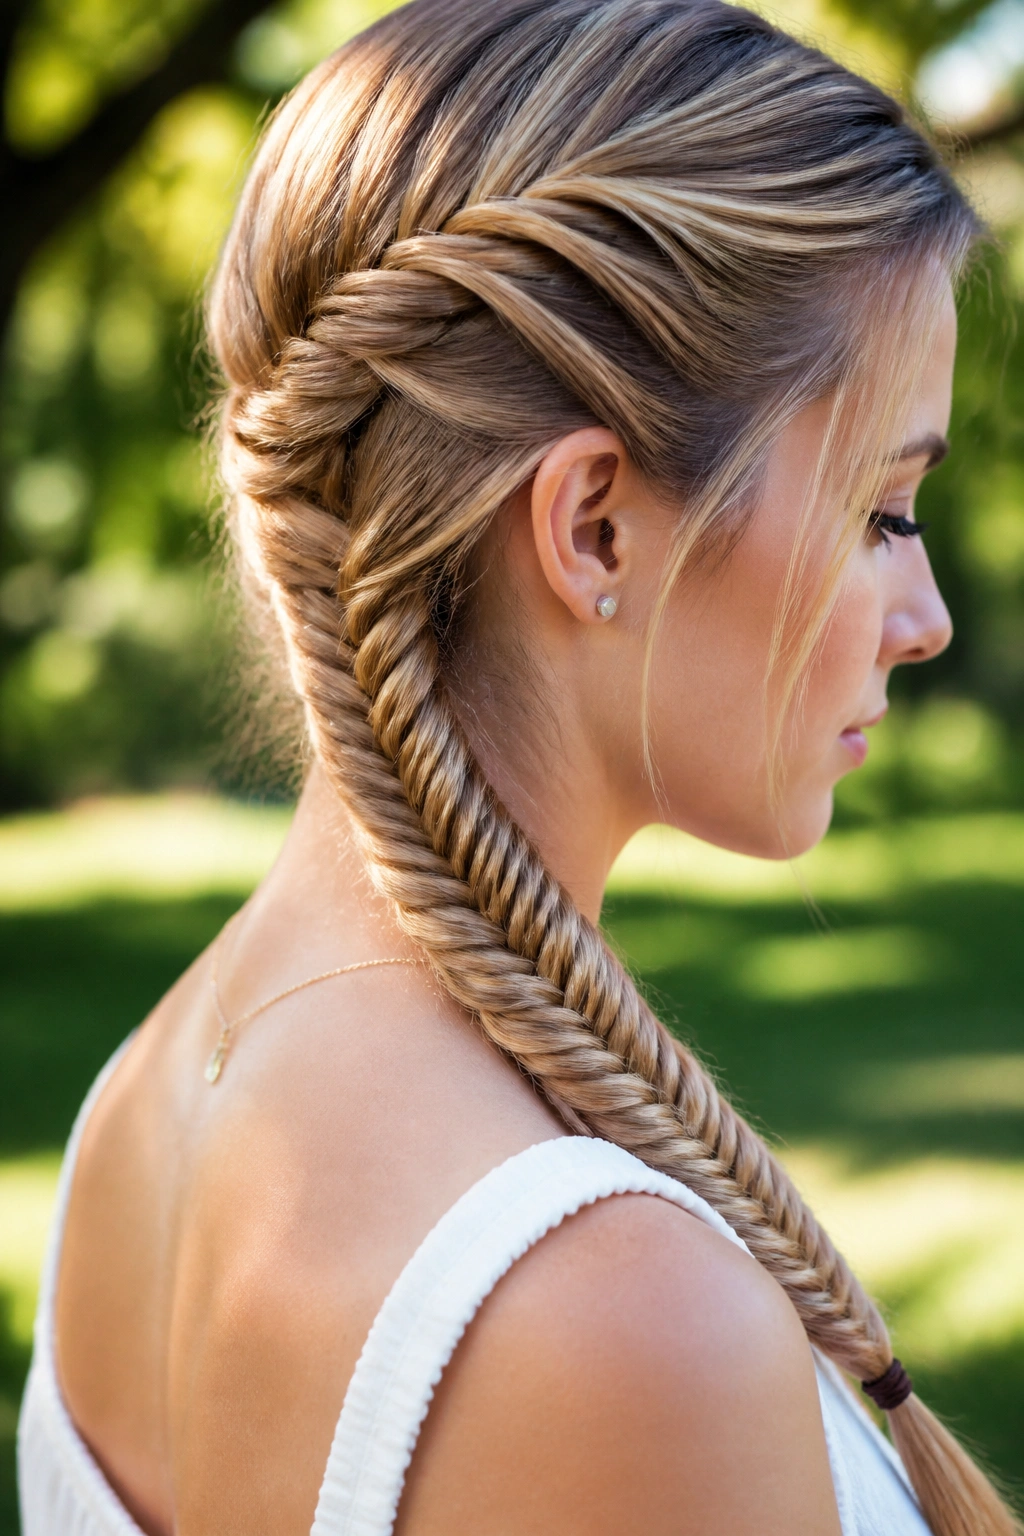
A fishtail braid looks intricate from across the room, which is why it keeps showing up in long straight hair. Up close, it is just a careful split-and-cross pattern, but the end result has a finer texture than a normal braid. Straight hair helps the little sections stay visible, so the pattern reads clearly.
This style takes more time than a standard braid, and that is the tradeoff. You need patience, and the sections should stay small and even. The payoff is a braid that looks more detailed and a little more dressed up, even if you pair it with a simple sweater or plain dress.
What to Expect
- Best when the hair is smooth, not freshly slippery
- Easier on medium to thick hair than very fine hair
- Looks fuller if you tug it open after tying
- Holds best with a tiny elastic at the end and a bit of spray
I like fishtails because they make long straight hair look intentional without heat. That’s a nice change from always reaching for the flat iron.
16. Rope Braid Half-Up Crown
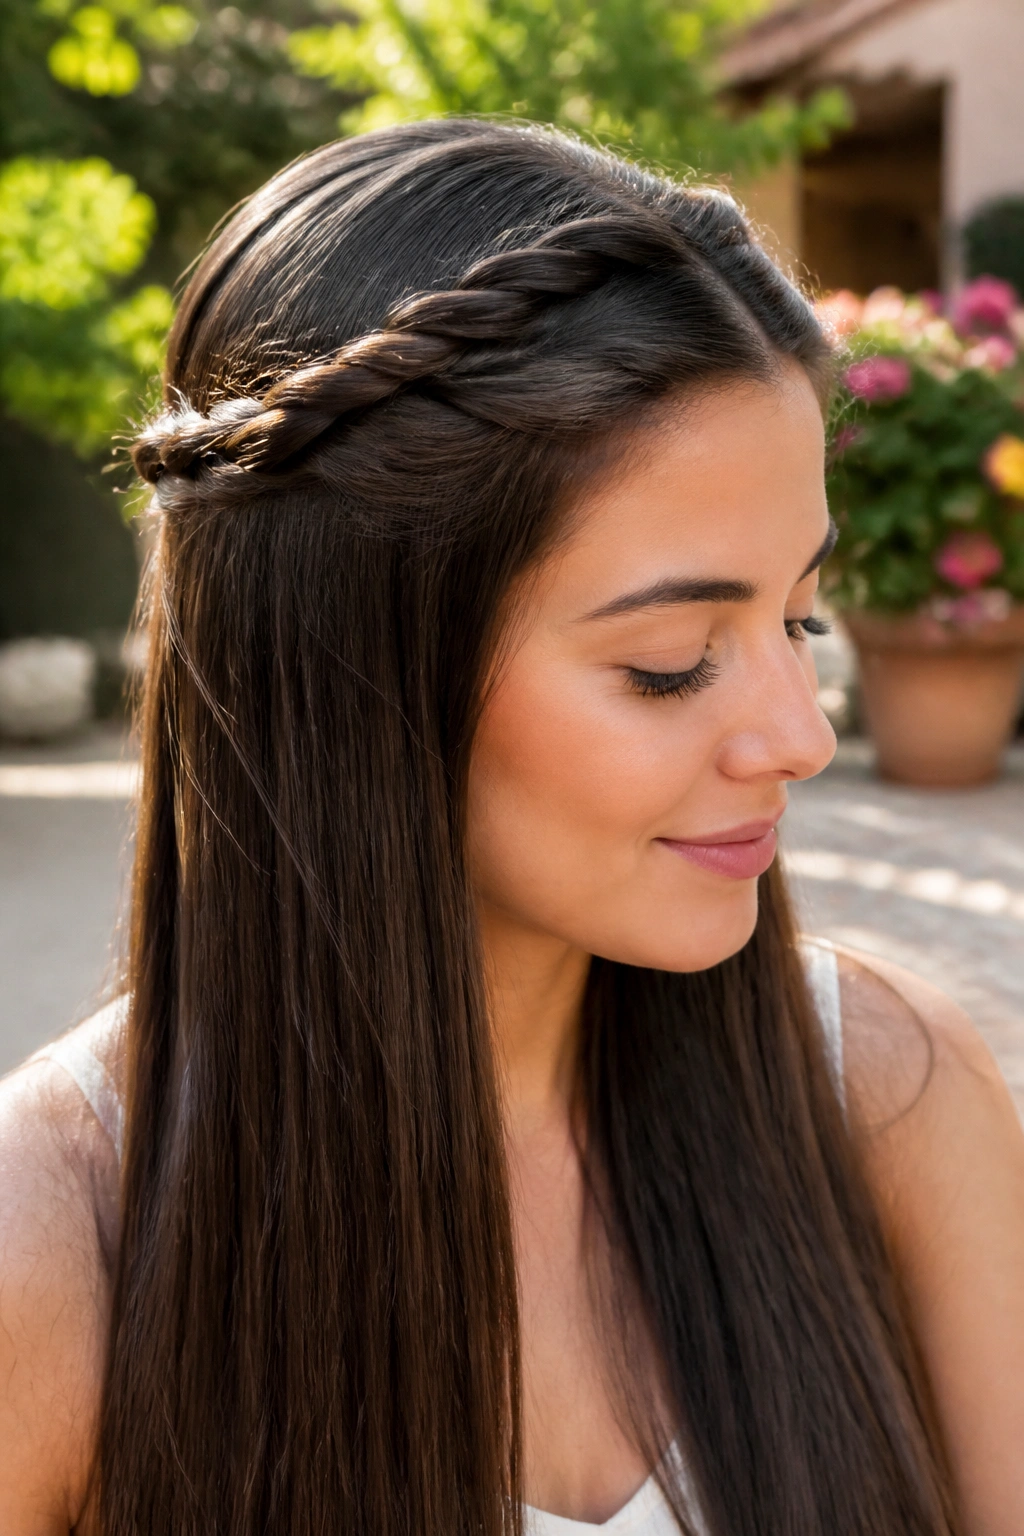
A rope braid gives you twist, shine, and just enough detail around the head to feel styled. Take two sections from each side, twist them in the same direction, then wrap them around each other in the opposite direction. The half-up crown version keeps the length loose, which matters when you want the hair to stay long and visible.
This style works beautifully on straight hair because the twisted pieces stay smooth and graphic. There is no frizz to fight unless the weather has other plans. And if your hair is very sleek, the braid almost looks like a cord laid across the head.
Why I Keep Reaching for It
The rope braid is faster than it looks. Once you know the twist direction, it comes together in a few minutes and pins down cleanly. A couple of bobby pins tucked under the twist hold it in place without showing.
It’s a strong choice for weekends, weddings, and those awkward in-between days when loose hair feels too plain but a full braid feels like too much. A narrow ribbon threaded through it changes the mood fast.
17. Crown Braid
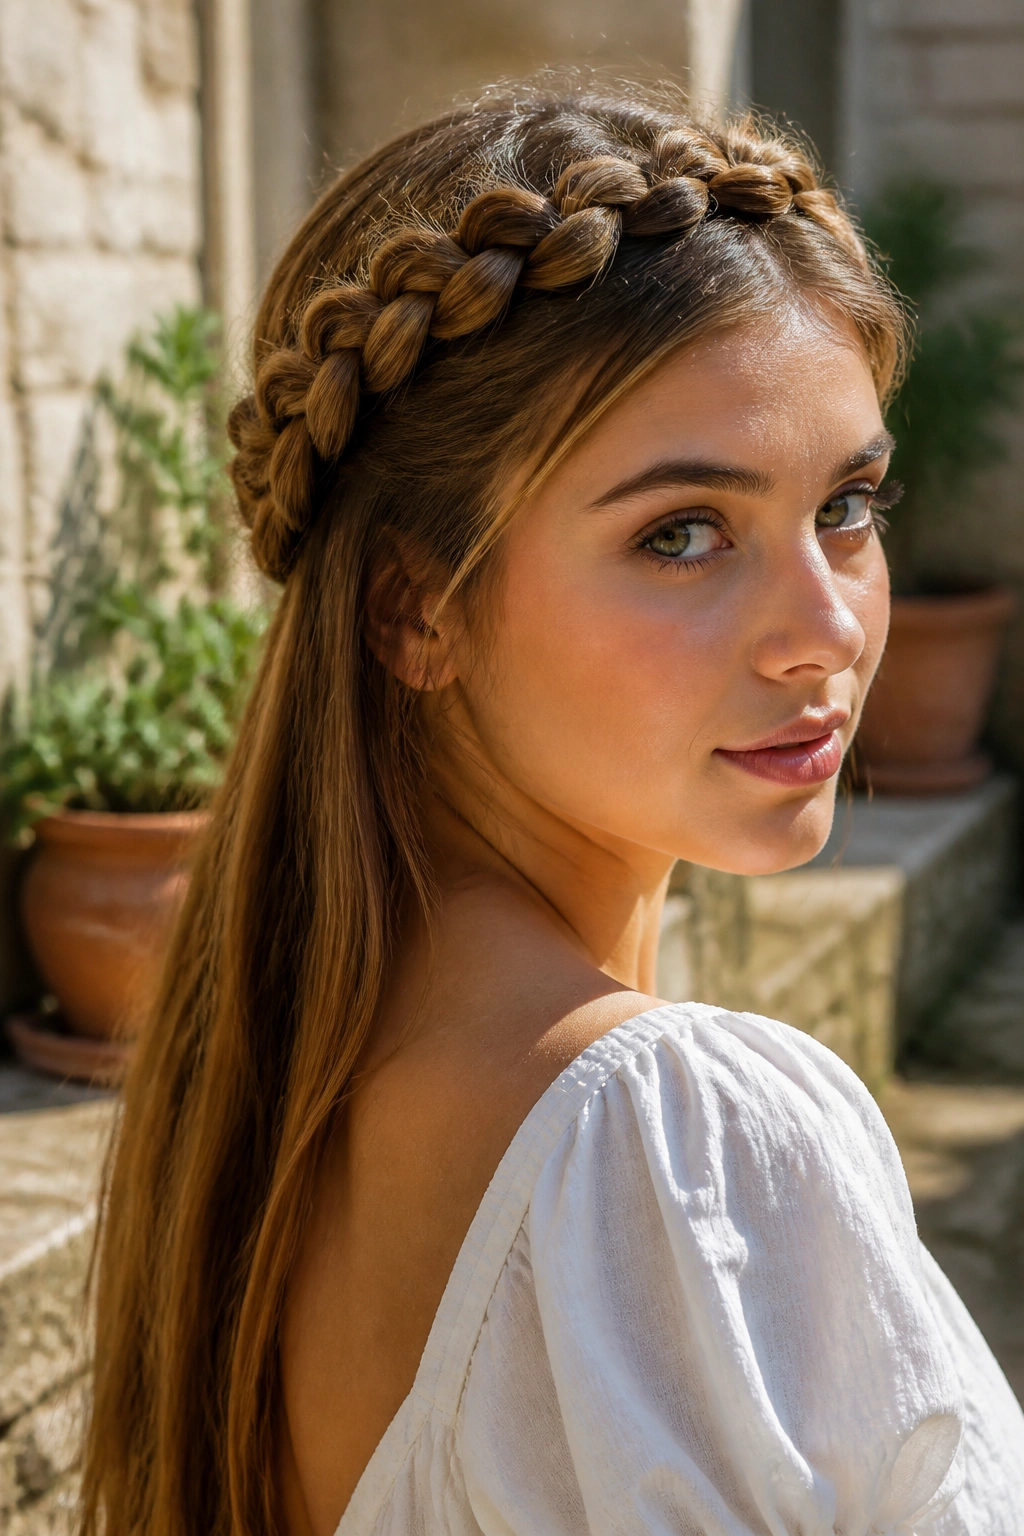
Can a crown braid work on straight hair? Absolutely, but only if you give it enough grip. Straight strands can slip, so a little texture spray or even second-day oiliness can help the braid hold. That’s the unglamorous part. It matters.
The appeal is obvious once it’s on. The braid circles the head like a built-in frame, and the rest of the hair can either stay tucked or hang down from underneath. I prefer the version that leaves the length visible in back. It keeps the style from feeling too costume-like.
How to Wear It Well
- Start with slightly textured hair
- Anchor the braid with small pins under the plait
- Keep the braid close to the hairline
- Let a few short pieces fall loose around the temples if you want softness
This is not the style for a rushed morning. It takes a little patience. But when you want long straight hair to feel dressed up without curling it, the crown braid has real staying power.
18. Sleek Low Bun
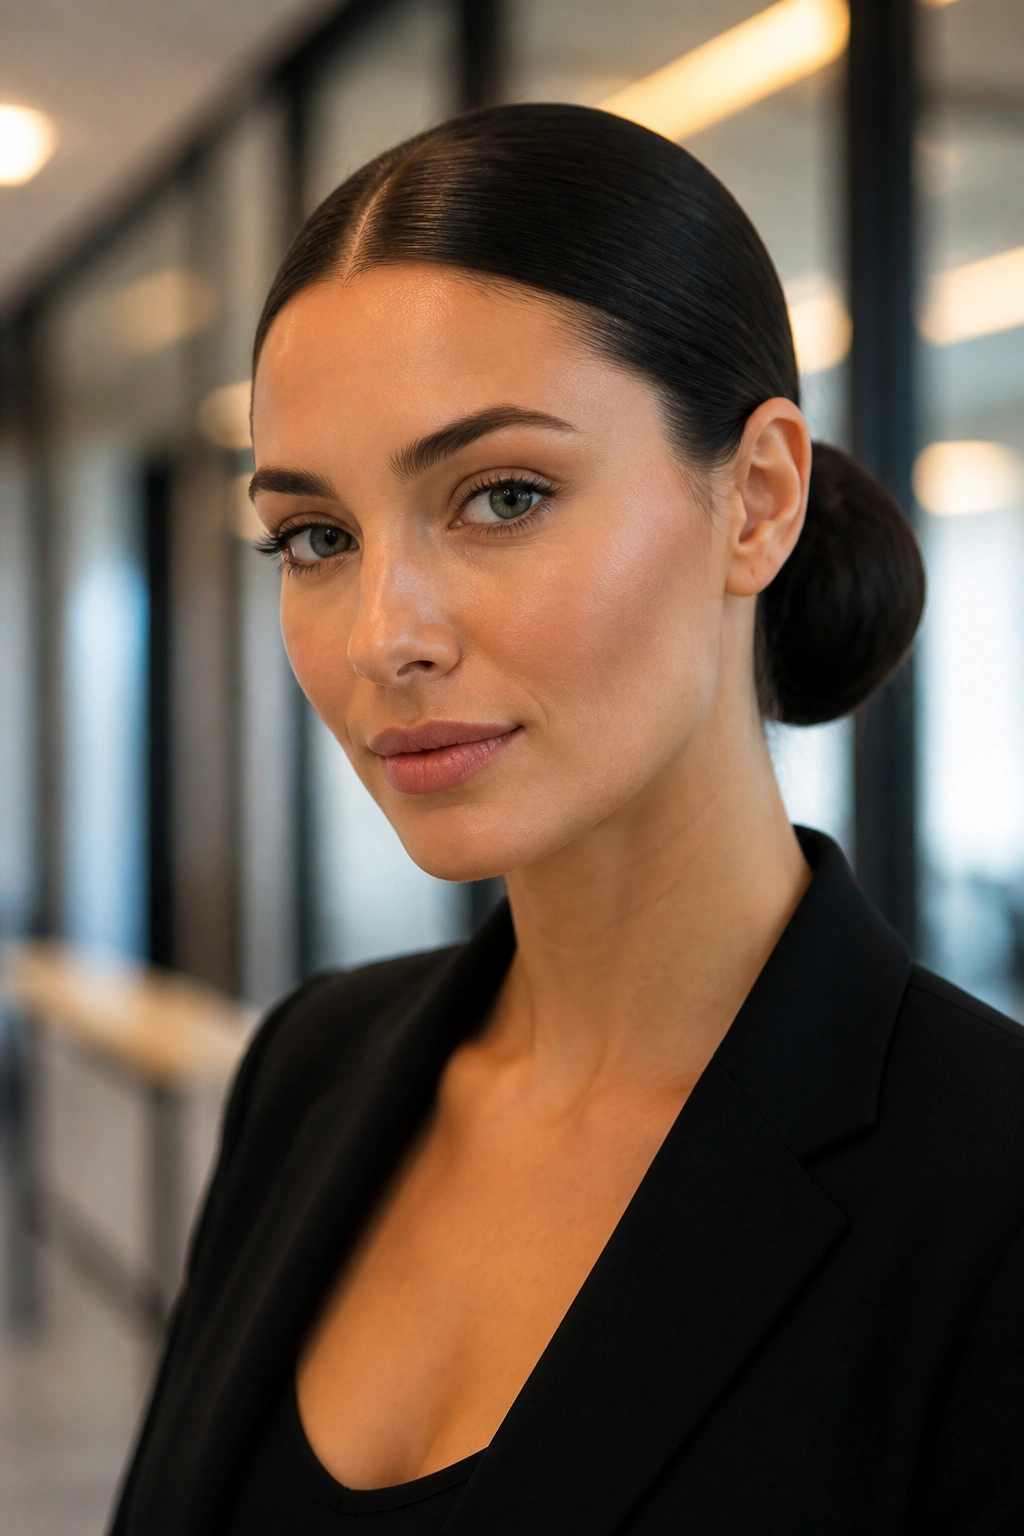
A sleek low bun gives straight hair a clean exit. It gathers the length at the nape, smooths the top, and lets the shape of your face do the talking for once. There is something almost severe about it, and that’s part of why it works so well.
The bun itself can be compact or a little fuller, depending on how much hair you have. Thick hair gives a larger bun naturally. Fine hair may need a small donut or a twist-based build to keep the shape from collapsing. Either way, the finish should look tidy at the hairline.
A shine cream or a tiny bit of gel through the crown helps, but do not overdo it. The line should be smooth, not greasy. A few hidden pins hold the bun’s base and keep it from sagging by lunchtime.
This is my pick when long straight hair needs to look serious for a while. It is neat, direct, and never tries too hard.
19. French Twist with Long Ends Left Out
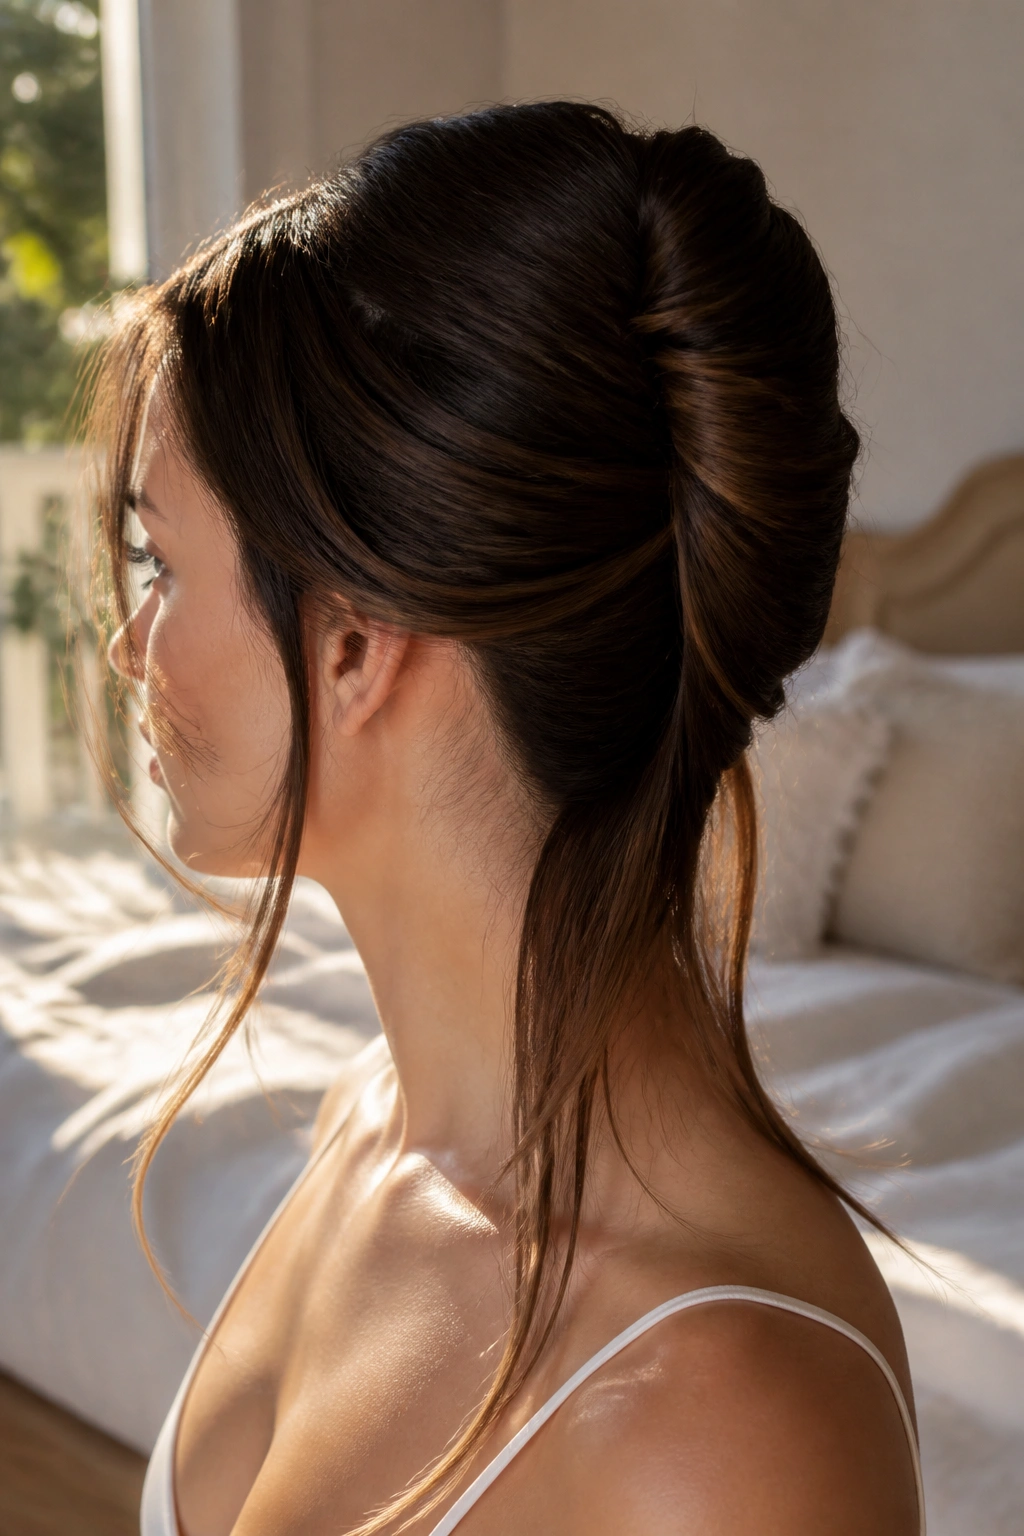
A French twist usually tucks all the length away, which is exactly why this version feels fresher. You pin the twist in the back, then leave the ends loose or partially visible so the hair still reads as long. It gives you structure without erasing the whole point of having long hair in the first place.
I like this one when the outfit is crisp and the hair should match it. Straight strands slide neatly into the twist, and the remaining length can fall in a straight sheet or a soft bend. The contrast keeps the style from feeling too formal.
Unlike a full updo, this version does not trap every strand. That means it can look a little softer around the edges, which is useful if your hair is very straight and tends to feel severe once it’s pinned up.
A pearl pin, a matte barrette, or a plain comb can make the twist feel finished. No need for much more. The shape already does enough.
20. Barrette-Backed Sides
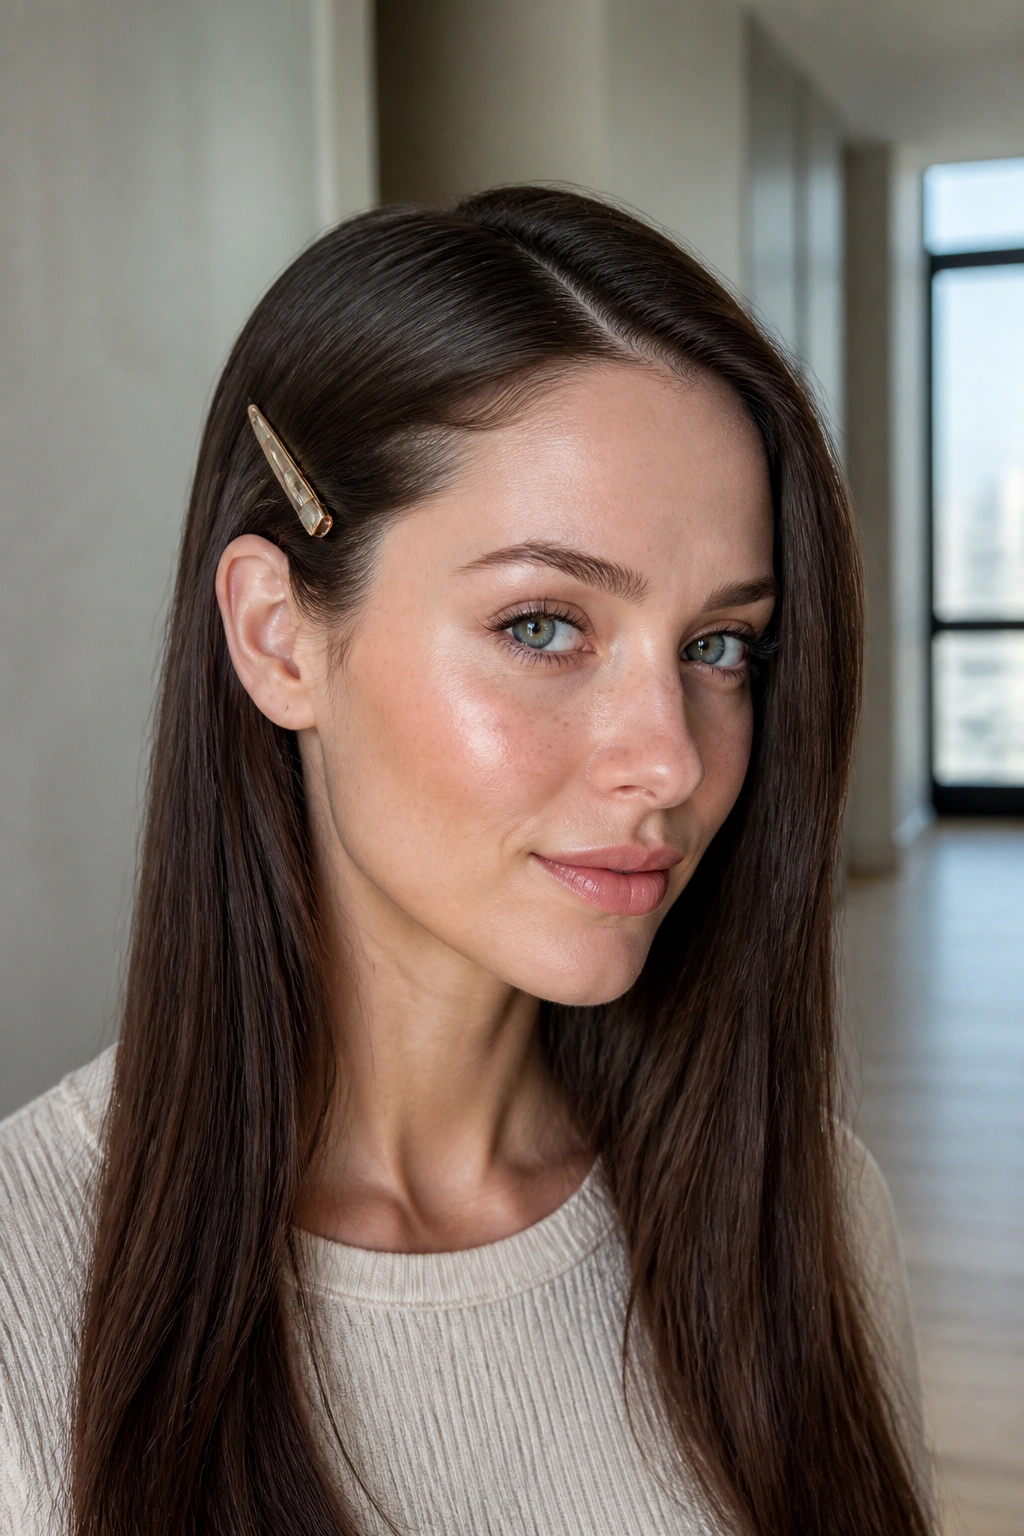
A barrette on one or both sides is such a small move, yet it can change long straight hair in seconds. Pin back one temple section, leave the rest down, and you get a cleaner face line with almost no effort. It’s the styling equivalent of rolling up the sleeves on a sharp shirt.
This works especially well when the hair is freshly straightened and a little too sleek around the face. A clip breaks the sameness. It also keeps shorter face-framing pieces from dropping into your eyes all day, which is a practical win.
What To Choose
- Matte metal clips feel modern
- Pearl barrettes feel dressier
- Rectangular shapes make the style look cleaner
- Small side pins disappear better on fine hair
The key is not overcrowding the head. One barrette can be enough. Two can be enough, too, if they’re symmetrical and the rest of the hair stays calm.
21. Tucked-Behind-Ear with Statement Earrings
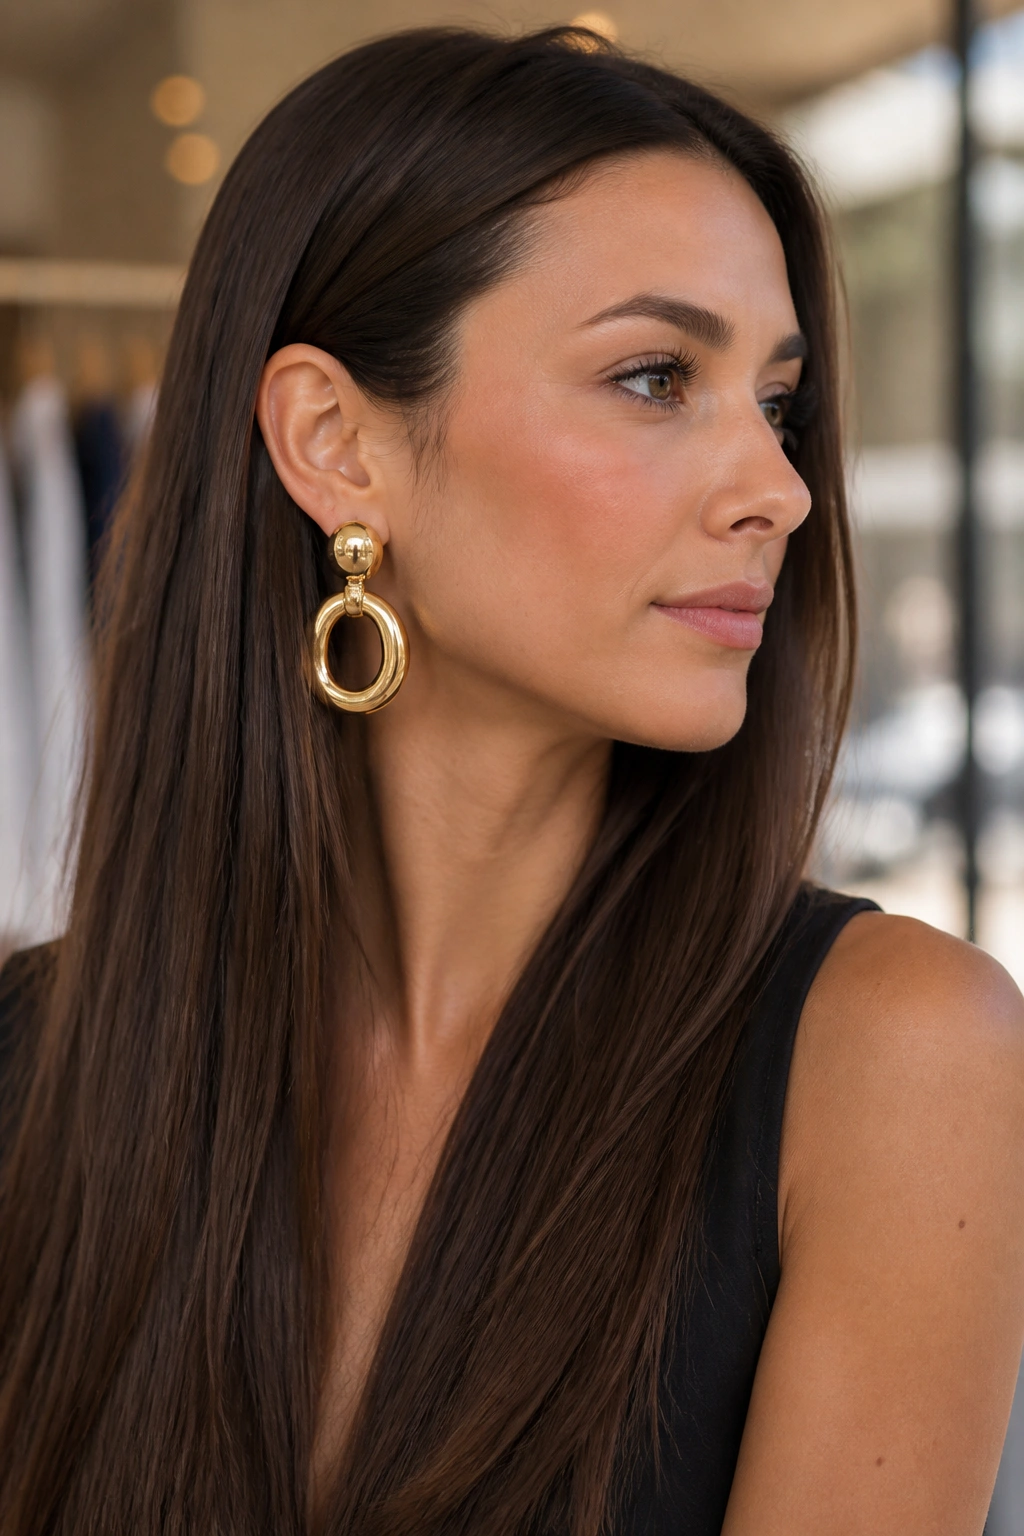
Some styles are barely styles at all, and that is the point. Tucking the front sections behind the ears opens the face, shows off the jaw, and makes room for earrings that deserve attention. On long straight hair, the move feels almost too simple, which is why it works.
I reach for this when the hair is down but I want a cleaner line around the face. It also helps if the hair is cutting across the cheekbones in a way that feels heavy. A tuck fixes the problem without changing the length or shape.
Why It Looks Better Than It Sounds
Straight hair tends to stay put once tucked, so the style has a tidy finish without much pinning. If you want more hold, a tiny, hidden pin near the ear will keep the section in place. The rest should stay loose and smooth.
This is also one of the few styles that can make a plain outfit feel finished. A black tee, long straight hair, and a good pair of earrings? Easy. Done.
Small move. Big payoff.
22. Long Hair with Invisible Layers
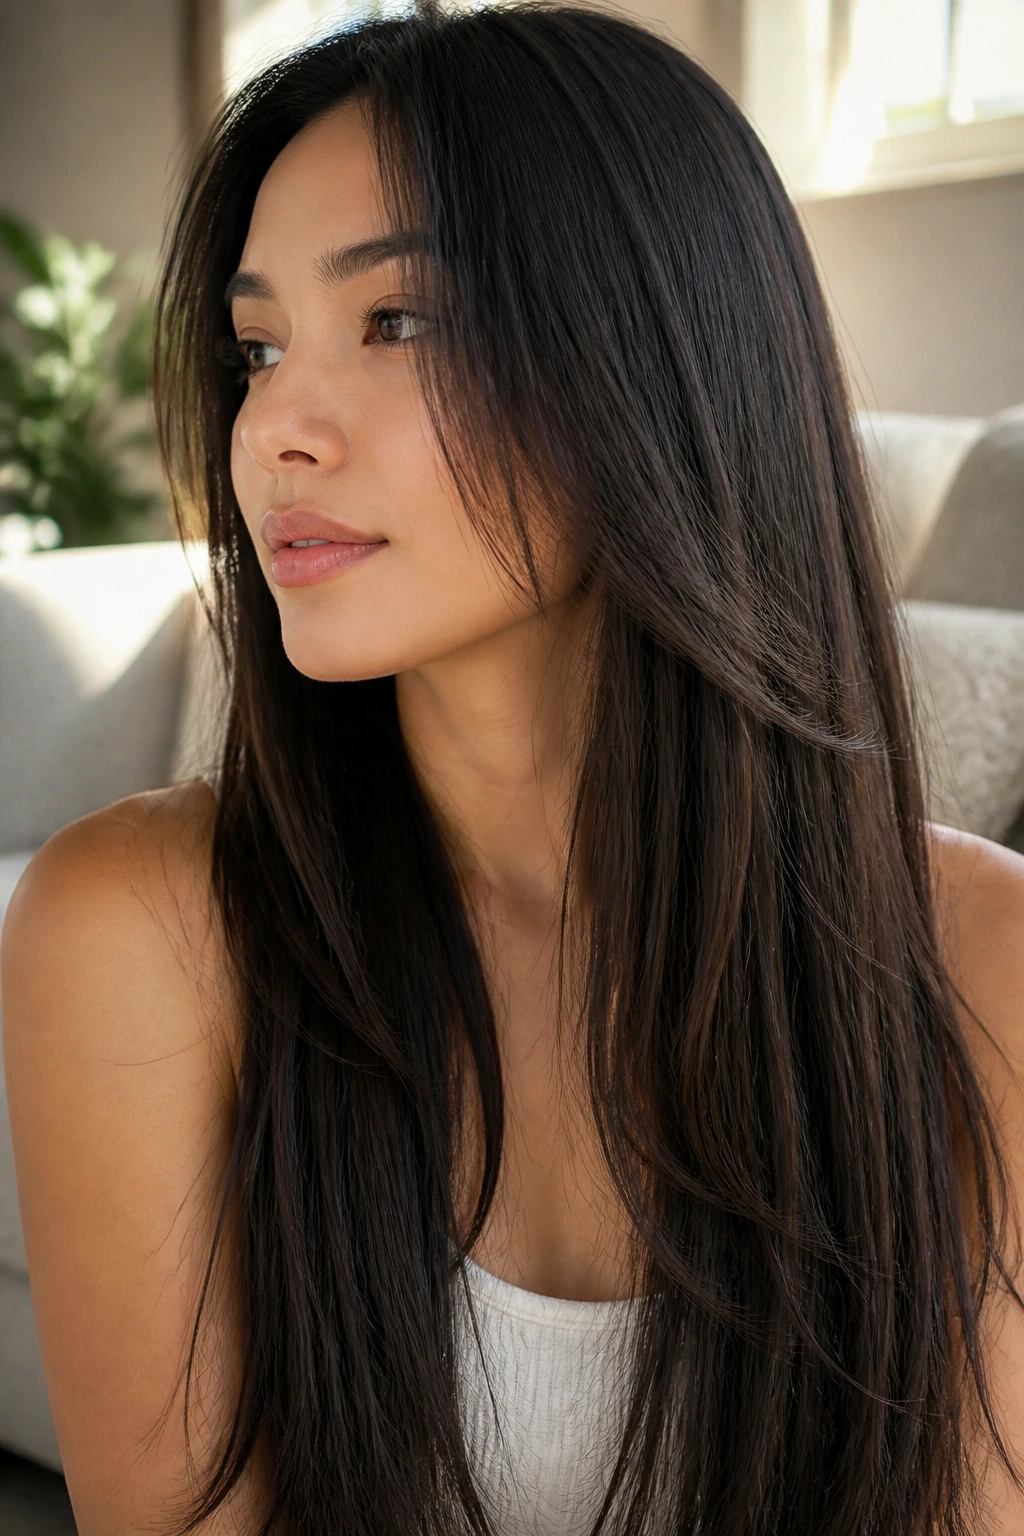
Invisible layers are the quiet answer for people who want movement but hate obvious chop lines. The layers sit inside the shape instead of shouting from the outside, so long straight hair keeps its length and gets a little more swing. That is the whole charm.
The cut works because it removes weight from the interior of the hair, not the visible edge. The outside line still looks smooth, but the inside has enough room to move. On thick hair, that can stop the ends from feeling heavy. On finer hair, it can add softness without turning the whole head into feathers.
How to Ask for It at the Salon
- Ask for internal layers, not choppy face pieces
- Keep the perimeter long and clean
- Mention whether you want movement or just weight removal
- Bring up how you usually wear your hair: center part, side part, half-up, or down
The result is subtle, which is exactly why I like it. You notice it most when the hair moves, not when you stare at a still photo.
23. Feathered Blowout
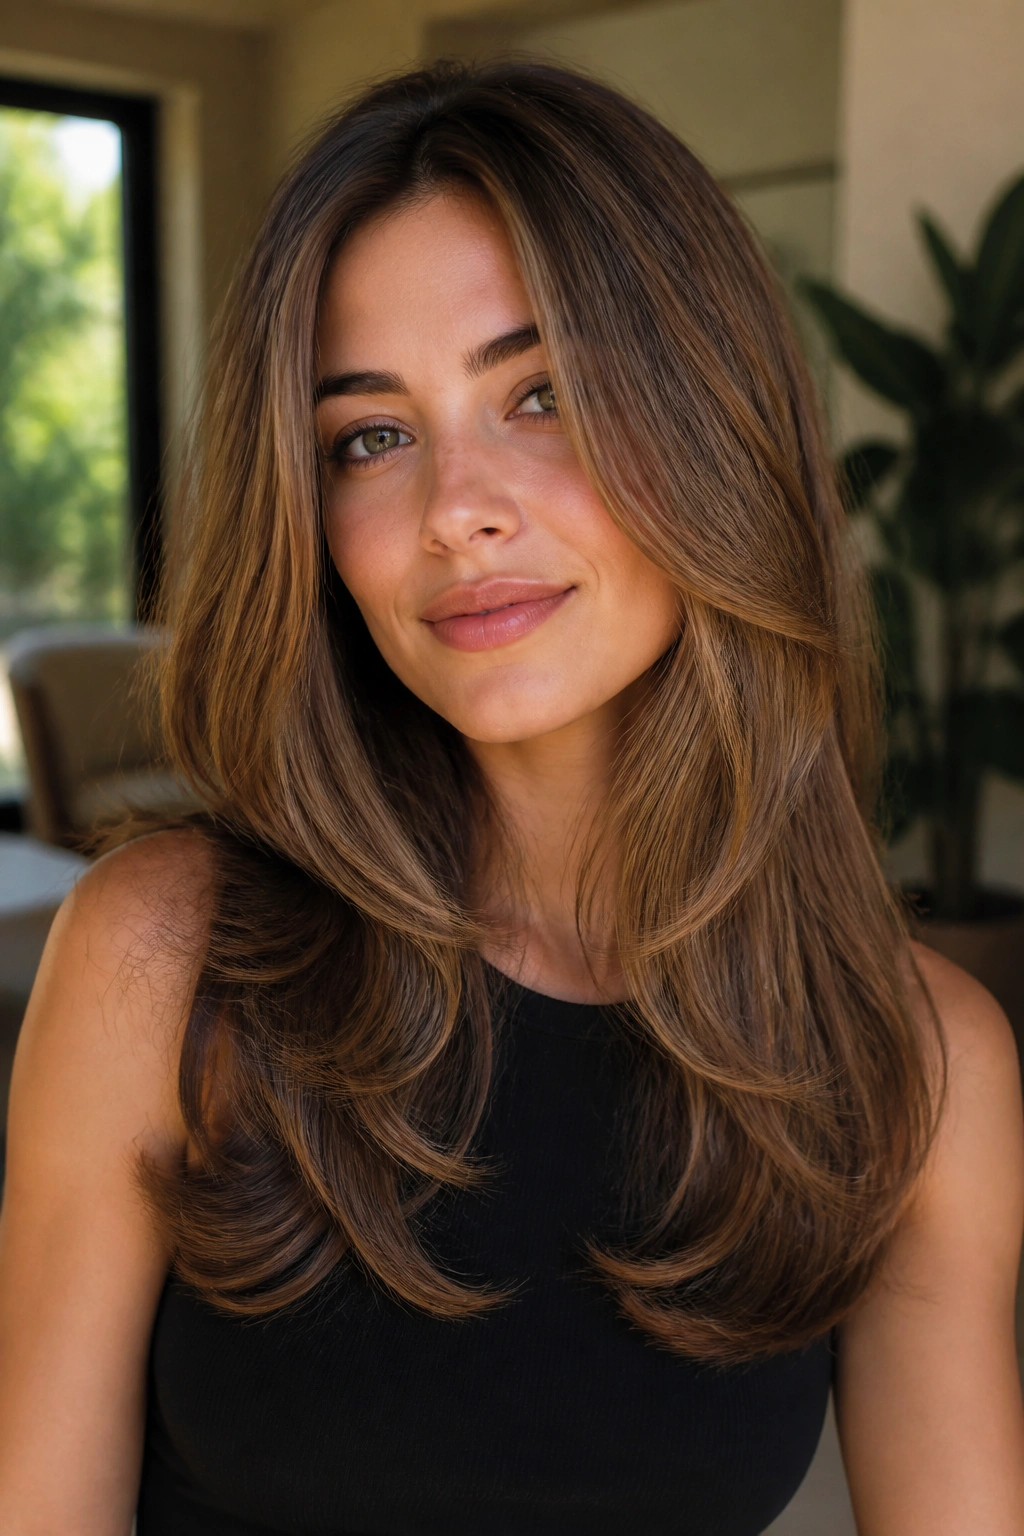
A feathered blowout gives straight hair a soft, lifted finish that feels a little old-school in the nicest way. The ends bend away from the face, the crown gets some air, and the whole shape looks lighter than a pin-straight blowout. It is still long. It just has more life in it.
What makes it work is the brush work. A medium round brush and a dryer with a nozzle will do more here than any fancy product. Pull the sections forward at the face, then roll the ends under or away depending on the direction you want. The hair should look soft, not puffy.
The Part That Most People Skip
If the roots are flat, the style collapses fast. Lift them with a little tension while blow-drying, then let the ends do the talking. A light spray on the crown can help, but the shape mostly comes from the dry-and-cool process.
This is one of those styles that looks glamorous without being stiff. I’d wear it when I want my long straight hair to feel styled, not forced.
24. Inward-Bent Ends
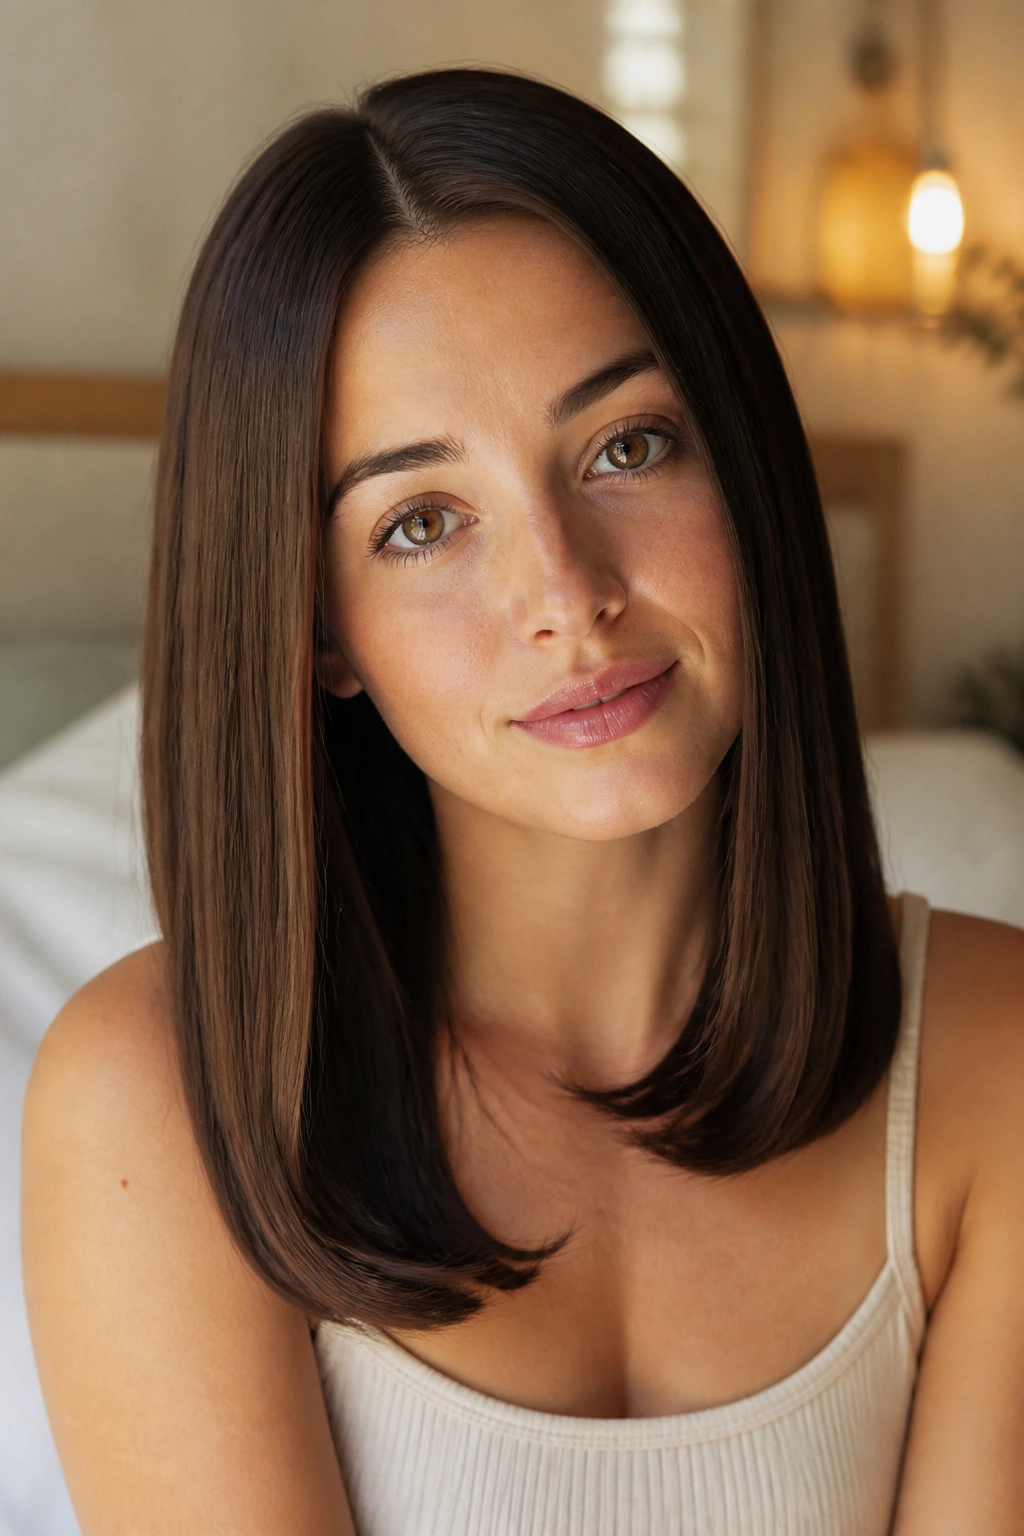
Inward-bent ends are the opposite of a poker-straight finish. Instead of letting the hair hang like a ruler, you curve the last inch or two under so the bottom line feels softer. It’s a small bend. That small bend matters more than people think.
This style is good when straight hair needs shape but you do not want layers, curls, or anything that changes the overall look too much. A flat iron can do it if you turn the wrist slightly at the end of each pass, and a round brush can do it too. The goal is a gentle tuck, not a curl.
Better Than Pin-Straight When You Want Softness
- Easier to wear with soft makeup or tailored clothes
- Helps the ends look tidy when they’re not freshly trimmed
- Keeps long hair from feeling too heavy at the bottom
- Works well with a side part or a middle part
I like this one because it feels discreet. You notice the shape without feeling the styling itself, which is usually a good sign.
25. Slicked-Back Length with a Satin Ribbon
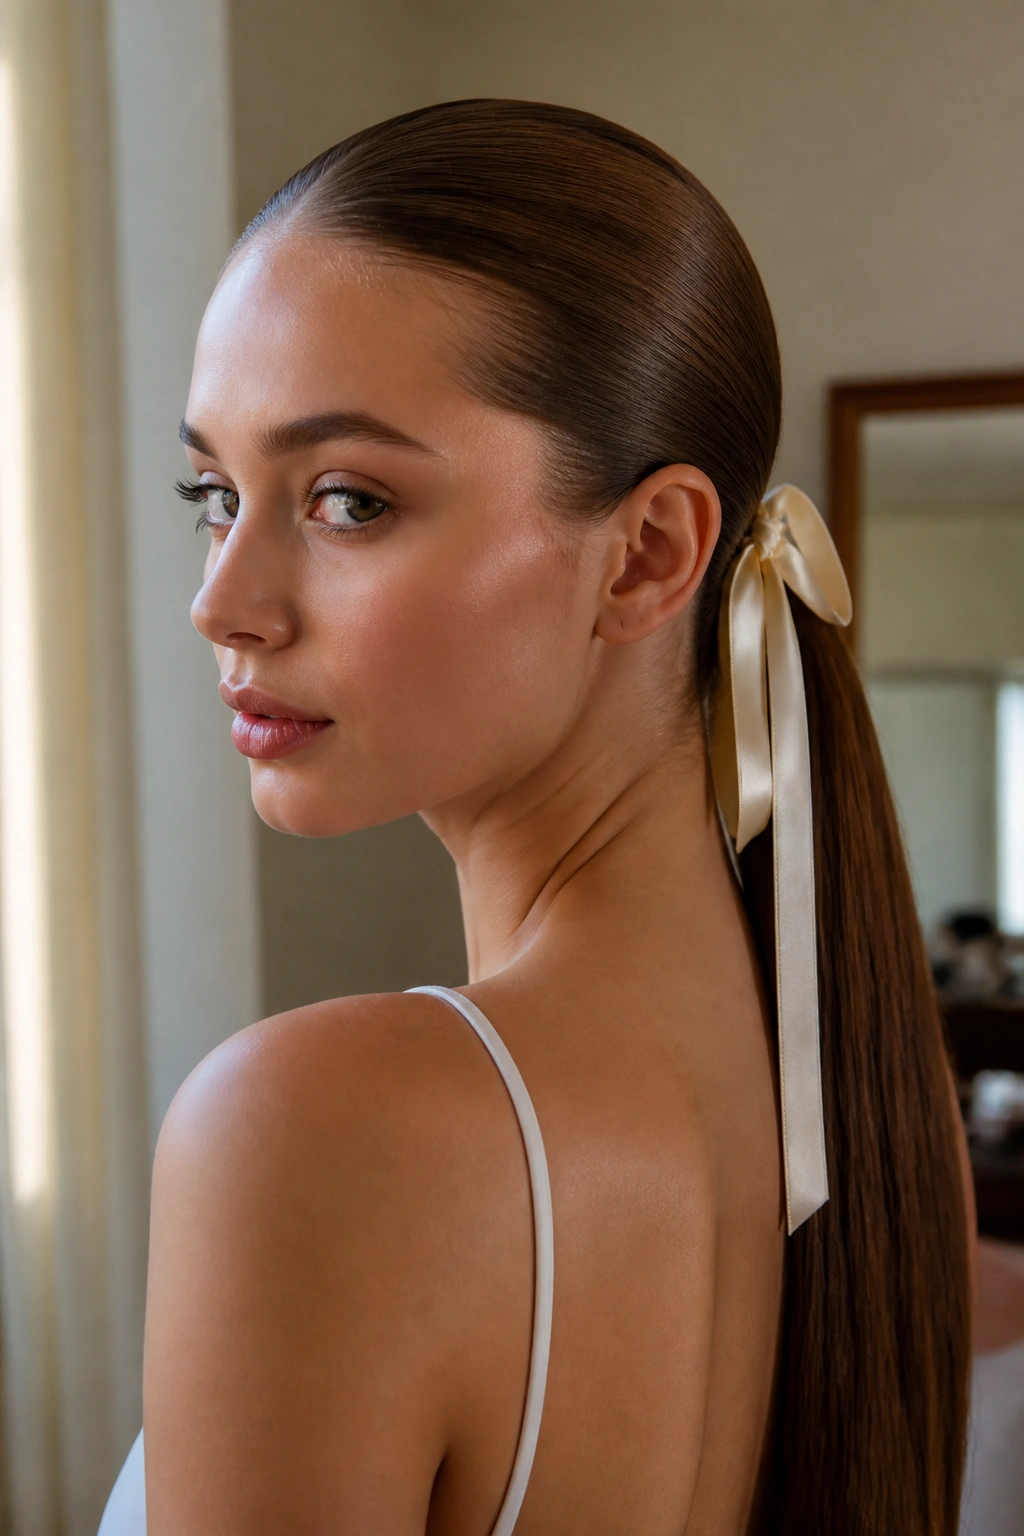
A slicked-back style with a ribbon gives long straight hair a clear point of view. The crown is smooth, the length stays straight, and the ribbon adds a little finish at the base of the ponytail or braid. Not loud. Just considered.
This look is especially useful when your hair is on day two or three and you want it to look controlled rather than freshly washed and slippery. A little gel at the front, a firm brush through the crown, and a narrow satin ribbon can make the whole style feel complete. It also works well with longer faces because the slicked-back top opens everything up.
I prefer this version over a plain elastic when the outfit needs a softer touch. The ribbon can match a blouse, a dress, or even a simple black top and make the hair feel connected to the rest of the look.
A ribbon is a small thing. It changes the tone fast.
Final Thoughts
Long straight hair does not need a hundred tricks. It usually needs a clean shape, a smart part, or one small detail that keeps the length from falling flat. That’s the real pattern running through all 25 looks here.
The styles that work best are the ones that respect the hair’s natural line. Some stay sleek. Some add movement. Some hide the elastic and call it a day. Good enough, honestly, beats overworked every time.
If you keep only one thing in mind, make it this: straight hair looks best when the finish matches the cut. A blunt edge wants polish. A braid wants grip. A half-up twist wants a little lift at the crown. Get that part right, and the rest stops feeling like work.
