



Highlights for round faces work best when they pull the eye up and down, not side to side. Too many color jobs miss that and park the brightest strands right at the widest part of the cheeks. The result is softer on paper and wider in the mirror.
That does not mean you should avoid lightness near the face. It means placement has to be smarter. Slim money pieces, vertical ribbons, crown lift, and a little darkness left at the outer edges can change the shape of the whole haircut, especially when the rest of the color stays blended and airy.
Babylights, lowlights, balayage, foilayage — all of those words matter here, but only if they’re used with a face-shaping plan. A round face already has softness; the goal is to add length, angle, and movement without drawing a bright line across the cheeks. That’s the part a lot of color charts never mention.
1. Skinny Money Piece at the Temples
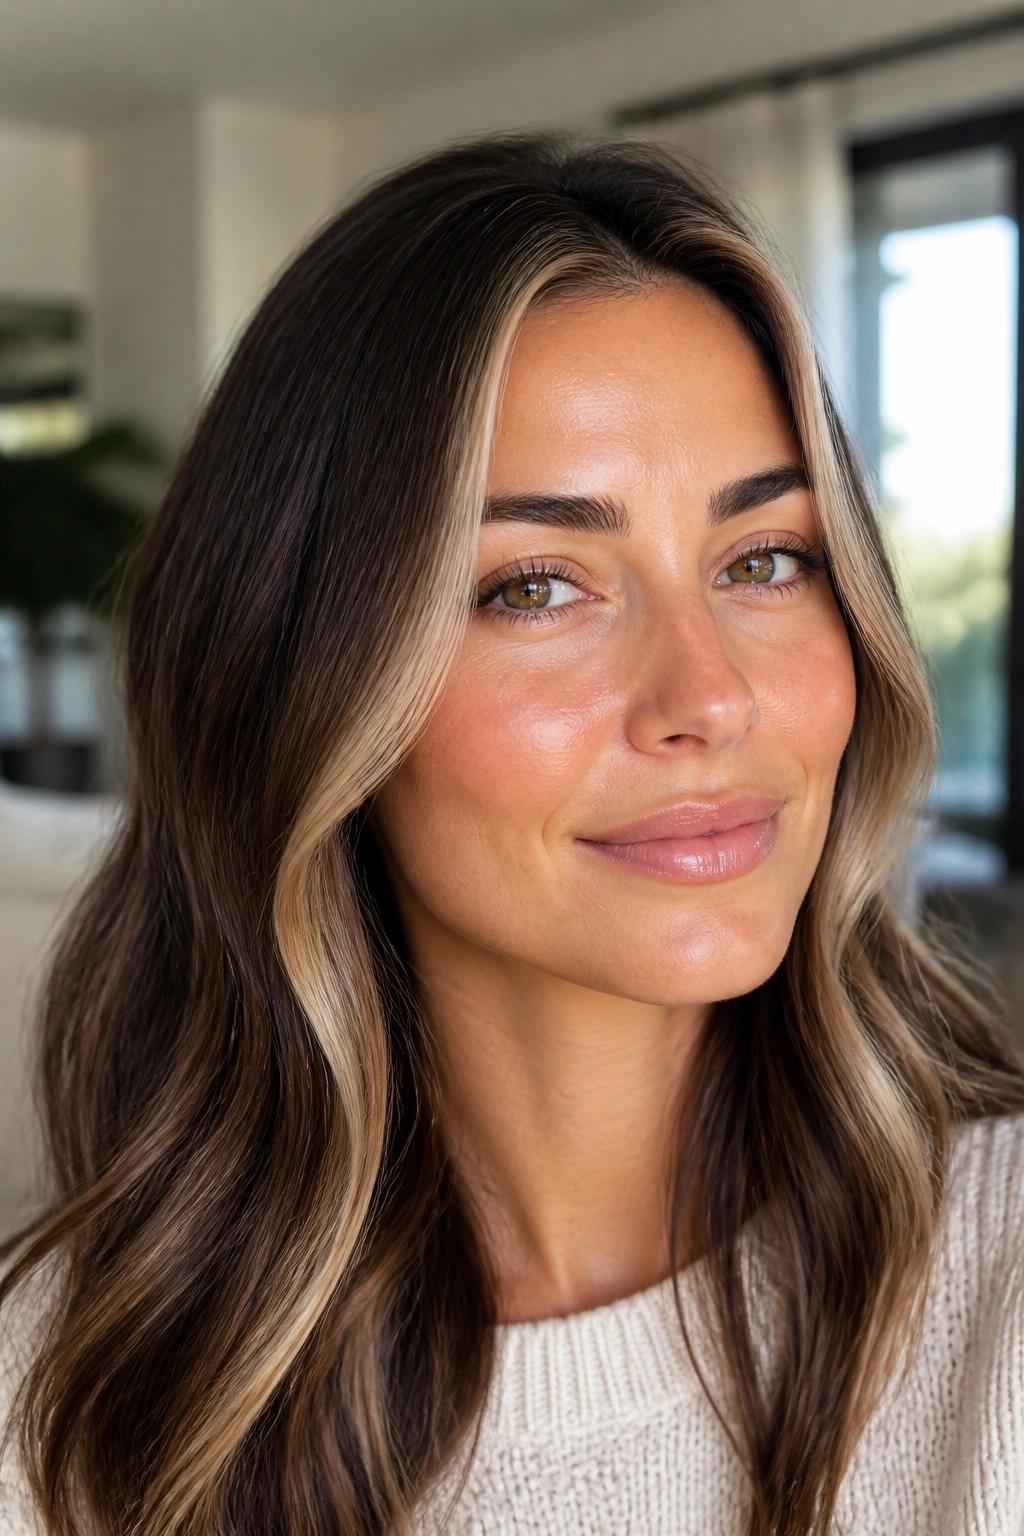
A skinny money piece is one of the cleanest ways to brighten a round face. Keep it narrow, vertical, and slightly longer than the cheekbone, and it lifts the whole look without creating a wide block of color. Thick face-framing streaks can make the face feel fuller. Thin ones read as light and shape-shifting.
What to ask for
Tell your colorist you want the brightest strands to start at the temple area, not as a heavy stripe right beside the nose. Ask for a tapered panel that gets softer as it moves toward the jaw. If you wear a middle part, keep both sides slim. If you wear a side part, one brighter side can do a lot of work.
- Keep the front section about ½ to 1 inch wide on each side.
- Ask for a soft transition, not a hard stripe.
- Let the light piece drop below the cheekbone so the eye moves downward.
Best on: medium to long hair, especially layered cuts.
Skip this if: you want a loud streak that sits like a stripe. That’s a different look, and it can widen the face fast.
2. Long Balayage Ribbons Through the Front
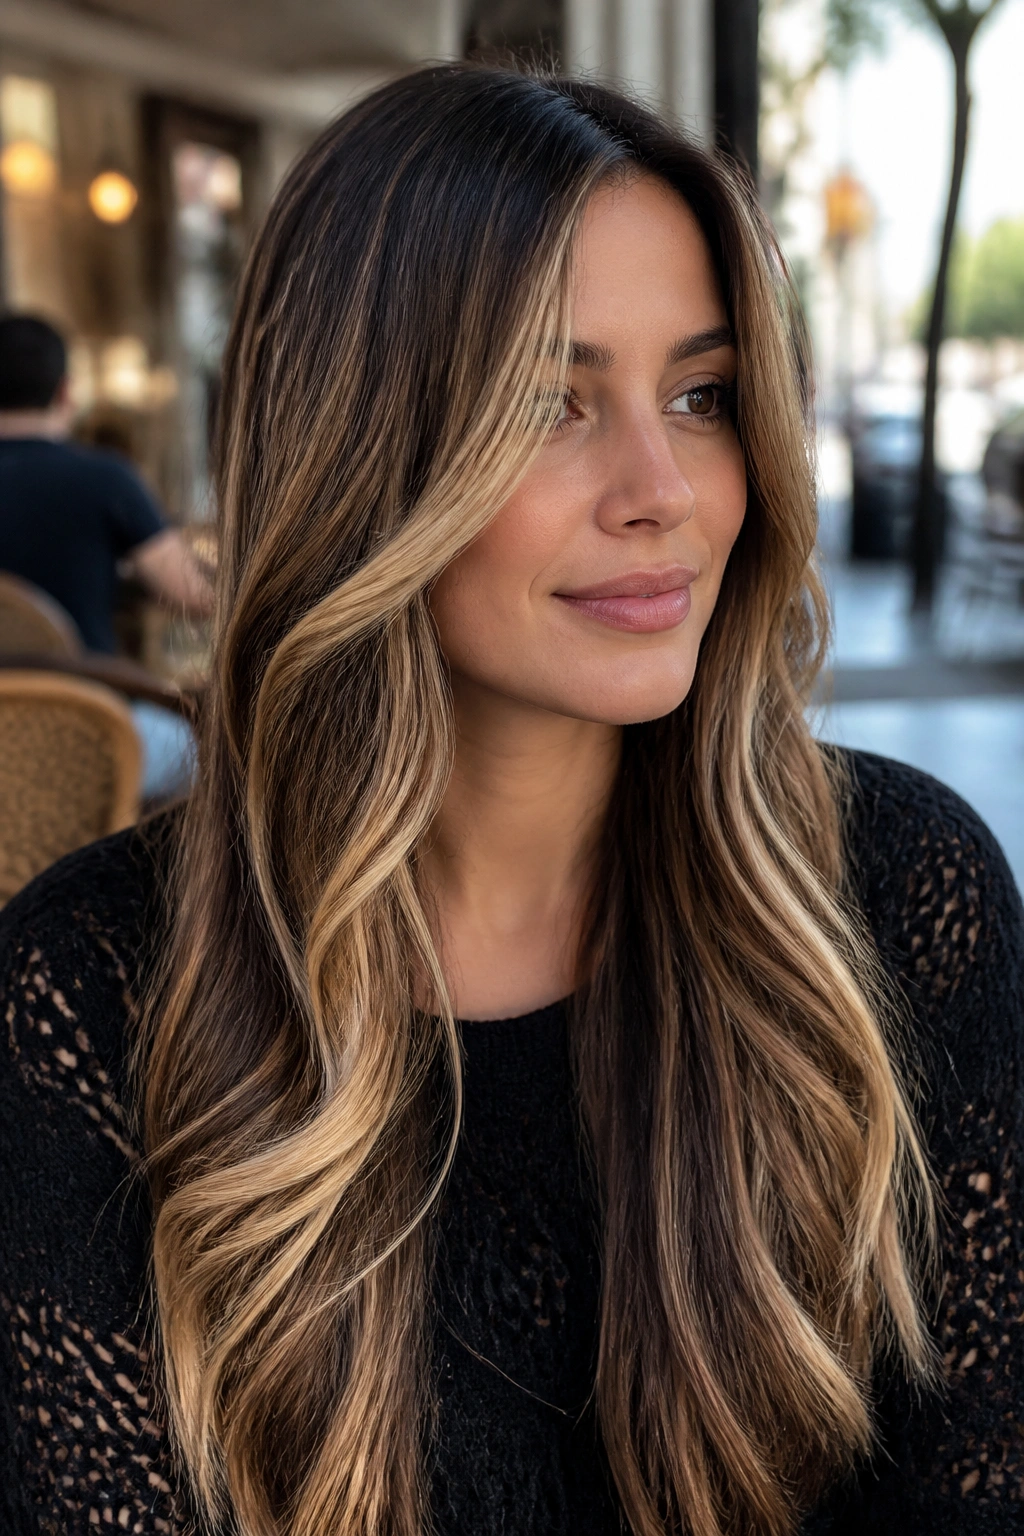
Long balayage ribbons are better than chunky front pieces when you want movement without bulk. The whole point is to create vertical streaks that trail down the front layers, almost like light falling through the hair. On a round face, that down-the-sides movement matters more than people think.
Balayage works well because the painted pieces do not start and stop in a straight line. They’re softer at the roots and brighter toward the ends, which keeps the color from boxing in the face. I like this choice on shoulder-length hair and longer, where the front sections have room to fall past the cheeks.
If you want to describe it to a stylist, say you want ribbons that begin lower on the head and brighten through the mid-lengths. That keeps the color from blooming too wide at the face. It also looks easier as it grows out, which is never a bad thing.
One sentence, because it matters: don’t let the lightest point sit right at cheek level.
3. Crown Babylights for a Little Lift
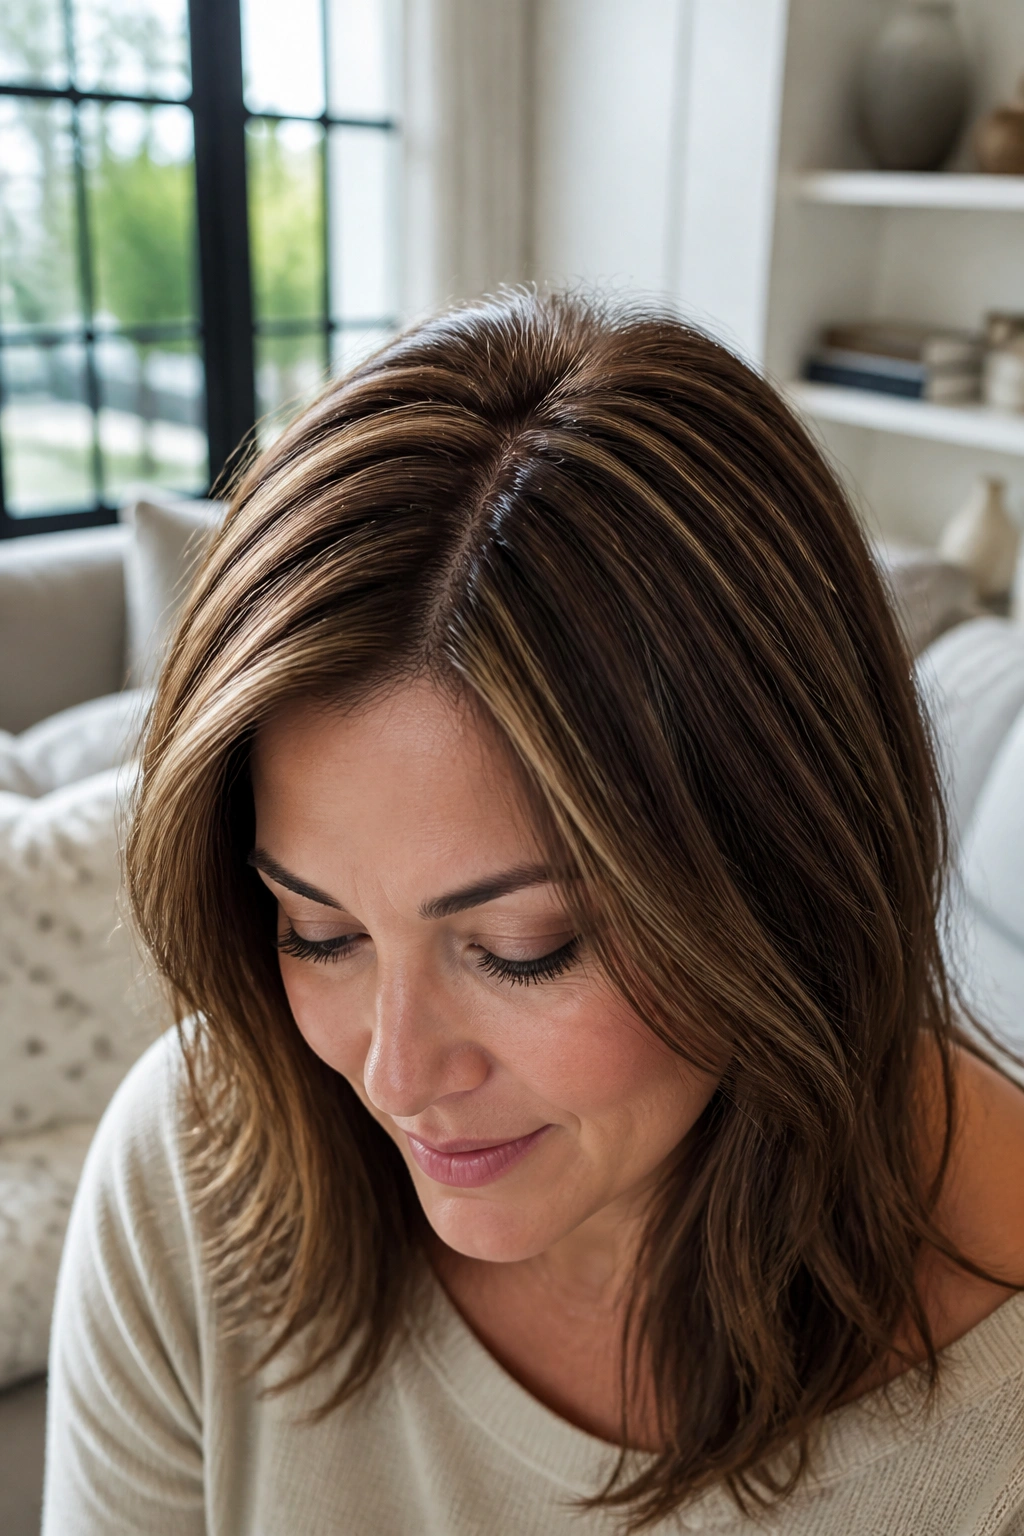
Need the face to look a touch longer without making the front too bright? Babylights through the crown do that better than a lot of people expect. These are tiny, fine highlights — almost thread-like — placed near the part and top layers so the hair looks lifted from above.
Why it works
Round faces read softer when the top of the head has a little extra brightness. That tiny bit of lift changes the eye line. Instead of stopping at the cheeks, the gaze moves upward first, then down.
Ask for very fine sections, about 1/8 inch wide, concentrated around the part and crown. The goal is not a streaky blonde top. The goal is a soft shimmer that gives the hair height and keeps the sides from feeling overbuilt.
- Best if your hair is fine or medium texture.
- Great on straight hair, where every color line shows.
- Use this with layers for the cleanest result.
If you love subtle color, this is one of the prettiest options on the list. It’s quiet. It works hard anyway.
4. A Deep Side Part With One Bright Side
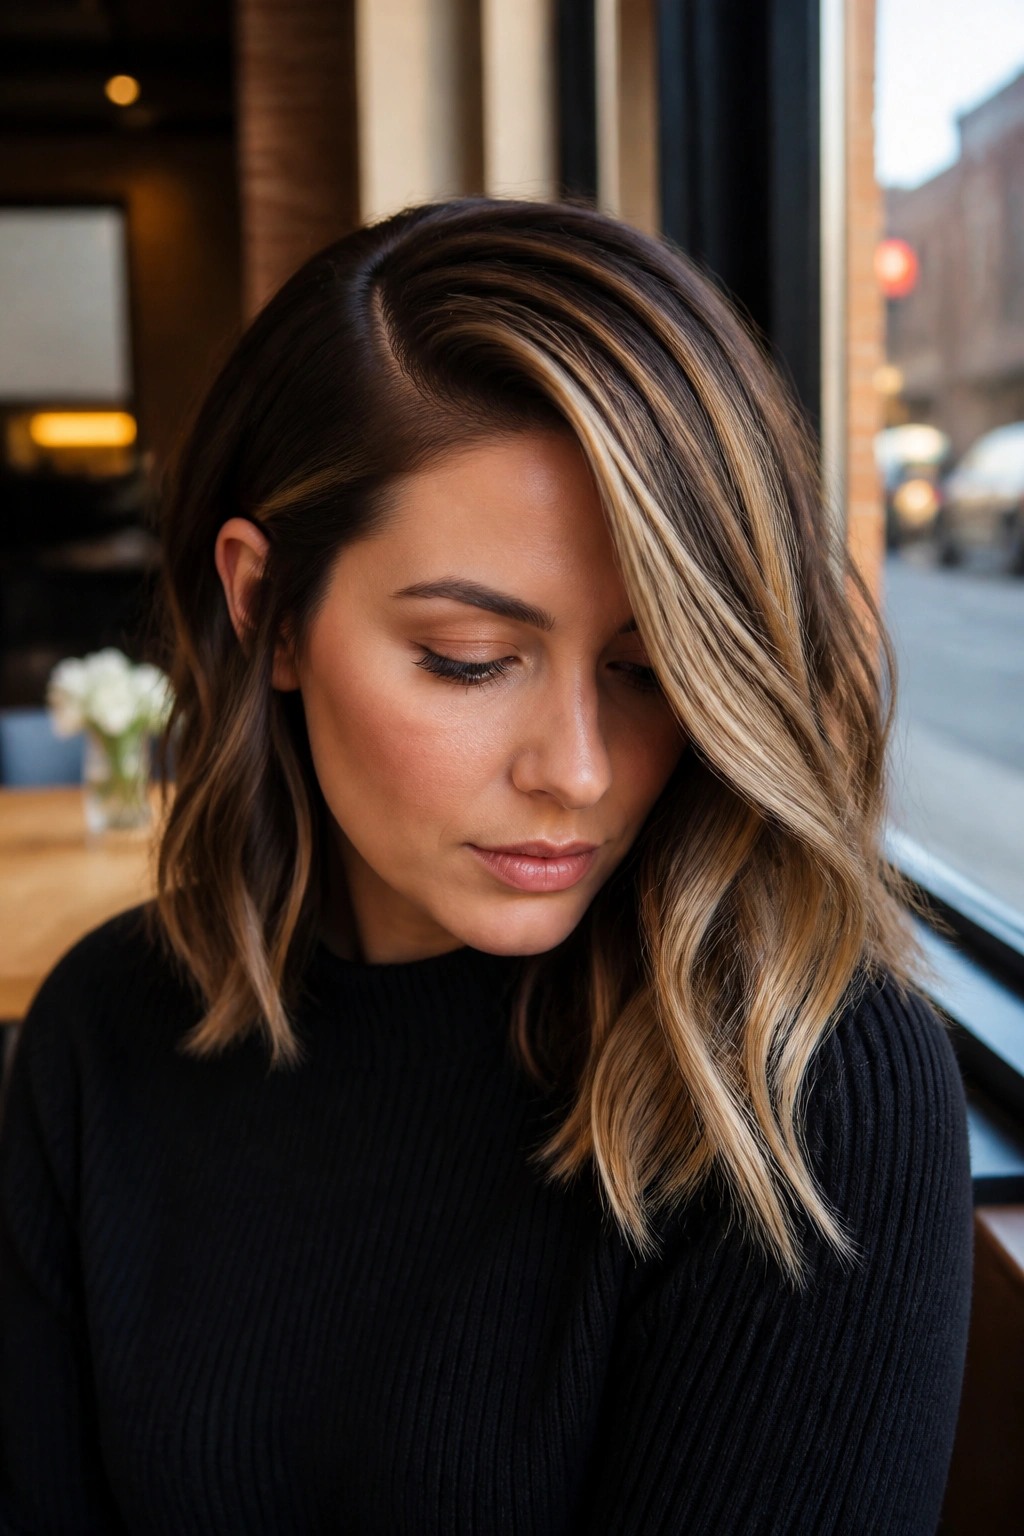
A deep side part changes the shape of a round face faster than a lot of color tricks. One side of the face gets a little more coverage, the other side opens up, and that asymmetry breaks the “circle” effect. Add a bright panel on the heavier side, and the whole cut starts looking more angled.
The key is restraint. A deep side part can look dramatic in a good way, but if both sides are equally bright, the shape loses that slimming effect. Keep the brighter side slim and let the darker side stay deeper near the temple. That contrast gives the face some contour.
Think of it like this: the part creates the line, and the highlight supports it.
A few stylists will call this a placement trick rather than a full color style, and they’re not wrong. Still, it belongs on a list like this because it solves a real problem. A soft side sweep paired with light around the front can make cheeks look less dominant and make the jaw feel longer.
5. Rooted Blonde Melt on Shoulder-Length Hair
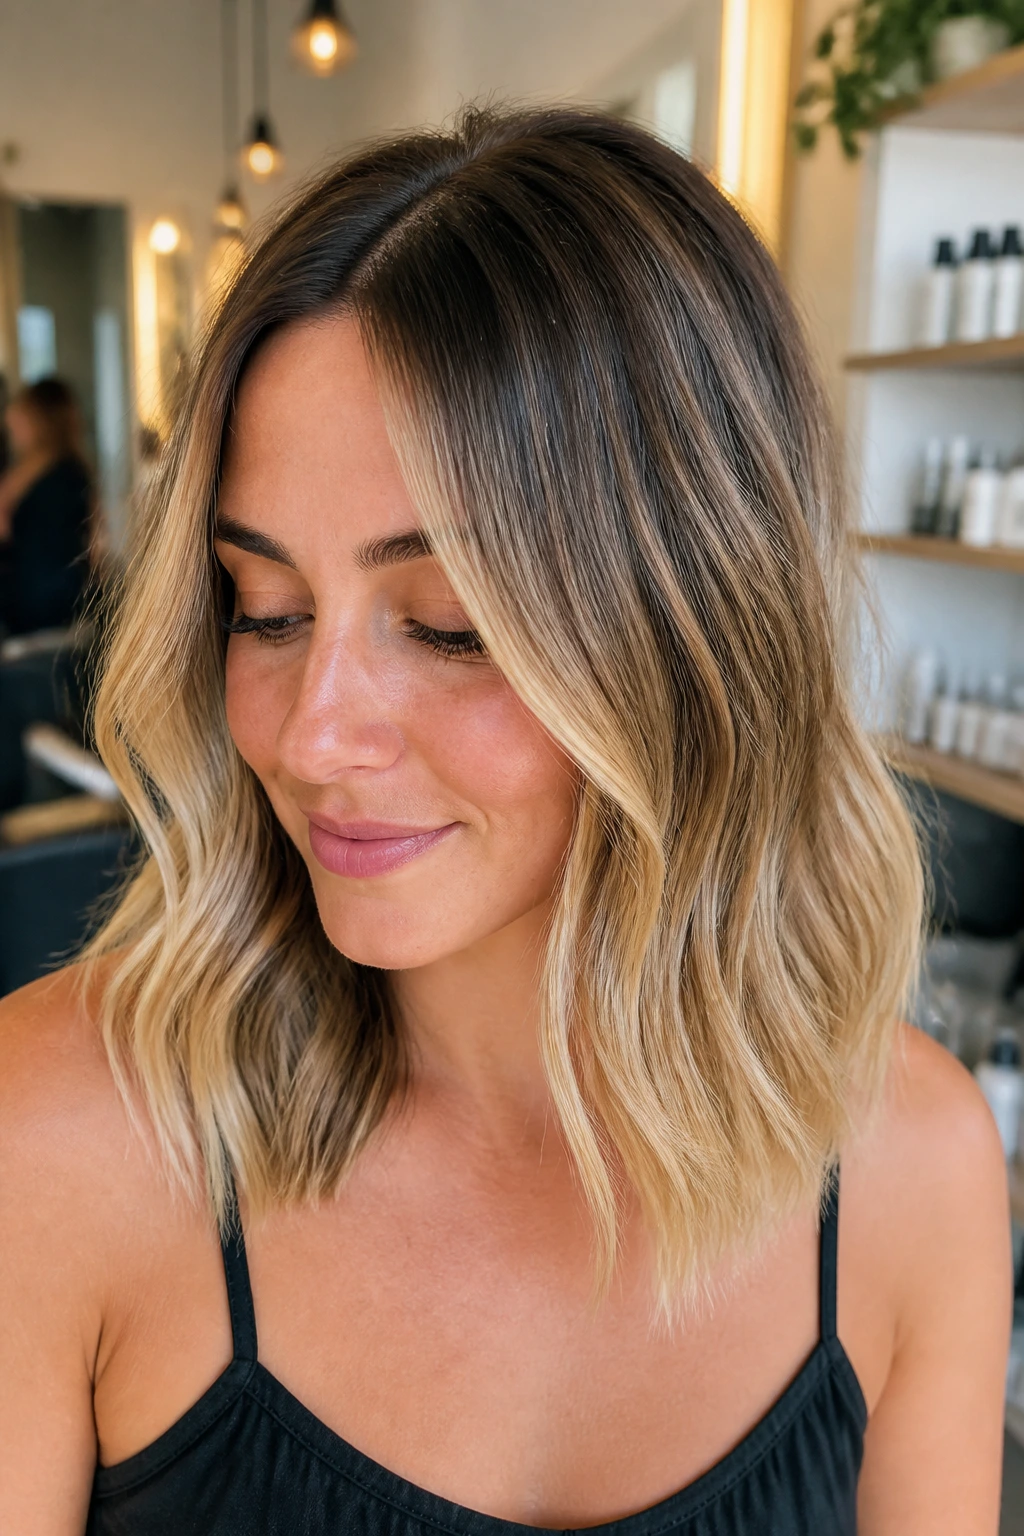
A rooted blonde melt is a smart choice when you want brightness but not a hard frame. The darker root keeps depth near the scalp, then the blonde flows into warmer or cooler mids and ends without a sharp stop. On shoulder-length hair, that transition is gold. The shape stays soft, and the color doesn’t sit in one thick band across the face.
This is one of the better options if your hair tends to puff out at the sides. A solid block of blonde at the front can exaggerate that width. A melt does the opposite. It blurs everything just enough that the face feels longer and the cut feels lighter.
The best version has the brightest tone lower down, usually from the cheekbones past the shoulders. That keeps the eye moving. It also means the color grows out in a way that doesn’t scream for a touch-up every few weeks.
Short version: depth at the root, brightness through the length. That balance is the whole game.
6. Caramel Ribbons on Dark Brunette Hair
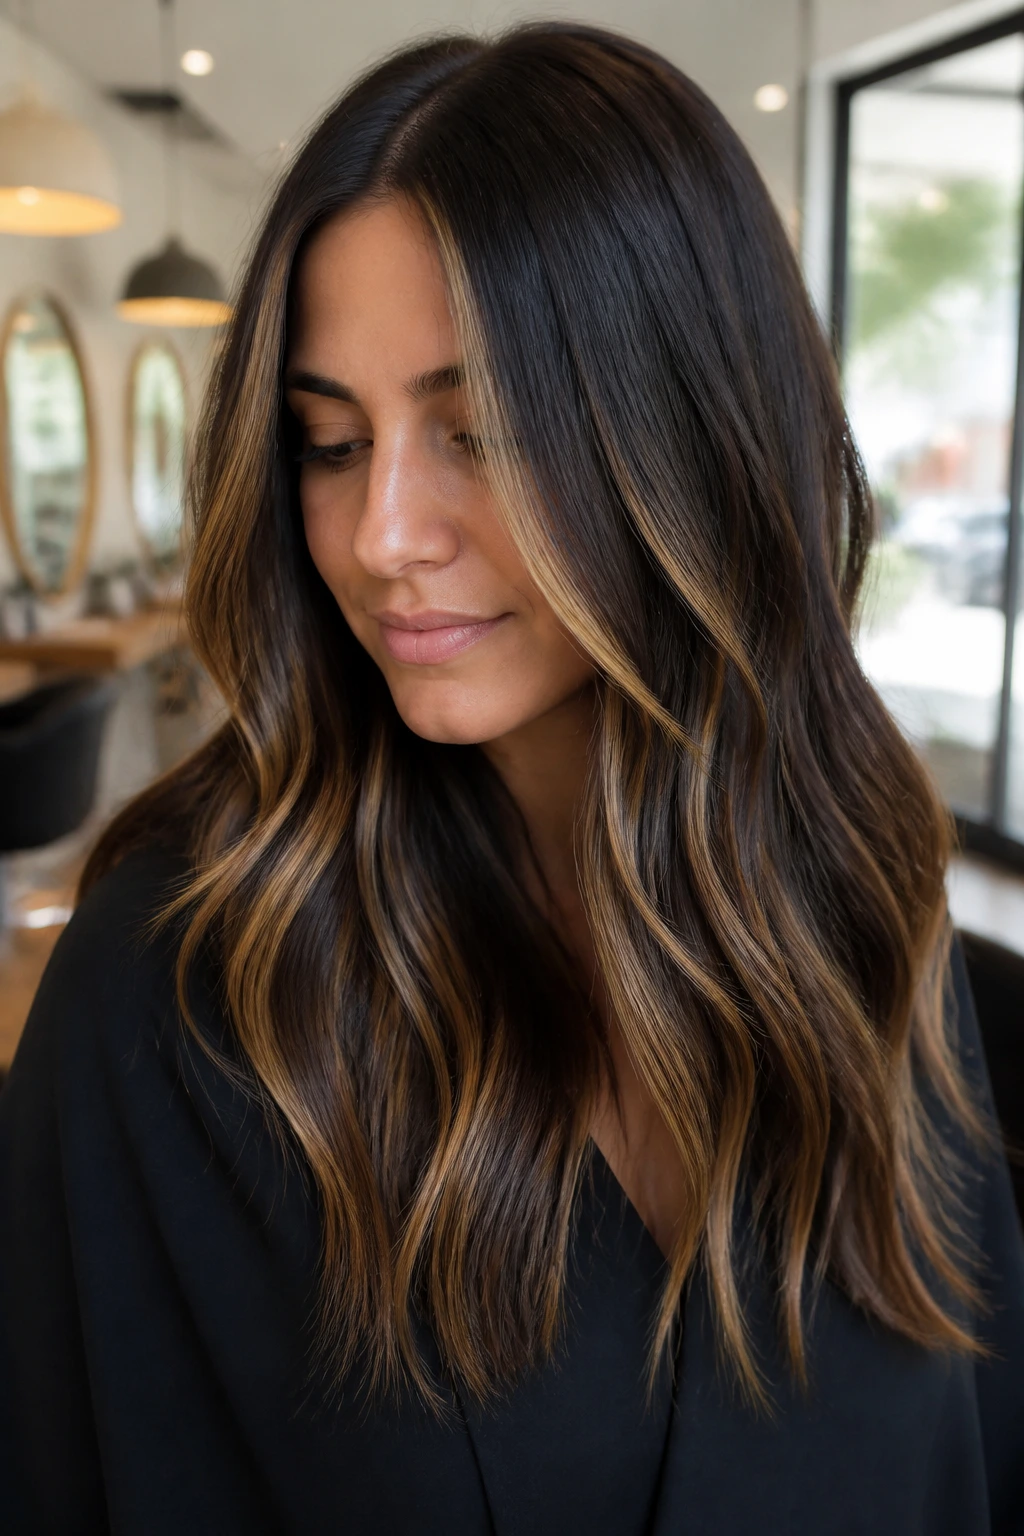
Caramel highlights are a classic for a reason, but they’re especially useful on round faces when they’re placed as thin, vertical ribbons instead of broad, blunt streaks. Dark brunette hair gets a little warmth and shine, while the face keeps its structure. That matters. Too much warmth in one solid patch can make the sides look wider.
Best placement notes
- Keep the caramel pieces around the front layers and ends, not as a wide band at the cheeks.
- Leave some darker hair at the outer edge.
- Ask for hand-painted ribbons instead of stripy foils.
Caramel is also friendlier than platinum if you want softness. It doesn’t shout. It just glows a little. On wavy or textured hair, the color catches in motion and makes the haircut feel more expensive without looking overworked.
This is one of my favorite choices for brunettes who want change but don’t want to look blond. It feels grown-up, easy, and a little sun-touched. Not fussy. Not flat.
7. Ash Beige Highlights That Keep the Shape Slim
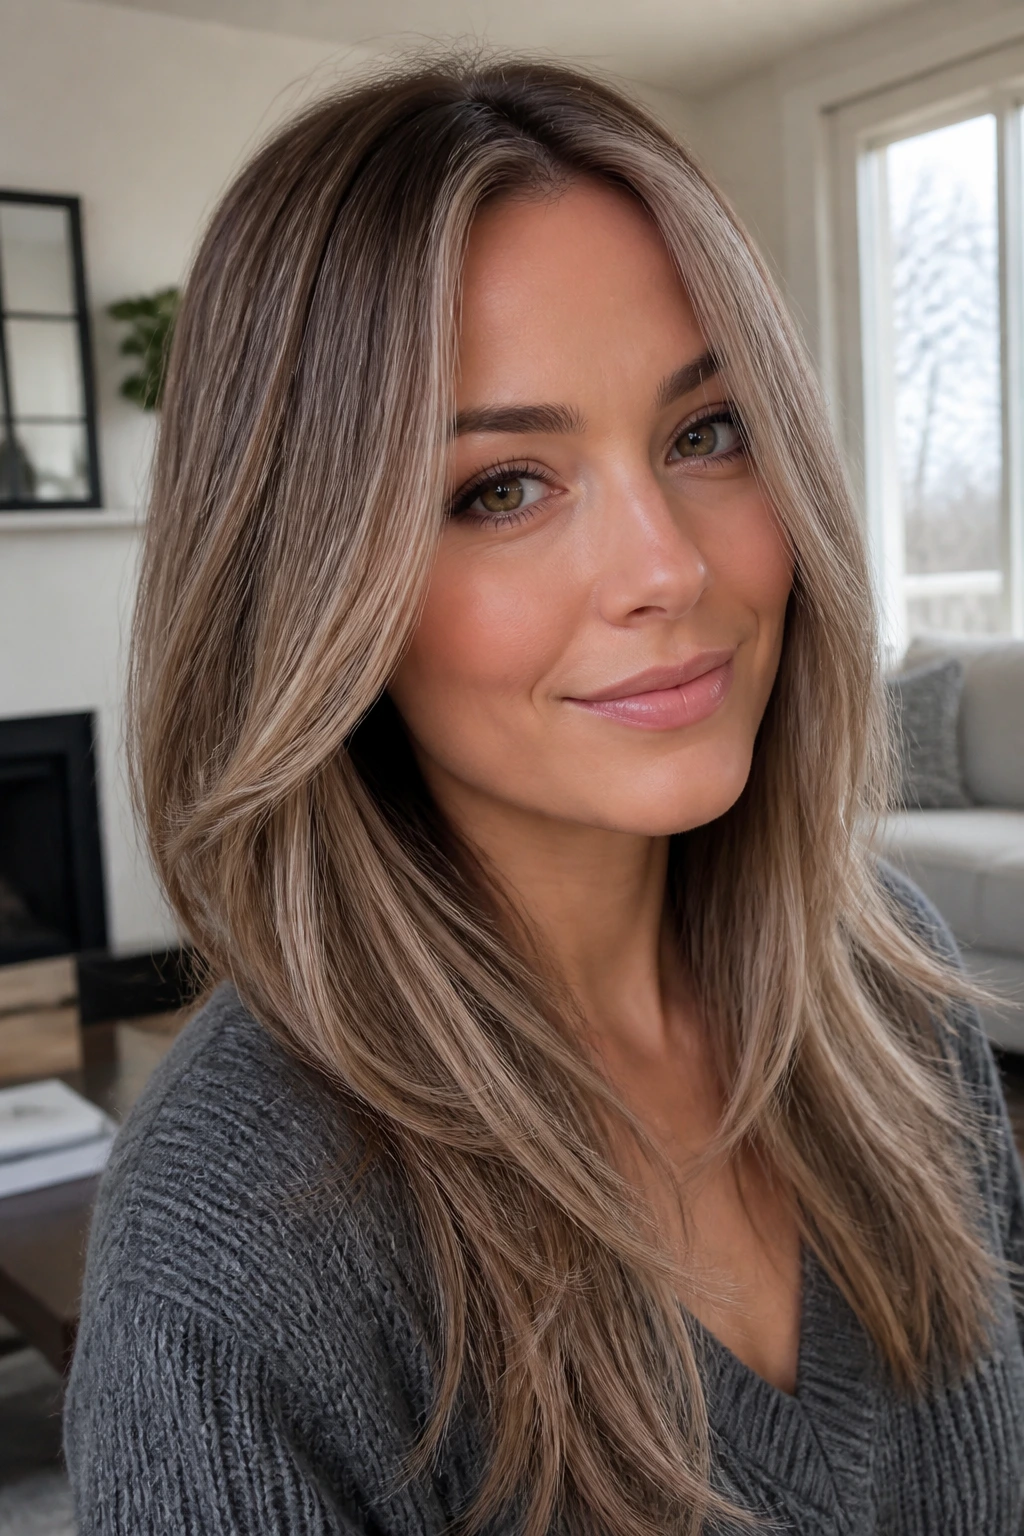
Cooler blonde tones do a lot of quiet work on round faces. Ash and beige highlights reflect less warmth than honey or gold, so the eye reads them as softer and a bit less bulky. That doesn’t mean they’re dull. It means they’re cleaner, especially on medium brown or dark blonde hair.
What matters here is the contrast. If the highlights are too warm and too wide, they can puff up the face visually. Ash beige keeps the edges blurred. It works well when the base color is cool brown, mushroom brown, or neutral blonde.
A lot of people assume cool tones look harsh. Sometimes they do, if the colorist pushes them too far. But a soft beige-ash mix can be very flattering because it keeps the front pieces airy. That airy feel is what helps round faces most.
Best for: neutral or cool skin tones, straight styles, and cuts with a side part.
Less ideal for: someone who wants a golden, beachy look with lots of warmth.
8. Curtain Bang Highlights That Open the Face
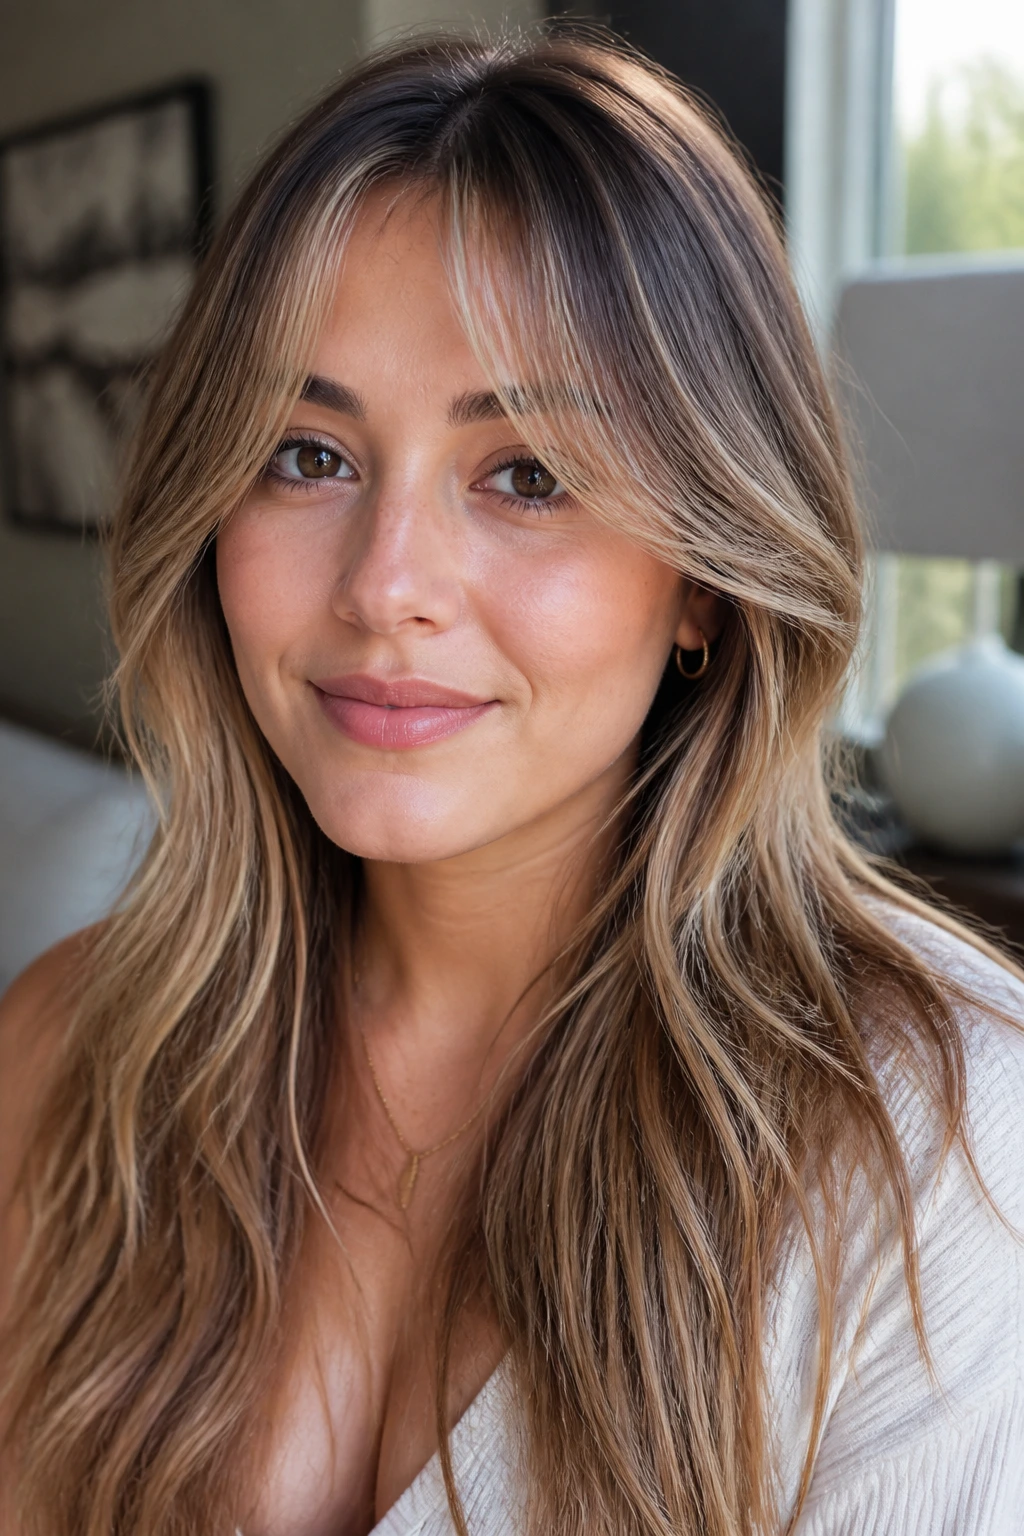
Curtain bangs can be a gift for round faces if the color is handled with care. The shape already creates a little vertical break in the face, which is exactly what you want. Add soft highlights that follow the sweep of the fringe, and the whole front section starts to look longer and lighter.
The mistake is making the bangs too bright across the middle. That can shorten the face. Keep the lightest strands closer to the outer sweep of the fringe and let the center stay softer. The eye should move outward and down, not stop dead in the middle of the forehead.
If you wear your hair with a middle part, this combo is especially useful. Curtain bangs and slim highlights give the face a more oval read without needing heavy contouring or big color contrast.
Tiny detail, big payoff. The fringe should bend, not block.
9. Copper and Cinnamon Lights on Warm Bases
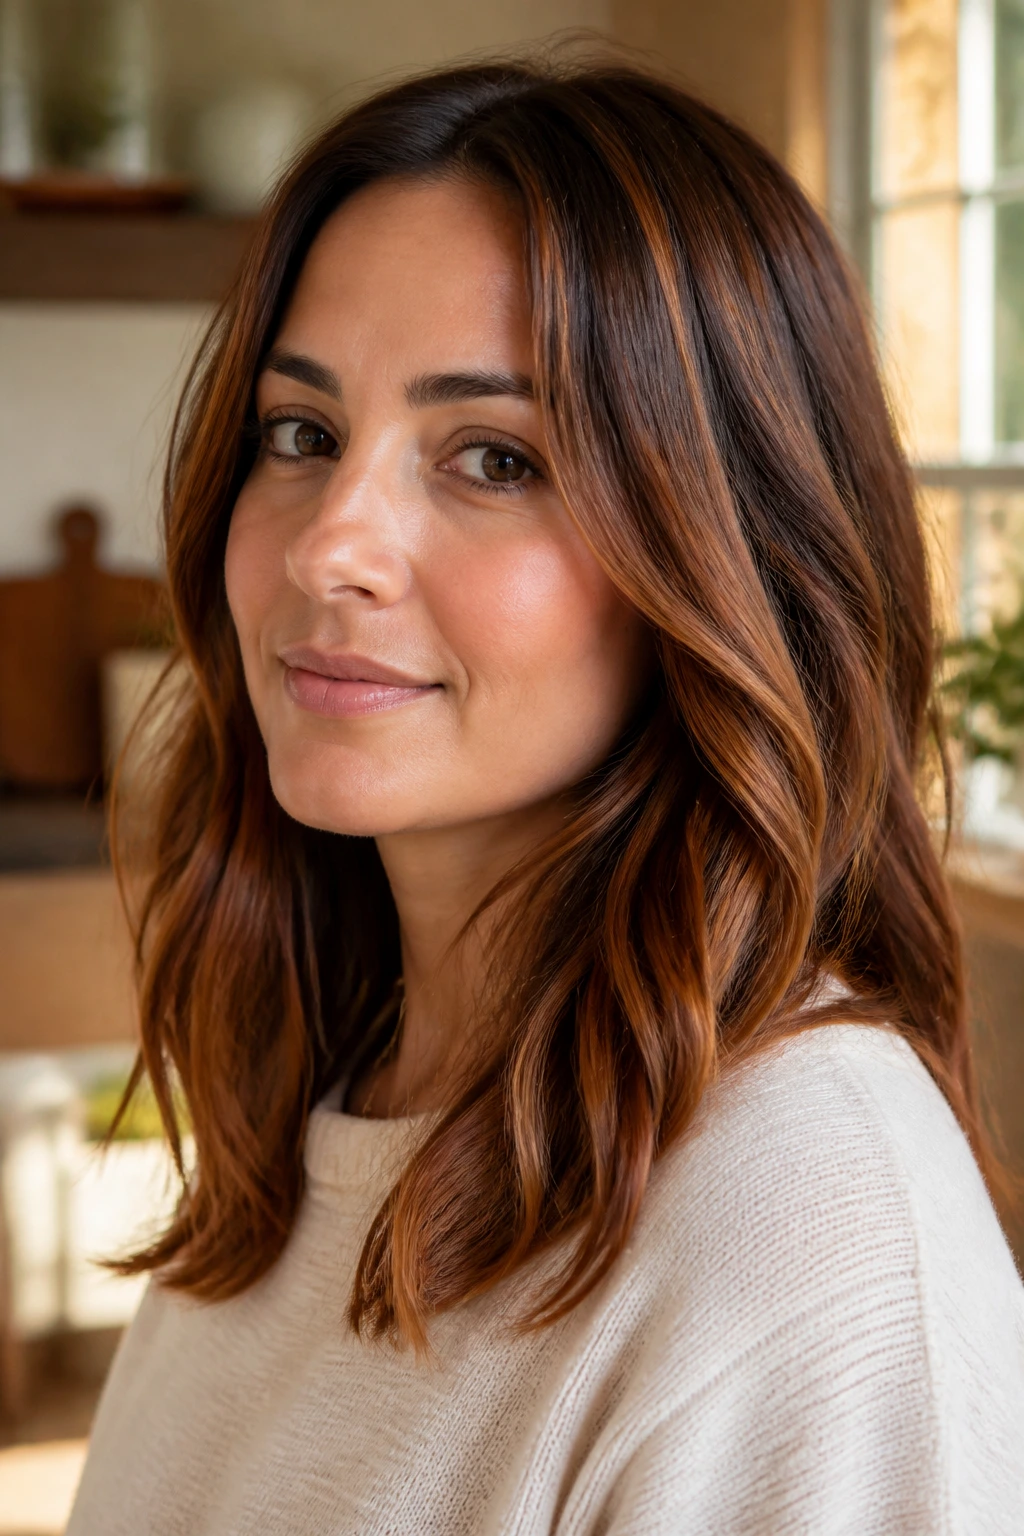
Warm tones can be gorgeous on round faces, but they need controlled placement. Copper and cinnamon highlights work best when they’re painted as fine ribbons through the mid-lengths and ends, not as a full fiery halo around the cheeks. That’s the difference between rich and bulky.
This look is especially nice on auburn, chestnut, and deep brunette bases. The warmth gives the hair depth and shine. The darker underneath keeps the shape from going too wide. When the lights are placed inside the layers, the color reads as movement instead of surface color.
If you like warmth, don’t be scared off by advice that says “go cool.” Warm color can flatter a round face just fine. It just needs breathing room. Leave some depth near the outer edges, keep the brightness lower on the lengths, and let the face framing stay slim.
A good copper job should feel softly lit, not loud.
10. Face-Framing Foils That Stop Above the Cheeks
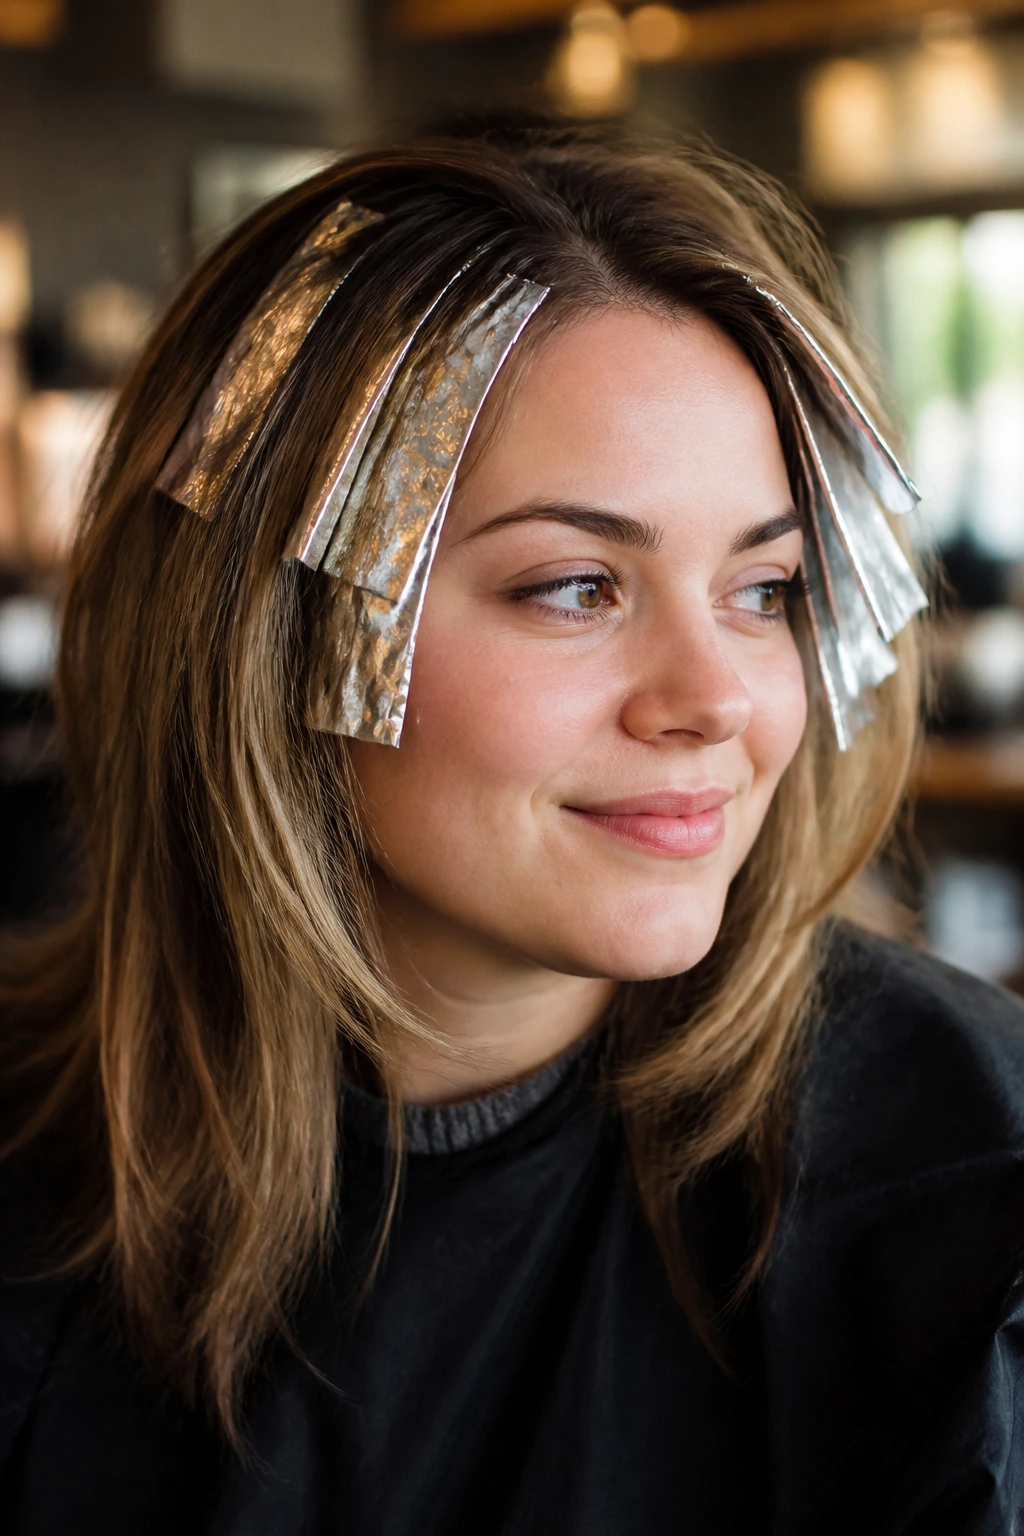
This is one of the most useful tricks in the whole article. Bright foils near the face can slim a round face, but only if they stop before the widest part of the cheeks. If they hit right there, they can widen the face instead of lengthening it. The placement matters more than the shade.
How to say it at the salon
Ask for foils that begin about 1 to 2 inches back from the hairline, then taper downward before they land on the cheek. You want the brightest area near the temple and upper front layer, not a blunt block beside the nose.
- Keep the front pieces narrow.
- Let them curve downward rather than flare outward.
- Pair them with softer color at the jawline.
This approach works on straight hair, wavy hair, and even finer textures. It’s one of those techniques that looks simple but takes a practiced hand. If the colorist places the foil too low, the whole illusion goes sideways. If they keep it high and tapered, the face gets a cleaner outline right away.
11. Lowlights for Contour and Shape
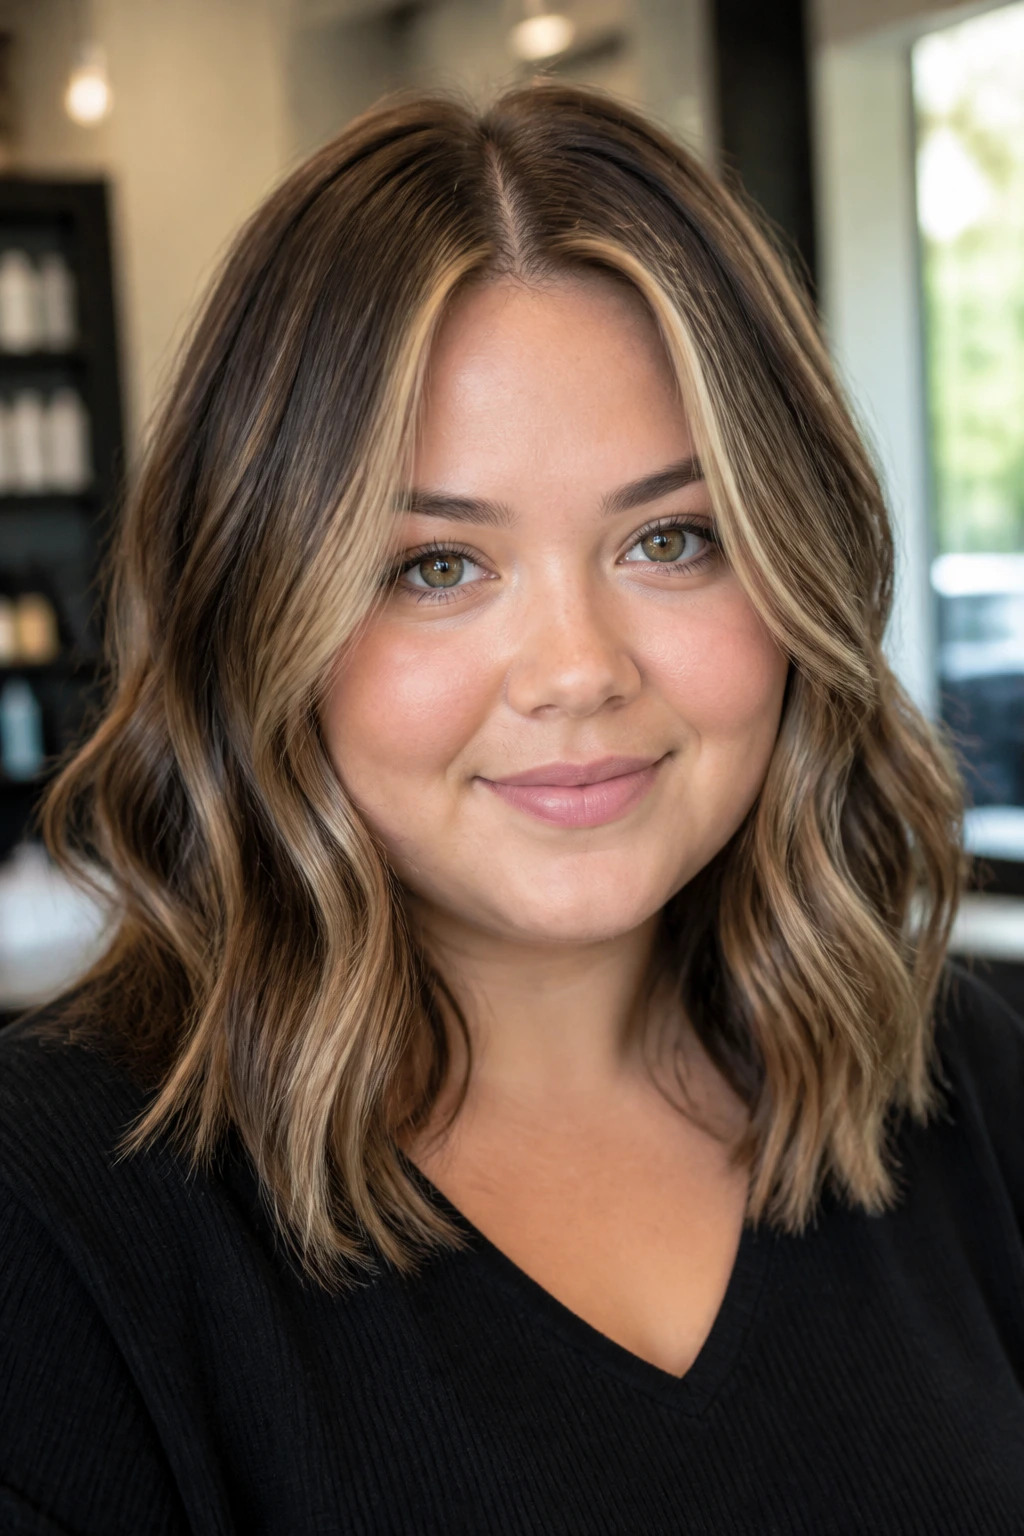
Lowlights deserve more love, especially on round faces. A lot of people chase brightness and forget that depth creates shape. When you add a few darker strands around the outer sections, the face reads more contoured. Think of it as the color version of cheek shading, but less obvious and a lot more wearable.
Use lowlights near the temples, just under the top layer, and through the outer perimeter if the hair feels too light all over. That deeper color gives the lighter pieces something to sit against. Without it, highlights can spread too evenly and make the face look broad.
This is a good fix if you already have a lot of blonde but the shape feels off. You do not need to start over. You just need contrast in the right places.
The contour map
- Darker near the outer edges
- Lighter through the center front
- Softer brightness below the cheekbones
Simple idea. Big difference.
12. Bright Ends on a Lob
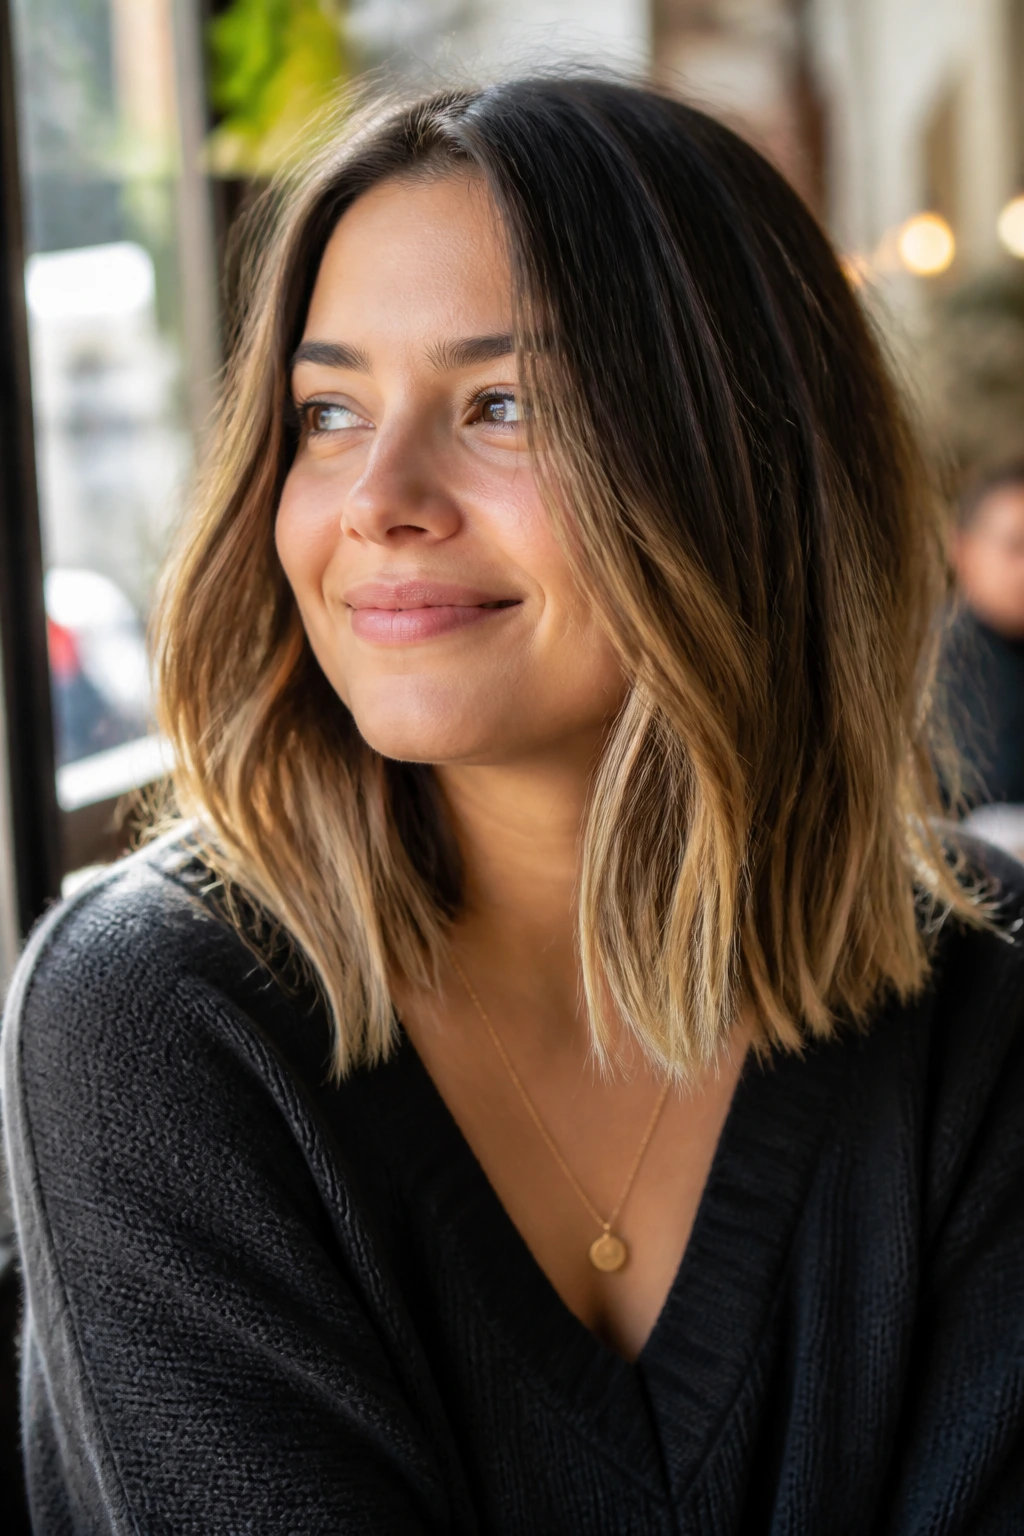
A lob — that shoulder-grazing cut everyone keeps coming back to — looks especially good on round faces when the ends are a little brighter than the top. That pulls the eye downward and makes the cut feel longer. It also keeps the perimeter from looking heavy.
The thing to avoid is a blunt, all-one-tone lob with bright chunks near the cheeks. That can box in the face fast. Instead, ask for soft brightness concentrated from the mid-lengths to the ends, with texture at the bottom edge. That way the color follows the haircut instead of fighting it.
This works nicely with curls and waves, too, because the movement makes the light bounce around the ends. The shape feels airy rather than wide.
Short hair doesn’t need to be dark to slim the face. It just needs direction. Bright ends give you that direction without making the head look bigger from the front.
13. Peekaboo Highlights Under the Top Layer
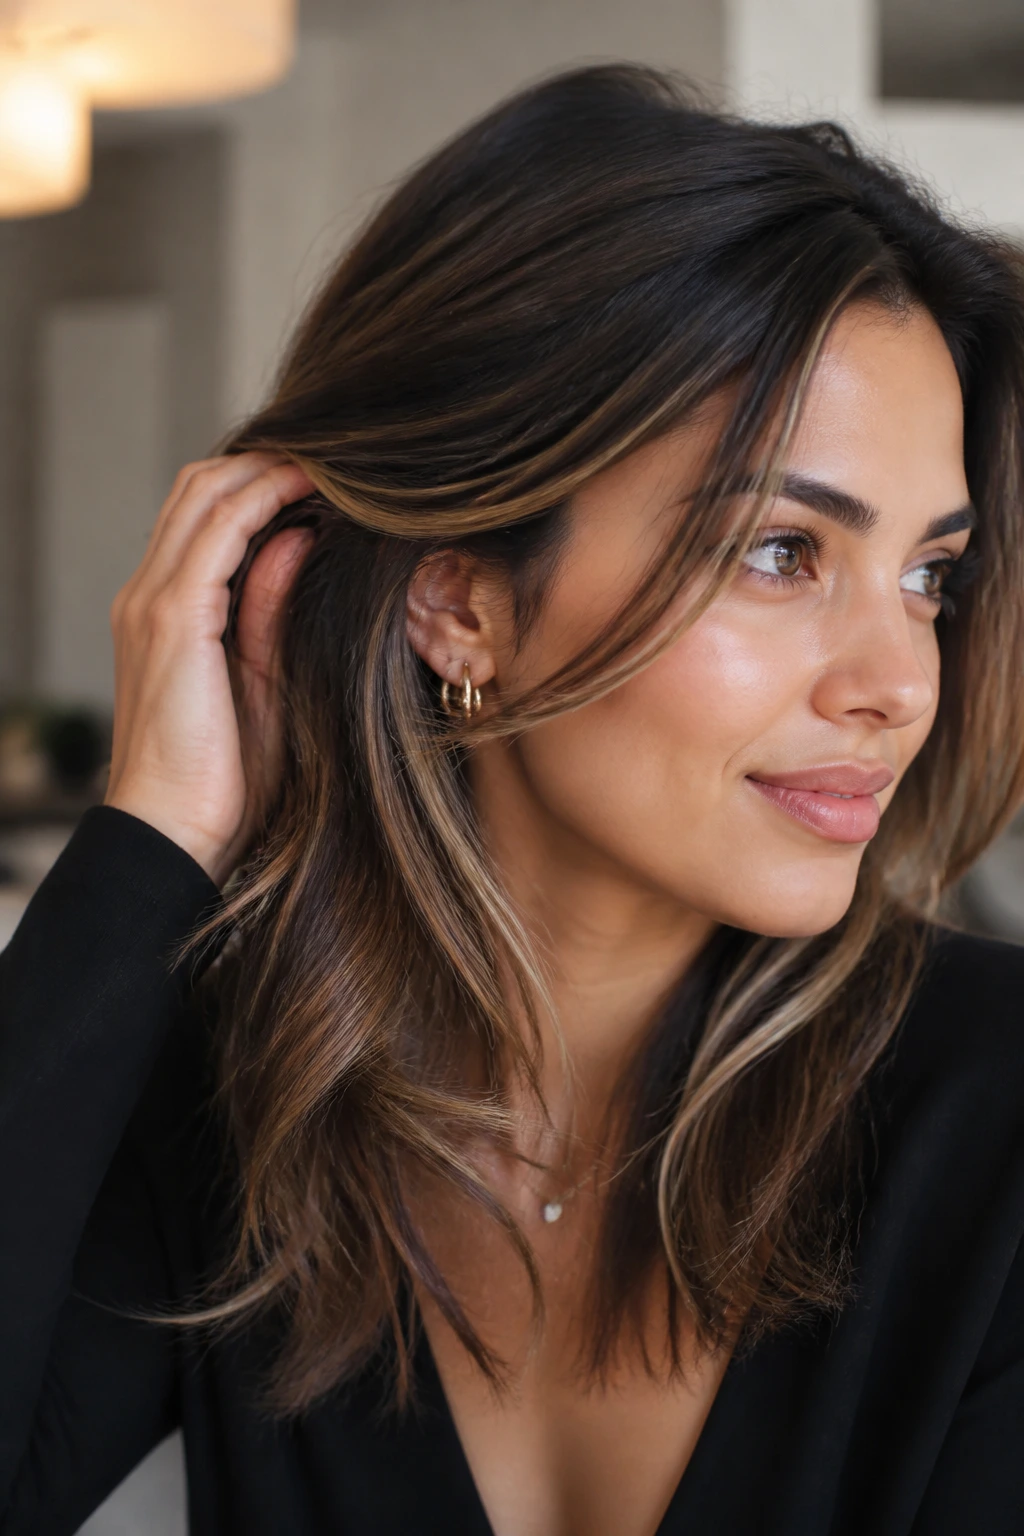
Peekaboo highlights are a sneaky-good choice if you want dimension without a lot of front-facing light. The brighter pieces sit under the top layer, so they show when hair moves, when it’s tucked behind an ear, or when the wind kicks through. That means the face stays softly framed while the color still has life.
This is a strong option for people who wear their hair down most of the time but still want some sparkle. Because the brightness is hidden lower in the shape, it doesn’t widen the sides. It gives you depth instead of a loud frame.
If you’re going subtle, ask for a few lighter panels through the interior layers and around the lower front, not right at the cheeks. That keeps the effect interesting but controlled.
Peekaboo color is also forgiving. It can grow out a little longer than a high-contrast money piece before it looks tired. Nice perk.
14. Golden Highlights on Wavy Layers
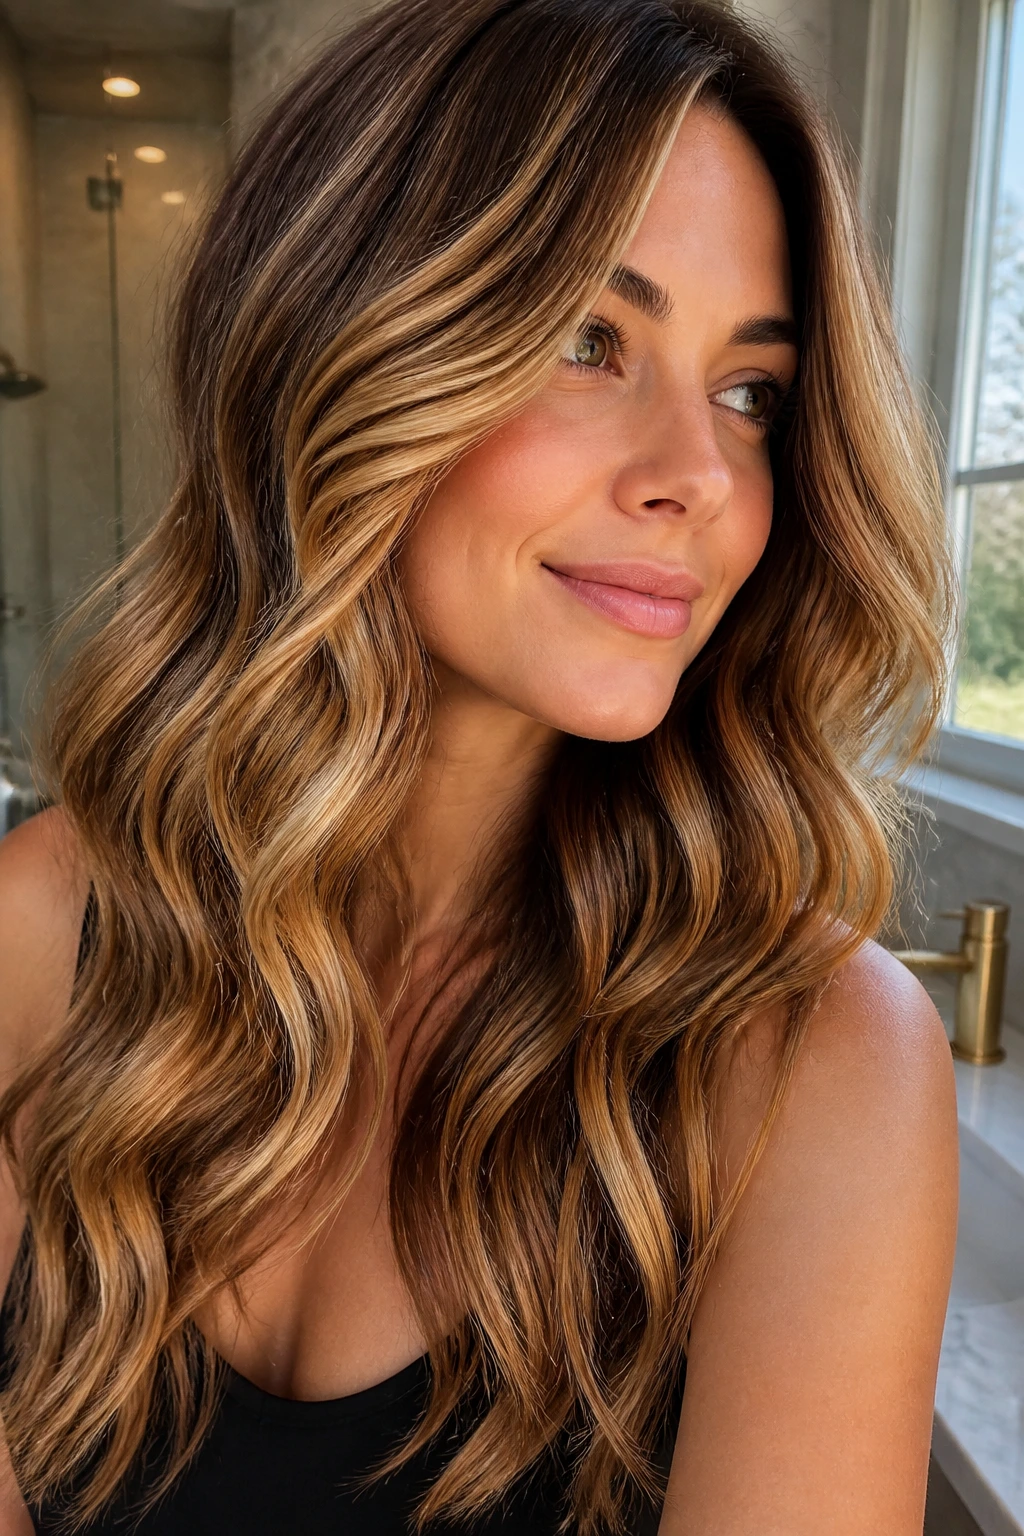
Waves and golden highlights are a strong pair because the movement does half the work. A round face benefits when the color follows those bends and drops in vertical ribbons, not straight stripes. Golden tones can soften the cheeks, especially when they’re painted onto the mid-lengths and ends of layered cuts.
The best result comes when the highlights are placed on the curve of the wave, not across it. That keeps the color from looking like a stripe sitting on top of the hair. It should look woven in.
What to ask for
- Fine to medium sections, not thick panels
- Brighter pieces through the front layers and outer waves
- A glossy finish so the gold looks soft, not brassy
Golden highlights can tip too warm if they’re overdone. So keep the shade controlled. A good golden brown-blonde mix gives movement and warmth without turning the face into the brightest thing in the room. That’s the balance.
15. Mushroom Brown With Soft Ash Ribbons
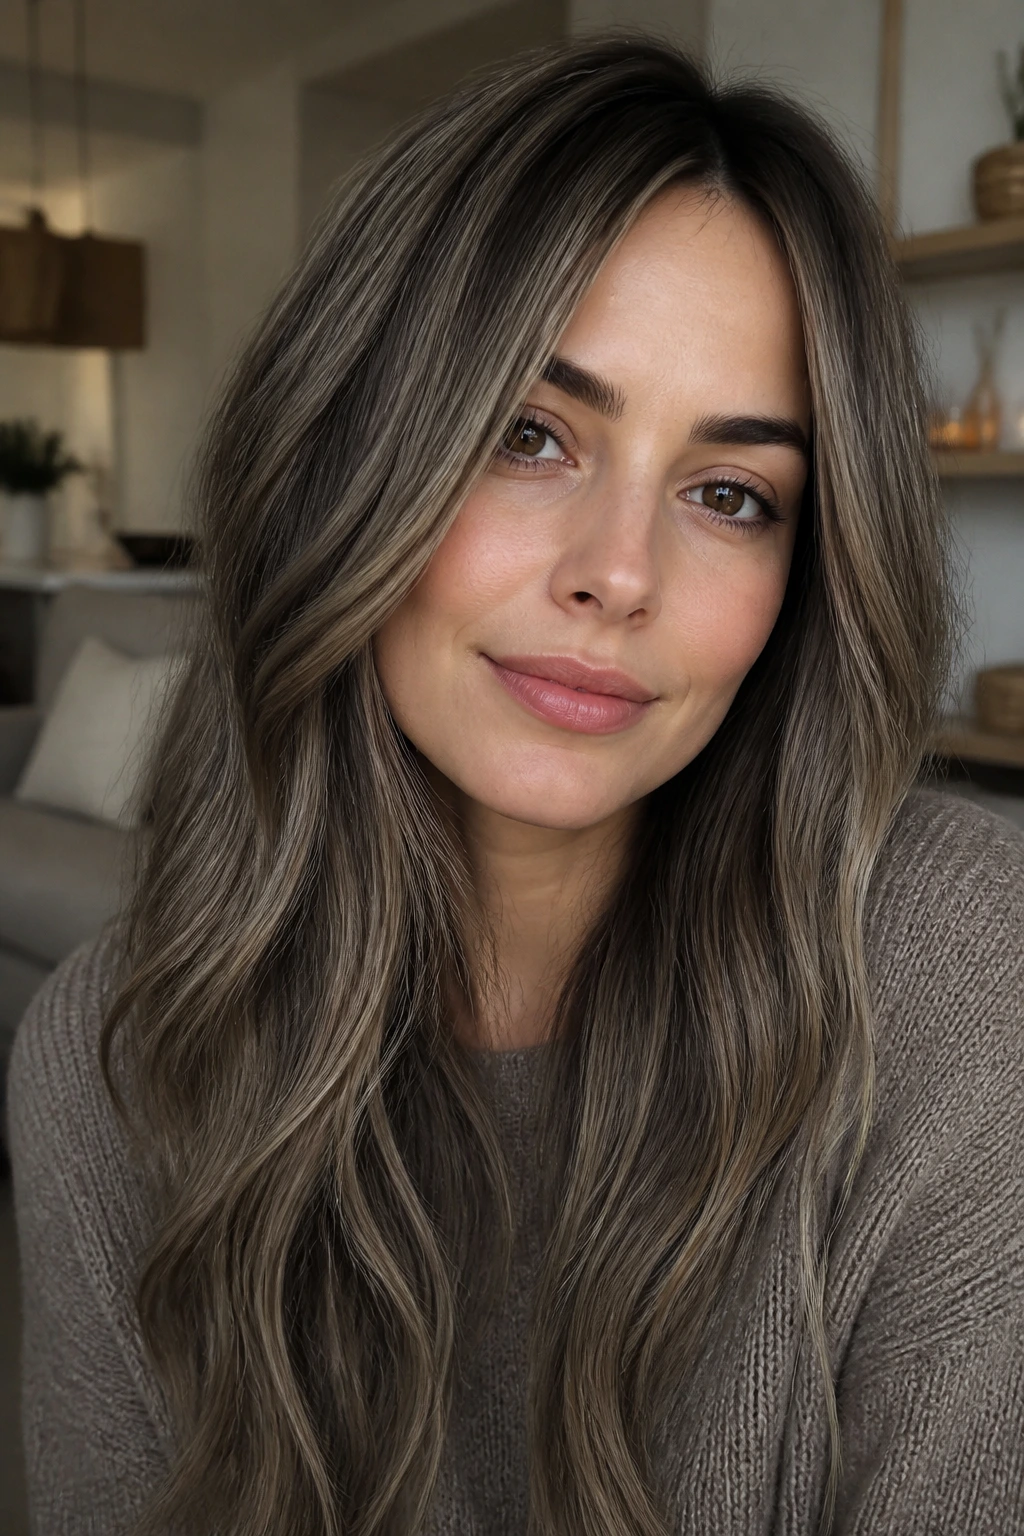
Mushroom brown is one of those shades that sounds niche and ends up being incredibly practical. It’s a cool, earthy brunette with beige and ash notes, and it can be a smart choice for round faces because it avoids the puffed-up feel that very warm highlights sometimes create. The ribbons stay quiet. The overall shape stays clean.
Flat brown is the enemy here. It can make the haircut look heavy and the face look rounder. Soft ash ribbons break that up without shouting. They bring in movement, but the movement stays inside the shape rather than sitting on the surface.
This is a strong option if you want something understated that still looks deliberate. It’s not a dramatic blonde job. It’s not plain brunette either. It sits in the middle, and that middle ground is often flattering when your goal is to slim the face a little.
If you like cool-toned clothes and low-shine makeup, this hair color plays nicely with that whole mood.
16. High-Contrast Money Piece on Long Layers
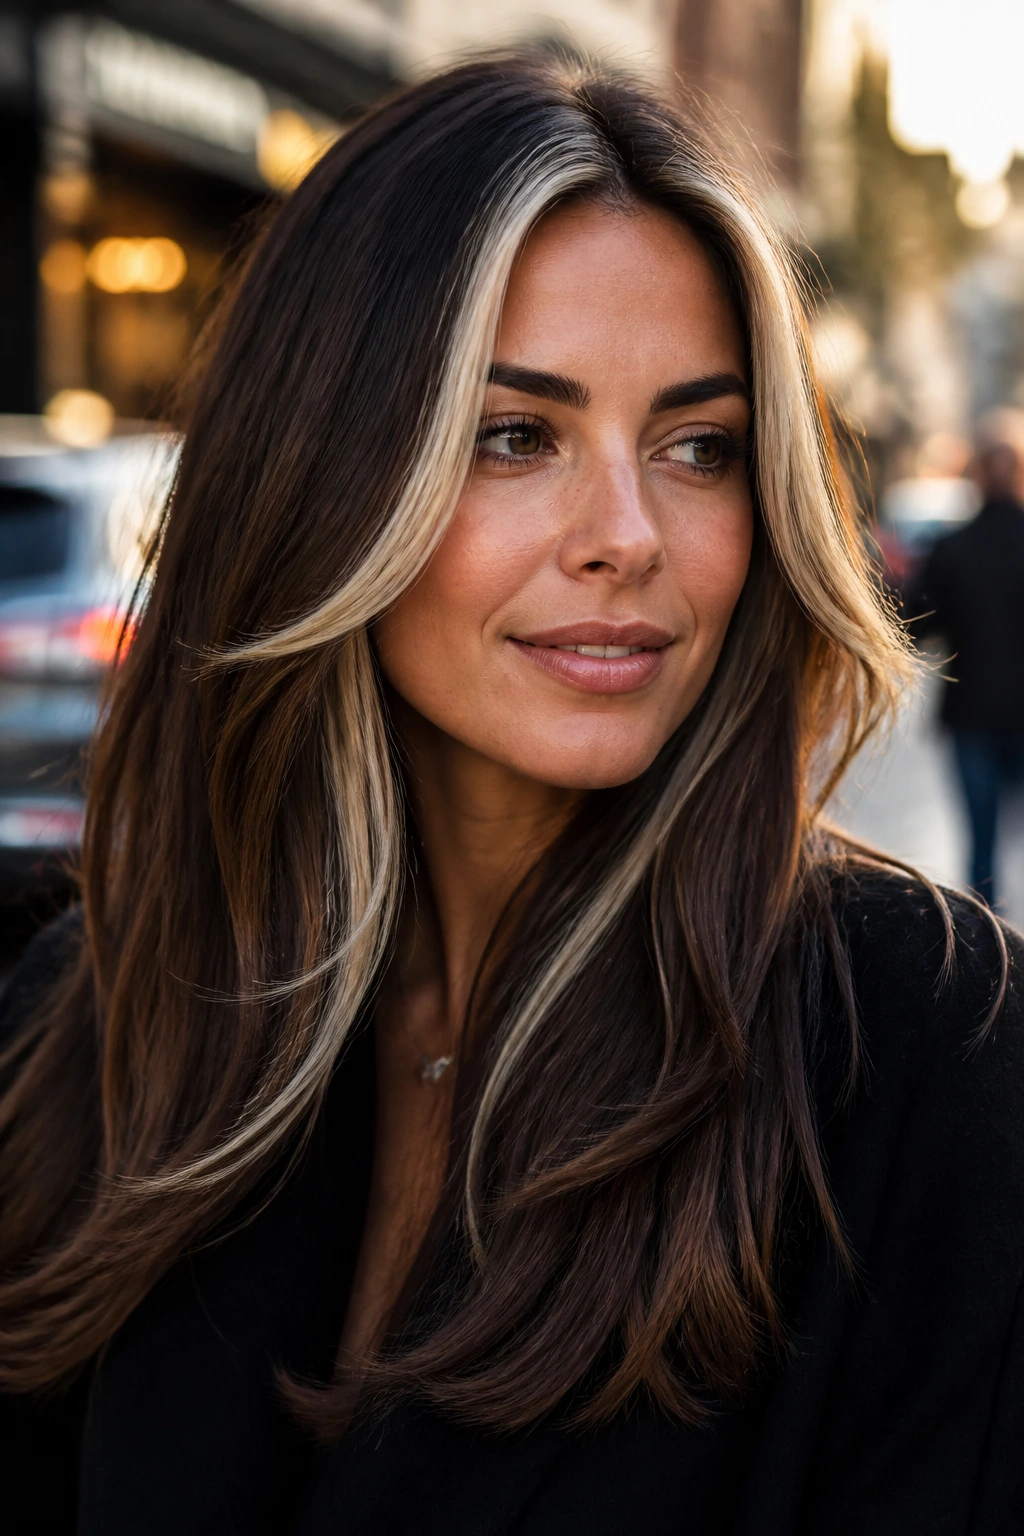
A bold money piece can work on a round face, but only when the rest of the hair supports it. Long layers help because they create a downward line around the face, which balances the brightness up top. If the haircut is too short or too boxy, a high-contrast money piece can feel wide. On longer hair, it feels intentional.
The trick is to keep the bright pieces narrow at the front and softer through the rest of the head. You want drama, not a helmet of light. Let the face frame be the star, then keep the rest of the color a shade or two deeper so the shape stretches vertically.
How to keep it from going too wide
- Use long layers below the chin.
- Keep the bright front pieces slim.
- Leave depth through the side panels.
This is the look for someone who likes visible color and isn’t afraid of upkeep. The contrast needs maintenance more often than a soft balayage, but the payoff is strong when it’s done with restraint. Loud in the right way. Not bulky.
17. Ribbon Highlights on Curls
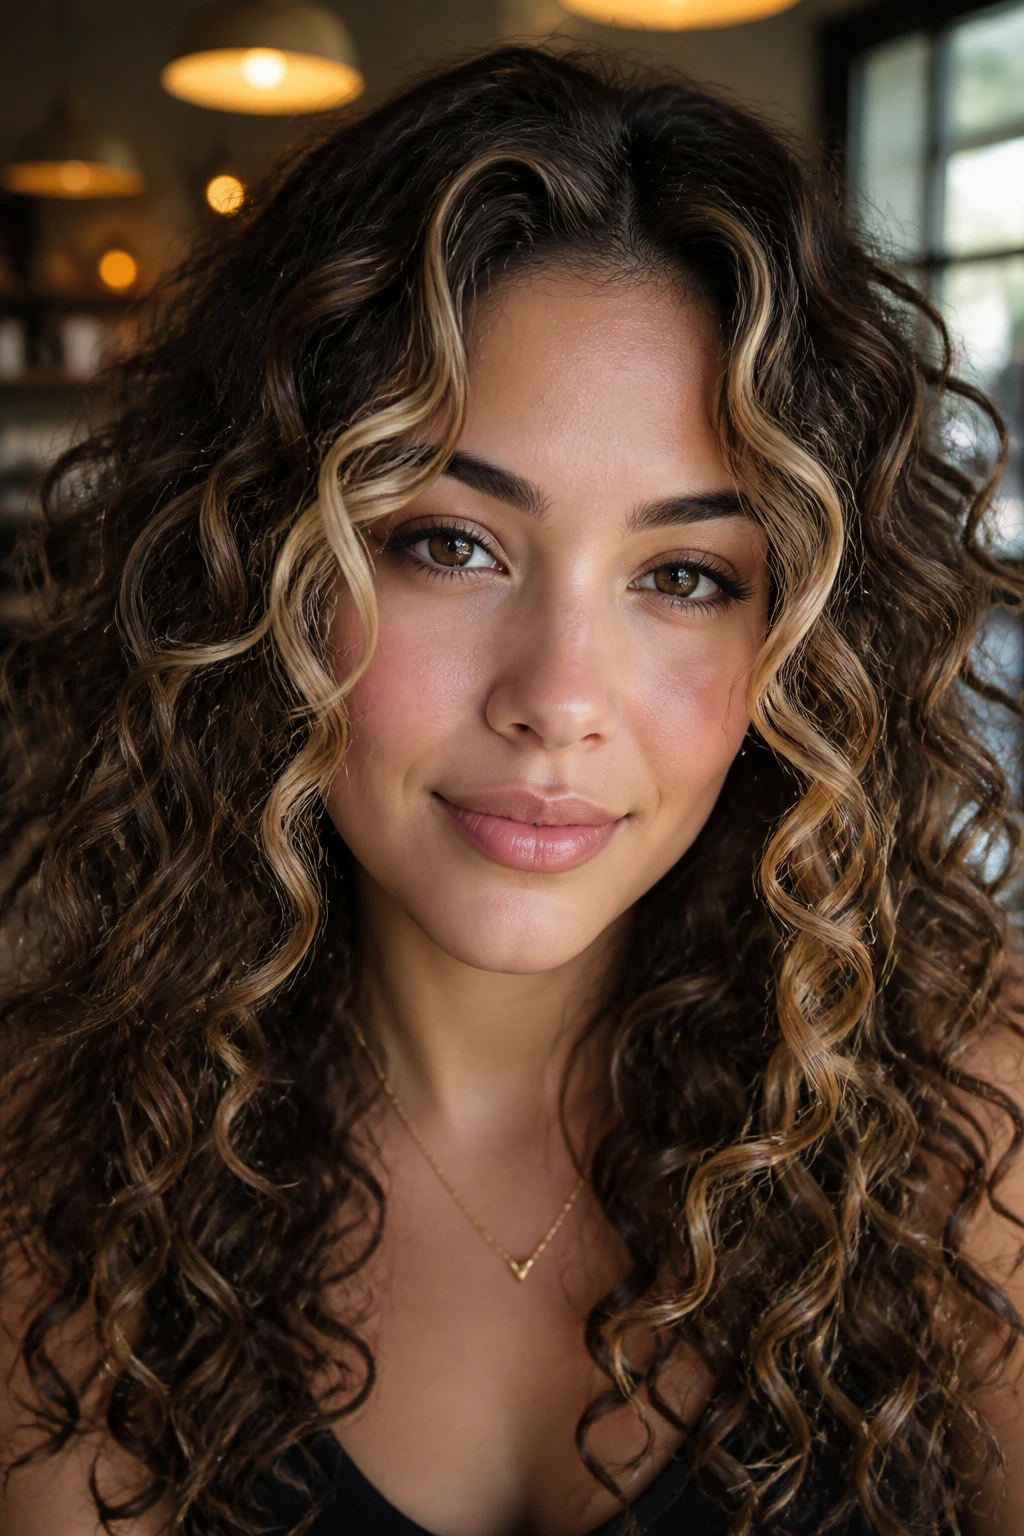
Curly hair needs different highlight placement than straight hair, and round faces benefit when those ribbons follow the way the curls actually spring. A highlight painted on a curl pattern can land somewhere very different once the hair dries, so the placement has to be a little more thoughtful. That’s especially true near the cheeks.
The safest move is to brighten the outer curve of the curl and the upper layers, where the eye already wants to travel upward. Keep the pieces slim near the temples and let the light drift down the length. Avoid striping the curls in a straight horizontal band. That can widen the face and make the curl pattern look disconnected.
- Paint where the curls sit, not where they hang wet.
- Keep the front pieces lighter but narrow.
- Use enough depth underneath so the color doesn’t spread outward.
Curly hair thrives on dimension. A few well-placed ribbons can do more than a full head of even lightener. And yes, the cut matters too. It always does.
18. Dimensional Bronde for Easy Wear
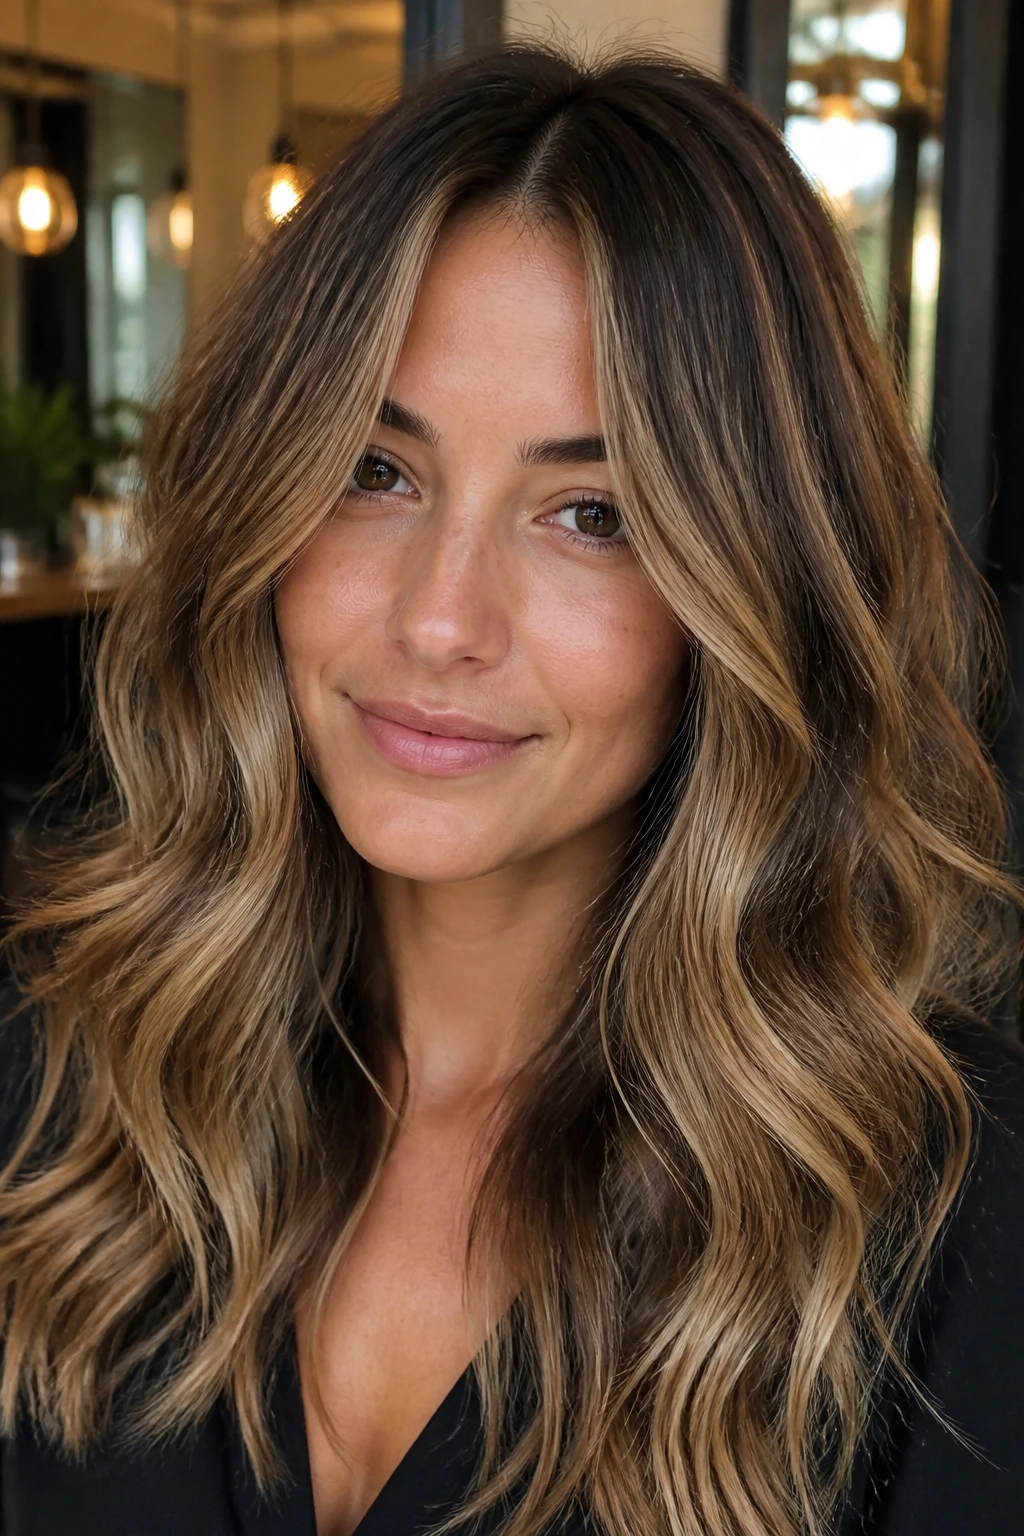
Bronde — that brown-blonde middle ground — is one of the easiest shades to wear on a round face because it avoids hard edges. The color never feels too dark or too bright, so the face doesn’t get boxed in by one strong tone. Instead, the hair reads as layered and soft from root to tip.
What makes bronde work is the mix. You need enough brunette to hold shape and enough blonde to keep the color light around the face. If it gets too flat, it loses the slimming effect. If it gets too bright all over, it can widen the face. The sweet spot is somewhere in between, with a few lighter ribbons through the front and a deeper base underneath.
This is the kind of color that looks expensive without looking obvious. It grows out cleanly, plays well with waves, and doesn’t ask you to live at the salon. For a lot of people, that’s the real win.
Bronde is not boring. It’s controlled.
19. Soft Halo Highlights Around the Hairline
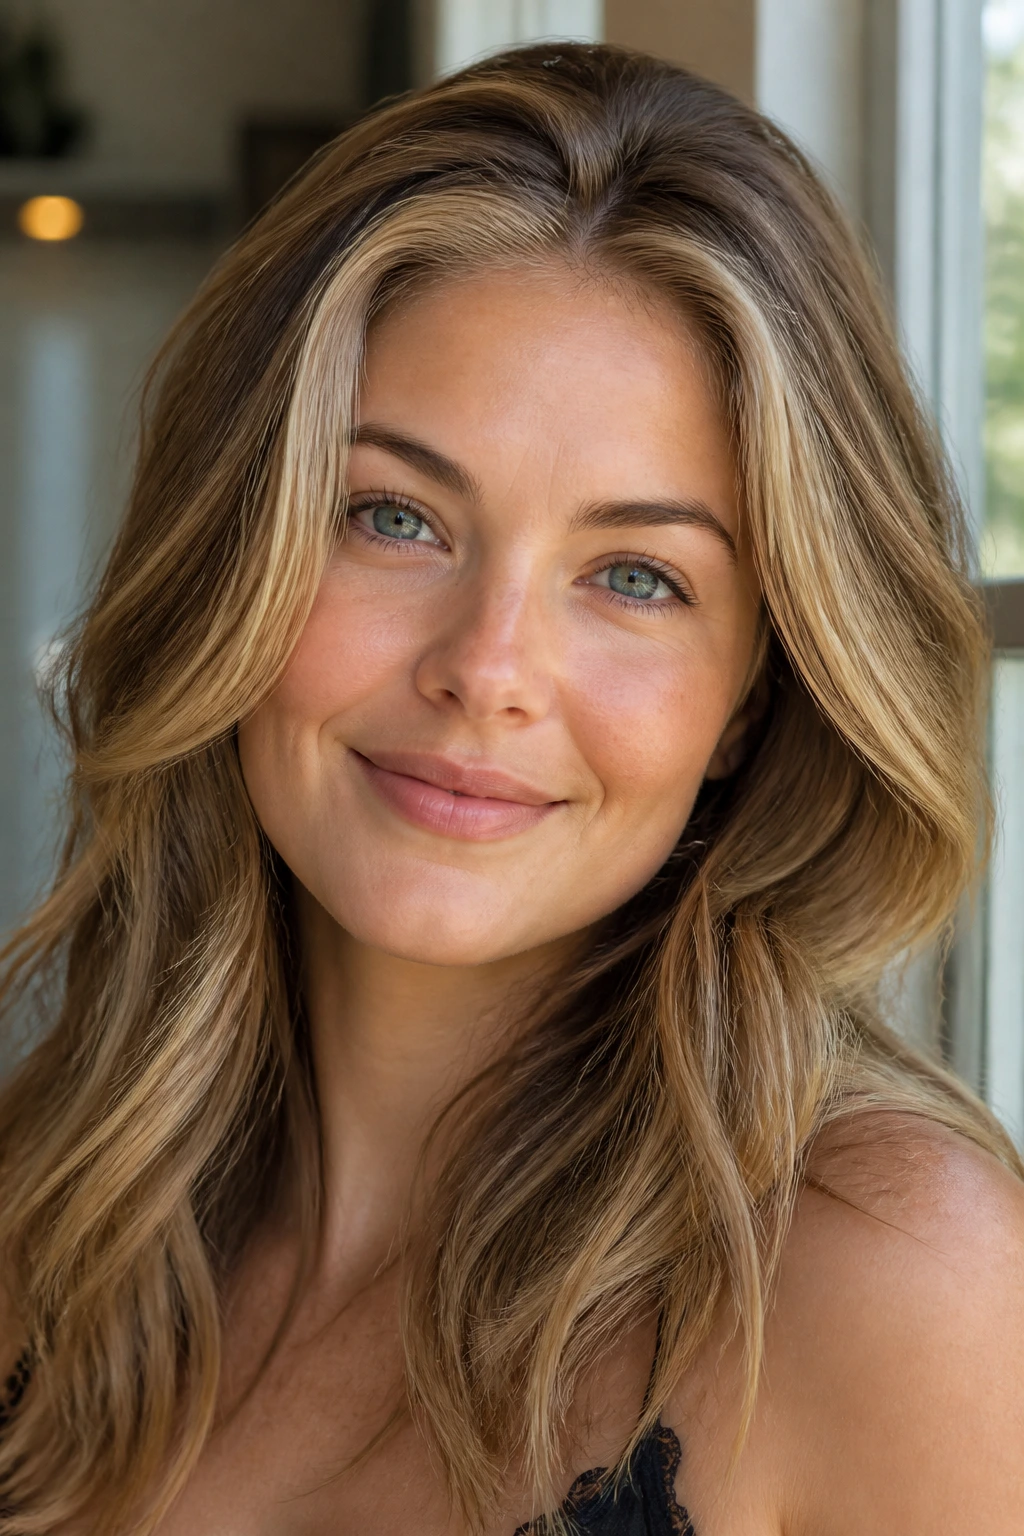
A halo of fine highlights around the hairline can brighten a round face without pulling focus to the cheeks. The key is to keep the light very thin and close to the perimeter near the forehead and temples, where it lifts the face upward. It should feel airy, almost feathered.
This technique is especially nice if you wear your hair up a lot or tuck it behind your ears. The soft halo keeps the hairline from looking heavy while still preserving depth through the sides. That depth is what stops the face from reading too wide.
What to avoid
- Do not place the brightest pieces in a thick ring around the whole face.
- Do not let the light stop in a blunt line at the cheeks.
- Do not over-brighten the lower side panels.
A halo should feel like a glow, not a frame. Tiny difference. Huge effect.
20. Shadow-Root Balayage With Bright Ends
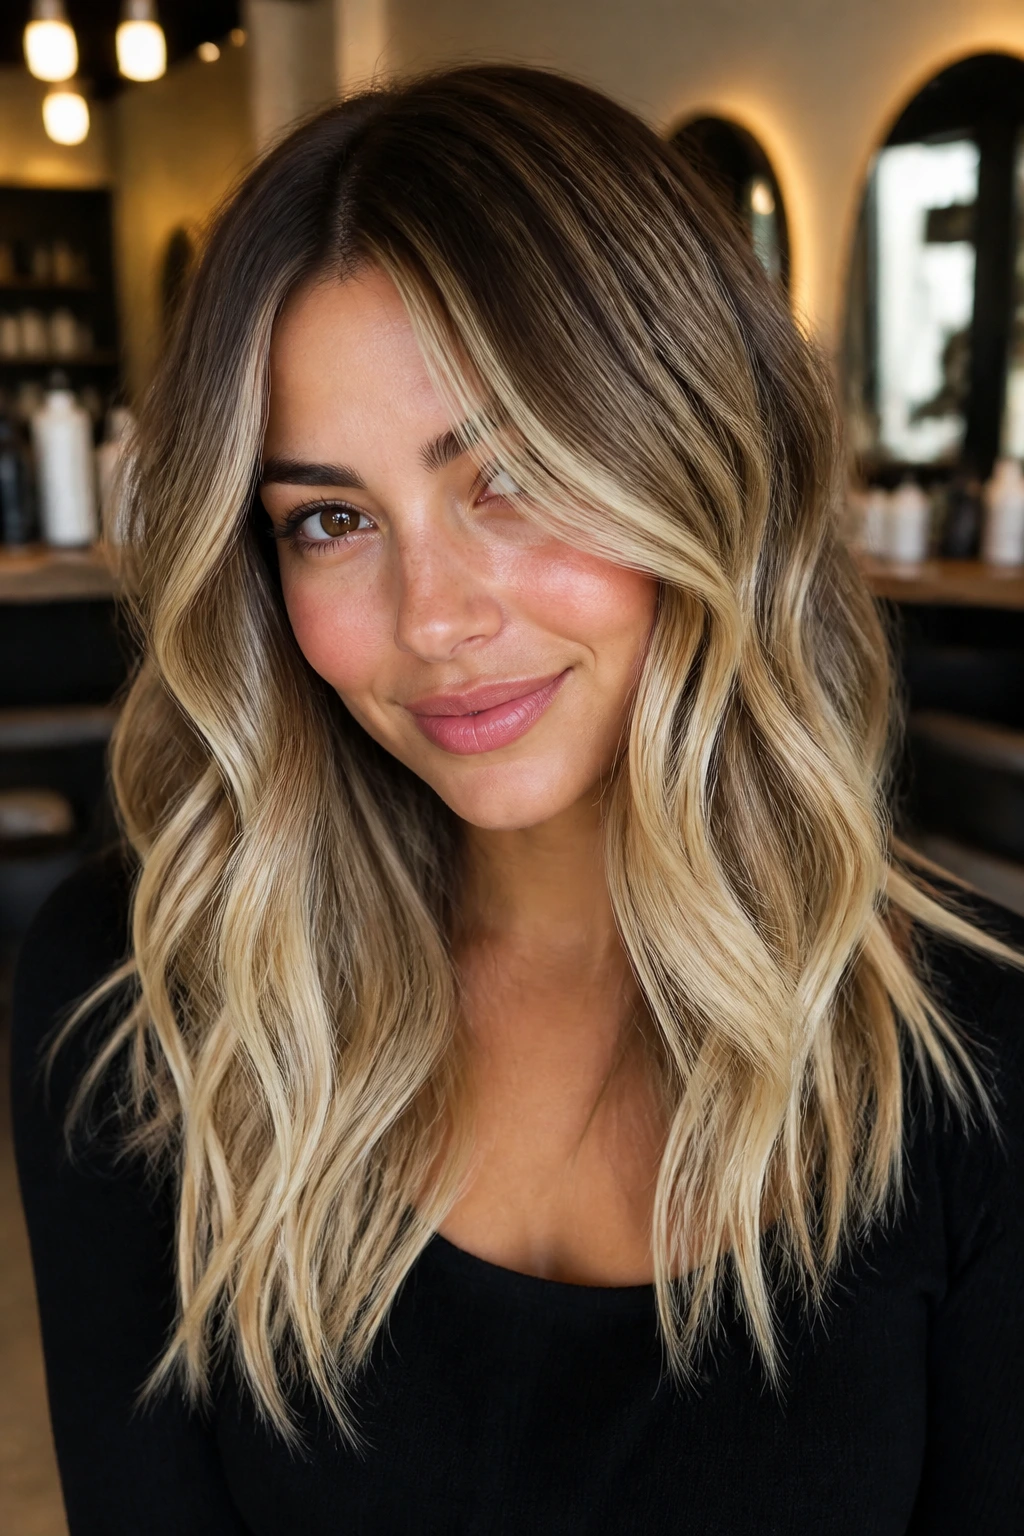
Shadow-root balayage is one of the easiest ways to flatter a round face and still keep life simple. The darker root adds depth near the scalp, which keeps the face from getting boxed in, and the brighter ends pull the eye down the length of the hair. That up-and-down movement is what softens a round shape.
The prettiest version keeps the front pieces lighter but not wide. The brightness should begin gently, then become more noticeable below the cheek area. That way the face stays slim at the sides and fuller in motion. It also grows out in a way that looks intentional for longer, which is a nice break from constant maintenance.
If you want one look that covers a lot of ground — flattering, easy to wear, and not too fussy — this is a strong place to land. Ask for a soft root smudge, vertical balayage pieces, and brightness concentrated through the lower lengths. Then leave enough depth around the outer face to keep the whole shape long rather than wide.
That’s the trick, really. Keep the sides calm, keep the ends alive, and let the color do the stretching.
