



Hair waves for medium length hair sit in a sweet spot that long hair never quite gets right. The length is there for movement, but not so much that every bend gets dragged flat by its own weight.
That matters more than people think. A collarbone cut can hold a soft wave without looking overworked, while a blunt shoulder cut can turn the same tool into something sharper and more graphic. The barrel size, the section size, even the direction you wrap the hair — all of it shows up more clearly on medium-length strands than it does on longer hair.
And that’s the fun part. You can go polished, messy, glossy, airy, or sculpted without changing your cut at all. The trick is matching the wave pattern to the shape already sitting on your head, then deciding how much shine, bend, and separation you want.
Some of these styles are quick and forgiving. Others ask for clips, patience, and a cool shot from the dryer before you touch them. Start with the easy ones if you like, then work toward the more exact shapes once you know how your hair likes to fall.
1. Soft Beach Waves for Medium Length Hair
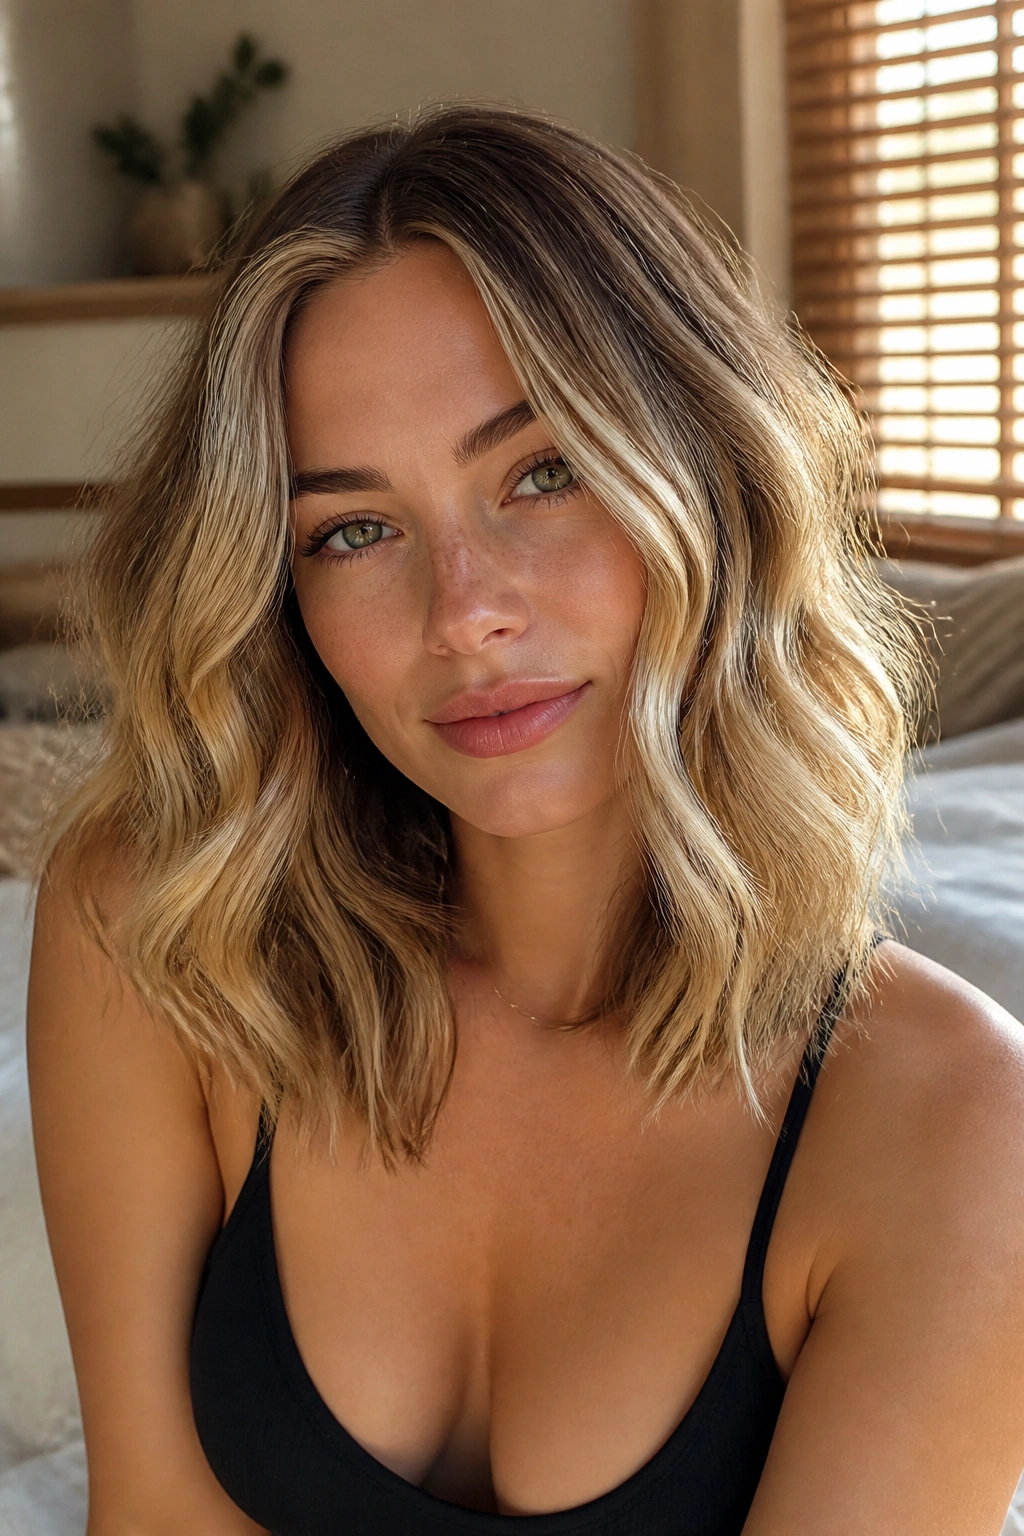
This is the wave most people picture first, and for good reason. Soft beach waves are easy to wear, hard to overthink, and flattering on medium cuts that need a little movement around the ends.
Why It Works on Shoulder-Grazing Hair
Medium length hair holds this shape without the wave collapsing into nothing. If your hair sits somewhere between the jaw and the collarbone, a 1-inch curling wand gives enough bend to create a loose ripple without turning the whole style into ringlets.
I like this version when the cut has a few layers, because the ends keep their shape instead of looking heavy. Use 1-inch sections, wrap away from the face on the front pieces, and leave the last inch out. That straight bit at the end keeps the style from looking too “done.”
- Use a light mousse at the roots before drying.
- Wrap alternating sections in opposite directions.
- Shake the waves apart with your fingers, not a brush.
- Finish with a dry texture spray for grip, not stiffness.
Pro tip: Let the curls cool for at least 5 minutes before you touch them. Warm hair falls fast.
2. Polished S-Waves
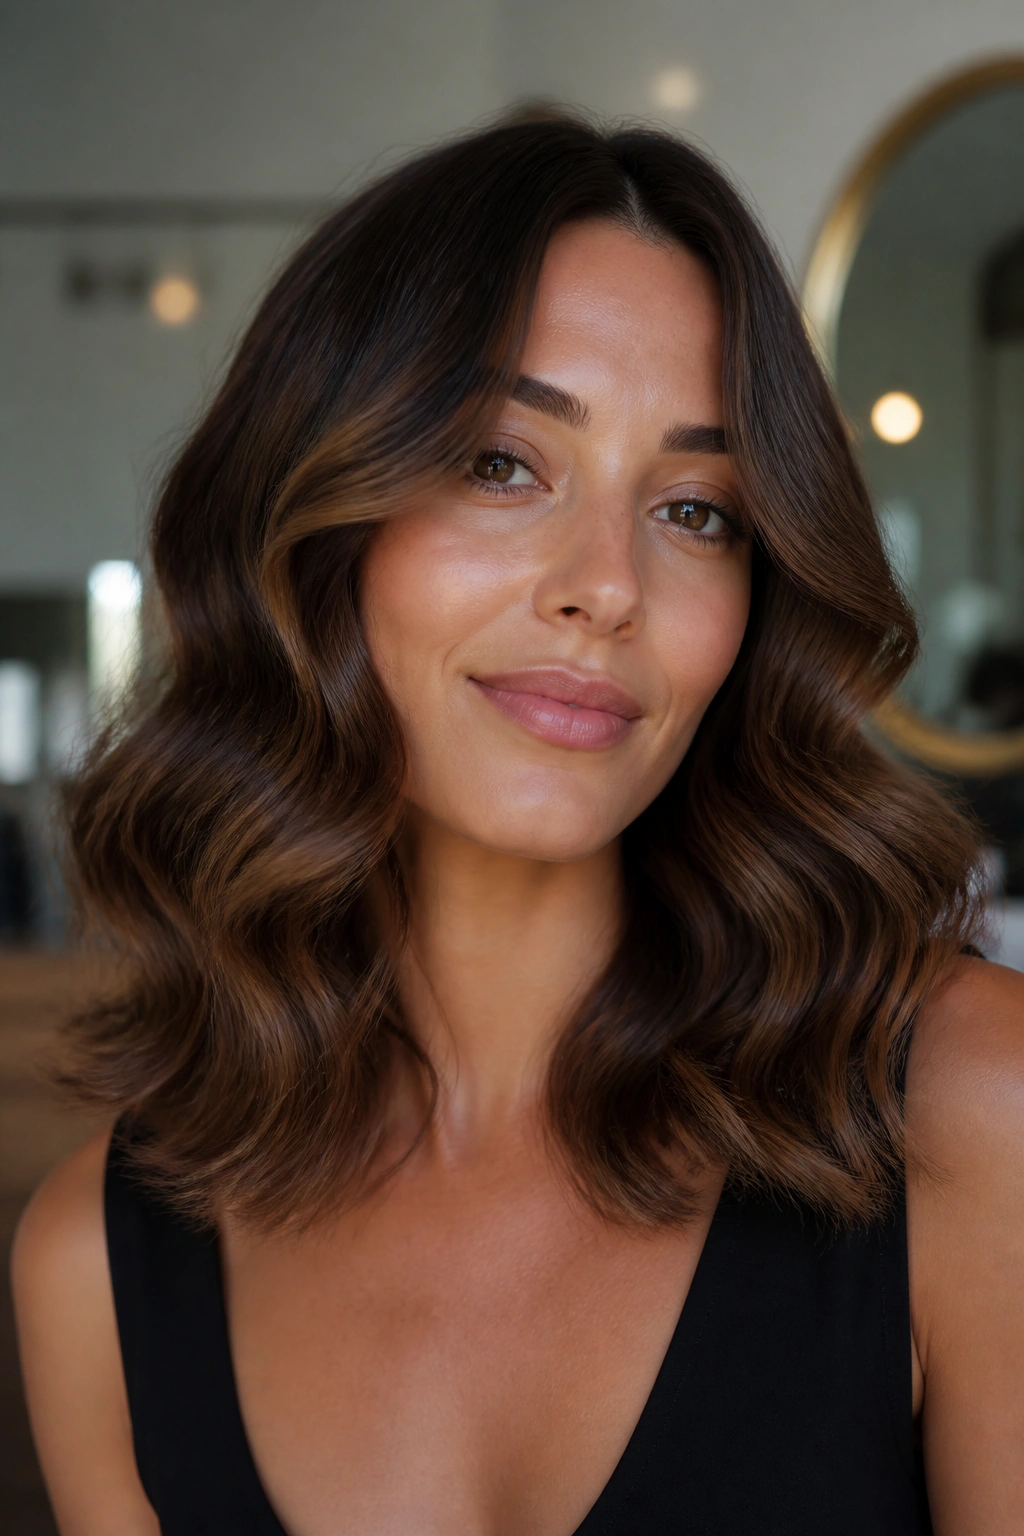
Polished S-waves look cleaner than beach waves and softer than curls. They have that smooth, sculpted bend that sits beautifully on medium hair with a blunt edge.
The style starts with larger sections and a little patience. Use a 1.25-inch curling iron, clamp the hair mid-shaft, then twist and release in a slow motion so the strand forms a long curve rather than a tight spiral. Once the whole head is curled, brush it out lightly with a soft bristle brush. The waves settle into that elegant S-shape people usually associate with glossy blowouts.
This one likes medium length hair because there is enough room for the wave to show, but not so much length that it turns heavy at the bottom. It also plays well with one-length cuts, where the clean ends make the wave pattern look sharper. Add a drop of shine serum only on the mids and ends. Too much at the roots kills the lift.
If you want a style that looks put together without looking stiff, this is it.
3. Old-Hollywood Waves
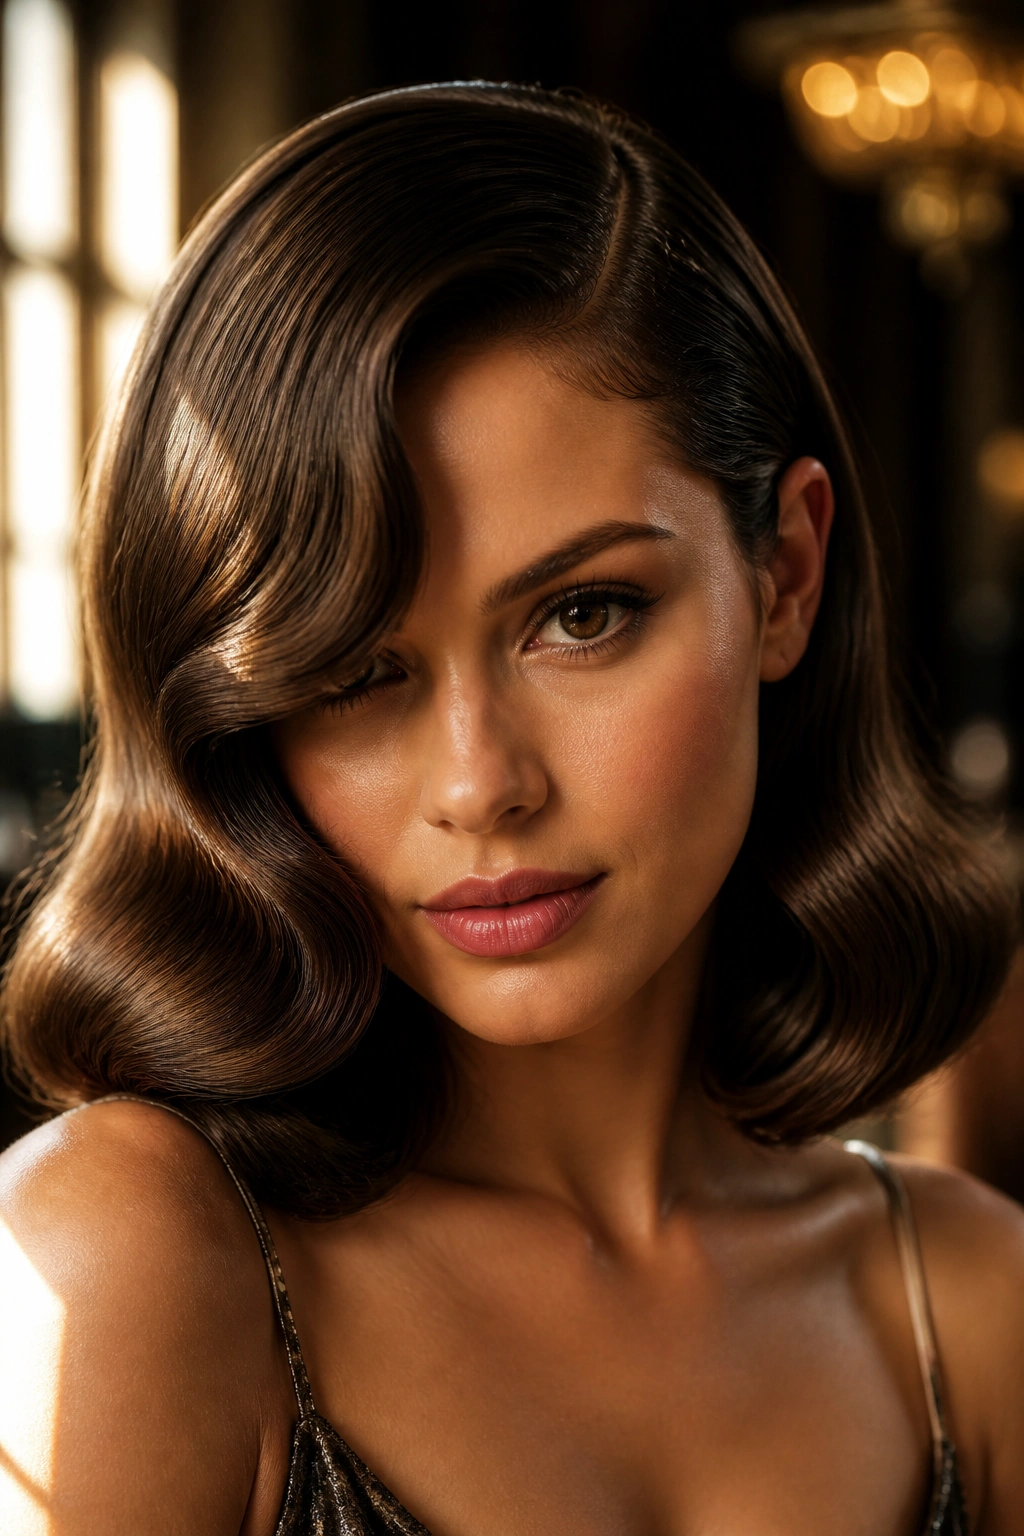
Old-Hollywood waves are all about uniformity, shine, and a deep side part. They look dramatic on medium length hair because the wave pattern stays visible from top to bottom instead of getting lost in extra length.
What makes this version different from softer styles is the direction. You curl the hair in the same direction on each side, pin the waves to cool, and then brush them together so they fall in one sleek curve. The front usually sweeps across the forehead in a wide arc. That part matters. It gives the whole style its expensive-looking shape, even if the tools were ordinary.
How to Style It
Use a 1.25-inch iron and clip each warm curl flat against the head for a few minutes. That setting step is what keeps the wave smooth instead of puffy.
A flexible-hold hairspray is better than a crunchy one here. You want movement when you turn your head, not helmet hair. And if your medium-length cut has face-framing layers, tuck one side behind the ear after brushing. It opens the face and makes the whole thing look more intentional.
4. Loose Mermaid Waves
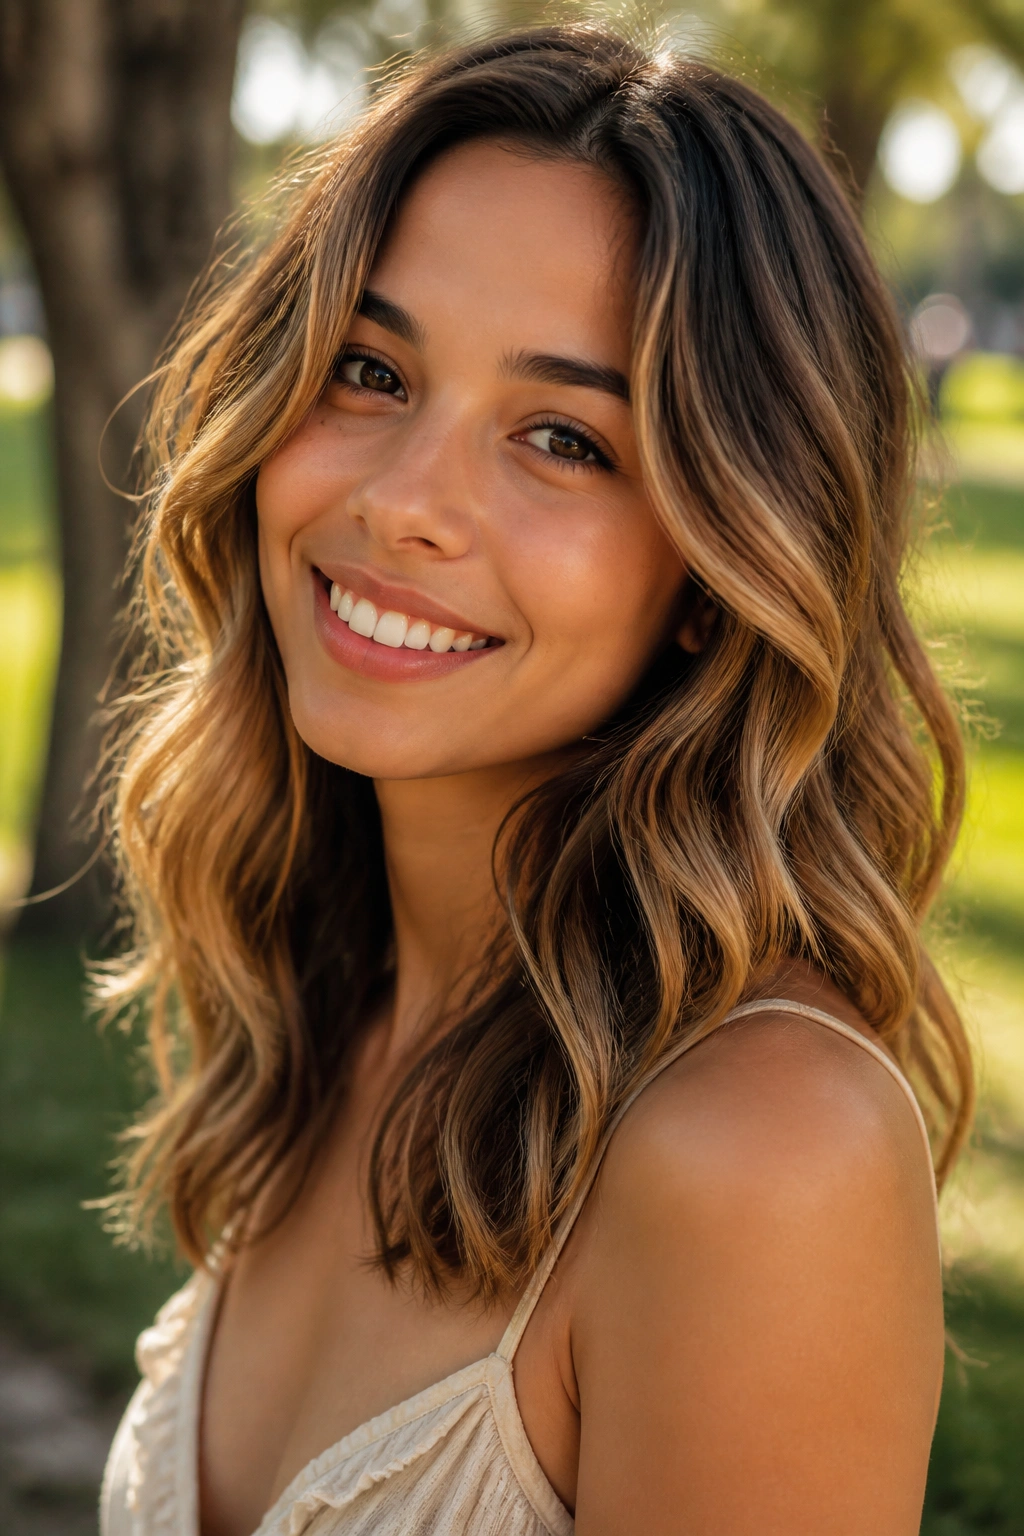
Loose mermaid waves are softer, wider, and a little more romantic than beach waves. They have that long, floating bend that looks expensive on medium length hair because the pattern doesn’t need extra inches to make sense.
I like this style on thicker hair, especially if the ends tend to get bulky. The trick is to use a 1.25-inch to 1.5-inch wand and take bigger sections — about 1.5 inches wide. You’re not chasing curl. You’re building soft, broad bends that move from mid-length to end.
- Curl away from the face on the front sections.
- Leave the roots flatter than you would with beach waves.
- Pin the curls for a few minutes if your hair drops fast.
- Use a light oil only on the ends.
This style has a softer finish than most people expect, and that’s why it works. The waves look airy, not stiff, even when the hair is cut blunt at the bottom. If you like hair that moves when you walk, this is a very good place to live.
5. Flat-Iron Ribbon Waves
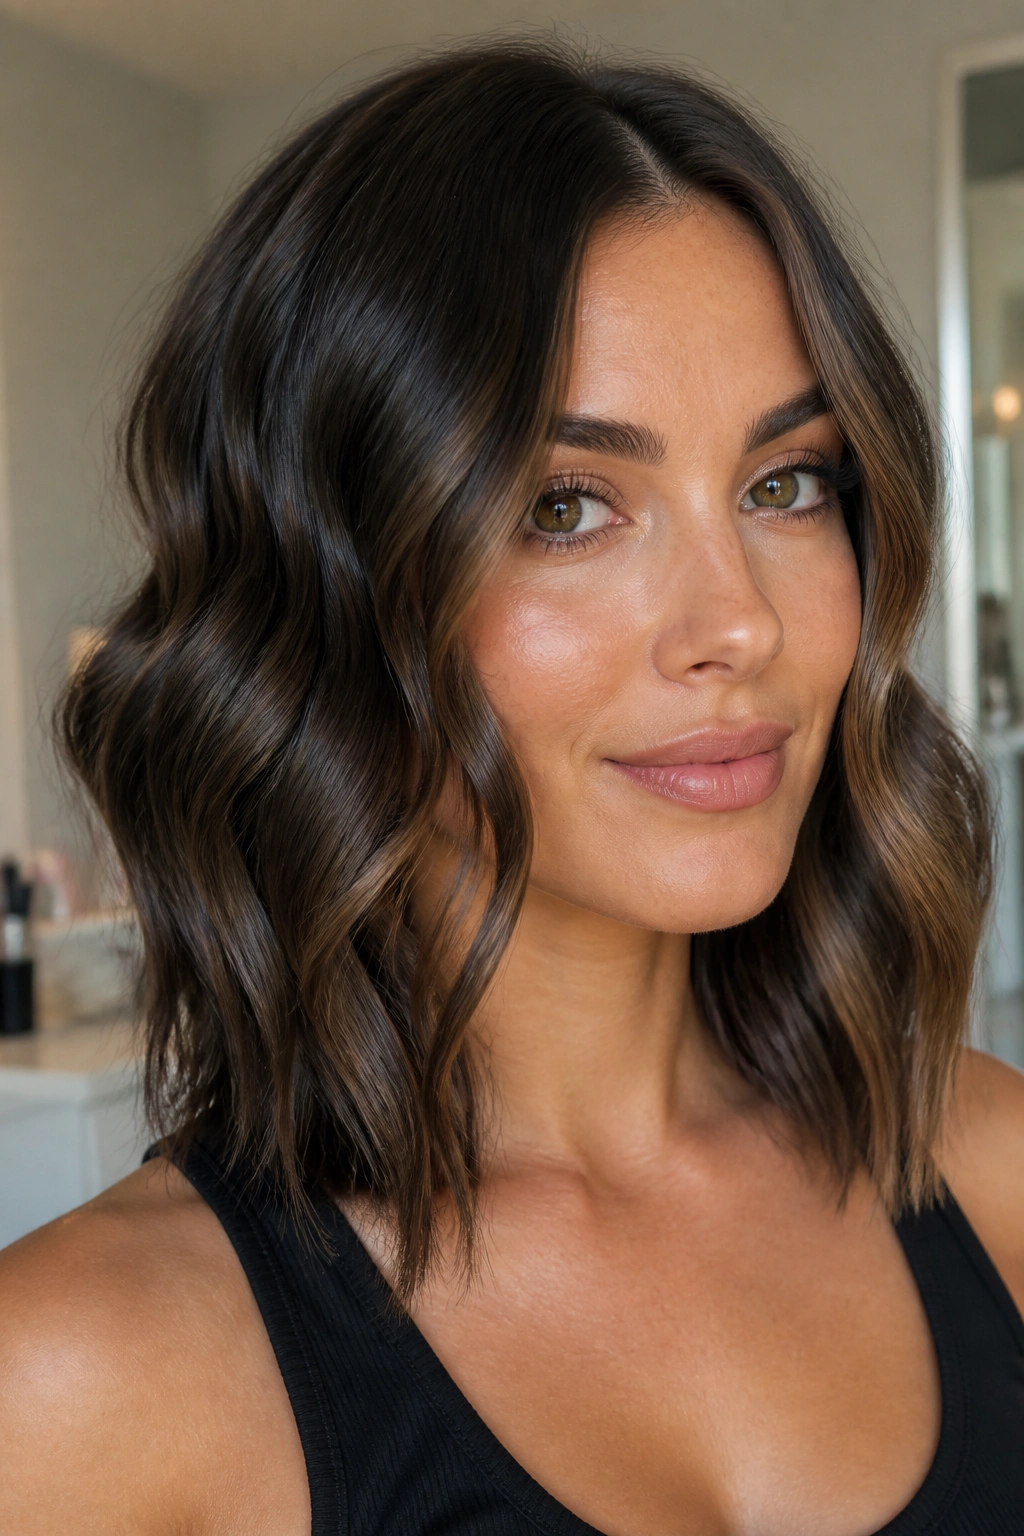
Flat-iron waves are the quickest way to get bend without a curl-iron look. They’re especially good if your medium length hair is blunt or a little shorter at the collarbone, where a big wand can feel too loose.
A flat iron creates a ribbon shape because the heat presses and twists the strand at the same time. Clamp a 1-inch section, rotate the iron a half turn, then slide it down slowly while changing the angle of your wrist. The motion is small. That’s the point. Big movements make kinks; tiny controlled turns make smooth waves.
The style looks best when the front pieces are slightly more polished than the back. That keeps the face from getting swallowed by texture. If your hair is fine, this approach also gives you more shape with less product, which I always appreciate. Too much spray on fine medium hair can make the wave collapse by lunchtime.
Use this when you want body, not curl. It has a cleaner finish than beach waves and a little more edge than a brush-out.
6. Rope-Twist Heatless Waves
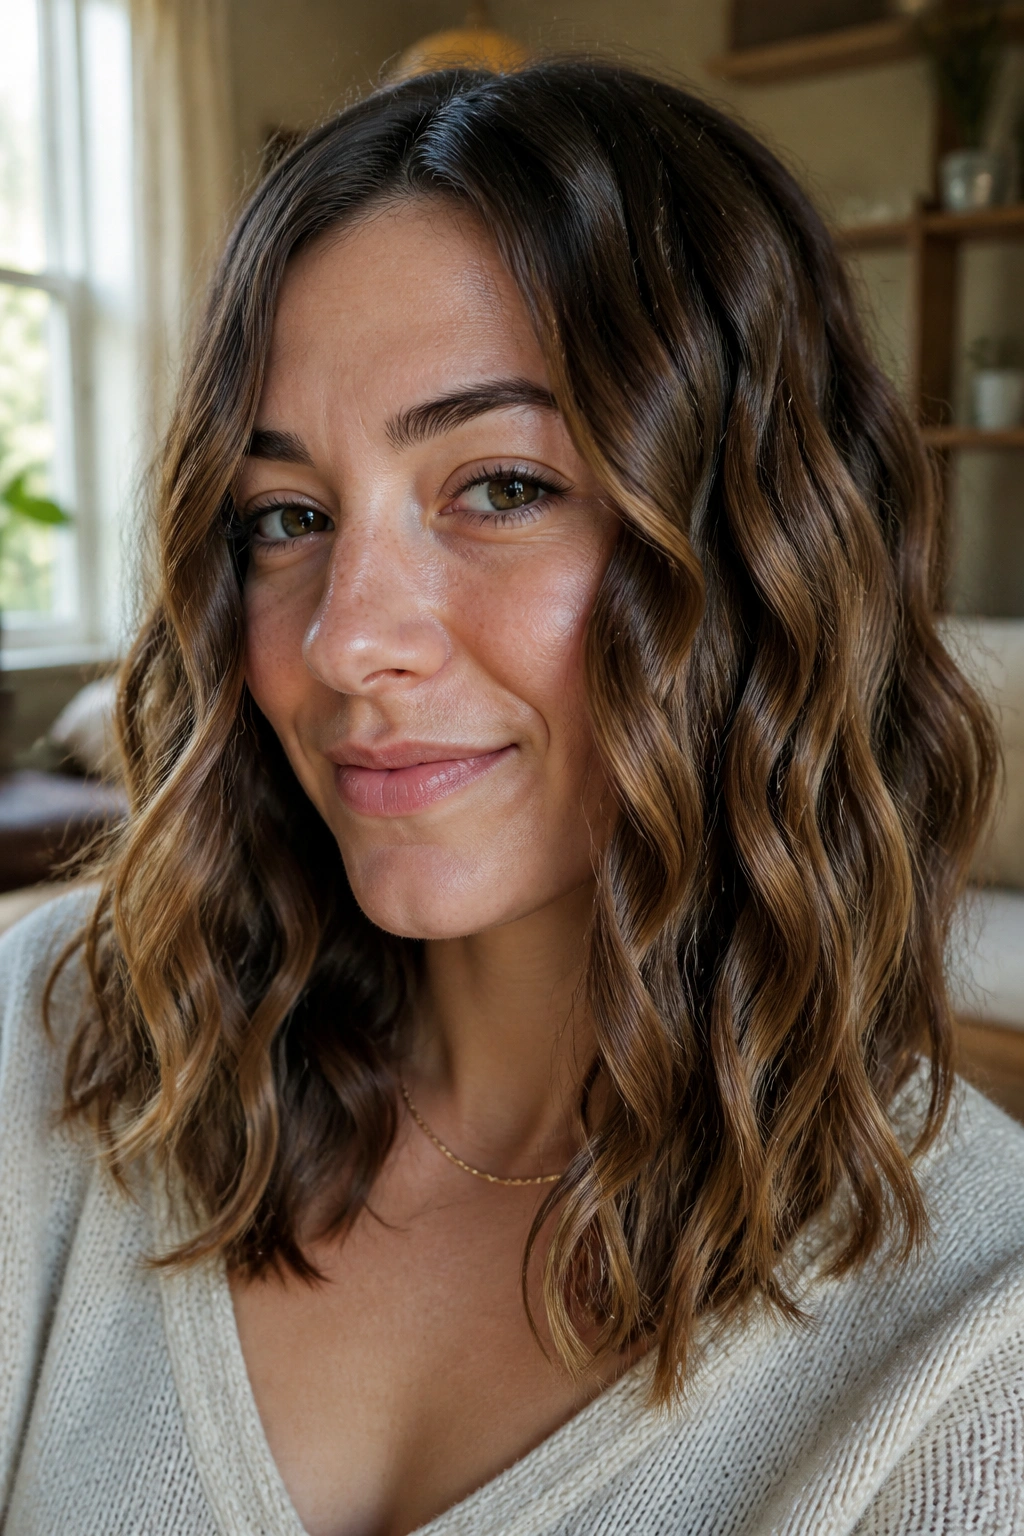
No heat. No rushing. No damage. Rope-twist waves are the style I point people toward when their hair feels tired, dry, or one too many passes away from snapping.
Dampen the hair until it’s about 70% dry, then split it into two sections. Twist each section tightly from root to end, coil the twists into buns or knots, and secure them with soft ties. Let the hair dry fully before taking it down. If you release it while it’s still cool and damp, the pattern falls apart faster than people expect.
What Makes It Different
Unlike braids, rope twists create a more defined spiral bend. On medium length hair, that usually means a wave that starts a little higher and looks less crimped at the ends. The result is airy but not fluffy.
Use a small amount of leave-in conditioner before twisting, especially on porous hair. Otherwise the ends can look frayed. And don’t make the twists too tight near the scalp; that leaves a dent that’s annoyingly hard to fix. A loose root and a firmer mid-length give the nicest result.
7. Braided Overnight Waves
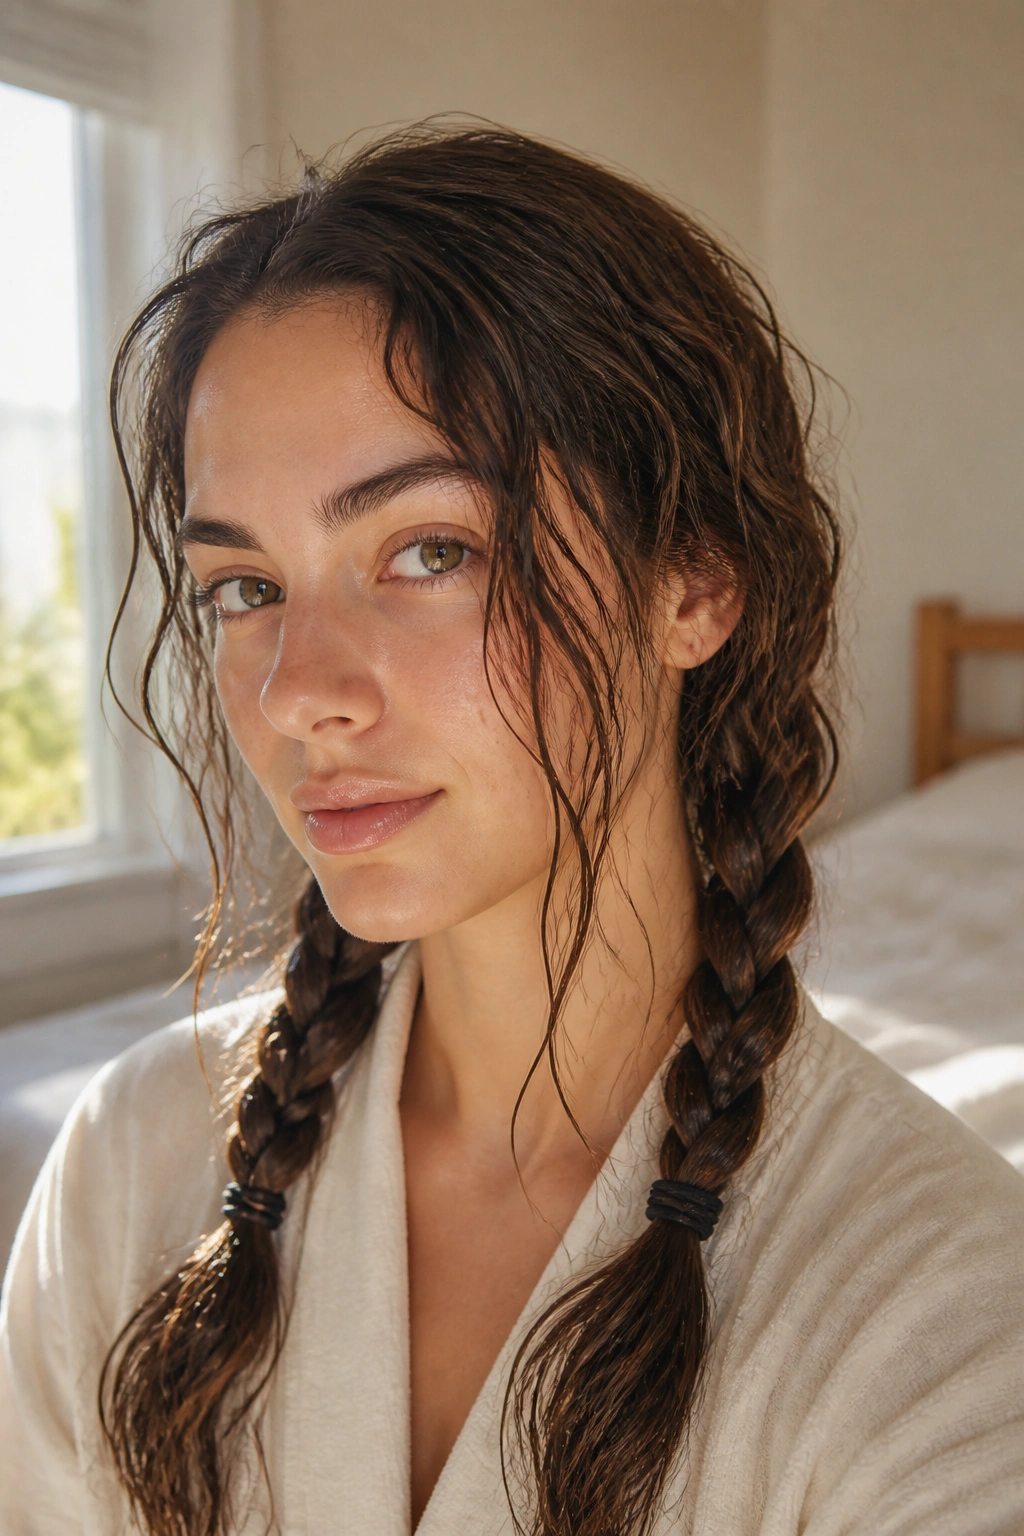
Braids make a different kind of wave than rope twists. They give a softer, more irregular texture, which is often better if you want that slept-in look without the messy knots.
Start with hair that’s damp, not soaking. Apply a little mousse or curl cream through the mids and ends, then divide the hair into two, three, or four braids depending on how tight you want the wave. Two braids give a broad pattern. Four braids give smaller bends. On medium length hair, three braids is the sweet spot if you want movement without too much puff.
This style can be a little unpredictable, and that’s part of the charm. The waves near the face usually come out looser, while the lower sections hold more shape. If you sleep on a rough pillowcase, they’ll frizz more. A silk or satin pillowcase helps, but even a clean T-shirt wrapped around the hair can reduce the friction.
Take the braids apart only when the hair is completely dry. Half-dry braids give you an uneven finish that nobody asked for.
8. Sculpted Finger Waves
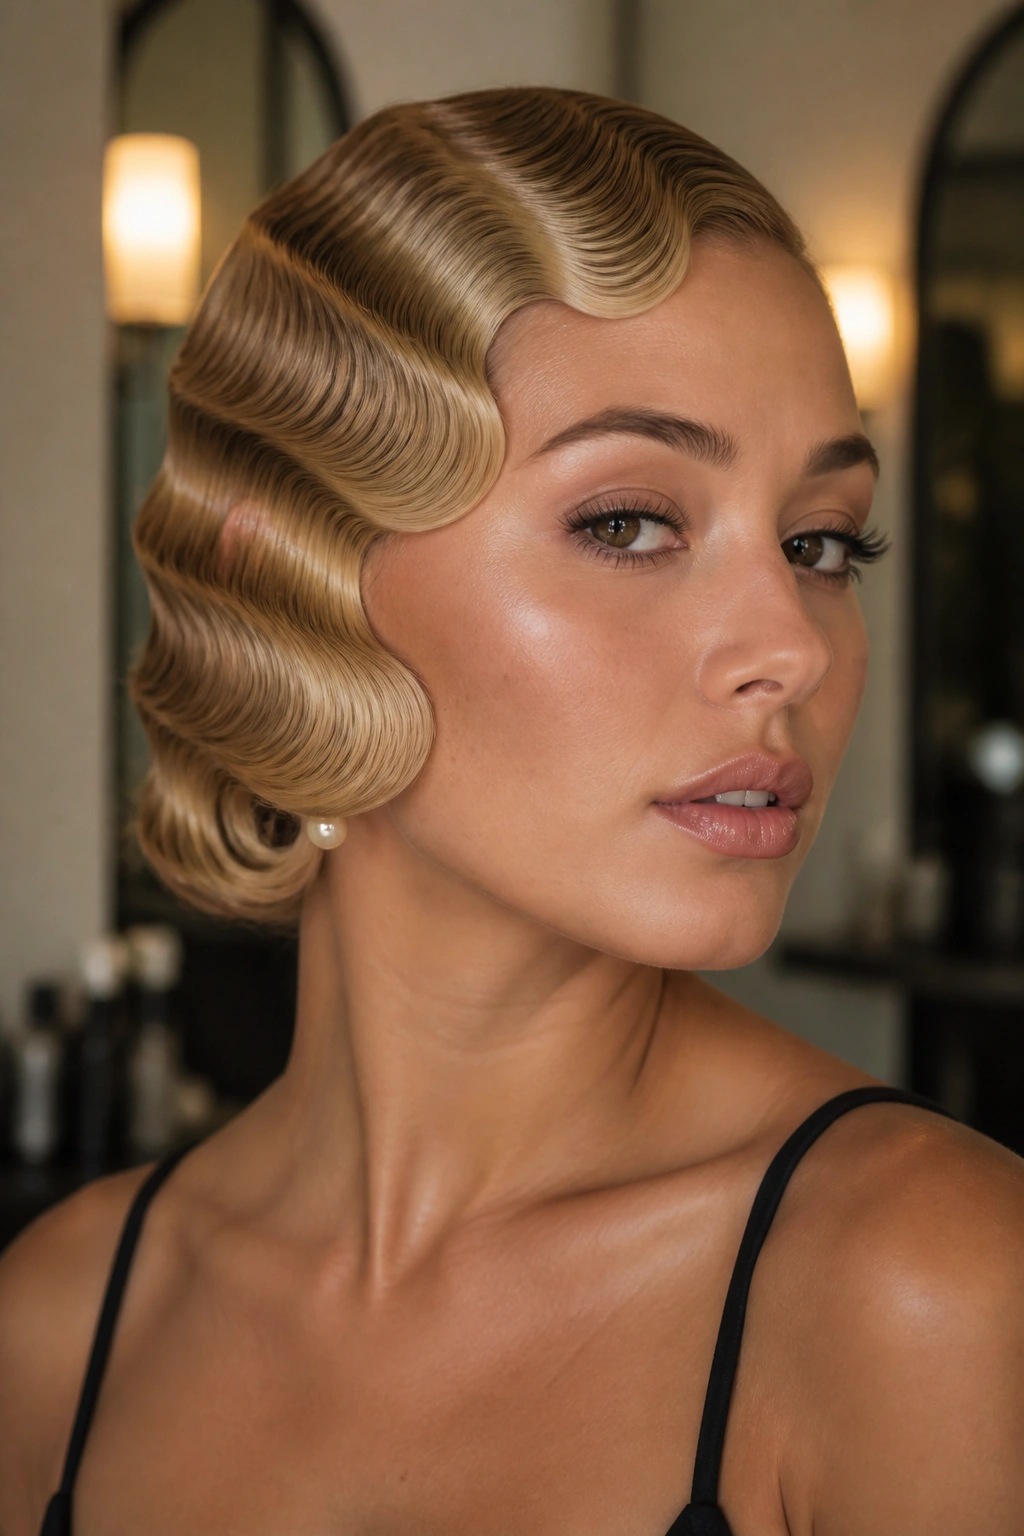
Finger waves are the sharpest style on this list, and they are not trying to be casual. They look bold, polished, and a little old-school in the best way.
Medium length hair is long enough to carve the wave, but short enough to keep the shape from getting lost. That’s why this style can look so good on a collarbone bob or a longer blunt cut. You’ll need a fine-tooth comb, strong gel, and a few clips to hold each ridge while it sets.
The Shape Behind the Style
Finger waves work because they push the hair into opposing curves. One section goes forward, the next goes back, and the ridges stay locked in place as the gel dries. The look is smooth at the root and sculpted through the side, which is very different from the loose, broken texture of beach waves.
I’d save this one for a night out, a photo session, or any time you want the hair to do the talking. It takes more care than the other styles, and it does not forgive sloppy sectioning. But once it’s right, it’s gorgeous.
Use a light hand with gel near the ends. Too much there makes the waves slump.
9. Modern Crimped Waves
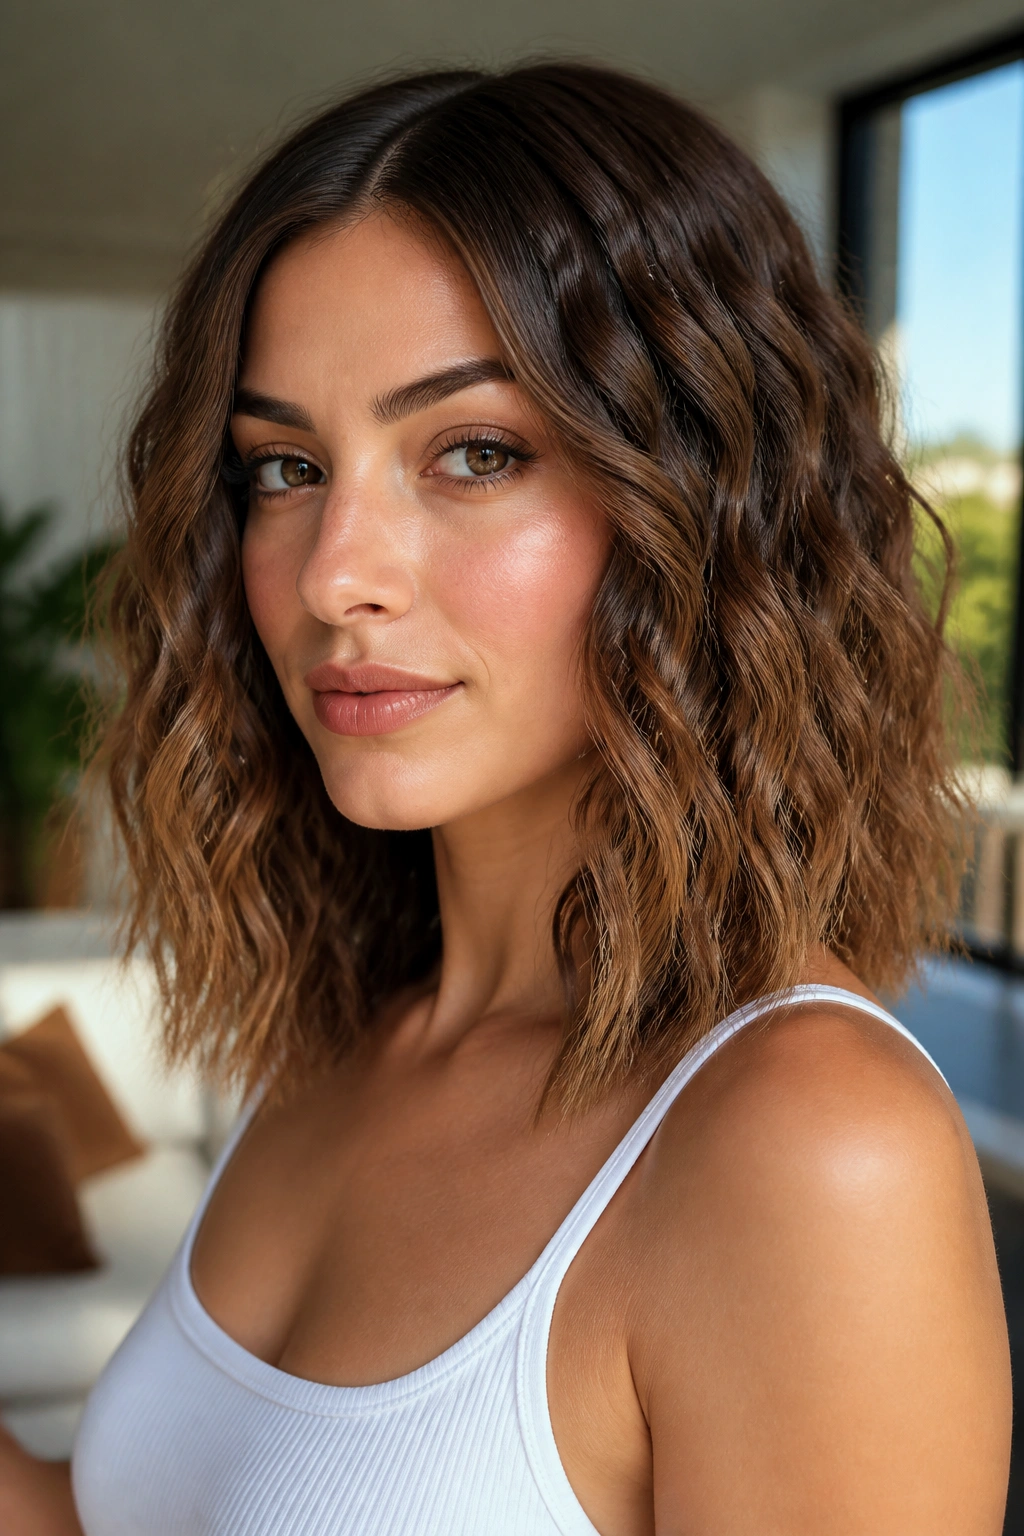
Crimped waves are back in a more controlled form, and on medium length hair they look much fresher when you don’t crimp the whole head. The trick is to keep the top smooth and the ends clean.
Use a mini crimper or a small wave iron on panels about 2 inches wide, but only work through the mid-lengths. Stop before the roots and stop before the very ends. That gives the hair texture without turning the whole head into one big triangle.
What Makes Them Different
Old-school crimping often covered everything. This version is more selective. It adds grip to layered medium hair, which can be useful if your strands slip out of curls fast or if you want the style to last longer in humidity.
A little texture spray over the finished waves can make the effect softer. Don’t brush it out too much. You want the crimp to be visible, just not loud. If your cut has face layers, crimping only the back sections can create depth without making the front pieces busy.
This is one of those styles that looks much better in motion than in a flat photo. It has attitude.
10. Alternating-Direction Waves
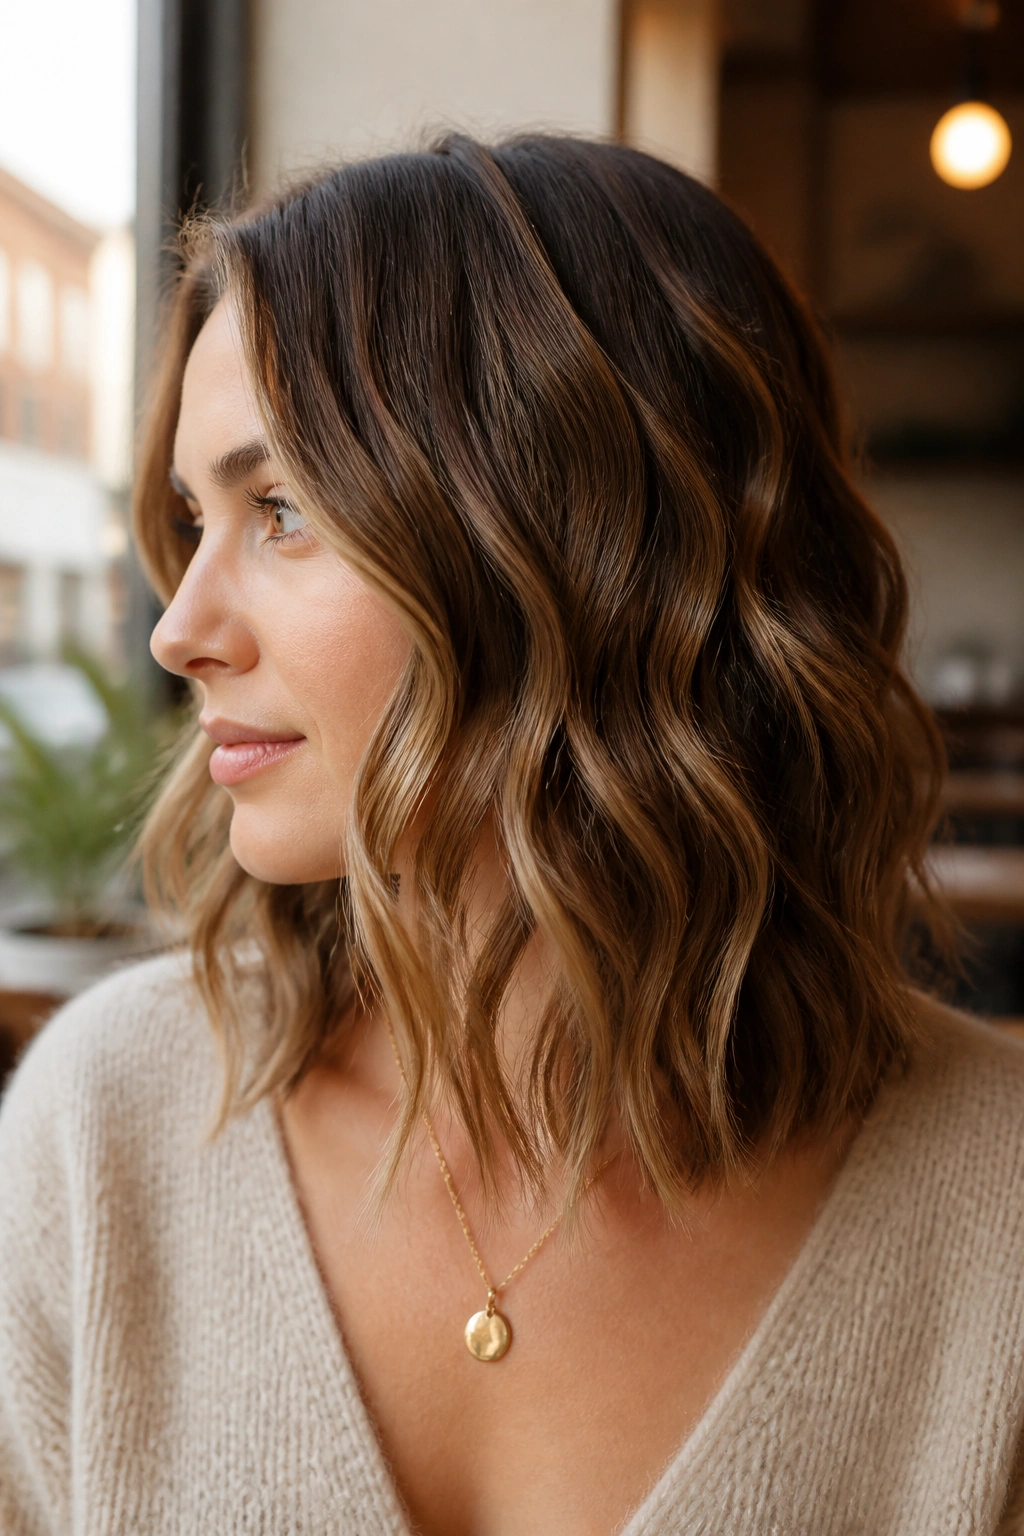
Alternating directions break up the pattern and make hair look fuller. That’s the whole point, and it works especially well on medium length hair that needs a little body around the sides.
Curl one section away from the face, then the next toward it. Keep the sections around 1 inch wide so the bends stay visible. If every curl goes the same direction, the style can look too neat. Alternating the pattern gives a more lived-in finish and prevents the waves from clumping into one flat shape.
The ends matter here too. Leave the last inch out on some sections and wrap it on others. That mismatch sounds minor, but it keeps the hair from looking machine-made. The finished texture should feel soft, not engineered.
How to Get the Most From It
Use this method on medium cuts with layers, because the wave pattern shows the cut instead of hiding it. And let the curls cool fully before you run your fingers through them. If you rush that part, the whole style loosens too much and loses the lift at the crown.
11. Face-Framing Waves for Medium Length Hair
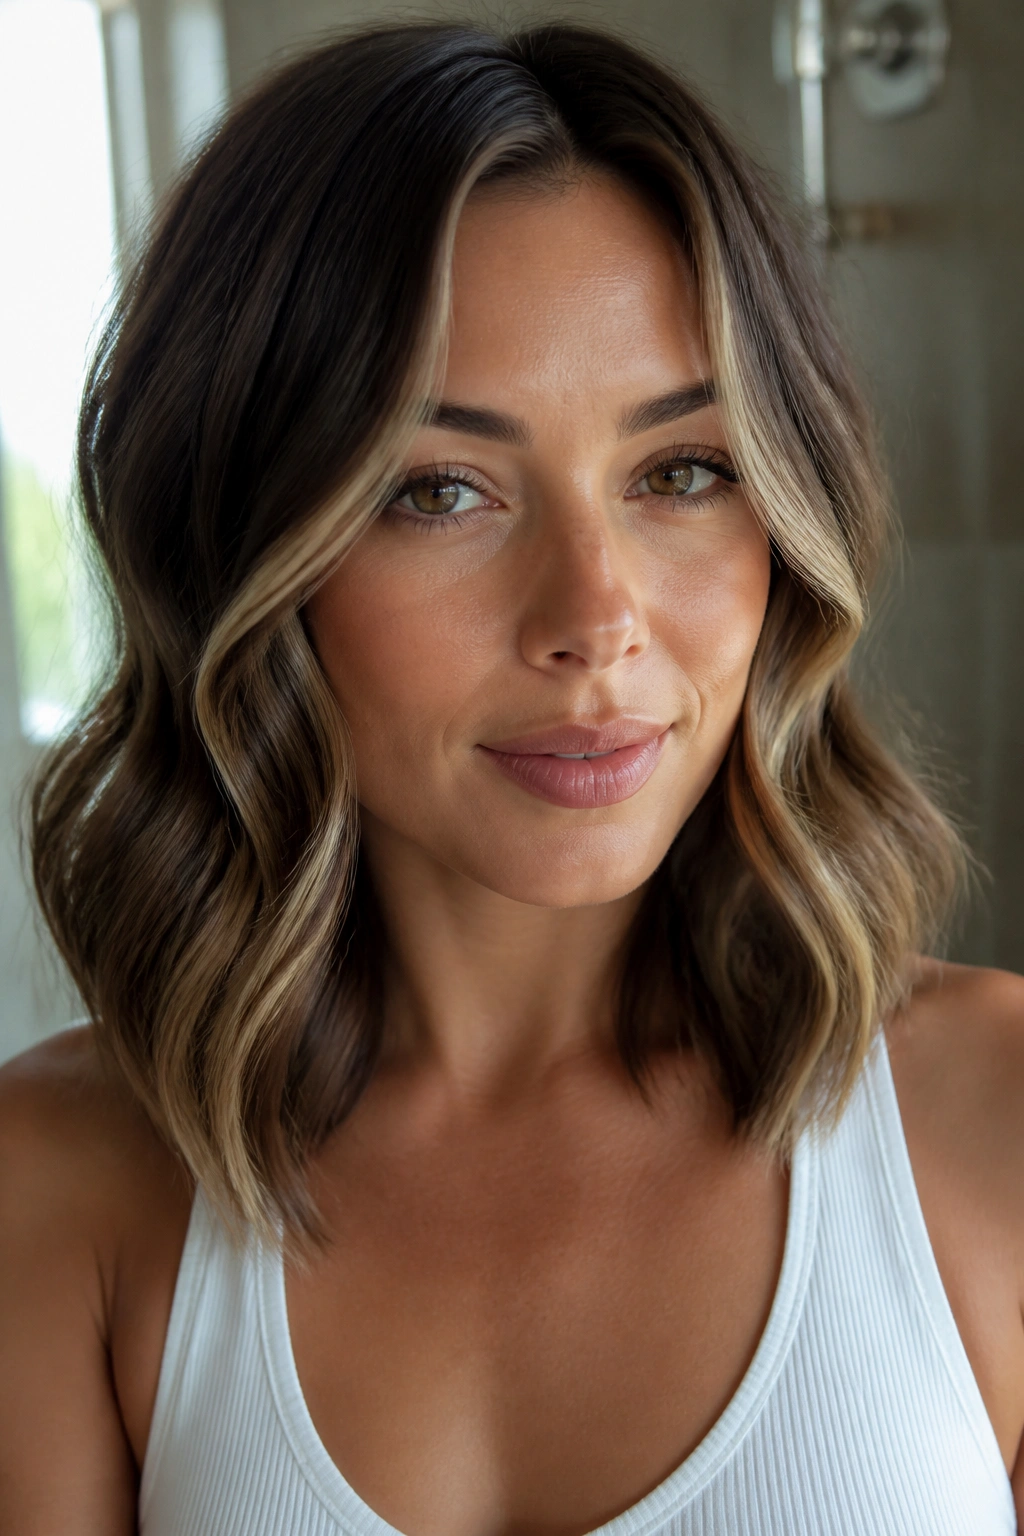
Face-framing waves are less about the whole head and more about where the bend starts. On medium length hair, that matters a lot because the wave can start just under the cheekbones and still hit the ends with movement.
Think of this as a softer approach. The top section stays calmer, while the pieces around the face get a slightly stronger bend. A 1.25-inch wand is usually enough. You’re aiming for a curve that opens the cheek area and softens the jaw, not a tight curl that fights the rest of the cut.
The best part is how fast it changes the mood of the haircut. A blunt medium cut can look sharper with face-framing waves. A layered cut can look lighter. That’s the kind of styling trick I like, because it doesn’t ask for more product or more tools. It just uses placement well.
If your face-framing layers are short, keep the iron moving. Hold heat on those pieces too long and they get too springy. A few seconds is enough.
12. Deep Side-Part Waves
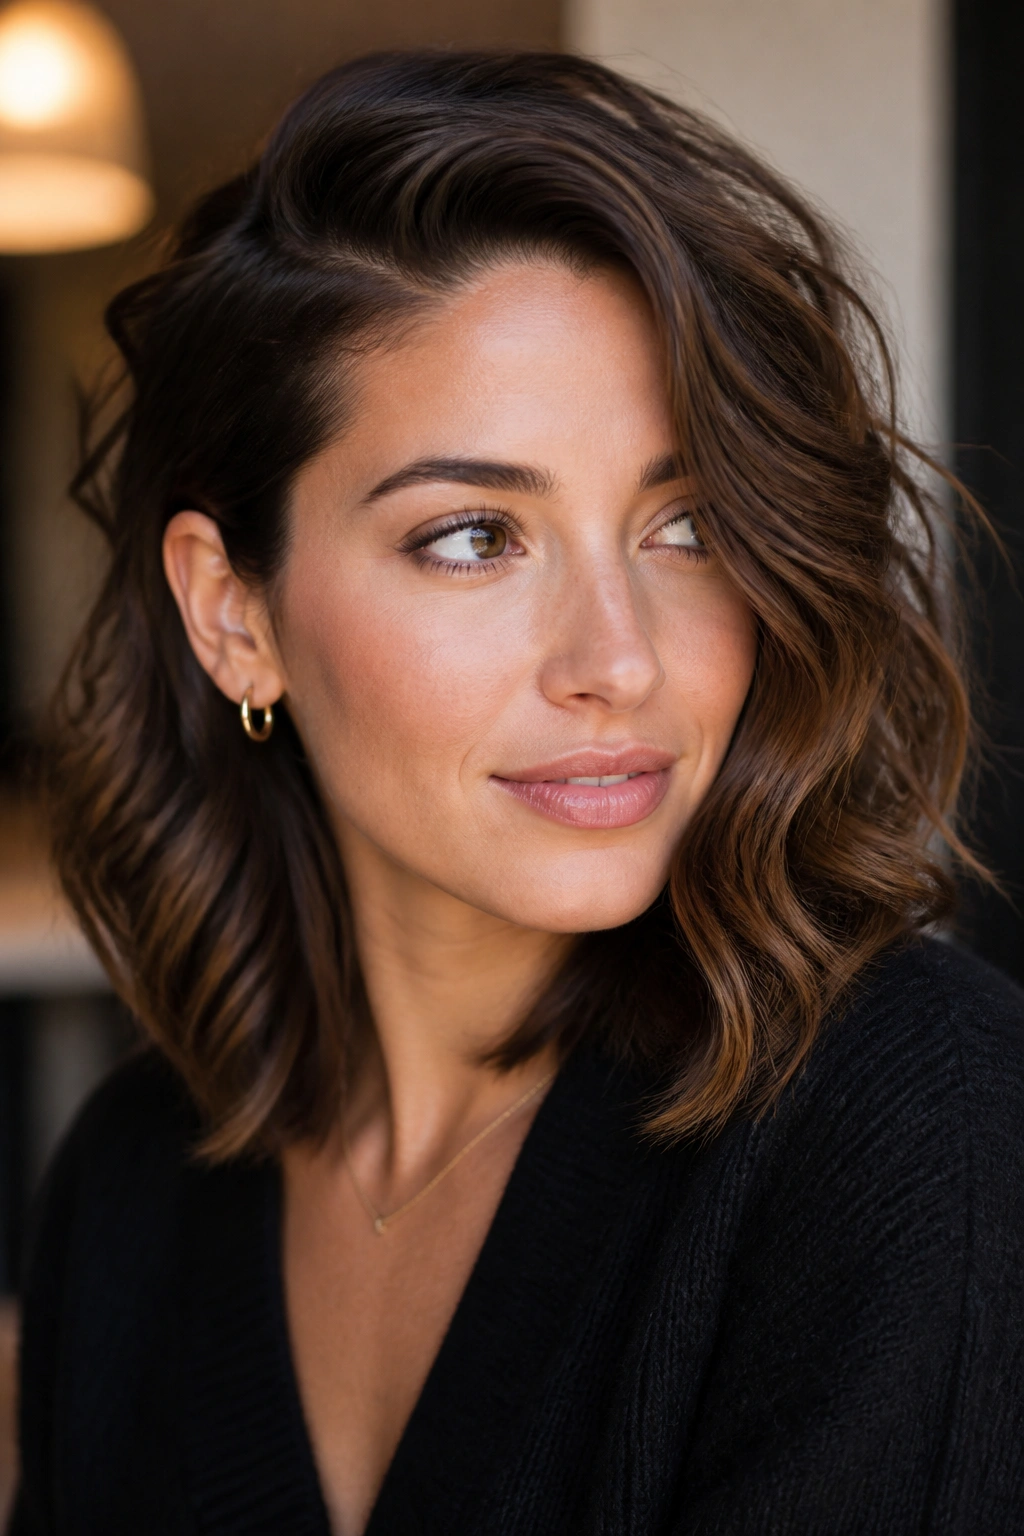
A deep side part changes everything before you even touch the ends. The root lift, the sweep across the forehead, the way one side gets more volume than the other — all of it makes medium length waves look fuller.
This style is a smart choice if your hair lies flat at the crown. Shift the part 3 to 4 inches off center, clip the heavier side at the root for a few minutes, then wave the rest with a medium barrel. The side with more hair should fall across the face in a loose curve. The smaller side can be tucked behind the ear or left soft around the temple.
Unlike centered waves, this version creates a built-in shape without needing extra teasing. It also flatters medium cuts that have a blunt hem, because the asymmetry keeps the bottom from feeling boxy.
A little volume powder at the root can help, but don’t pile it on. The part itself already does most of the work. The trick is to let the wave and the lift support each other instead of fighting for attention.
13. Tousled Layered Waves
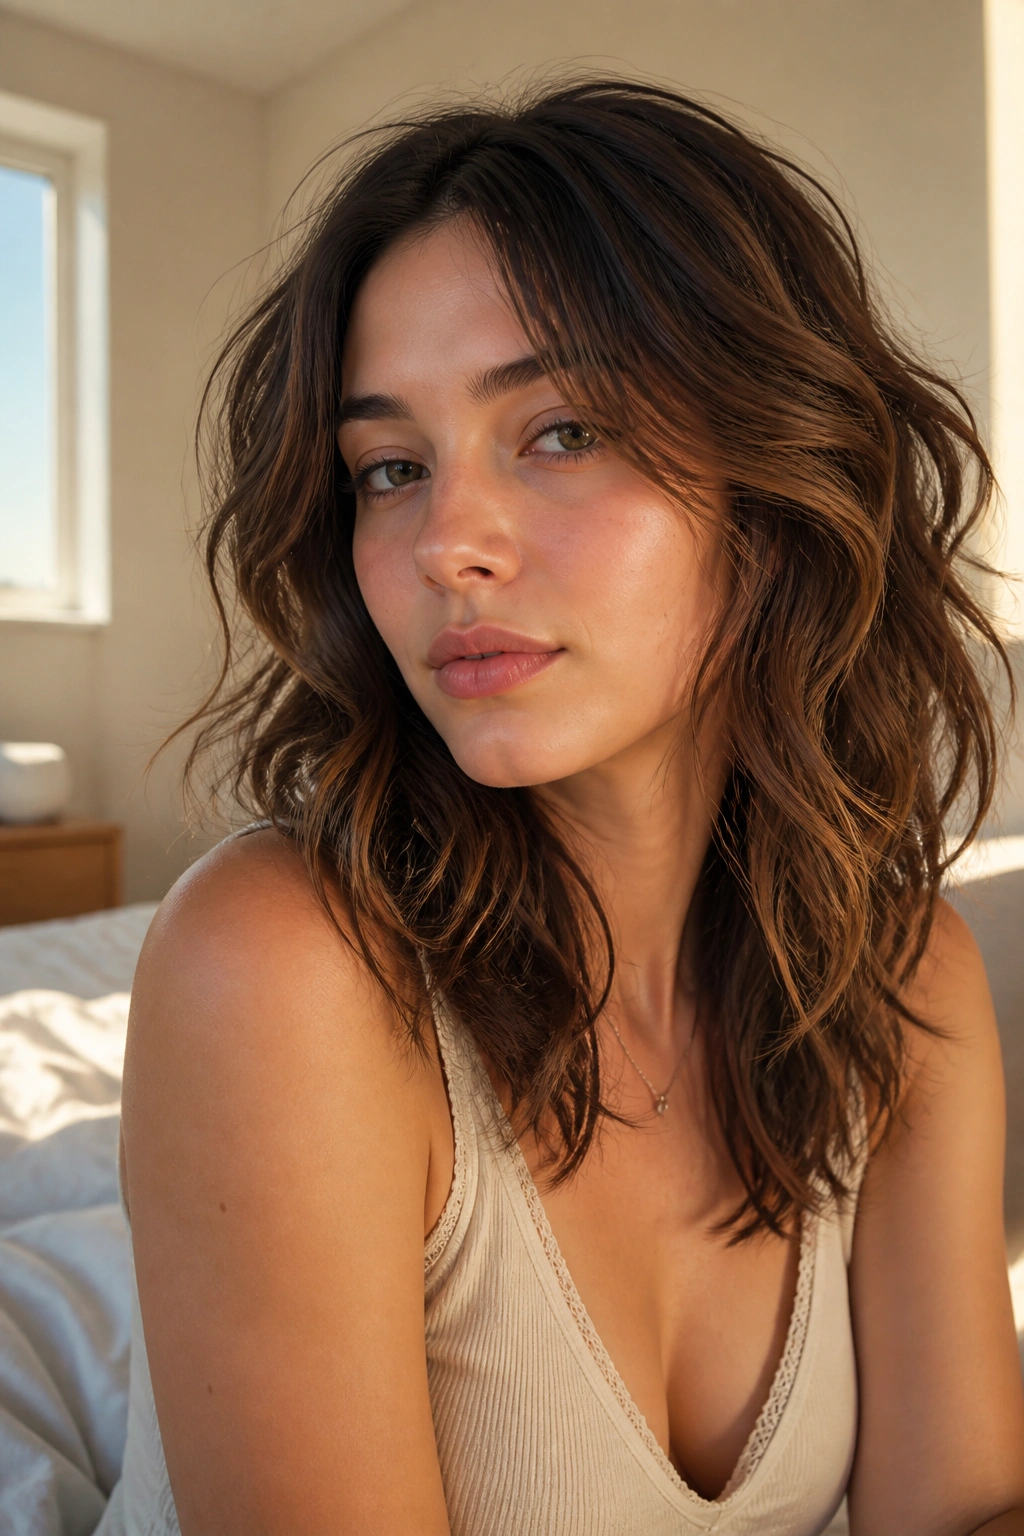
Tousled layered waves are what happen when the haircut does half the work and the styling stays loose. If your medium length cut has layers, this is probably the easiest way to show them off without making the hair look over-styled.
Start with a texturizing spray or a light mousse, then dry the hair until it’s almost finished and twist random sections with your fingers as you go. You do not need every strand to curl the same way. In fact, the style looks better when some sections stay a little straighter and others bend more sharply.
Why It Suits Layers So Well
Layers break up the wave pattern, which keeps medium length hair from looking heavy at the ends. A few piecey bends around the cheekbones and jaw can make the whole cut feel lighter. The result is messy in a controlled way — not sloppy, just relaxed.
Use a tiny amount of cream on the ends if they stick out. Too much product weighs this style down fast. And if your layers are short, skip the brush entirely. Fingers only. A brush can flatten the texture before you’ve had a chance to enjoy it.
14. Half-Up Waves with a Soft Crown Lift
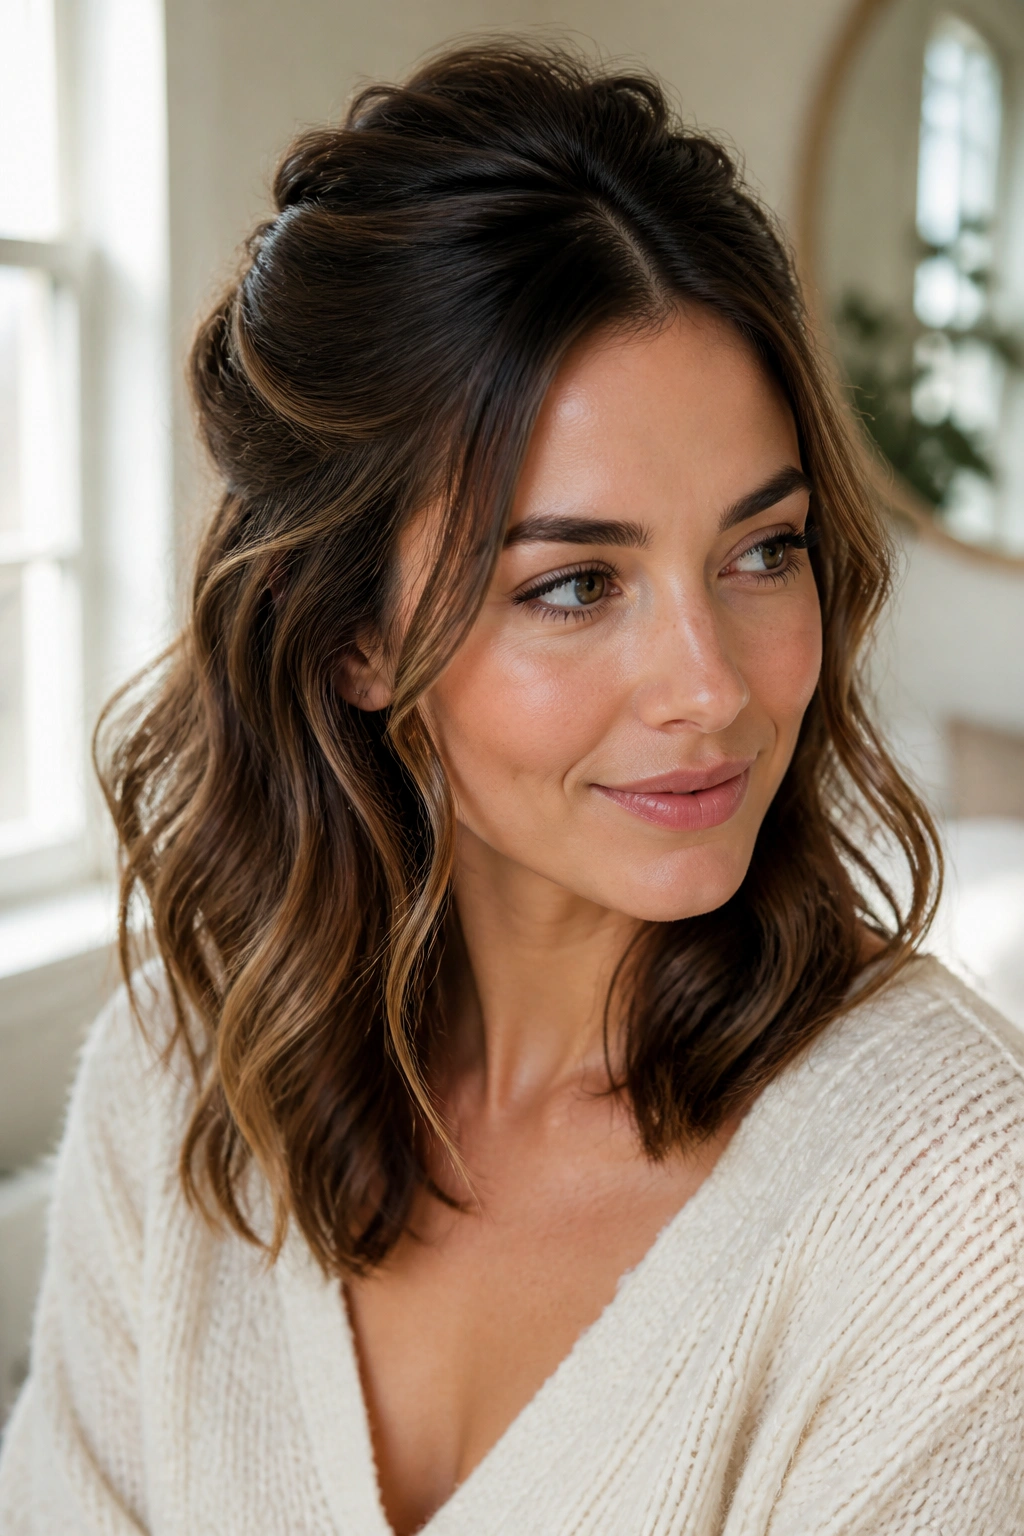
Half-up waves solve a simple problem: the lower half gets to stay loose while the top stops falling into your eyes. On medium length hair, that balance can look polished without making the style feel formal.
Pull back the crown section with a small clip, a soft twist, or a tiny knot, then leave the lower waves loose and lightly separated. The lift at the top matters more than the shape of the tie. If the crown lies flat, the whole style can feel unfinished. A little root volume makes the wave pattern below it look richer.
This is one of the easiest ways to dress up a wave without starting over. It works well when your medium cut has face-framing pieces, because those front strands can stay out and soften the temples while the top section gets swept back.
If you want the half-up area to stay in place, mist it with flexible spray before clipping. That gives you hold without turning the crown into a stiff shell. Nobody needs that.
15. Wet-Look Waves
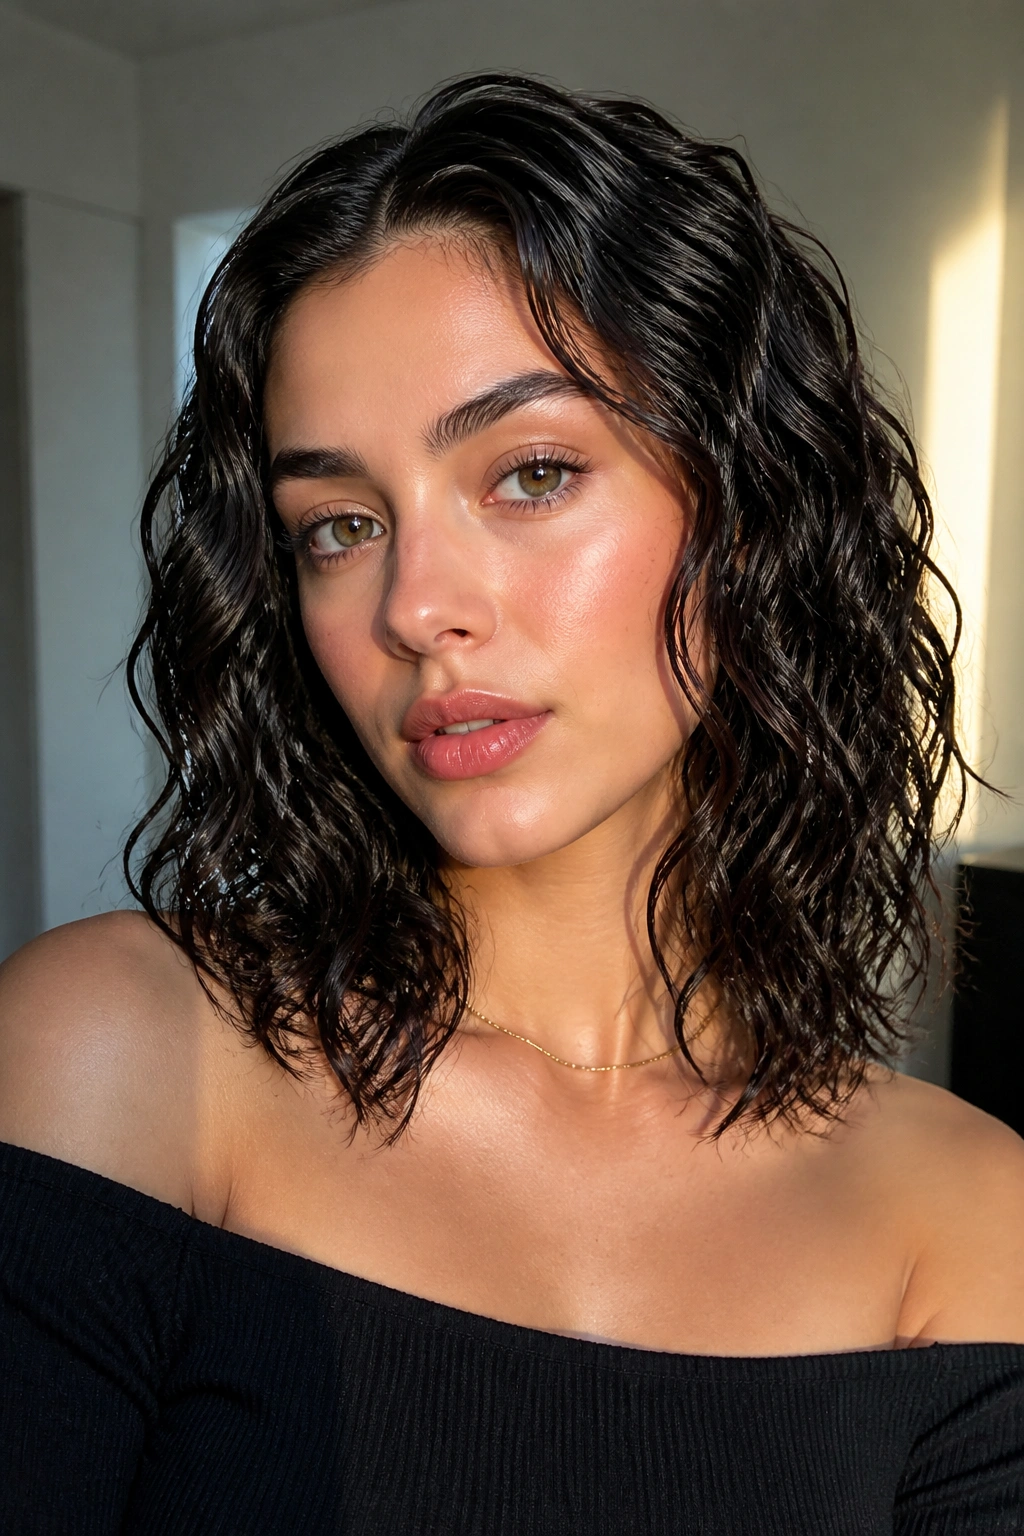
Wet-look waves are sleek, glossy, and a little daring. They’re not trying to imitate natural texture. They’re trying to look deliberate.
Start with damp hair and work in a gel or styling cream from root to tip. Then comb it through with a wide-tooth comb so the product sits evenly. Instead of roughing the hair up, press a few soft bends into the mid-lengths with your hands or twist the ends lightly before letting it dry. The finish should stay smooth at the root and defined through the wave.
This style feels strong on medium length hair because the length is enough to show the shine, but not so long that the product gets lost. It also handles humidity better than many loose wave looks. That’s useful if your hair usually blows up the minute the air gets damp.
A small warning: too much gel turns the style stiff and flaky. Use enough to coat, not enough to crust. If the hair feels tacky after drying, you used too much.
16. Soft Barrel Waves
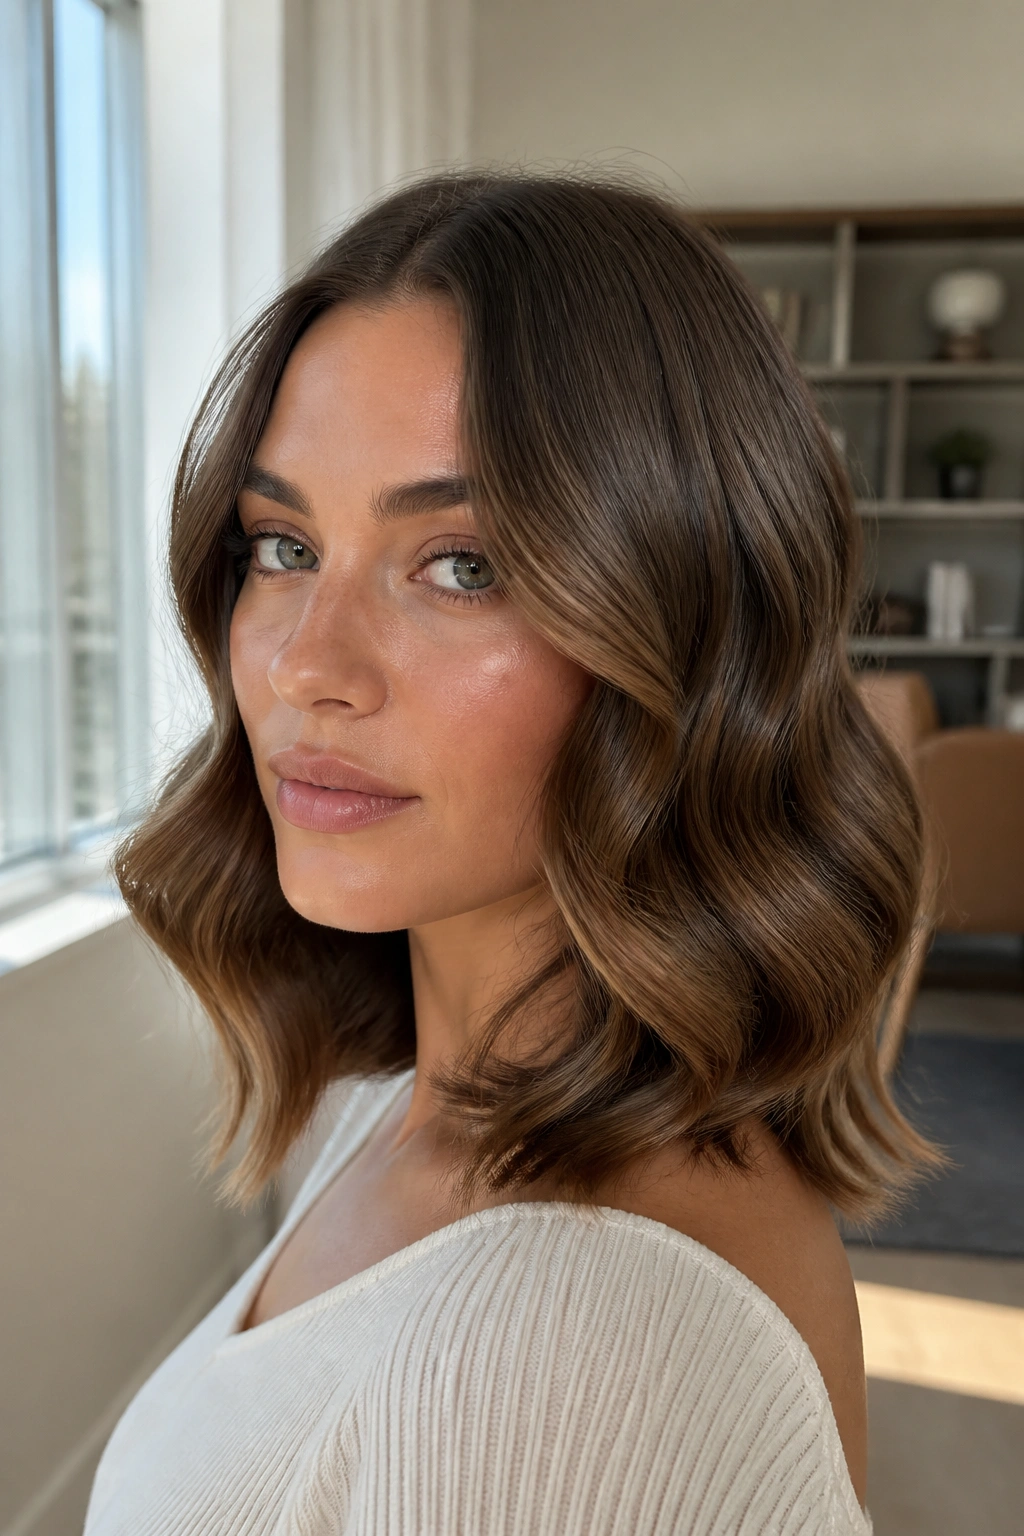
Soft barrel waves are the middle ground between beachy and glam. They have a broader curve than a tight curl, but more polish than a loose bend.
Use a 1.5-inch barrel if your hair is medium length and fairly dense. Smaller barrels can overcook the shape and leave you with too much bounce at the bottom. Take medium sections, wrap them with steady tension, and release them into your palm before clipping them to cool. That setting time matters. It gives the wave its round shape.
Why They Feel Different
Unlike beach waves, soft barrel waves look more uniform. Unlike Hollywood waves, they don’t need a perfect side part or a full brush-out. They sit neatly in the middle, which makes them useful for workdays, dinners, and everything in between.
If your cut is a little layered, leave the shortest front pieces out of the barrel for a few seconds less. They pick up shape faster than the rest. A light mist of spray at the end is enough. You want touchable movement, not a shell.
17. Barely-There Bends
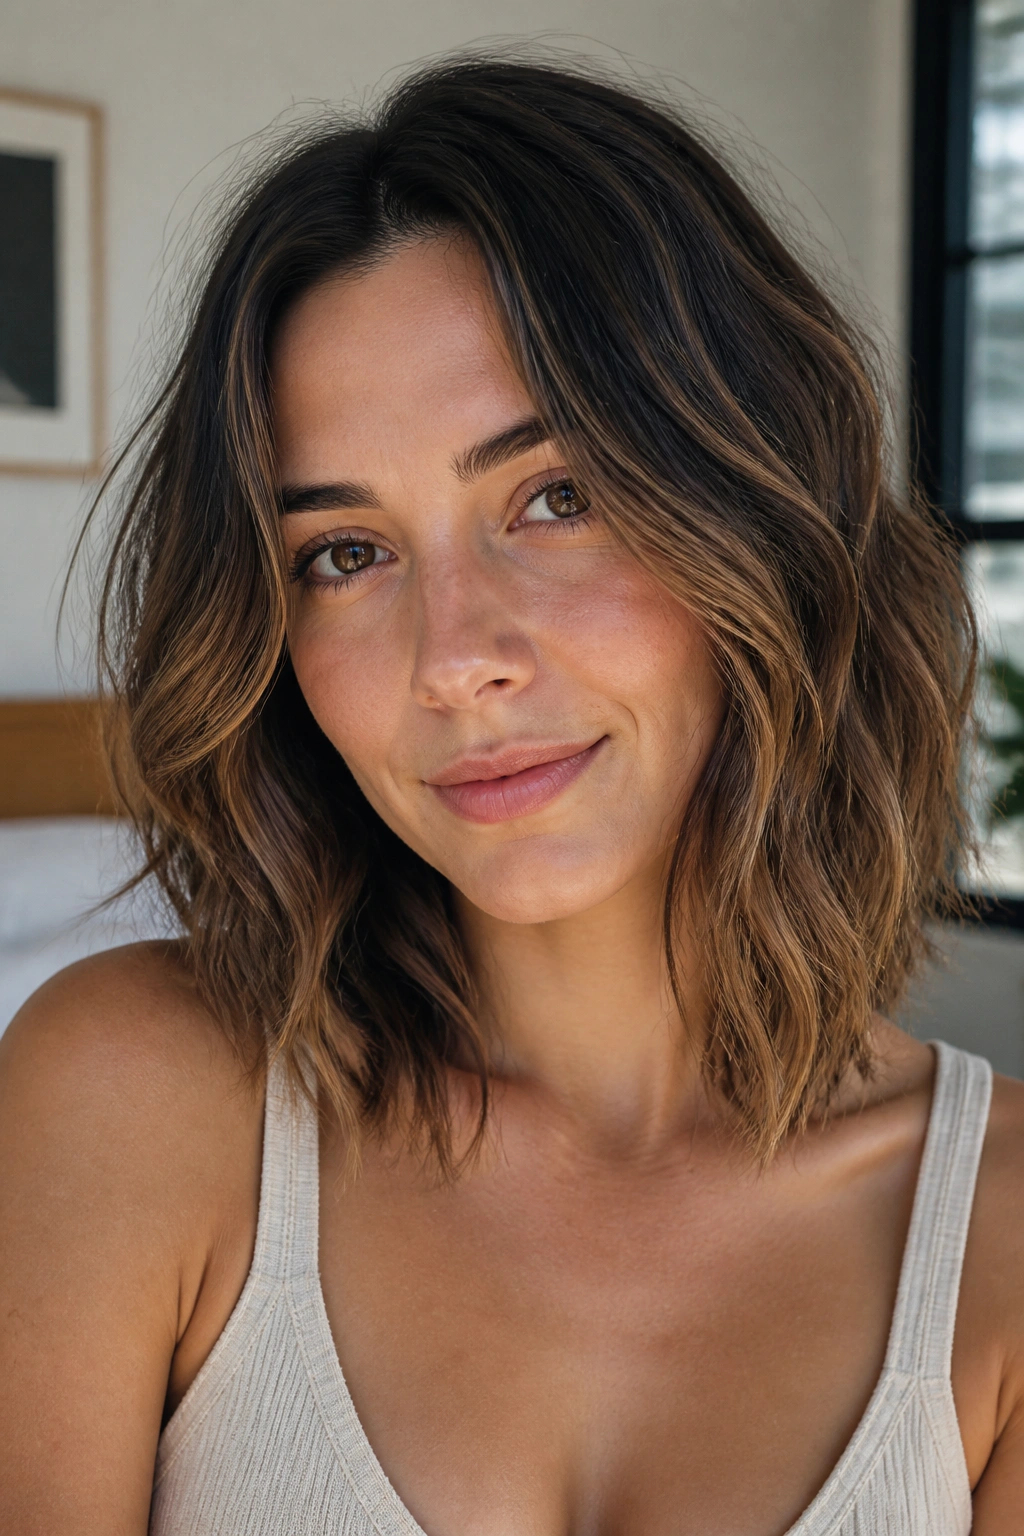
Barely-there bends are for the days when you want hair that looks styled but not announced. On medium length hair, this can be a very smart choice because the length already gives you some movement.
The technique is simple. Use a flat iron or curling iron to create gentle S-shapes in random sections, then stop before the wave becomes obvious. You’re aiming for the kind of texture people notice only after they look twice. It sits nicely on finer hair because it adds body without needing a lot of heat or product.
How to Keep It Soft
Keep the sections loose and the twists small. If you overdo the bend, the style starts reading as old-fashioned curl rather than relaxed wave. And don’t try to make every section match. A few straighter pieces mixed in with soft bends keep the finish from looking too tidy.
This style also lasts longer than people expect when the hair is cut at one length. The straight bits around the ends create a little anchor, so the wave doesn’t spring apart as quickly. That part is useful if you hate restyling by lunch.
18. Shaggy Piecey Waves
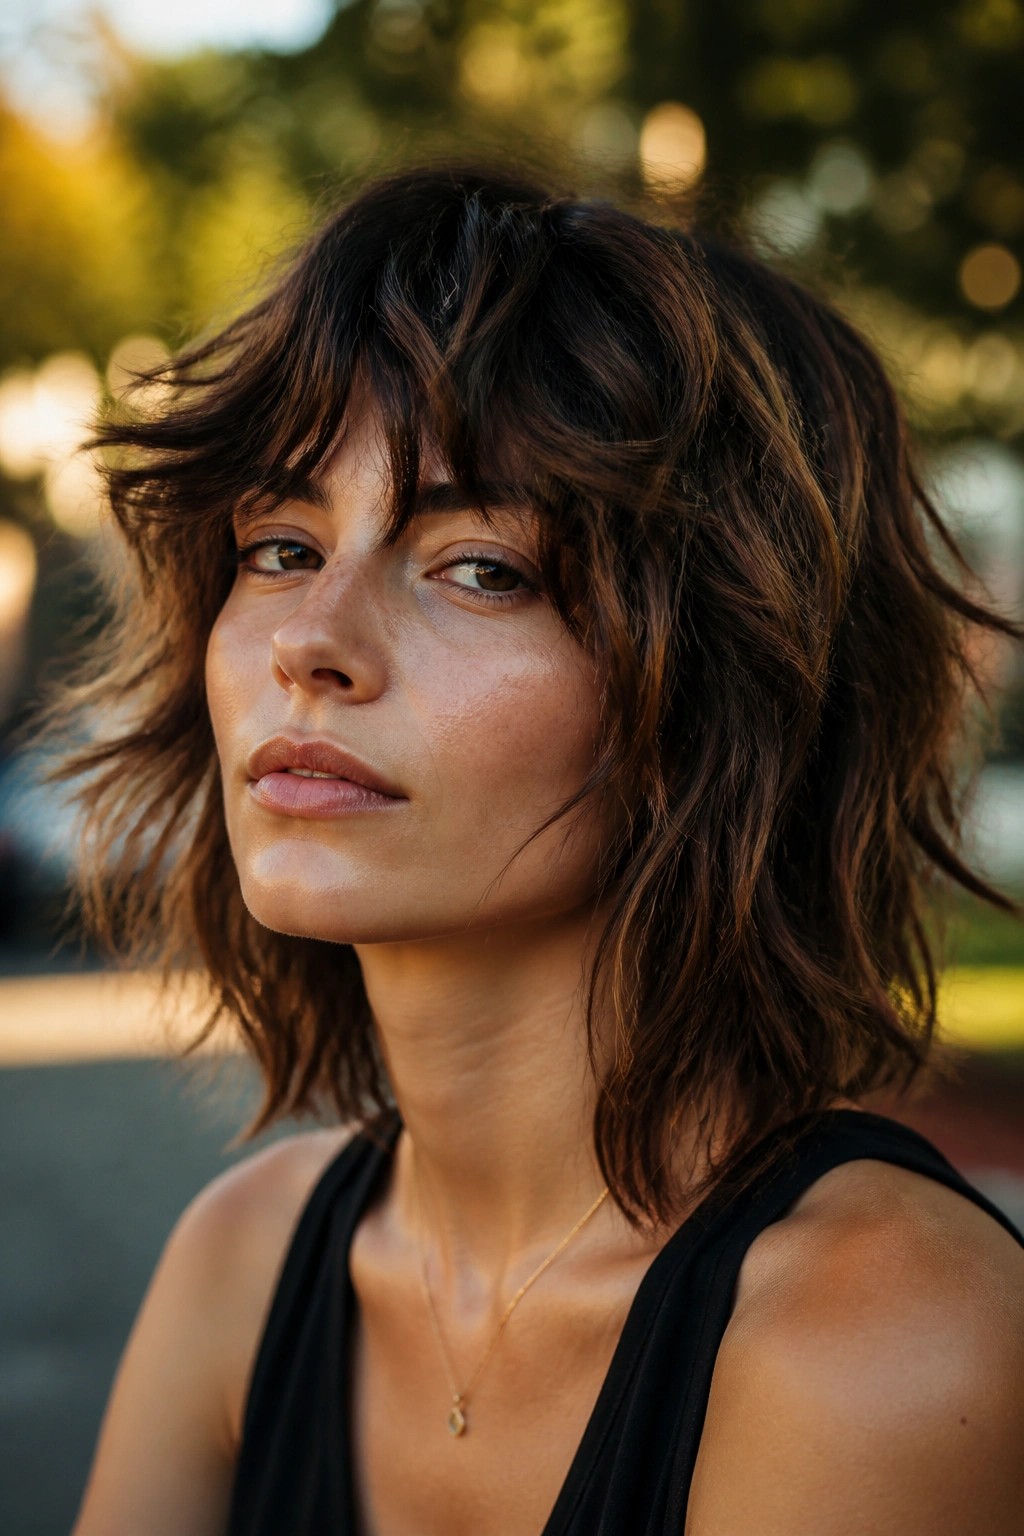
Shaggy piecey waves lean into separation. They’re less about smooth curves and more about visible chunks of texture, which makes them a natural fit for medium length shag cuts or layered cuts with a little attitude.
A matte texturizing paste or light wax works better here than shine spray. Work a pea-sized amount through the ends, then twist a few random pieces around your fingers to define them. The style should look a little undone, with some sections more lifted than others.
The reason this works on medium hair is simple: the length is long enough to show texture, but short enough that the pieces don’t droop into one heavy sheet. If your haircut has choppy layers, this style will show them off fast. If it doesn’t, the waves can still create that kind of rough-edged movement, though the result will be softer.
Do not smooth this style too much. The separation is the point. If everything blends together, the whole thing loses its shape.
19. Brushed-Out Curls
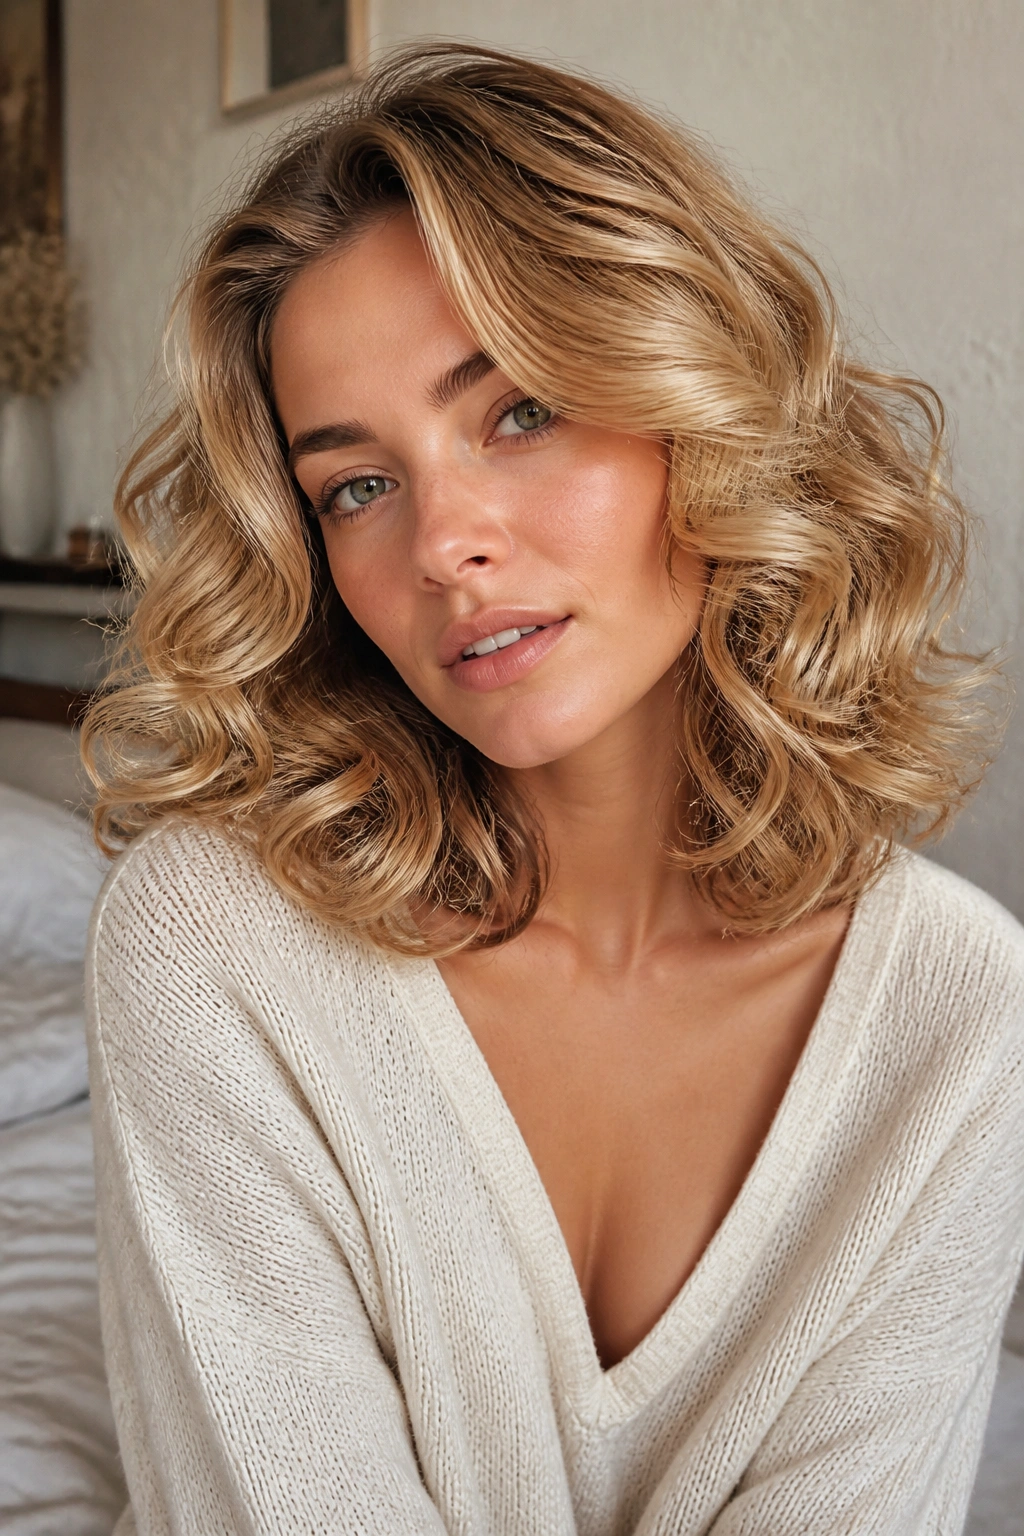
Brushed-out curls sit close to glamorous waves, but they feel fluffier and less structured. The first step is to curl the hair more tightly than you want the final result to be. Then let it cool completely. Only after that do you brush it out.
Use a boar-bristle brush or a soft paddle brush and start from the ends, not the roots. That keeps the wave from turning into one flat swell. On medium length hair, the brush-out creates volume that sits through the mids without dragging the ends into fuzz.
This style is a favorite when you want softness with a little presence. It gives the hair a rounded shape, which can make thinner medium cuts look fuller. A flexible spray at the end helps the brushed texture hold together. Too much spray, though, and you lose the airy finish that makes it work.
There’s a nice side effect here: if the curls were a touch uneven to begin with, the brush hides most of that. Handy.
20. Air-Dried Waves for Medium Length Hair
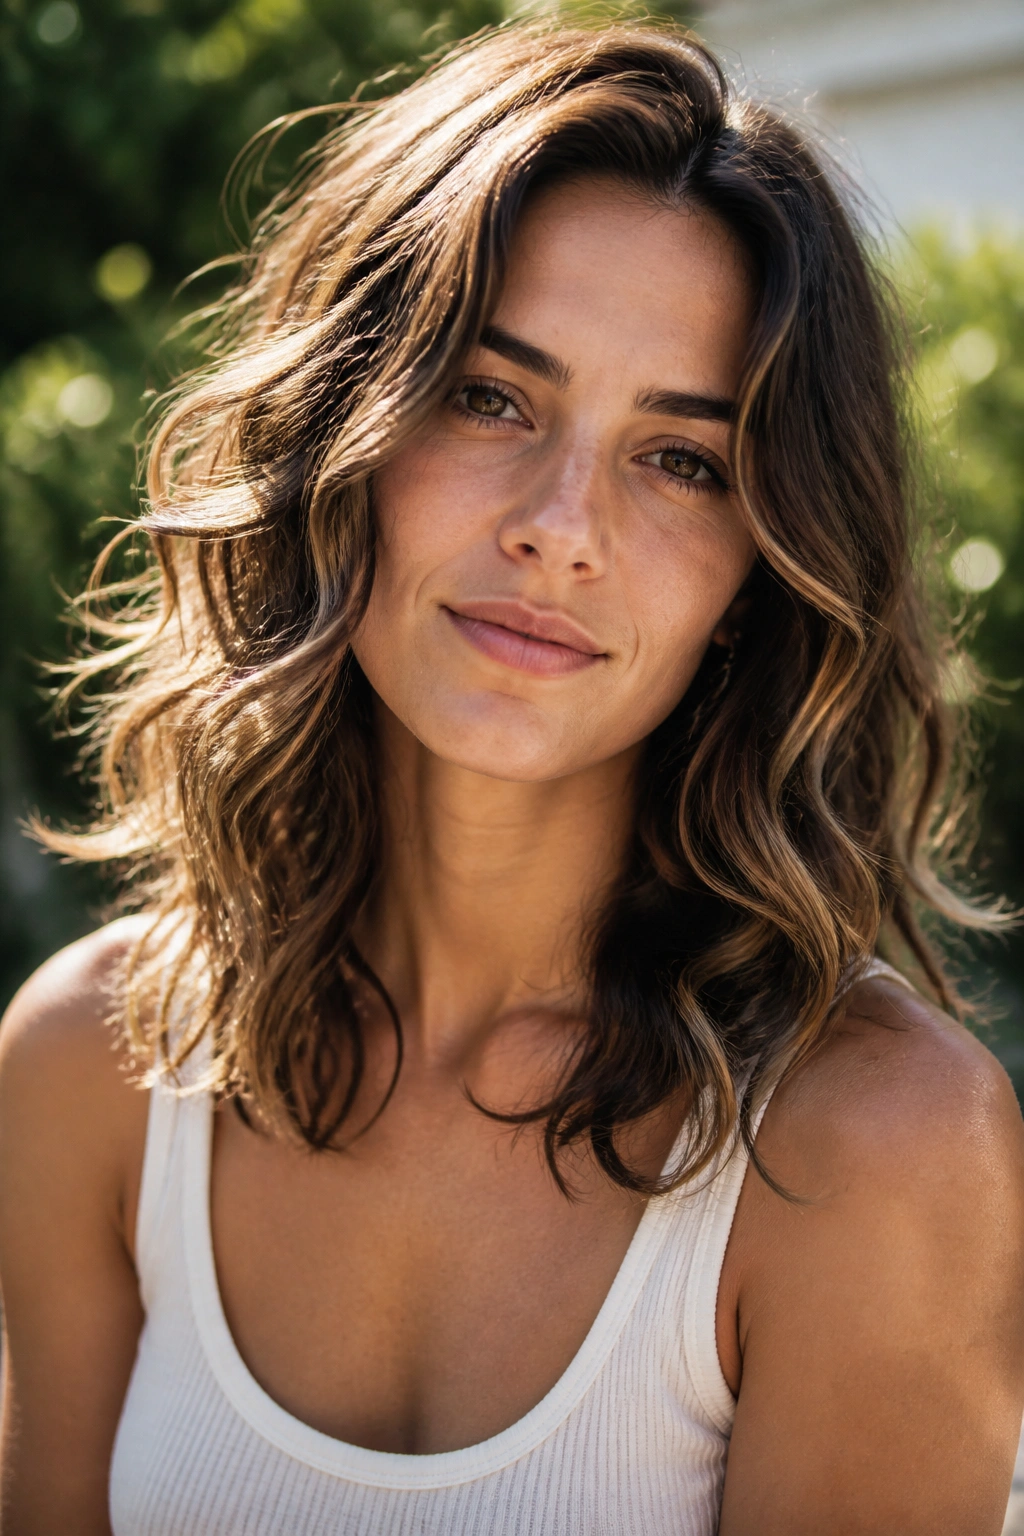
Air-dried waves are the low-effort answer that still looks intentional. Medium length hair is a good candidate because the cut has enough weight to fall in a shape, but not so much length that it takes forever to dry.
Work a leave-in conditioner and a small amount of curl cream through damp hair, then scrunch from the ends upward. If your hair is straighter in some spots, twist those pieces around your finger while it dries. A cotton T-shirt or microfiber towel helps with the first dry-down, since rough terry cloth can puff up the surface and wreck the bend.
What Makes It Work
Unlike heat-styled waves, this version depends on your natural pattern and the shape of the cut. Layers help. A blunt edge can still work, but it usually needs more product and a bit of manual twisting near the ends.
If you want extra hold, diffuse on low for 5 to 8 minutes, then leave the rest alone. Touching it too early is the mistake people make most often. Air-dried hair looks better once it has fully settled, and medium length hair usually needs that quiet time before it finds its shape.
Final Thoughts
Medium length hair gives you room to play without asking for a complicated routine. That’s the real advantage here. A few inches can change the entire wave pattern, and the cut usually holds enough shape to make the work feel worthwhile.
Some days call for polished S-waves or a deep side part. Other days want rope twists, air-drying, or a quick bend from a flat iron. The nice part is that none of these styles require the same finish, which means you can keep the cut and change the mood whenever you want.
If one version falls flat on you, don’t write off waves altogether. Tweak the barrel size, change the section width, or stop brushing earlier than you think you should. That tiny adjustment is often the difference between hair that droops and hair that moves.
