



Fine hair can go flat in a heartbeat, and a blunt cut only makes that feel louder. That is exactly why messy layered haircuts for fine hair make so much sense: they add movement, break up limp ends, and make the crown look lifted without turning the haircut into shreds.
The catch is that “layers” is a loose word. Too many short pieces and fine strands start to look wispy in the wrong way. Too little layering and the hair sits there like a curtain with no air in it. The sweet spot is usually a soft perimeter with controlled texture inside the shape, plus a little face framing where the eye wants movement anyway.
Fine hair is its own thing. It can be dense and still feel delicate, or it can be sparse and silky, which means the same cut will not behave the same on two heads of hair. A good stylist looks at how fast your roots collapse, where your cowlicks live, and how much you actually style your hair before they start chopping.
The 18 cuts below cover short, medium, and long lengths, because the right haircut is usually the one that fits your daily life instead of your mood board. Some are soft and wearable, some are choppier, and a few lean a little cooler and more undone. The common thread is simple: they all give fine hair more shape without asking it to do heavy lifting.
1. The Soft Shag With Crown Lift for Fine Hair

A soft shag is one of the easiest ways to make fine hair look fuller without making it look chopped up. It gives the crown a little lift, keeps the ends from hanging dead straight, and leaves enough length that the haircut still feels wearable.
The trick is restraint. You want layers that start around the cheekbone or slightly below, not a stack of short pieces at the top that expose every thin section underneath. On fine hair, a shag works best when the perimeter keeps some weight. That weight is what stops the cut from looking see-through by day three.
What to ask your stylist
- Keep the outer line soft and intact.
- Start the shortest visible layers around the cheekbone.
- Leave the back longer than the crown so the shape does not puff out.
- Use point cutting, not aggressive thinning shears, if your ends already look fragile.
How to style it
A pea-sized dab of mousse at the roots and a quick rough dry can do most of the work. Once the hair is about 80% dry, flip your head upright, lift the roots with your fingers, and finish with a diffuser or a regular blow-dryer on low heat.
A little mess reads better than a lot of product. If the ends separate a bit, that is the point.
2. The Chin-Length Choppy Bob That Makes Fine Hair Look Denser
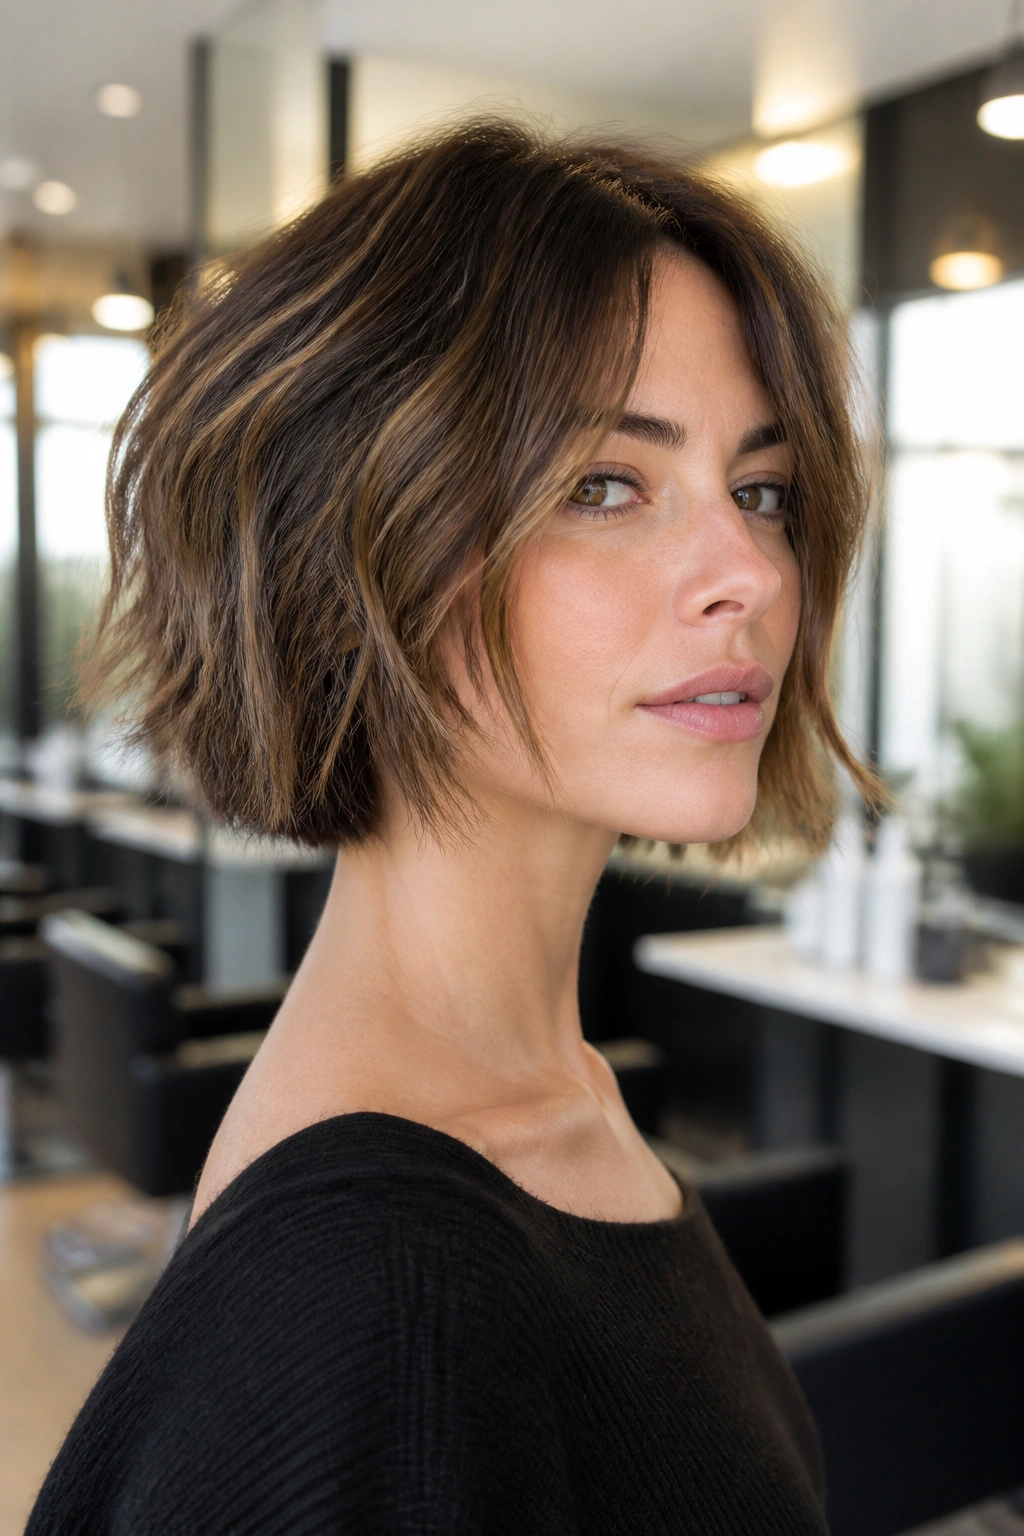
Why does this bob work so well on fine hair? Because a chin-length cut draws the eye to one strong line, then the choppy ends keep that line from feeling stiff. The shape looks intentional fast.
A blunt bob can be gorgeous, but it can also sit too flat if your strands are silky and light. This version keeps the outline at the chin or just above it, then adds small internal cuts so the hair moves when you turn your head. The result is not fluffy. It is sharper than that, which is why it works.
If your hair tends to cling to your head, ask for just enough texture to loosen the ends, not so much that the perimeter starts to fray. Fine hair usually looks fuller when the bottom edge is still strong. That bottom edge is doing a lot of work here.
A quick bend with a flat iron on the last 1 inch of the hair can make the whole cut feel more casual. Short, broken pieces at the jawline keep it from reading too polished.
3. The Collarbone Lob With Feathered Ends
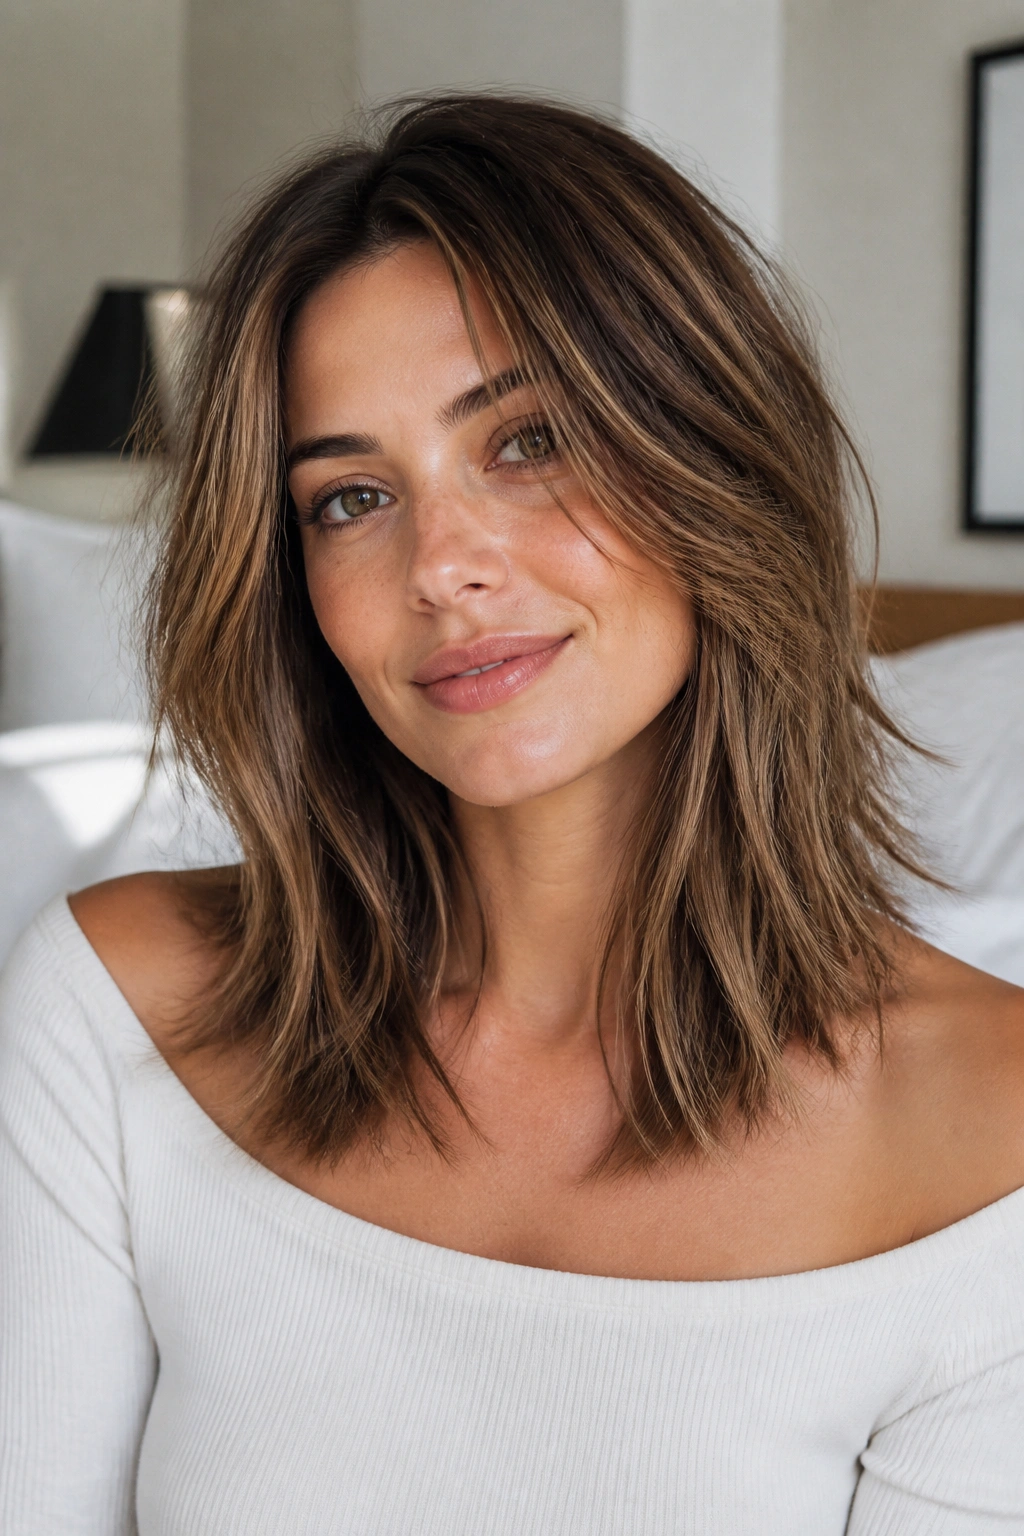
If your hair starts to collapse by lunch, a collarbone lob gives it somewhere to sit. The length brushes the shoulders, the ends can flip or tuck, and the whole cut still feels light enough to move.
This version works because the weight stays in the middle instead of getting stripped away from the bottom. Ask for feathered ends rather than a blunt, heavy line, but keep the feathering gentle. Fine hair loves a little air. It does not love being over-layered into bits.
Best things to request
- Keep the length grazing the collarbone.
- Add face-framing pieces that start around the jaw.
- Feather only the last 1 to 2 inches of the ends.
- Preserve enough density at the back so the lob does not spread out.
A 1.25-inch curling iron or hot brush gives this cut a loose bend in a few minutes. Alternate the direction of the curls, then run your fingers through the mids once the hair cools. That little break in pattern makes the cut look lived-in instead of curled.
It is also one of the easiest lengths to tie back without losing shape. Handy, that.
4. Face-Framing Waterfall Layers That Keep Movement Up Front
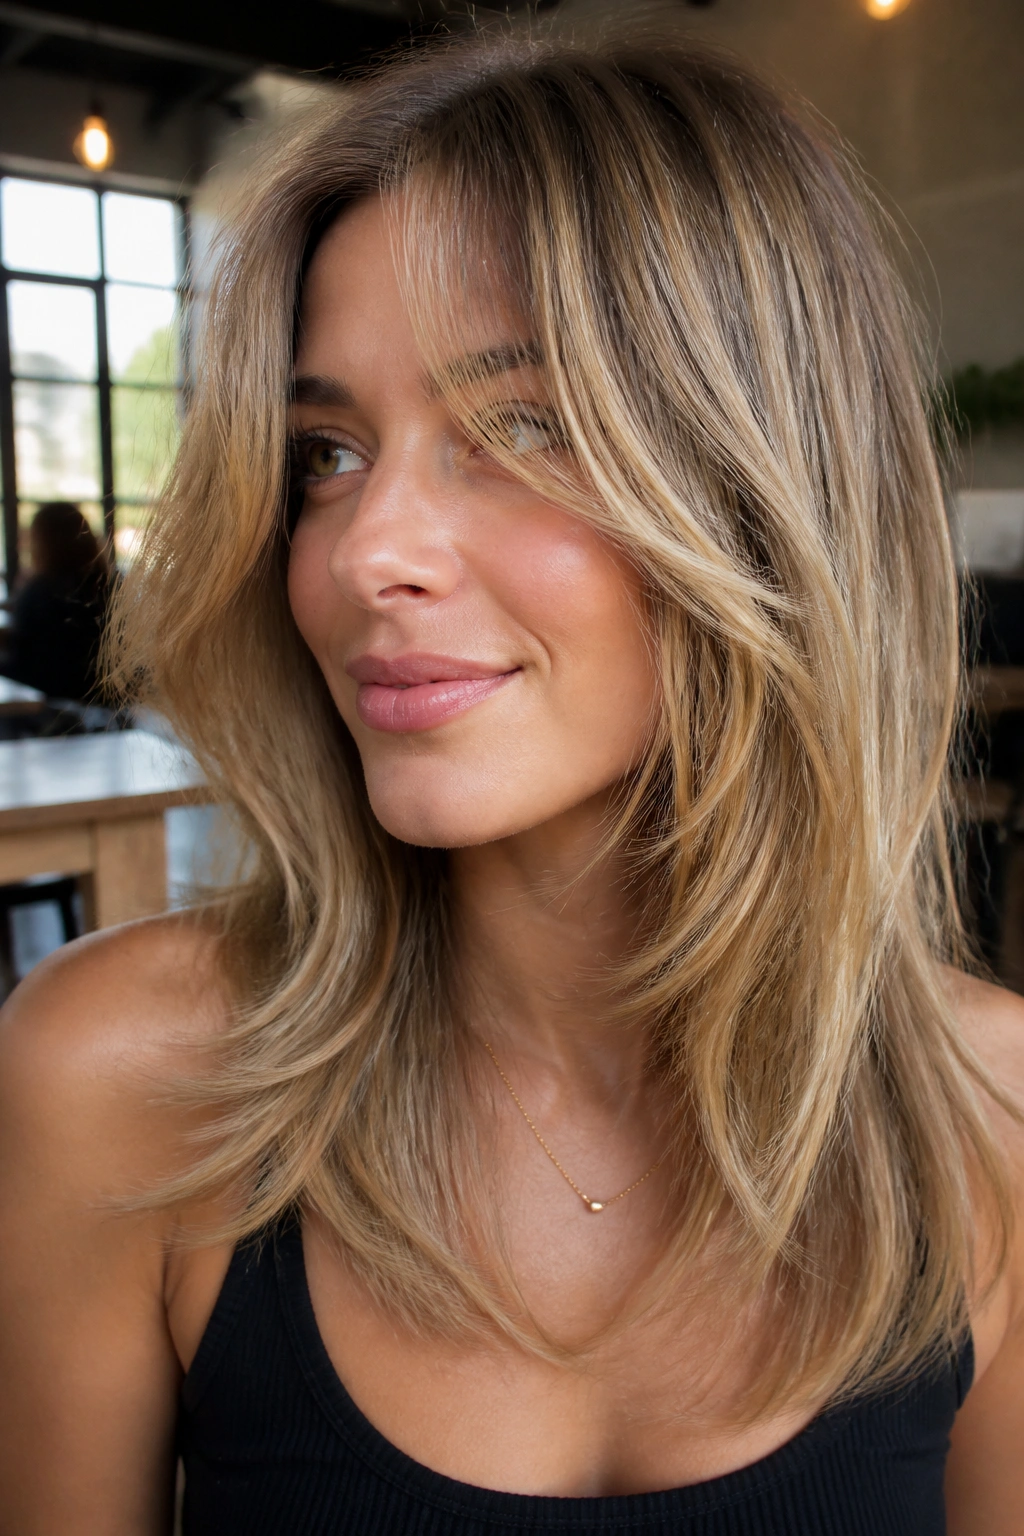
Unlike a blunt one-length cut, waterfall layers let the front move first. That matters on fine hair, because the eye notices motion near the face before it notices anything in the back.
The best version starts with the shortest pieces around the lips or chin, then lets the rest fall gradually into the longer length. You get a soft cascade without losing the feeling of fullness at the bottom. If those front sections are cut too high, they can look sparse in daylight. Nobody wants that.
Where to place the shortest pieces
- Around the chin for shorter lobs.
- Around the mouth for medium-length hair.
- No shorter than the jaw if your hair is very thin at the front.
- Blended through the sides with point cutting, not a hard step.
This cut is sneaky good for people who wear their hair half-up a lot. The front pieces stay interesting when the rest is pulled back, so the style does not fall flat in a clip.
And it grows out kindly. That matters more than people admit.
5. Curtain Bangs With Soft Layers for Fine Hair
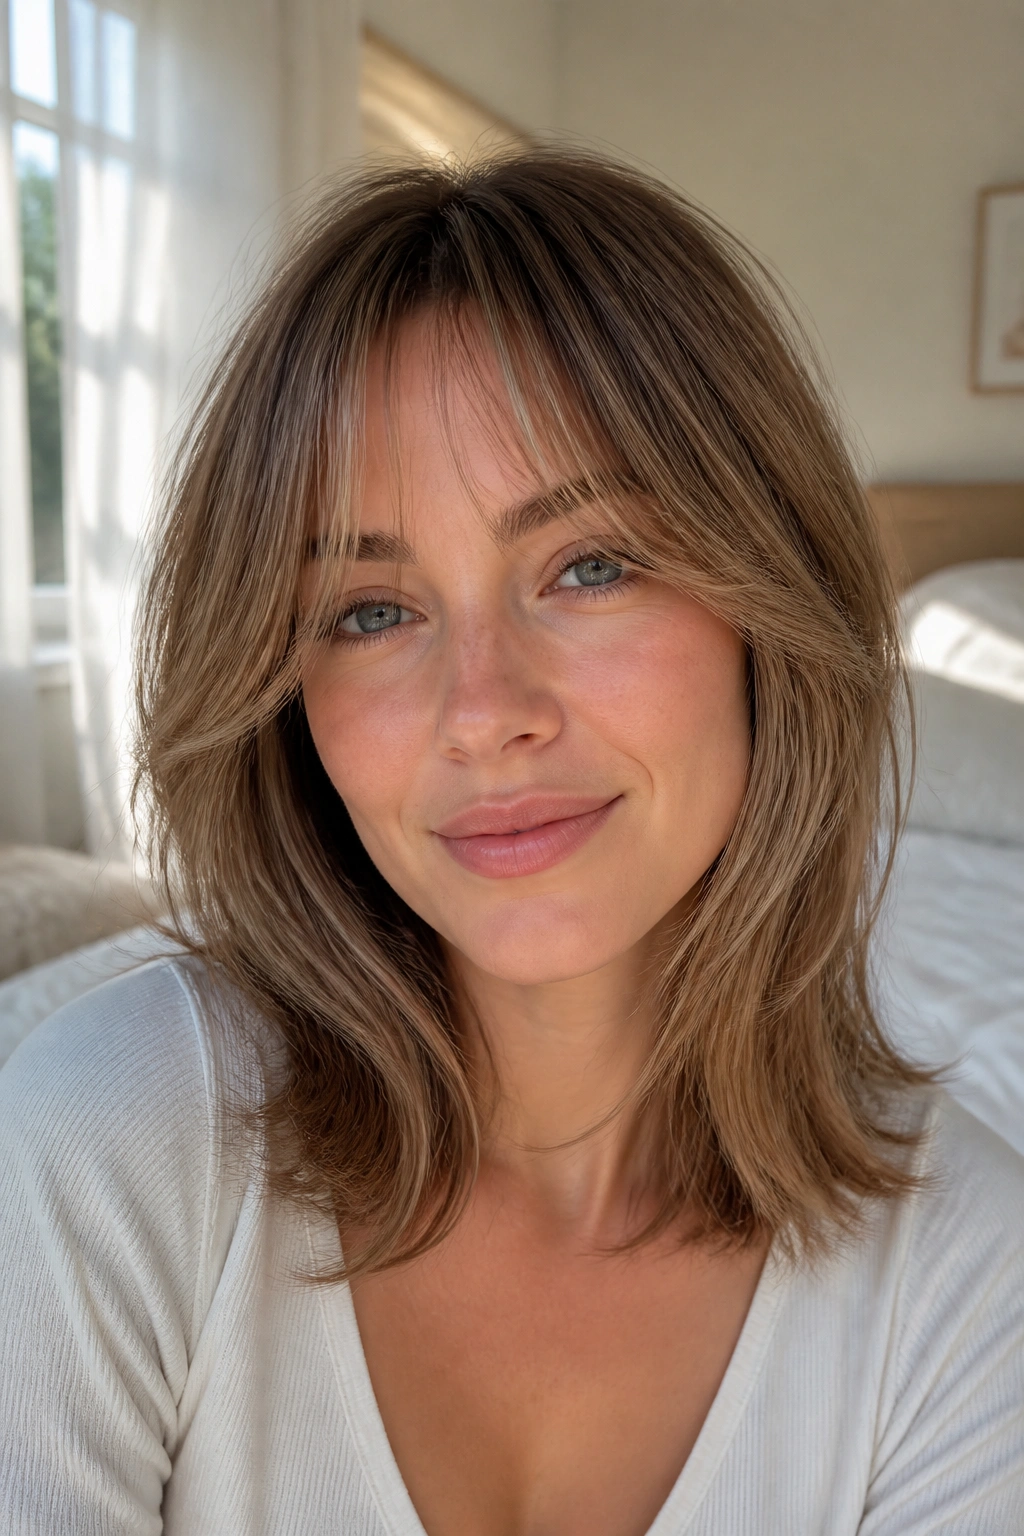
Curtain bangs are one of the easiest ways to make a layered haircut feel fuller right away. They put shape at the front, which is where fine hair often needs help most.
The fringe should feel airy, not heavy. I would rather see curtain bangs start a little too long than too short on fine hair. A good starting point is somewhere between the bridge of the nose and the tip of the nose, depending on forehead length and how much you want to style them. Those front pieces then flow into cheekbone layers instead of stopping dead.
The reason this works is simple: curtain bangs create a shadow line around the face. That shadow makes the rest of the hair look denser than it is. When the bangs are too thick, though, they swallow the rest of the cut and make fine hair look tired. So keep them soft.
A round brush or a Velcro roller can give the bangs a tiny bend. You do not need a lot. A gentle sweep away from the face is enough.
6. The Messy Pixie With Longer Top Layers
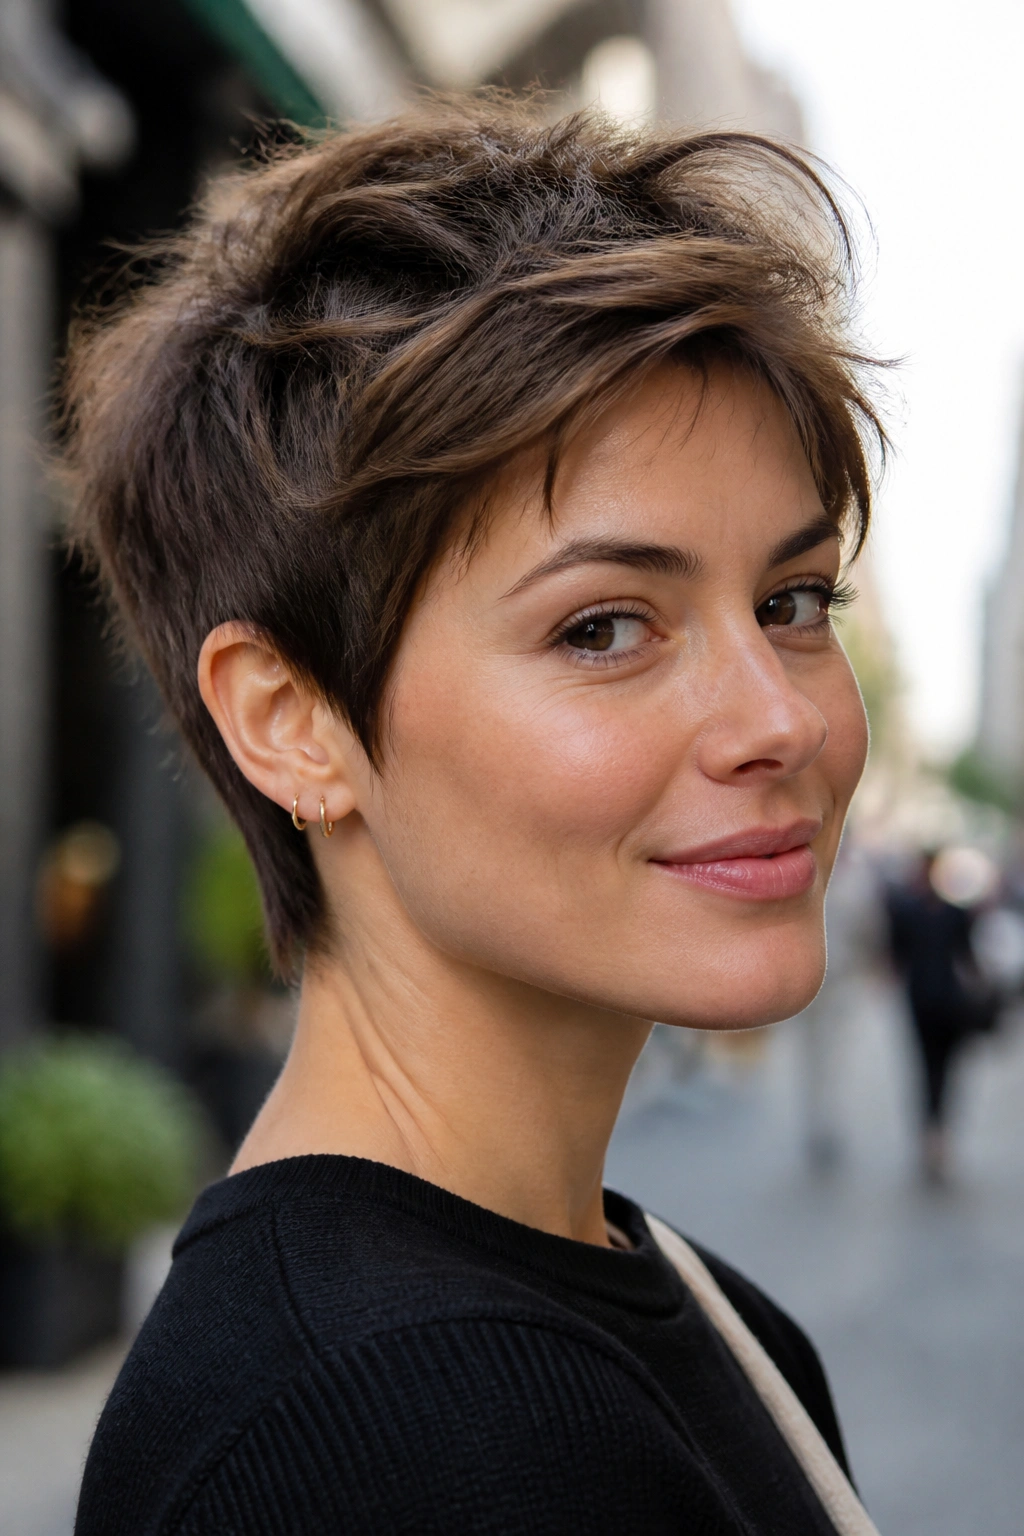
Short hair can still look full. It just has to be cut with intention.
A messy pixie for fine hair keeps the sides clean and the top a little longer, so the crown has somewhere to go. Ask for top layers that leave about 1 to 2 inches of extra length compared with the sides. That difference is what creates lift and texture. Without it, the cut can look too tidy and a little flat.
The real win here is ease. A tiny bit of paste or matte cream warmed between the fingers can separate the top pieces in seconds. Work it into dry hair, not damp hair, or it can go slick fast. Fine strands usually need less product than you think anyway.
This cut is not for someone who wants to tuck hair behind both ears and forget it. It is for someone who likes a bit of shape and a bit of edge, without daily fuss.
7. The Italian Bob With Airy Texture
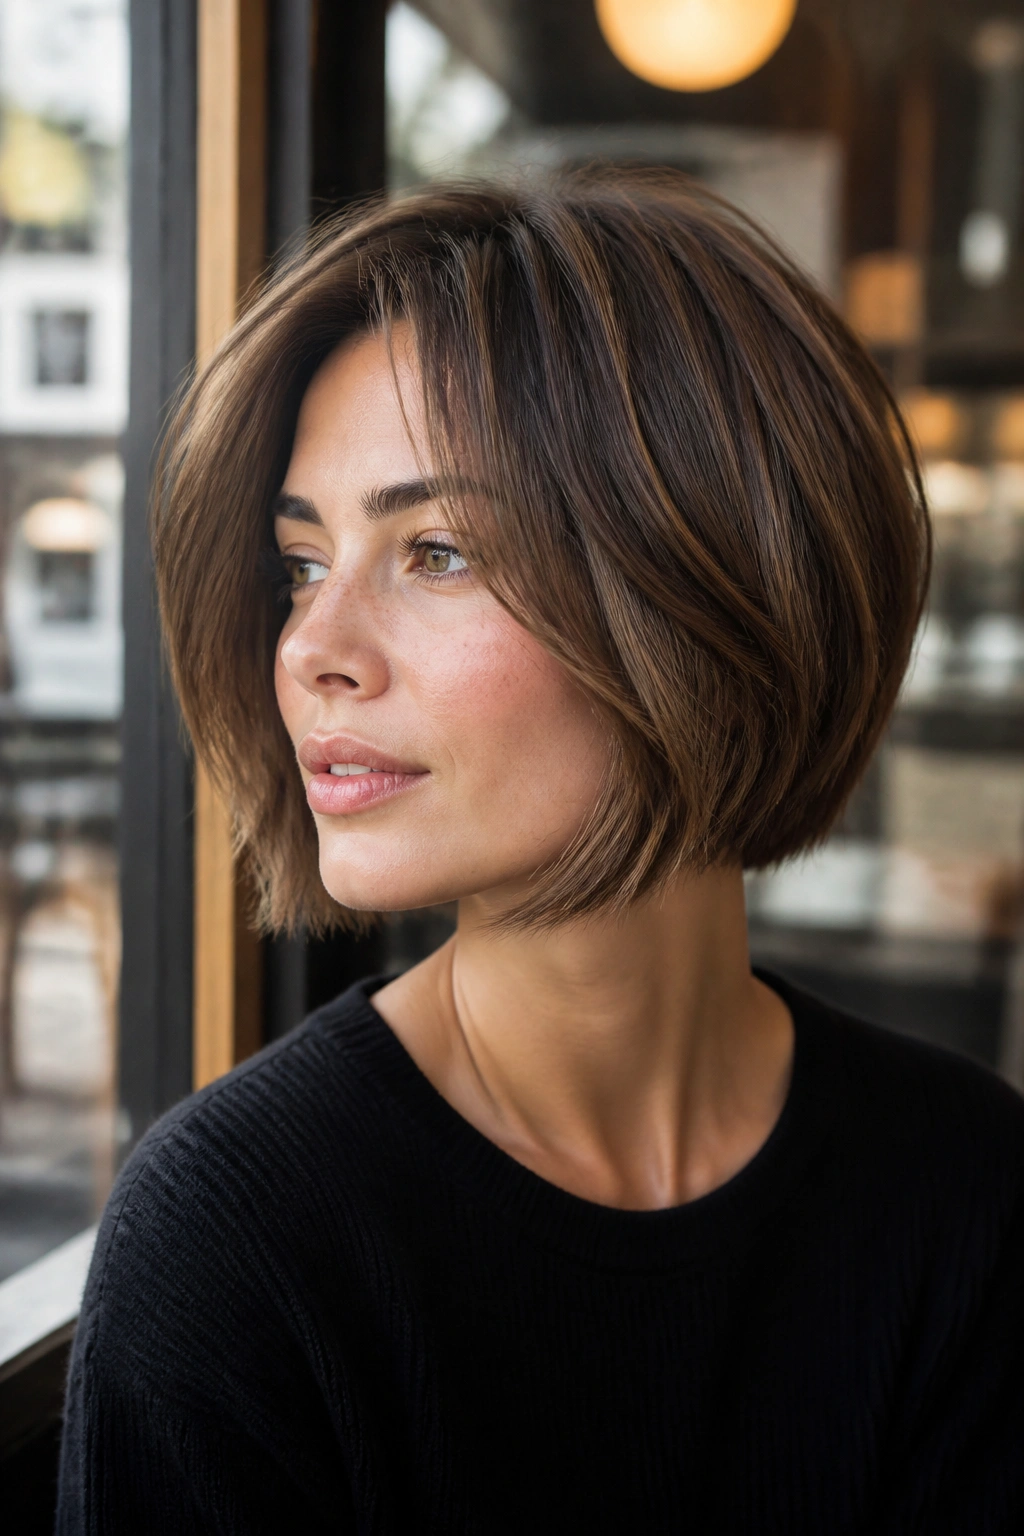
A bob does not have to be sharp to look polished. A softer Italian-style bob gives fine hair a solid shape at the bottom and a little movement through the middle, which is often the sweet spot.
The perimeter usually lands somewhere between the jaw and the top of the neck. That keeps the cut feeling thick, because the eye reads the bottom as one clean weight line. Then the internal texture lightens the interior just enough that the hair bends instead of sticking out like a helmet.
Why the perimeter still matters
If the edge is too soft, fine hair can look wispy. If the edge is too hard, it can feel severe. A clean line with a touch of internal movement is the middle ground.
This version suits straight or slightly wavy hair especially well. It also looks good when air-dried, which is useful because a cut that only behaves after 25 minutes with a round brush is annoying. Nobody needs that kind of relationship with their hair.
Keep the styling minimal: a little smoothing cream on the mids, then a quick tuck behind one ear. Done.
8. Long Layers With Point-Cut Ends
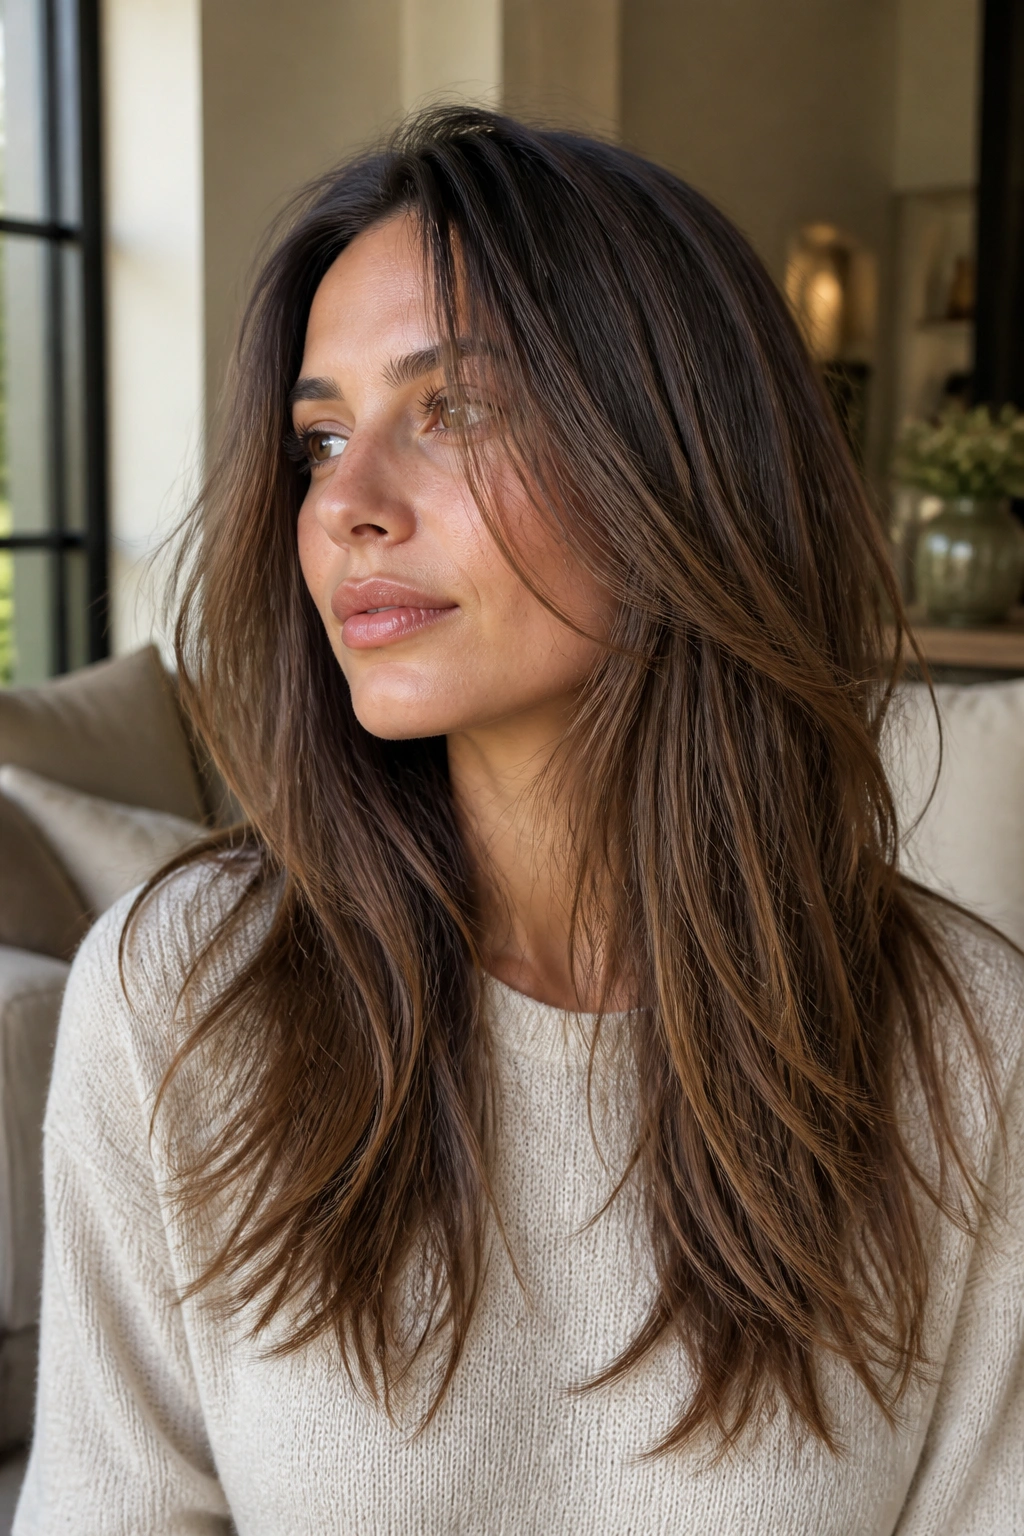
Fine long hair can feel slippery, like it slides out of every braid and ponytail. Long layers solve that without forcing you into a shorter cut.
The key is to keep the layers low. Think below the collarbone, then let the shortest face frame sit around the jaw or just under it. The ends should be point-cut so they do not land in one hard shelf. That softens the bottom while keeping enough density to look like hair, not wisps.
This is the cut for someone who likes length but hates the dead-straight, heavy feel that long fine hair sometimes gets. A small trim every 8 weeks keeps the bottom from tapering too much. Wait too long, and the ends start to look overworked.
A light wave from a 1-inch iron helps, but it is not mandatory. The cut already does a lot of the visual work. That is the appeal.
9. The Softer Wolf Cut That Does Not Overdo the Crown
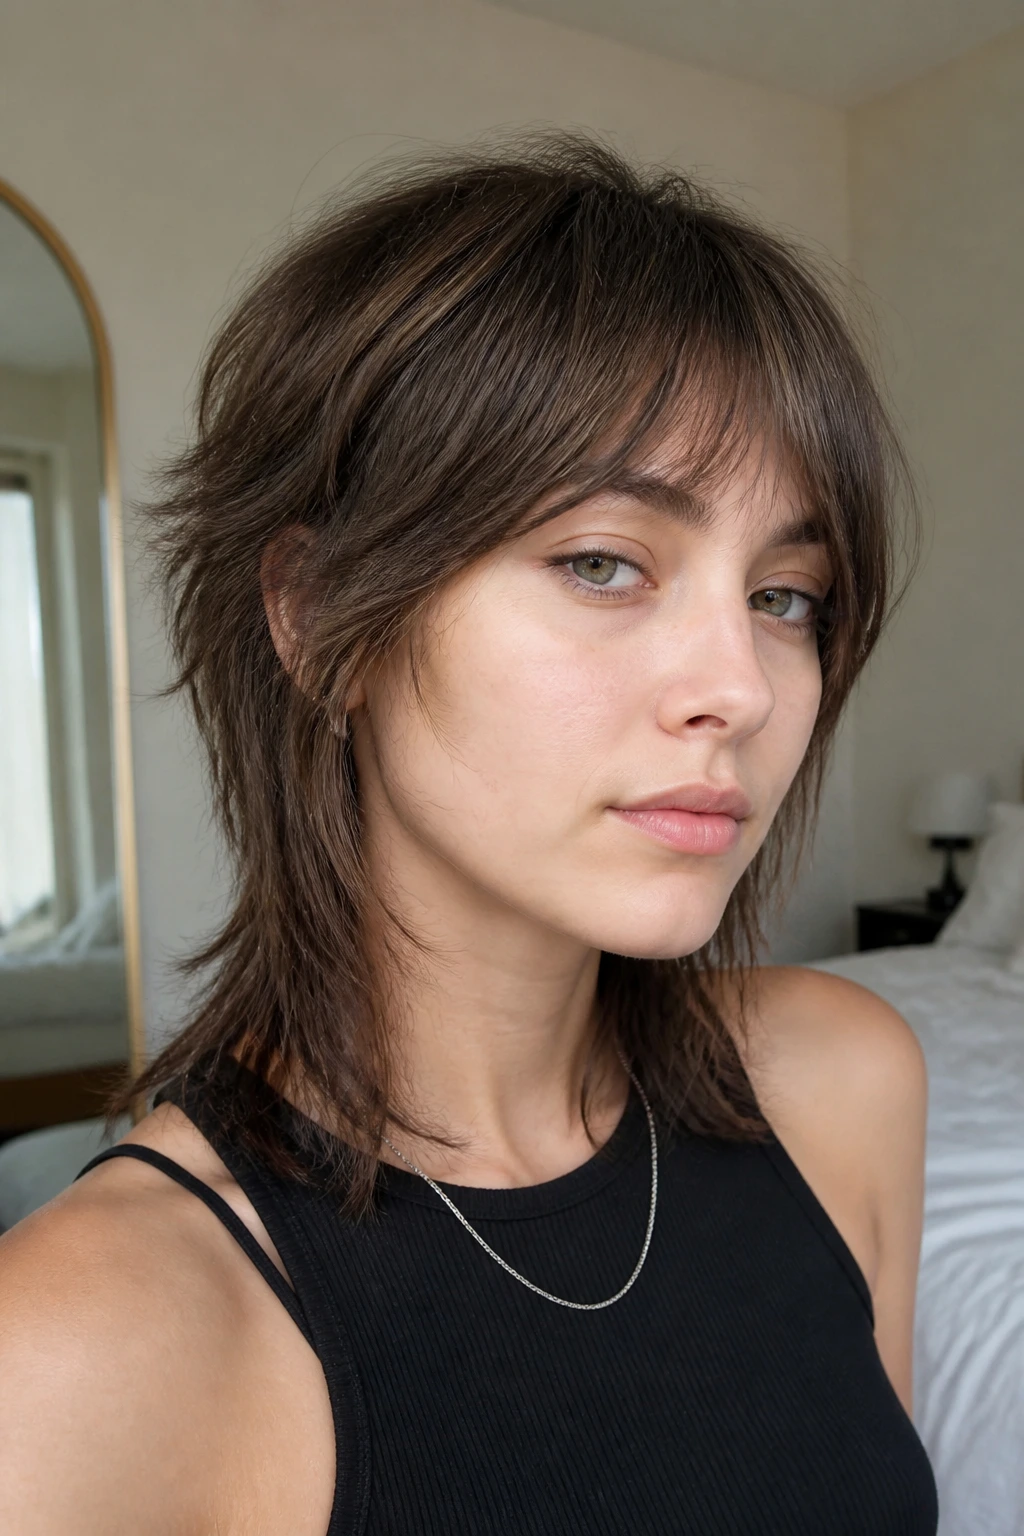
The wolf cut gets a bad rap when it is pushed too hard. On fine hair, the softer version is the one that makes sense.
The top stays a little choppy, the fringe stays light, and the nape keeps enough length to anchor the shape. You get movement without the mushroom effect that happens when too much weight gets removed from the crown. That bad version looks cool in a photo and weird on an ordinary Tuesday.
What to avoid
- Very short crown layers on sparse hair.
- Heavy texturizing at the ends.
- A disconnected fringe that sits like a separate haircut.
- Removing so much weight that the back starts to split.
The better approach is to let the layers overlap rather than jump. If the stylist can keep some softness through the sides and back, the whole cut feels current without looking chopped to pieces.
It works especially well on hair with a little natural bend. On pin-straight strands, it may need mousse and a diffuser to get the right amount of grit.
10. The U-Shaped Cut That Keeps the Ends Looking Full
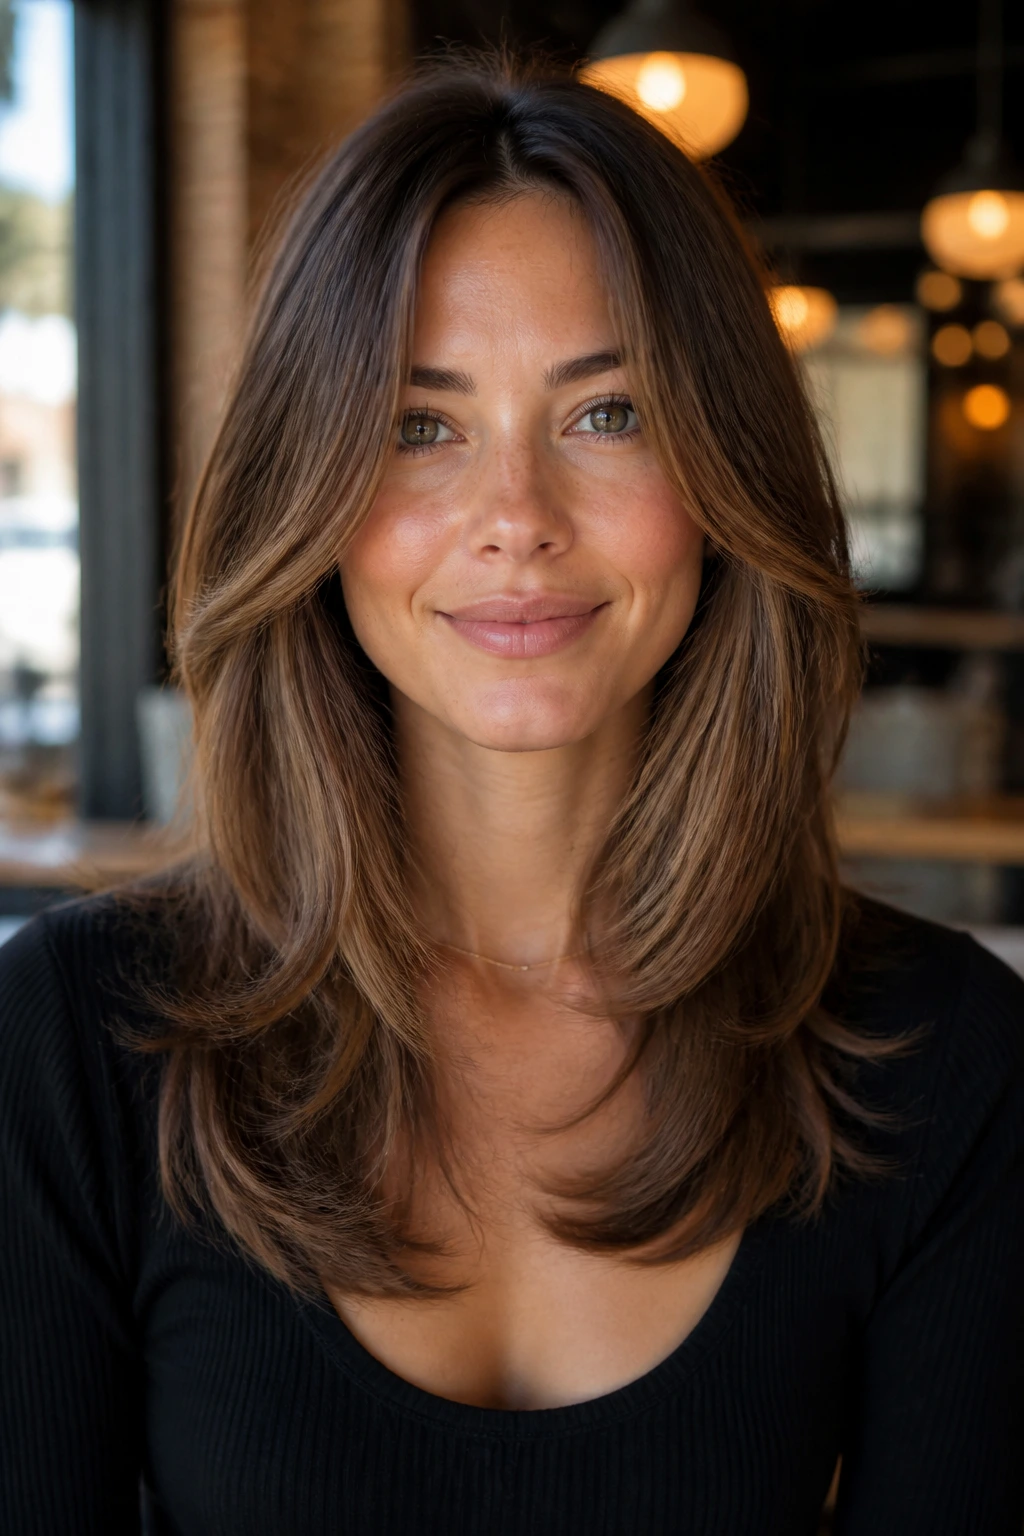
Why does a U-shape help? Because it gives the hair a thicker-looking center line while still allowing movement at the sides.
A straight across hemline can look blunt, which is fine, but a gentle U shape softens the silhouette and keeps long fine hair from hanging like one flat sheet. The longest point usually sits in the center back, with the sides sweeping up slightly toward the shoulders. That shape makes the ends feel denser, even when the strands are fine.
Ask for long face-framing pieces that start around the collarbone, then taper down. That front softness keeps the haircut from feeling heavy near the face. The best version still looks like you have hair to work with, not just a shape.
What to tell the stylist
- Keep the U subtle, not dramatic.
- Preserve thickness at the bottom 2 inches.
- Add movement only through the front and the outer surface.
- Avoid thinning the ends too much if your hair already sheds shape fast.
It is a quietly useful cut. Not flashy. Just practical in a way that looks better than practicality usually does.
11. Razor-Cut Midi Layers With Airy Movement
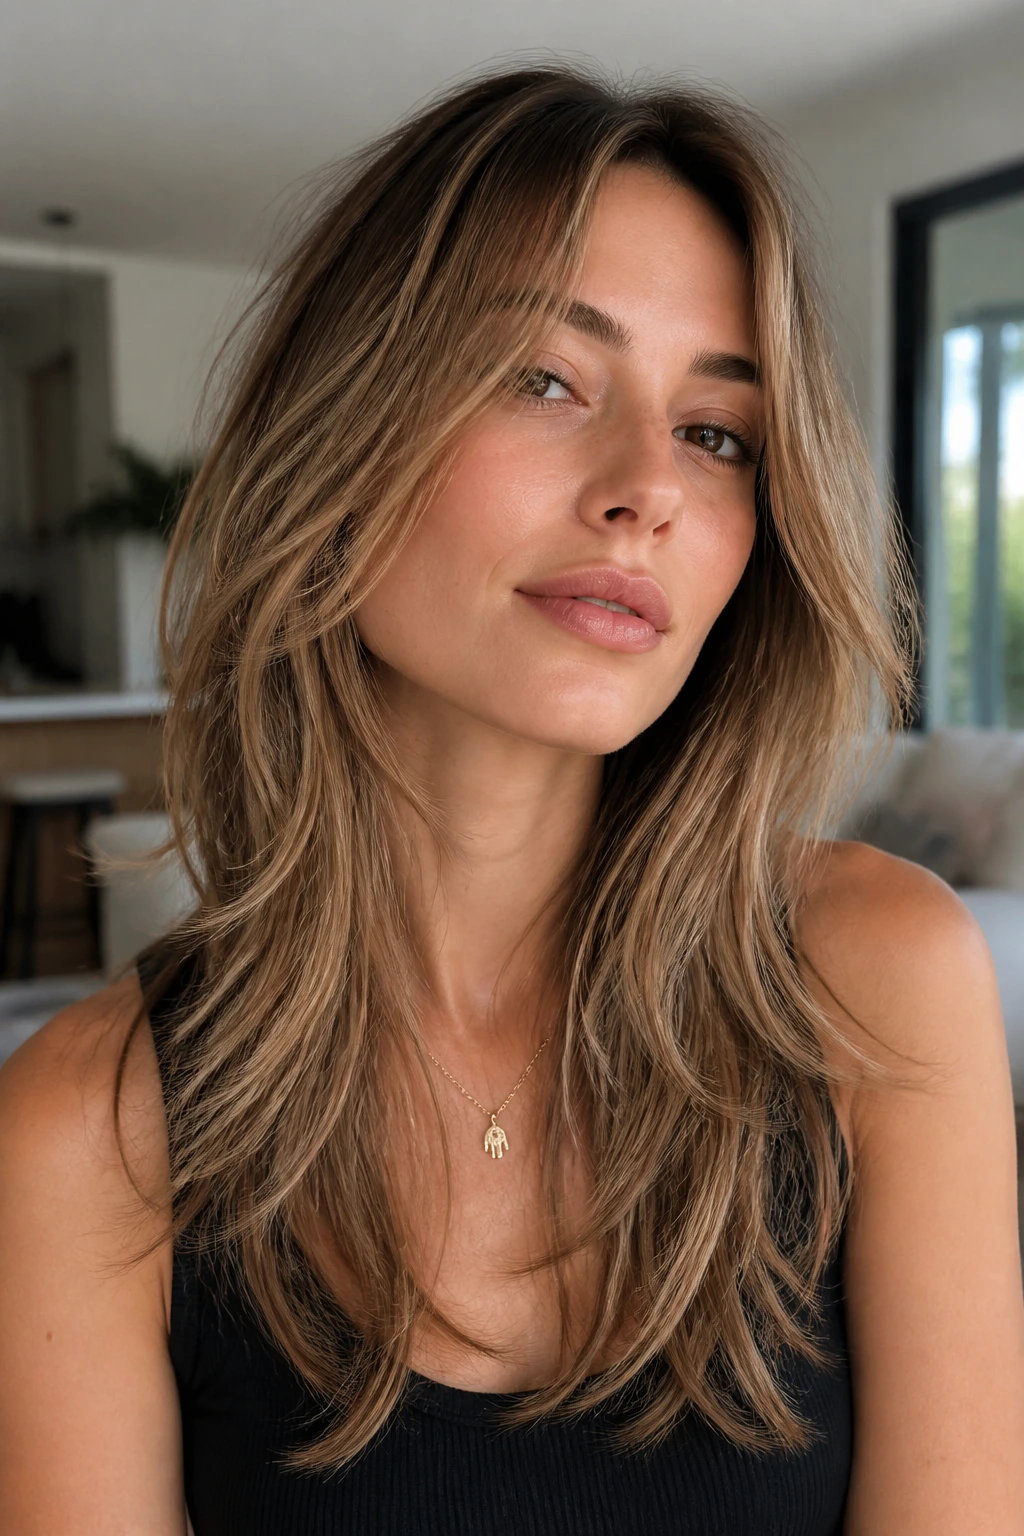
Razor-cut layers can make fine hair feel light in the best sense. The ends move more easily, the mids lose some stiffness, and the shape gets that soft, broken edge people often want from a messy haircut.
The catch is condition. If your hair is already dry, split, or bleached past its limit, a razor can make the ends look frayed. In that case, scissors and point cutting are safer. I would rather see a clean finish than pretend every technique suits every head of hair.
For healthy fine hair, though, a razor cut can add a nice, feathered quality to a midi length. Think shoulder to mid-chest, with layers that skim around the jaw and collarbone. A little texturizing spray at the mids brings the separation forward.
When this cut makes sense
- Your hair is soft but not damaged.
- You want movement without a lot of curl.
- You do not mind a little separation at the ends.
- You usually style with a blow-dryer or air-dry cream.
It is a lighter-looking cut, and that is exactly the point.
12. The Textured Crop With Micro Layers
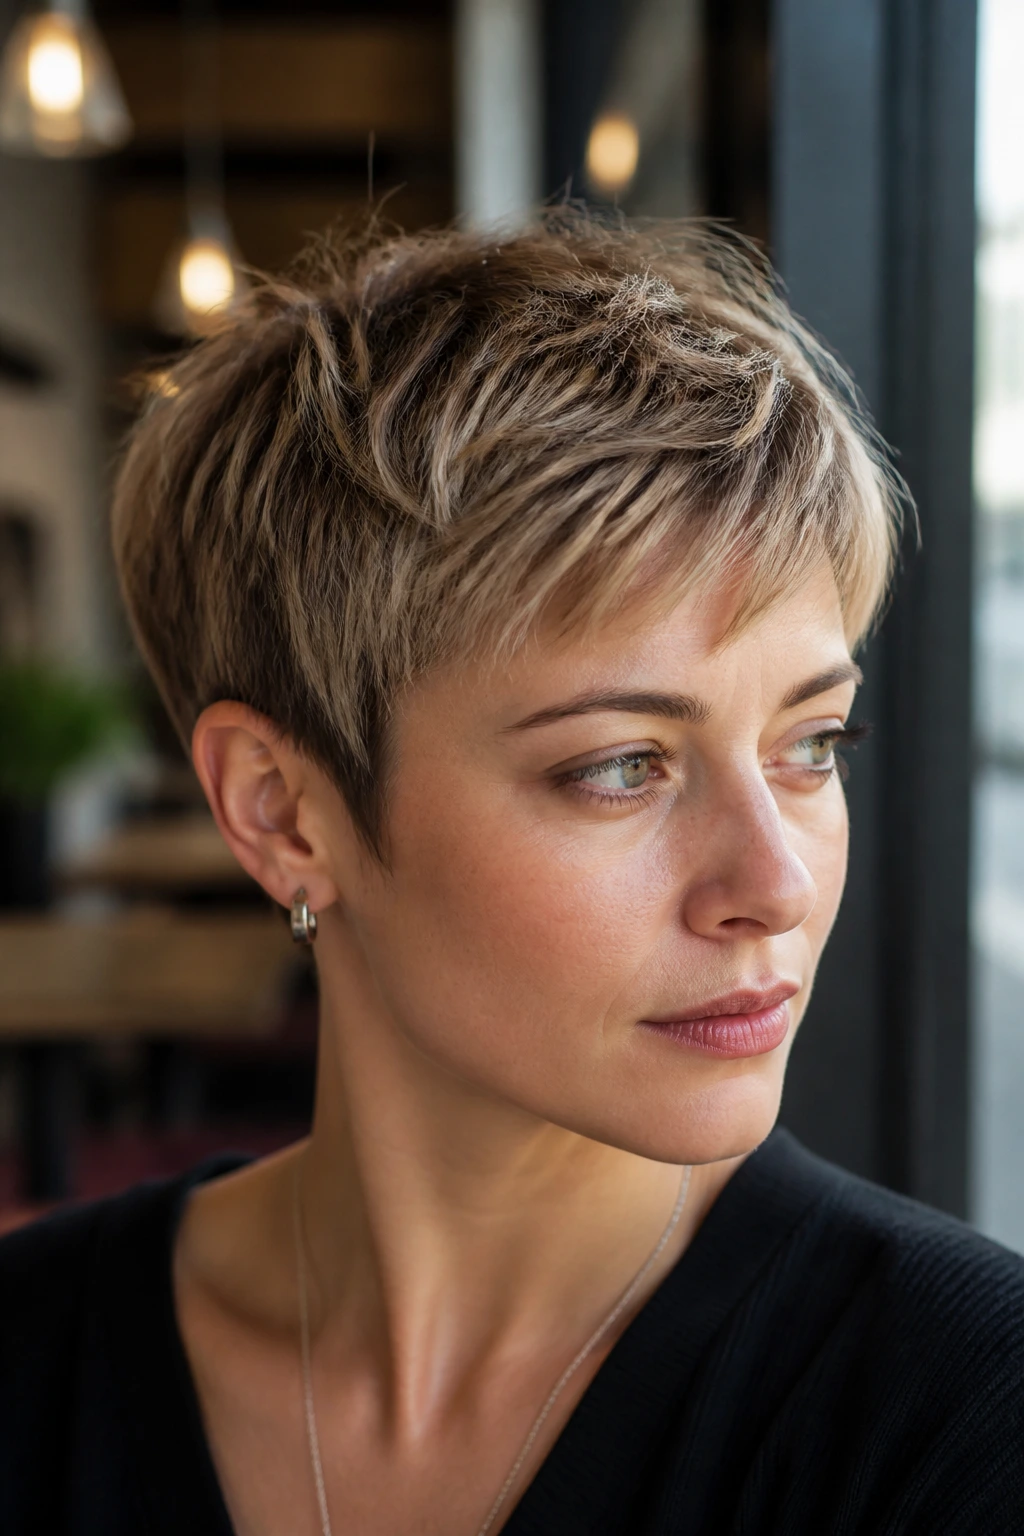
If your hair is short and you want it to look denser, not longer, this is the move.
A textured crop with micro layers keeps the shape close to the head, then uses tiny bits of movement on top so the hair does not sit like one flat cap. The sides stay neat. The top gets enough lift to look deliberate. On very fine hair, that balance can be better than a longer haircut that hangs limp by midday.
The styling is tiny, too. A root powder or a dry texture spray at the crown gives you grip, and a fingertip twist through the top creates separation. You do not need a whole bag of products. You need one that gives matte hold without turning the hair sticky.
This cut is also forgiving if you hate brushing your hair every morning. It gets better when it looks a little imperfect.
13. The Layered French Bob With Soft Bend

A French bob looks neat in theory, but the messy version is where fine hair gets interesting.
This cut usually lands around the jaw, with a light fringe or a soft face frame that hits just below the cheekbone. The ends are not razor-sharp. They bend. That bend is what gives the style a little looseness, which keeps fine hair from looking too precious or too strict.
Styling moves that help
- Use a 1-inch round brush for a slight undercurve at the ends.
- Let the fringe dry forward, then sweep it apart with your fingers.
- Add one spray of texture mist only at the mids.
- Keep the roots airy rather than packed down.
A French bob works especially well when you want a haircut that feels neat on bad hair days and stylish on good ones. It does both without much drama.
If you wear glasses, it can be especially good. The shorter length keeps the frame and the hair from competing.
14. Shoulder-Length Layers With Flipped Ends

A shoulder-length cut can look heavy fast, especially on fine hair. Flipped ends fix that problem without taking away too much length.
The shape sits around the shoulders and collarbones, then the ends bend outward or inward just a bit so the haircut does not rest like one big block. Add 2 or 3 long internal layers, and the hair starts to swing instead of sit. That swing is what keeps shoulder-length fine hair from feeling boring.
A medium round brush or a large Velcro roller can give you the flip in 5 to 10 minutes. You do not need a perfect blowout. You just need enough bend that the cut lifts off the shoulders.
This is a smart choice if you like putting your hair up during the day and wearing it down at night. The length stays useful, but the movement stops it from looking plain.
15. Tapered Layers That Flatter Round Faces
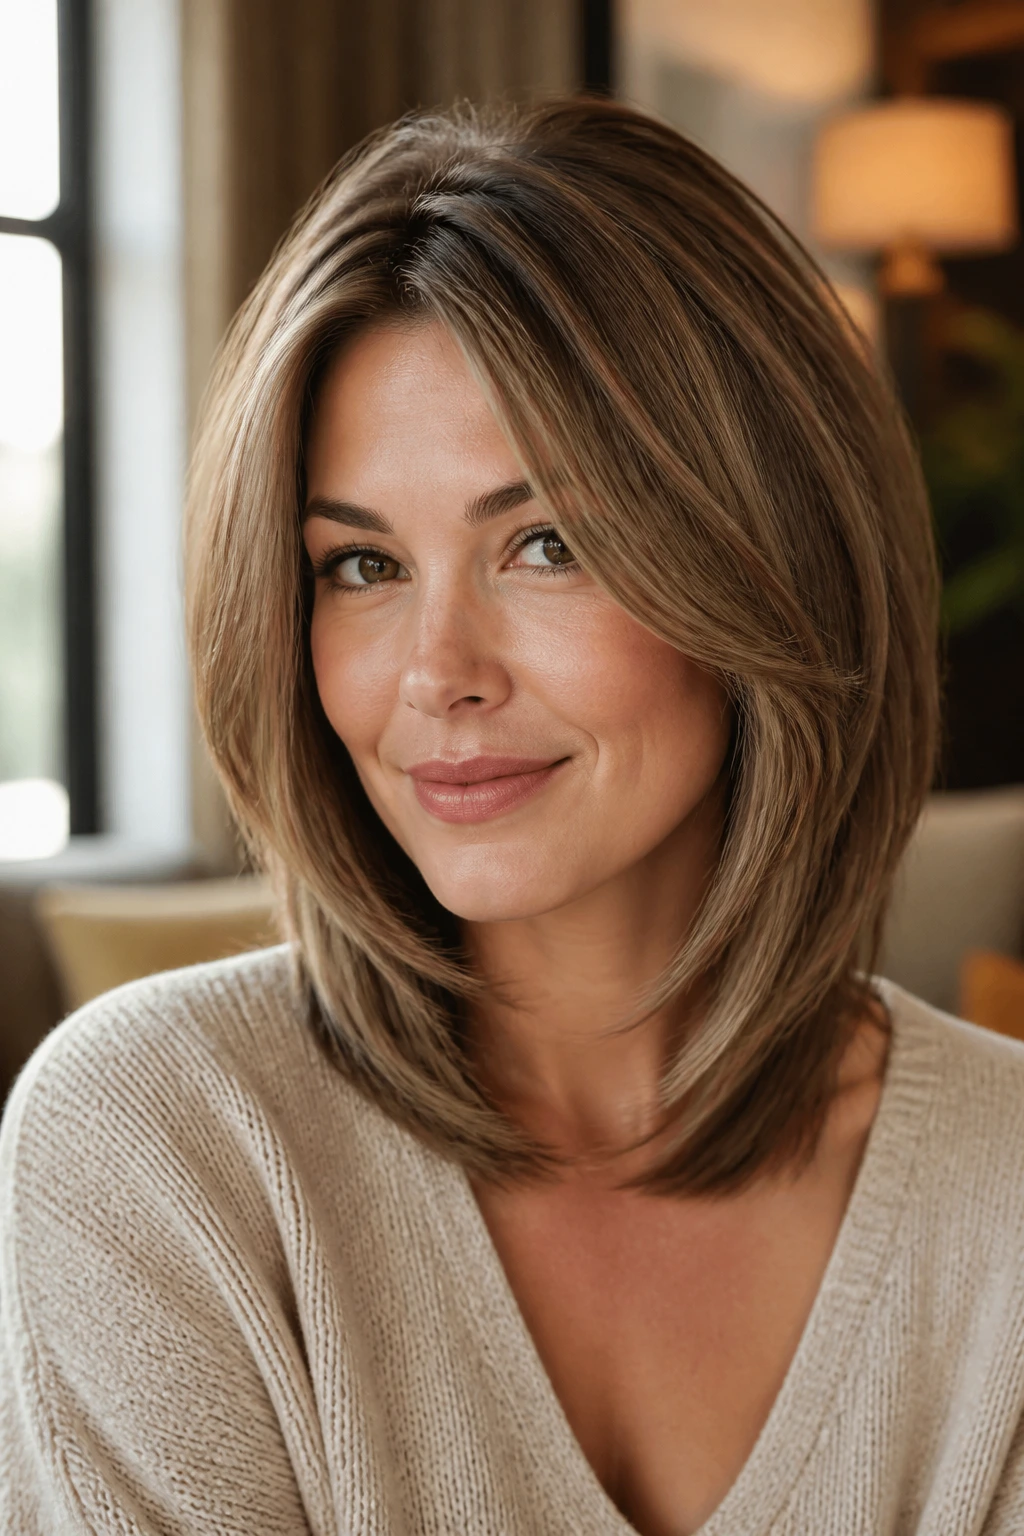
Round faces need vertical movement more than width. That sounds obvious, but a lot of layered cuts miss it.
A tapered shape helps by keeping the shortest pieces below the cheek fullness, then letting the layers fall longer toward the collarbone. That draws the eye down, not out. Fine hair benefits because the cut creates shape without making the sides puff too wide.
Where the layers should land
- Start the face frame below the fullest part of the cheek.
- Keep volume at the crown, not the sides.
- Let the back stay longer so the silhouette narrows gently.
- Avoid blunt cheekbone layers if your hair is already sparse there.
A cut like this does not need dramatic shagging. It needs smart placement. The shape can be soft and messy, but the lines still matter.
A side part can help too, especially if your roots flatten fast. It gives you a little lift right where the haircut needs it most.
16. The Wavy Shag That Works With Natural Bend

If your hair already has a wave, do not fight it. Work with it.
A wavy shag for fine hair lets the bend do half the styling. The layers are placed so the hair falls into loose pieces instead of one thick curtain. On hair with a natural S-shape, that can look richer than a perfectly smooth blowout ever will.
The best routine is simple: microfiber towel, a small amount of air-dry cream, then scrunch the mids and ends while the hair is still damp. If your roots go flat, clip them up for 10 to 15 minutes while the hair dries. That tiny lift at the scalp helps a lot.
Heavy creams can flatten this cut fast, so stay light. Fine wavy hair usually wants grip more than softness. Strange, but true.
A diffuser can help if your wave is stubborn. Keep the heat low and stop when the hair is about 90% dry. Overdrying makes the ends frizz and can erase the shape you just built.
17. The Sleek Layered Cut With Hidden Movement
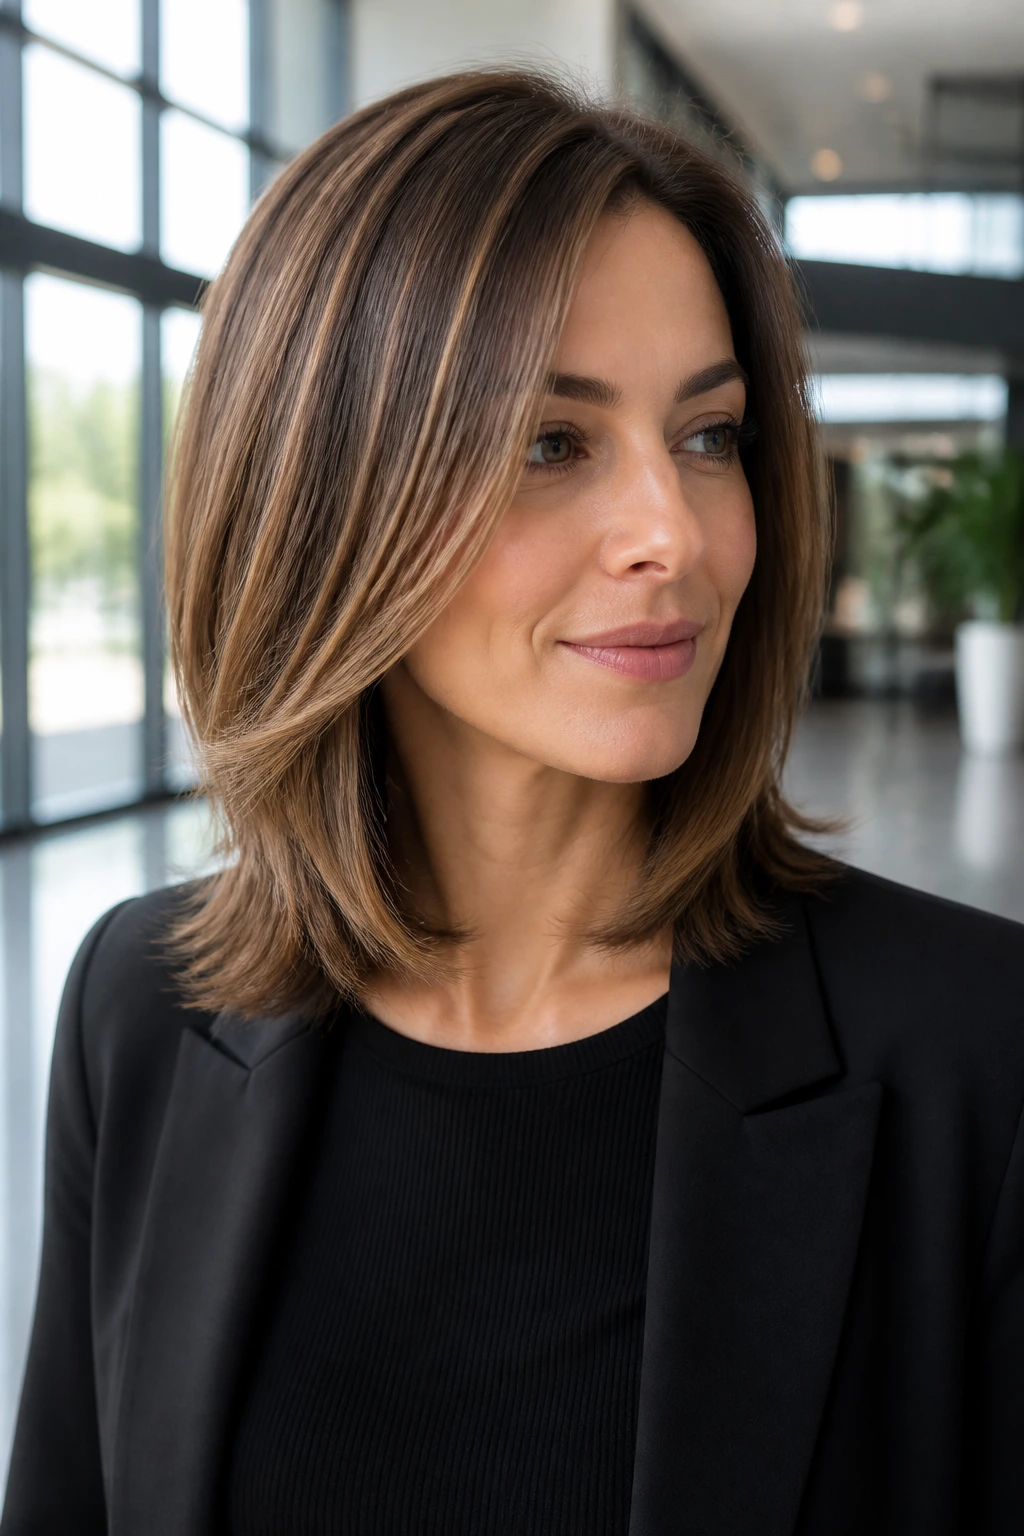
Messy does not have to mean beachy. Sometimes the smartest move is a cut that looks polished on the surface and lively underneath.
That is what hidden layers do. The top stays smooth, which is nice if you like a cleaner finish or work in a place where textured hair can feel too casual. Underneath, the internal layers remove just enough weight to keep fine hair from collapsing into a sheet.
This cut tends to work well around shoulder length or a touch longer. The perimeter stays neat, so the style still looks full at the bottom. Then the hidden layering gives the hair a little swing when you move. It is a subtle effect, but subtle is often what fine hair needs.
A flat iron bent slightly at the ends can sharpen the look without killing the softness. Use 1-inch sections and keep the bend shallow. You want movement, not little hooks.
It is a good option for people who like clean lines but hate hair that behaves like a board.
18. The Grown-Out Shag That Still Looks Intentional
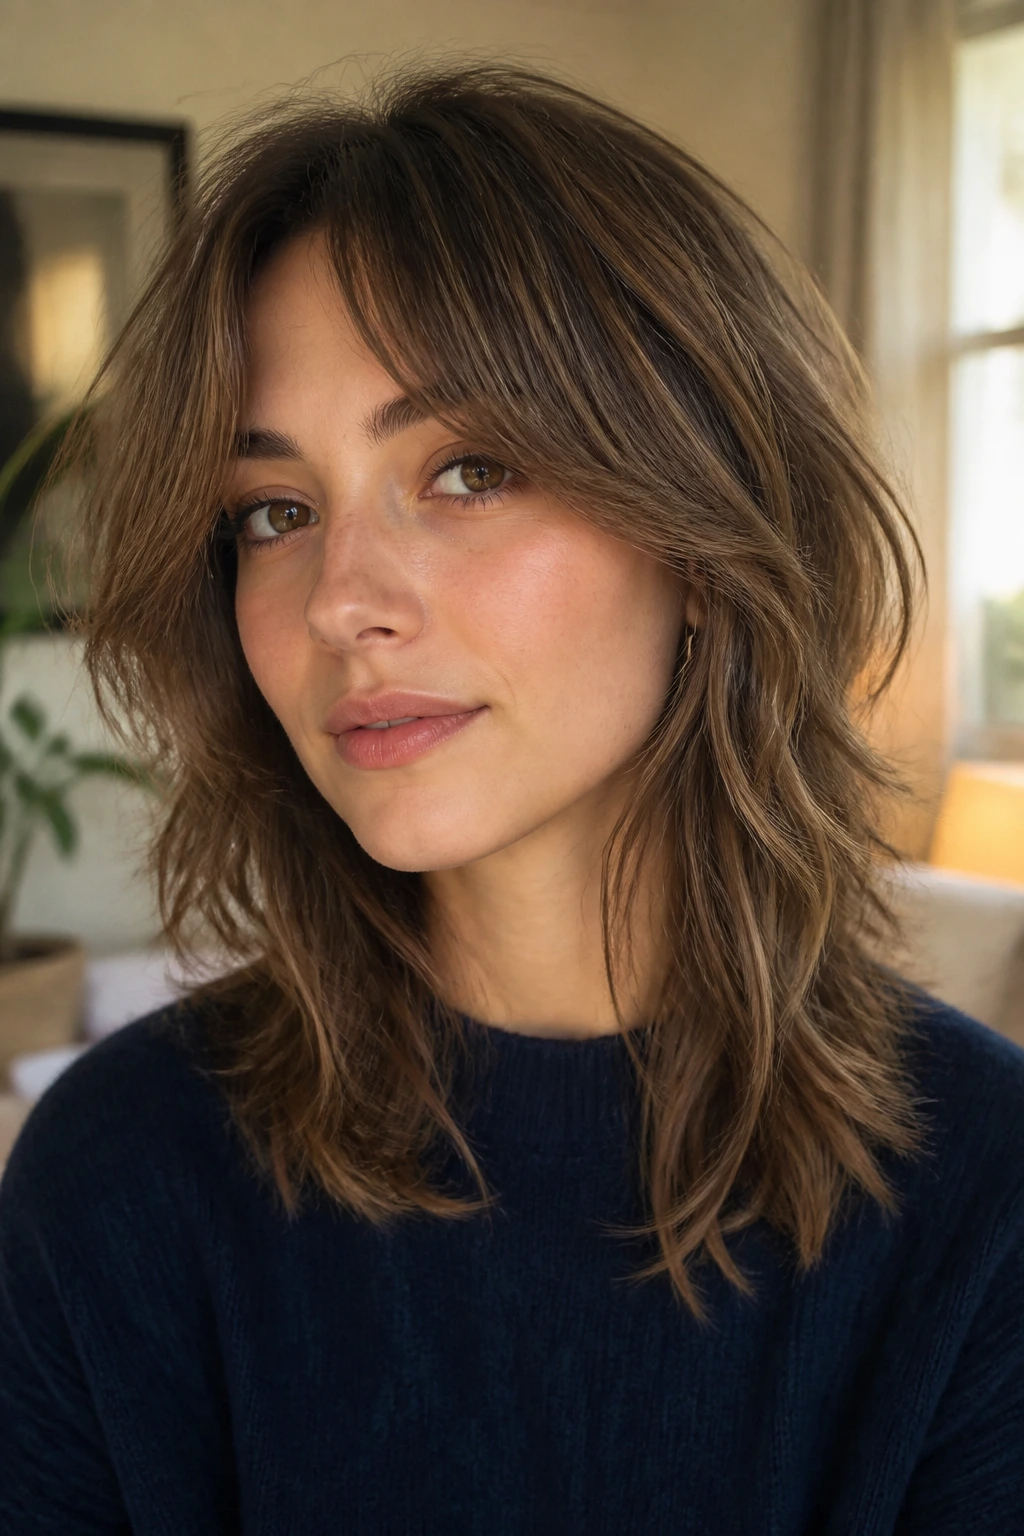
This is the cut for anyone who wants shape without constant trims. A grown-out shag keeps the face frame soft, lets the layers blend from cheekbone to collarbone, and still gives fine hair enough movement to avoid looking limp.
The key is that nothing is too severe. The fringe should blend into the sides. The layers should feel like they belong to the haircut, not like they were added in a panic. When a shag grows out well, it usually just looks a little softer, not messy in the bad sense.
That makes this style useful if you do not enjoy monthly salon visits. A trim every 6 to 8 weeks keeps the ends tidy, but even if you stretch it a bit, the cut usually holds its shape. The hair around the face does most of the visual work anyway.
If you want one rule to remember, make it this: ask for movement where the eye lands and keep density where the hair tends to quit. That’s the whole trick with fine hair. Get that balance right, and the haircut starts doing the heavy lifting for you.
