



Straight hair shows every line. Every blunt edge. Every layer that sits too high and starts to look like a mistake.
That is exactly why long shag haircuts for straight hair can work so well when they’re cut with a little restraint. The best versions keep enough weight at the bottom to stop the ends from going thin, then add movement through the mid-lengths and around the face. If the layers start too high, the cut can turn choppy fast. If they’re too low, you barely get the shag effect at all. The sweet spot is smaller than most people think.
I’ve always liked shags on straight hair more than people expect. Curly hair gets all the attention for texture, sure, but straight hair has its own kind of drama. It shows shape cleanly. It also punishes bad layering. That’s why the version you choose matters so much — a shag can look soft and expensive, or flat and stringy, with one wrong placement.
The 18 options below cover the whole range: soft face-framers, fringe-heavy cuts, wolf-inspired shapes, polished blowout versions, and a few that barely whisper “shag” until the light hits them. Some are easy to air-dry. Some look better with a round brush. All of them can work on straight hair if the cut respects the texture instead of fighting it.
1. Long Shag With Soft Face Frames
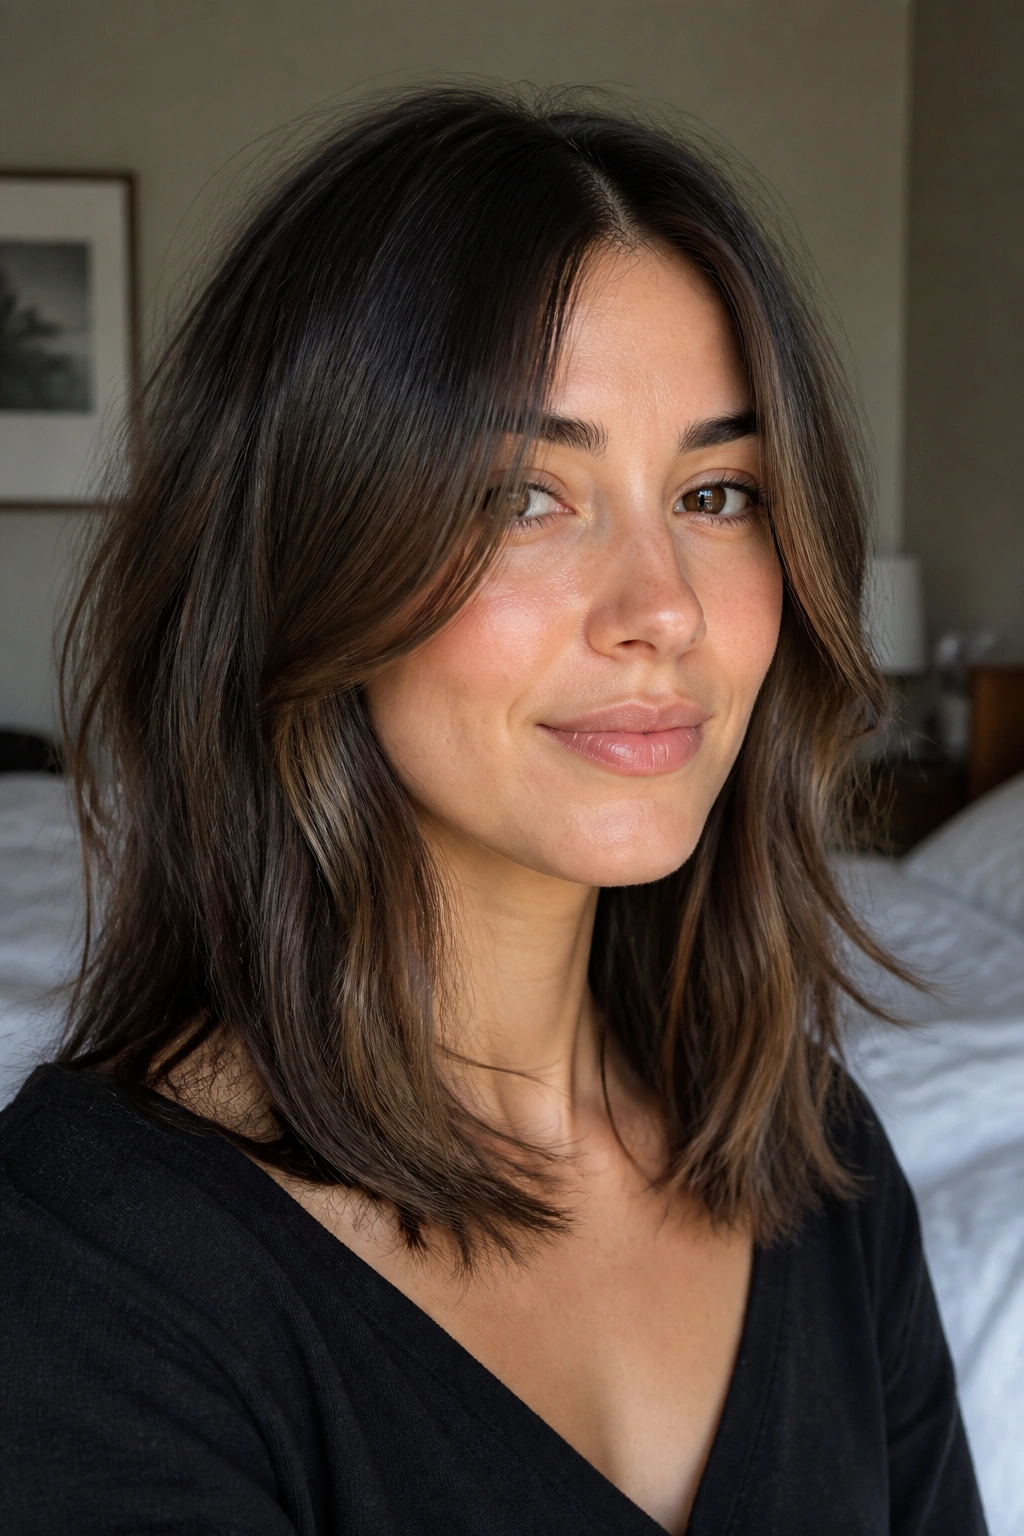
This is the easiest place to start if you want the shag feel without the rough edges. The length stays long and calm, while the front gets just enough movement to keep the cut from looking like one solid block.
Why It Works on Straight Hair
Straight hair shows every angle, so soft face-framing layers do a lot of heavy lifting. Ask for the shortest pieces to start around the cheekbone, then melt down toward the jaw instead of stopping abruptly. That keeps the shape light near the face while the rest of the hair stays full.
A clean perimeter matters here. If the bottom is too feathery, straight hair can look see-through by the time it reaches the shoulders. I like this cut best when the ends are point-cut and the face frame is soft enough to tuck behind the ears without turning spiky.
- Keep the shortest layer at cheekbone level or lower.
- Ask for a blunt-ish bottom line at the collarbone.
- Style with a 1.25-inch round brush or a soft bend from a flat iron.
- Best for medium-density hair that needs movement, not drama.
My favorite thing about this version: it still looks like your hair on a normal day. That matters.
2. Curtain Bangs and Long Layers
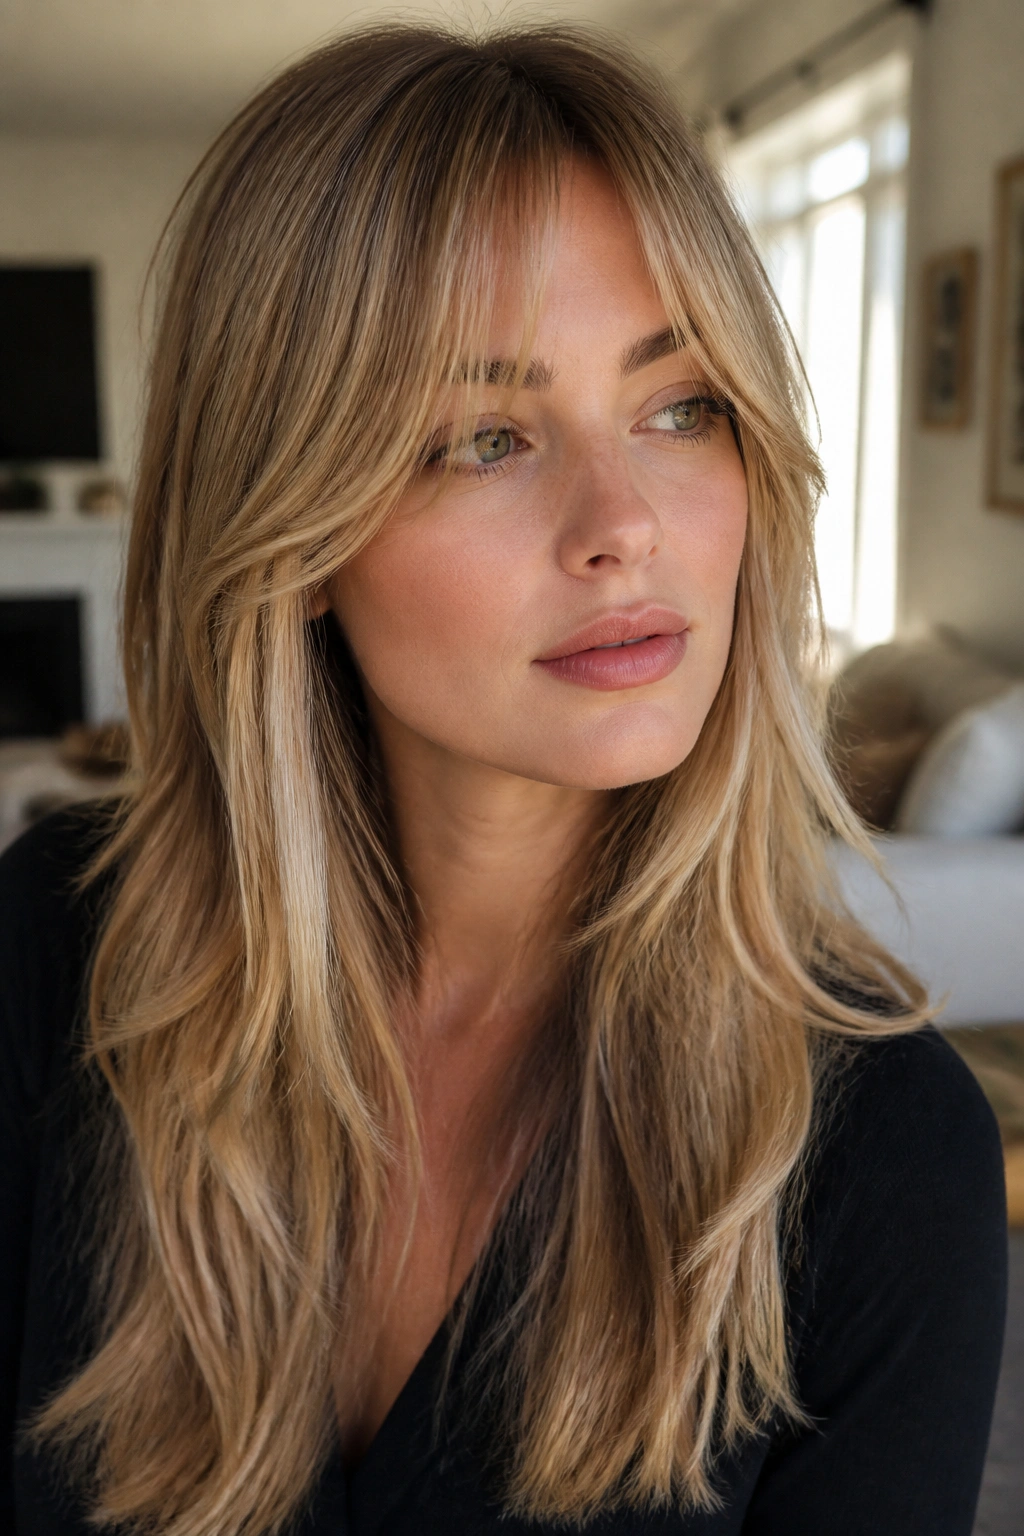
Curtain bangs make straight hair feel less rigid almost immediately. They open the face, break up the center part, and give the whole cut a little swing without asking for a full fringe commitment.
The trick is keeping the bang area light enough to blend. On straight hair, curtain bangs that are too thick can sit like a curtain — which sounds obvious, but I see it happen all the time. Ask for the shortest point near the bridge of the nose, then let the sides graze the cheekbones and disappear into long layers. That transition is what makes the haircut feel expensive instead of obvious.
This version is especially useful if your hair tends to fall flat around the crown. The bangs create a little lift up front, and the long layers make the lengths move when you walk. A quick blow-dry with a round brush is usually enough. You do not need to curl every piece. Please don’t.
3. Wolf-Inspired Long Shag

Can straight hair handle a wolf-inspired shag? Yes — if you keep the crown soft and the bottom long enough to ground the shape.
The wolf cut can go a little wild on straight hair when the layers are too short through the top third. That’s the part most people get wrong. A better version borrows the energy of the wolf cut — slightly choppy, a little rebellious, more volume around the crown — but keeps the ends long so the shape doesn’t puff out like a triangle.
How to Wear It
A wolf-leaning shag works best when you style it with a small amount of bend, not a full curl. That bend can come from a diffuser, a flat iron, or a large barrel brush if you want a cleaner finish.
- Ask for long top layers, not short crown snips.
- Keep the perimeter below the shoulders if your hair is fine.
- Use mousse at the roots before blow-drying.
- Finish with a pea-sized amount of matte paste on the ends for separation.
If you like a little edge and do not mind hair with personality, this one earns its keep fast.
4. Razor-Cut Long Shag
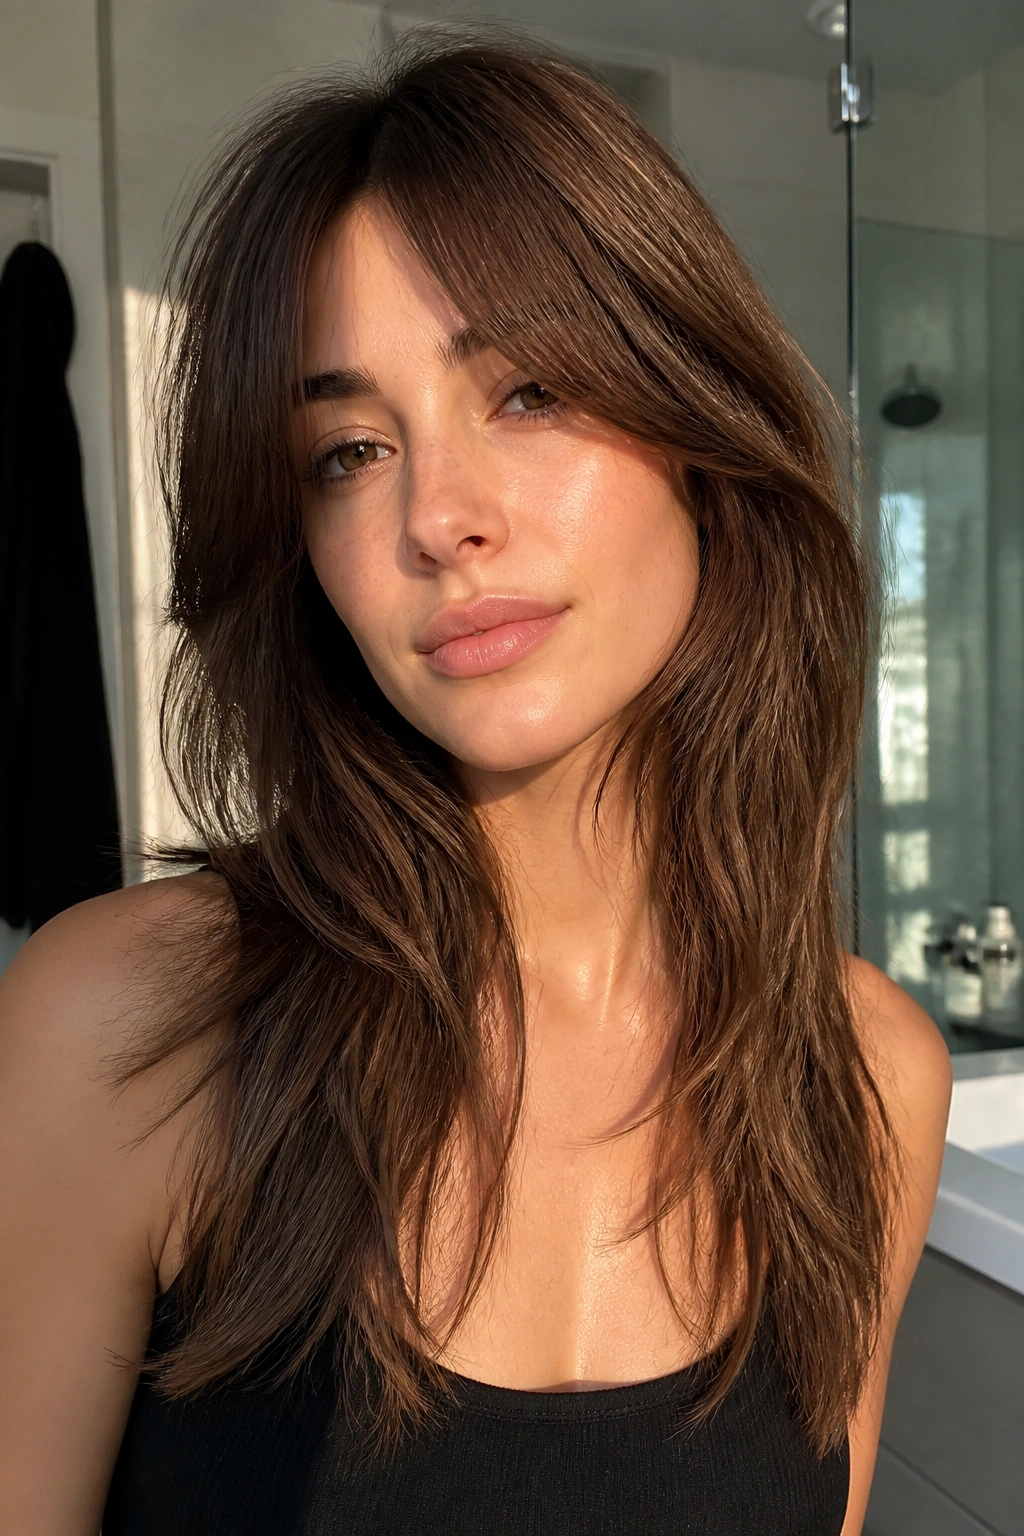
If your straight hair falls like a sheet and refuses to move, a razor-cut shag can wake it up. It’s not about making the hair wild. It’s about taking some of the bluntness out of the ends so the layers can breathe.
A razor works best on healthy, medium-to-thick hair that can handle a softer edge. The tool slices the hair in a way scissors don’t, which makes the perimeter look more broken up and airy. That can be beautiful on straight hair, especially if the cut needs texture but the hair itself has very little natural bend.
The catch is frizz. Damaged hair and razors do not always get along. If your ends already feel rough, a razor can make them look worse, not better. In that case, ask for slide cutting or point cutting instead.
- Best on clean, healthy lengths.
- Avoid if the ends are dry or split.
- Pair with a smoothing cream, not a heavy oil.
- Great for hair that looks too blunt after a standard layered cut.
The difference is texture, not mess. That’s the line I’d keep in mind.
5. Butterfly-Style Long Shag
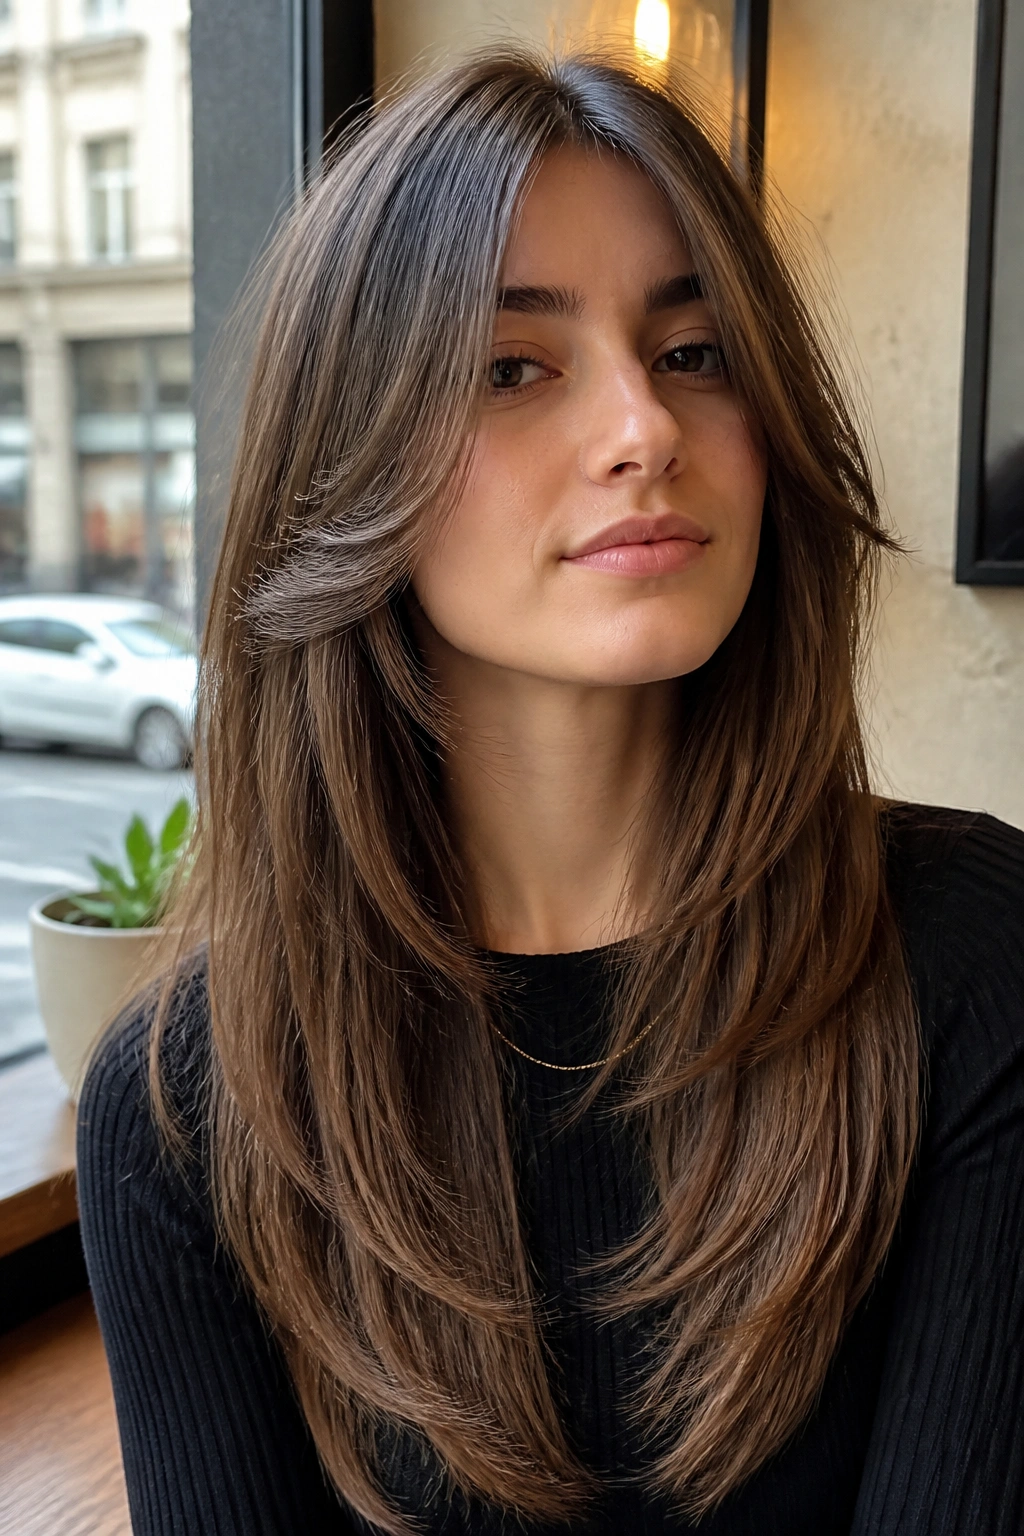
The butterfly shag borrows from two places at once: soft face-framing layers in front and long internal layers that give the rest of the hair lift. On straight hair, that combination can be gorgeous because it creates movement without chopping the length apart.
What I like most is the illusion. The front pieces can look almost like a shorter cut when they’re styled out, while the back still hangs long and sleek. That makes the haircut feel light around the face but still polished from behind. It’s a neat trick, and it works especially well if you like a blowout look.
This one also grows out nicely. The layers don’t need to be razor-sharp to read well, so the shape stays readable for a while between trims. That matters more than people admit. Hair that looks good only for ten days is a nuisance.
The butterfly shag is a strong pick if you want movement around the cheekbones, want to keep your length, and enjoy styling with a round brush or large rollers. It’s a little more polished than a punky shag. Not bland. Just smoother.
6. U-Shaped Long Shag
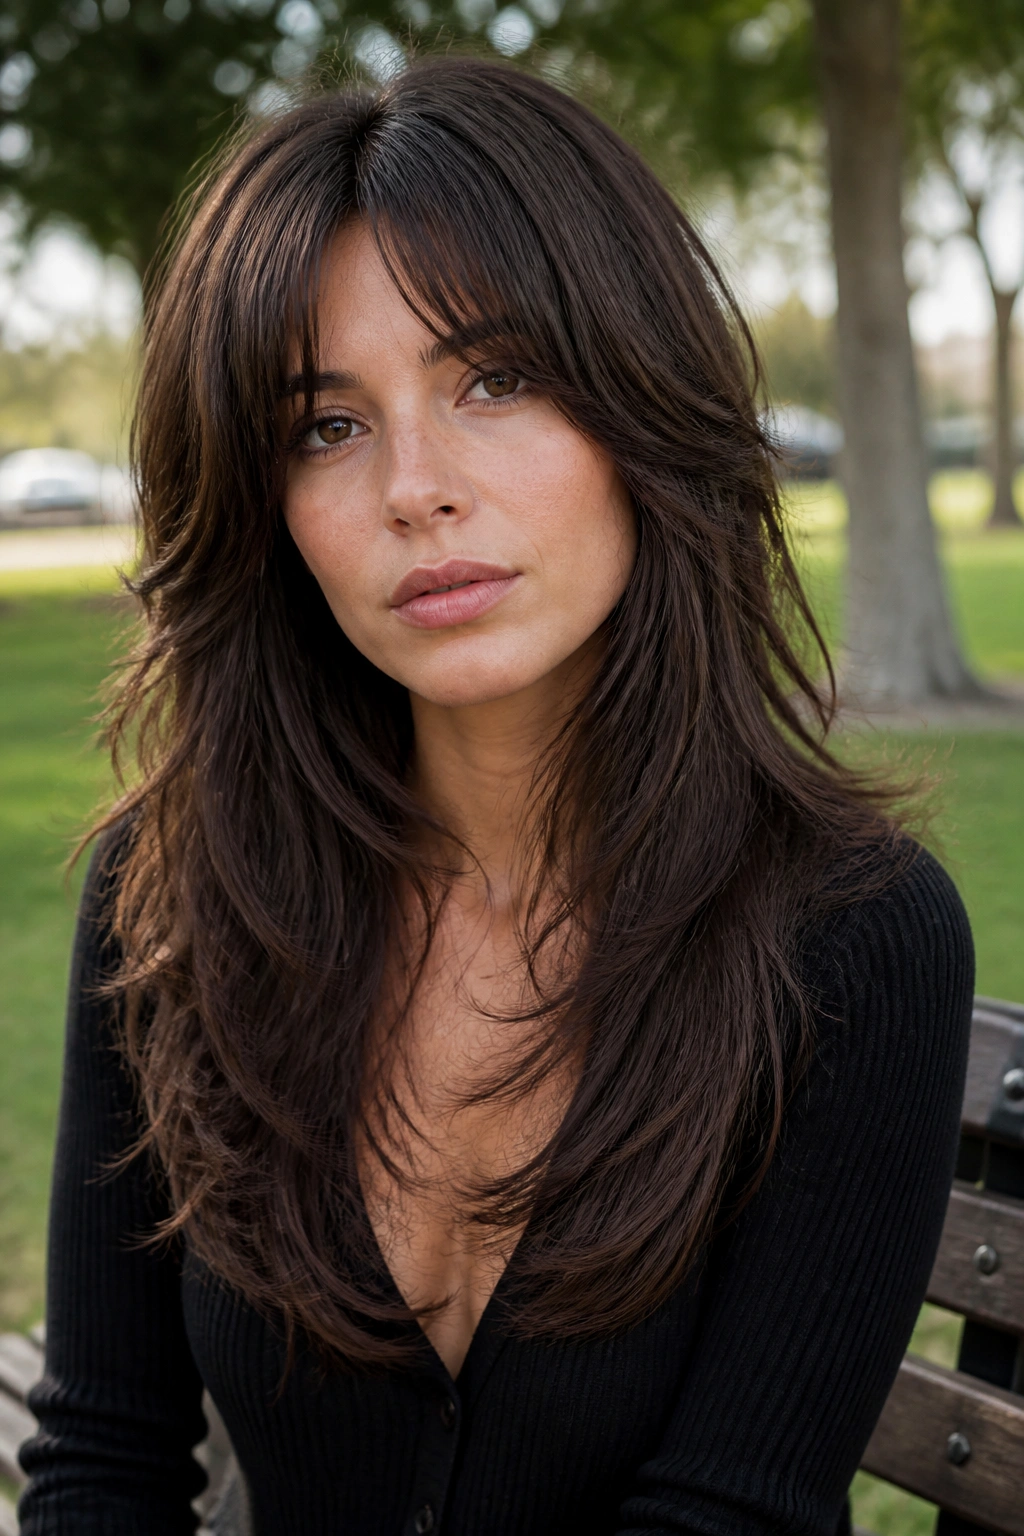
Unlike a V-cut, a U-shaped shag keeps the bottom fuller. That single detail changes the whole mood of the haircut.
On straight hair, a V-shape can start to look thin at the point if the layers are too aggressive. A soft U shape gives the ends a rounder finish, which keeps the haircut from looking stringy as it gets longer. The shag layers sit inside that shape, so you still get movement, but the outline stays generous.
This is the cut I’d point someone toward if they want a little texture and still like hair that feels substantial in a ponytail. It also plays well with both middle parts and soft side parts. The shape does the work even when you barely style it.
Ask your stylist for a rounded perimeter and internal layers that begin below the chin. Keep the face frame longer if your hair is fine, shorter if you want a stronger frame around the eyes. Clean, deliberate layers beat random ones every time.
7. Long Shag With Bottleneck Bangs
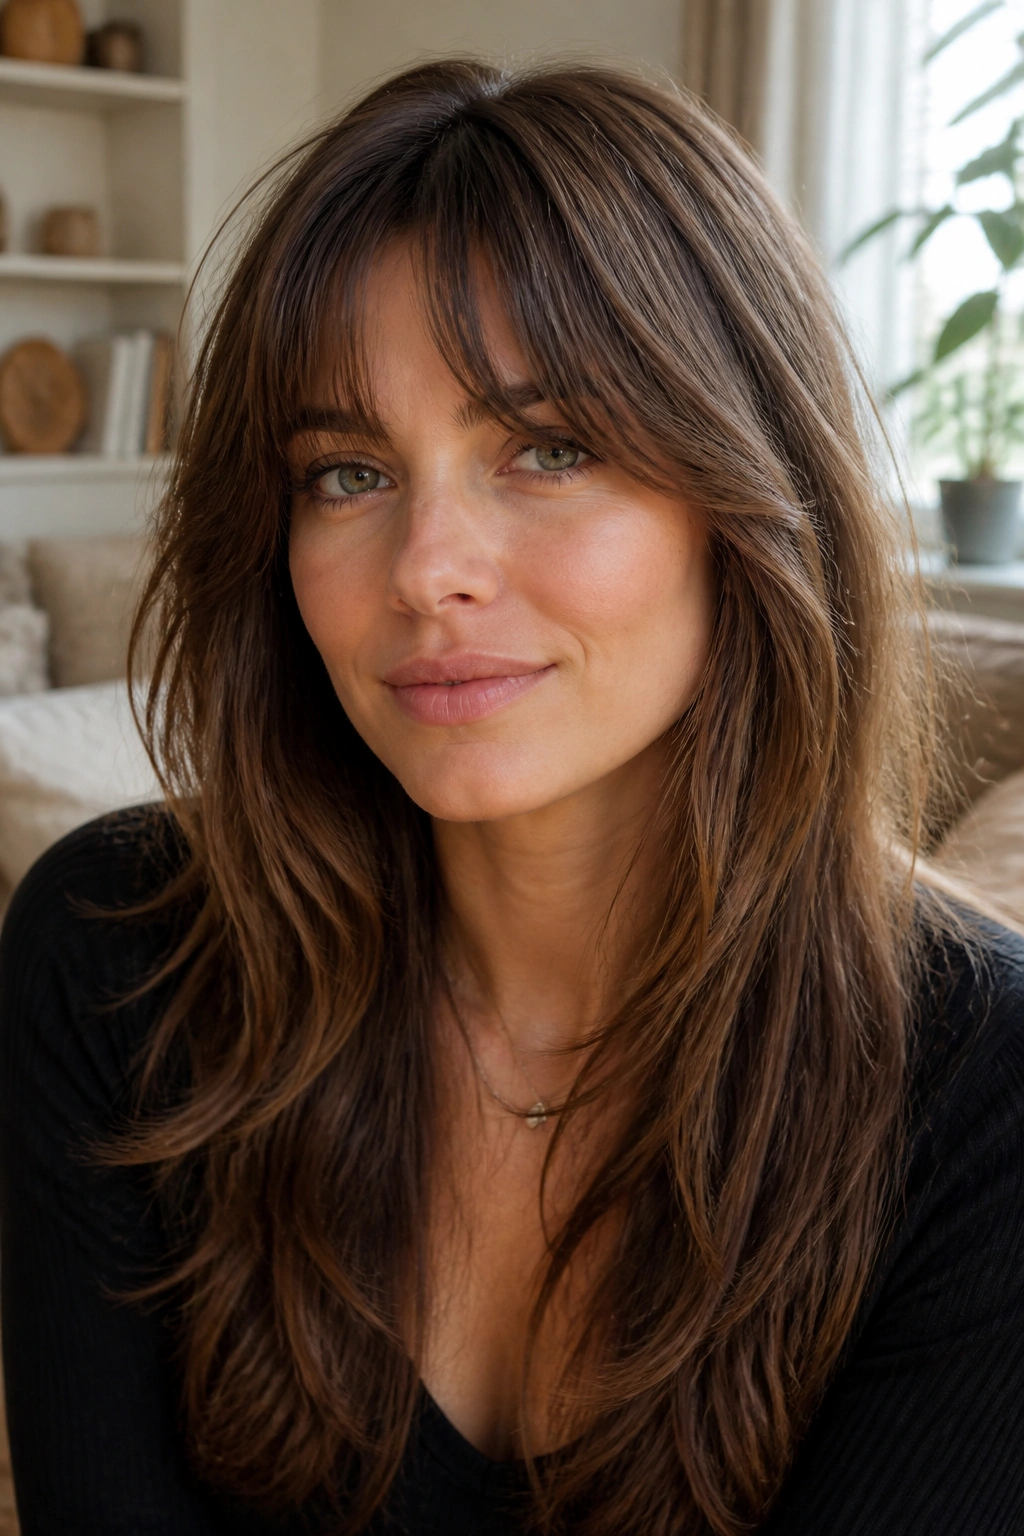
Why do bottleneck bangs keep showing up with long shag haircuts for straight hair? Because they sit in that useful middle ground between a curtain bang and a full fringe.
They start narrow in the center, then widen near the temples, which means they blend into the rest of the haircut without looking like a hard line. On straight hair, that matters. Straight hair makes edges obvious, and bottleneck bangs soften the top of the cut without swallowing the forehead.
How to Style the Bend
The shape looks best with a slight bend, not a deep curl. I’d dry them with a small round brush, rolling the center under and pulling the sides away from the face. A flat iron can work too, but keep the movement loose.
- Ask for the shortest point just above the pupil.
- Leave the outer pieces long enough to hit the cheekbones.
- Use a light volumizing spray at the roots.
- Trim every 5 to 7 weeks if you want the shape to stay crisp.
This cut is a nice choice if you want fringe, but not the full maintenance that comes with blunt bangs.
8. Heavy Fringe Long Shag

A heavy fringe can make a long shag look more deliberate fast. It gives the haircut a clear front, which helps straight hair from feeling too open or airy.
This works best when the rest of the hair stays soft and layered. If everything is heavy — fringe, crown, ends — the haircut can feel boxy. Keep the fringe dense, yes, but let the body of the hair stay lighter so the contrast does the styling for you. That contrast is the whole point.
I like this version on longer faces and on people who want to draw attention to the eyes. It can also make straight hair feel a little more luxurious, because the fringe gives the cut a stronger shape up top. The downside is maintenance. Heavy fringe shows oil fast, flattens quickly, and needs regular drying. If you want to wash and go, this is not the easiest pick.
Still, it’s a sharp look. And sometimes sharp is the better choice.
9. Long Shag for Fine Straight Hair
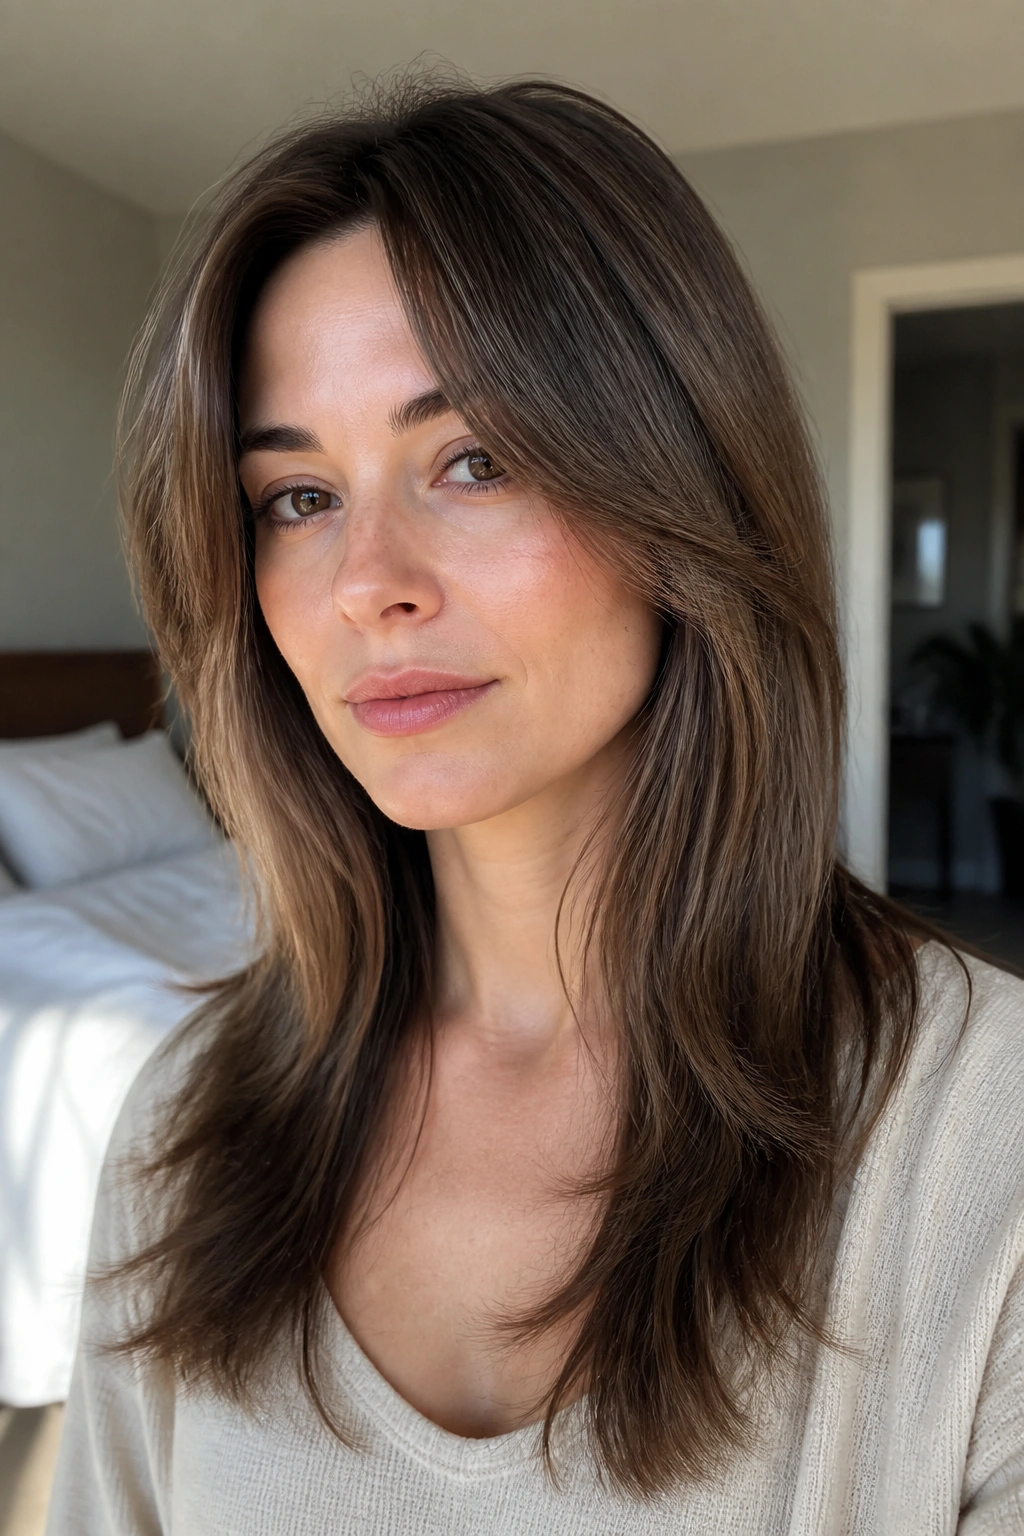
What if your hair is fine and straight, and you’re nervous that layers will make it look thinner? Fair concern. Fine hair can go wispy fast if the shag is cut too high or too aggressively.
The answer is restraint. Keep the longest layers below the chin, preserve a solid perimeter, and avoid stripping out too much weight at the ends. You want movement inside the shape, not a million little pieces hanging off the outside. That distinction is the difference between airy and sparse.
What to Ask For
- Long, blended layers that begin around the collarbone.
- Minimal texturizing at the ends.
- A blunt or slightly rounded bottom line.
- Root lift at the crown, but not short crown layers.
A mousse or root spray at the roots helps fine straight hair hold the shape without collapsing by noon. I would skip heavy creams here. They can make the whole cut slump, and fine hair rarely needs the extra weight.
This version of the shag is all about illusion. You want body, not bulk.
10. Long Shag for Thick Straight Hair
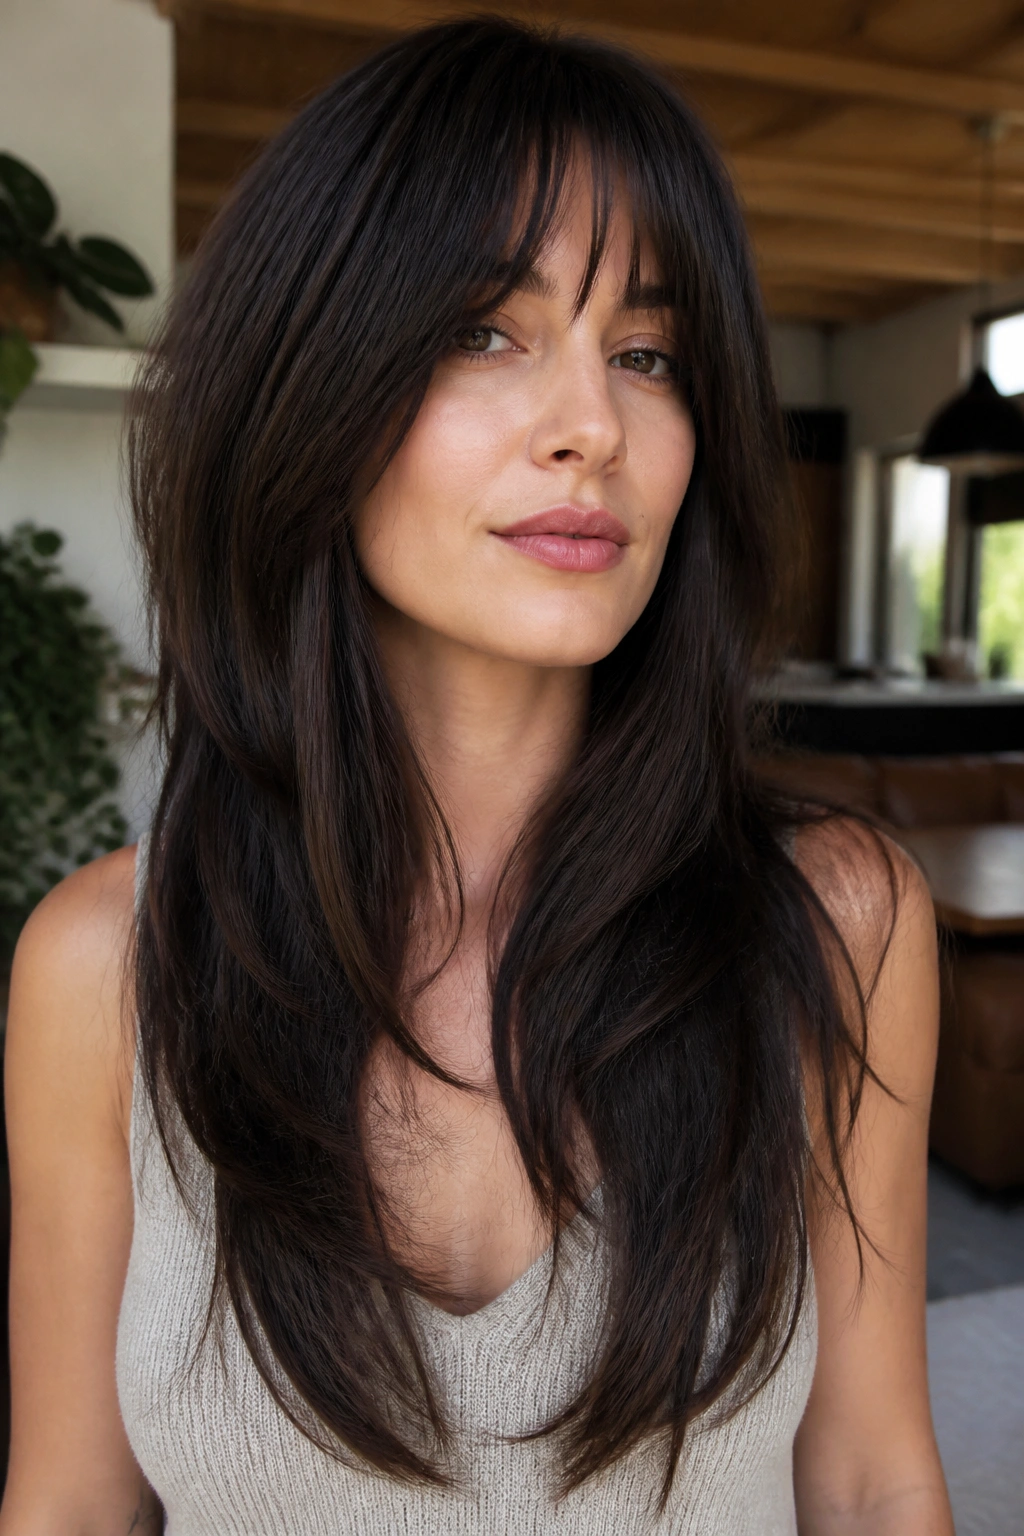
Thick straight hair needs a different kind of control. The problem usually isn’t lack of movement. It’s too much of everything all at once.
A good shag for thick hair removes bulk in the right places and leaves weight where the shape needs it. That usually means longer layers through the mid-lengths, controlled thinning near the interior, and a perimeter that stays strong enough to stop the hair from exploding outward. If the shortest layers are too short, thick straight hair can pop out in awkward shelves. I’ve seen that more than once, and it’s never charming.
A stylist who knows how to handle thick straight hair will often work with larger sections and cut less hair than the client expects. That’s not laziness. It’s control. You want the cut to move when you turn your head, not sit in a halo around it.
If your hair is heavy, ask for a long shag with internal weight removal rather than a lot of visible short layers. The goal is a cleaner swing, not a shredded outline. Thick hair can take more shape. It just needs it in the right places.
11. Center-Part Minimalist Long Shag
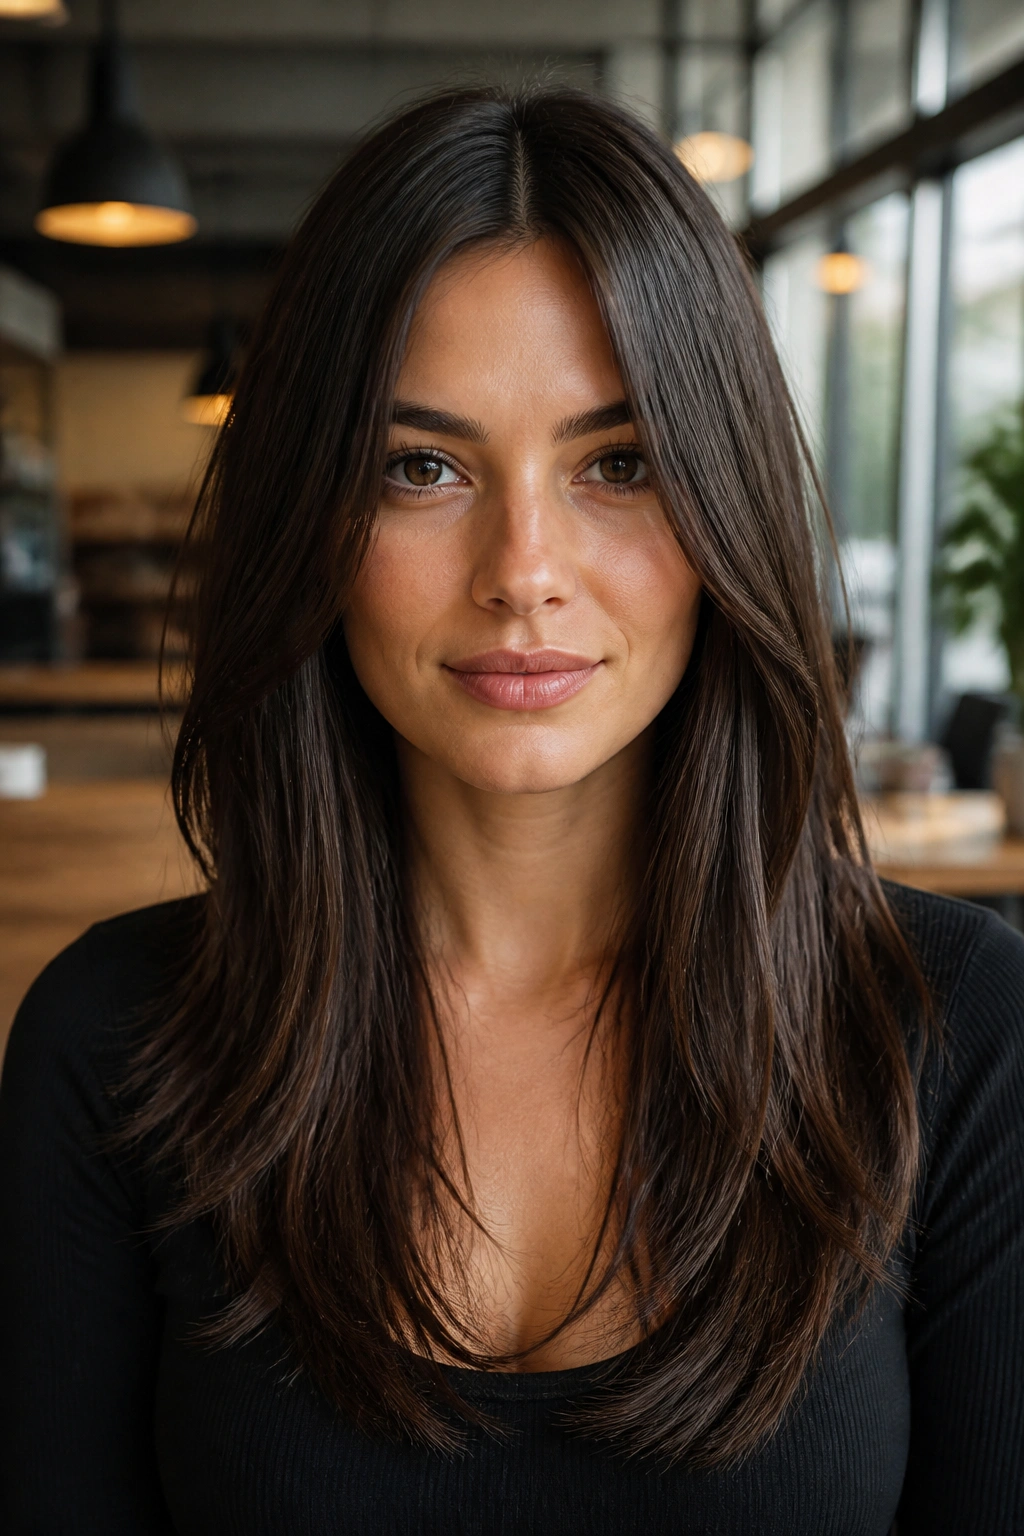
A center-part minimalist shag is the one I reach for when someone wants shape but does not want the haircut to announce itself. It’s pared back, neat, and a little cooler than the more dramatic versions.
Straight hair loves this because the part creates symmetry and the layers give just enough break in the silhouette. The face-framing pieces are usually longer, often starting near the jaw or collarbone, and the rest of the cut is kept subtle. Nothing screams. Nothing flares out. It just moves.
This version looks especially good on hair with a bit of natural shine. Straight strands reflect light cleanly, so the soft layers read as shape rather than texture. A lightweight gloss spray or serum on the ends can make the difference between flat and sleek. Use a small amount. Too much and the cut loses all air.
It’s a good choice if you want a shag that feels grown-up, not costume-y. There’s enough edge to keep it interesting. There’s also enough restraint to wear it with a blazer, a sweatshirt, or a dress shirt without feeling overdressed in either direction.
12. Side-Swept Long Shag
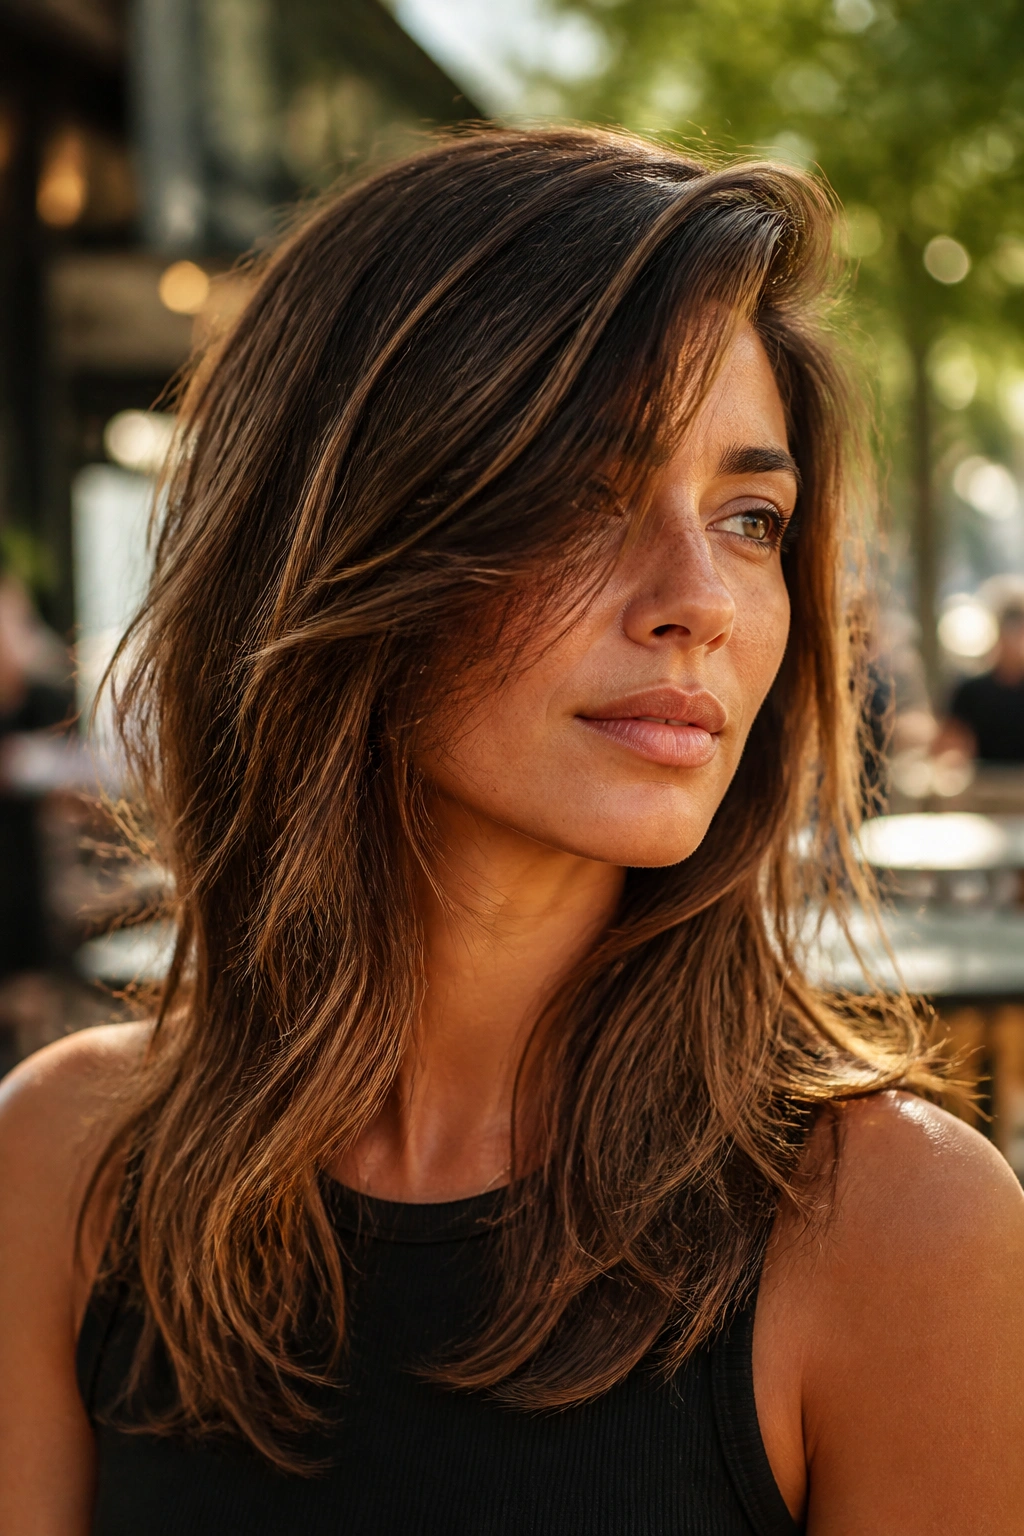
A side part changes the whole mood. It gives straight hair lift at the root, softens the line across the forehead, and makes even a simple shag feel more relaxed.
Compared with a center part, a side-swept shag can feel less severe. That makes it useful for square faces, strong jaws, or any face shape that looks better with a little asymmetry. It’s also a practical fix for a stubborn cowlick. If your hair naturally wants to split off-center, fighting it every morning is a waste of time.
The styling trick is simple enough: blow-dry the roots in the opposite direction first, then flip the part back over once the hair is warm and set. That gives the front some lift without needing a mountain of product. A medium-hold mousse at the roots can help, but don’t load up the lengths. Straight hair will show every heavy patch.
This version suits people who want their shag to feel a little softer and less structured. It still has layers. It still has movement. It just leans more casual than crisp.
13. Long Shag With Choppy Ends
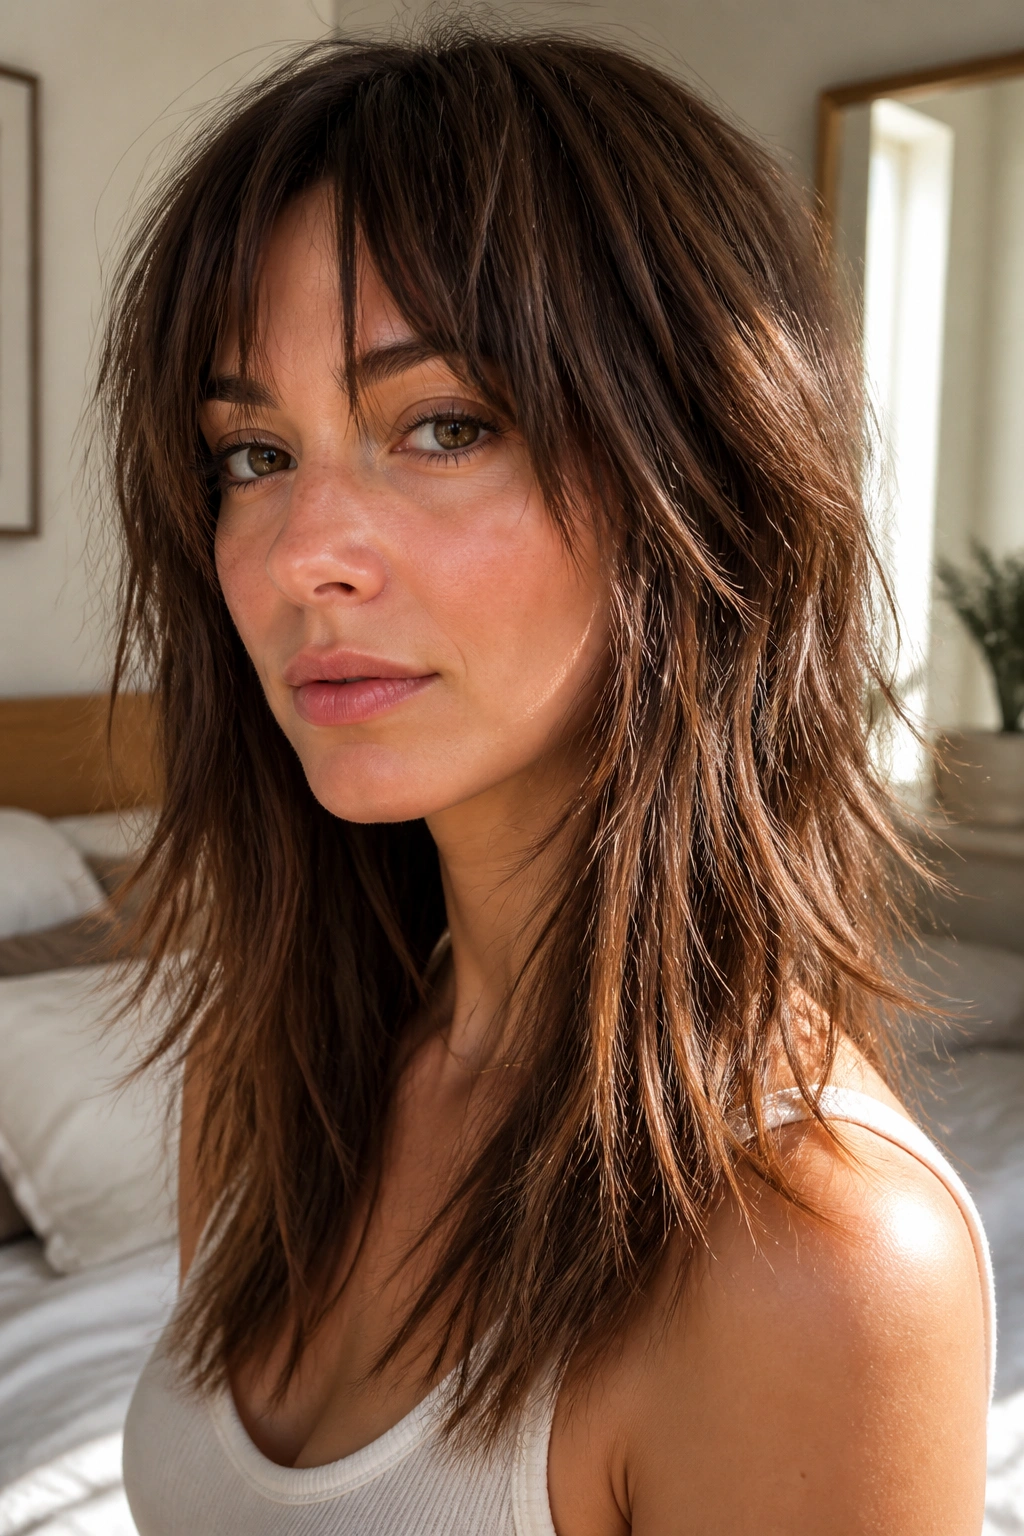
Choppy ends are where a shag stops feeling sweet and starts feeling sharp. A little roughness at the bottom can work in your favor, especially on straight hair, which otherwise likes to fall in one solid sheet.
What to Ask For
Tell your stylist you want the ends broken up, not shredded. Point cutting is usually safer than heavy razor work if your hair already feels dry. The goal is small irregularities at the edge, not visible chunks missing from the outline.
- Keep the chop concentrated at the perimeter.
- Ask for soft separation, not obvious gaps.
- Use a light wax or paste on the last 2 inches.
- Avoid this look if your ends are fried or split.
I like choppy ends on straight hair that holds a sleek surface but needs a little grit underneath. The contrast is what makes it interesting. Smooth roots, imperfect ends. That combination keeps the cut from looking overstyled.
The downside is maintenance. If the ends start to fray, the cut can go from edgy to tired fast. A trim every 8 to 10 weeks helps keep the shape intentional.
14. Glam Blowout Long Shag
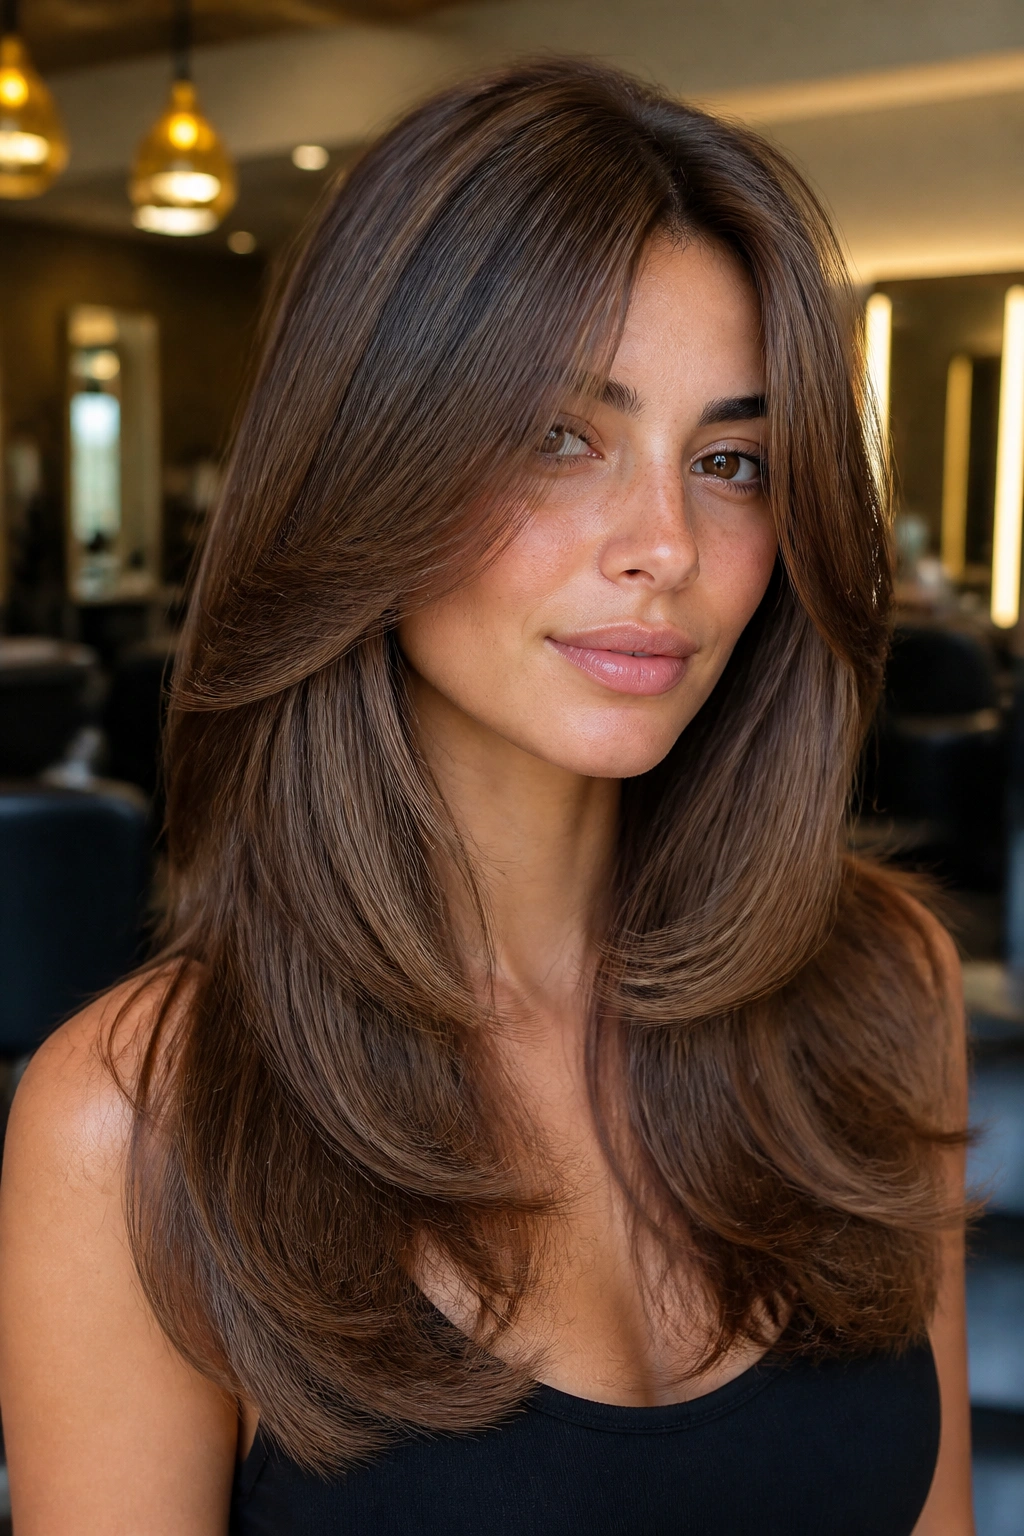
If you like a full, soft blowout, this is the shag that behaves. It has the layers and movement people want from a shag, but it leans polished instead of messy.
The structure usually includes longer face-framing layers, a lifted crown, and ends that curve under just enough to feel finished. Straight hair is a good match because it takes a round-brush blowout cleanly. You can get that airy, polished shape without fighting curls or waves that want to do their own thing.
A 2-inch round brush helps here, as does a decent heat protectant and a nozzle attachment on your dryer. Dry the roots first. Always. Once the root area is flat, the rest of the style has to work twice as hard. Roll the front sections away from the face, then let them cool before touching them again. That cooling step is the part people skip.
This version does need styling. No way around that. But if you enjoy hair that looks done, it rewards the effort with a soft, expensive-looking finish that still has shag movement underneath.
15. Invisible-Layer Long Shag
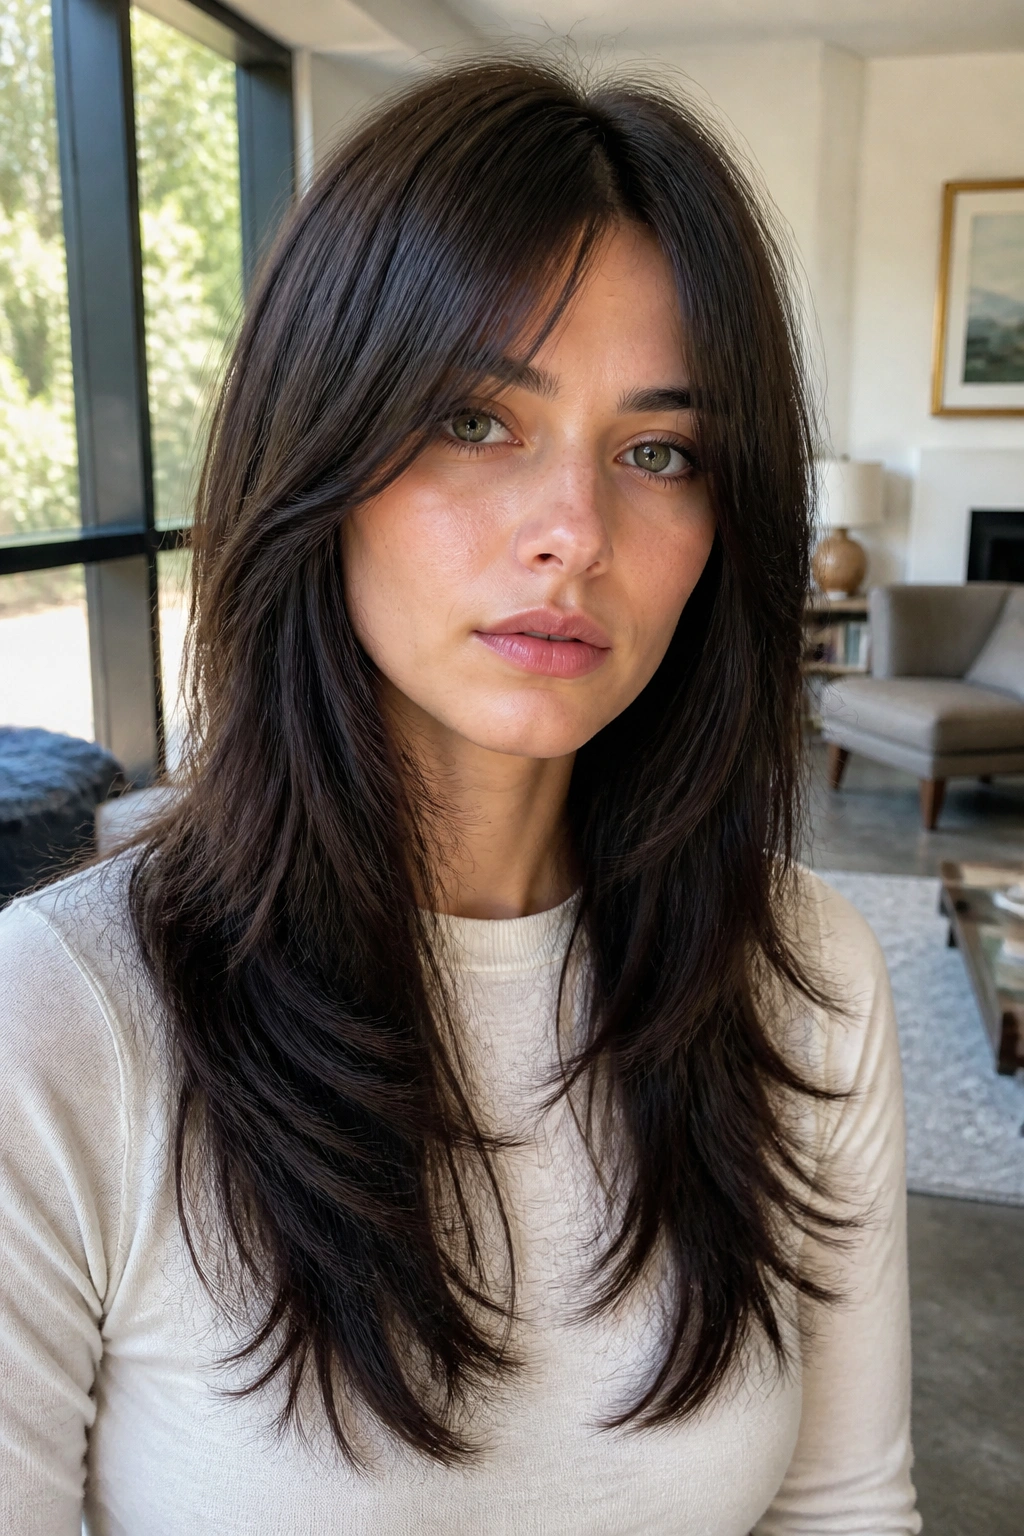
Can a shag be nearly invisible and still work? Absolutely. This is the cut for people who want movement but do not want the layers to shout about it.
Invisible layers are cut inside the shape, so the front and surface stay smooth while the underneath gets a little lift. On straight hair, that can be a very smart choice. You get less bulk, more swing, and almost no visible choppiness. It’s a quieter shag, which is not a bad thing. Some of the best haircuts are the ones people can’t quite name.
Who Should Choose It
This version suits conservative workplaces, low-drama styling habits, and anyone who likes straight hair to look clean from every angle. It also works well if you wear your hair half-up a lot, because the hidden layers give the style some internal movement without short pieces sticking out everywhere.
Ask for long internal layers and a soft face frame, then keep the ends strong. If you want the haircut to live in the background and still keep the hair from falling flat, this is the one.
16. Feathered Mid-Length Layers

Feathered layers are gentler than choppy ones. They move with straight hair instead of breaking it up into sharp pieces, which makes the whole haircut feel softer and more wearable.
This version sits somewhere between a classic long shag and a blown-out layered cut from the old salon books — in a good way. The layers often start around the collarbone or a little below, then taper into the lengths with a feathered edge. On straight hair, that creates flow without obvious chunkiness.
It’s a smart pick if you like shine. Feathering lets straight strands stay sleek while still giving the ends a light, brushed-out finish. I’d ask for a soft round brush set or a bend from a large barrel iron if you want the layers to show more clearly. A paddle brush alone can make the cut too tame.
This is also one of the better shags for people who want movement but do not want to feel like they’re wearing a trend piece. It looks familiar. Comfortable. Still interesting.
17. Air-Dried Tousled Long Shag

The air-dried shag is for people who want hair that looks done without looking styled. Straight hair makes this a little trickier than wavy hair, but it’s far from impossible.
The key is giving the hair a tiny bit of memory while it dries. A lightweight mousse or styling cream at the mids, a quick twist of a few face-framing pieces, and a little root clipping while the hair is damp can make a big difference. You’re not trying to create curls. You’re just teaching the hair to break up the line a bit.
A Simple Styling Routine
- Apply mousse from roots to mid-lengths on towel-dried hair.
- Twist two front sections away from the face.
- Clip the crown roots up for 10 to 15 minutes.
- Let the hair finish drying naturally, then separate the ends with clean fingers.
This cut works best when the layers are not too short. If the top pieces are cut too high, air-drying straight hair can leave the ends looking thin and the crown looking fuzzy. Keep the shag relaxed, and it will pay you back.
18. Low-Maintenance Long Shag
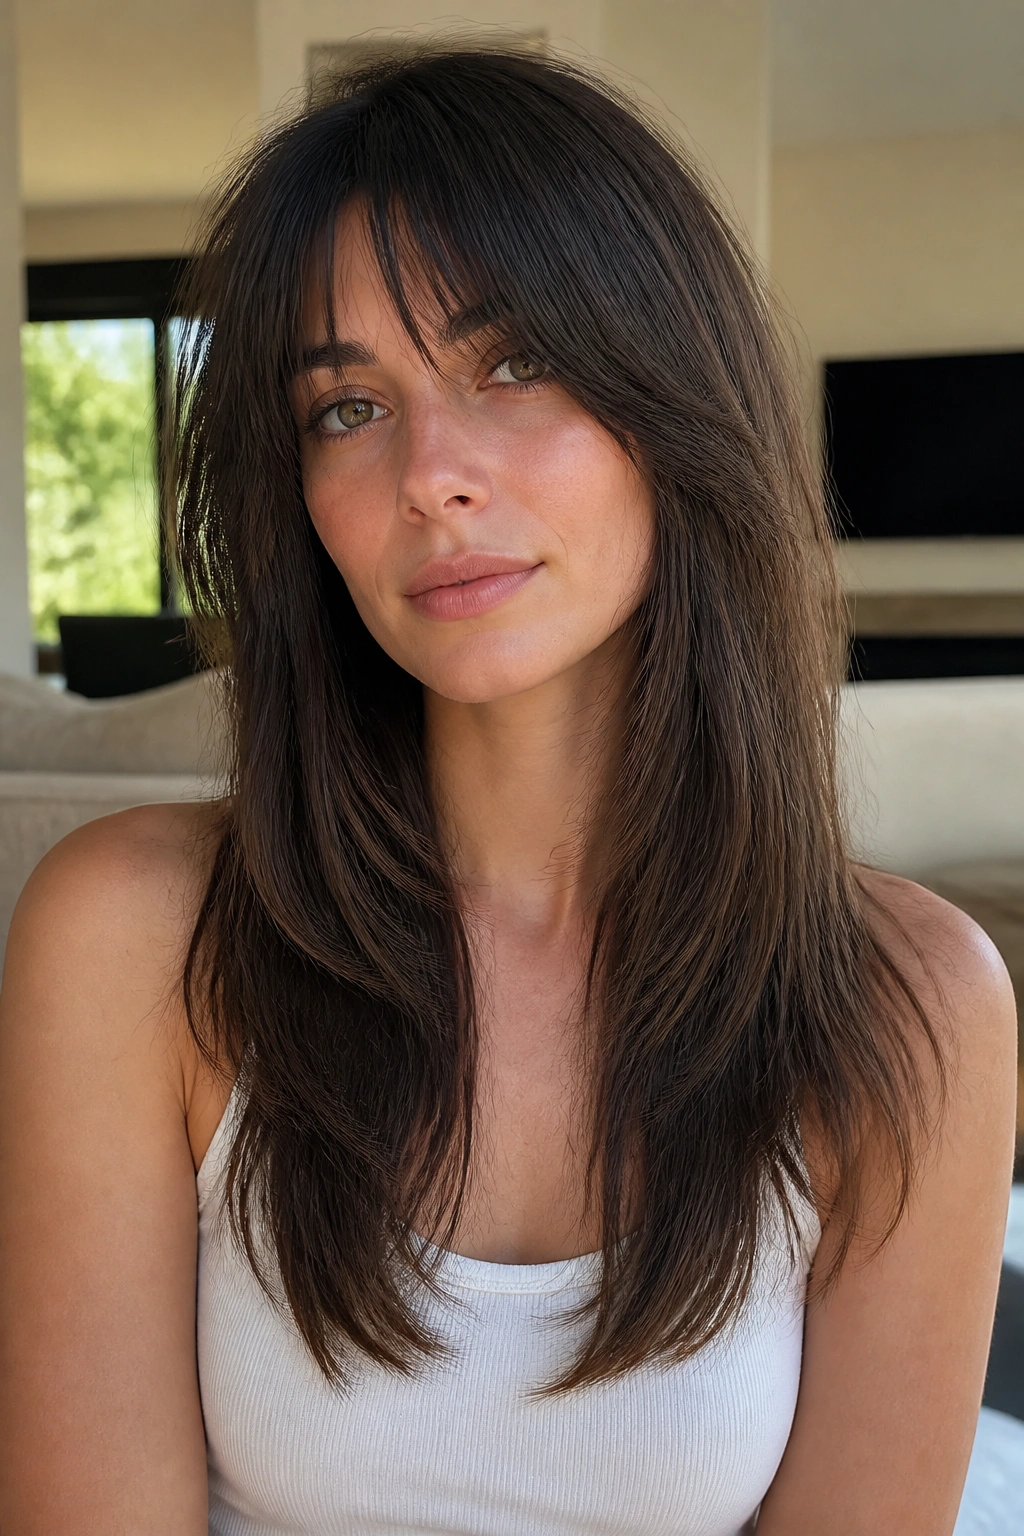
This is the long shag for people who want the idea of layers without turning their morning routine into a project. It’s the version that grows out cleanly, keeps its shape for a while, and doesn’t need careful styling every day.
The cut usually starts with a strong perimeter, then adds just enough face framing and internal layering to stop the hair from collapsing. Straight hair is a good fit because the cut stays readable even when it’s not freshly blown out. That matters. A lot of shag cuts look great on day one and awkward by week four. This one should not.
Ask for the shortest layers to stay long enough to tuck behind the ear, and keep the interior texture light. If you want easy hair, resist the urge to pile on fringe, micro-layers, and extra thinning all at once. That combo looks busy fast. Clean layers, soft movement, and a solid bottom line will give you a cut you can actually live with.
Final Thoughts
The smartest long shag on straight hair usually keeps more weight at the ends than people expect. That is the whole trick. The cut needs room to move, but it also needs enough structure to avoid looking thin or broken.
If you’re choosing between versions, think about your real routine, not the photo you saved from a salon feed. The cut that looks best in a mirror after a quick comb-through is usually the better one.
And if you want one blunt bit of advice: keep the outline stronger than the layers. Straight hair respects that.
