



Finding the perfect haircut for a round face shape often feels like a balancing act. You hear conflicting advice: keep it long to elongate, don’t go too short, avoid blunt bangs, steer clear of excessive volume at the cheeks. It’s enough to make you want to throw your hands up and settle for a ponytail forever. But the medium-length straight shag is the exception that proves the rule. It is one of the few styles that works with your bone structure rather than fighting against it.
A shag cut is defined by layers—usually choppy, textured, and shorter around the crown—while the ends remain piecey and often wispy. When you apply this to a round face, the magic happens in the vertical lines created by the layers. These lines act like natural contouring, drawing the eye up and down rather than side to side. Because the shag is inherently imperfect and “lived-in,” it avoids the dreaded helmet-head look that can happen with a standard bob on a round face.
You don’t need wild curls or a complicated blowout to make this style work. In fact, keeping the hair straight is often the best way to showcase the precision of the cut. When the hair is straight, the razor-cut layers become more visible, emphasizing that necessary verticality. Let’s look at the specific variations that handle round faces with grace, structure, and that distinct, effortless edge.
1. The Classic Center-Parted Shag
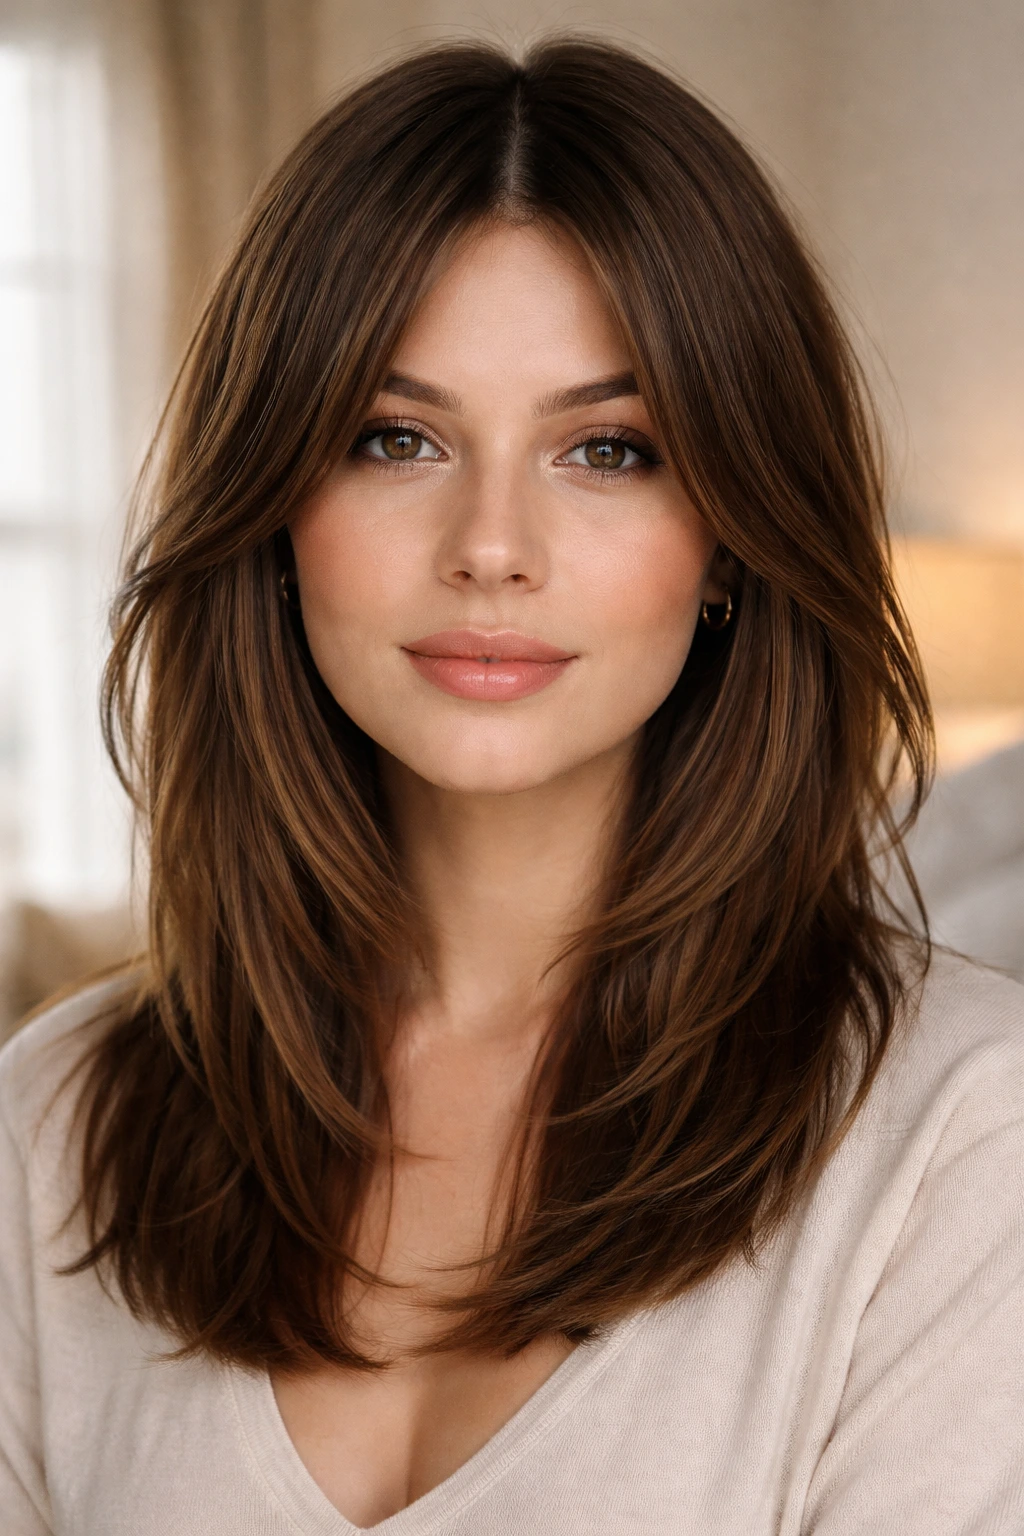
Most people with round faces are told to avoid center parts at all costs, but that advice is outdated. When combined with the heavy, broken-up layers of a shag, a center part actually acts like a curtain, framing your face and creating two strong vertical lines that slice through the roundness of your cheeks. It pulls the eye directly to the center of your face and forces a downward gaze.
Why It Works for Round Faces
The key here is the weight distribution. You need to keep the hair around the ears slightly lighter so it doesn’t puff out and add width. By keeping the hair sleek and straight, you maintain that slender silhouette.
Styling for the Center Part
- Use a tail comb to get a razor-straight line.
- Apply a smoothing serum to the mid-lengths only—avoid the roots or you will lose the volume at the crown.
- Ask your stylist for “invisible” layering around the cheekbones to keep the hair from bunching up.
Pro tip: If you feel like a center part is too severe, try a “cheat” part. Part it in the center, but flip one side slightly deeper to give the illusion of a soft, effortless drape.
2. Wispy Feathered Layers
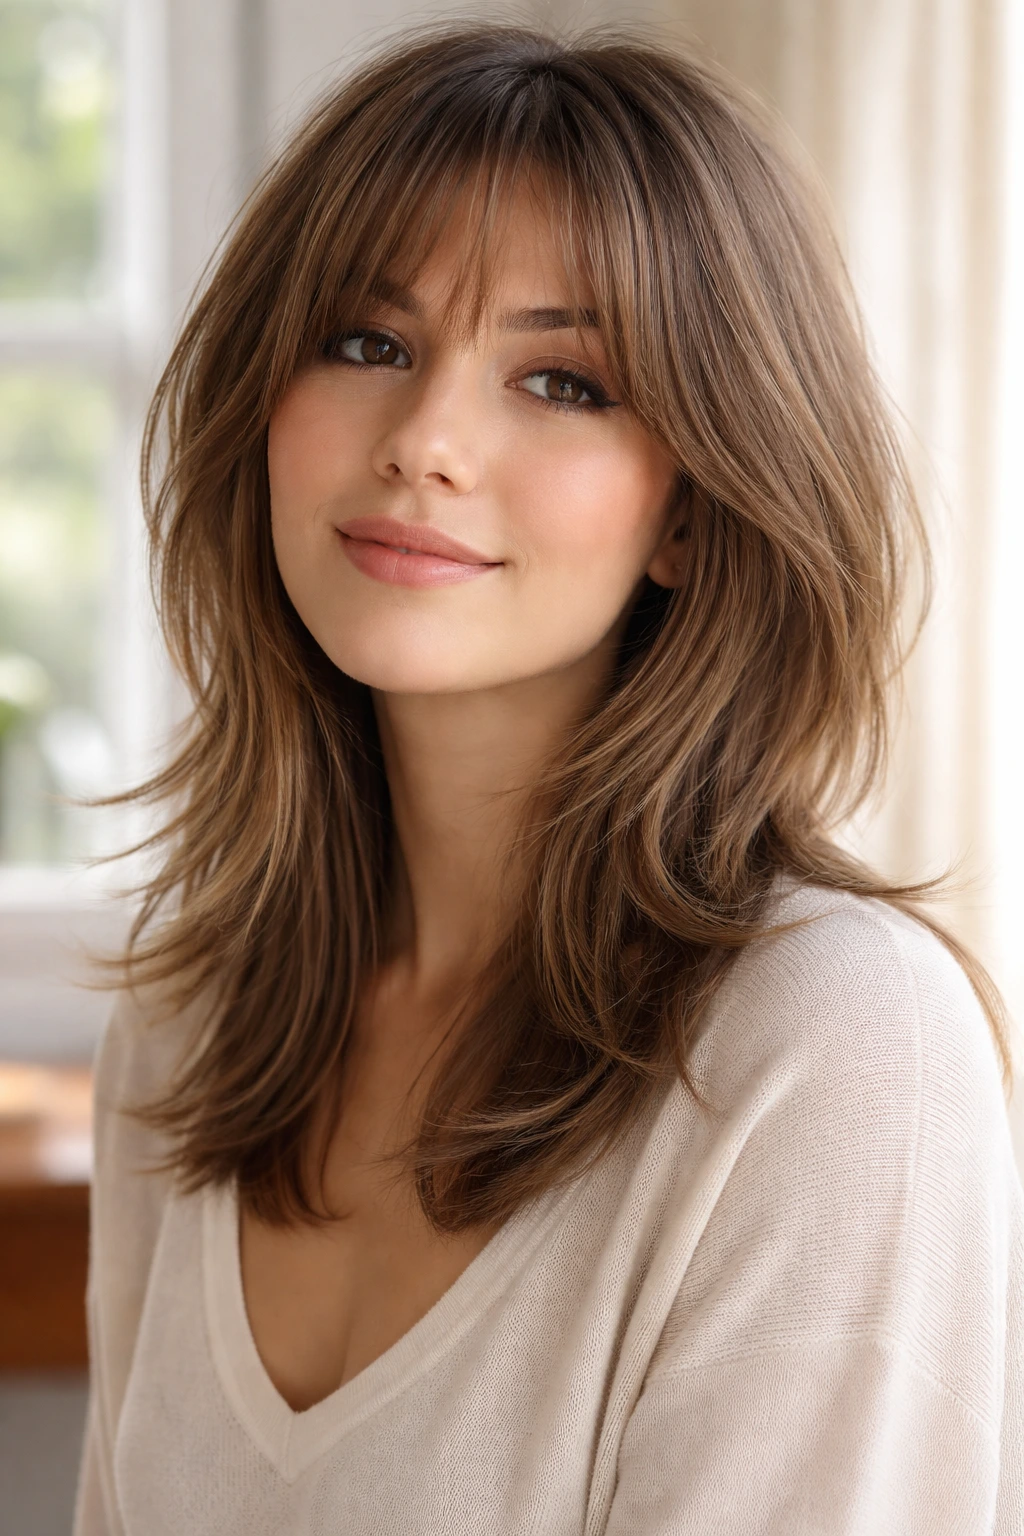
Feathering is a technique that thins out the ends of the hair, making them look light and airy. For a round face, heavy, blunt ends can create a horizontal line that makes the face look wider. By feathering the ends of your shag, you eliminate that visual “stop” sign and create a soft, tapering effect.
The Mechanism of the Cut
Think of this as the opposite of a blunt cut. Your stylist should use a razor or thinning shears to ensure the ends don’t clump together. This allows the hair to move freely. When the hair is straight, these feathered ends will naturally gravitate toward your neck and collarbone, further elongating the appearance of your jawline.
What to Ask For
- “Textured ends” is the phrase you want.
- “Point-cutting” is the technique.
- Request that the layers start below the chin to avoid highlighting the fullest part of your face.
3. The Modern Wolf-Cut Shag
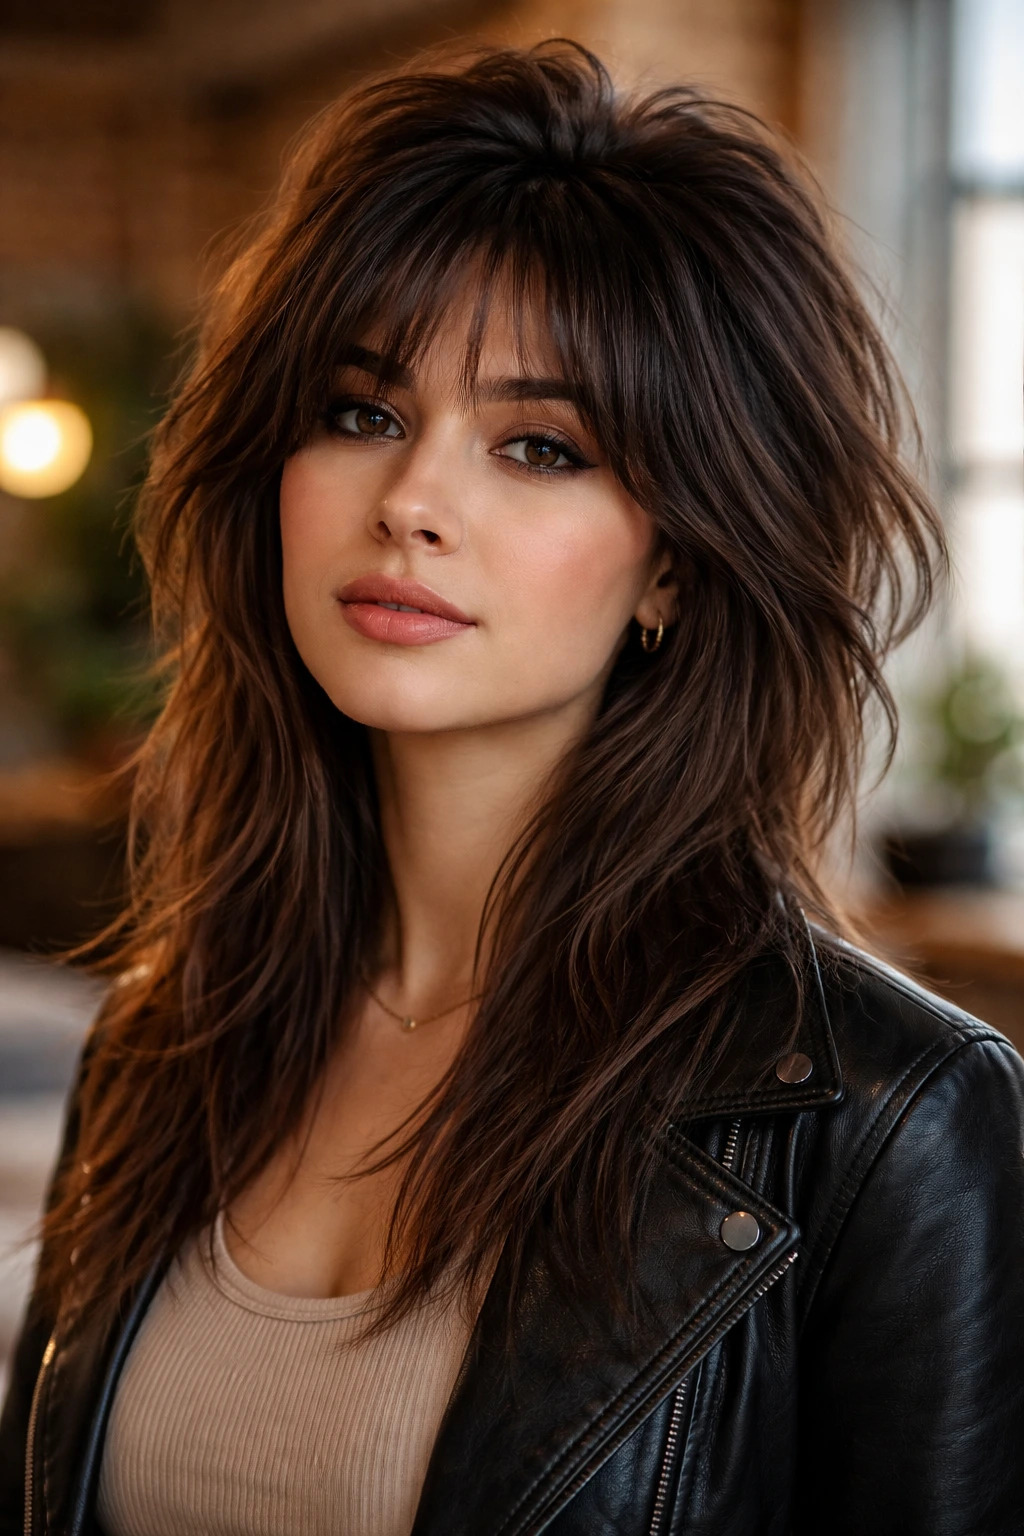
The wolf cut is essentially a high-volume shag, characterized by heavy layers at the crown and longer, thinner pieces at the bottom. While it can get bulky, for a round face, you just need to dial back the volume at the mid-shaft. The high volume at the crown is actually a massive benefit because it adds height, which is the ultimate goal for balancing roundness.
Managing the Volume
You want the “poof” to be at the top of your head, not the sides. If the hair is too thick near your ears, it will widen your face. Ask for “de-bulking” through the mid-lengths. This creates a vertical profile that draws attention upward to your eyes and forehead rather than outward.
Styling the Crown
- Use a volumizing mousse on damp roots.
- Blow-dry the crown using a round brush to lift the roots straight up.
- Leave the ends natural and straight to provide that sleek, edgy contrast.
4. Curtain Bangs with Razored Ends
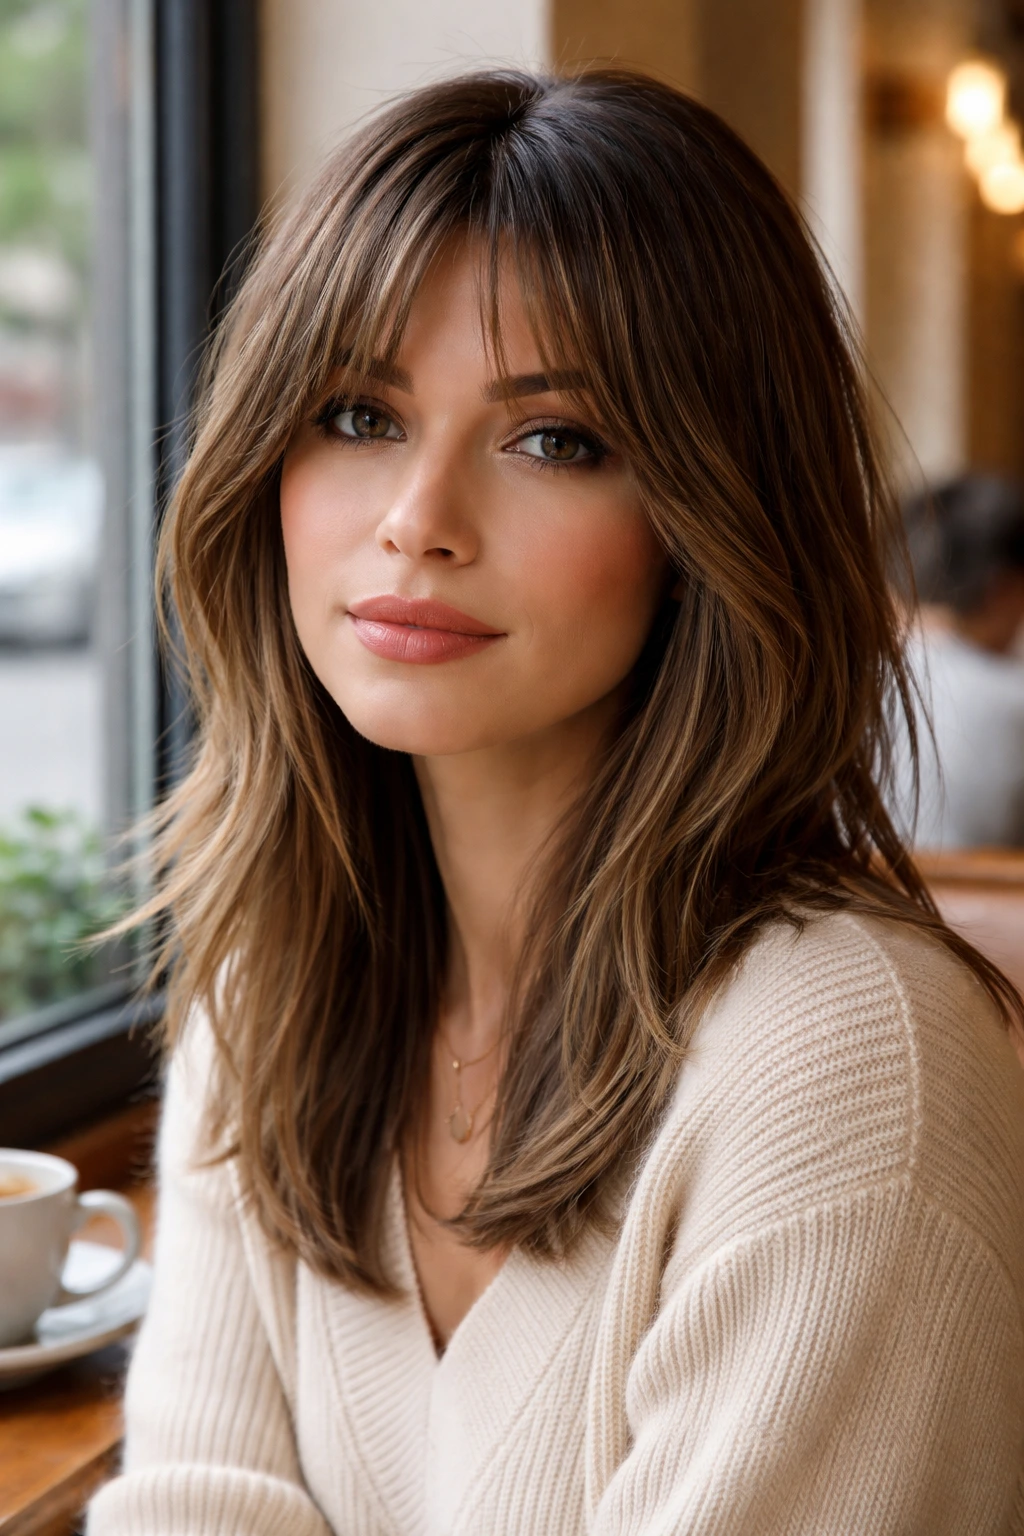
Curtain bangs are universally flattering, but they are particularly effective on round faces when paired with a shag. They create a “V” shape around your eyes and nose, which breaks up the circular expanse of the cheeks. When you incorporate these into a straight shag, ensure the bangs blend seamlessly into the rest of the layers.
Framing the Face
The length is everything with curtain bangs. If they hit exactly at your cheekbone, they might make them look rounder. Ask your stylist to have the bangs start near the eyes and taper down to the jawline. This “swoop” creates a diagonal line across your face, which is structurally the opposite of roundness.
Daily Maintenance
- A quick pass with a flat iron can flip the ends of the bangs outward.
- Avoid using heavy styling creams on the fringe, as this will make them look greasy and flat against your forehead.
5. The Collarbone-Grazing Shag
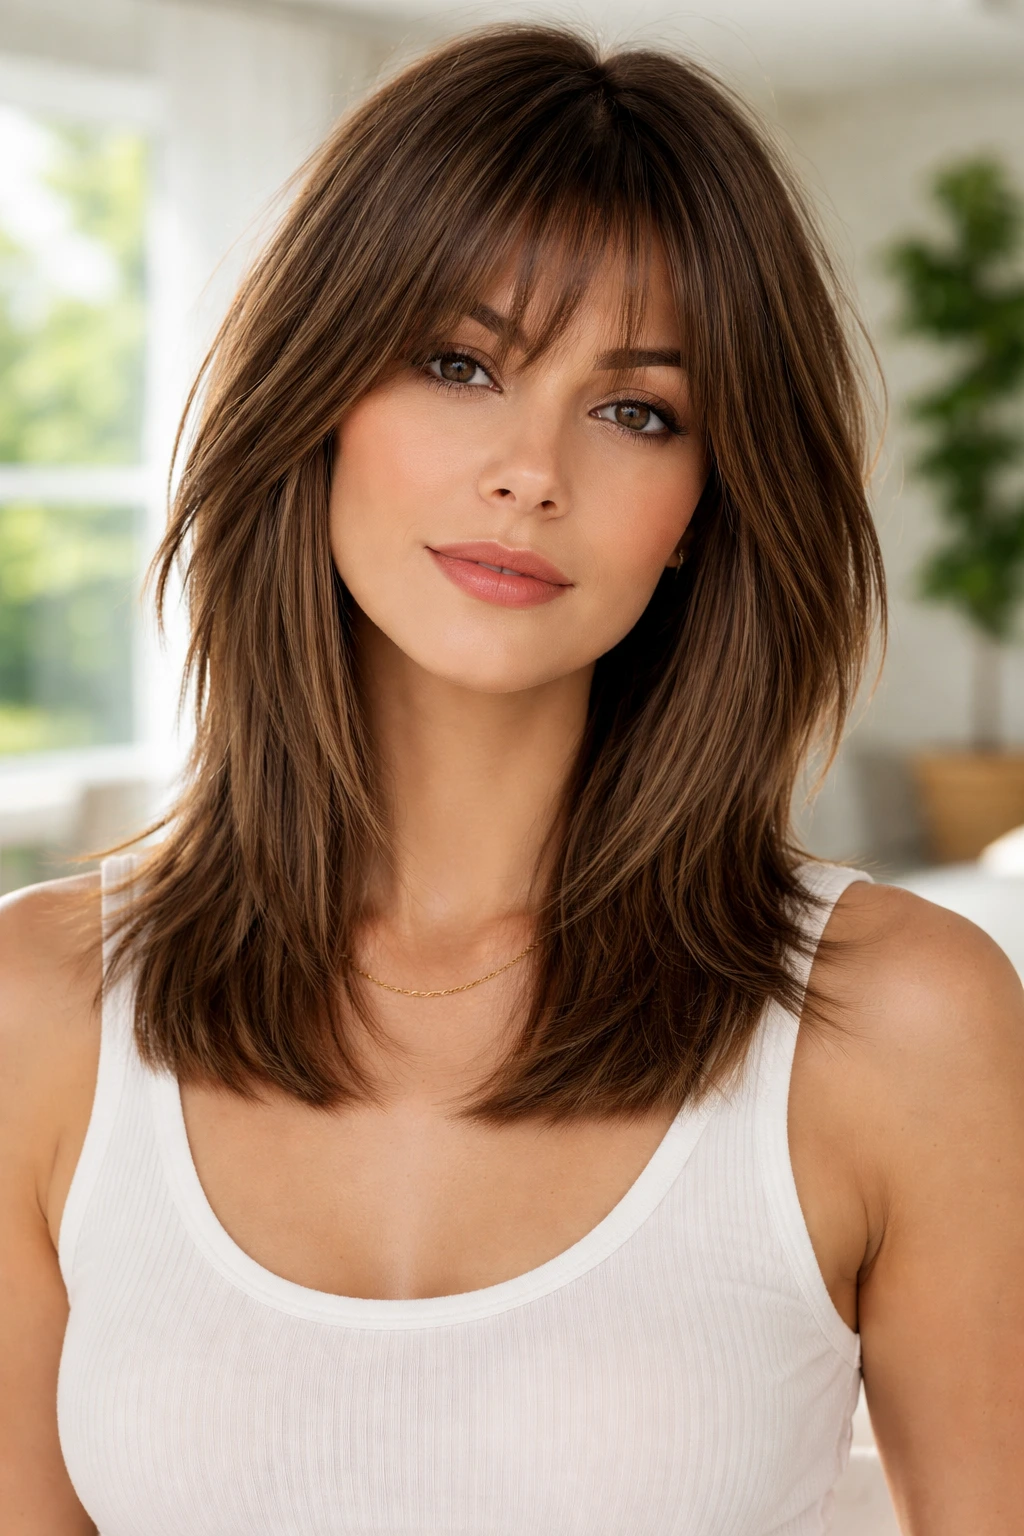
Length matters. If your hair is too short, like a chin-length bob, it frames the roundness of your face directly. If it is too long, it can weigh down your features. The collarbone is the sweet spot. It is long enough to provide that vertical illusion but short enough to retain the “shaggy” texture.
Why This Length Flatters
The collarbone is an angular part of your body. By having your hair end right there, you are essentially drawing a line to a sharp, bony landmark. This tricks the eye into associating your face shape with the sharp angles of your collarbone.
Styling the “Grazing” Effect
- Use a flat iron to keep the ends straight and sharp.
- If you find the ends flipping inward naturally, let them—it creates a soft, feminine frame.
- If they flip outward, that’s also fine, provided the layers are cut to direct that movement away from the cheeks.
6. Piecey Ends with Shadow Roots
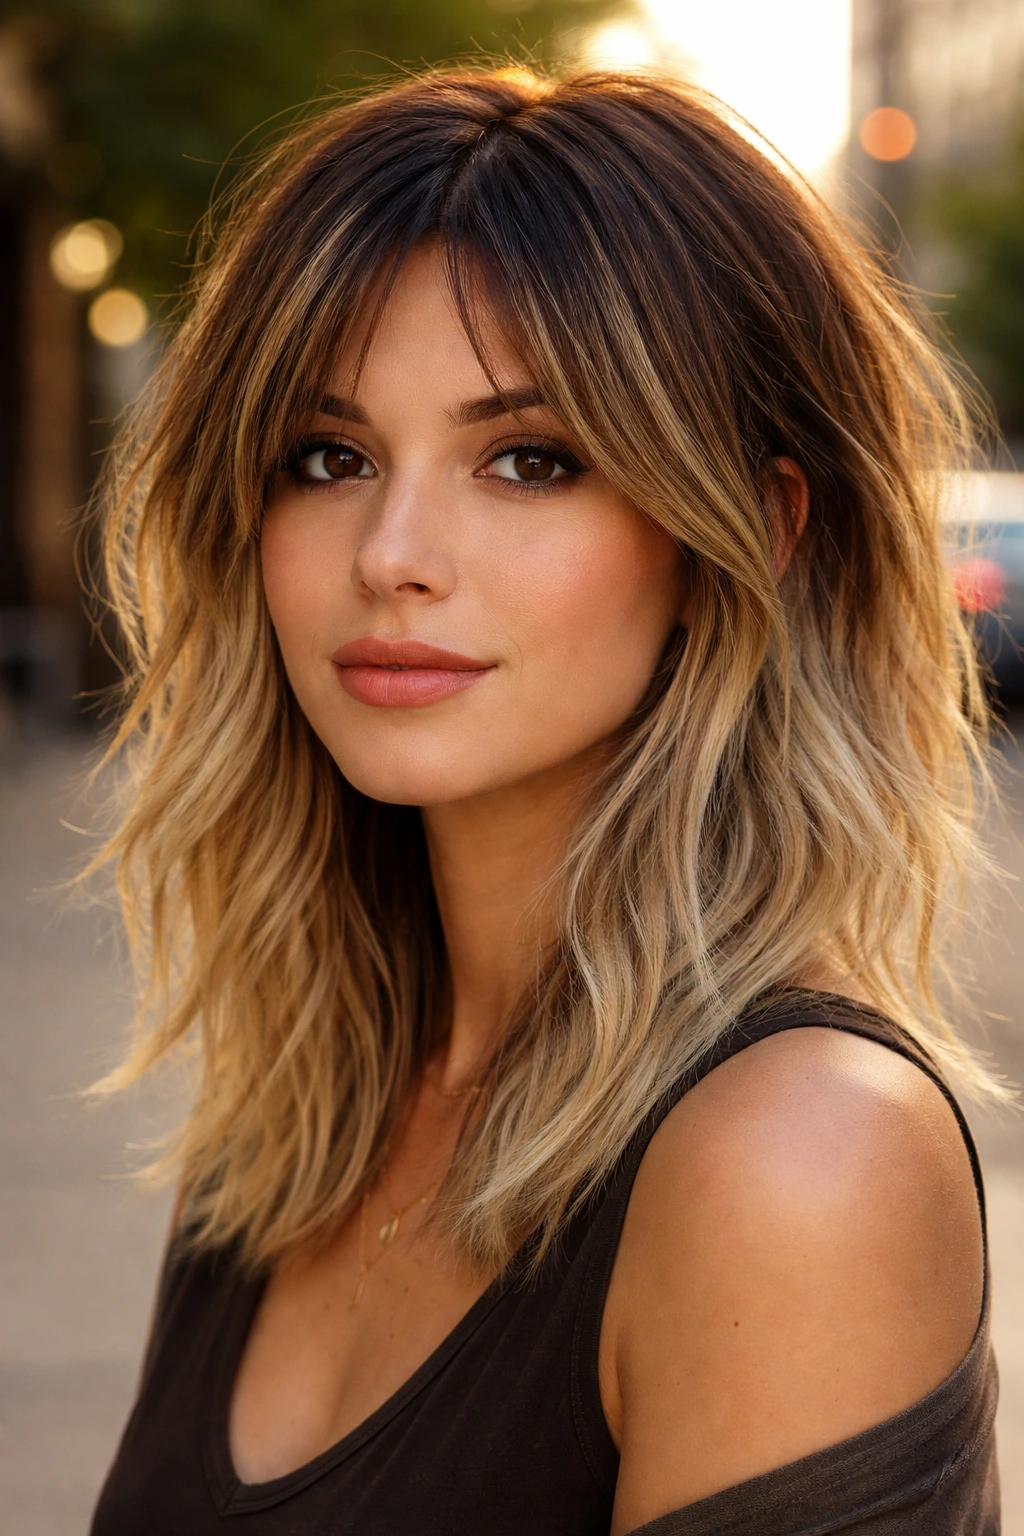
Sometimes the issue with a round face is the uniformity of the hair color, which can make the head look like one solid, round shape. By introducing color variation, specifically a shadow root, you change the dimension of the style. The darkness at the roots creates depth, while the lighter, piecey ends keep the focus on the movement.
The Importance of Contrast
A shadow root keeps the focus on the top of the head. It makes the hair look intentional and “lived-in.” When you pair this with a straight shag, the color movement makes the hair look less static. It’s about creating visual interest in different areas of the hair, pulling the viewer’s eye away from focusing solely on facial width.
Color Considerations
- Keep the transition from dark to light subtle to avoid a harsh horizontal line.
- The lightest pieces should be concentrated around the face-framing layers to brighten your complexion.
7. Soft-Layered Curtain Shag
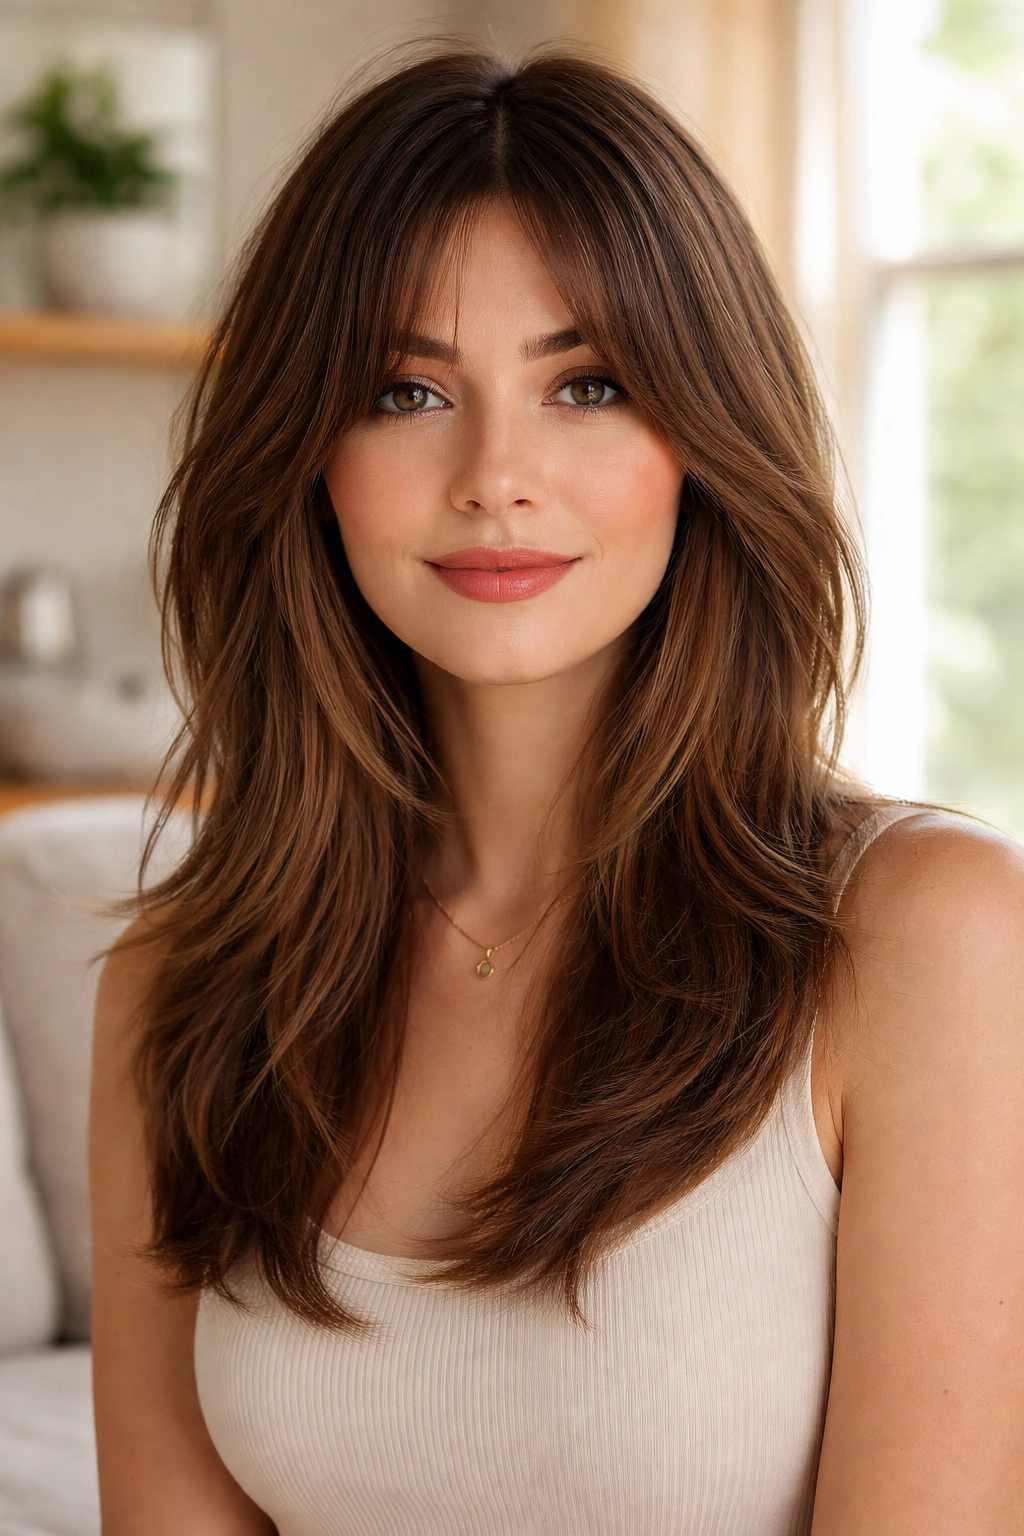
This variation is for those who want the shag look but are afraid of the choppy, aggressive layering. It involves softer, longer layers that blend into one another rather than standing out as distinct “shelves” of hair. It is a more polished version of the style.
Achieving the Softness
You are asking for internal layering. This means the stylist cuts into the interior of the hair sections to remove weight and create movement without leaving distinct, choppy lines on the surface. This is vital for straight hair, where harsh layers can look like “steps” if not cut properly.
Why It’s Great for Round Faces
The softness prevents the cut from looking too wide. It creates a sleek, fluid shape that hugs the face gently. It’s perfect for professional environments where a messy, high-fashion shag might feel slightly too unkempt.
8. The Deep Side-Part Shag
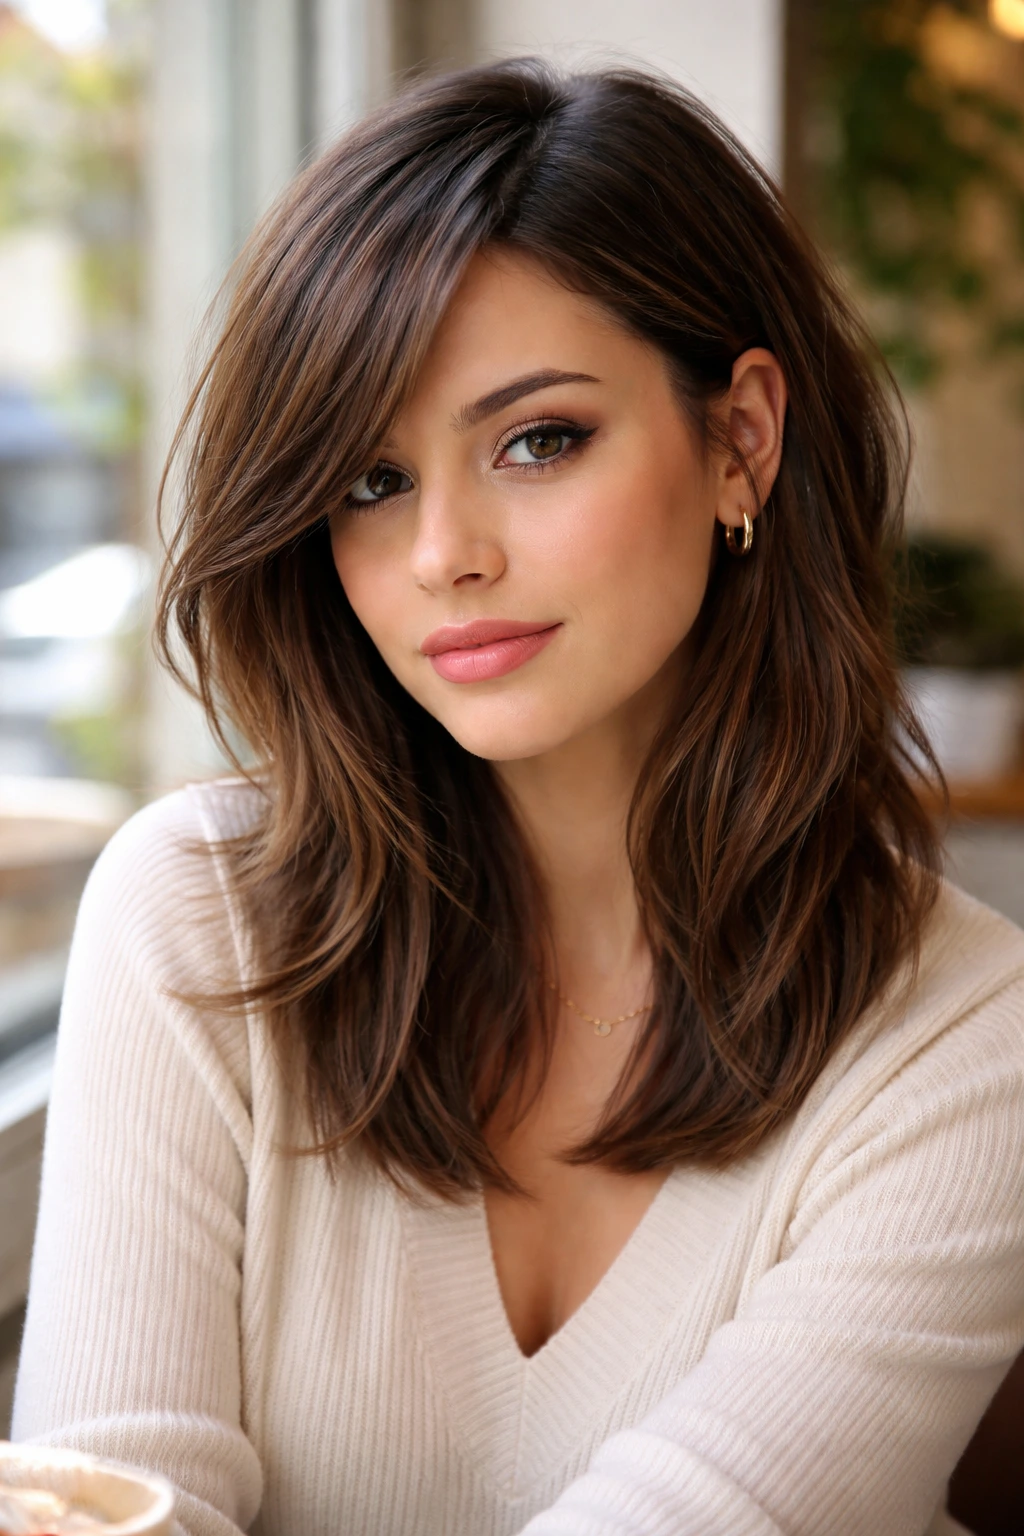
If you aren’t sold on the center part, the deep side part is your next best friend. A deep side part creates an asymmetrical look, which is arguably the most effective way to disguise a round face shape. It draws the eye toward the higher, deeper side and creates a sweeping effect across the forehead.
How to Style the Deep Part
- Flip your hair while it is still damp.
- Blow-dry in the direction you want the part to sit to “train” the roots.
- Ensure the shag layers on the shorter side are cut to tuck behind the ear, while the layers on the longer side frame the face.
Asymmetry as a Tool
The diagonal line formed by the side part disrupts the symmetry of a round face. It is an instant geometry lesson: asymmetry beats symmetry when you want to minimize roundness.
9. Subtle Texture Shag
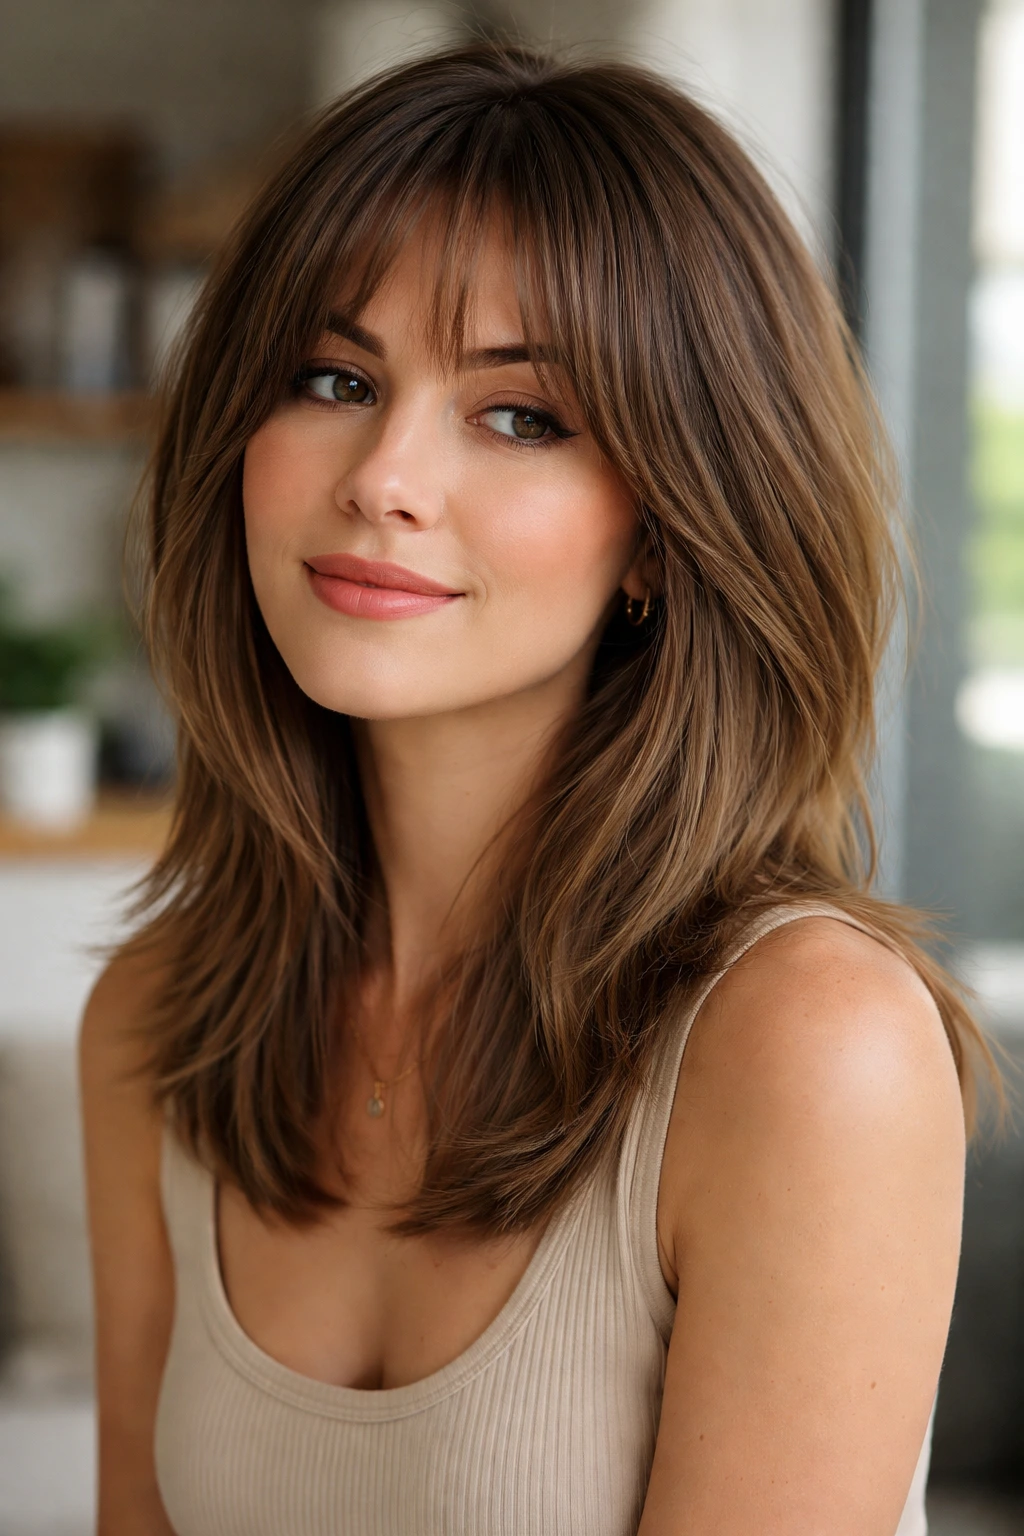
Not everyone wants a dramatic, rocker-chic haircut. If you prefer something more low-maintenance and understated, a subtle texture shag is the way to go. This involves minimal layering—mostly just enough to give the hair some bounce and remove bulk.
The Minimalist Approach
This style relies on the cut of the ends. Instead of a blunt, heavy edge, ask for “invisible layers.” The hair looks straight and sleek at a glance, but when you touch it or move, you can see the texturized, piecey bits. It’s a very sophisticated look that keeps the focus on the hair’s health and shine rather than the “shag” aspect.
Who It Suits
If you have fine hair, this is much better than a heavily layered wolf cut, which can make fine hair look stringy. This keeps the hair density intact while still giving you that trendy, shaggy shape.
10. The Asymmetrical Shag
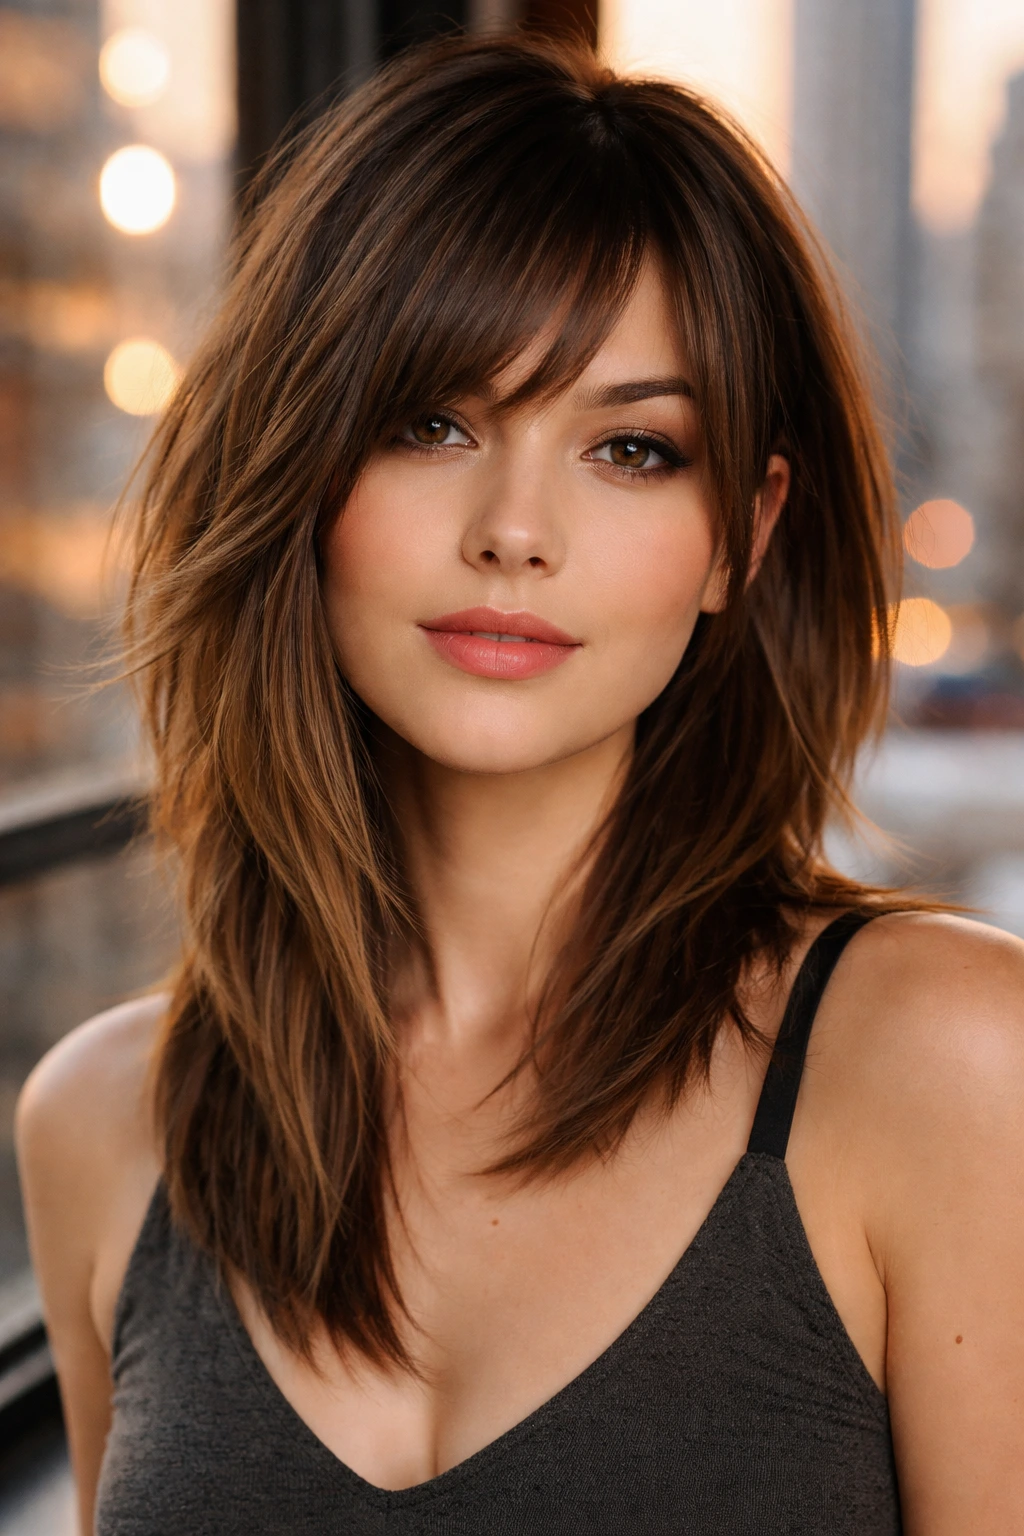
This is for the person who wants to lean into the structural correction. An asymmetrical shag—where one side is slightly longer than the other—is a bold choice. It creates a striking diagonal line that forces the viewer’s eye to follow the slope of the cut rather than the shape of your face.
The Mechanics of the Cut
The “long” side should hit below the chin, while the “short” side can graze the jawline. Because the lengths are different, the face is never perceived as a circle. It’s a deliberate, edgy style that screams confidence.
Styling the Asymmetry
- You don’t need to overstyle this. A simple sleek blow-dry is enough to let the haircut do the work.
- Use a light shine spray to emphasize the different lengths.
11. Shag with Blunt Face-Framing
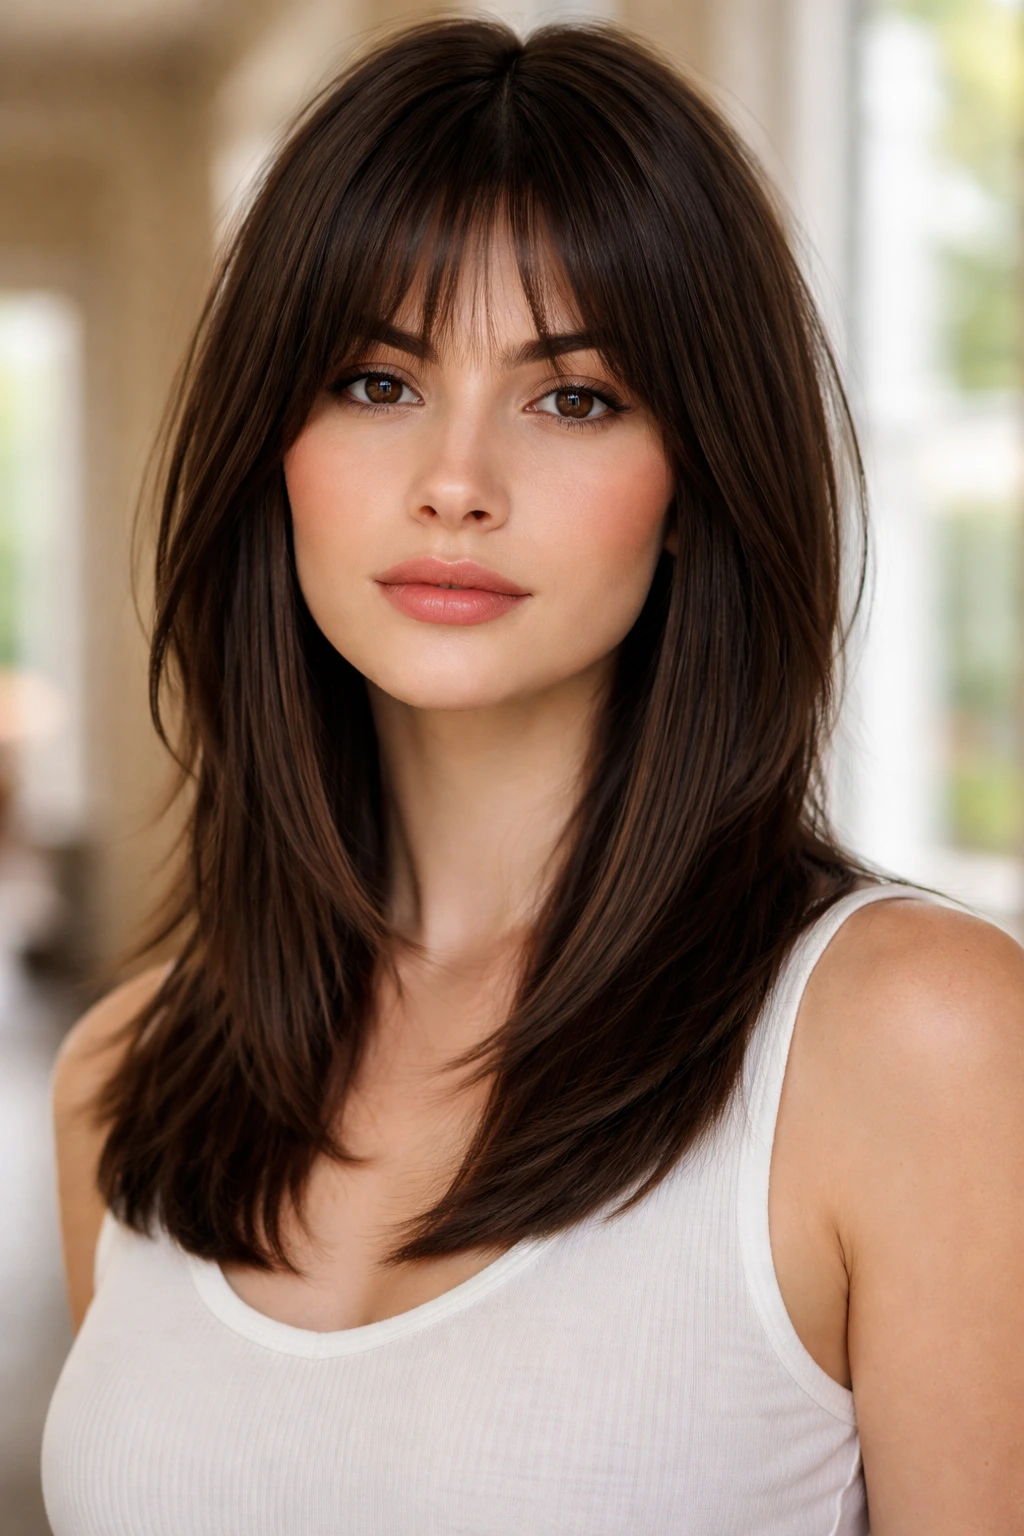
This sounds counterintuitive, right? Usually, you hear that round faces need soft, wispy framing. But a blunt face-frame—like a thick, straight-cut piece of hair that stops right at the collarbone—can actually act as a strong, vertical pillar. It creates a clean “break” in the roundness of the face.
The “Pillar” Effect
When you leave two distinct, straight pieces framing the face, it forces the eye to focus on the space between them. That space is the length of your face. By framing it with straight lines, you elongate the area between your chin and forehead.
Maintaining the Look
- This style requires regular trims to keep the “blunt” ends crisp.
- Use a paddle brush when drying to keep the face-framing pieces perfectly straight.
12. Choppy Layers with Highlights
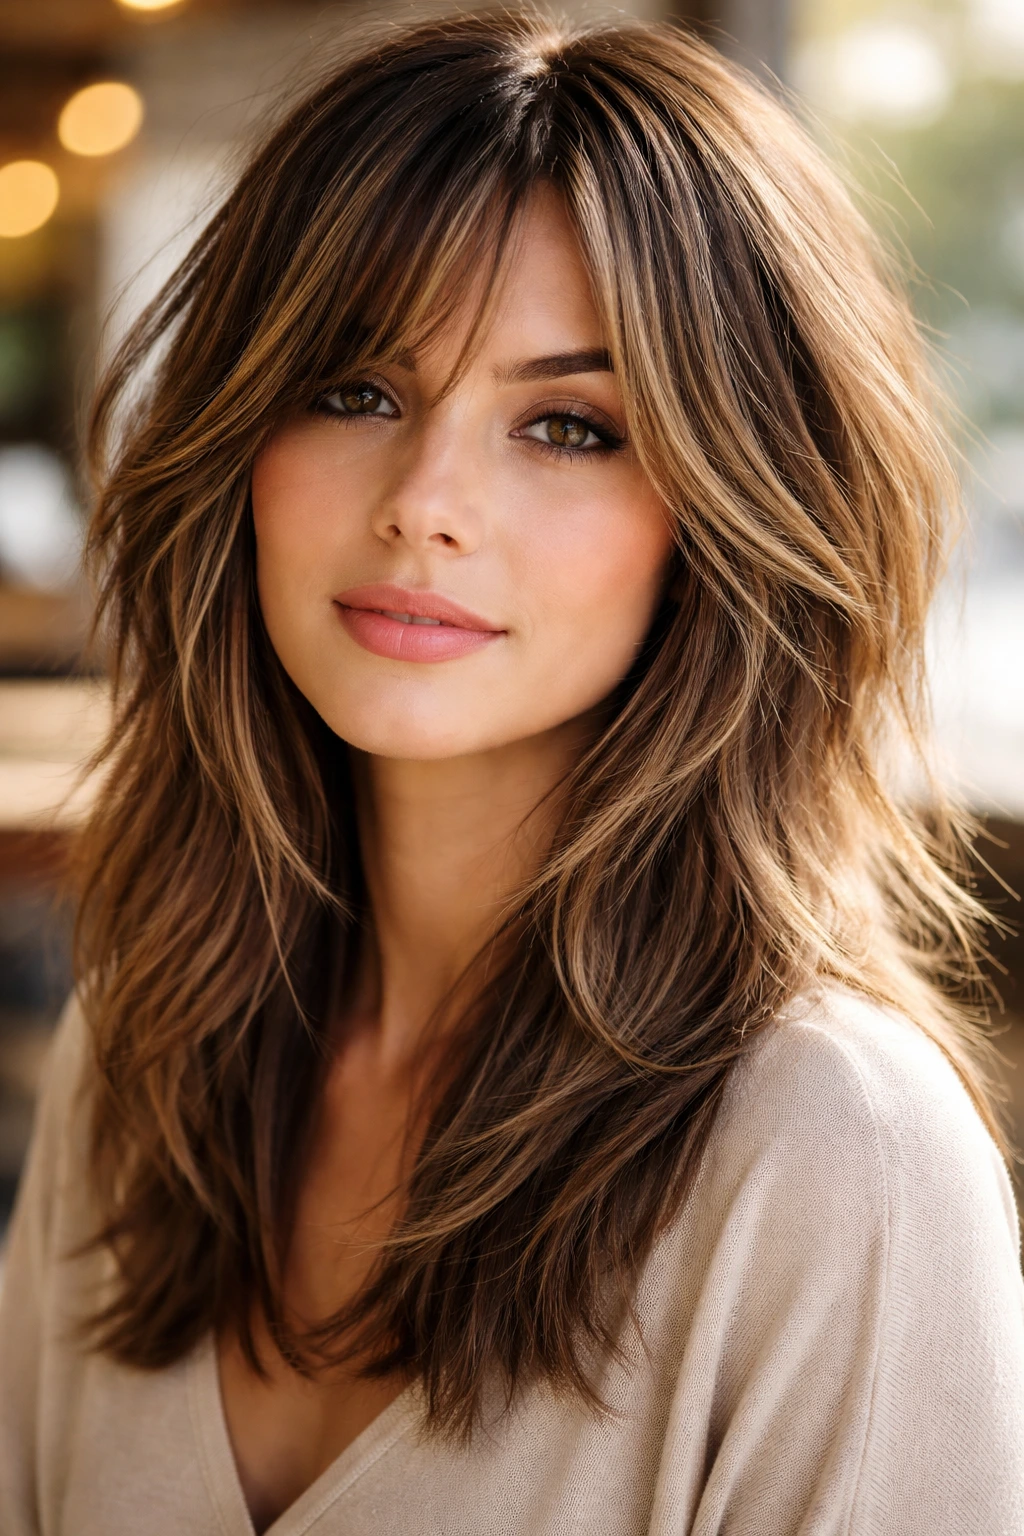
Texture is a visual distraction. If you have choppy layers, people are looking at the texture of the hair, not the shape of your cheeks. When you add highlights into that mix, you create even more visual movement. The contrast between light and dark strands breaks up the solid shape of the hair.
Highlighting Placement
Ask your stylist for “ribbon” highlights. These are slightly wider streaks of color that catch the light and emphasize the movement of the choppy layers. Avoid thin, uniform highlights, which can blur into a singular, solid color—this won’t give you the dimension you need.
The Strategy
- Highlight the top layers to add brightness near the face.
- Keep the bottom layers slightly darker for depth.
- The combination of choppy cut + dimension = a face that looks smaller and more sculpted.
13. The Minimalist “Lazy” Shag
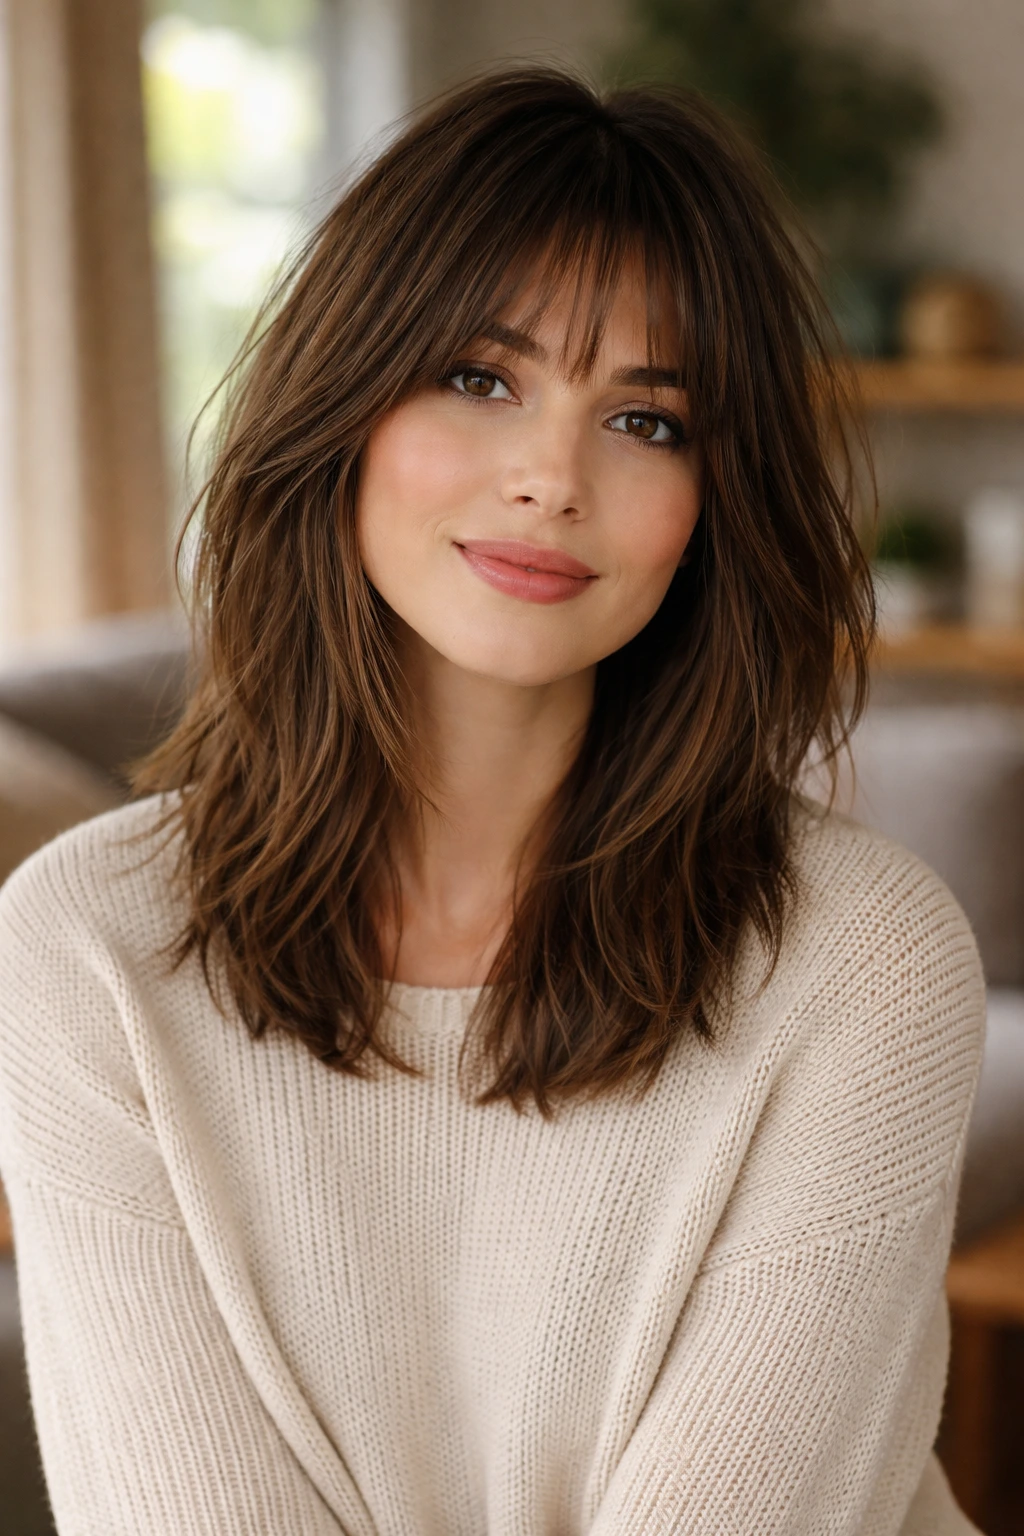
This cut is defined by its lack of maintenance. It is essentially a long bob with a few internal layers that give it a shaggy, undone feel. It doesn’t have the heavy crown volume of a traditional shag, but it retains the choppy ends.
Why It’s Great for Round Faces
It is long enough to elongate the face, but the texture prevents it from looking like a flat, boring long bob. It’s an easy transition cut if you are nervous about committing to a full-blown, layered shag.
Routine
- Air-dry with a bit of texturizing sea-salt spray.
- The natural bend of your hair will create the “shag” effect without needing hours of styling.
14. Shag with Long, Sweeping Fringe
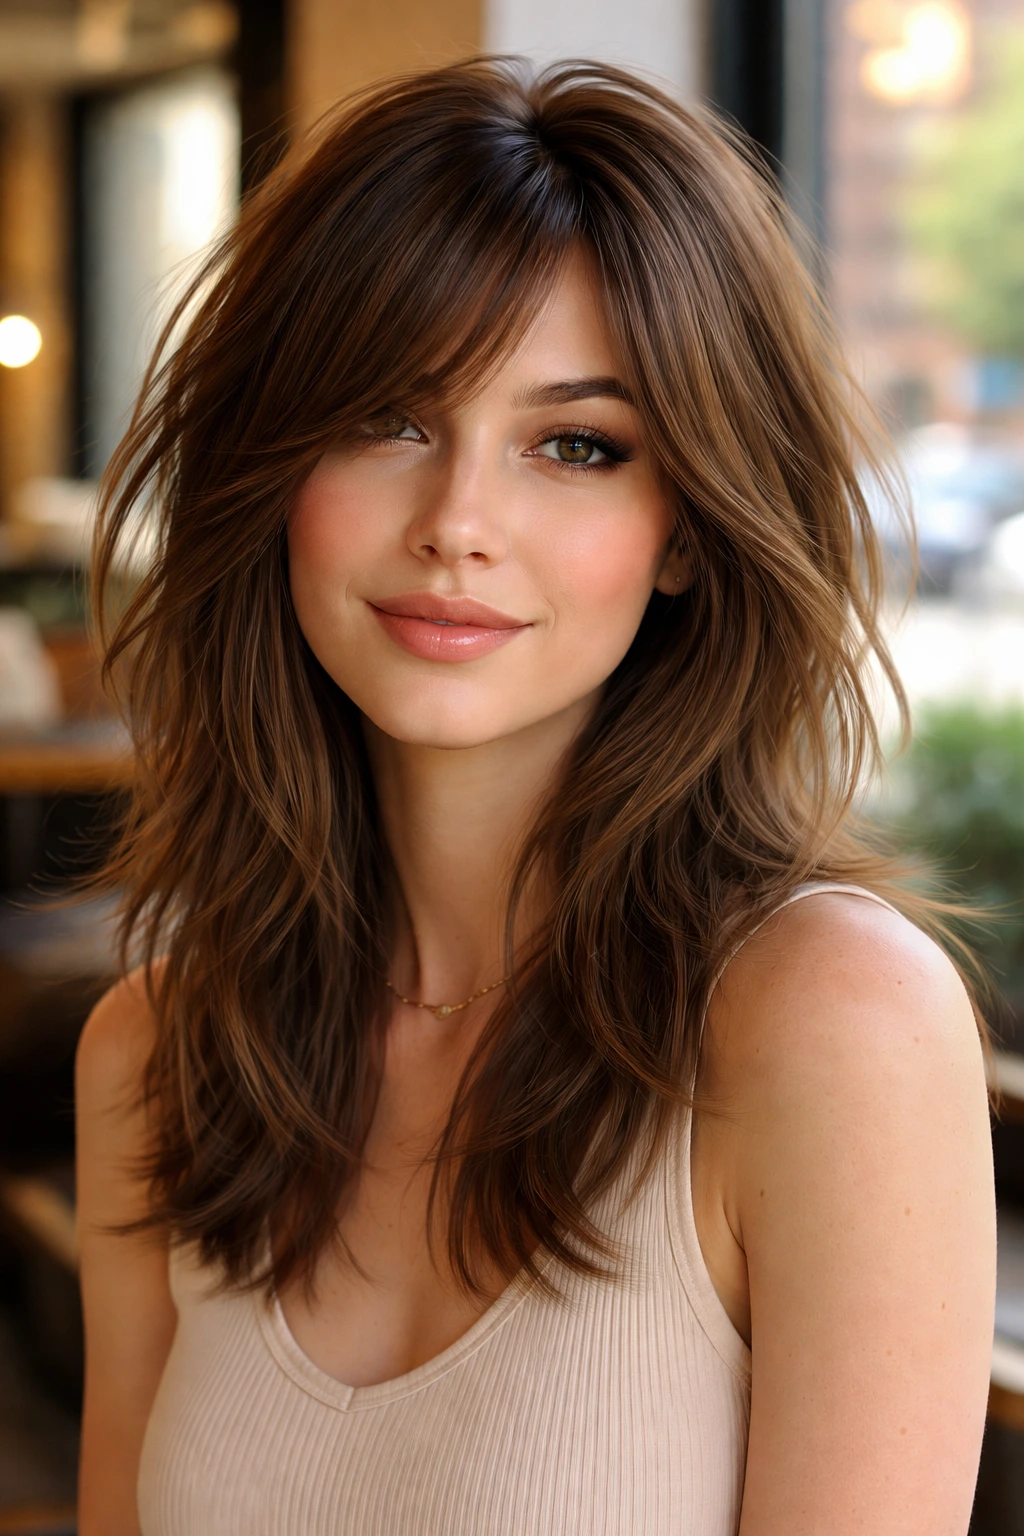
Bangs are tricky for round faces. The wrong ones (short, blunt, horizontal) can turn a round face into a circle instantly. The right ones—a long, sweeping fringe—do the opposite. They create a diagonal line from the temple to the cheekbone, effectively “cutting” the round shape in half.
Defining the Sweep
The fringe should start at the side part and sweep across the forehead, blending seamlessly into the face-framing layers. It shouldn’t be a solid block of hair. It should be airy, almost wispy, so you can see bits of your forehead through it.
The “Sweep” Benefit
This style directs attention to your eyes and your cheekbones, rather than your jawline. It is a very flattering, youthful, and highly effective shape for minimizing face width.
15. The Shattered-End Shag
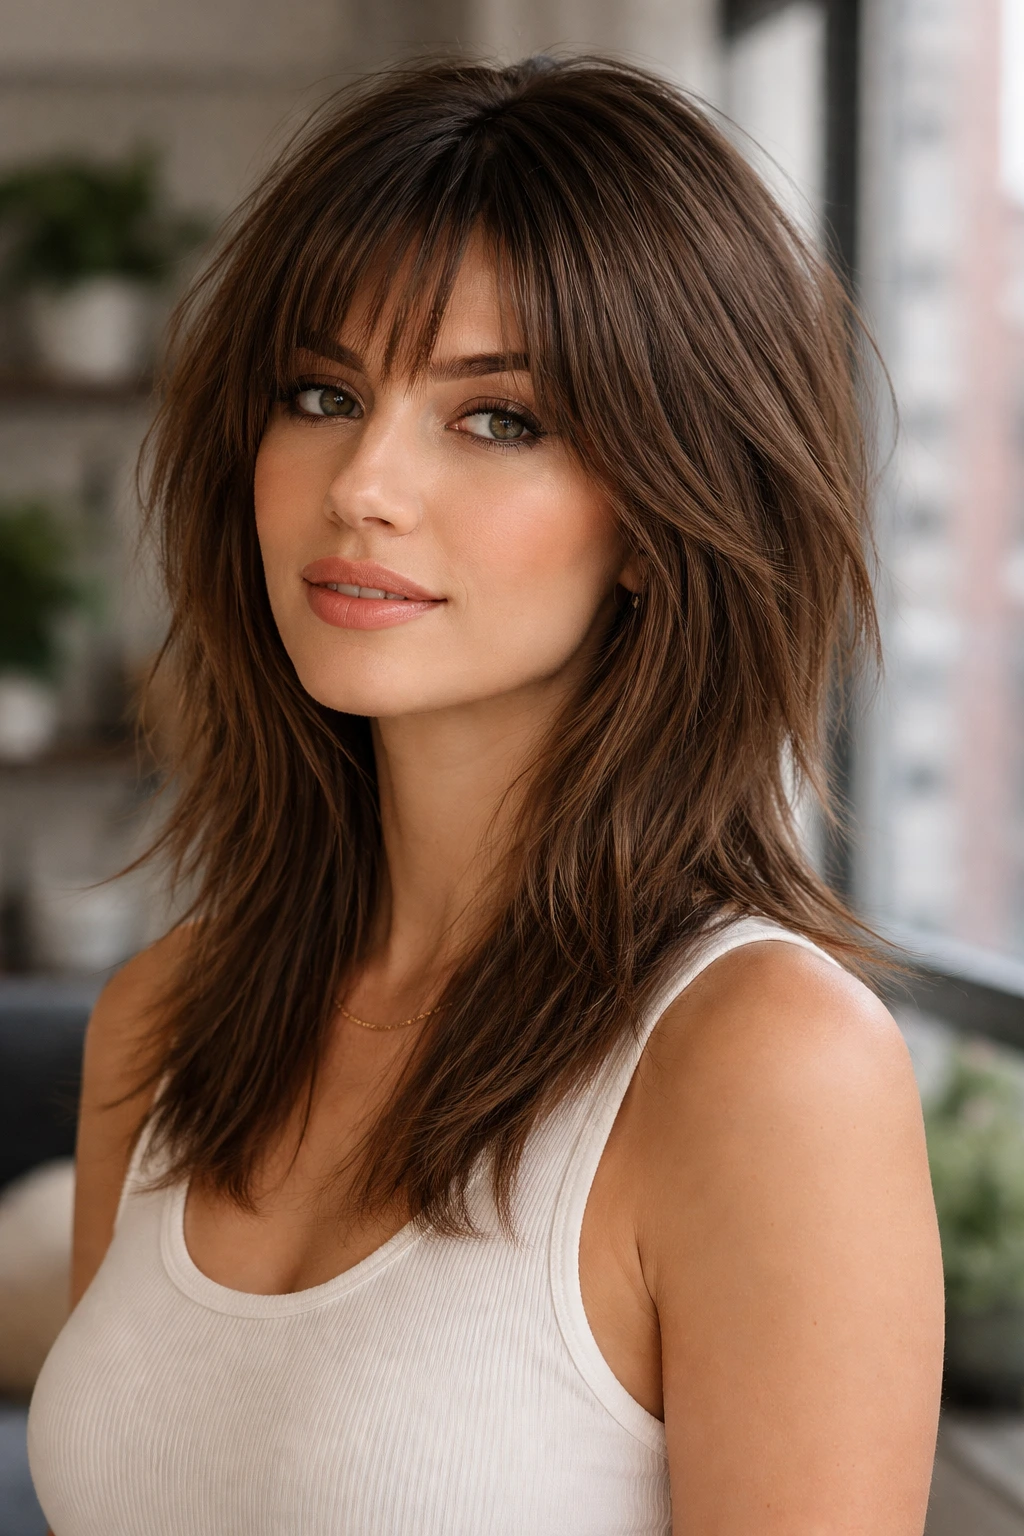
“Shattered” ends refer to a razor-cutting technique where the hair is cut at an extreme angle to create jagged, uneven edges. This is not about being messy; it is about precision. The jagged ends make the bottom of the hair look lighter and more tapered.
Visual Weight
The heaviest part of the hair is usually at the ends. If your ends are blunt, that’s where the face looks “roundest.” By shattering those ends, you remove the physical and visual weight. The hair becomes thinner and more tapered at the bottom, which creates a pointier, more elongated silhouette at the jawline.
Styling Tip
- Run a flat iron only through the ends to exaggerate the “shattered” look.
- Use a matte pomade on the tips to define the jagged pieces.
16. Voluminous Crown Shag
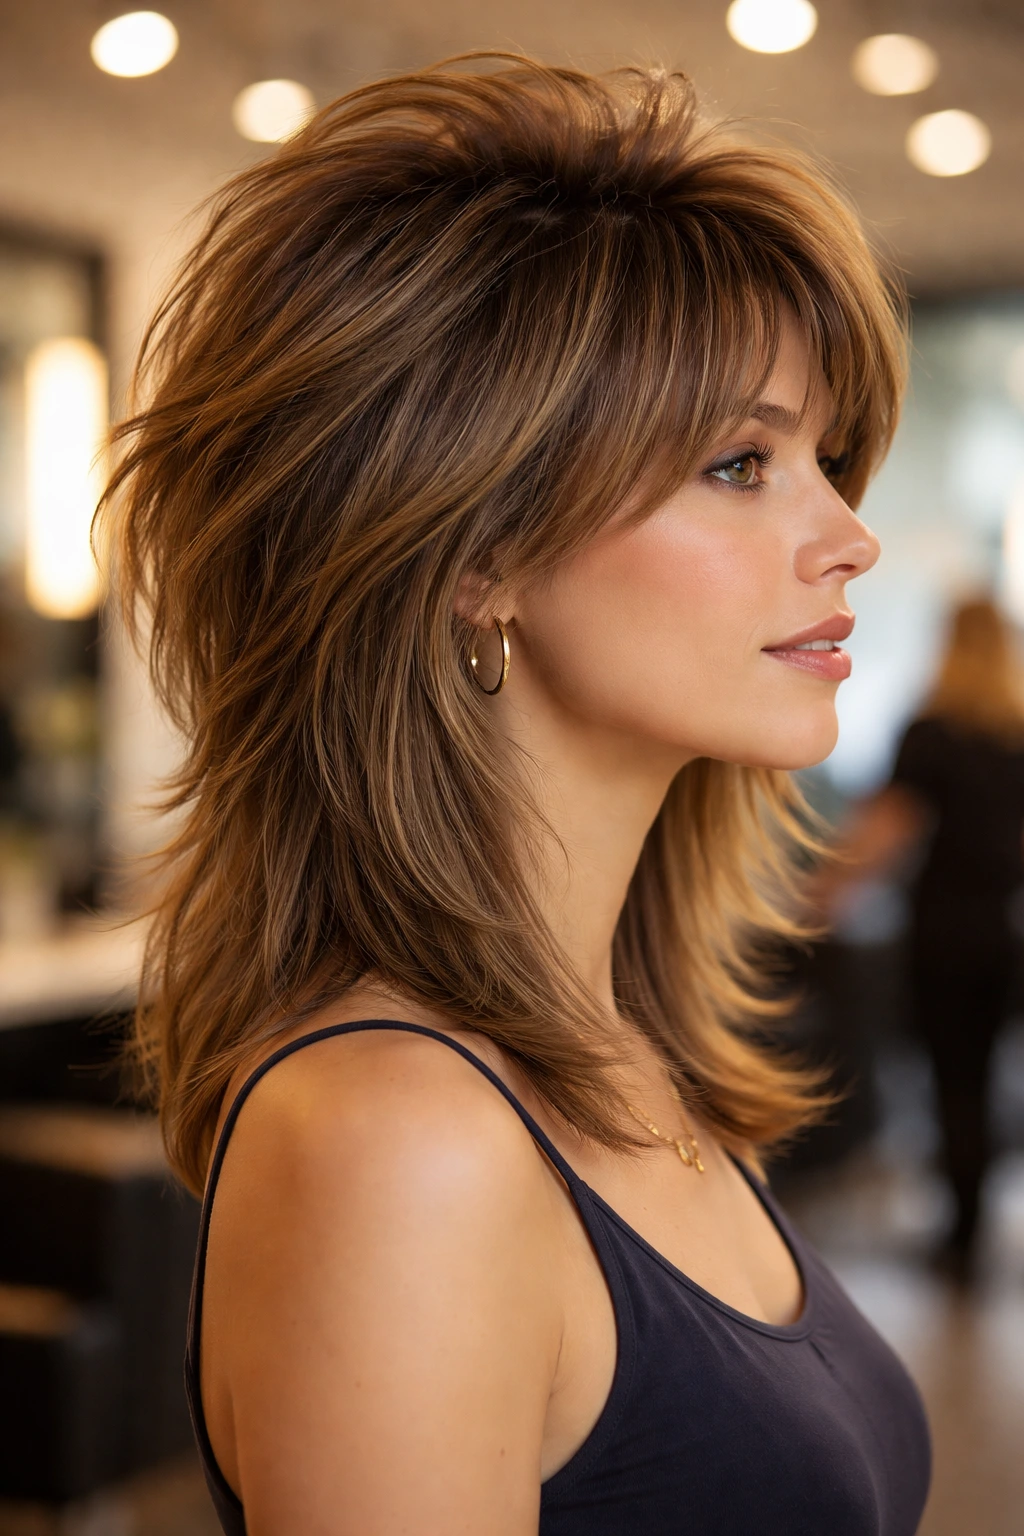
Let’s address the height issue directly. If your face is round, you want height. The voluminous crown shag focuses all the layering at the top of the head. It creates a profile that is taller and narrower.
How to Build the Crown
You need shorter layers at the top. This removes weight and allows the hair to stand up naturally. When you blow-dry this style, focus on lifting the roots at the crown. Do not worry about volume at the sides—let that hair fall flat.
The Ratio
- High volume at the top + low volume at the sides = a more oval face shape.
- This is simple visual geometry. The more you “build up” the hair on top, the less round the face appears.
17. Two-Tiered Layered Shag
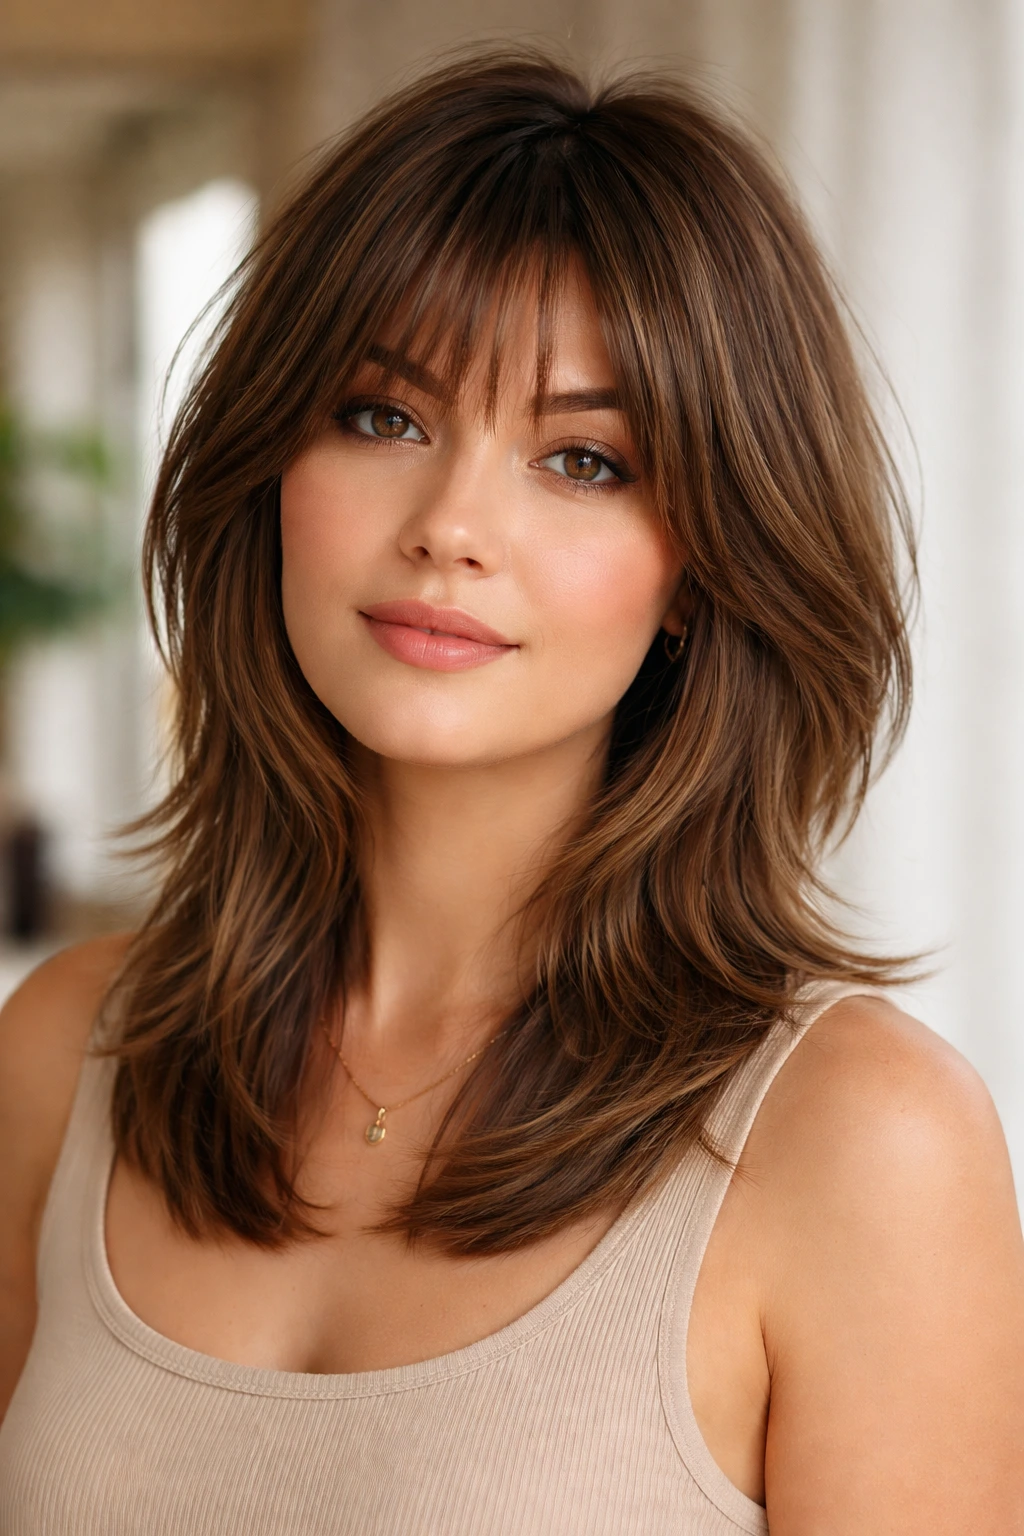
This is an advanced cut, but it is incredibly effective for thick hair. It involves two distinct sections of layers: one section around the crown for volume and one section at the mid-lengths for texture. It skips the “in-between” layers that can cause the hair to bulk out at the ears.
Managing the Bulk
By creating two distinct zones of layering, you bypass the area of the face that is usually the widest (the cheeks). You are putting the texture above the cheeks (at the crown) and below the cheeks (at the ends). This creates a “diamond” shape for your hair, which is excellent for countering roundness.
Considerations
- This requires a skilled stylist. You want the blend between the two tiers to be invisible, or it will just look like an uneven haircut.
18. The “Undone” Beachy Shag
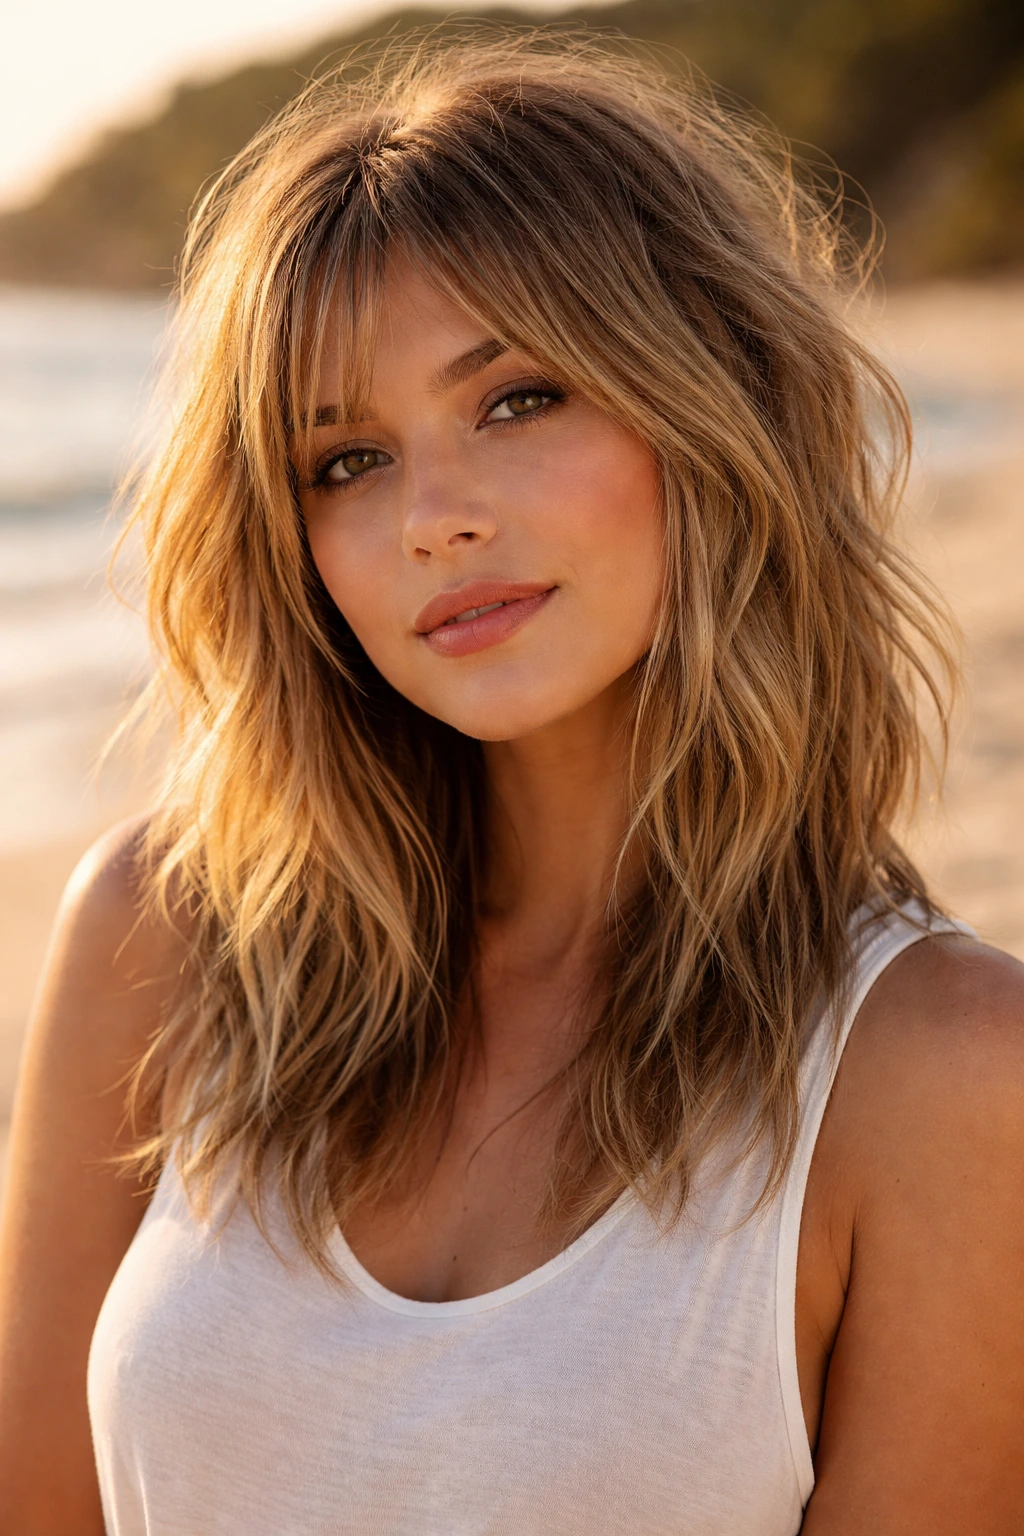
Sometimes the best way to deal with a round face is to embrace the mess. The “undone” shag relies on texture rather than precision. It’s about creating a vibe that is so relaxed and effortlessly cool that people are looking at your style, not your face shape.
Texture vs. Shape
The messiness actually helps. If your hair is perfectly sleek and rounded, it accentuates a round face. If your hair is jagged, messy, and piecey, it breaks up the symmetry. The chaos of an undone shag works against the symmetry of a round face.
Effortless Styling
- Dry your hair 80% of the way.
- Twist sections with your fingers and let them air-dry the rest of the way.
- Finish with a dry shampoo to add grit and lift.
19. Shag with Hidden Undercut Layers
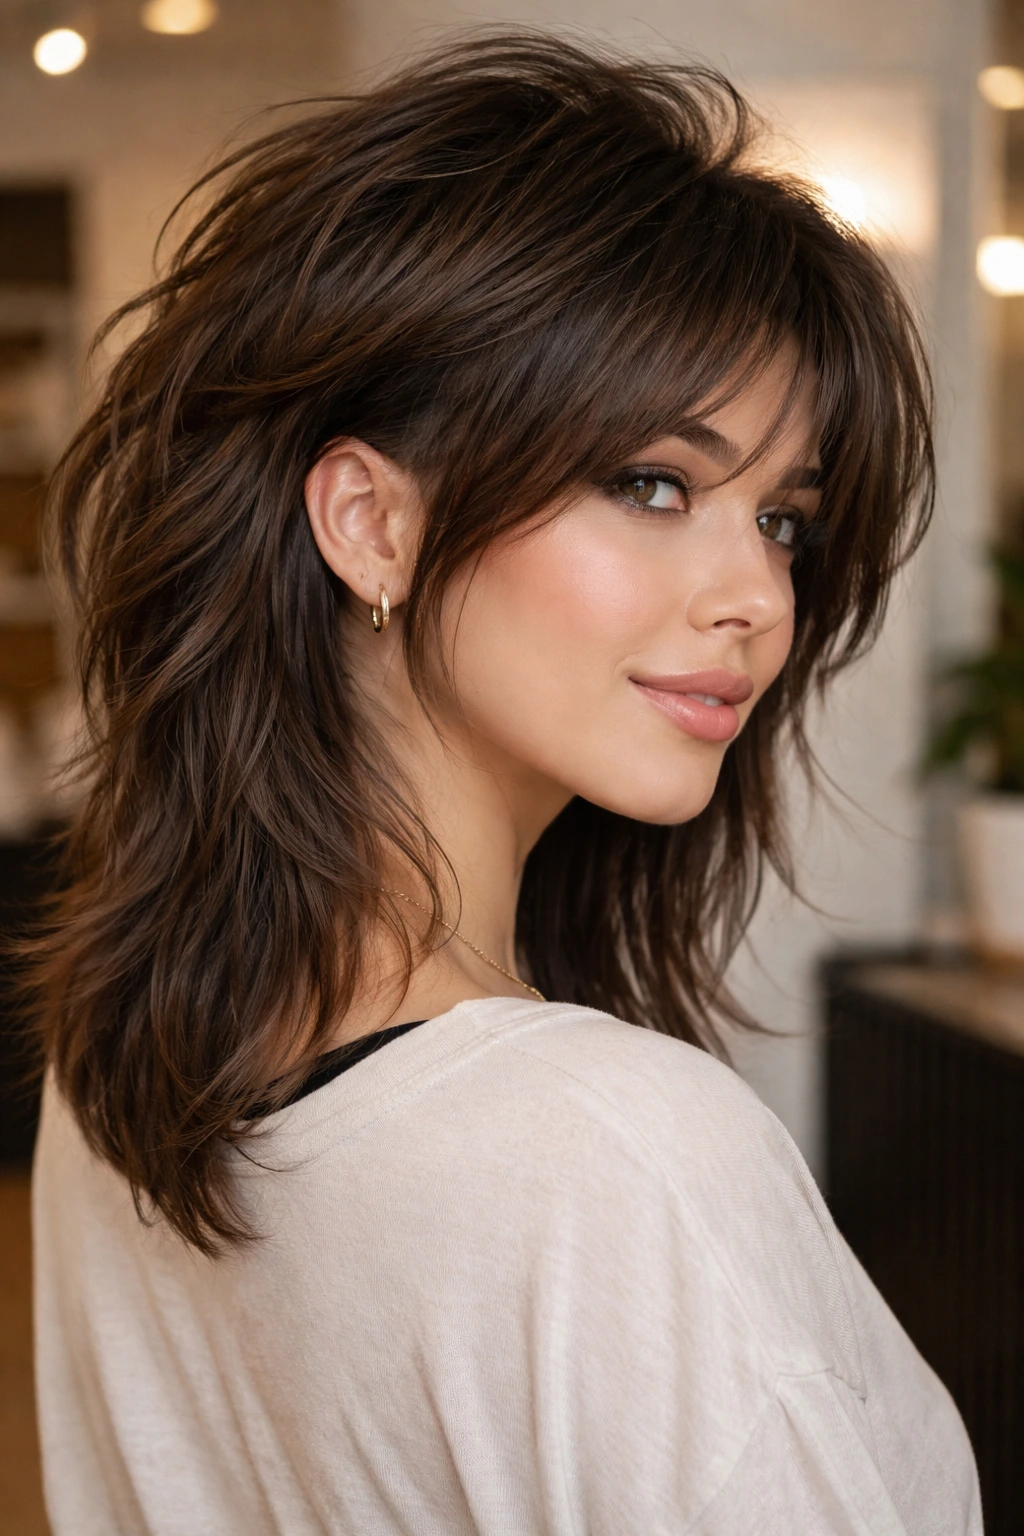
If you have thick, coarse hair that tends to puff out (the enemy of the round-faced person), an undercut or internal thinning is a life-saver. Your stylist can shave or thin out the hair underneath the top layers.
Removing the Width
This removes the bulk that pushes the rest of your hair out, creating that unwanted “triangle” shape. With an undercut, your hair can lay straighter and sleeker against your face. You get all the volume and shag texture at the crown, but the sides lay flat and close to the head.
The Result
You get the benefits of the shag cut without the side-effects of increased facial width. It’s the best of both worlds.
20. Sleek, Straight-Edge Shag
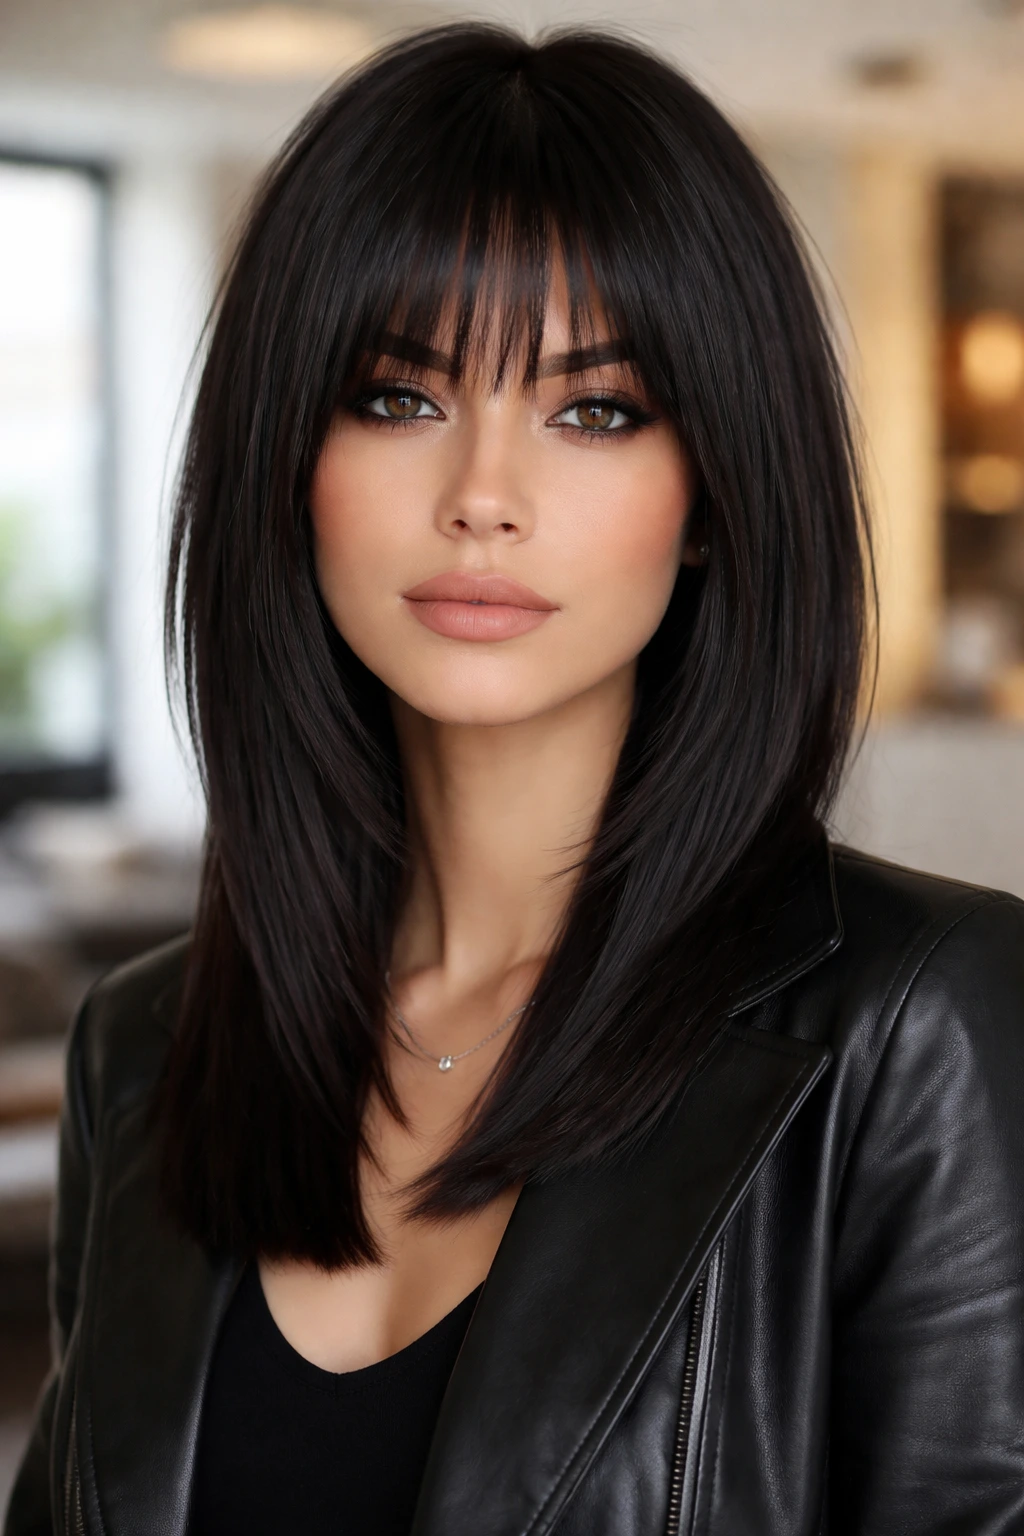
This is the most “high fashion” version of the shag. It’s not about messy waves or wild volume. It’s about a sharp, precise cut that has been ironed bone-straight. It is very polished, very intentional, and very structural.
Why Straightness Works
When your hair is bone-straight, it falls exactly where it is cut. It creates a curtain. If that curtain is cut with strategic, shaggy layers, it effectively frames the face in a way that suggests sharp angles.
The Maintenance
- You will need a high-quality flat iron.
- Apply a heat protectant spray to prevent damage, as frequent heat styling is required to keep this look sleek.
- Finish with an anti-frizz serum to lock in the straightness.
21. The Graduated Shag
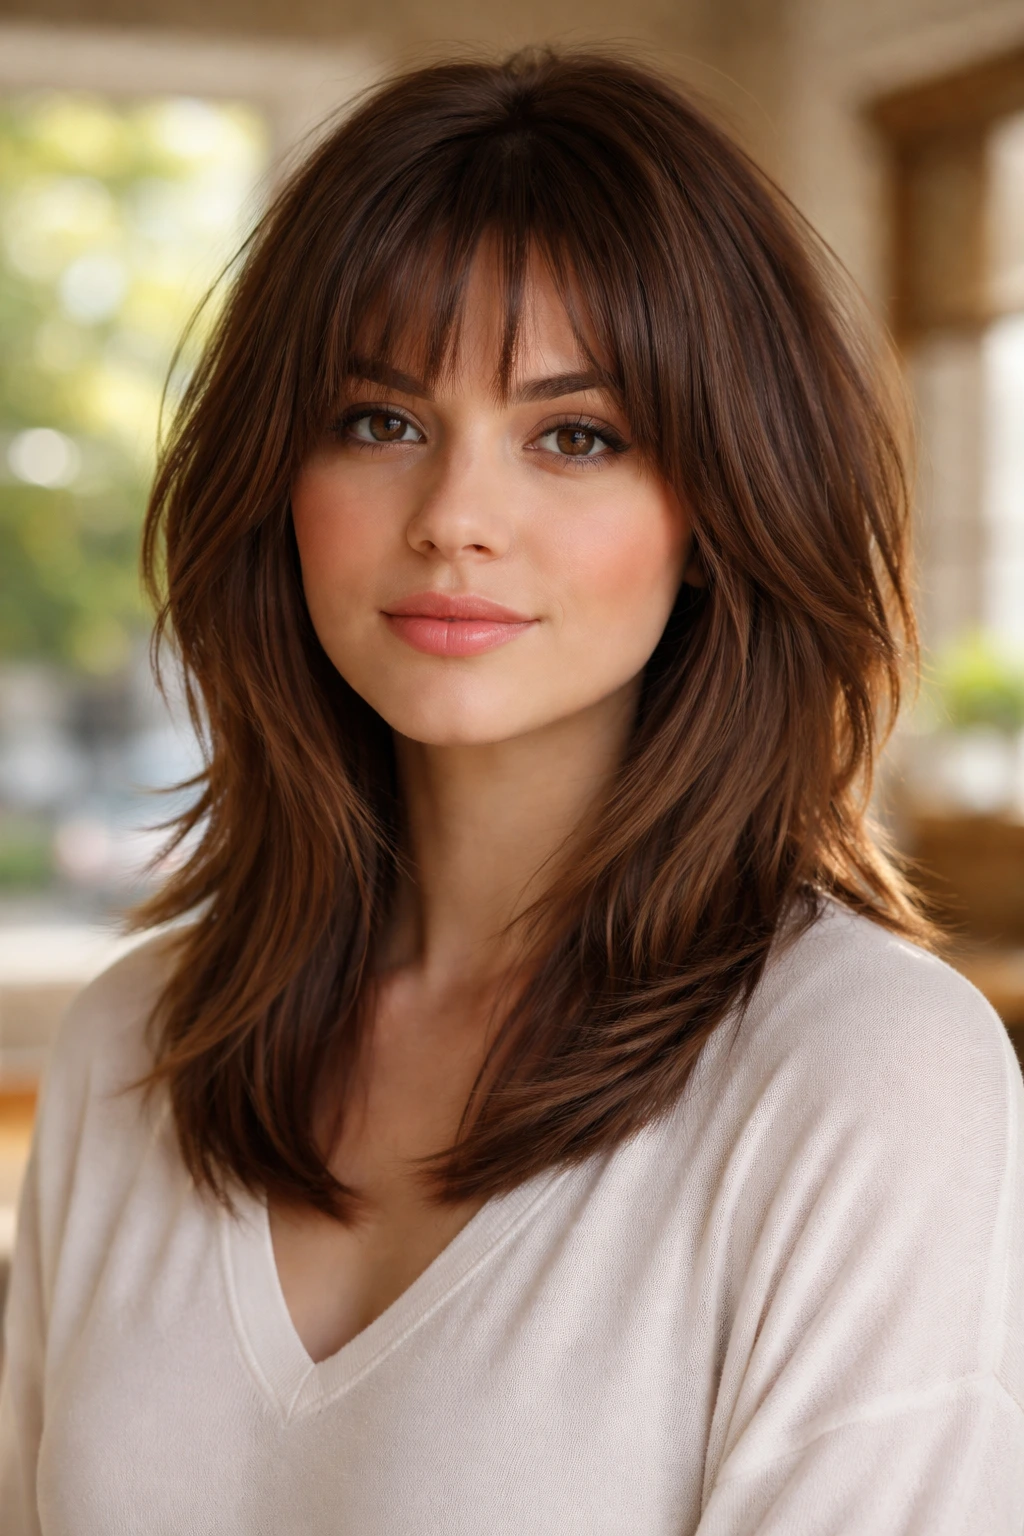
A graduated cut—where the layers get progressively longer as you move toward the front—is a classic tool for elongating a round face. The shortest layers are in the back, and the longest layers are framing the face.
The Visual Guide
Your eyes follow the length. If the hair is shorter in the back and longer in the front, the eyes naturally travel downward, past the jawline. This creates the illusion of a longer, more oval face. It’s a very subtle technique that makes a significant difference.
Why It’s Timeless
It is a sophisticated, clean look that works in professional settings while still allowing for that edgy shag texture in the back and crown.
22. The 90s-Inspired Blowout Shag
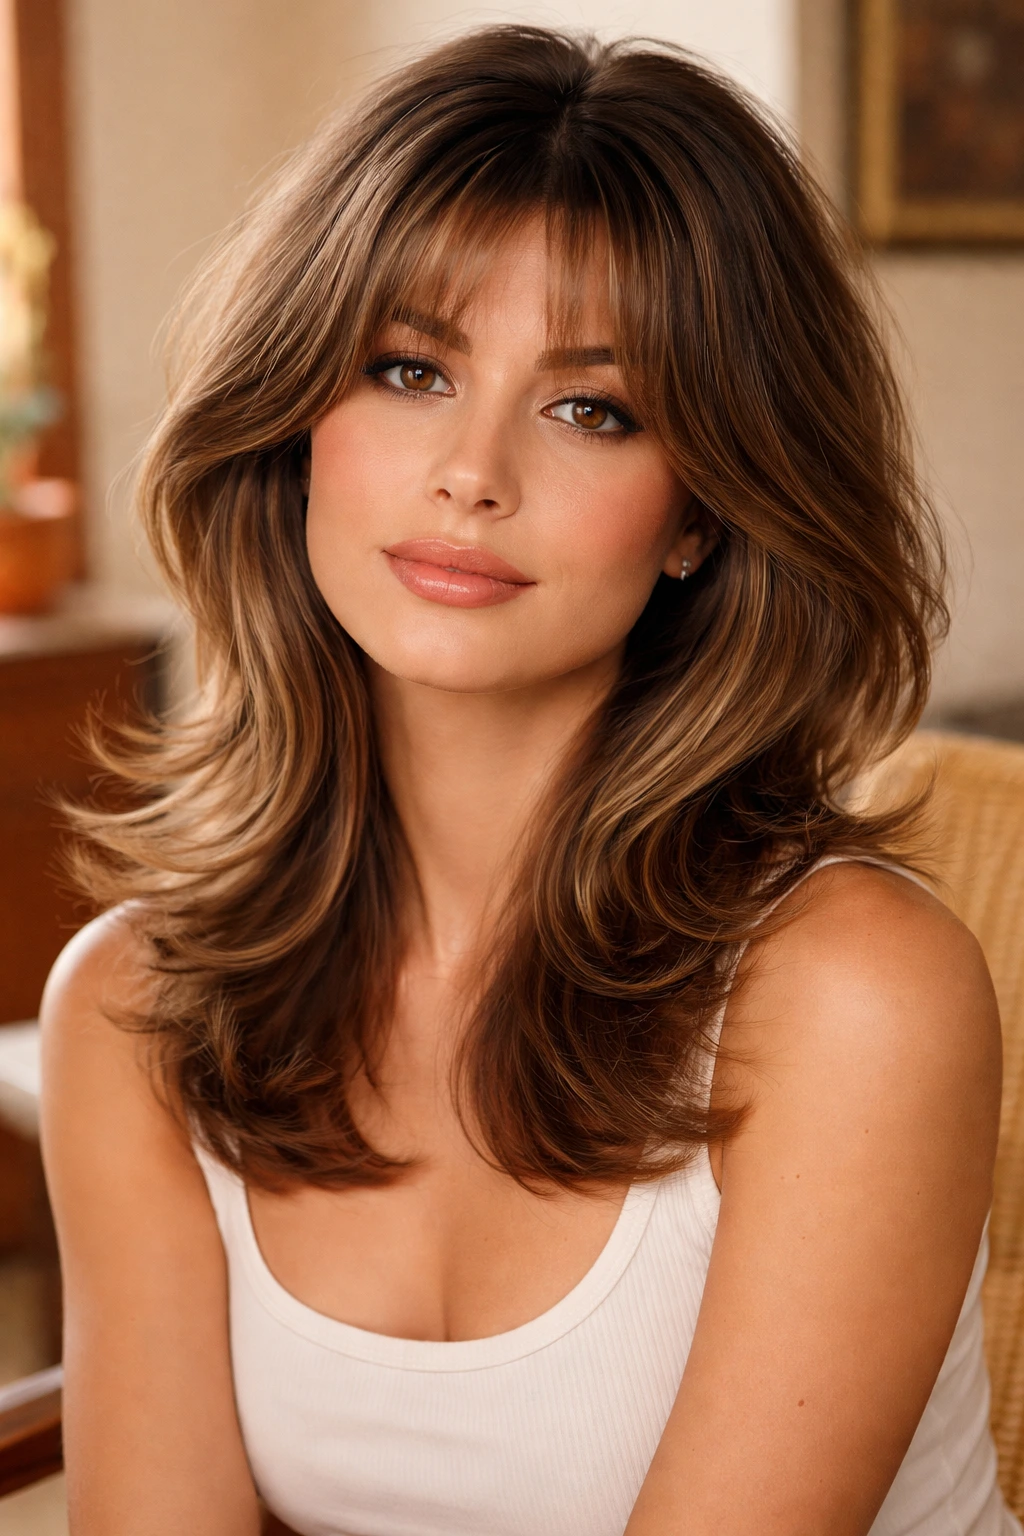
Think of the iconic, supermodel blowout but with a modern, shaggy twist. This involves using a large round brush to flip the ends out and build volume at the root. The key for a round face is to keep the “flip” happening below the jawline.
The Geometry of the Flip
If you flip the ends out at the cheek level, you create width. If you flip the ends out at the shoulder or collarbone level, you create an angular silhouette. The shag layers allow for this style to hold its shape longer than a standard, one-length cut.
The Look
- It is bouncy, fun, and very feminine.
- It looks best when the hair is healthy and shiny, so prioritize a good conditioner.
Final Thoughts
Choosing a haircut when you have a round face is not about following a rigid set of rules; it is about understanding how to use your hair to manipulate lines and shapes. The beauty of the medium straight shag lies in its versatility. You are not forced into one specific “safe” style. Instead, you have twenty-two distinct ways to wear a cut that is fundamentally designed to add texture, verticality, and edge to your appearance.
Whether you opt for the severe geometry of a center-parted, bone-straight shag or the soft, sweeping motion of a feathered, curtain-bang style, the goal remains the same: create lines that complement your features. Focus on where the volume sits on your head—keep it high at the crown and away from the cheeks—and you will find that the shag is one of the most flattering, easy-to-wear haircuts you have ever tried. Trust the layers, keep the ends piecey, and don’t be afraid to let your hair create the frame your face deserves.
