



Round faces don’t need more width at the cheeks. They need light placed with a little nerve.
That is why the best highlights for round faces rarely sit in one bright band around the temples. Brightness there can make the widest part of the face look broader, while narrow vertical pieces lower down pull the eye toward the chin and neck. Colorists use that idea all the time, even if they call it money pieces, balayage, babylights, or lowlights.
Hair texture changes the whole equation. Curly hair expands outward; straight hair shows every line; wavy hair sits somewhere in the middle and can get bulky fast if the lightness is packed too high. A good placement plan pays more attention to where the face needs length than to how pale the blonde looks in the bowl.
Some of the prettiest results are not the blondest ones. They’re the ones that give a round face shape a cleaner outline and a little movement around the jaw. Start there, and the rest gets easier.
1. Face-Framing Money Pieces for Round Faces
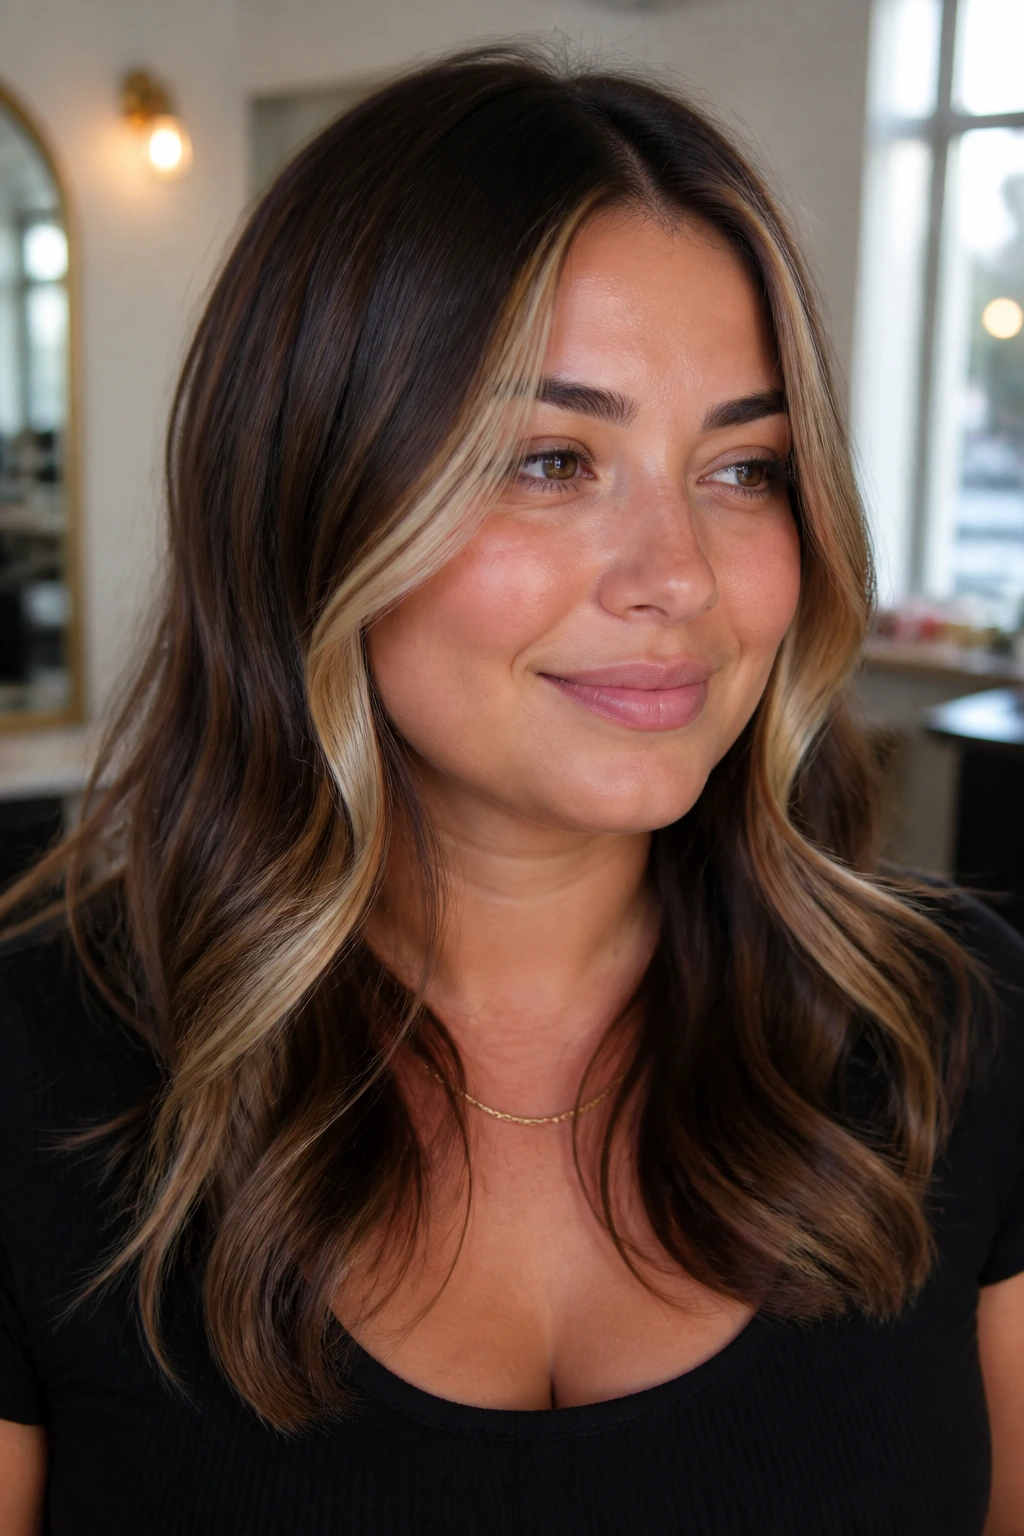
The best money pieces are narrower than most salon photos make them look. If you paint two thick blonde stripes at the temples, the face can look wider in the exact spot you were trying to soften. A better version starts around the cheekbone or just below it, then tapers toward the ends so the light feels like a line, not a block.
Where They Should Start
Money pieces work because they create a vertical edge beside the face. The eye follows that edge downward, which is exactly what you want on a round face. The trick is to keep the brightest part away from the widest point and let the light travel lower, almost like a frame that stretches the face instead of boxing it in.
- Keep each front piece about 1/4 to 1/2 inch wide.
- Start the brightest point at or just below the top of the cheekbone.
- Leave the temple area a little deeper if the face is very full.
- Feather the ends so the highlight does not stop in a blunt line.
Ask for a soft root melt, not a solid stripe. That tiny bit of shadow at the root keeps the color from looking pasted on and gives the face a longer, cleaner line.
2. Balayage That Starts Below the Temples
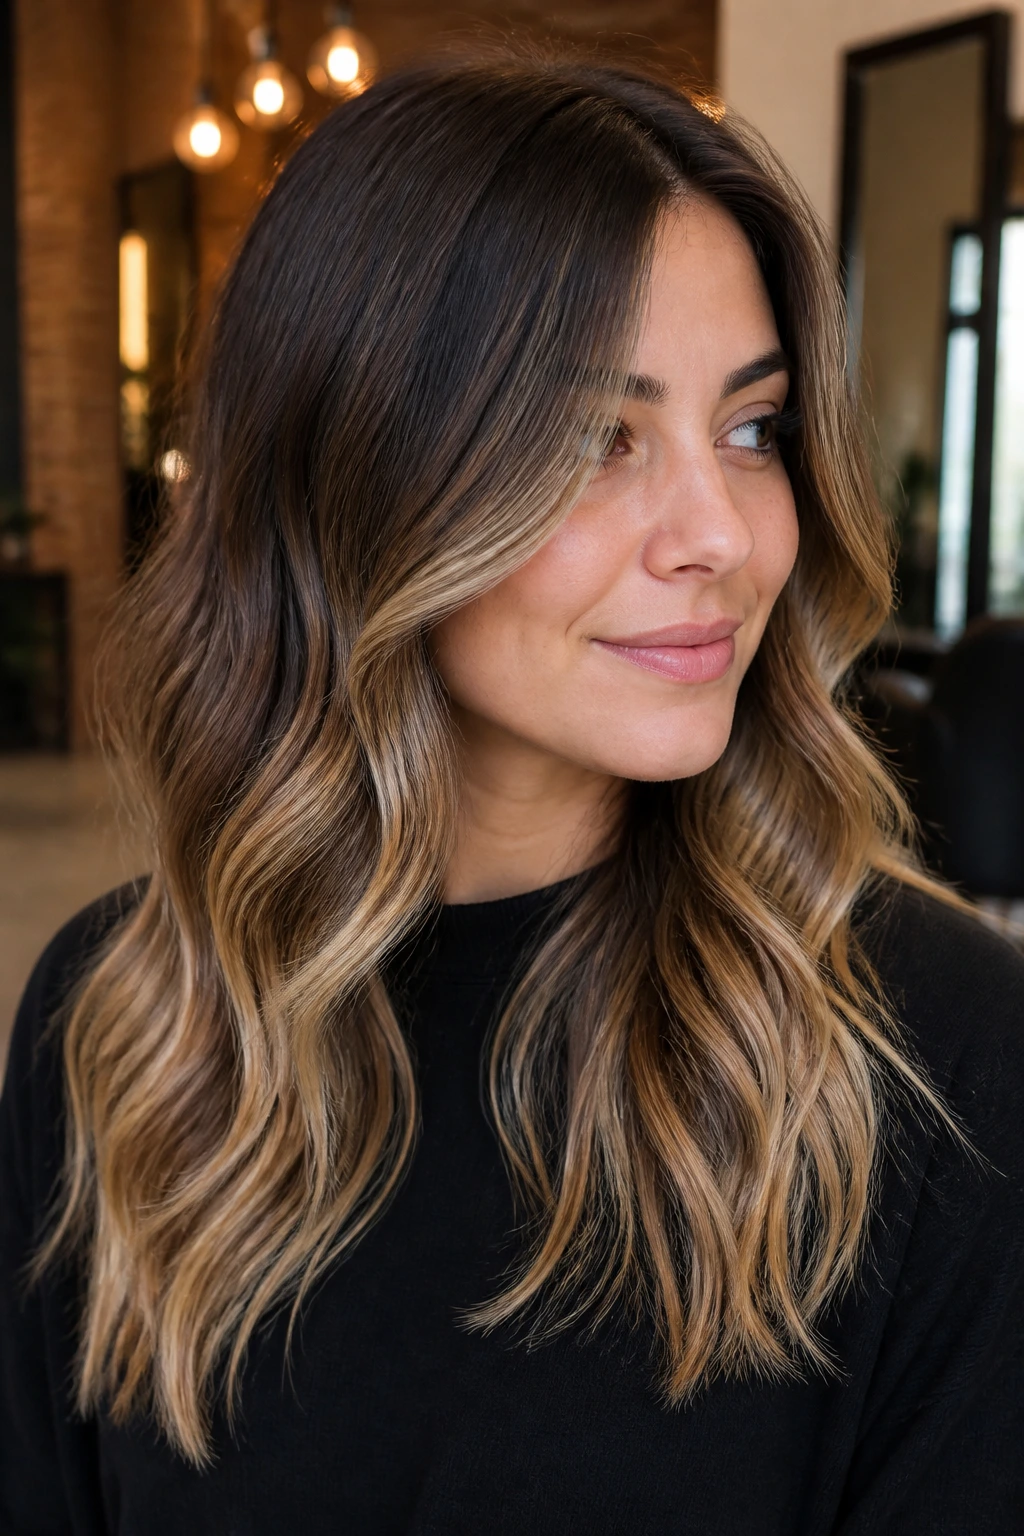
Balayage looks best on round faces when the brightest paint stays out of the temple area. That sounds small, but it changes the whole effect. If the light begins lower — around the mid-lengths, just past the cheekbone — the face reads a little slimmer because the eye goes down instead of side to side.
The hand-painted look also helps if you hate obvious regrowth. A soft balayage grows out with less drama than foils, and the blurred root keeps the crown from looking wide or puffy. On shoulder-length cuts, that matters a lot. A bright crown plus a blunt line at the temples can make a round face feel fuller than it is.
I like this placement on medium brown, dark blonde, and brunette bases. It can be warm, beige, or ash, but the placement should still feel low and gentle. If the color is dense near the top, ask the colorist to back off and leave more of your natural shade through the crown.
3. Ribbon Highlights Through the Mid-Lengths
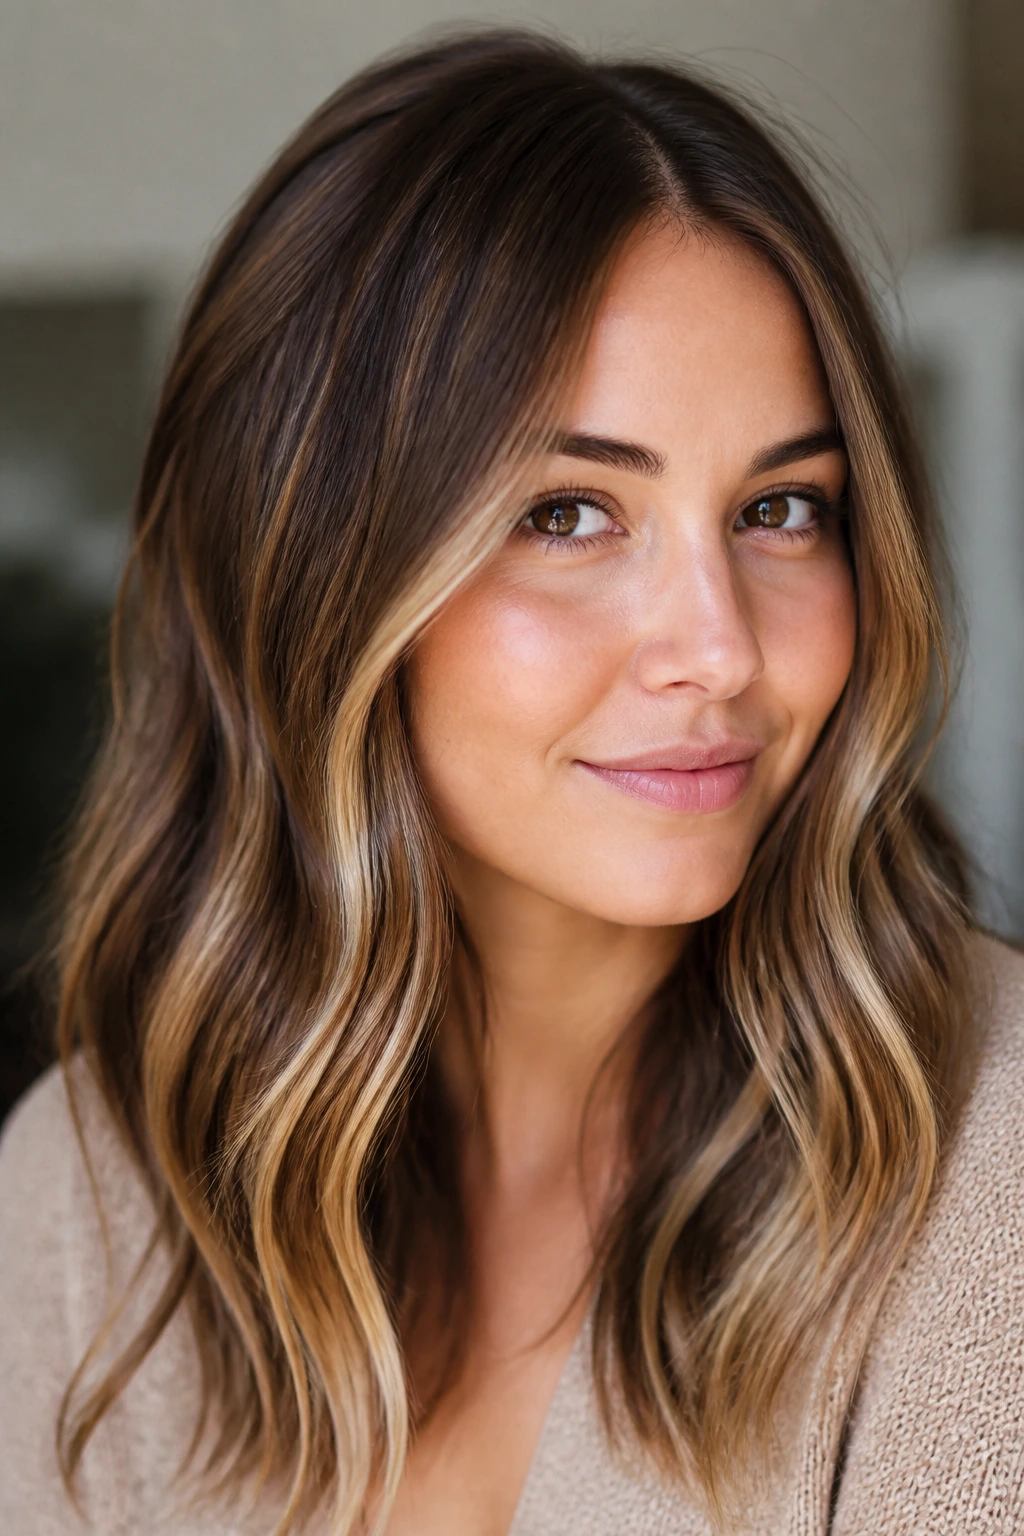
Imagine a loose wave with three or four thin blonde ribbons running through the middle of the hair. The face looks longer because the brightness moves in vertical strips instead of one wide block. That’s the quiet magic of ribbon highlights.
Why Ribbons Beat Broad Panels
Broad panels can be pretty on long faces, but round faces usually do better with slimmer pieces that break up the width. The ribbons should sit through the mid-lengths and ends, not pile up at the cheekbones in one solid curtain. A few narrower strips are enough to make the hair look lighter and more layered.
How to Ask for Them
- Keep the ribbons thin and separated.
- Place most of the brightness below the outer cheek area.
- Blend them into a deeper base so the contrast stays soft.
- Keep the top section quieter than the lower half.
This is the kind of placement that looks expensive without shouting. It gives movement, but it does not fight the shape of the face.
4. Babylights That Wrap the Hairline
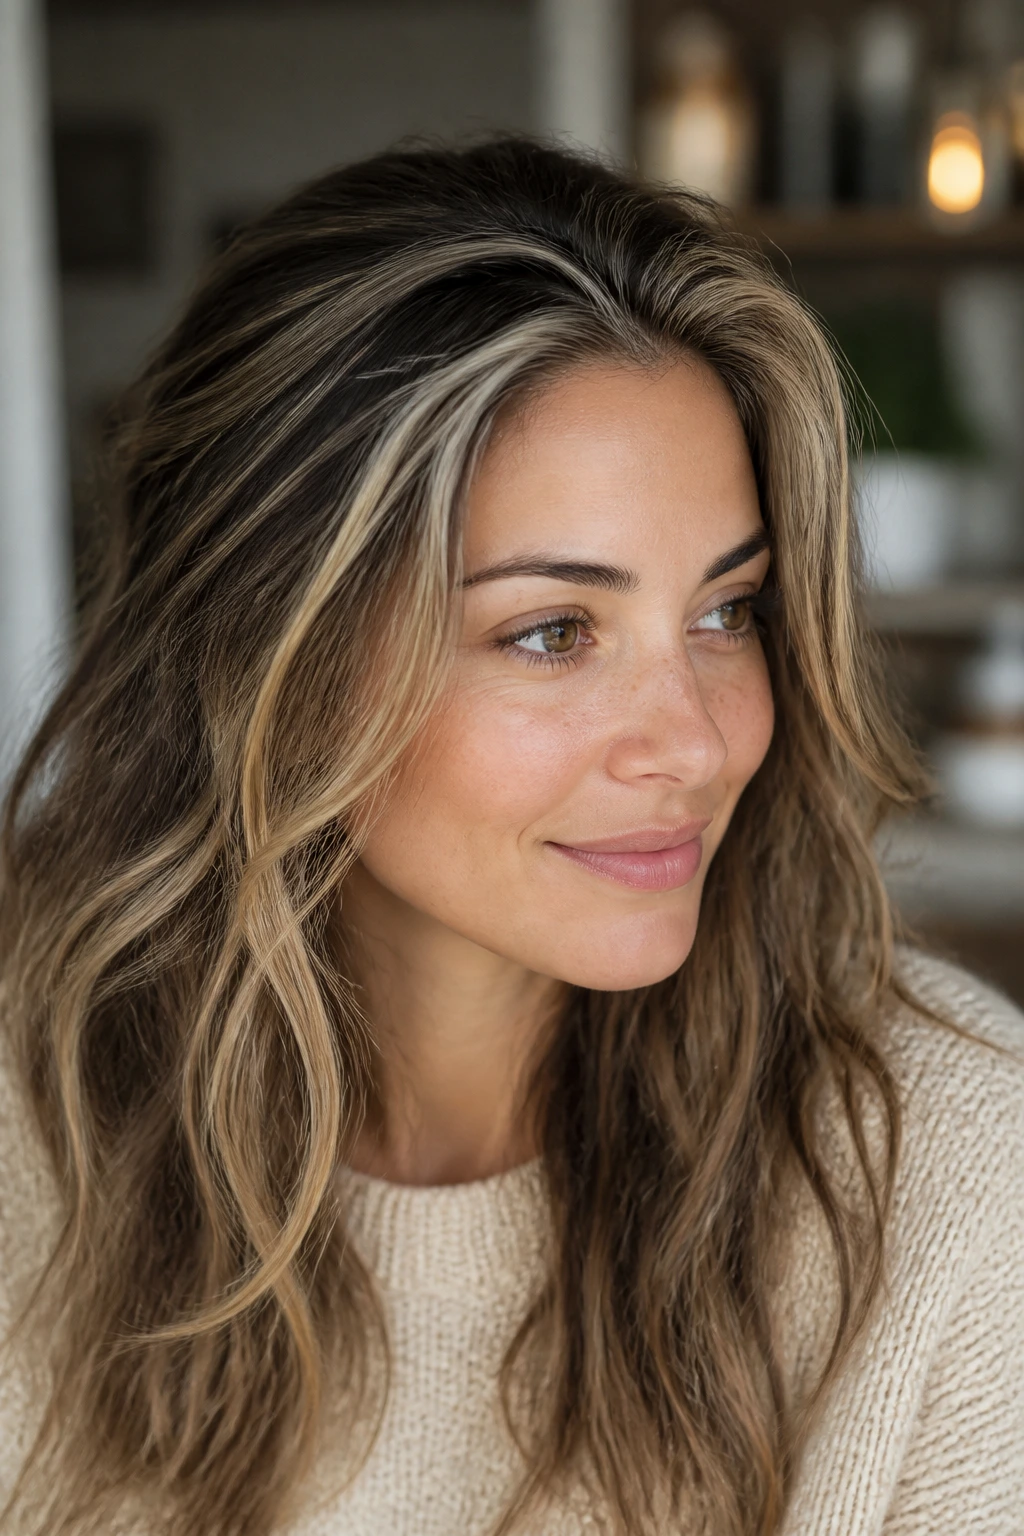
Can tiny highlights change a round face? Yes, if they are placed with restraint. Babylights are so fine that they soften the hairline instead of drawing a hard border around it, which is a huge win when you do not want extra width at the temples.
The best babylights for this face shape sit close to the root but not heavy at the sides. They create a mist of brightness around the face, then fade into the rest of the hair. That keeps the result airy instead of stripey. On fine hair, babylights can also make the texture look fuller without adding a thick block of color.
How to Use Them
- Ask for micro-thin sections around the front.
- Keep the brightest threads slightly lower near the face.
- Mix in a few lowlights if the hair needs depth.
- Use a gloss or toner to keep the tone soft, not brassy.
Babylights are the quiet choice. They are also one of the smartest choices when you want the face to look a little slimmer but still fresh around the edges.
5. Brunette Lowlights With Thin Honey Strands
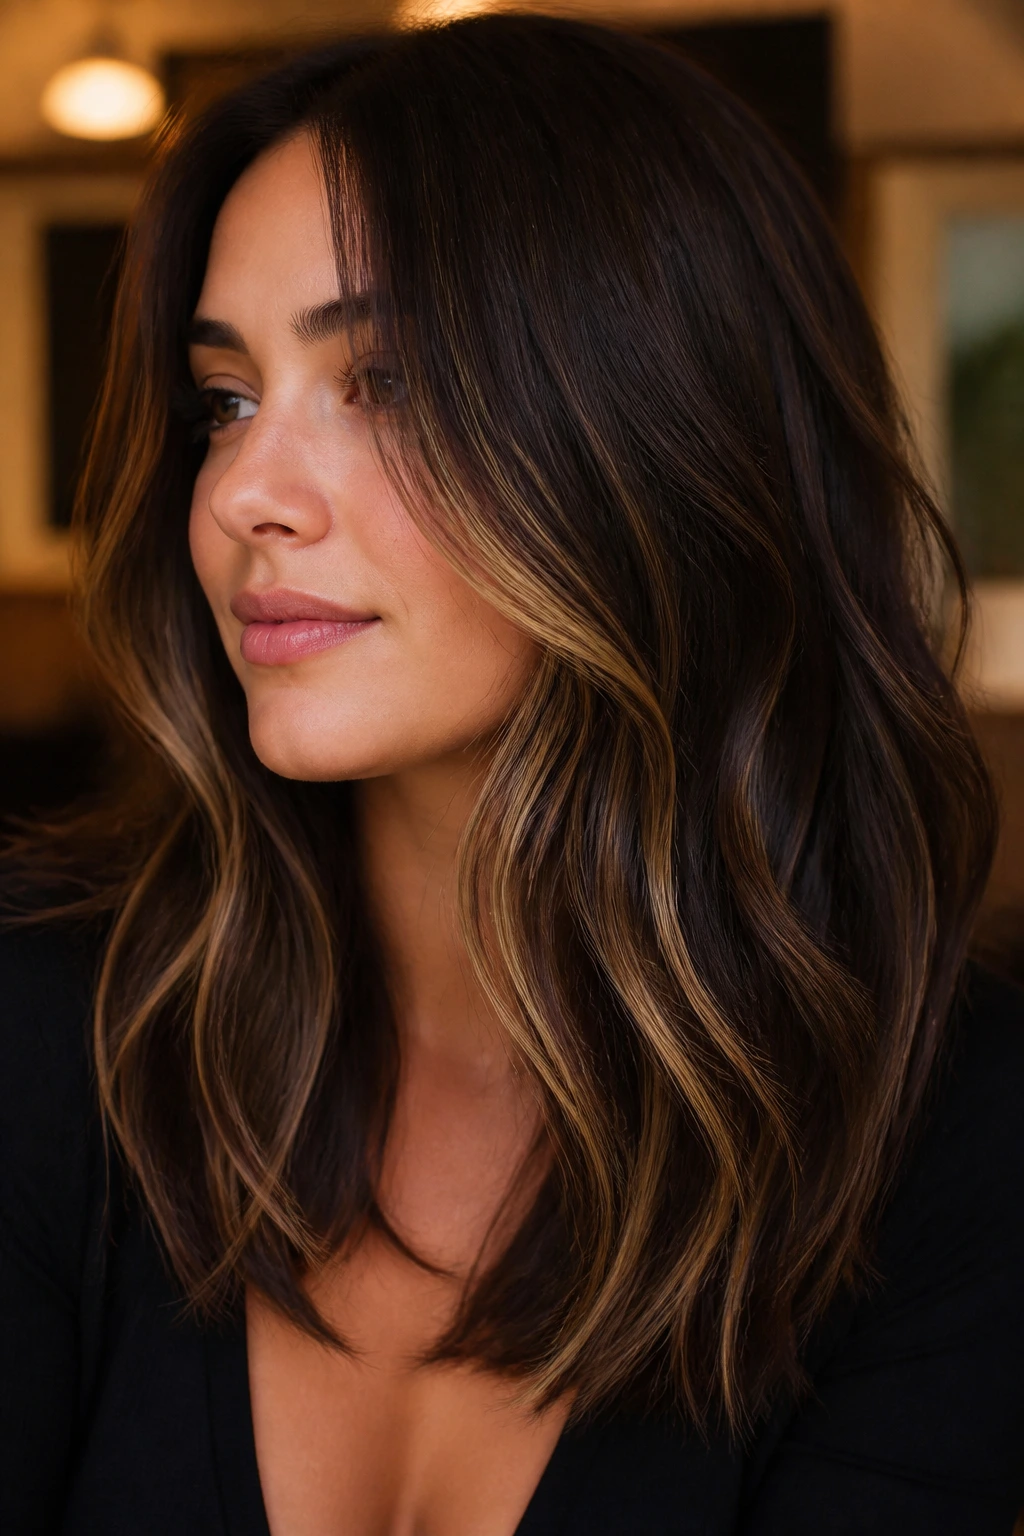
Sometimes the smartest move is adding shadow first. Round faces do not always need more blonde; sometimes they need enough depth to keep the shape from looking broad. That’s where lowlights come in. They break up the lighter pieces, narrow the visual field around the cheeks, and make the whole style feel more layered.
What the Shadow Does
A few deeper strands near the outer face can be more useful than a lot of light ones. The eye sees contrast, and contrast gives shape. If everything around the face is pale, the silhouette can look flat. If you weave in soft brunette or chestnut lowlights, the lighter pieces stand out more cleanly without having to cover the whole head.
Thin honey strands through the lower lengths keep the color from feeling heavy. They add warmth near the chin and collarbone, which is a nice place to place brightness on a round face. Up top, though, keep things calmer.
- Use lowlights at one to two levels deeper than the base.
- Keep the honey strands slim, not chunky.
- Concentrate brightness below the mid-cheek line.
- Avoid a bright halo at the temples.
Shadow is the whole point here. Without it, the lighter strands lose their shape and the face can look wider than it really is.
6. Caramel Contour Highlights Along the Jawline
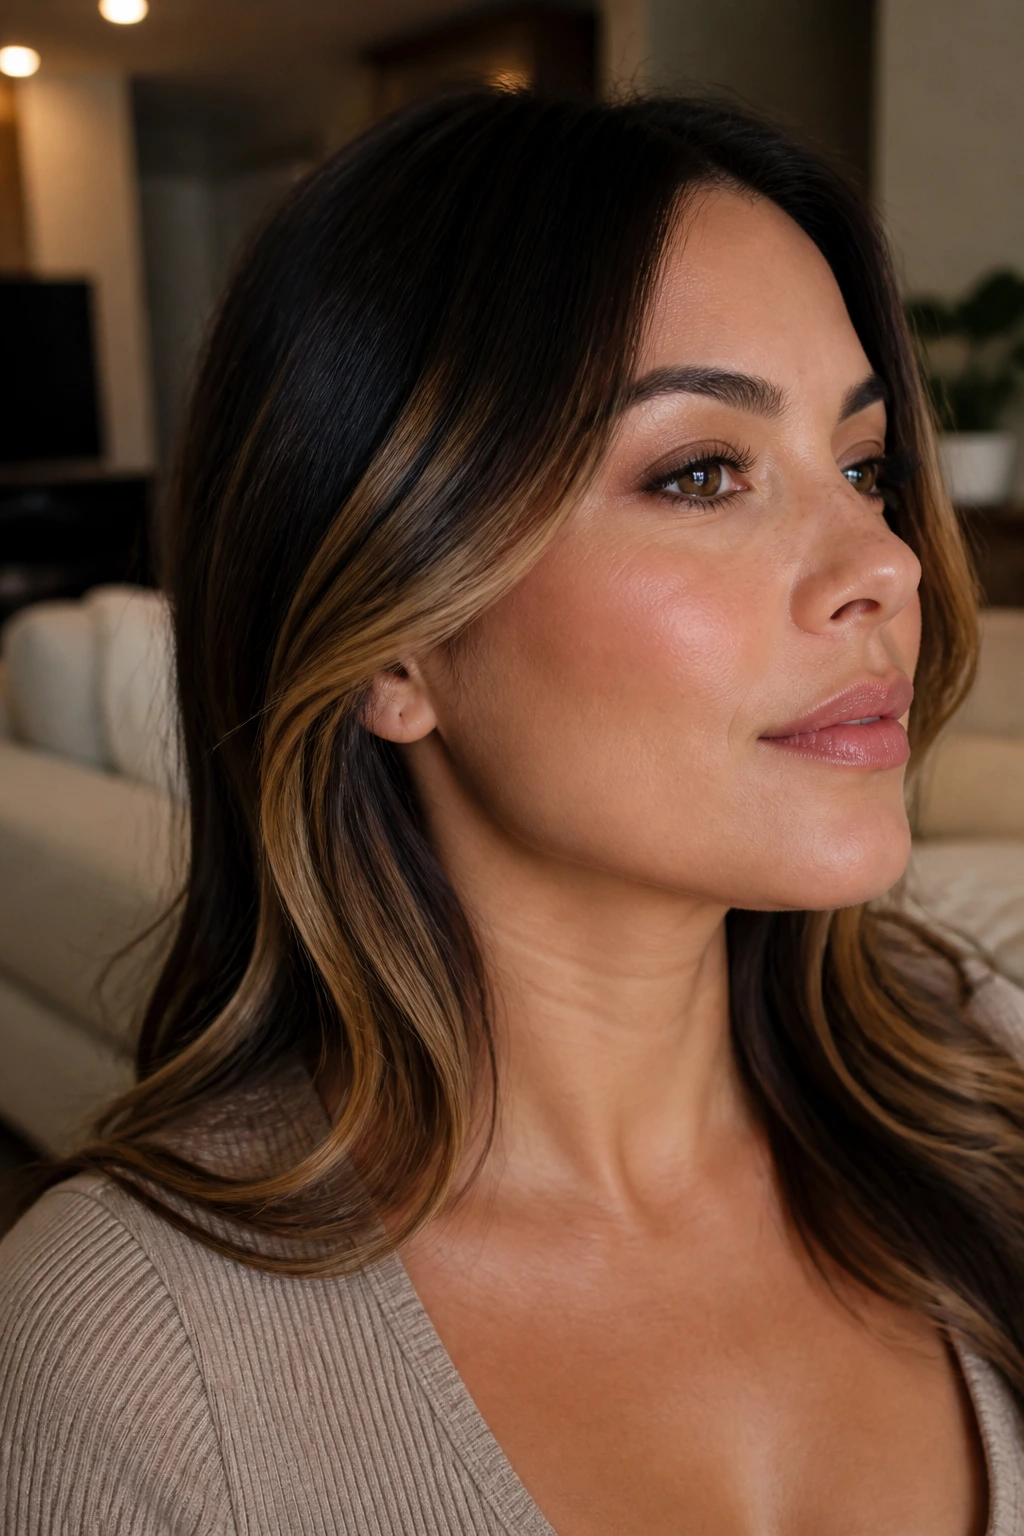
Caramel near the jawline acts like a soft line drawing. It gives a round face a little contour without looking harsh or fake, and it works especially well on medium brown hair. The warmth is easy on the eyes, which matters because severe contrast can make the face feel heavier, not lighter.
What I like about this placement is that it uses the lower part of the hair to do the shape work. Instead of loading the brightness up by the temples, you let it appear near the jaw and under the cheek. That creates a subtle down-and-in effect. The face feels framed, but not boxed.
This is a nice move if your skin has peach, golden, or olive undertones. Caramel tends to sit naturally against those tones, and it does not need to be icy to look polished. On long bobs, the effect is even better because the lighter pieces have room to swing just below the face.
A gloss every so often keeps the caramel from turning flat. And flat caramel, honestly, is the boring version.
7. Root-Melted Beige Blonde for Round Faces
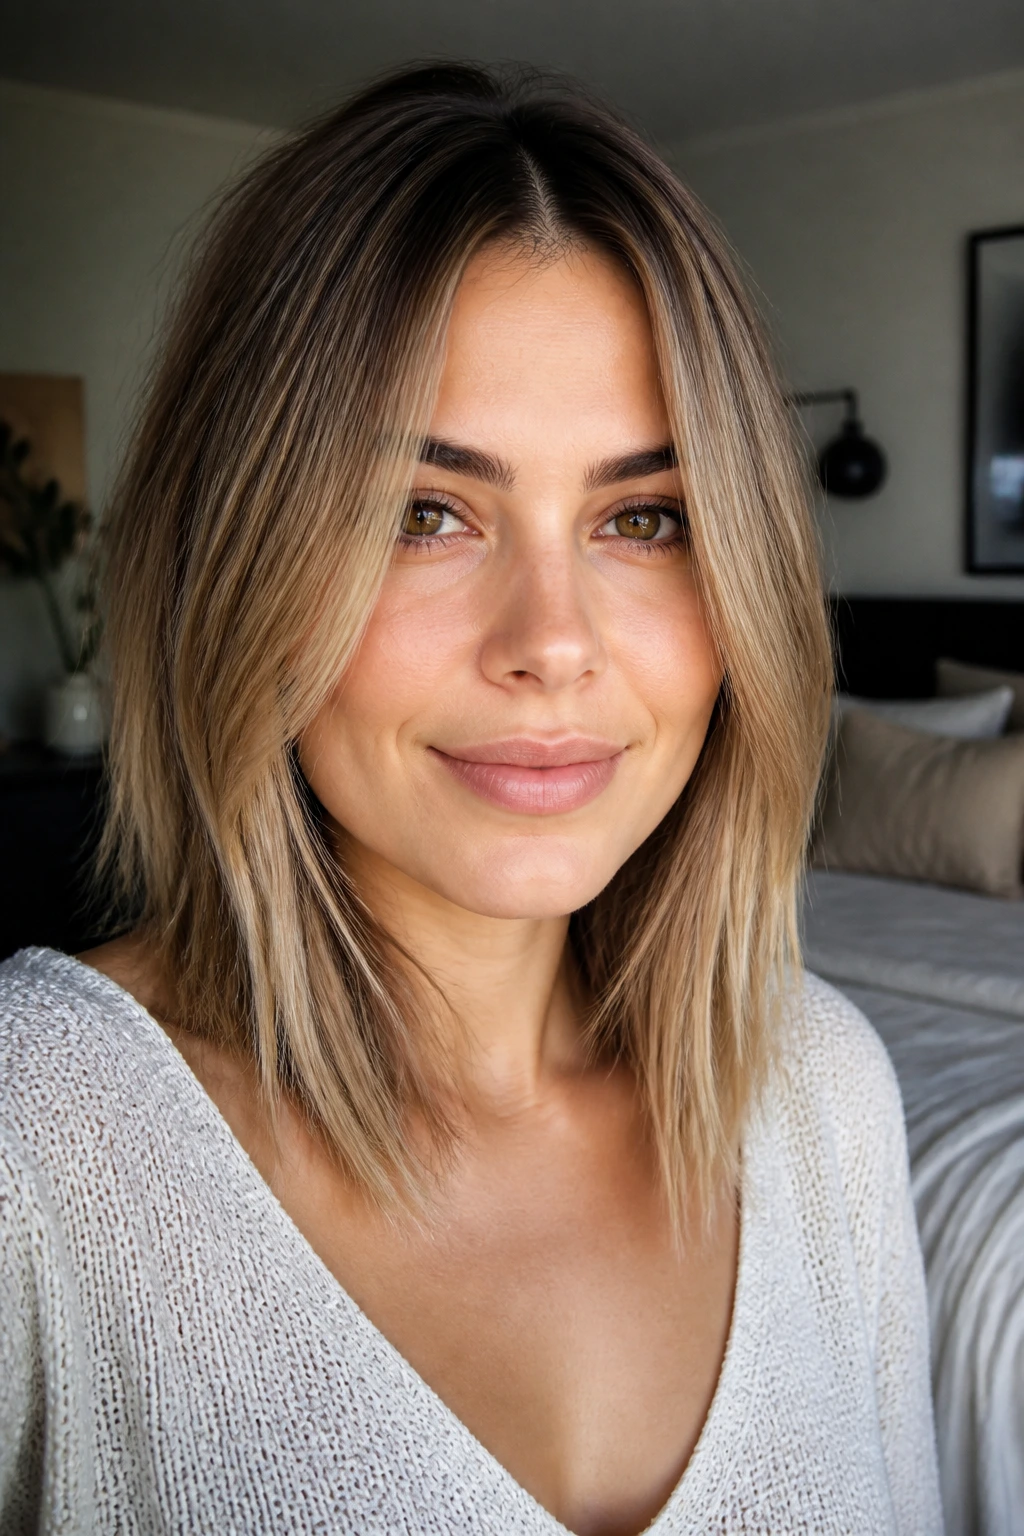
Unlike all-over blonde, a root melt keeps the top of the head quiet. That matters on a round face because the crown is not where you want to build extra visual width. A deeper root that melts into beige blonde mid-lengths gives you brightness where it helps most, then softens the transition so the face still feels long.
This look works well on straight hair and loose waves, especially when the length hits the collarbone or lower. The root shadow makes the hair look denser at the top and lighter through the ends, which naturally draws the eye downward. Beige blonde also sits in a friendly middle ground. It is lighter than caramel, but not so pale that it steals all the attention.
If you want this look to stay flattering, keep the lightest pieces away from the widest part of the face. Ask for a soft sweep from the cheekbone down, and make sure the root transition is blurred rather than stripy.
It is a calm blonde. That is the selling point.
8. Side-Part Highlights That Pull the Eye Diagonally
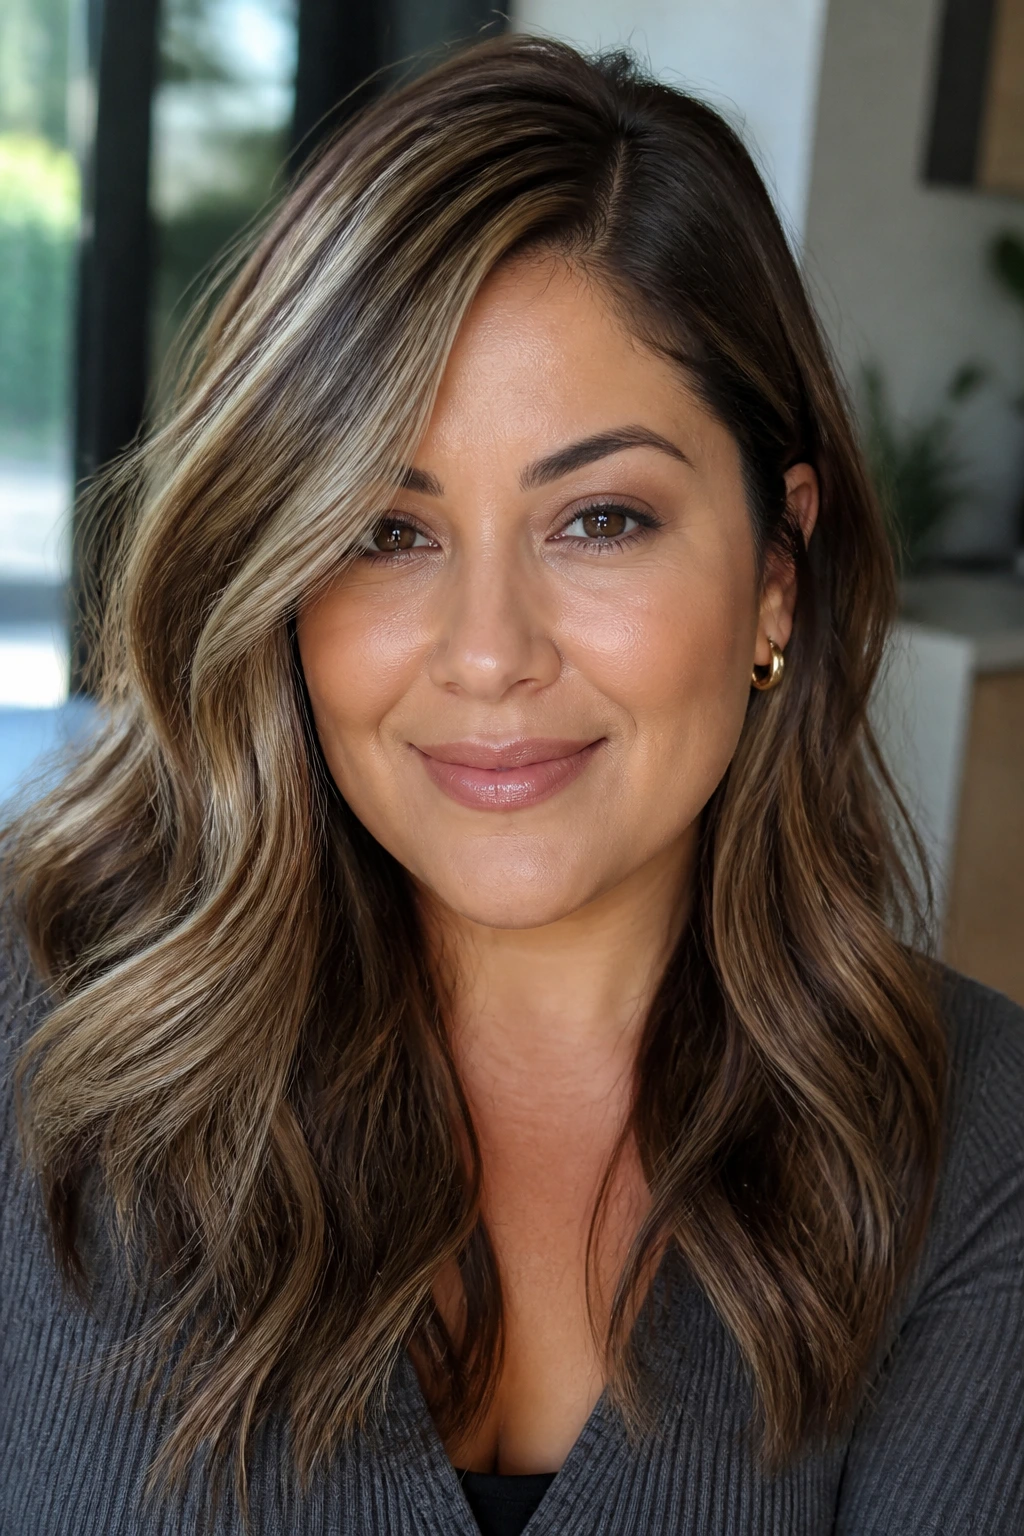
A side part changes the geometry before the color even shows up. On a round face, that diagonal line creates movement from one side of the forehead to the opposite cheek, which is useful because it breaks the symmetry that can make the face feel broader. Add highlights to that pattern, and the effect gets stronger.
The best version does not flood both sides of the face with equal brightness. One side can be a little more luminous, while the other stays quieter and deeper. That asymmetry gives the hair a sense of direction. It looks less like a helmet and more like hair with shape.
This is a good choice if your haircut already has layers. The side part helps the top lay flatter, and the highlights ride those layers instead of sitting in one static band. On a blunt cut, you need more care; the part can still help, but the color has to be softer so the ends do not look too heavy.
A diagonal line is doing a lot of work here. Let it.
9. Curly Highlights for Round Faces
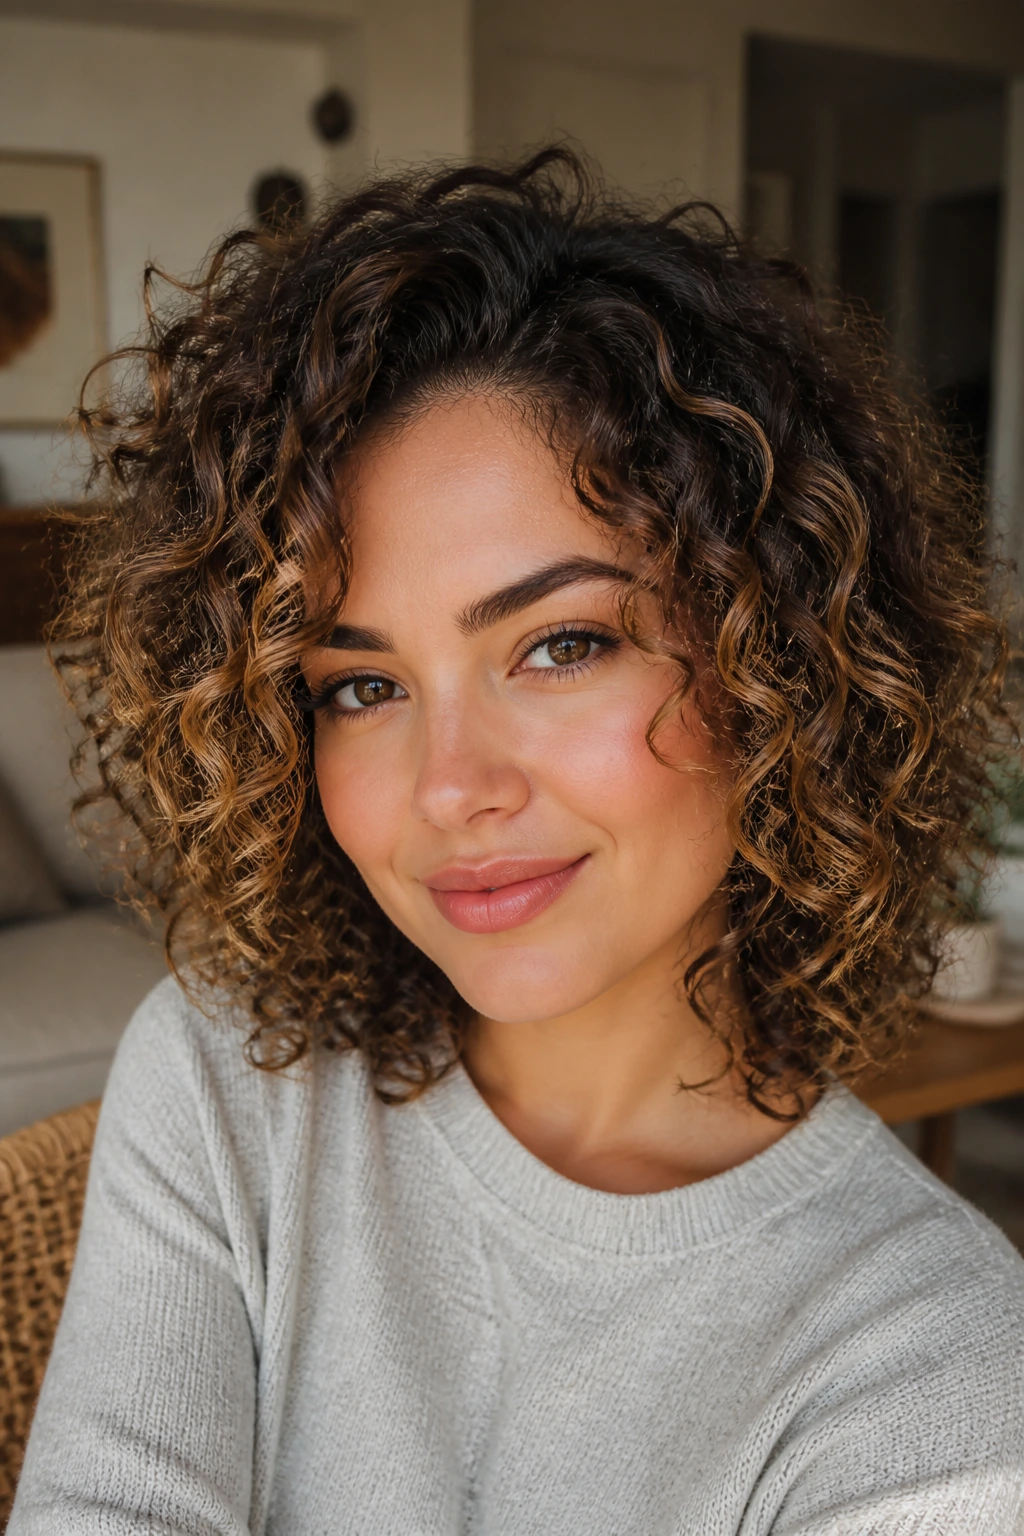
Curly hair needs a different map. You cannot place highlights on curls the same way you would on straight hair and expect a flattering result. Curls move outward, which means bright pieces at the wrong height can make the head look wider than the actual face. The safest route is to keep the lightness lower on the curl pattern and avoid a bright ring around the top.
Where to Paint on Curls
Color on curls should follow the shape of the coil, not fight it. That means placing highlights on the outer curve of the curl clump, then letting the brightness drop through the mid-lengths and ends. The hair will still look lively, but the face stays more balanced.
- Place highlights below eye level when possible.
- Keep the crown darker or only softly lifted.
- Use thinner sections near the front.
- Let a few lowlights sit between the light pieces.
Do not over-light the halo area. That is the fastest way to make a round face read wider in photos and in person.
The nicest curly highlight jobs I have seen feel like movement, not decoration. They let the curl shape do the talking.
10. Peekaboo Highlights Under the Top Layer
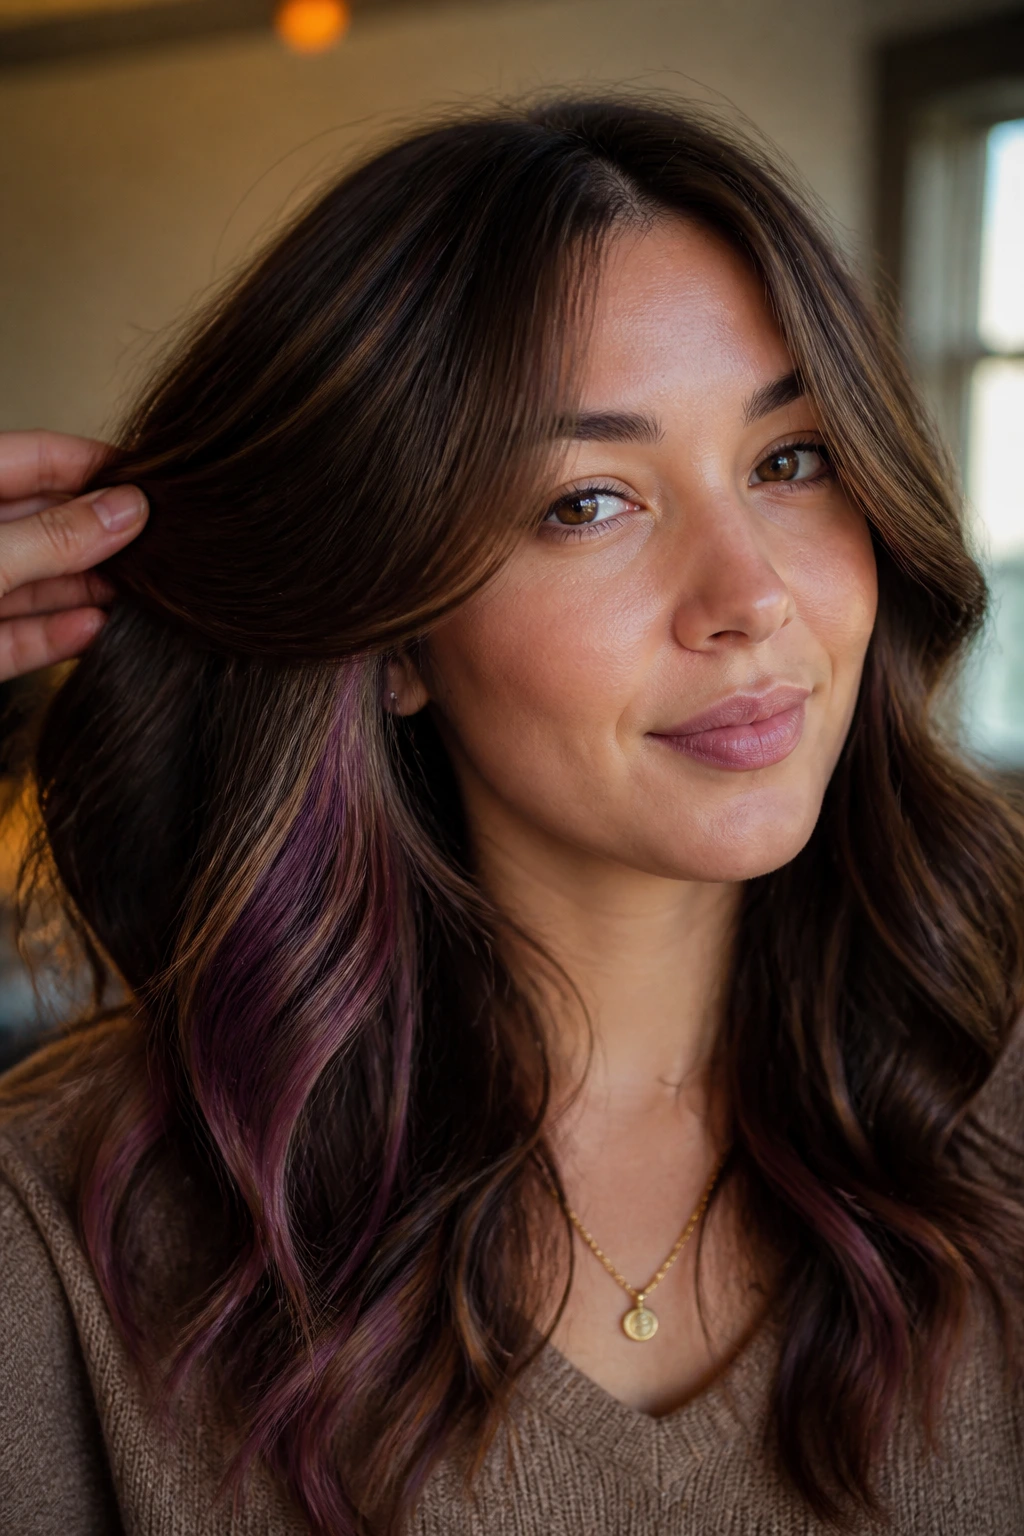
A friend of mine once asked for lavender streaks and worried they would make her face look wider. The fix was simple: put the color under the top layer, not on the surface. The result was playful when her hair moved, but calm when it sat still.
That is the whole point of peekaboo highlights. They give you a surprise without adding brightness across the widest part of the face. Because the color hides under the top layers, the outline stays soft. On round faces, that can be a relief. You get interest, but you do not get the extra bulk that sometimes comes with face-framing light pieces.
This works with bold shades and with softer ones. Copper under brunette hair, rose gold under dark blonde, even pearl under ash brown — all of it can work. The trick is keeping the visible surface a little deeper and letting the fun color live in the lower layers.
If you want something more adventurous without sacrificing shape, this is a smart place to start.
11. Center-Part Brightening That Stays Low
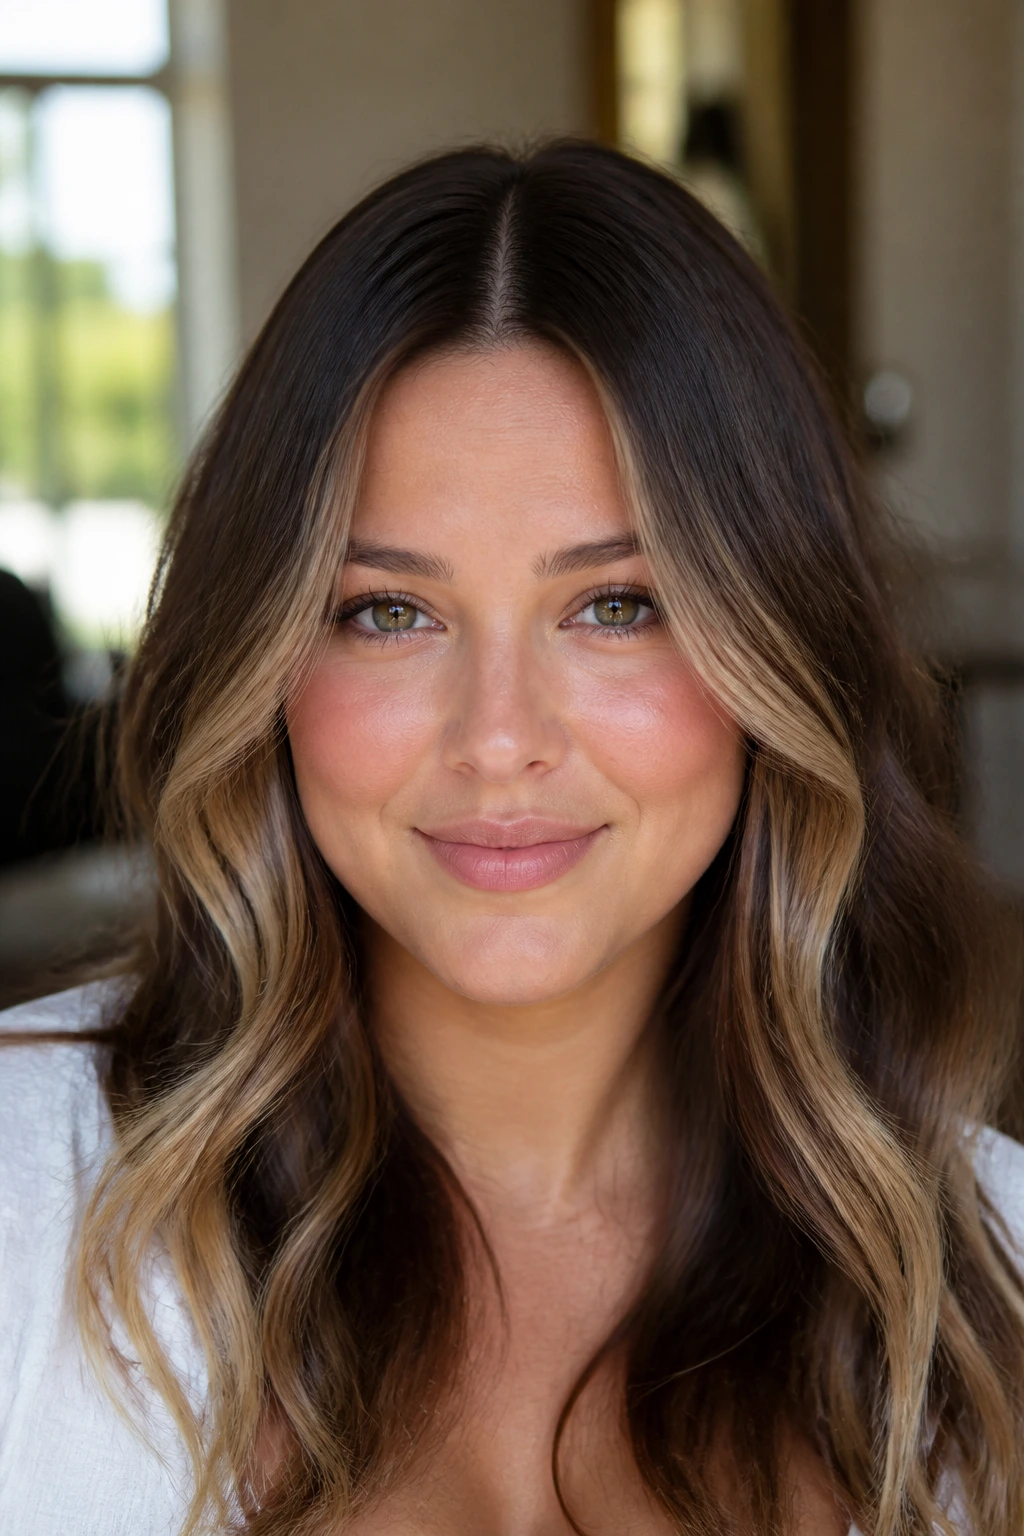
Does a center part work on a round face? Yes, if the bright pieces stay low and narrow. The part itself can create a clean vertical line, but the highlight placement has to respect the width of the cheeks. Brightness at the temples on both sides at once can flatten the face in a bad way. Keep the light lower and the result changes fast.
The One Rule to Remember
Put the brightest pieces below the strongest part of the cheek. That usually means starting just past the cheekbone and carrying the light into the lengths. If the front pieces are too wide, they can act like two pale wings and make the face look fuller.
This is one of those looks that depends on finesse. You do not need a huge amount of color. You need good placement and a decent cut, preferably with layers that fall forward a little.
On fine hair, the center part can still work because the low brightness adds some swing without bulk. On thicker hair, the deeper roots are even more important. Otherwise the shape can get too full up top.
Simple rule. Harder execution. Worth it.
12. Cinnamon and Copper Ribbons
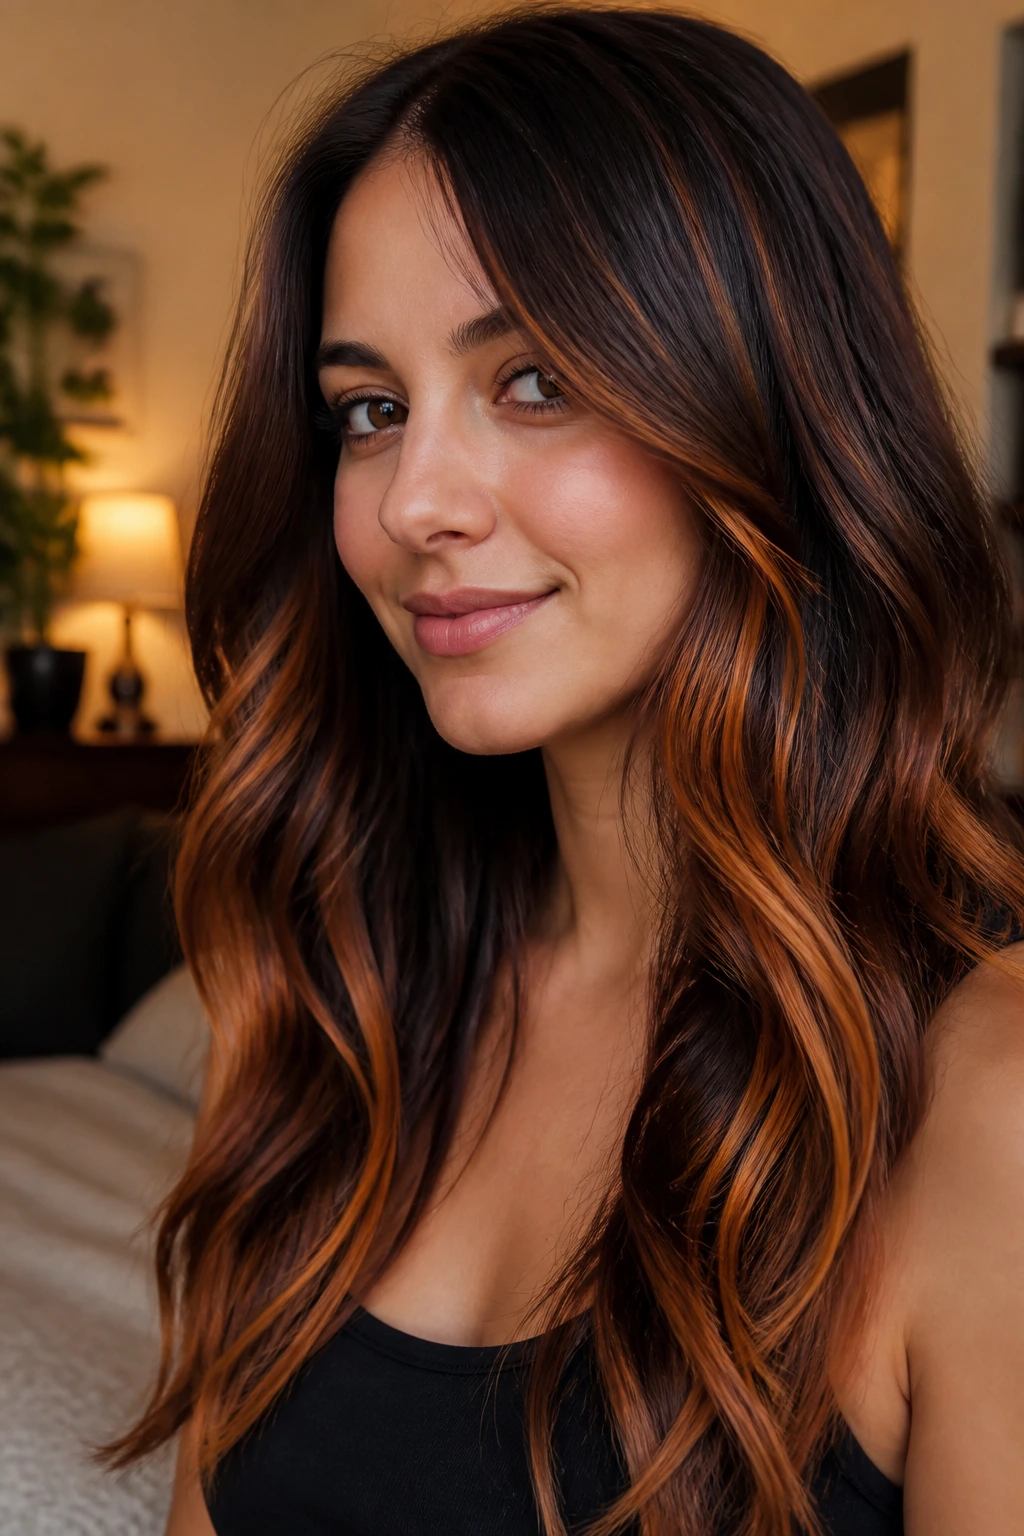
Cinnamon and copper ribbons are the opposite of timid, and that is exactly why they can work so well. On a round face, warm ribbons placed through the mid-lengths and lower front sections create motion without a blunt blonde block. The warmth draws attention to the hair texture first, then to the shape of the face.
These shades look especially good in brunette hair that needs a little life. The copper should not sit as one thick stripe near the temples. That gets loud fast. Instead, let it move through thin ribbons from around the jaw down to the ends. Cinnamon deeper in the mix keeps the color from turning too bright or too orange.
This kind of highlight also plays well with waves. The bends in the hair catch the contrast and break it up, which makes the face look softer. On straight hair, the ribbons need to be even finer so they do not create a horizontal feel.
A warm glaze helps keep the copper from going dull. That part matters. Copper that goes muddy is nobody’s friend.
13. Champagne Highlights on Long Layers
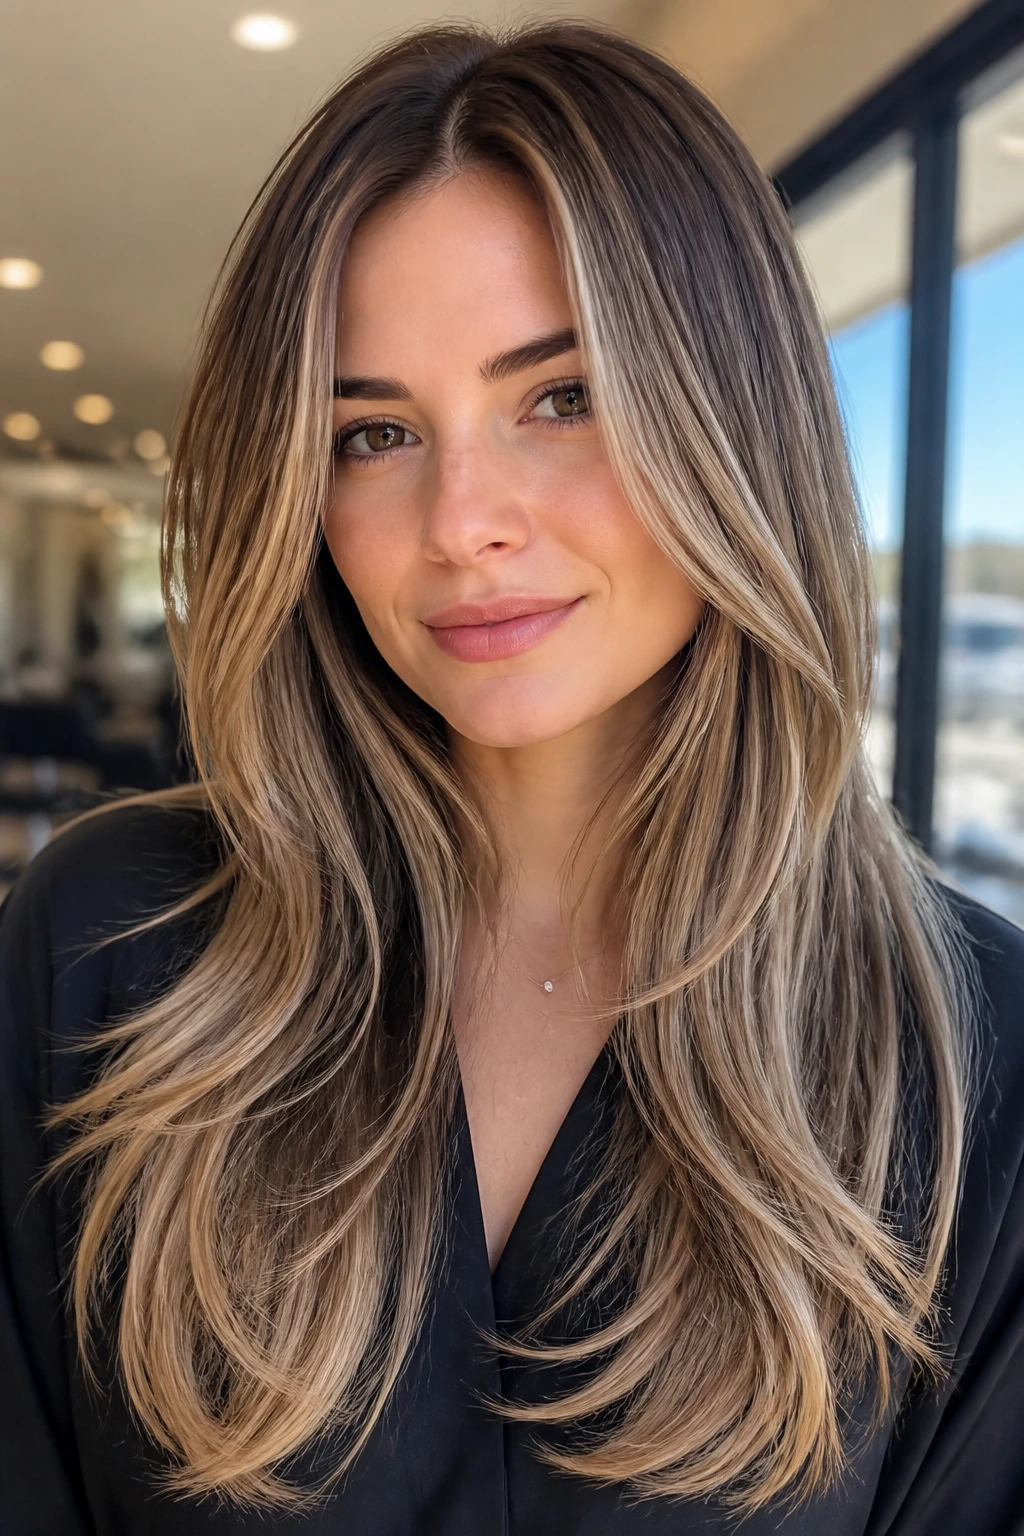
Champagne blonde sits in a sweet spot between beige and soft gold, which is why it works on so many round faces. On long layers, the color can follow the hair’s movement downward, and that downward movement is what you want. The layers create vertical lines; the champagne pieces light them up without adding width around the cheeks.
What Makes It Different
Champagne highlights are cooler than caramel but softer than icy platinum. That middle temperature makes them easy to wear on a lot of skin tones. They can also be toned more beige or more pearl depending on how much brightness you want.
- Ask for thin, layered placement instead of one big front panel.
- Keep the brightest pieces from sitting at the exact widest part of the face.
- Leave enough depth at the roots to avoid a blocky top.
- Use a purple or blue-toned shampoo only when brass starts to show.
On long hair, this color looks strongest when the lighter pieces flow down the front and through the ends. If the highlight stops high on the cheek, the face can look broader. If it keeps going, the eye follows the line lower.
That little extension matters more than people think.
14. Face-Opening Pieces at the Jawline
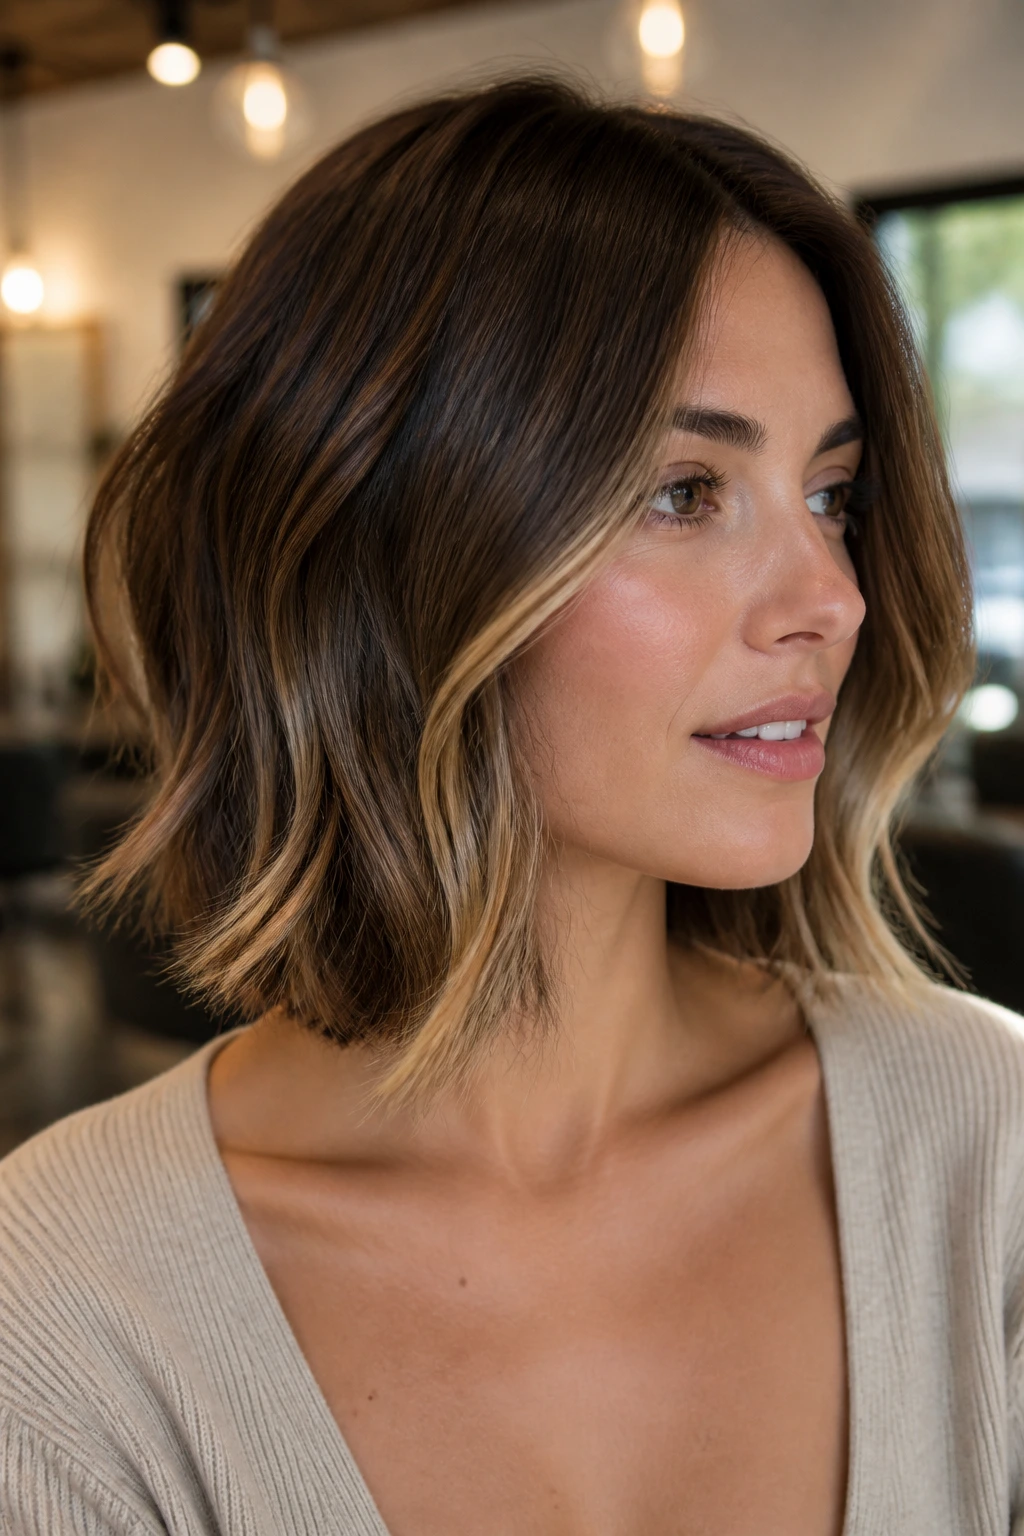
People obsess over the front hairline, but jawline pieces do more shape work. On a round face, a highlight that opens near the jaw can make the whole lower half feel less boxed in. It is a sneaky move, and a good one.
This placement is especially useful on bobs and lobs. When the light lands near the jaw, it gives that part of the face a softer edge. The eye notices the brightness, then traces it downward. That creates length where round faces usually want it most.
The pieces should not be blunt. Blunt is the enemy here. You want soft ribbons or feathered panels that begin subtly higher and bloom a little near the ends. If they are too thick, the jawline gets busy. If they are too pale, they can pull attention sideways instead of down.
I would choose this placement over a heavy temple highlight almost every time. It does more shape work with less drama.
15. Sunkissed Ends With Minimal Top Brightness
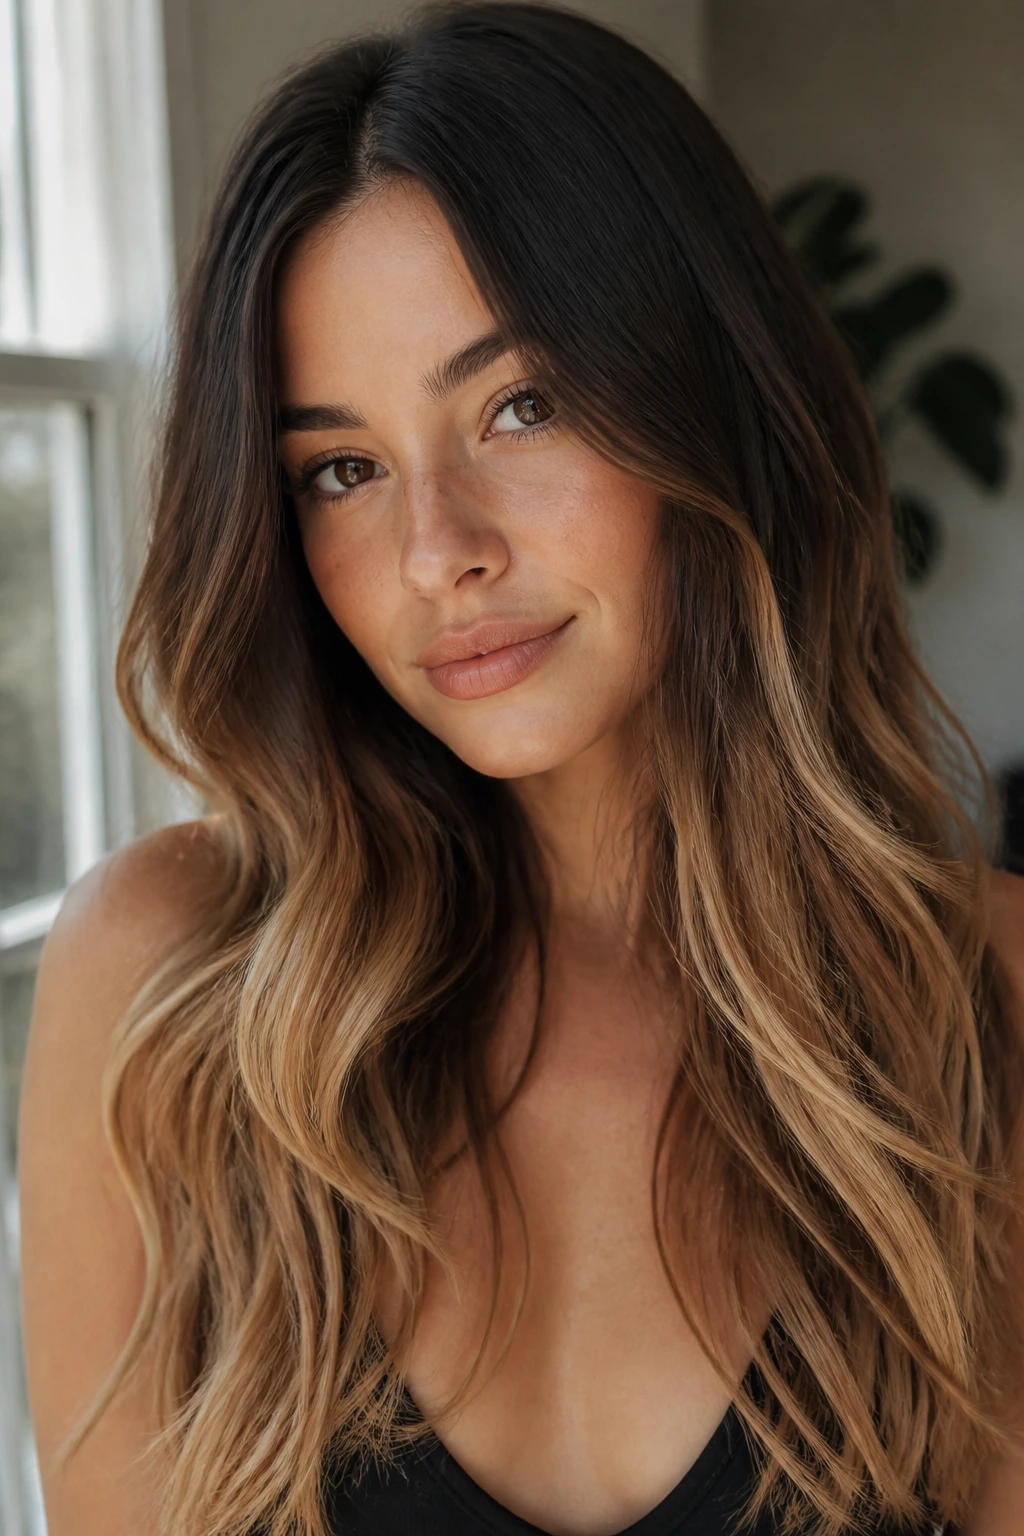
A lot of people think “lighter everywhere” is the answer. It usually is not. On round faces, a better move is to keep the top quieter and let the ends carry the brightness. That gives the hair an easy, sunkissed look without making the crown puff up.
This is especially nice on longer hair. The lower you place the light, the more the eye follows the line downward. You get movement through the ends, softness around the face, and less risk of widening the upper half. It also grows out gracefully, which is one reason I like it for people who do not want constant salon visits.
The color itself can be warm beige, soft gold, or even a gentle copper blonde. The exact shade matters less than the placement. Keep the top deep enough to give the face a frame. Then let the lower lengths brighten gradually.
It is calm color with a real job to do.
16. Controlled Chunky Highlights
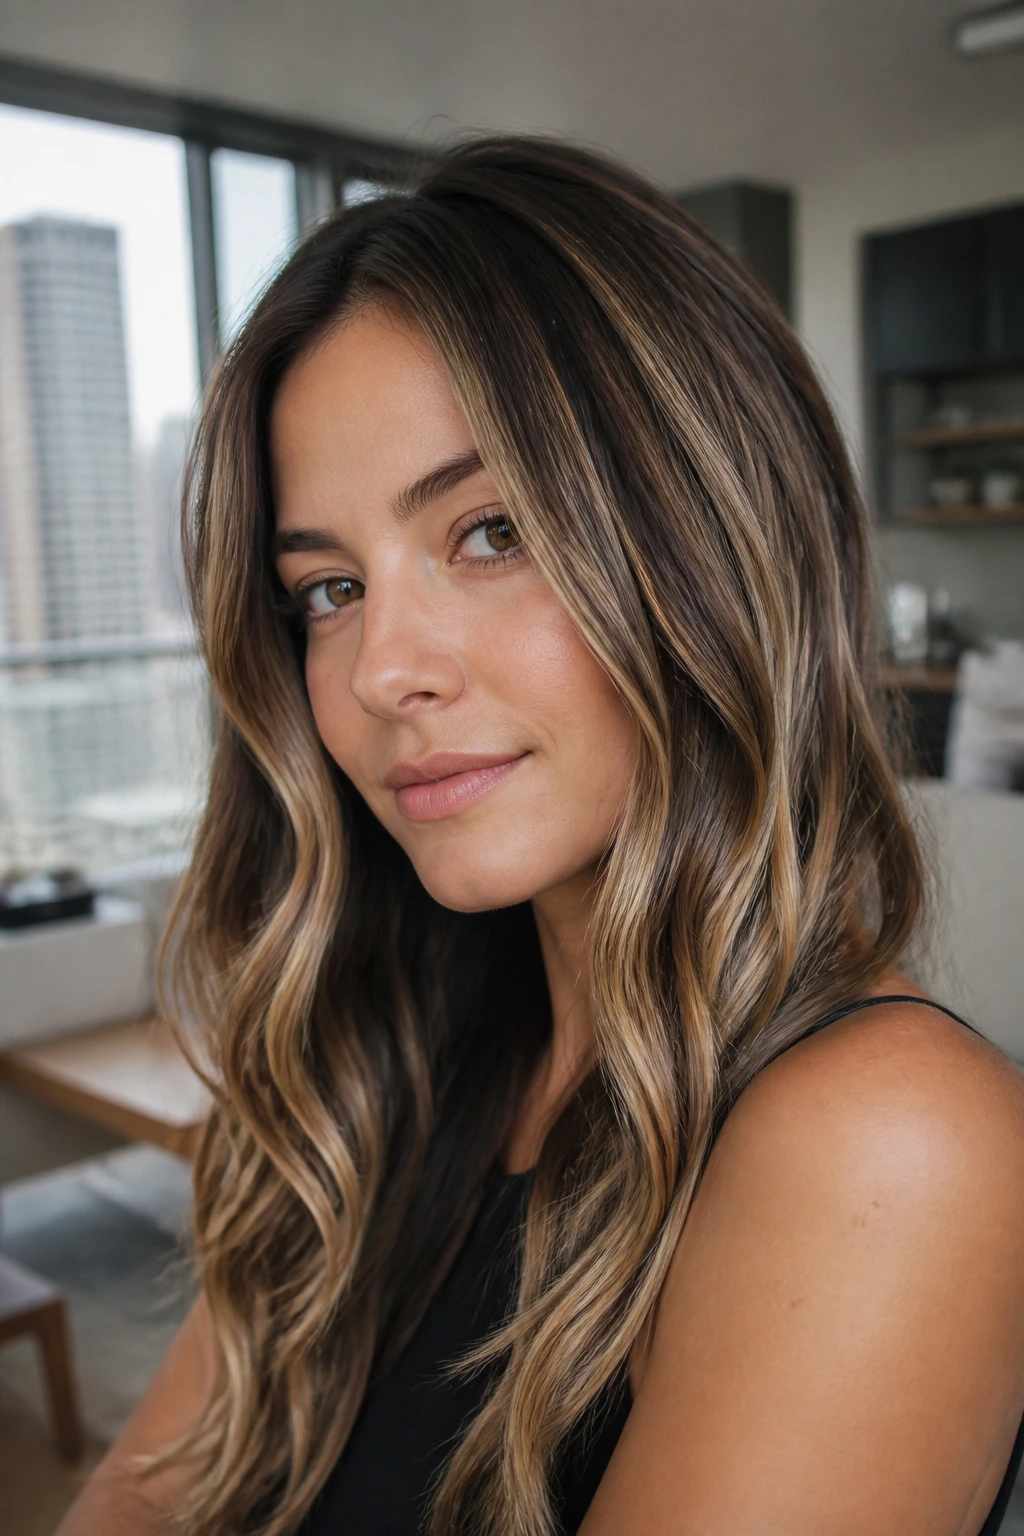
Chunky does not have to mean harsh. That old striped look people remember from bad salon photos is not the same thing as controlled chunky highlights. When the sections are placed with purpose — and spaced out with lowlights — the result can add shape and energy without making a round face look wider.
Why This Version Works
A thicker ribbon can help if the hair is very dense or very dark. Fine babylights sometimes disappear in heavy hair. A controlled chunky section gives you visible contrast, but the piece should still run vertically. That is the important part. Vertical contrast lengthens; horizontal contrast spreads.
- Keep the pieces separated by deeper hair.
- Place them from the mid-lengths downward.
- Use a soft toner so the contrast stays clean.
- Avoid putting the widest sections directly over the cheeks.
This look is for someone who wants a bit of drama, not a whisper. The trick is keeping the drama organized.
If the colorist paints huge front stripes and leaves the rest empty, walk away.
17. Mushroom Brown Dimension
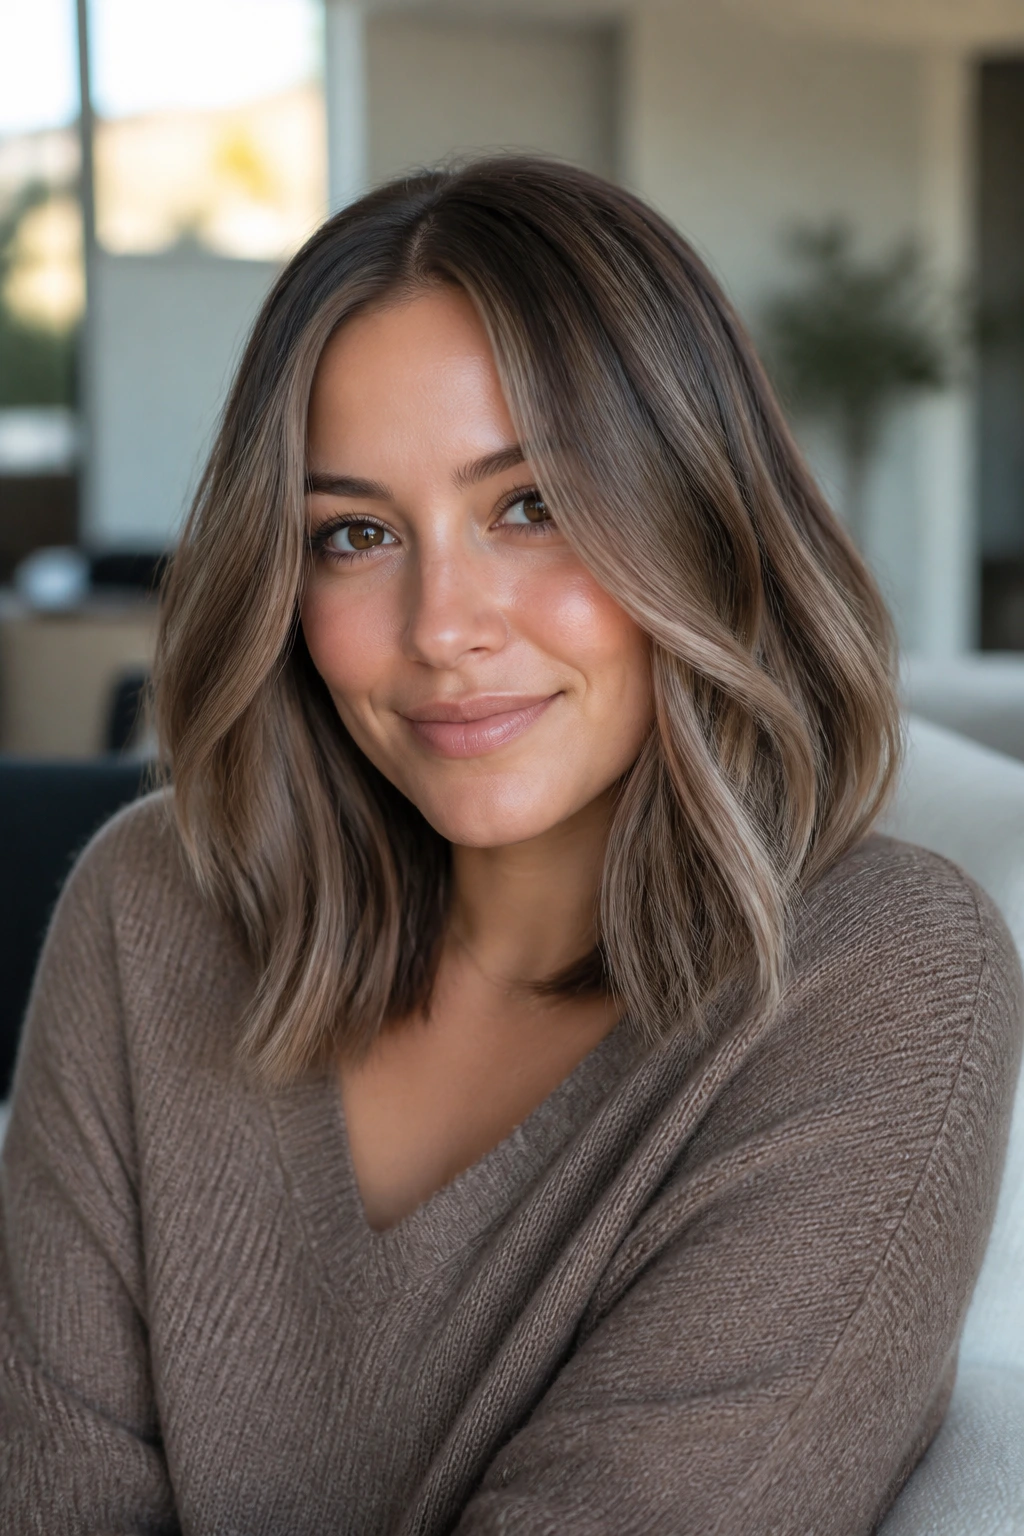
Mushroom brown is one of those shades that looks quiet in a photo and smarter in person. It mixes cool brown, taupe, and soft ash tones, which is useful on round faces because cooler shades tend to recede a little instead of pushing forward. Add a few lighter mushroom ribbons and some lowlights, and the face gets dimension without extra width.
The best thing about this color is that it does not scream for attention. It gives the hair a smoky, expensive-looking depth, but it still lets the cut do the work. On shoulder-length hair, that can be especially nice because the color never feels too loud near the cheeks.
I would keep the lighter pieces very soft here. Think of them as mist, not stripes. The darker bits matter just as much, maybe more. Without them, mushroom brown can go flat and lose the shape that makes it so useful on a round face.
It is not flashy. It is good. There is a difference.
18. Soft Platinum With Dark Roots
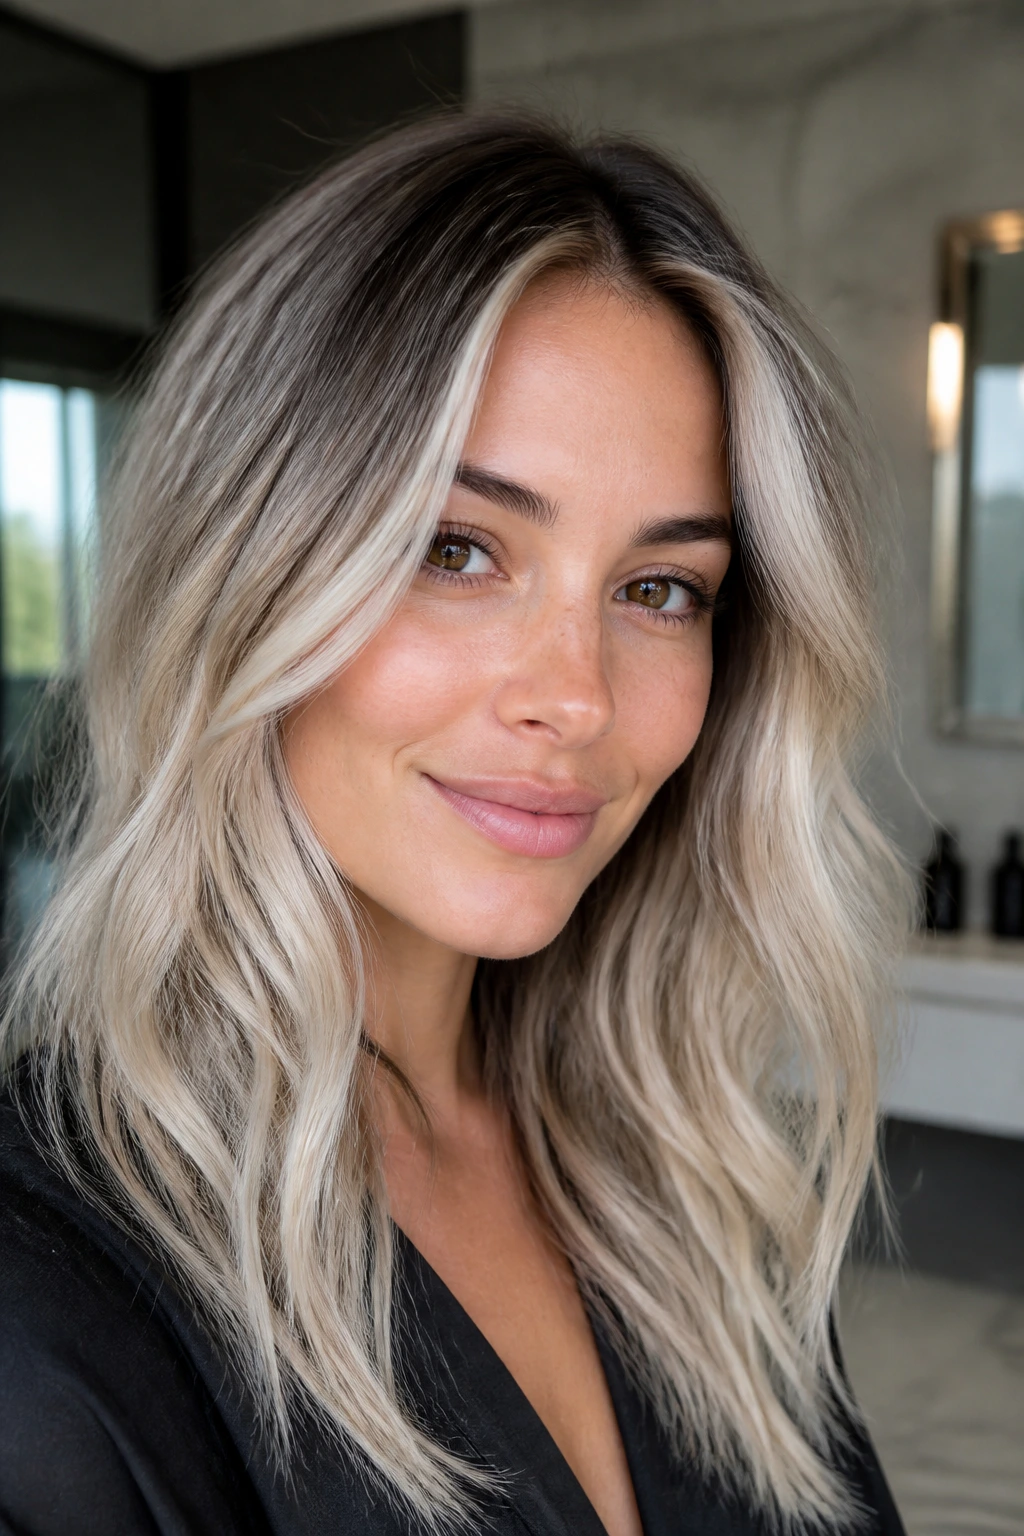
Platinum can work on a round face, but only when the root stays shadowed. The dark root gives the style a frame and stops the brightness from spreading across the top in one wide sheet. From there, the platinum can live through the lengths and ends, where it gives contrast without making the face look fuller.
This is a high-maintenance look, and I will not pretend otherwise. Tone drifts fast, especially if the hair pulls warm or if the ends are porous. A purple shampoo helps, but it is not a magic fix. A good toner and a careful application schedule matter more. If you like bold blonde, keep the root soft and the brightest pieces a little lower than you think you need them.
Ask For This, Not That
- Ask for: a shadow root, slim face-framing pieces, and platinum concentrated through the mid-lengths and ends.
- Skip: a solid white panel right at the temples.
- Watch: brass at the ends and a flat crown.
The best platinum on a round face does not look sprayed on. It looks placed. And when the placement is right, the face gets a leaner outline without losing the punch that makes platinum fun in the first place.
If you are choosing between a few options, keep the same rule in your head: brightness lower, pieces slimmer, roots softer. That formula does more for round faces than any trendy color name ever will.
