



A round face needs angles.
That’s why black highlights for round faces work best when they do more than add contrast. The right placement can stretch the eye downward, sharpen the cheek area, and make the hair look a little longer even when the cut stays the same.
What tends to go wrong is easy to spot. Thick black panels dropped right at the fullest part of the cheeks can make the face look wider; tiny streaks hidden only under the back layers can disappear completely; one blunt black money piece on a very soft cut can feel harsh. The sweet spot is usually somewhere in the middle: ribbons, not stripes; movement, not blocks.
I keep coming back to placement because placement does the heavy lifting. A diagonal sweep from temple to collarbone, a deeper side part, a shadowed crown, or black pieces tucked under softer colors can all change how the face reads without making the color look heavy. That’s the part most people miss, and it’s where the good ideas start to separate from the cheap-looking ones.
1. Thin Black Highlights at the Cheekbones
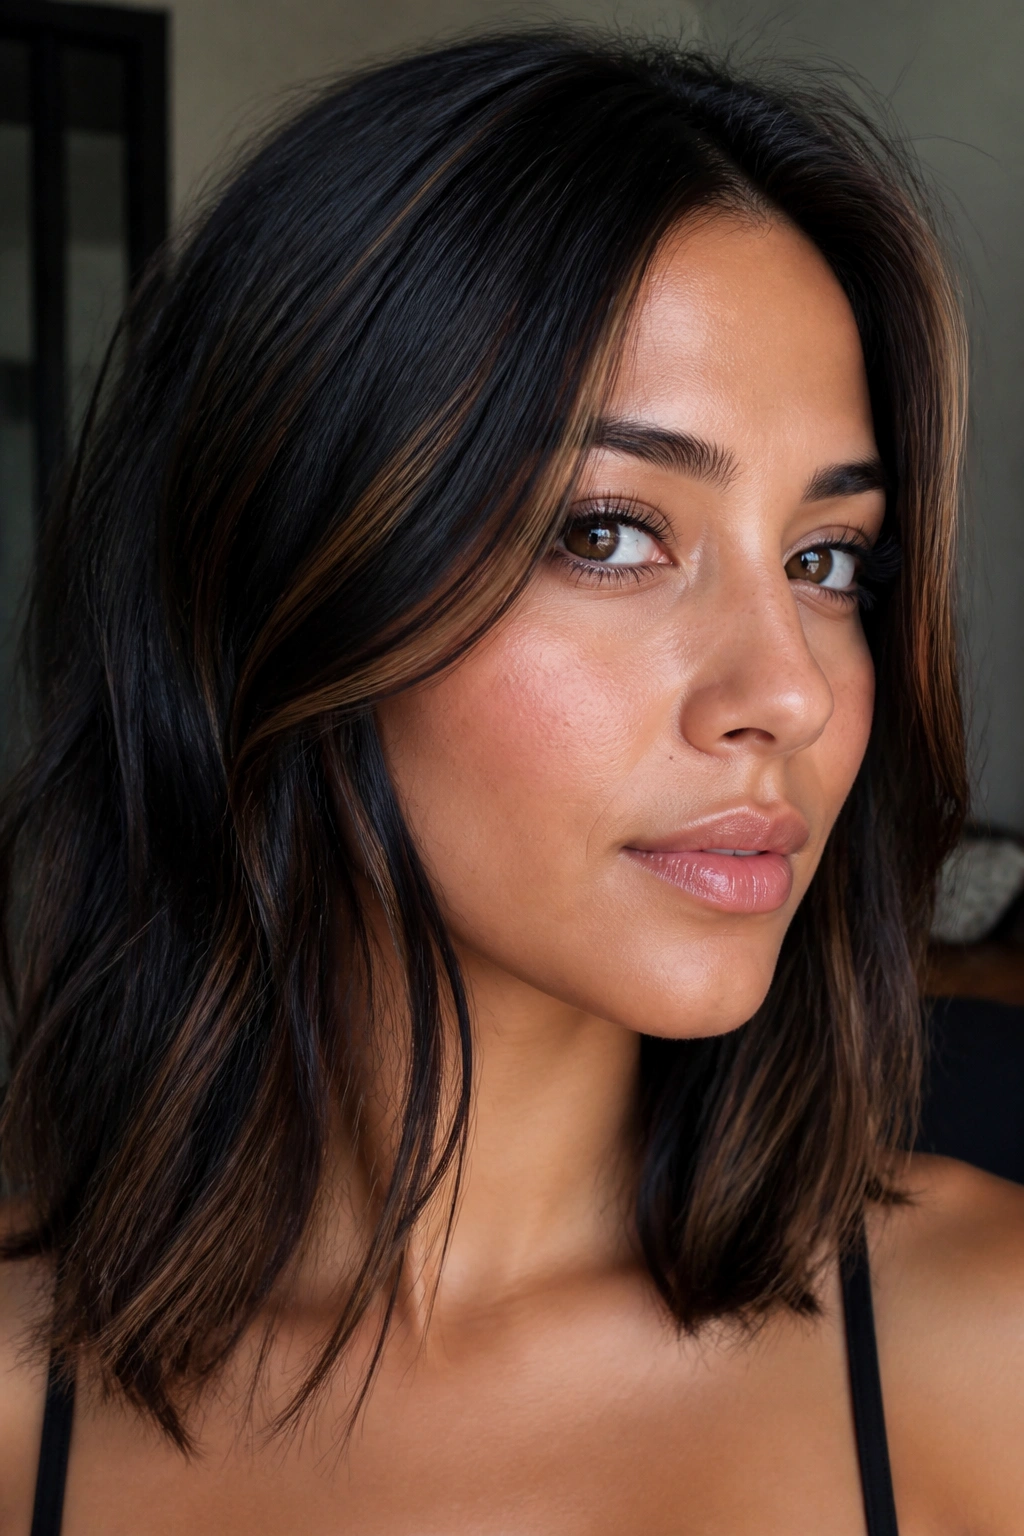
A narrow ribbon of black near the cheekbone is one of the cleanest ways to flatter a round face.
Why It Works
These pieces act like drawn-in contour. Because the sections stay thin—think 1/8 to 1/4 inch—they create line, not a block of darkness, and that line makes the face read longer. On a bob or lob, the effect gets stronger because the eye follows the strand down toward the collarbone.
That’s the trick. Not drama. Shape.
What to Ask For
- Keep the darkest strands just outside the widest point of the cheeks, not centered on the apples.
- Place the first ribbon at the temple and let it fall past the jaw.
- Soften the finish with a gloss if your base is already dark brown; raw jet black can look flat.
- Pair it with loose bends, not tight curls, so the line stays visible.
My rule: if the black piece looks thicker than a pencil, it’s probably too much.
2. A Deep Side Part With Black Highlights
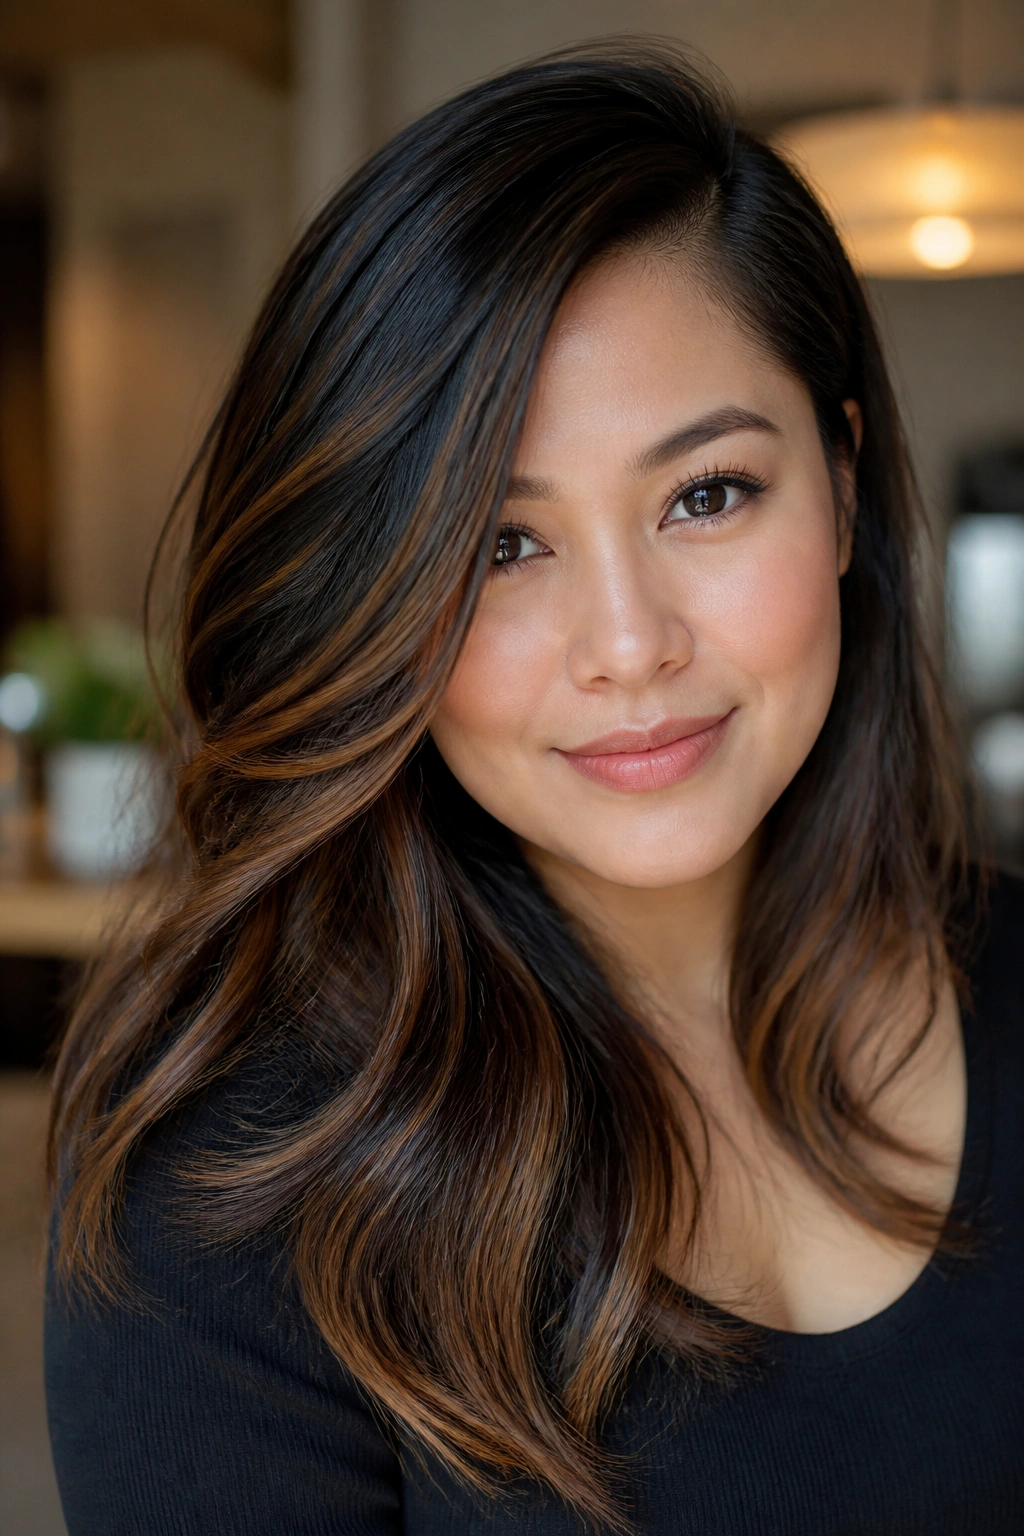
A deep side part changes the whole face in a few seconds.
On a round face, it breaks the circular line across the forehead and shifts weight to one side, which makes the face look a little longer. Add black highlights along the heavier side of the part, and the effect gets sharper because the eye follows that dark diagonal instead of stopping at the cheeks.
The part matters as much as the color. A shallow off-center part usually reads as an accident. A real deep side part—about 2 to 3 inches off center—creates intent, and intent is what keeps black highlights from looking random. This works especially well on medium-density hair that can hold a clean fall without puffing up at the sides.
If you wear your hair tucked behind one ear, even better. The exposed side gets a cleaner frame, and the black pieces look precise instead of noisy. That little asymmetry does a lot of work.
3. Soft Black Highlights on Shoulder-Length Waves
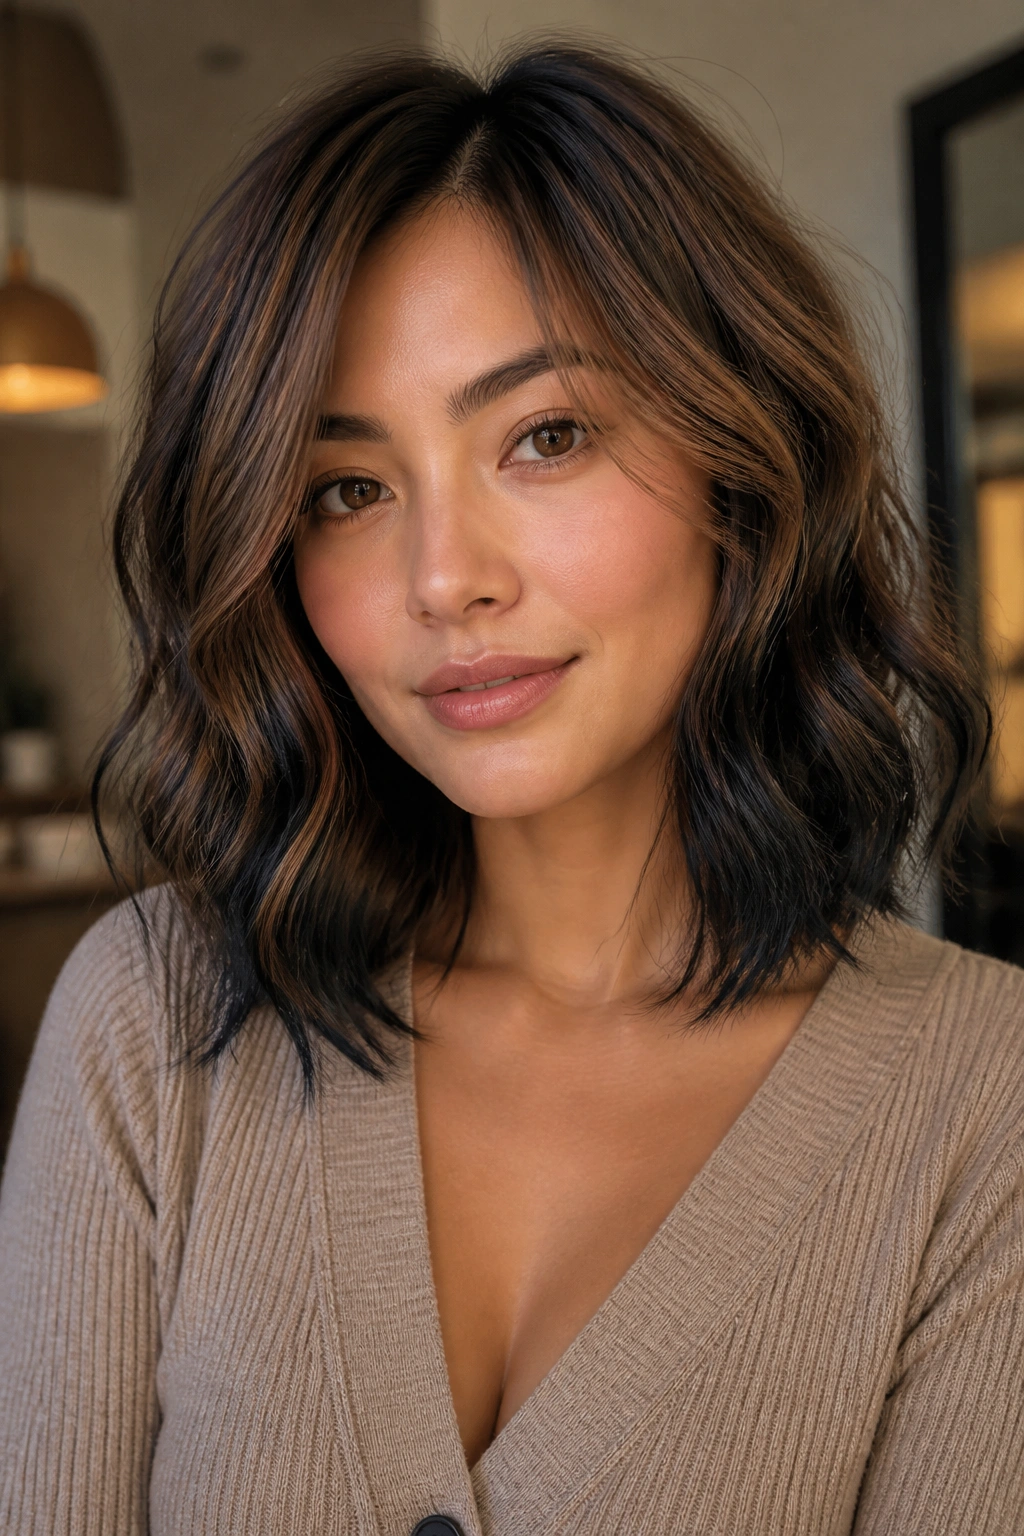
Why do shoulder-length waves work so well with black highlights? Because the bend breaks up the color and keeps the face from looking boxed in.
How to Wear It
Ask for hand-painted black pieces that start below the cheekbone and land around the collarbone. That keeps the color low enough to elongate the face, but not so low that the front looks flat. Loose S-waves are the sweet spot here; tight curls can bunch the dark pieces together and make them read heavier than you want.
A shoulder-length cut also gives you room to cheat a little. When the front is slightly longer than the back, the black strands angle down instead of across. That tiny shift matters. It’s the difference between dark dimension and a cut that suddenly feels wider at the sides.
Best pairing: a soft blowout with a round brush at the ends.
4. Underlayer Black Highlights That Move When You Do
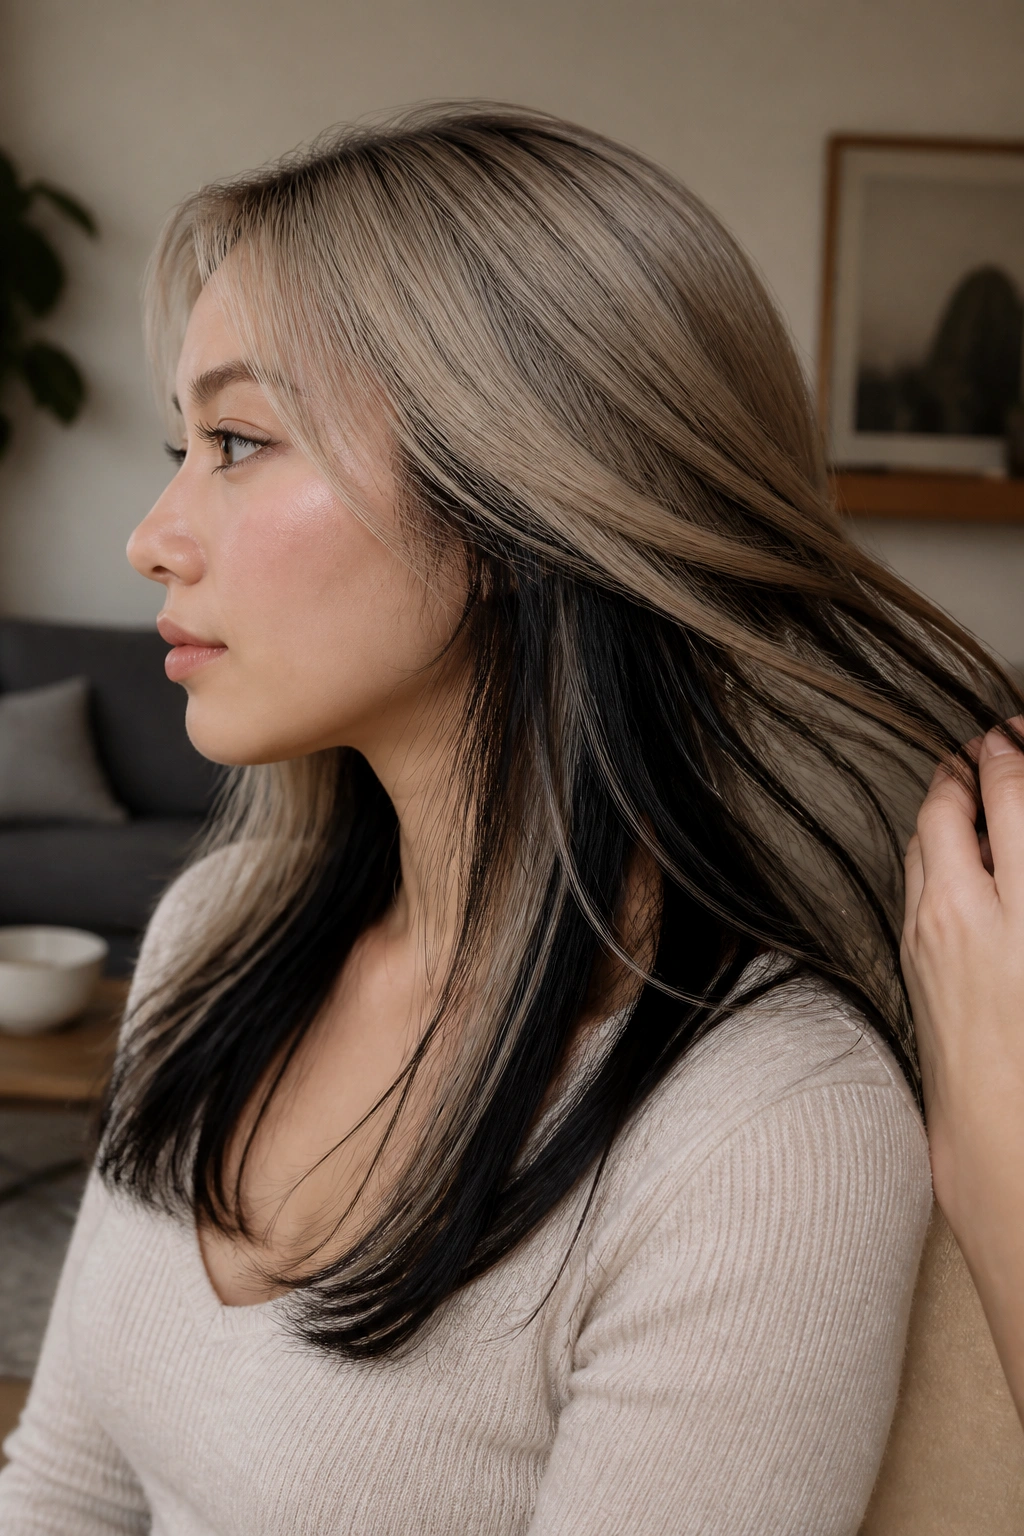
If you want contrast without shouting, hide the black underneath.
This is one of those styles that looks calm standing still and richer the second you turn your head. The outer layer stays soft, while the underlayer flashes black between waves, curls, or straight lengths. For a round face, that hidden depth is useful because it adds dimension without building width around the cheeks.
What Makes It Clever
The black pieces sit below the top veil of hair, so the color shows in motion instead of sitting flat across the front. That means you get the moodiness of black without turning your face into a dark frame. It’s especially nice on people who wear their hair half-up, because the lifted top layer reveals the undercolor in a clean strip.
- Leave the top 1.5 to 2 inches untouched.
- Paint the black on the mid-lengths and lower thirds.
- Keep the visible front pieces softer than the interior.
- Use a shine spray, not a heavy cream, so the movement stays loose.
That last part matters. Heavy products kill the effect fast.
5. Curtain Bangs With Black Streaks at the Cheeks

Curtain bangs and black highlights make a very good pair when the goal is to slim the face visually.
The bangs split down the center and create a vertical opening right where round faces need it most. Then the black streaks at the cheeks pull the eye downward, which stops the face from reading as one wide curve. I like this combo on hair that already has some bend in it, because the movement keeps the bangs soft instead of boxy.
The worst version is the one that gets too blunt. Full, heavy fringe plus thick black pieces can feel like a curtain walling off the face. That is not what you want. What you want is a little swing at the brow line and darker pieces that feather into the cheek area, not sit on top of it.
This style is also forgiving during grow-out. Curtain bangs soften before blunt ones do, and the black pieces blend into the layers instead of shouting for attention every time they shift.
6. Long Layers That Let Black Highlights Travel
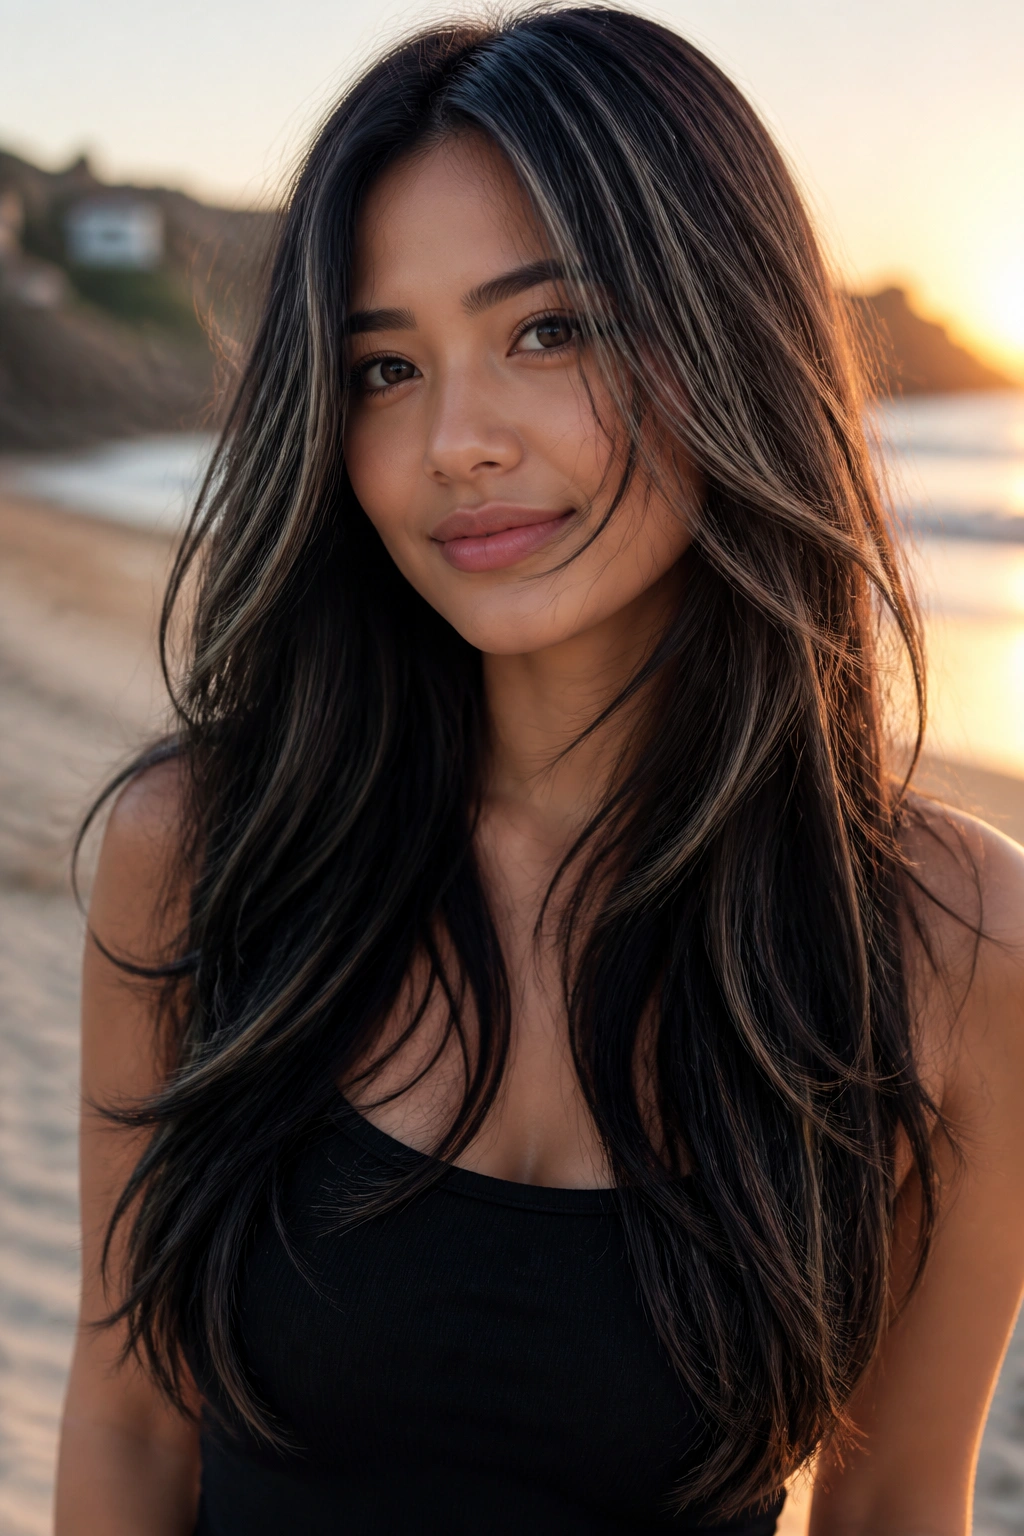
Unlike one-length hair, long layers give black highlights somewhere to go.
That matters on a round face because a blunt cut tends to stop the eye at one width line. Long layers break that line into pieces. The black ribbons can start near the temple, continue through the mid-lengths, and taper near the ends, which pulls the face down in a way that feels natural rather than styled to death.
Best For
This look is strongest on thick straight hair and loose waves. Thick hair holds the contrast without collapsing, and the layers prevent the dark pieces from sitting like heavy stripes. If your hair is fine, keep the black highlights narrow and avoid too many of them near the outer edge. Too much contrast on fine hair can make the ends look thin.
A good ask for your colorist is three to five face-framing ribbons plus a couple of softer pieces through the back. Not a dozen. Not a grid. Just enough to keep the shape moving.
7. Babylight-Thin Black Highlights on Curly Hair
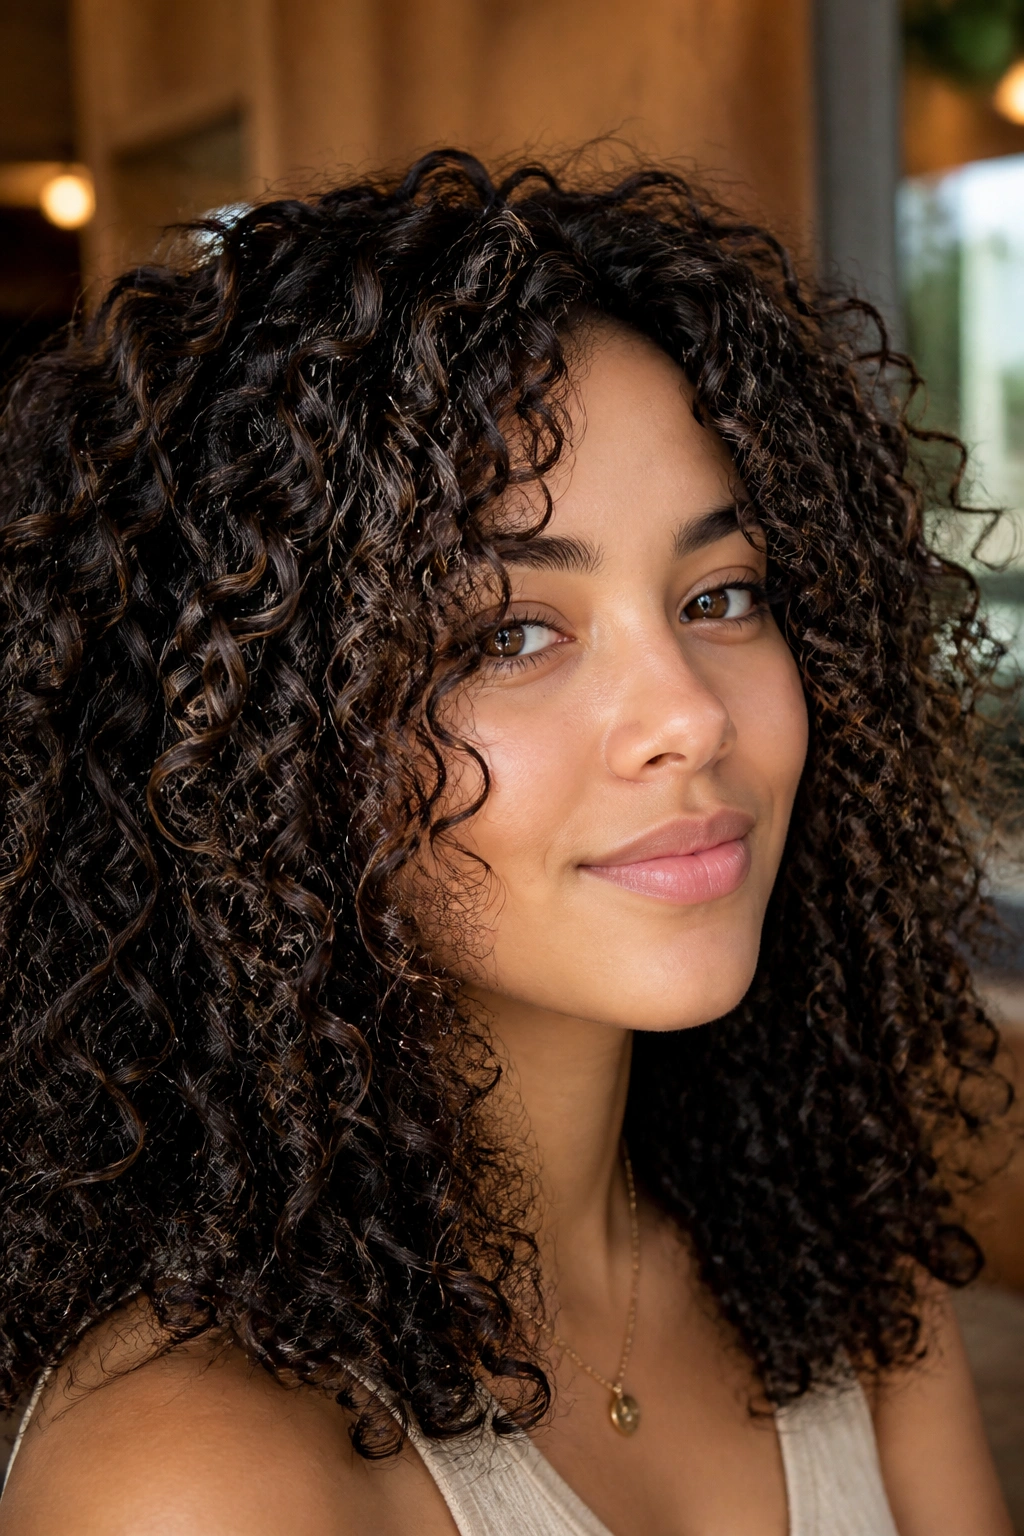
Curly hair does not need big black streaks to make an impact.
Tiny babylight-style pieces can do more work than chunky panels, especially on a round face. The curls already bring width and texture, so the color should support the shape, not fight it. Thin black highlights placed inside the curl pattern create depth between the coils and make the hair look taller from the crown to the ends.
What to Watch For
- Put the darkest pieces in the interior, not just the outer halo.
- Keep the curl line around the cheeks lighter or softer.
- Use a diffuser on low heat so the curls keep their spring.
- Ask for a gloss if the black comes out too stark against your base.
If you’ve ever seen curly hair that looked too heavy around the sides, this is usually why. The color sat on the outside edge instead of sinking into the texture. A better placement makes the whole head feel more lifted.
8. A Smoky Pixie With Piecey Black Accent Strands
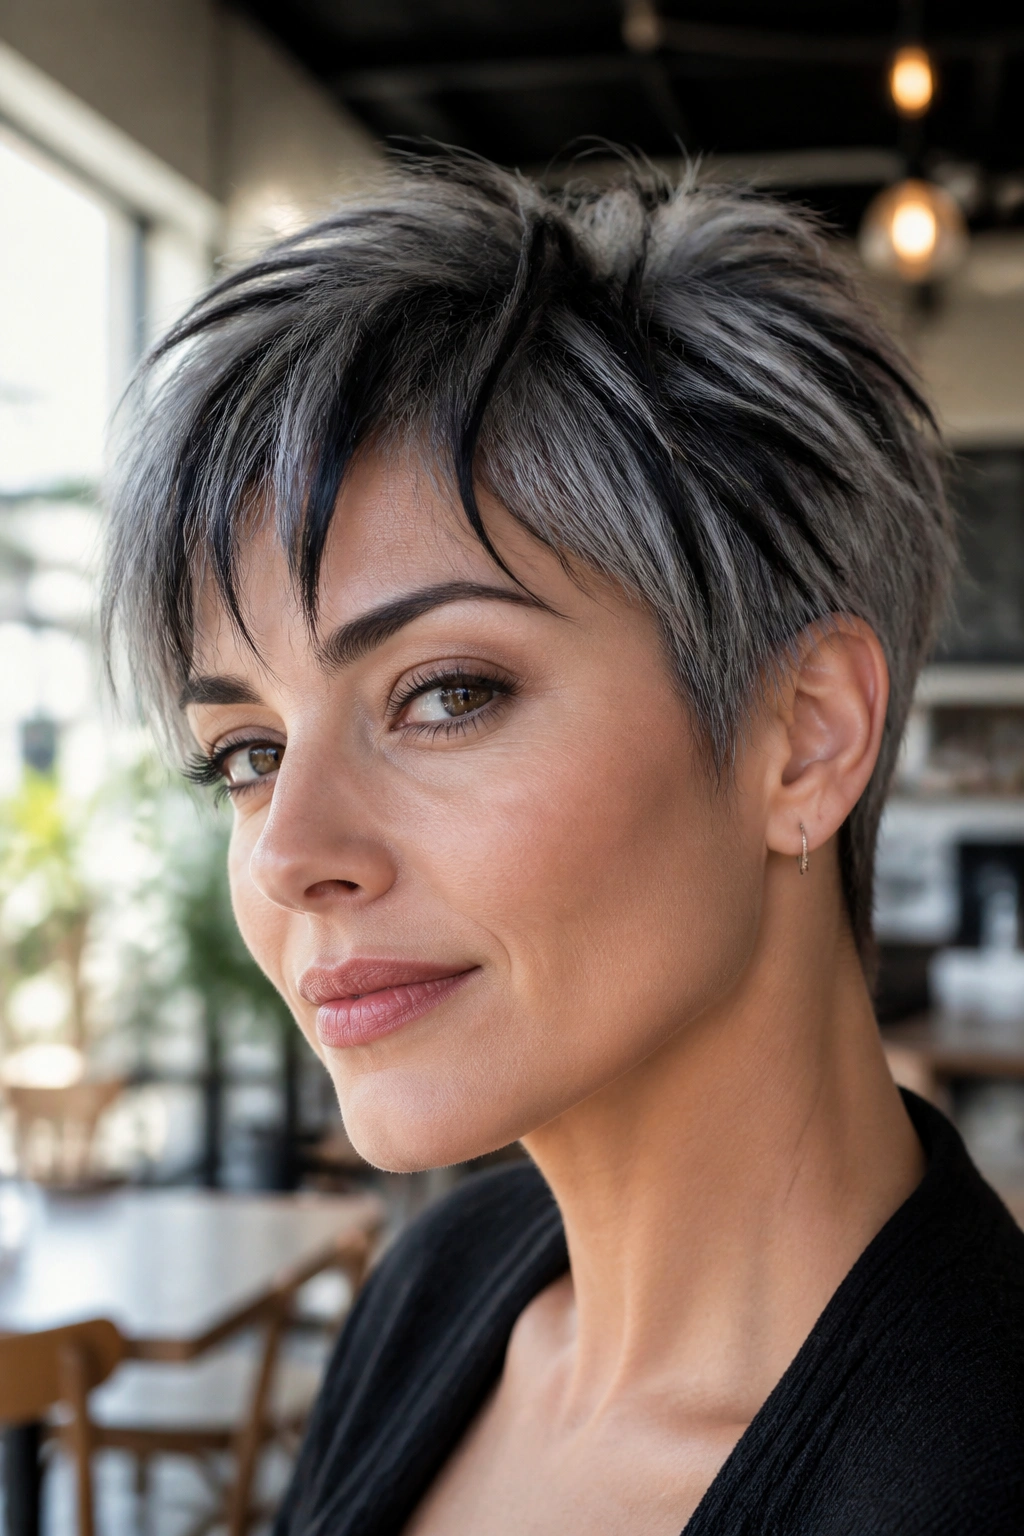
Short hair is not the problem. Bad placement is.
A pixie can flatter a round face when the black accents are piecey and directional. Instead of one dark cap of color, you want short black strands that break up the top and pull attention upward. That keeps the face open at the sides and gives the crown a little lift, which round faces always appreciate.
The best versions have a slightly longer top and softer temples. Think of the black as punctuation, not the whole sentence. A few inky strands at the fringe, a little darkness through the crown, and a lighter edge near the ears can change the shape without making it severe. It’s a neat little trick, and it works.
I’d avoid this if the cut is too blunt around the hairline. A helmet-shaped pixie plus black highlights can make the face read wider. Piecey texture fixes that fast.
9. Black Highlights on a Textured Bob
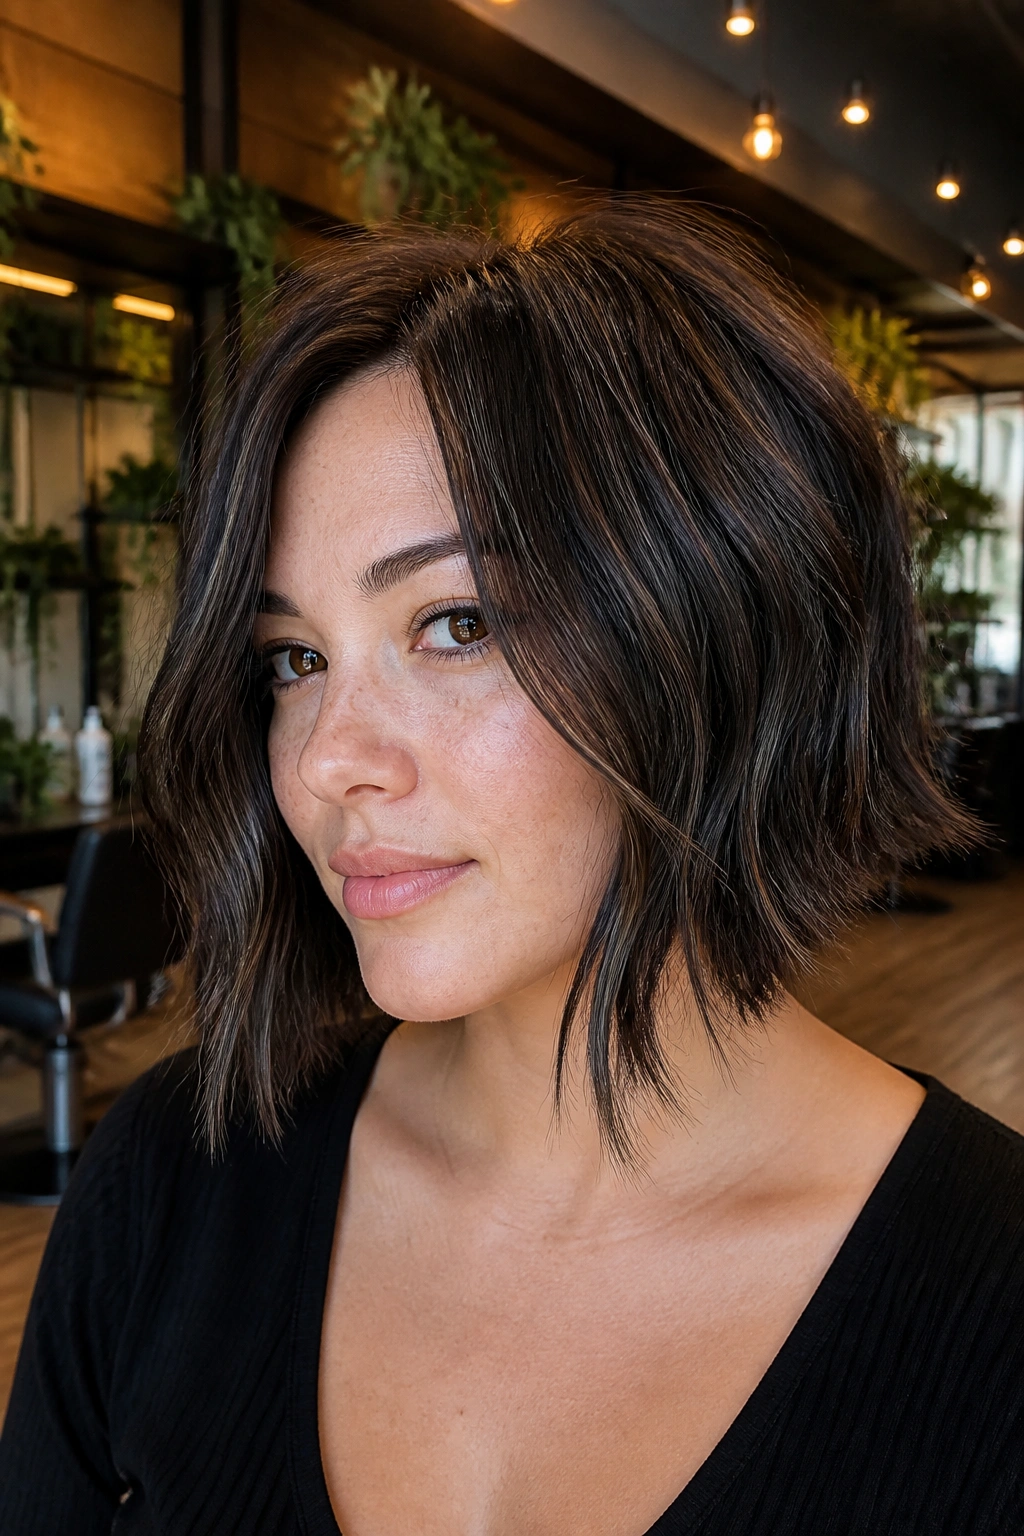
Can a bob flatter a round face without looking too blunt? Yes, if the texture is doing its job.
A textured bob works because the ends are broken up and the black highlights can fall through those gaps instead of sitting like a solid block. The color adds edge, the texture adds movement, and the face gets a cleaner outline. That’s the whole point.
How to Ask for It
- Keep the front pieces slightly longer than the back.
- Place black highlights at the temple and just under the cheekbone.
- Ask for soft texturizing at the ends, not razor-thin wisps.
- Leave the interior lighter or softer so the shape doesn’t close in.
This is one of the best looks for people who want structure but not a heavy style. A bob can get boxy fast. Black highlights fix that when they’re used sparingly and in the right spots.
10. Blue-Black Panels Around the Jaw
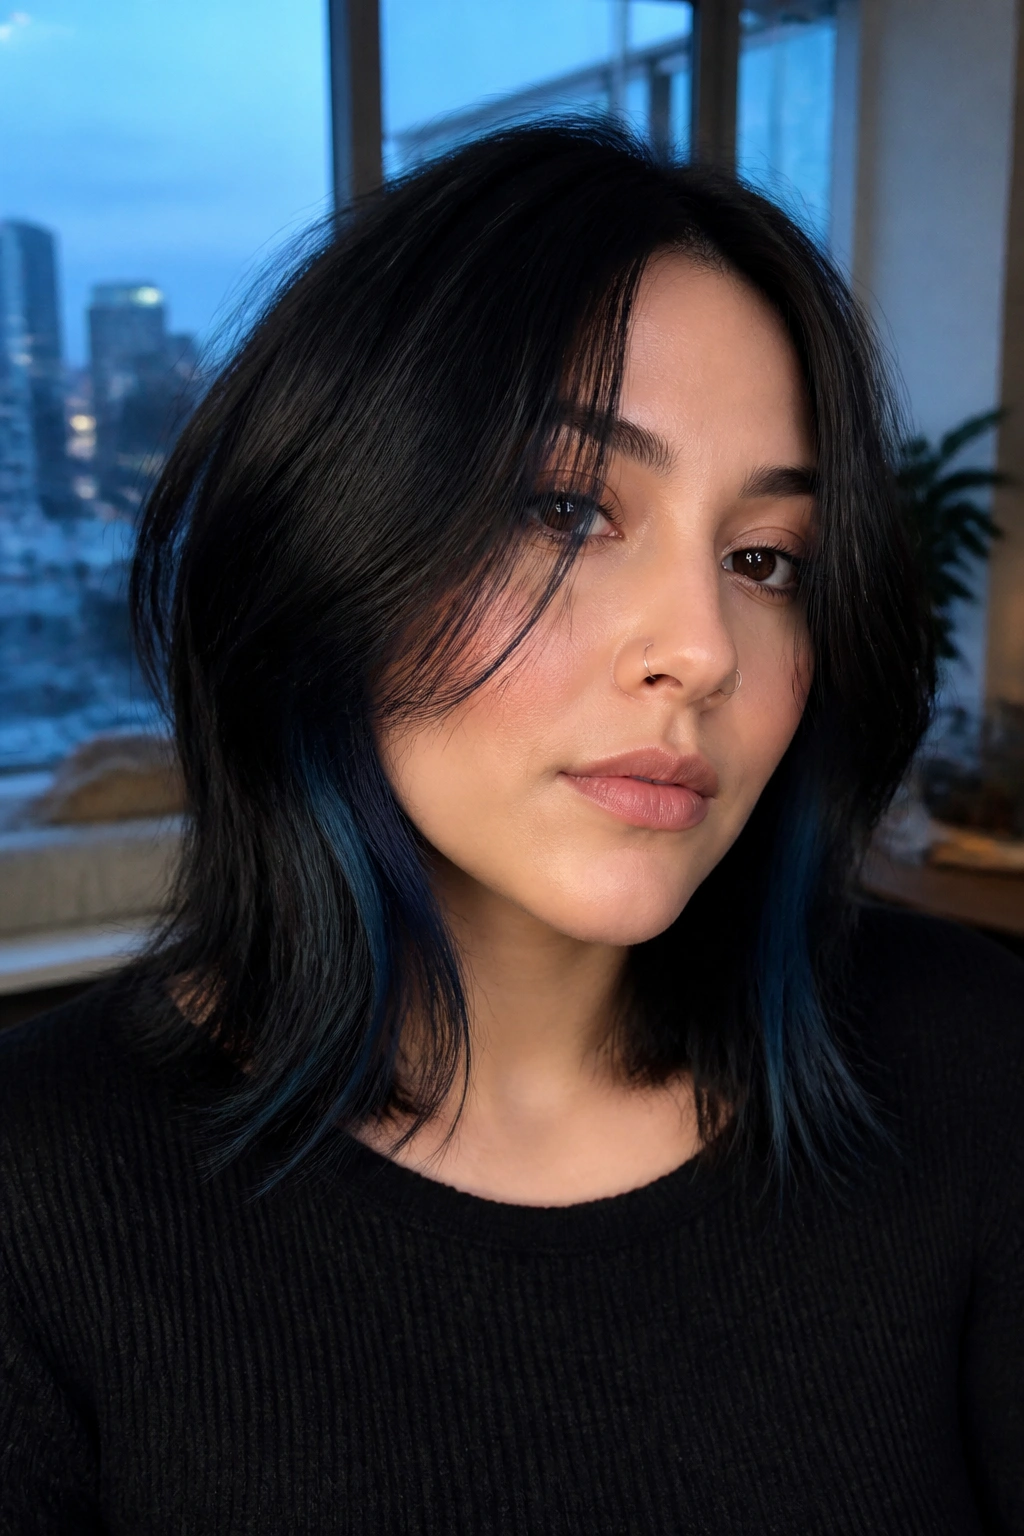
Blue-black is not flat black. That difference matters.
The blue sheen keeps the color from looking chalky or dead, which is a problem with some darker dyes on round faces. A cool reflective black around the jawline can sharpen the lower face without making it look harsh. It’s especially good if you have a softer jaw and want a more defined edge.
What Makes It Work
The panels need to stay narrow. About 3/4 inch to 1 inch wide is plenty. Wider than that, and the darkness starts to take over. Narrower than that, and you still get the shine without losing movement.
This look loves a side part, but it can also work with center-parted styles if the front pieces are long enough to fall below the chin. Pair it with a gloss every few weeks, and the blue cast stays crisp instead of muddy. That little cool gleam is what gives the style its shape.
11. Peekaboo Black Highlights Beneath Blonde Lengths
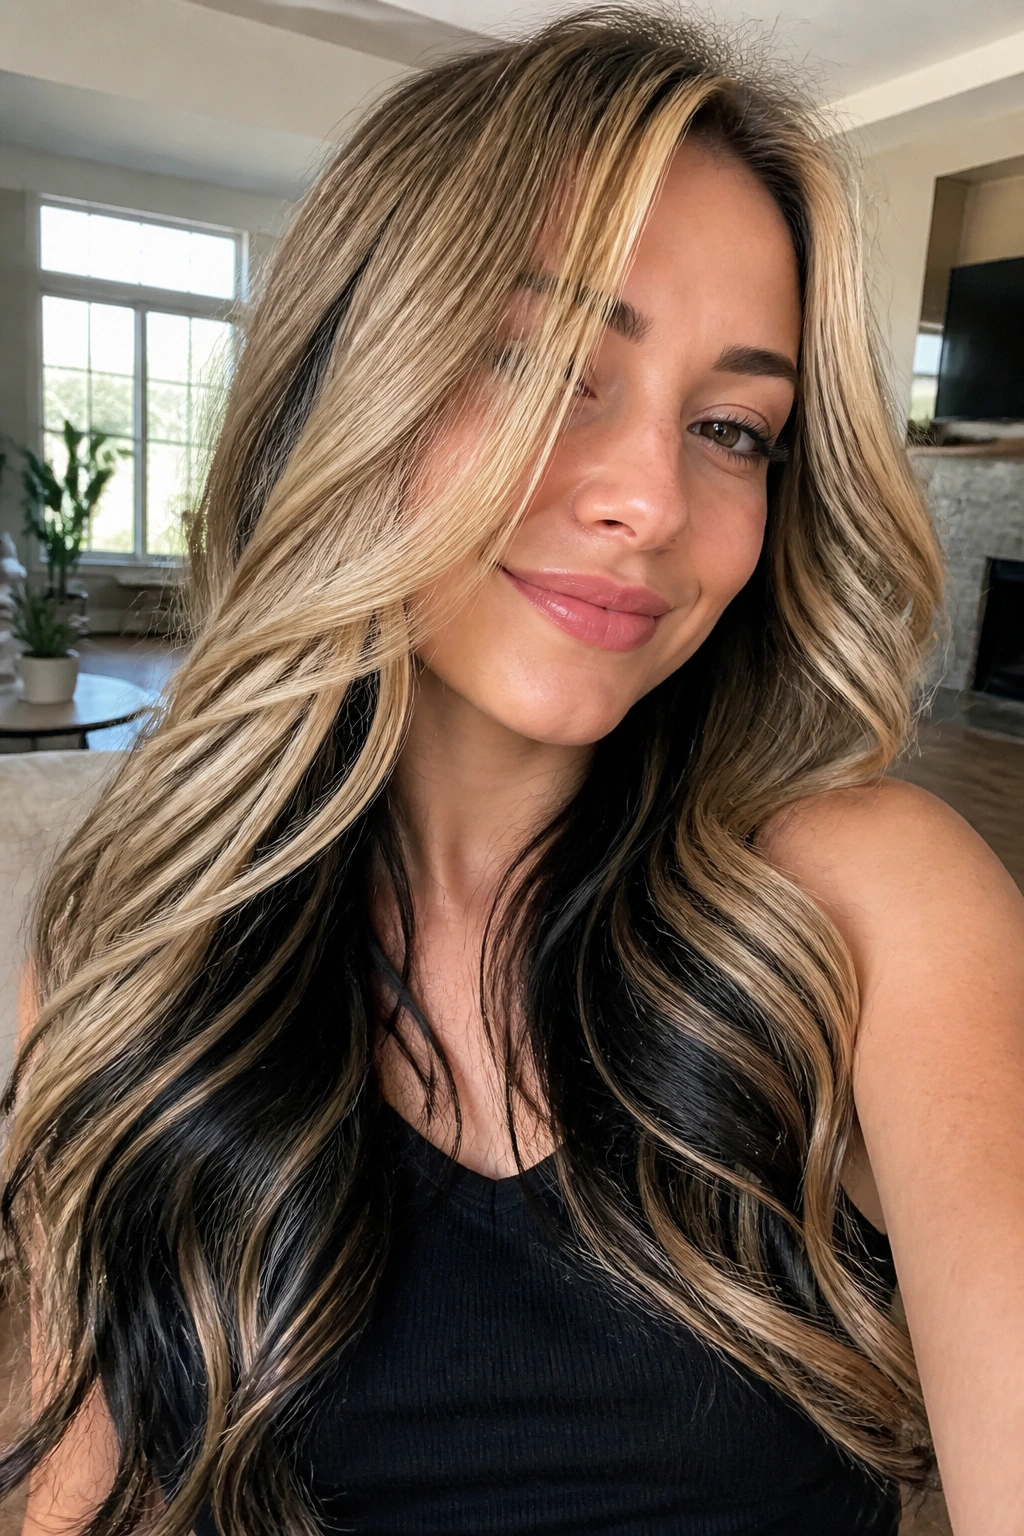
Peekaboo black highlights are for the person who wants contrast but doesn’t want the whole head to read dark.
The blonde layer on top keeps things bright around the face, while the black underneath gives the hair some shadow and depth. On a round face, that’s useful because the eye sees brightness first and depth second. The face stays open. The color still has a little edge.
This works especially well on long hair. When the lengths move, the black underneath flashes through the blonde in strips and shadows, which makes the whole style feel fuller. If your hair is pin-straight, the effect is subtler. If it has a bend, it looks richer right away.
It’s also one of the easier ways to live with darker color. The grow-out is soft, and the black doesn’t sit right at the hairline where it can harden features. That makes a difference on rounder shapes.
12. Black Foils on a Shag Cut
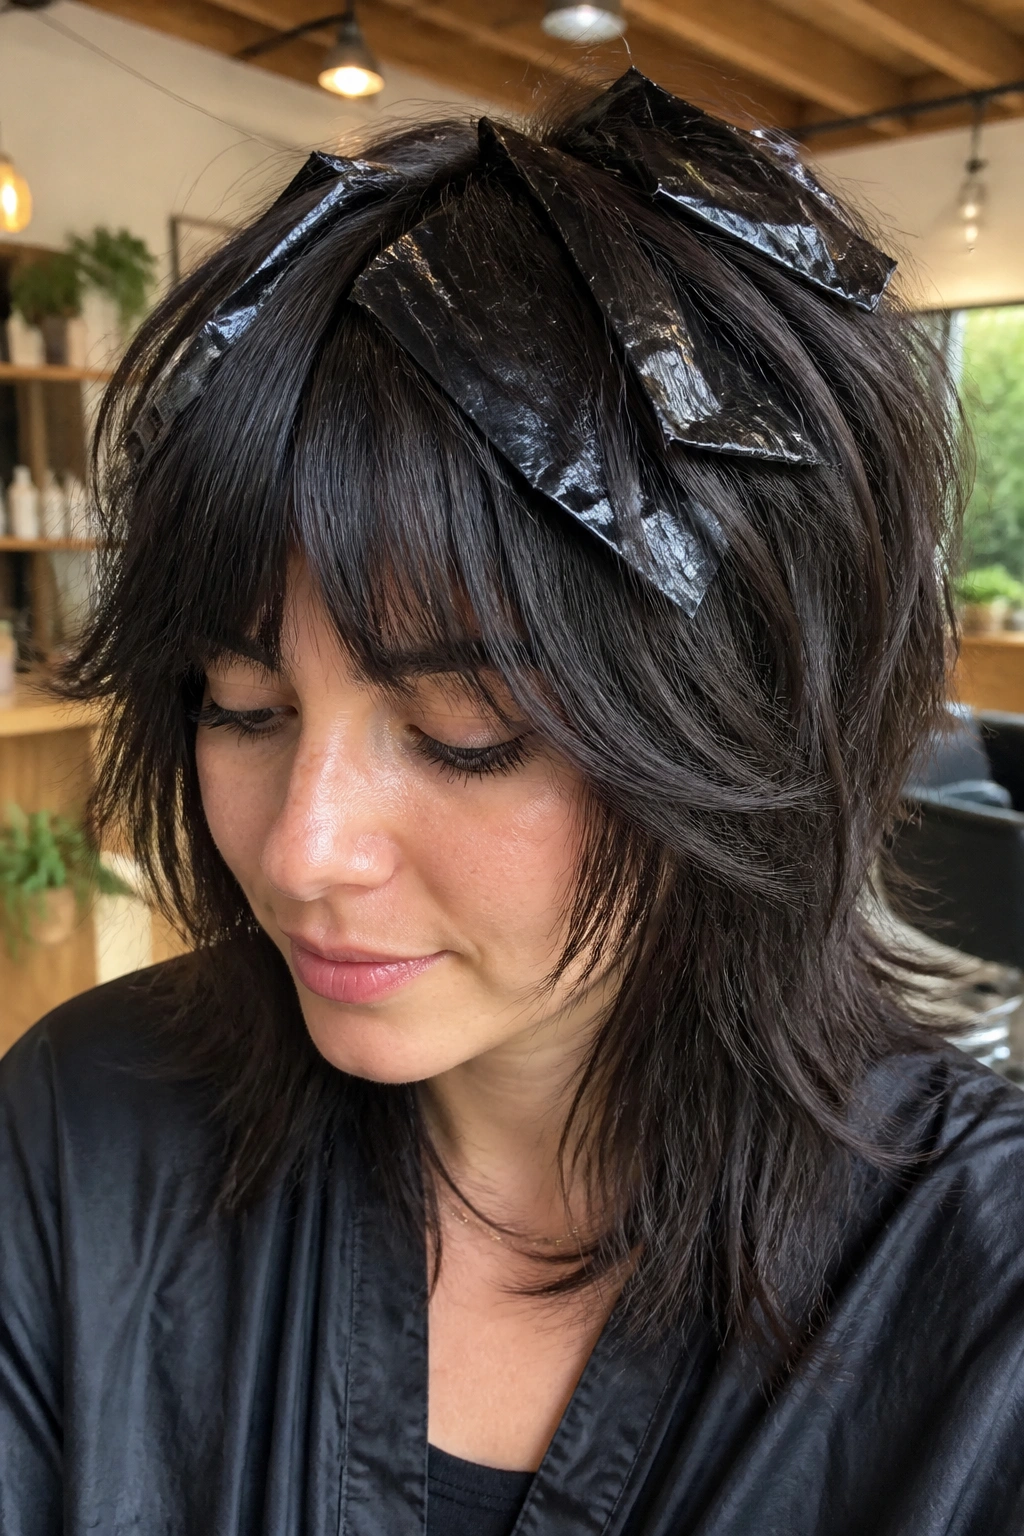
A shag and black foils get along because both rely on broken lines.
Unlike a blunt cut, a shag has layers that flick in different directions, so the black pieces never sit in one flat plane. They catch on the crown, around the temples, and through the mid-lengths, then disappear again. For a round face, that scattered movement keeps the outline from feeling too circular.
Why This Combo Works
The shag already builds height at the top and movement through the sides. Black foils add contrast where the layers bend, which makes the hair look more piecey and less dense around the face. If your hair is fine, this is a smart way to fake fullness without adding width.
I’d keep the foil count moderate. Too many dark pieces can make a shag collapse into a busy blur. Six to ten foils around the crown and face frame is usually enough. You want shadows, not a blackout.
13. Black Highlights at the Crown for a Little Height
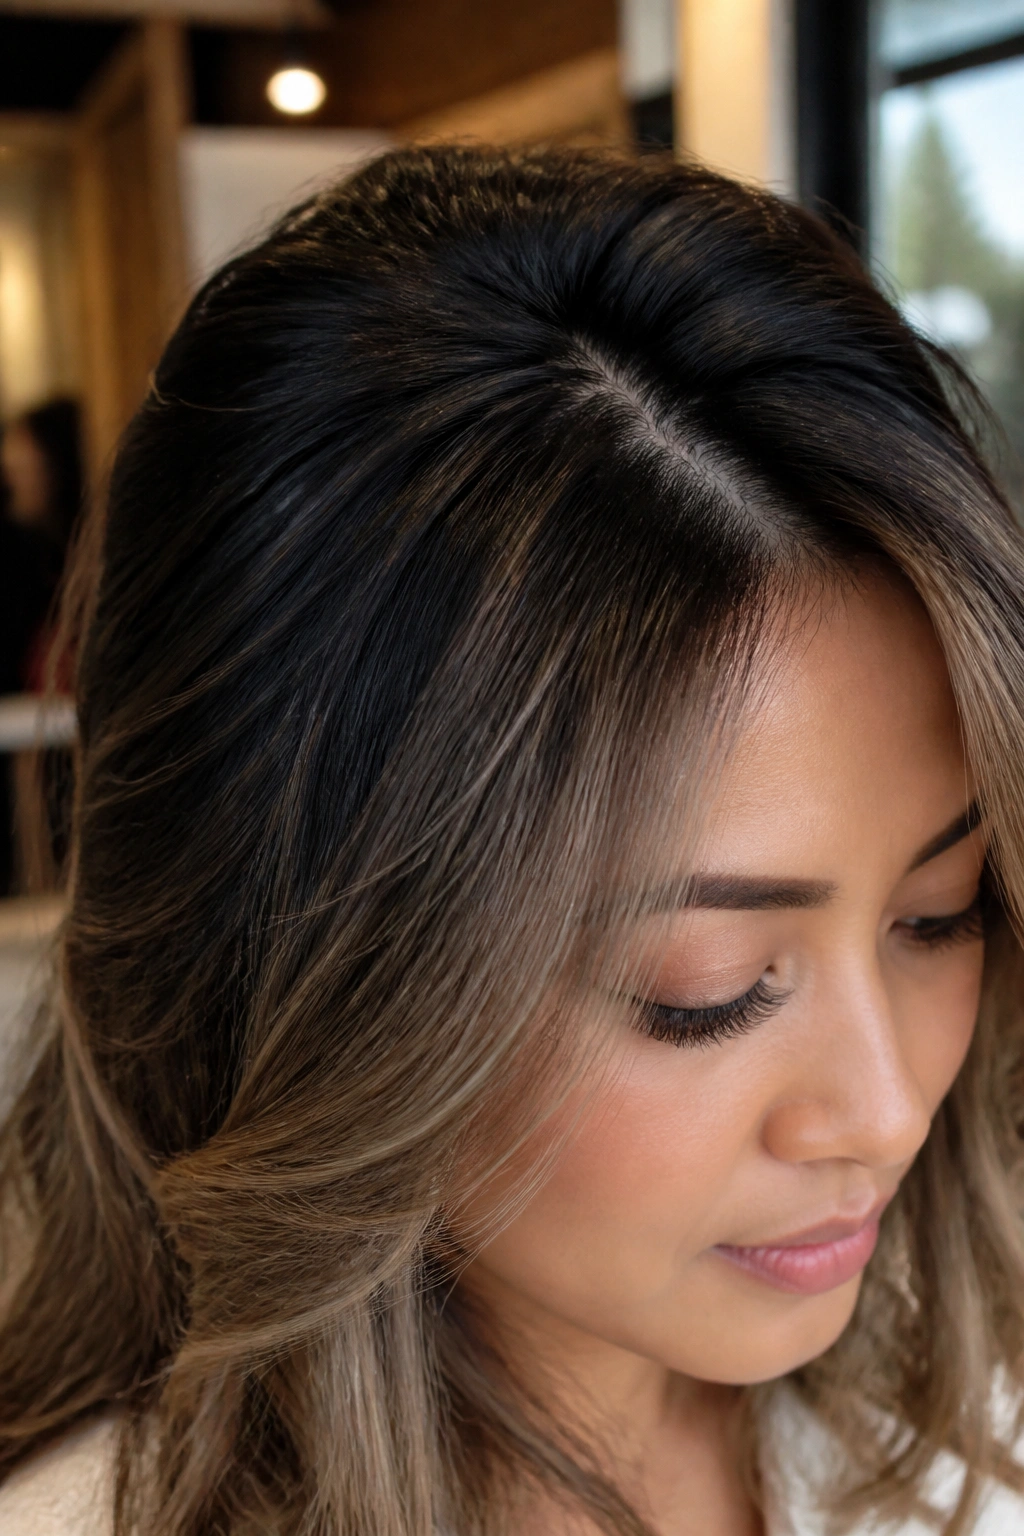
A little darkness near the crown can make a round face look longer.
That sounds backward at first, but it makes sense once you see it in motion. When the crown has depth, the eye moves upward before it moves outward. That creates the feeling of lift. On softer face shapes, that lift is worth more than a dozen face-framing pieces placed in the wrong spot.
Why It Works
The black needs to be feathered, not banded. A hard line across the top of the head will drag the whole style down. A soft set of babylight-thin black strands, woven through the crown and just behind the hairline, gives shadow without making the top look heavy.
- Keep the darkest pieces at the top third of the head.
- Blend them into lighter lengths near the cheek area.
- Use root lift or mousse if your hair collapses flat.
- Avoid placing the darkest section right over the temples.
That last note is easy to miss. Temples are usually where round faces need softness, not weight.
14. Sleek Straight Hair With Vertical Black Highlights
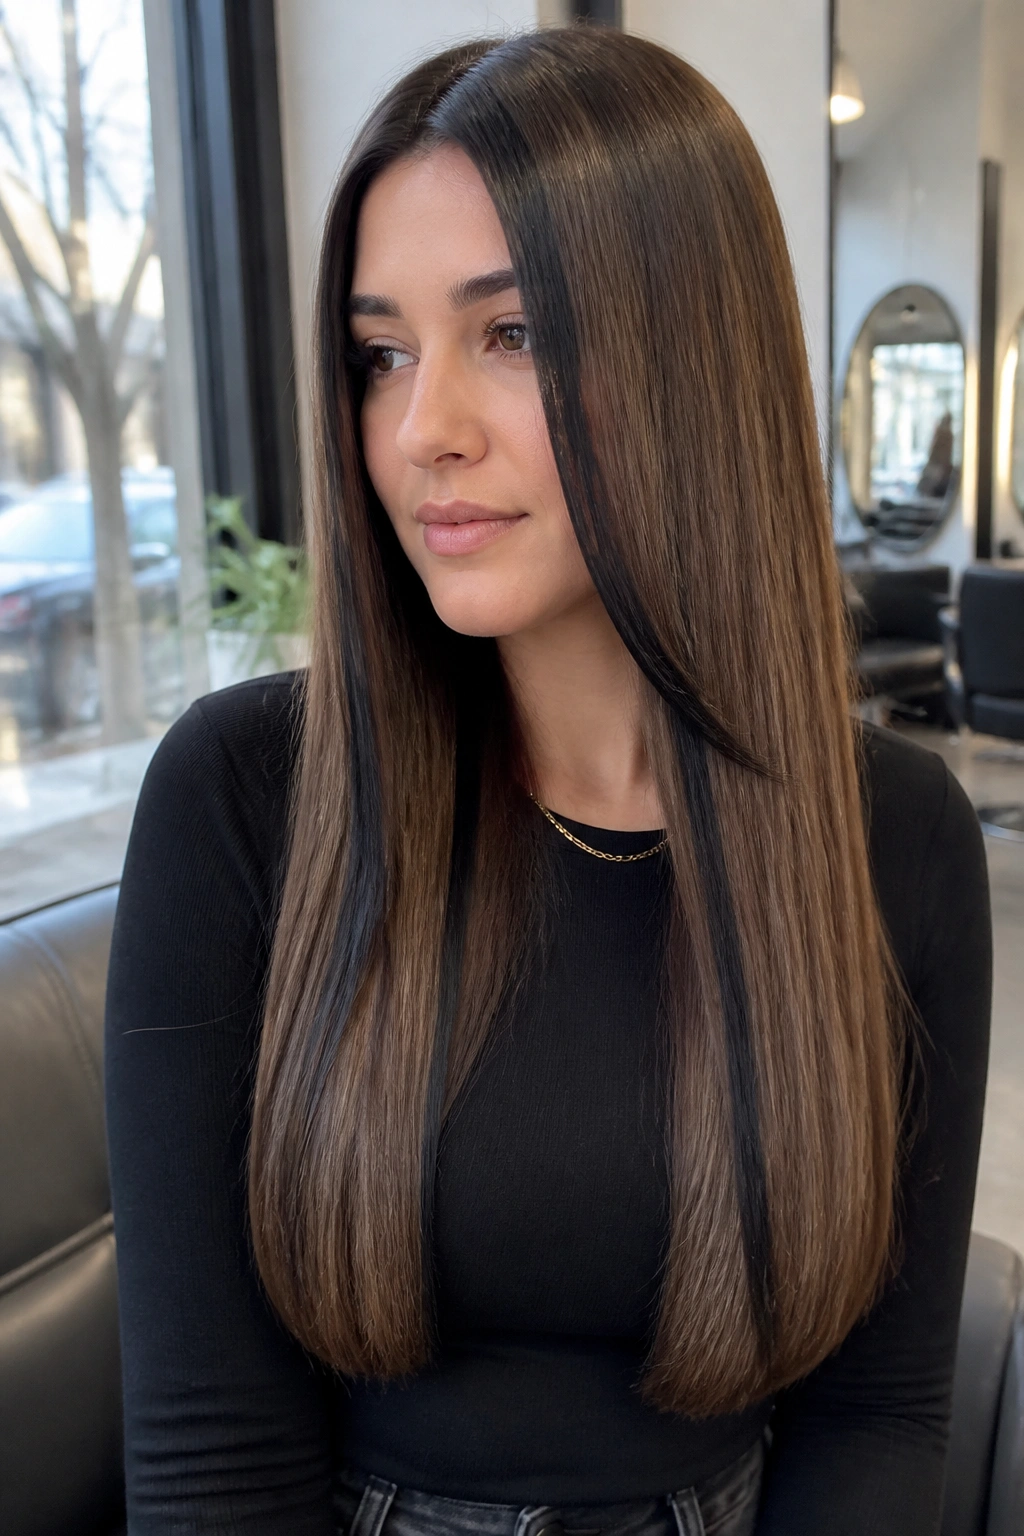
Sleek hair can flatter a round face when the black highlights run top to bottom.
A straight finish creates the cleanest possible line, which is helpful if your hair tends to puff outward at the sides. Black ribbons placed vertically through long lengths pull the eye down. They also look sharp against a smooth base, so the face gets edge without extra bulk.
The key is restraint. Too many black panels on glass-straight hair can feel stripey. Too few, and the style looks plain. I like one strong face-framing piece on each side, then a couple of softer interior ribbons that start at the mid-lengths. That gives the hair a long, lean look.
Use a heat protectant and a flat iron set around 300°F to 350°F if your hair is fine, a little higher if it’s coarse. The finish should move, not stick. A tiny bend at the ends keeps the style from feeling severe.
15. Auburn and Black Highlights for Warm Skin Tones
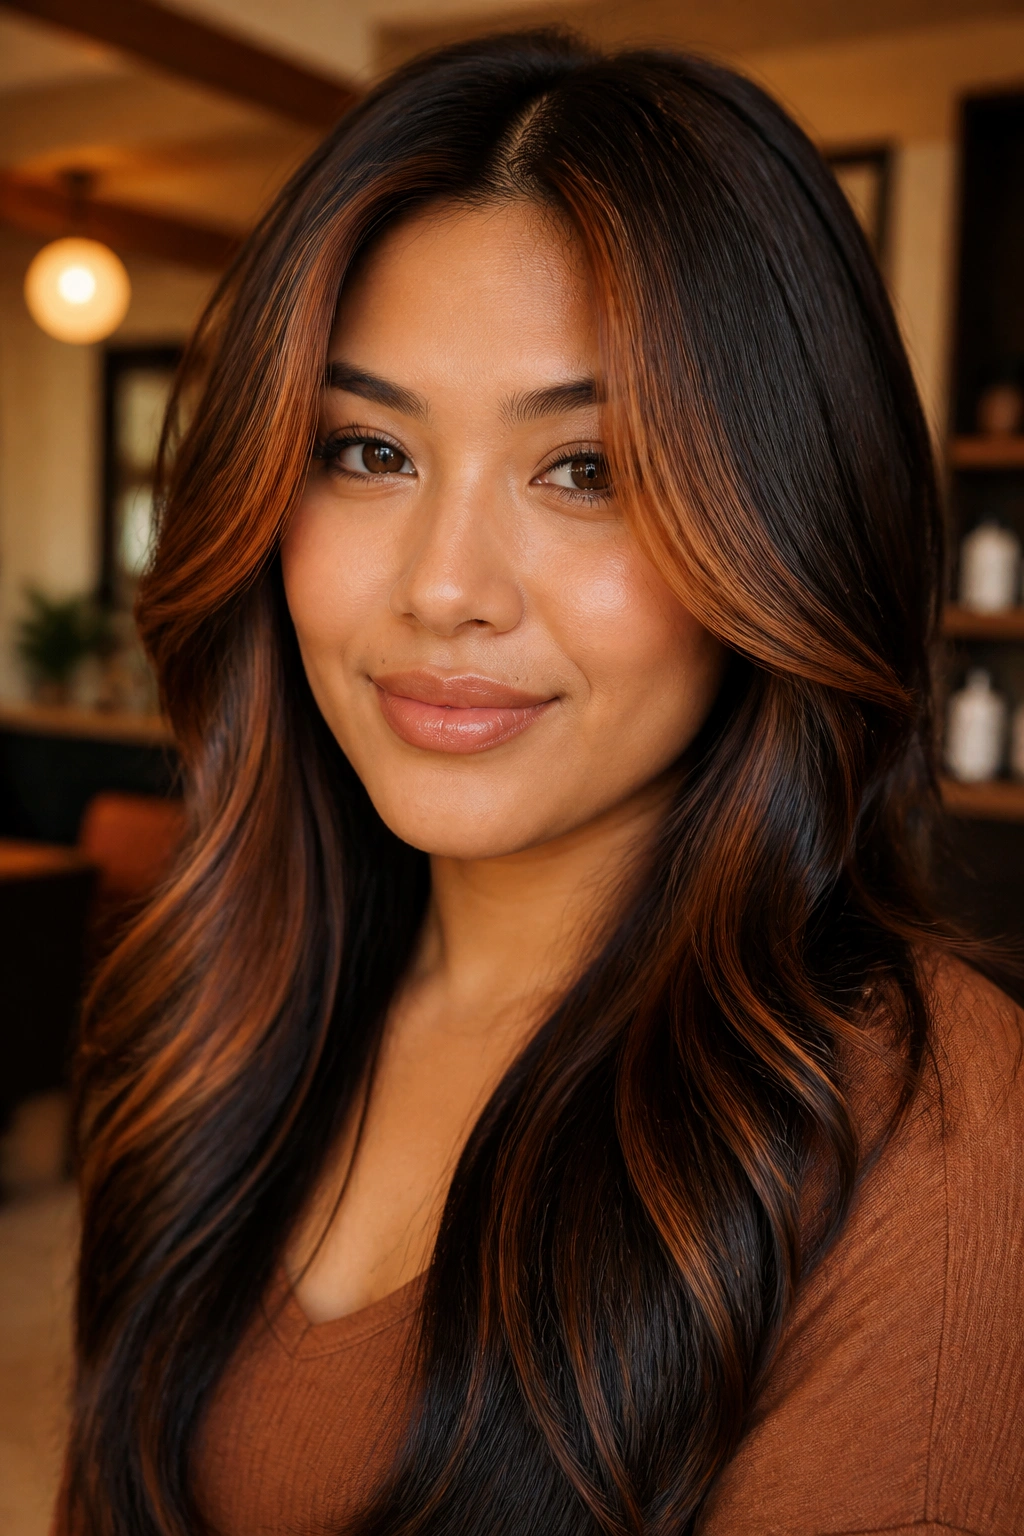
Auburn and black is a very good mix when you want contrast that still feels warm.
Pure black can be hard on some warm complexions if it sits too close to the face in wide sections. Auburn softens that edge. The red-brown note keeps the black from looking flat and gives the whole style a deeper, richer look. On round faces, that warmth matters because it stops the darker pieces from overpowering the cheek area.
How to Wear It
Keep the auburn around the front and the black slightly deeper underneath or through the mid-lengths. That way the warm color brightens the face while the black still does the shaping work. If your natural hair sits somewhere between brown and copper, this combo looks especially natural.
This is one of those styles that looks expensive when the tones are blended well and a little cheap when they’re not. Harsh separation kills it. A soft transition—almost like the colors are sliding into each other—makes the whole thing feel richer.
16. Thick Hair With Black Face-Framing Highlights
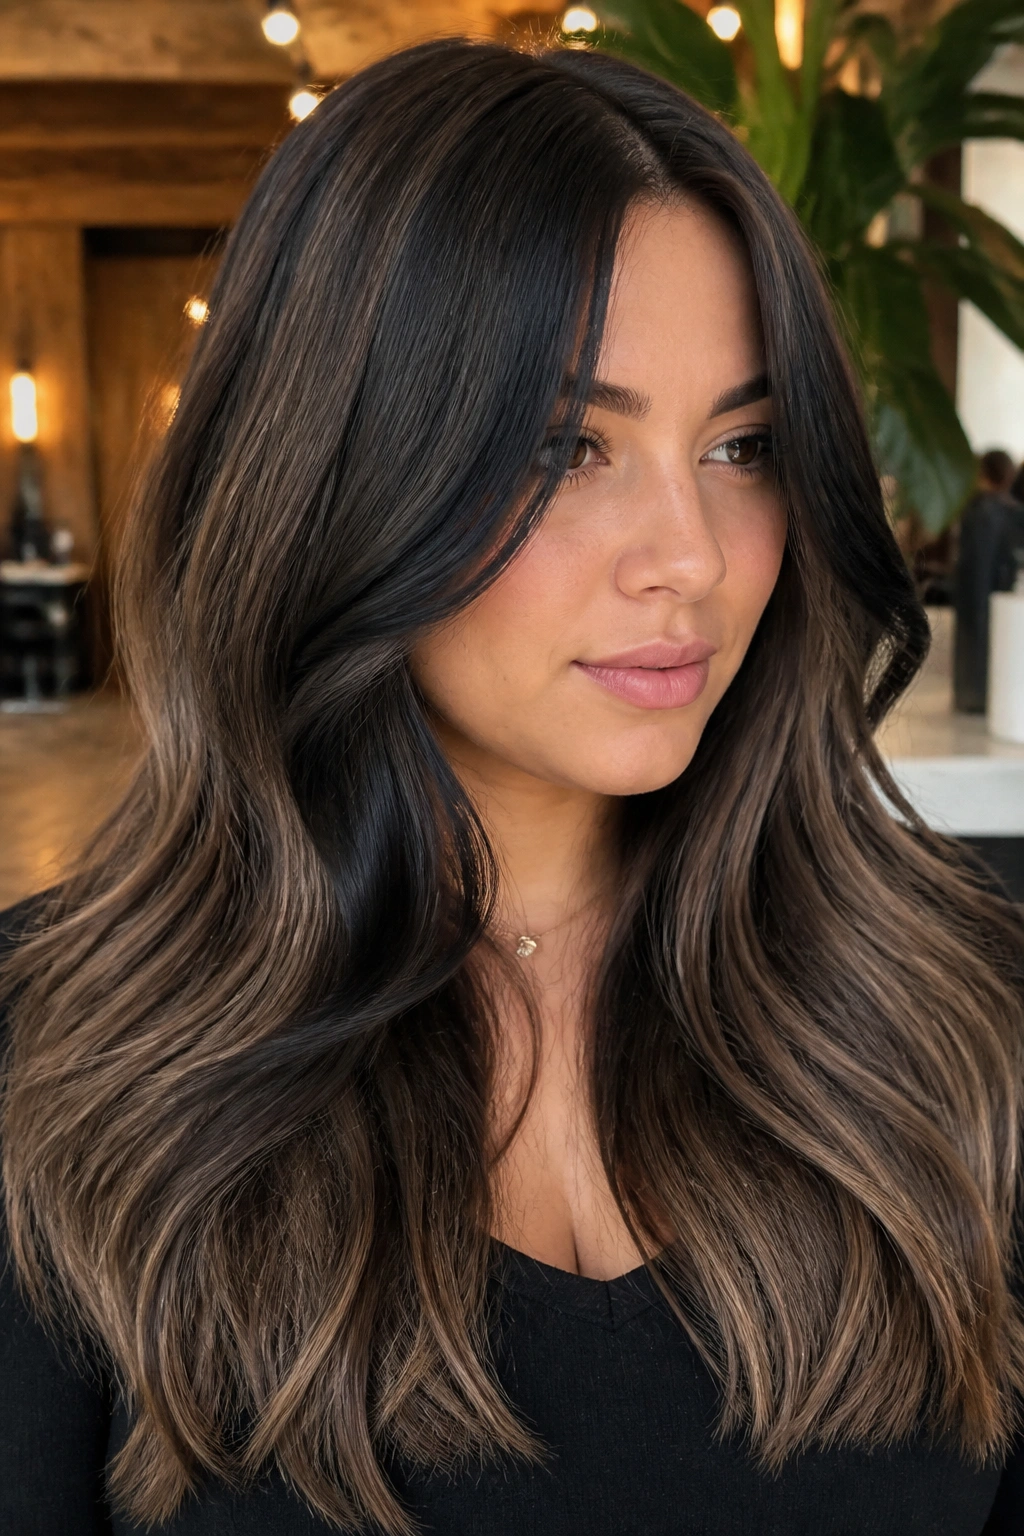
Thick hair can carry stronger black highlights, but the placement still has to be smart.
When the hair has a lot of density, narrow little ribbons can disappear. You need pieces with enough weight to show through, but not so much that they widen the face. The outer frame should stay controlled while the inside of the cut keeps its bulk. That balance keeps the style from swallowing your features.
A Good Setup
- Use 2 to 3 wider face-framing panels instead of many thin ones.
- Keep the darkest pieces below the cheekbone.
- Remove bulk through the back and interior so the front doesn’t balloon.
- Ask for soft layers, not choppy ends, if your hair already feels busy.
Thick hair can look luxurious with black highlights. It can also look bulky fast. The difference is usually a matter of where the weight sits. Get that right, and the face looks longer immediately.
17. A Shadow Root With Black Ribbons Through the Mid-Lengths
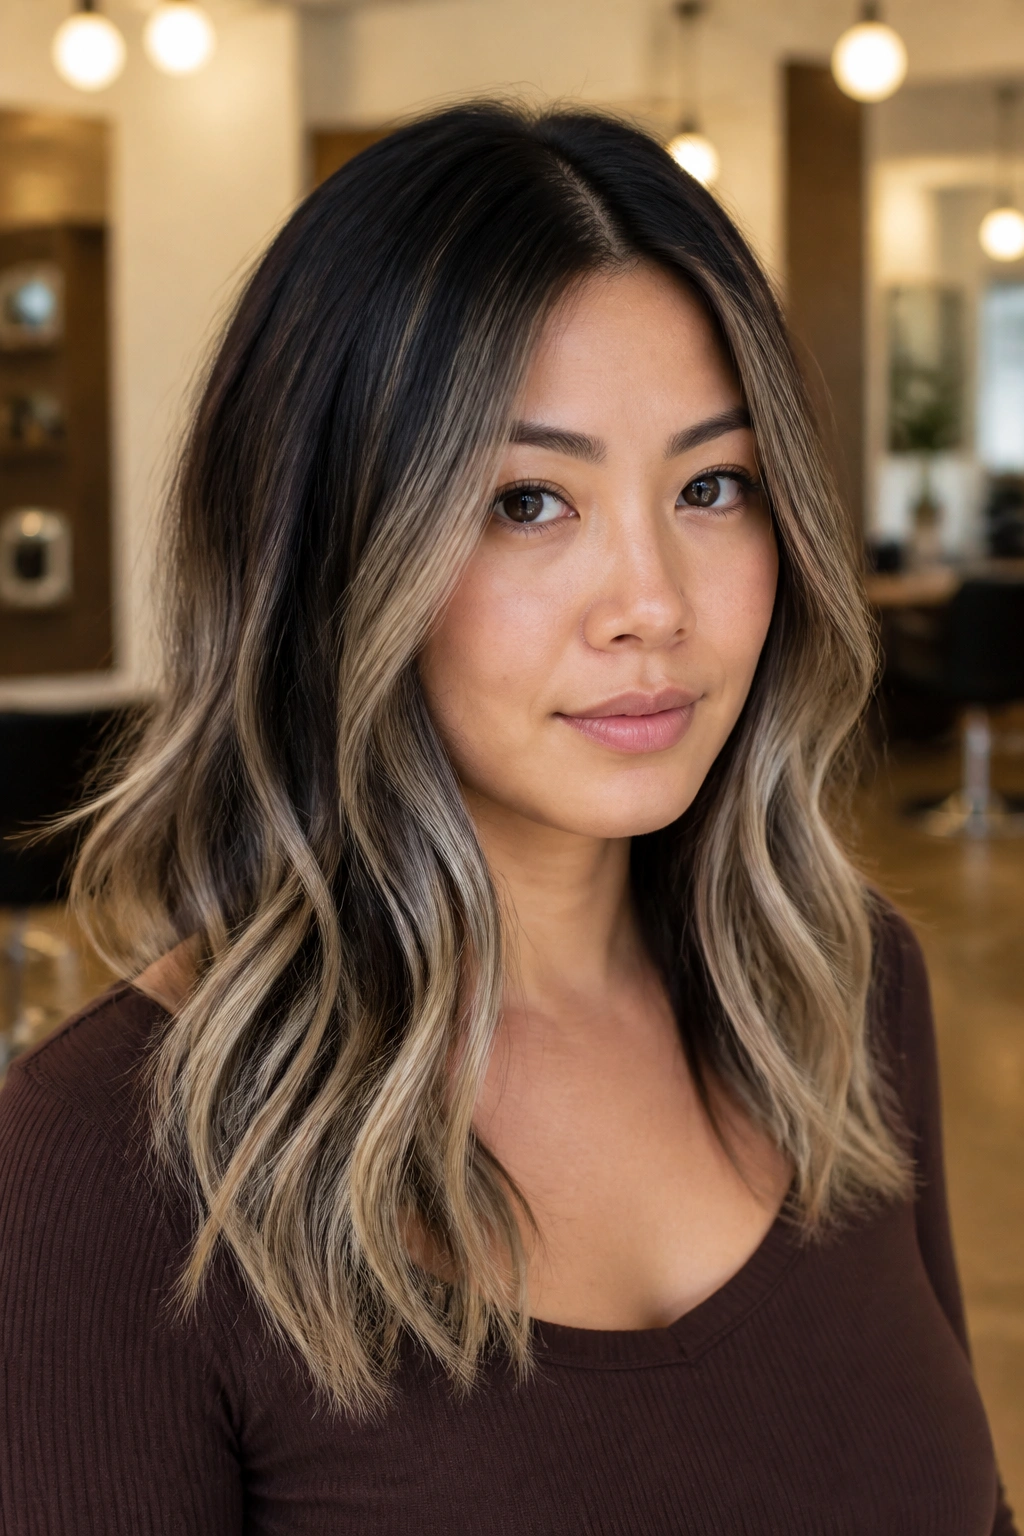
A shadow root is one of the easiest ways to make black highlights feel lived-in.
The darker root gives you a smooth start, then the black ribbons travel through the mid-lengths instead of stopping at the face. That keeps the eye moving down, which is a good thing on a round face. It also softens grow-out, since the root and the darker pieces already belong together.
This style shines on balayage builds. If you’ve got lighter ends, the black bands create contrast without forcing every strand to compete with the face. They sit in the middle of the hair, where they can add depth without crowding the cheeks. That’s smart color, plain and simple.
I like this one because it ages gracefully between appointments. The root doesn’t scream for attention, and the highlight pattern stays readable even when the hair grows an inch or two. A lot of color jobs lose their shape fast. This one usually doesn’t.
18. The Most Forgiving Black Highlight Placement for Round Faces
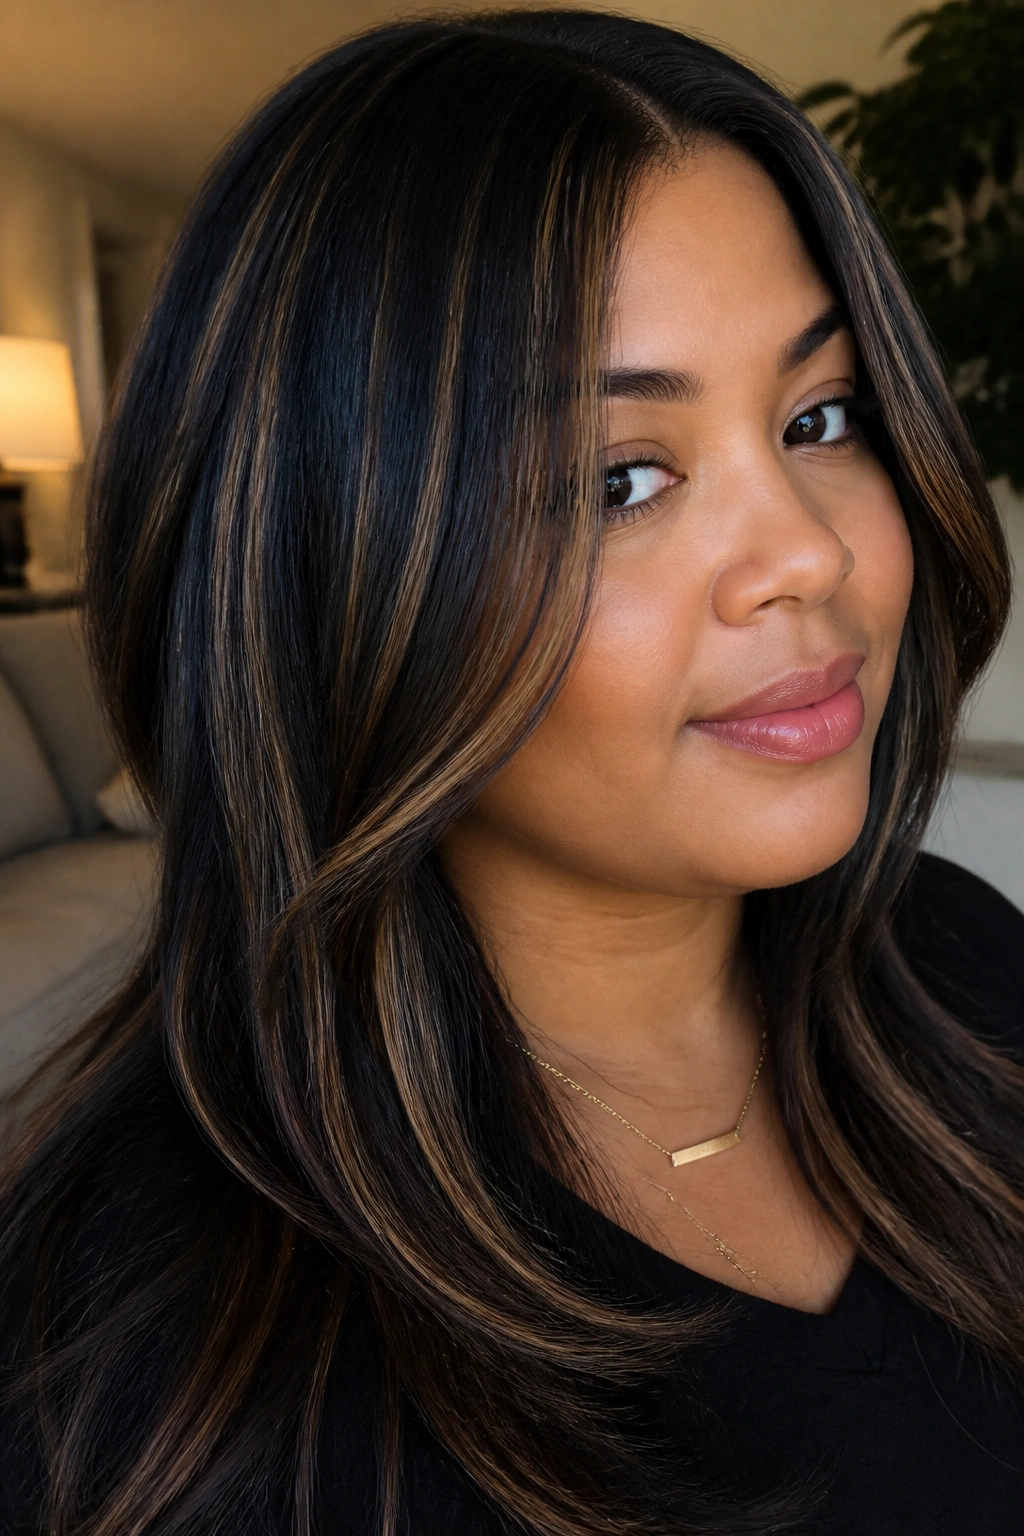
If you only try one placement, make it a diagonal face frame.
Start the black at the temple, let it skim past the cheekbone, and finish below the chin or collarbone. That single line does three jobs at once: it creates length, it breaks up width, and it keeps the color from sitting on the fullest part of the face. It works on long hair, lobs, shag cuts, and even some pixies if the top is left a little longer.
What I like about this placement is how little it asks of the rest of the haircut. You do not need a dramatic chop. You do not need a full color overhaul. You just need the black in the right lane, and the rest falls into place more easily than people expect.
If you’re sitting in the chair and trying to explain it, ask for thin-to-medium black ribbons that angle down from the temple, not wide stripes around the cheeks. That wording gets you closer to the shape you want. And if you’re unsure, start softer. Black can always be deepened. It’s a lot harder to pull back once it turns into a heavy block.
