



Round faces and micro bangs can look like a risky mix, but the right length changes the whole mood. Long micro bangs for round faces work when they skim the brow line, bend a little off-center, or break up the width across the cheeks. Too blunt, and the fringe can feel heavy. Too short, and the face can look shorter than it really is.
The sweet spot sits in that narrow band between baby bangs and a classic full fringe. It is short enough to feel sharp, yet soft enough to keep some movement. That little bit of softness matters more than people think. A round face usually looks best when the hair adds a line, a lift, or a bit of angle near the forehead instead of a hard horizontal bar.
Texture changes everything, too. A stubborn cowlick, a strong swirl at the hairline, or dense hair that puffs up after drying can swing the result from chic to awkward in a heartbeat. A good stylist looks at that first, then decides whether the fringe should be straight, curved, piecey, or grown out a touch longer at the temples.
The styles below lean into those details in different ways. Some are crisp. Some are airy. A few are surprisingly forgiving, which is usually what people want once the scissors have come out.
1. Brow-Skimming Straight Micro Bangs
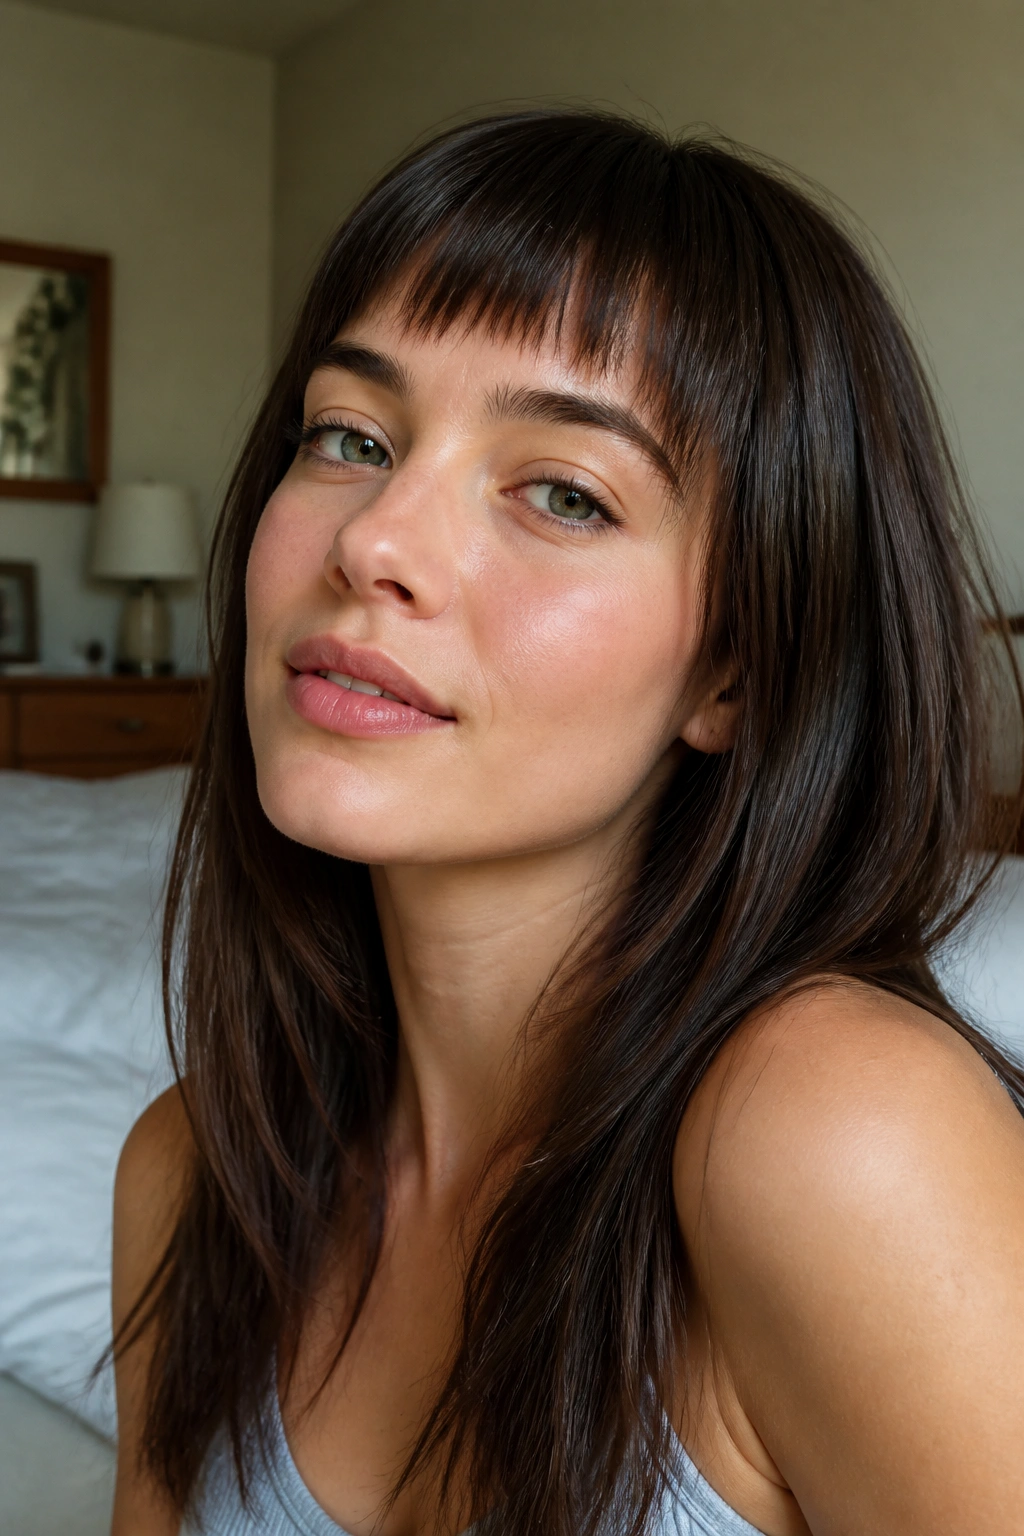
A straight fringe can work on a round face when it stops just shy of the brows. The trick is keeping the line clean without making it severe. Aim for the shortest point about 1/4 inch above the brow bone, then let the corners sit a little longer so the fringe does not read as a hard shelf.
That tiny bit of length at the edges helps the eye travel outward instead of getting stuck in the center. It also keeps the look from making the face feel wider than it is. I like this version on people whose hair already has some natural swing, because a fringe that falls perfectly flat can look stiff fast.
Keep the finish soft. Not fluffy. Soft. A quick pass with a small flat brush and a low heat blow-dryer is usually enough, especially if you direct the roots forward first and then bend the ends under for half a second. Do not cut this version too high unless you want a strong, graphic look that needs daily styling.
2. Soft Curved Micro Bangs
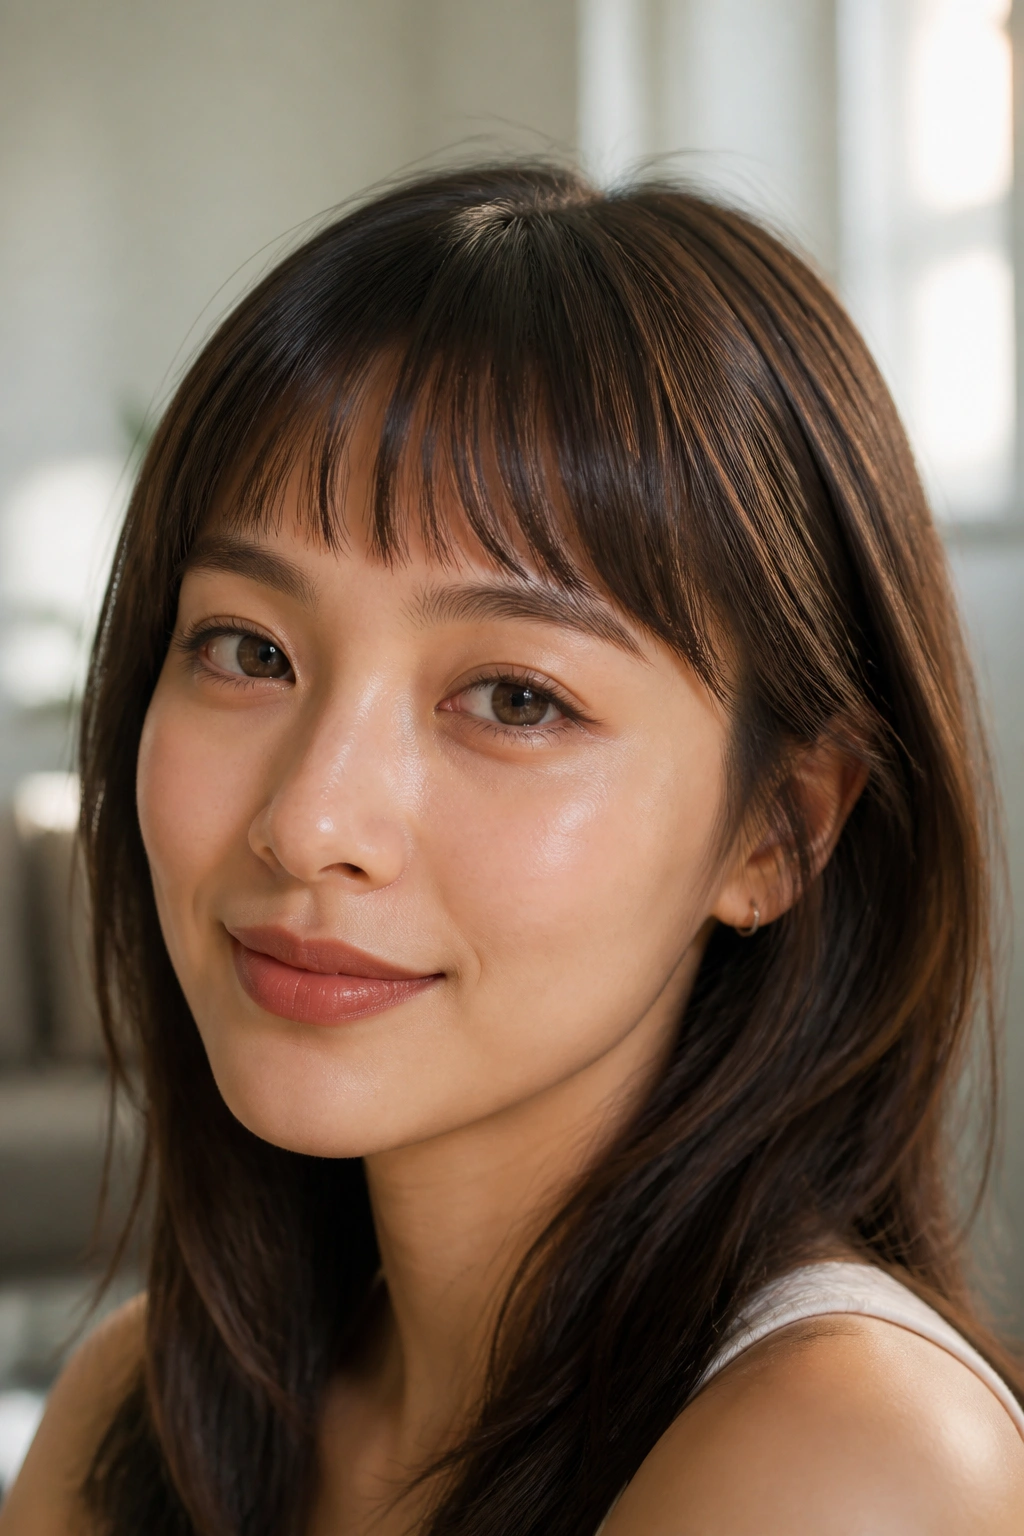
Why do curved bangs work so well on round faces? Because they copy the shape of the brow line instead of fighting it. The result feels smoother, less blocky, and a lot easier to wear when your cheeks carry the widest part of your face.
Where the Curve Should Sit
Ask for the center to sit just above the brow bone, with the sides gradually dropping toward the temples. That little slope matters. It keeps the fringe from slicing straight across the face, which is where a lot of round-face cuts go wrong.
Quick Details to Ask For
- Keep the center piece no shorter than 1/4 inch above the brow bone.
- Leave the temple pieces about 1/2 inch longer than the middle.
- Blow-dry with a 1-inch round brush so the bend stays gentle, not curled.
- Ask for point-cut ends instead of a blunt chop.
This shape works especially well if your forehead is medium to high. It gives the face some lift without making the fringe look severe. And if you are nervous about commitment, this is one of the easiest shapes to grow out because the curve blends into side pieces instead of ending in a hard line.
3. Piecey Center-Split Micro Bangs

A little separation goes a long way. Piecey micro bangs can be kinder to a round face than a dense, solid fringe because the gaps let some forehead show through. That breaks up the width and keeps the style from feeling too closed in.
A soft center split works best when the opening is narrow, not dramatic. Think of it as a tiny break, not a full curtain. The shortest bits can sit near the center, with the strands moving outward in small, uneven sections. That unevenness is the point. It stops the fringe from reading as one heavy block.
This style is also good if you hate spending ten minutes on your bangs every morning. A pea-size dab of styling cream or a touch of lightweight wax is usually enough. Rub it between your fingers, pinch a few strands together, and leave the rest alone. Overworking piecey bangs makes them look greasy fast, and nobody wants that.
4. Choppy Micro Bangs with a Shag

If the rest of your hair already has movement, a shag keeps the fringe from looking pasted on. That is why choppy micro bangs and a shag cut get along so well on round faces. The layers create vertical motion, which pulls the eye up and down instead of side to side.
I have always liked this version on people with a lot of hair density. The chop gives the fringe breathing room. Without it, thick hair can turn the front into a little curtain that sits too heavy over the forehead. A few shattered ends fix that fast.
What to Ask for at the Salon
- A point-cut fringe at a 45-degree angle.
- Shorter layers through the crown so the top does not puff out.
- Face-framing pieces that begin around the cheekbone.
- A dry finish check before the stylist calls it done.
One small warning: this cut looks much better with texture than with perfect sleekness. If you love polished hair, this may not be your favorite. If you like a bit of mess and movement, it can be one of the easiest shapes to live with.
5. Side-Swept Long Micro Bangs

Side-swept micro bangs are not a compromise. They are often the fastest way to add a diagonal line across a round face, and diagonals are useful when you want the face to feel a little longer. Straight across is tidy. Diagonal is smarter.
The key is making the sweep feel intentional, not like the bangs lost a fight with your part. A deep side part, usually 2 to 3 inches off center, gives enough weight for the fringe to fall softly over one brow. From there, you can keep the shortest piece near the center or just off center, then let it graze the upper cheek on one side.
This style plays nicely with glasses, too. The angled front keeps the lens line from competing with the bangs. And if you want a quick styling trick, blow-dry the fringe in the opposite direction for about 20 seconds, then sweep it back across once the roots cool. That little move helps the part hold.
6. Grown-Out Micro Bangs with Face-Framing Pieces

Unlike a fresh blunt fringe, grown-out micro bangs feel softer the second they move. That is why they work so well on round faces. The shorter center still gives you the little hit of edge, but the longer sides melt into pieces around the eyes and cheekbones.
This version is for the person who does not want to be at the salon every three weeks. The grow-out period is part of the look. A fringe that sits just above the brows, then slides into cheekbone-length strands, can be more flattering than a fully trimmed micro bang because it gives the face some length at the sides.
The one thing to watch is balance. If the side pieces start at jaw level, the shape can get bulky fast. I prefer the front pieces to start around the top of the cheekbone or just below the eye, so the whole front section keeps a light shape. Sharp edges make this style lose its ease.
7. Arched Micro Bangs That Open the Eyes

When the center lifts a touch and the outer corners fall away, the face feels less boxed in. That is the appeal of arched micro bangs on a round face. They create a small opening in the center, which keeps the forehead from disappearing under a straight band of hair.
How to Style the Arch
- Use a small round brush and lift the center for 3 to 5 seconds at a time.
- Set the roots with a clip while the hair cools.
- Keep the ends soft, not curled under hard.
- Finish with a light mist of flexible hairspray from 8 to 10 inches away.
This shape is good for people who want the fringe to frame the eyes without swallowing them. The arch should feel subtle. If it becomes too dramatic, the bangs start to look theatrical in a way that can be hard to wear on a casual day.
A small detail makes a big difference here: the center should not sit flat against the forehead. A little lift keeps the whole cut from collapsing into the face by noon.
8. Micro Bangs with a Lob

A lob and a short fringe solve each other’s problems. The lob gives the face length below the jaw, and the micro bangs keep the top section sharp enough to stop the whole look from feeling mushy. On round faces, that balance matters.
This pairing works best when the lob hits somewhere between the collarbone and the top of the chest. Shorter than that, and the shape can crowd the neck. Longer than that, and the bangs can feel disconnected if the front is not given any texture. A slightly beveled end on the lob helps the front line move.
The fringe itself should stay light. Not wispy to the point of disappearing, but not dense either. A little bend at the brow, plus some face-framing pieces that start around the mouth or chin, keeps the front of the hair from looking too square. If you wear your lob straight, this is one of the easiest ways to make the cut feel deliberate instead of plain.
9. Airy Micro Bangs for Waves and Curls

Can micro bangs work with waves or curls on a round face? Yes, if the cut respects shrinkage. Curly hair springs up after drying, and if the fringe is cut too short wet, the result can land far above the brows and look far more severe than planned.
The safer move is to cut curls dry, or nearly dry, while the hair sits in its natural pattern. Leave at least 1/2 inch of extra length if your curl pattern is springy. That buffer saves a lot of regret. It also keeps the fringe from floating away from the forehead in a way that makes the face feel wider.
What to Watch for with Curl
- Trim in tiny sections, not a single blunt pass.
- Use a curl cream about the size of a nickel.
- Scrunch upward, then let the fringe dry without constant touching.
- Avoid heavy oils at the roots; they collapse the shape.
What I like most here is the softness. Waves and curls naturally break up the horizontal line, which is helpful on round faces. The look feels lively instead of strict.
10. Choppy Micro Bangs with a Wolf Cut

A wolf cut can make long micro bangs easier to wear because the layers do some of the work for you. The crown gets lift, the lengths get movement, and the fringe no longer has to carry the whole shape alone. That is a gift on a round face, where too much weight in the front can make everything feel compressed.
The key is keeping the bangs broken into small sections rather than one solid strip. Four to six visible pieces is usually enough. More than that, and the fringe can look stringy. Less than that, and it starts to look blunt again. The sweet spot is rough, not ragged.
This cut works best if you are okay with product. A light mousse at the roots and a texture spray through the front layers can make the shape sit where it should. Fine hair usually needs a little root lift; thicker hair may need only the spray. Either way, the wolf cut gives the bangs room to breathe, which is why it can feel less fussy than a polished fringe.
11. Crescent-Shaped Micro Bangs

Rounded does not mean childish. A crescent shape can be one of the nicest ways to soften a round face because it gives a gentle frame without drawing a hard line across the forehead. It feels a little like a smile shape for the face, only quieter.
The danger here is heaviness. A crescent fringe should be airy enough that you can still see a little skin through the shortest spots. If it turns dense, the curve starts to close the face in. That is the opposite of what you want. Keep the center soft and the edges feathered.
This version is a good choice if your forehead is shorter or you like the idea of bangs but do not want the haircut to look severe. It also tends to behave well when hair has a natural wave. Straight hair can wear it too, but it needs a careful blow-dry so the curve does not flatten out.
A good crescent fringe never looks puffy. It just sits there, calm and neat, doing its job.
12. Deep Side-Part Micro Bangs

If one side of your hair naturally falls flatter, use it. A deep side part changes the whole shape of micro bangs on a round face because it shifts the weight off the center line and creates a longer diagonal across the forehead.
How to Keep the Part in Place
- Part the hair 2.5 to 3 inches from the center.
- Blow-dry the roots in the opposite direction first.
- Pin the front section for 3 to 5 minutes while it cools.
- Finish with a light spray only at the root, not the ends.
This style is one of my favorites for people who want to look put together without looking “done.” The off-center line adds a bit of drama, but not the hard kind. It is more like a little tilt in the frame. Round faces often benefit from that tilt because it gives the eye a reason to move.
The bangs themselves can stay long enough to brush the brow bone, or they can be cut just above it. Either way, the part does the heavy lifting. That is why this version can feel easier than a center-framed fringe when you are not in the mood to style every single strand.
13. Bottleneck Micro Bangs

Unlike curtain bangs, bottleneck bangs start narrow and open wider toward the sides. That shape is sneaky-good on round faces because it keeps the center from looking bulky while still giving you some softness at the temples.
The narrow center should sit close to the brow bone, then the fringe can widen gradually as it moves outward. Think of the front like a slim neck that opens into a broader shoulder line. It is a tiny shape trick, but it changes how the whole face reads. The visual width moves away from the center.
This version is worth a look if you want something that feels modern but not trendy in a loud way. It also grows out neatly, which matters. A bottleneck shape can slide into longer fringe or short face-framing pieces without making you feel like you need an emergency trim the moment it changes.
Styling is straightforward. Use a medium brush, guide the center down first, then bend the outer pieces away from the face. No need to make it perfect. A little bend is enough.
14. The Most Forgiving Long Micro Bangs

If you want one starting point, ask for micro bangs that sit just above the brow bone and taper softly at the temples. That is the most forgiving version for round faces, and I say that with a fair bit of confidence. It gives you shape without trapping the face under a hard line.
This cut has a useful middle ground. It is short enough to feel current, but long enough to survive a bad hair day, a little humidity, or a lazy blow-dry. The center should be the shortest point. The sides should feather out before they hit the temple. That tiny shift in length is what keeps the fringe from feeling square.
If you are on the fence, start here. It is the least dramatic option in the group, which is not a bad thing at all. A fringe that grows out gracefully is worth more than one that looks great for five days and then starts misbehaving. And if you decide you want more edge later, this shape gives you room to go shorter without jumping straight into regret.
