



Braided hairstyles for medium hair hit a sweet spot that long hair often misses: enough length to build shape, not so much weight that the braid sags halfway through the day. Shoulder-length and collarbone-length hair can hold a braid with real texture, and if you know where to place a few pins, even layered cuts behave.
Medium hair also forgives a lot. A braid that looks too tight on long hair can look clean and polished here, while a style that would vanish in short hair still has room to show its pattern. Fine hair gets instant grip from dry shampoo. Thick hair usually needs smaller sections. Layered hair often likes a little texturizing spray or a soft bend through the ends so the pieces don’t slip apart.
The best part is range. You can wear a side braid to coffee, a halo braid to a wedding, or a braided ponytail when you need your hair off your face and still want it to look intentional. Some of these styles take three minutes. Others ask for a few bobby pins and a mirror that shows the back of your head. Either way, medium hair gives you enough room to play.
1. Classic Side Braid
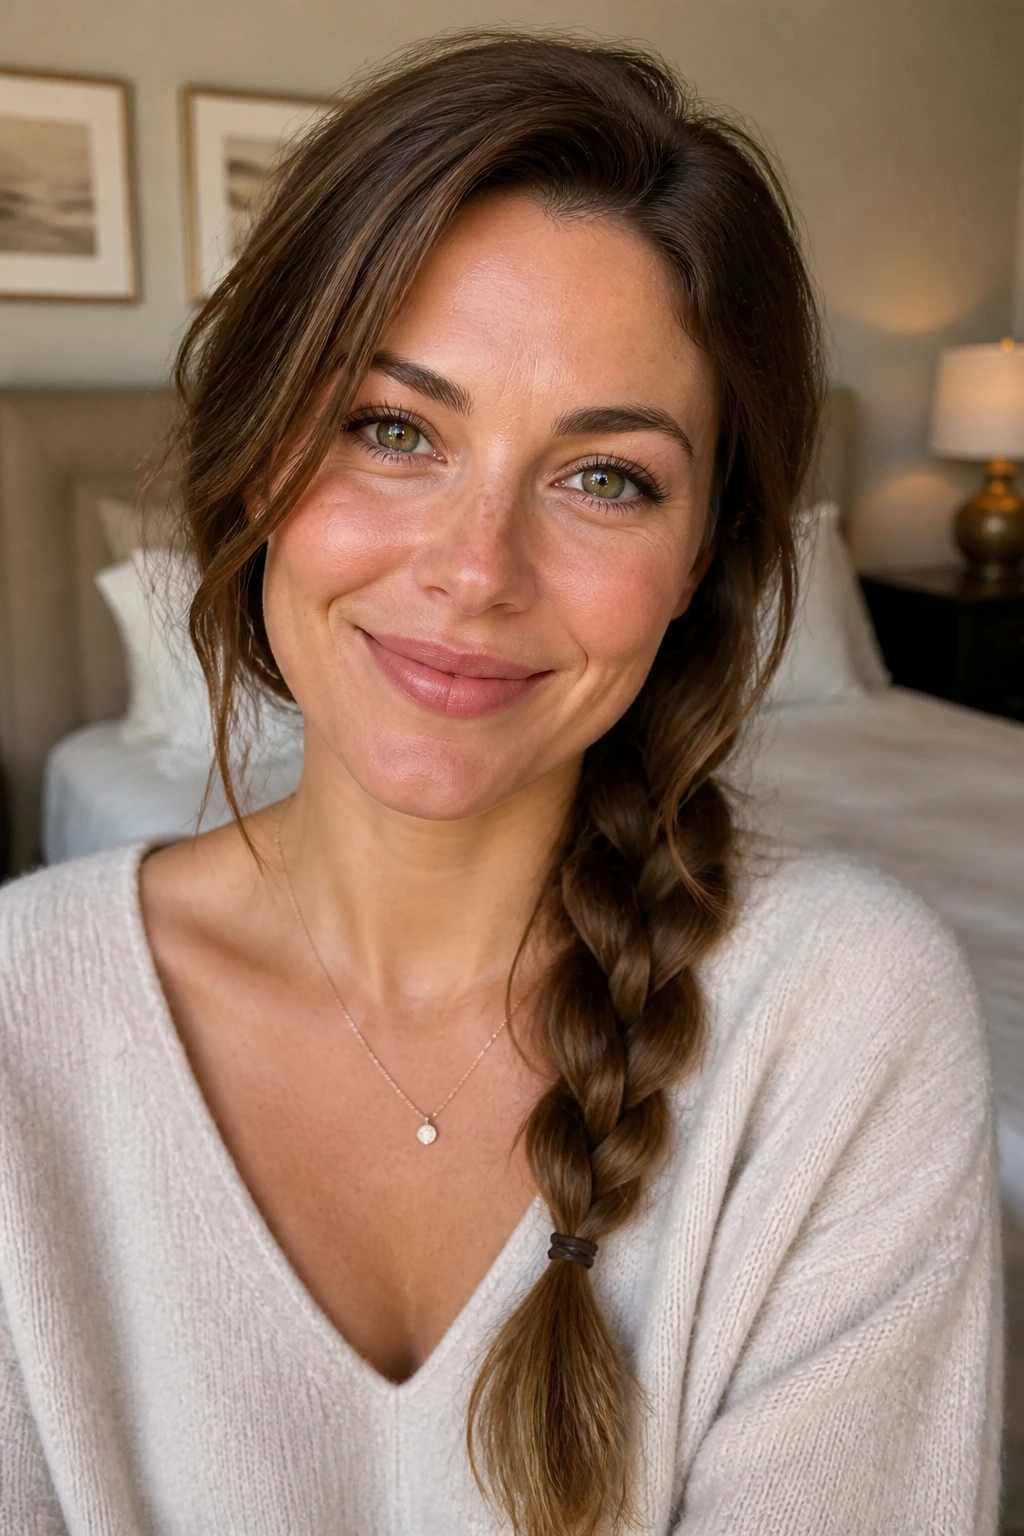
A classic side braid is the one I keep coming back to when I want hair that looks calm, not fussy. It sits well on medium hair because the length gives the plait enough swing to show off the pattern without dragging the whole style down. Start your part slightly off-center, pull the hair over one shoulder, and braid loosely all the way to the end.
A little looseness helps here. If you pull every section tight, the braid can look stiff and flat against the head. On medium hair, that’s a shame, because the cut often has enough movement to make the braid look soft and full with almost no extra effort. A light mist of texture spray at the roots and a small clear elastic at the end are usually enough.
If the ends poke out awkwardly, curl the last 2 inches with a 1-inch iron before braiding. It sounds minor, but it changes the finish a lot. The braid sits better, and the tail looks deliberate instead of chopped off.
2. Loose French Braid Down the Center
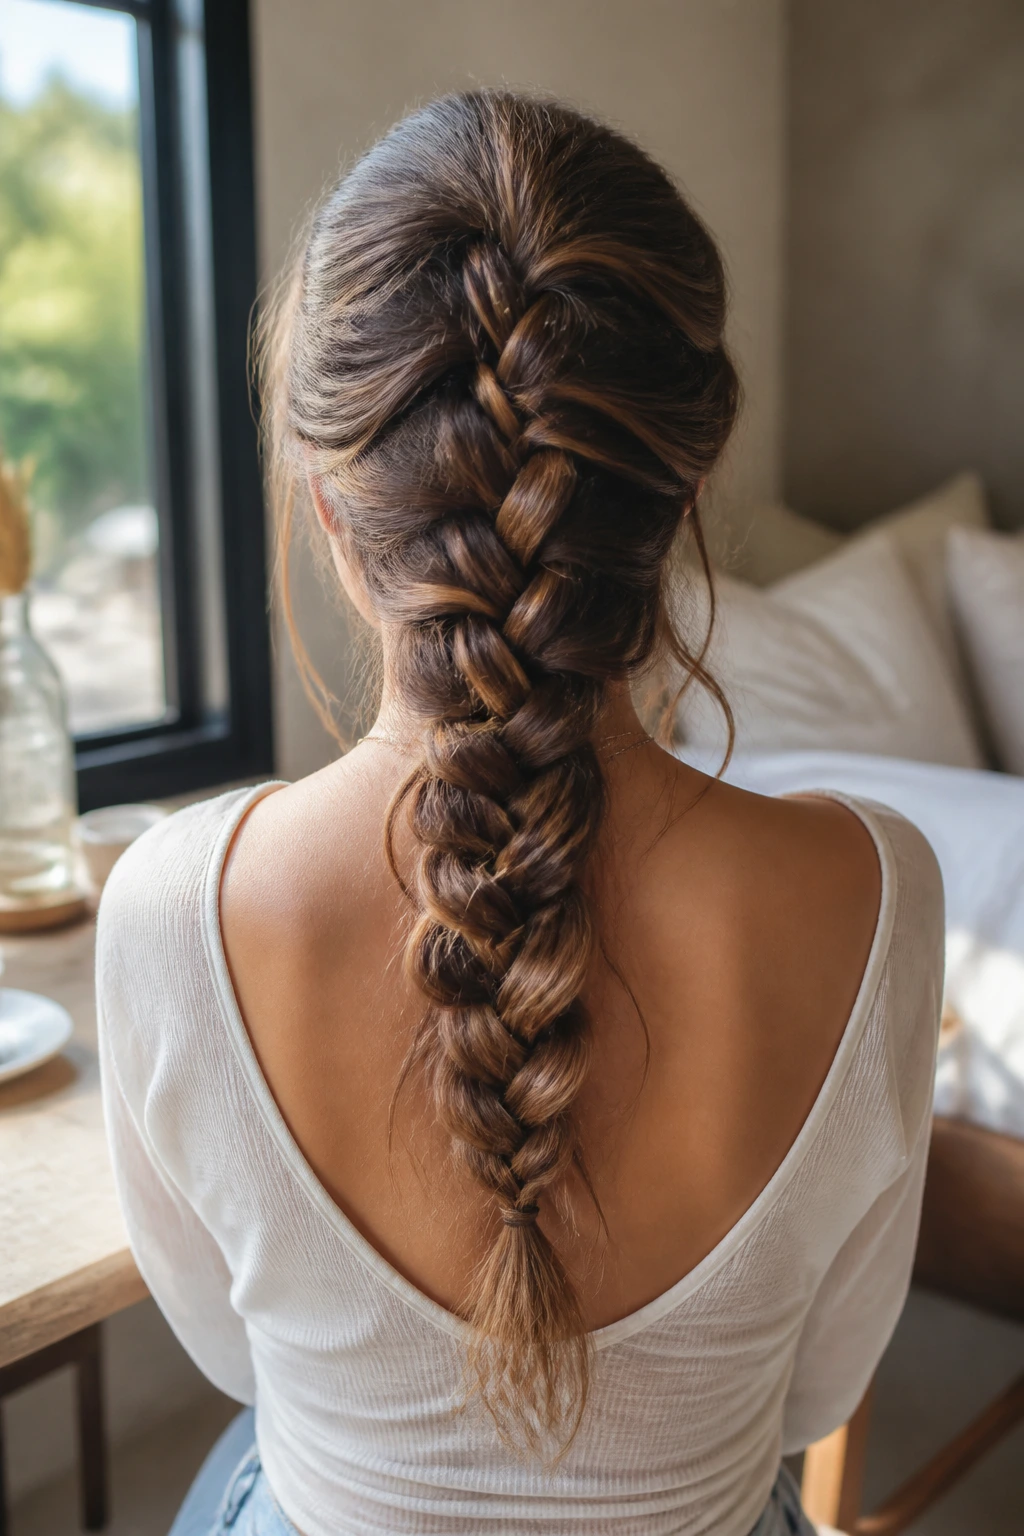
Why does a loose French braid hold medium hair so well? Because the shorter length keeps the braid from getting too heavy before the lower half is done. That means you can build height at the crown without the style collapsing. It’s a smart pick when your hair has layers or a slight wave.
How to Keep the Tension Soft
Take a clean section from the crown, then add hair from each side as you work downward. Don’t yank the sections tight. Hold them firm enough to stay neat, but leave a little give so the braid has width.
A tail comb helps a lot here. So does a quick finger-comb before you start, because tangles near the nape can make the whole braid lopsided. Once you reach the ends, leave the last 2 or 3 inches plain and secure them with a small elastic.
This braid looks especially good when the front pieces are tucked slightly loose around the face. Straight, blunt cuts can look severe here, so soften the front with a few pulled-out strands if needed.
3. Dutch Braid Pigtails
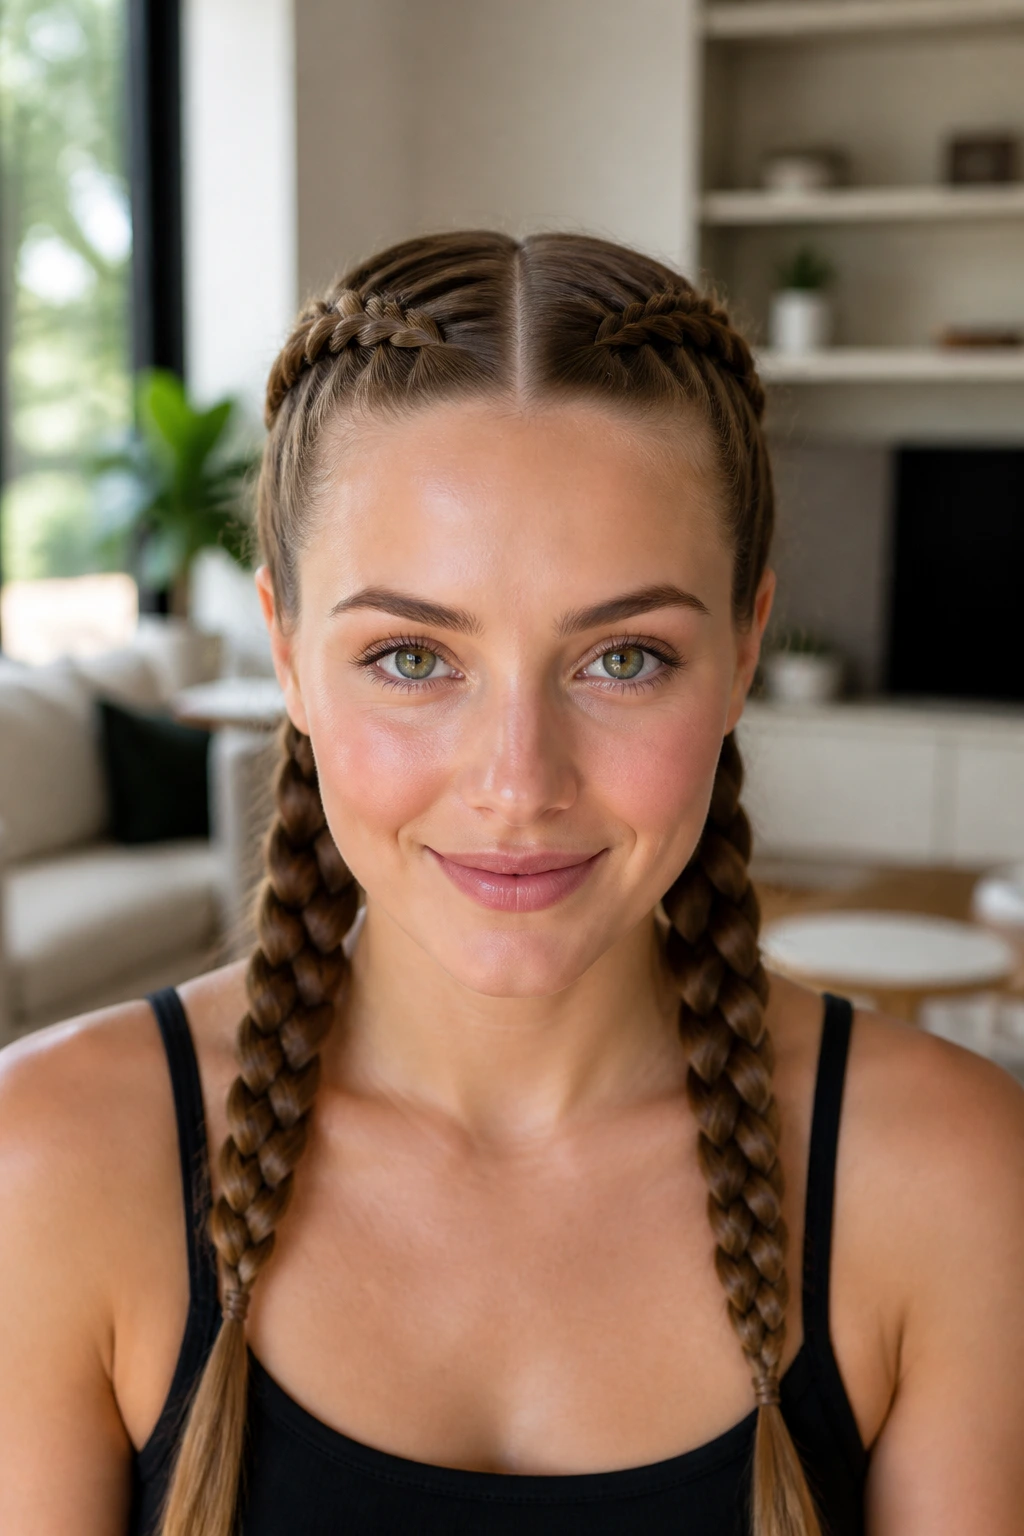
This is the hairstyle I’d pick for a long errand day, a workout, or any time I want my hair to stay put without a lot of thought. Dutch braids sit on top of the hair instead of sinking into it, which gives medium hair a bit more visual thickness right away. Two braids also make shoulder-length hair look fuller than a single braid usually does.
The trick is keeping the part clean. Split the hair down the center all the way back to the crown, then start each braid close to the hairline. Braid under, not over, so the pattern pops. On medium hair, the ends are often short enough to tuck neatly, which keeps the whole look tidy.
- Use a light hold mousse on damp hair if your strands are slippery.
- Keep the braids level with each other or the style starts to feel crooked.
- Leave 1 inch of the ends free before the elastic so the braid doesn’t unravel.
- Gently pull at the outer loops after you finish for a fuller look.
No need to overthink this one. Dutch pigtails already do the hard work.
4. Fishtail Braid Over One Shoulder
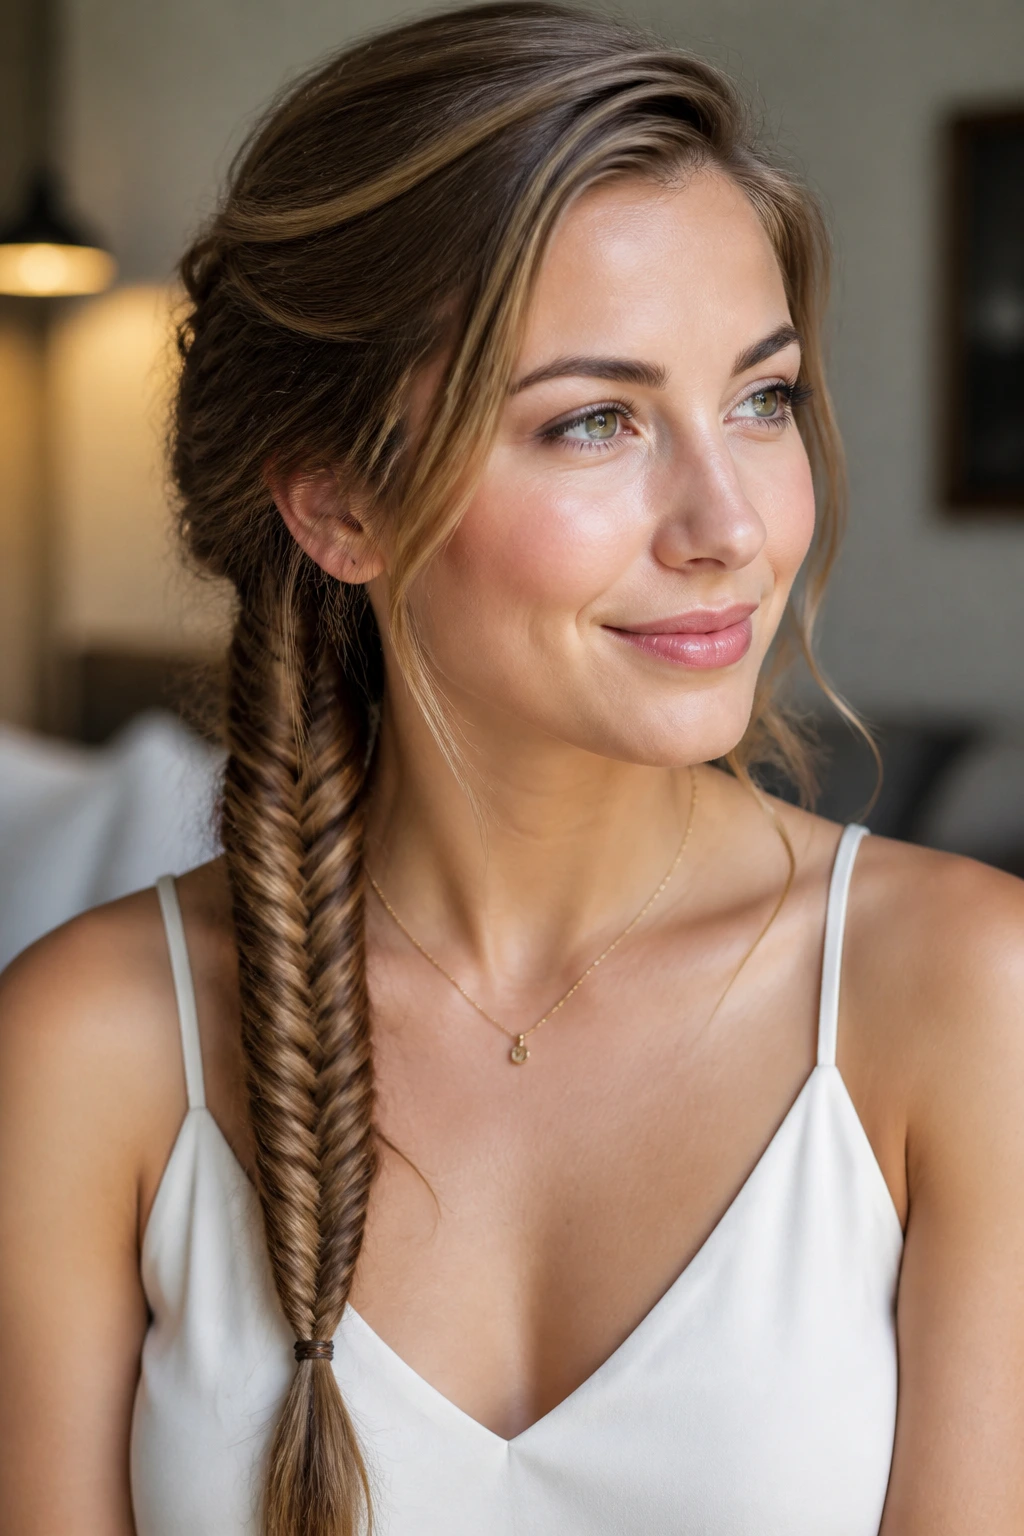
A fishtail braid can look more detailed on medium hair than on long hair. That sounds backward, but it’s true. Medium length keeps the pattern visible from top to bottom, so the braid reads as intricate instead of heavy. It’s especially good when you want something that feels dressed up without being stiff.
Start with a low side ponytail, split it into two sections, and take thin pieces from the outside edge of each section. Cross them over to the other side, repeating all the way down. Small pieces make a cleaner fishtail; thicker pieces make a chunkier, looser one. Both work, but the thinner version usually looks sharper on medium hair.
A dab of lightweight smoothing cream at the ends helps prevent frizz, though I’d skip anything oily if your hair tends to slip. The braid looks best when the tail stays narrow and the edges are gently pulled open. Too much tugging turns the whole thing fuzzy.
5. Braided Low Ponytail
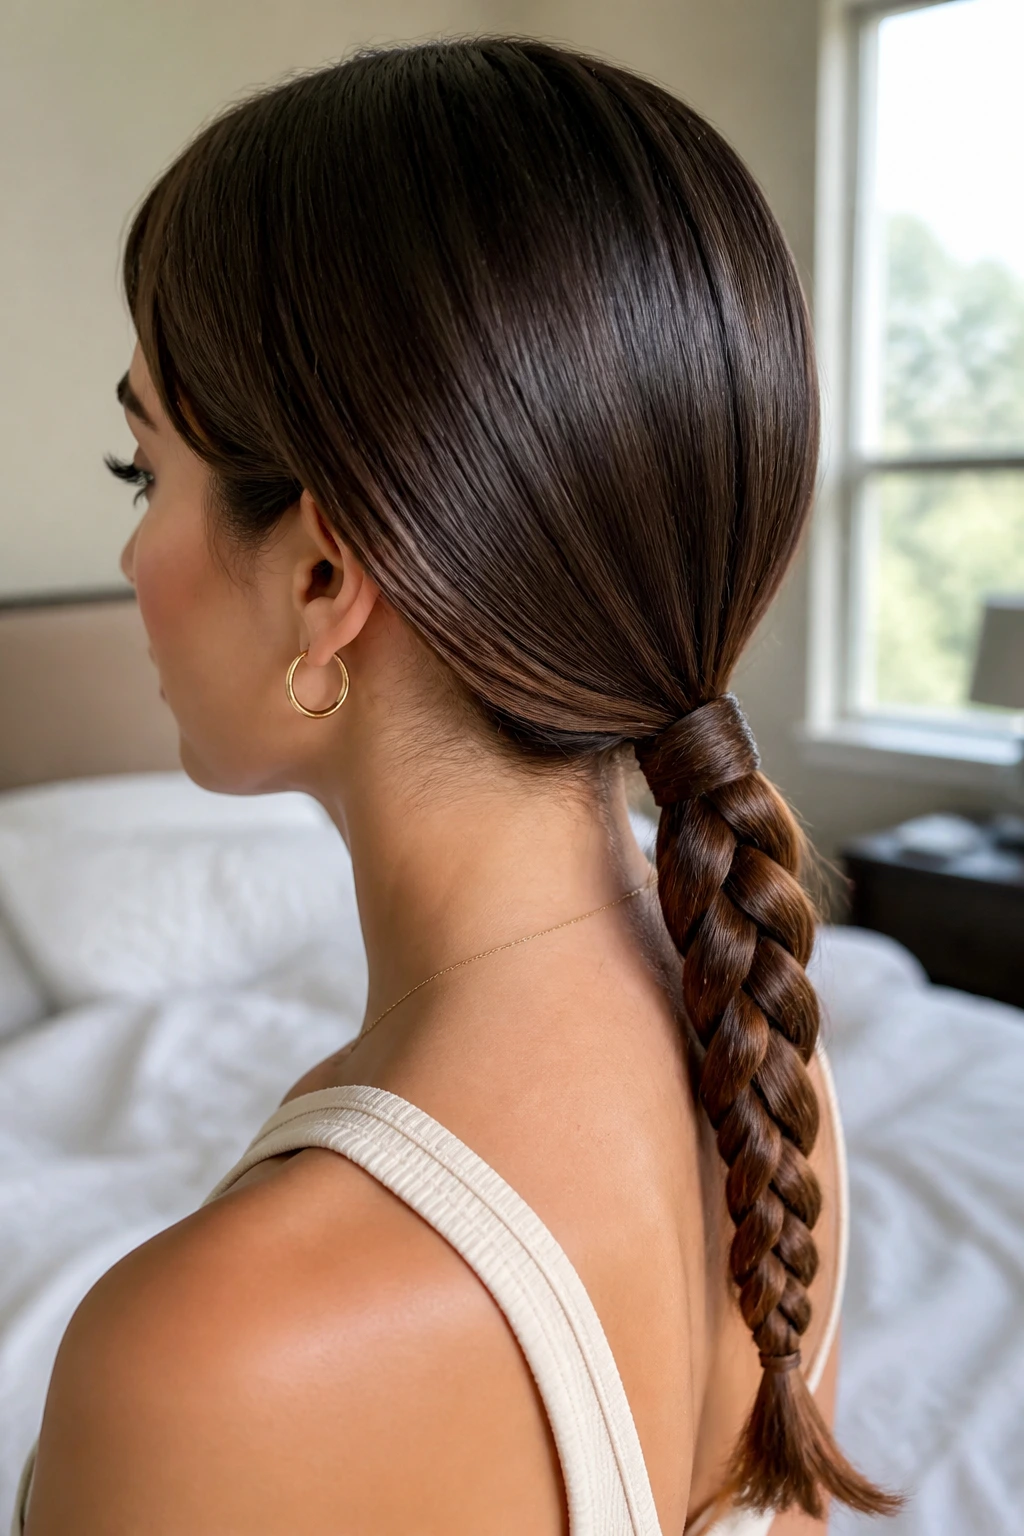
Unlike a plain low ponytail, a braided low ponytail keeps the ends from feeling like an afterthought. That matters on medium hair, where the tail can sometimes look too short to do much on its own. Braiding the ponytail gives it structure and makes the style feel more finished.
Pull the hair into a low ponytail at the nape, secure it, then braid just the tail. If your hair is layered, smooth the top with a little cream or a few drops of serum before you tie it back. The top should lie flat. The braid itself can be tight or loose, depending on how polished you want it.
This is one of those styles that looks better with a clean base and a textured tail. If you want a softer finish, wrap a small strand around the elastic at the top before braiding the rest. It hides the band and makes the whole style look more intentional.
6. Half-Up Crown Braid
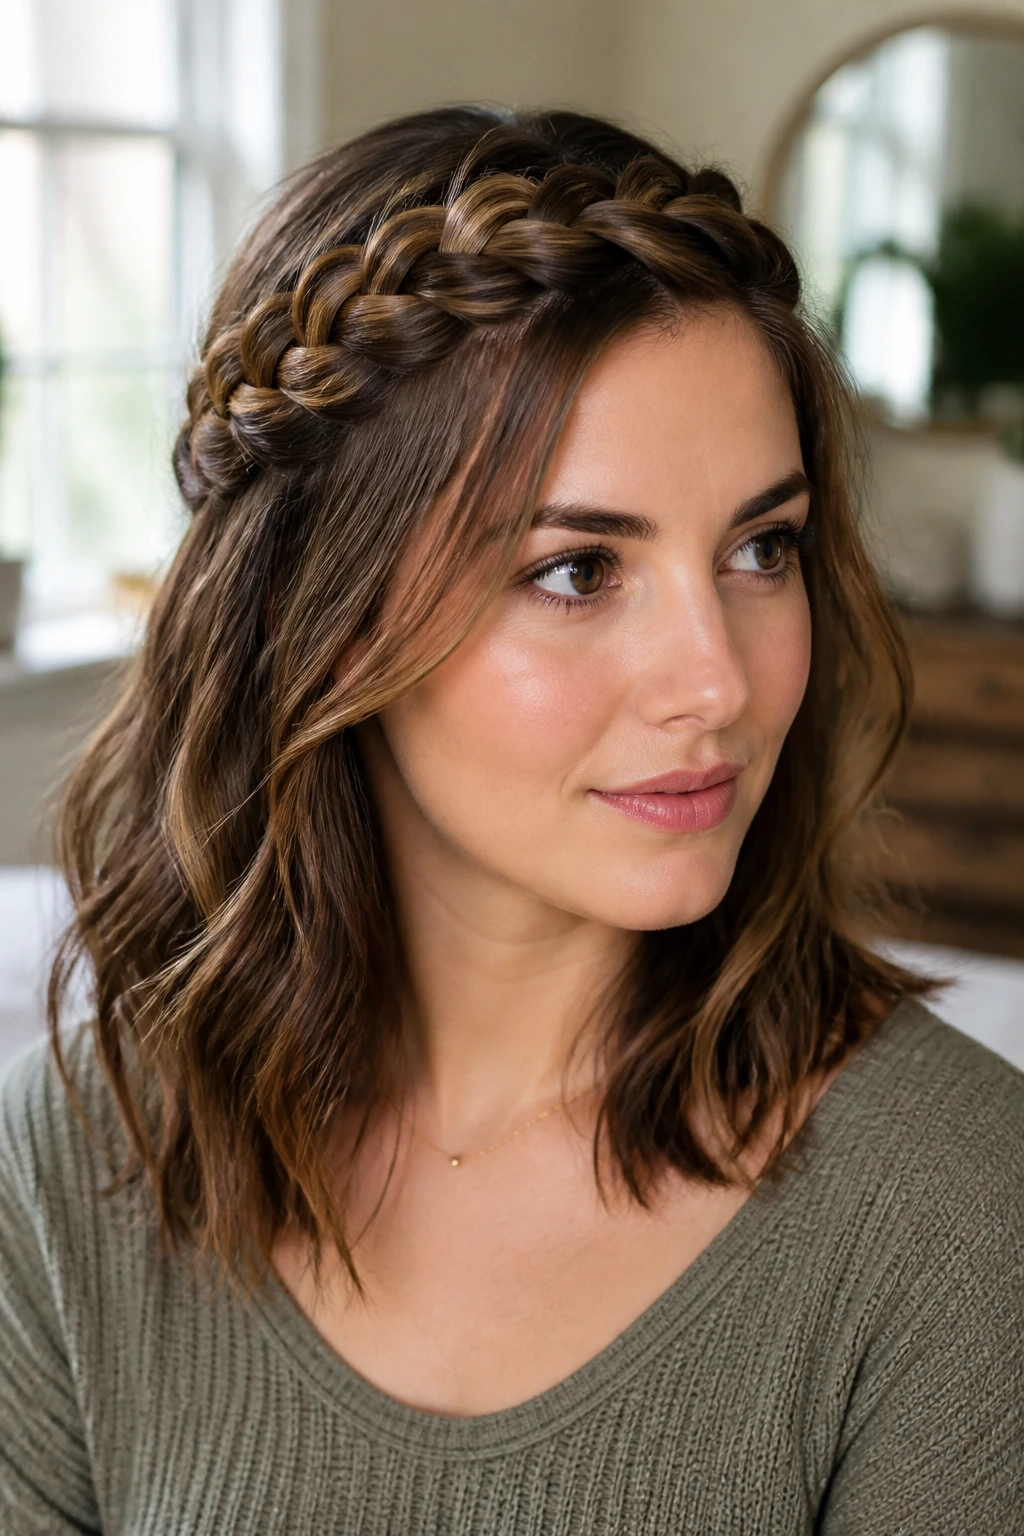
Half-up crown braids are made for medium hair. The style uses just enough length to arc across the head, while the rest of the hair stays down and keeps the whole thing from looking severe. It’s the braid I reach for when I want my face clear but I still want movement around the shoulders.
Take a section from one temple, braid it across the top of the head, and pin it behind the opposite ear. Then repeat on the other side if you want a fuller crown, or leave one side as a single sweep for a lighter look. The best versions leave the bottom hair loose and slightly bent, not poker-straight.
If your hair is fine, backcomb the crown lightly before pinning. Not much. Just enough to give the braid something to grip. A couple of crossed bobby pins hidden under the braid usually hold better than one big pin that shifts around.
7. Waterfall Braid
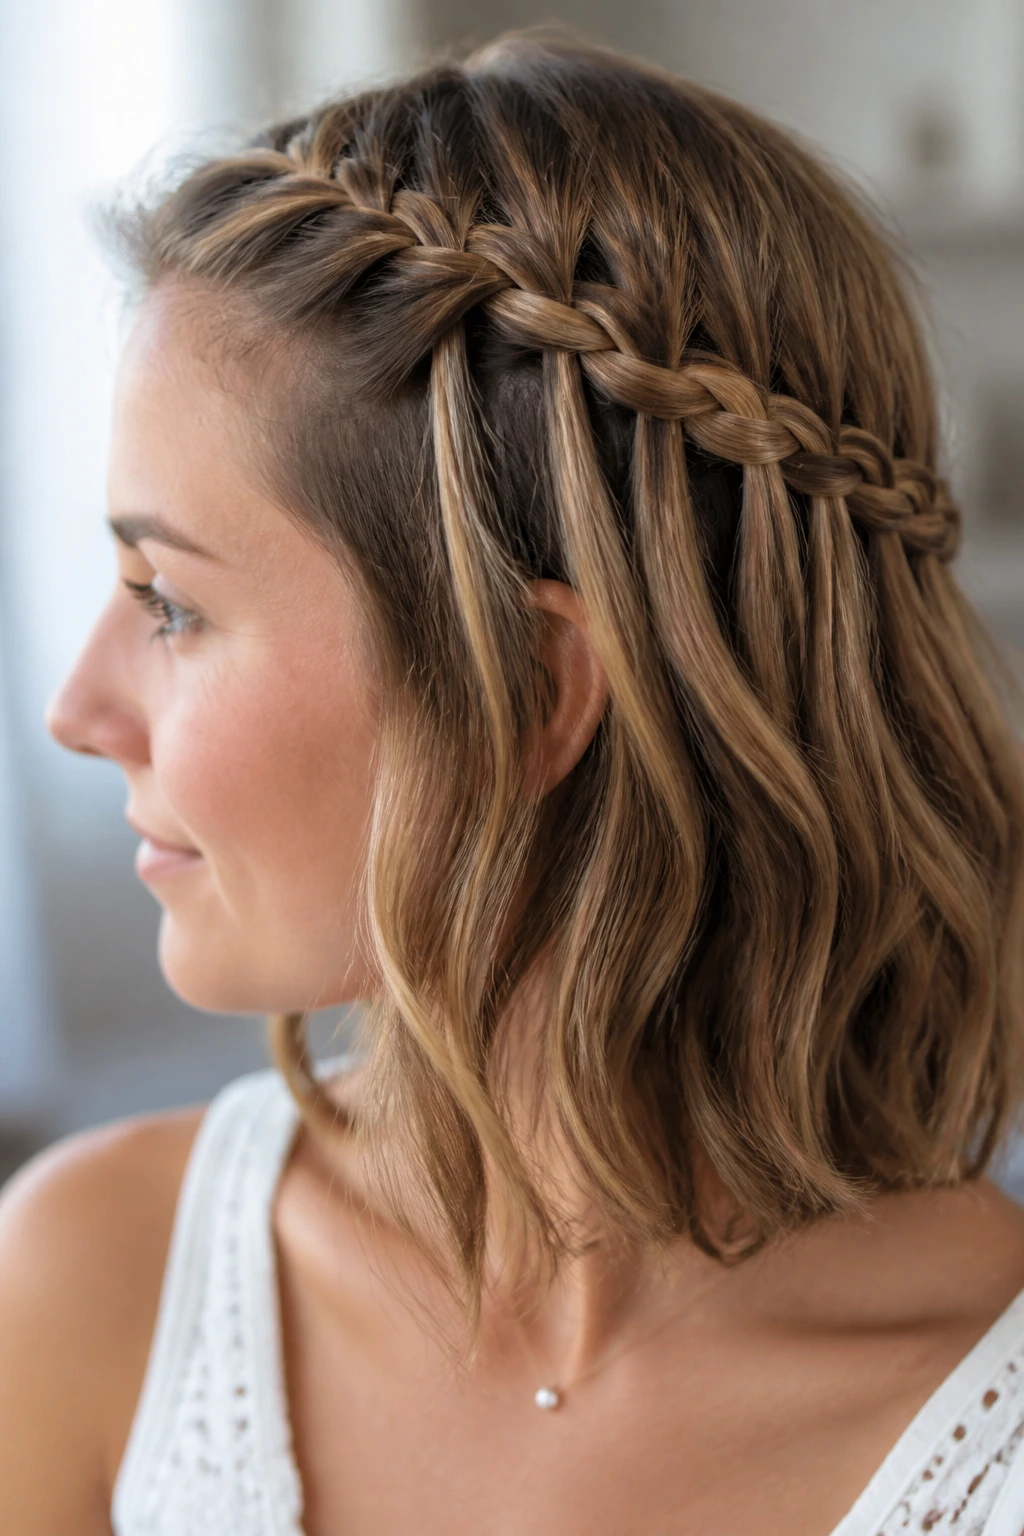
Can a waterfall braid survive medium hair without sliding apart? Yes, if you keep the tension even and use a light texturizer first. The style works because each dropped strand creates a little open space, which is easier to read on medium hair than on very long hair where the pattern can disappear.
How to Keep the Drops Neat
Start near the temple and braid along the side of the head, dropping the bottom strand each time and replacing it with a new piece from above. That’s the whole trick. The hard part is keeping the drops the same size so the braid doesn’t look wobbly.
- Mist the hair with light-hold spray before you begin.
- Work on hair that has some grip, not freshly washed silk.
- Pin each end behind the ear with two bobby pins crossed in an X.
- Curl the loose hair underneath if you want the braid to stand out more.
This style looks airy, but it does take patience. I’d save it for days when you have five extra minutes and a mirror that lets you see the side of your head clearly.
8. Halo Braid
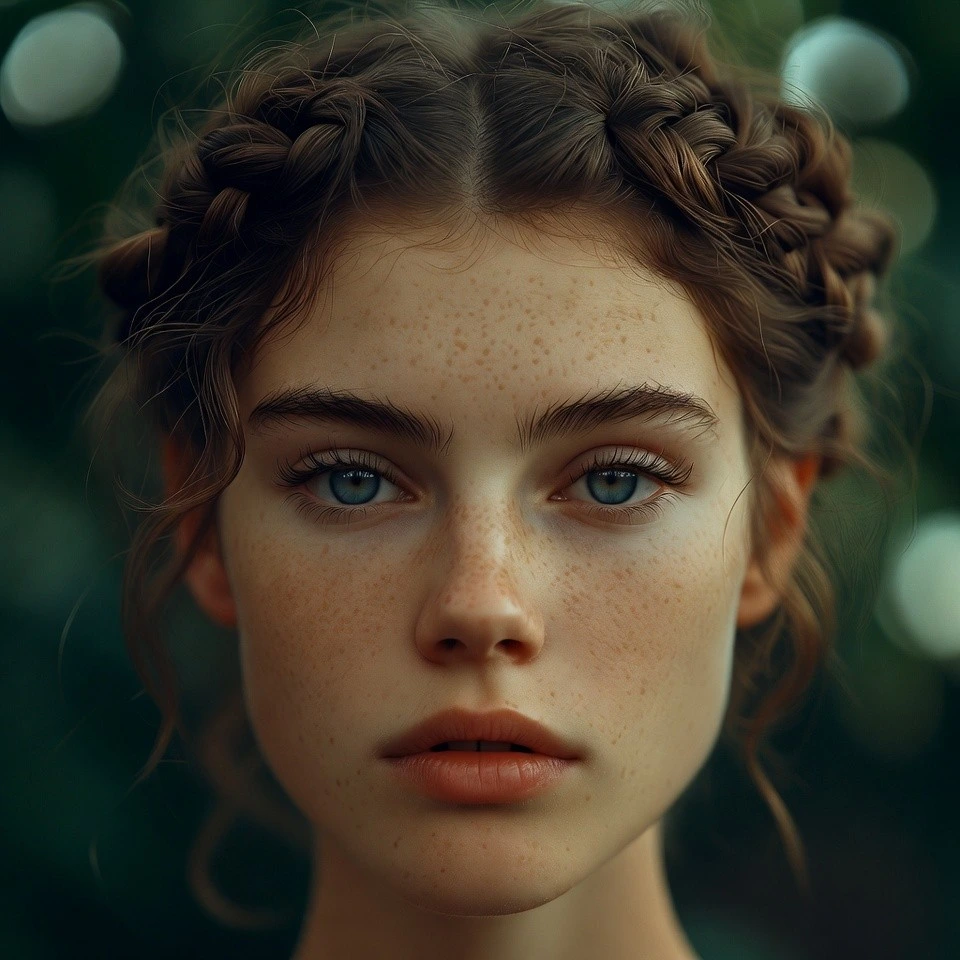
A halo braid asks for a little more time, and it gives a lot back. On medium hair, the braid usually sits closer to the head than it does on long hair, which makes the shape look cleaner and easier to pin. That’s one reason it works so well for events, dinners, and any day when you want your hair off your neck.
Braid around the perimeter of the head, either as one continuous braid or as two braids crossed at the back. Use small sections near the hairline so the braid hugs the head. If the hair at the nape is shorter, don’t fight it. Pin those ends under the braid instead of forcing them into the pattern.
A halo braid looks best when the crown has a little lift. Flat roots can make the style feel pressed down. A dry texture spray at the top and a few hidden pins near the ears usually fix that fast.
9. Rope Braid Ponytail
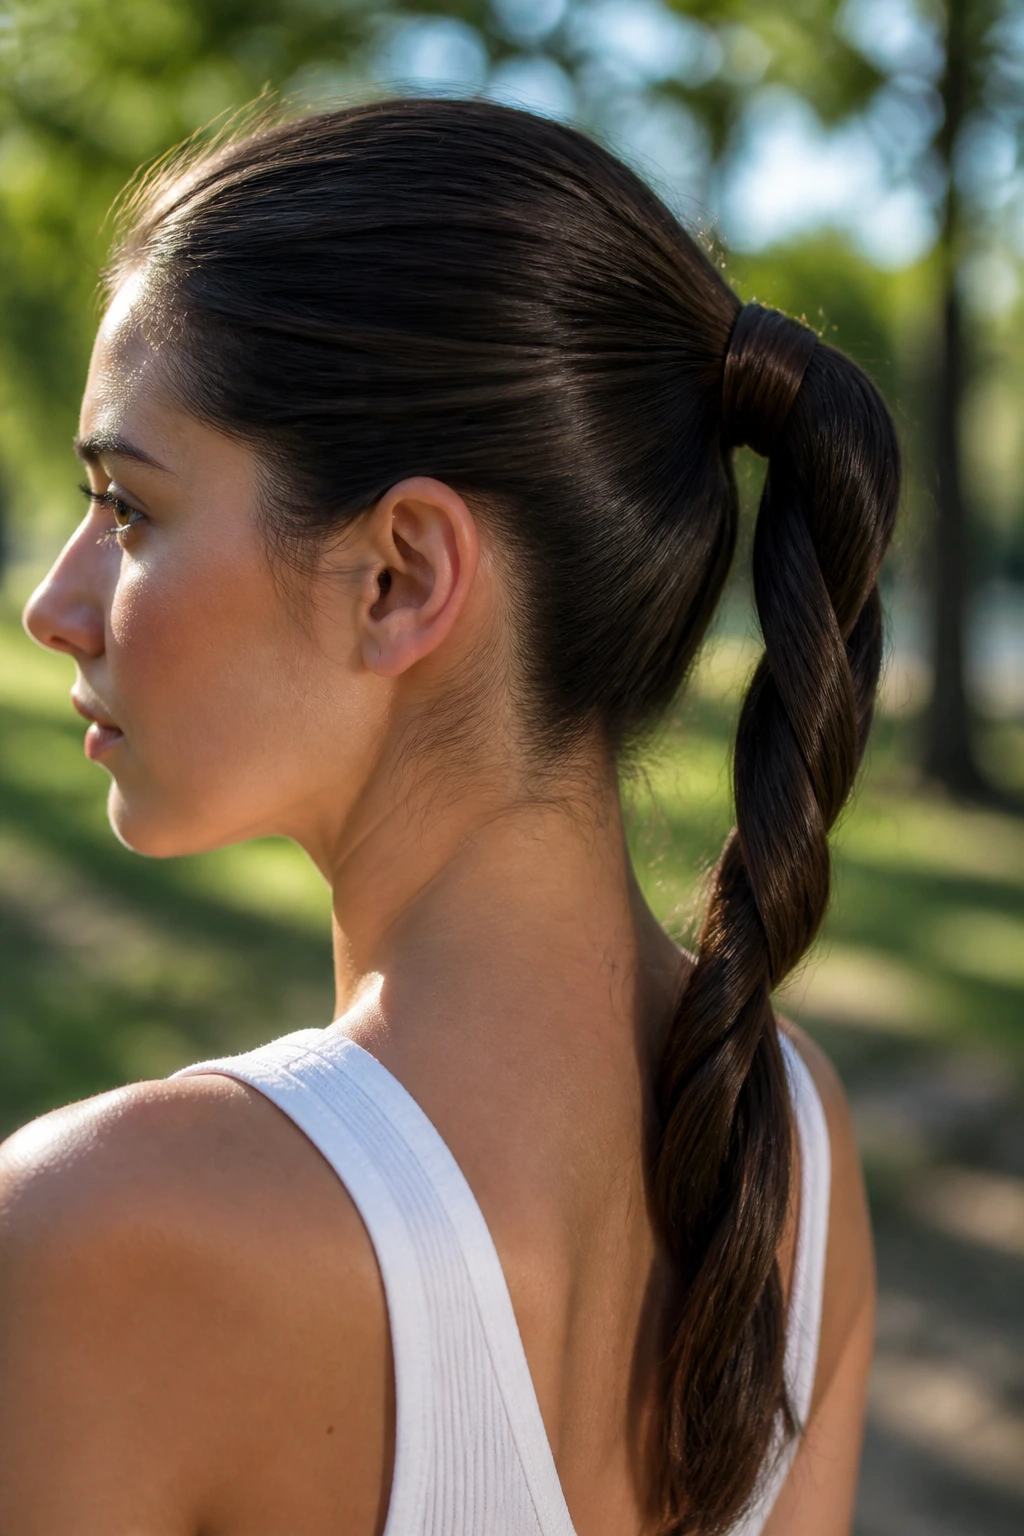
A rope braid ponytail is one of the quickest ways to make medium hair look styled with almost no effort. It uses two strands twisted around each other, so the result feels neat and a little sharper than a normal braid. Straight hair especially likes this style because the twist shows clearly.
Pull the hair into a mid or low ponytail, split the tail into two sections, twist each section in the same direction, then wrap them around each other in the opposite direction. That sounds fiddly, but once your hands get used to it, the braid moves fast. The key is direction: same way for the individual twists, opposite way when you join them.
This style doesn’t need much more than a couple of elastics and a brush. If your hair is layered, keep the first ponytail a bit lower so the shorter pieces can stay controlled. A rope braid can loosen through the day, but that slight softening often looks better than a too-tight finish.
10. Braided Bun at the Nape
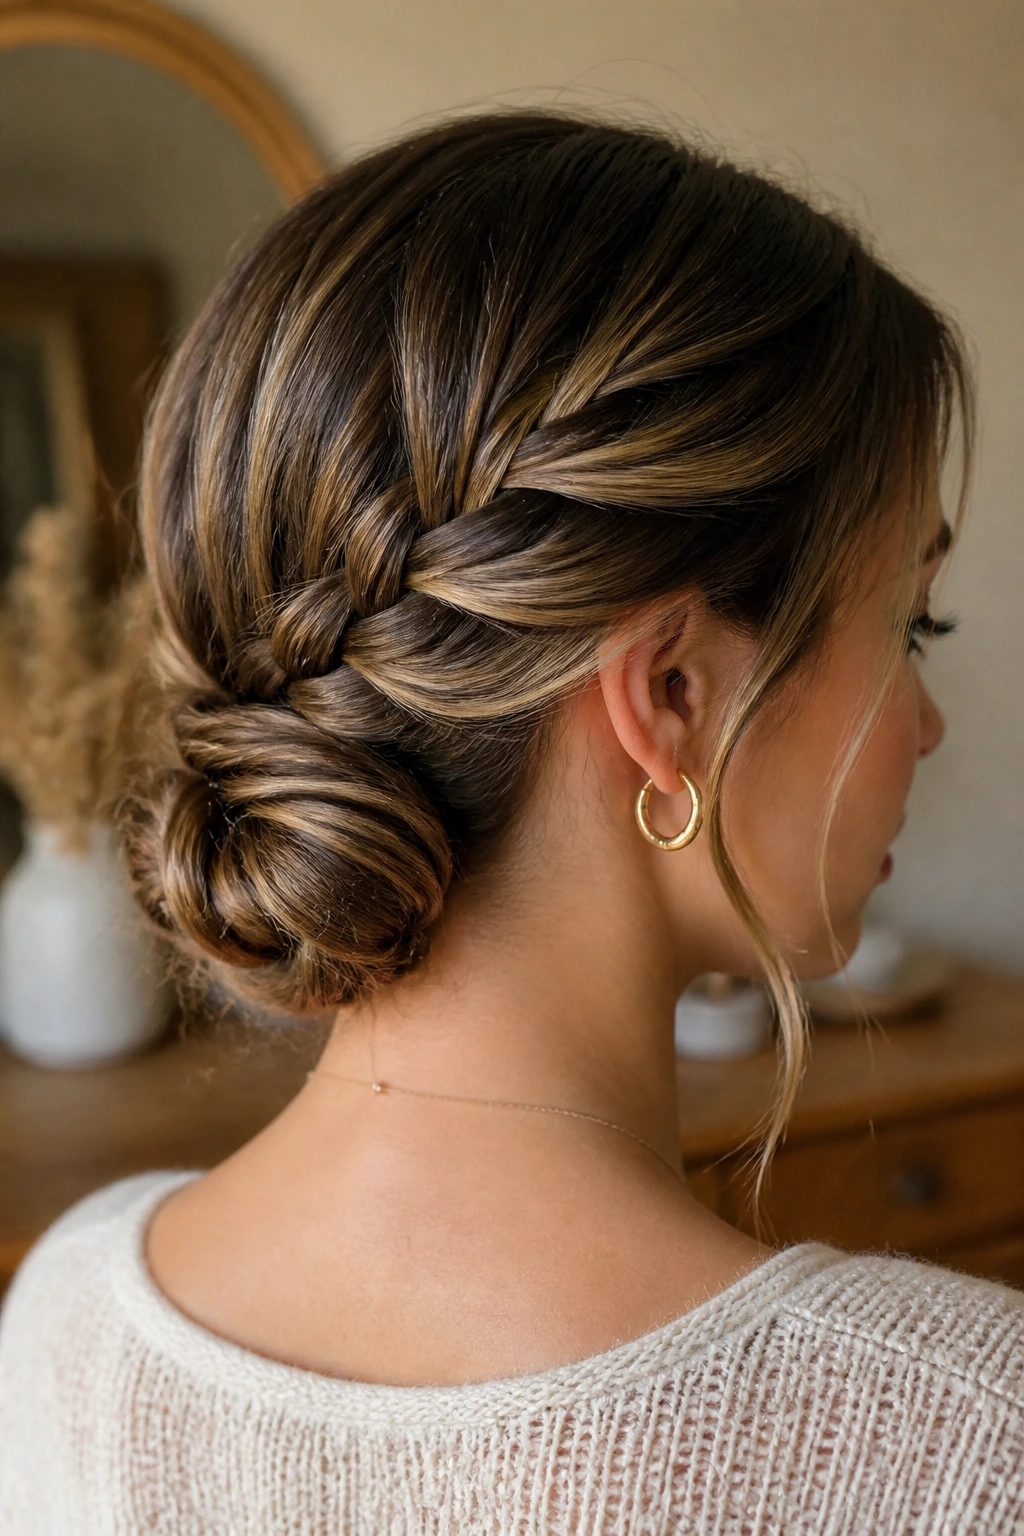
This is one of the cleanest braided hairstyles for medium hair if you want polish without a lot of fuss. A low braid folded into a bun keeps the hair compact, which matters when your length sits right at the shoulder and the ends might otherwise poke out. It’s neat, secure, and far less formal than it looks.
Start with a low braid at the nape, then coil it into a bun and pin it flat against the head. If your hair is thick, make the braid a little loose so it has enough bend to wrap. Fine hair often does better with a tighter braid and more pins.
What to Watch For
The bun should sit low enough that the braid can tuck under itself without stretching. If the ends escape, hide them underneath with crossed pins. A little spray wax on the palms helps smooth flyaways before you pin the bun in place.
I like this style because it doesn’t pretend to be easy when it’s not. It is simple, but it still looks finished.
11. Boxer Braids
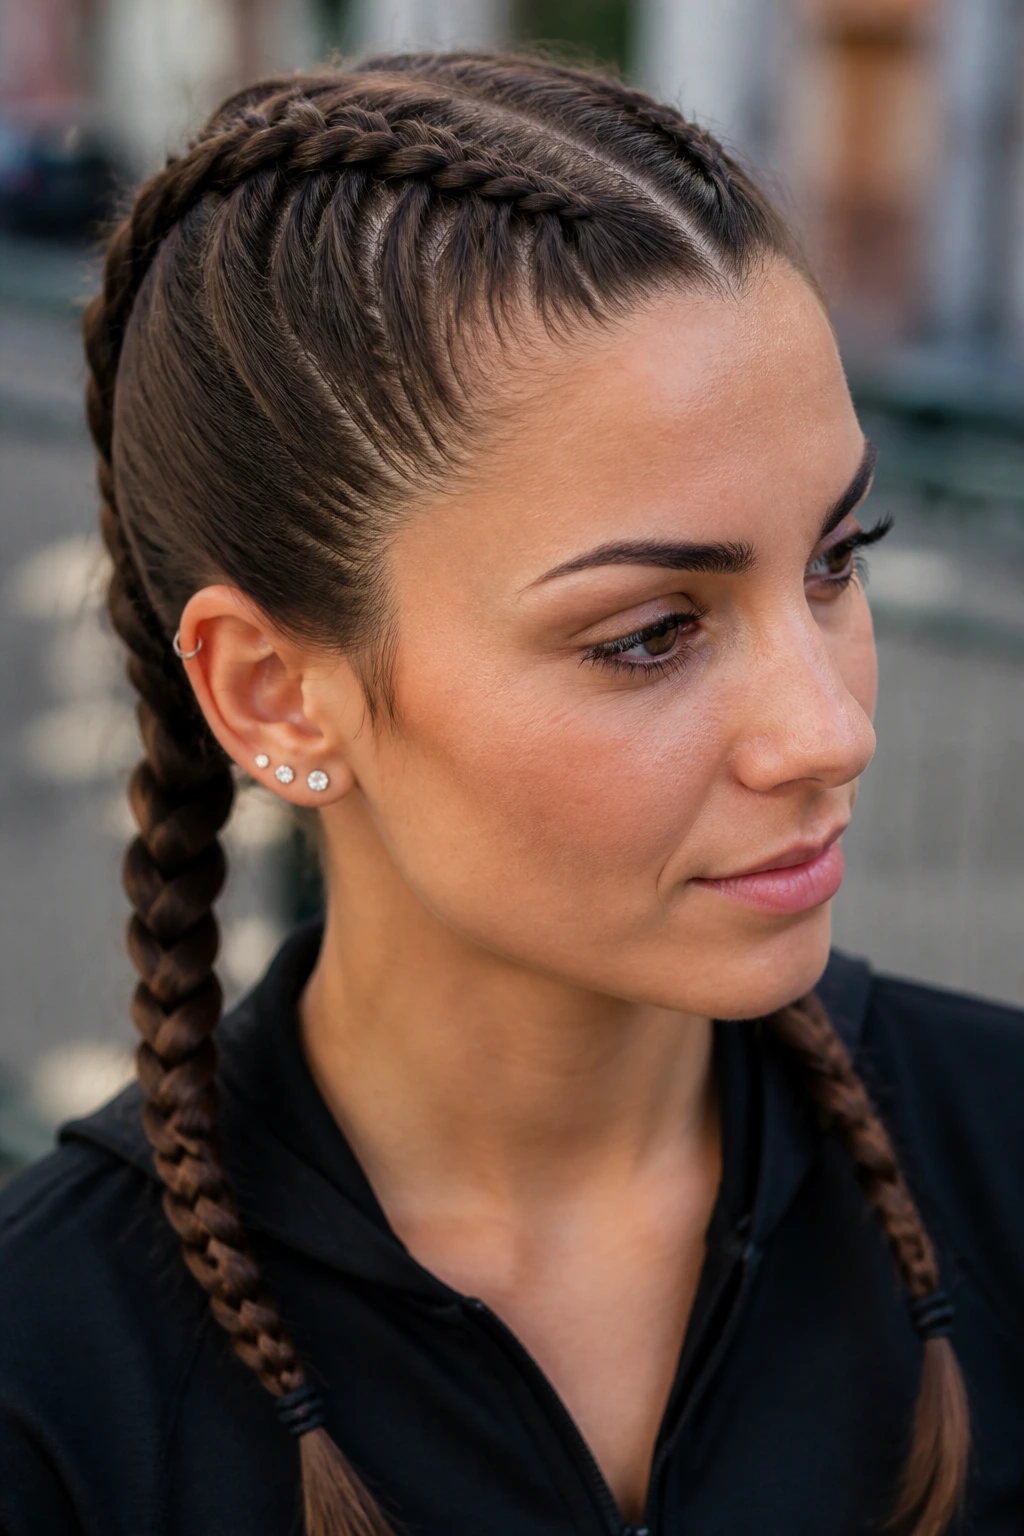
Boxer braids are basically two tight Dutch braids, and medium hair is a good length for them because the braids stay close to the scalp and don’t drag down as the day goes on. They’re practical first, style second. That’s not a flaw. That’s the point.
Part the hair cleanly from forehead to nape, then braid each side underhand, keeping the tension even from top to bottom. If you want them to last, start with hair that has a little grip. Freshly washed hair is slippery and annoying here.
A lot of people pull boxer braids too tight at the temples. I wouldn’t. Keep them firm enough to hold, but not so tight that they leave a sore line behind your ears. The best version feels secure, not harsh.
12. Pull-Through Faux Braid
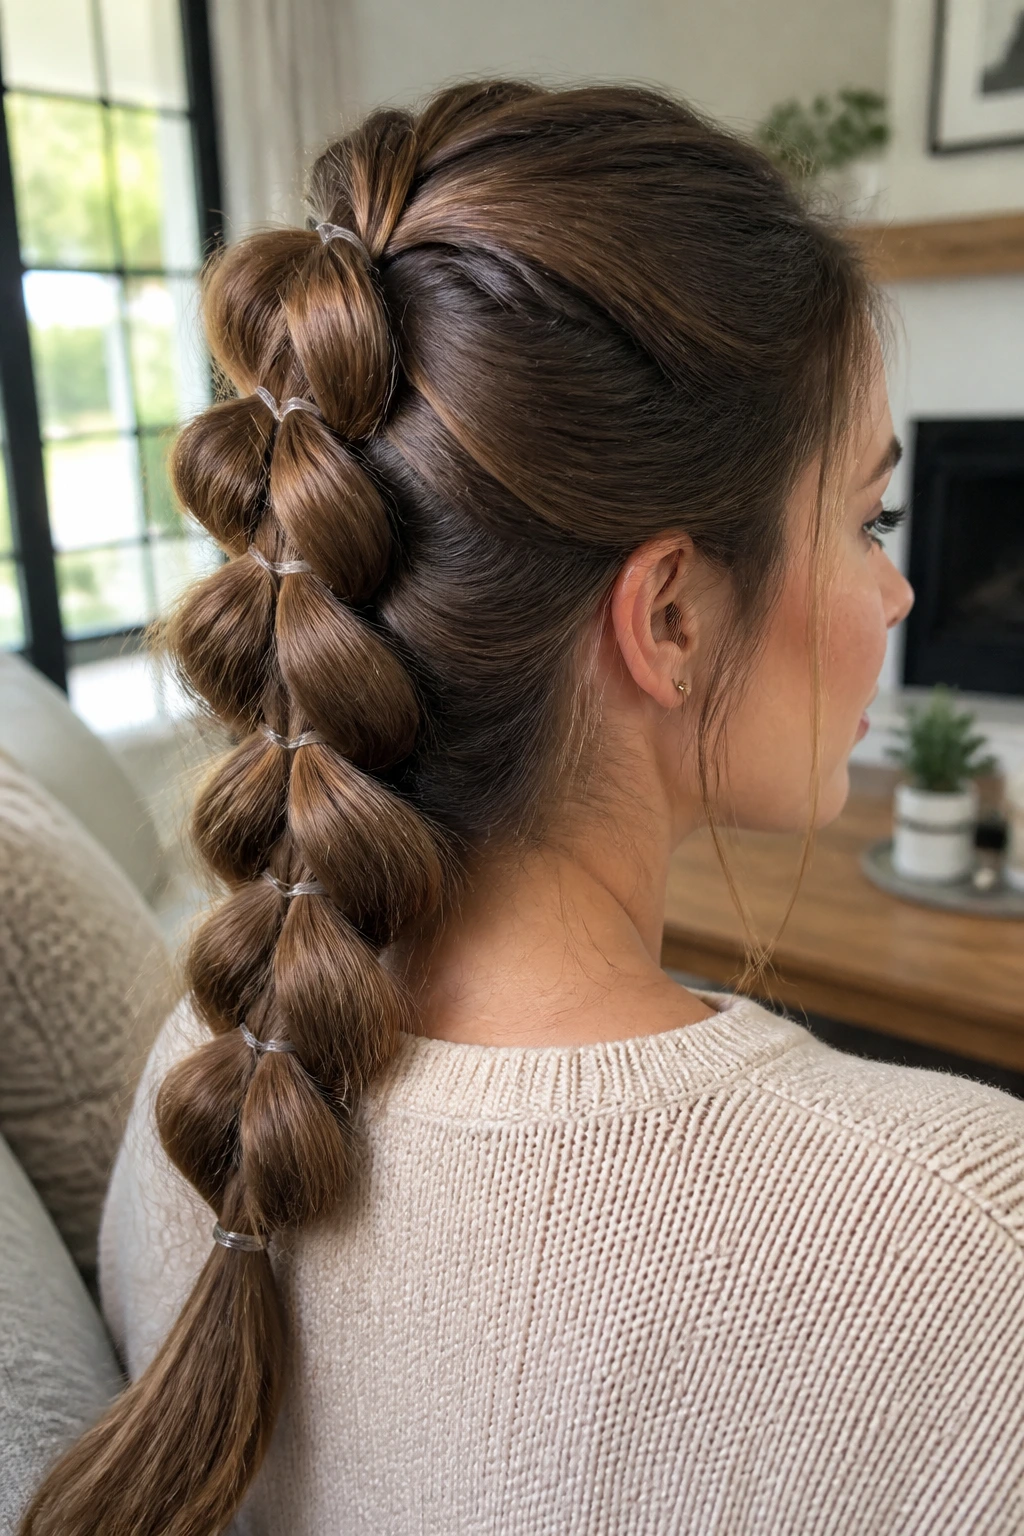
If your hair is layered or not quite long enough for a thick traditional braid, the pull-through braid is the one to try. It creates the look of a full, stacked braid by building a chain of ponytails, and medium hair is often the ideal length for it because the sections are easy to control.
Divide the hair into small ponytails down the back of the head, then split and loop them one by one to build the braid shape. Use clear elastics every 1 to 1.5 inches. The spacing matters. Too wide and the braid looks sparse; too tight and the whole thing gets bulky at the scalp.
This style is a little more mechanical than a normal braid, but it pays off if your hair is fine or slippery. A touch of texturizing spray between the sections helps them stay put. The finished braid should look full all the way down, with no awkward gaps showing through.
13. Milkmaid Braids
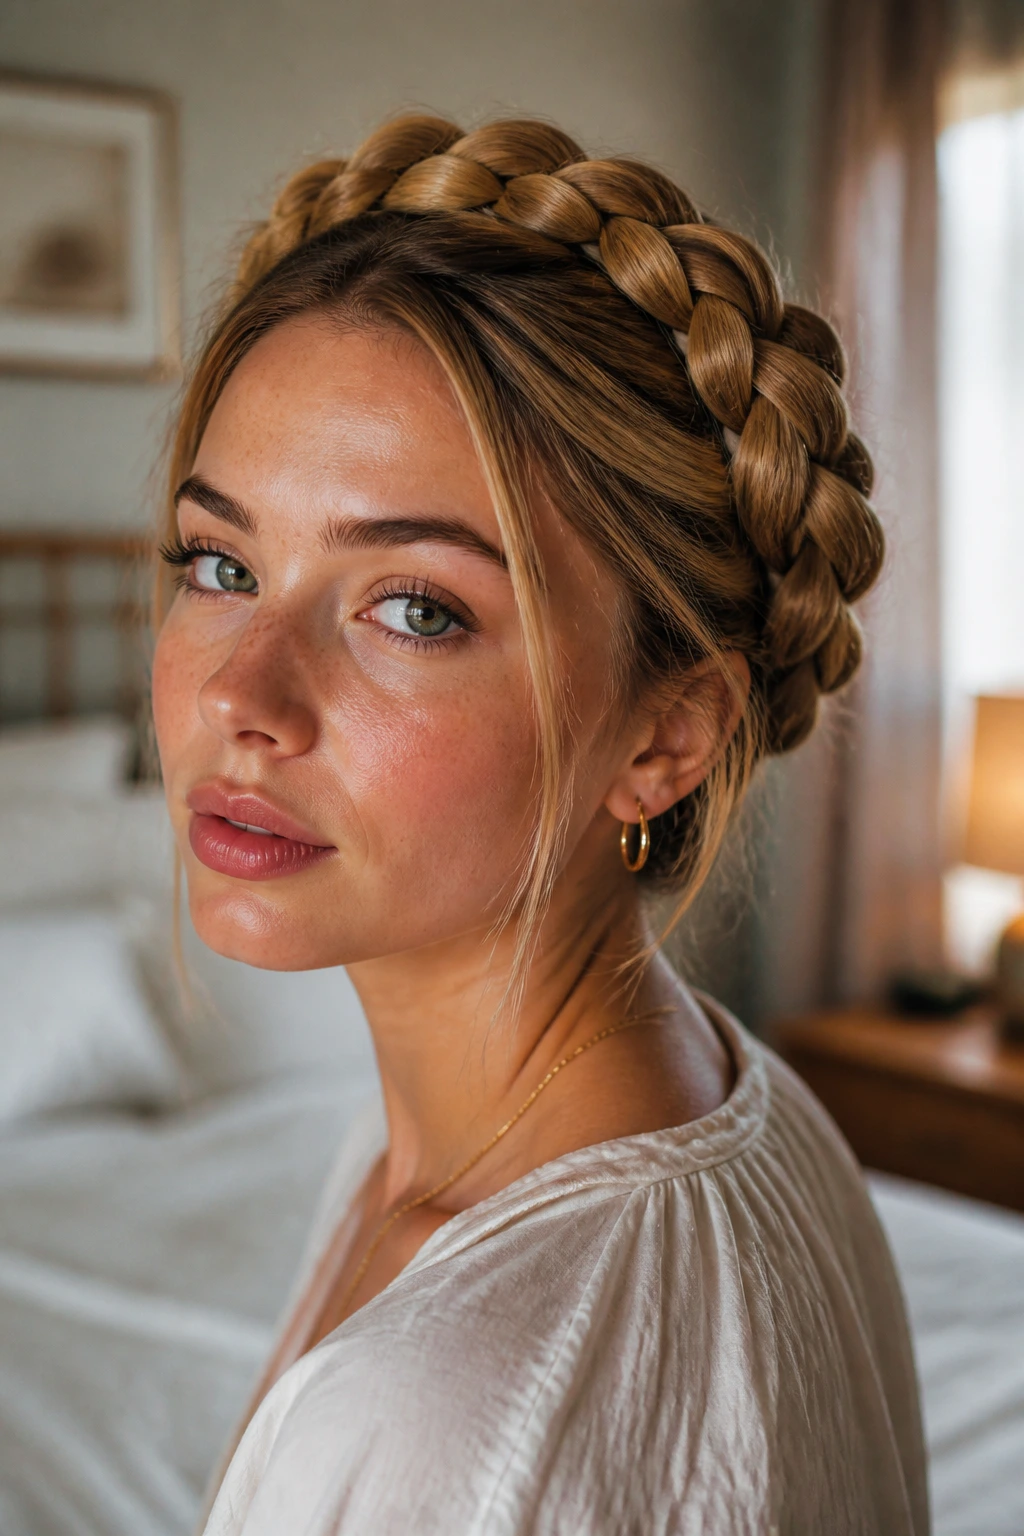
What makes milkmaid braids so useful on medium hair is the fit. The braids wrap over the crown and sit snugly, so there’s less chance of the style slipping out of place. That matters if your hair is slippery or cut in a blunt bob that reaches the shoulders.
How to Pin Them So They Stay
Split the hair into two low braids, then lift each one over the head and pin it along the opposite side. Keep the braids low and close to the hairline rather than floating above the head. That’s where people go wrong; the style needs to feel anchored.
- Make the braids slightly loose before pinning so they bend easier.
- Hide the pin tips under the braid, not across the surface.
- Tuck shorter ends underneath instead of trying to force them into the plait.
- Leave a few face-framing pieces out if the style feels too severe.
Milkmaid braids can look rustic, but they can also look very clean. It depends on how neat the part is and how much you tug the braid after pinning.
14. Braided Headband
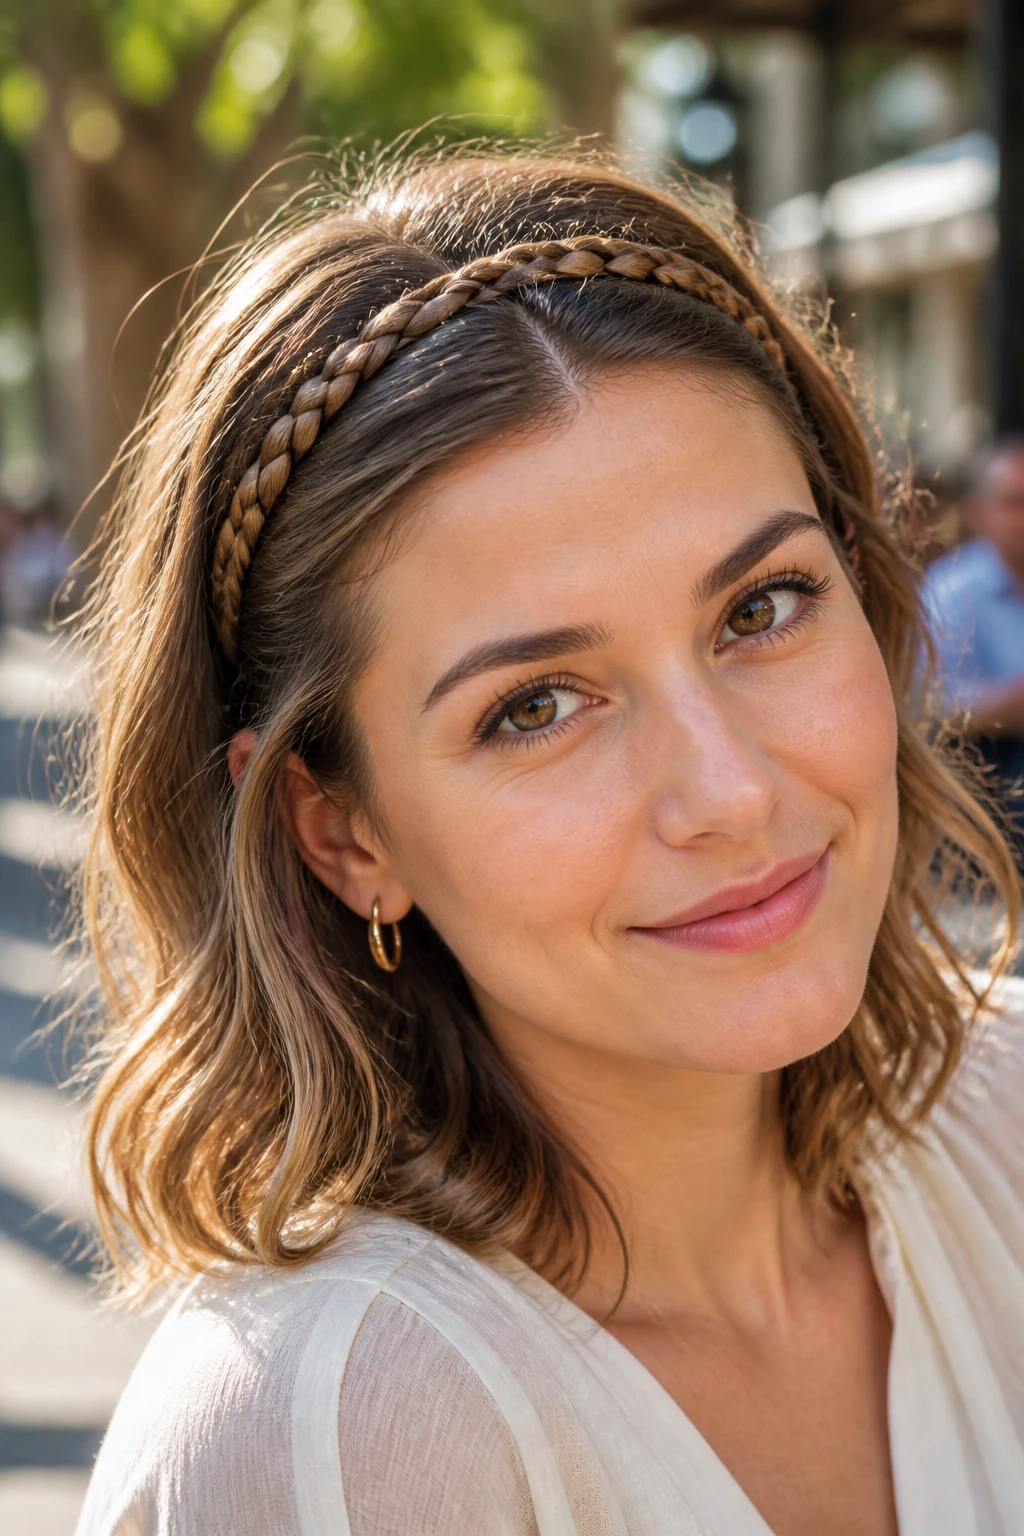
A braided headband is one of those styles that quietly solves a problem. It keeps hair off the forehead without pinning the whole head back, and medium hair gives you enough length to make the braid visible without swallowing the rest of the style. It’s a good call for layered cuts, too.
Take a small section from behind one ear, braid it, and sweep it over the crown like a band. Then pin it behind the other ear or let it blend into the loose hair. If you want a softer finish, curl the rest of the hair in loose bends so the braid doesn’t look like a separate object sitting on top.
This style works best when the braid is narrow. A thick braid can crowd the hairline and make the look feel heavy. A slim braid sits better and leaves the rest of the hair to do its thing.
15. Four-Strand Braid
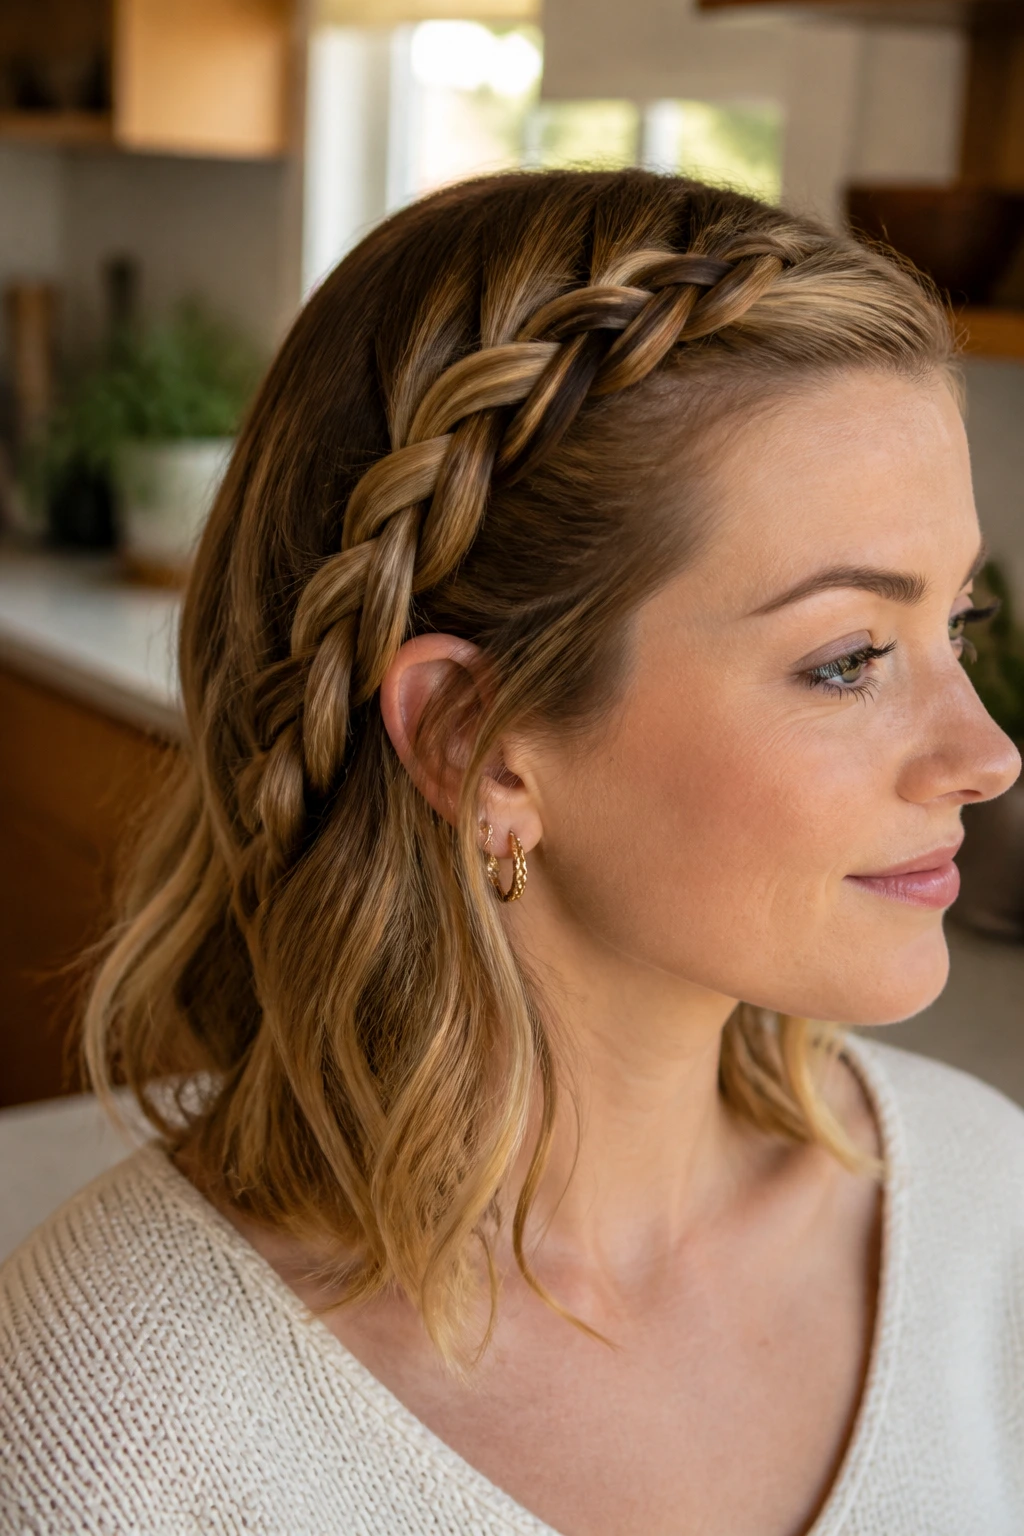
A four-strand braid looks fancier than it is. That’s the real appeal. Medium hair has enough length to show the woven pattern, but not so much that the braid turns into a ropey mess halfway down your back.
What Makes It Different
Instead of three sections, you work with four and pass them in a specific pattern. It sounds technical, then it clicks. Once it does, the braid looks almost like woven ribbon. If your hair is very slippery, use a bit of mousse first so the sections stay separate.
The best part is the texture. A four-strand braid has more edges and shadow than a standard plait, so it stands out even when the hair is the same color all the way through. That makes it a smart choice if you want the braid itself to be the focal point.
I’d wear this one for dinner, photos, or any time you want people to ask how you did it. It’s a little more work, but not by much once your hands remember the pattern.
16. Lace Braid Along the Hairline
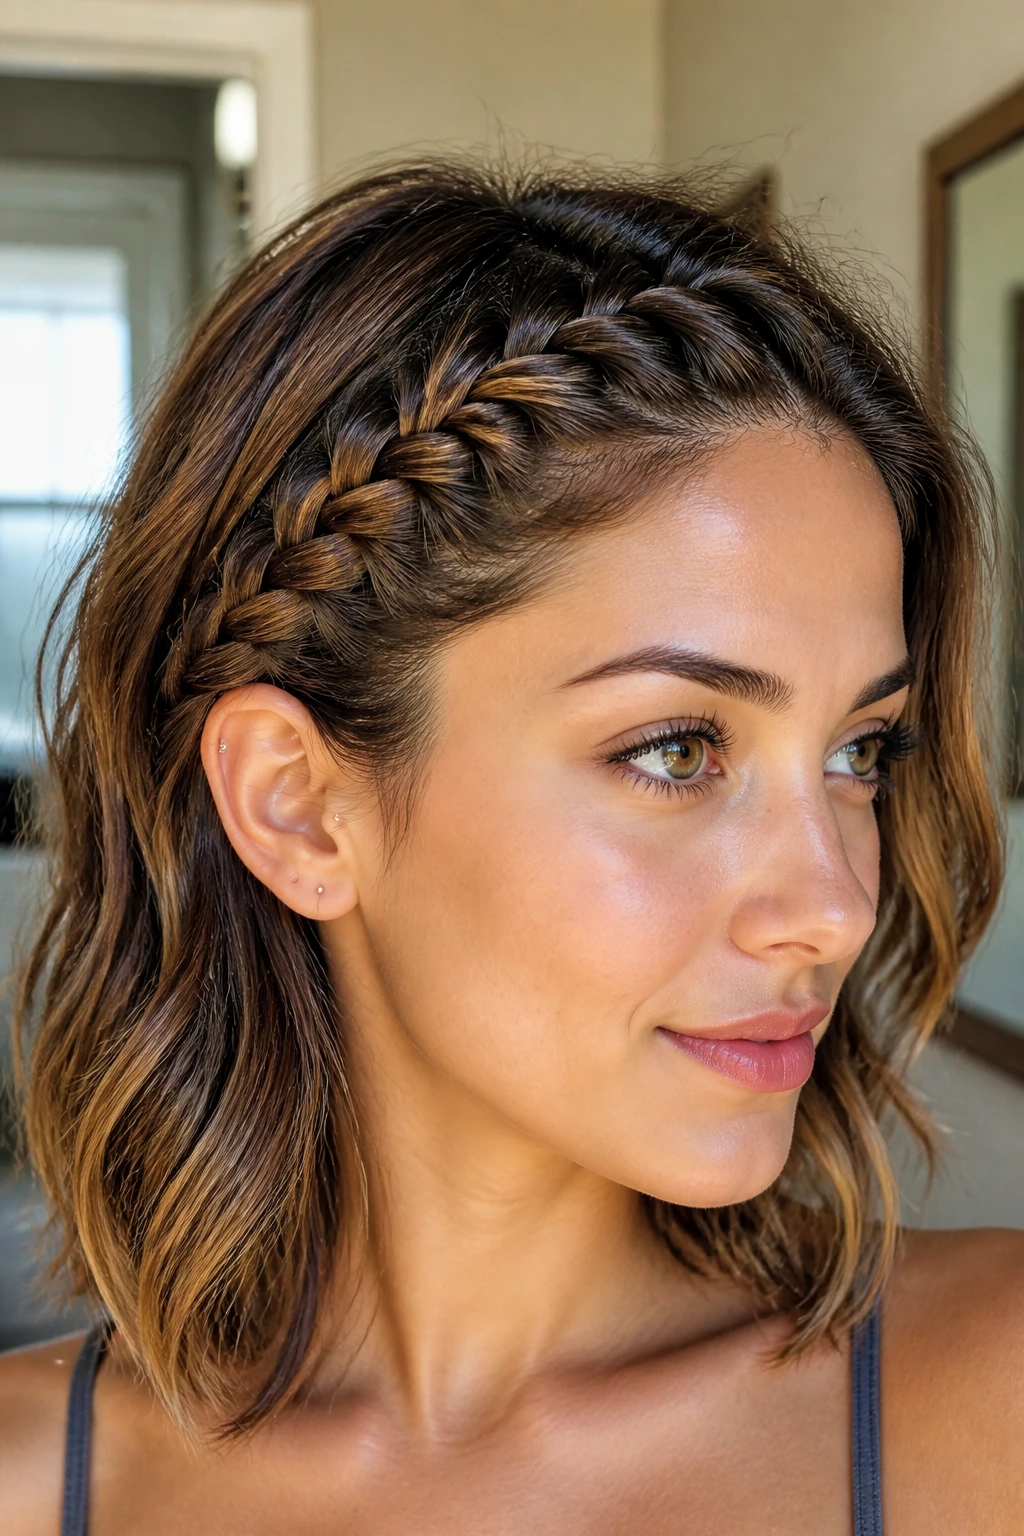
A lace braid is basically a French braid that only gathers hair from one side, which makes it a nice way to keep bangs or front layers out of the face. On medium hair, that one-sided sweep looks cleaner because the braid doesn’t have to fight a lot of extra length.
Start near the temple and braid along the hairline, adding hair only from the back side as you move across. Pin it behind the ear or let it trail into the rest of the hair. This style is useful when you want some structure at the front but don’t want to commit to a full updo.
If the front layers are short, let them sit a little loose around the braid. Forcing every piece in can make the style look cramped. A lace braid should look like it was placed there on purpose, not dragged into position.
17. Messy Boho Accent Braids
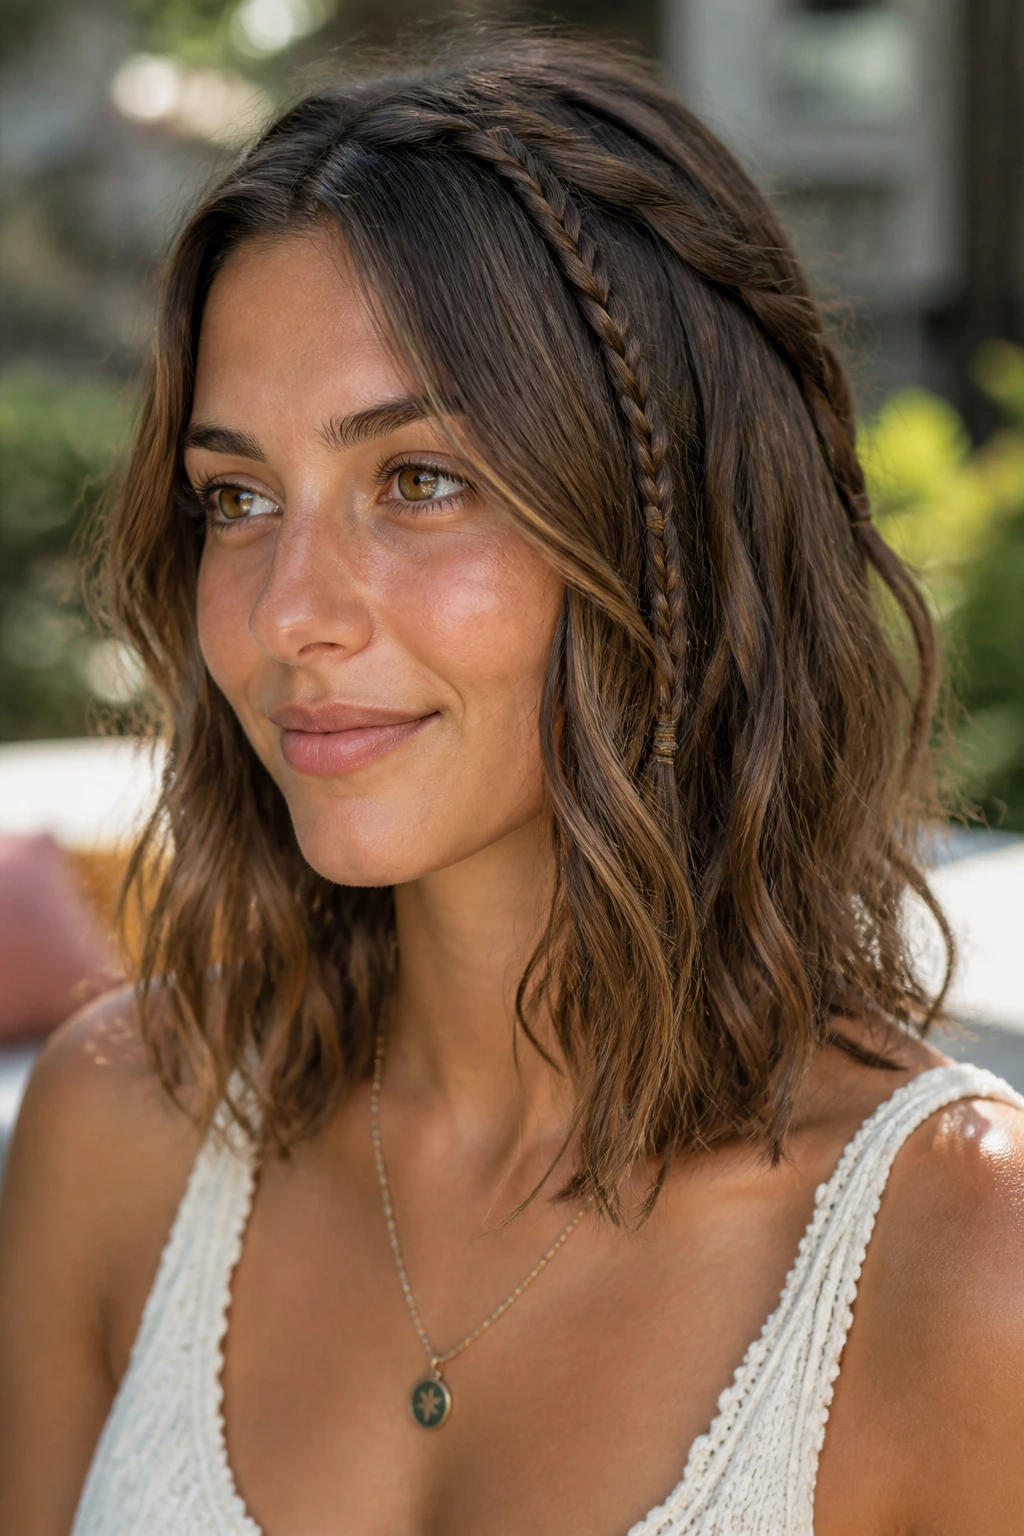
Small accent braids do a lot more than people think. A few tiny plaits scattered through medium hair can change the whole mood of a style without taking over the shape. That makes them a nice option when you want texture but not a full braided look.
Add one or two thin braids near the temples, behind one ear, or tucked into the crown. Keep them loose and imperfect on purpose. The point is contrast: the braids should give the hair some structure while the rest stays soft and movable.
- Clip the section first so it stays separate while you work.
- Use tiny elastics if the ends are too short to braid all the way down.
- Pull a few pieces free around the face to keep the style relaxed.
- Pair them with loose waves if you want the braids to blend in.
These braids are easy to overdo. Two is enough most of the time. Three if you want more texture. Ten would be a mess.
18. Double Fishtail Pigtails
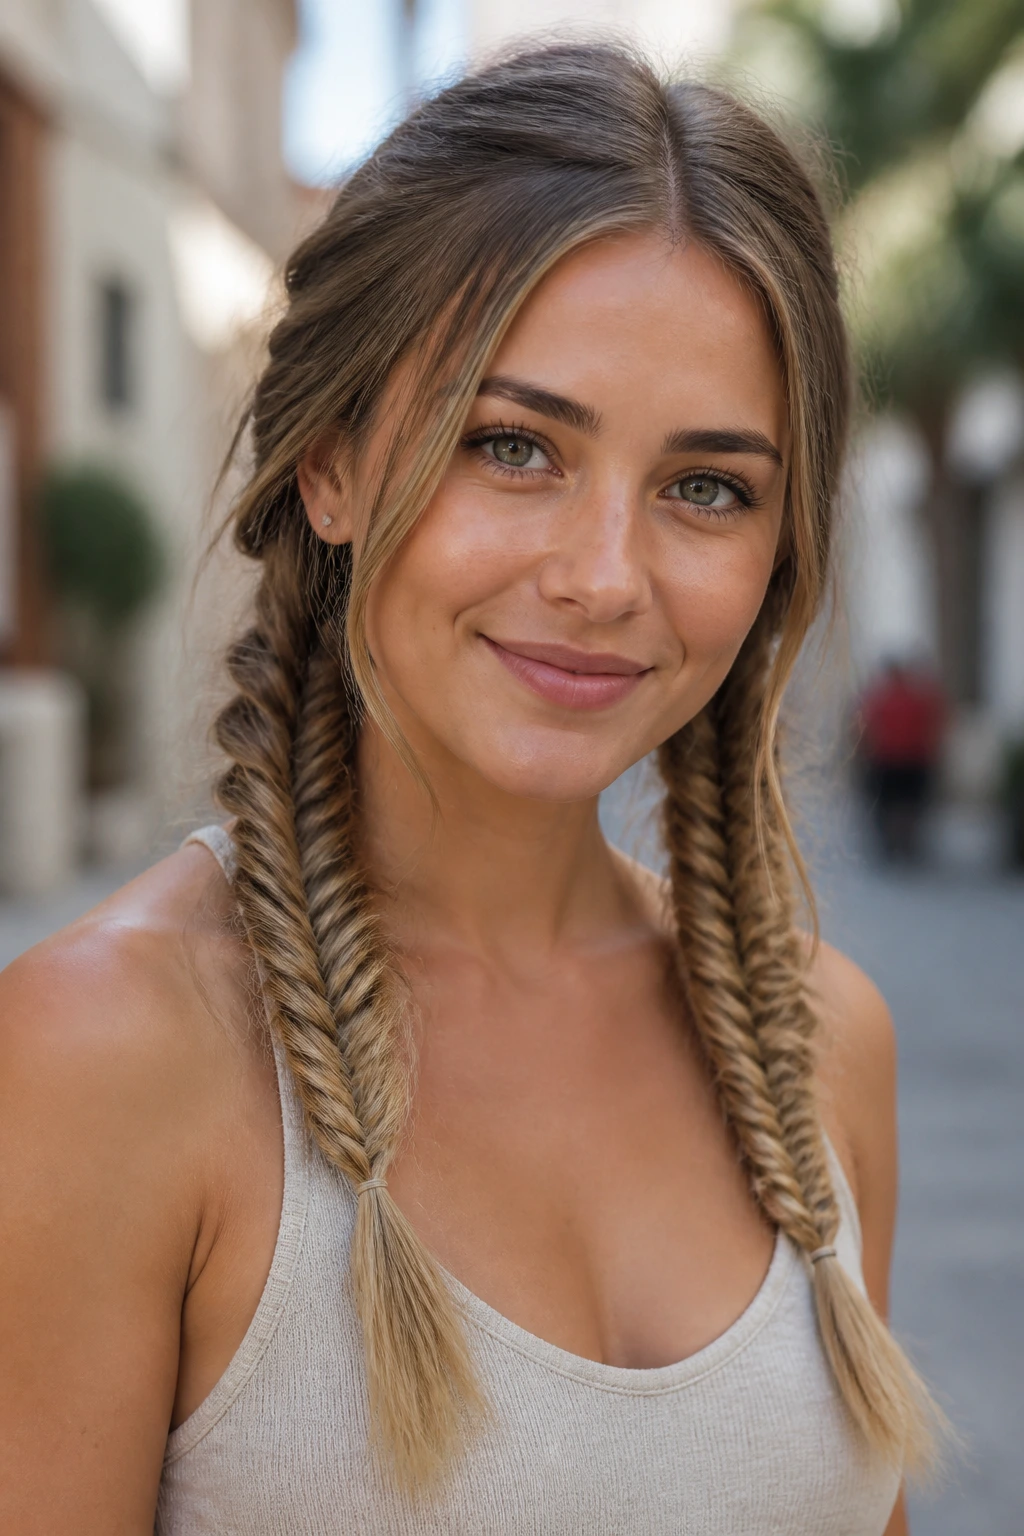
Double fishtail pigtails can look playful without feeling juvenile, which is a nice line to walk. Medium hair works well here because the braids sit cleanly on the shoulders and don’t get lost in extra length. They also keep the ends neat, which I appreciate more than I should.
Part the hair down the middle and create two low ponytails. Braid each one into a fishtail and tug the outer edges a little once you finish. If your hair is thick, keep the ponytails lower so the braids don’t puff out too much at the sides.
This style has a slightly softer feel than tight boxer braids. That makes it easier to wear with casual clothes, but it can still look polished if the part is sharp and the braids are even. A center part that’s clean all the way back makes a huge difference.
19. French Braid Into a Low Bun
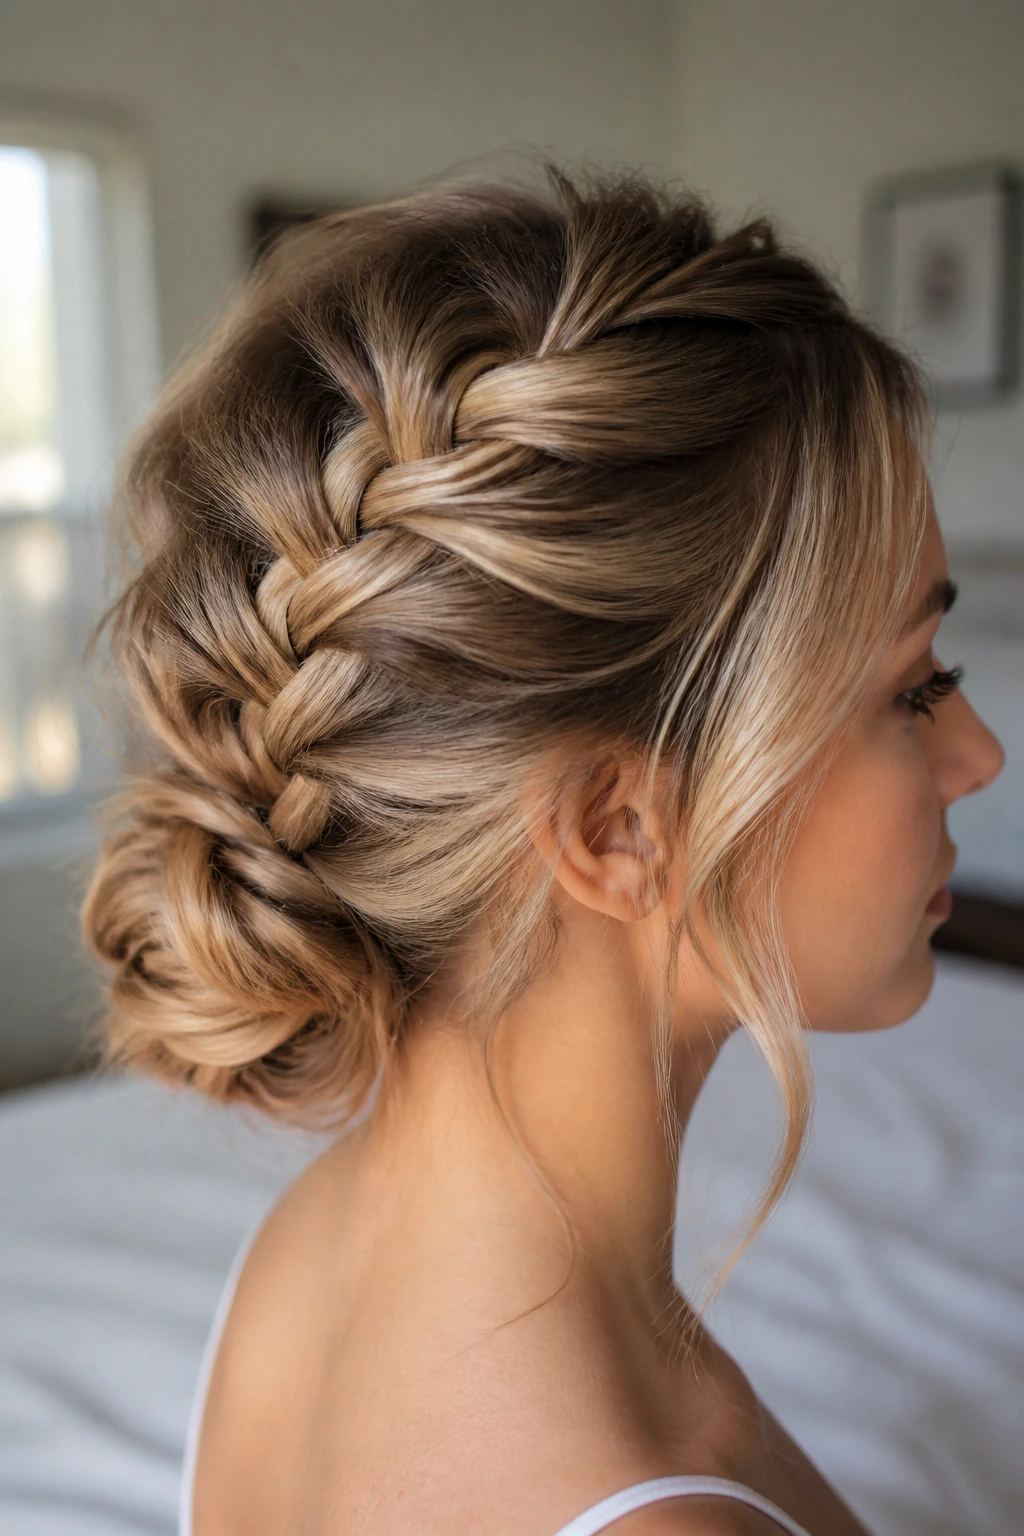
A French braid into a low bun is a neat answer when you want your hair up but not severe. It starts with the structure of a braid and ends with the tidy shape of a bun, which gives medium hair enough control without making it look overworked.
Braid from the crown down to the nape, then twist the remaining length into a small bun and pin it flat. This works especially well if the ends of your hair hit the shoulders, because there’s just enough length to coil without bulking up the bun. Too much hair can make the bun sit weirdly high. Medium hair usually avoids that problem.
A Few Fixes That Help
Use two pins to anchor the braid before you start twisting. Then use another two or three around the bun itself. If pieces stick out, tuck them under the braid line instead of trying to smooth them into place with more spray. That usually makes things worse.
The style feels professional, but not stiff. I like that. It gives you a little order without looking like you spent forty minutes on it.
20. Crisscross Braided Ponytail
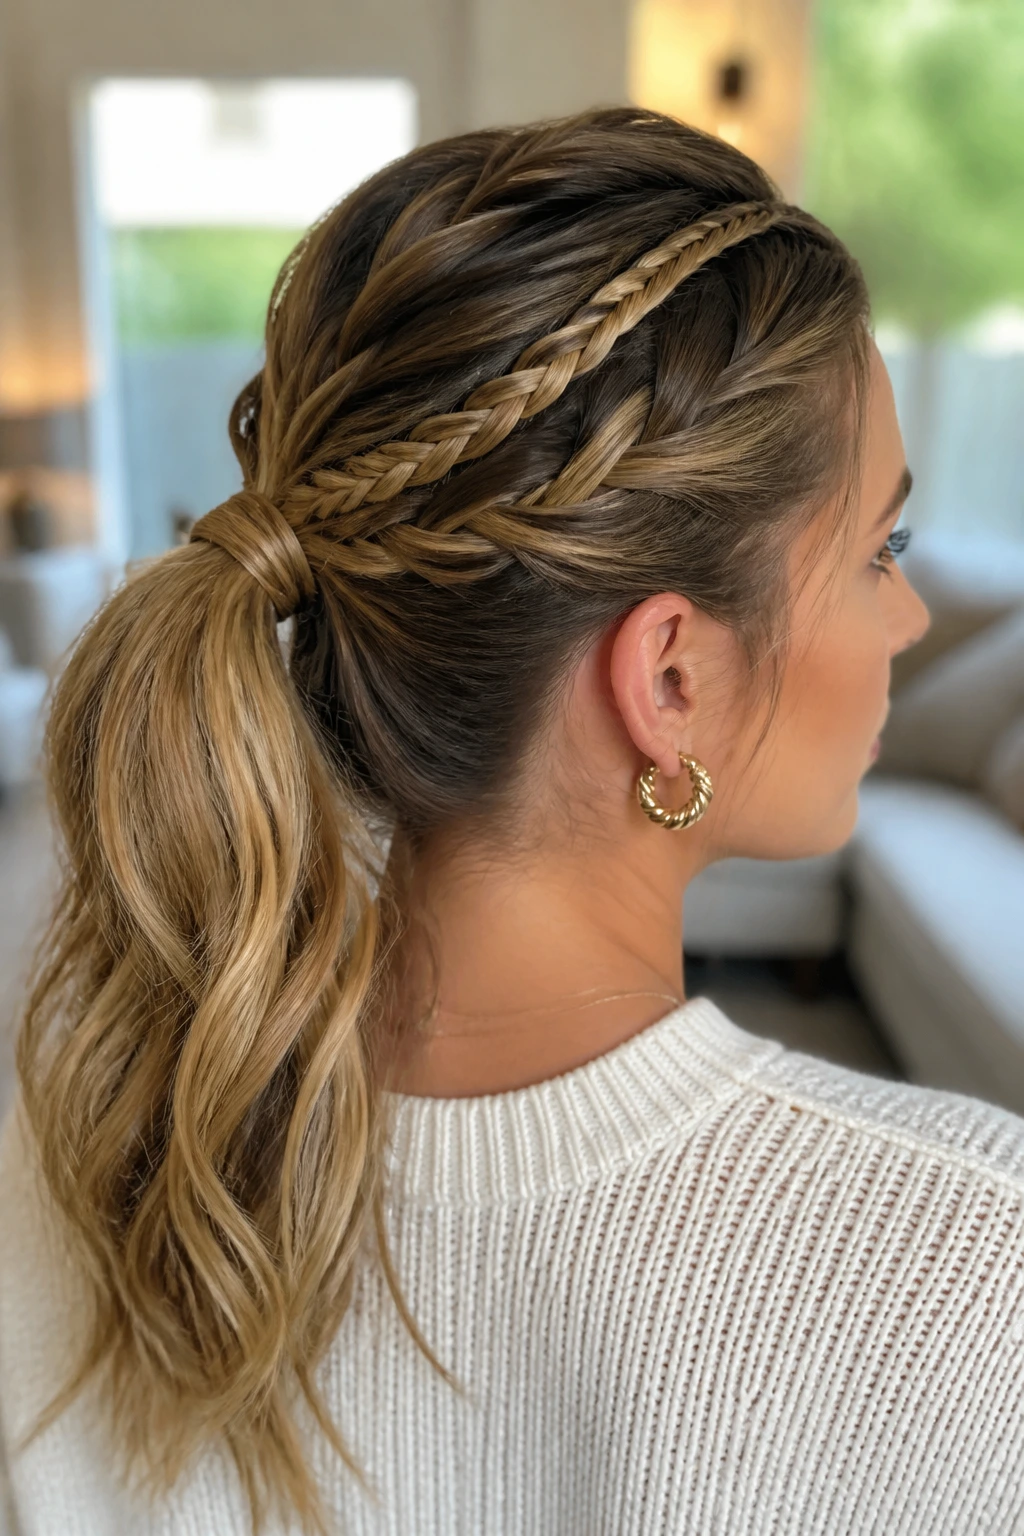
A crisscross braided ponytail gives a regular ponytail more shape without requiring a lot of braiding skill. On medium hair, the detail shows clearly because the sections don’t get buried under too much length. It’s a good pick when you want something sharper than a basic ponytail, but not as involved as a full braid.
Start with two small front braids or twisted sections, then cross them over the crown and secure them into a ponytail at the back. You can wrap a thin strand around the elastic to hide it. That tiny finish matters more than people think.
If your hair is layered, keep the front sections slightly wider so they hold. Narrow pieces tend to slip. A light teasing at the crown gives the crisscross shape more lift and keeps the ponytail from sitting flat against the head.
21. Mermaid Braid
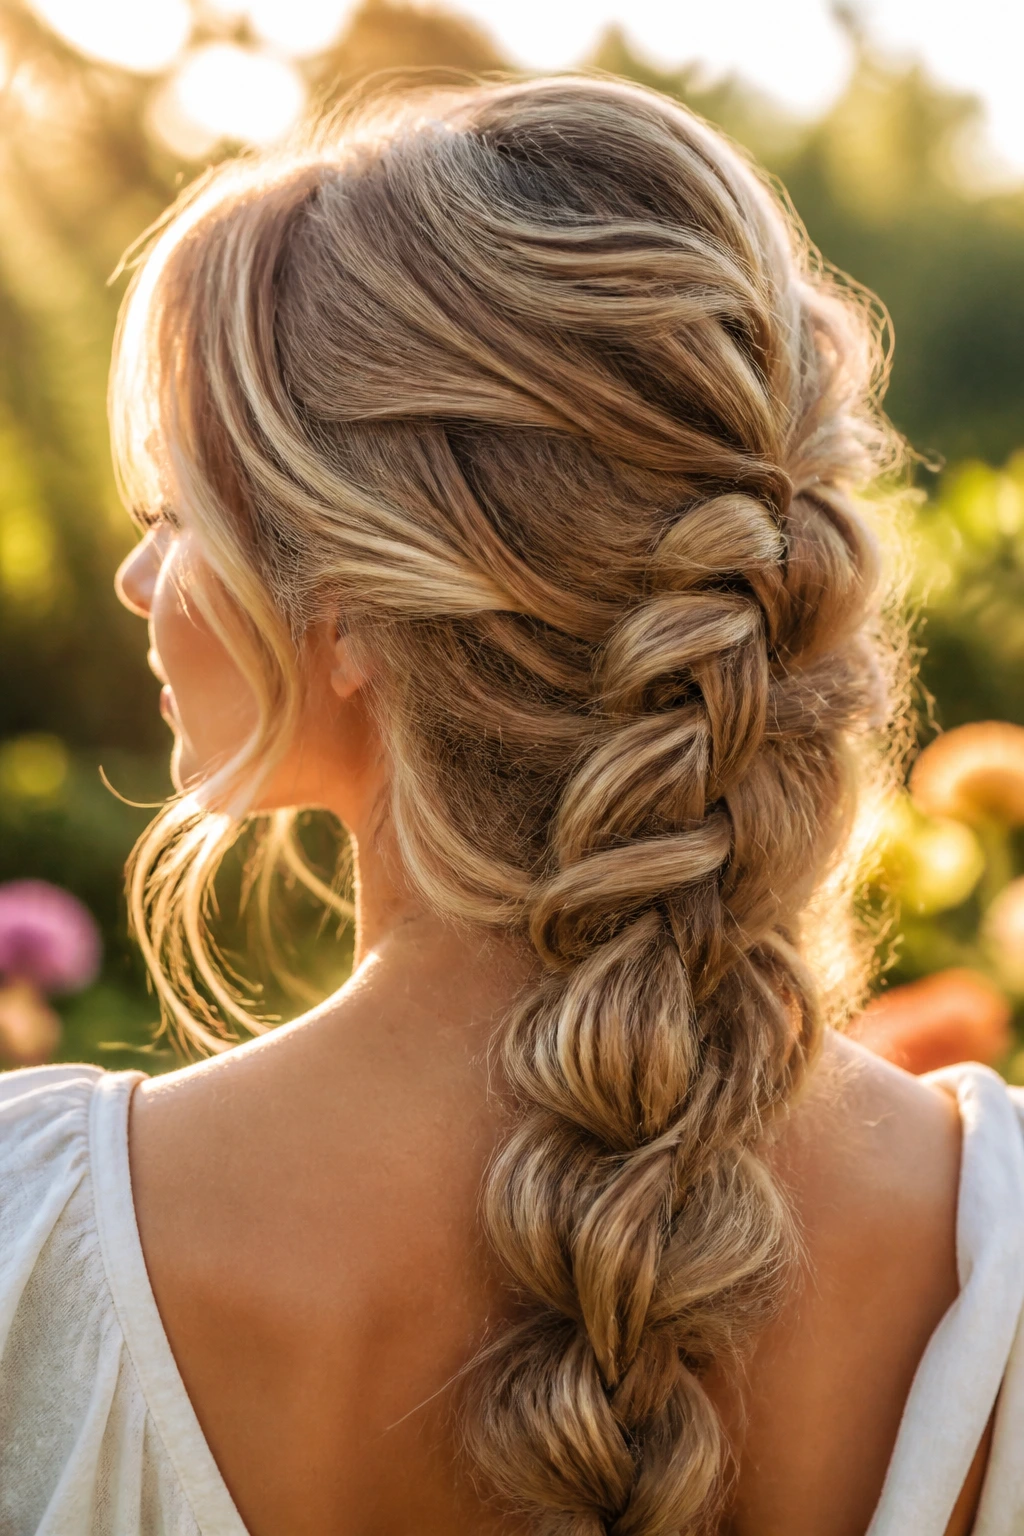
A mermaid braid is one of the few styles that actually benefits from medium hair staying a little compact. The braid looks thick and airy, but it does not need endless length to read well. In fact, medium hair keeps the woven shape from turning into a heavy curtain.
The style is built from loose, fat sections, almost like a puffed fishtail with more volume. Start at the back and work down with gentle tension, then pull the braid apart after you finish. That final widening gives it the soft, piecey look people want from this style.
This braid is a good fit if your hair has natural wave. Straight hair can wear it, too, but it usually needs texturizing spray first. The braid should look full, not fuzzy. There’s a difference, and the second one is usually a sign that the sections were too rough.
22. Braided Space Buns
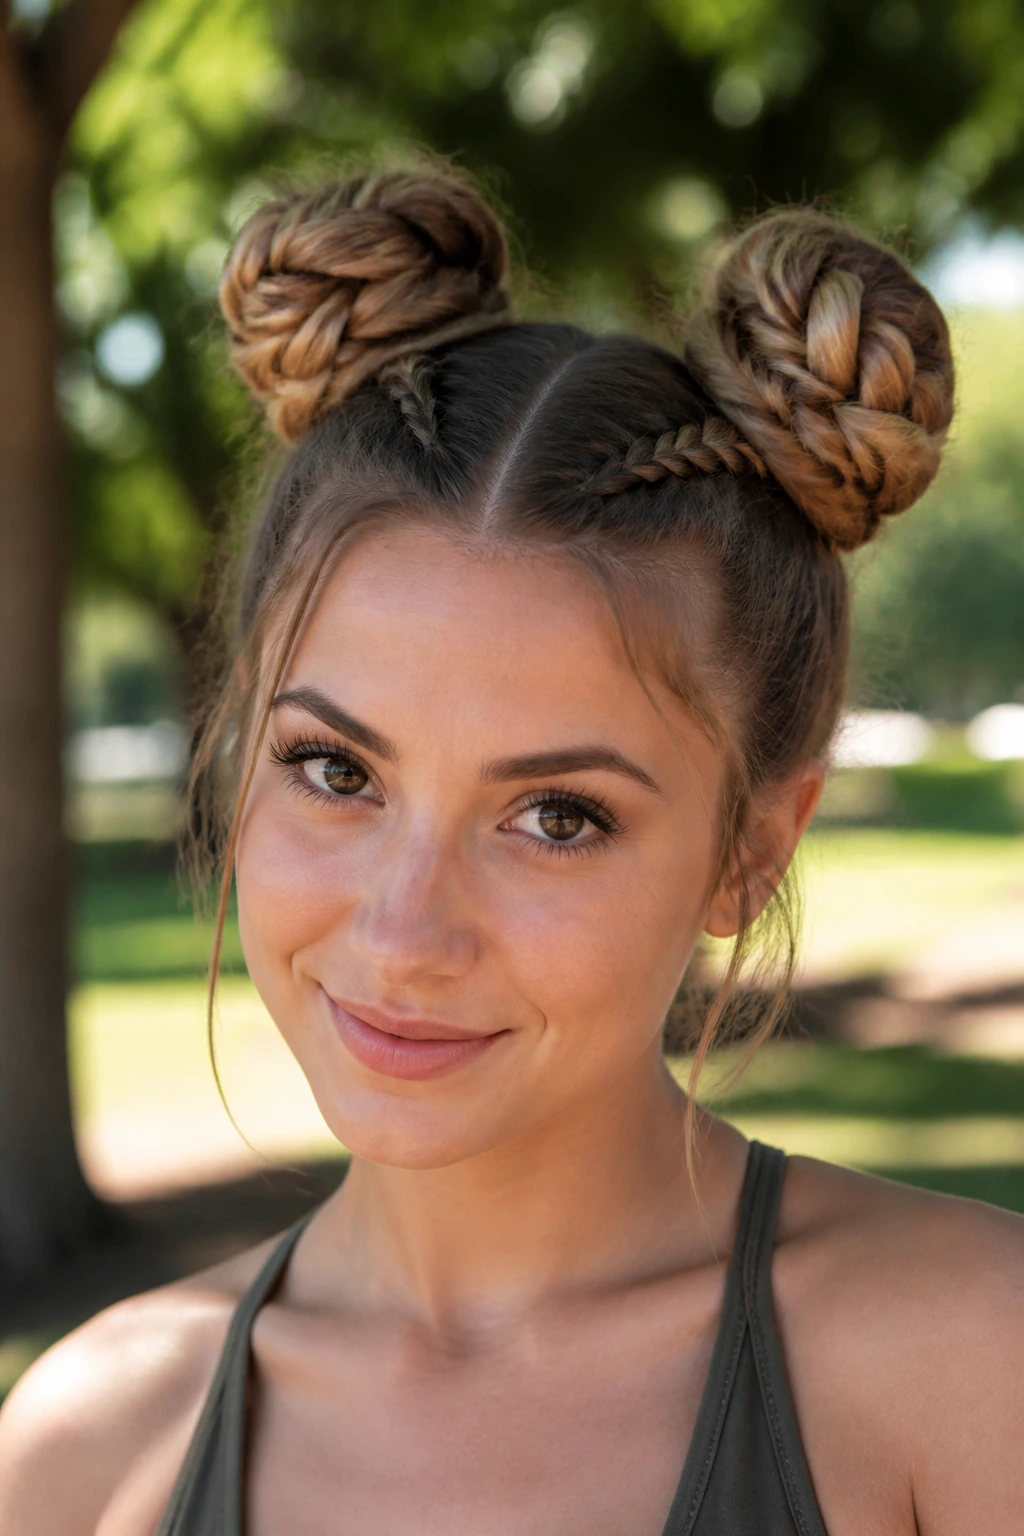
Braided space buns are fun, but they’re also practical on medium hair. The braid gives each bun enough body to hold shape, and the shorter length keeps the buns from drooping as the day goes on. If your hair is thick, this style can actually be easier than a high bun because you’re splitting the weight.
How to Keep the Buns Balanced
Make two high pigtails, braid each tail, then wrap them into buns and pin them firmly. If you want a softer look, pull a few loops loose before you twist the braid into the bun. If you want more hold, keep the braid tighter and use more pins.
- Place the buns level with each other before you start pinning.
- Use clear elastics at the base so the buns don’t slide.
- Tuck the ends underneath the bun, not around the outside edge.
- Spray the roots lightly before lifting the hair into pigtails.
This style is playful, yes, but it’s also useful for concerts, travel, and hot days when you want the hair completely off your neck.
23. Twist-and-Braid Half-Up Style
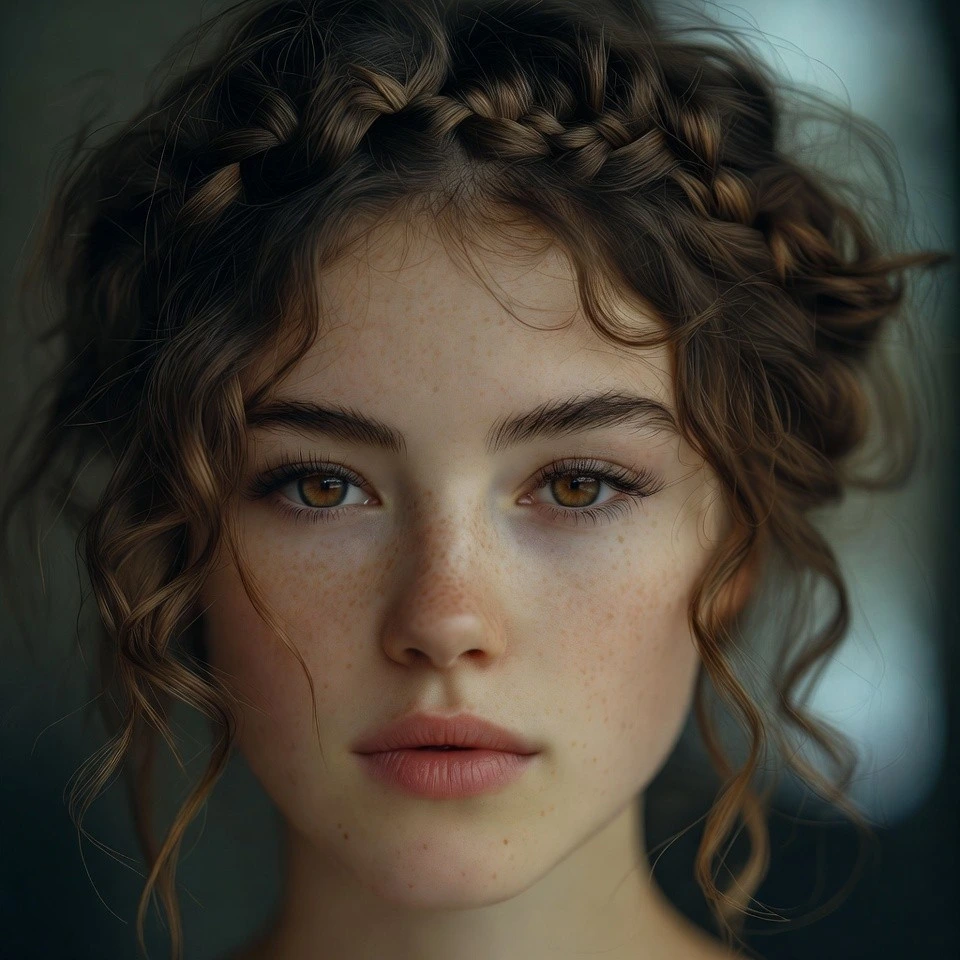
This one sits nicely between a braid and a twist, which is part of why it works so well on medium hair. You get texture at the crown without having to drag every strand into a full updo. The ends stay loose, which keeps the whole thing from feeling too tight or formal.
Take two small sections from the front, twist them back, then join them into a braid at the center. Or do the reverse: braid a center piece and feed the side twists into it. Both versions work. The style is flexible, which is handy when your hair has layers that won’t stay in a straight line anyway.
A few hidden pins under the joining point make the style last longer. I’d also leave the ends slightly wavy instead of flat-ironed. The contrast between the braid and the loose hair is what gives this one its shape.
24. Side-Swept Crown Braid
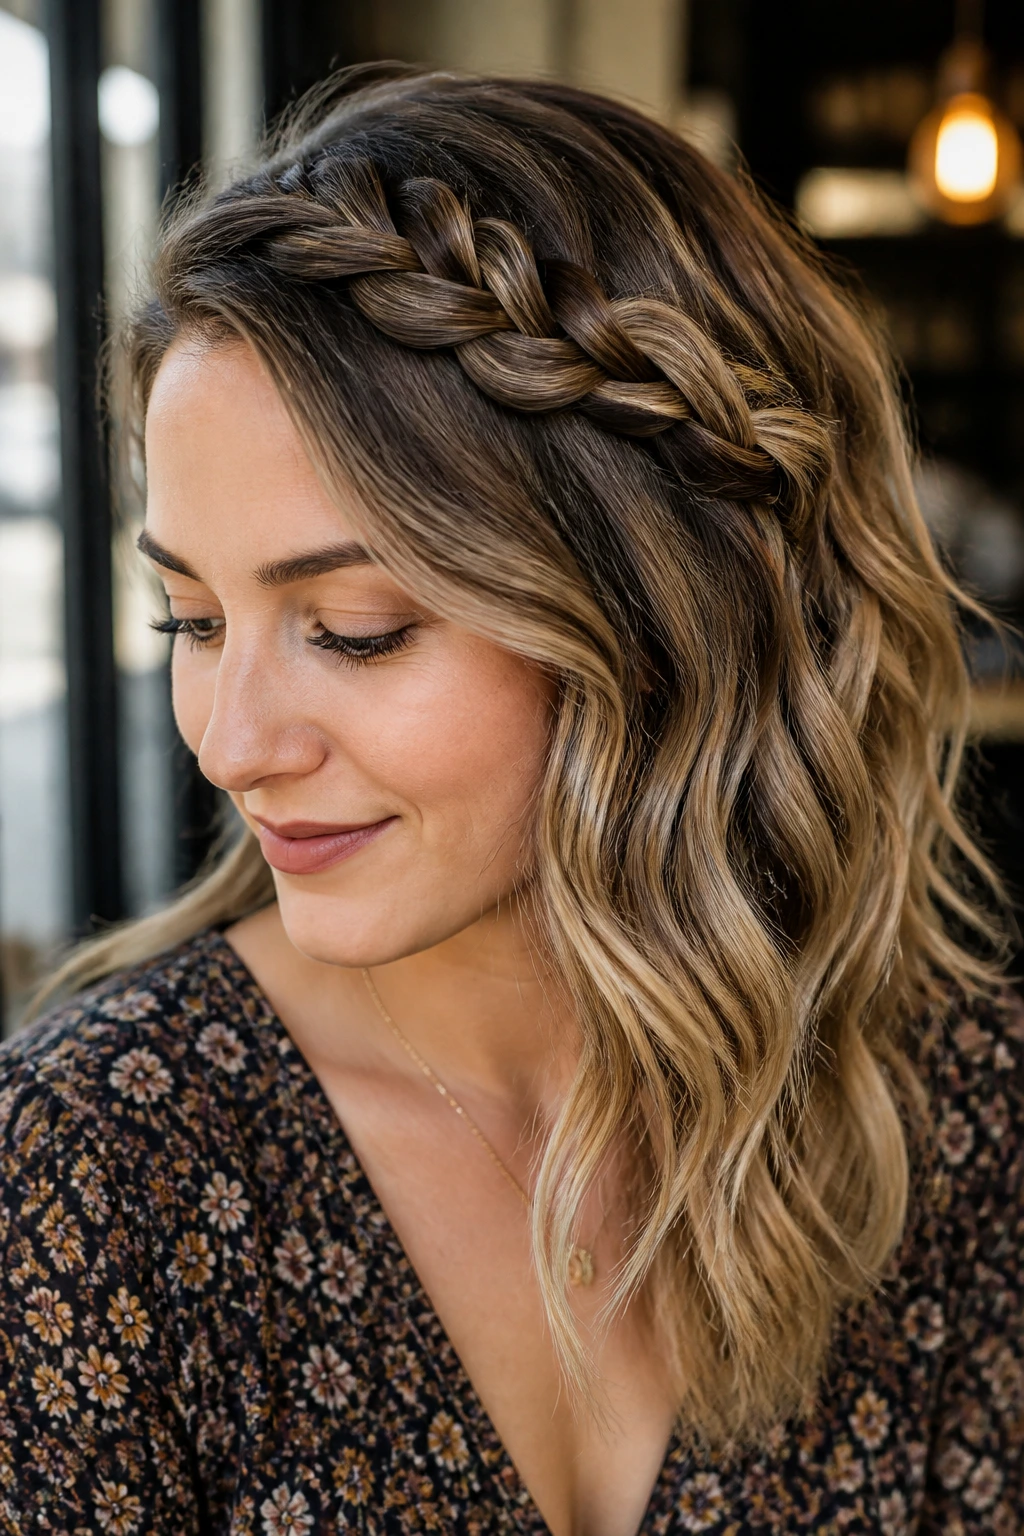
A side-swept crown braid feels softer than a full halo braid, which is exactly why I like it on medium hair. The braid only travels across part of the head, so it leaves room for the rest of the hair to move. That makes the style feel lighter and less formal.
Braid from one side of the head across the top, then stop before you reach the opposite temple and pin the end underneath. Let the loose hair fall over one shoulder or curl around the collarbone. If the braid sits too high, the whole look can feel stiff. Lower placement is better here.
This is a good choice when you want the crown detail but don’t want the commitment of wrapping braid all the way around the head. It’s also kinder to layered hair because it doesn’t demand perfect symmetry.
25. Infinity Braid
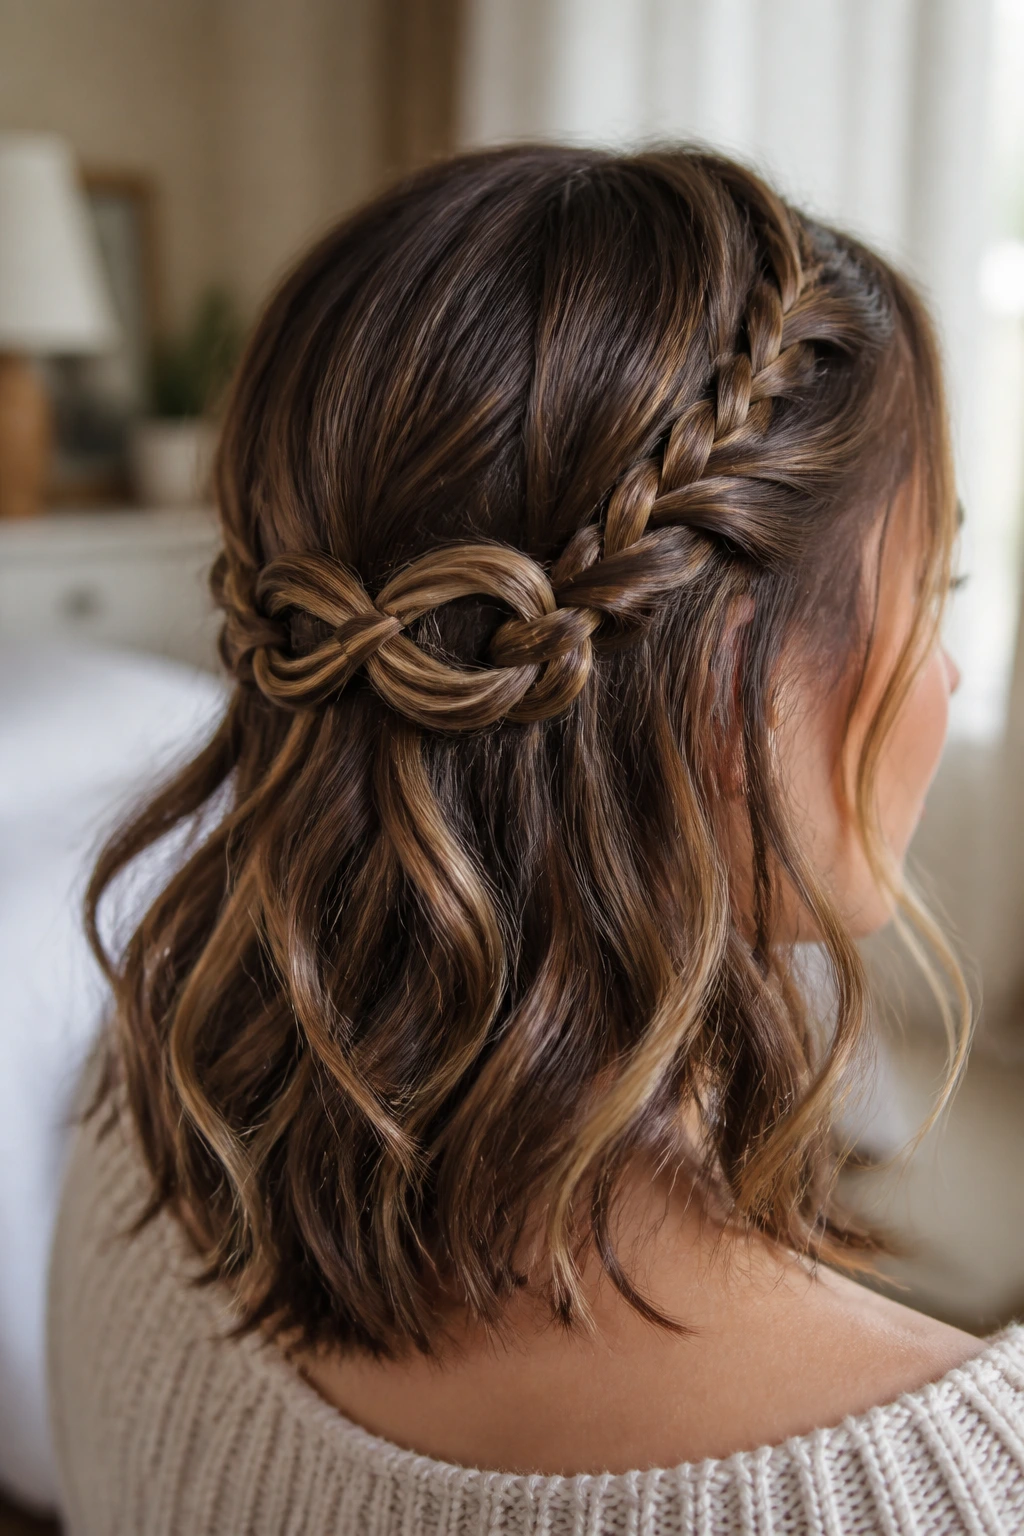
What makes the infinity braid fun is the shape, not the difficulty. It creates a woven loop pattern that stands out on medium hair because the sections stay visible. On longer hair, the braid can lose its definition. Here, the pattern usually holds its line.
You’ll need a little patience, because the motion is more about looping one strand around another than crossing three sections in a normal rhythm. Once it clicks, though, it looks surprisingly neat. A smooth base helps a lot. Frizz makes the pattern harder to read.
I like this braid for a single section down the back or as a side detail tucked into loose waves. It does not need to be the whole hairstyle. In fact, it often looks better as one clear accent than as an all-over effect.
26. Knotted Braid Ponytail
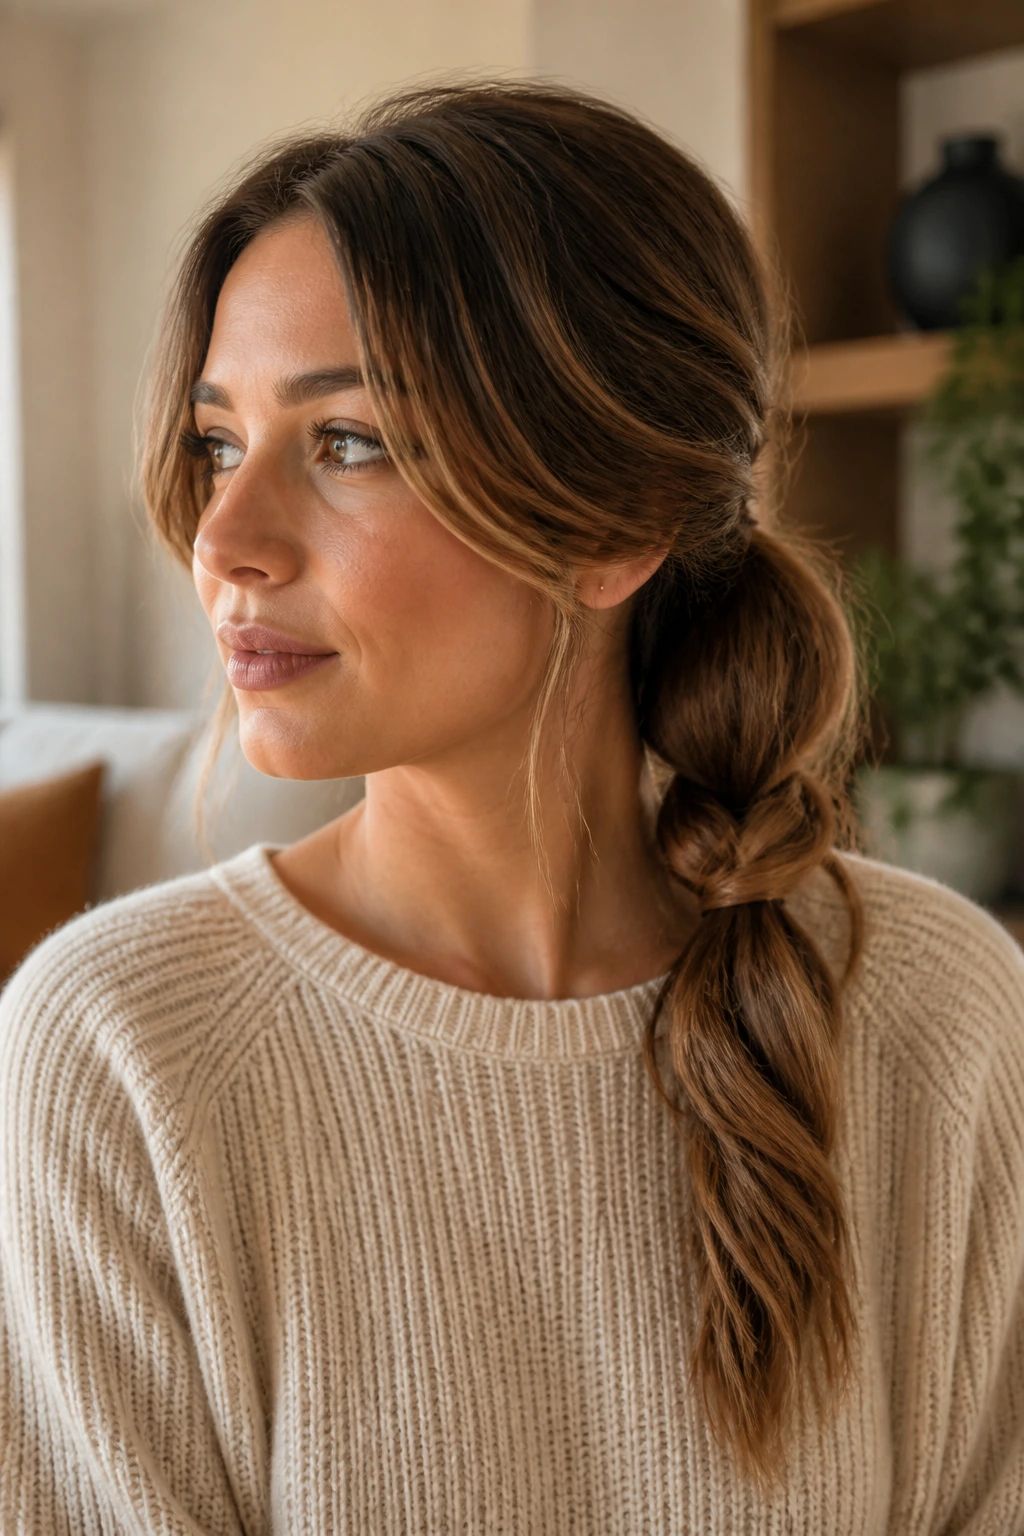
A knotted braid ponytail gives medium hair extra shape without asking for a full braid from root to tip. That’s useful when the front of your hair is layered or when you want the tail to look a little more interesting than a standard ponytail. The knot effect creates a break in the line, which makes the style feel deliberate.
Start with a ponytail, split the tail into two sections, and tie them into a loose knot or two before securing the rest in a braid or twist. The result lands somewhere between a braid and a wrapped ponytail. It sounds odd on paper. In the mirror, it makes sense fast.
- Keep the knot low so it doesn’t stick up from the head.
- Secure each section before moving to the next step.
- Use a small elastic right under the knot if your hair is slippery.
- Leave the tail a little undone for softness.
This one is especially good if you’re tired of the same ponytail shape and want something with a bit more structure.
27. Pinned-Back Accent Braids
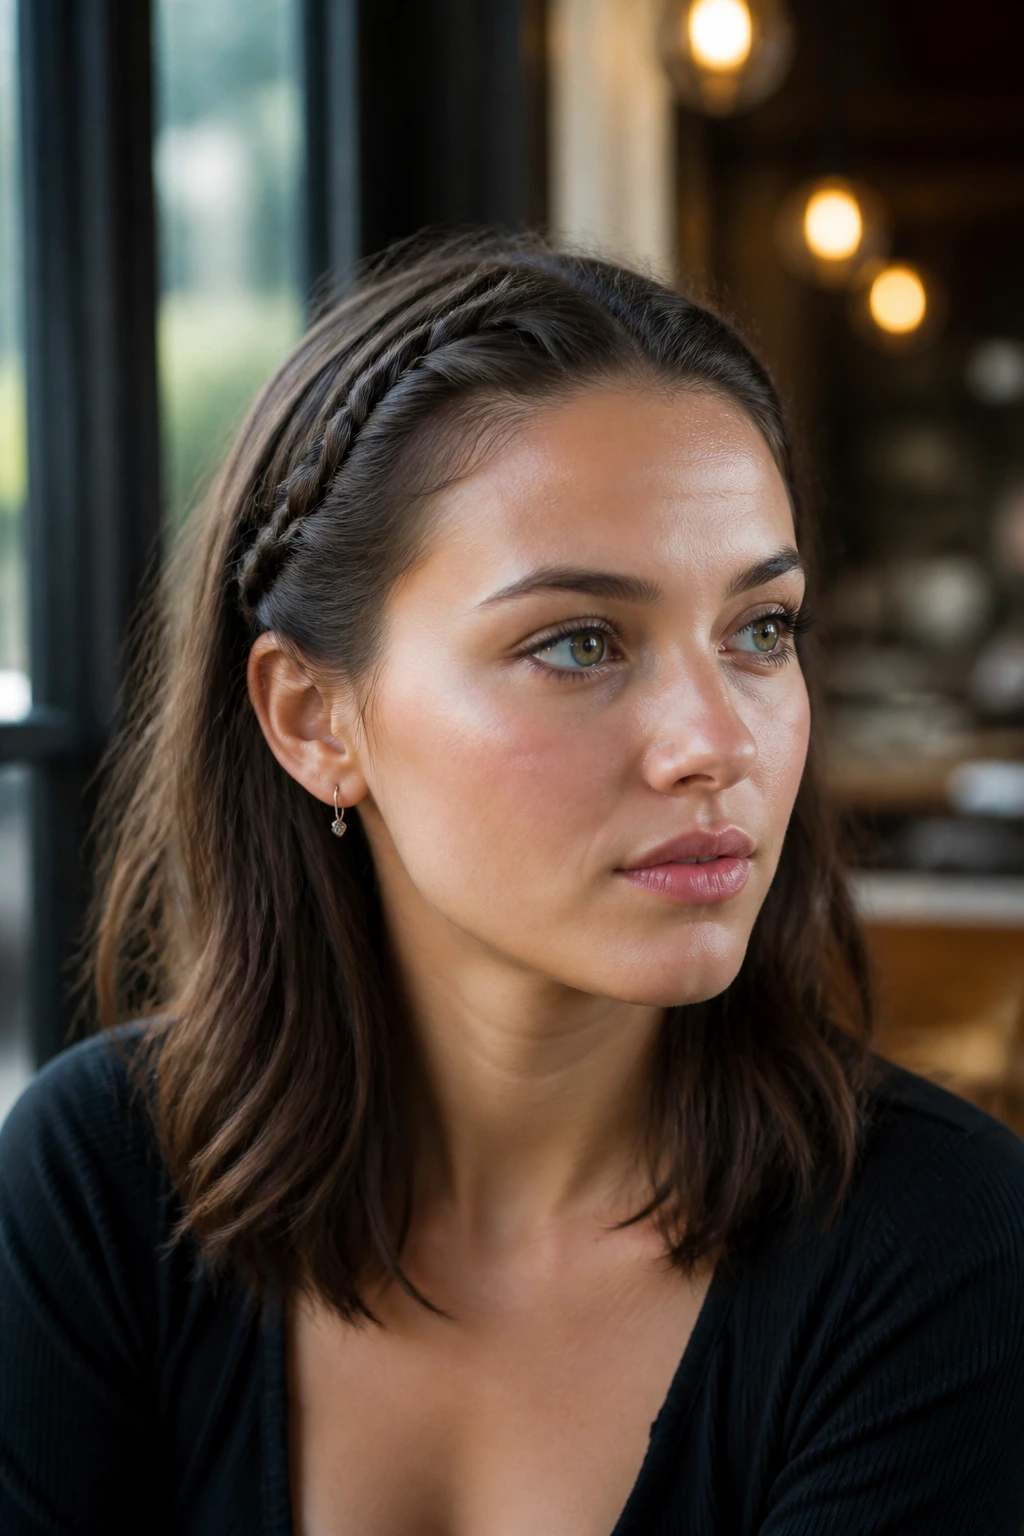
Pinned-back accent braids are one of my favorite easy fixes for medium hair that wants to fall into your face all day. They use a tiny section at the temple or just behind the ear, braid it, and pin it back so the rest of the hair can stay loose. Nothing dramatic. Just useful.
Where to Place Them
The best placement depends on your cut. If you have face-framing layers, braid from the part line and pin the section near the temple. If your hair is more blunt, tuck the braid lower behind the ear so it blends into the rest of the hair.
This style works well when you need a quick refresh between washes. It also pairs nicely with loose waves or a low bun. You can use one braid for a subtle detail or two braids for a more balanced look. I’d stop there. Any more and it starts to compete with the rest of the style.
28. Braided Chignon
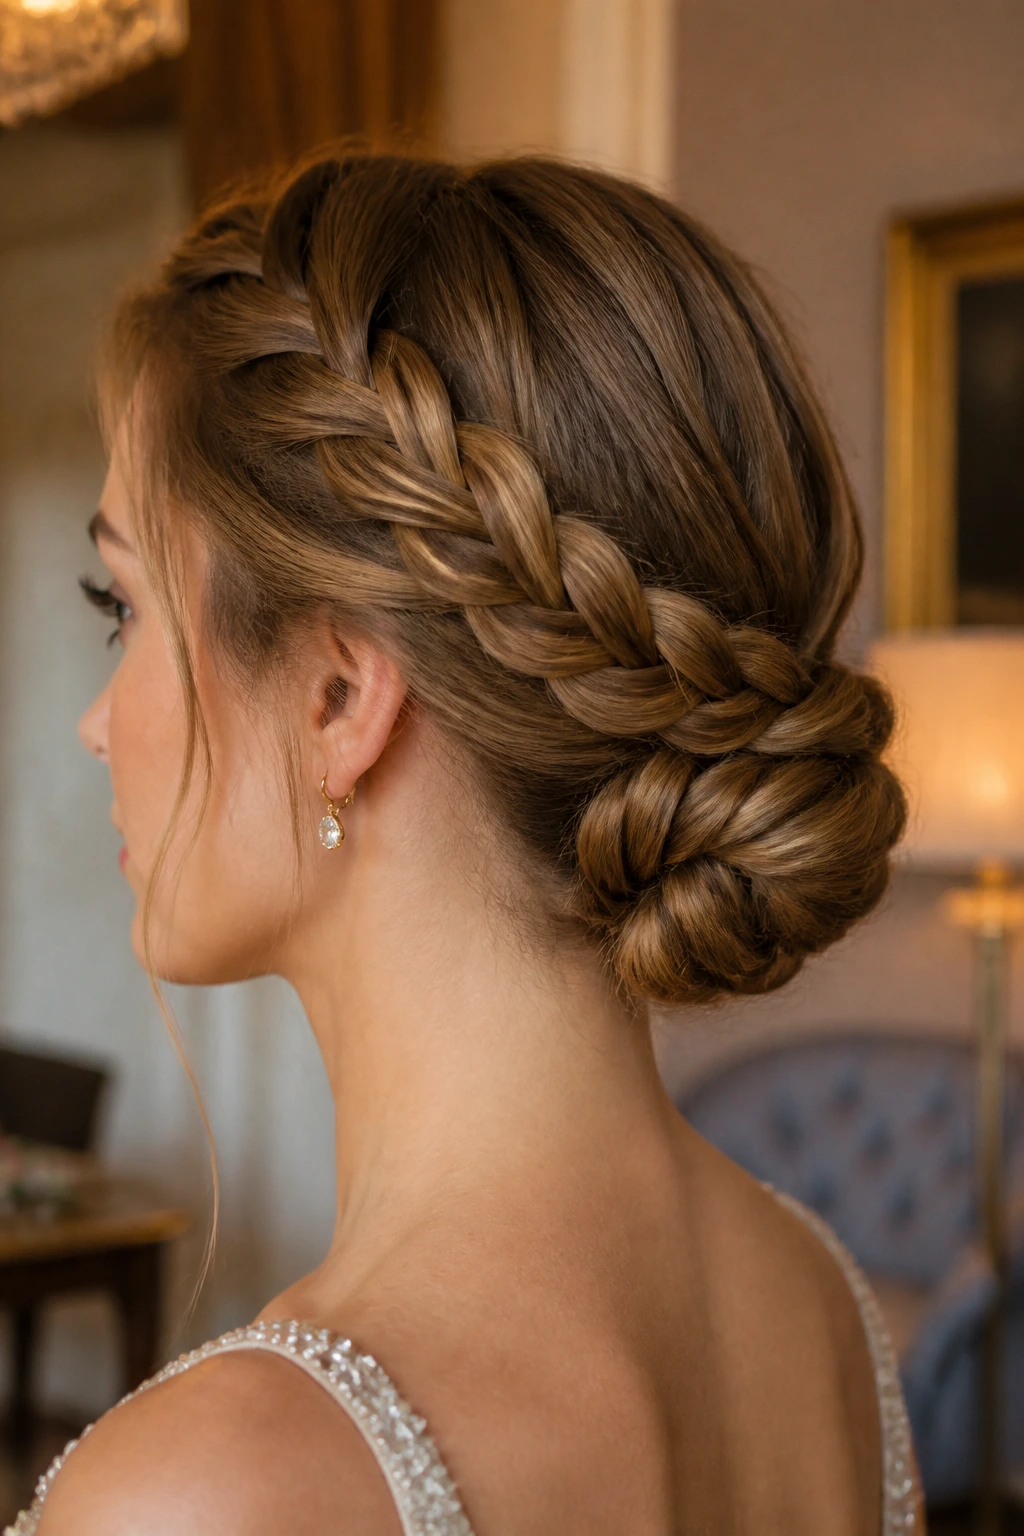
A braided chignon is the dressiest style in the group, and medium hair is a strong length for it because the braid can be tucked and pinned without creating a bulky knot. The finished shape sits low and neat, with enough texture to keep it from looking flat.
Make a low braid, wrap it into a compact coil, and pin it into place at the nape. If the hair is thin, backcomb the braid lightly before coiling so it has more body. If it’s thick, keep the braid a little looser so it bends without fighting you. That small adjustment matters.
This is the style I’d reach for when I want braids to look grown-up without getting fussy. The chignon gives you a clean line, and the braid gives you texture. That combination works in a way a plain bun often doesn’t.
Final Thoughts
Medium hair gives braids enough length to show their shape and enough lightness to keep them from feeling dragged down. That’s the reason so many braided hairstyles for medium hair look better here than they do on longer, heavier lengths. The braid sits where you put it. It doesn’t vanish.
The real trick is matching the braid to the job. A side braid is easy and casual. A halo braid or chignon takes more time but gives you a cleaner finish. And if your hair is layered or slippery, prep matters more than force. Texture spray, small elastics, and a few well-placed pins usually do more than another round of hairspray ever will.
I’d start with the styles that suit your daily routine, not the ones that look hardest on a screen. Medium hair is forgiving, but it still likes a braid with a clear shape and a little softness at the edges. That’s where the good ones live.
