



A clean side part changes everything. Side cornrow braid styles for natural hair can look sharp, soft, sporty, dressy, or all of the above, and the difference usually comes down to three things: the parting, the tension, and where the ends land.
On coily and curly hair, a neat braid pattern starts long before the first strand gets crossed. If the hair is stretched, detangled, and sectioned with a calm hand, the style sits flatter and stays cleaner at the root. If the roots are puffy, the whole look can lose its shape fast.
I care about comfort more than glossy photos. A style can look flawless and still be a terrible choice if it pulls the hairline, feels heavy at the temples, or needs so much product that your scalp feels coated by bedtime.
The 15 styles below move from easy everyday looks to more sculpted ones. Some are quick, some take patience, and a few are the kind of style you book when you want the braid pattern itself to do the talking.
1. Deep Side-Part Cornrows Falling Over One Shoulder
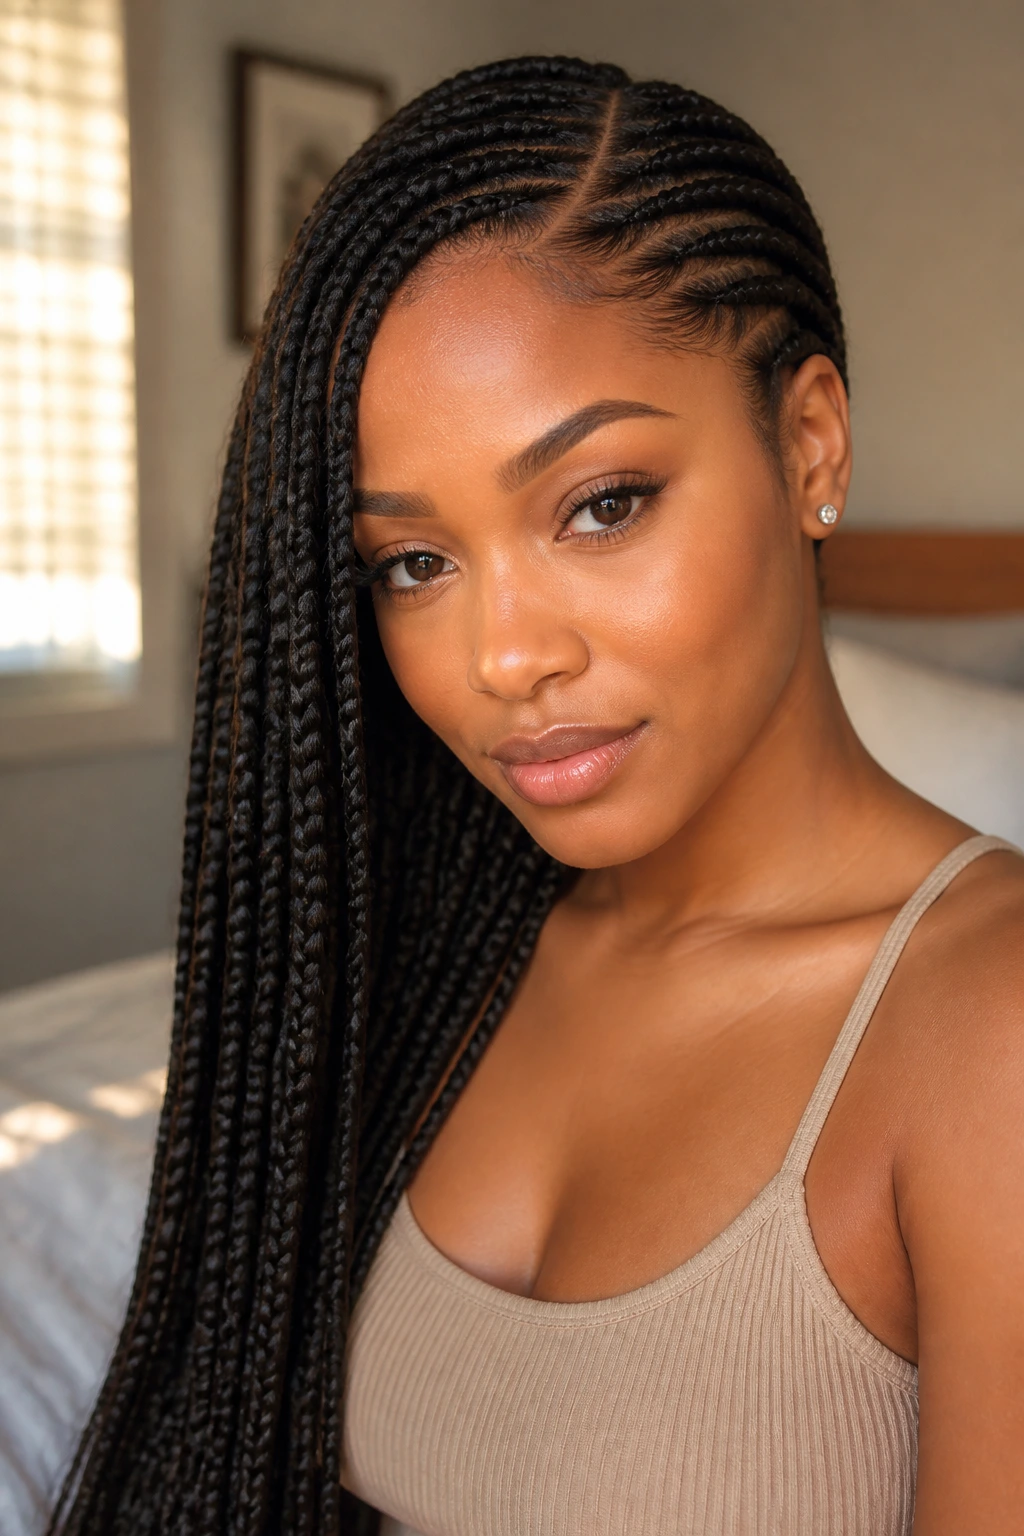
A deep side part changes the whole mood of a braid set. Instead of sitting evenly on both sides of the head, the style leans hard to one side, which gives natural hair a little drama without asking for extra length.
This version works especially well when you want your face open on one side and a soft curtain of braids on the other. I like it on medium to long natural hair because the braids can land on the shoulder and still feel controlled, not messy. If the hair is tightly coiled, stretch it first so the part line stays visible.
Why This Shape Works
The side part does more than move the braids around. It gives the eye a place to land, which makes the whole style feel intentional, even when the braid size is simple. A braid set can look ordinary from the front if the part is straight down the middle. Shift that line over, and suddenly the head has shape.
For natural hair, the front edge matters a lot. Keep the first braid a little away from the hairline if your edges are tender. A finger-width of breathing room is better than a braid that looks sharp on day one and irritated by day three.
- Ask for 4 to 8 cornrows, depending on density.
- Make the side part start just above the arch of the eyebrow for a strong sweep.
- Let the braids fall over the fuller shoulder, not the side that already feels crowded.
- Finish the ends as straight plaits, curly ends, or tucked ends, depending on how much movement you want.
Small tip: if you wear earrings, this style is one of the few that actually shows them off.
2. Feed-In Side Cornrows Into a Low Ponytail
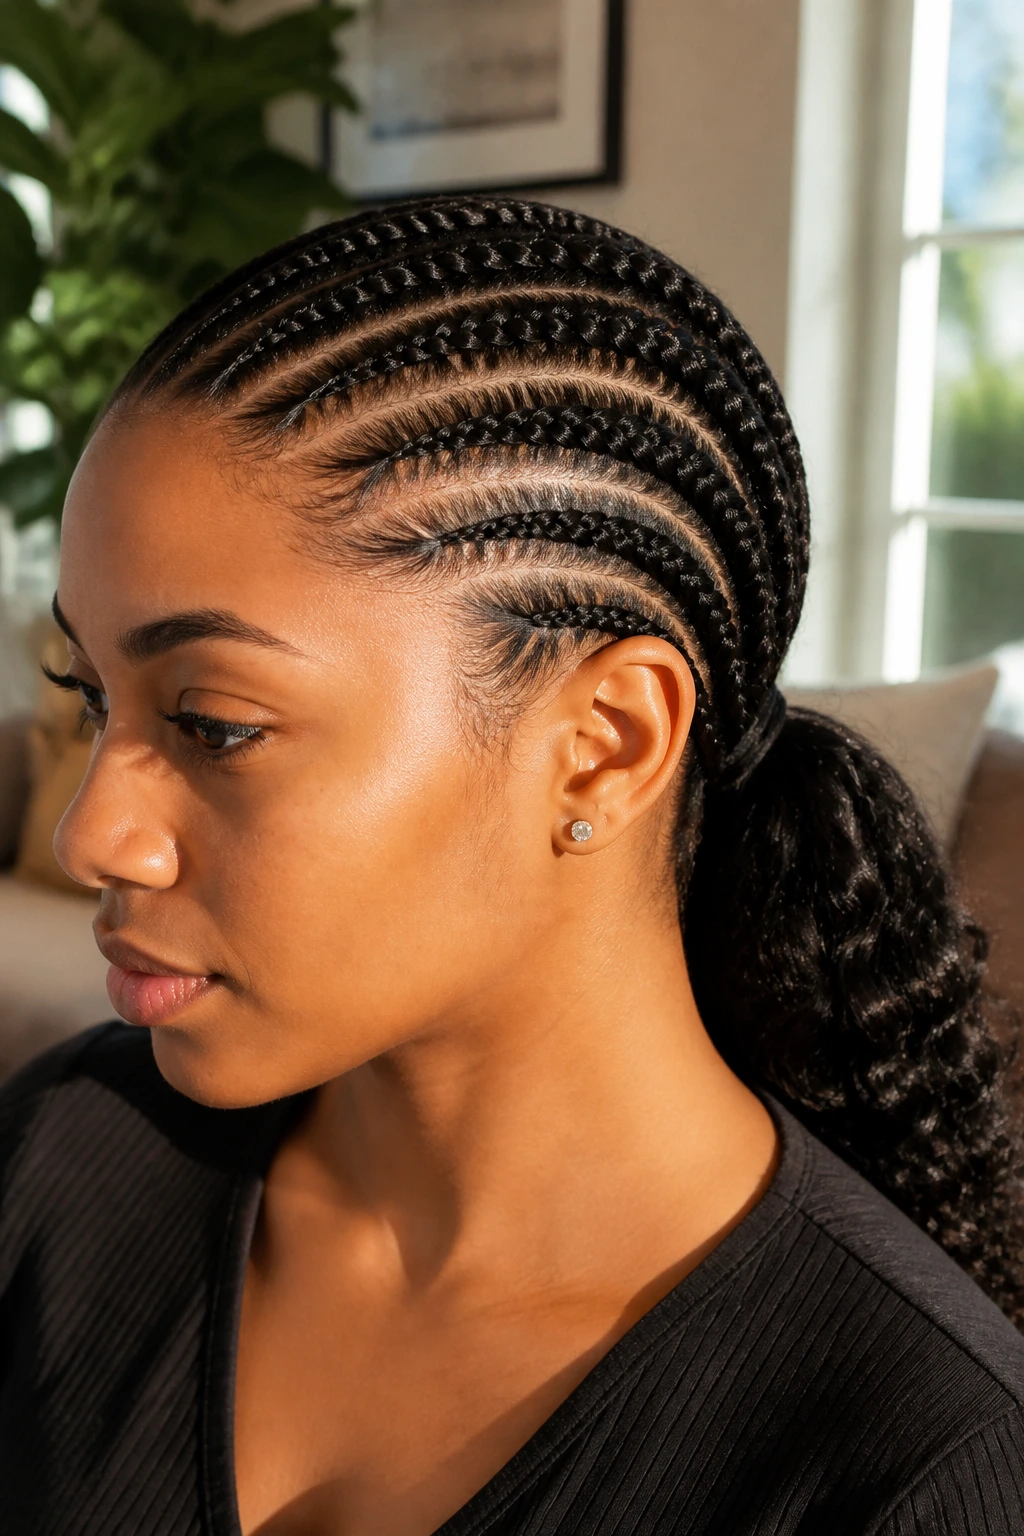
This is the workhorse style. Clean, easy to read, and far lighter than a full head of chunky braids.
Feed-in cornrows start small at the hairline and slowly build as braiding hair gets added, which keeps the front from looking bulky. Pulled into a low ponytail, the whole look settles near the nape and stays neat without screaming for attention. That makes it a smart choice for work, errands, or any day when you want your hair handled and off your neck.
The low ponytail also takes pressure off the temples. That matters. A lot of side styles get ruined because the front is too tight, too dense, or too packed with gel. Here, the braid line can stay sleek while the ponytail does the heavy lifting.
I’d pick this style when I want something practical but still polished enough to wear with a blazer, hoop earrings, or a plain tee that needs a little structure. It lasts longer than a loose side sweep and is easier to refresh at the roots with a satin wrap and a touch of mousse.
3. Curved Side Cornrows With a Sculpted Side Bun
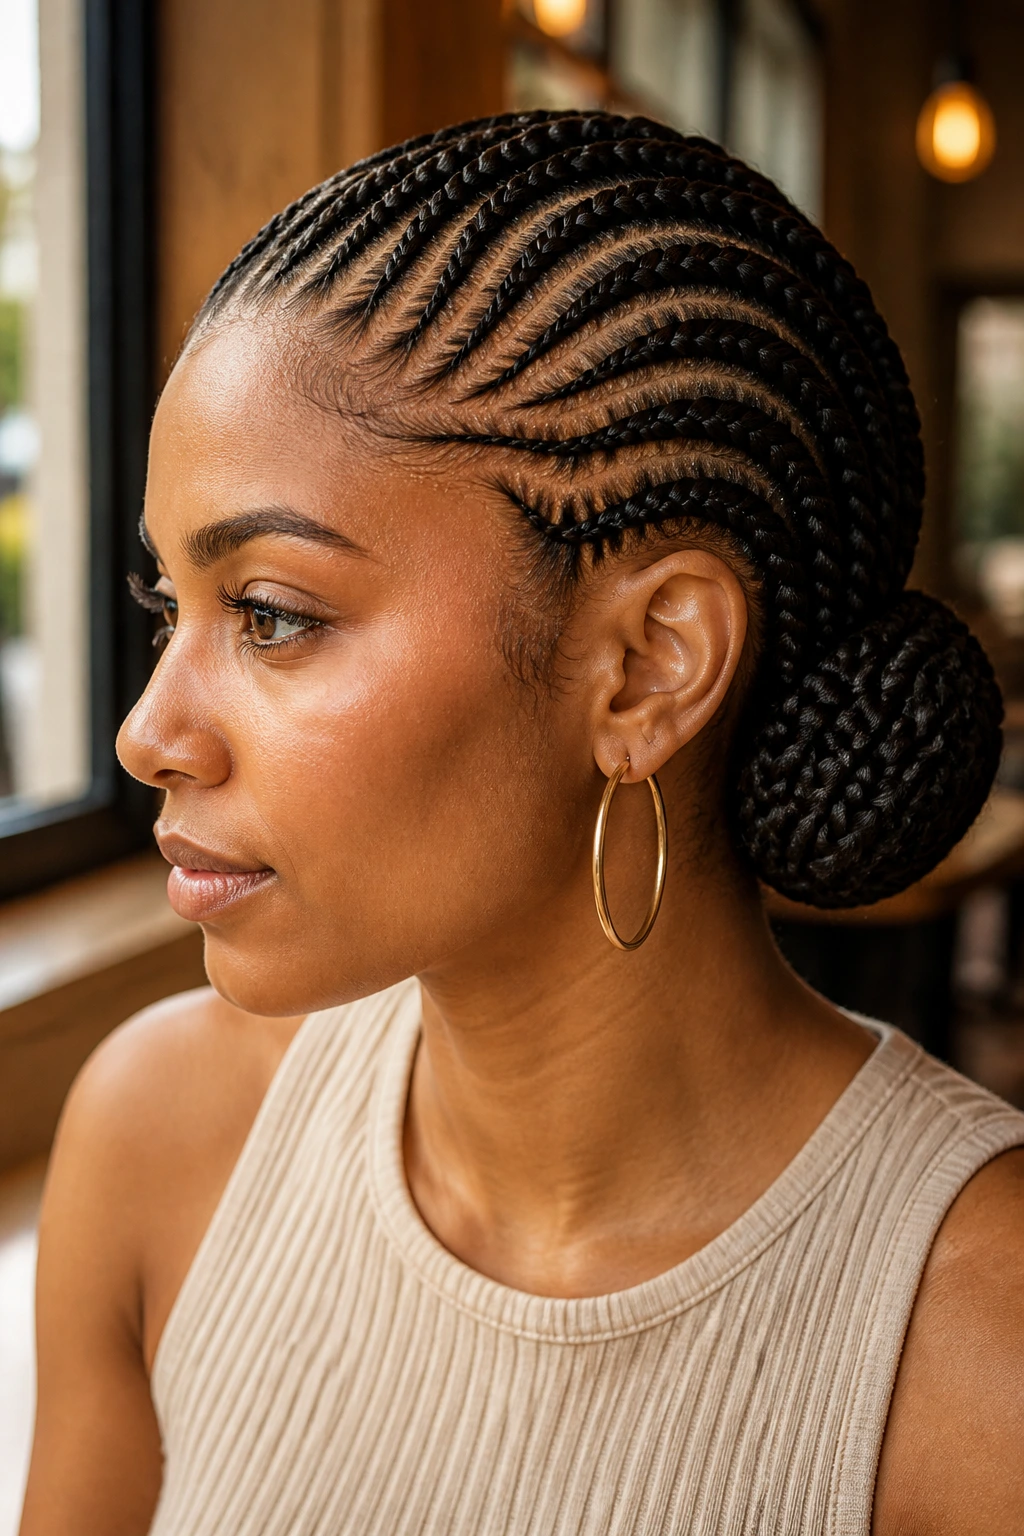
Want something that looks dressed up without hanging in your face? This is the one I reach for when the occasion calls for neatness and a little shape near the cheekbone.
Curved cornrows travel in a soft arc instead of a straight line, and that curve matters on natural hair. It gives the braids movement before they even leave the scalp. Pull those rows into a side bun and the whole style feels compact, tidy, and a little more deliberate than a standard side ponytail.
Who It Suits
This style is a good pick when you have medium-density hair and want the crown area to stay flat. A side bun keeps the ends tucked, which is handy if you hate braids brushing your collar or getting caught in scarf ties. It also works well when you want the side pattern to stay visible from the front and the back.
If your braider is skilled with parting, ask for the bun to sit just behind the ear rather than directly under it. That small shift keeps the profile softer. It also helps the bun read as part of the style instead of an afterthought.
A few shiny pins can help, but don’t load the bun with too much hardware. The braid line should be the main event. Everything else should stay in the background.
4. Side Cornrows Mixed With Loose Curls
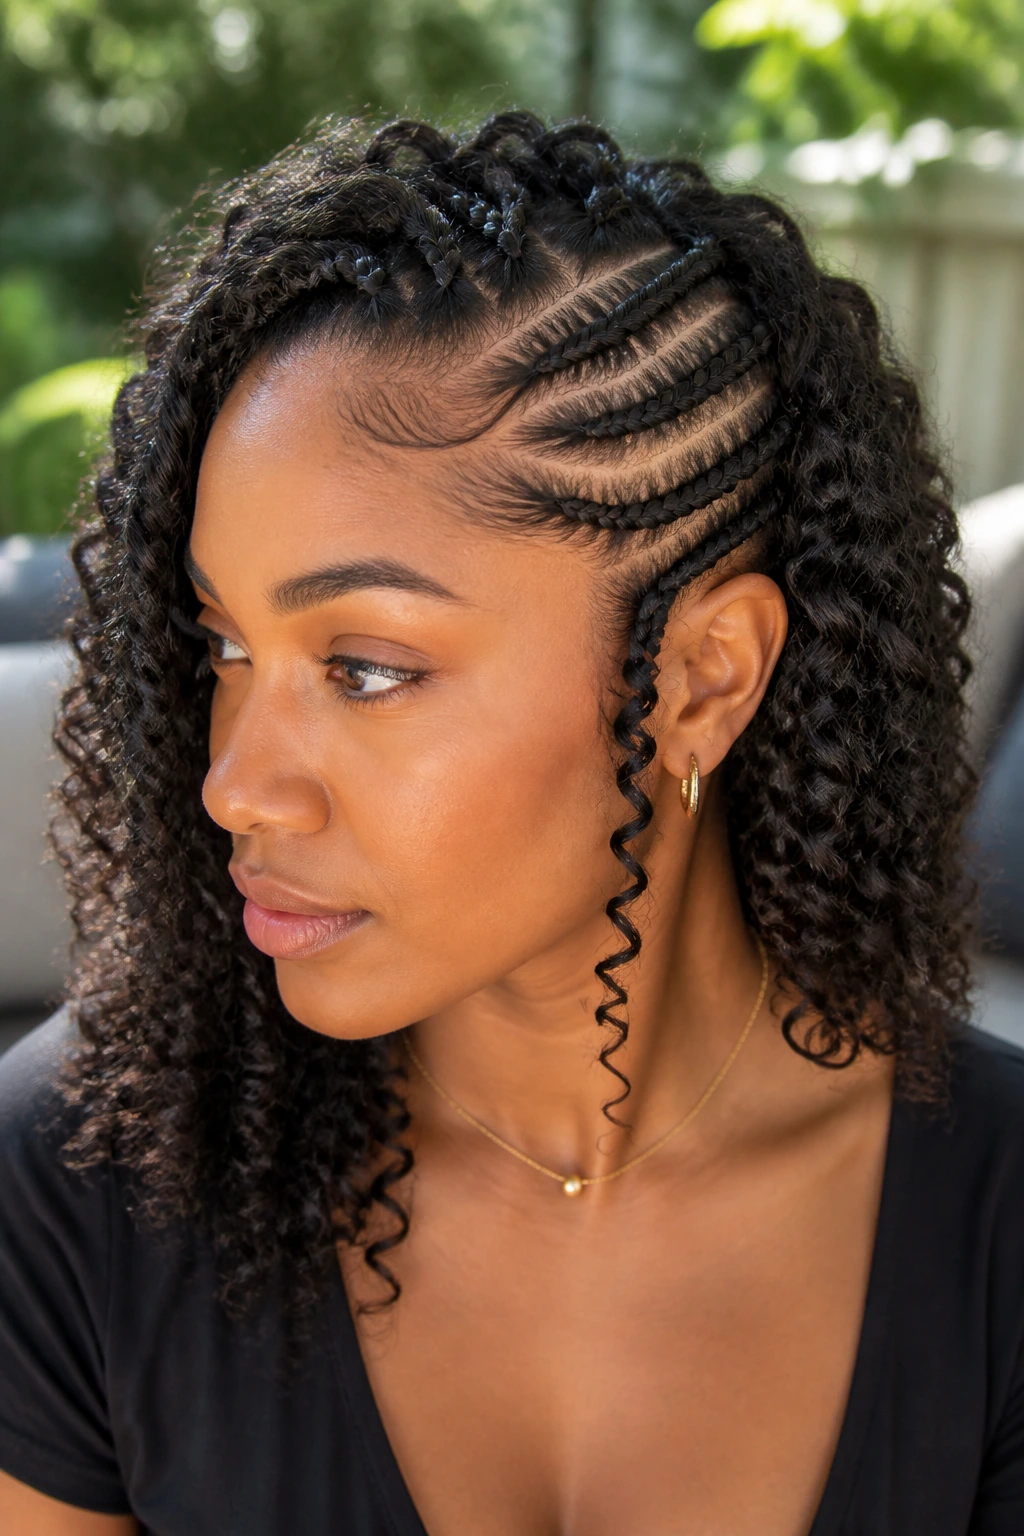
If you like neat roots but don’t want a fully braided finish, this hybrid style is one of the easiest ways to soften the look. The cornrows give structure, and the loose curls keep it from feeling too severe.
I like this on natural hair because it lets texture show up in two different ways at once. The scalp braids keep the front controlled, while the curls at the ends add bounce and a little looseness around the shoulders. On humid days, the contrast matters more than people think. Tight braid bases can look a bit hard; loose curls break that up.
The style works best when the curls are set with some shape, not left to chance. Flexi rods, perm rods, or a curl-former setup can give you a more polished finish than air-dried ends. A light mousse at the braid-to-curl transition helps too. Heavy cream there is a mistake. It weighs the ends down and makes the curl pattern collapse by evening.
- Use smaller curls if you want a more delicate finish.
- Use larger rods if you want a softer, fuller shoulder line.
- Keep the braid length long enough to let the curls hang, not puff.
- Refresh the ends with a water-and-leave-in spray, not a thick butter mix.
One thing: this style looks best when the roots are crisp and the curls are intentionally shaped. Lazy curls make the whole look feel unfinished.
5. Side Cornrow Braids With a Zig-Zag Part
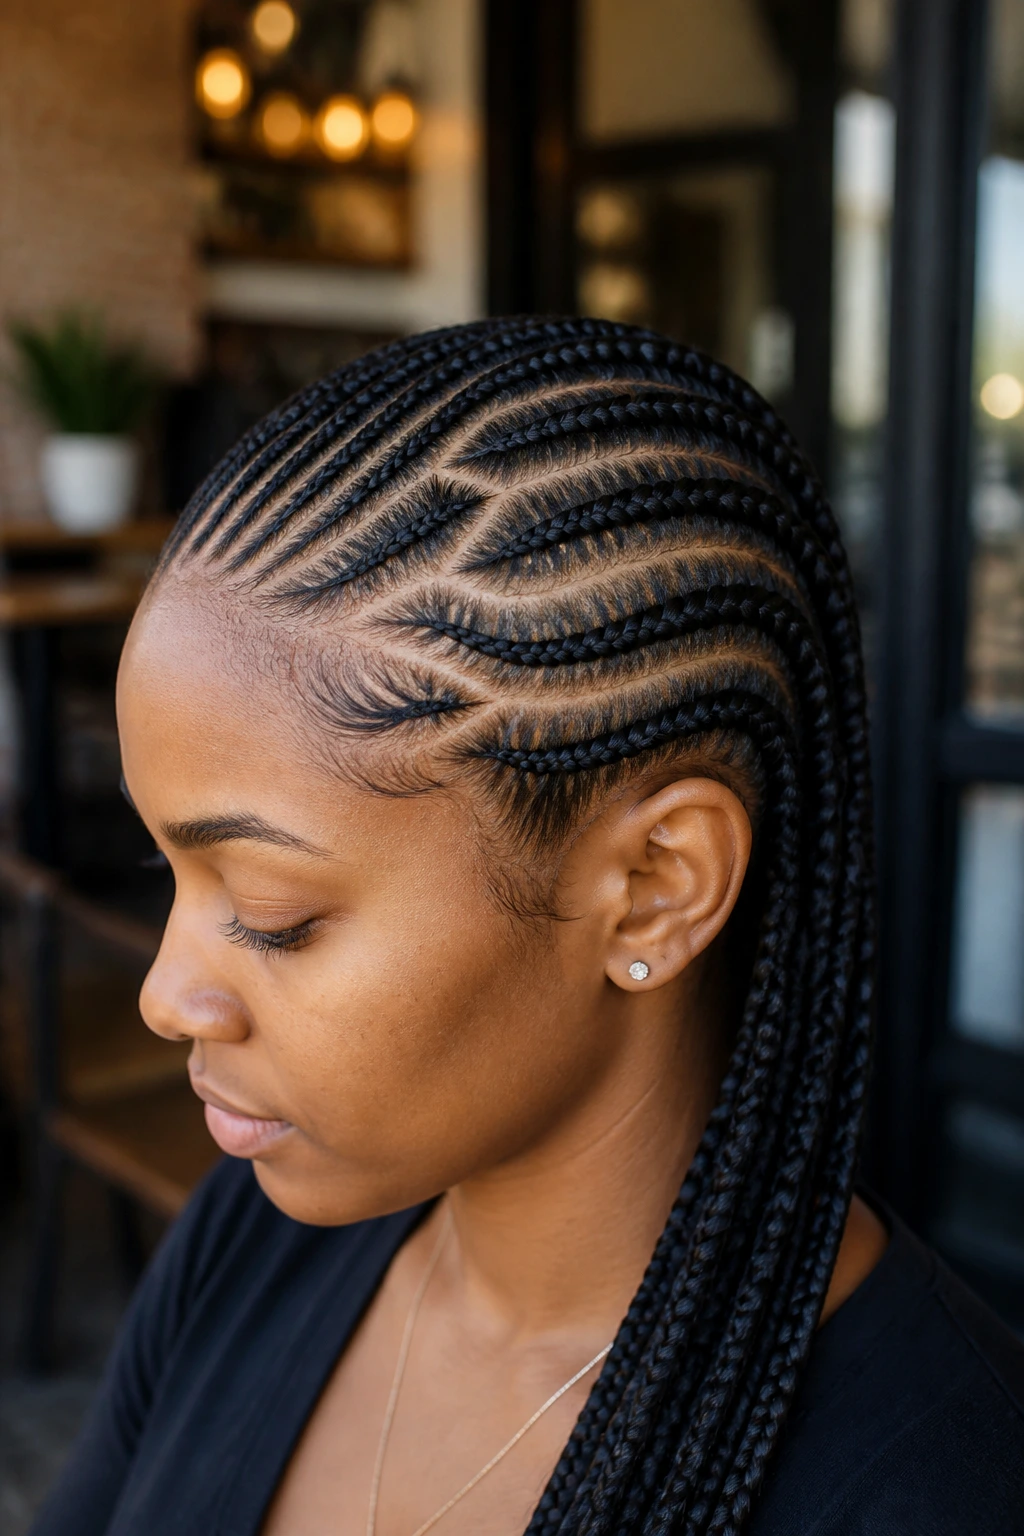
A zig-zag part is a small detail that changes the whole braid set. It breaks up the straight line at the scalp and gives the style a bit of edge without needing extra length, color, or accessories.
The trick is to keep the zig-zag clean. Messy zig-zag parting looks accidental. Clean zig-zag parting looks sharp. The difference is all in the comb work, and on natural hair, that means stretching the section first so the part doesn’t get swallowed by shrinkage. A rat-tail comb, a little gel at the part line, and patience go a long way here.
This style is one of my favorites for people whose hairline isn’t perfectly even, because the zig-zag distracts from small asymmetries. It also helps if you want the braid pattern to feel playful without tipping into anything too loud.
Do not rush the part. A good zig-zag takes longer to draw than a straight line, and if the corners are sloppy, you’ll notice it every time you look in the mirror.
6. Side Cornrows Pulled Into a High Side Ponytail
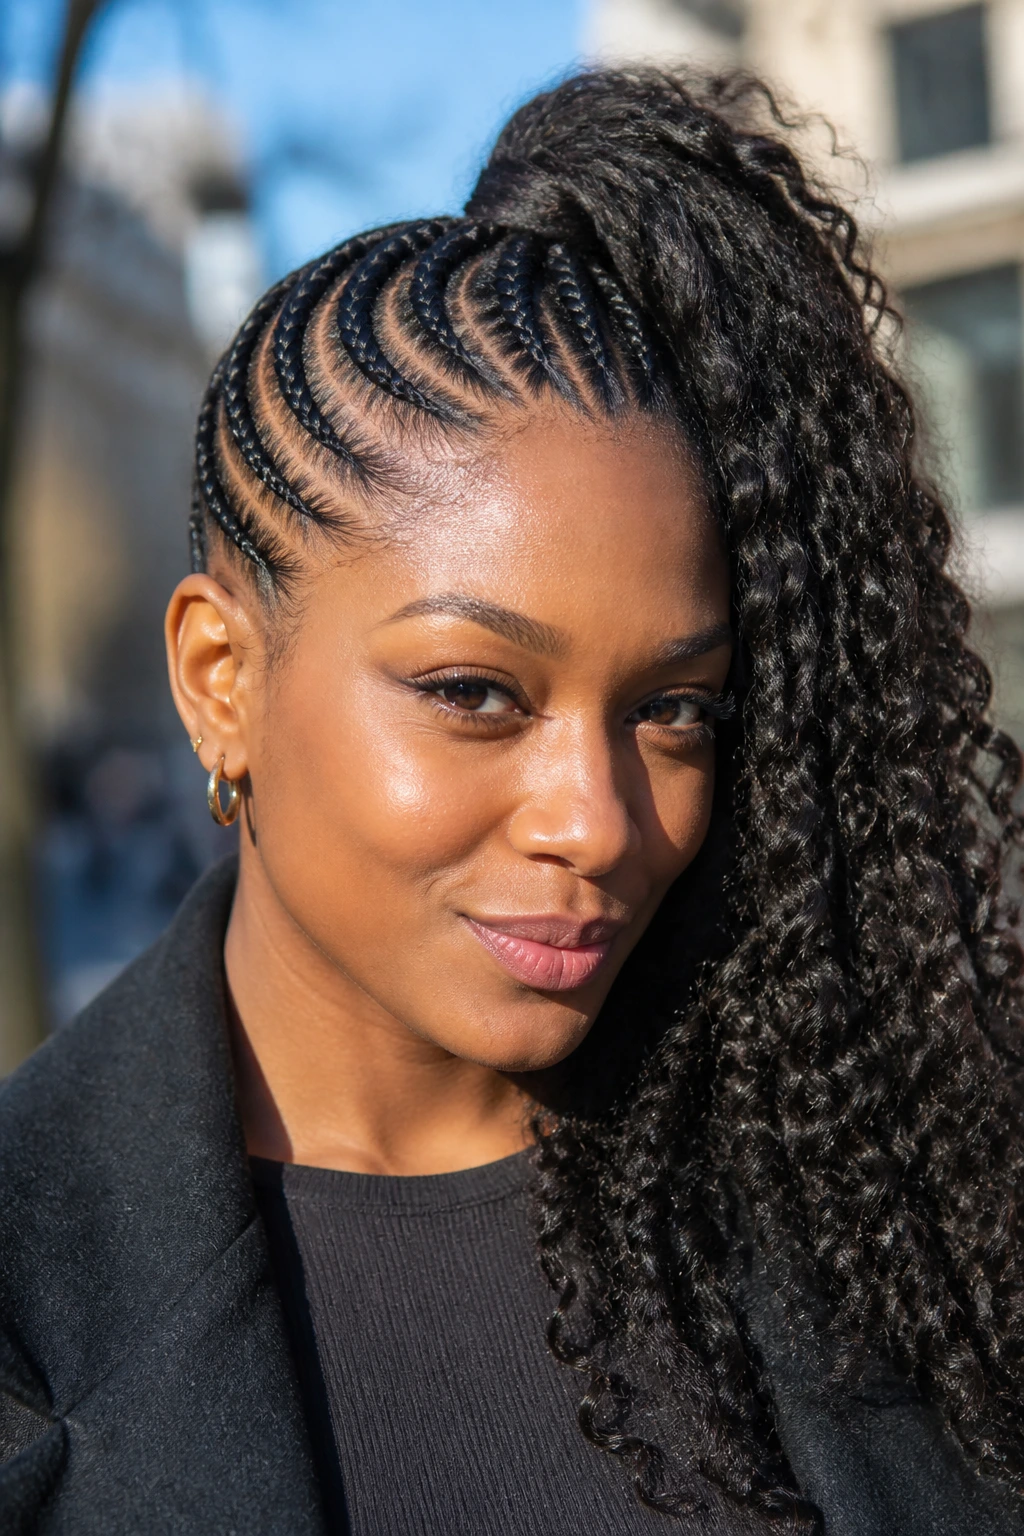
A high side ponytail changes the energy completely. The braids still sweep to one side, but instead of settling low and quiet, they lift upward and sit with more bounce near the crown.
That makes this style feel livelier than a low ponytail. It shows more face, shows more neckline, and tends to read a little younger and more playful. If you like the shape of a high ponytail but want the scalp detail of cornrows, this is the cleanest mix.
I’d use this style when I want volume without loose strands in my face. It works well for textured hair that has been stretched, because the ponytail can get heavy fast if the braid feed is too thick. A covered elastic or a braid wrap around the base keeps the finish neat. If the ponytail is too bulky, split it into two smaller gathered sections before wrapping them together. That trims the weight and keeps the side sweep from sagging by the end of the day.
What Makes It Different
Unlike a low side ponytail, this version opens the face and gives more lift at the crown. It’s a better choice for people who want height without teasing or heat styling.
7. Lemonade-Style Side Cornrows With Long Ends
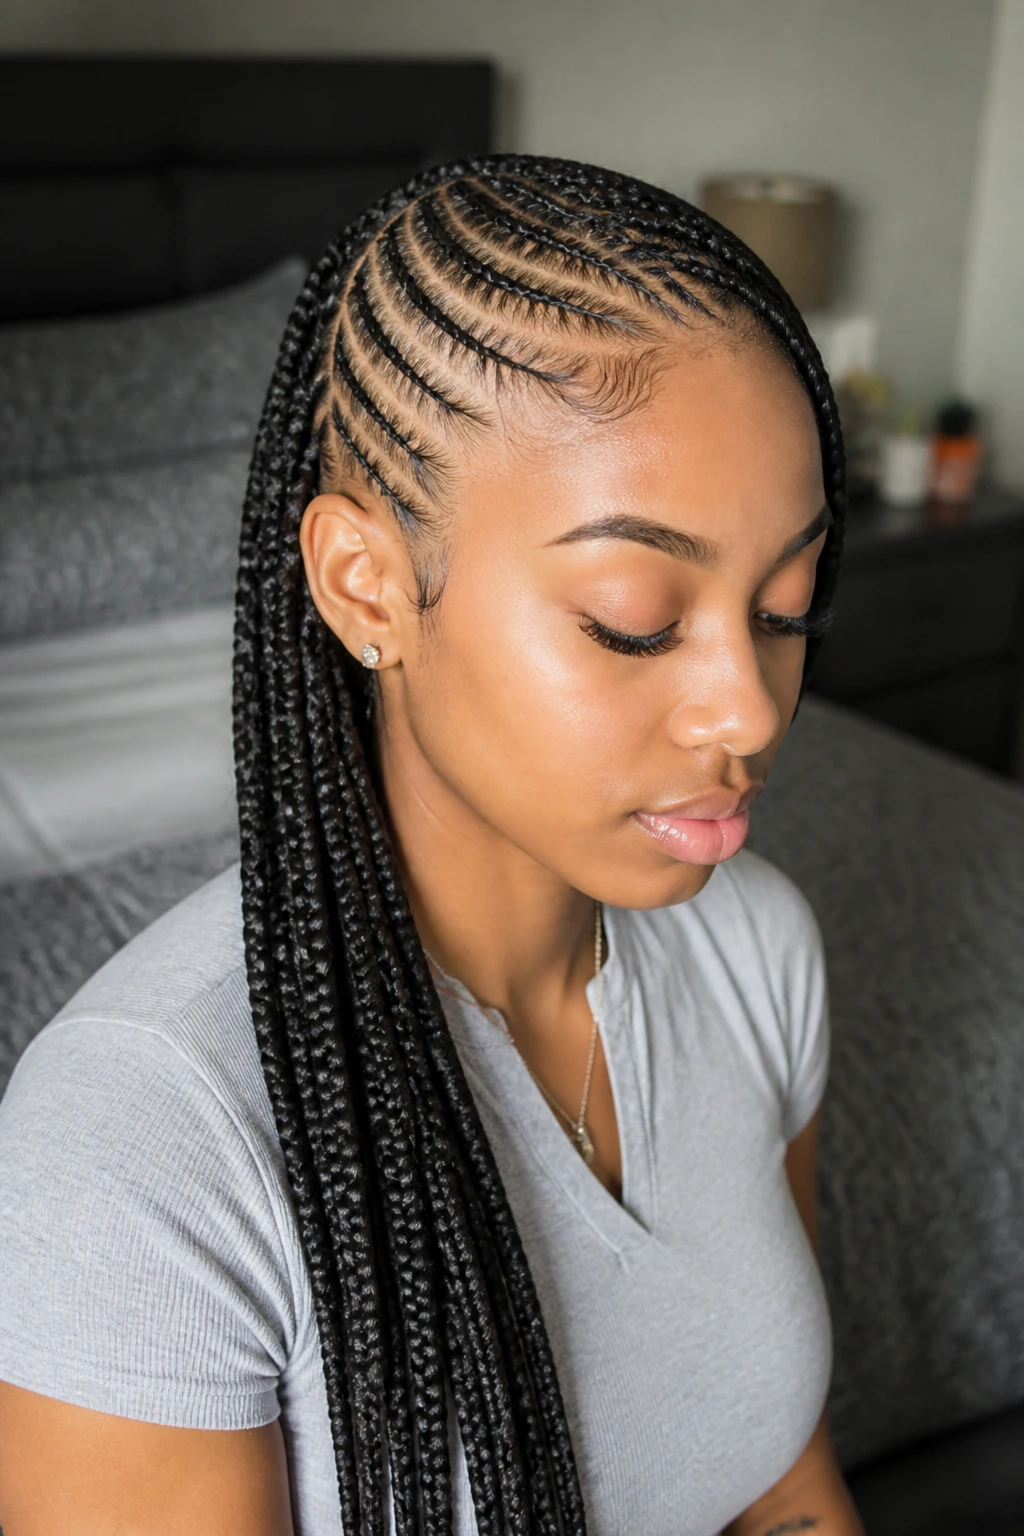
This is the style people recognize even from across a room. Skinny side cornrows that travel in a clean angle and end in long plaits create a sharp line that suits natural hair beautifully when the parts are crisp.
The appeal is the direction. Everything pulls toward one side, so the braid pattern itself becomes the design. That’s why this look needs clean roots. If the parts are fuzzy, the whole style loses the point. I usually think of it as a style that rewards discipline more than volume.
How to Keep the Parting Crisp
- Stretch the hair first so the scalp lines show clearly.
- Use only a thin layer of gel or braid product at the part.
- Keep braid sizes consistent from front to back.
- Wrap the hair in a satin scarf each night so the front doesn’t puff.
The long ends add a little swing, which helps the style avoid looking too rigid. On natural hair, that matters because heavy braid sets can feel static. A long side sweep with straight ends gives movement without needing curls or extra accessories.
If your hair is fine at the edges, ask for the front braids to start a touch farther back. The look stays strong, and the scalp stays happier.
8. Side Cornrow Braids Decorated With Cuffs and Beads
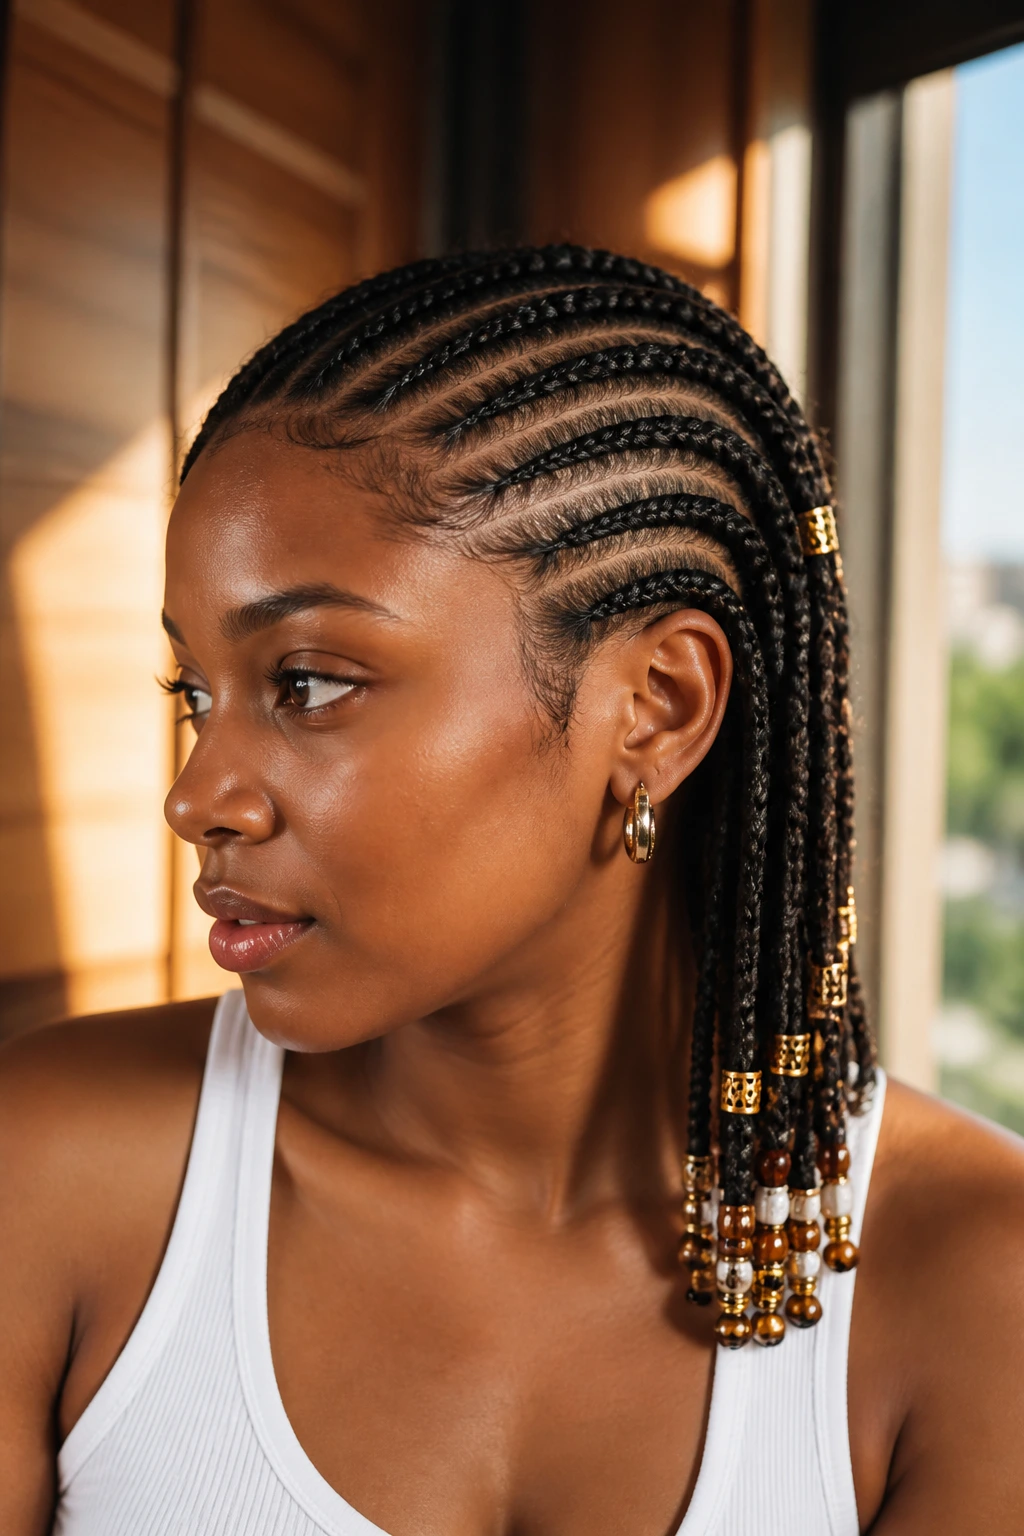
A plain side braid can look finished. Add a few cuffs or beads, and it starts to feel more personal.
The nice thing about accessories is that they let you change the mood without changing the braid pattern. Small gold cuffs near the ends give a tidy, polished finish. Wooden beads feel warmer and more relaxed. Clear or black bands keep the look simple if you want the decoration to stay quiet. The one rule I stick to is weight. Too many beads on the front braids tug harder than people expect, especially on natural hair that’s already carrying braid tension.
A few cuffs go a long way.
- Put heavier pieces lower on the braid, never near the root.
- Choose lightweight beads if the braids are medium or thin.
- Keep the front section light so the hairline doesn’t feel pulled.
- Match the accessory size to the braid size; tiny braids and huge beads look clunky together.
This style is a good pick when you want the braid pattern to feel finished without adding color or curl. It’s also easy to change later. Remove two cuffs and the whole vibe shifts.
9. Side Cornrows With a Braided Halo Across the Hairline
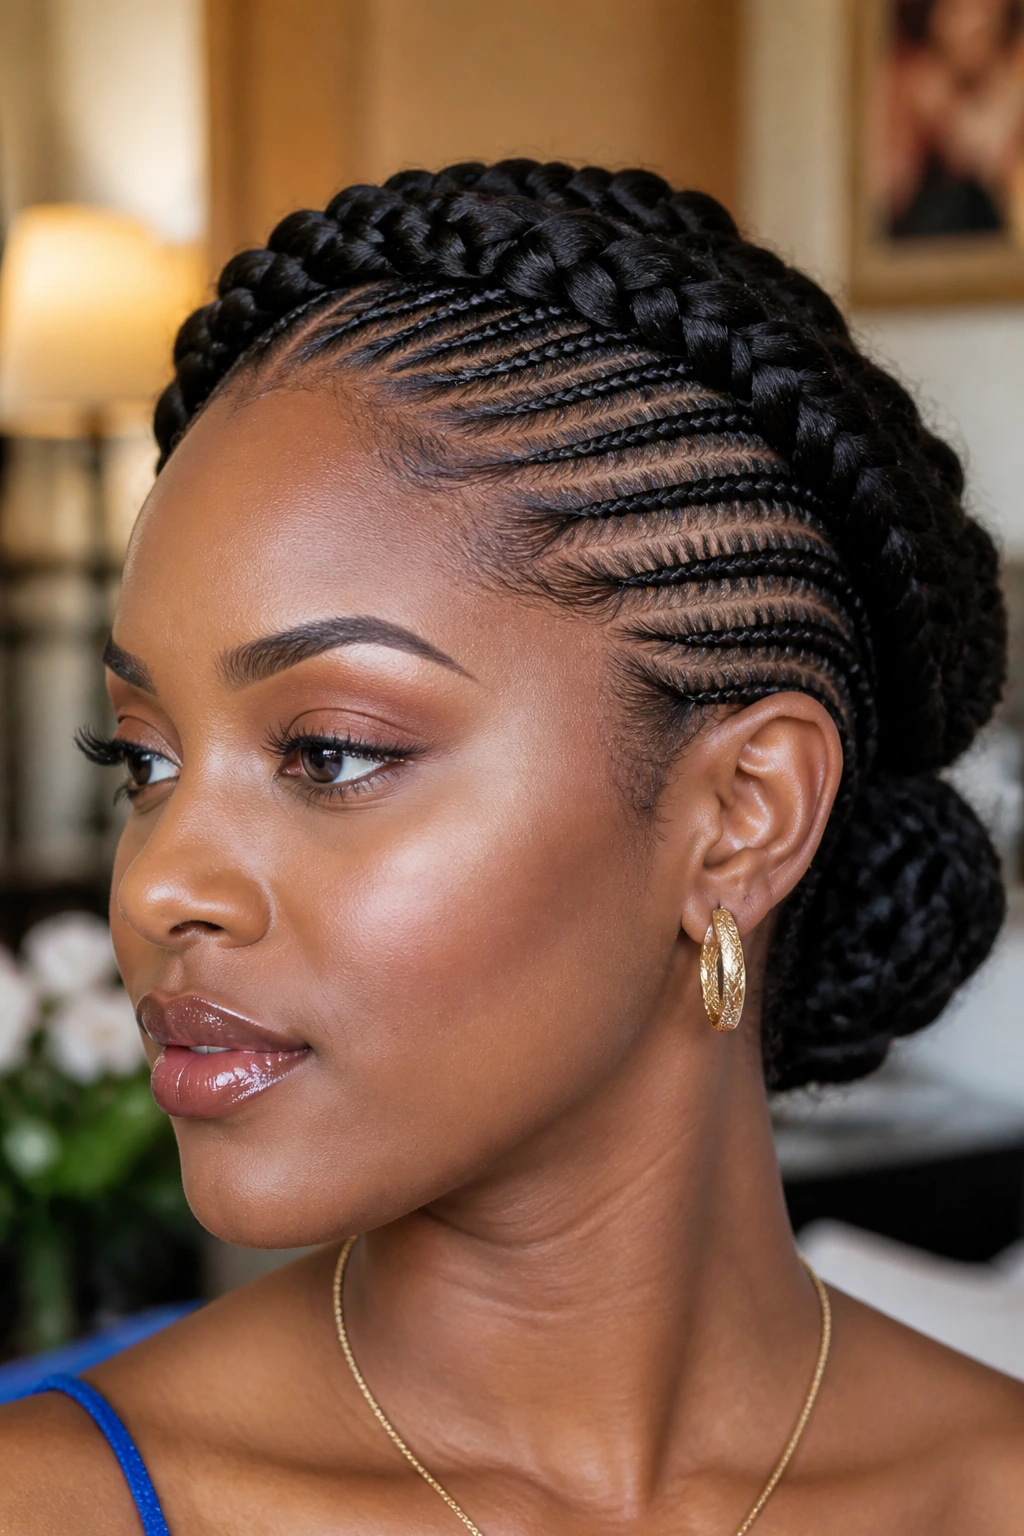
This is one of the smartest ways to make side cornrows look finished. The halo braid acts like a frame, wrapping the hairline in a curved line that leads the eye toward the side sweep.
A halo across the front is especially useful when you want the forehead area neat but still want the side pattern to feel soft. It gives shape without hard edges. On natural hair, that frame can make the whole style feel more balanced because the crown and the perimeter are working together instead of fighting each other.
I like this for events where the hair needs to stay in place for hours. The halo keeps the front from slipping around, which is where a lot of braid styles start to look tired. If the halo is too thin, though, it disappears. I prefer a braid that is just wide enough to read from the front. Pencil-thin halos look fragile and tend to unravel visually, even when they’re secure.
A satin wrap at night matters here. The halo is the first thing to puff if you sleep rough.
10. Stitch Cornrows Swept Low and Tight
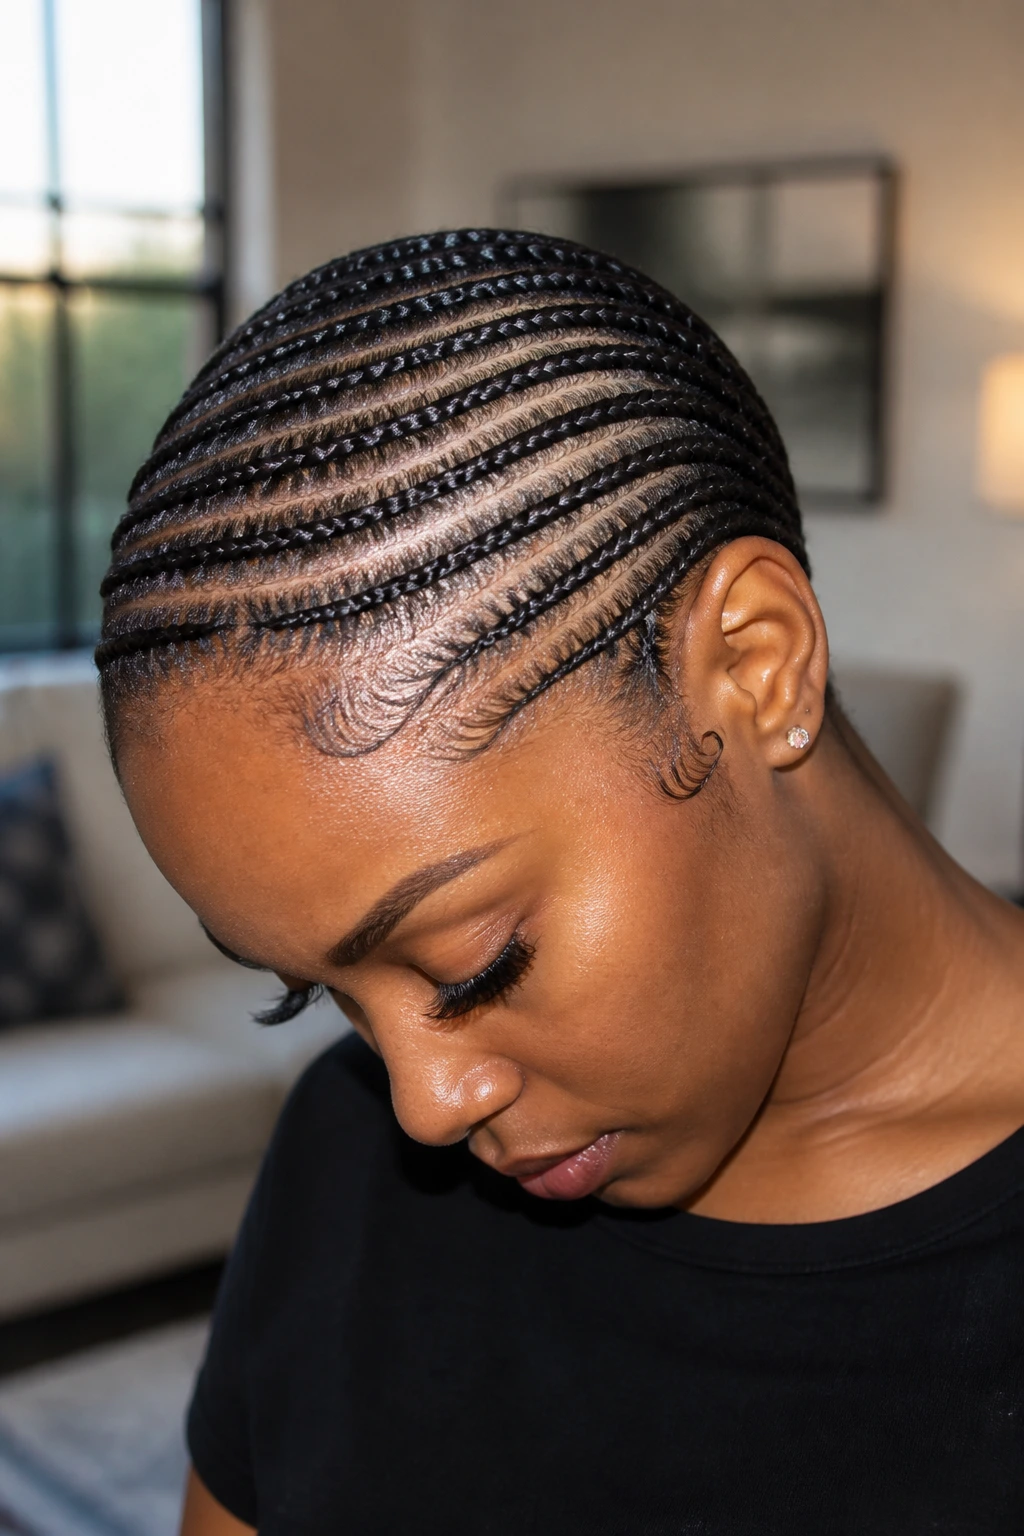
Why do stitch cornrows look so crisp? Because the parting does half the work before the first braid even starts.
Stitch braids use tiny horizontal sections that create those neat, stacked lines at the scalp. On natural hair, they can look striking on a side sweep because the eye follows every line from the front to the back. The style is more precise than a loose feed-in cornrow, which means it rewards clean sectioning and steady tension. It also means mistakes show fast.
Sloppy stitch work shows fast.
A good stitch braid set needs stretched hair, a fine-tooth comb, and a light hand with product. Too much gel makes the root look wet and sticky; too little and the stitches blur together. I prefer a little mousse after the braids are in place, then a scarf while the hair sets. That helps the rows stay visible without building up a crusty finish.
This style is ideal if you like detail. If you want something soft and fluffy, skip it. Stitch cornrows are about line, order, and clean movement.
11. Side Cornrows With a Half-Up Top Knot
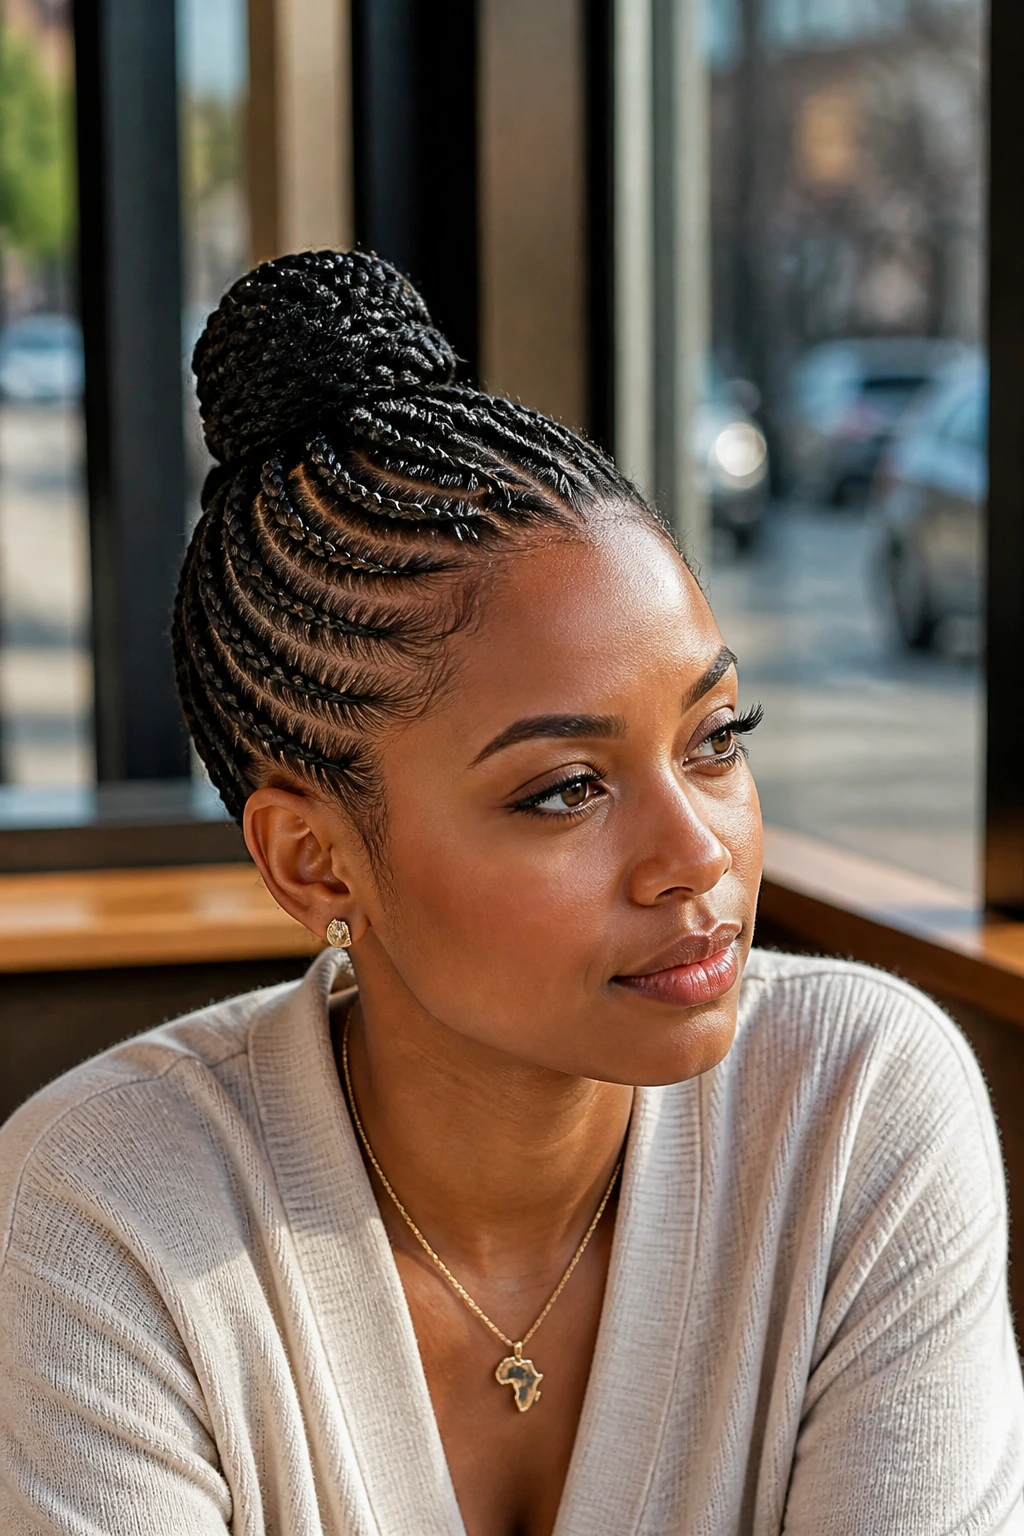
If you need your hair out of the way but still want some height, this is the one that makes the most sense. The side cornrows keep the front sleek, while the top knot lifts the style and stops it from feeling flat.
The half-up knot works especially well on medium-length natural hair because it gives the braids somewhere to go without forcing every strand into a tight finish. You can leave the rest of the lengths down, braid them out, or tuck them under depending on how much movement you want. The knot itself should sit high enough to show the side feed but not so high that it looks like a tiny helmet.
- Keep the knot compact if the braids are thick.
- Use a covered elastic first, then wrap a braid around it for a cleaner finish.
- Leave a little softness at the front so the style doesn’t feel severe.
- If the sides feel heavy, lower the knot by an inch.
This is a smart pick for days when you want both structure and ease. It keeps the style off the face, but it does not hide the braid pattern.
12. Side Cornrows Paired With a Twisted Front Section
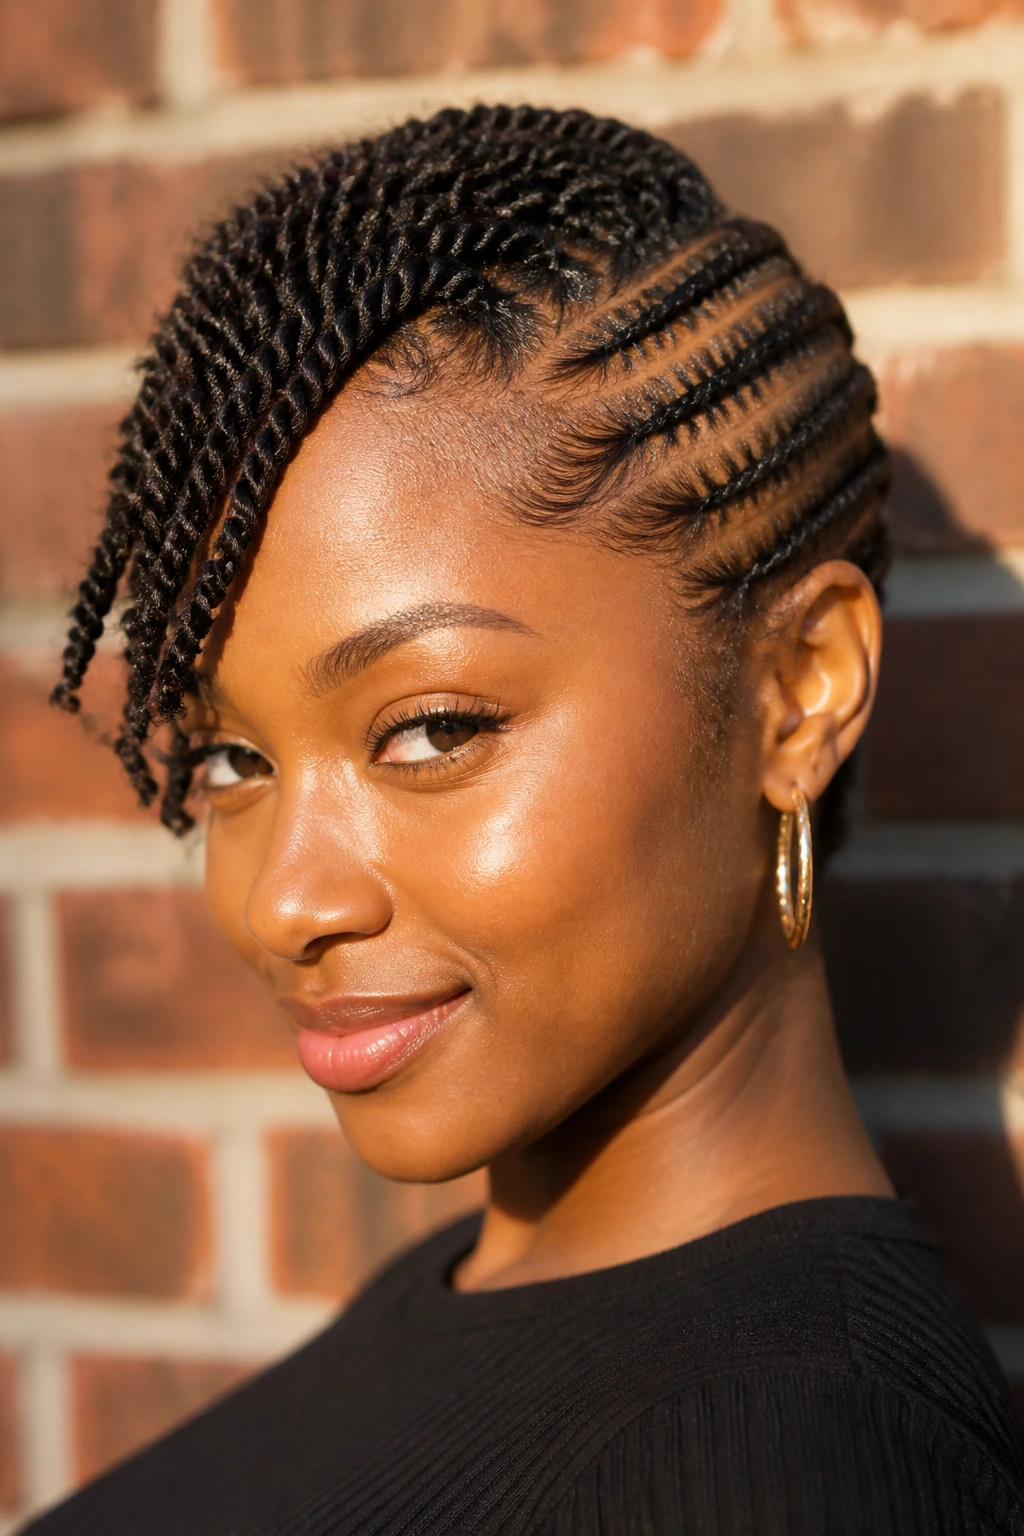
A twist in the front changes the mood of the whole style. Braids feel firmer and more defined; twists feel softer and a little looser around the face.
That’s why I like this option for shorter natural hair or for front sections that are too short to hold a long braid cleanly. A two-strand twist can blend better at the hairline and still connect into side cornrows at the crown or temple. The finish looks intentional, not patched together.
When I’d Pick Twists Instead of Braids
If the front layers are shorter than the rest of the hair, twists usually behave better. They also put less pressure on fragile edges because the section can be built with a lighter grip. Braids are sharper, sure, but twists move more and sometimes sit flatter when the hair is dense at the root.
This style also gives you a little more softness around earrings and makeup. That matters more than people admit. A hard braid line near a bold lip or a strong brow can look too stiff. A twist softens that edge without making the style casual.
13. Side Cornrows Ending in Rope Twists
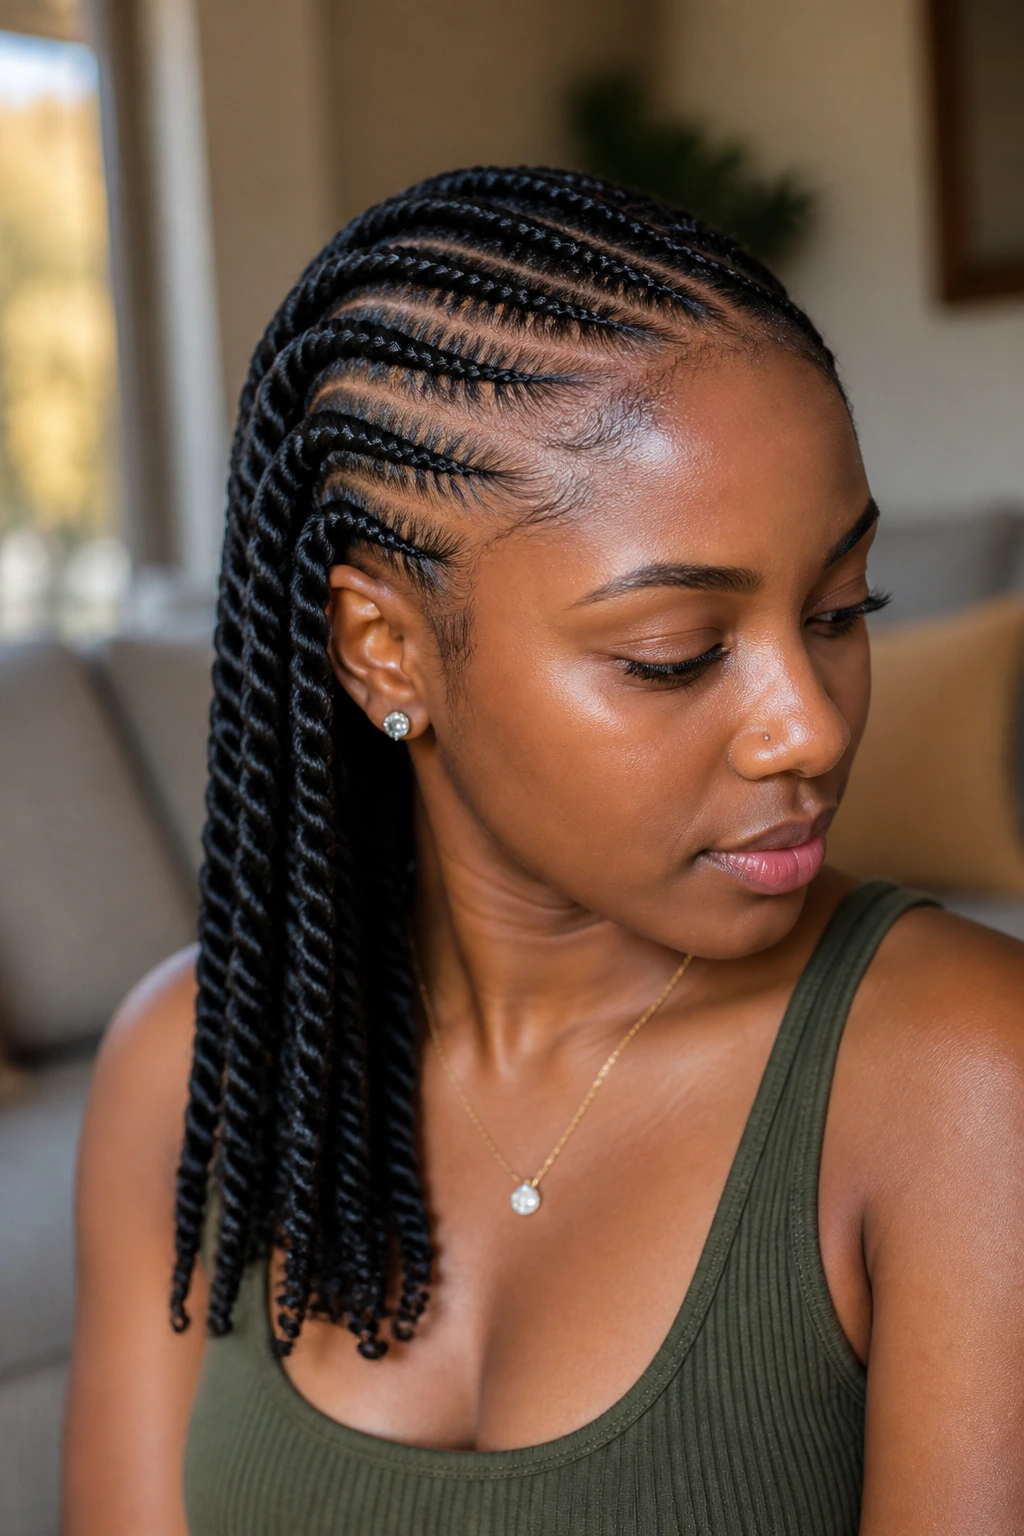
Rope twists at the ends give side cornrows a lighter finish. Instead of a standard three-strand tail, the braids taper into a twisted rope that moves more and feels a little less bulky.
I like this on natural hair because the rope twist keeps the ends from looking stiff. It also dries faster and tends to feel less heavy when the hair is long. If you wear your braids over one shoulder, rope twists sit nicely because they bend and swing instead of staying blocky.
The trick is to keep the twist neat all the way down. Once the braid transitions into the rope section, use a small amount of mousse or styling foam on the fingers and twist in the same direction from root to tip. If one side twists tighter than the other, the finish can look uneven and start to unravel at the bottom. A satin scarf helps here too, especially if you sleep on your side and the ends rub against the pillow.
This is one of those details that sounds small and turns out to matter a lot.
14. Side Cornrows Into a Low Braided Bun
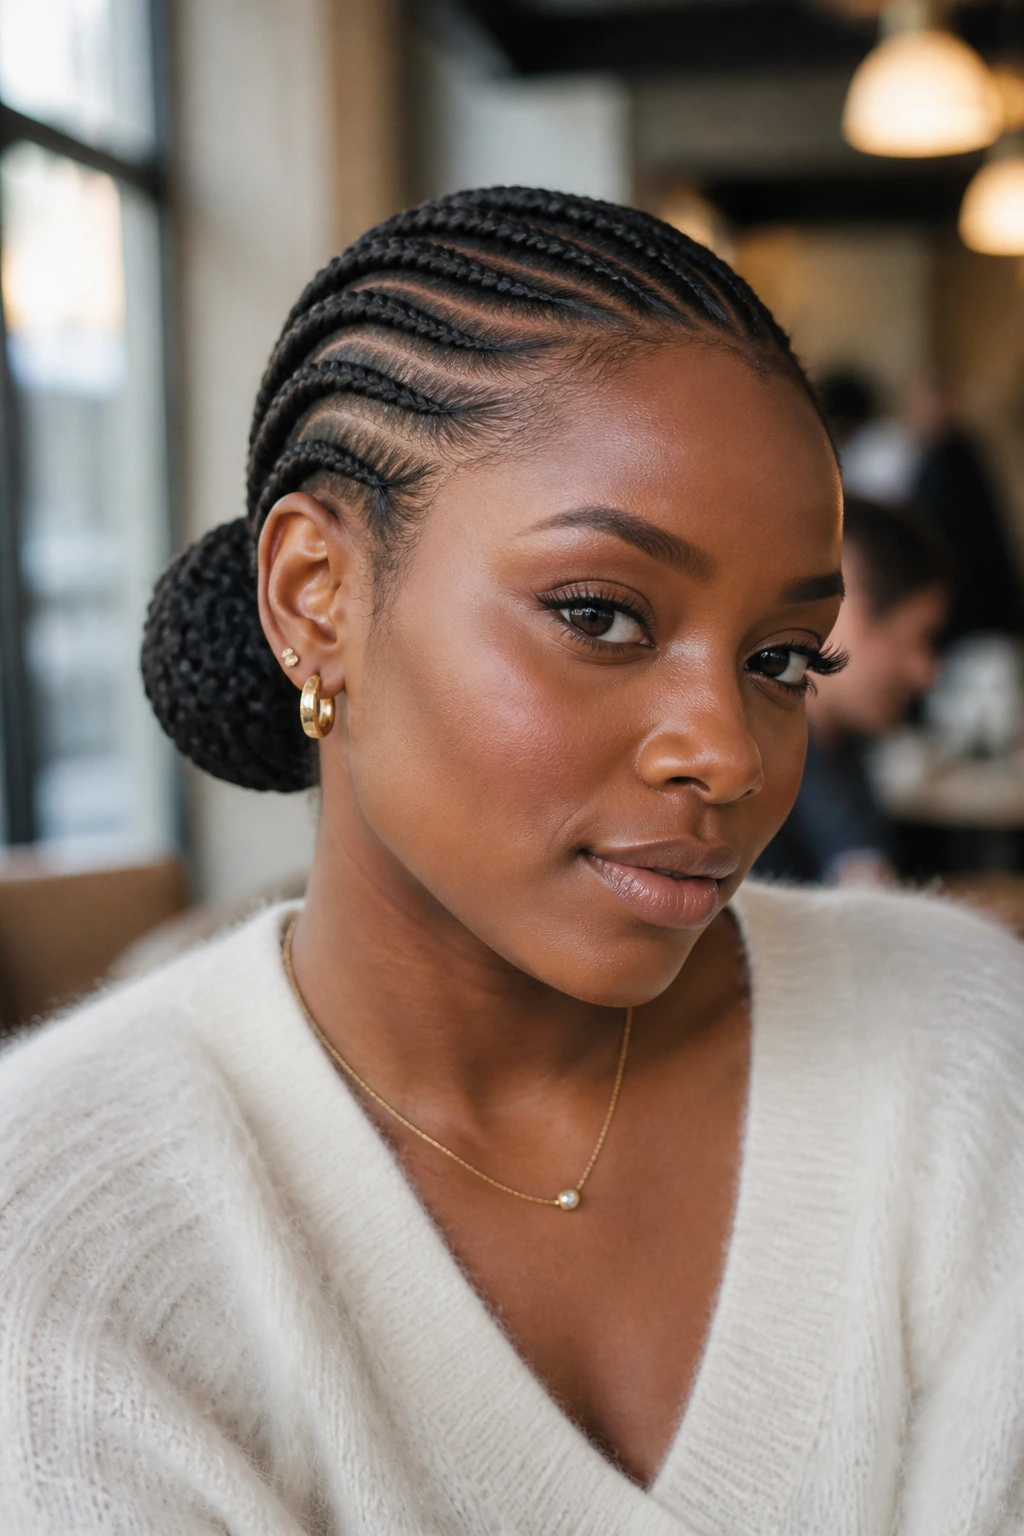
A low braided bun is the neatest option in this group, and I mean that in the best way. It keeps the neck clear, stays controlled under coats or collars, and looks finished without needing much else.
The side cornrows guide the eye toward the bun, which usually sits just behind the ear or at the nape on the braided side. That off-center placement is what gives the style its personality. Put the bun dead center and it loses the side-cornrow effect. Shift it over, and the pattern feels deliberate again.
How to Keep the Bun From Feeling Heavy
- Split very thick hair into two smaller coils before wrapping them together.
- Use pins that match your hair color so they disappear into the bun.
- Keep the bun low if your scalp gets sore easily.
- Braid the ends before wrapping them so the bun stays compact and doesn’t swell.
This style is good for long days, formal settings, and anyone who likes a clean neckline. It also gives the scalp a break from loose ends rubbing against the shoulders.
15. Side Cornrows With a Freestyle Curve and Tucked Ends
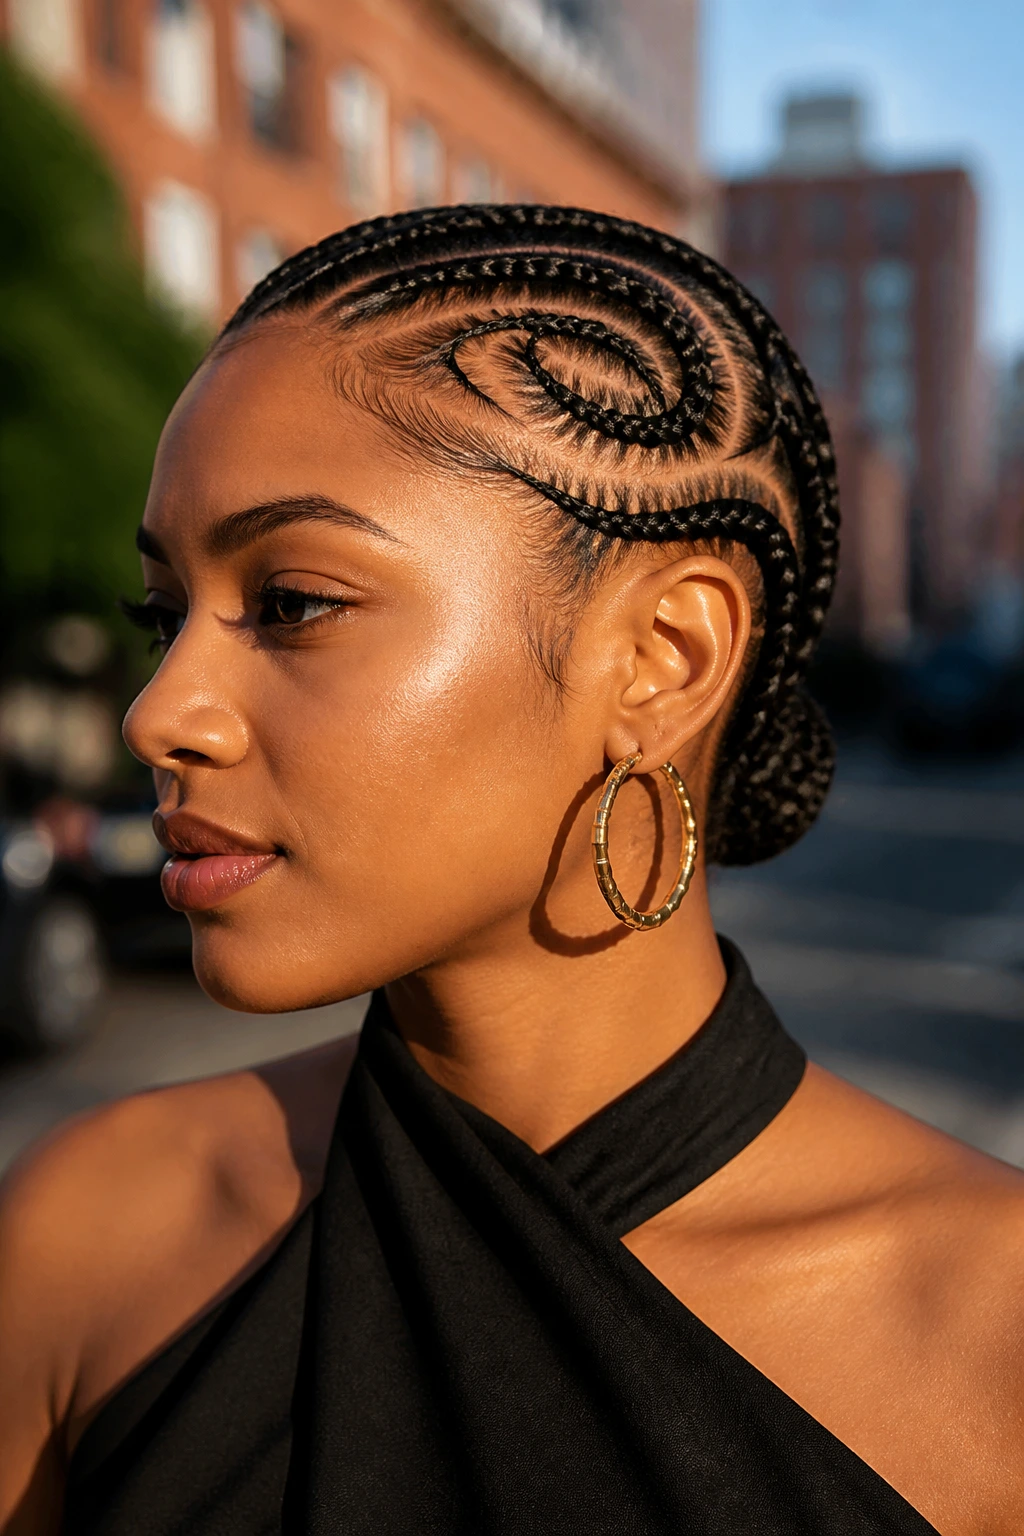
This is the style I’d choose when I want the braid pattern to feel artistic but still wearable. The curves are freer, the angles are less rigid, and the tucked ends keep the look neat without adding extra length.
A freestyle curve works well on natural hair because it lets the braider follow the head shape instead of fighting it. That can make the style look custom even when the braid count is modest. I like tucked ends here because they stop the finish from getting bulky. When the ends disappear into a bun, knot, or folded braid base, the side pattern stays front and center.
It’s also a good style if you wear bold earrings or high necklines. The braids don’t compete with the rest of the outfit. They sit in the background and frame the face instead of taking over the whole look.
If you’re torn between a statement braid and something practical, this is the middle ground. It has shape, but it still feels easy to live with. And that, to me, is the real test for any braid style on natural hair. Pick the one you can keep neat without resenting it by day four.
