



Caramel black highlights for round faces work best when they move the eye up and down, not side to side. Plenty of color jobs still dump warm streaks right across the cheeks and then wonder why the face reads wider.
Black hair can take caramel in a lot of directions, but the placement matters more than the shade card. If the light pieces sit too high and too wide, the whole effect can feel heavy. If they start below the cheekbone, narrow toward the ends, and keep the root area deep, the face gets a cleaner line.
The other thing people miss is tone. Caramel on black hair should look warm, but not brassy or orange. A good version lands somewhere in the level 6 to 7 range, with enough shadow left behind it to keep the contrast crisp. That contrast is the whole point. Flat color does nothing for a round face.
Some of these looks are soft and easy to grow out. Others bring more punch. I like both, honestly. The useful question is not “Can I wear caramel highlights?” It’s “Which placement makes my face look a little longer, my cut look sharper, and my color feel like it belongs to my hair?”
1. Long Caramel Ribbons Starting Below the Cheekbone
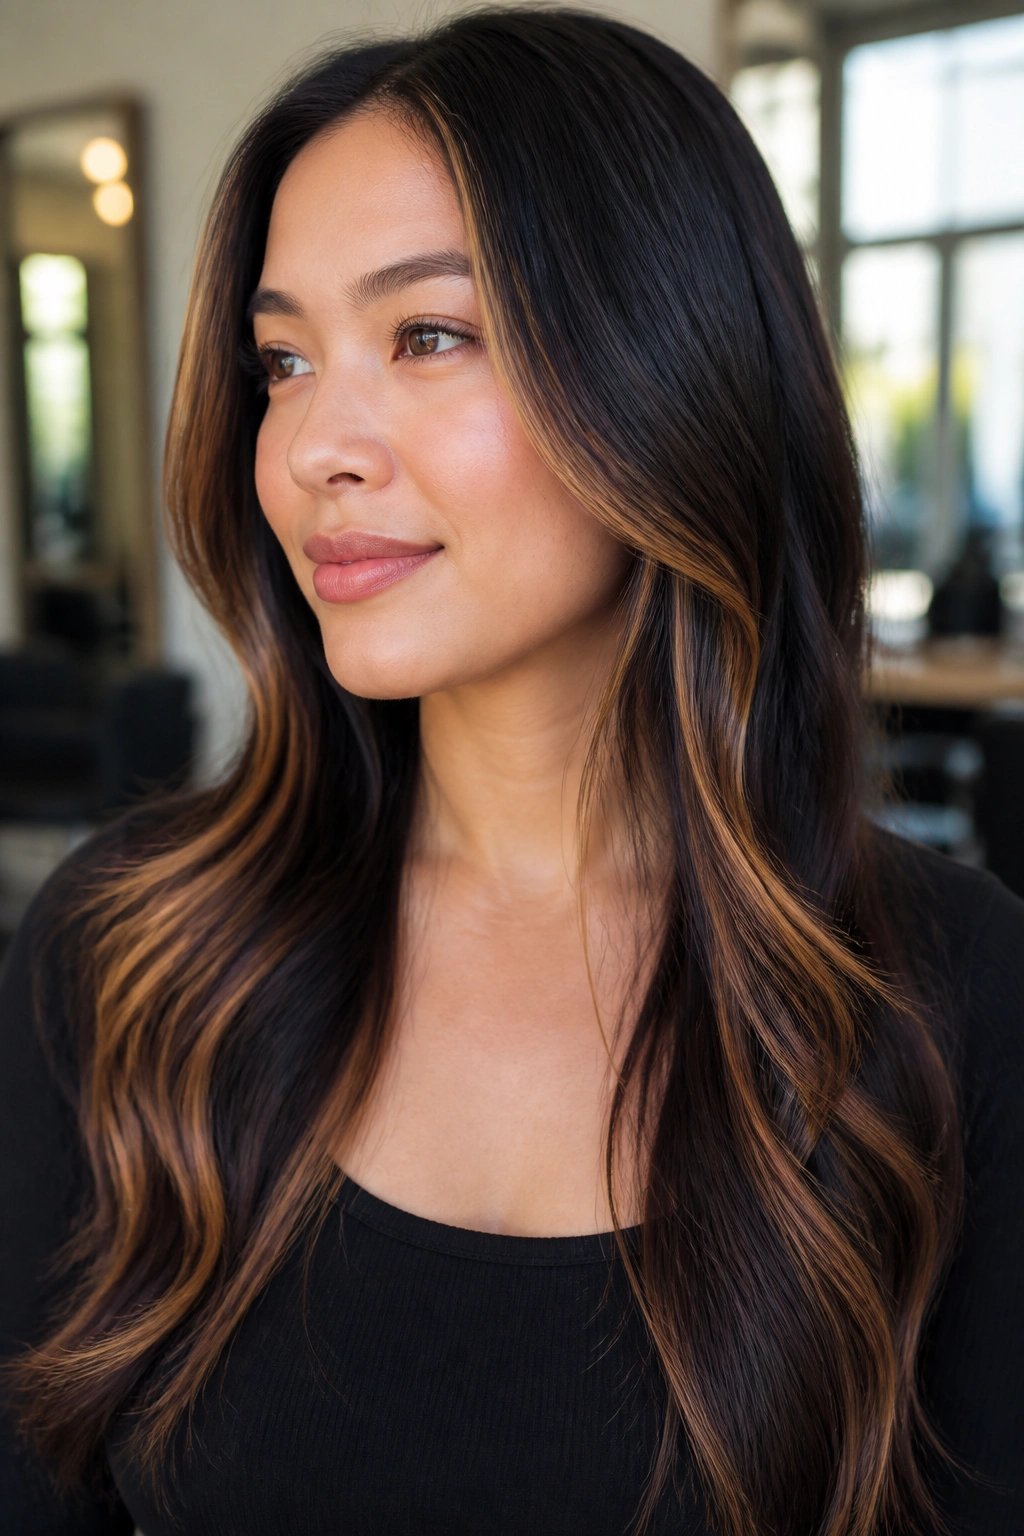
This is the safest place to begin if you want movement without crowding the face. Long ribbons that start below the cheekbone pull the eye downward, which helps a round face look a touch longer and less full through the middle.
Why It Flatters Round Faces
The trick is spacing. Ask for the brightest ribbons to begin just under the cheekbone, then taper them as they fall toward the ends. You do not want a chunky bar of color sitting right across the widest part of the face.
A clean version usually uses 2 to 3 ribbons per side, each one no wider than 1/2 inch near the front. The back can be softer and more diffused. That keeps the front interesting without making the whole head look striped.
- Start the first bright ribbon about 1.5 to 2 inches below the cheekbone
- Keep the root area darker by at least 1 inch
- Let the pieces get thinner near the chin
- Use a caramel shade around level 6 or 7, not pale blonde
Pro tip: if your hair is thick, keep the front ribbons slightly farther apart. Thick hair can swallow fine highlights fast.
2. Deep Side Part With Jaw-Skimming Money Pieces
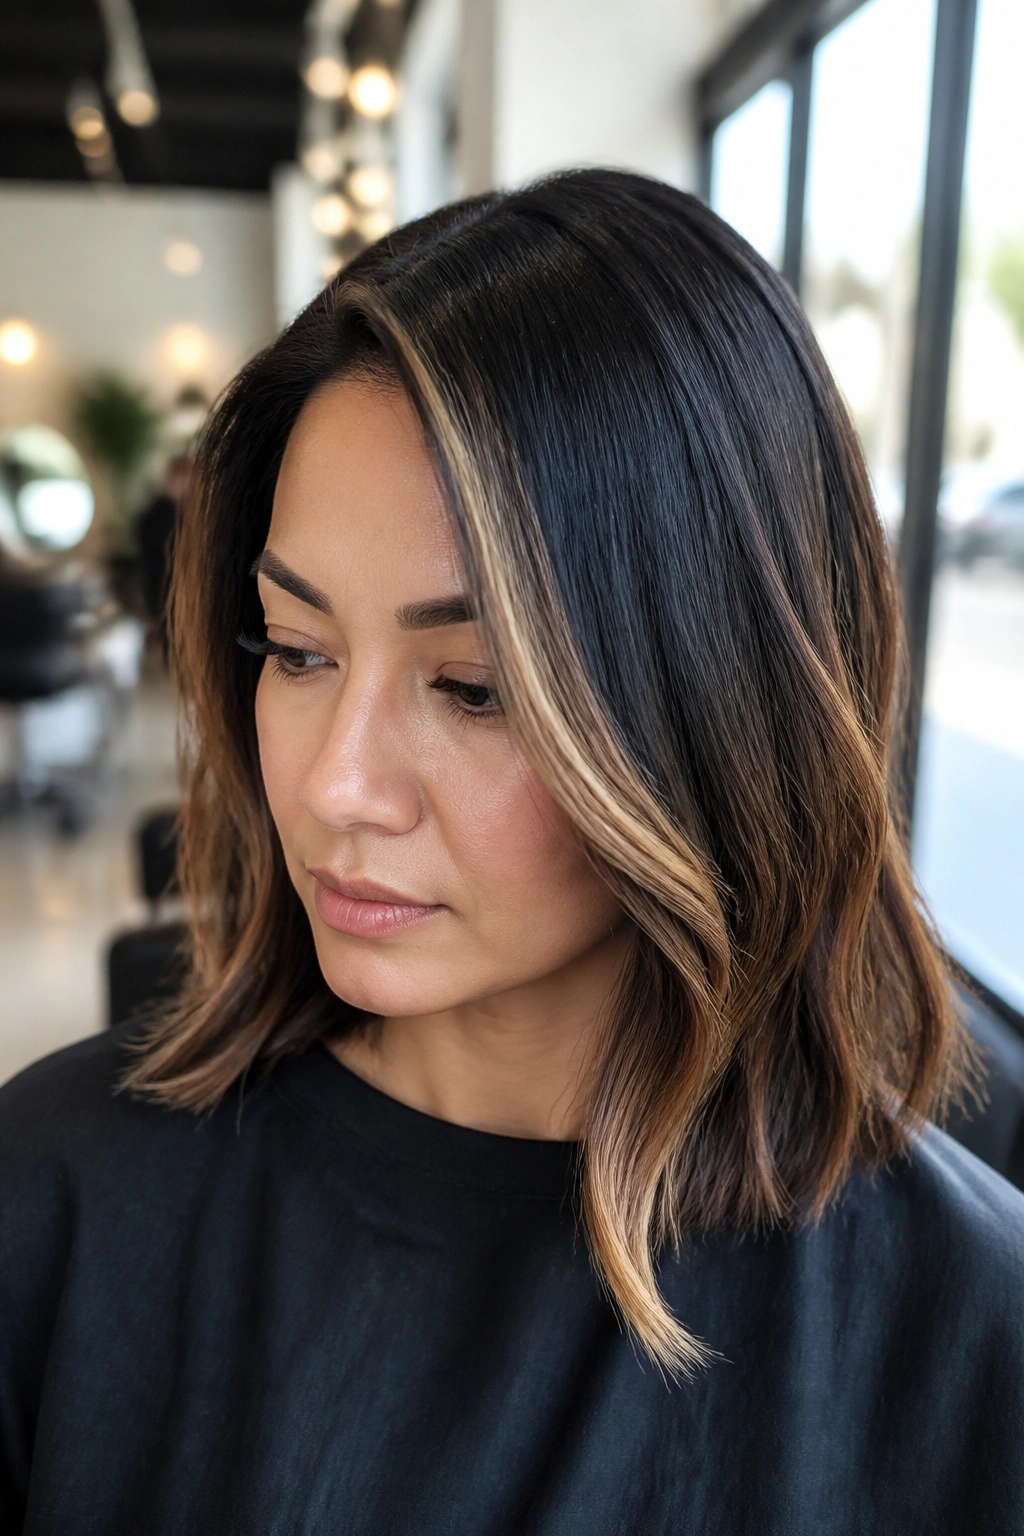
A deep side part does more work than people expect. It breaks up the symmetry of a round face and gives the highlights a diagonal line to follow, which makes the whole style feel sharper.
The best version puts the lightest pieces at the temple and then lets them skim past the jaw instead of stopping high on the cheek. That little bit of length changes the mood of the cut. It feels more deliberate, less puffy.
This works especially well on straight blowouts and soft waves, because the part stays visible. If your hair goes flat at the crown, the side part also gives you a little lift where you need it most. I’d choose this over a center-part look if your goal is a bit more angle and a bit less fullness around the cheeks.
What to ask for: a deep side part, one bright money piece on the heavier side, and softer caramel trails on the opposite side. Keep the front pieces narrow. Wide panels can take over.
3. Tiny Babylights Through the Crown
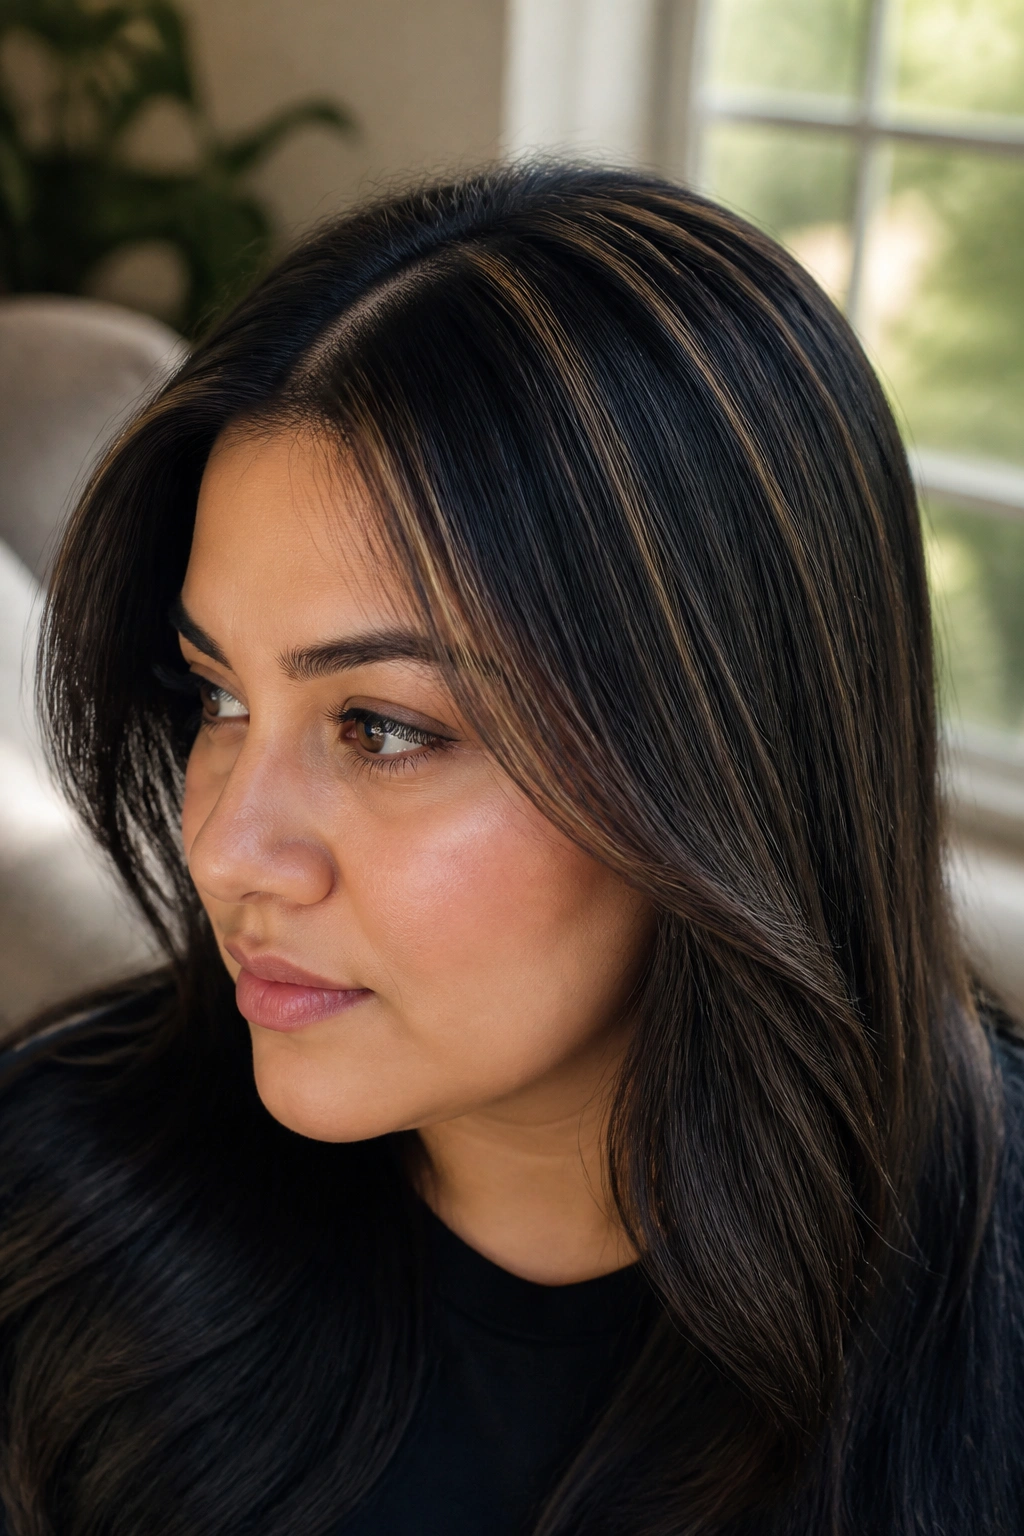
Can something this subtle still help a round face? Yes. Sometimes the smallest highlights do the most useful job, because they build lift at the top without drawing attention to the cheeks.
Babylights through the crown add tiny flashes of caramel that catch when the hair moves. On black hair, that movement matters. The contrast stays soft, but the surface stops looking like one solid block.
How to Ask for It
Tell your colorist you want micro-weaves no wider than 1/8 inch through the top layers. The lightest pieces should stay above the cheek area and break up the crown, not fan out across the sides.
A few things to keep in mind:
- Keep the babylights 3 to 4 levels lighter than the base, not more
- Focus on the top and part line
- Leave the underside darker for depth
- Use a warm caramel gloss, not a gold toner
This is the kind of look that grows quietly. No harsh line. No big regrowth problem. Just a soft lift that makes the top of the head look a little taller.
4. Chunky Caramel Panels for Curly Black Hair
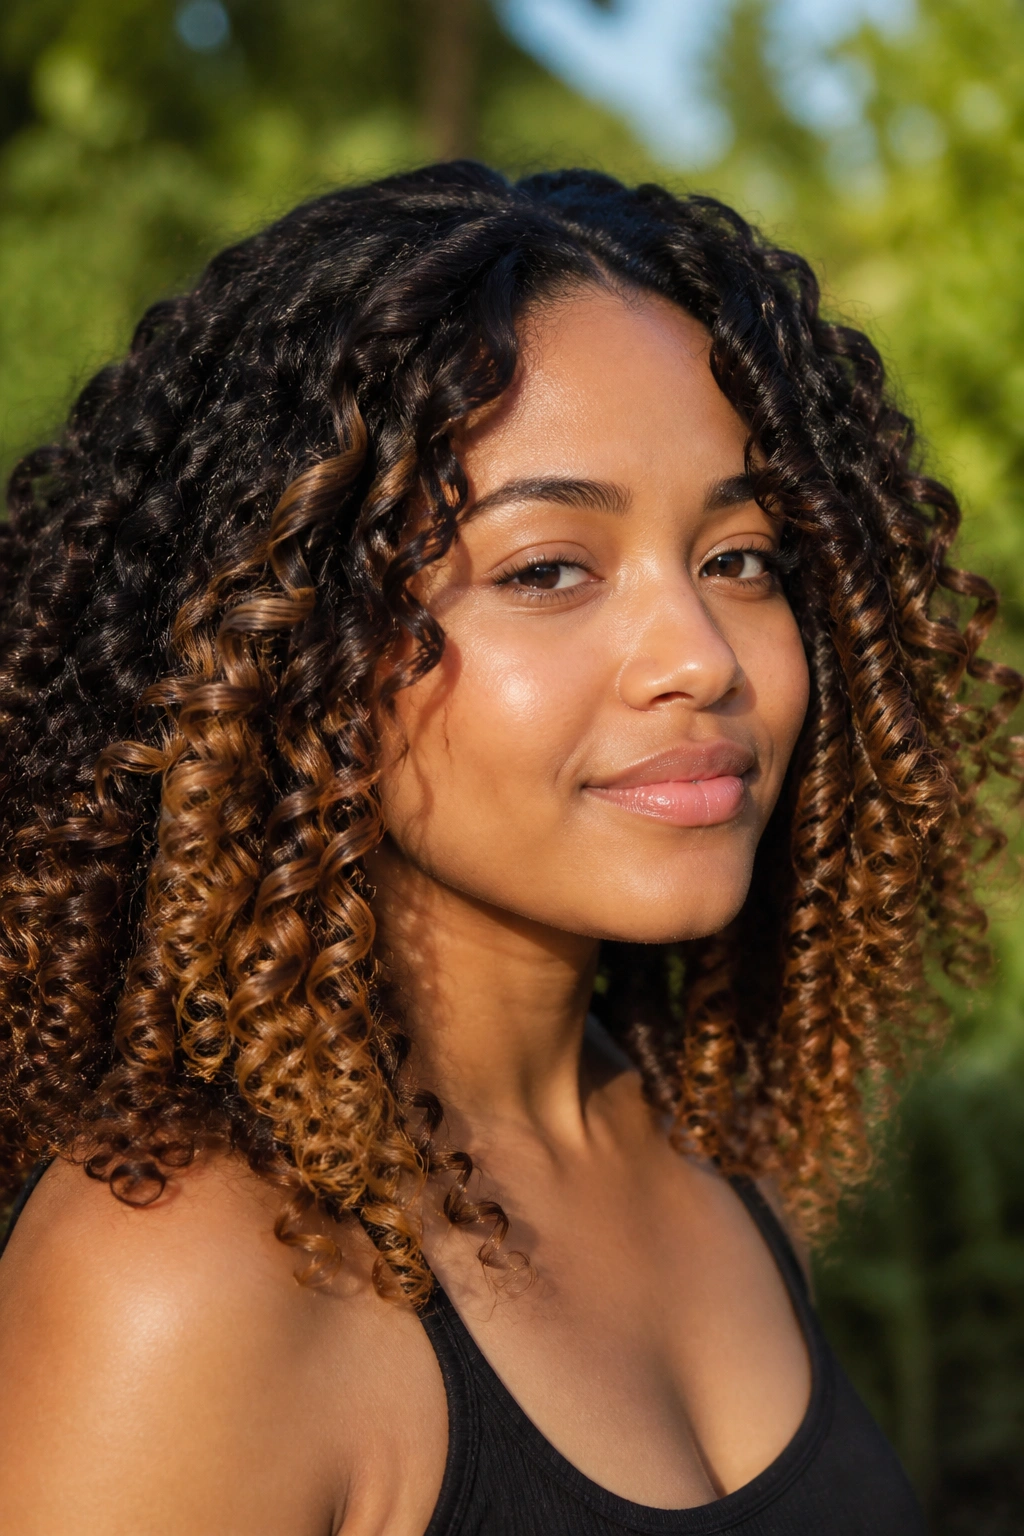
On curls, skinny highlights can disappear. I’m not kidding. Once the hair shrinks and bends, a fine weave can get lost in the pattern, so chunkier panels often read better.
For round faces, the goal is to place the brighter curls where they stretch the silhouette. That usually means the outer layers, a few pieces around the jaw, and some lifted ends that move when the curls bounce. Keep the front pieces vertical, not wide and flat.
A shoulder-length curly cut takes this look well. So does a longer curl pattern with enough weight to show the color. If the hair is very short, chunky panels can feel busy. On longer curls, though, they add shape fast.
- Use 3 to 5 larger painted sections rather than dozens of tiny ones
- Brighten the outer curve of the curl, not the inside of the coil
- Keep the brightest caramel away from the widest cheek line
- Pair with a curl cream that defines the ends, not a heavy butter that mutes the color
5. Cinnamon-Caramel Balayage on a Blunt Lob
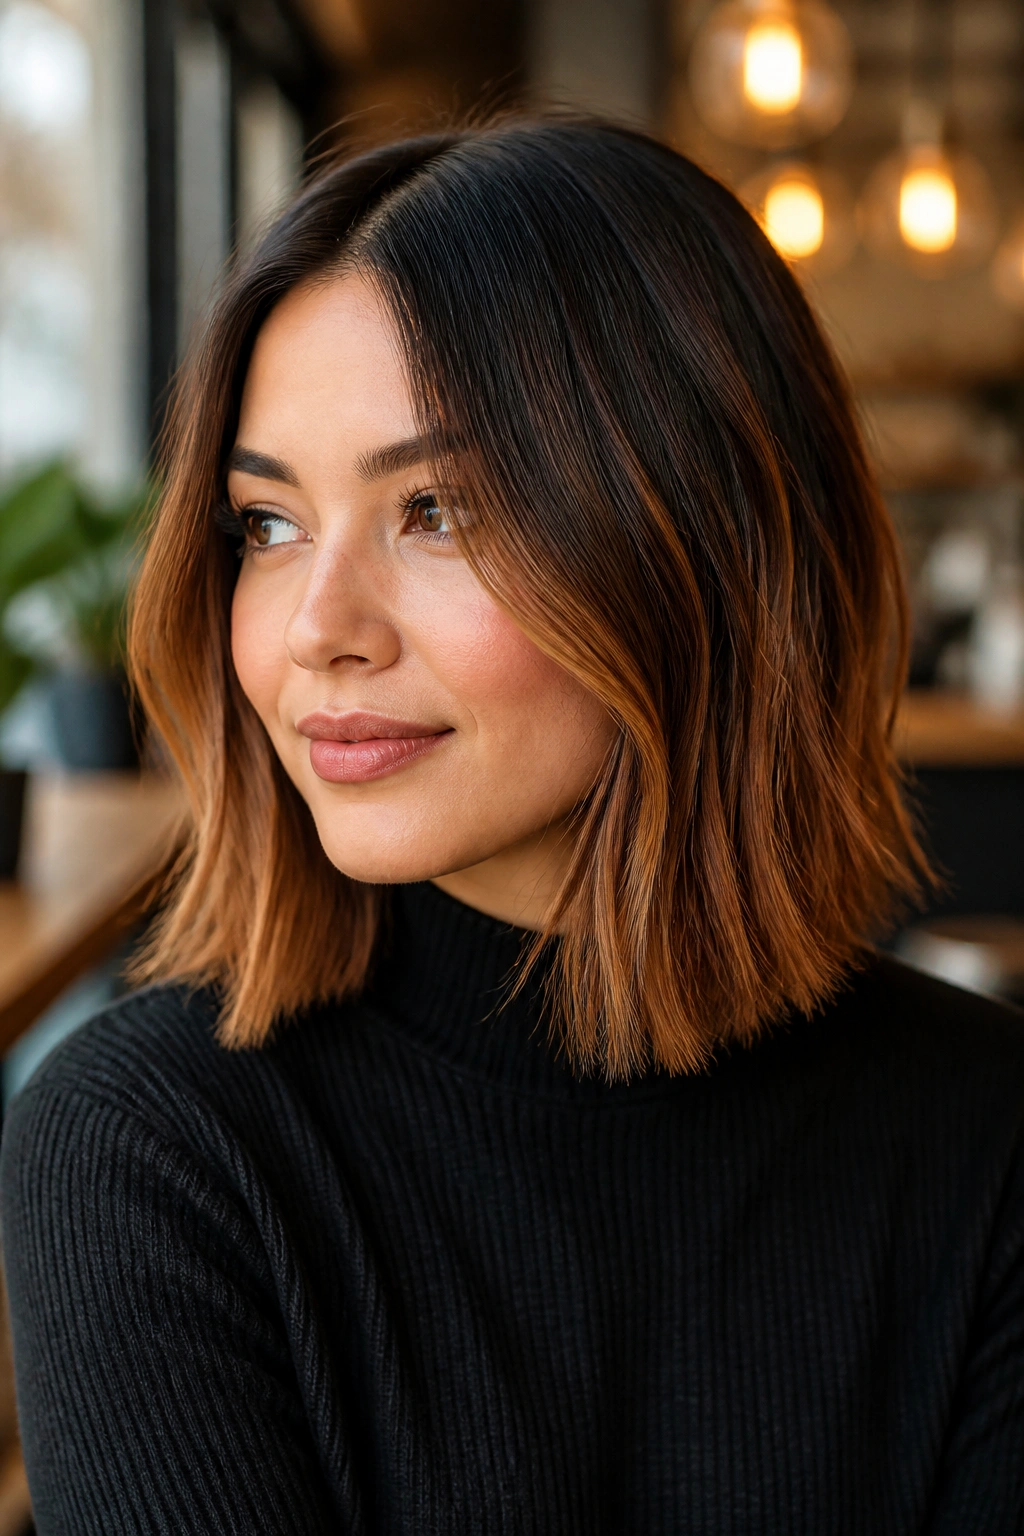
A blunt lob can make a round face look fuller if the color sits in the wrong place. Add a cinnamon-caramel balayage, though, and the whole cut starts behaving differently.
The blunt edge gives you structure. The balayage softens it. That’s the interesting part. The caramel should land from mid-length to ends, with a few lighter face-framing strokes that begin lower than the cheekbone and finish just below the jaw.
I like this on hair that lives at collarbone length. A lob at that spot already gives the face a little vertical pull, and the warm color keeps it from looking severe. If the cut is too boxy, the highlights should be feathered more at the front and heavier in the back half.
This one is also good when you want low drama. The cut stays simple. The color does the shape work.
6. Honey Slices Around a Deep Side Part
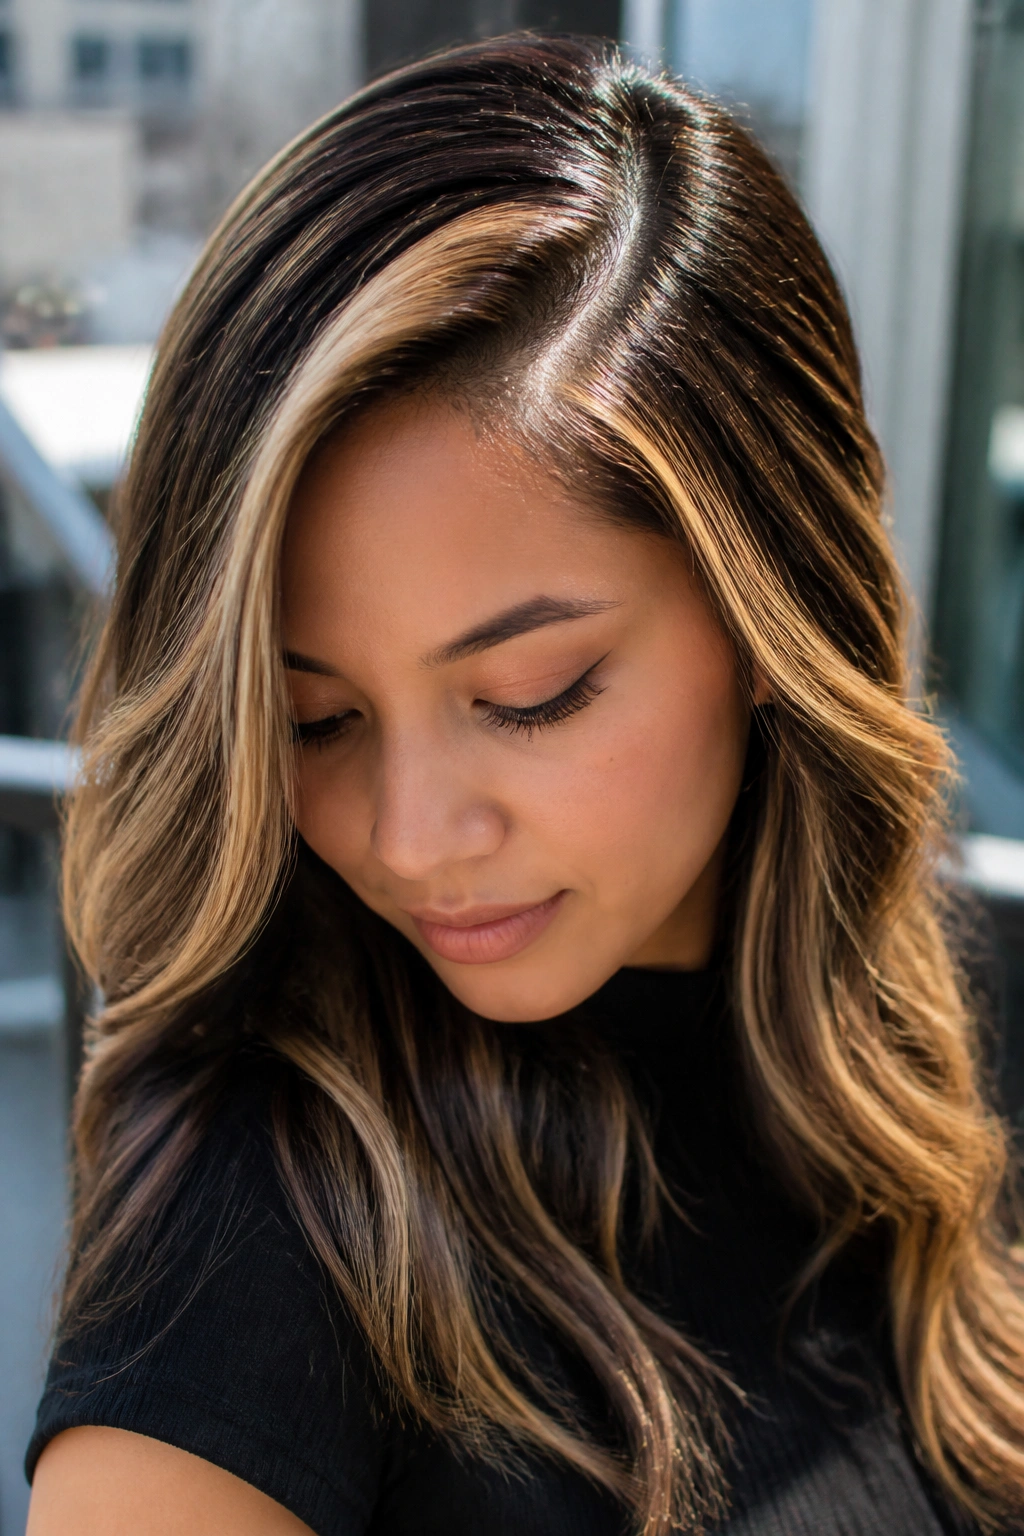
Unlike soft babylights, honey slices make a statement. They’re brighter, wider, and easier to spot from across the room, which is exactly why they work on some round faces. The diagonal part line cuts the face shape, and the honey pieces reinforce that angle.
The key is restraint. Two slices on the fuller side, one smaller slice on the other side, and then softer ribbons through the rest of the hair. That keeps the look from turning blocky. Honey is warmer than true caramel, so it plays well with black hair that already has a soft brown undertone.
Best use case? Fine to medium hair that needs a little more visual weight. A thin hairline can disappear under tiny color. A slice gives it a spine.
Who should try it: someone with a side part, a medium-length cut, and a little confidence.
Who should skip it: anyone who hates seeing a bright piece in photos. This one shows up.
7. Dark-Root Ombre With Sunlit Ends
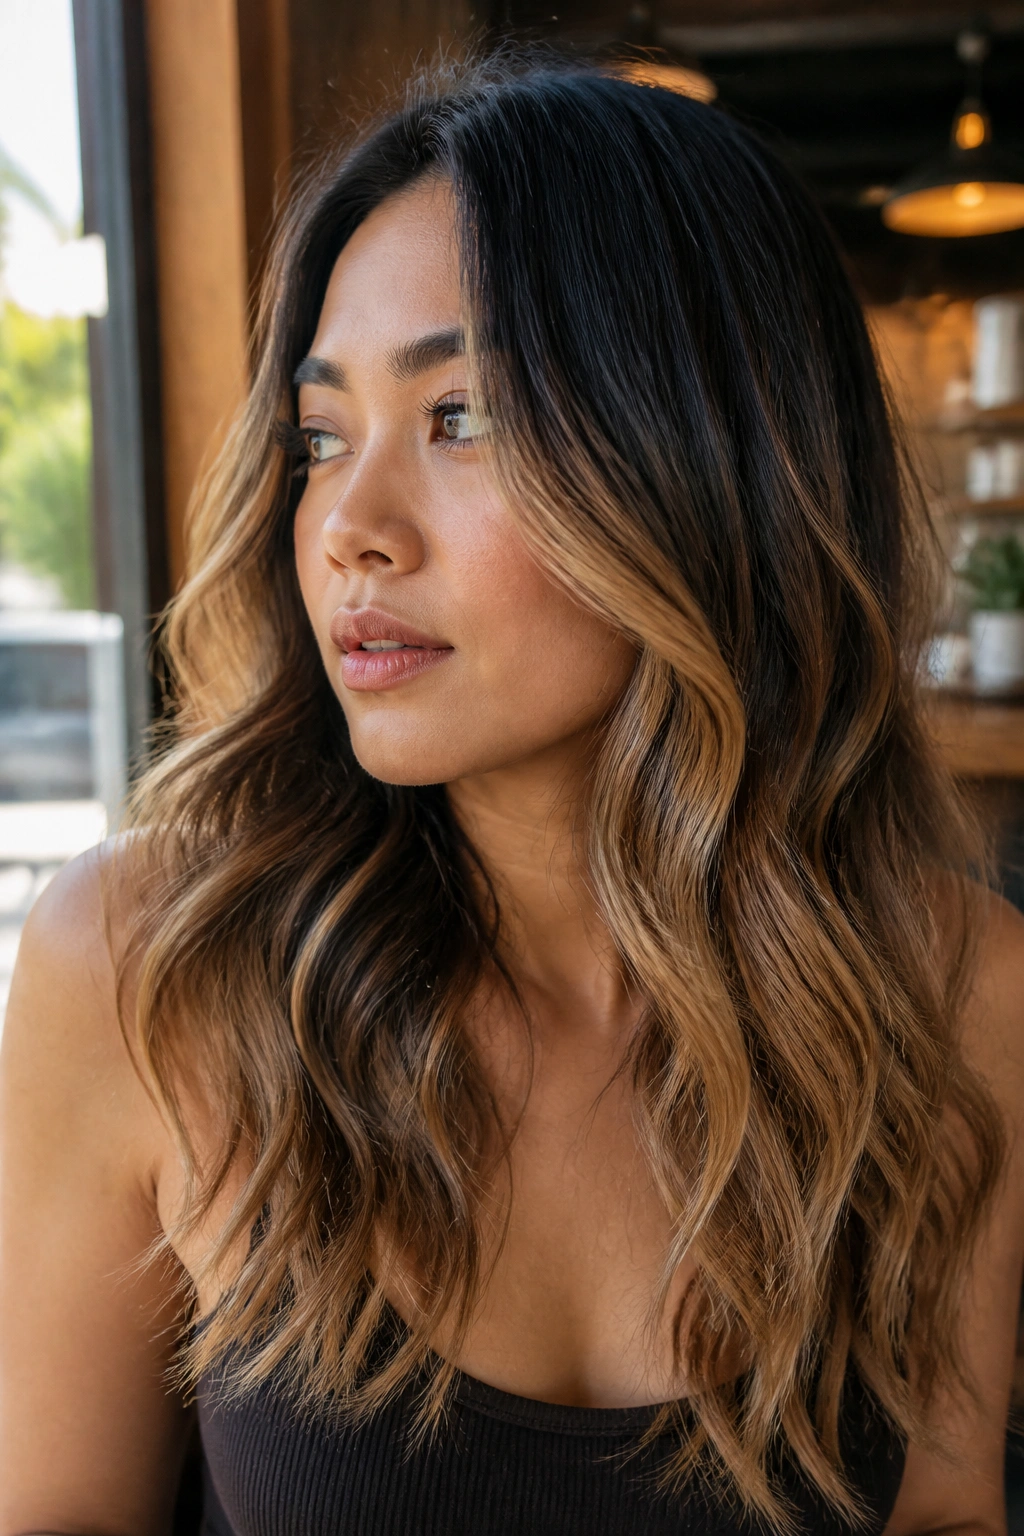
This is the easiest version to live with if you do not want a high-maintenance salon schedule. Keep the root area dark, let the mid-lengths soften, and push the caramel mostly into the ends. The effect looks like the color has been there for months, even when it hasn’t.
The reason it suits a round face is simple. Dark roots keep the top of the head tall and clean. Bright ends pull the eye down. That up-and-down movement matters more than people think.
What Makes It Different
The transition should be smooth, not dusty. A good ombre on black hair still has clear contrast. It just avoids hard lines.
- Ask for 1.5 to 2 inches of root shadow
- Keep the mids soft and blended
- Brighten the ends to a warm caramel, not a pale blonde
- Trim the ends regularly so the fade looks neat
This style is especially good if your hair gets worn in buns or ponytails a lot. The color still reads when it’s down, and it does not scream for touch-ups every few weeks.
8. Peekaboo Caramel Underlayers
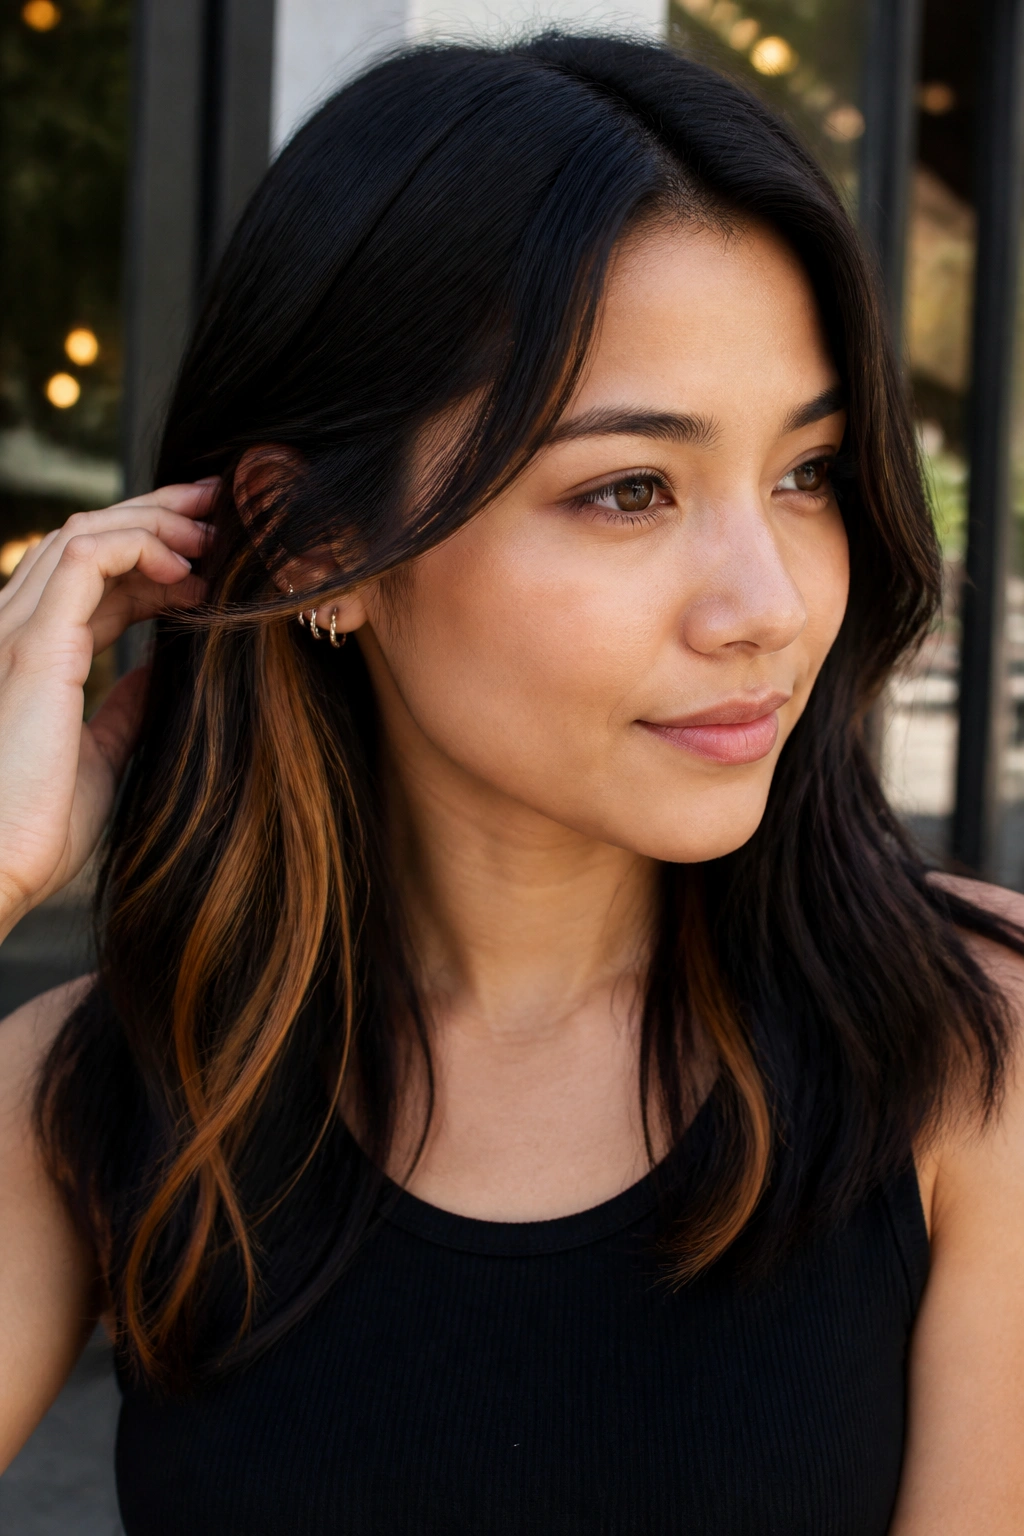
Peekaboo color is sneaky in the best way. The top stays dark, so the face keeps its strong frame, and the caramel shows when the hair swings or gets tucked behind the ear. That hidden flash works well on round faces because it does not add width at the outer cheeks.
I’d choose this for someone who likes dark hair but wants a little movement. It is also smart if you wear your hair half up, since the lower layers become the part people notice. The top layer acts like a curtain. Nice and simple.
The underlayers can be painted in a smooth ribbon or in narrower panels, depending on how much you want them to show. If you curl the hair, the color will peek out more. If you wear it straight, it stays more hidden.
This one has a low-commitment feel without being boring. That’s a rare thing.
9. Thin Veil Highlights Around the Hairline
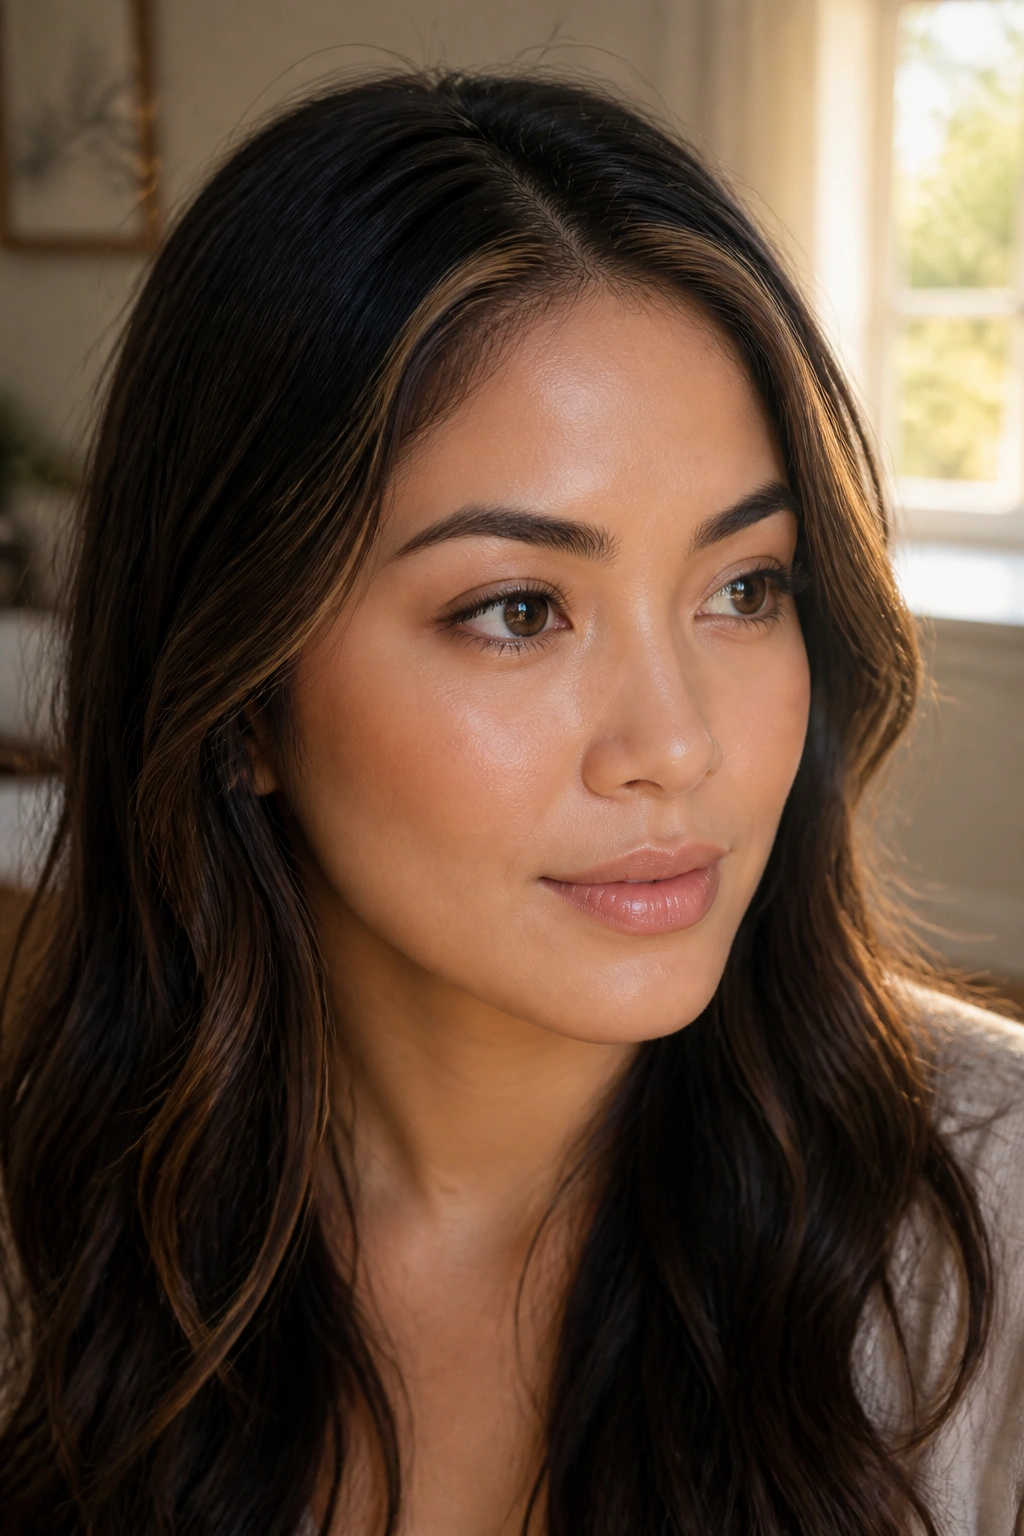
Can a little brightness around the face change the whole cut? Absolutely. Thin veil highlights sit just inside the hairline and give a soft frame without turning the front of the head into a color block.
For a round face, the main rule is placement. Start the veil at the temples, then let it fall just past the cheekbone. Don’t stop it right at the widest part of the face. That’s the mistake that makes the style feel bulky.
How to Wear It
Ask for 1/4-inch slices near the hairline, painted softly and blended into the darker hair behind them. The ends can be a bit lighter than the roots, but the change should stay subtle.
This is a good first-color move if you’re nervous about caramel on black hair. It gives you a taste of brightness without a full commitment.
- Keep the pieces narrow
- Place them slightly below the brow line
- Let them taper toward the jaw
- Use a warm beige-caramel gloss for shine
10. Melted Caramel Ombre for Long Black Hair
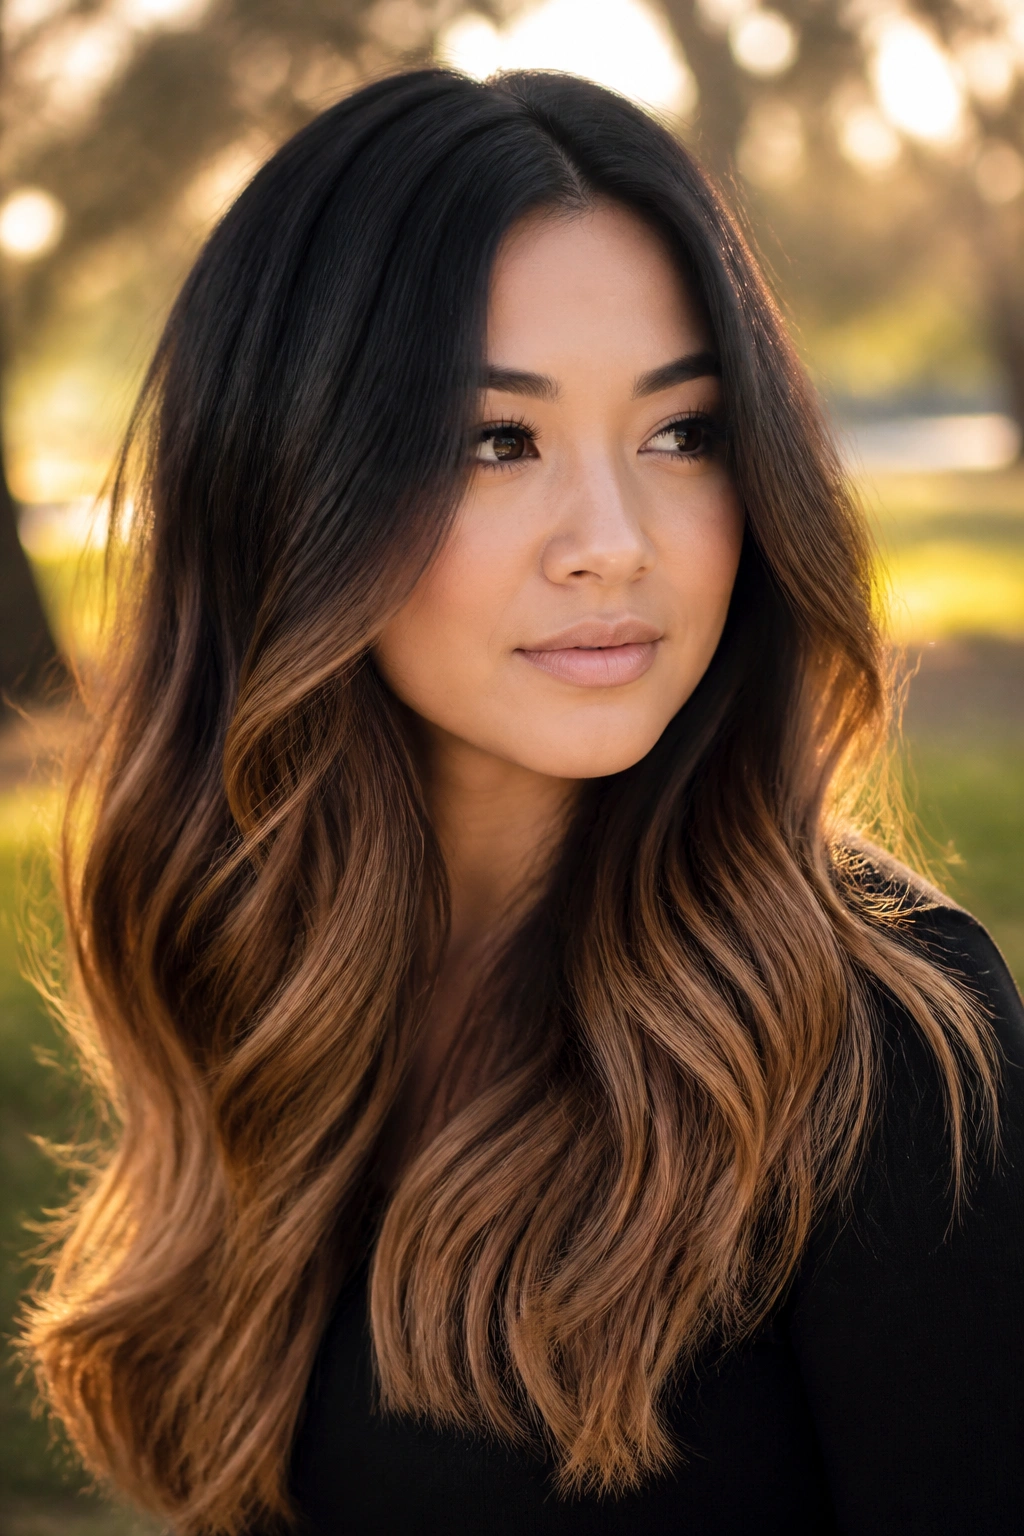
Long hair can handle a heavier color shift, and that’s where a melted ombre shines. The black root stays rich, the transition zone gets soft, and the caramel shows up in the lower half where it can stretch the face shape vertically.
This is one of my favorite ways to color long hair for a round face because the length already does some slimming on its own. The ombre adds a second line of movement. It keeps the eye moving down instead of hanging out at the cheeks.
The blend should start lower than you think. Around mid-shaft is often right, sometimes a touch lower if the hair is thick or layered. The worst version of this look starts too high and turns the whole head into a warm cloud. You want melt, not fog.
It’s also one of the better choices if you wear hair straight some days and wavy on others. The fade changes with the texture, and that makes it feel more alive.
11. Textured Shag With Scattered Caramel Pieces
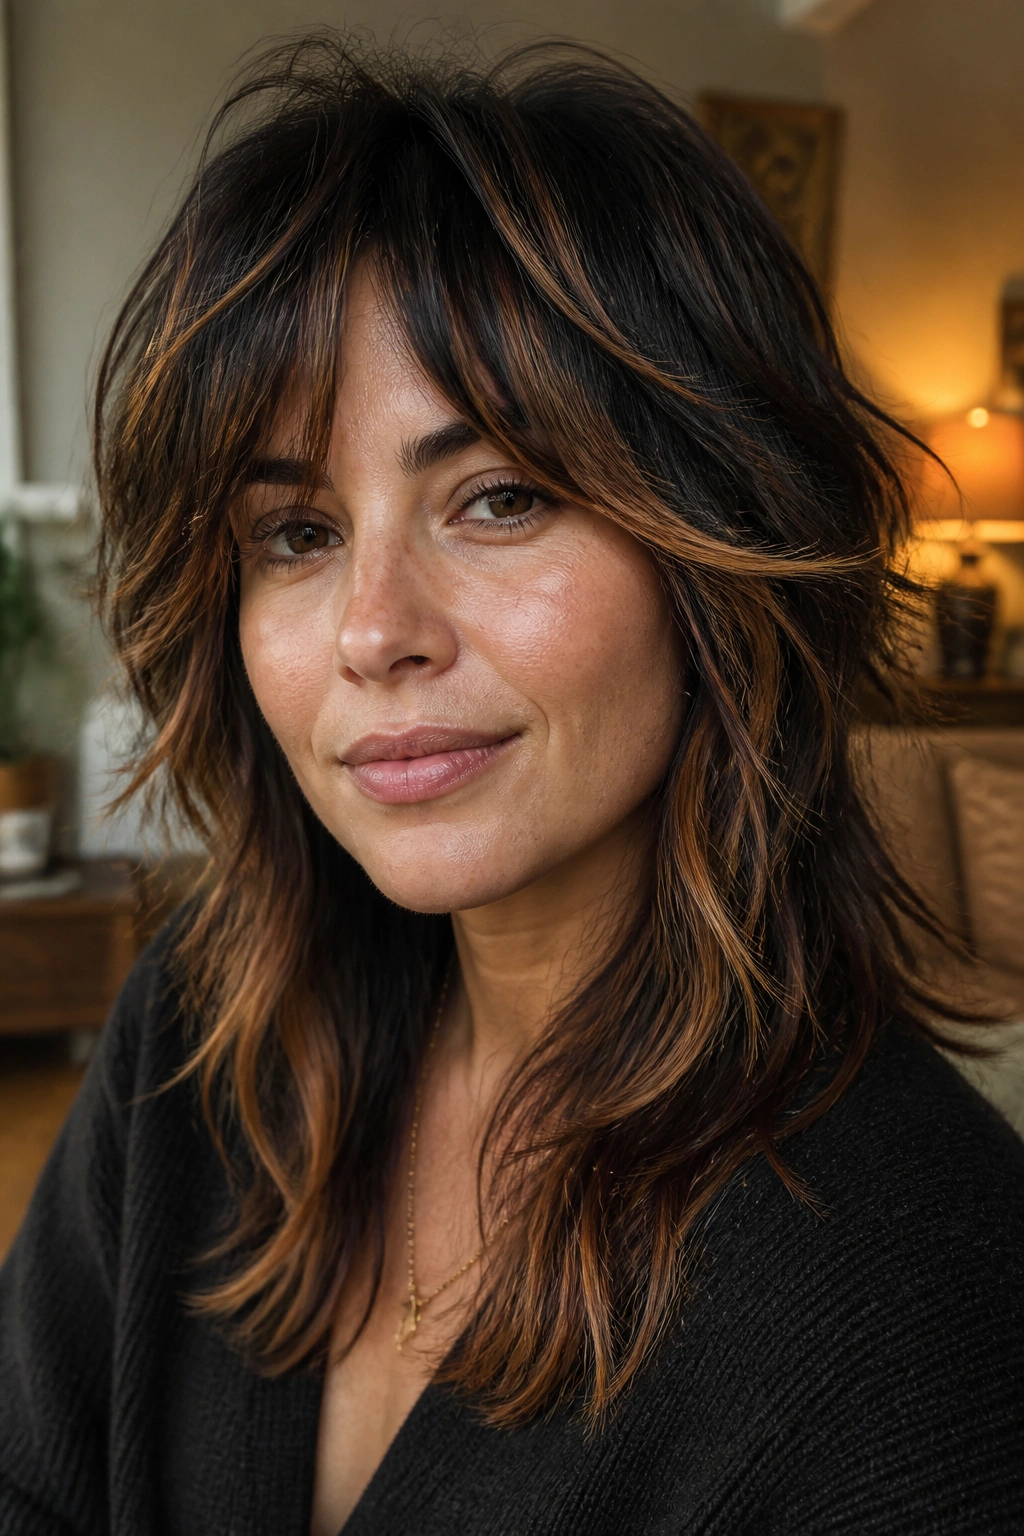
A shag can carry more visible contrast than a blunt cut because the layers already break up the outline. That’s why scattered caramel pieces work so well here. They look casual, not stiff.
Round faces often do better when the cut itself creates angles, and a shag does that with movement. Add a few caramel pieces around the cheekbones, some through the crown, and a couple longer bits near the neck. The result feels messy in a good way.
This is not the place for perfectly even strips. Uneven placement is the point. The cut wants to move, and the color should move with it. I’d keep the highlights a little wider near the ends and thinner on the top layers.
If your hair is naturally wavy, this may be the best option on the list. The bend in the hair helps the color show up without looking too planned.
12. Warm Mocha Lowlights With Narrow Caramel Ribbons
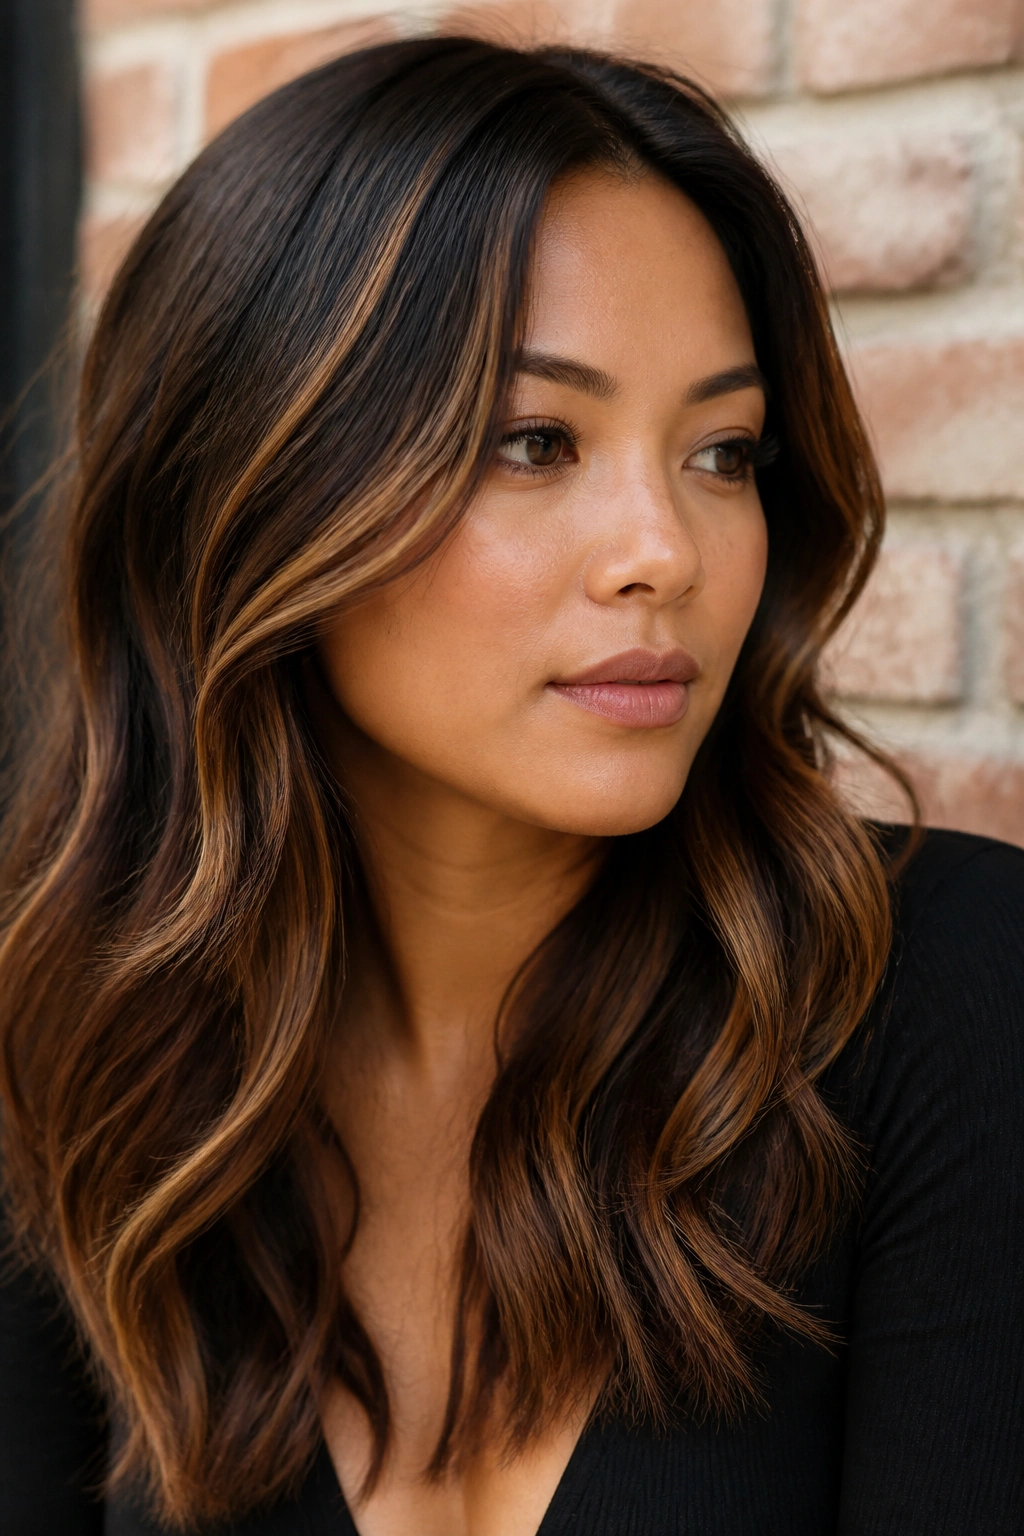
Most people think first about highlights, but lowlights matter too. Warm mocha lowlights keep black hair rich, especially when caramel starts to lighten the mid-lengths too much.
This combination works because the darker pieces stop the color from floating. The caramel ribbons become more readable, and the face stays framed by deep tones near the root and sides. On a round face, that extra shadow is useful. It trims the outline a little.
What to Watch For
If your hair is thick, start with mocha lowlights in 1/2-inch sections and then layer thin caramel ribbons on top. If your hair is finer, the lowlights should be lighter and more diffused so they do not look patchy.
- Use mocha, espresso, or dark chestnut lowlights
- Keep caramel ribbons narrow and warm
- Place more brightness below the cheekbone than above it
- Refresh with a gloss before the caramel turns orange
This is a smart pick when black hair feels too flat but you do not want the whole head lifted. Depth first. Then shine.
13. Caramel Highlights Focused at the Collarbone
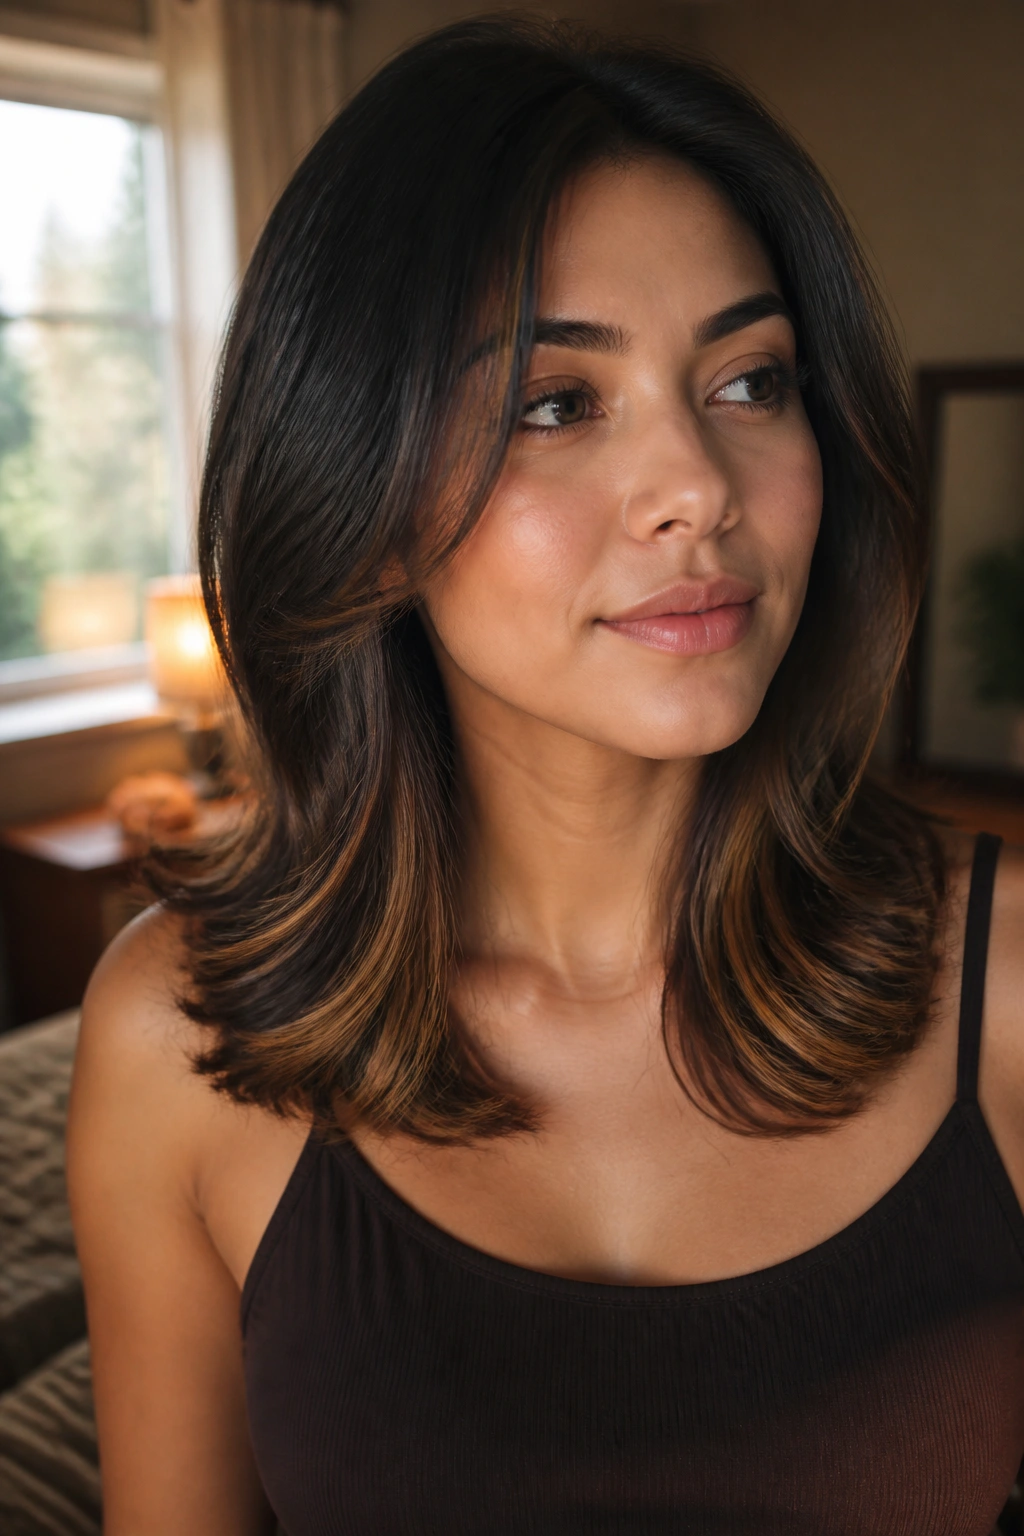
Why the collarbone? Because it sits below the face’s widest point and gives the eye a place to land. Brightness there can make a round face look longer without screaming for attention up top.
This placement works best on medium to long layers. The light pieces should begin around the chin or upper neck, then get stronger near the collarbone. That keeps the face framed, but not crowded. Think of it as a soft vertical trail.
You can keep the front very quiet and let the brightness emerge once the hair moves past the jaw. That’s the part I like most. It feels restrained, but the shape payoff is real.
If you wear necklaces, this look is especially nice. The highlights and jewelry end up sharing the same visual space, and the whole area feels finished without trying too hard.
14. Soft Contrast Layers for Natural Afro Texture
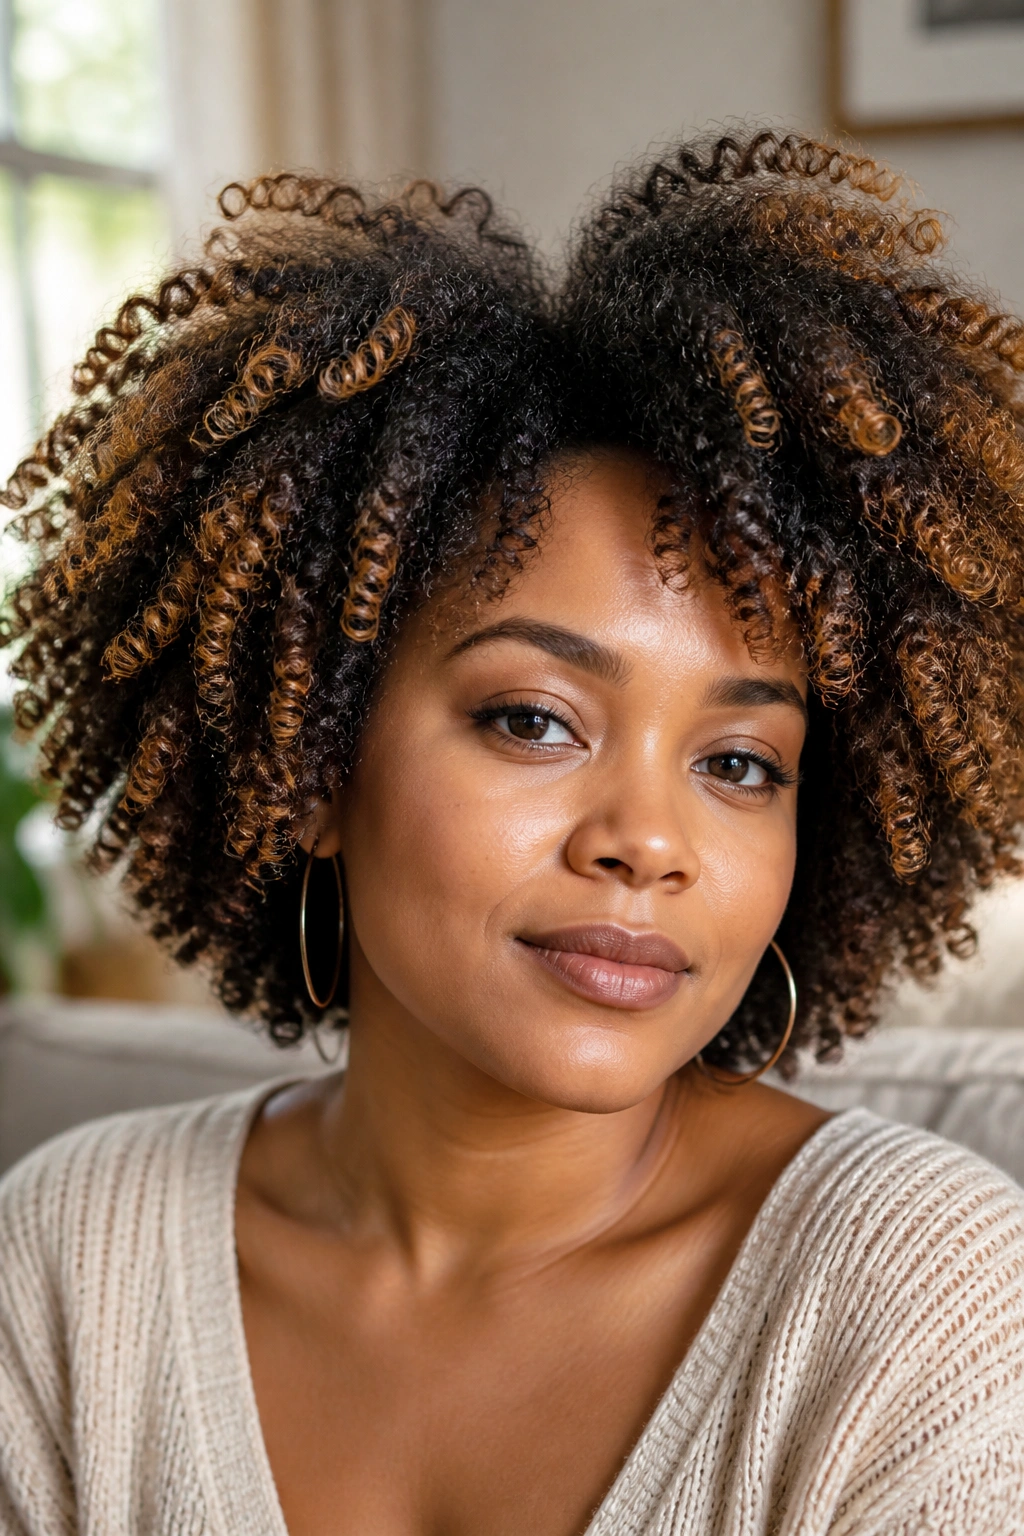
Natural afro texture needs a different color map. Tiny streaks often disappear, and heavy blocks can look harsh. Soft contrast layers, painted where the curls open and curve outward, give black hair a caramel lift that still feels connected to the texture.
The best placement usually happens on the outer shell of the curl pattern. That means the pieces you see first when the hair is shaped, not deep inside the coil. On a round face, that outer shell can do useful contouring. It draws the eye upward and out along the line of the style.
This also gives the hair a brighter edge when it moves. Not a flat edge. A lit one.
Ask for freehand painting on selected sections, then a gloss that keeps the caramel warm and soft. If the curls shrink a lot, the highlight should be placed where the curl opens, not where it sits compressed. That detail makes the difference between color that disappears and color that actually shows.
15. Glossy Espresso Base With Fine Caramel Lattice
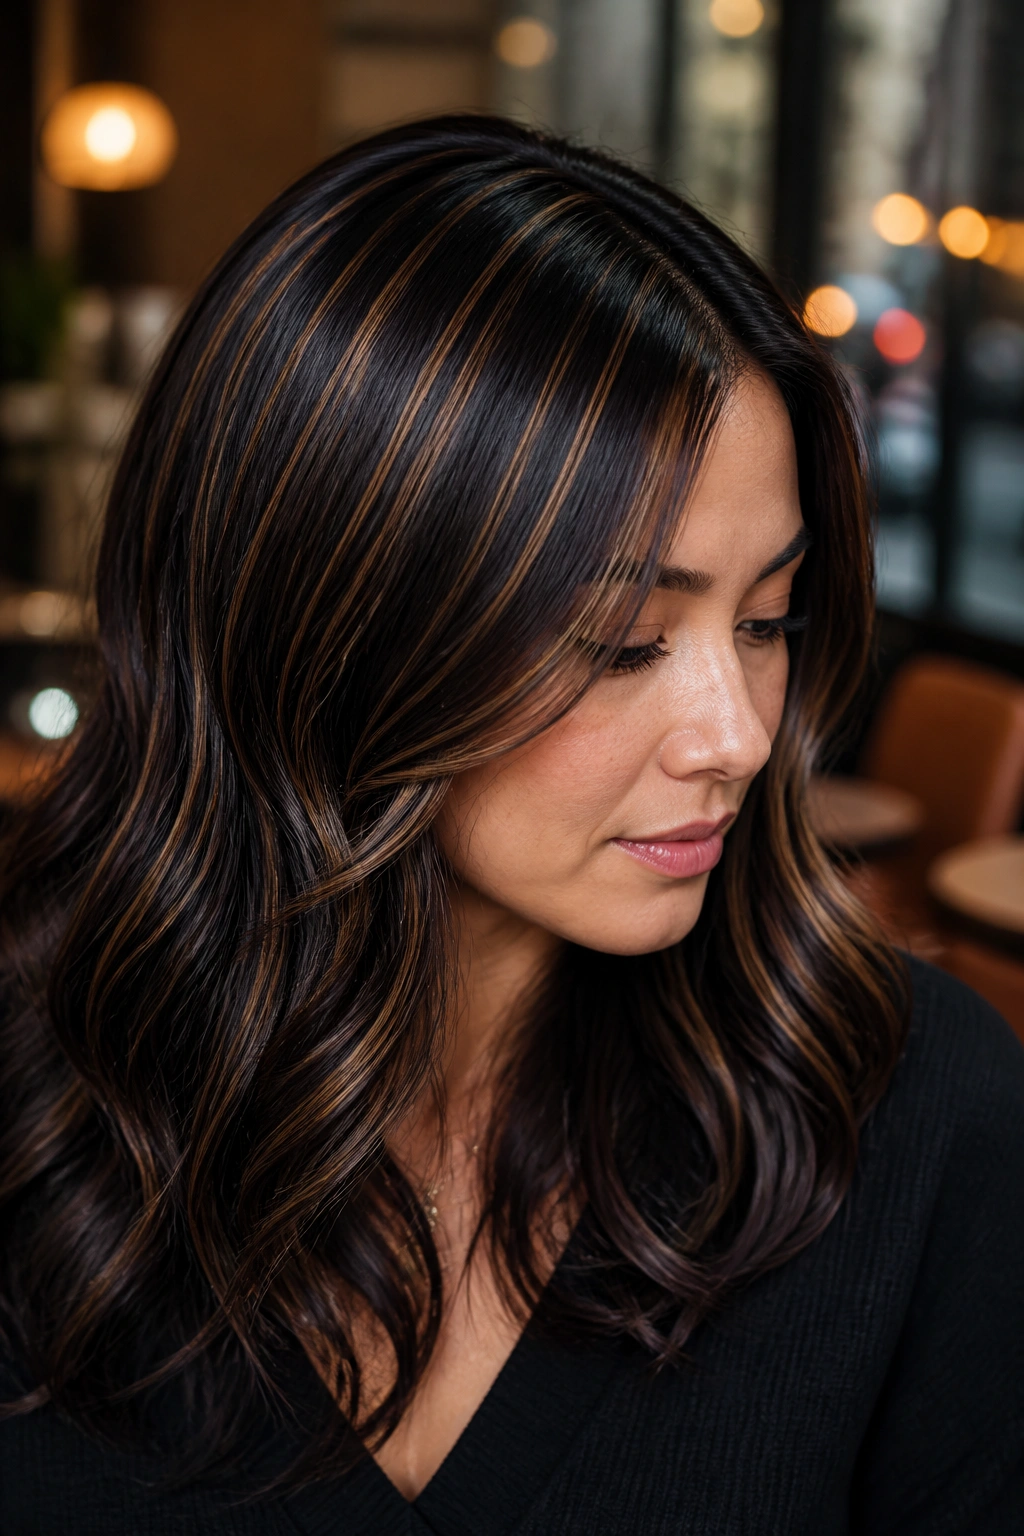
Fine lattice highlights are for people who want shine more than drama. The caramel sits in threadlike lines over a glossy espresso base, almost like woven strands. It looks polished because the contrast is controlled.
What Makes It Different
Unlike chunky streaks, this technique keeps the black base dominant. The caramel acts like a fine pattern, not a loud stripe. That matters on a round face, because the eye reads texture and movement instead of width.
Use this on straight hair, blown-out curls, or a smooth silk press. The color shows best when the surface is clean and reflective.
- Ask for very fine slices, about 1/16 to 1/8 inch
- Keep the brightest pieces around the top layers and sides
- Use a neutral caramel, not a gold tone
- Finish with a clear gloss so the espresso stays shiny
This is a good option if you want something that looks expensive without being flashy. And yes, that sounds a little fussy. But sometimes fussy is the right call.
16. Beveled Bob With Bright Corner Pieces
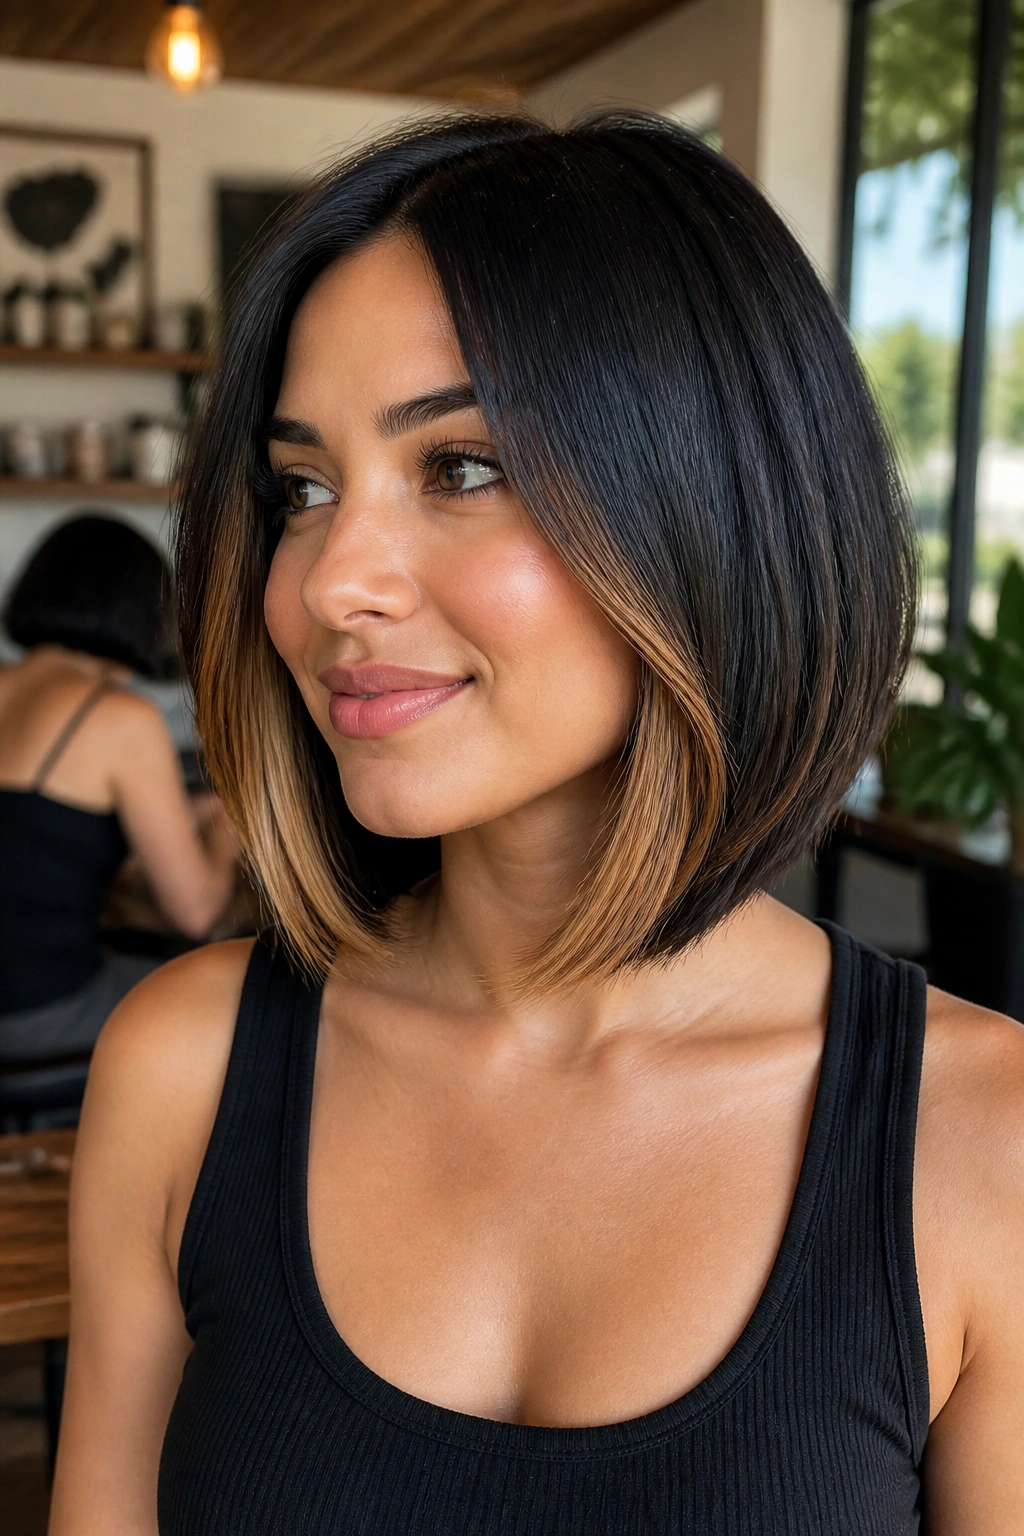
A bob without light at the edges can sit a little heavy around the cheeks. Bright corner pieces fix that. They give the cut a point, almost like a frame, which helps balance a round face.
The corners I mean are the front ends of the bob, just below the jaw. Brighten them more than the middle sections and you get a cleaner line. It’s a simple move, but it changes the whole read of the haircut.
I especially like this on a beveled bob, where the ends are slightly longer in front than in back. The caramel catches the beveled edge and makes the shape look more deliberate. If the bob is blunt, keep the bright pieces thinner. Too much light can make the sides puff out.
This is one of those looks that looks expensive when the cut is sharp. A sloppy trim will expose every problem. A good bob makes the highlights look intentional.
17. Lived-In Balayage With Root Shadow
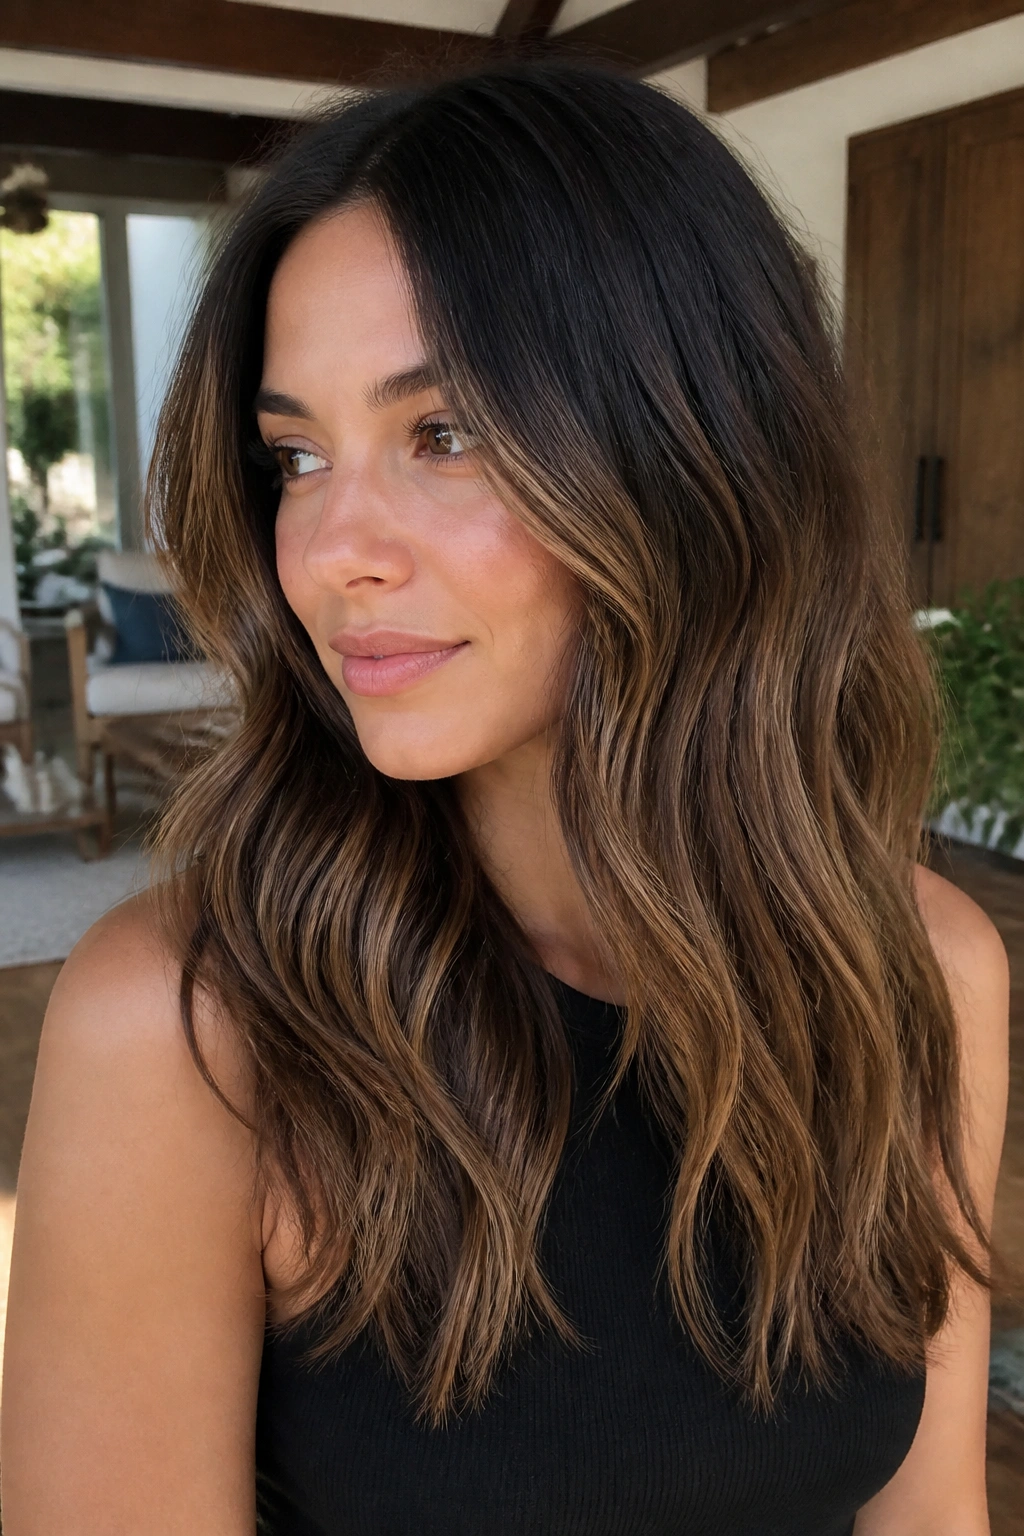
If you hate obvious regrowth, start here. A lived-in balayage with root shadow keeps the top dark for a longer stretch and lets the caramel live mostly in the middle and lower lengths.
That root shadow is useful on black hair because it preserves depth where round faces need it most. The upper part of the style stays long and clean, while the lighter pieces do their work farther down. It’s a practical color map, not a delicate one.
The touch-up schedule is also kinder. Many people can stretch this look longer than a full highlight service because the roots are part of the design. A gloss every 6 to 8 weeks helps the caramel stay warm and stops the ends from going dull.
This is a strong pick if you wear your hair both up and down. It still reads when tied back, and it does not depend on perfect styling to make sense.
18. Curved Highlight Placement That Traces the Jawline
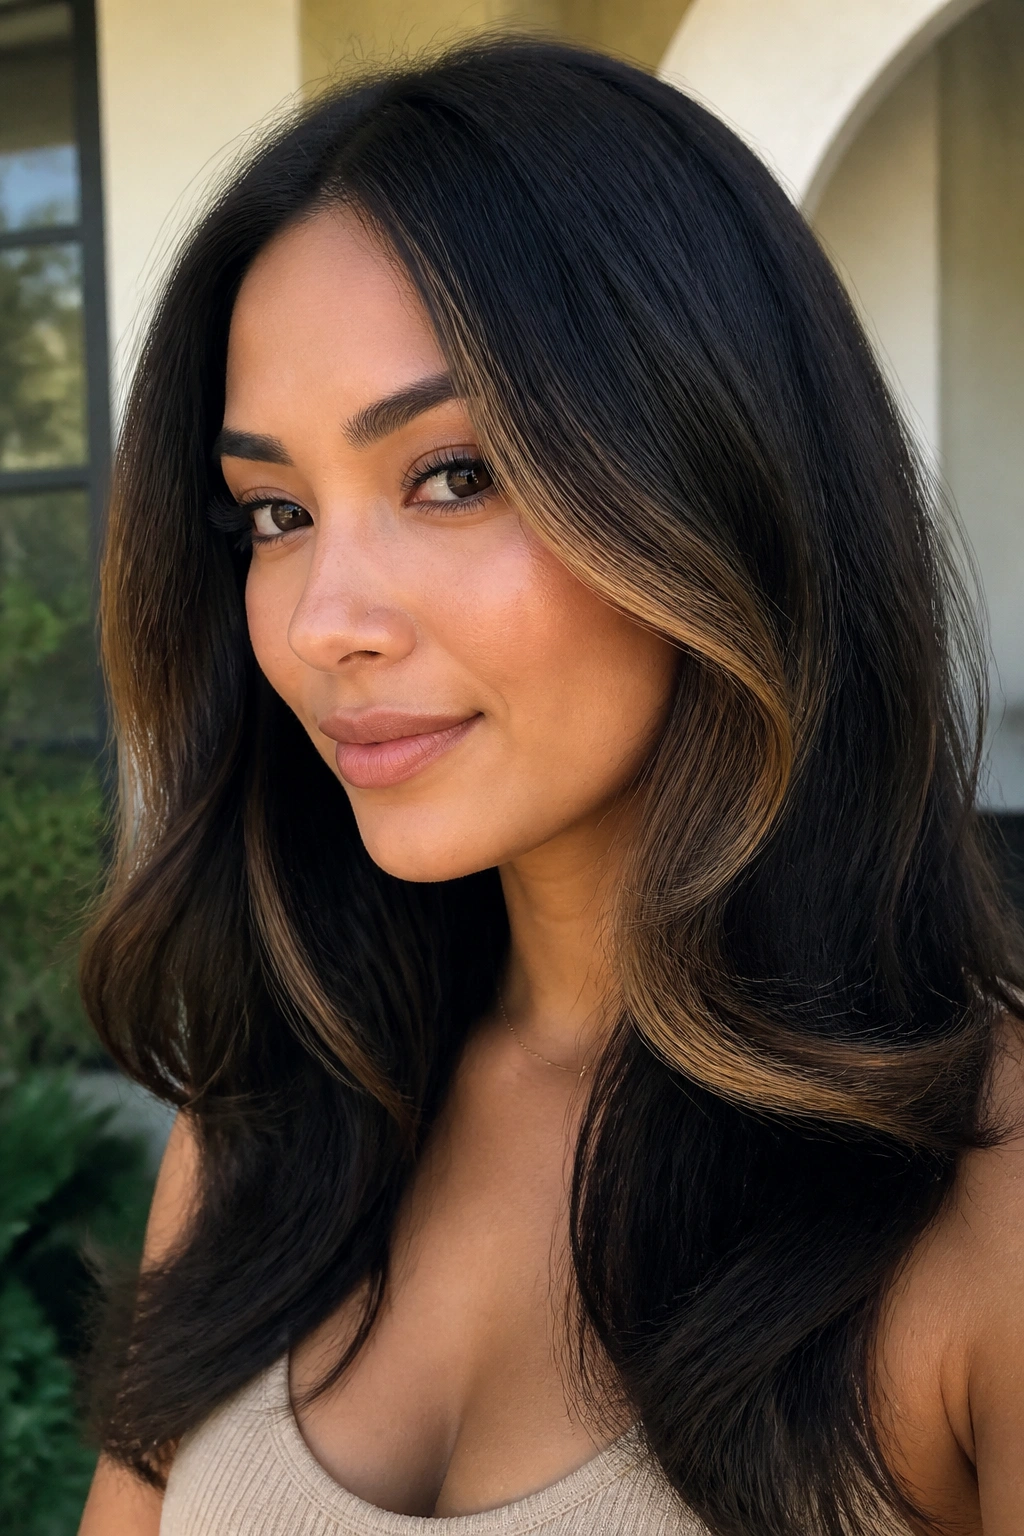
Straight stripes can look awkward on a round face. Curved placement is better because it echoes the shape of the jaw and guides the eye down and back.
Tell your colorist to paint the caramel in a soft C-shape along the front sections. Start around mid-cheek, curve toward the jaw, and let the pieces taper as they move downward. That shape is subtle, but it changes how the face reads in motion.
The best version is soft enough to blend into a layered cut. It works on lobs, shoulder-length hair, and longer styles that need a little contour. I would not do this with a blunt fringe. Too many lines at once can feel busy.
This approach is one of my favorites for clients who want shape more than brightness. The highlight map almost behaves like hair contouring, except it doesn’t look painted on.
19. Smoky Black Base With Toasted Caramel Ends
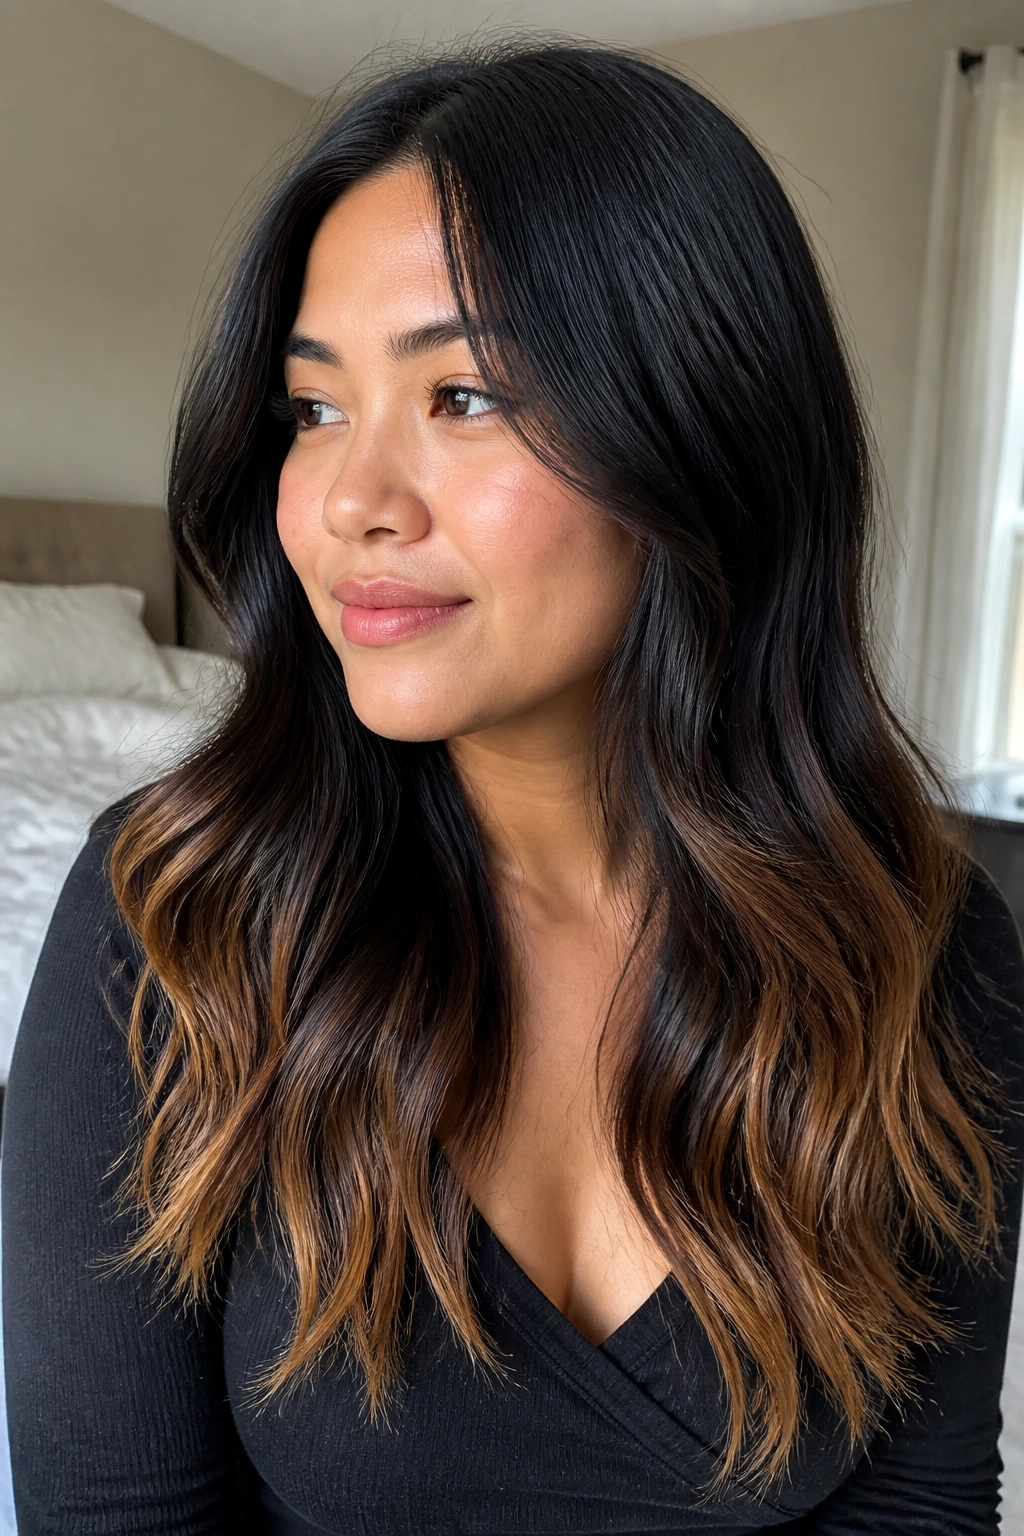
Some black hair lifts orange fast. If that sounds familiar, a smoky base with toasted ends can be the better route. The caramel should lean warm and neutral, not sugary or gold.
This is a quieter look. The lightest color stays toward the ends, but it’s toned down enough to keep the hair looking rich. On a round face, that matters because too-bright ends can pull the eye outward if they’re too wide. Toasted ends keep the line narrower and softer.
Use a beige or ash-caramel gloss if your hair tends to go brassy. If the warmth disappears too much, the finish starts to look flat, so there’s a narrow middle ground here. Not every highlight needs to shout.
This one suits people who want depth first and brightness second. It’s especially good in thicker hair that can handle more shadow.
20. Loose-Wave Highlight Map for Round Faces
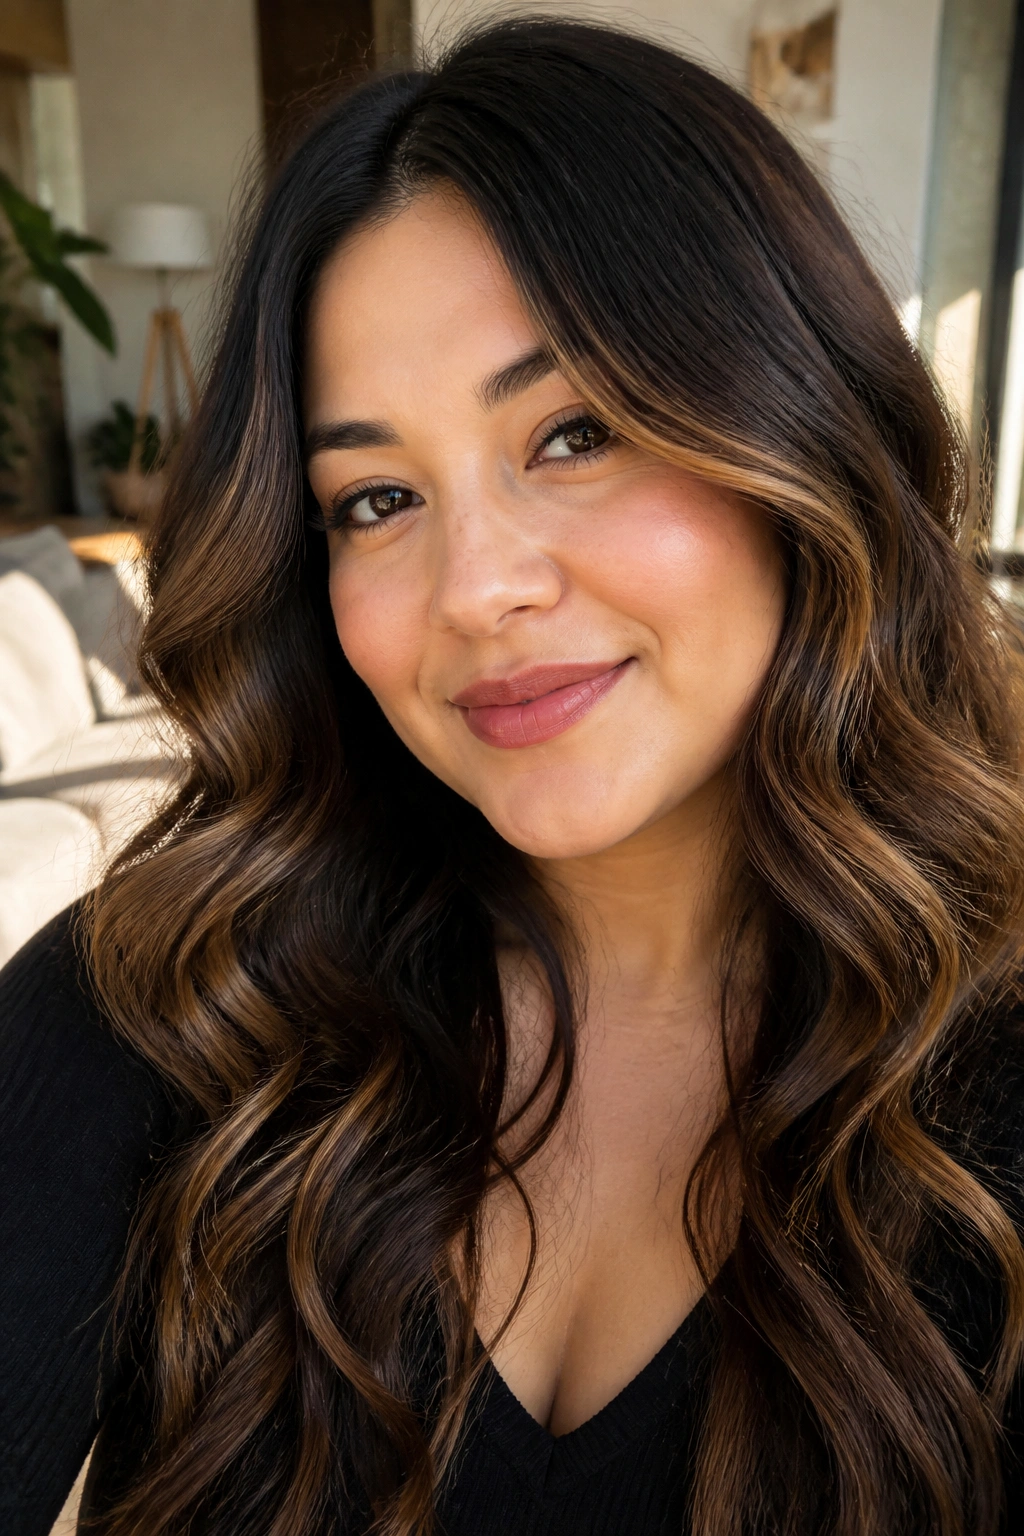
Where do highlights go when the hair is waved? On loose waves, the bend itself becomes part of the design, so the color needs to follow the pattern instead of fighting it.
Where the Bright Pieces Go
Place the caramel on the outer ridge of the wave, not buried inside the fold. That makes the light catch the movement and keeps the face from looking wider than it is.
The best map usually starts just below the eyes and continues toward the ends. Keep the crown soft. If the top gets too bright, the head can look rounder from the front.
- Brighten the outer curve of each wave
- Avoid wide panels across the cheek area
- Keep the front pieces vertical
- Let the ends hold the strongest caramel
A loose wave can make black and caramel look expensive without needing much styling. A quick bend from a curling iron or heatless wave set is enough.
21. Center Part With Narrow Caramel Pop
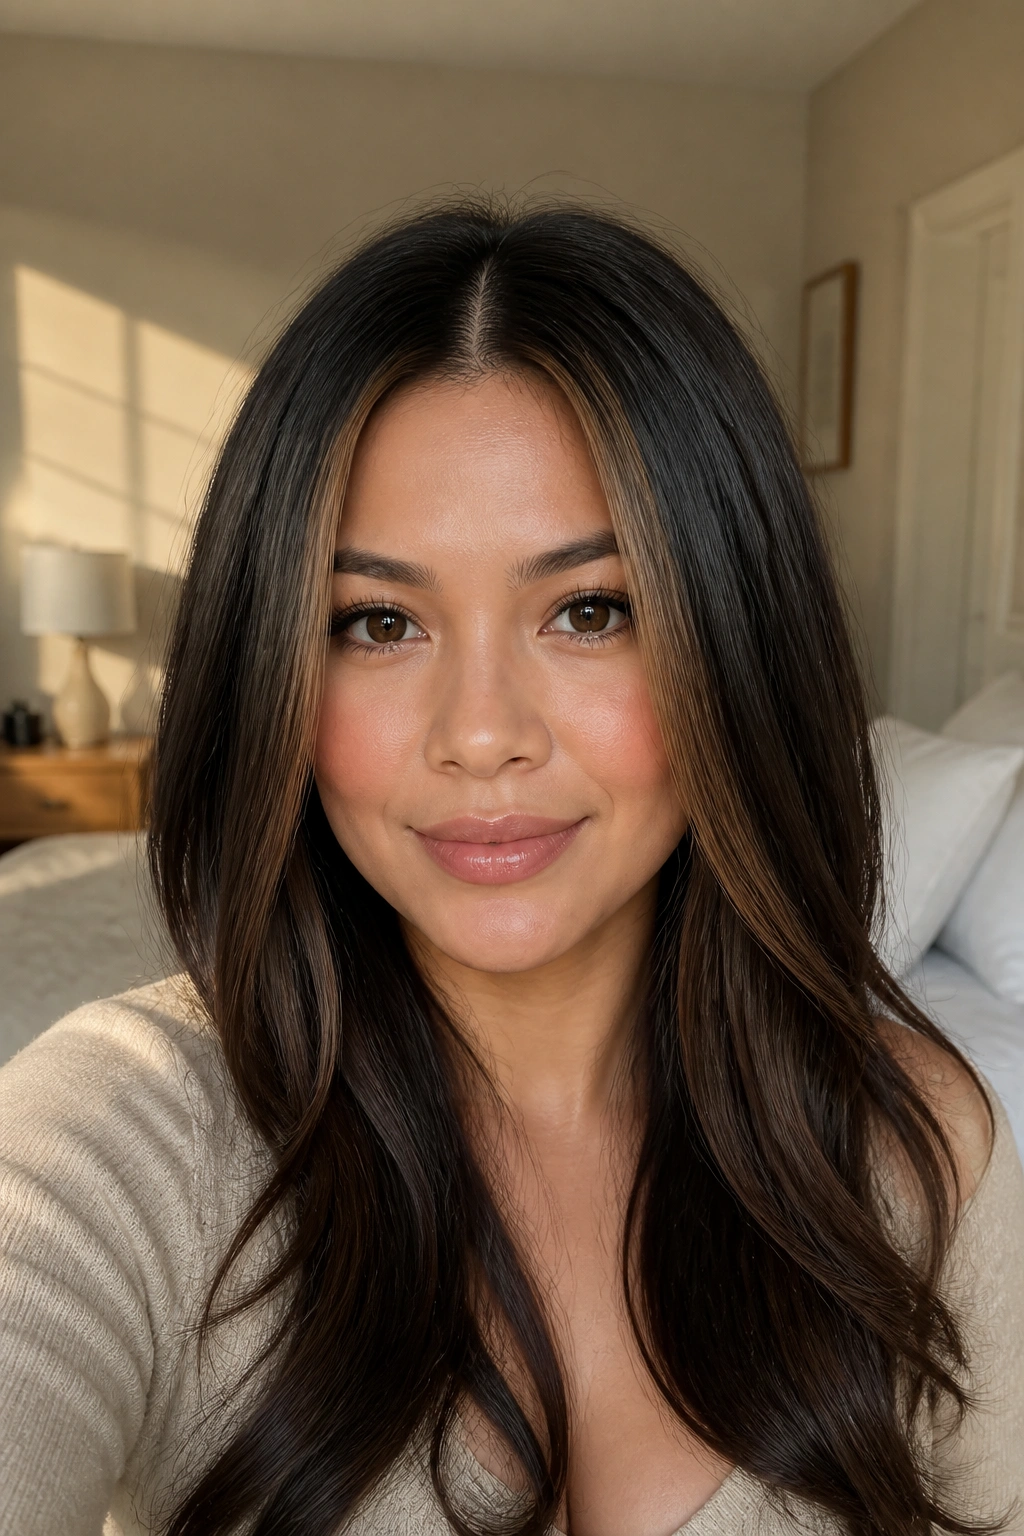
A center part is not off-limits for round faces. The trick is keeping the color narrow enough that the part line feels long and clean instead of wide and heavy.
This look works best when the brightest caramel sits just beside the part and then drops straight down through the front layers. The lines should be vertical. Anything that spreads sideways near the temples works against the shape you’re trying to build.
Longer layers help a lot here. They give the color a place to travel. On shorter cuts, a center part can feel too symmetrical unless the front pieces are very soft.
I’d choose this if you like a neat, balanced look and don’t want to lean on a side part for face-shaping. It’s calmer than some of the others, but it can be extremely flattering when the highlights stay slim.
22. Higher-Contrast Streaks for Edgier Style
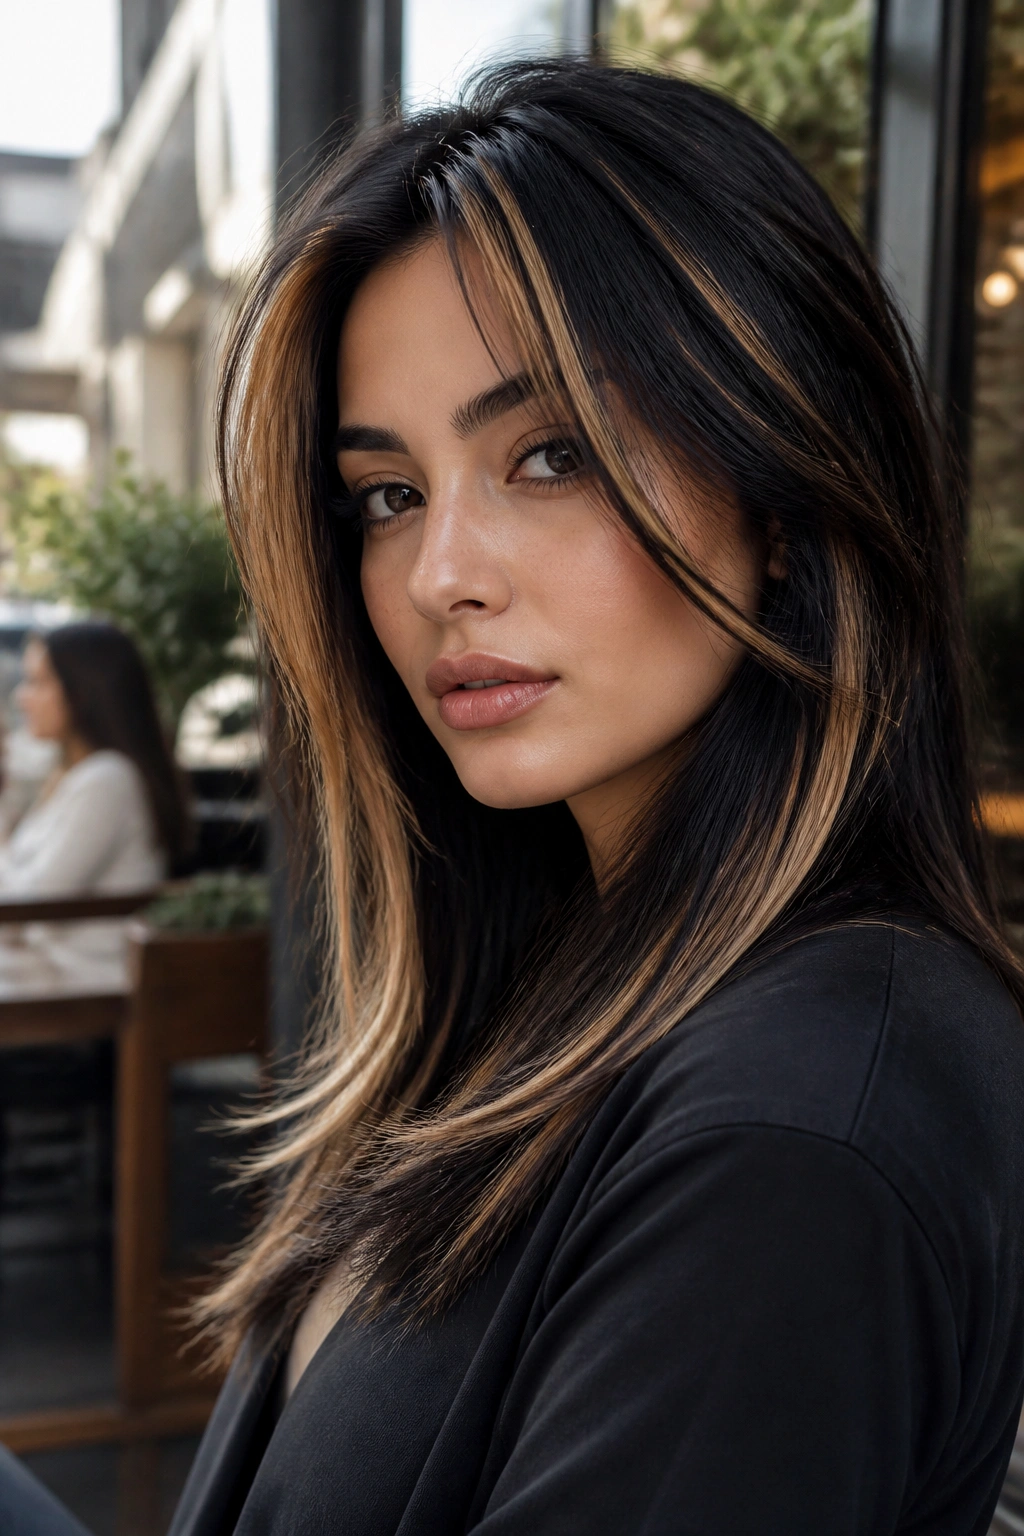
This is not shy color. If you want people to notice the highlights first, go for a few higher-contrast caramel streaks against the black base. The face-shaping rule still applies, though: keep the widest pieces away from the cheeks and let the color fall vertically.
A round face can wear contrast well when the streaks are placed with intention. One strong face-framing piece, two softer echoes behind it, and then a darker underlayer often looks better than a head full of bright panels. The color gets punchy without turning boxy.
This style is especially good with sharp cuts—think long layers, a shag, or a textured bob. It can look too busy on very blunt shapes.
If you want to keep the caramel from tipping into orange, ask for a neutral-to-warm tone rather than a honey-heavy one. Strong contrast needs good toning. Otherwise the whole thing starts looking loud in the wrong way.
23. Partial Highlights That Stay Low Maintenance
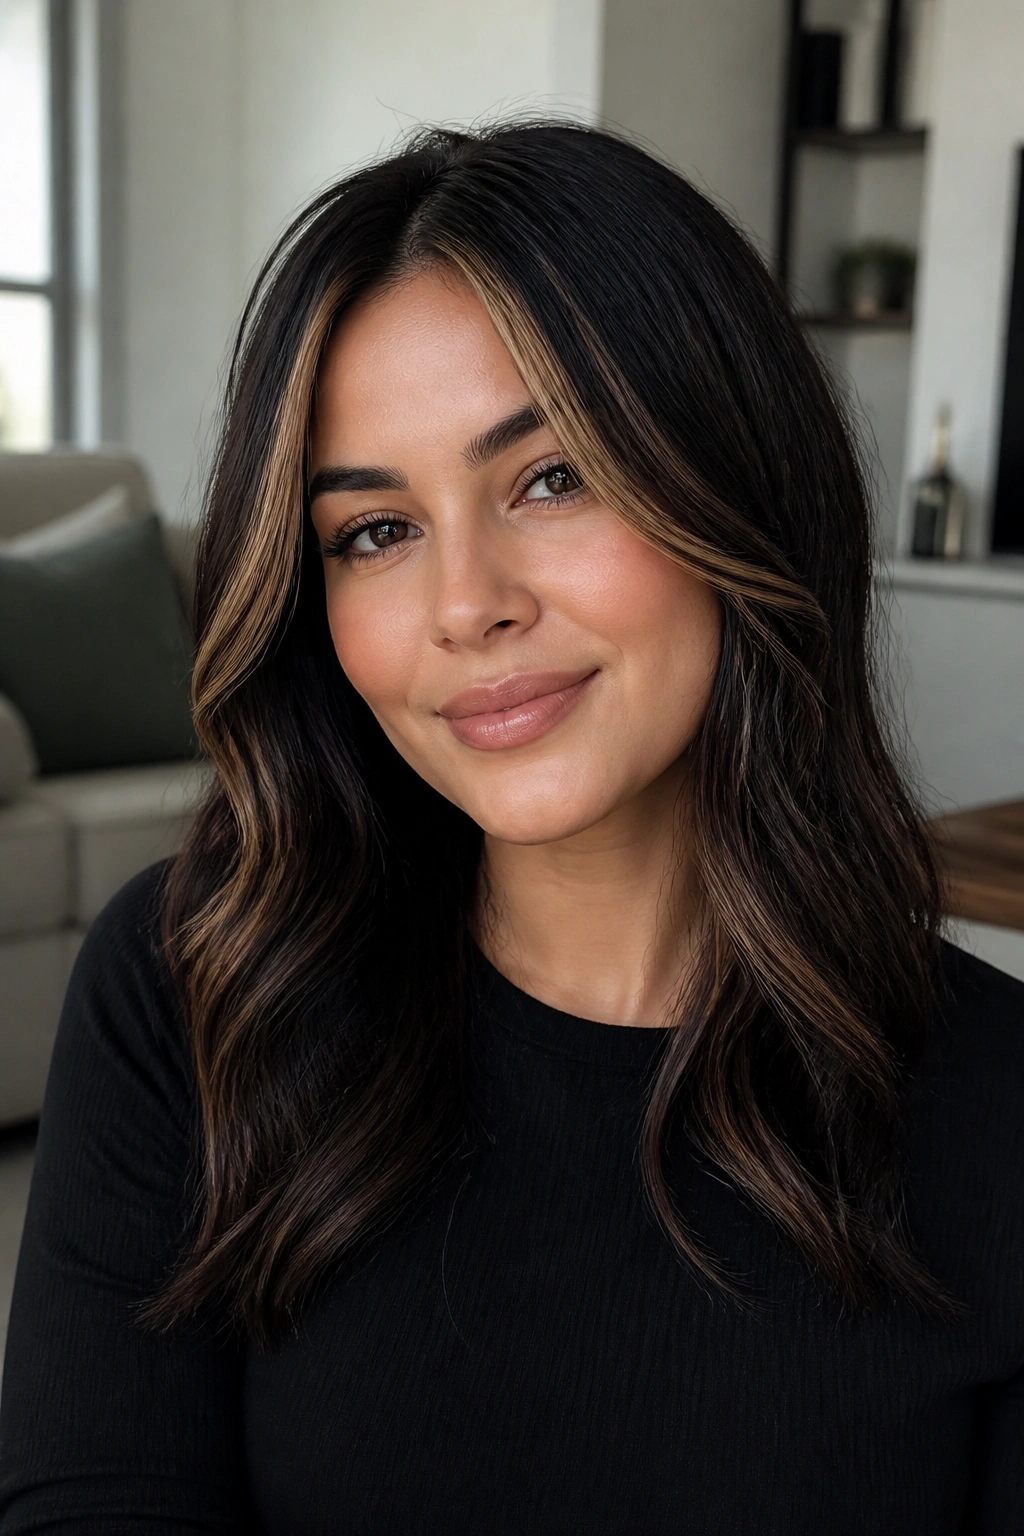
Partial highlights are the sensible option when you want brightness without signing up for a full color overhaul. They focus on the front third and upper layers, leaving the back and lower sections mostly dark.
For round faces, that’s useful because the color sits where the eye starts—near the face—but doesn’t spread into a wide halo. The black base keeps the outline tidy. The caramel gives just enough lift to keep the cut from going flat.
A Smart Maintenance Plan
Partial highlights usually age better than full head lightening because there’s less to fade. Still, the color needs care.
- Use color-safe shampoo 2 to 3 times a week
- Deep condition once a week if the hair feels dry
- Book a gloss or tone refresh every 6 to 8 weeks
- Touch up the visible front pieces before the color gets patchy
This is a good choice if you wear your hair up often, travel a lot, or just don’t want to spend half your life in a salon chair.
24. Face-Brightening Pieces for Glasses Wearers
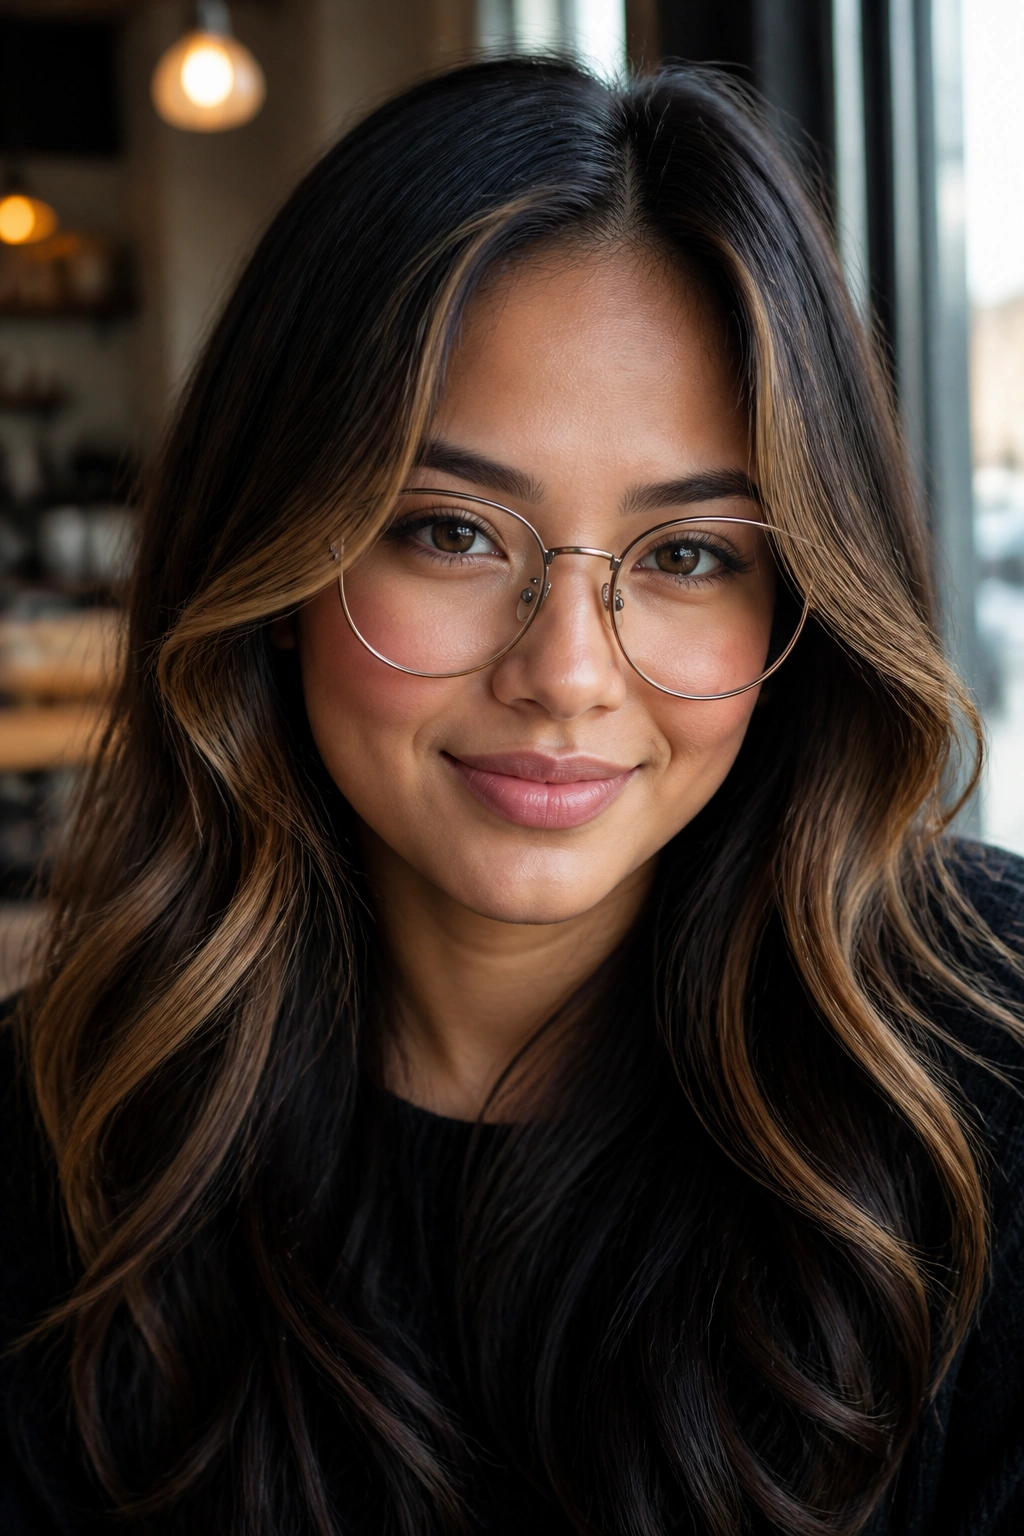
Glasses change where the eye lands. That means the highlights need to work around the frames, not fight them. Caramel pieces placed too close to the frame line can get lost fast.
The best approach is to brighten just outside the frame and slightly below it, around the temples and upper jaw. That way the color frames the face without competing with the glasses. On a round face, the side pieces should stay narrow and vertical, not spread wide across the cheeks.
What to Avoid
Big chunks directly under the lenses can look cluttered. So can highlights that stop right at the broadest part of the frame.
A cleaner version looks like this:
- Thin caramel ribbons at the temple
- Softer brightness below the frame line
- Darker roots to keep structure
- Ends that taper below the jaw
If your frames are thick, subtle highlights often look better than loud ones. The glasses are already making a statement. The hair should support them, not argue.
25. The Softest Caramel Finish for a Low-Drama Grow-Out
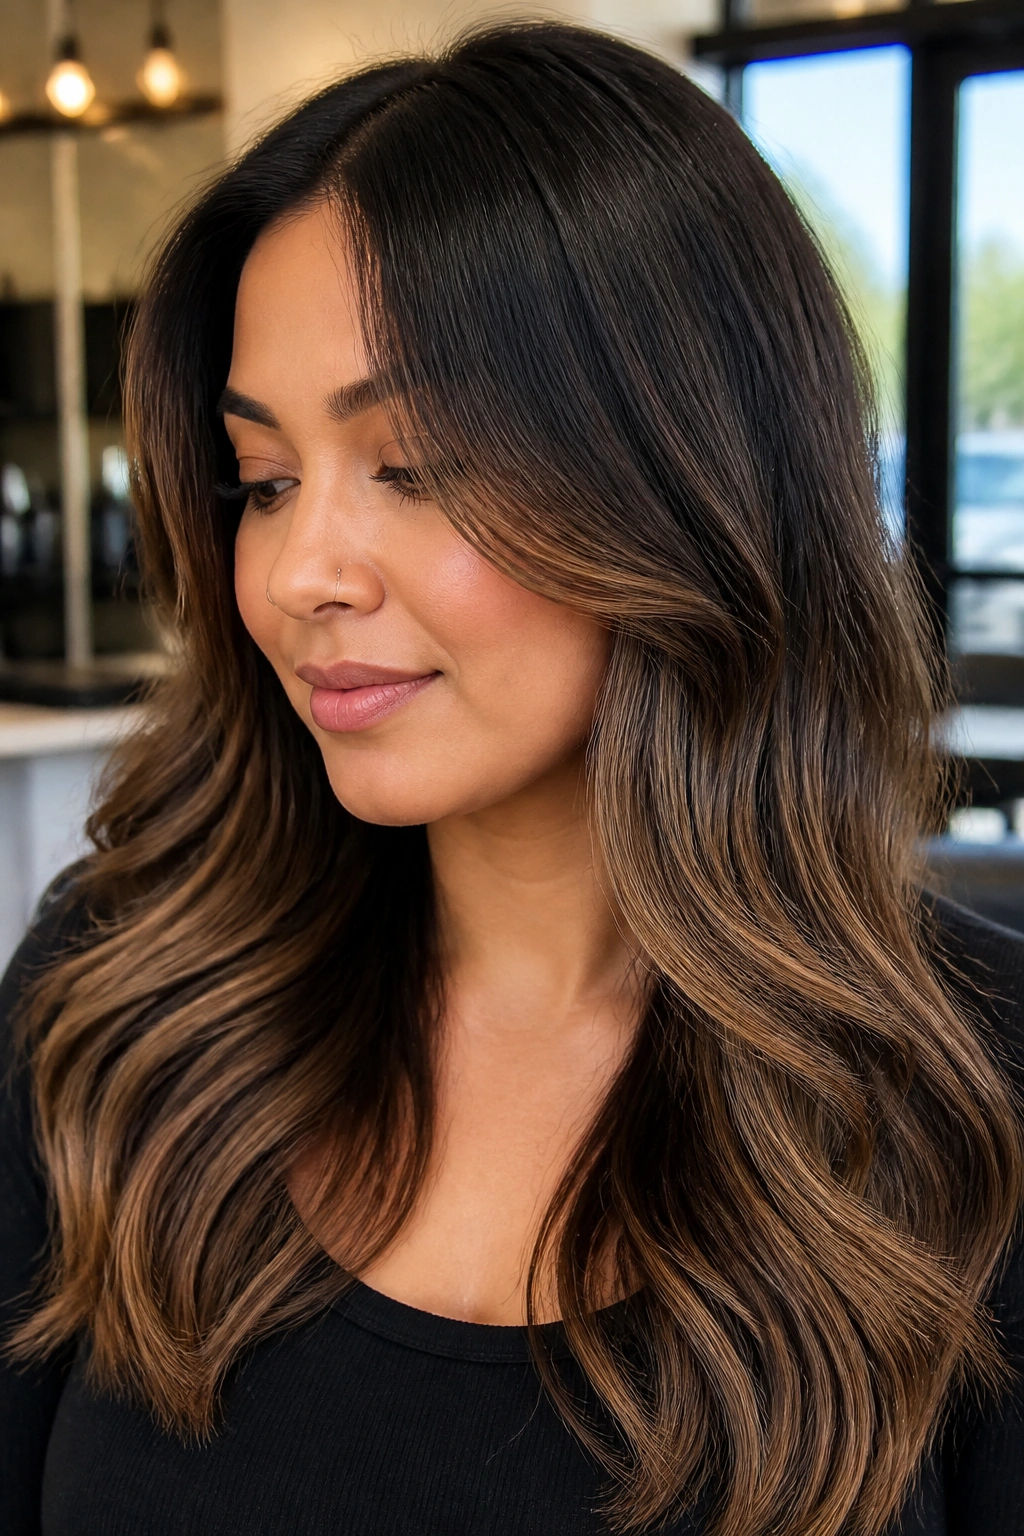
If you want one look that plays nicely with a round face, black hair, and a busy schedule, this is the one I’d put at the top. Keep the root dark, brighten the lower mid-lengths, and soften the caramel at the ends so the grow-out stays calm.
This version does not rely on a big change at the cheek line. That’s the appeal. The face still gets shape from the darker top and lighter bottom, but nothing feels hard or obvious. It’s a quiet way to wear caramel on black hair, and it’s easy to live with between appointments.
Bring 2 to 3 reference photos to your colorist, but make sure they show the same haircut and texture you actually have. A highlight map that looks fantastic on long waves can sit strangely on a blunt bob. That mismatch is where a lot of bad color decisions start.
Soft is not the same as boring. When the placement is right, it’s the smartest look in the room.
