



Medium-length hair can be the annoying middle child of styling. It’s too long to shrug off completely, too short to fold into those giant, dramatic buns that look effortless in photos and collapse in real life. Low updos solve that problem fast. They sit at the nape, where shoulder-length ends can tuck in without fighting gravity, and they usually look calmer and more deliberate than a high knot that keeps trying to escape.
The sweet spot is the nape.
That lower placement hides blunt ends, softens layered cuts, and gives you a little more room to work with pins, twists, and braids than people expect. If your hair sits around the collarbone, brushes your shoulders, or lands somewhere in that practical medium zone, low updos often hold better than their taller cousins because the weight stays closer to your neck instead of hanging out in the air.
Texture matters more than perfection here. A mist of dry shampoo, a few 1-inch bobby pins, and a light grip from second-day hair can make the difference between a shape that lasts and one that slides out by lunch. You do not need a drawer full of tools. You need a few good moves, a sense of where your ends are hiding, and a willingness to let the style look lived-in instead of overworked.
1. The Loose Low Knot for Medium Length Hair
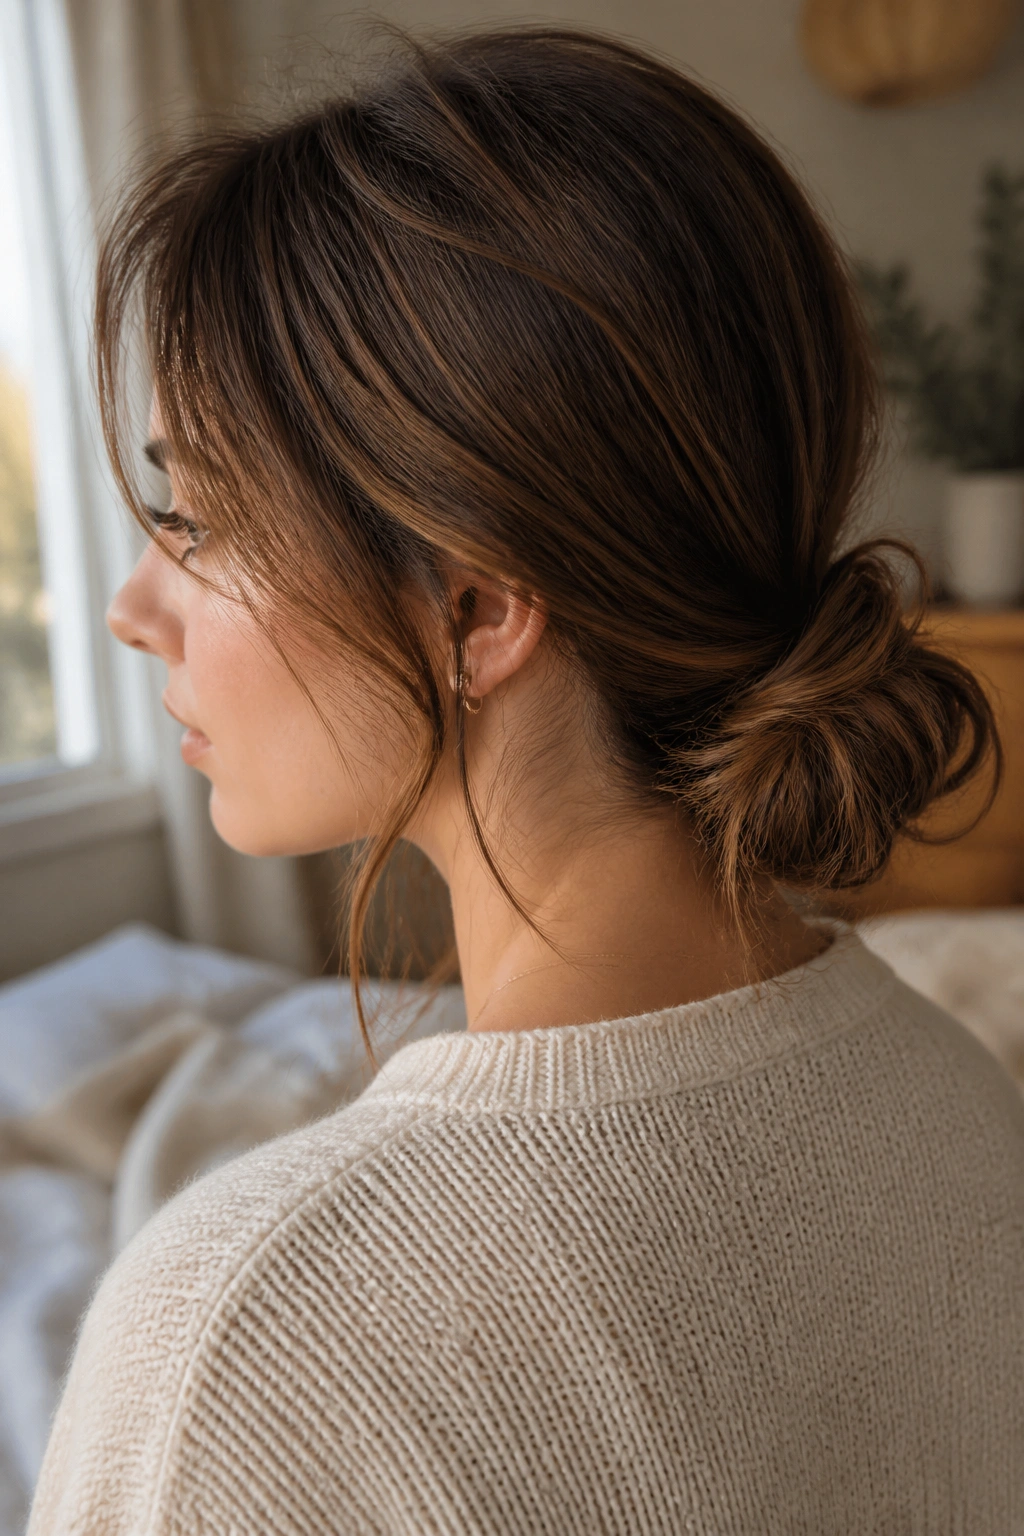
The loose low knot is the one I keep coming back to when hair feels a little too clean, a little too flat, or just not cooperative enough for something fussy. It works because it doesn’t ask medium-length ends to disappear completely. They get tucked, looped, and pinned in a way that looks relaxed instead of accidental.
Why It Flatters Shoulder-Grazing Ends
A loose knot leaves a little movement around the face and at the nape, which keeps medium length from looking chopped off or overstuffed. If your layers are uneven, that extra softness helps hide the fact that not every strand will land in the same place.
- Tie the hair into a low ponytail first.
- Twist the length once or twice, then fold it into a knot.
- Secure with 3 to 5 bobby pins, crossing at least one pair in an X.
- Leave 2 slim pieces loose around the temples if the hair needs softness.
My favorite trick: pinch the knot gently after pinning so it looks lived-in, not packed tight.
2. The Sleek Center-Part Bun
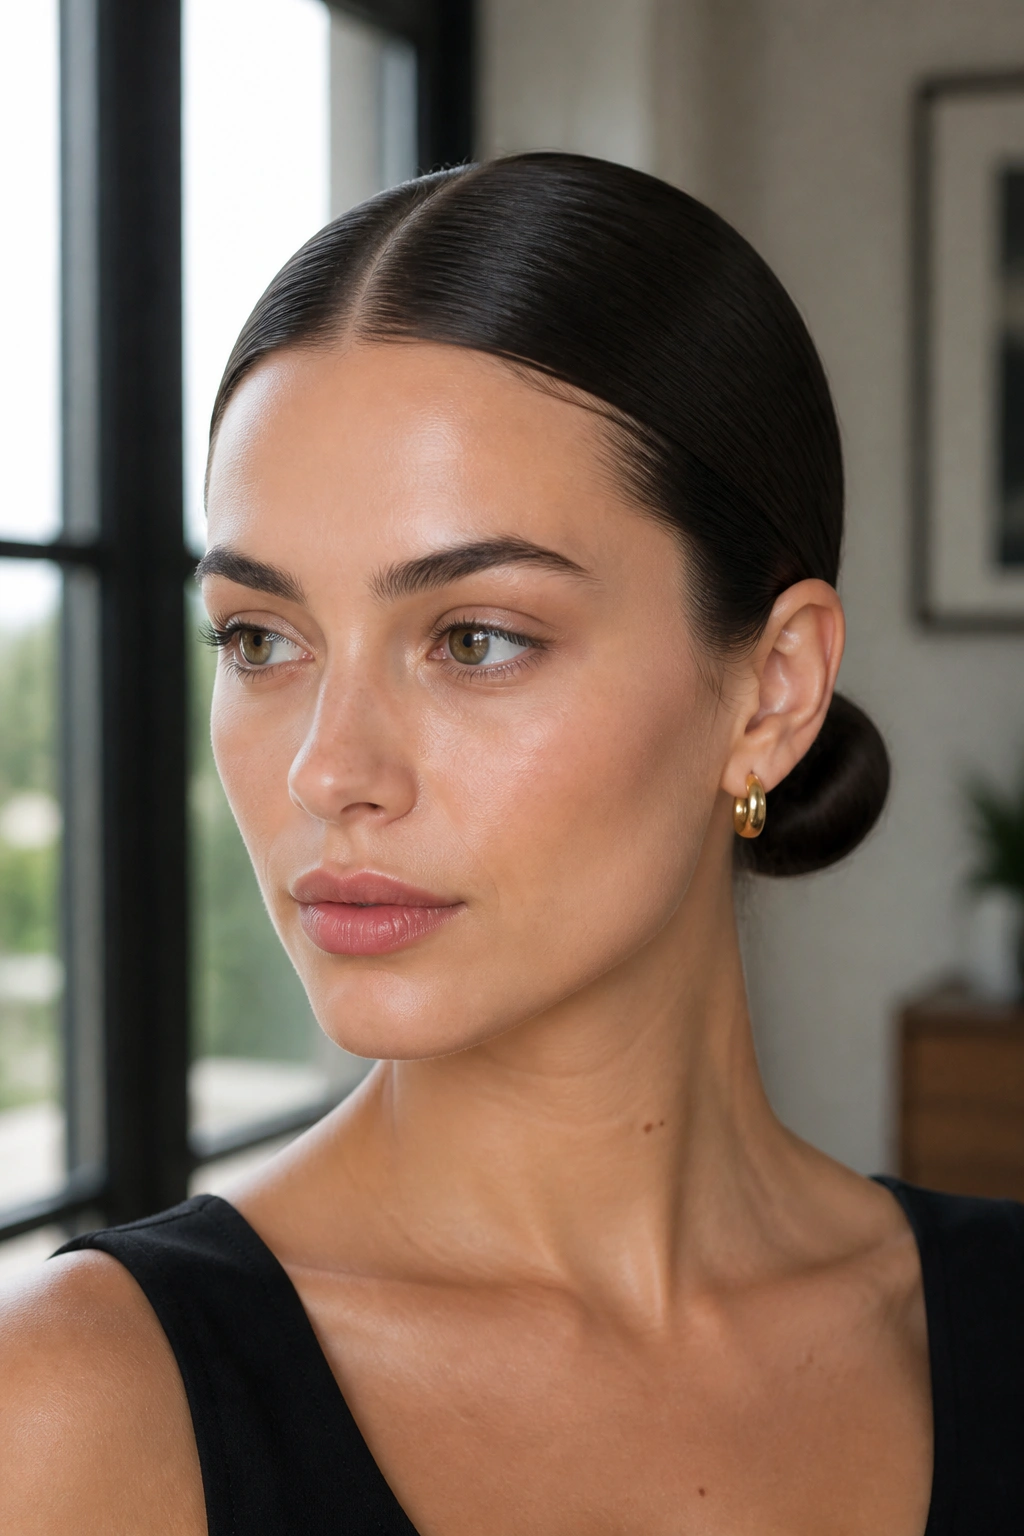
A sleek center-part bun can look sharper than almost any other low style, especially on medium-length hair that has clean ends and not much layering. The part gives the whole shape structure. The bun does not need to be huge. In fact, a smaller bun often looks better because it sits close to the head and keeps the finish tidy.
This one leans on control. Smooth the top with a pea-sized amount of styling cream or gel, then brush the hair straight back from the part into a low ponytail. If the hair at the crown puffs up, flatten it with the side of a brush or a fine-tooth comb, then pin the bun low and tight.
I like this style for evenings, interviews, and any outfit that already has a lot going on. No extra fluff needed. If your hair tends to frizz at the edges, mist a little hairspray onto a toothbrush and tap it along the part and temples. It’s a small move, but it makes the front look clean without turning it stiff.
3. The Braided Low Chignon for Medium Length Hair
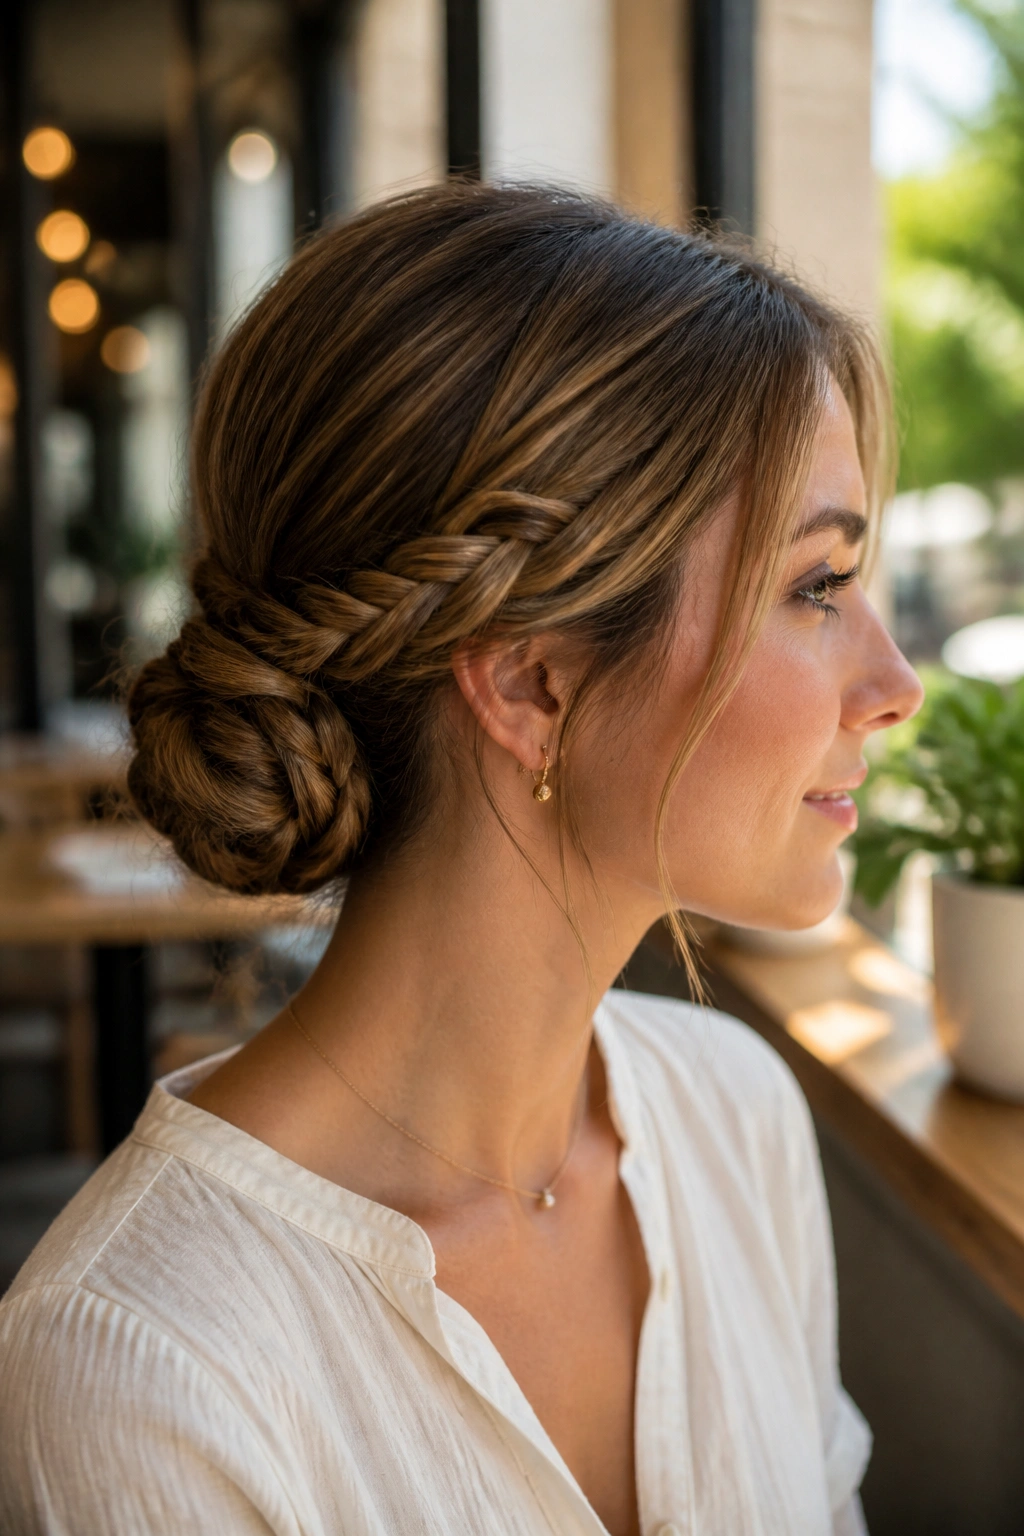
Why does a braid help so much here? Because it gives medium-length hair a bit of grip before you tuck it into a chignon. A plain bun can slide if your ends are silky or layered. A braid changes that. It locks the length together first, so the final shape feels more secure and usually lasts longer.
How to Keep the Braid Flat
Start with a low ponytail, braid it all the way down, and leave the last inch or two free if your hair is very layered. Then coil the braid into a flat circle at the nape and pin around the edge, not just through the middle. That spreads the hold and keeps the center from bulging.
- Use a small clear elastic if your hair is fine.
- Use a regular elastic if the hair is thick and slippery.
- Mist the braid lightly with texture spray before coiling.
- Pull the outer braid loops a little wider for a fuller look.
This is one of those styles that looks more complicated than it is. Good news, because once you’ve made it twice, your hands start doing the work for you.
4. The Twisted Tucked Bun
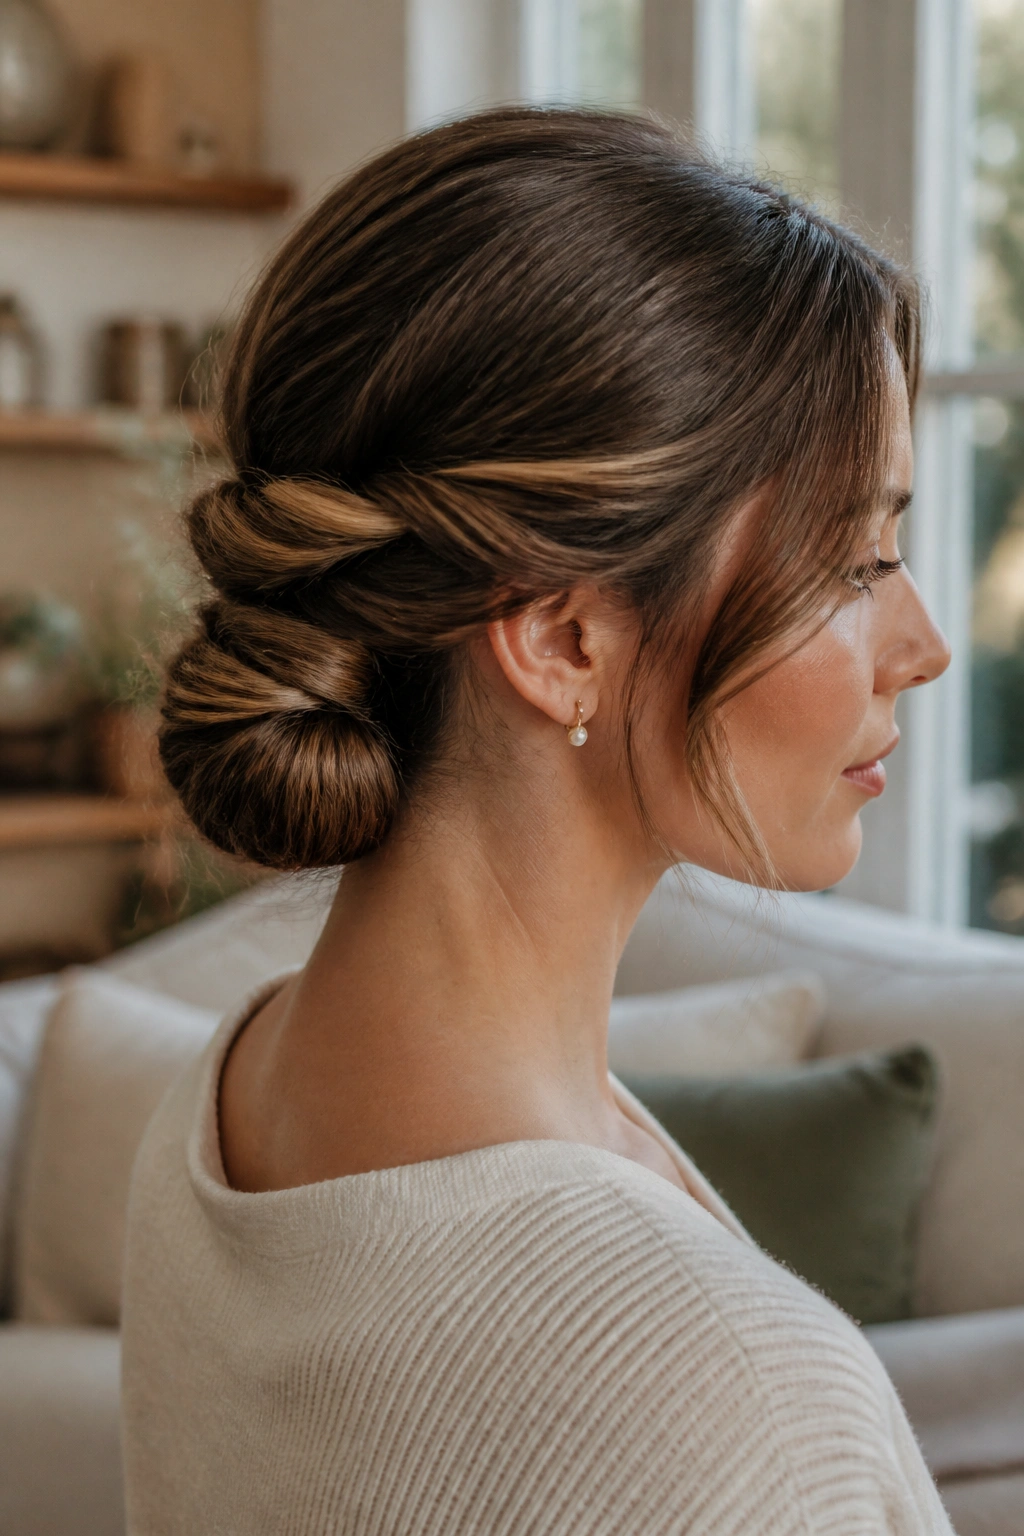
Unlike a braid-heavy style, the twisted tucked bun has a softer, quicker feel. You split the hair into two sides, twist each side back toward the nape, and tuck the remaining ends under the twists. It sounds modest. It looks better than that.
The reason it works on medium-length hair is the twist shortens the visual length before the final pinning happens. That means shoulder-length pieces don’t stick out as much, and you don’t need a perfect, long tail to make the shape hold. A little unevenness is fine. Actually, it helps.
If the hair is layered, twist the sections a little tighter near the scalp and looser toward the ends. That tiny shift keeps the updo from looking bulky near the crown. Finish with a few pins hidden under the overlap, then press the sides gently with your palms. Not too hard. You want the twist to stay visible.
5. The Side-Swept Low Knot
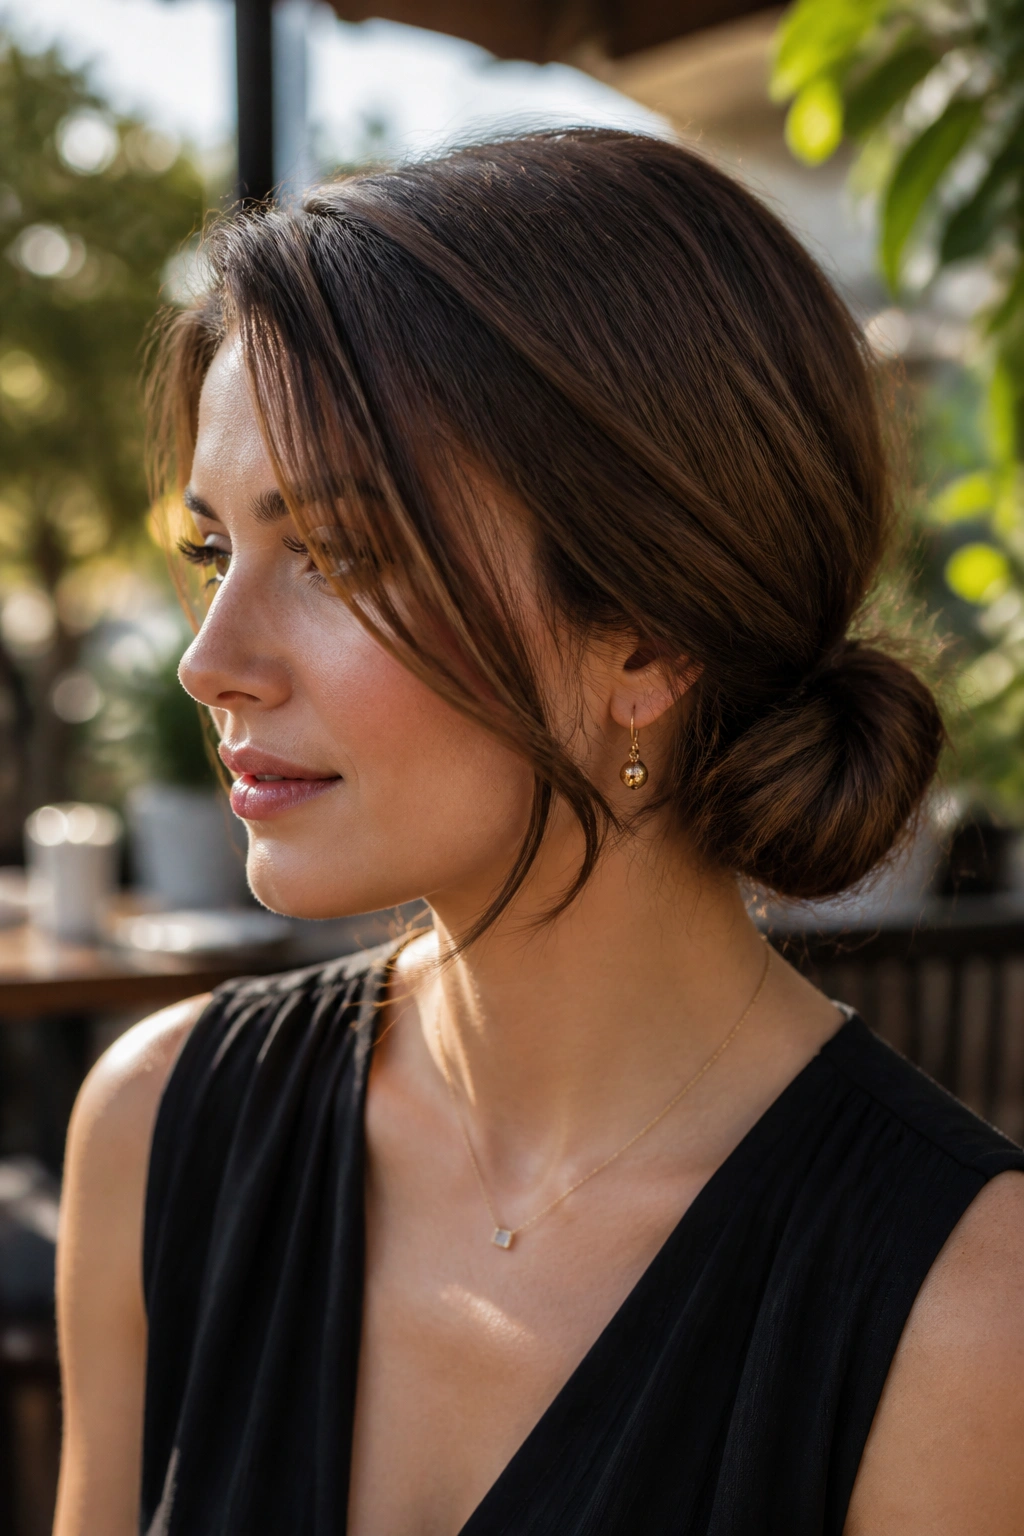
I reach for this when the middle part feels too severe or the hair has enough texture that a centered bun would look stiff. The side-swept low knot starts a little off to one side, which gives it a softer line across the back of the head and keeps the face-framing pieces from feeling too formal.
The charm is in the asymmetry. One side sits a touch flatter, the other carries a little more volume, and that difference makes the style feel less rehearsed. Medium-length hair handles that lopsided balance well because there isn’t so much length that the knot becomes heavy.
- Sweep the hair to the left or right before tying it back.
- Twist the ponytail into a loose knot just below the ear line.
- Pin the outer curve first, then secure the center.
- Leave one front section slightly longer than the other if you want a softer edge.
Best with: second-day hair, side parts, and clothing with a simple neckline.
6. The Rope-Braid Wrap
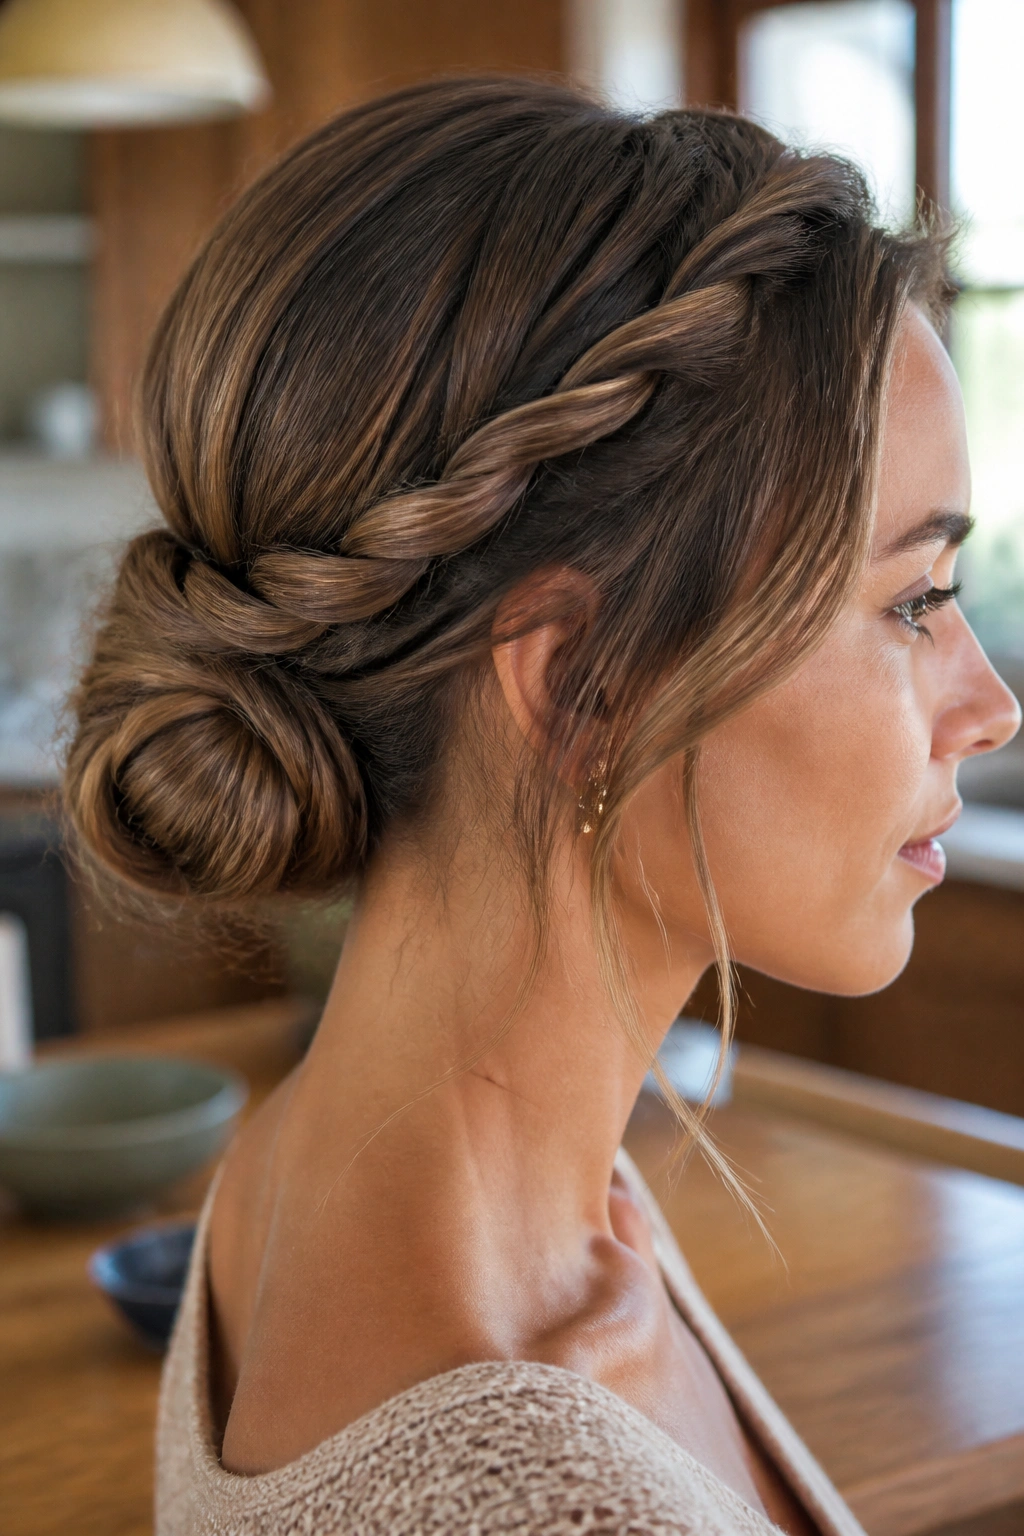
Not every low updo needs to be soft and wispy. Sometimes the cleaner choice is the better one, especially if your hair slides out of regular knots. A rope-braid wrap gives medium-length hair more bite because the two twisted sections grip each other before you shape them into a bun.
The method is easy: split the ponytail into two sections, twist each section in the same direction, then wrap them around each other in the opposite direction. That creates the rope effect. After that, coil the twist into a low bun and pin it in place. The style holds surprisingly well on hair that has been sprayed with a little dry shampoo at the roots.
This is a good option when your hair is fine but dense, or when the ends are a bit blunt and need a tighter structure. It also looks nice with a square neckline, because the twist echoes the clean line of the clothes. Small detail. Big payoff.
7. The Gibson Tuck
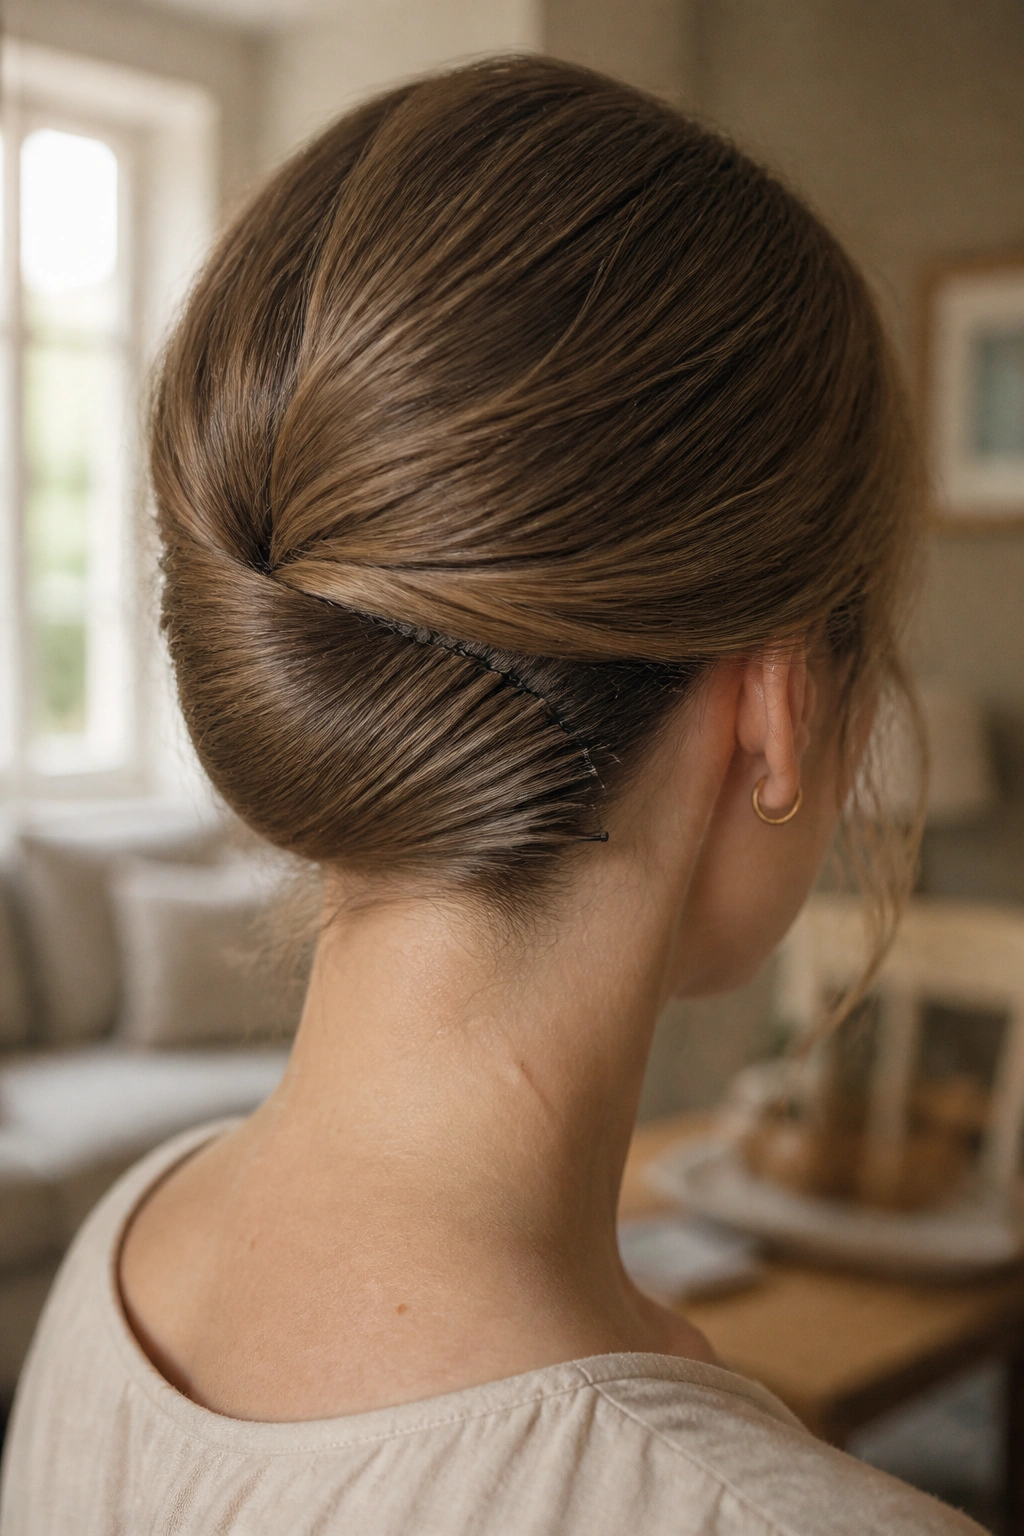
What makes a Gibson tuck work on medium-length hair is the fold. The style doesn’t ask the ends to stay long and free; it asks them to disappear upward into a roll. That makes it one of the smartest low updos for shoulder-length hair, especially when the layers are a little uneven and you want them hidden.
Building the Fold
You can make the tuck with a small elastic headband or a row of pins at the nape. Either way, the shape is the same: hair is gathered low, lifted up, and folded under itself until the ends vanish. The finish feels vintage without being costume-y.
Where the Pins Go
Pin the fold along the underside, not the top. If the pins sit too high, the tuck opens and the shape loses its smooth curve. Press the roll gently after pinning, then tug the outer edge just enough to make the fold look rounder.
A Gibson tuck is one of those styles that rewards a little patience. Not much. Just enough.
8. The Scarf-Wrapped Low Bun
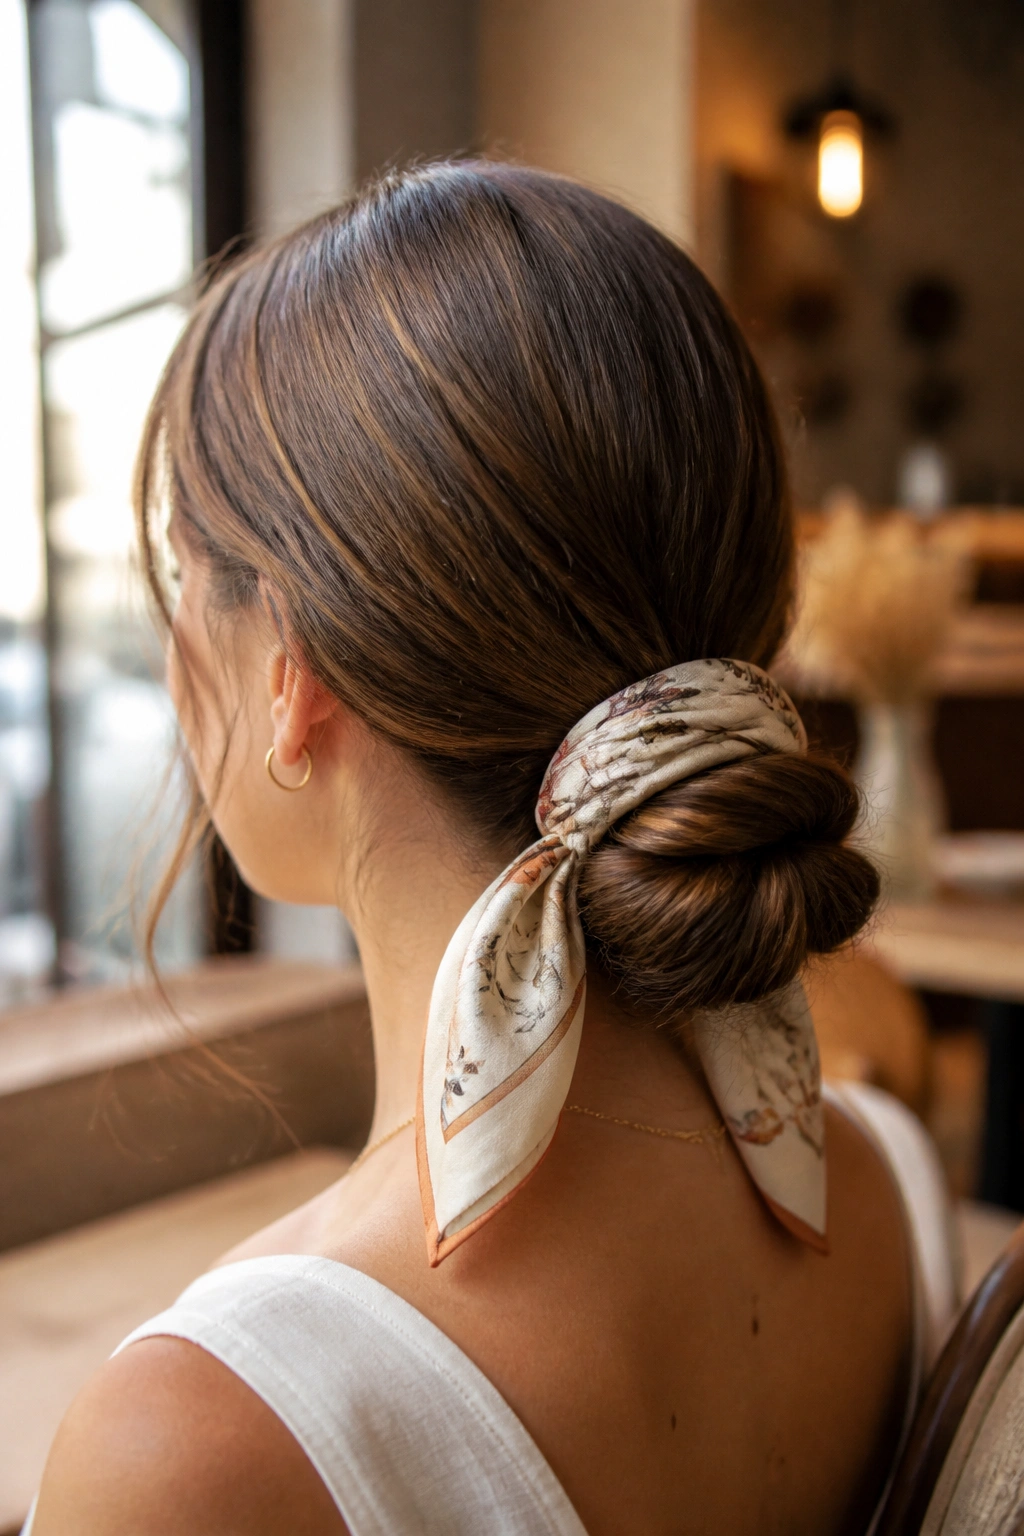
The scarf changes everything here. A silk or satin scarf gives a plain low bun a cleaner outline, and it also helps medium-length hair feel more secure because the fabric adds a little grip under the knot. That matters when the ends are short enough to slip but long enough to poke out in annoying places.
This style looks best when the scarf is not too bulky. A thin square scarf folded into a band is usually easier to manage than a thick rectangle. Tie the hair into a low bun first, then wrap the scarf around the base and knot it off to one side or tuck the tail underneath. If the scarf is glossy, the bun can feel dressier right away. If it has a matte print, the whole style reads more casual.
A small note. Keep the scarf away from the widest part of the bun if your hair is thick, or it can start to look crowded. Let the fabric sit at the base and do its job there.
9. The Folded Faux Bob Updo
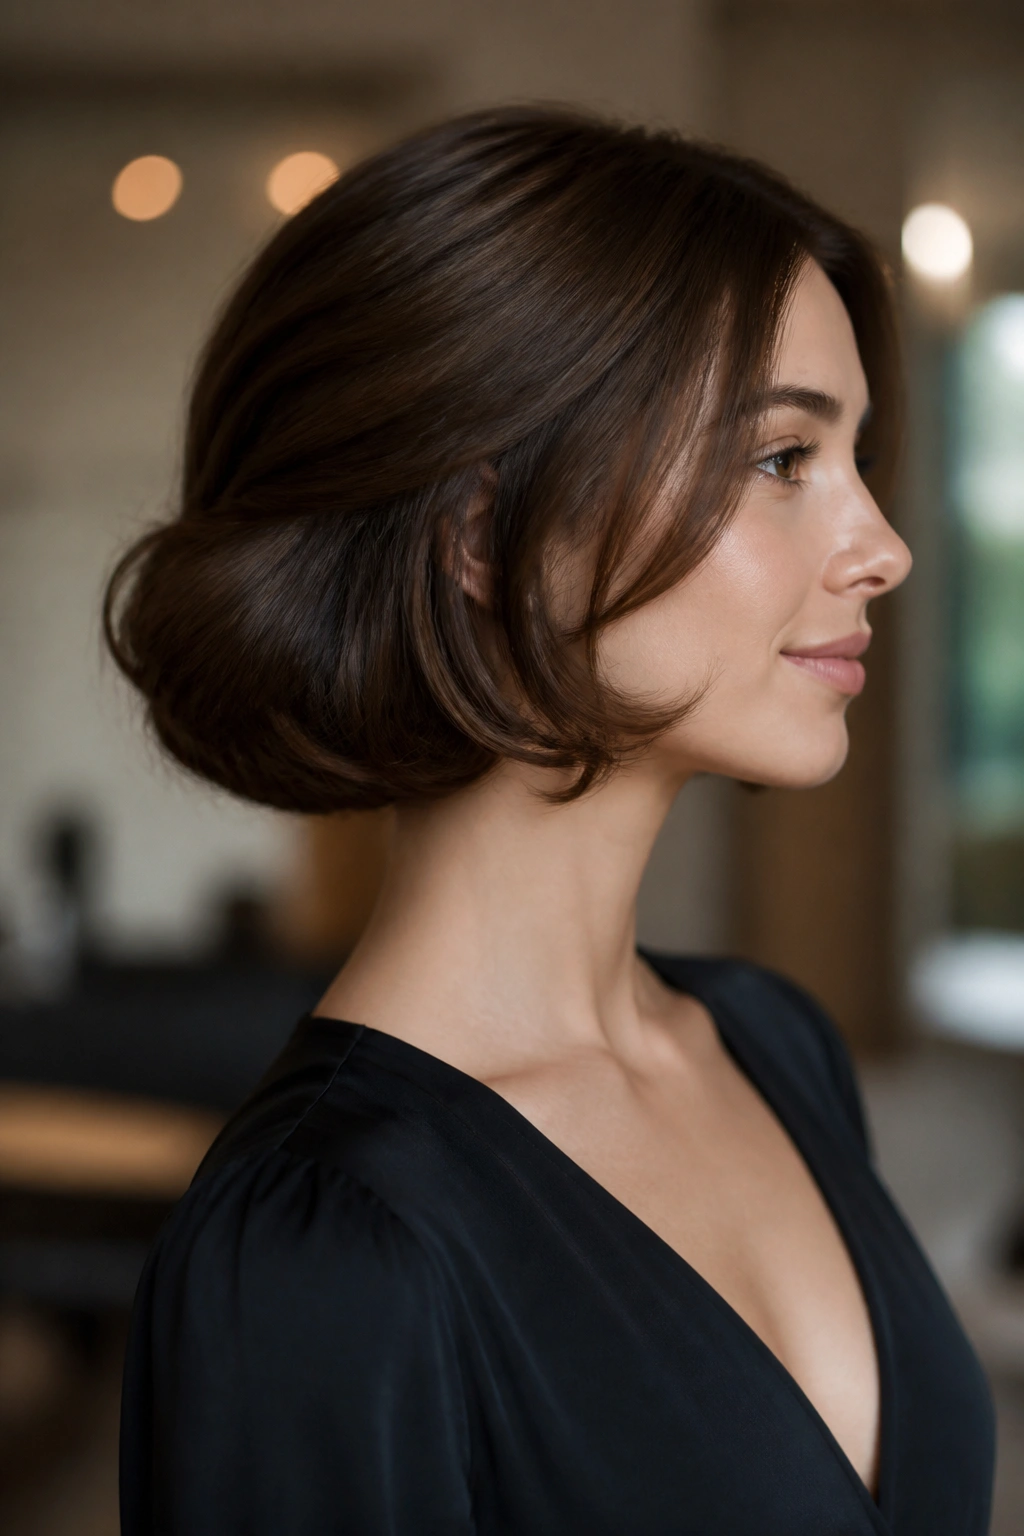
A folded faux bob works because it takes medium-length hair and makes it appear shorter and more intentional than it really is. That sounds fancy, but the process is plain: you tuck the ends under in sections until the whole shape sits near the neck like a soft rolled bob.
This is one of my favorites for hair that has a blunt edge. Blunt ends can make some low buns look boxy, but once they’re folded under, the line gets cleaner. Start by curling the ends slightly or giving them a bend with a flat iron. That tiny curve helps the fold stay round instead of sticking straight out.
The style also opens up the neckline, which is nice with high collars or earrings that need some space. No need for a huge amount of volume on top. A little lift at the crown is enough. Anything more and the style starts looking like it’s trying too hard.
10. The Half-Braided Low Updo
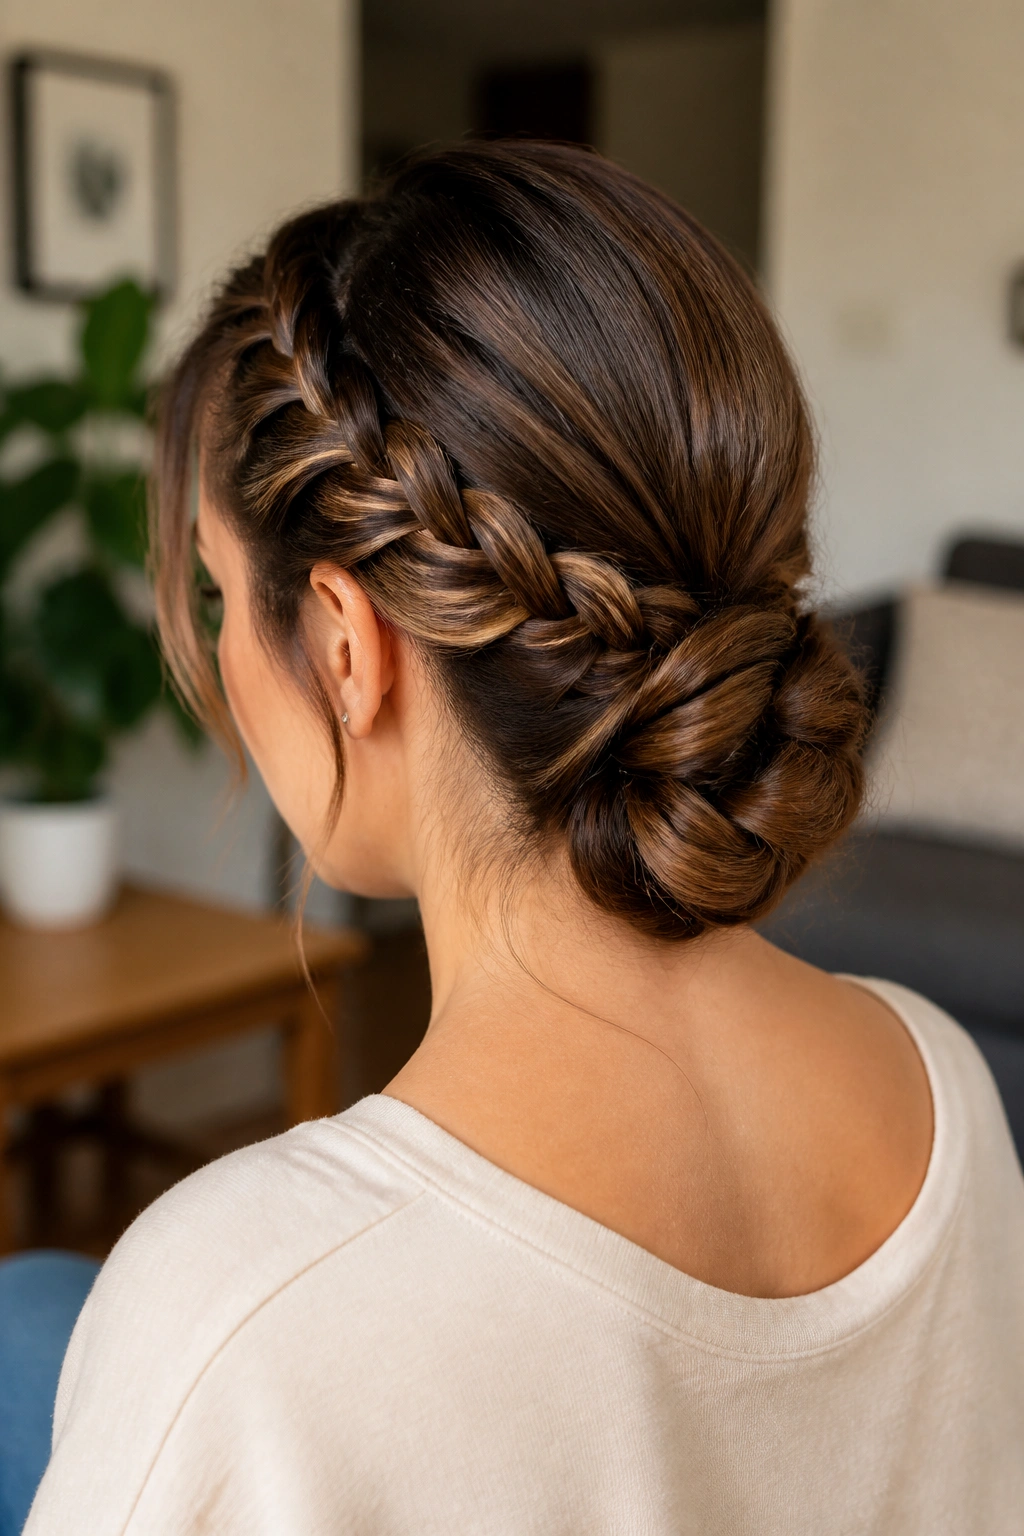
What if you want a little detail but don’t want to braid the whole head? The half-braided low updo is the answer. You braid only the top or side sections, then gather the remaining hair into a low knot or tucked bun. That gives you texture where the eye lands first and keeps the back from feeling plain.
Why the Braid Helps
The braid anchors the front layers, which is useful if your hair has shorter pieces around the face. It also adds a visible line that makes the finished shape feel more deliberate. Medium-length hair benefits from that because the braid eats up some of the length before the bun gets built.
How to Style It
Braid one side from the temple back toward the ear, then join it with the rest of the hair at the nape. Tie a low ponytail, twist the ends into a bun, and pin beneath the braid so the braid looks like it feeds into the knot. If the braid is loose, pull a few loops wider with your fingers. That softens the edges and keeps the style from looking too tight.
It’s a good one for people who like structure but do not want stiffness. There’s a difference.
11. The Low French Twist
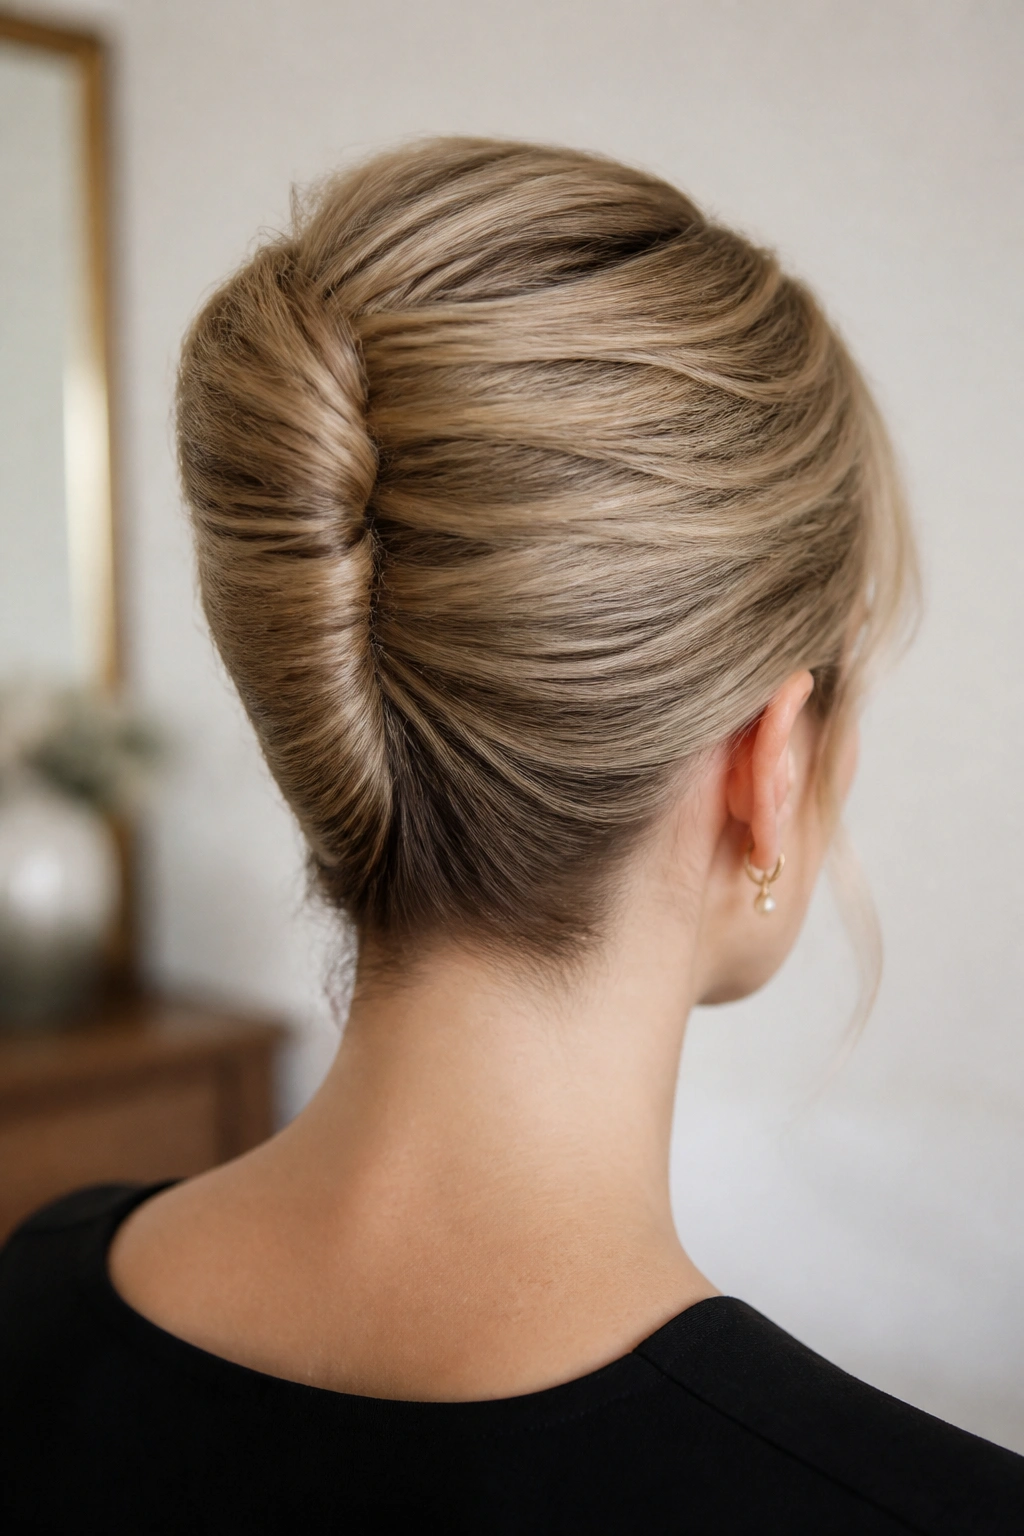
A low French twist has a cleaner line than a bun, which is why it suits medium-length hair that needs a little polish but not a lot of bulk. Instead of wrapping the hair into a round shape, you roll it upward against the head and pin the seam vertically. The finish is narrow, neat, and close to the neck.
This style tends to behave better when the hair has some texture. Day-old hair, a dry shampoo mist, or a light dusting of volumizing powder at the roots helps the twist stay put. Fresh, slippery hair can make the roll slide, and that’s when people get annoyed and start adding pins in random places. I’ve seen that story before. It usually ends badly.
A low French twist works especially well if your ends are blunt or slightly layered, because the roll hides a lot of the unevenness. Keep the shape compact. If it gets too wide, it stops looking like a twist and starts looking like a shrug.
12. The Double-Knot Bun
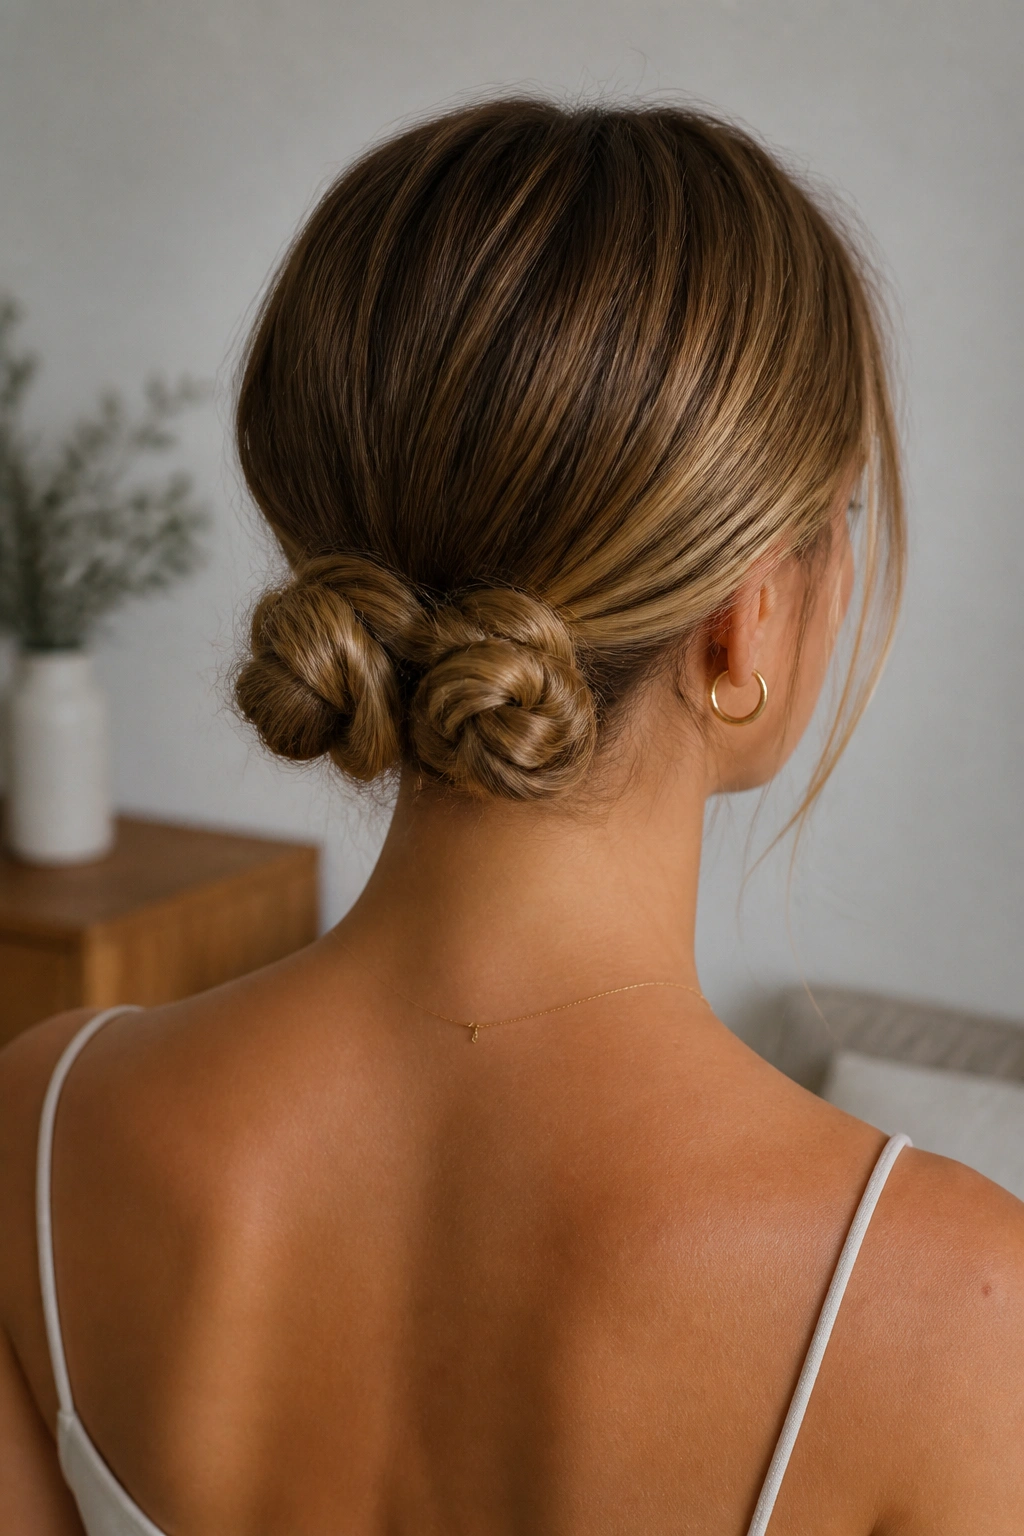
A double-knot bun is what happens when one knot feels too loose but a smooth bun feels too plain. You make one knot with the ponytail, then loop the remaining length again and pin it low so the structure feels a little more layered. It’s a small difference, but the shape changes a lot.
Compared with a single knot, this version gives medium-length hair a better chance of staying centered. That matters if the hair is thick, because thick hair can create a heavy knot that drifts to one side. The second fold helps spread that weight out. It also gives you a more interesting back view without needing braids or accessories.
Keep the surface a bit broken up, not slicked flat. If the knot looks too tight, pinch the top loop and loosen the edges with your fingers. You want two visible folds, not one compressed lump. That’s the whole point.
13. The Minimal Nape Knot
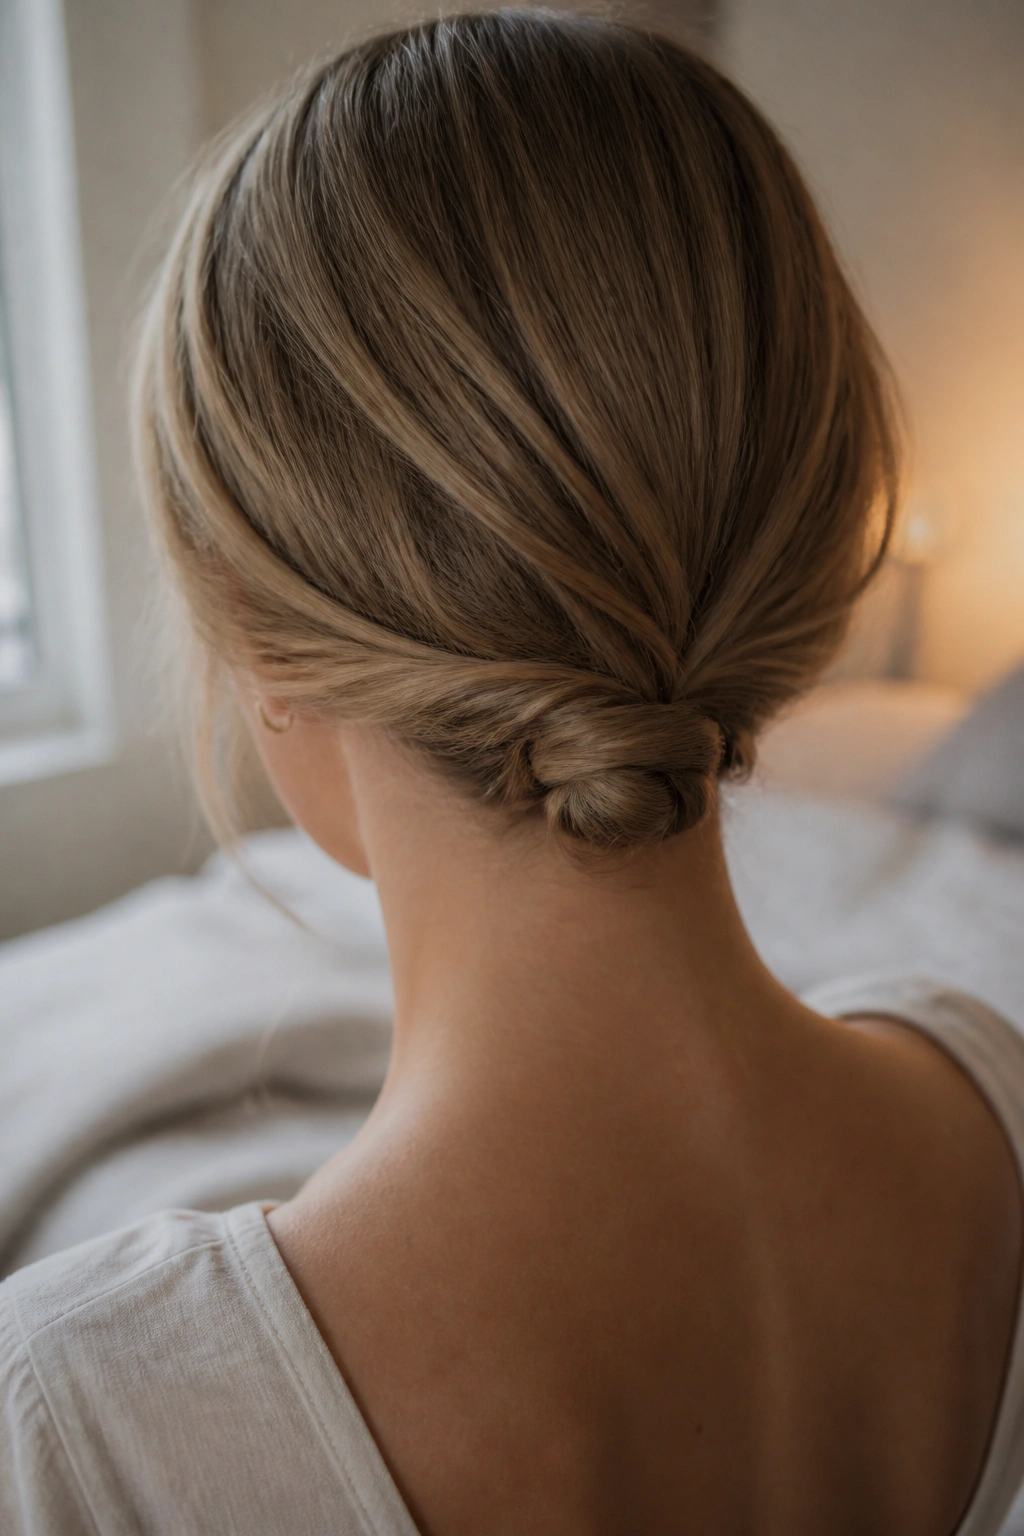
Some days the best low updo is the one that barely announces itself. The minimal nape knot is tiny, neat, and especially good for medium-length hair that sits on the thinner side. It uses less length than a full bun, so the shape doesn’t get oversized or droopy.
Best for Fine Hair
Fine hair can disappear inside a big bun and look limp at the bottom. A smaller knot solves that. It keeps the style close to the head and lets the hair’s natural thickness, even if modest, do the work it can actually do.
Start with a low ponytail, twist the tail once, and fold the end under the base. Pin the knot from below and at the sides. If the hair wants to slip, spray the inside of the knot lightly before you fold it. That tiny bit of grip helps a lot.
The style looks best when it stays compact. Don’t chase fullness here. The charm is the clean little knot sitting right at the neck.
14. The Crown-to-Nape Twist
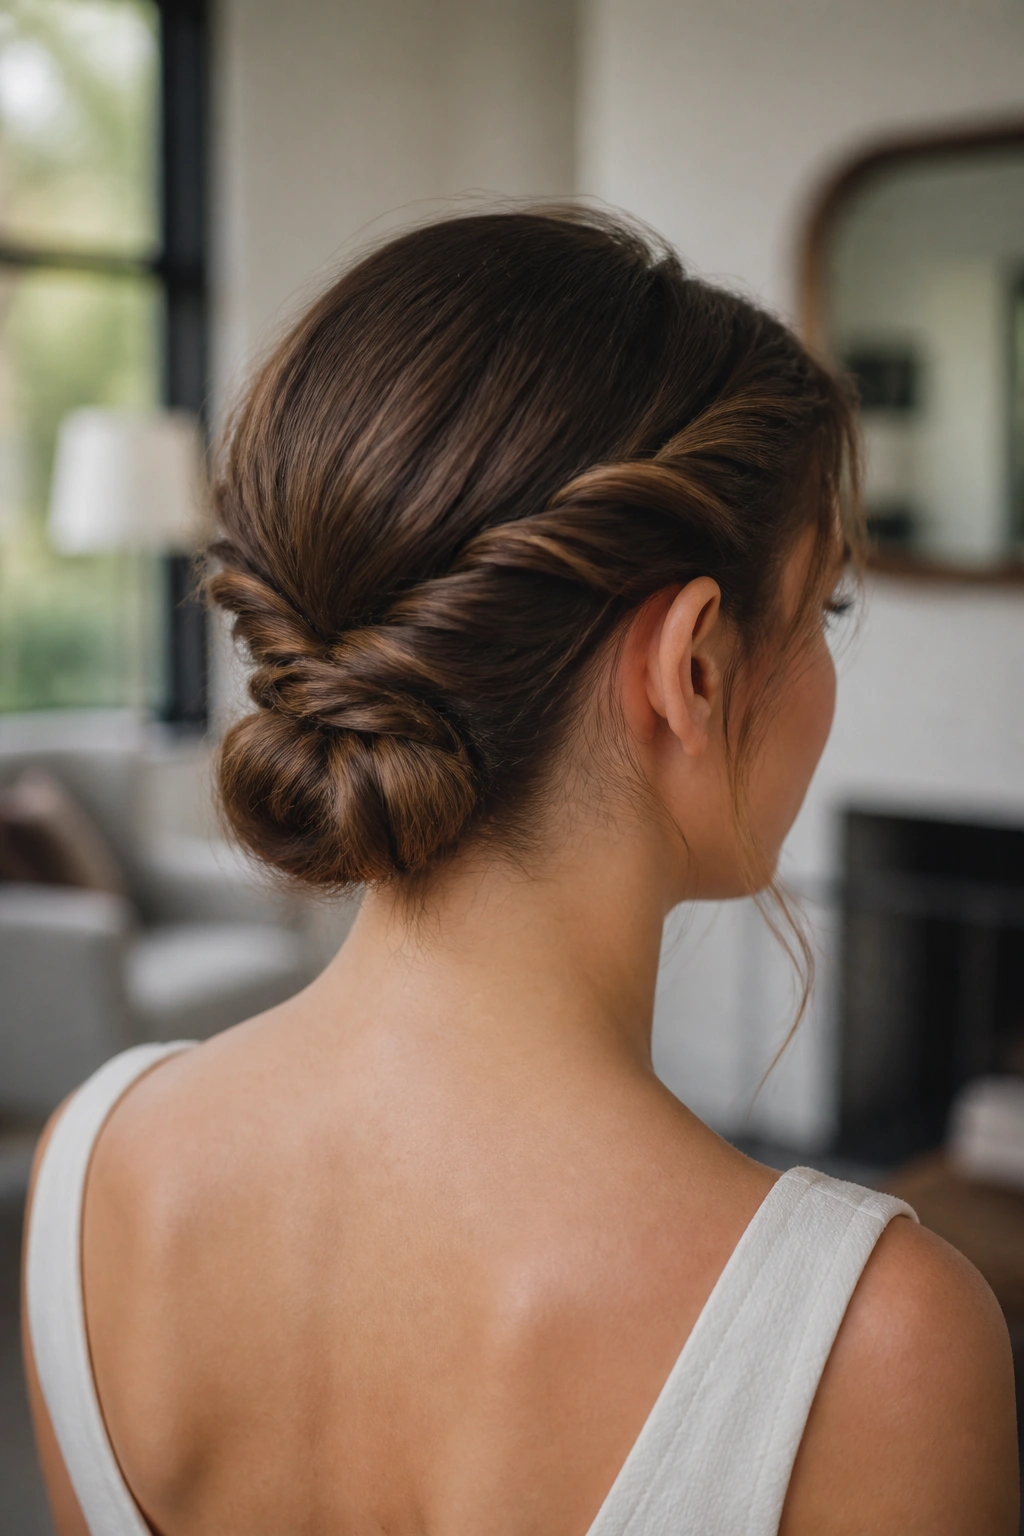
Most people think you need a full braid to keep the front of the hair under control. You don’t. A crown-to-nape twist pulls the sides back in two clean sections, then merges them into a low knot. It keeps the face open and still leaves the back soft enough for medium-length hair to behave.
Pin Placement Matters
The pins should sit where the twist overlaps, not out in the open. If you pin the surface, the shape looks busy. If you pin underneath the twist, the style stays smooth and the hardware disappears.
- Take a section from each temple.
- Twist each side back toward the center.
- Cross them at the nape and anchor with two pins.
- Tuck the remaining length into a small bun or fold.
This is a good choice when you want the front to look controlled but not severe. It’s a neat trick for soft layers, too, because the twists keep shorter pieces from hanging in your eyes all day.
15. The Braided Side Bun
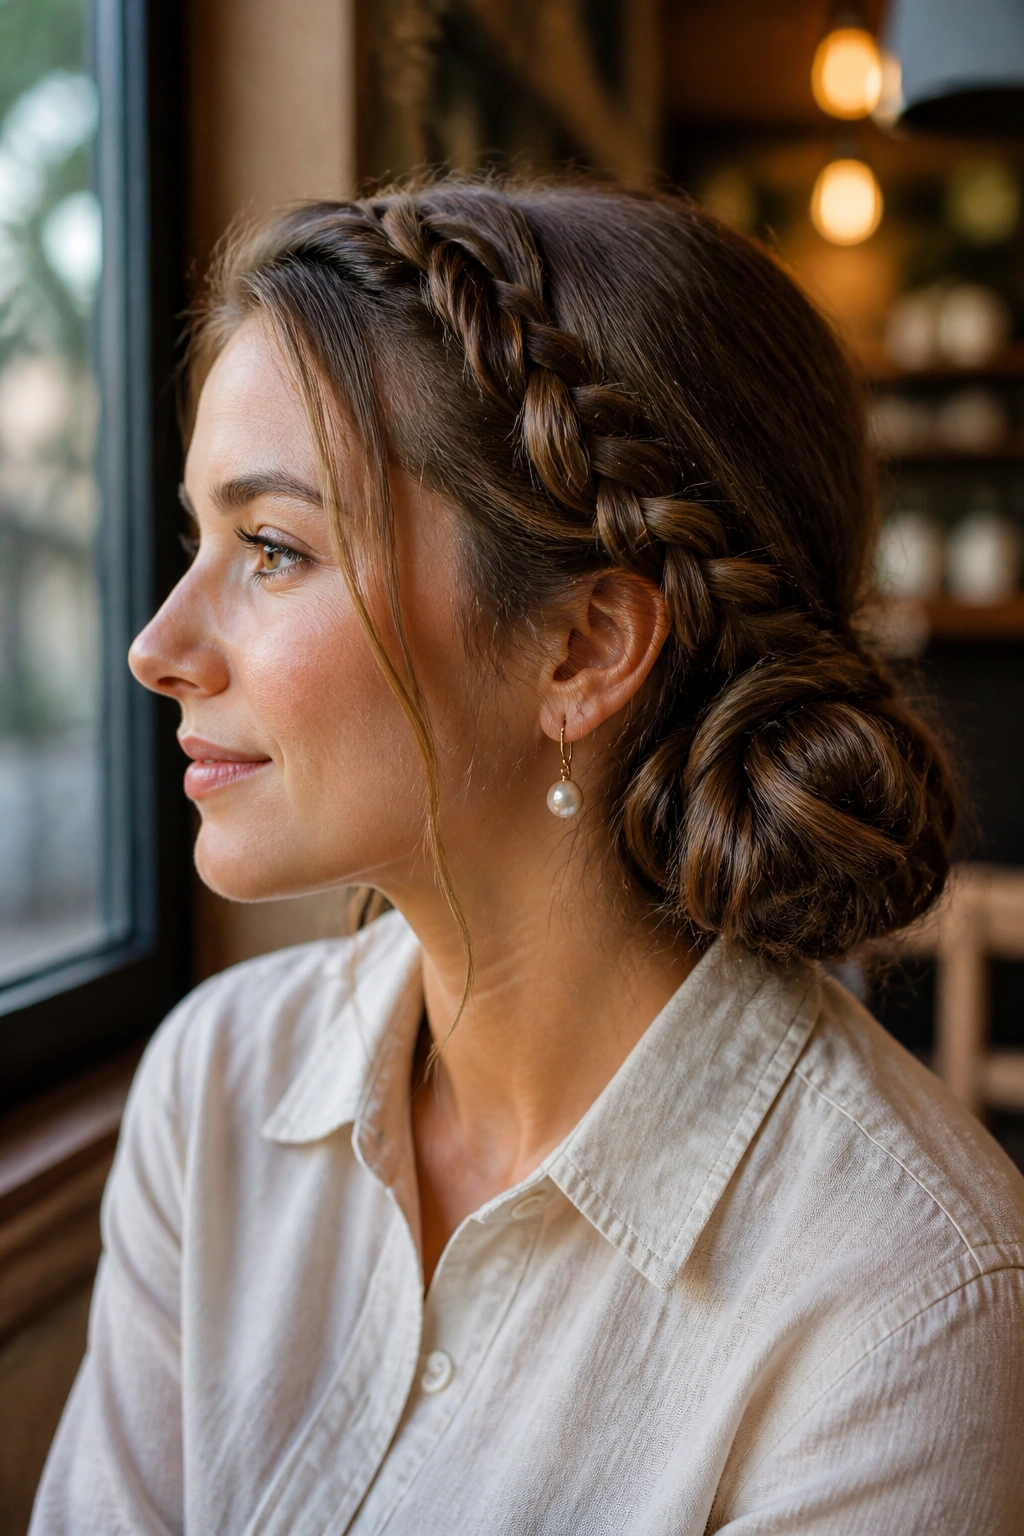
A braided side bun has more character than a straight-back style because the braid leads the eye across the head before it lands at the bun. That little shift matters. It gives medium-length hair enough visual interest to feel styled without making the shape too heavy.
The side braid also helps with thicker hair that tends to swell at the nape. By moving some of the bulk to one side first, you can build the bun lower and flatter. That makes the back of the head look cleaner. Good news if you wear scarves, high necklines, or jackets that already add volume around the shoulders.
Keep the braid loose if you want softness, tight if you want a neater line. Either way, pin the bun just below the ear line on the same side as the braid. If it sits too far back, the whole look loses the side sweep that makes it interesting.
16. The Claw-Clip Low Roll
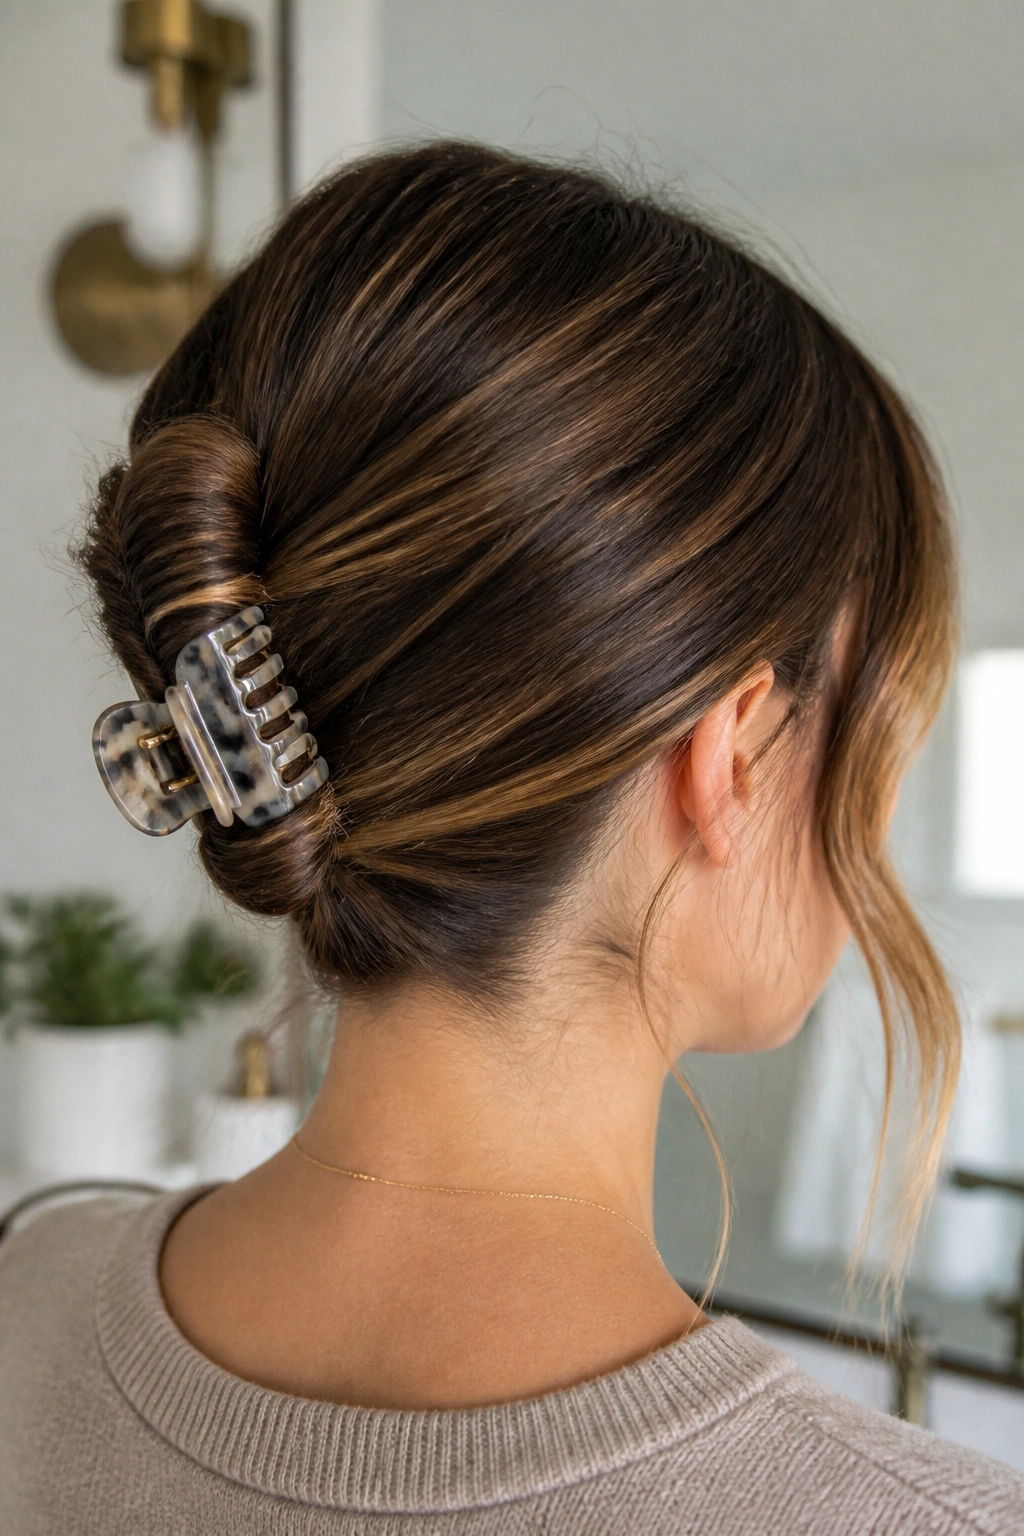
A claw-clip low roll is the fastest style on this list, and on medium-length hair it can look more intentional than people expect. The trick is to twist the hair upward from the nape, fold the ends in, and catch the whole roll with a medium clip that has firm teeth. A flimsy clip won’t do it. It will slide, and then you’ll be redoing the whole thing.
Clip Size and Tooth Shape
Pick a clip that fits the width of your twist without forcing the jaws open too far. The teeth should grab the hair, not just sit on top of it. Rounded teeth are gentler, but the grip matters more than the shape if your hair is slick.
- Twist the hair once at the nape.
- Fold the length upward so the ends disappear inside the roll.
- Press the clip over the fold from the bottom up.
- Tug the sides lightly until the roll sits flat.
I like this one on days when the hair needs to get off the neck in under a minute. That’s the whole appeal. Fast, tidy, done.
17. The Wrapped Ponytail Bun
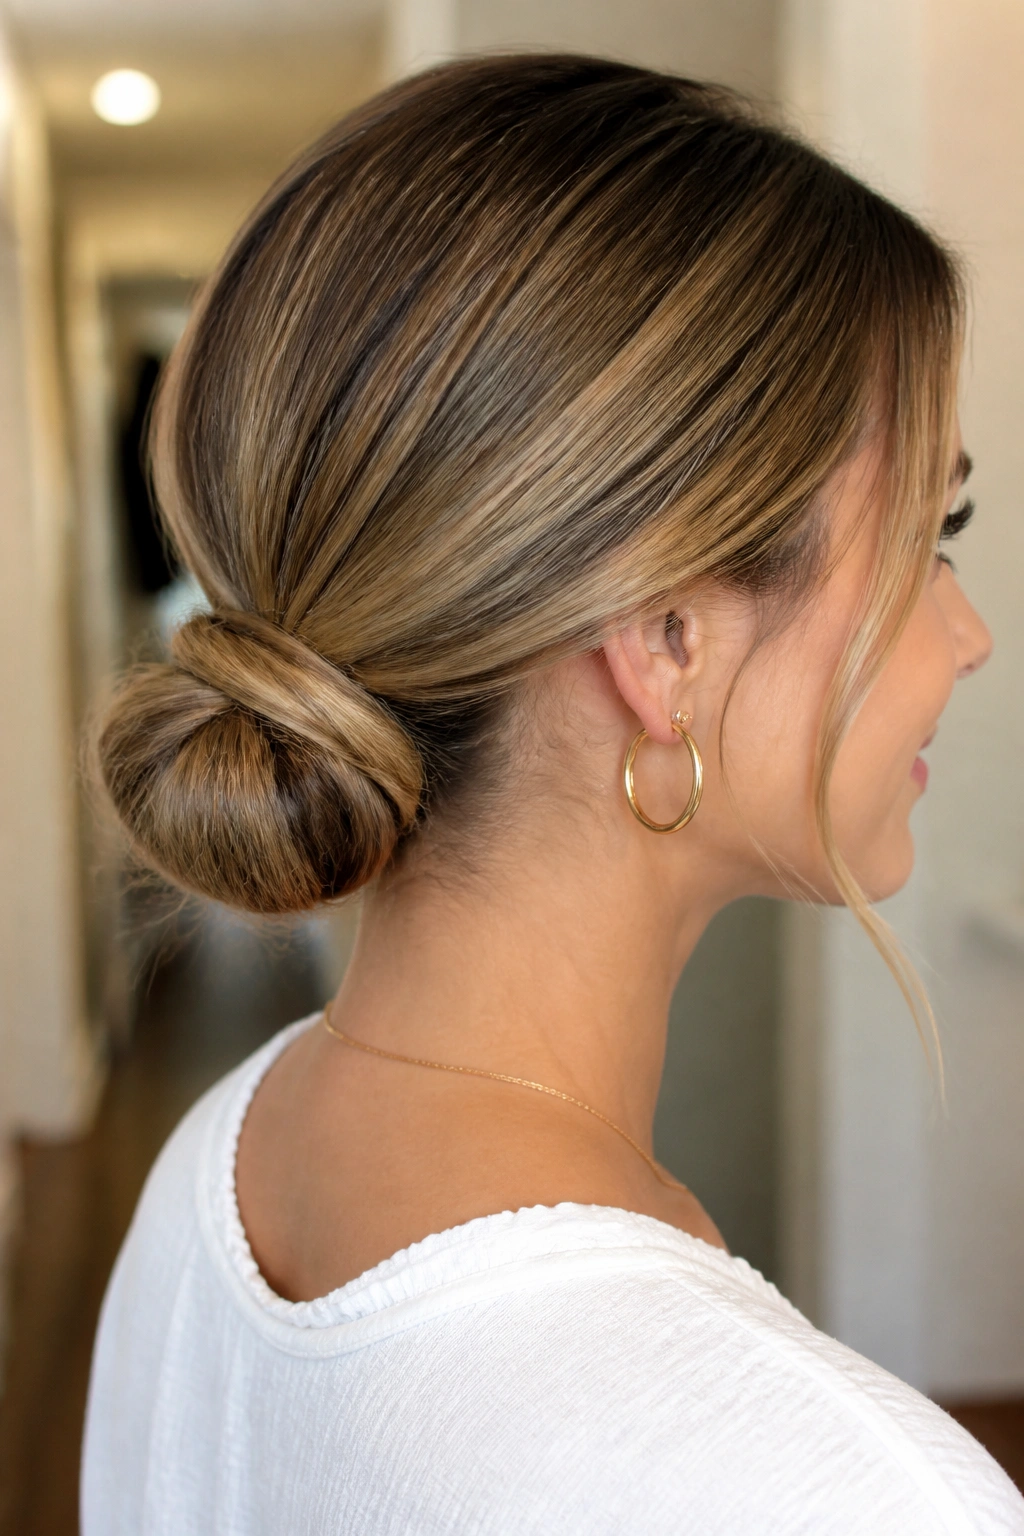
Why does a wrapped ponytail bun feel easier than a regular bun? Because the ponytail does the organizing for you first. Once the hair is tied low, the rest of the shape is just wrapping the length around the base and hiding the ends. That’s a cleaner path for medium-length hair, especially if the layers are medium-long and reluctant to stay in place.
The wrap can be neat or slightly broken up. If you want a smoother finish, mist the tail before wrapping so the strands lay together. If you want a softer finish, backcomb the tail a little at the ends before you coil it. That gives the bun more grip and keeps the wrapped edge from looking too perfect.
This is one of those styles that works in almost any setting because it can lean plain or dressed up. Add a barrette, leave a face-framing piece, or keep it bare. The base stays the same.
18. The Soft Pin-Up Roll
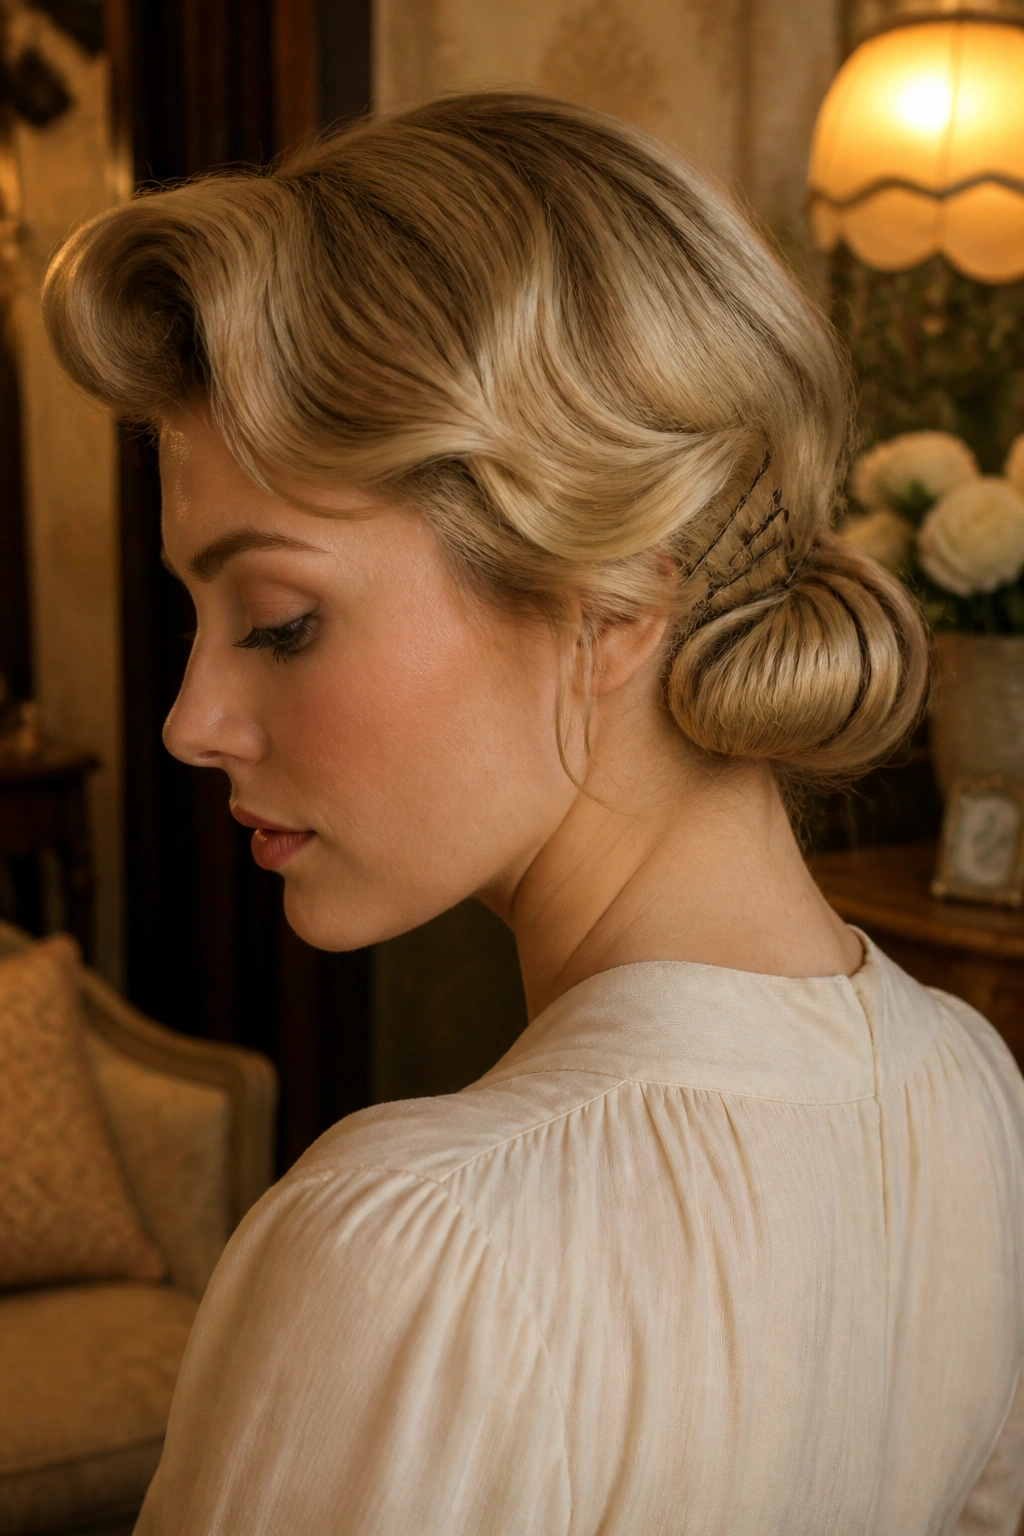
The soft pin-up roll has that old-school feel, but it doesn’t need a costume or a full set of curls to work. Medium-length hair can do it well because the shorter length makes the roll sit close to the head and keeps the ends manageable. You’re shaping the hair into a cushioned curve at the nape, then pinning the roll so it stays rounded.
The Pin Pattern
Use pins in a shallow diagonal, not straight across. That helps them hold the rolled section instead of just sitting under it. If the hair is slippery, add one pin from each side first, then a third pin through the center where the roll overlaps.
This style likes a little bend in the hair. You do not need a formal curl set. A soft wave from a curling iron or a flat iron twist is enough. The movement makes the roll look cushioned rather than stiff, which is exactly what you want here.
The result feels a touch retro, a touch casual, and much easier than it looks. That combination never gets old.
19. The Twisted Halo Bun
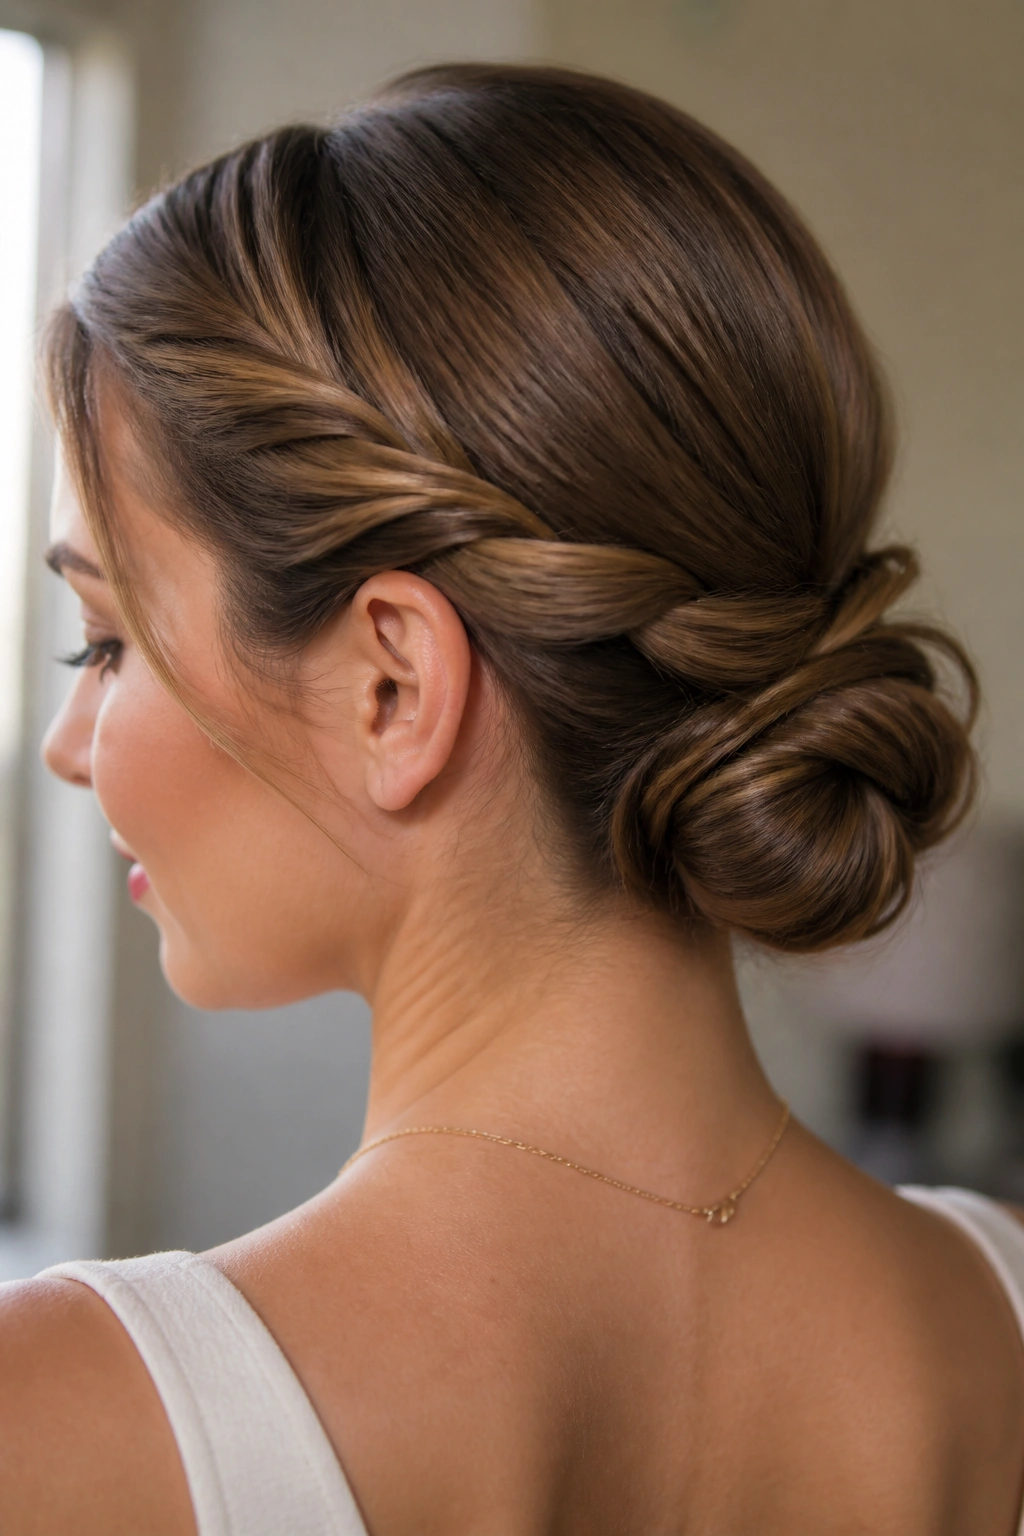
Compared with a braided crown, a twisted halo bun feels lighter and faster to build. Two side twists travel around the head, meet at the back, and turn into a low bun instead of circling all the way around the crown. That keeps the style low and centered, which suits medium-length hair better than a heavy full halo.
The shape works because the twists create a frame. Your face stays open, the back gets a tidy knot, and the middle lengths tuck in without needing extra extensions or a ton of pins. If the hair has layers, keep the twists narrow near the temples and widen them only once they’re past the ears. That stops the top from puffing up too much.
- Twist from each temple toward the nape.
- Cross the twists at the center back.
- Fold the tails into a low bun.
- Pin under the bun and at the cross point.
That cross point is the anchor. Don’t skimp on it.
20. The Clean Nape Chignon
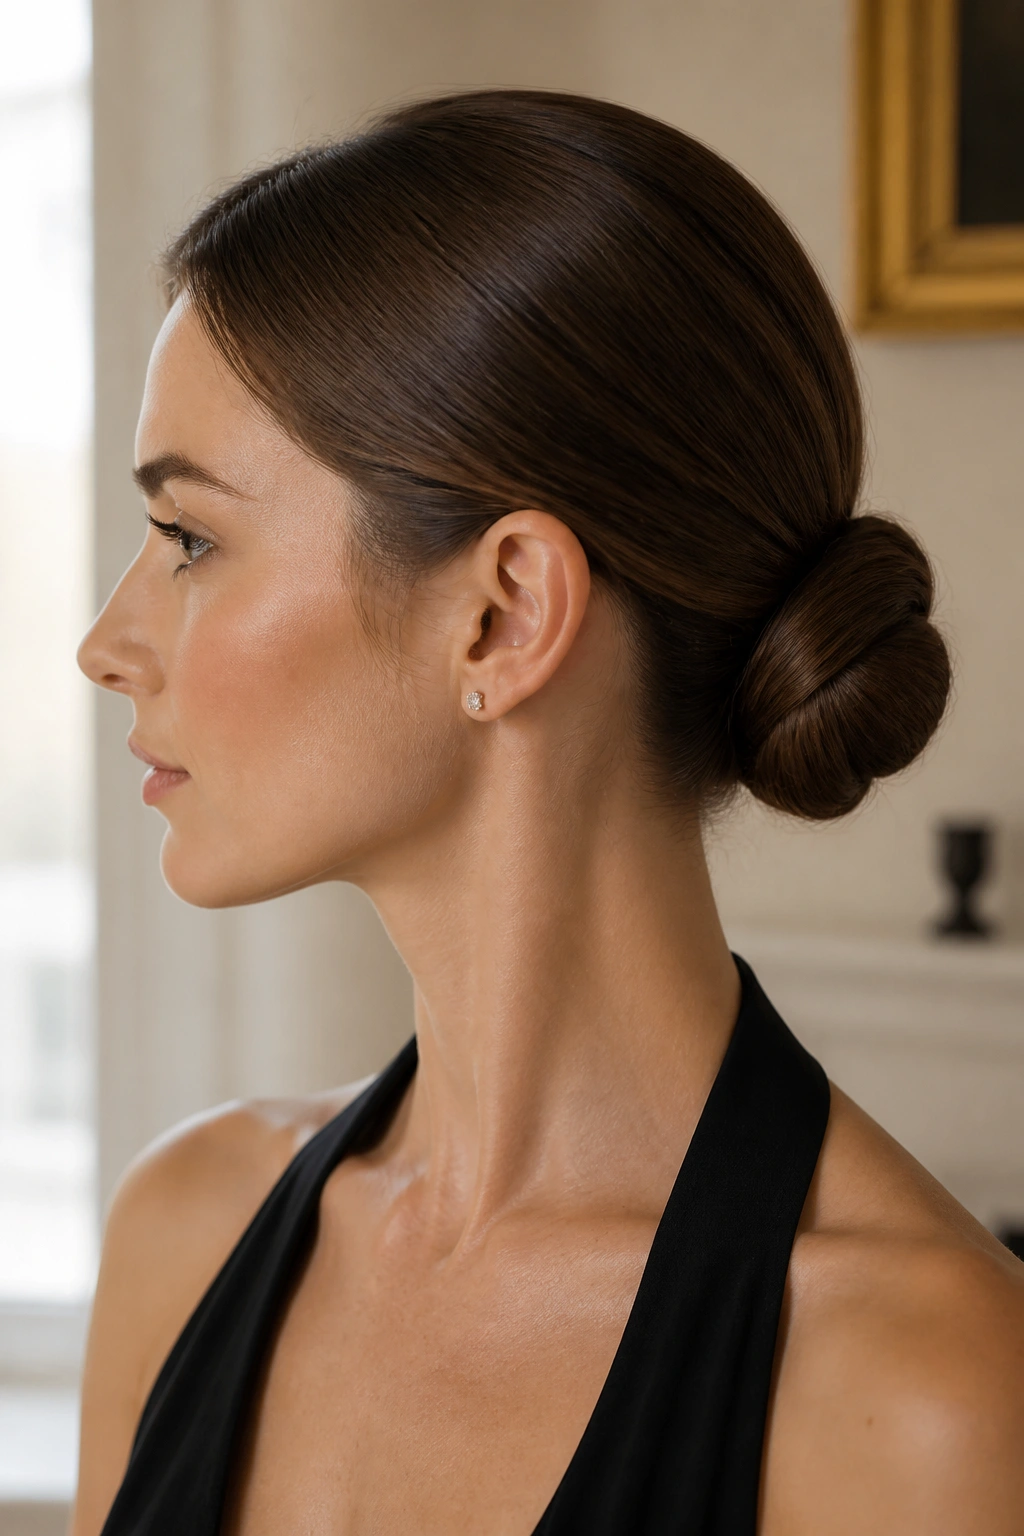
This is the style I’d hand to someone who wants one low updo that can behave in a dozen different situations. The clean nape chignon is smooth, small, and close to the neck, which makes medium-length hair look tidy without demanding too much length. It’s also the easiest one to make look expensive without actually being fussy.
The trick is to keep the shape compact and the surface calm. Brush the hair back, secure a low ponytail, then wrap the tail into a flat coil and pin the outer edge first. If the ends stick out, fold them under before the last pin goes in. A dab of lightweight cream on the fingers helps smooth flyaways, but keep it small. Too much product will make the chignon look greasy instead of neat.
I love this style with earrings, bare shoulders, or a strong lip because it gives the rest of the look room to breathe. And that’s the nice thing about low updos for medium length hair: they do not need to shout to look finished. They just need the right fold, the right pin, and a little restraint.
