



Medium-length hair hits that frustratingly perfect sweet spot. It is long enough to pull back into something elegant, yet it lacks the sheer weight of waist-length hair that makes updos sag and pull against the scalp after an hour. If you have ever felt like your hair is in that awkward “in-between” stage, I have good news: this length is actually the most versatile for styling. It holds volume better than fine, long hair, and it offers enough material to create interesting shapes without needing a dozen packs of extensions.
Most people struggle with updos because they try to force hair into shapes it does not want to take. The secret is not in the strength of your hair ties or the volume of your hairspray—it is in the texture. Before you even think about pinning, you need to build a foundation. Clean, slippery hair is the enemy of a secure updo. If you are washing your hair, try to style it on day two or use a texturizing spray to give your strands a bit of “grip.” Think of it like trying to build a castle out of silk versus building one out of clay. You need that grit.
Here are eighteen distinct updos designed specifically for medium-length hair, ranging from casual, five-minute fixes to styles that could handle a wedding day.
1. The Modern French Twist
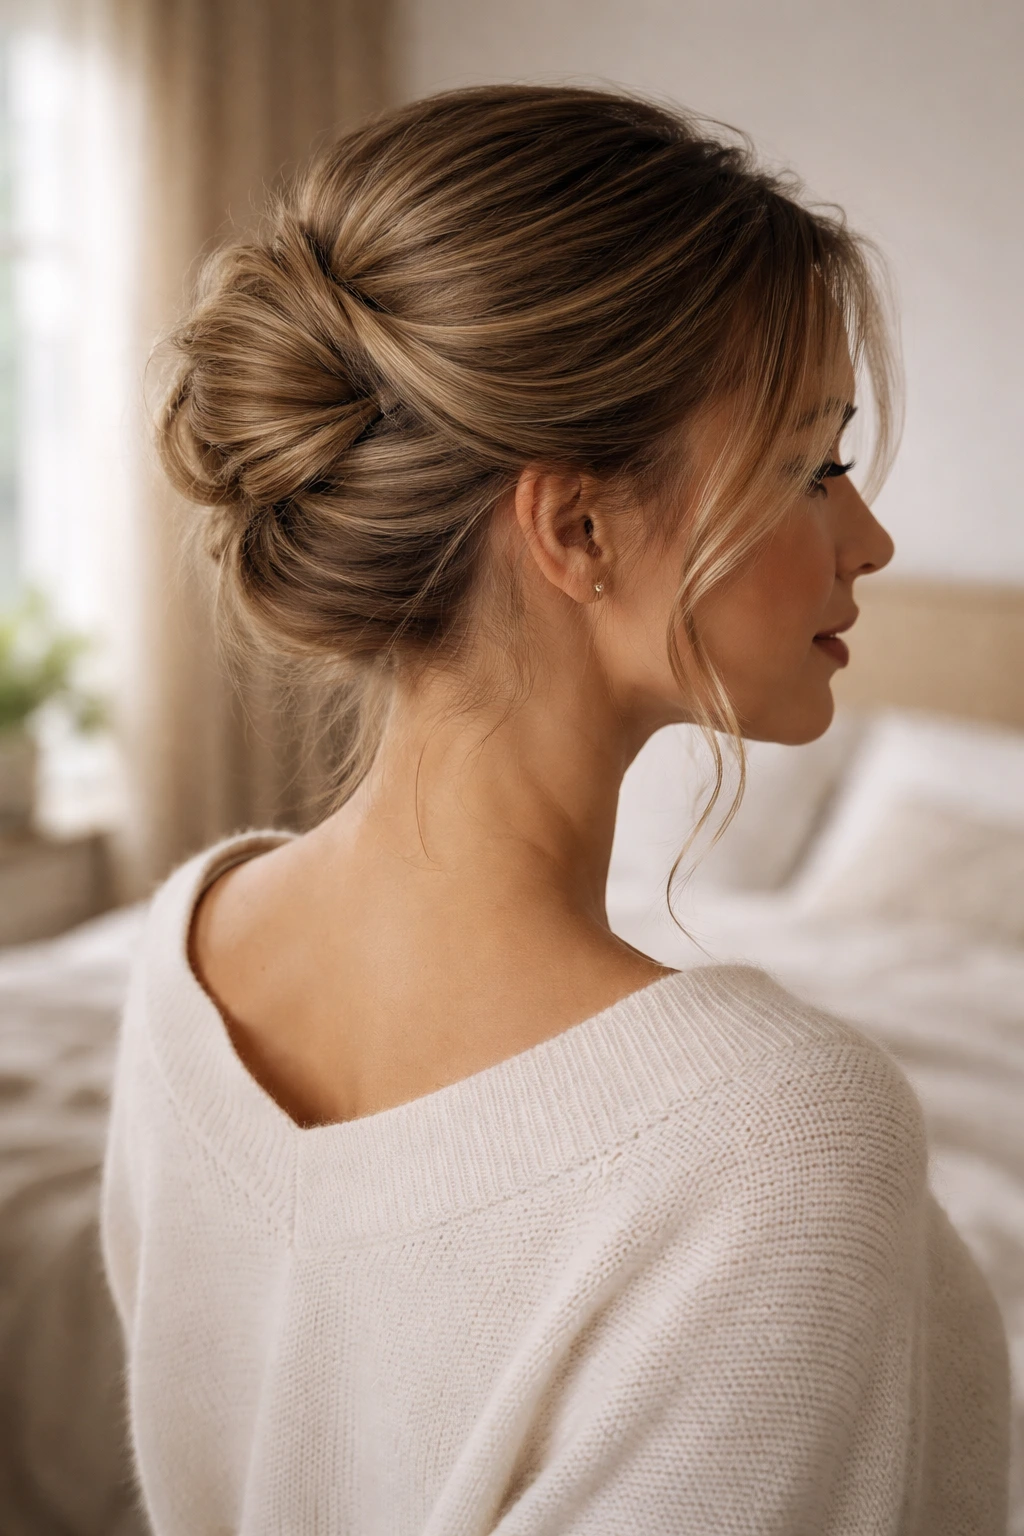
The French twist often gets a bad reputation for looking like something out of a stuffy office, but the modern version is looser, messier, and significantly more wearable. The key here is to ditch the massive, heavy clip and use U-pins. These pins hold the hair much more securely than traditional bobby pins and they don’t leave those annoying crimps in your hair when you take them out.
How to Get the Shape Right
Start by pulling your hair back as if you are making a low ponytail, but don’t secure it with an elastic. Twist the hair upwards against the back of your head. As you twist, the hair will naturally start to coil against itself. Fold the ends of the hair underneath the roll so they aren’t sticking out.
The Finishing Touch
This is where people usually go wrong—they over-tighten. Use your fingers to gently pull at the top of the twist to create a bit of volume and “lived-in” texture. If a few strands fall around your ears, let them. That is the point. Secure the entire roll with two or three large U-pins, inserting them into the fold and then pushing them back against your scalp.
2. Low Messy Chignon with Tendrils
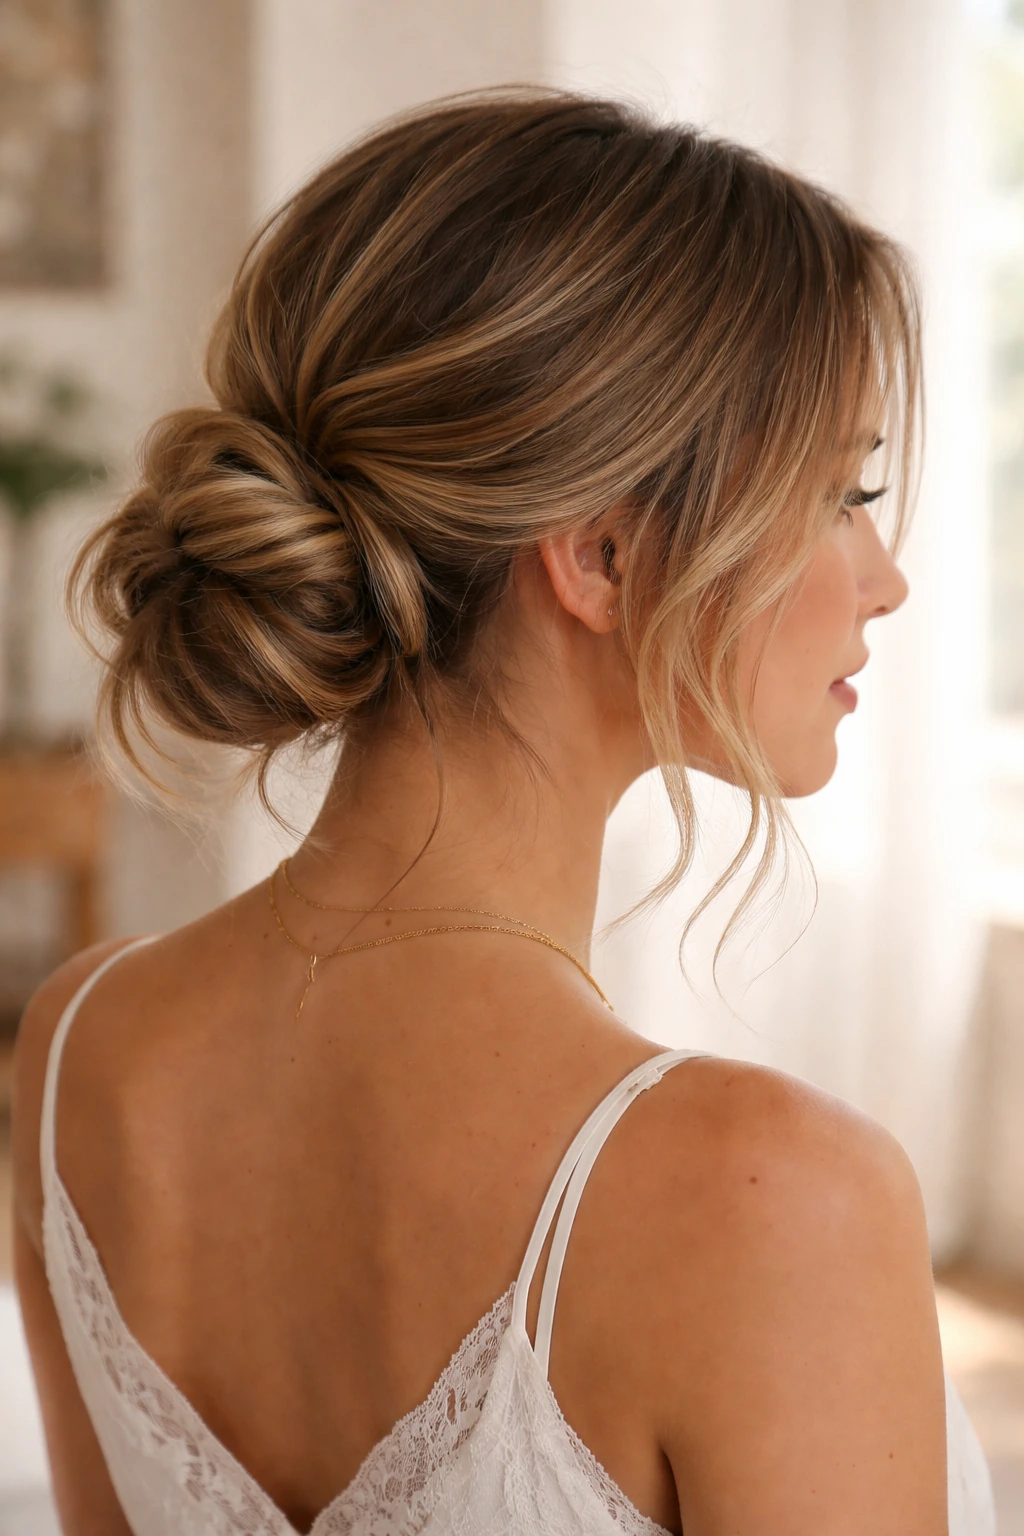
This is my go-to for when I want to look like I put in effort, even though I spent maybe three minutes on my hair. It relies on the hair being slightly wavy. If your hair is poker-straight, run a curling wand through the mid-lengths quickly before you start. You aren’t looking for tight curls; just a soft bend.
Getting the Texture
Take a generous amount of dry texture spray and work it through your hair from roots to ends. This provides the friction needed to keep the chignon from sliding out the back of your head. Gather the hair into a low, loose ponytail at the nape of your neck.
The Knotting Technique
Instead of pulling the hair all the way through on the final loop of your elastic, leave the ends tucked under to form a loop. Split that loop in half and pull the ends through the center to create a knotted effect. Pin the loose ends underneath with bobby pins. Pull out two small sections near your temples to frame your face—keep these sections thin, or they end up looking like outdated “antennas” rather than a soft, romantic detail.
3. The Dutch Braid Crown
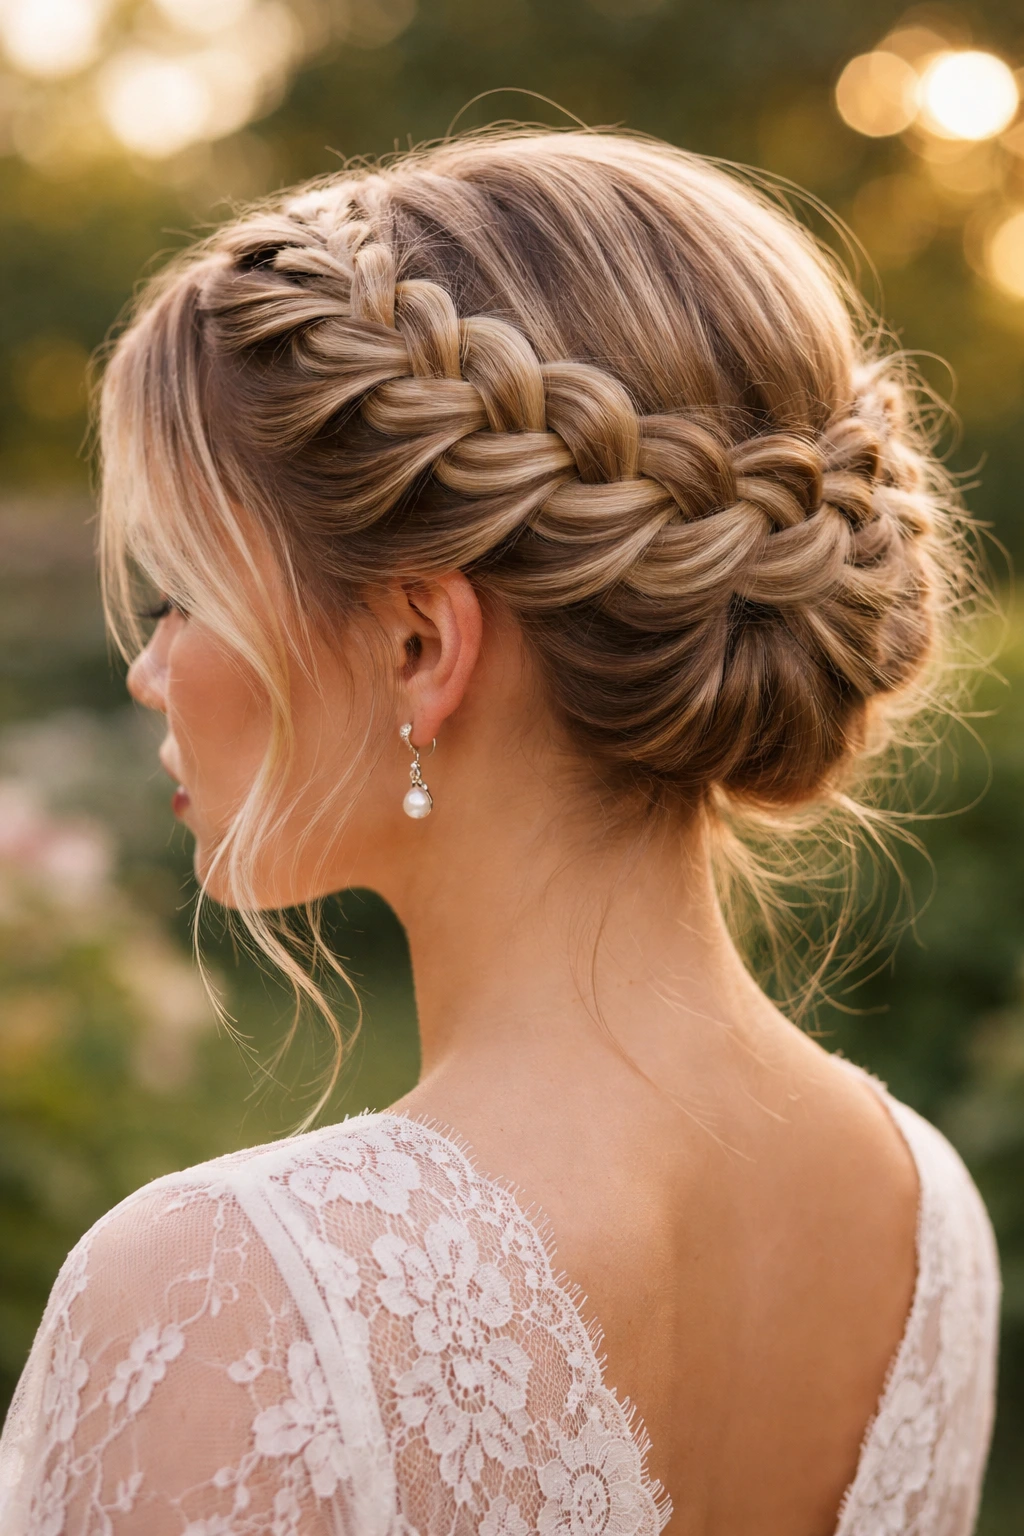
Medium hair is often the perfect length for a halo braid because you don’t have to deal with yards of excess hair at the ends. A Dutch braid is essentially an inverted French braid—you cross the strands under instead of over, which makes the braid pop out and look three-dimensional.
The Prep Work
Part your hair down the center from your forehead to the nape of your neck. Secure one side away so it doesn’t get in your way. Begin the Dutch braid right at your hairline. As you braid, add small sections of hair from the top and bottom. Do not pull the braid tightly against the scalp.
The “Pancaking” Trick
Once you reach the nape, secure it with a clear elastic. Repeat on the other side. Now, take your fingers and gently pull on the edges of the braid sections. This is called “pancaking.” It creates that full, voluminous look and hides any thin spots. Cross the braids over each other at the back and pin them securely into place using bobby pins that match your hair color.
4. The High Sleek Donut Bun
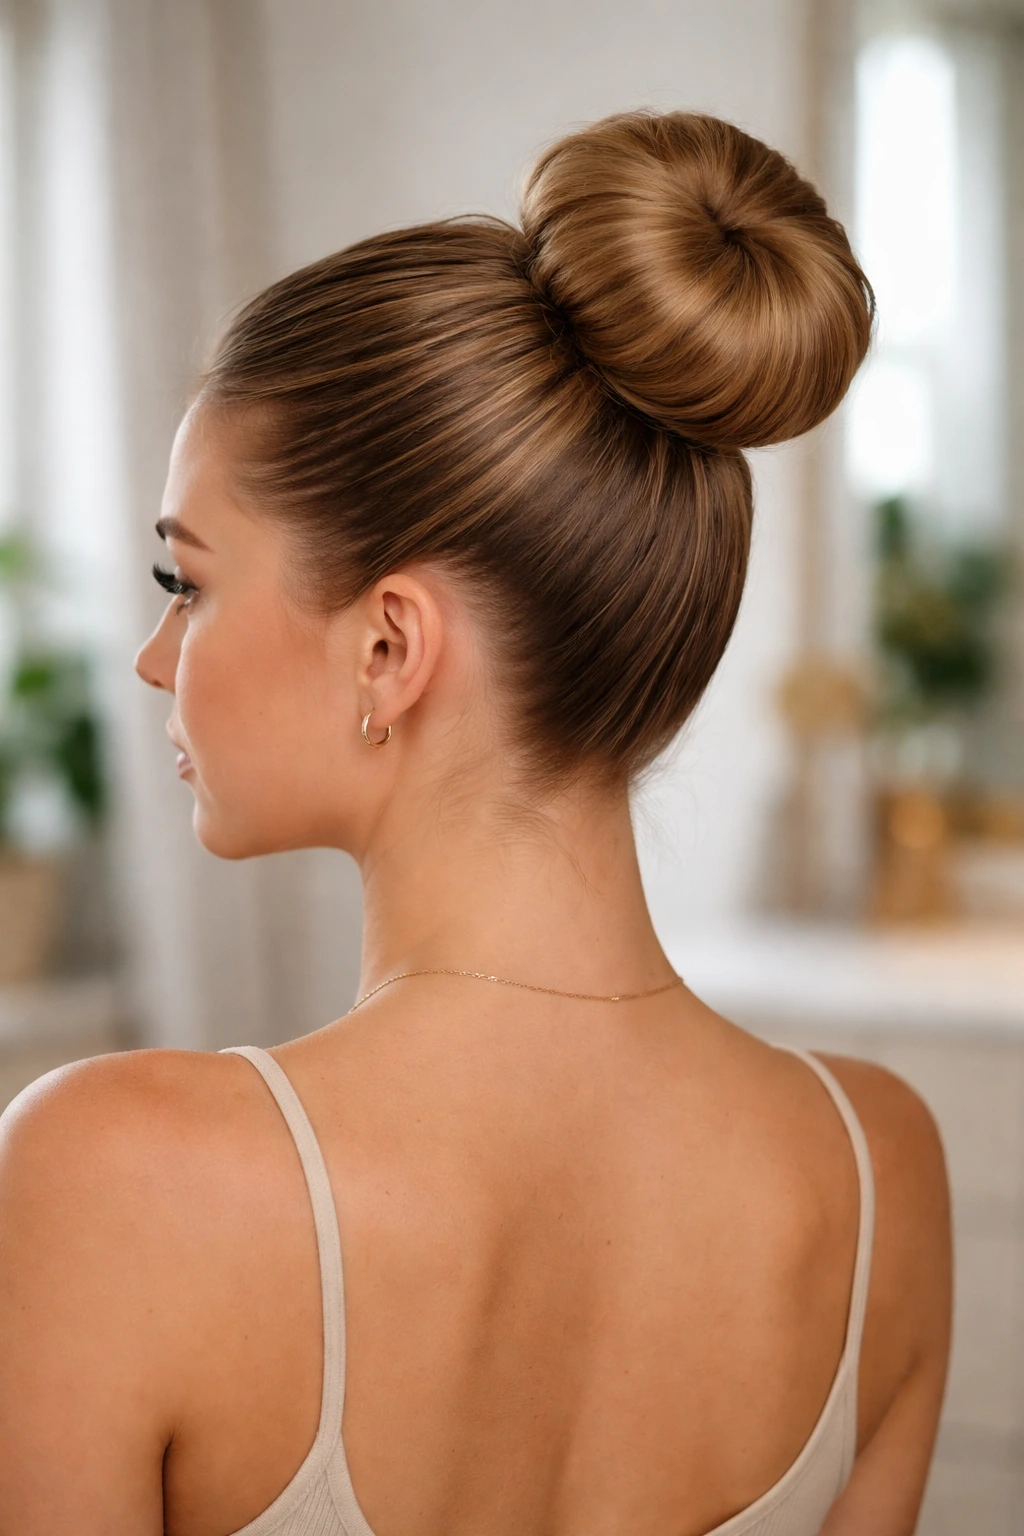
If you are dealing with day-three or day-four hair, this is the ultimate solution. It hides the fact that your roots might need a wash, and the sleekness looks incredibly polished. The “donut” here refers to the foam shaper, which is a lifesaver for medium-length hair that might not have the volume to create a massive bun on its own.
Getting the Sleek Finish
Use a boar bristle brush and a dab of styling paste or pomade to get the hair pulled back into a high ponytail. The tighter the ponytail, the better the bun will look. Secure it with a sturdy elastic. Slip the foam donut over the ponytail.
The Wrapping Phase
Spread your hair evenly over the donut so no foam is visible. Slide another elastic over the hair and the donut to secure it. You will have hair hanging out from the bottom—this is completely normal. Divide that leftover hair into two sections, twist them, and wrap them around the base of the bun. Tuck the ends in and pin them with small bobby pins.
5. The Half-Up Top Knot
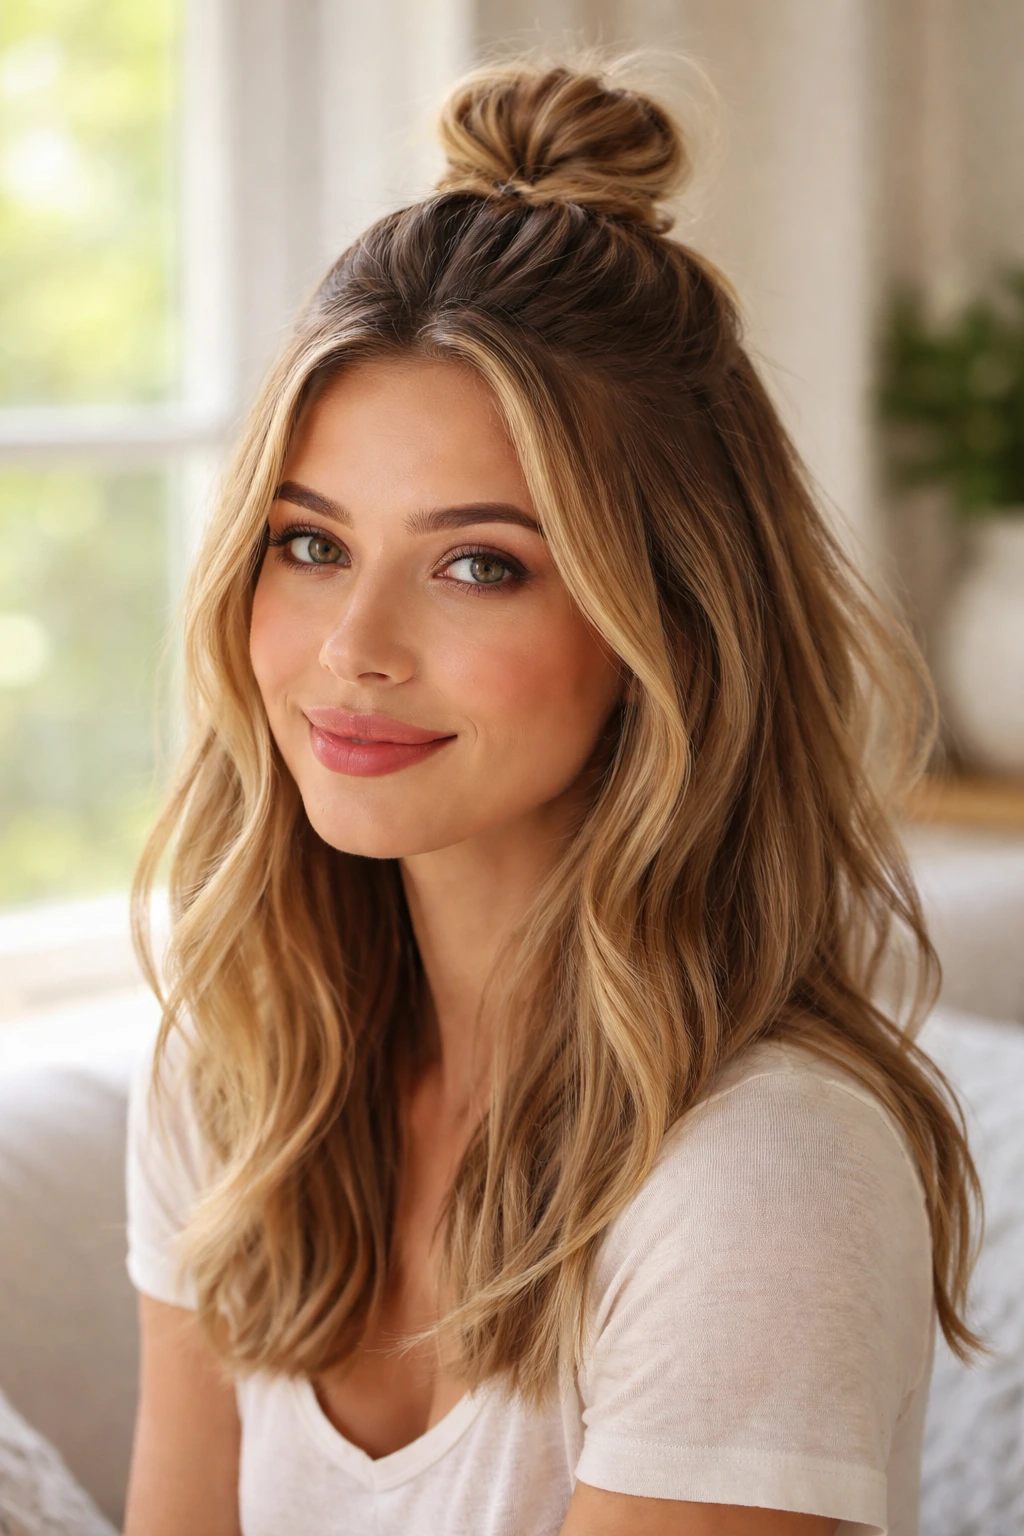
Sometimes, you want an updo, but you also want your hair down. The half-up top knot gives you the best of both worlds. It is playful, practical, and incredibly easy to execute. It keeps hair out of your face while letting the rest of your hair frame your shoulders.
Sectioning
Take a section of hair from your temples up to the crown of your head. Gather this into a high ponytail. If you have bangs or layers, leave those out—it adds to the casual vibe.
The Knot
Twist the ponytail until it starts to coil around itself. Wrap it around the base of the ponytail, creating a bun. Secure it with an elastic. If the bun feels too tight or perfect, pull on it slightly to loosen the shape. You can leave the rest of your hair straight, wavy, or however it naturally falls. If it looks too clean, add a quick spritz of sea salt spray for texture.
6. Twisted Side Low Bun
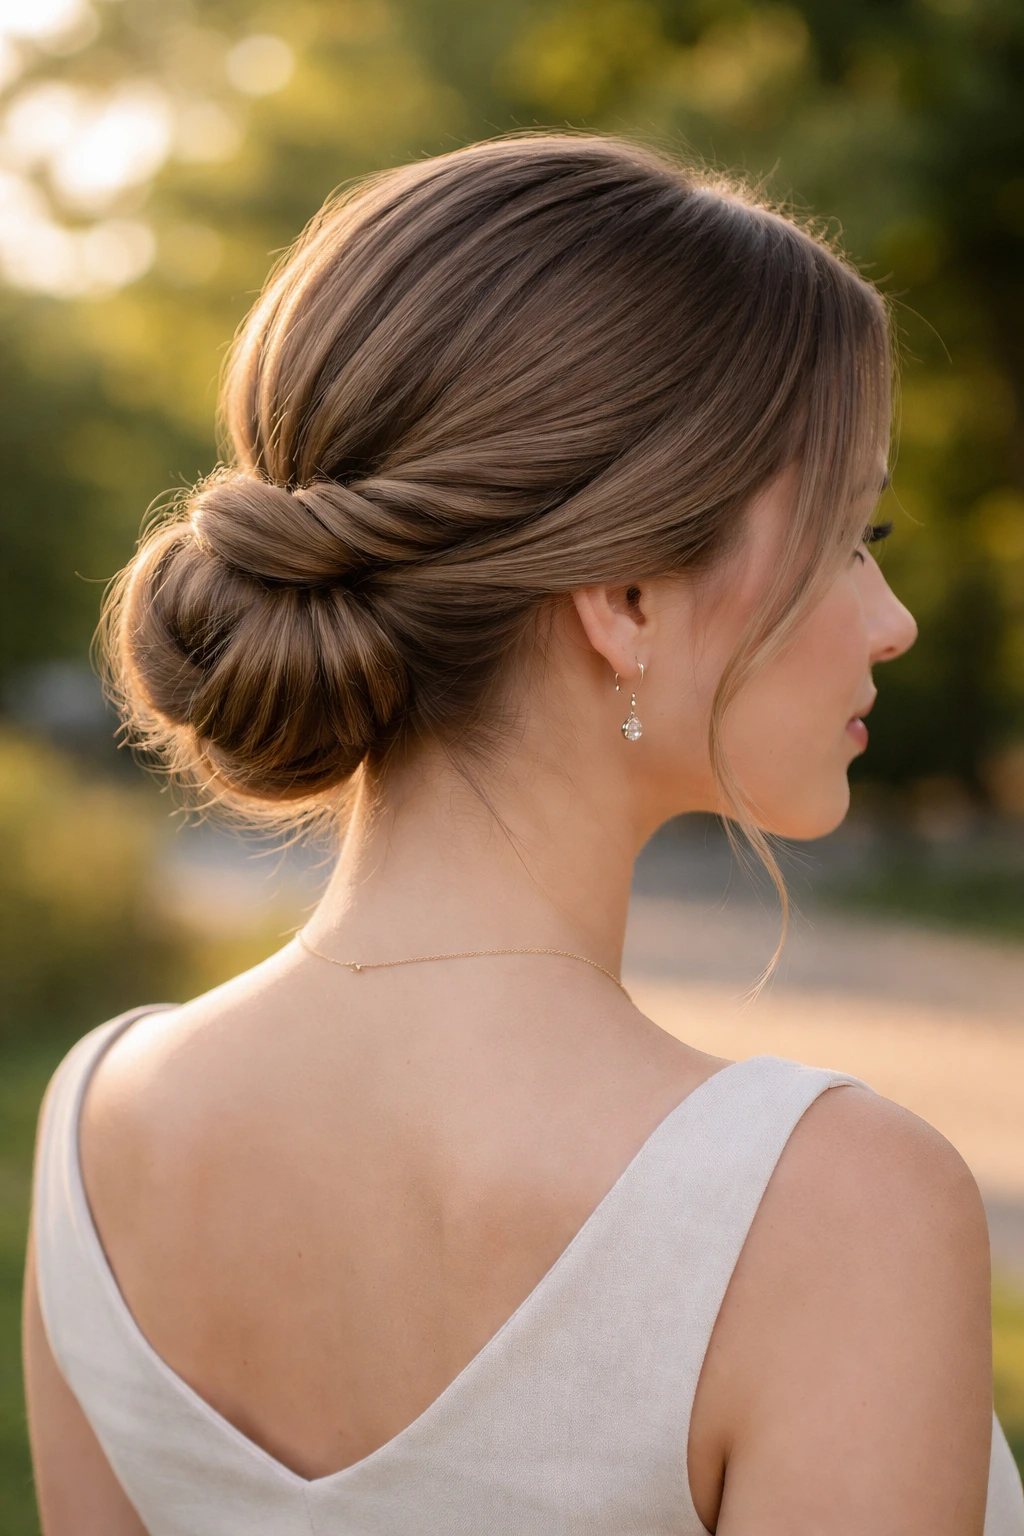
This style adds an element of asymmetry that makes it look more intricate than it actually is. It works exceptionally well if you have a side part, but it is just as effective with a center part. The twist draws the eye toward the face, making it a very flattering option for most face shapes.
The Two-Section Method
Start by creating a low ponytail and securing it with an elastic. Divide the ponytail into two equal sections. Twist each section tightly in the same direction. Then, twist those two twisted sections around each other in the opposite direction.
Finishing the Bun
Once you have this “rope” twist, wrap it around the base of your ponytail. The twist creates a unique, braided texture that looks much more complex than a standard bun. Secure the ends with U-pins. This style holds up surprisingly well during long days, as the twist creates a sturdy structure that doesn’t easily unravel.
7. The Braided Faux Hawk
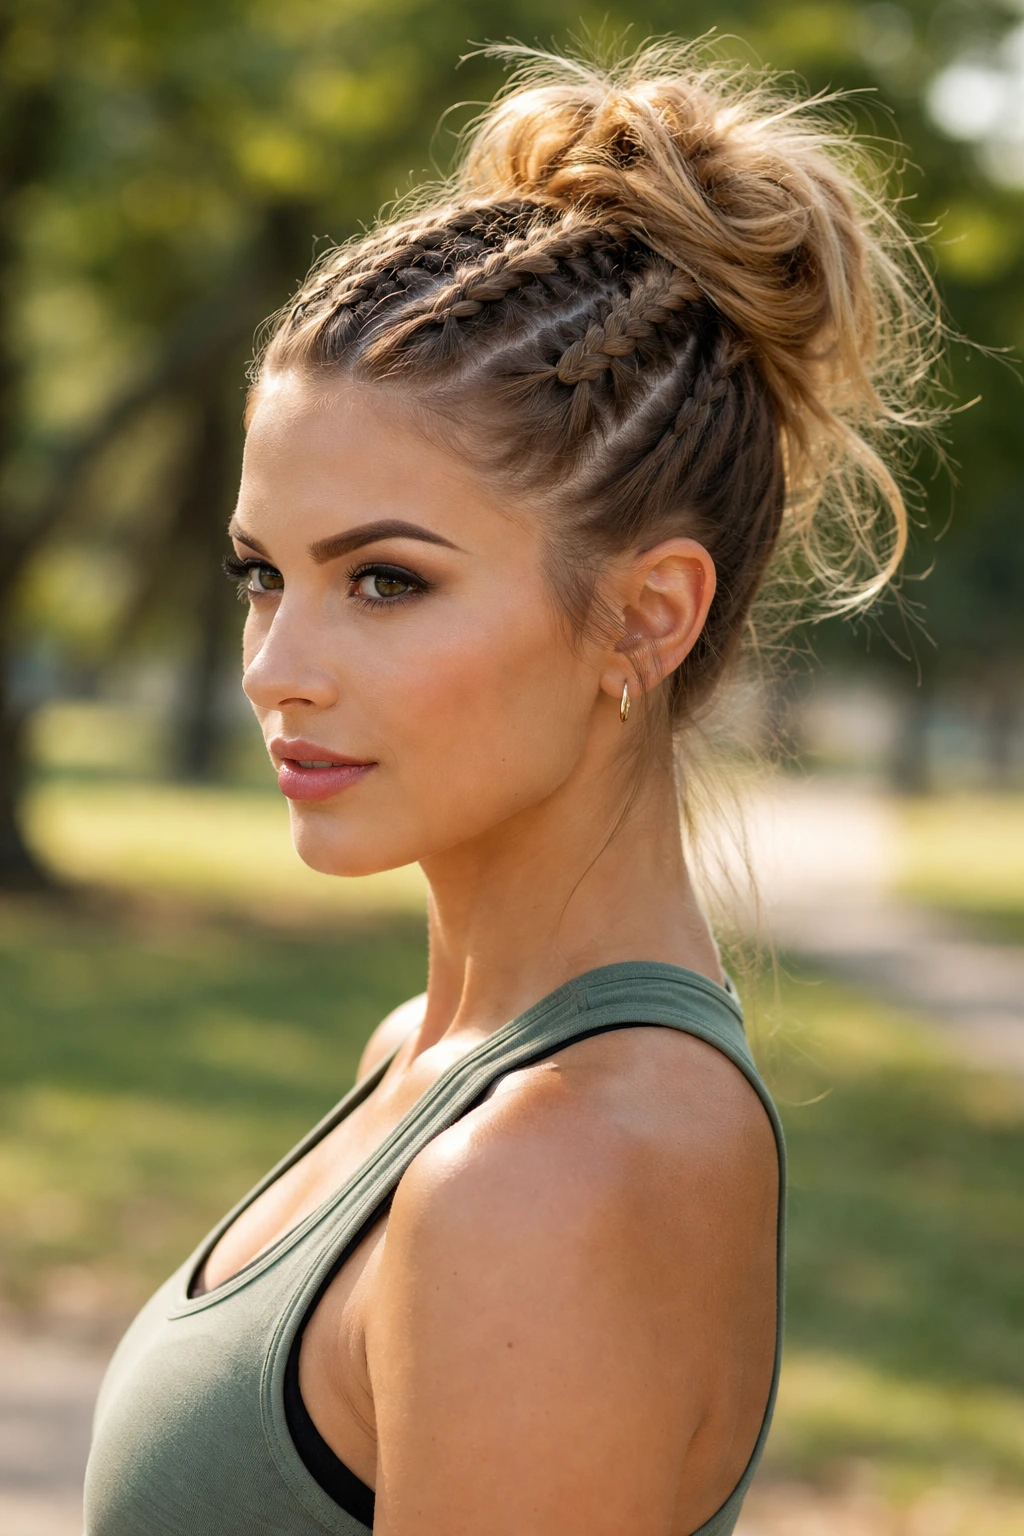
If you want an edgy look without actually shaving the sides of your head, a braided faux hawk is the answer. It creates vertical volume and keeps your hair completely off your neck. This is a great style for summer months or for when you need your hair to stay put during a workout or a busy day.
Creating the Base
The trick here is to create three or four small, tight Dutch braids going from your forehead back toward your crown. Don’t take them all the way to the ends—just braid until you reach the crown and secure them with small clear elastics.
The Updo Conversion
Gather the remaining hair, including the ends of the braids, into a messy bun or a series of loops. The braids act as the “faux hawk” section, providing height and interest on top of the head. Pin the bun securely. The contrast between the tight, structured braids and the messy bun is what makes this style work.
8. The Infinity Knot
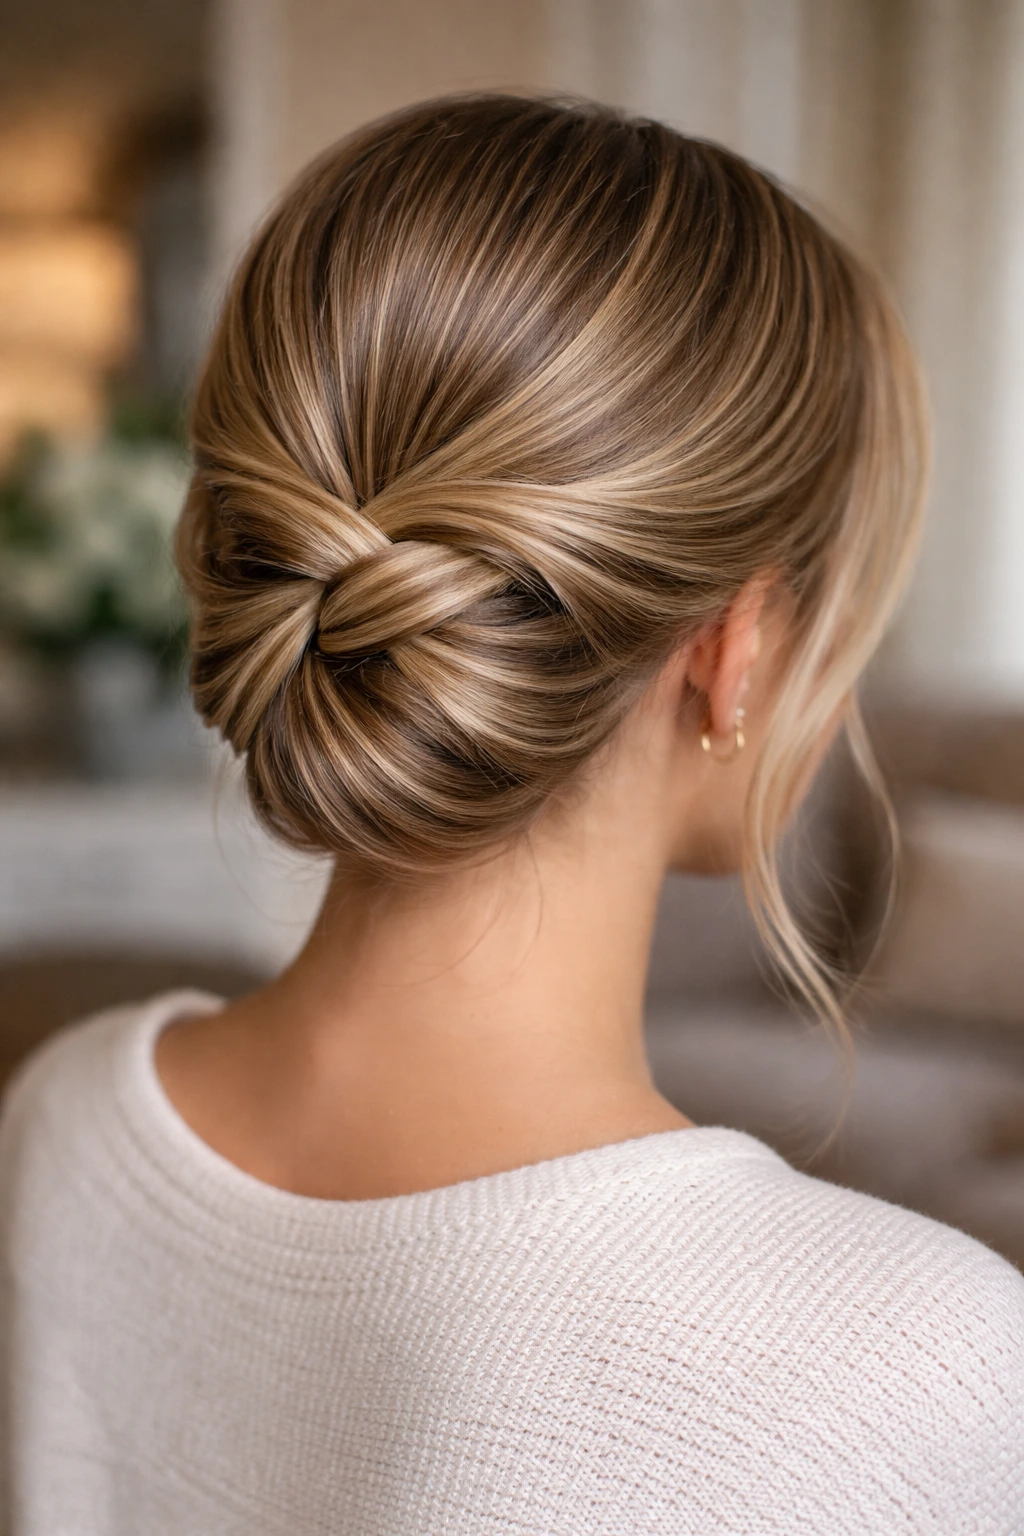
This is a beautiful, sculptural style that looks like it belongs on a ballet dancer. It uses the hair to create a figure-eight shape, which is where the name comes from. It is surprisingly sturdy despite its delicate appearance.
The Foundation
Start with a low ponytail. Pull the hair through the elastic halfway, creating a loop. Leave about two inches of the ends hanging out.
Forming the Infinity
Take the loop and split it in half to create two smaller loops. Twist these loops and cross them over each other, pinning them into an infinity symbol or a figure-eight. Take the loose ends that were left out, wrap them around the center of the figure-eight, and tuck them underneath. Use plenty of bobby pins here—you are essentially constructing a shape, so don’t be afraid to anchor it firmly.
9. Low Braided Loop
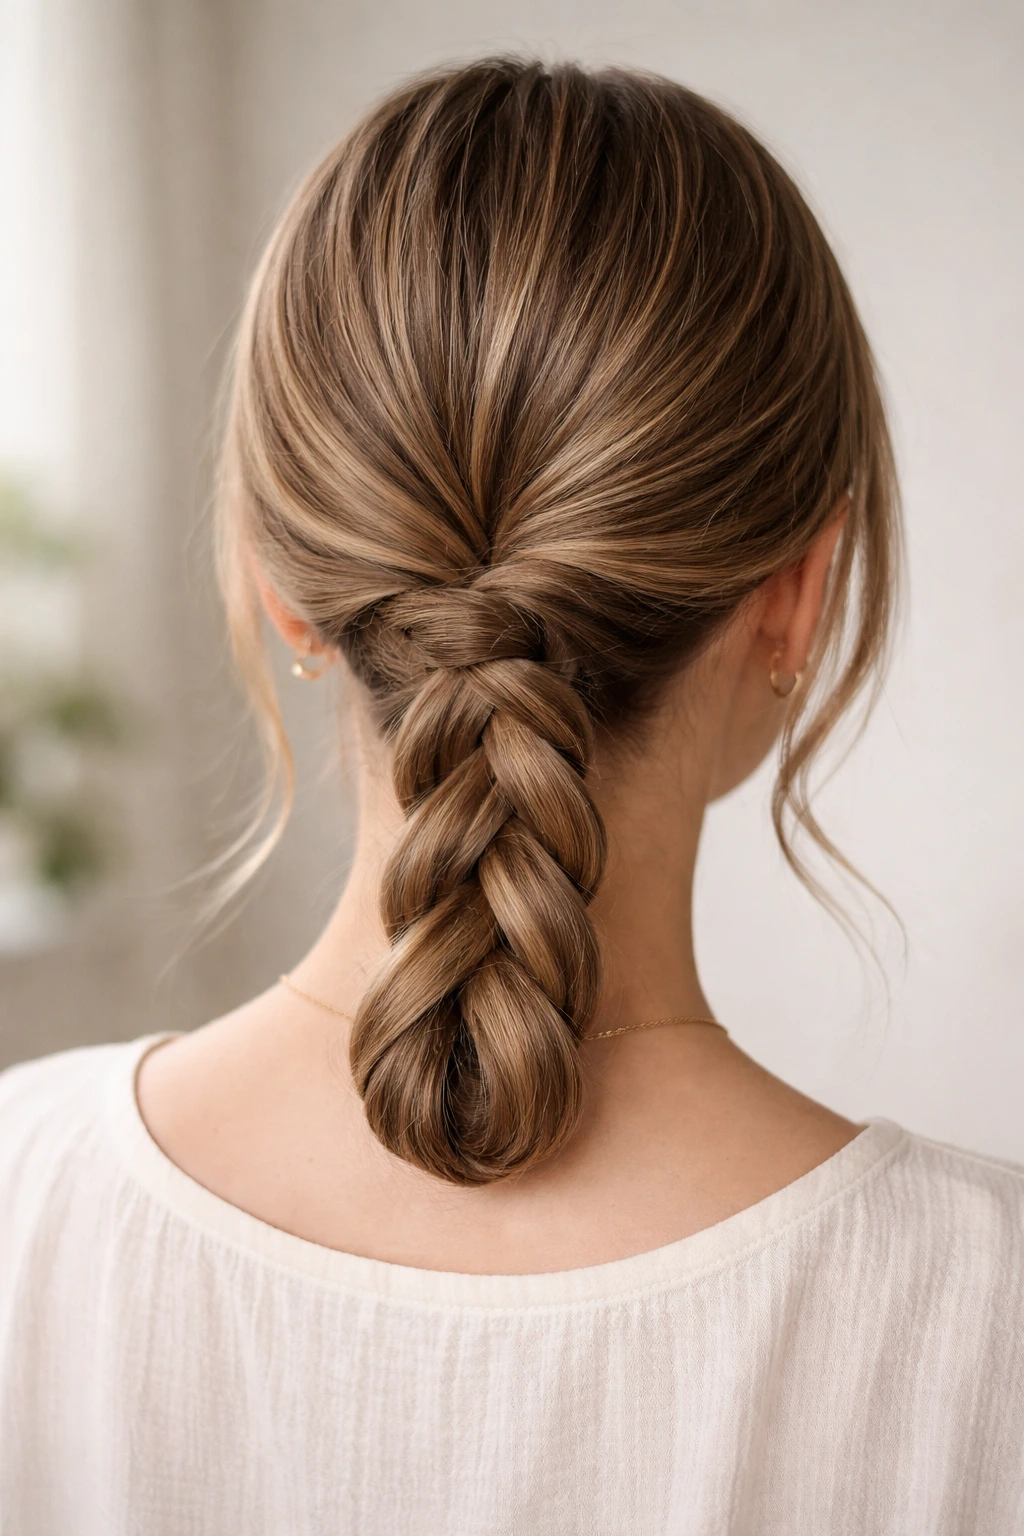
This style is a variation of the chignon, but with the added texture of a braid. It is excellent if your hair is medium length because you have just enough hair to form the loop without it getting too bulky.
The Braiding Process
Begin by gathering your hair into a low ponytail. Braid the entire ponytail to the ends and secure with a clear elastic. It doesn’t need to be a perfect braid—in fact, a slightly loose, messy braid is better.
The Loop
Take the braided ponytail and tuck the ends back up toward the elastic at the nape of your neck. Secure the ends with a bobby pin right behind the elastic. This creates a rounded loop. If your hair is on the shorter side of medium, this style is particularly effective because the braid gives you more control than loose hair.
10. Bubble Ponytail Updo
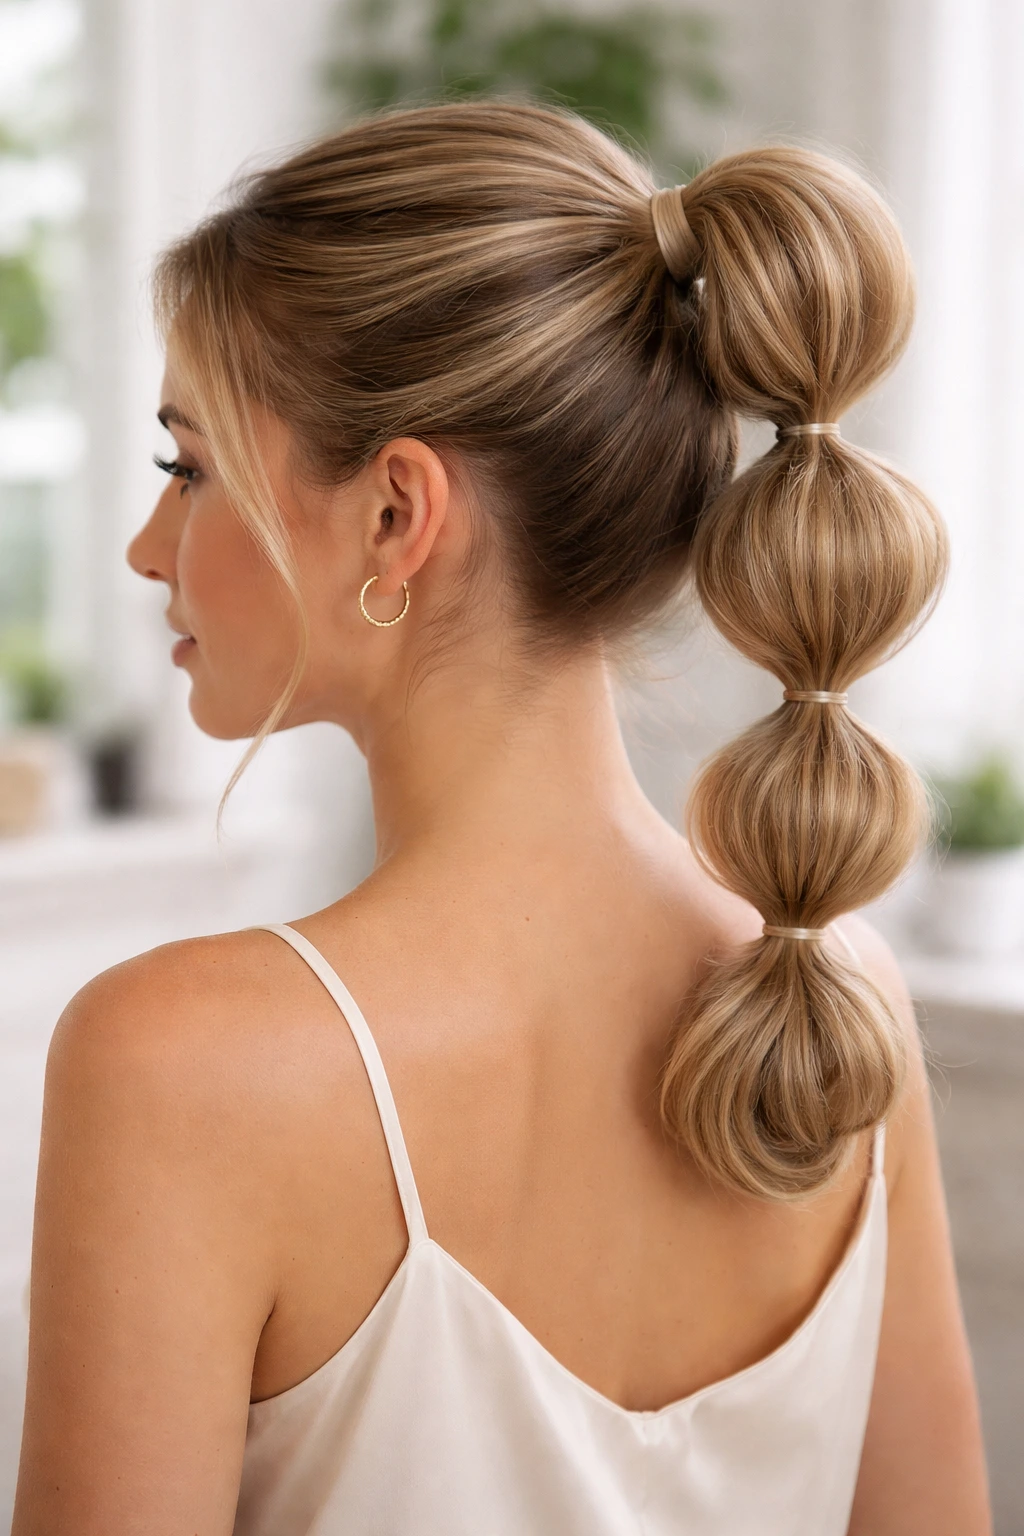
The bubble ponytail has become a standard in the world of easy updos, and it is incredibly adaptable. While we usually think of it as a low ponytail style, you can easily turn it into an updo by tucking the end of the final bubble underneath to create a rounded shape.
Segmenting
Create a high ponytail. Secure it tightly. Every two inches down the ponytail, add another clear elastic. This creates the “bubbles.”
Volumizing
Gently pull on the hair between each elastic to make the bubbles round and full. If you leave it as a ponytail, it is a great look, but to make it an updo, roll the entire length of the bubble ponytail toward the base. Pin it so it sits like a bun at the top of your head. The bubbles add a unique texture that a standard bun could never achieve.
11. Triple Twist Updo
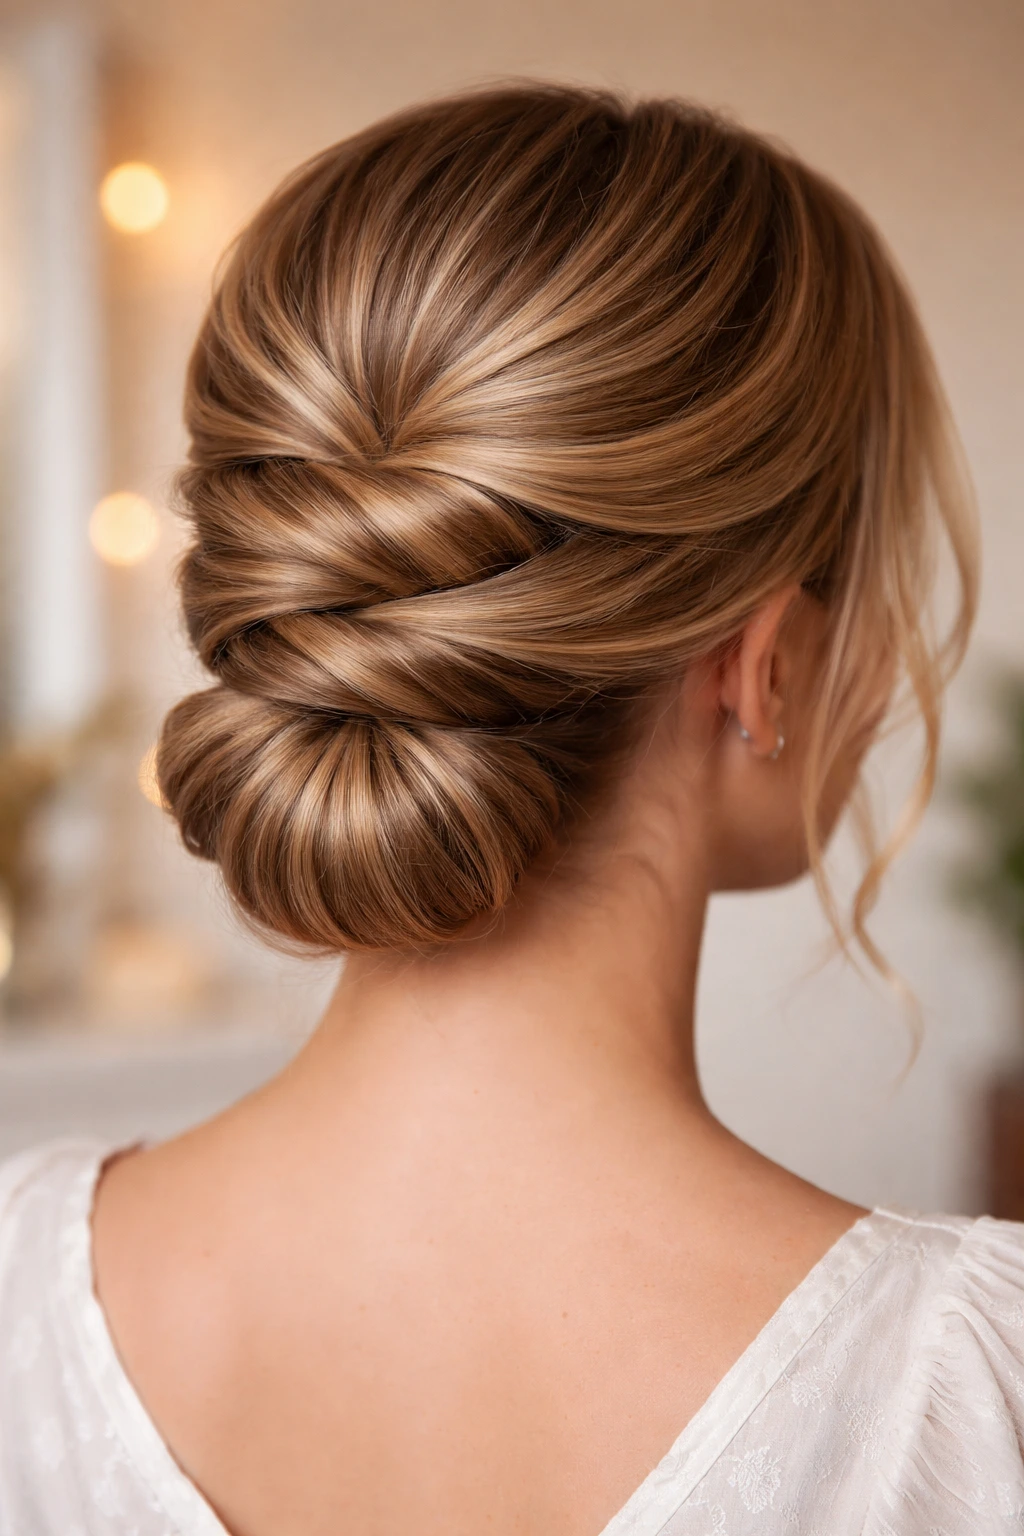
This style is all about patience and sectioning. It creates a very elegant, classic look that works beautifully for formal events or just when you want to feel a bit more “put together.”
The Three Sections
Divide your hair into three horizontal sections: a top, a middle, and a bottom. Tie the middle and bottom sections away for now. Take the top section, twist it, and pin it to the back of your head, leaving the ends loose.
Working Down
Take the middle section, twist it, and pin it slightly below the first one. Finally, take the bottom section and pin it below that. Once all three are pinned, take all the loose ends, gather them, and tuck them into a small bun at the nape of your neck. The three twists create a “stacked” effect that looks very intentional and sophisticated.
12. Romantic Rolled Updo
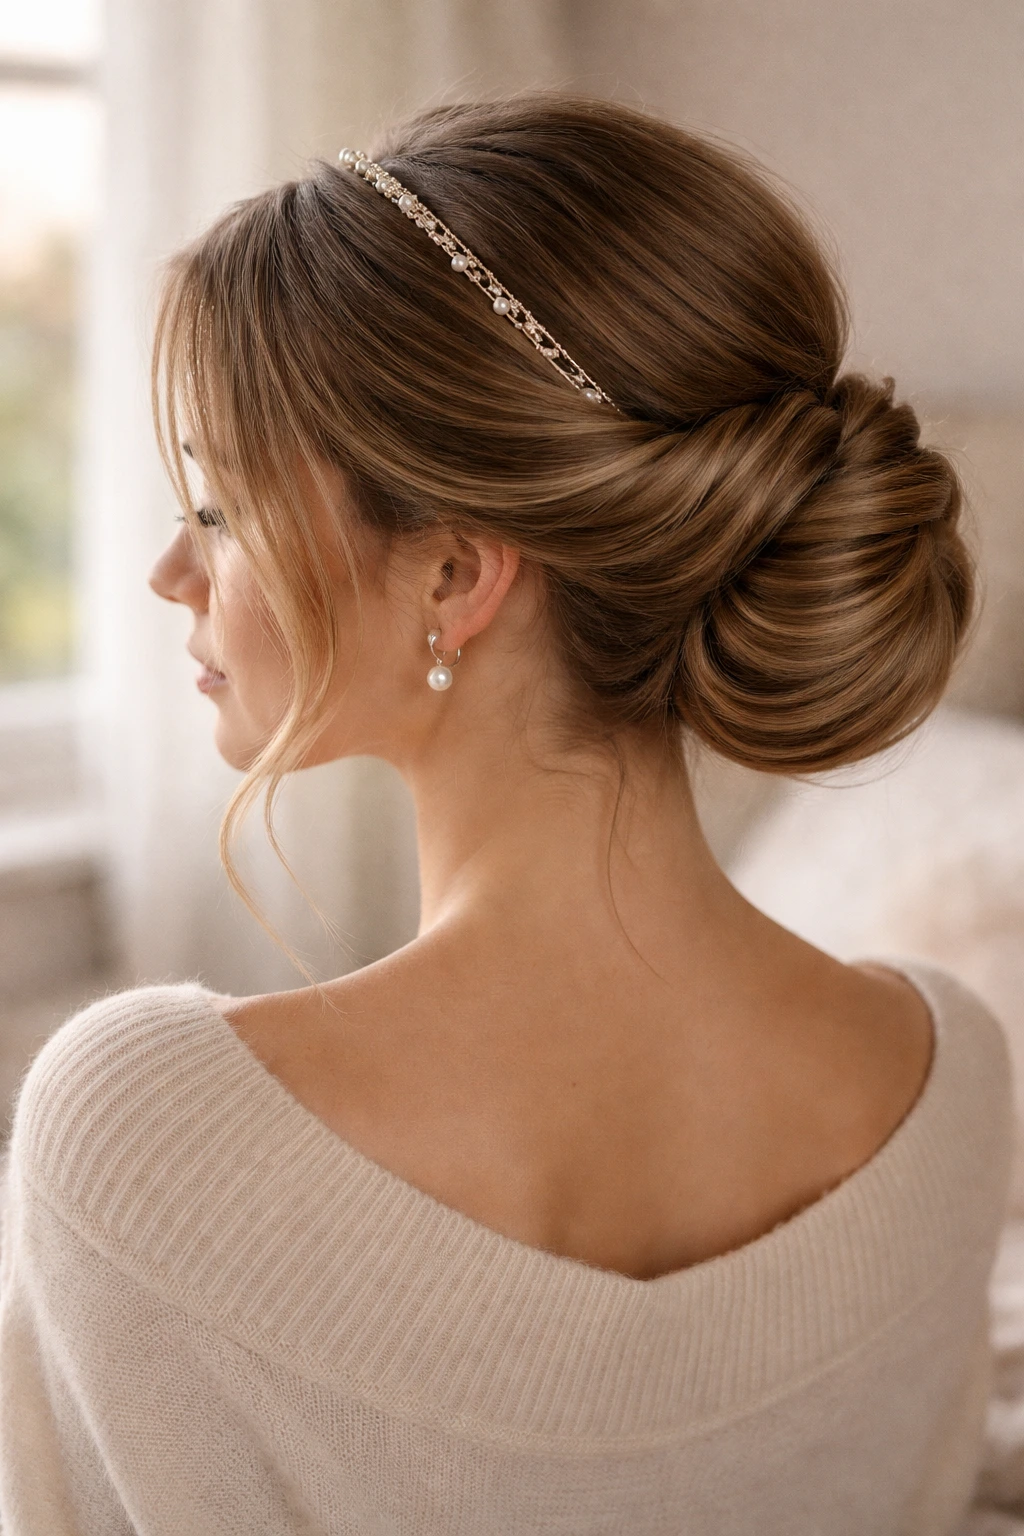
This is a variation of the classic “tuck and roll” technique. It is perfect for medium hair because it uses the length of your hair to hide the ends of the roll, creating a smooth, seamless finish.
The Headband Trick
Start by putting a thin, elasticated headband over your hair—like a crown. You don’t want it to be too tight; just enough to sit comfortably. Start at the front, near your temples. Take a small section of hair and tuck it over and under the headband.
Working Around
Continue tucking sections of hair into the headband, working your way toward the back. By the time you reach the center of the back, all your hair should be tucked into the elastic of the headband. Pin any stray pieces that fall out. The headband essentially does the heavy lifting of holding the hair in place.
13. Loose Fishtail Braid Bun
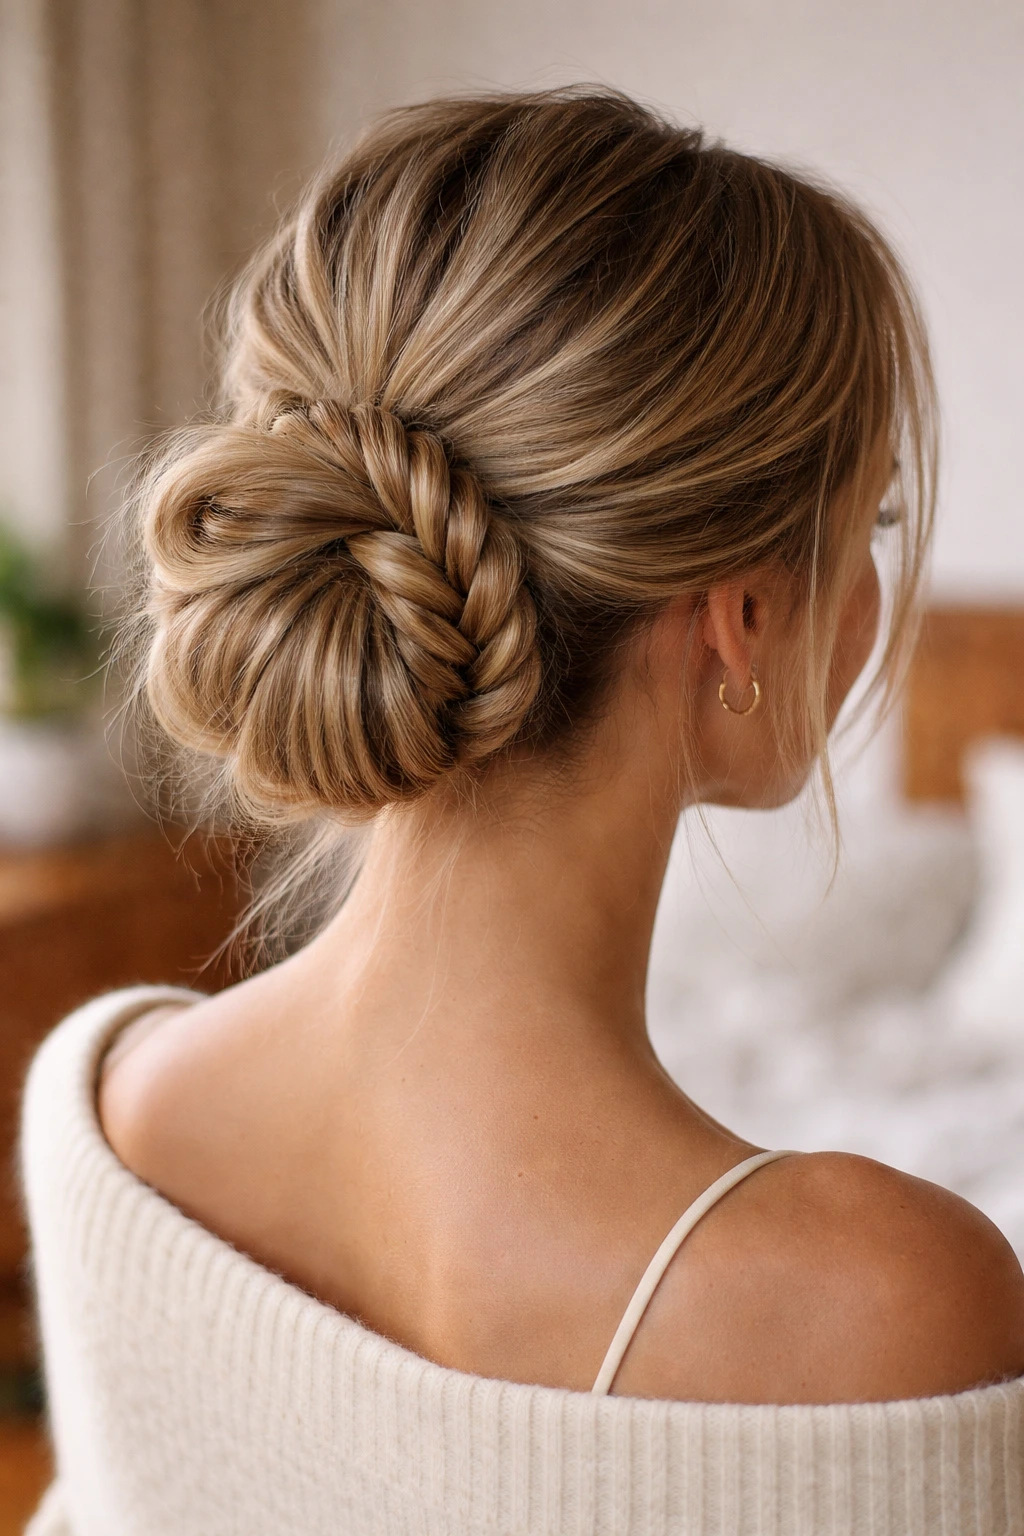
Fishtail braids are stunning, but they take a bit of practice. If you can handle a fishtail, this updo is spectacular. If not, a regular three-strand braid still works, though the texture will be different.
Braiding
Gather your hair into a ponytail (high or low, your choice) and fishtail braid it all the way to the ends. Secure with a clear elastic.
The Wrap
Wrap the braid around the base of the ponytail to form a bun. Secure with U-pins. Because fishtail braids are tighter than standard braids, the bun will hold its shape very well. You can pull the sides of the braid slightly before wrapping to make the bun appear larger.
14. Scarf-Integrated Updo
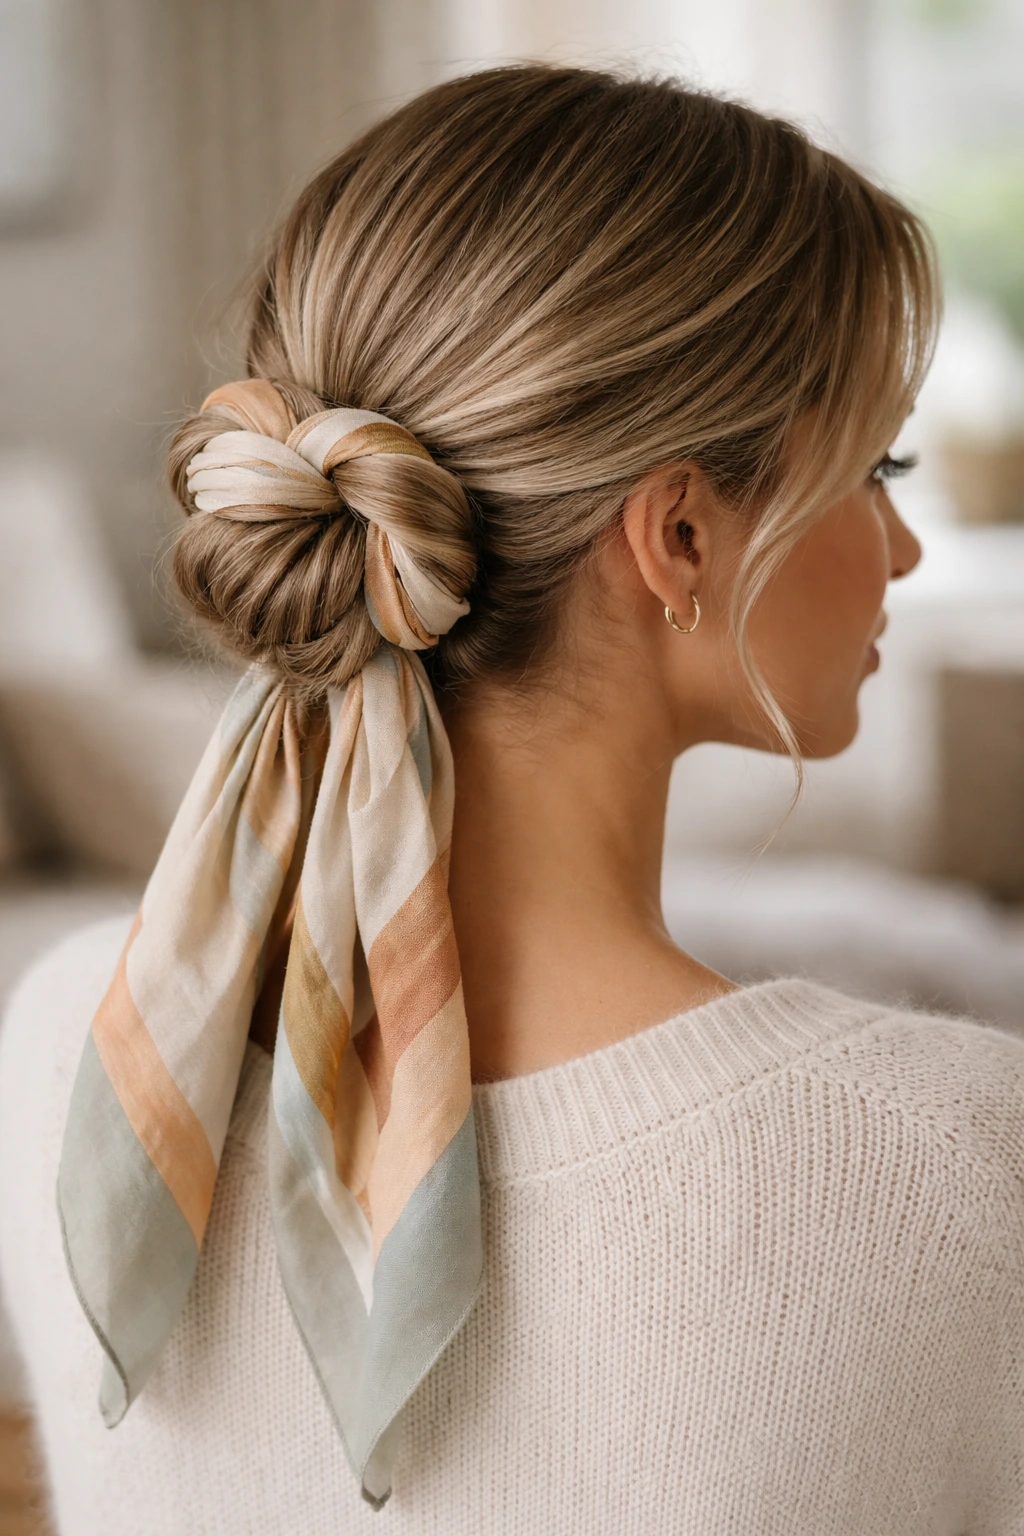
Sometimes the best updo accessory is a piece of fabric. A silk scarf can add color, texture, and volume to an updo, especially if your hair is on the thinner side of medium and you need a little “cheating” to get a full bun.
The Base
Tie your hair into a low ponytail. Thread a scarf through the elastic so that the scarf hangs down evenly on both sides of the ponytail.
The Weave
Divide your hair into two sections. Incorporate one scarf tail into each section. Twist the hair and the scarf together. Wrap these twisted sections around the base of the ponytail. You get a bun that is part hair, part scarf, and completely secure. Pin the ends of the scarf to hide them.
15. The “Claw Clip” Messy Updo
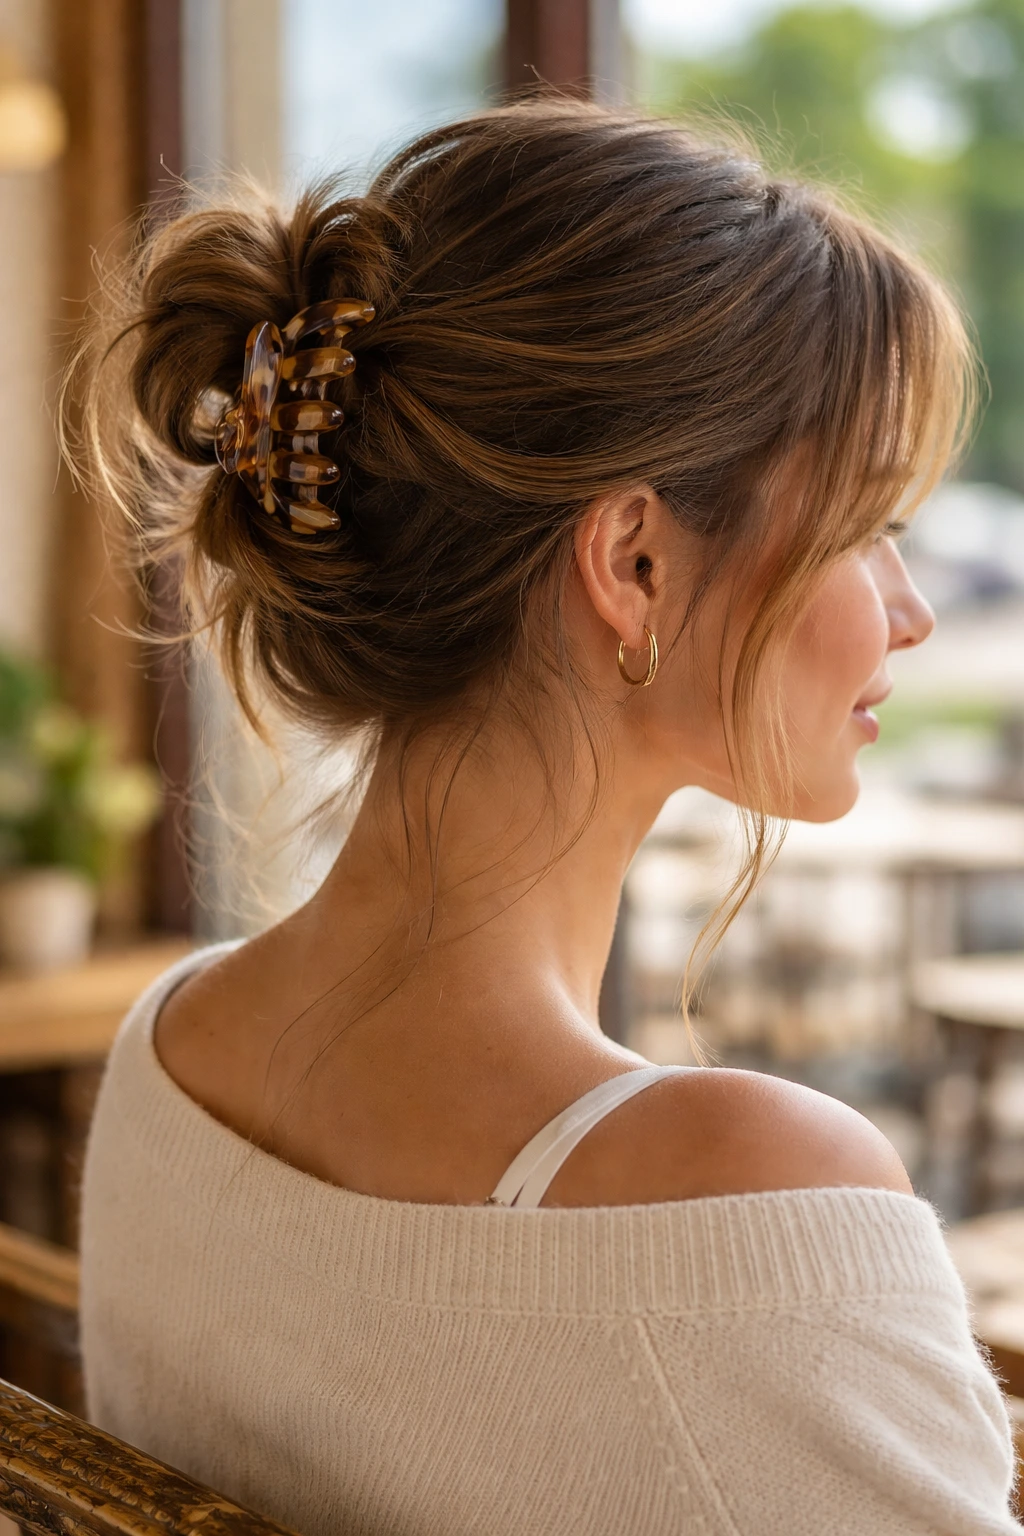
Claw clips have made a major comeback, and for good reason. They are the least damaging way to wear an updo because they don’t have the tension of an elastic. This style is the definition of “effortless.”
The Twist
Gather all your hair as if you are making a low ponytail. Twist the entire length of your hair up toward the crown of your head, just like you were doing a French twist.
The Clamp
Fold the excess hair at the top down over the twist. Take a medium-sized claw clip and clamp it over the entire roll. It takes five seconds, holds perfectly, and looks trendy. If you have layers, let them fall out naturally around your face.
16. Double Braid Low Bun
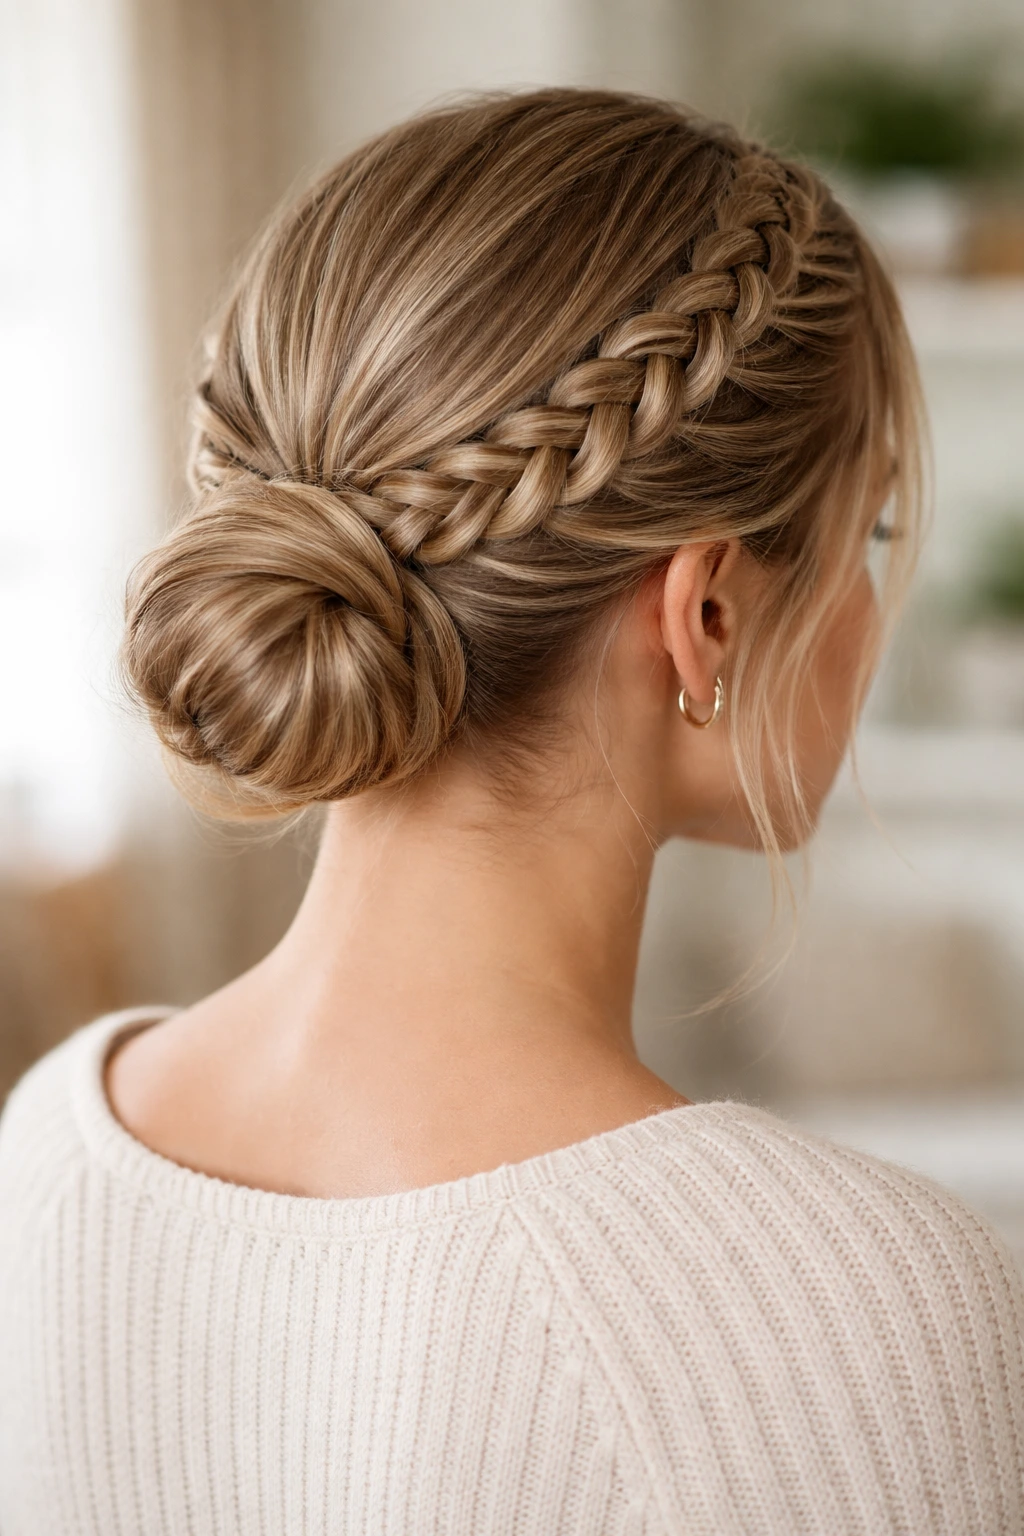
If you have layers, simple buns can sometimes look messy because the shorter pieces poke out. This style uses two braids to “lock in” those shorter layers, making it a great solution for layered haircuts.
The Braids
Part your hair in the middle. Create a Dutch braid on each side of your head, starting from the temple and working toward the nape. Stop when you reach the nape and secure each braid with a small elastic.
The Bun
Now you have two braids and the rest of your hair at the nape. Combine all of it into a single low bun. Pin it securely. The braids add detail to the front and sides of the style, while the bun keeps the length controlled.
17. Sleek Center-Parted Low Chignon
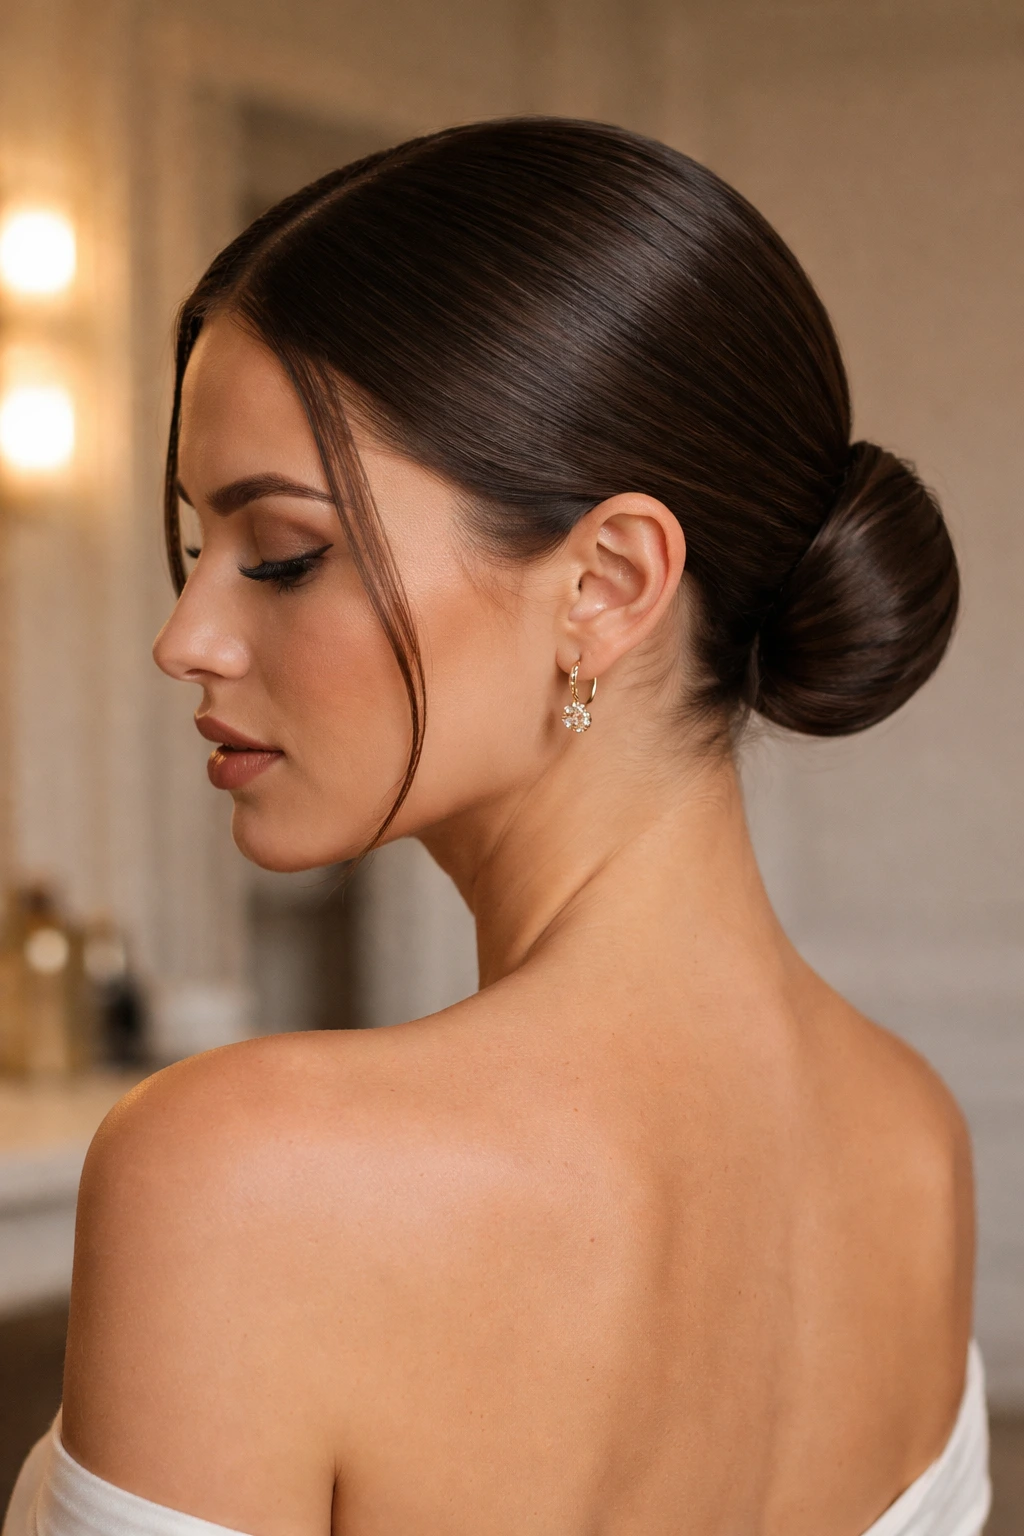
This style is about precision. It is minimalist, modern, and looks fantastic with a high-neck outfit or statement earrings. It is the style to choose when you want your accessories to do the talking.
The Part
Use a fine-tooth comb to create a razor-sharp center part. Apply a smoothing serum or a light pomade to your palms and run them over the surface of your hair to eliminate flyaways.
The Chignon
Gather the hair into a low, tight ponytail. Twist the ponytail into a tight, compact bun right at the nape of your neck. Secure it with as many bobby pins as you need to make it feel rock-solid. There is no messy texture here—the beauty is in the sleekness.
18. Bohemian Knotted Updo
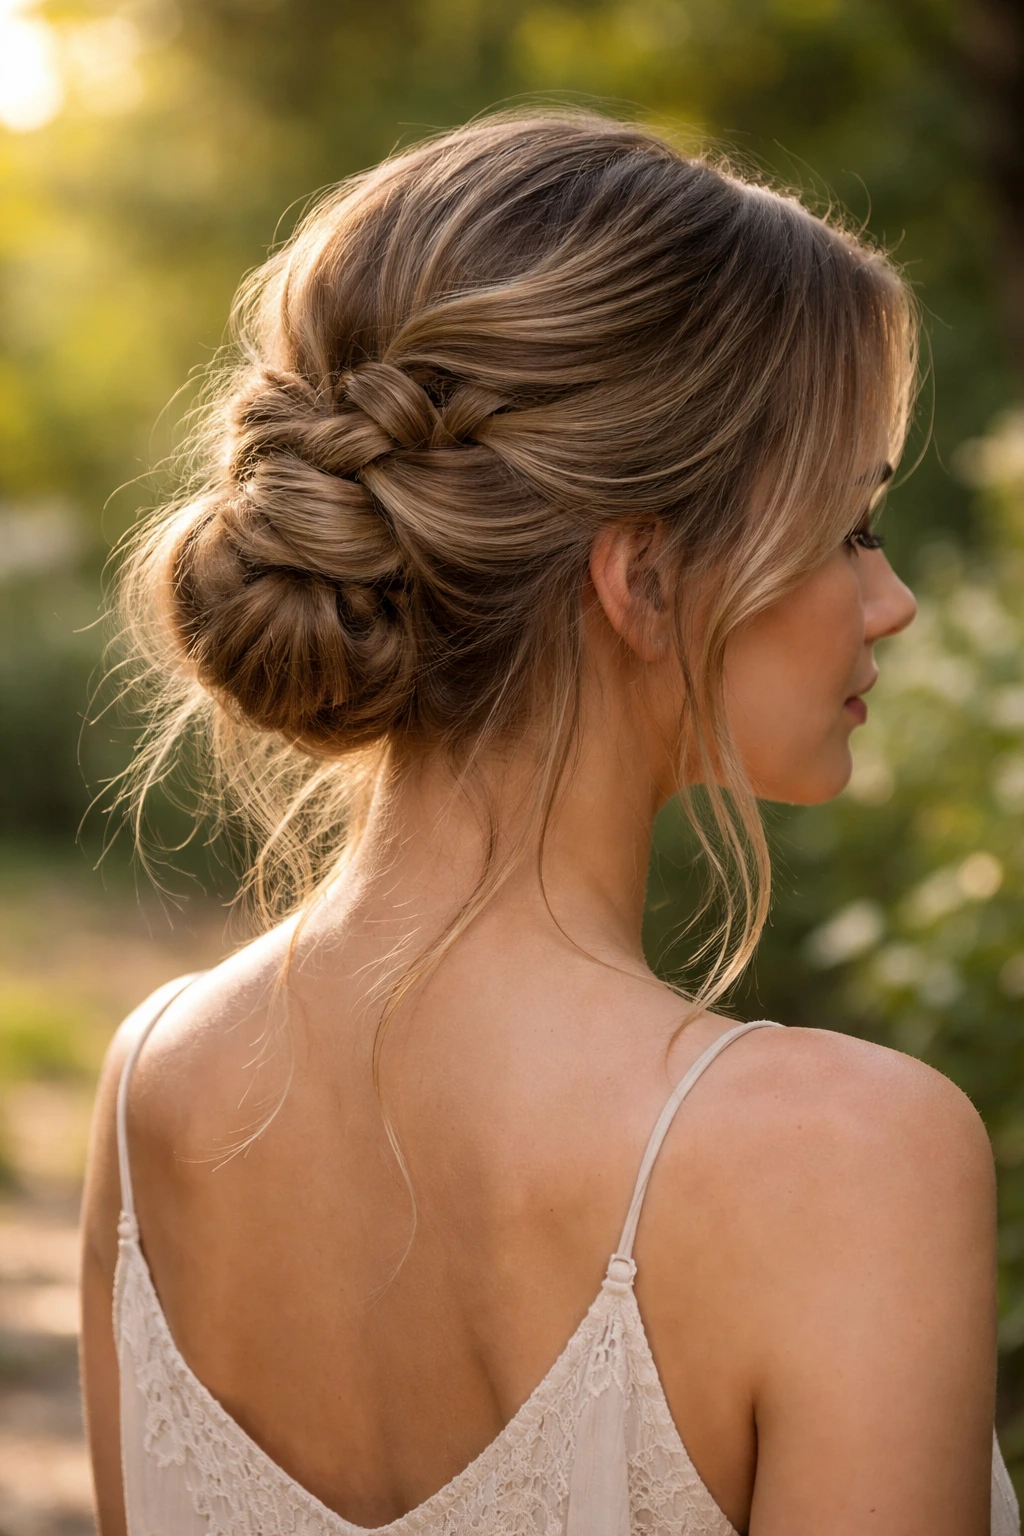
This is the most relaxed of the bunch. It’s perfect for a casual outing where you want your hair up but don’t want to look like you’re going to a board meeting.
The Sectioning
Take two large sections from the front of your hair and tie them loosely behind your head with an elastic. Take another two sections below those, tie them, and loop them through the first section.
The Final Knot
Keep doing this until you run out of hair. Take all the ends, gather them, and tuck them into a loose, low bun. The result is a series of knots leading into a bun, which creates a very organic, boho-inspired texture. Secure with pins and let a few pieces hang loose around your face.
Final Thoughts
The biggest mistake people make with updos for medium length hair is aiming for perfection on the first try. Your first attempt at a French twist or a crown braid will rarely be your best, and that is okay. Hair is a forgiving medium—it does not have to be exactly like the photos or instructions you see.
Focus on the prep rather than the pinning. If you use the right amount of texture spray or dry shampoo to give your hair grip, the styling becomes much easier. The pins, clips, and elastics are just there to hold the shape; the texture is what makes the style stay in place. Experiment with these styles on a day when you aren’t rushing out the door. Once you understand how your hair responds to different twists and knots, you will find that “styling day” becomes much less about stress and much more about creativity.
