



Medium length hair sits in a sweet spot that stylists like for a reason. It’s long enough to twist, fold, braid, and pin, but not so long that every updo turns into a wrestling match with your own hair. That’s why modern updos for medium length hair can look cleaner, sharper, and more wearable than styles that depend on waist-length thickness.
There’s also a practical advantage here that people skip over too fast. Medium hair usually holds shape well once you give it a little grip, which means a smart prep step can do more for the finished look than another round of hairspray ever will. A touch of texture at the roots, a few well-placed pins, and a part that actually suits your face can change everything.
Freshly washed hair fights back. Second-day hair usually behaves.
And that matters, because the best updos are not the ones that look the most complicated. They’re the ones that stay put, feel comfortable, and still look like you meant to wear them after three hours, two drinks, and one awkward coat check line. The styles below all work with that in mind, starting with the cleanest chignon and moving through twists, braids, and softer shapes that keep medium-length hair looking intentional instead of overworked.
1. Sleek Low Knot Chignon
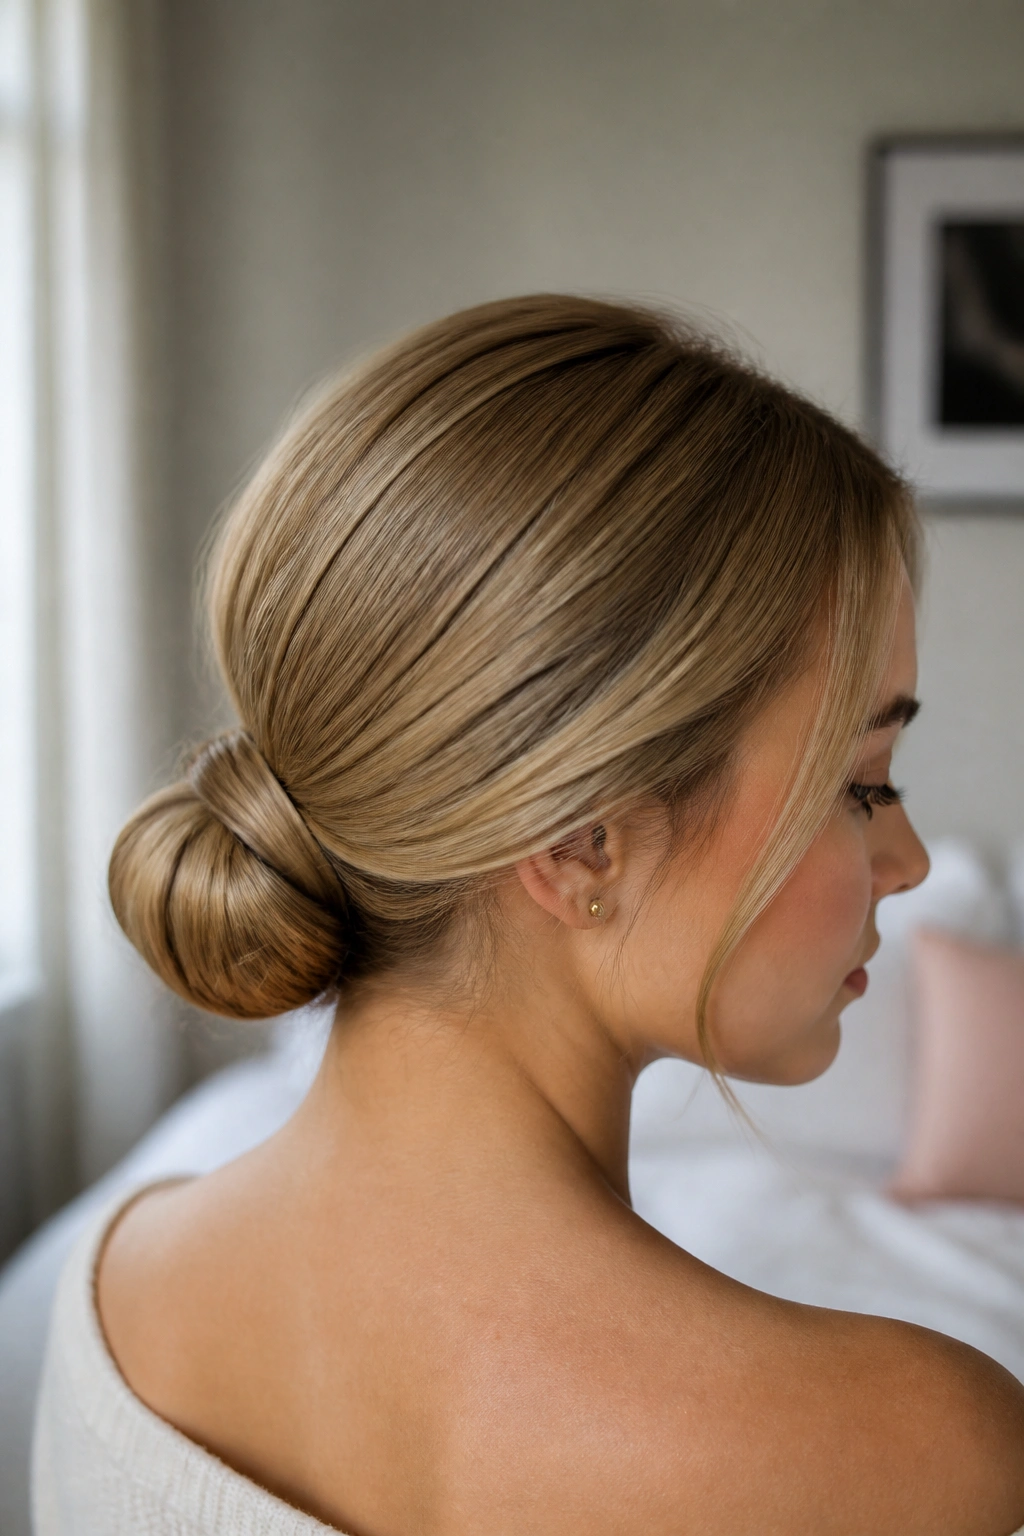
A sleek low knot chignon is the style I reach for when I want the neckline to do some of the talking. It sits low, stays calm, and looks sharper than a loose bun without feeling fussy. On medium-length hair, that balance matters because you have enough length to build a real knot, but not so much that the bun turns bulky.
Why It Works
The shape is compact, which keeps the style from sliding around during the day. A center part makes it look modern fast, though a deep side part can soften it if that suits your face better. The real trick is to keep the surface smooth while leaving the knot itself slightly rounded, not smashed flat.
Small Details That Matter
- Start with a little texture spray at the roots, especially if your hair is freshly washed.
- Gather the hair at the nape before you twist it, so the base stays low and neat.
- Use two bobby pins in an X shape under the knot instead of stuffing pins everywhere.
- Finish with a tiny bit of shine serum on the top layer only. Too much, and it goes slick in a bad way.
Best tip: Pin upward through the knot, not sideways through the hair. It holds better and hides the hardware.
2. Soft French Twist with Face-Framing Ends
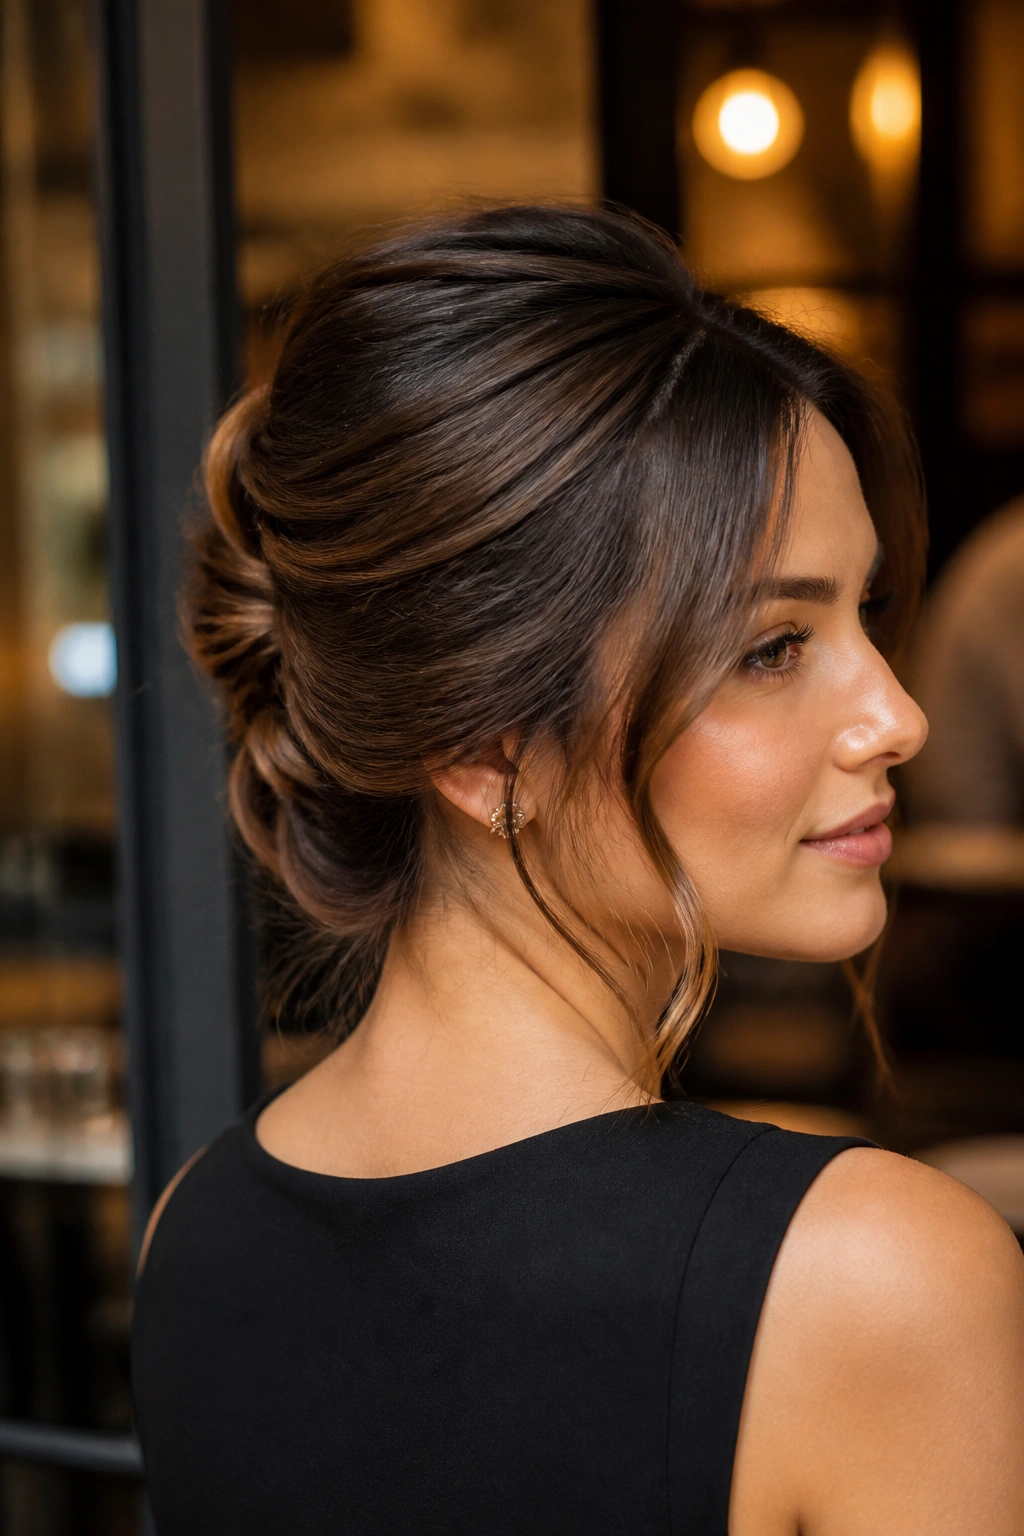
A French twist stops feeling stiff the moment you let the edges breathe. That’s the version I prefer on medium-length hair: smooth through the back, but with a couple of thin pieces left loose at the temples and maybe a few ends softly tucked instead of sealed away like packaging tape. It makes the whole thing feel less formal and more current.
This style works especially well if your hair has some bend to it already. You roll the length inward, tuck the ends, and pin vertically along the spine of the twist. If you go too tight, the whole look can start to feel dated. If you leave a little movement around the face, it looks deliberate.
No helmet hair. Please.
The best version of a French twist has a little tension at the center and a little softness at the edges. That contrast is what keeps it from looking like a costume. I’d wear this to a dinner, a gallery opening, or anywhere a low bun would feel too plain.
3. Braided Crown Bun
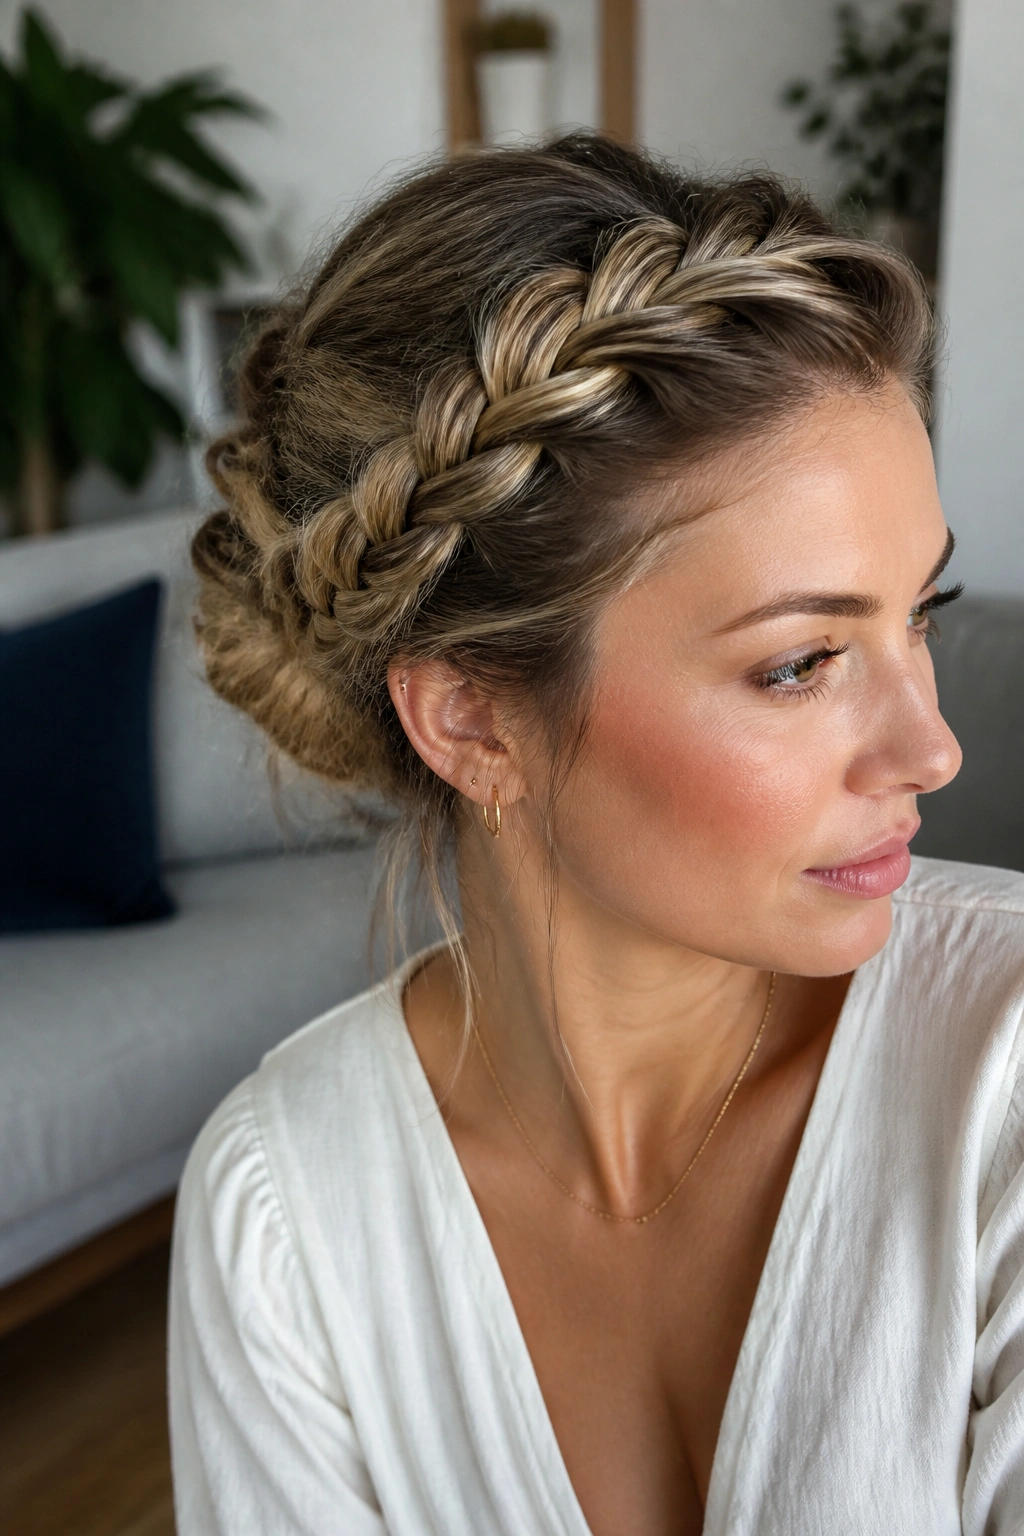
Need an updo that keeps shorter layers from escaping every five minutes? Braid first. A braided crown bun is one of the smartest modern updos for medium length hair because the braid does half the holding for you before the bun even goes in.
How to Style It
Start a braid just above one temple and work it across the hairline, either as a Dutch braid for more shape or a regular braid if you want something softer. Bring it around toward the other side, gather the rest of the hair low, then twist everything into a bun at the back. The braid becomes both decoration and anchor.
What Makes It Easier
- Mist the hair with dry texture spray before braiding.
- Keep the braid snug, but do not yank it flat.
- Secure the bun with pins placed inside the roll, not on top of it.
- Leave one tiny piece near the ear loose if you want the style to feel less severe.
Quick note: This is one of the better choices if your medium-length layers are slippery, because the braid gives the style teeth.
4. Twisted Low Bun with a Center Part
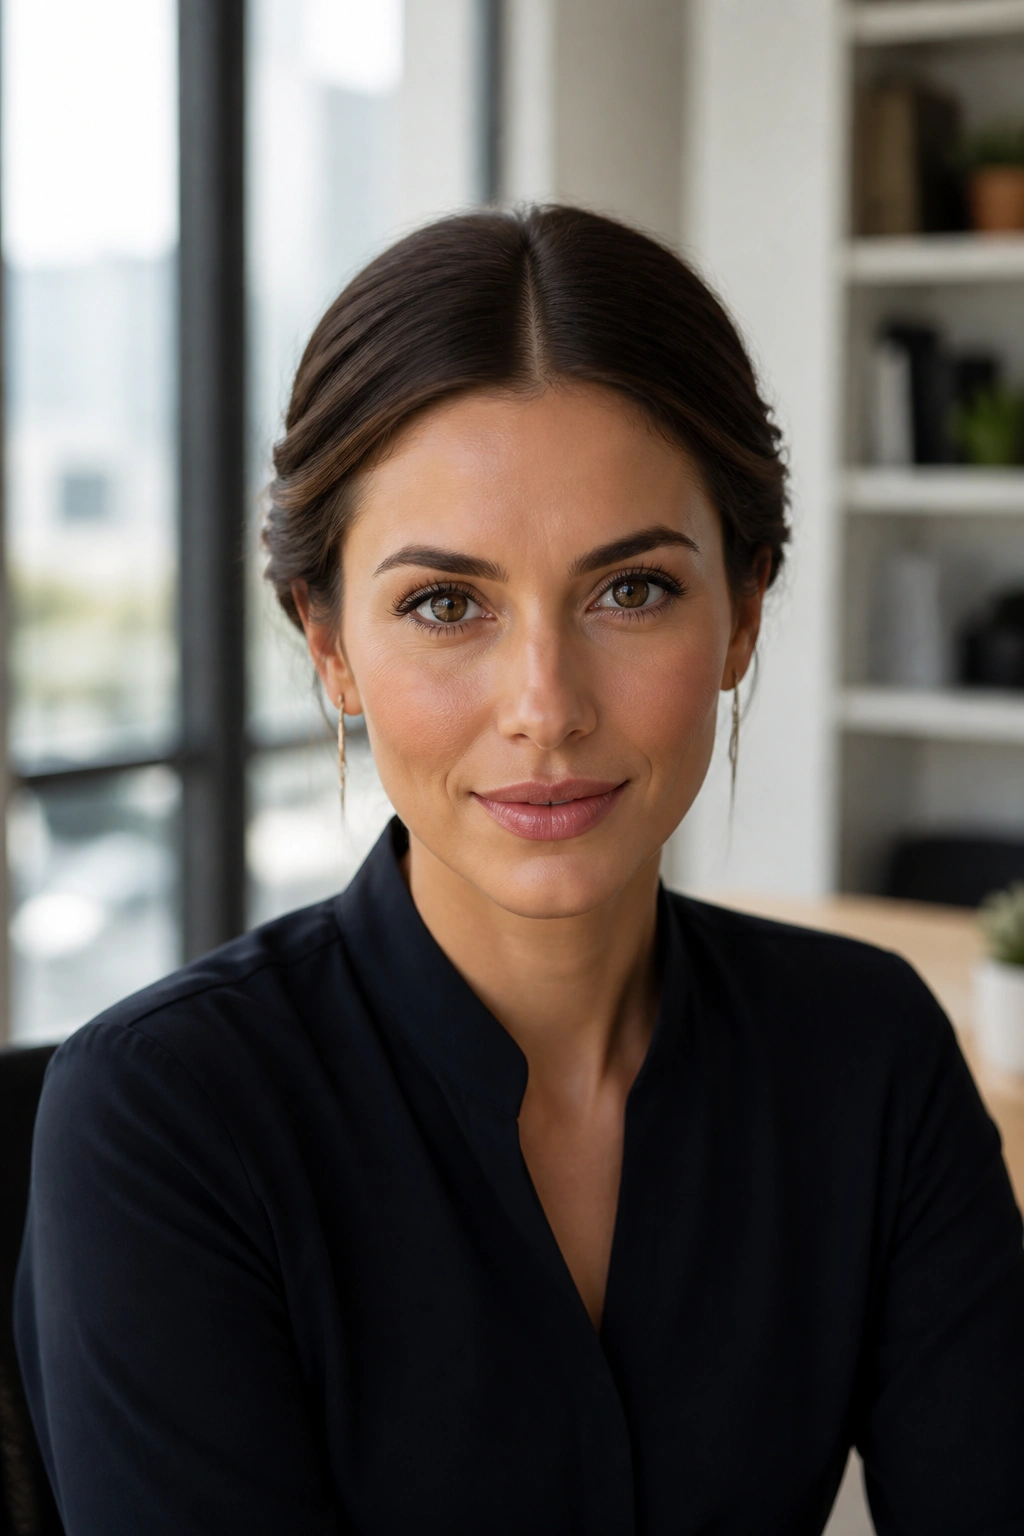
Picture a rainy workday, a blazer, and hair that still needs to look presentable by dinner. That’s exactly where a twisted low bun with a center part earns its keep. It is tidy without being cold, and the center part gives the whole shape a clean line that photographs well from the front without trying too hard.
The structure is simple. Split the hair down the middle, twist each side from the temples toward the nape, then join the two twists into a low bun. The twists should sit close to the head so the style feels smooth, but you want enough softness in the twists that they don’t read as severe.
A medium-length cut makes this easier than people expect. You usually have enough length for the twists to anchor, but not so much hair that the bun gets heavy. If the ends stick out a little, tuck them under and pin from below. That’s the part many people skip, and it matters.
A pair of small hoops or studs works well here. Big earrings can compete with the center part.
5. Messy Ballet Bun
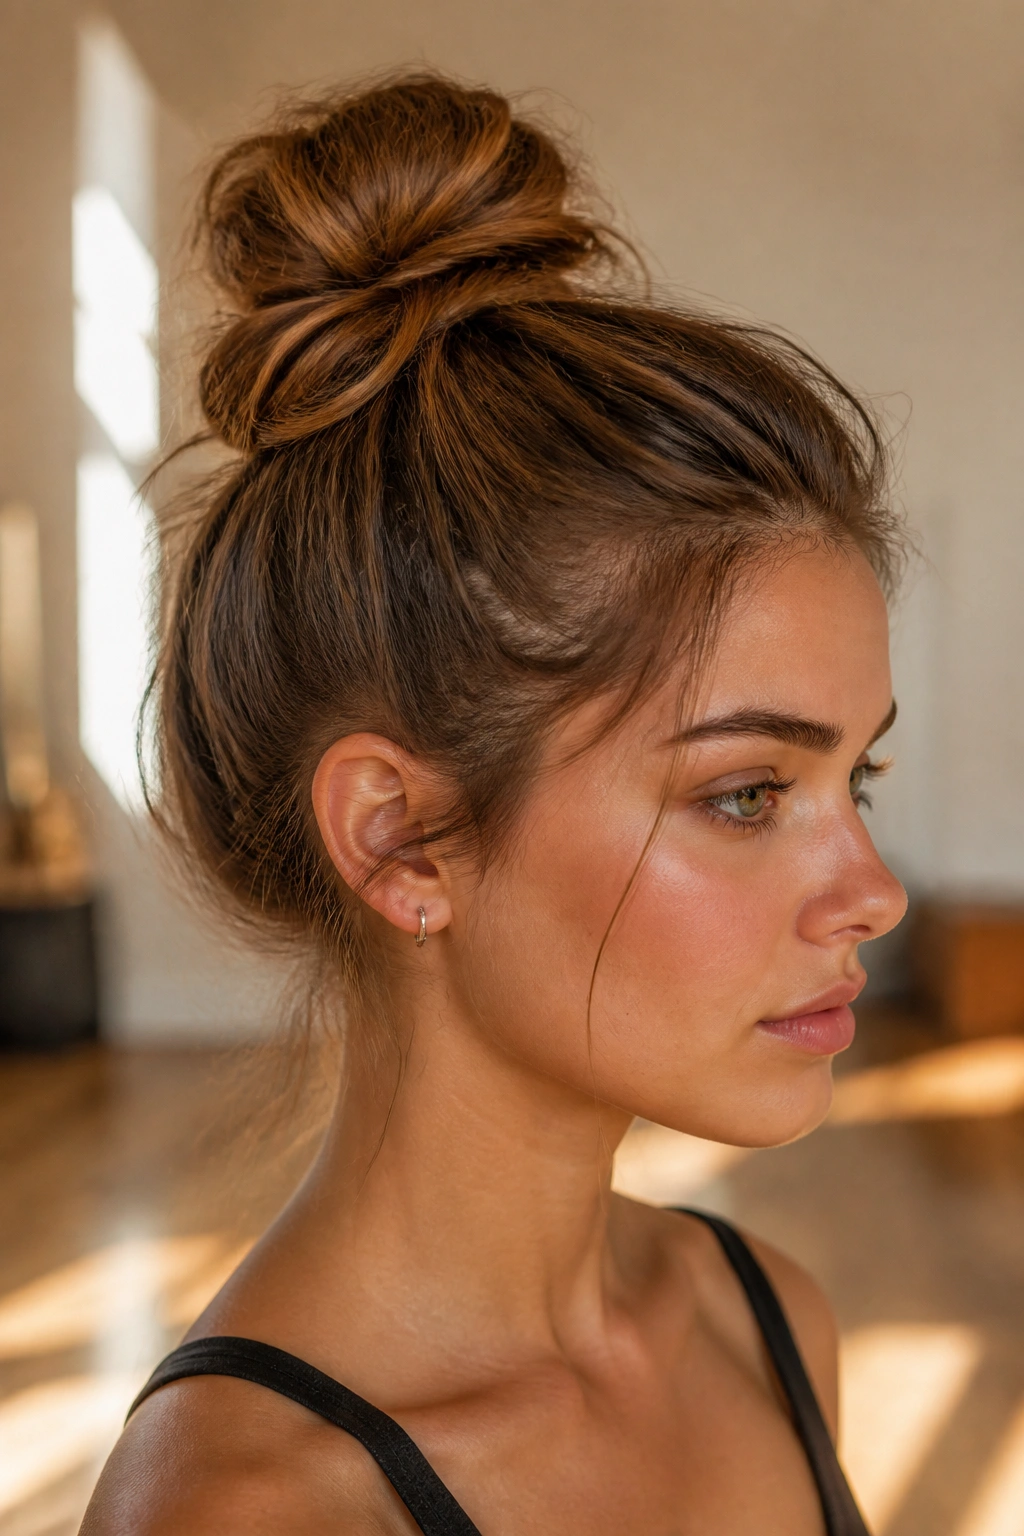
A messy ballet bun can go wrong fast if you confuse “soft” with “unfinished.” The version worth wearing keeps the shape controlled even when the surface has some lift and movement. On medium-length hair, that distinction matters because the shorter length can make a sloppy bun look accidental in a hurry.
What I like about this style is the contrast. The bun sits high enough to feel light, but not so high that it turns into a top knot. The crown gets a little lift, the ends are tucked in loose coils, and a few wisps stay out near the hairline. That’s enough. You do not need to shred the style to make it modern.
Compact beats fluffy here.
A little teasing at the crown helps, especially if your hair is fine or freshly blown out. Then wrap the hair around the base in a loose circle, pin the ends in several places, and stop before the bun starts to wobble. If you can shake your head and it still feels secure, you’ve done it right.
6. Knot-Through Bun
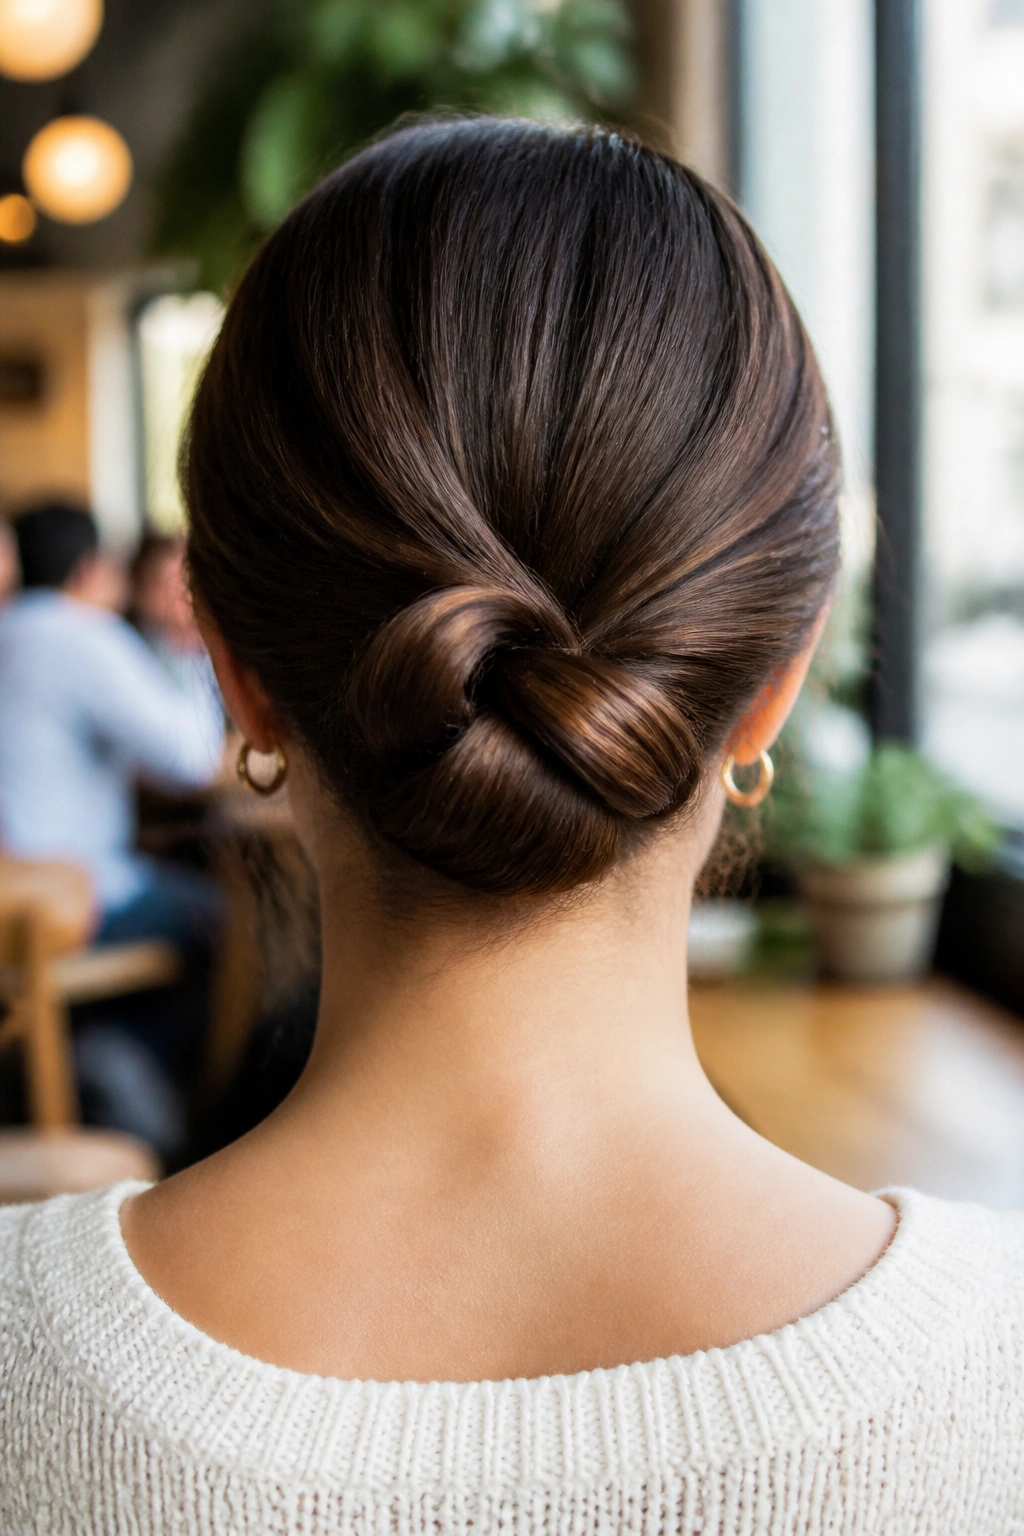
Unlike a classic wraparound bun, the knot-through bun shows you the crossing of the hair on purpose. That tiny bit of structure is what gives it a modern edge. It looks more designed, less like something you threw together in the bathroom mirror because you were late.
The trick is to split the ponytail into two sections, loop one through the other, and then tuck the remaining length into a compact bun or knot at the base. On medium-length hair, this works especially well because the tail is long enough to manipulate, but short enough that the finished shape stays small and crisp.
It’s a good choice when you want the back of the head to look interesting without adding braids or volume. I also like it for hair that has a few layers, because the knot gives those ends somewhere to disappear. If the hair is too silky, rough it up first with powder or spray; otherwise, the knot can slide loose before you leave the house.
7. Gibson Tuck with Crown Volume
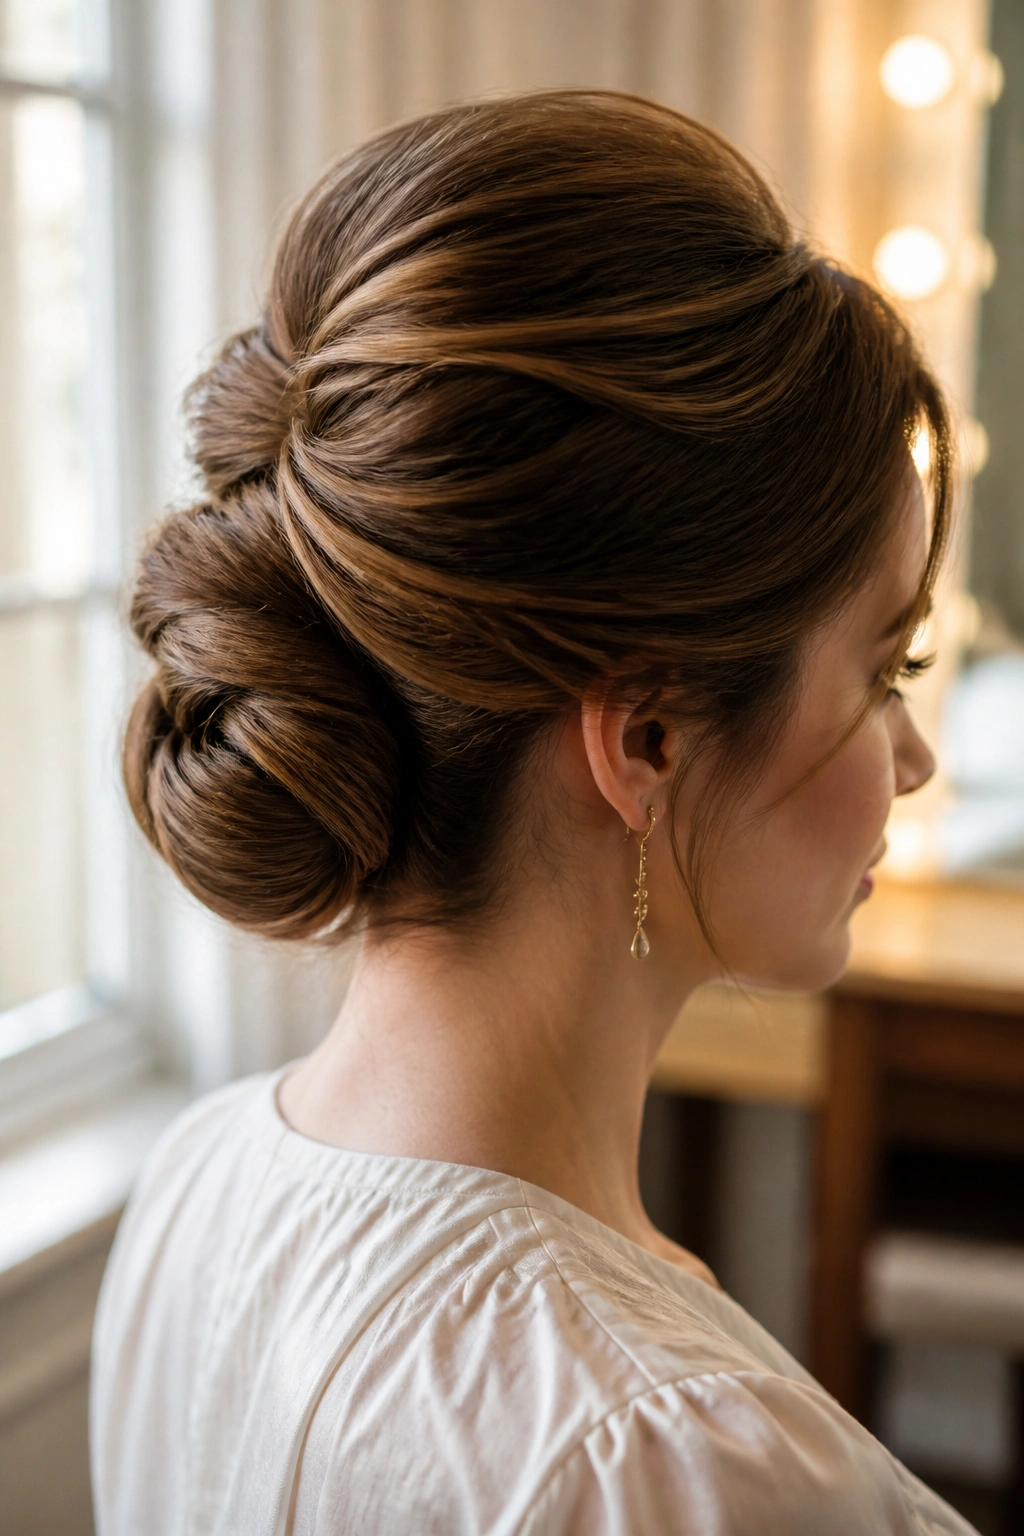
A Gibson tuck gives medium-length hair the kind of shape that looks polished from every angle. It’s low, rolled, and neat, but when you add a little lift at the crown, it stops looking flat or old-fashioned. That little crown volume is the difference between “formal hair” and “hair I actually want to wear.”
Why It Suits Medium-Length Hair
You do not need endless length to make it work. You only need enough hair to fold under itself and disappear into a soft roll. Medium hair usually lands in that sweet zone, especially if it has some bend or was set with a round brush. Straight, slippery hair can still do it, but it needs more grip.
Keep These Details in Mind
- Backcomb the top 2 inches at the crown if you want height.
- Smooth only the outer layer, not the whole head.
- Tuck the ends under gradually, pinning as you go.
- Finish with a light mist, not a hard shell.
My opinion: This is one of the best medium-length updos for formal settings because it looks finished without looking stiff.
8. Rolled Chignon at the Nape
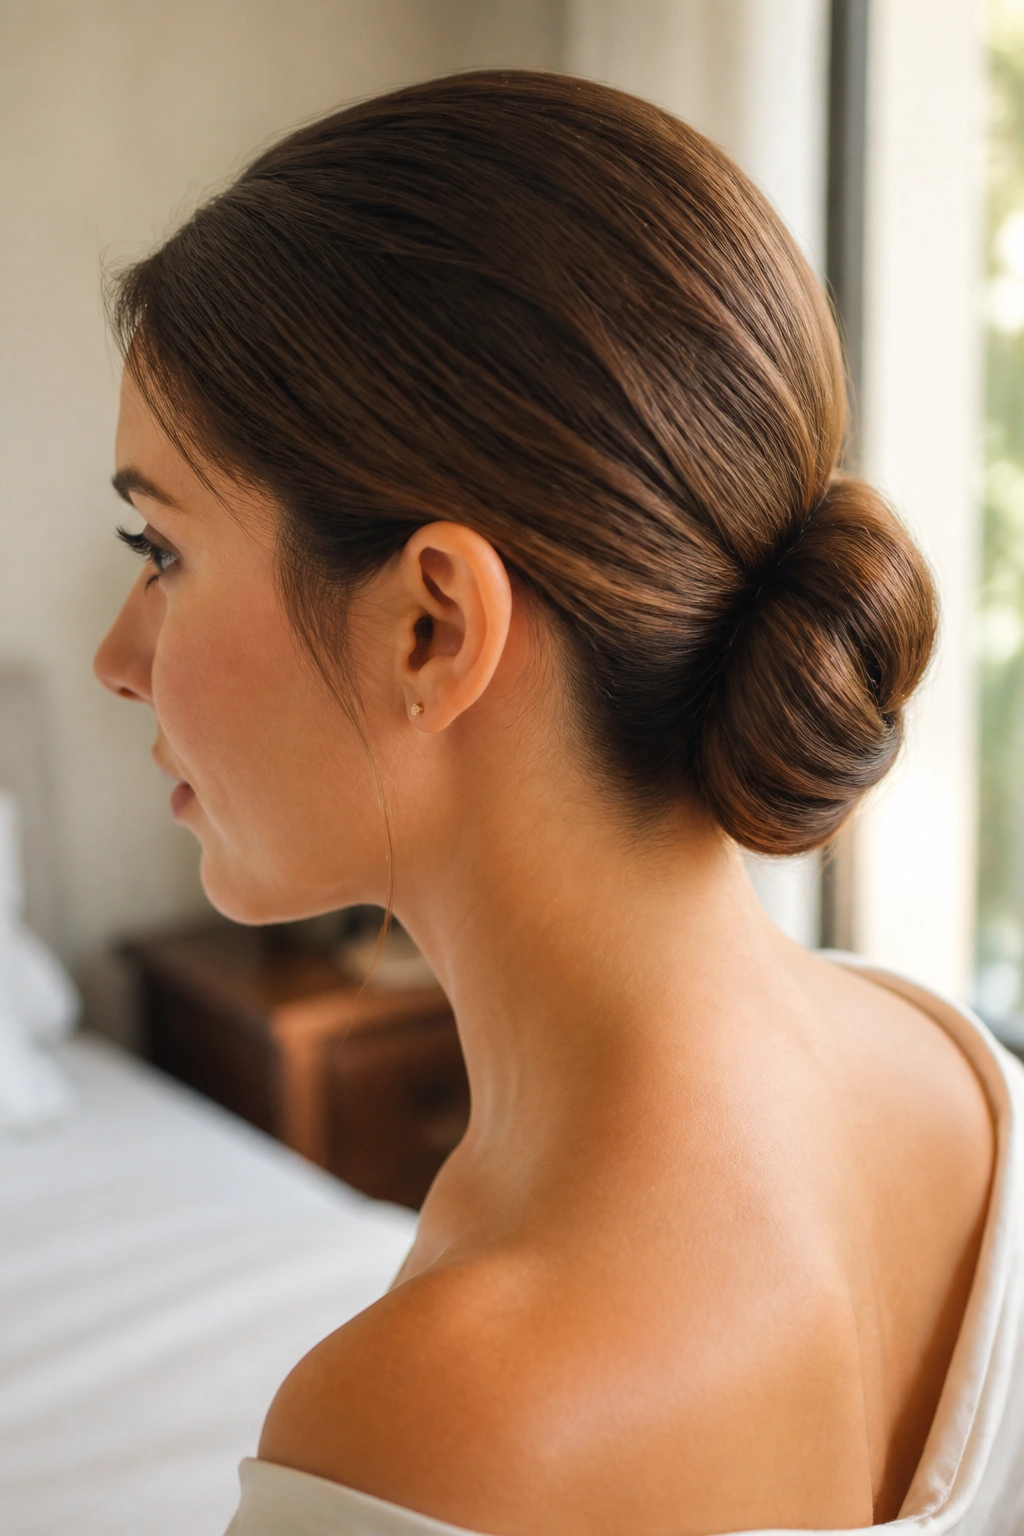
The rolled chignon at the nape is the clean answer when you want something low and orderly. It has the same calm mood as a classic bun, but the roll gives it a little more shape and a little less puff. For medium-length hair, that matters because you can build the roll without ending up with too much bulk at the back of the head.
This style works best when the hair has already been smoothed with a blow-dry or stretched slightly with a brush and heat. If the hair is too airy, the roll breaks apart. If it’s too slick, the pins slip. You want that middle ground where the surface lies flat but still has enough friction to stay where you put it.
I like this one for shirts with collars and dresses with open backs. The nape becomes the focal point, which is a nice change from styles that pile everything high. One careful row of pins along the roll keeps the shape clean. One careless pin job ruins it.
Grease kills this style.
9. Braided Low Pony Bun
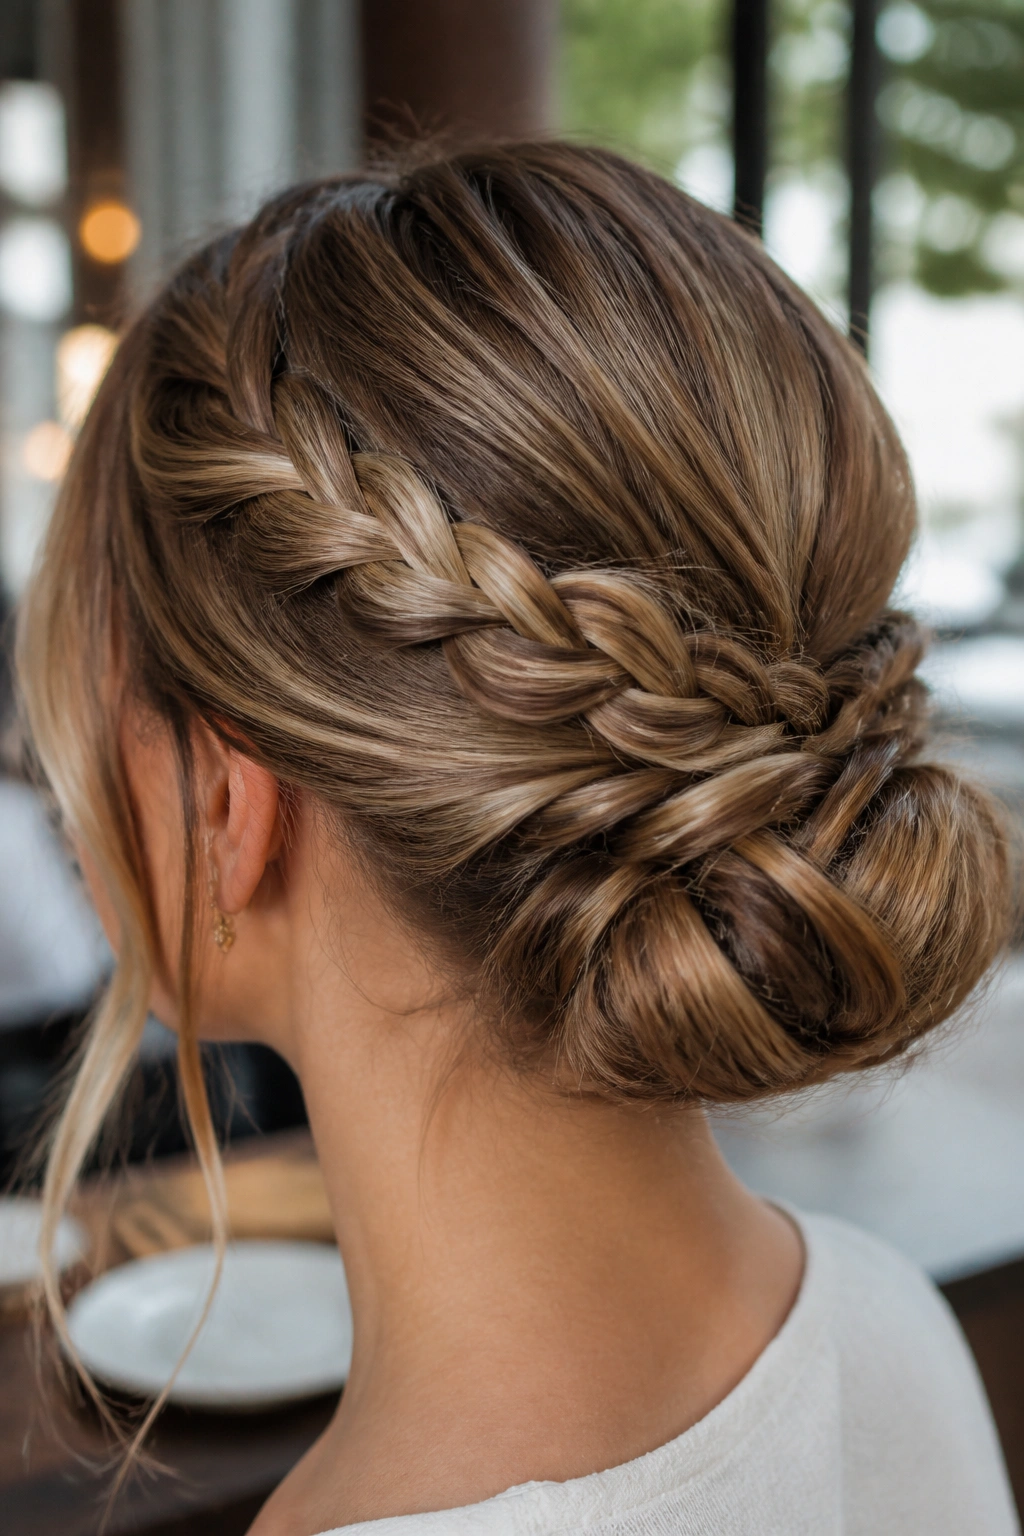
Want something that stays put through a long dinner or a humid walk across town? A braided low pony bun is a practical answer that still looks put together. The braid gives the ponytail a spine, and the bun built from that braid has more grip than a plain twist.
Start with a low ponytail at the nape, secure it tightly, and braid the tail all the way down. Then wrap the braid around the elastic and pin the braid’s end underneath the bun. That hidden end is what keeps the style from unraveling during the day. If your hair is layered, a clear elastic and a few extra pins help a lot.
How to Keep It from Slipping
- Spray the tail before braiding so the strands hold together.
- Keep the braid even, not loose in one spot and tight in another.
- Pin through both the braid and the base of the pony.
- Press the bun gently once it’s done so it sits close to the head.
This one reads sporty and elegant at the same time, which is a nice trick.
10. Wrapped Top Knot for Shoulder-Length Layers
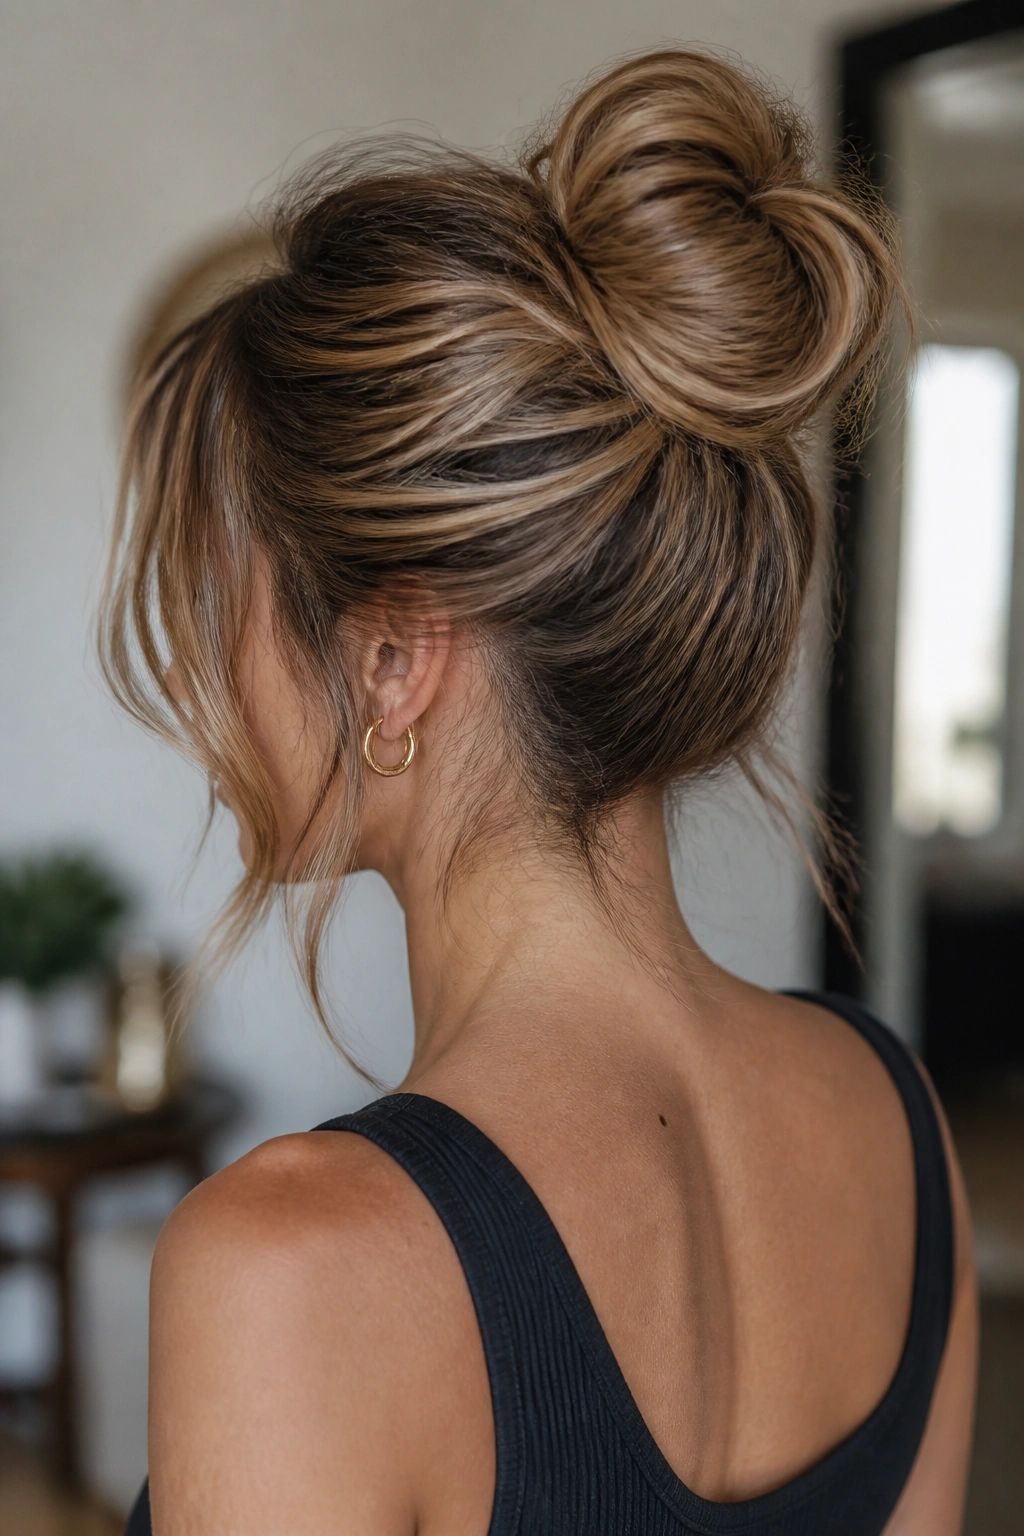
Shoulder-length layers can be annoying in high updos because the shorter pieces poke out where you least want them. A wrapped top knot fixes that by using the lengths you do have without pretending the hair is longer than it is. The result looks modern, not forced.
The key is placement. Don’t shove the bun all the way to the crown unless the hair is dense enough to support it. A slightly forward top knot, centered just behind the hairline, tends to hold better on medium-length cuts. Twist the ponytail, wrap it around the base, and use the shorter ends to lock the knot in place under the elastic.
A little mess around the face is fine. Too much, and the style turns fussy. Too little, and it looks severe. That middle zone is where this updo lives, and it’s a good zone.
If your layers keep falling free, pin them in the direction they want to lie instead of forcing them straight back. Hair usually tells you where it wants to sit. Listen to it.
11. Side-Swept Chignon
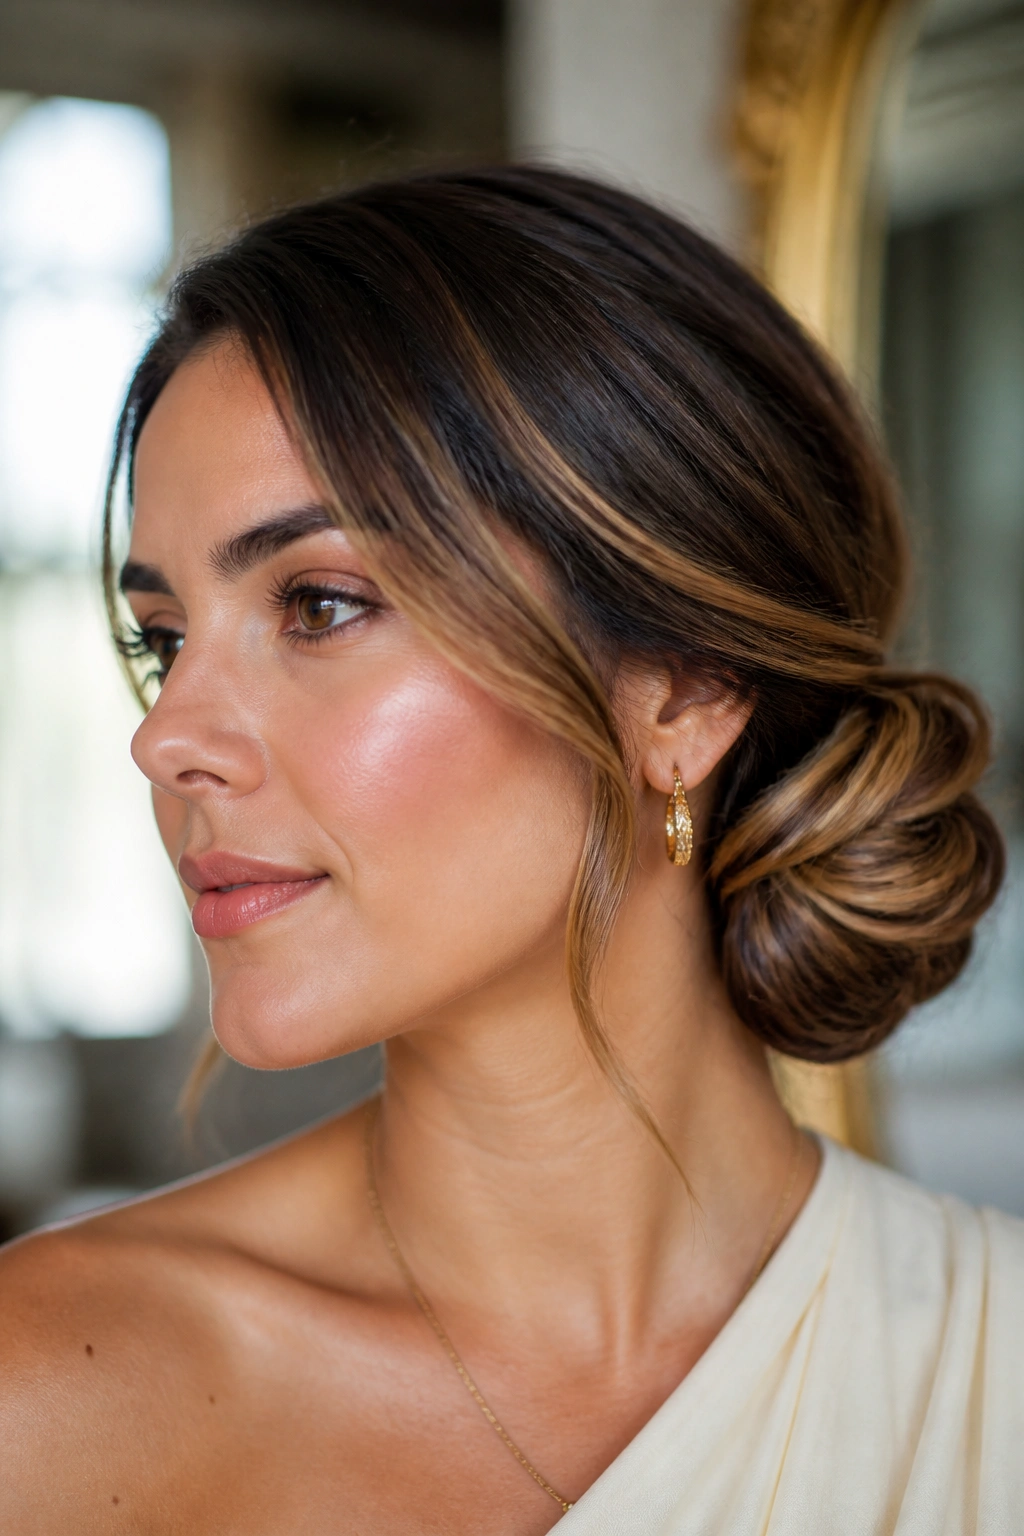
A side-swept chignon has a softer mood than a centered bun, and I think that’s why it keeps showing up in wardrobes that lean elegant rather than severe. Pulling the hair to one side changes the line of the whole head, so the style feels less formal even though the technique is still controlled.
This is one of those updos that works especially well with a dress or top that leaves one shoulder bare. The chignon settles low behind one ear or just under it, which gives the neckline some space. It also pairs nicely with earrings because the hair opens up the opposite side of the face instead of covering everything evenly.
The trick is not to overbuild the bun. A side chignon needs shape, yes, but not size. If it gets too large, it starts fighting the angle of the head and looks awkward from profile. Keep the base snug, wrap the ends in a smooth curve, and let one small section soften near the cheek if you want movement.
Sometimes less hair on one side is the whole point.
12. Double-Twist Updo
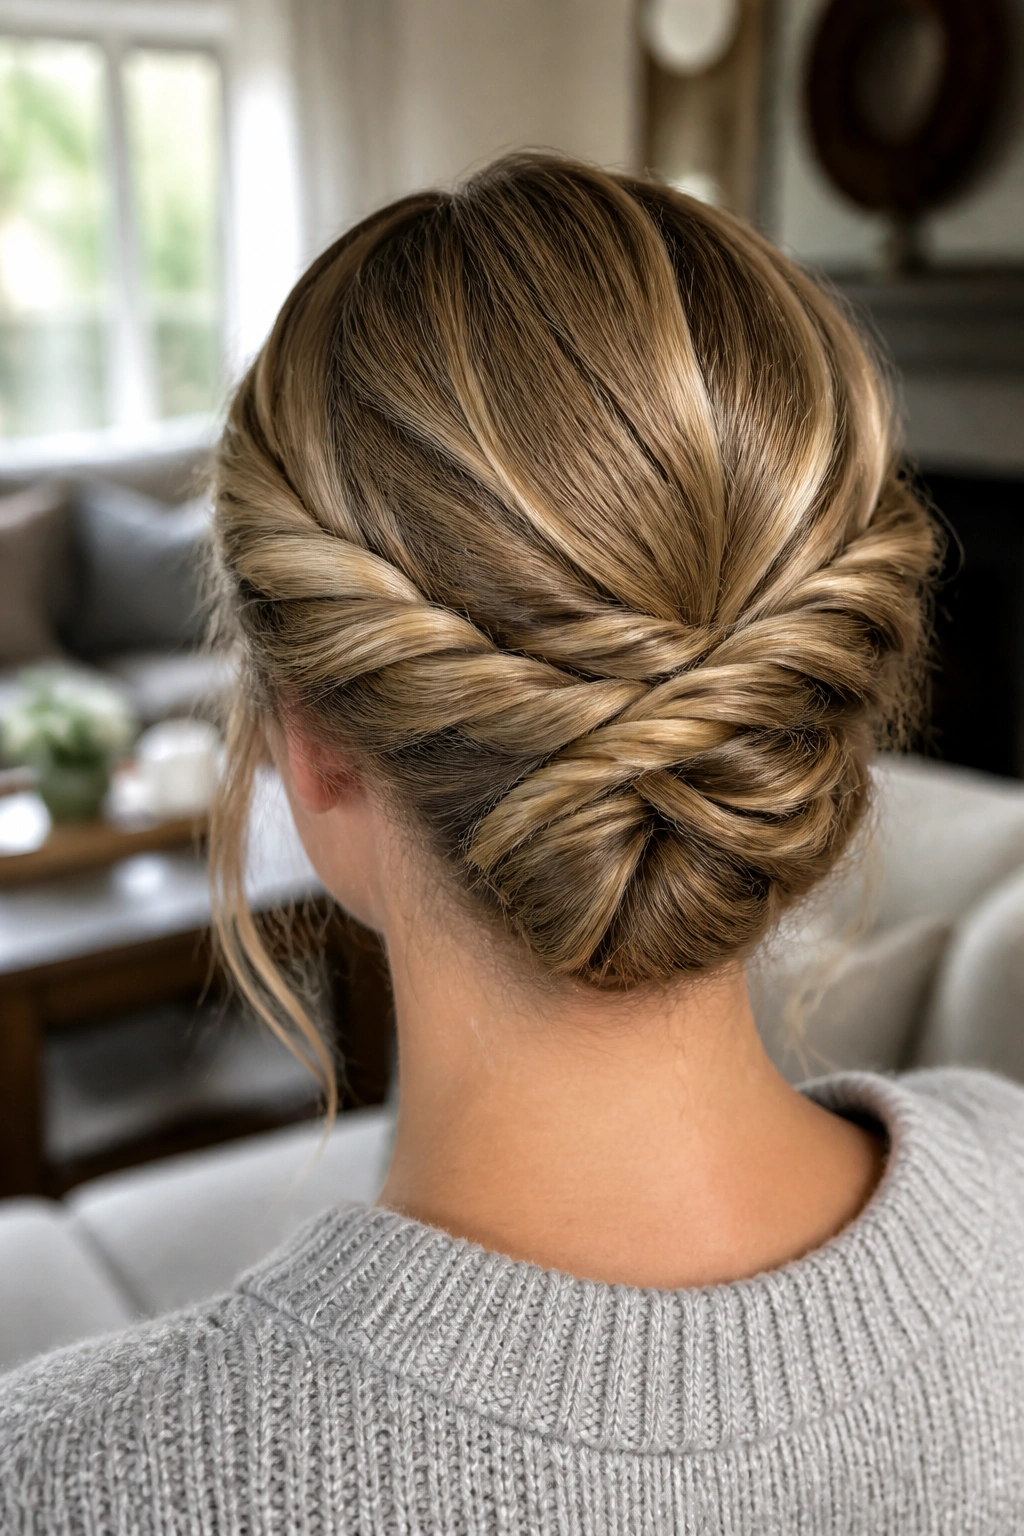
Unlike a braid, a double-twist updo gives you texture without the extra steps. Two sections twist cleanly into each other, and that crossing creates visual interest even on medium-length hair that doesn’t have a ton of thickness. It’s a nice option when you want something more relaxed than a bun but more structured than loose pins.
Start by dividing the hair into two main side sections. Twist each one from the temple toward the back, then cross them over one another and pin where they meet. If you want more polish, roll the ends inward and hide them under the crossing point. If you want a softer feel, leave the ends tucked loosely so a few pieces escape.
The biggest advantage is speed. You can do it with a mirror and a handful of pins, and it still looks deliberate. I’d wear this for a work presentation, a brunch, or a night out where you want your hair off your neck but not fully bundled up.
A light mist at the end is enough. Heavy spray can make the twists look carved instead of soft.
13. Pinned French Roll for Fine Hair
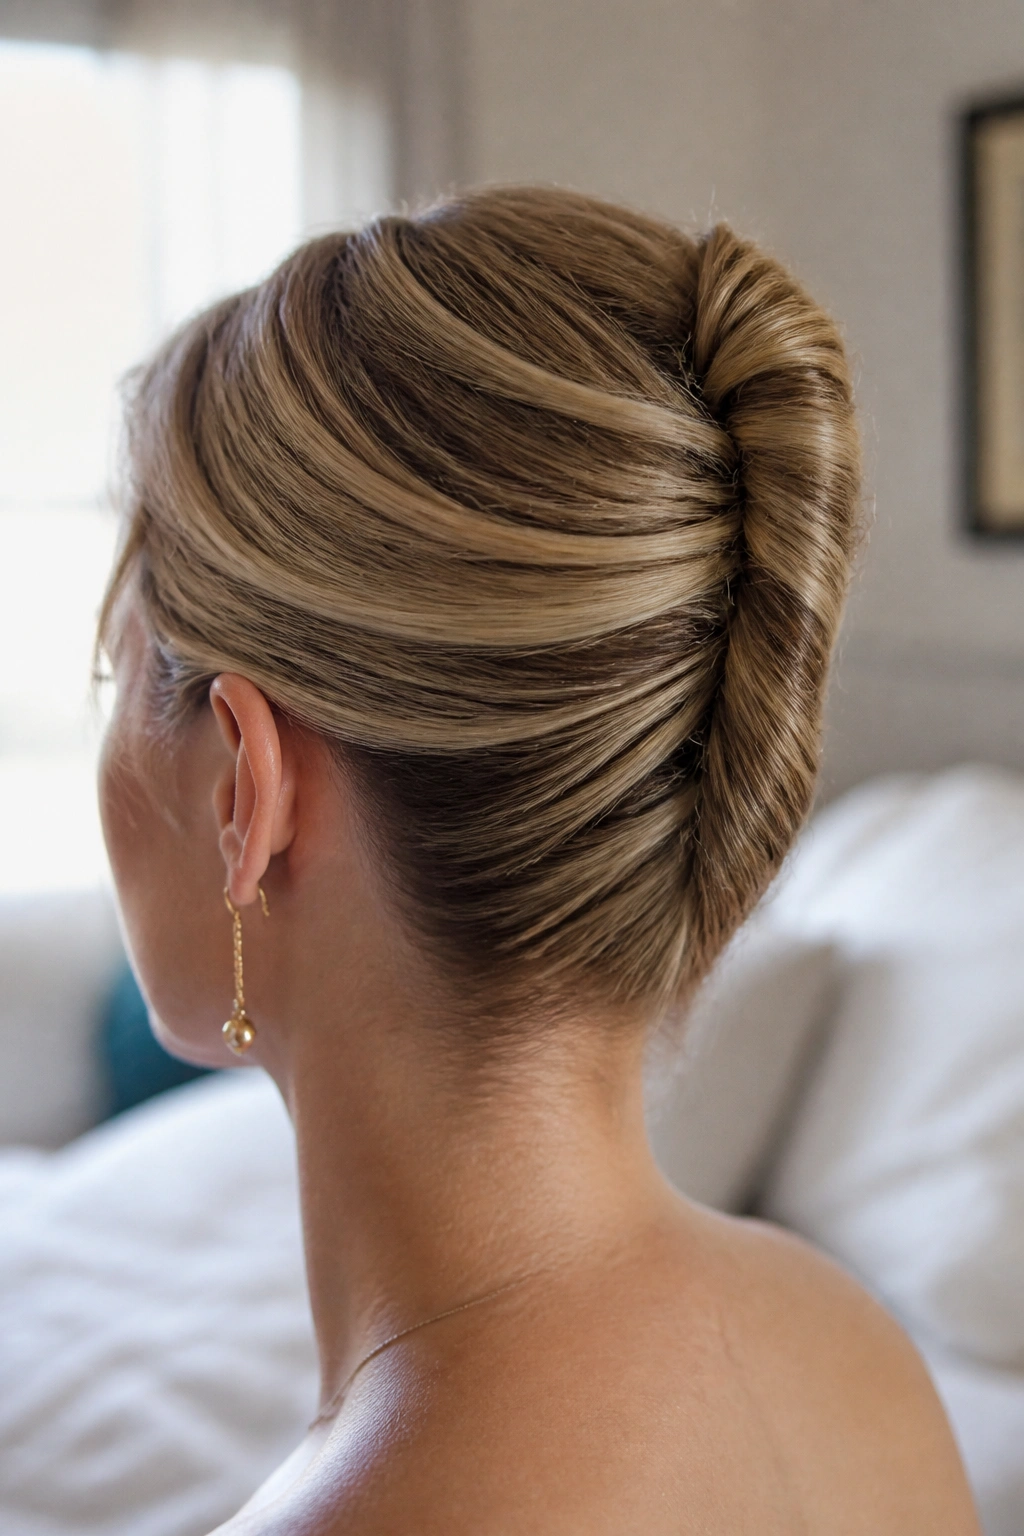
Fine hair can do a French roll beautifully if you stop trying to force volume where it does not naturally want to be. The pinned French roll for medium-length hair is all about smart support, not excess teasing. It stays sleek, but the shape still has enough lift to feel modern.
Why Fine Hair Likes It
The roll gives fine strands a shape they can hold without needing a giant bun. Because the hair is folded upward and pinned in a straight line, you avoid the sagging that can happen with heavier updos. Medium length helps here, too, because the ends tuck in more easily and the roll stays slimmer.
Small Moves That Help
- Backcomb only the top layer at the crown, about 2 inches deep.
- Smooth the outer surface with a soft brush, not a hard one.
- Pin every 1 to 1.5 inches along the roll.
- Use a hairnet under the final pass if the style needs extra control.
A little root lift makes the whole thing look intentional. Too much makes it look overworked, which is the last thing you want.
14. Textured Mini Bun Cluster
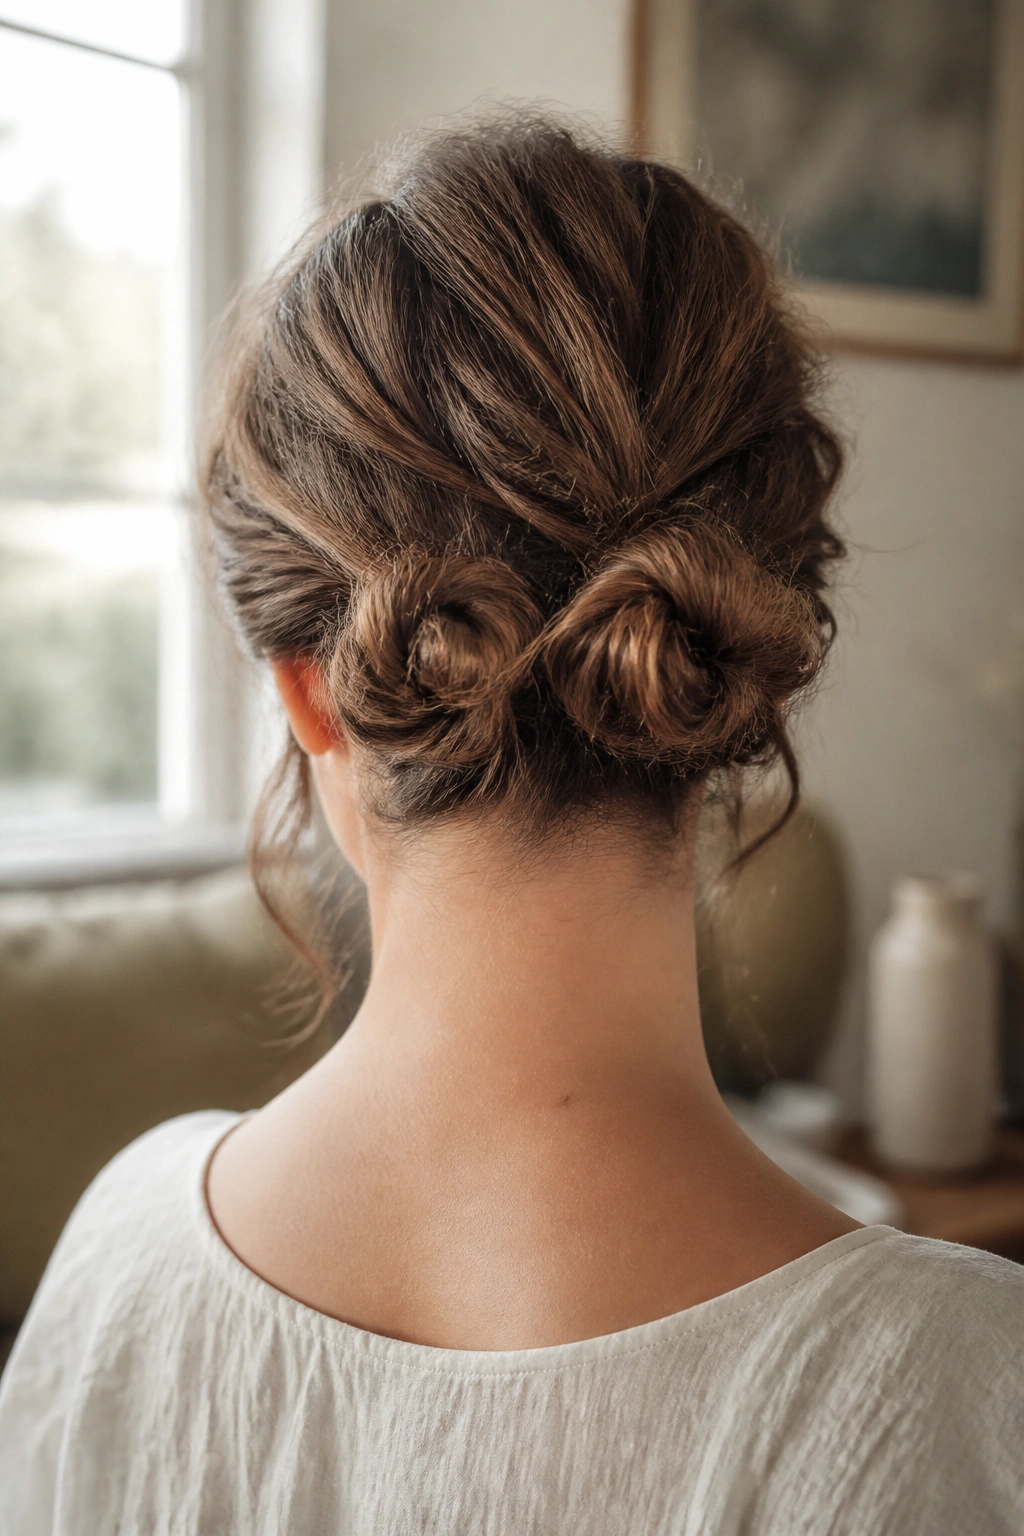
This style sounds odd until you see it on the head. Then it makes sense fast. A textured mini bun cluster uses two or three small buns or loops placed close together at the back of the head, and the effect feels more editorial than a single big bun on medium-length hair.
I like it because it breaks the shape up. Instead of one heavy knot sitting at the nape, you get a cluster of smaller forms that look lighter and a bit more modern. The trick is to keep the spacing tight so the style reads as one composition, not a row of random knots.
The hair should have texture before you begin. If it is too soft, the mini buns collapse into each other and lose the point. If it is too frizzy, the shape turns messy in a bad way. Controlled mess is the goal. Chaos is not.
It works best when you place the cluster slightly off-center or low in the back. Dead center can feel too perfect.
15. Rope-Braid Bun
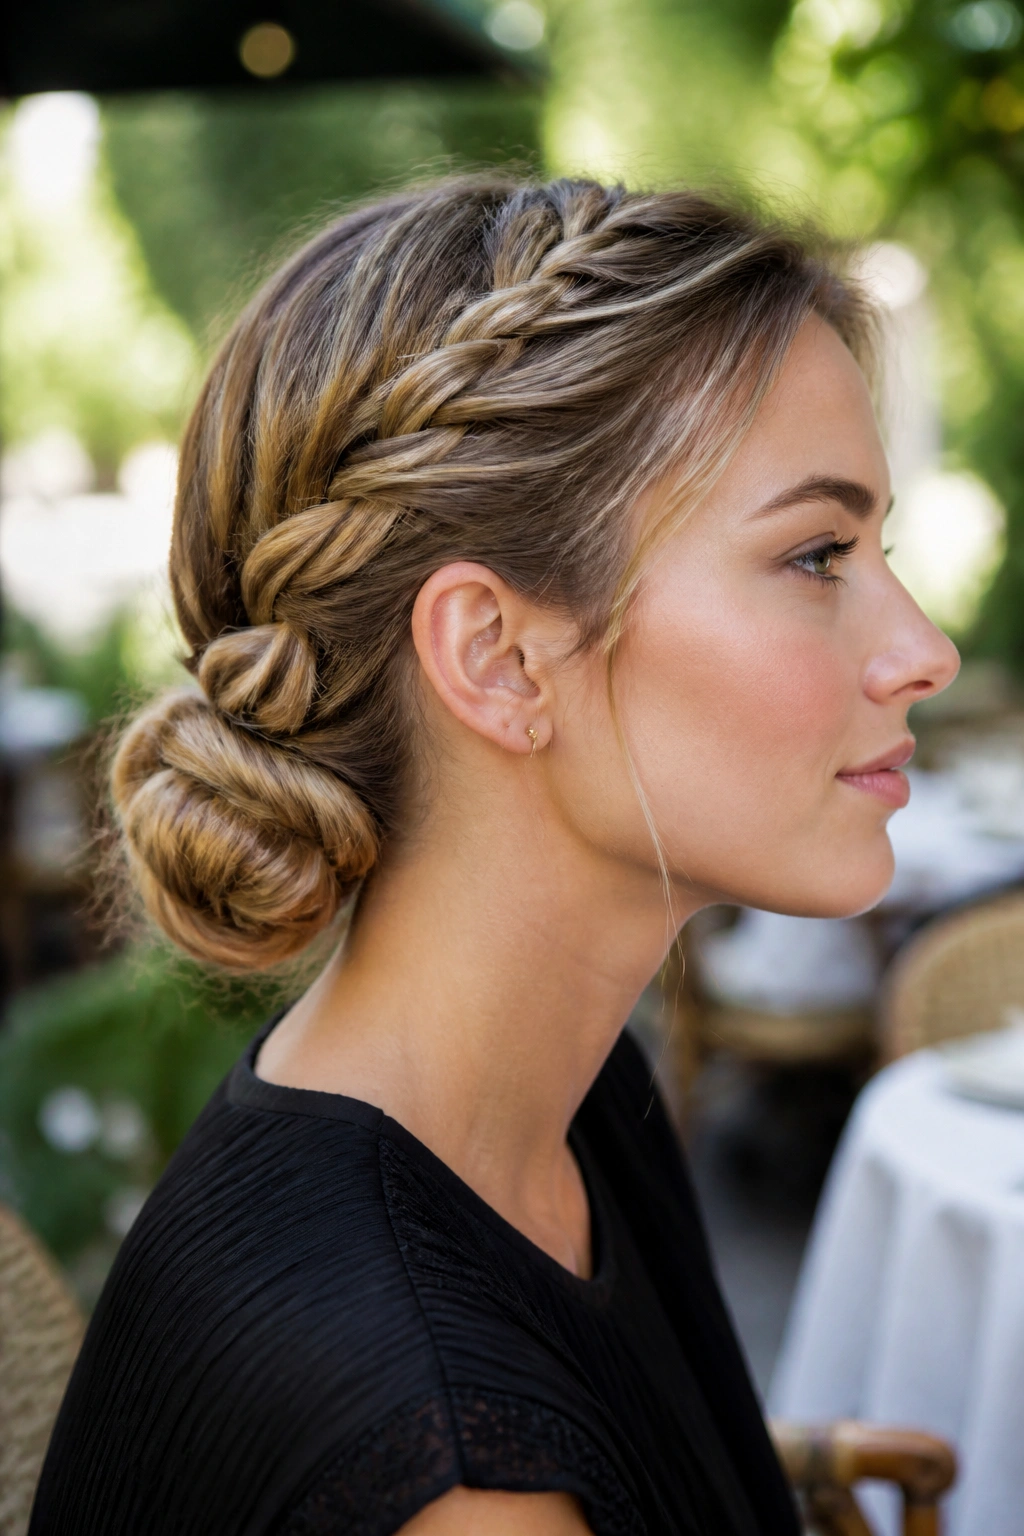
Want structure without wrestling a four-strand braid? A rope-braid bun gives you plenty of shape with less fuss. It also behaves nicely on medium-length hair because rope braids use the hair’s own twist to create hold, which means you usually need fewer pins than you’d think.
How to Use It
Split the hair into two large sections, twist each section in the same direction, then wrap them around each other in the opposite direction. That’s the rope braid. Once you’ve made one or two long ropes, coil them into a bun at the nape or slightly higher and pin the loops under themselves. The braid should feel snug, not stretched to the point of breaking.
What to Watch For
- Twist each side evenly so one rope doesn’t end up thicker than the other.
- Keep your hands close to the head while wrapping.
- Pin the bun at the base first, then secure the outer curve.
- Use a little texture spray if the hair is too smooth to grip.
This one is especially good for layered cuts because the twist gathers the shorter pieces neatly.
16. Sleek Side Bun with a Hidden Elastic
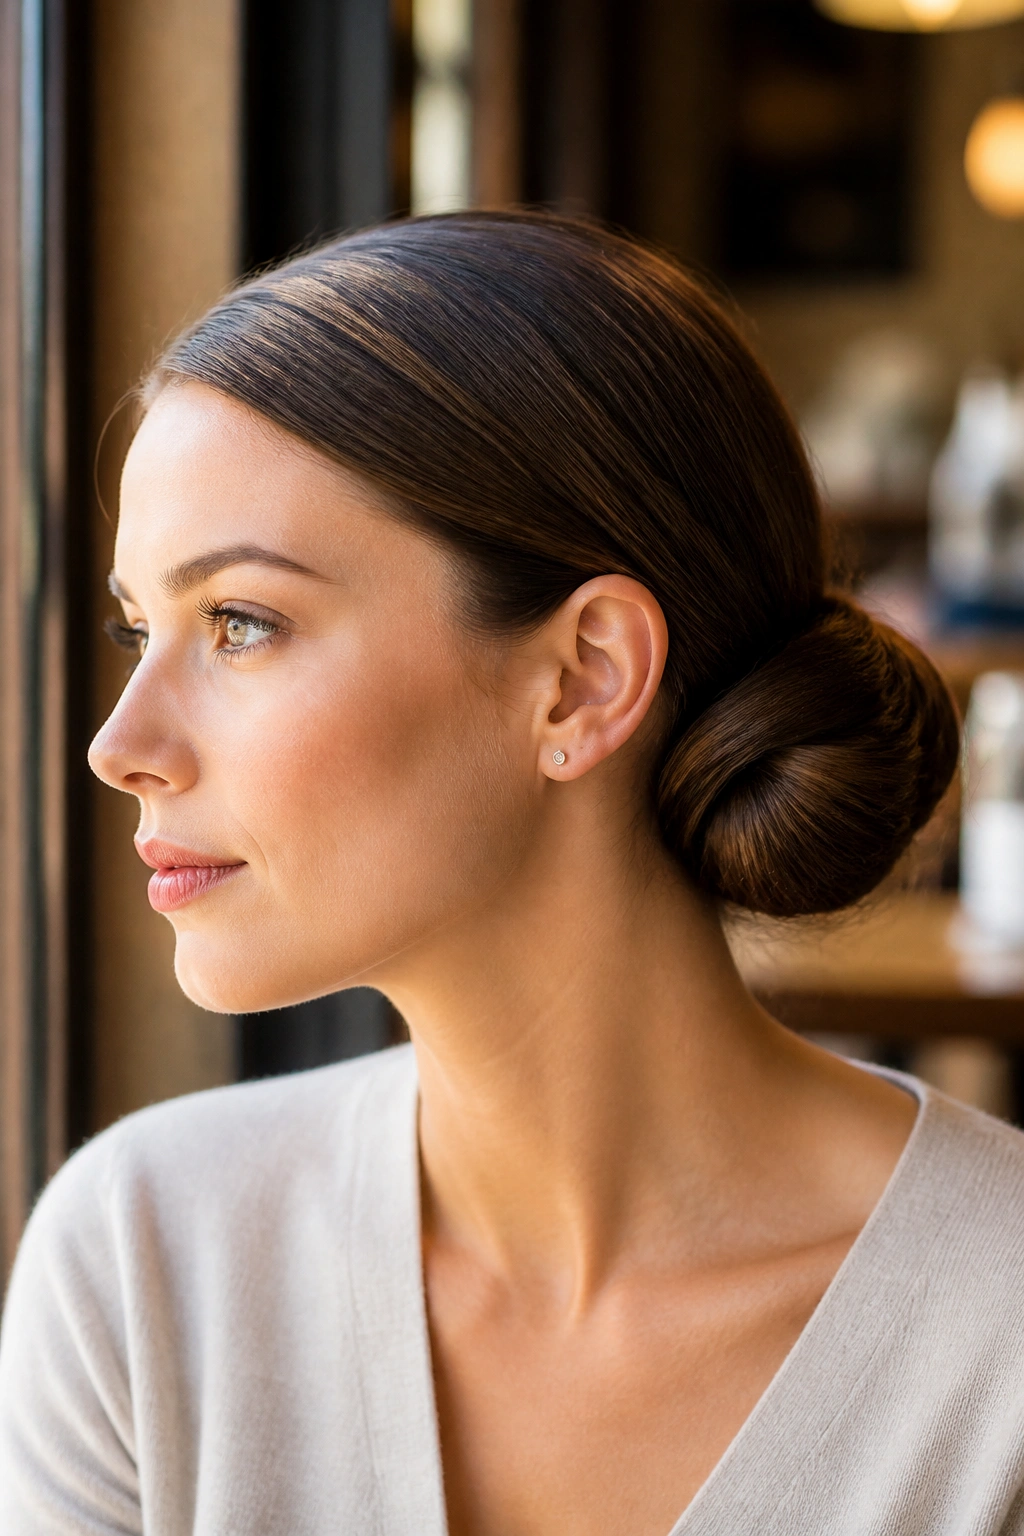
There are days when you want polished, but not severe. A sleek side bun with a hidden elastic lives right there. It sits low and to one side, usually just behind the jawline, and the elastic disappears under a wrapped piece of hair so the whole thing looks cleaner than a standard side pony.
This style is strong on medium-length hair because the shorter length keeps the bun compact. Long hair can make a side bun swell outward, which changes the shape more than you may want. Here, the compactness is the point. The bun stays close to the head and leaves the neckline open in a flattering way.
I like this with simple clothes and a statement earring on the opposite side. The asymmetry does the work for you. If your hair slips, rough up the underside before you gather it. The top layer can stay smooth, but the hidden section needs grip.
A hidden elastic makes a bigger difference than people think. It keeps the silhouette neat even if the wrapped piece shifts a little during the day.
17. Soft Halo Twist
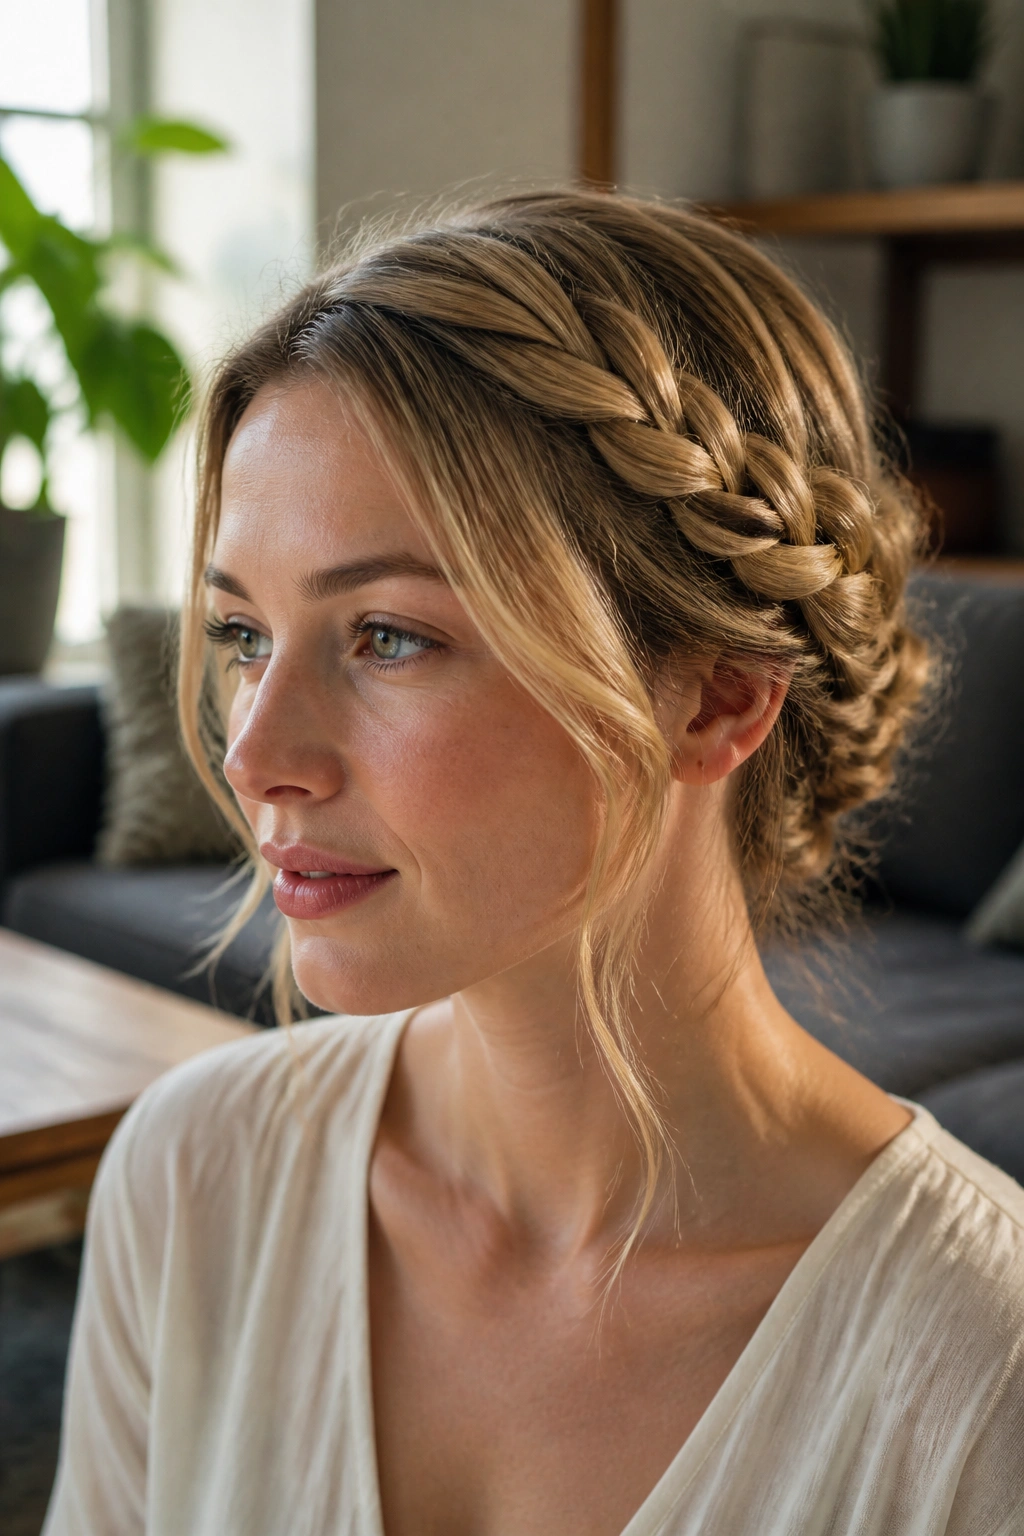
A soft halo twist is a gentler answer to a crown braid. Instead of plaiting the hair all the way around, you twist sections from each side and let them meet at the back. The result sits like a loose halo around the head, but it feels softer and less formal than a full braided crown.
This is one of my favorites for medium-length hair because it keeps the front under control without pulling everything tight. The twist along the hairline opens the face, while the back stays low and relaxed. If you’ve got waves, even better. The movement reads as part of the style, not a mistake.
Leave the ends soft.
That one choice changes the whole mood. If you tuck everything hard and tight, the halo can start to look serious. If you let a few ends hide beneath the twist and keep a small bit of texture at the temples, the style feels easier to wear. It’s a good choice for daytime events, warm weather, or any outfit that needs a softer frame around the face.
18. Low Swirl Chignon
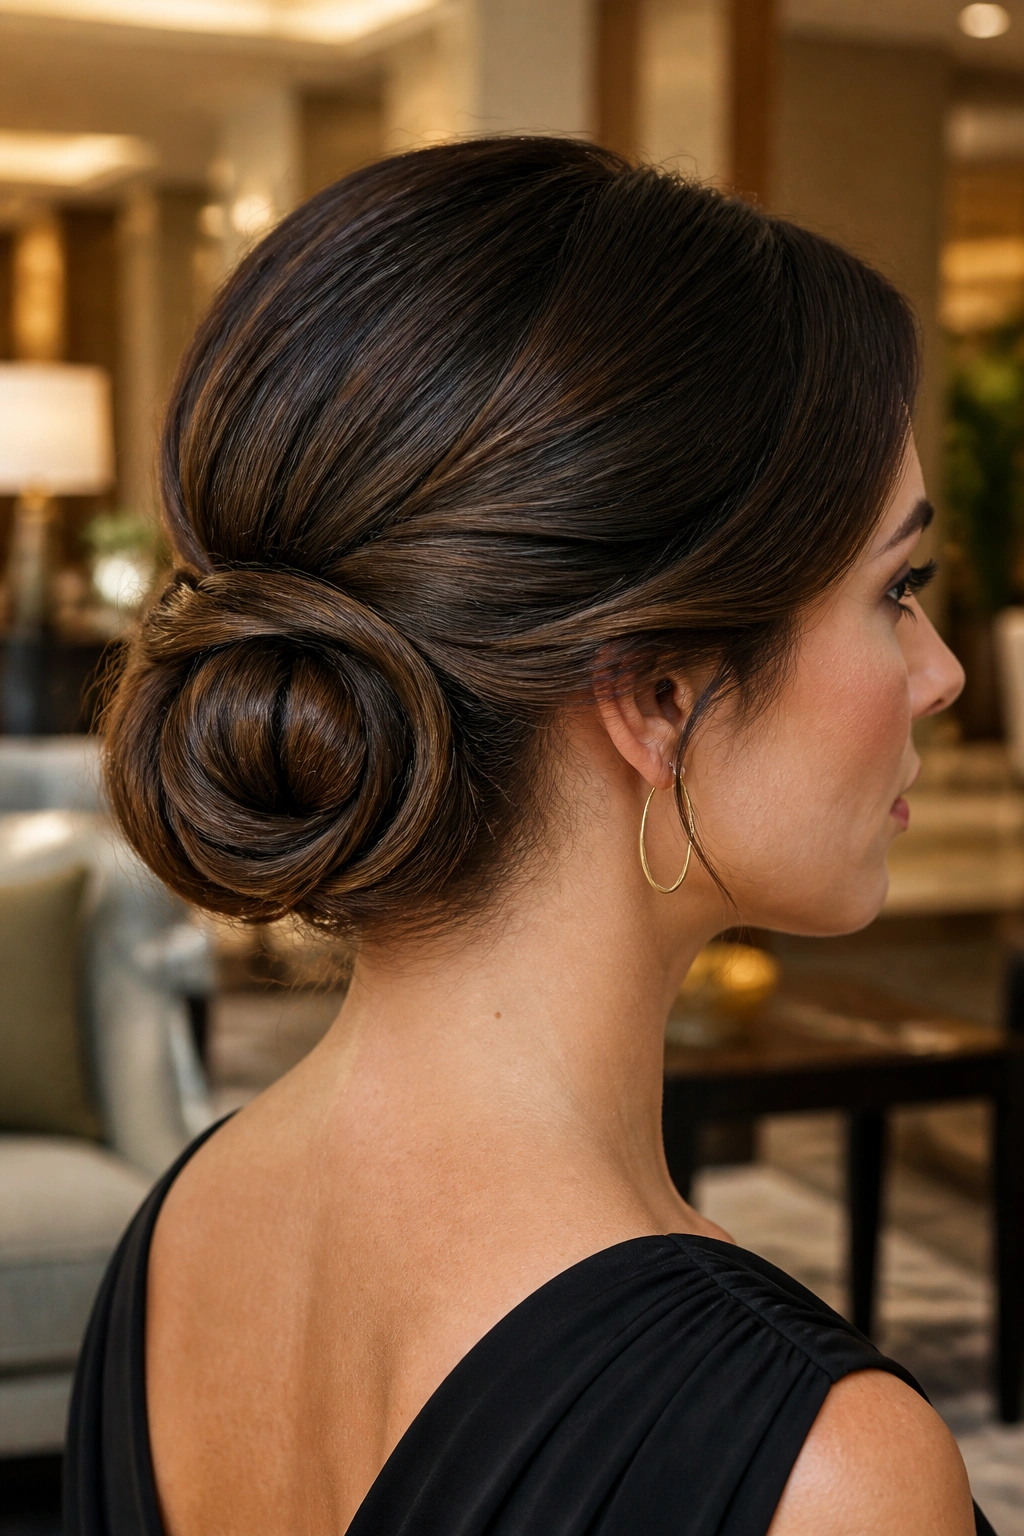
A low swirl chignon looks more tailored than a basic bun because the hair moves in one visible direction before it disappears into itself. That swirl gives the style a sense of shape, and on medium-length hair it can be easier to build than a giant wrapped bun that wants to fall apart halfway through the evening.
The trick is to create a smooth base, then guide the hair around the nape in a spiral rather than just looping it randomly. Start with a low ponytail, twist the length gently, and wrap it around the base in a circular line. Pin the spiral as you go, not only at the end. That’s what keeps the curve visible.
A side part can make the swirl look even cleaner, though a center part works if you want the front to stay simple. Either way, this is one of those chignons that looks more expensive than it feels to wear. The hair stays low, the shape stays defined, and the ends disappear neatly under the curve.
If you want one modern chignon that can move from office to dinner without a change, this is the one I’d pick.
Final Thoughts
Medium-length hair gives you more options than people tend to admit. It’s long enough for real shape, but short enough that the style can stay crisp when you pin it with intent instead of just piling it up and hoping for the best.
The styles that work best all share the same basic idea: build a solid base, keep the surface controlled, and leave a little softness where it helps the face. That can mean a loose strand, a center part, a braid, or a cleaner nape line. Small choices. Big payoff.
If an updo starts to slip, don’t keep adding spray. Slide in two bobby pins in an X under the weight point and pin closer to the scalp. That tiny fix usually does more than another round of hairspray ever will.
