



Medium-length hair can be maddening on the wrong day. It’s long enough to slip out of place, short enough to refuse a clean wrap, and layered enough to leave a few stubborn pieces doing their own thing no matter how neat you try to be.
That is exactly why trendy updos for medium length hair are worth your attention. This length has a sweet spot that people underestimate: enough hair to twist, pin, braid, and tuck, but not so much that the style turns heavy or fussy. Done well, it can look polished in five minutes and still feel soft enough for real life.
My favorite thing about this hair length is that it rewards smart structure. You do not need waist-length hair to get shape, and you do not need a mountain of styling product either. A few bobby pins in the right place, a little texture at the roots, and a style that respects the ends instead of bullying them—that’s the whole trick.
Some of these looks lean sleek. Some are loose and undone. A few are better on second-day hair, which is saying something because second-day medium hair is usually where the useful texture lives. Keep that in mind as you scan the styles below, because the best one is often the one that works with your hair’s actual behavior, not the one that looks prettiest on a perfectly staged head.
1. Low Twisted Chignon for Medium Length Hair
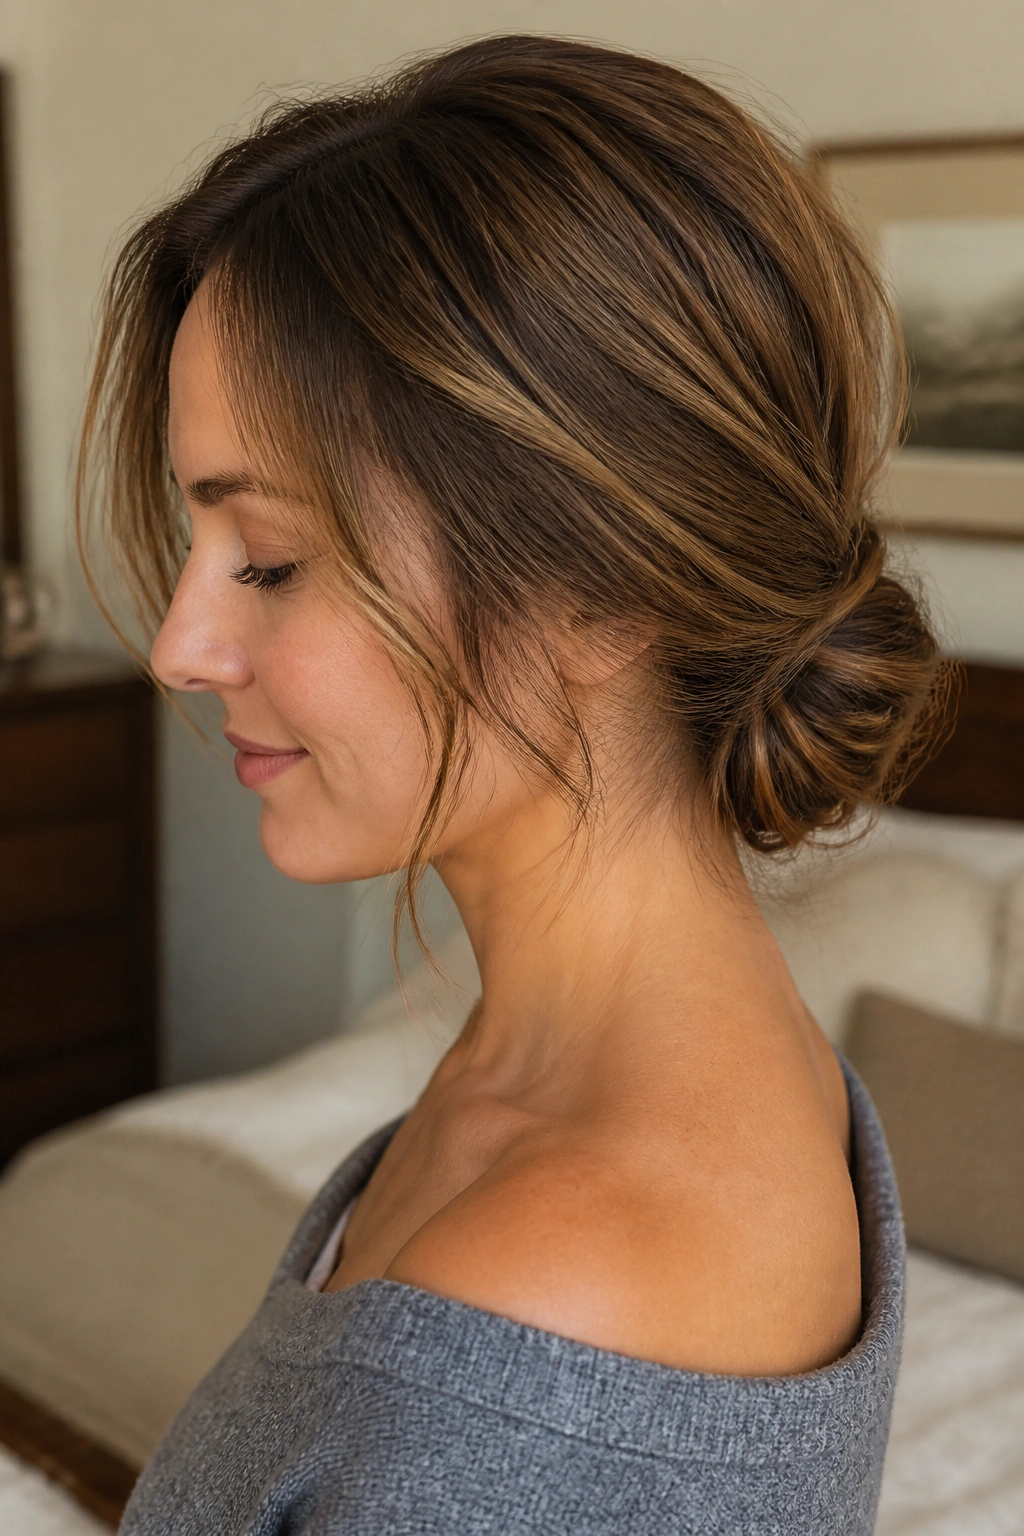
A low twisted chignon is the style I reach for when I want medium hair to look intentional without looking stiff. It sits close to the nape, uses the natural swing of shoulder-grazing ends, and gives you that tucked, neat shape that works for dinners, interviews, and weddings without asking for much drama.
Why It Flatters Shoulder-Length Layers
The low placement matters. On medium-length hair, a chignon placed too high starts to fight gravity, and that’s where the loose pieces begin. Keep it low, keep it compact, and let the twists do the work.
If your hair is layered, leave a few shorter pieces out near the temples and pin them back after the chignon is set. That tiny bit of softness keeps the style from looking too severe. A light mist of texture spray at the roots helps too, especially if your hair is fine or freshly washed.
- Best on hair that hits between the collarbone and shoulders
- Uses about 6 to 10 bobby pins, depending on thickness
- Works especially well with a side part or soft center part
- Looks cleaner when the ends are curled under once with a 1-inch iron
Quick tip: twist each side before you pin it. Straight tucks look flat; twisted sections give the bun shape from the inside out.
2. Claw-Clip French Twist
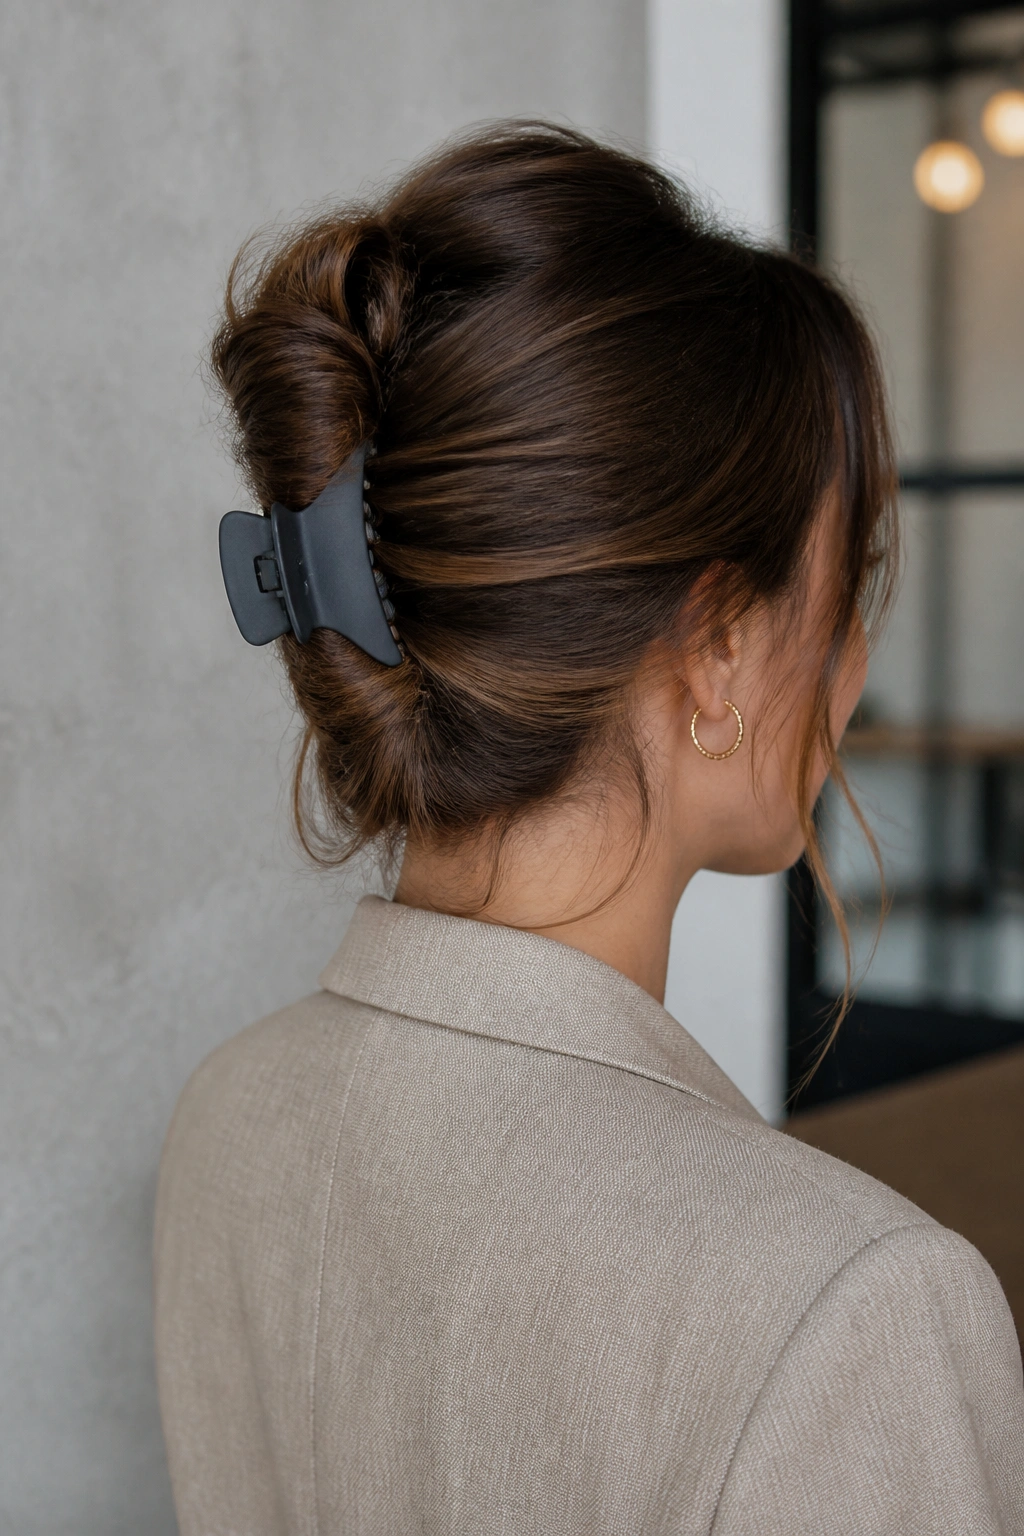
A good claw-clip French twist looks more expensive than it is. That’s the charm of it. It takes the classic rolled shape and turns it into something faster, looser, and easier to wear with a blazer, a knit sweater, or a slip dress.
The real reason it works on medium-length hair is simple: you have enough length to gather the hair upward, but not so much that it turns into a heavy rope. Start by twisting the hair vertically at the back of the head, then fold the length upward and secure it with a clip that actually grips—wide teeth, strong spring, no flimsy plastic nonsense. If the clip is too small, the whole thing pops open by lunchtime.
Leave the ends a little imperfect. That’s the point. A French twist that looks too perfect can feel old-fashioned in a bad way, while one with a few soft edges looks current without trying too hard.
A matte claw clip gives more hold than a glossy one, and it usually looks better in medium hair because it doesn’t scream for attention. Pin the sides first if your hair is slippery. Then clip the twist in place. Done.
3. Half-Up Mini Bun
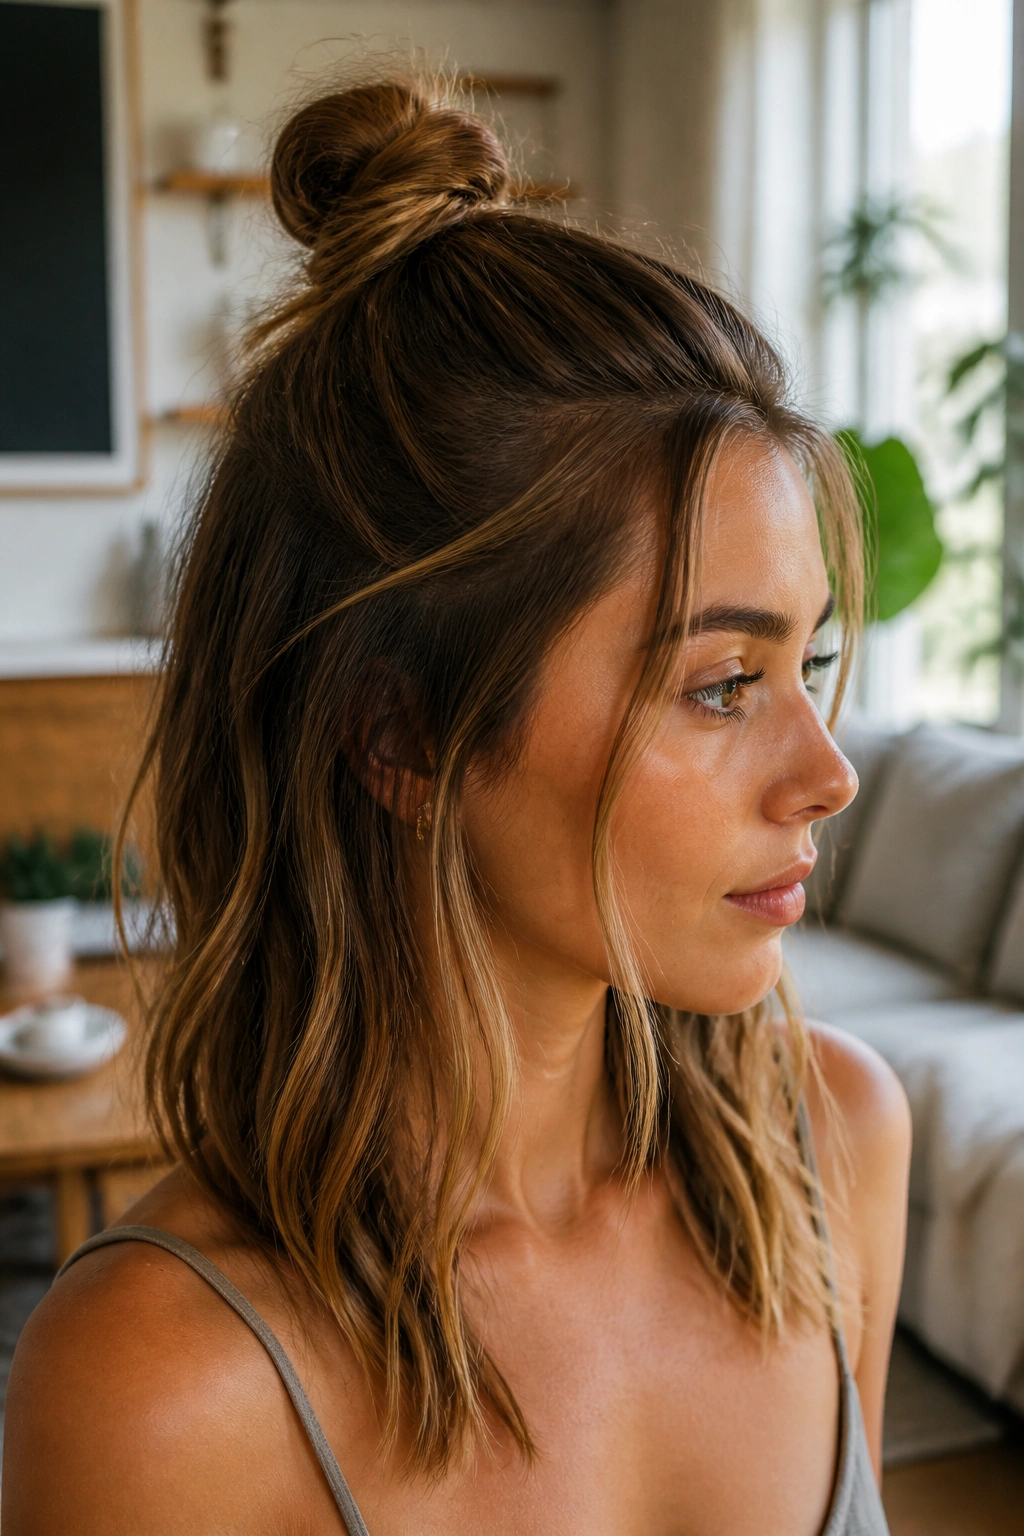
Why does the half-up mini bun work so well on medium-length hair? Because it gives you shape without stealing all the length. You keep the movement of the bottom half, but the top section gets a little lift, which is often all this haircut needs.
The trick is to gather only the crown section, not half of your whole head. That distinction matters. Take hair from temple to temple, twist it once or twice, then coil it into a small bun. If you grab too much hair, the bun gets bulky and starts competing with the rest of the style. Too little, and it collapses into a sad knot.
How to Keep It From Collapsing
Backcomb the root section lightly before you twist. Not a giant tease. Just enough grit to give the bun something to hold onto.
A tiny clear elastic works, but I prefer two crossed bobby pins once the twist is coiled. They hide better and let the bun sit flatter against the head. If you want a softer finish, pull one or two face-framing pieces loose and bend them with a 1-inch curling wand.
This style is easy, but it isn’t lazy. There’s a difference. The shape at the crown is what makes it look finished.
4. Braided Crown Tuck
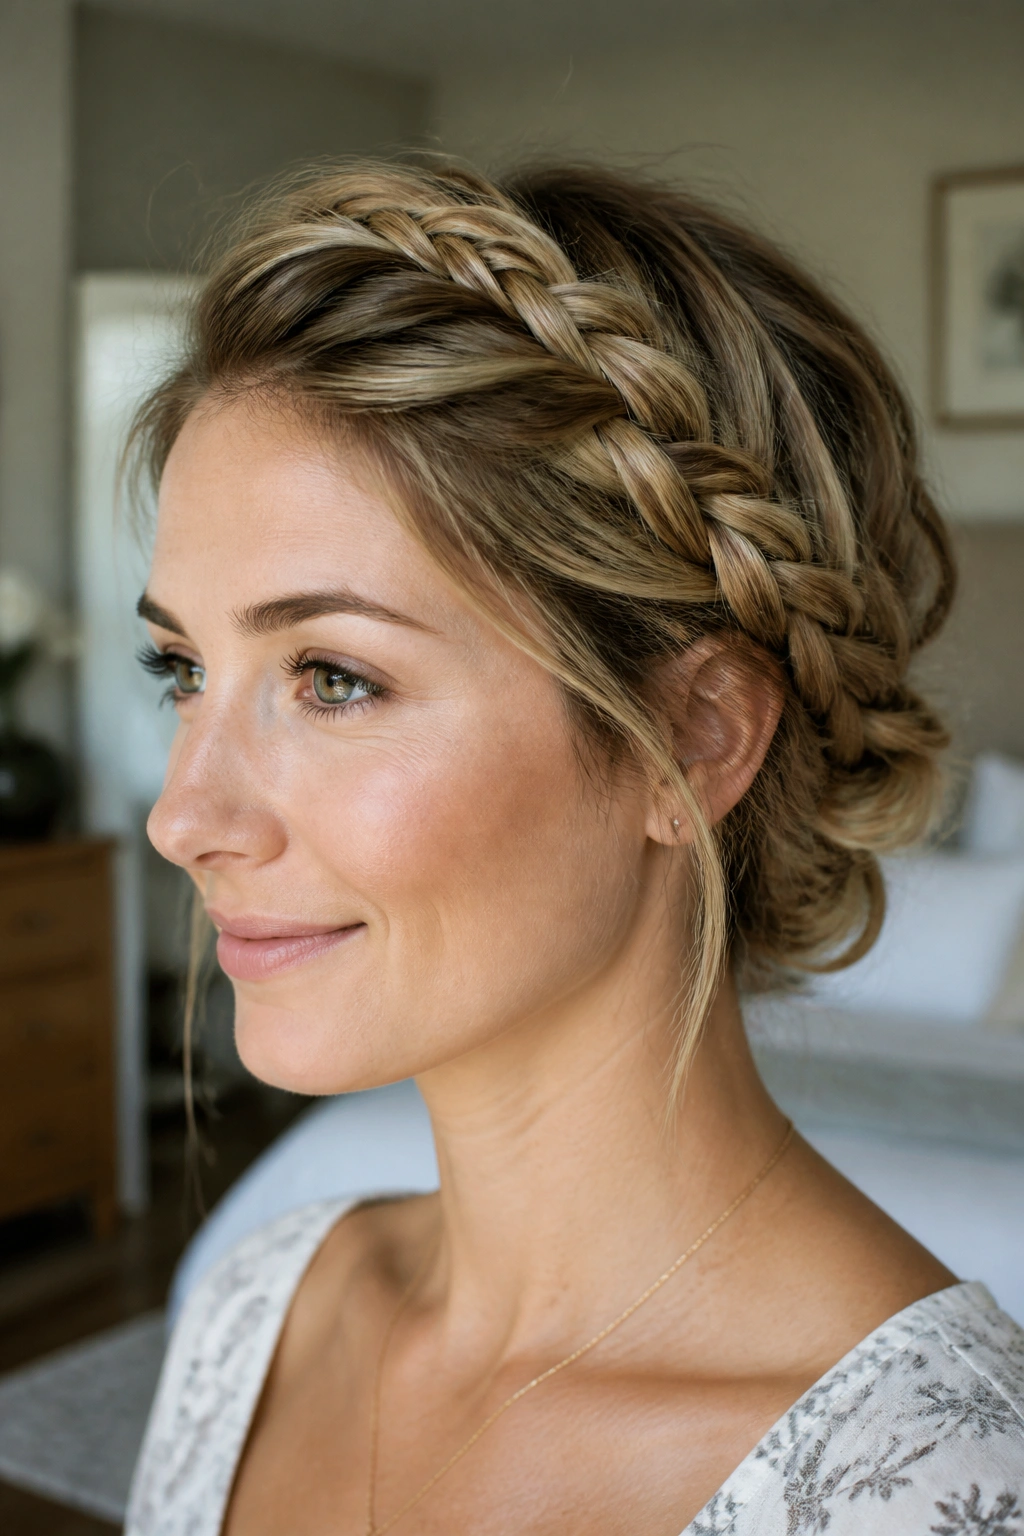
If your hair keeps slipping out of updos, the braided crown tuck is the style that stops the argument. You build a braid around the front and sides, then tuck the rest low at the back, so the braid acts like a frame and the tucked ends stay hidden.
It’s one of those looks that sounds complicated and behaves politely once you’ve done it a few times. Start with a deep side part or a soft center part, then braid each side loosely from the temple toward the back of the head. Pin the braids where they meet, and fold the remaining length under itself at the nape. The braid gives the style structure. The tuck gives it a finished edge.
A little texture spray helps the braid hold. So does slightly dirty hair. Freshly washed hair tends to slip, and medium-length hair with silky ends can be especially annoying in that way.
- Best for straight or lightly wavy hair
- Use 4 to 6 pins under the braid junction
- Slightly pancaked braid edges look fuller
- A small spritz of flexible hairspray keeps the crown from loosening
What I like here is the balance. It feels decorative, but it still behaves like a real hairstyle, not a costume.
5. Messy Low Bun with Face-Framing Pieces
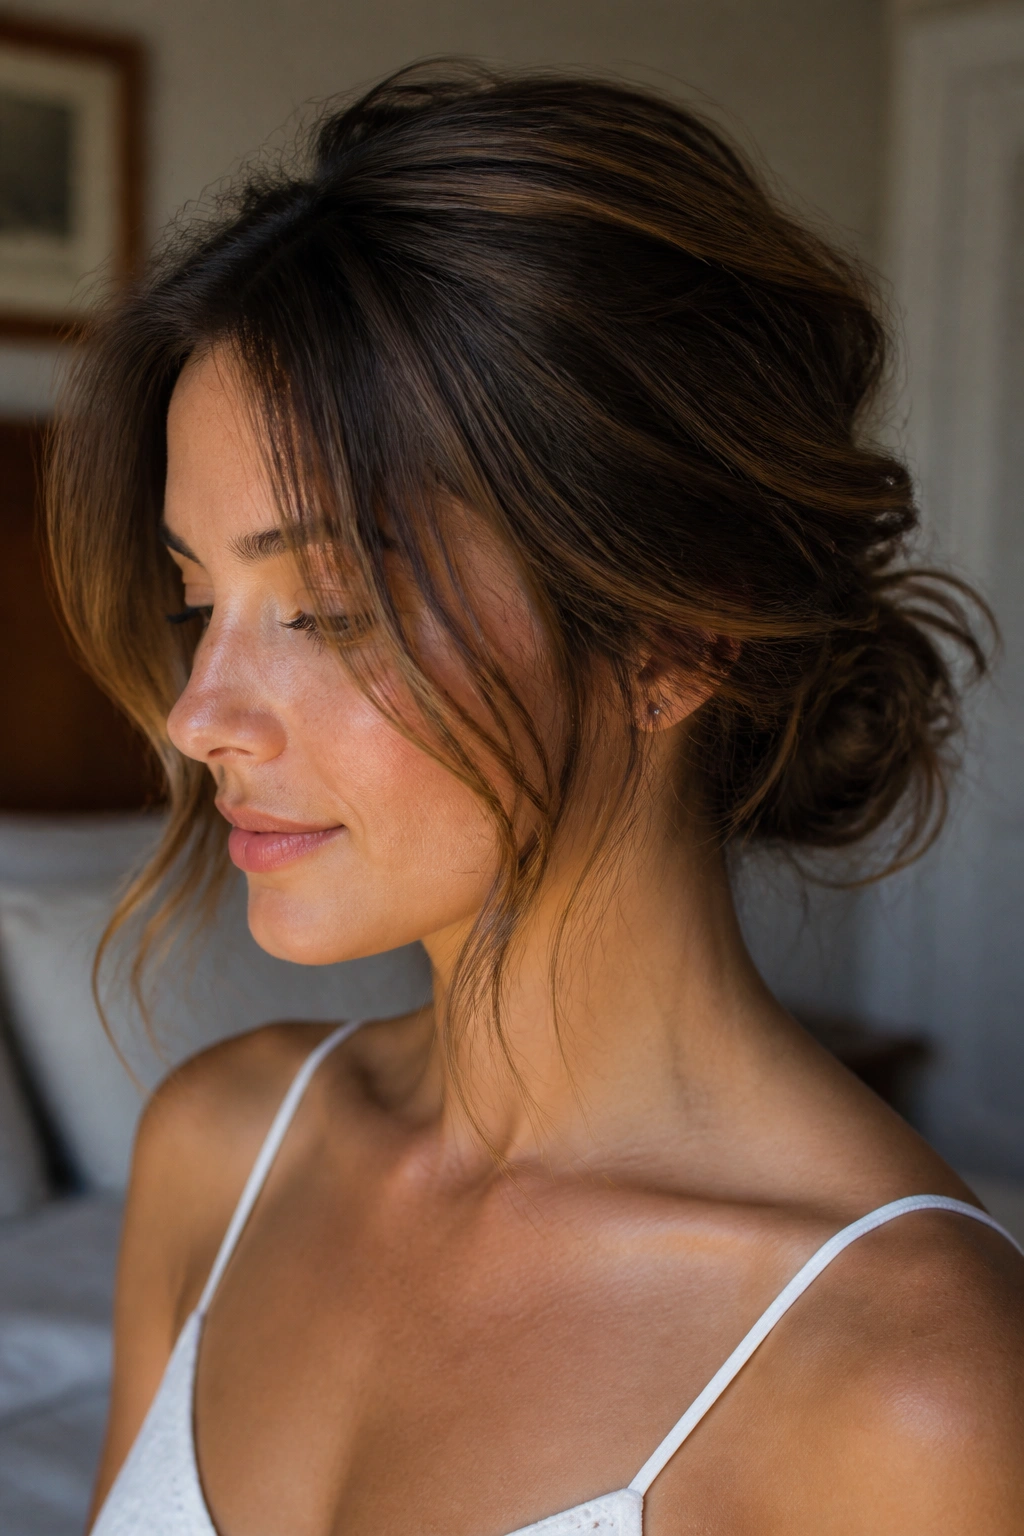
There’s a reason this style keeps showing up everywhere: it flatters medium-length hair without demanding much precision. The messy low bun with face-framing pieces is forgiving, a little soft around the edges, and good at making ordinary hair look deliberate.
The length works in your favor here. Medium hair is long enough to gather into a bun at the nape, but short enough that the ends often create a fuller shape instead of hanging like a weight. Twist the hair loosely, fold it into a bun, and let a few ends stick out before pinning them down. Do not chase perfect symmetry. That’s how the bun starts looking like a helmet.
The pieces around the face matter more than people think. Leave two small sections near the cheekbones, then curl them away from the face with a 1-inch wand or bend them with a straightener if that’s what you use most. They should look soft, not curled into shiny little sausages.
I also like this style for layered cuts because the shorter bits at the nape can hide inside the bun instead of ruining it. Use a textured powder or spray at the roots if your hair is clean. If it’s already on day two, you may not need much at all.
A messy bun is only pretty when it has shape. That’s the part most people skip.
6. Sleek Knot at the Nape
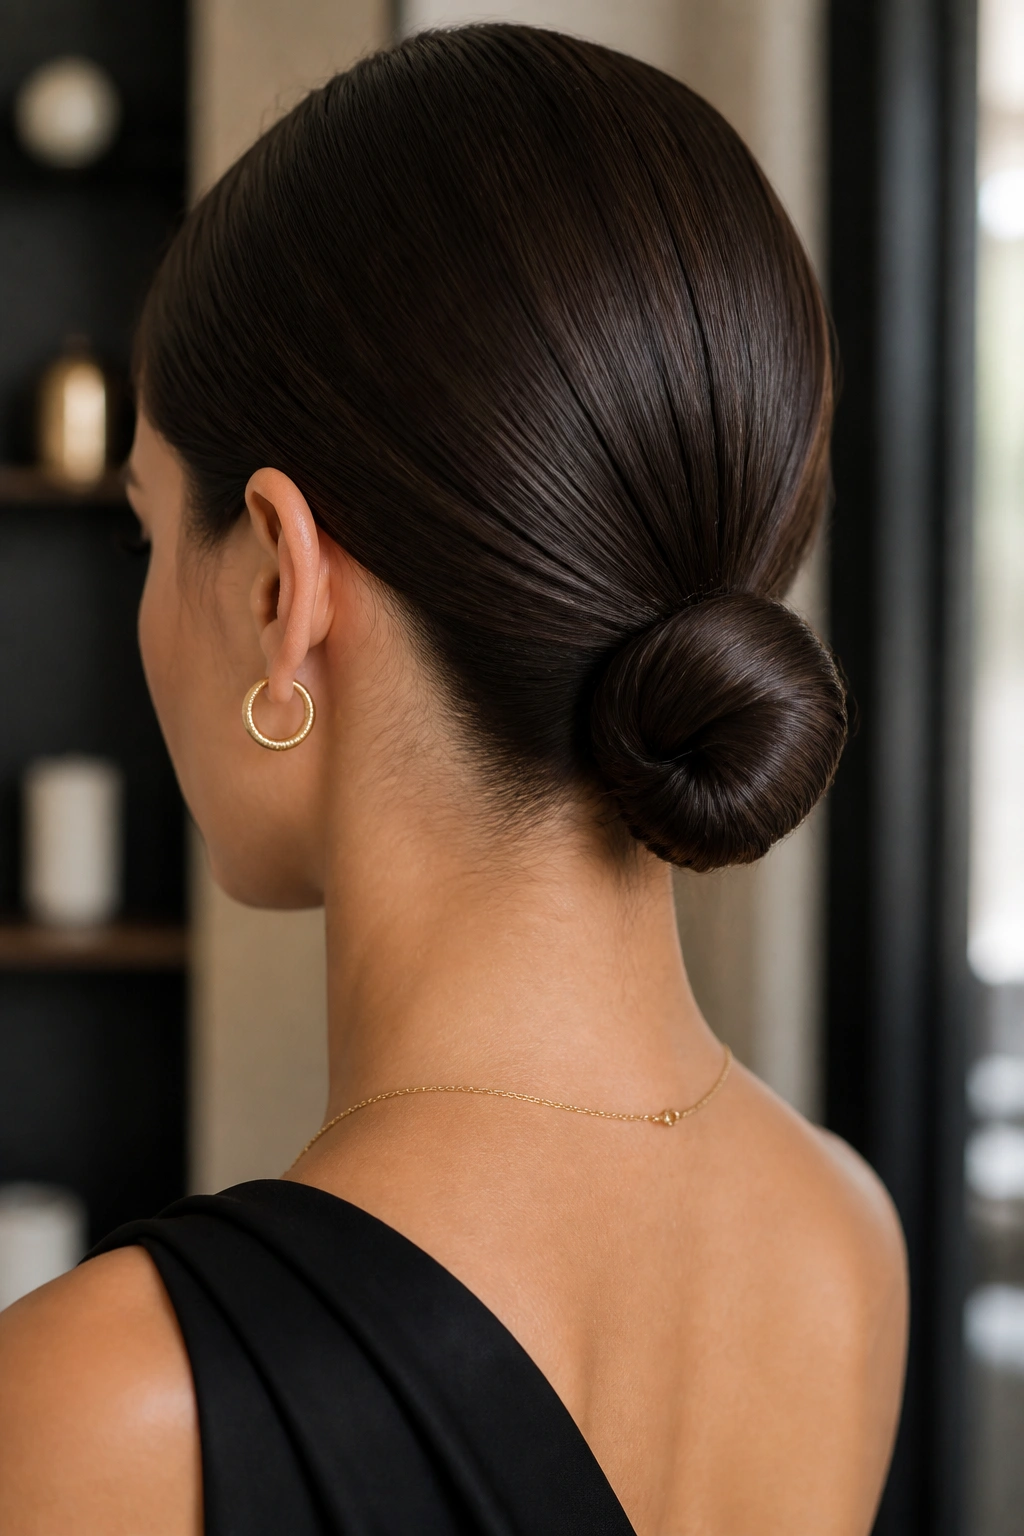
A sleek knot at the nape is the opposite of the messy bun, and that’s why it earns a place here. Medium-length hair can do clean lines better than you’d expect, especially if the cut is blunt or only lightly layered. When the hair is combed smooth and tucked low, the result feels sharp without being severe.
Unlike a loose bun, this style needs tension. Brush the hair back with a little serum or smoothing cream, gather it tightly at the nape, and twist the length into a compact knot. Use pins that match your hair color if you can. Black pins on dark hair and bronze pins on lighter hair disappear faster than the shiny ones that catch the eye.
This style is best when you want the neckline to stay open. It works with earrings, with high collars, with a dress that already has a lot going on. It also handles medium hair that tends to puff up in humidity, because the smooth finish keeps the silhouette controlled.
If your ends poke out, hide them under the knot instead of trying to flatten them. That tiny move makes the whole thing look cleaner. A satin scrunchie can help underneath if your hair is very slippery, but keep it hidden.
7. Bubble Pony Updo
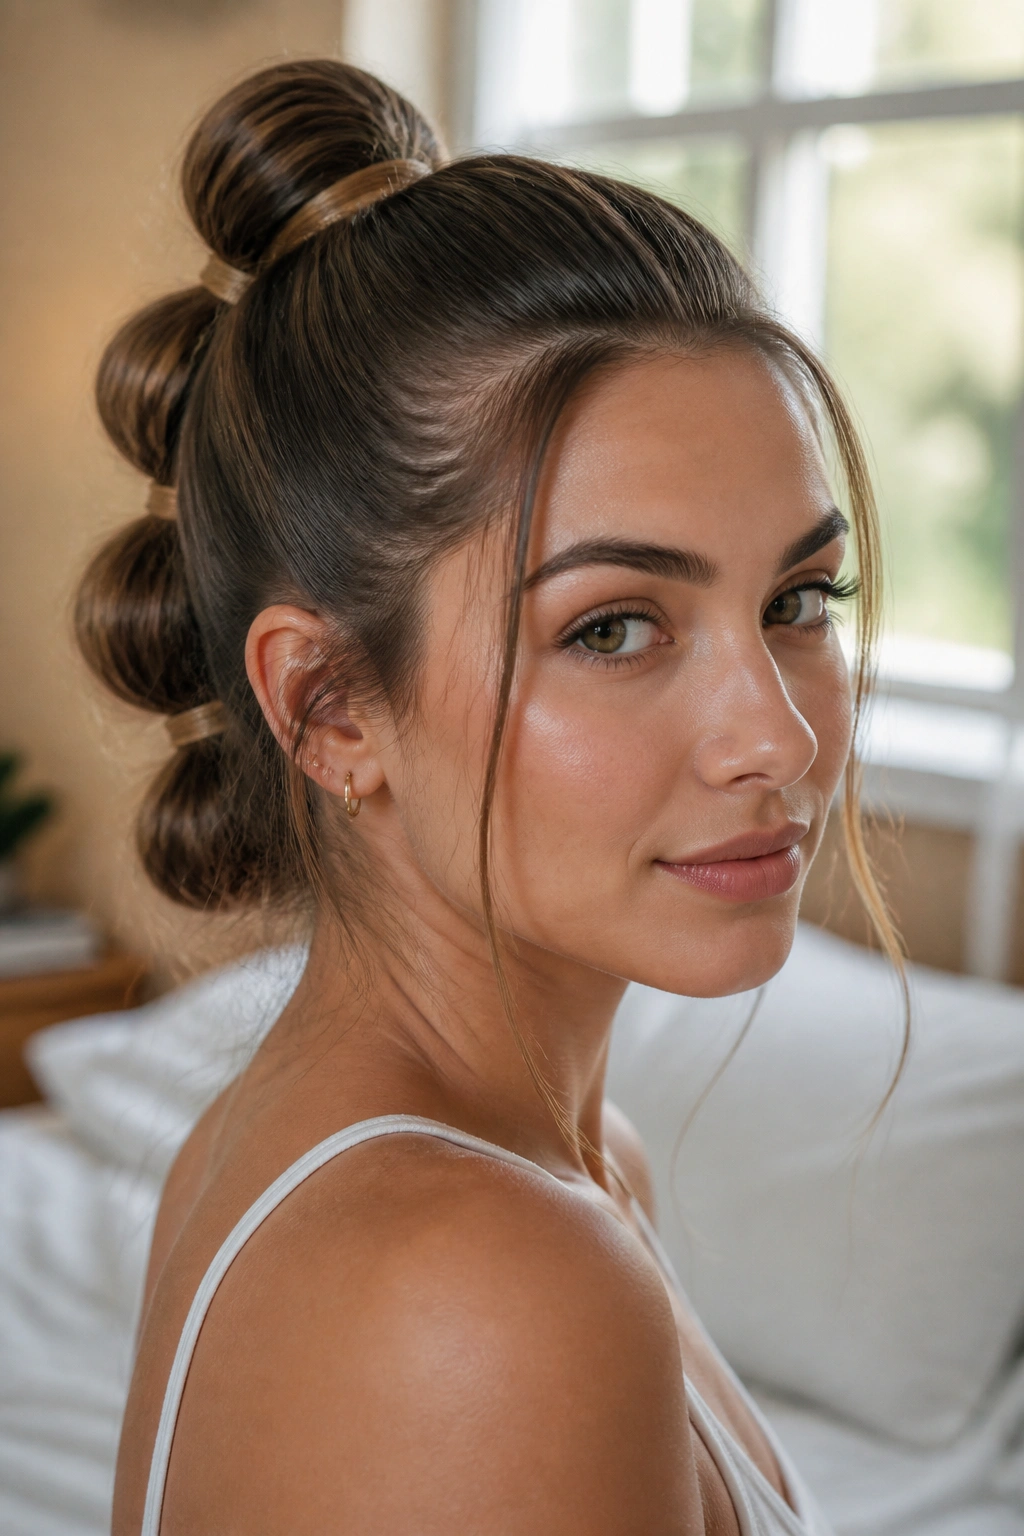
This one gives medium hair more shape than a regular ponytail ever will. The bubble pony updo looks playful, but it’s also practical because the sections create their own structure. If your hair falls flat at the crown, this style gives you a quick fix without needing a full braid or bun.
What Makes It Hold
Start with a ponytail at the mid-nape or just below it. Secure it with a strong elastic, then add more elastics every 2 to 3 inches down the length. Gently pull each section outward to create rounded bubbles, but stop before the hair starts to look stretched or frizzy.
A little tease at the crown helps. So does a texturizing spray brushed lightly through the top section. If you have fine hair, keep the bubbles smaller and closer together. Thick hair can handle larger, puffier sections without losing shape.
- Works well on straight, wavy, or lightly curly hair
- Needs 3 to 5 small elastics
- Looks best when the bubbles are even, not oversized
- Easy to dress up with a ribbon or a metal cuff
I like this style because it feels modern without trying to be slick. It has movement, and medium-length hair is just the right length to make each bubble visible instead of squashed.
8. Braided Bun Hybrid
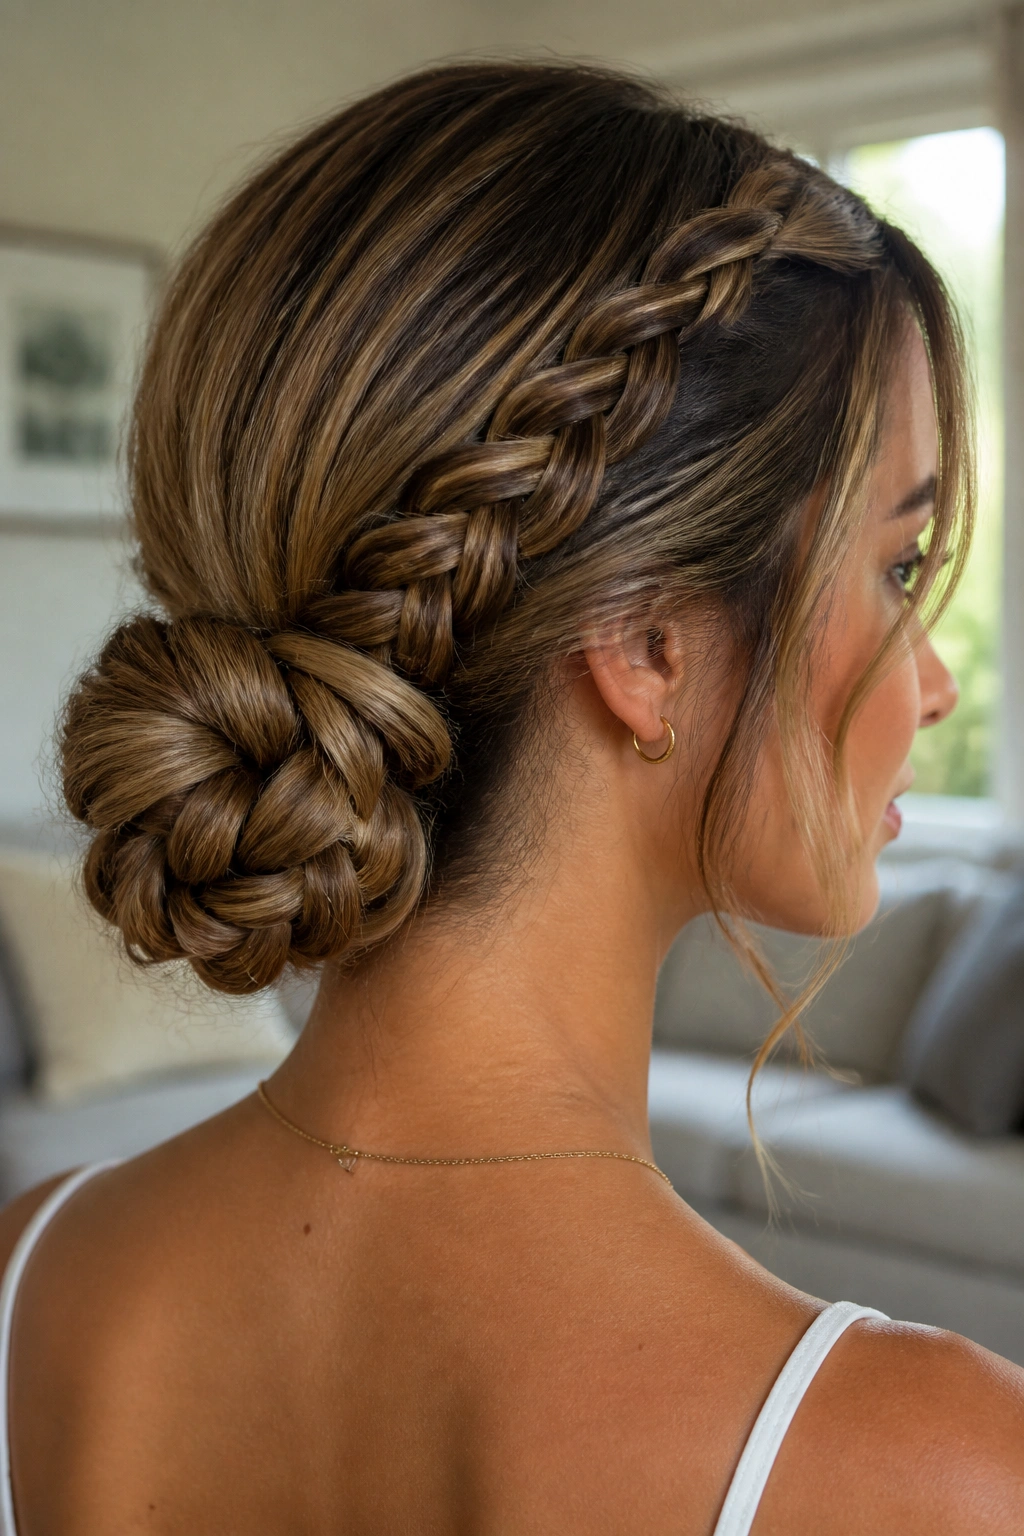
A braided bun hybrid solves a very common problem: the ends that stick out of a bun and make you want to start over. Instead of hiding the braid, this style uses it as part of the bun, so the whole shape looks fuller and cleaner at the same time.
Here’s how it usually goes. Pull the hair into a low ponytail, braid the length all the way down, then wrap the braid around its base into a bun. If your hair is layered, braid a little tighter than you think you need to. That helps keep the shorter pieces tucked in. A few pins at the outer edge hold the spiral together and keep the bun from unraveling.
This is one of the better choices for medium-length hair because the braid gives the style length you may not have naturally. It adds a bit of texture too, which keeps the bun from looking flat against the head.
- Best with second-day hair or light texturizing spray
- Use a snag-free elastic at the base
- Tuck the braid tail under the bun, not straight out
- A little tug on the braid edges makes the bun look fuller
What I love most is that it looks more complicated than it is. That’s always a nice outcome.
9. Gibson Tuck
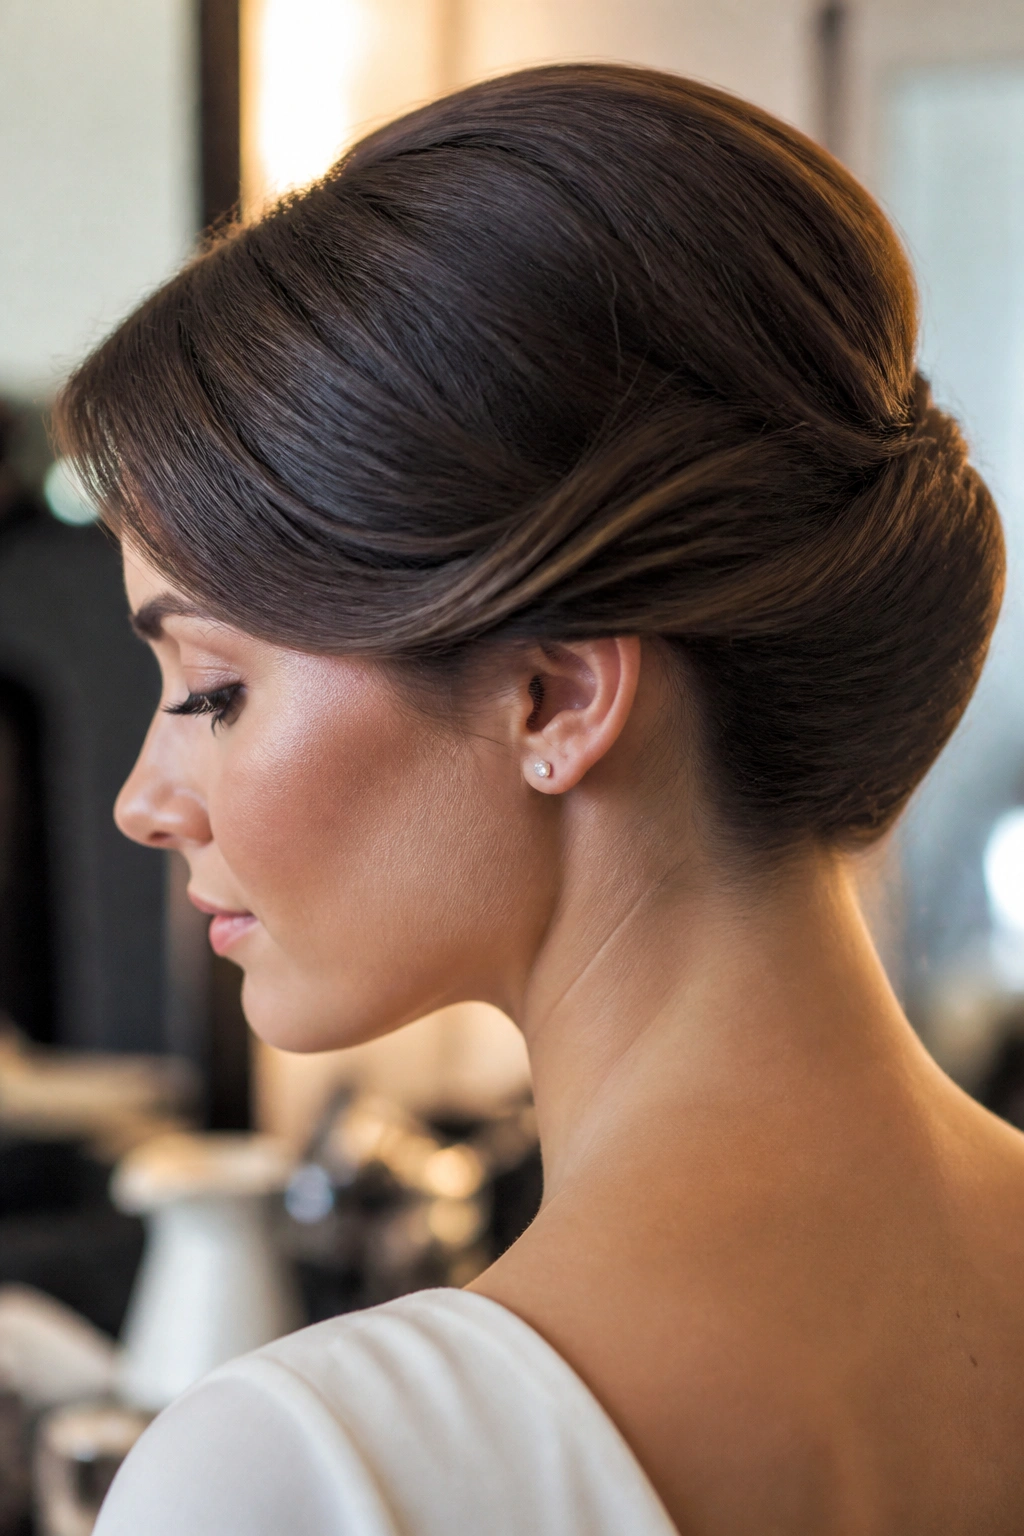
The Gibson tuck is one of the easiest formal updos for medium-length hair. It has that polished, tucked-under shape that reads as elegant right away, yet it doesn’t require the kind of length that old-school chignons often expect.
Start by gathering the hair into a low ponytail, then roll the length upward and inward against the back of the head. Tuck the rolled section into itself and pin it across the seam. If the hair is layered, leave a little extra room in the roll so the shorter pieces can disappear inside instead of springing out at the sides.
A side part gives the Gibson tuck a softer look. A center part makes it feel cleaner and more structured. Either way works, but the part changes the mood more than people realize.
This is one of those styles that benefits from a little gloss. A drop of serum through the ends before you roll them helps the tuck slide into place. Too much product, though, and the hair starts to slip. That’s the only real trap here.
The Gibson tuck suits medium hair that reaches the collarbone or a bit below. On shorter mid-length cuts, the roll stays compact and tidy. On longer mid-length hair, it looks fuller and more formal.
10. Scarf-Wrapped Bun
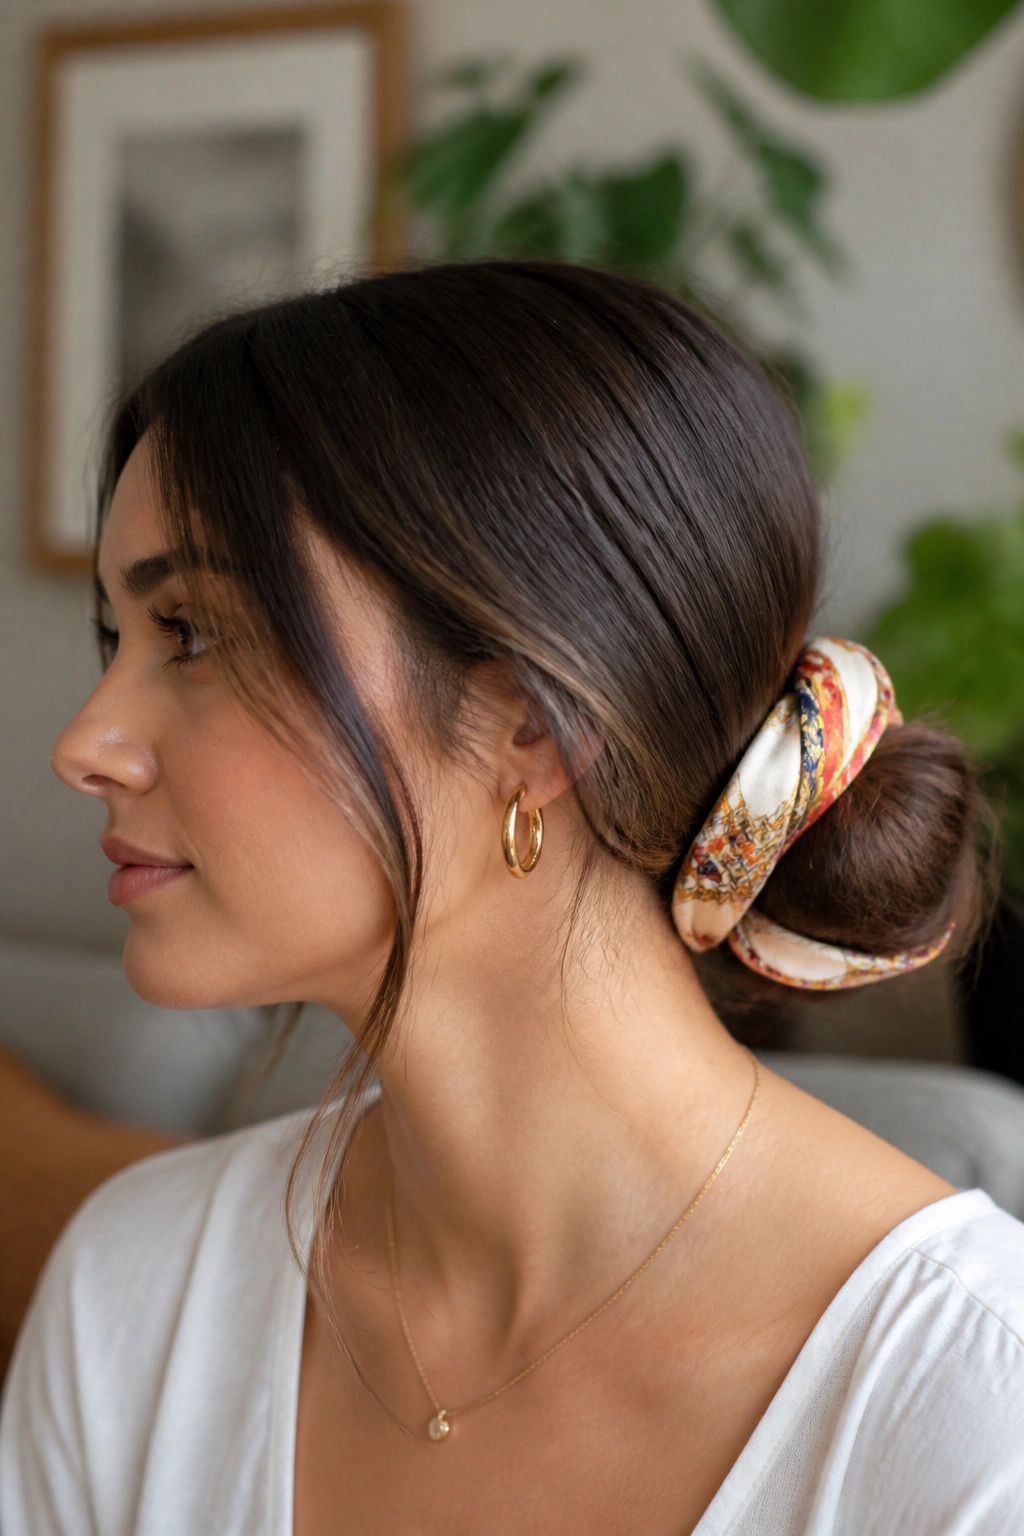
What happens when you want the updo to do most of the styling for you? A scarf-wrapped bun. The scarf brings color, hides a messy base, and gives medium-length hair a built-in finish that feels intentional even when the bun itself is soft and simple.
Begin with a low bun or a small coiled knot at the nape. Then wrap a silk or satin scarf around the base, tying it under the bun or off to one side. The scarf should frame the knot, not bury it. If the print is busy, keep the rest of the style clean. If the scarf is solid, you can let the bun be a little looser.
This is a strong choice when your hair has gone flat and you do not want to rewash it. The scarf hides the root situation and makes the whole style look considered. It also works well with medium layers because any stray ends can be tucked under the fabric.
A narrow scarf gives a neater look. A wider square scarf feels softer and a bit more playful. Either one works. The main thing is grip: tie it firmly enough that it stays put, but not so tight that it digs into the scalp.
11. Side-Swept Rolled Bun
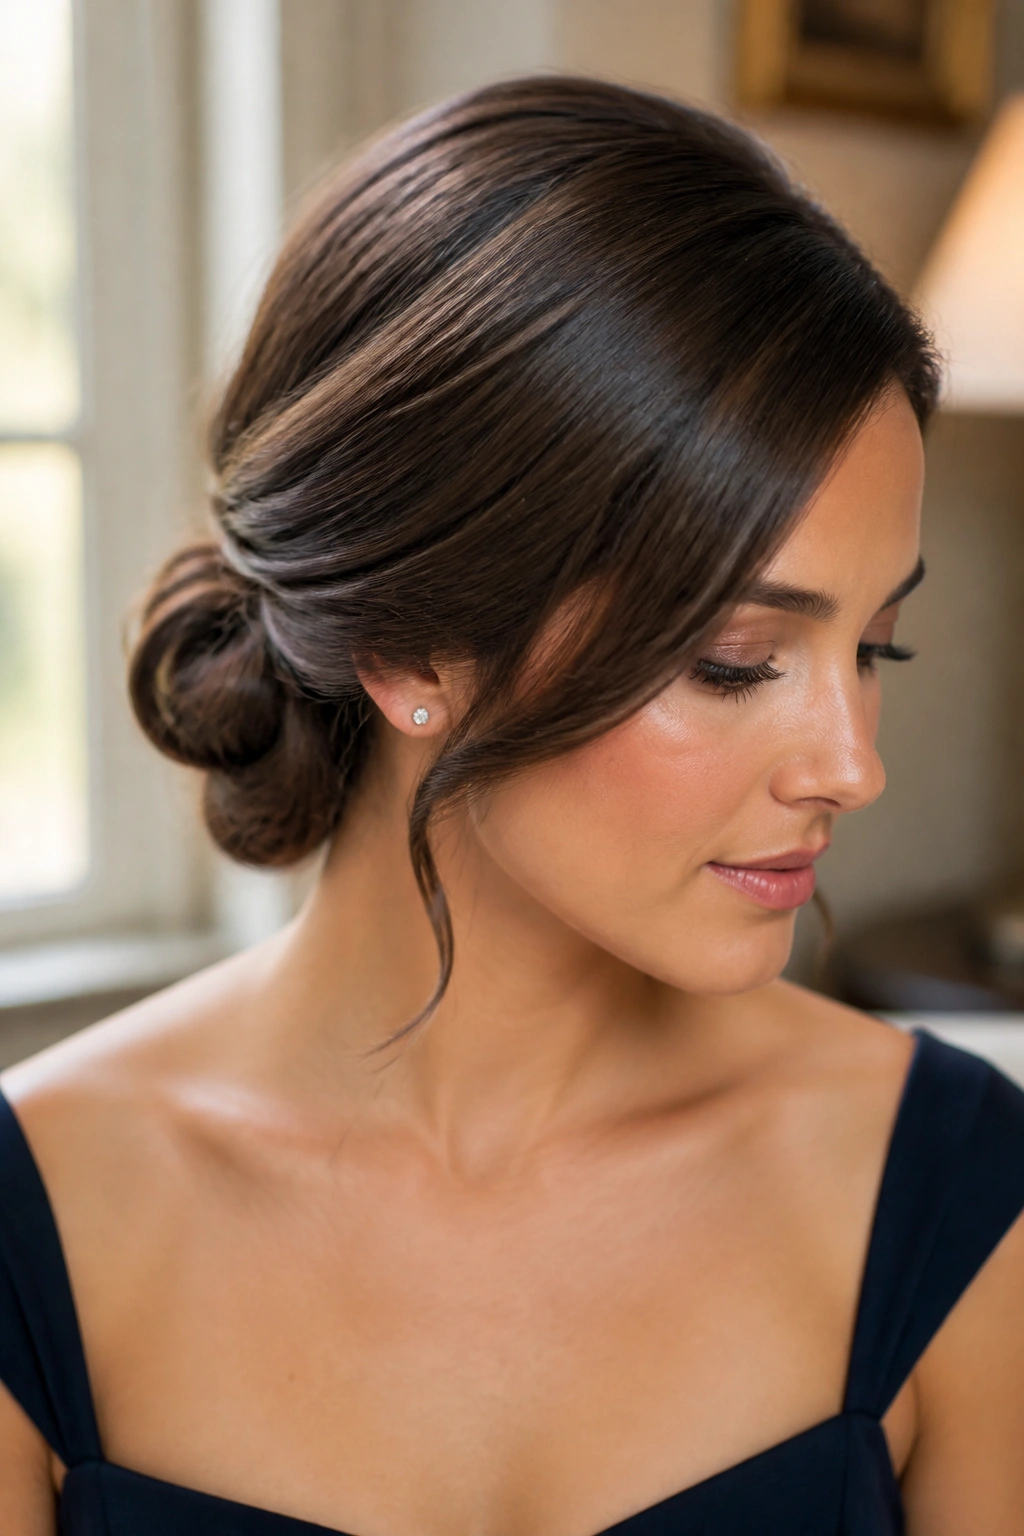
The side-swept rolled bun has a little old-Hollywood shape to it, but it does not look dated when it’s done with medium-length hair. The side part gives the style a clear line, and the roll at the back keeps the silhouette soft instead of boxy.
Brush the hair to one side first. That matters. Then roll the heavier side inward toward the nape, pinning as you go, before folding the rest of the hair into a low bun or tucked roll. The shape should feel like it sweeps across the back of the head instead of sitting directly in the middle. That offset gives the style its charm.
This one suits people who like structure but do not want a slick, severe finish. A few airy pieces near the temple keep it from looking frozen. I’d also keep the crown slightly lifted with a gentle backcomb, because a flat crown can make the whole style sink visually.
Use stronger pins than you think you need. The sweep creates weight on one side, and medium hair can slide if the base is too loose. Once it’s pinned, smooth the outer layer with a soft brush, not a comb, so the surface stays clean but not harsh.
There’s a little drama here. Not much. Just enough.
12. Faux Bob Pin-Up
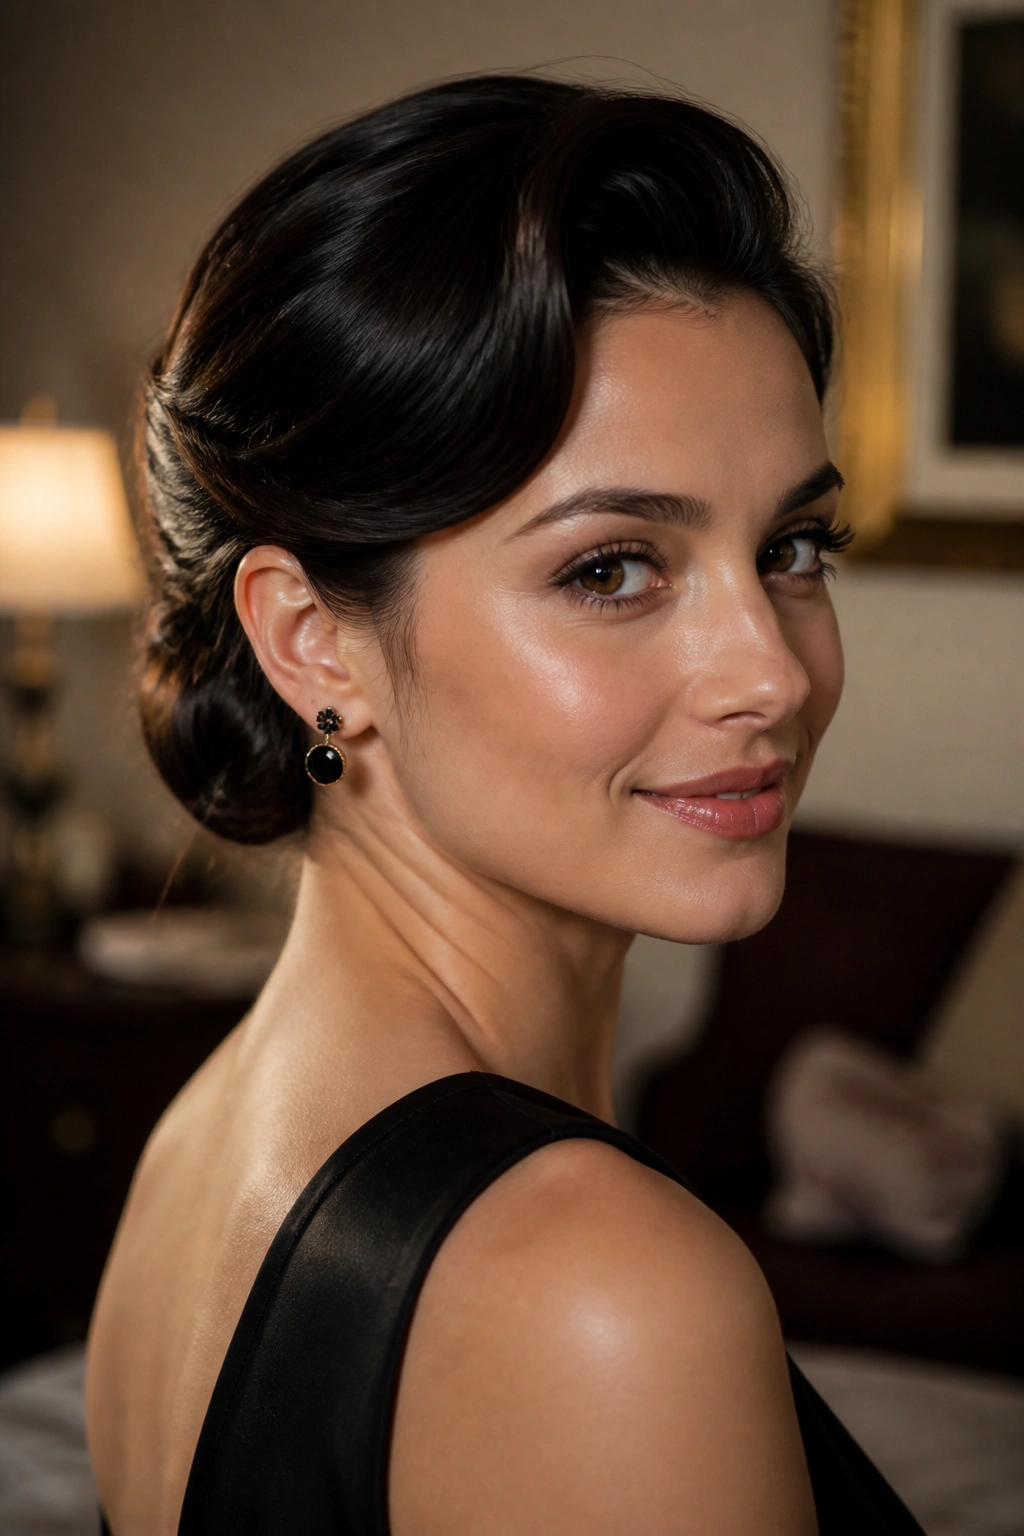
Unlike a true bob, this one disappears when you want it to. That is the entire appeal of the faux bob pin-up: medium-length hair can look short, tucked, and chic for a night, then come back out without a cut.
The style works by folding the ends under and pinning them so they sit hidden at the nape or just above it. Start with loose bends through the hair if you want the finished shape to feel softer. Then gather the lower sections inward, roll them up, and pin them against the back of the head. A deep side part often helps because it gives the front some movement while the back stays tucked.
This look can be a little fiddly the first time. Fine hair tends to tuck easily but may need extra pins. Thick hair may need a smaller fold so the shape doesn’t balloon outward. Either way, the goal is a clean outline from the front and a neat hidden fold from the back.
I’d call this one best for events, dinners, or any time you want a sharp neckline without committing to a haircut. Add one statement earring and it changes the whole mood. Keep the ends hidden, though. Visible puckers ruin the illusion fast.
13. Knotted Pony Updo
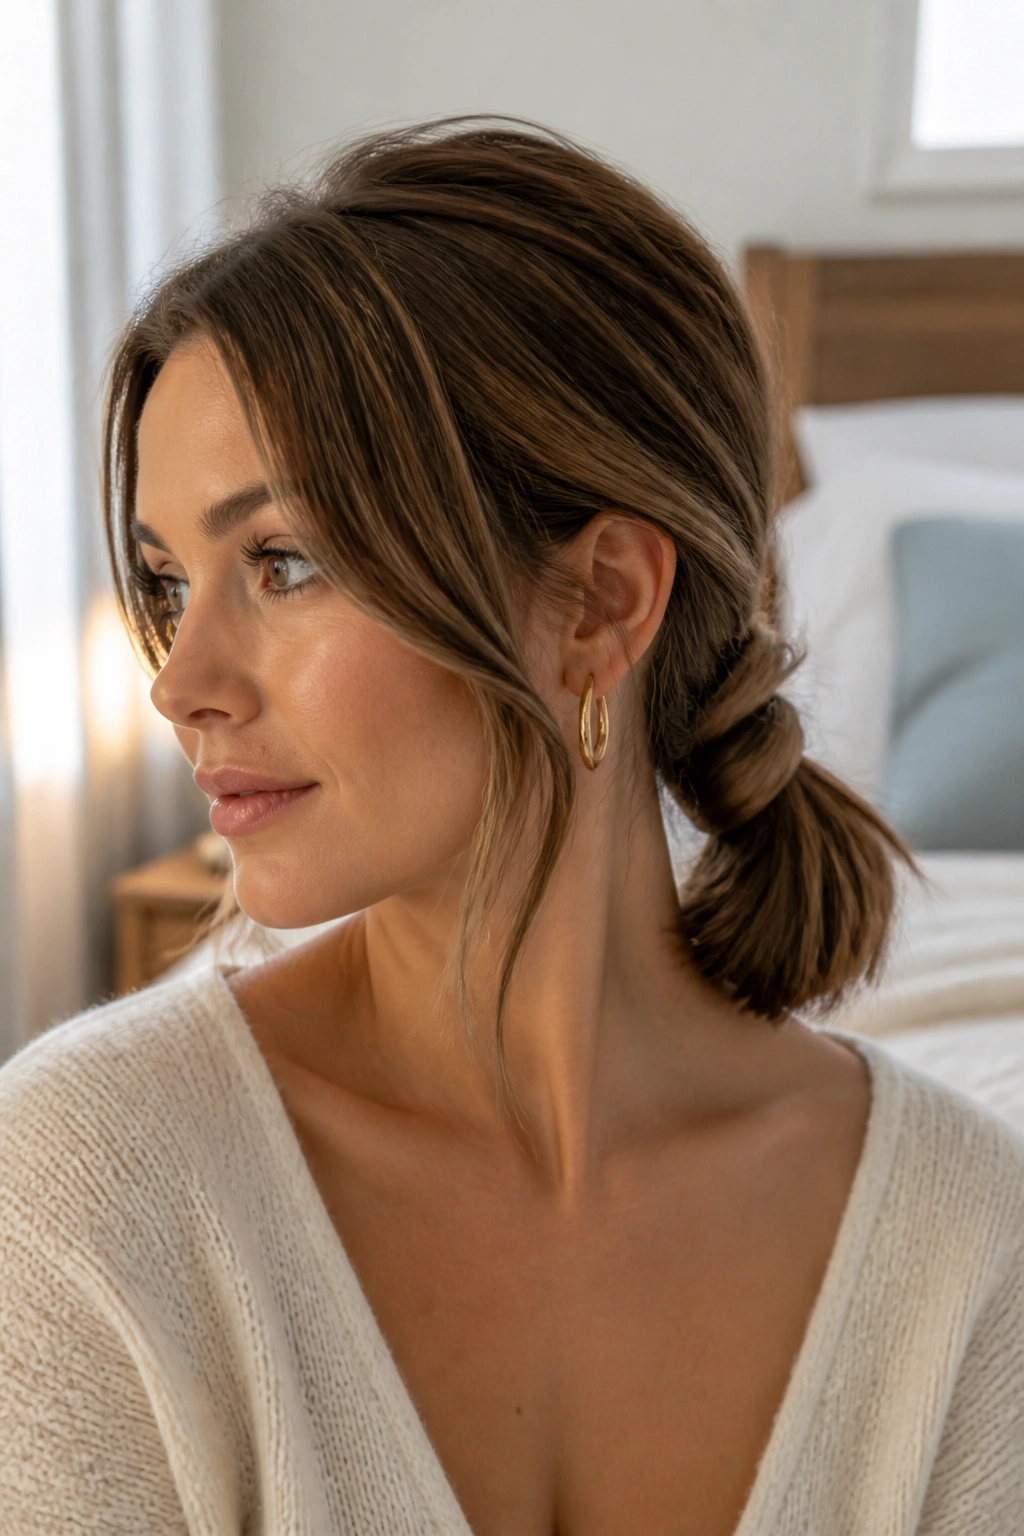
A knotted pony updo is the style I recommend when you want something casual that still looks thought through. It takes the basic ponytail and gives it a twist—literally—so medium-length hair ends up with shape instead of hanging in one plain line.
Why It Works Better Than a Basic Pony
A ponytail on medium hair can look thin at the ends. Knots solve that. You split the pony into two sections, knot them once or twice, then pin the tail under the knot or let it peek out depending on how full your hair is.
This style shines on hair with a little grit. Clean, slippery hair makes the knot slide, and that’s annoying. Second-day hair, dry shampoo, or a light texture spray gives the sections enough hold to stay put.
- Best for casual events and daytime wear
- Needs 2 to 4 pins beyond the elastic
- Looks fuller when the knot sits low, not mid-back
- Works with straight hair or soft waves
If you want it to feel more polished, wrap a small strand around the base elastic. That tiny touch makes a big difference. It also keeps the style from looking like a rushed gym pony.
14. Double-Bun Midi Updo
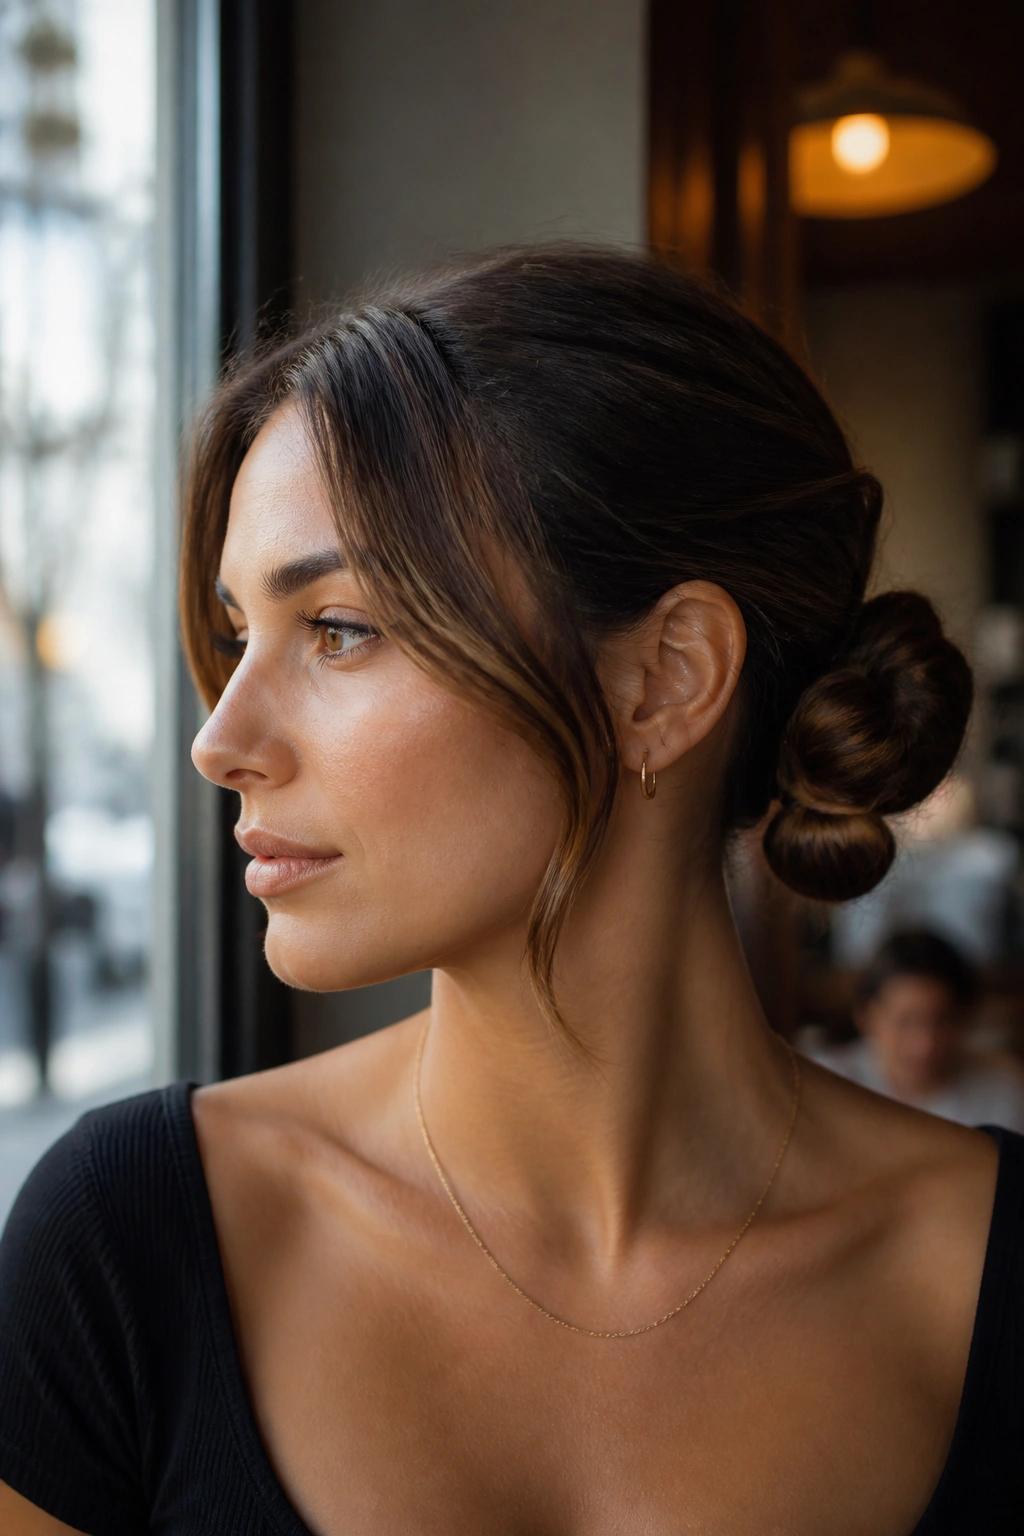
You do not need waist-length hair for this look. The double-bun midi updo works because medium-length hair creates two compact shapes instead of one big one, which makes the style look playful and balanced rather than overloaded.
Part the hair down the middle and create two low puffs, twists, or mini buns behind the ears or near the nape. Keep them close together if you want a cleaner look. Space them slightly wider if you want something more playful. The key is symmetry at the base and softness at the edges.
This style is a solid pick for thick hair because each bun gets its own section, so the weight is distributed. It also works on finer hair if you add texture first. A touch of teasing at the roots gives the buns more body, and a few hidden pins help them sit flat against the head instead of bobbing around.
- Use matching elastics for a tidy finish
- Pin the bun centers first, then secure the outer edges
- Leave two small front pieces out if you want a softer frame
- Keep the buns low enough that they don’t feel juvenile
There’s a cheeky side to this style, but it can still look refined. The difference is in the finish.
15. Wet-Look Low Chignon
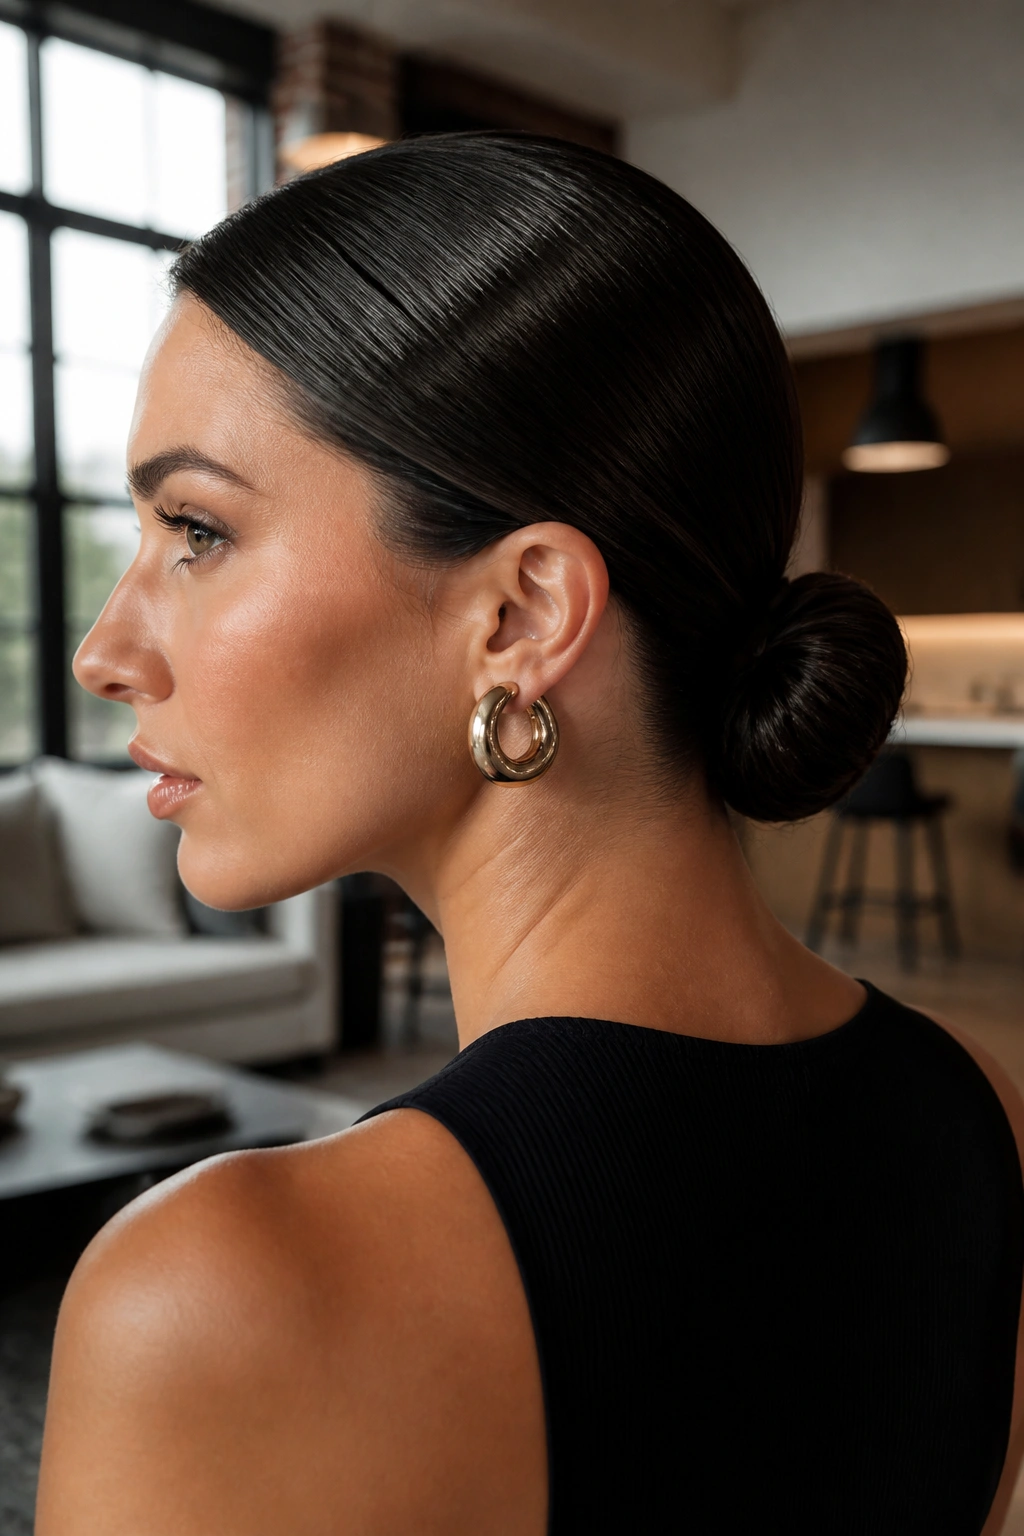
The wet-look low chignon is one of my favorites for medium-length hair because it handles frizz, layers, and second-day texture all at once. The shine gives it edge; the low shape keeps it wearable. It is sleek, but not fussy.
Start with damp or dry hair, then work a light gel or styling cream through the top and sides with a fine-tooth comb. Gather the hair low at the nape, twist it into a compact chignon, and pin it tightly. The front should look smooth and controlled, while the bun itself can stay slightly softer underneath. That contrast is what keeps it from looking stiff.
This style works especially well when the hair has a few shorter layers that refuse to blend into a standard bun. The slicked surface takes attention away from the odd pieces and turns the whole look into a deliberate shape. If your hair is very fine, use less product and more pins. If it’s thick, add a second pass of gel only on the top layer.
A wet-look finish does demand confidence. Not loud confidence. Just enough to wear the shine and leave the neckline clean. It’s a strong ending note for medium-length hair, because it proves the length can be sharp, elegant, and a little bold without needing extra inches.
