



A round face shape is defined by its soft lines and balanced proportions, typically possessing a similar width and length. While this facial geometry is undeniably youthful, many people find themselves craving a bit more definition—a way to introduce artificial angles or create the illusion of length. This is where strategic hair color becomes your most powerful tool. You do not need to rely solely on contouring makeup or specific haircuts to alter your look; the right placement of highlights can visually “stretch” your features and draw the eye in ways that create a more sculpted appearance.
Red-brown hues—ranging from deep, moody auburns to bright, spicy coppers—are particularly effective for this purpose. These colors add warmth and depth, which are essential for creating the dimension required to break up the circular uniformity of a round face. When you layer these tones strategically, you manipulate where light hits and where shadows rest. It is less about the color itself and more about how you place that color to manipulate your facial silhouette.
1. Bright Copper Money Piece
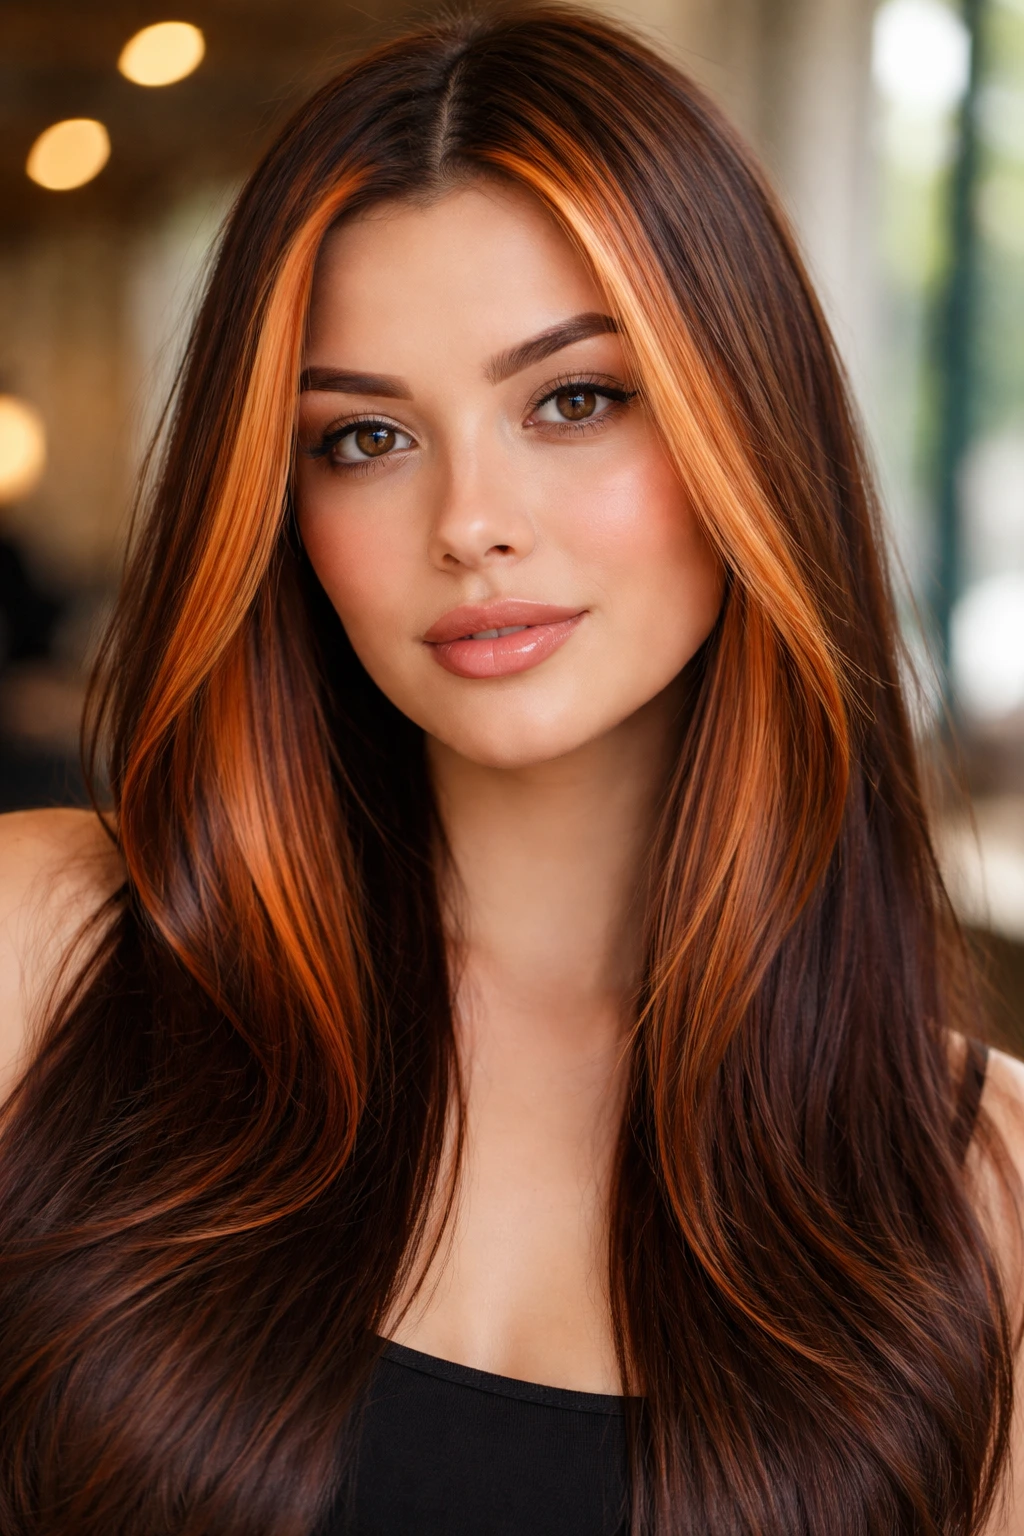
The concept of a money piece—or face-framing highlights—is arguably the most effective technique for anyone with a round face. By saturating the front strands with a vibrant copper, you create two distinct vertical lines that run directly alongside your cheeks. This framing effect acts like curtains, drawing the eye toward the center of your face and away from the width at the jaw and temples.
Why This Placement Works
When you bring brightness right to the front, you effectively cut the visual width of the face in half. The stark contrast between the bright copper and a darker base creates a focal point that elongates the neck and chin area. Keep the highlights narrow for the most slimming effect; if you pull the light too far back, you risk accidentally accentuating the fullness of the cheeks.
How to Style It
- Blow-dry straight: Smooth, straight styling allows the copper lines to hang vertically, reinforcing that elongating illusion.
- Avoid heavy waves near the jaw: While curls are lovely, tight curls right at the jawline can add horizontal volume, which we want to avoid here.
- Maintain root depth: Ensure the roots remain darker to add height and structure to the crown.
2. Vertical Auburn Ribbons
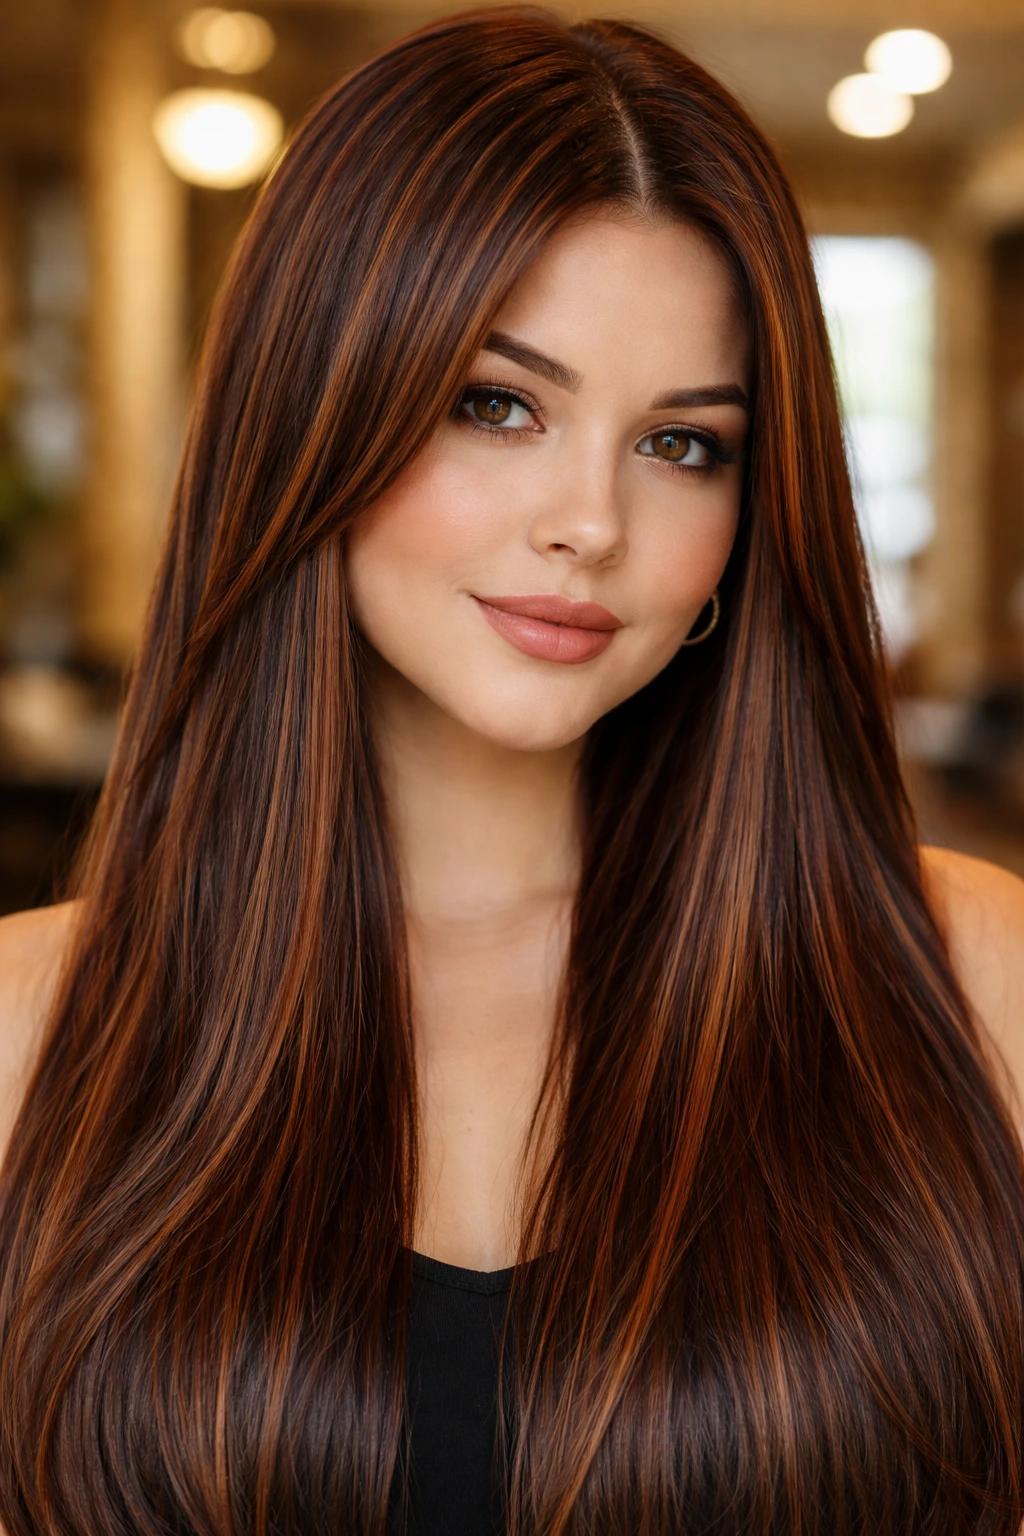
Forget the all-over highlight look. For a round face, you want to focus on verticality. Ribbons of auburn placed in clean, vertical sections from the roots to the ends create a ladder-like effect. This draws the eye up and down, rather than side to side. It is a subtle technique that provides massive structural benefits without requiring constant maintenance.
The Physics of Color
Color placement creates a map for the eyes. When a stylist paints vertical ribbons, they are creating a path of high-reflectance light that forces the viewer to look vertically. This is critical for people with round faces who feel their face looks “short.” By adding these streaks of rich auburn, you effectively increase the perception of height in your hair, which translates to a more oval-looking face shape.
Key Considerations
You must ask for hand-painted balayage or foil slices that start near the root. Avoid starting these highlights at the mid-shaft, as that will draw focus to the middle of your face, right where you likely want to create more space.
3. Deep Burgundy Balayage
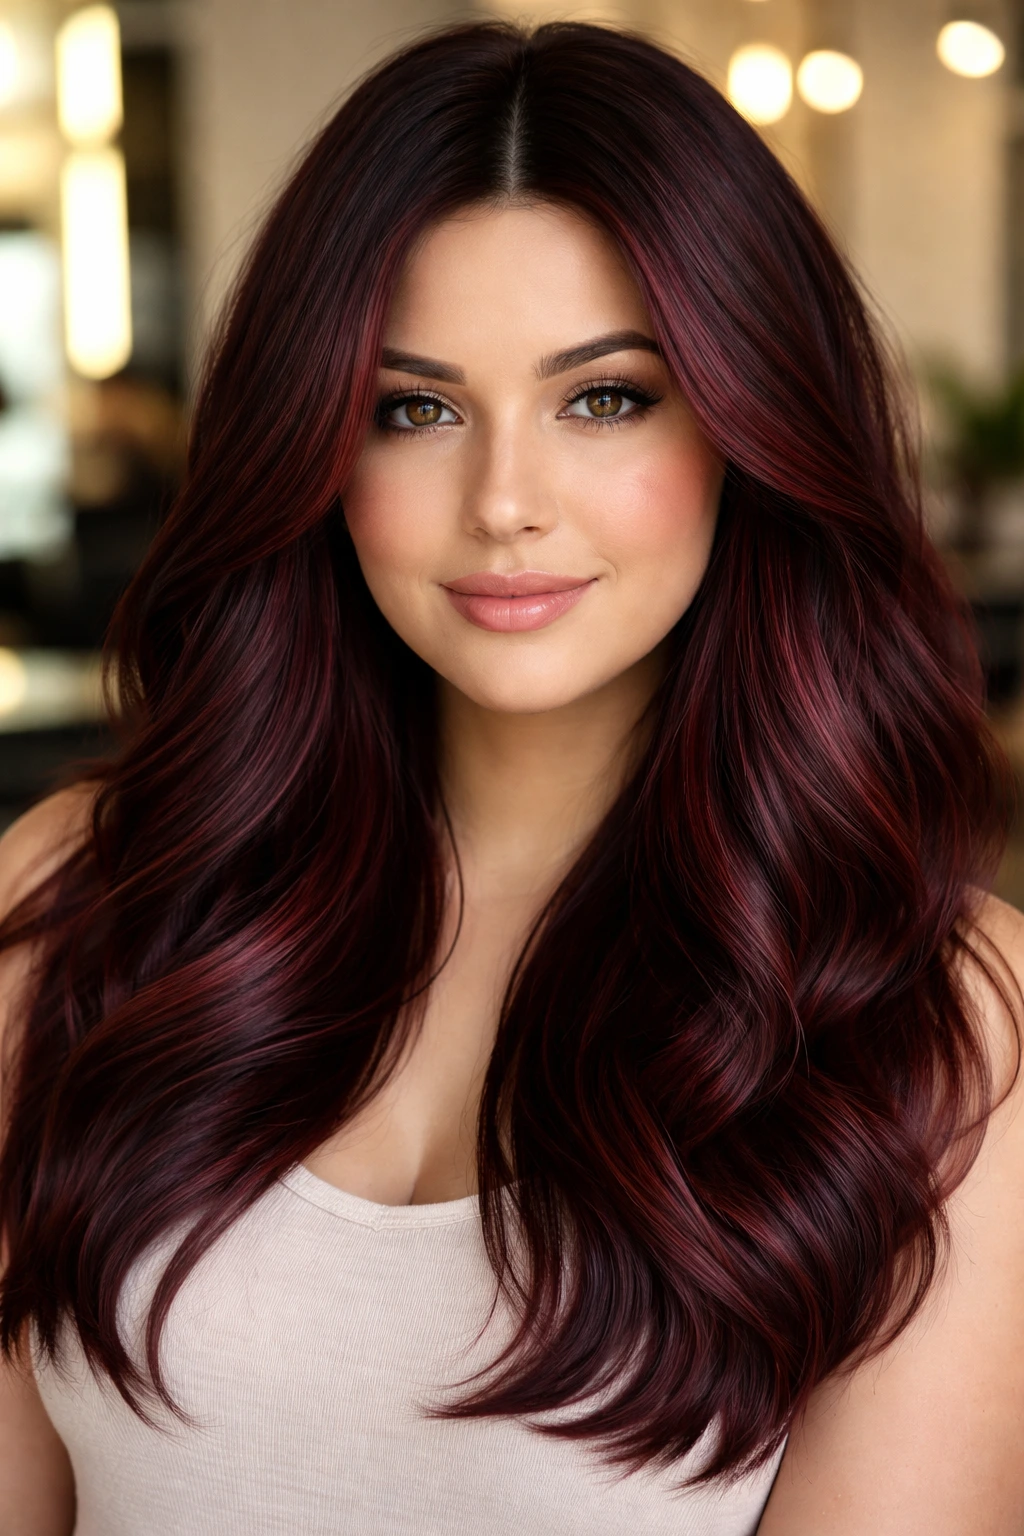
Burgundy offers a cooler, moodier alternative to standard reds, and it works wonders for structural contouring. When you paint deep burgundy highlights into a dark brown base, you aren’t just adding color; you are adding shadow. This is essential for creating depth in areas where you might feel your face looks too “full.”
Why Darker Tones Help
Lighter highlights can sometimes broaden the face. Darker, rich reds like burgundy add a sense of weight and sophistication, but they also act as a sophisticated “shadow” that can soften the edges of a round face. By concentrating this burgundy through the mid-lengths, you can create a subtle gradient that moves the eye downward, away from the cheeks.
Stylist Tip: Always ask for a “shadow root” with this look. A dark root paired with burgundy mid-lengths creates a seamless transition that adds height to the crown of the head, which is an automatic win for round face shapes.
4. Spice-Infused Chestnut Babylights
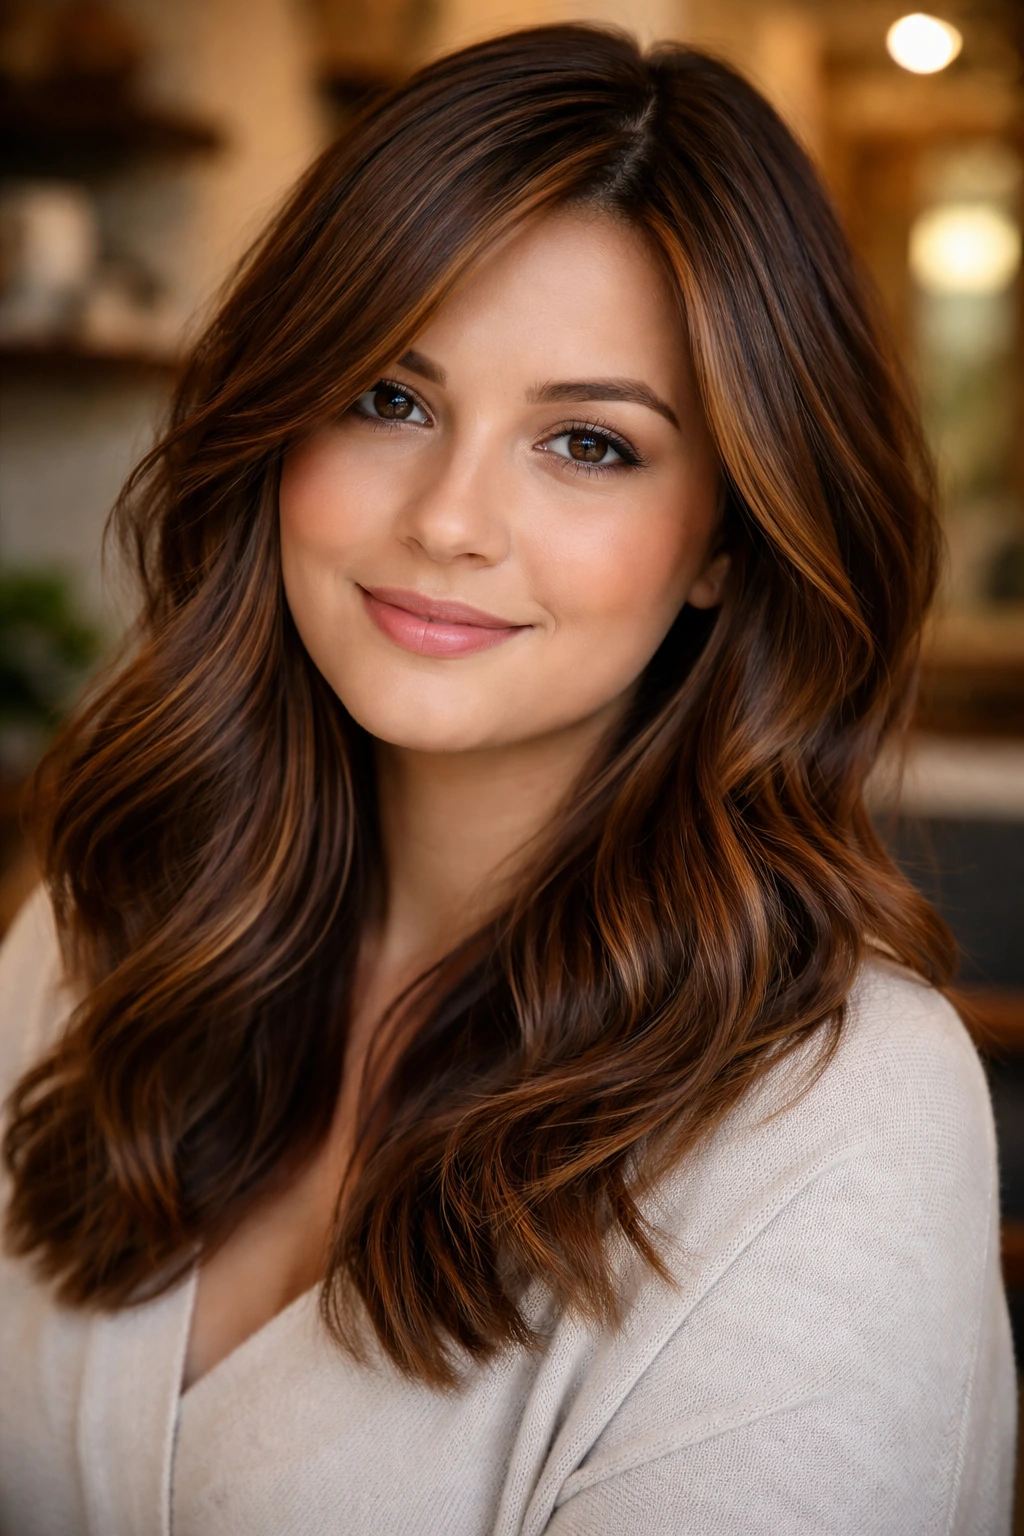
Babylights are ultra-fine, delicate highlights that look like naturally sun-kissed hair. When you use a spicy, cinnamon-infused chestnut shade, you create an all-over warmth that distracts from facial geometry. This technique is for those who prefer a softer, more blended look rather than the “chunky” highlight style.
The Benefit of Texture
Round faces often benefit from texture. If the hair is too flat and one-dimensional, it can emphasize the roundness of the jawline. These fine chestnut babylights add movement. When the hair has movement and texture, it creates a visual “fuzziness” around the face, which softens the perceived edges of your jaw and temples, making the whole silhouette feel more oval and less perfectly circular.
Maintenance Reality
These are low-maintenance. Because the strands are so fine, there is no harsh line of demarcation as your hair grows out. You can expect to visit the salon for a gloss refresh rather than a full foil service, which keeps your hair healthier and your wallet happier.
5. Mahogany Face-Framing Strips
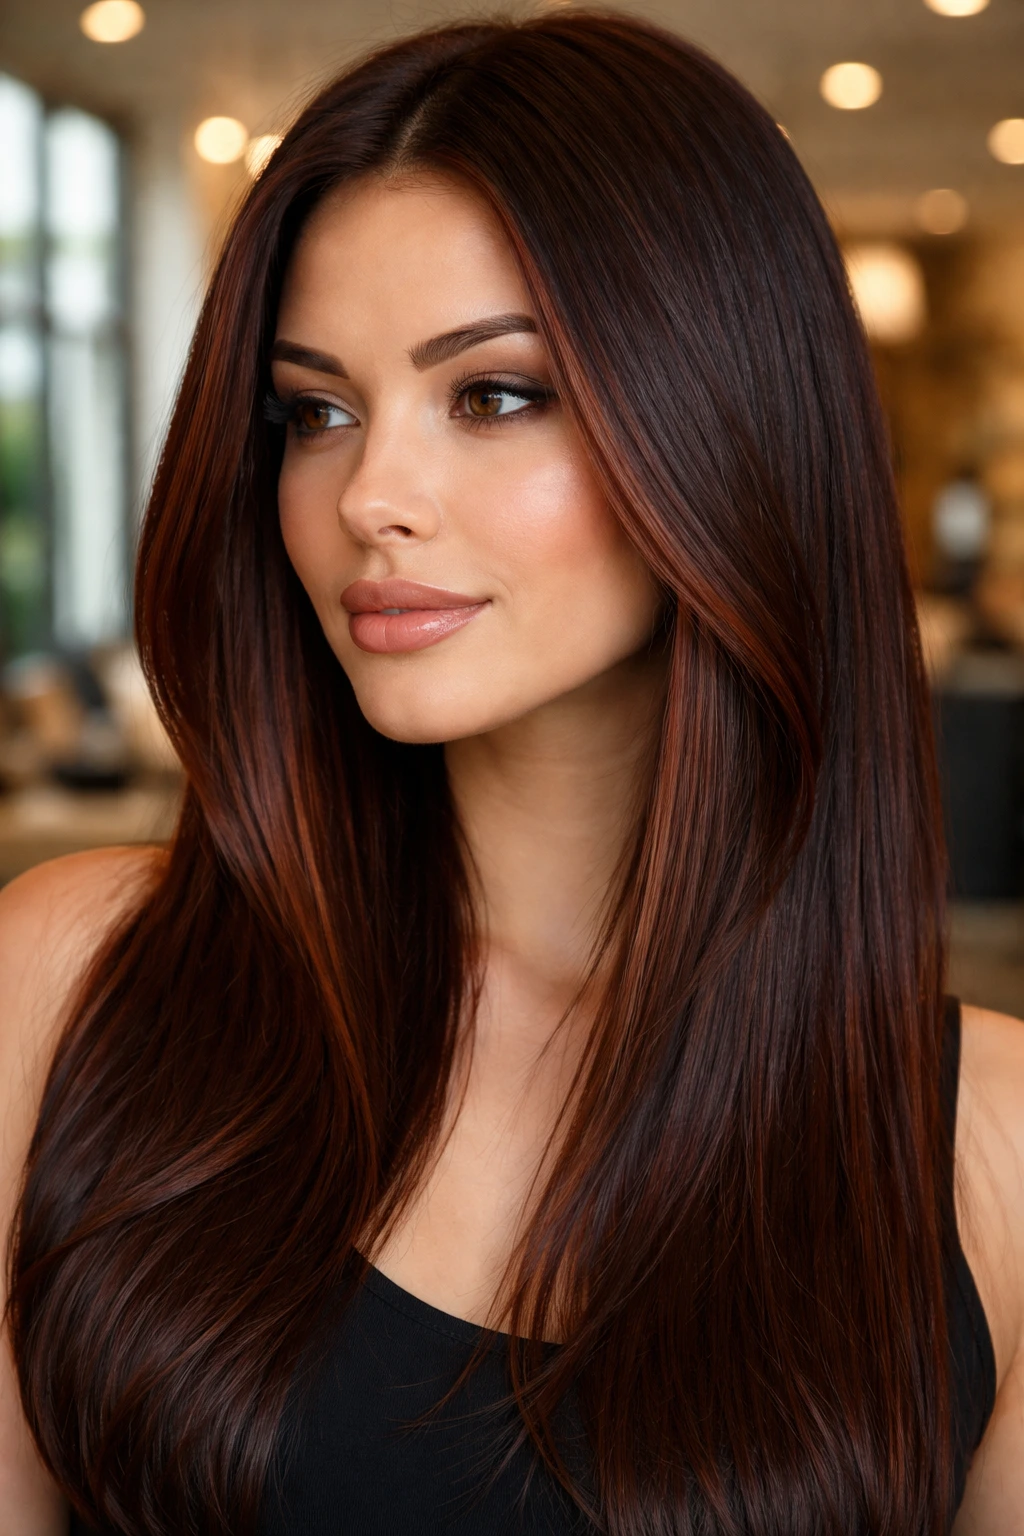
Mahogany is a mix of red and brown that leans toward the cooler, purple-toned side of the spectrum. It is sophisticated and rich. When used specifically in face-framing strips, it does the work of “carving out” the face. By keeping the mahogany concentrated right at the jawline and the cheekbones, you create a contouring effect that defines bone structure where it might be lacking.
Creating Angles with Color
If you want to make your jawline appear sharper, you place the mahogany highlights slightly below the cheekbones and let them trail down toward the chin. This creates a visual V-shape. The V-shape is the enemy of the circle. By constantly repeating this V-shape with color placement, you steer your face away from the round aesthetic and toward a more tapered, angular look.
6. Caramel-Red Ombre Ends
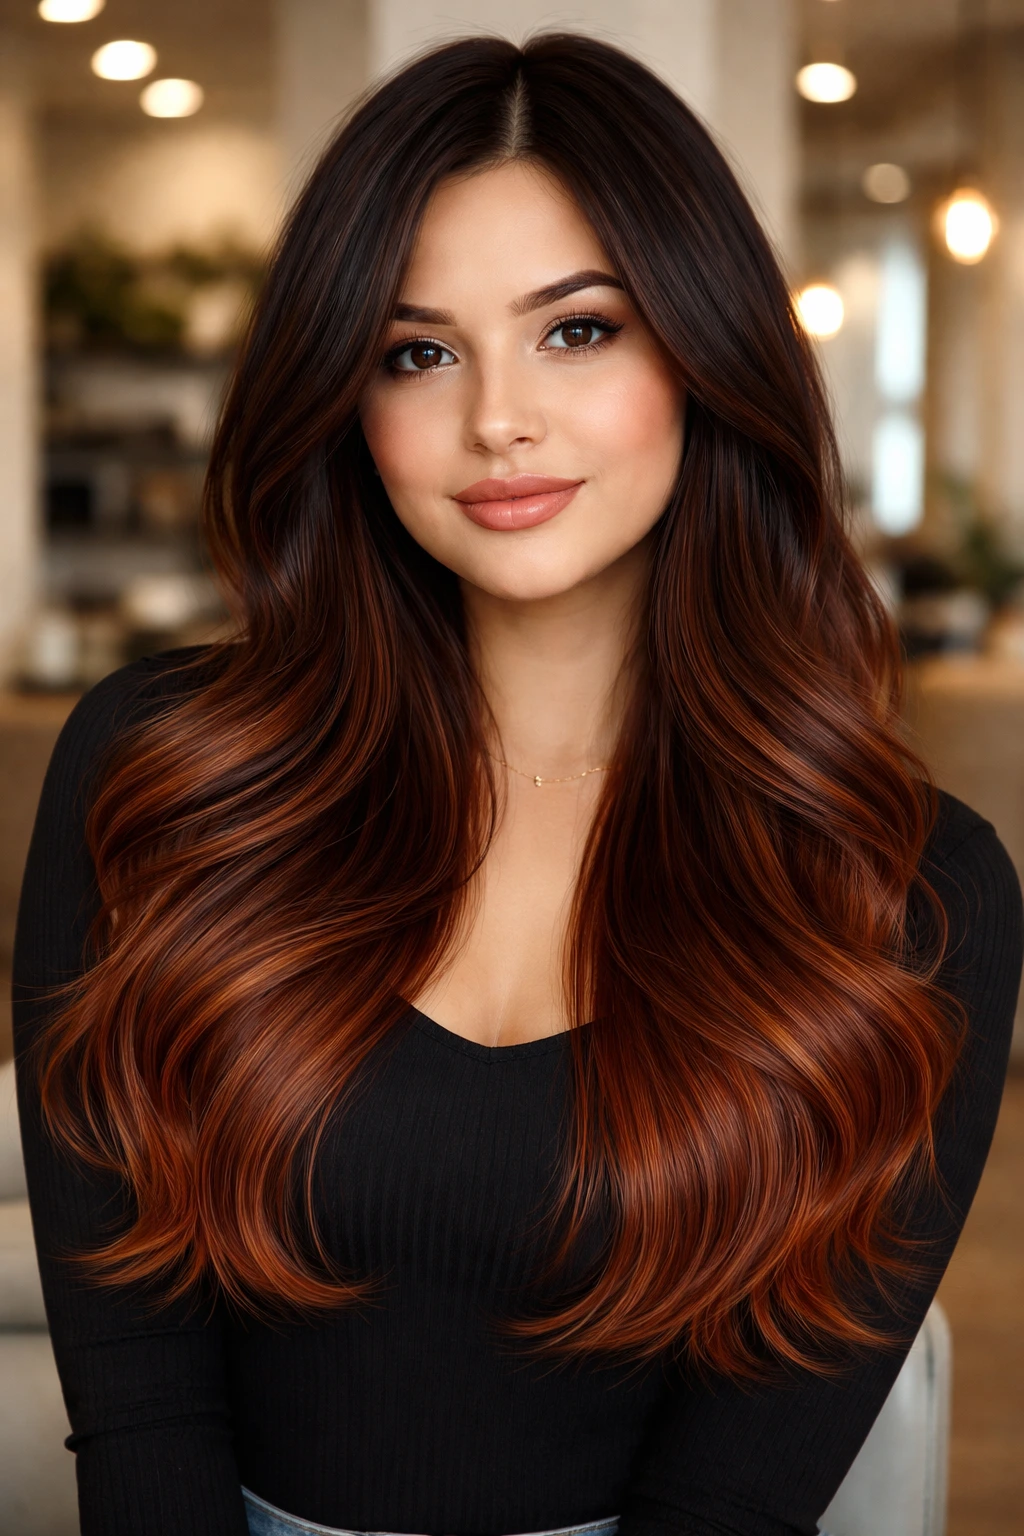
An ombre—where the hair is darker at the roots and gradually lightens toward the ends—is a classic. For a round face, the goal is to make the ombre very bottom-heavy. By keeping the top half of your hair a dark, rich brown and introducing the caramel-red at the very ends, you create a heavy visual weight at the bottom of your hair.
The Weight Effect
Weight is helpful here. When you drag the focus to the ends of your hair, you are lengthening the neck. A longer-looking neck instantly elongates the face. A round face often feels “compact,” so anything that adds physical length to the hair cut and visual length to the neck will help.
Essential Warnings
- Avoid blunt cuts: A blunt bob with ombre can sometimes make a round face look wider.
- Layering is key: Pair this color technique with long, textured layers to ensure the hair falls away from the face rather than clinging to it.
7. Cinnamon Root Melt
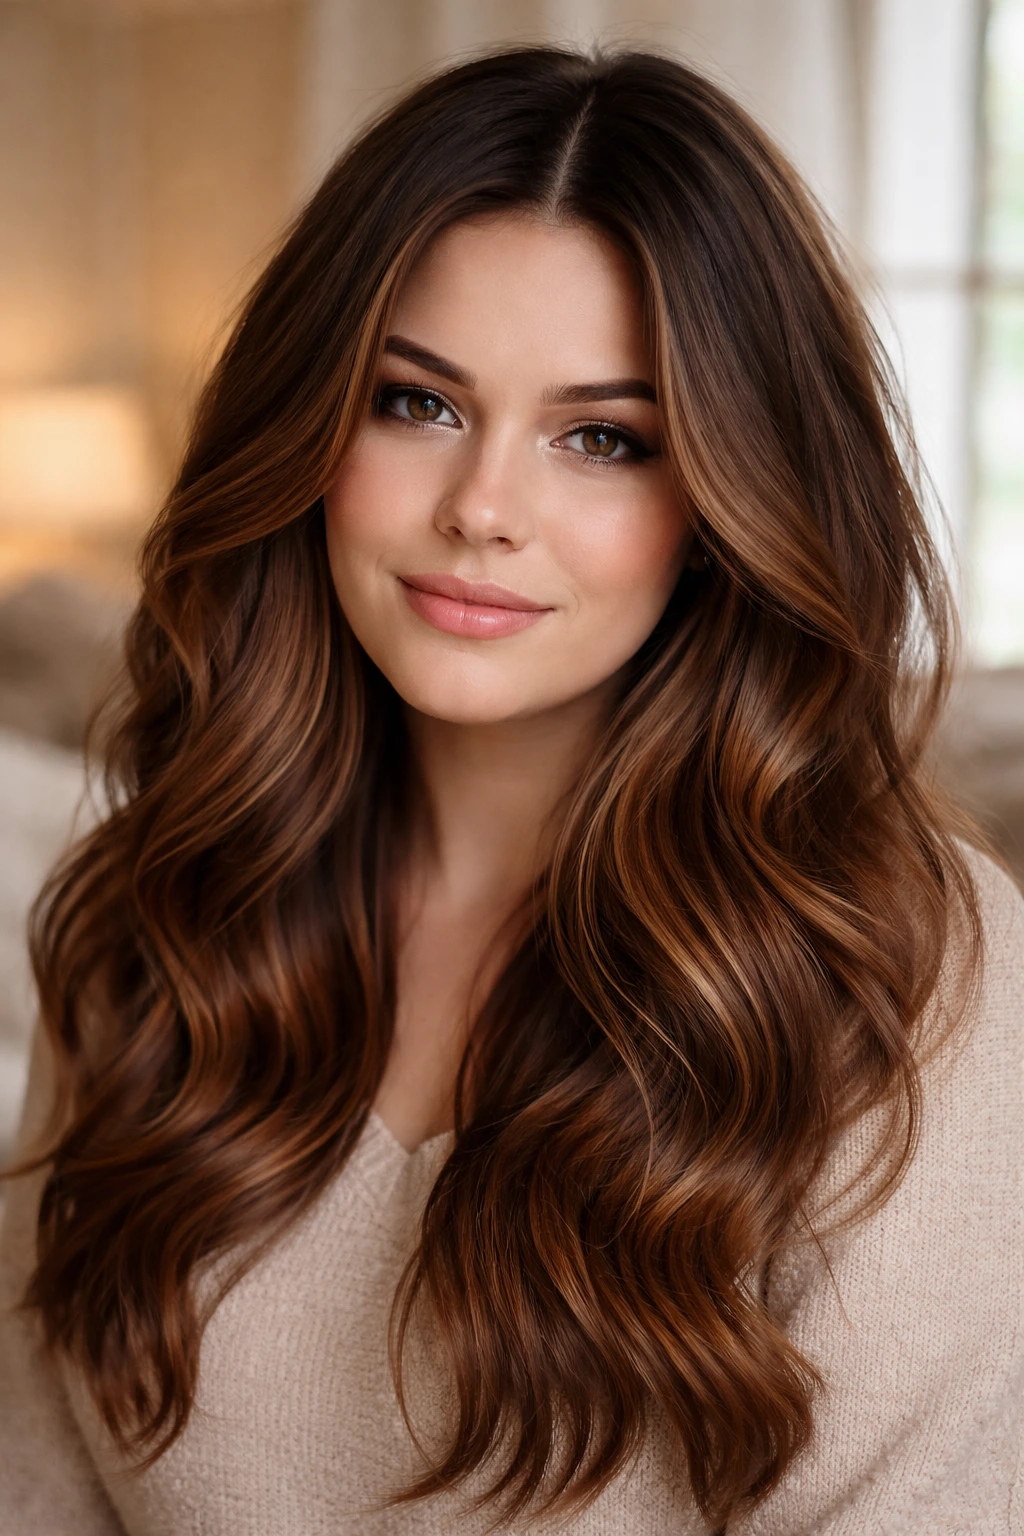
A “root melt” involves blending your natural root color into the highlights so there is no harsh start point. By using cinnamon-toned red highlights melted into a deep espresso root, you achieve a continuous, fluid color. This is excellent for round faces because it removes the “breaks” in color that can highlight facial width.
Why Fluidity Wins
Harsh horizontal lines across the head create a shelf that can broaden the face. A melt creates a vertical gradient. The eye follows the color from the dark roots all the way down to the cinnamon ends. This flow creates a sense of endlessness. If you want to maximize this, ensure your hair is parted slightly off-center; a dead-center part can sometimes emphasize facial symmetry too much, whereas a side-part naturally introduces a diagonal line that helps break up roundness.
8. Cherry-Cola Face Contouring
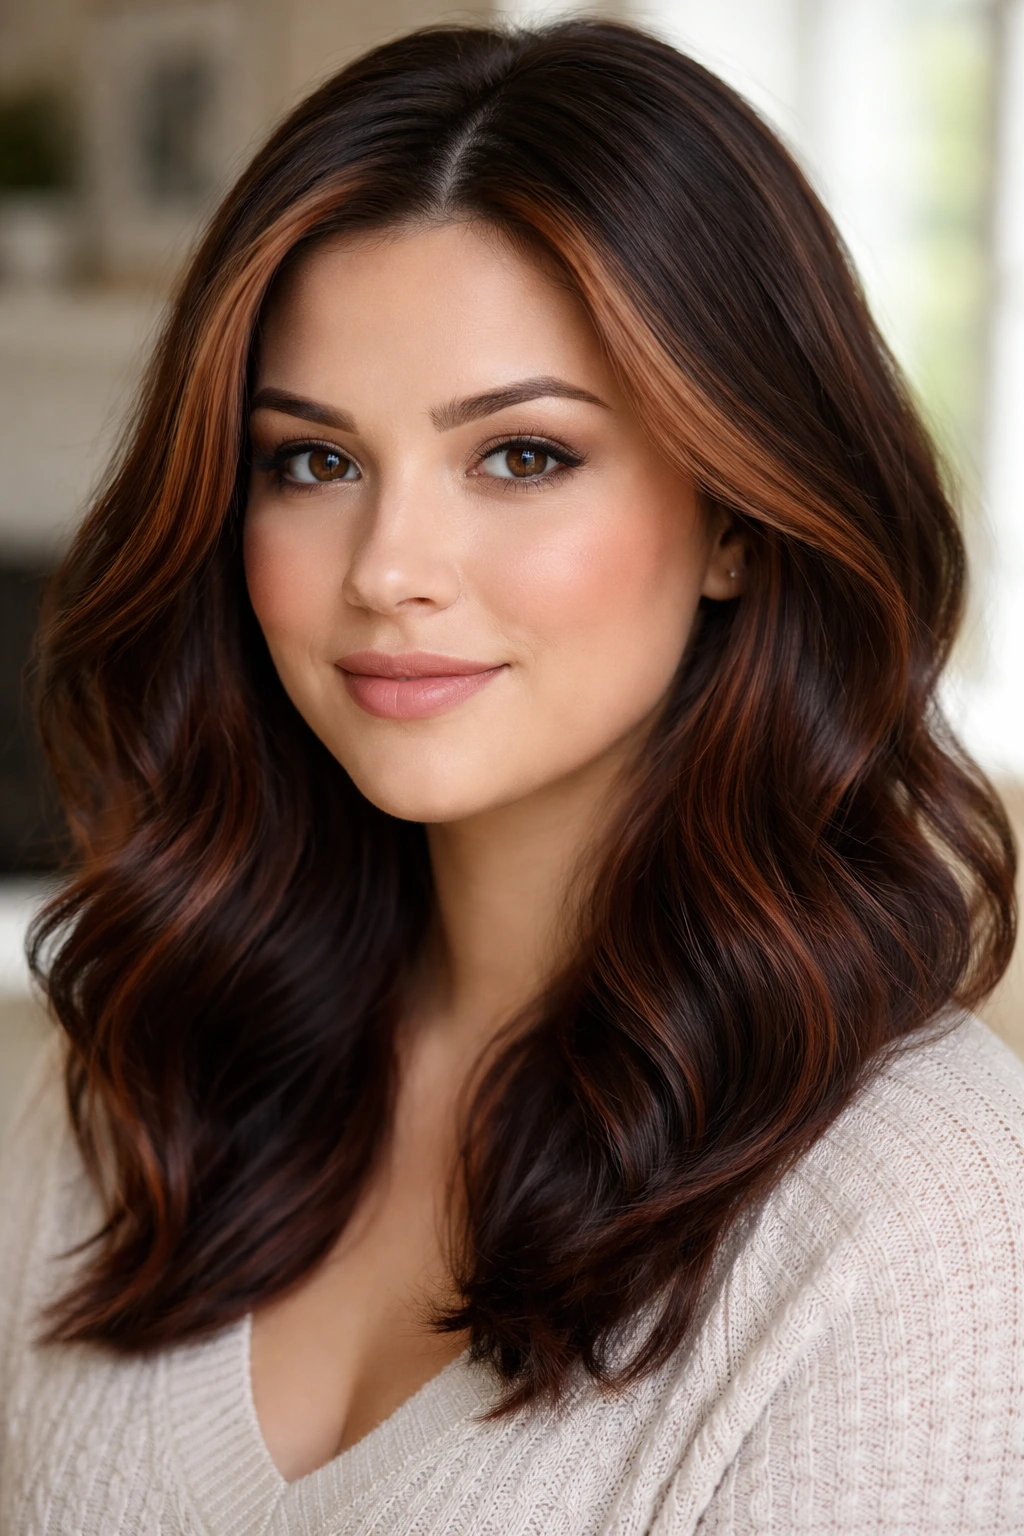
Cherry-cola is a blend of deep violet-red and dark brown. It is dark, intense, and very high-contrast. When you use this shade for “contouring”—which involves placing brighter or slightly lighter pieces around the face and darker pieces tucked behind the ears—you are literally shading your face with your hair.
The Art of Shadow
Think of this like bronzer. You place the darker cherry-cola tones in areas where you want to create shadow, such as right around the jawline. You place the slightly lighter, more vibrant pieces around the temple to open up the eye area. By doing this, you are manually manipulating where light hits the face, effectively narrowing the appearance of the cheeks.
Note: This requires a skilled colorist who understands placement. It is not a standard “all-over” dye job. You are asking for “dimensional color placement.”
9. Russet Babylights Near the Temples
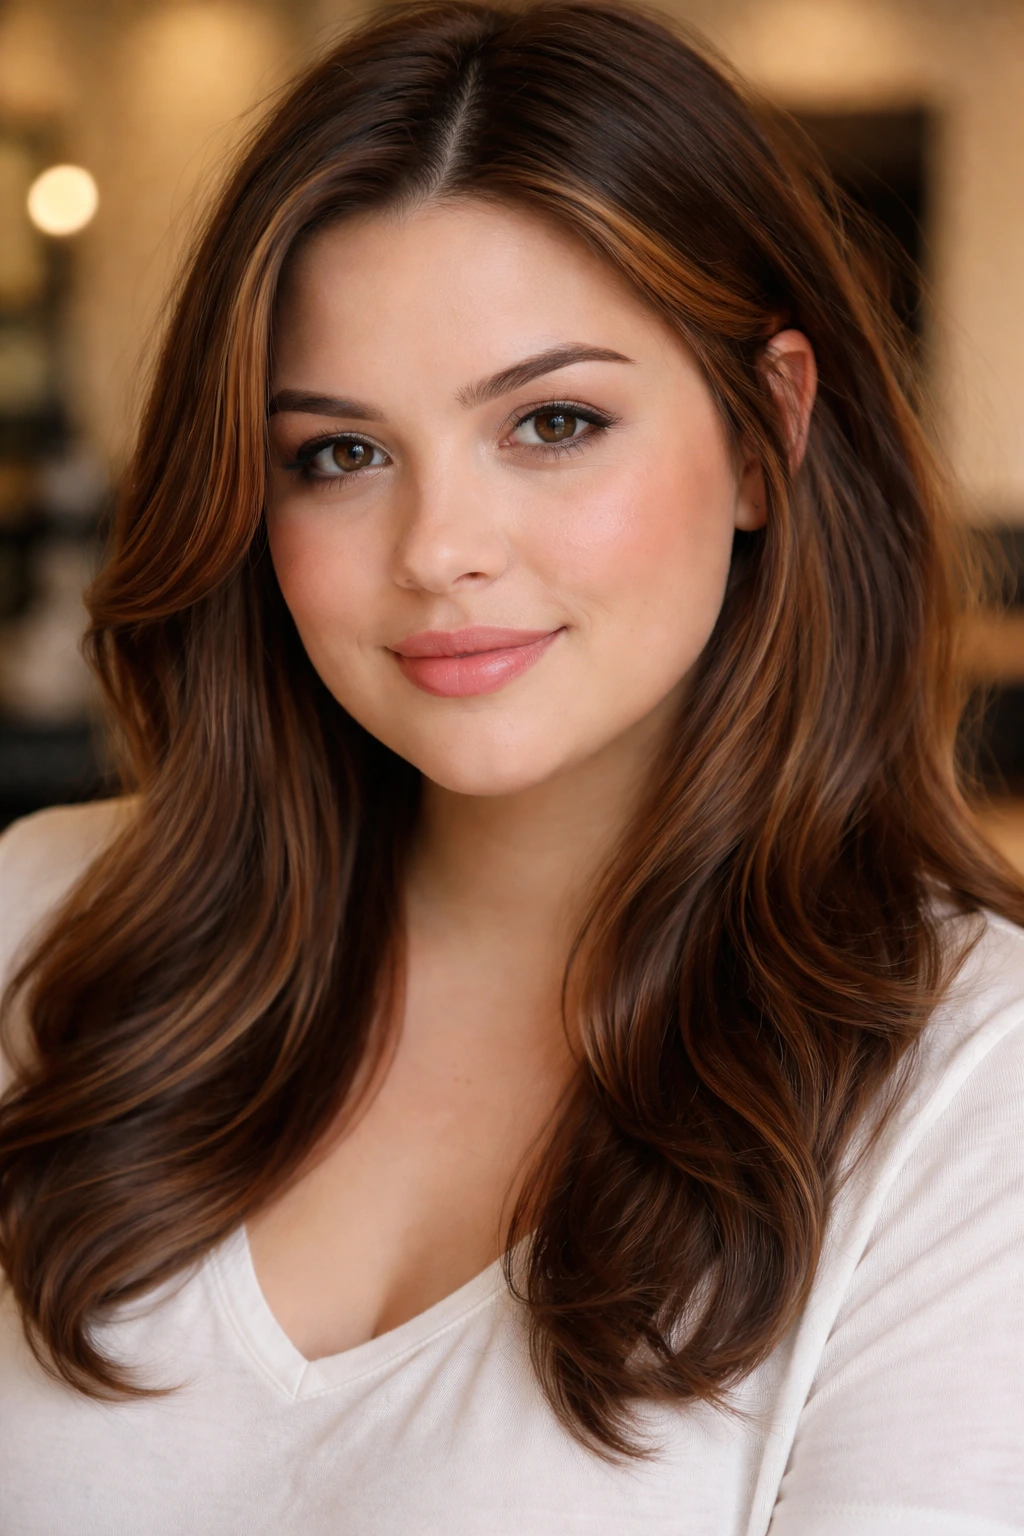
The temple area is a major focal point for round faces. Often, people want to narrow the width across their forehead and temples. By concentrating fine, russet-toned babylights specifically in the hair around the temples and sweeping them away from the face, you can create a subtle receding effect.
The Temple Trick
Darker hair near the temples makes them look wider. Lightening them up—even just a shade or two with warm russet—makes the area look less dense. When the hair at the temples feels lighter and airier, it visually softens the perimeter of the face. It is a minor adjustment, but it changes how your hairline interacts with your cheekbones.
10. Ginger-Brown Chunky Highlights
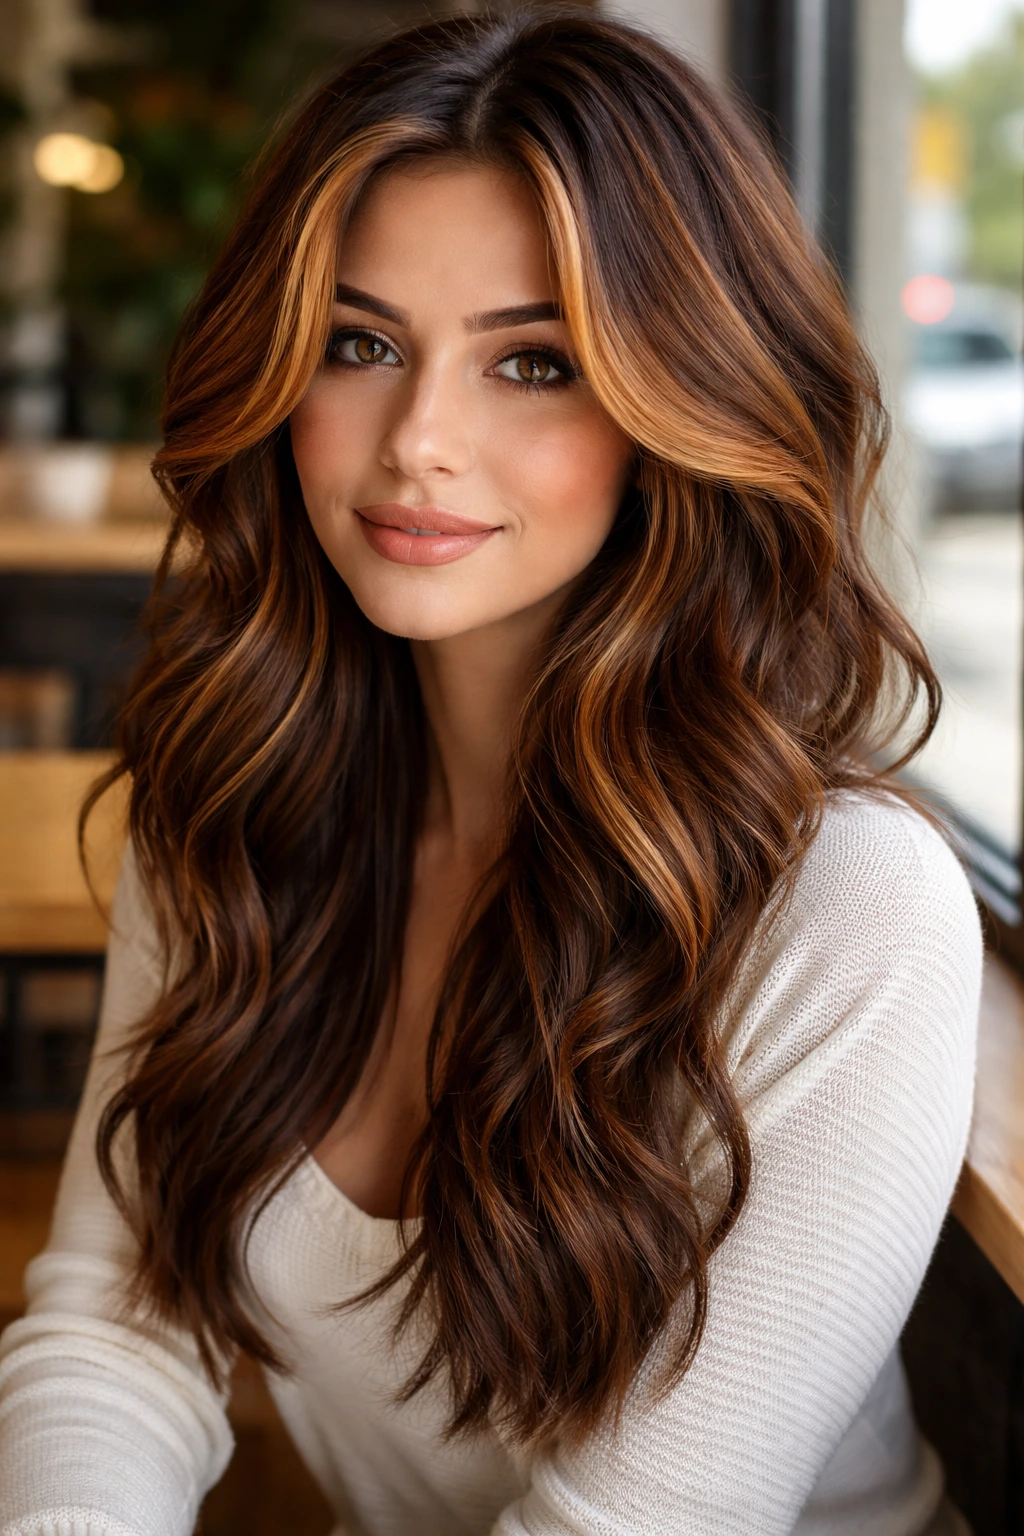
“Chunky” highlights often get a bad rap because they can look dated, but when done with a blend of ginger and warm brown, they create a retro, textured look that is actually perfect for round faces. The larger sections of color create distinct columns.
Why This Works
Wide columns of color (as opposed to thin streaks) create more contrast. This contrast creates “movement” in the hair. If your hair is too uniform, it acts like a frame around your face. If your hair has movement and big chunks of color, the hair becomes the focal point, and the eye stops focusing so intently on the shape of your face. It is a simple distraction technique that works every time.
Styling Suggestion: Use a large barrel curling iron to create loose, undone waves. The large waves complement the “chunky” highlights and prevent the look from appearing too controlled or rigid.
11. Dark Espresso with Auburn Panels
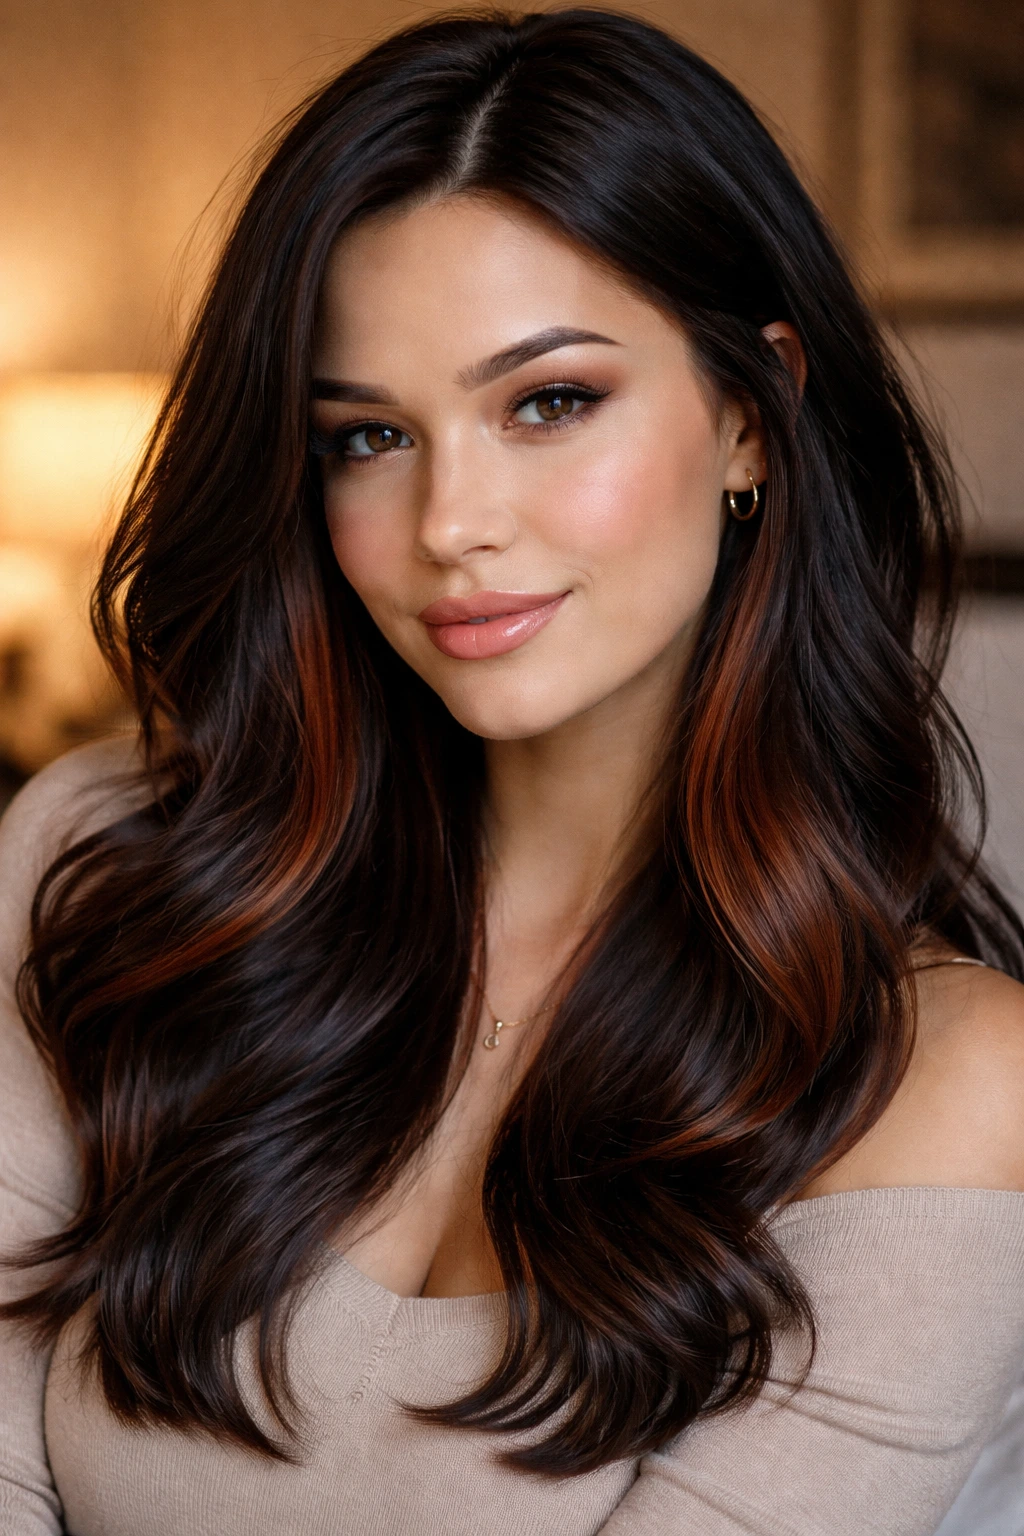
If you have very dark hair, you do not need to bleach your entire head to get a red-brown look. Instead, opt for large panels of auburn placed in the interior of your hair. This is sometimes called “hidden color” or “peekaboo” highlights, but with a structural twist.
The Internal Glow
By placing auburn panels on the sides (near the ears/jaw), you provide a vibrant background against which your face sits. This color provides warmth to the skin tone and adds visual bulk to the sides of the hairstyle, which can actually help if your hair is thin. Do not overdo the sides, however. The goal is to frame, not to widen. Keep the most intense auburn panels slightly behind the ear line, so they peek through when you move.
12. Strawberry-Bronze Soft Balayage
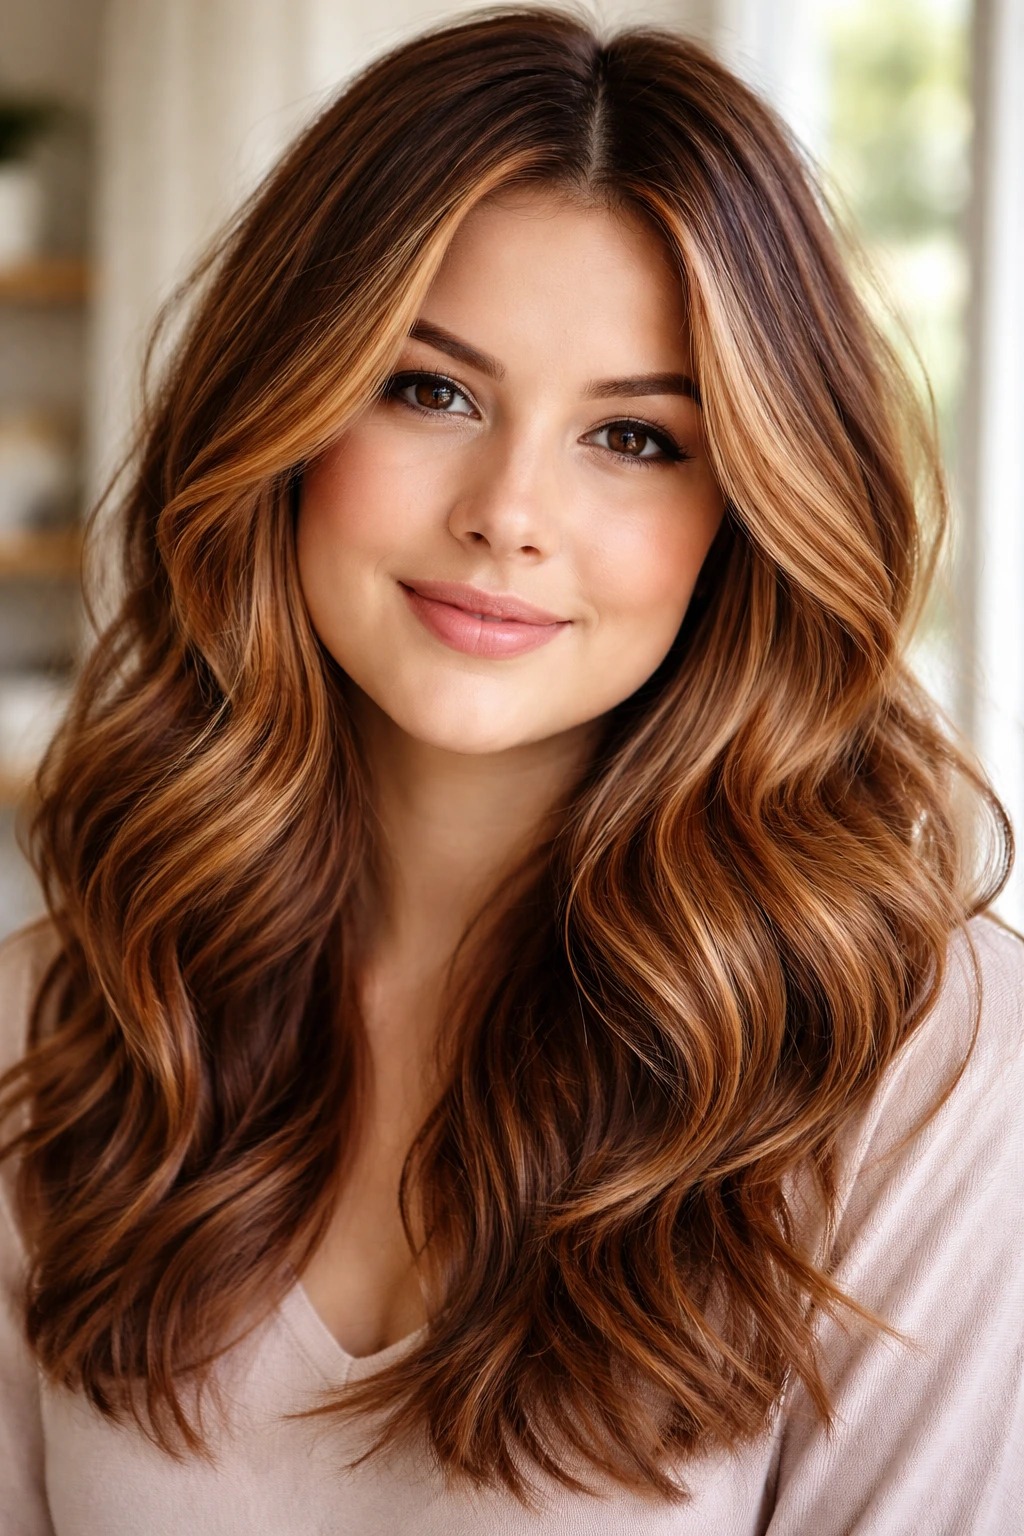
Strawberry-bronze is a gorgeous, metallic shade that catches the light beautifully. This is a much lighter look than the deep mahoganies. For a round face, this light-reflecting quality is helpful because it creates “brightness” all over.
Light Reflectance
Round faces benefit from brightness. When your hair is dark and matte, it can look “heavy” and sometimes drag the face down. Strawberry-bronze highlights are inherently shiny and light-reflective. This glow draws attention upward to the eyes and away from the jawline. It is essentially a highlighter for your face.
13. Mahogany Lowlights Mixed with Copper
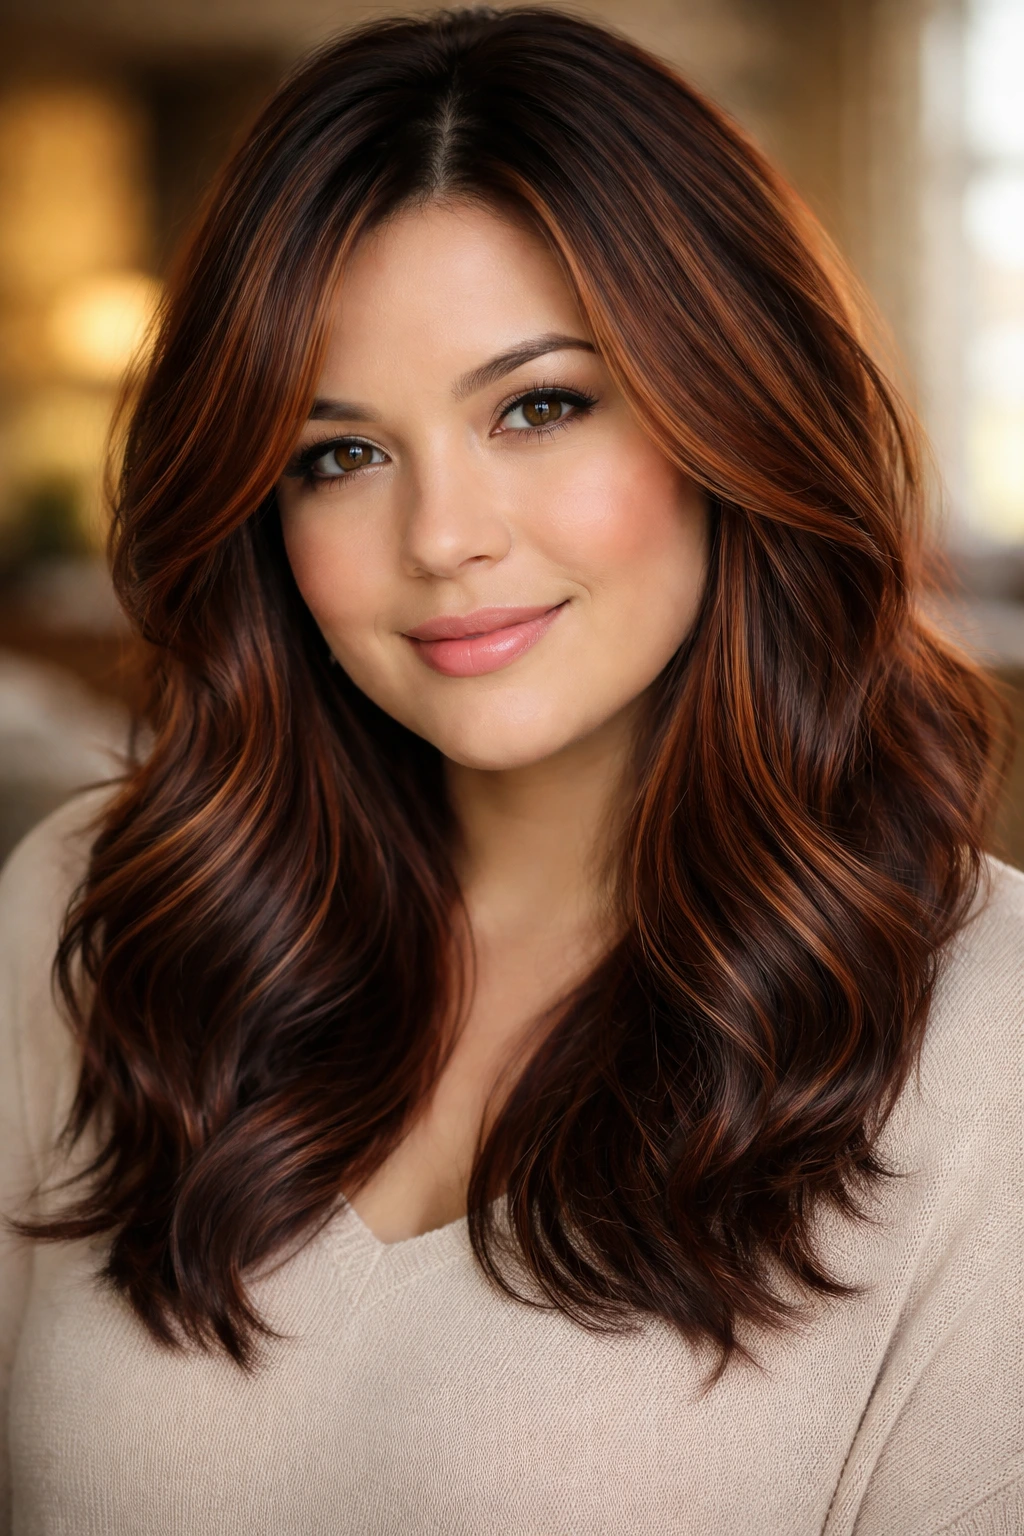
Sometimes, the issue isn’t the need for more light, but the need for more depth. If your hair is already light-brown or blonde, you might be struggling with a lack of structure. By adding mahogany lowlights mixed with copper highlights, you create a “salt and pepper” effect of red and brown.
Contrast vs. Depth
- Copper highlights: Add the necessary light to frame the face.
- Mahogany lowlights: Add the necessary depth to ground the look and prevent it from appearing “flat” or too “fuzzy” around the edges. This combination provides the perfect balance. You get the slimming effect of the dark tones and the face-lifting effect of the bright copper.
14. Vertical Slices of Copper
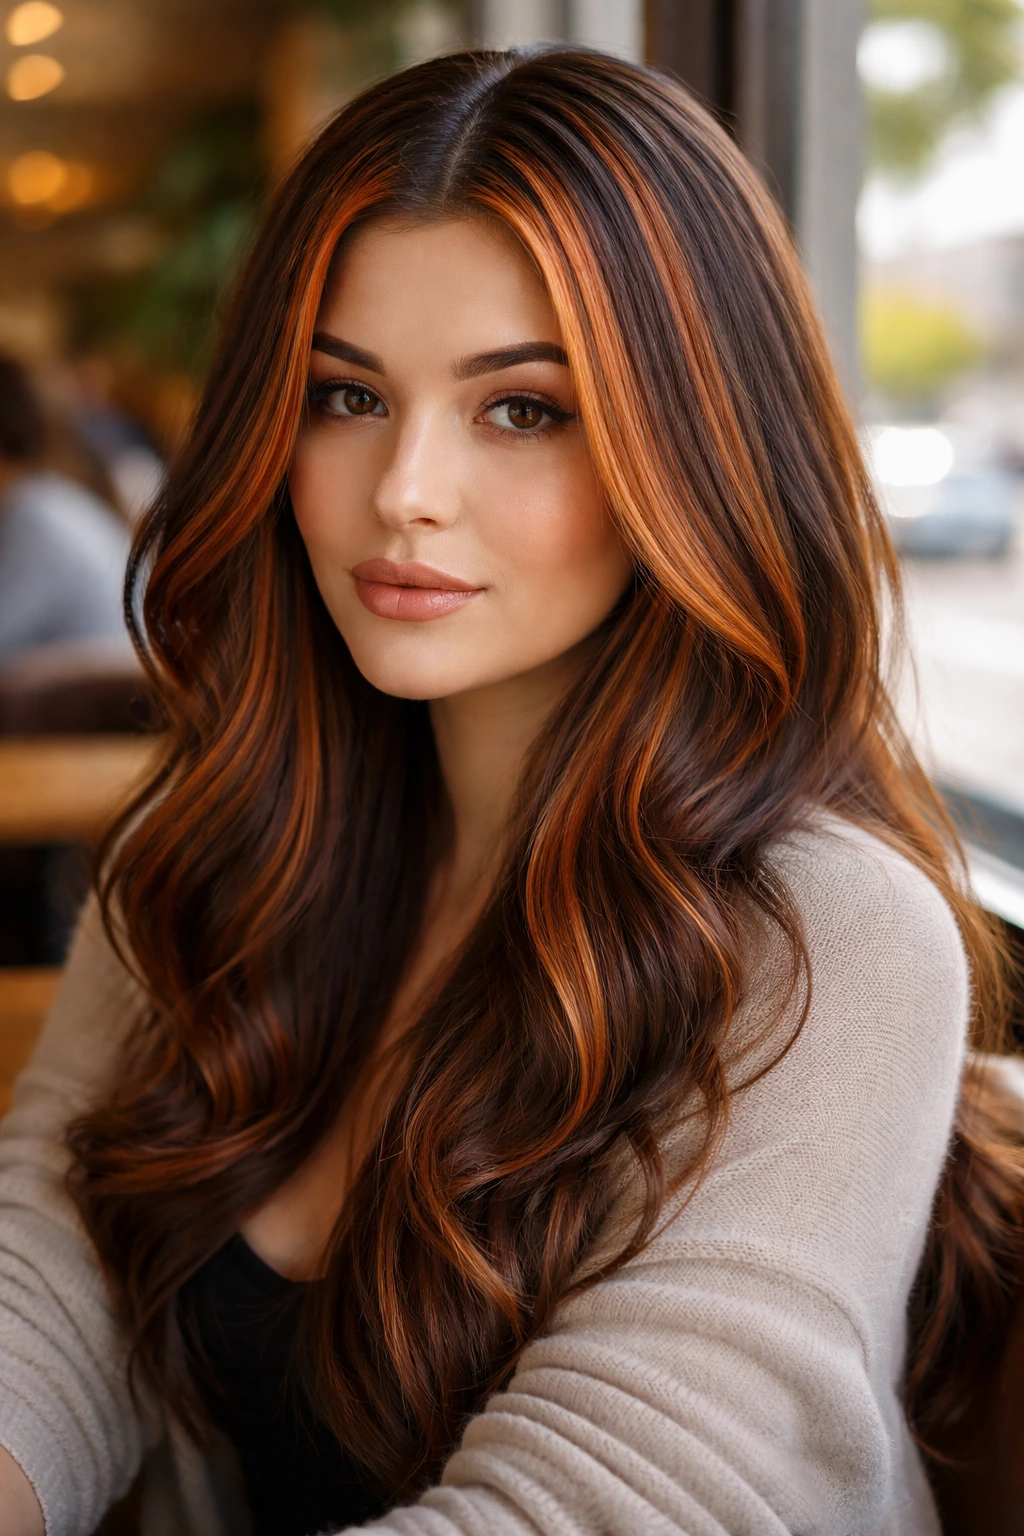
Vertical slices are different from ribbons. Ribbons are painted; slices are sectioned and foiled. Slices create a more definitive, bold line of color. If you have a round face, you want these slices to be placed specifically at the front and along the parting line to draw the eye vertically.
The Geometric Advantage
A round face lacks sharp angles. A vertical slice of copper provides a sharp line. When you have multiple sharp lines running vertically through your hair, you are essentially “drawing” an oval shape into the hair. The eye picks up on these lines, and the brain subconsciously interprets the overall shape as more elongated than it actually is.
Placement: Start the slice at the part and run it straight down to the ends. Avoid horizontal slicing, which will add width.
15. Wine-Toned Peekaboos
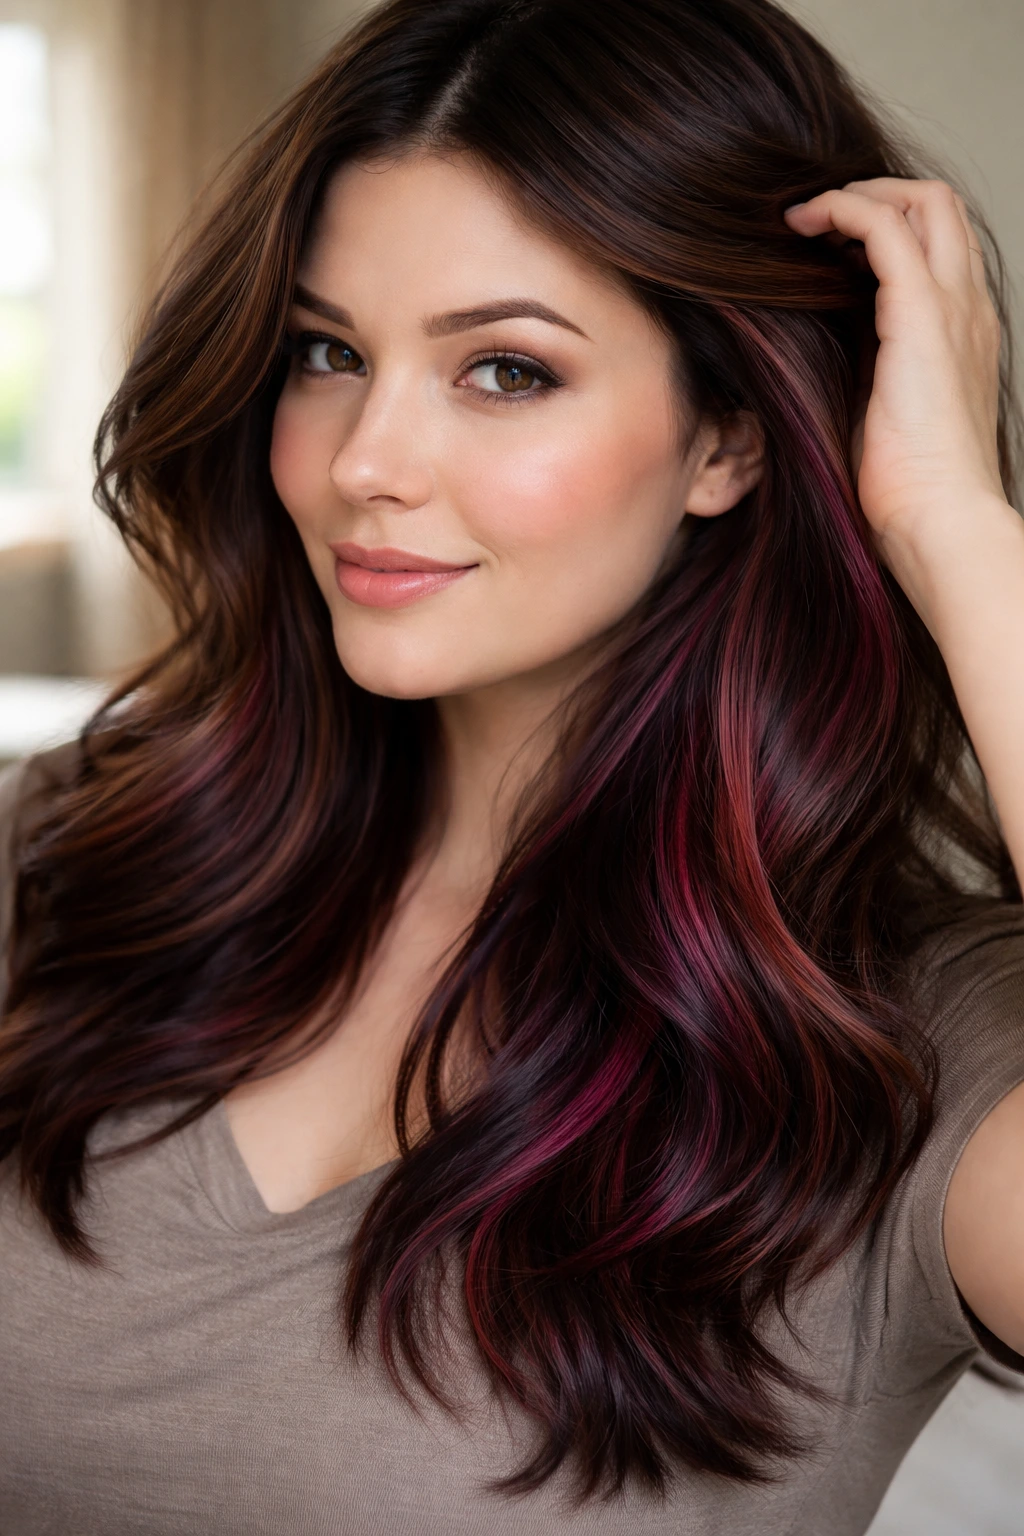
Wine tones (a mix of deep red and dark purple) are great for creating a high-contrast look that is still professional and wearable. Placing these as “peekaboos” beneath the top layer of your hair allows you to add color without overwhelming your features.
The Illusion of Density
Round faces can sometimes be overwhelmed by too much color near the face. By hiding the wine-toned highlights underneath, you ensure that the color is only visible when the hair moves. This keeps the face-framing area relatively clean and simple, which prevents the look from becoming “busy.” A busy hairstyle can sometimes make a round face look cluttered and smaller. This technique is clean, sophisticated, and controlled.
16. Warm Sienna Face-Framing
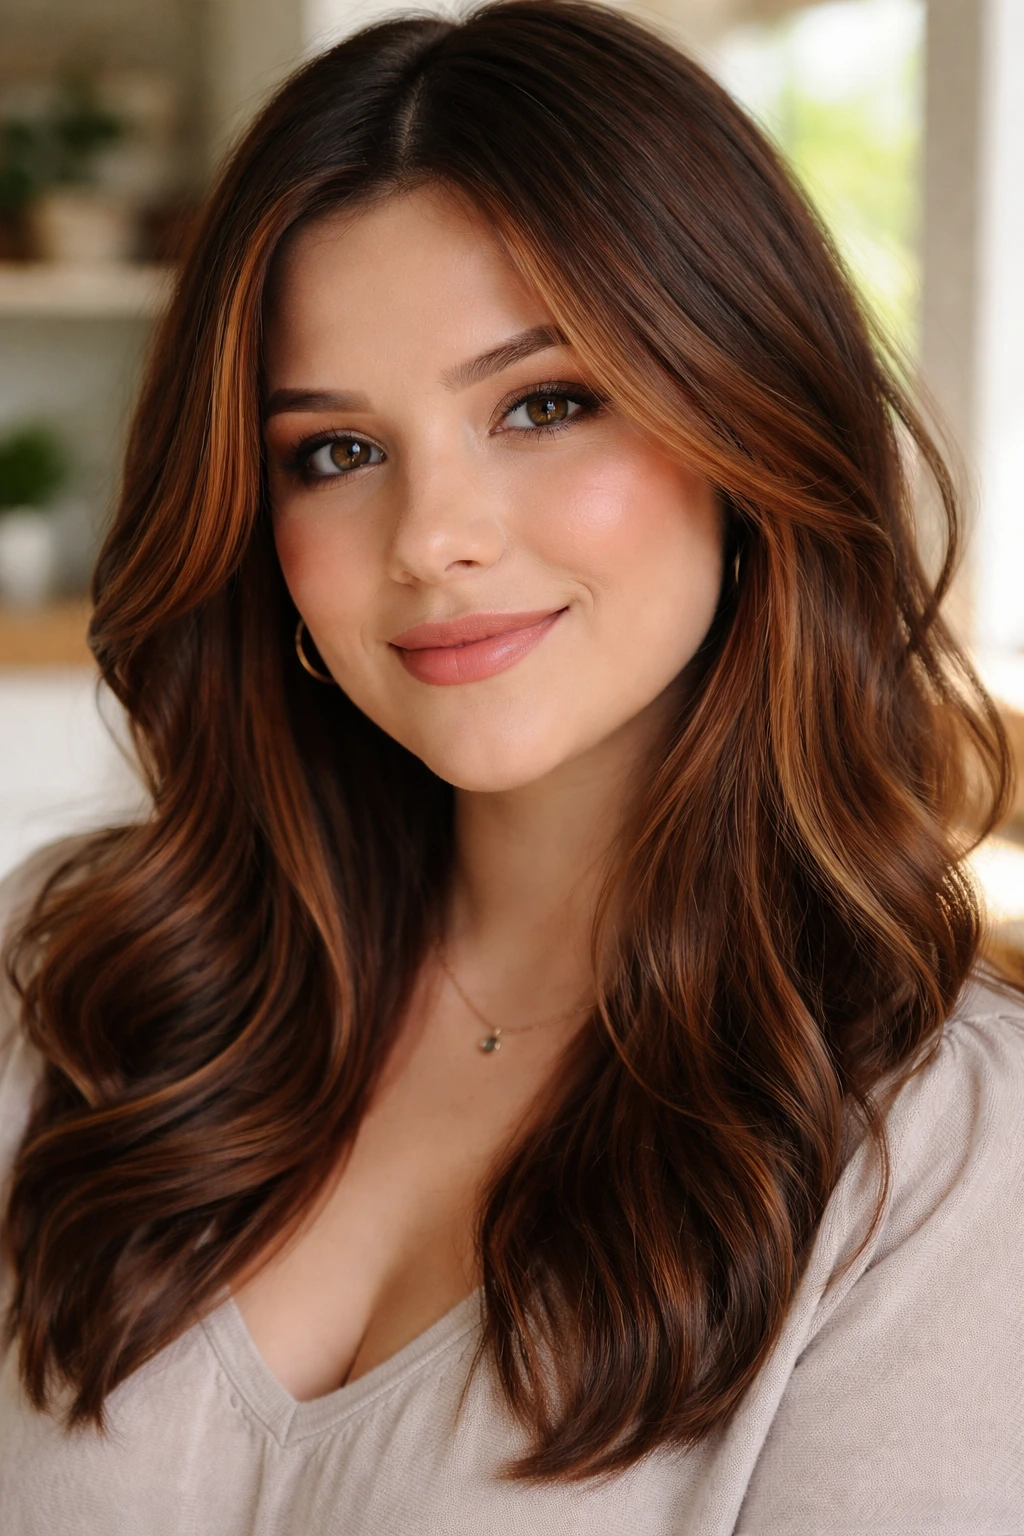
Sienna is a rich, earth-toned red—think terracotta or burnt orange, but softer. It is warm and inviting. Using this for face-framing—painting the color from the roots to the mid-lengths around the face—is less jarring than a bright copper money piece, but it still serves the same structural purpose.
The “Glow” Factor
Warm colors have a tendency to “advance,” meaning they look closer to the eye. When you place a warm sienna highlight around your face, that area appears to “pop” forward, while the rest of your hair sits back. This creates a 3D effect. That 3D effect gives your face a sense of depth and structure that it might not naturally have.
17. Dark Base with Terracotta Tips
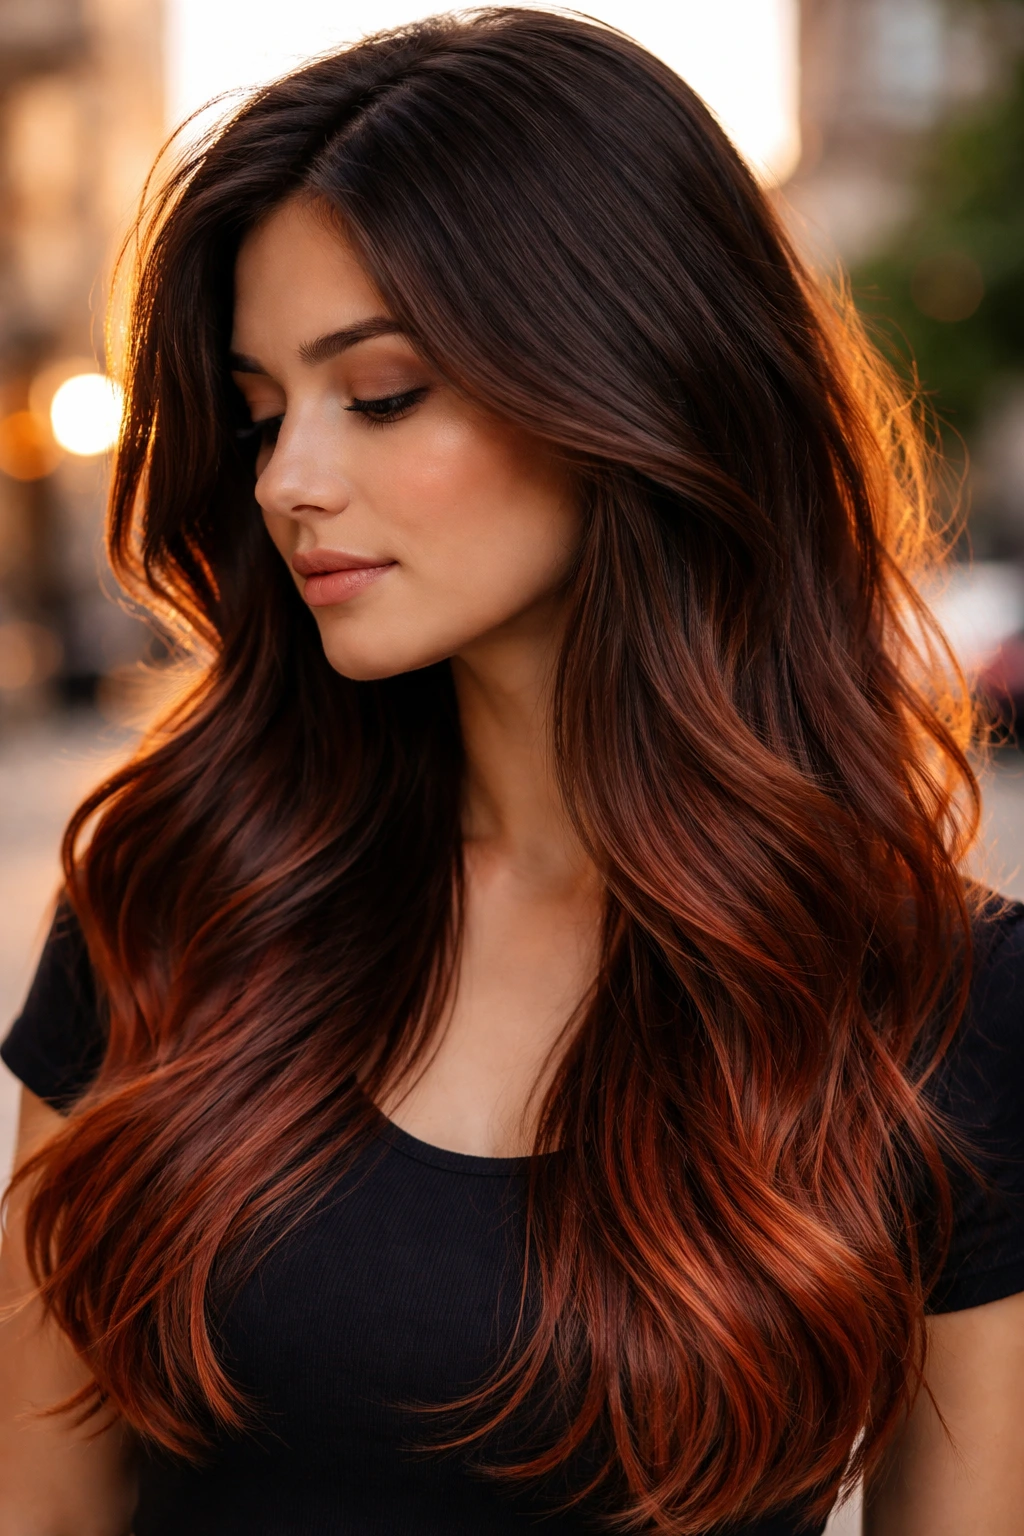
This is a modern take on the dip-dye, but much more sophisticated. Keep the majority of the hair a very dark, natural brown. Then, saturate only the last two or three inches with a terracotta-red shade.
The Gravity Pull
As mentioned earlier, drawing the eye down is the golden rule for round faces. By having a dark top and a vibrant bottom, you force the observer’s gaze to travel the full length of your hair. This is the ultimate “lengthening” hack. It works best on long or medium-length hair. If your hair is very short, this technique can sometimes create a “blocky” look that might highlight facial width rather than diminishing it, so proceed with caution if you are rocking a pixie or a very short bob.
18. Subtle Auburn Babylights Throughout
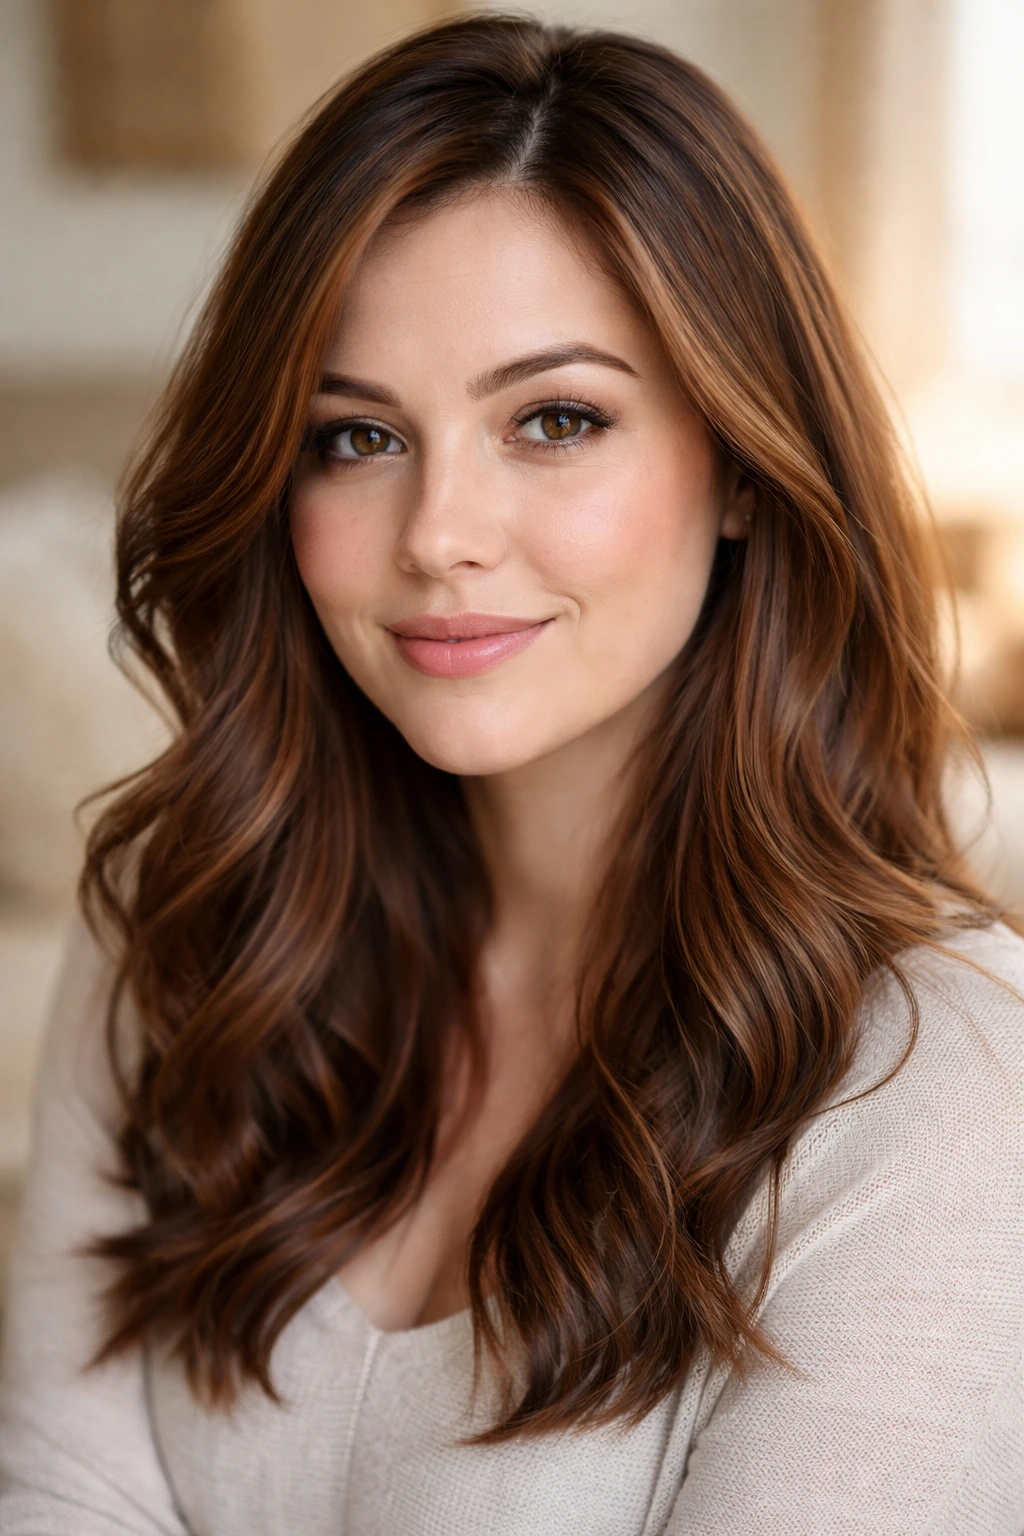
If you are hesitant to commit to major changes, subtle auburn babylights throughout the entire head are the safest and most effective entry point. These are fine, sparse highlights that mimic natural red undertones.
The “No-Contrast” Approach
Sometimes, high contrast is the enemy. If you have a round face and are worried that harsh highlights are making it look “choppy,” then subtle babylights are the answer. They create a “glow” rather than a “line.” This glow helps soften your features without creating any harsh geometric shapes that might conflict with the roundness of your face. It is a universally flattering approach that adds warmth to your skin and depth to your hair, effectively enhancing your look without forcing it.
Final Thoughts
When you are working with a round face, the objective is never to “fix” your shape, but to use your hair as a frame that complements and balances your features. Red-brown highlights offer an incredible palette for this. They bring warmth, intensity, and the ability to play with light and shadow in ways that cooler, lighter tones often cannot.
Whether you choose a sharp copper money piece to create verticality or deep burgundy balayage to add shadow and contour, the secret lies in placement. Keep your vertical lines clean, avoid heavy horizontal blocks of color, and focus on drawing the eye up and down rather than side to side. Your hair is the ultimate accessory for shaping your silhouette—use it to your advantage. Take these techniques to your colorist, discuss the depth that works for your skin tone, and you will find that a few well-placed highlights can change everything.
