



Fine hair at medium length can look flat for one boring reason: the shape keeps asking the hair to do more than it can. The best medium hairstyles for fine hair do the opposite. They protect the ends, lift the crown, and leave enough clean line for the eye to read “full” even when the actual strand diameter is tiny.
Heavy layers are where a lot of people go wrong. Too many snips can make the mid-lengths flimsy and the ends wispy, which is the last thing you want when your hair already lies close to the head. Good medium hair has a little discipline. A blunt edge, a smart part, and the right kind of bend can do more than another round of texturizing.
And the product matters. Heavy cream is a trap. So is piling on oil at the roots and hoping for lift. Fine strands want lightweight mousse, root spray, dry shampoo, and a little grit where the style needs to hold. That’s the whole game, honestly.
Some of the looks below are cuts, some are styling tricks, and some are the kind of halfway-between styles that save you on second-day hair. They all share one thing: they make medium-length hair look like it has more substance than it actually does, which is the point.
1. The Collarbone Blunt Lob That Makes Fine Hair Look Thicker
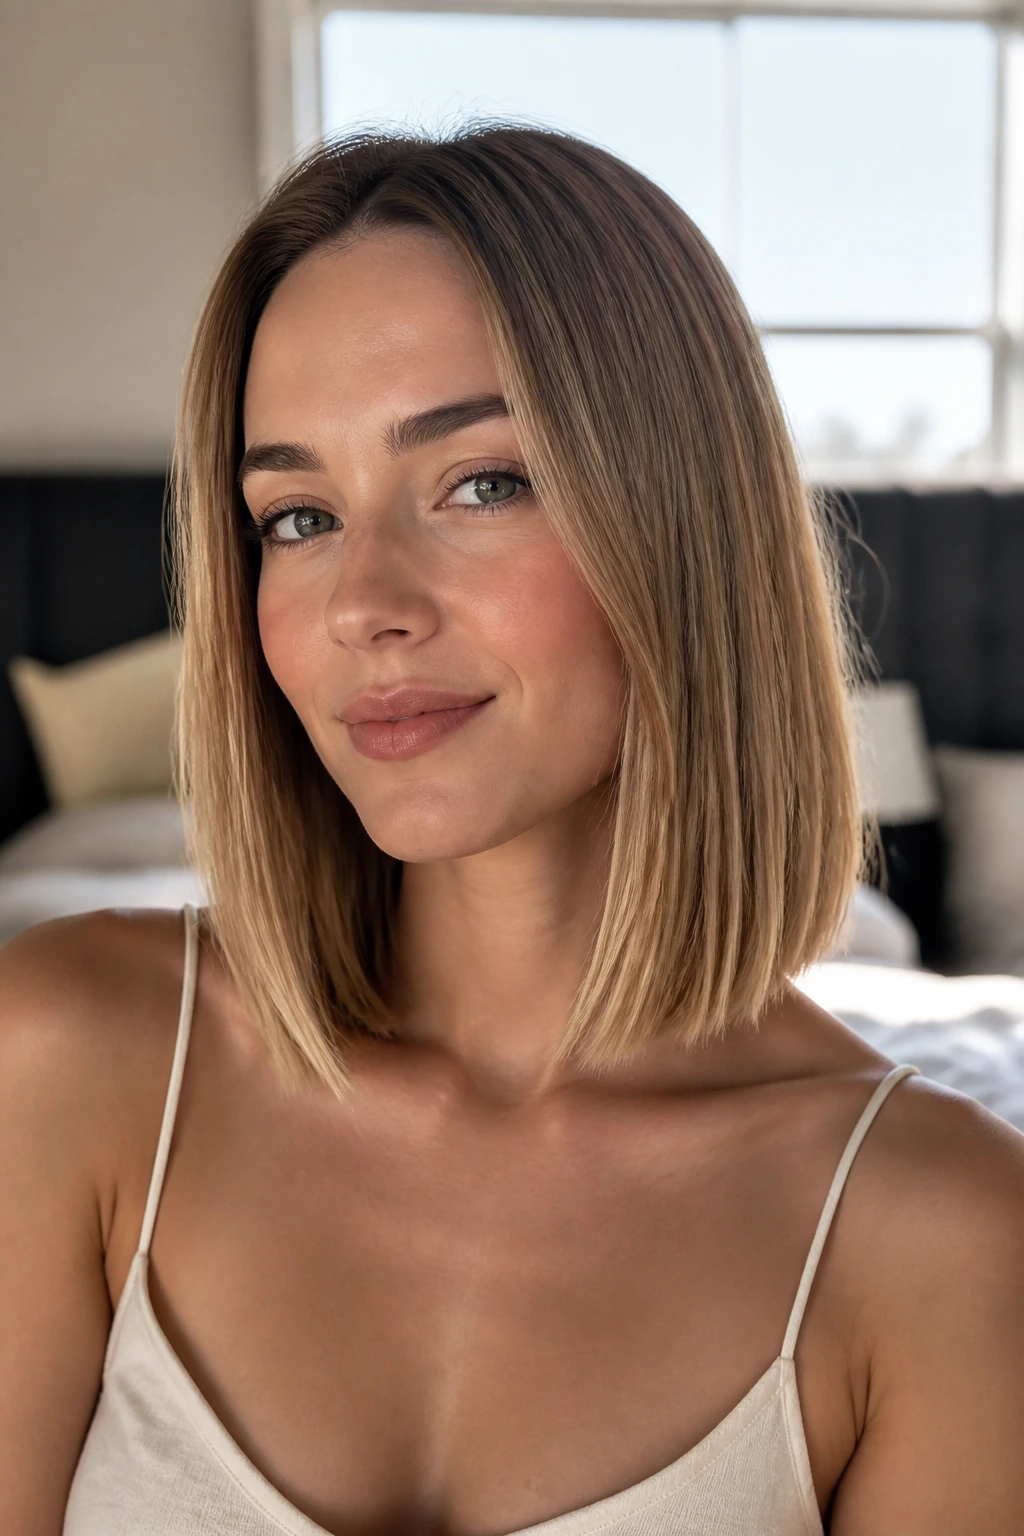
Nothing beats a blunt lob when fine hair needs a stronger outline. The whole trick is in the edge: when the ends sit in one clean line at the collarbone, the eye reads density instead of sparse tapering. Go much longer than that and the ends start to look thin. Go much shorter and you’re in bob territory, which is a different mood entirely.
Why It Works
A blunt perimeter gives fine hair a visual weight it can’t get from layers alone. The shape looks intentional from every angle, and it stays neat even when the hair is air-dried a little messily.
Ask for the length to graze the collarbone, not sink below it. A tiny bevel at the ends is fine, but skip the heavy feathering. That stuff eats the shape.
- Length to ask for: collarbone to just above the collarbone.
- Shape to ask for: blunt perimeter with minimal internal layering.
- Best styling tool: a 1-inch round brush or a flat iron for a gentle bend.
- Best finish: root-lifting mousse, then a light spray at the ends.
Best move: flip the last half-inch inward or outward, but keep the rest of the line clean. That little bit of movement keeps the cut from looking boxy.
2. A Soft Side Part With Long, Soft-Edged Layers
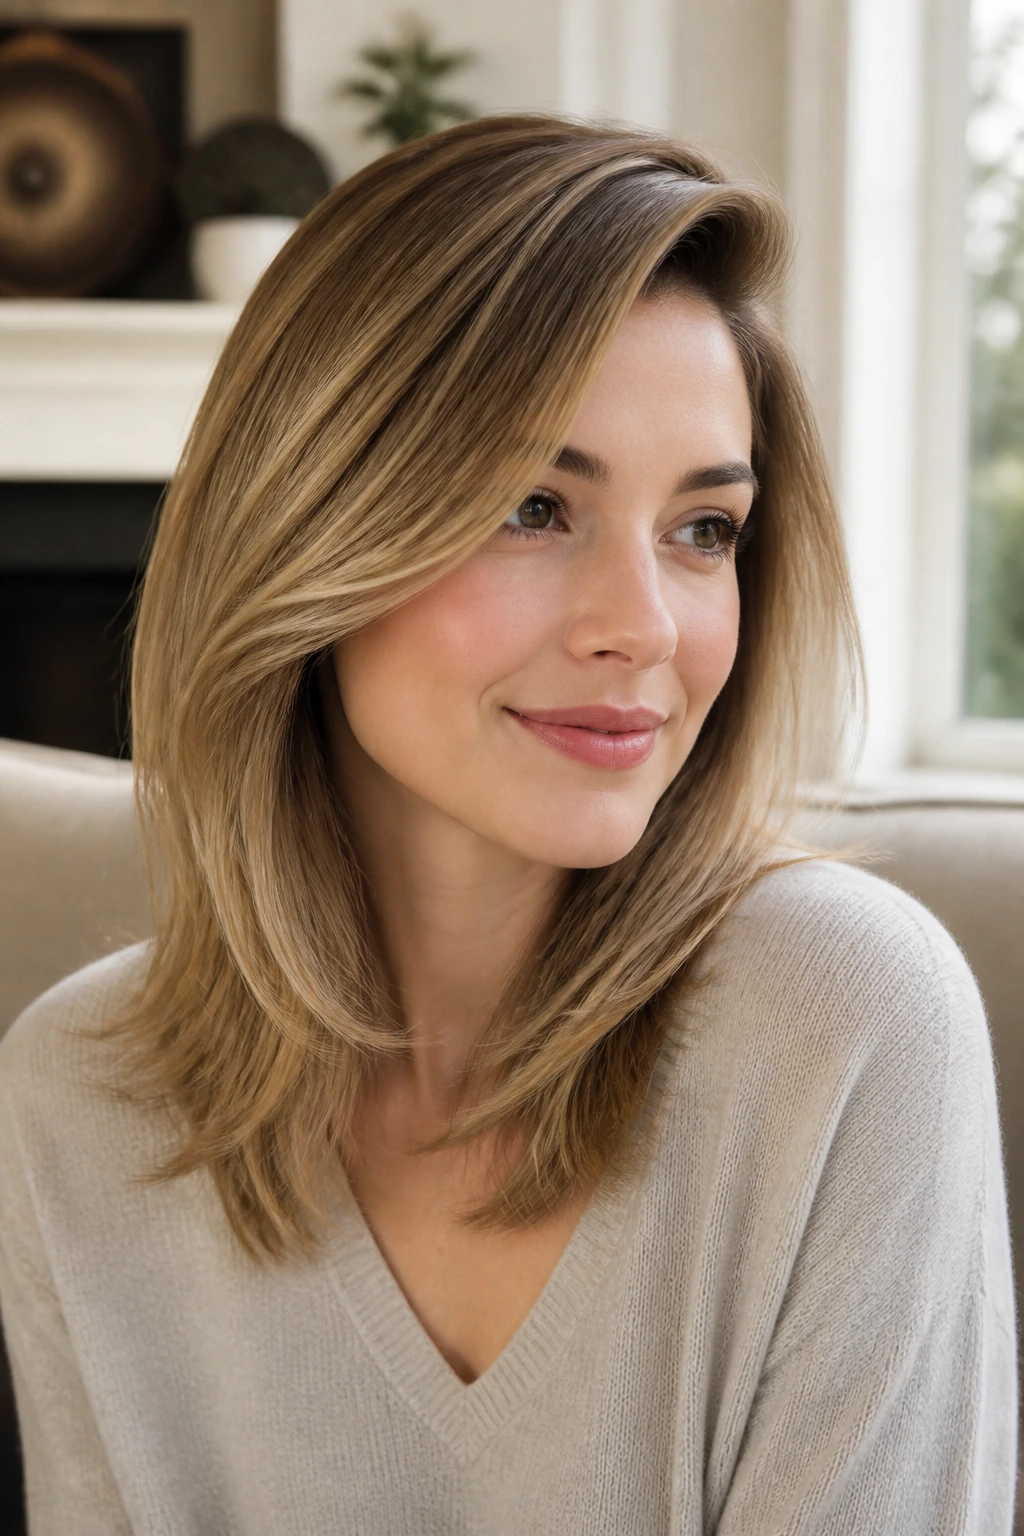
A side part does more for fine hair than another inch of layering ever will. It shifts weight off the center, lifts the crown, and gives the front pieces a little more drama. That matters because fine hair often collapses at the part first, then drifts flat everywhere else.
The layers should stay long. Think below the cheekbones, not near the ears. Shorter layers can work, but they’re risky on very fine strands because they remove too much support from the middle of the cut. The result is motion without collapse, which is what you want.
If your hair insists on splitting down the middle, move the part about 1½ to 2 inches off center and blow-dry against it for the first few minutes. That simple move builds a little root memory. It also makes the top look less skin-tight, which is a small detail until you see the difference in a mirror.
One more thing. Keep the ends blunt enough to hold their own. Soft layers up top are nice; wispy ends are not.
3. Curtain Bangs That Open the Face
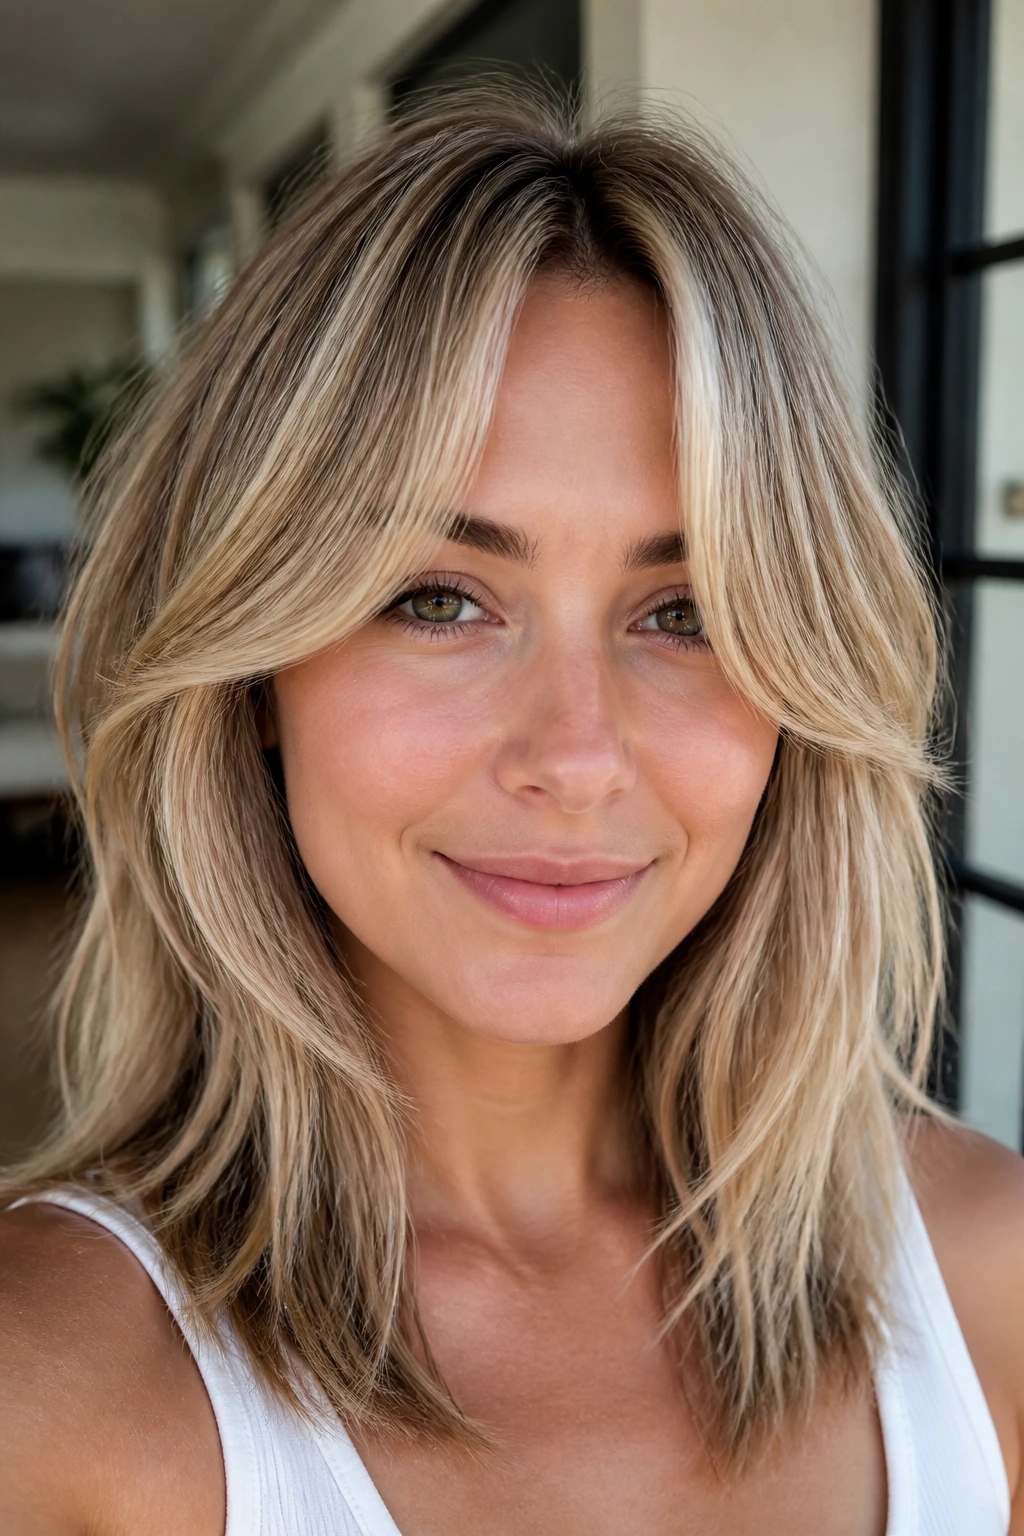
Can bangs make fine hair look fuller? Yes, if the bangs are light and the rest of the cut stays controlled. Curtain bangs work because they create a frame around the face, and that frame draws attention away from the fact that the rest of the hair may not be especially thick.
The best version starts around the cheekbones and blends into medium-length layers. You do not want a heavy, blunt fringe sitting across a thin head of hair. That can drag everything down and make the hairline look smaller. Soft curtain bangs add shape without stealing too much bulk from the sides.
How to Style Them
Blow-dry the bangs away from the face using a small round brush, then switch direction at the ends so they open softly. A 1-inch curling iron can help if your hair bends oddly under heat. Keep the heat low enough that the fringe doesn’t go puffy.
- Dry the bangs first while they’re still damp.
- Roll them away from the face for 10 to 15 seconds.
- Let them cool before touching them.
- Finish with a whisper of texture spray, not a heavy cream.
Watch this: if your bangs stick to your forehead by noon, they’re probably too dense or too long. Fine hair likes a lighter hand here.
4. Beveled Ends That Flip Inward at the Collarbone
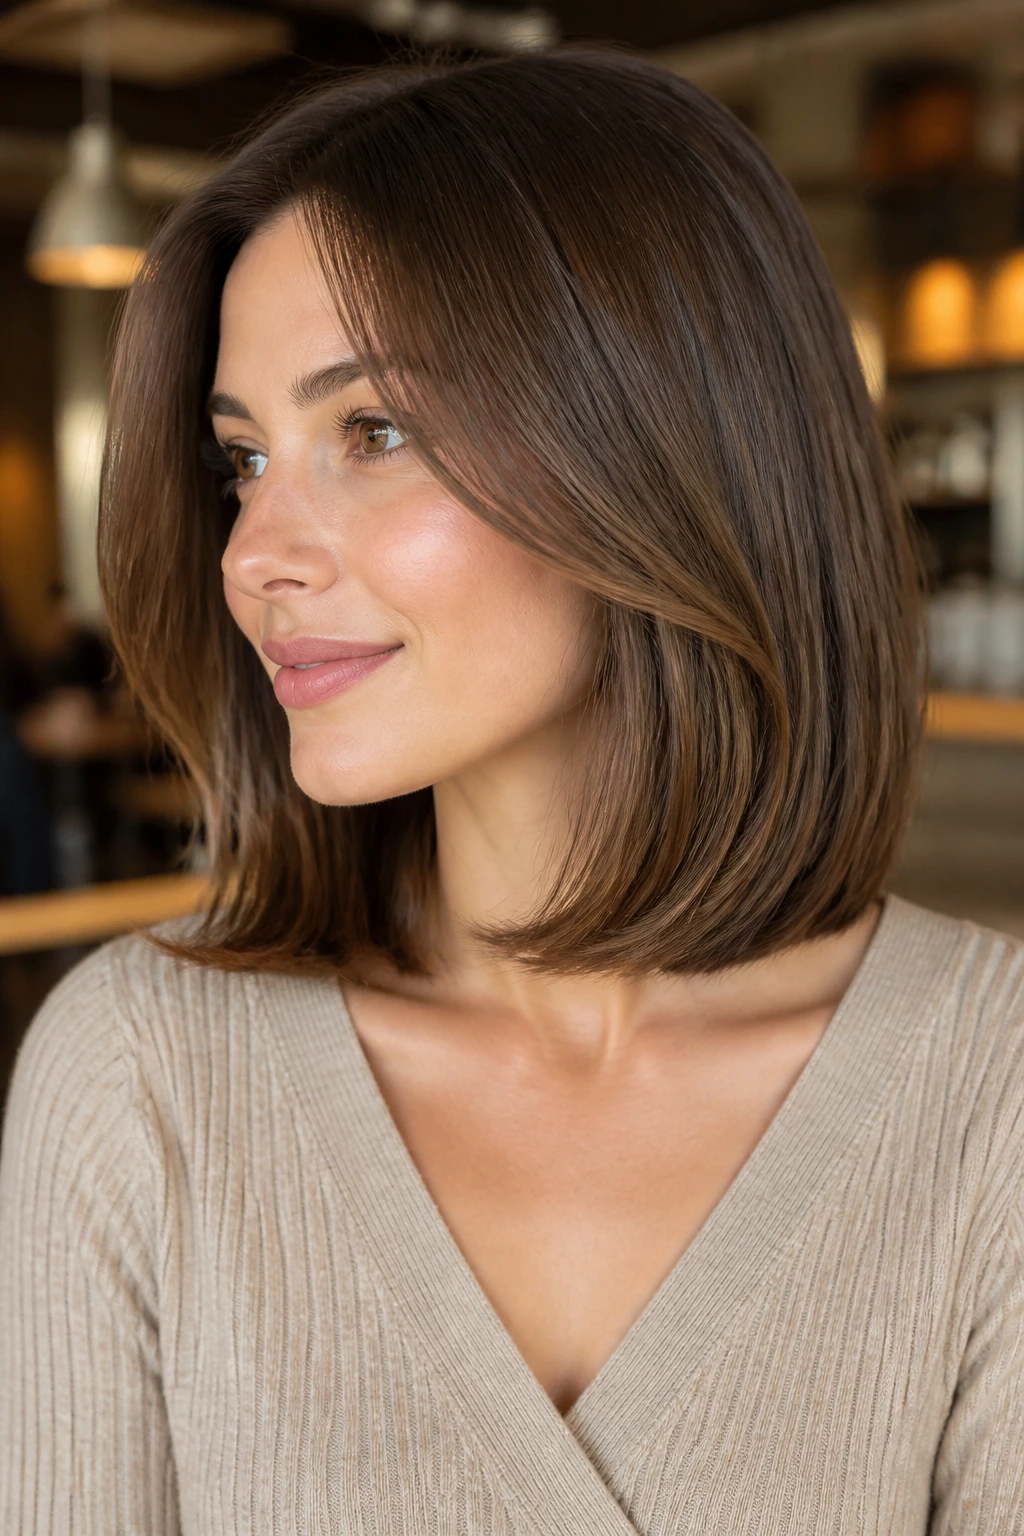
If your hair hits the shoulders and kicks out at random, stop fighting it. Shape it. A beveled end turns that awkward flip into a deliberate curve, and that curve makes the hair look denser because the line stays compact instead of hanging raggedly.
I’ve always liked this look on medium fine hair because it feels polished without trying too hard. The ends do the work. You can wear it straight, tucked behind one ear, or with a tiny wave through the front, and it still holds together.
What to Ask For
Ask your stylist for a collarbone-length cut with a soft bevel at the bottom. That means the ends are slightly angled under, not chopped bluntly and not thinned out with a razor. The shape should look as if the hair naturally curves in on itself.
Quick Details
- Best tools: blow-dryer with a concentrator nozzle, medium round brush.
- Best product: lightweight smoothing cream on the mids and ends only.
- Best setting: medium heat, then a cool blast at the finish.
- Best face shape: almost everyone, but especially long and oval faces.
The little inward bend matters more than people think. It keeps the ends from looking stringy at the exact place fine hair tends to break the illusion.
5. The Airy Shaggy Midi for Fine Hair
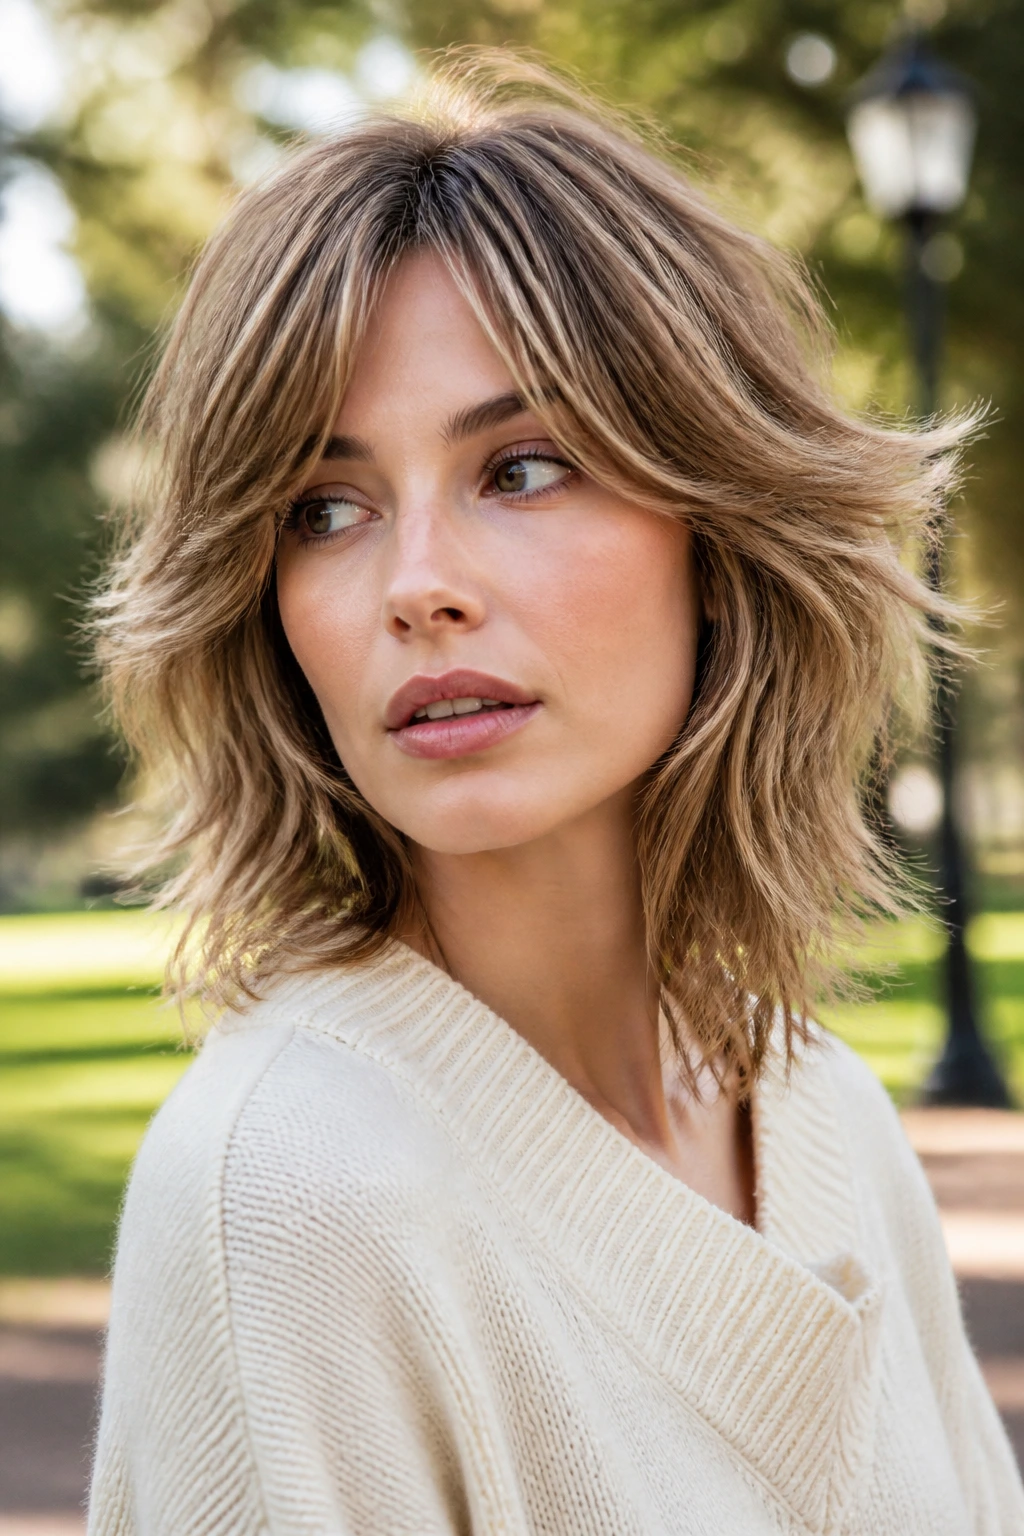
The shag gets a bad reputation on fine hair because people overdo it. They hear “texture” and start slicing in short pieces everywhere. That’s how you end up with a cut that looks cool for one afternoon and thin by the second wash. A good shaggy midi is quieter than that.
This version keeps the shape around the collarbone or a touch below, with soft crown texture and longer pieces through the sides. The goal is lift, not chaos. The crown should move. The ends should still feel like they belong to the same haircut.
A dry cut can help here because it shows where the hair naturally falls, which matters when the strands are light. I also like a shag on people who have a slight wave already. If the hair is pin-straight and very slippery, the style can lose its edge unless you commit to product and heat.
The best part is that it looks better when it’s a little lived-in. That’s rare. Most fine-hair styles punish you for being a day late on washing. This one tends to soften in a way that still reads as shape.
Skip the overly razored crown. Keep the outer line more solid than you think you need.
6. A One-Length Shoulder Cut With Tucked Sides
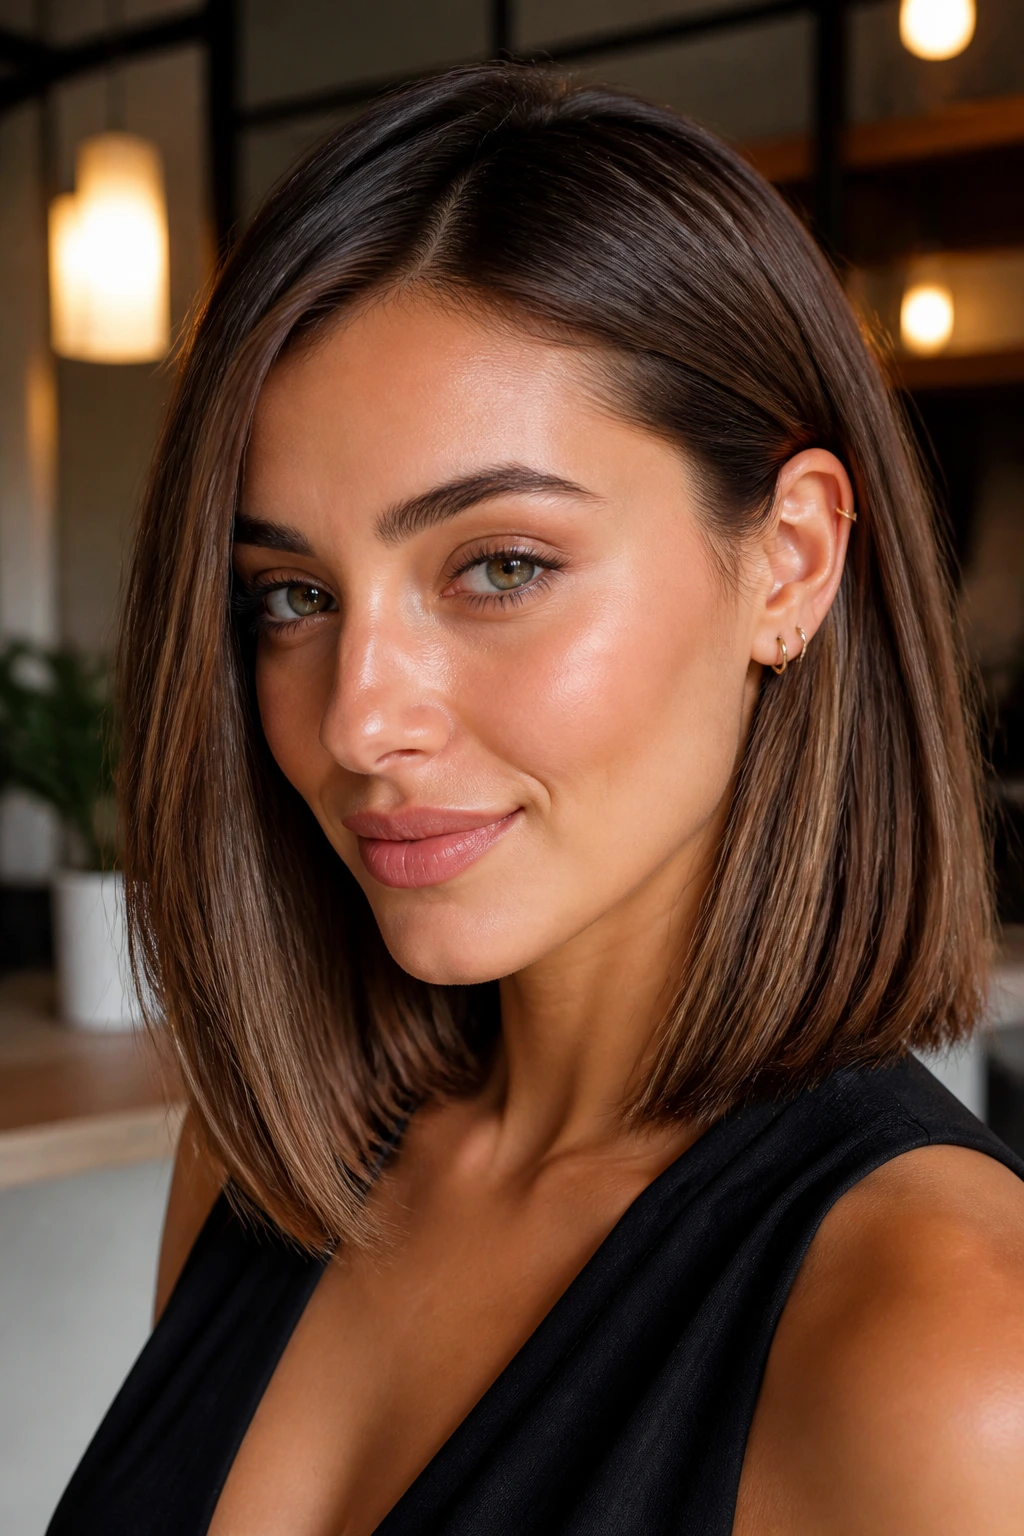
A one-length shoulder cut is the bluntest answer to flimsy ends, and that’s exactly why it works. Unlike heavily layered hair, this cut keeps every strand in play, so the length looks fuller from root to tip. If your hair tends to disappear as it gets past the chin, this is a strong place to start.
The shoulder length gives you enough room to tuck one side behind the ear, clip it back, or leave it loose without the style collapsing. It’s the haircut I’d point someone toward if they want something easy to live with, not just pretty in photos. Fine hair likes simplicity when the shape is good.
What to ask for? A straight-across line that lands right on the shoulders, maybe with one or two face-framing pieces that stop at the chin. That’s it. No carved-up layers, no wild thinning, no overworked texture on the ends.
This is also a good cut if you wear earrings. The tucked side creates a little asymmetry that makes the hair look more styled than it really is.
7. A Deep Side Part With Glossy, Brushed-Out Waves
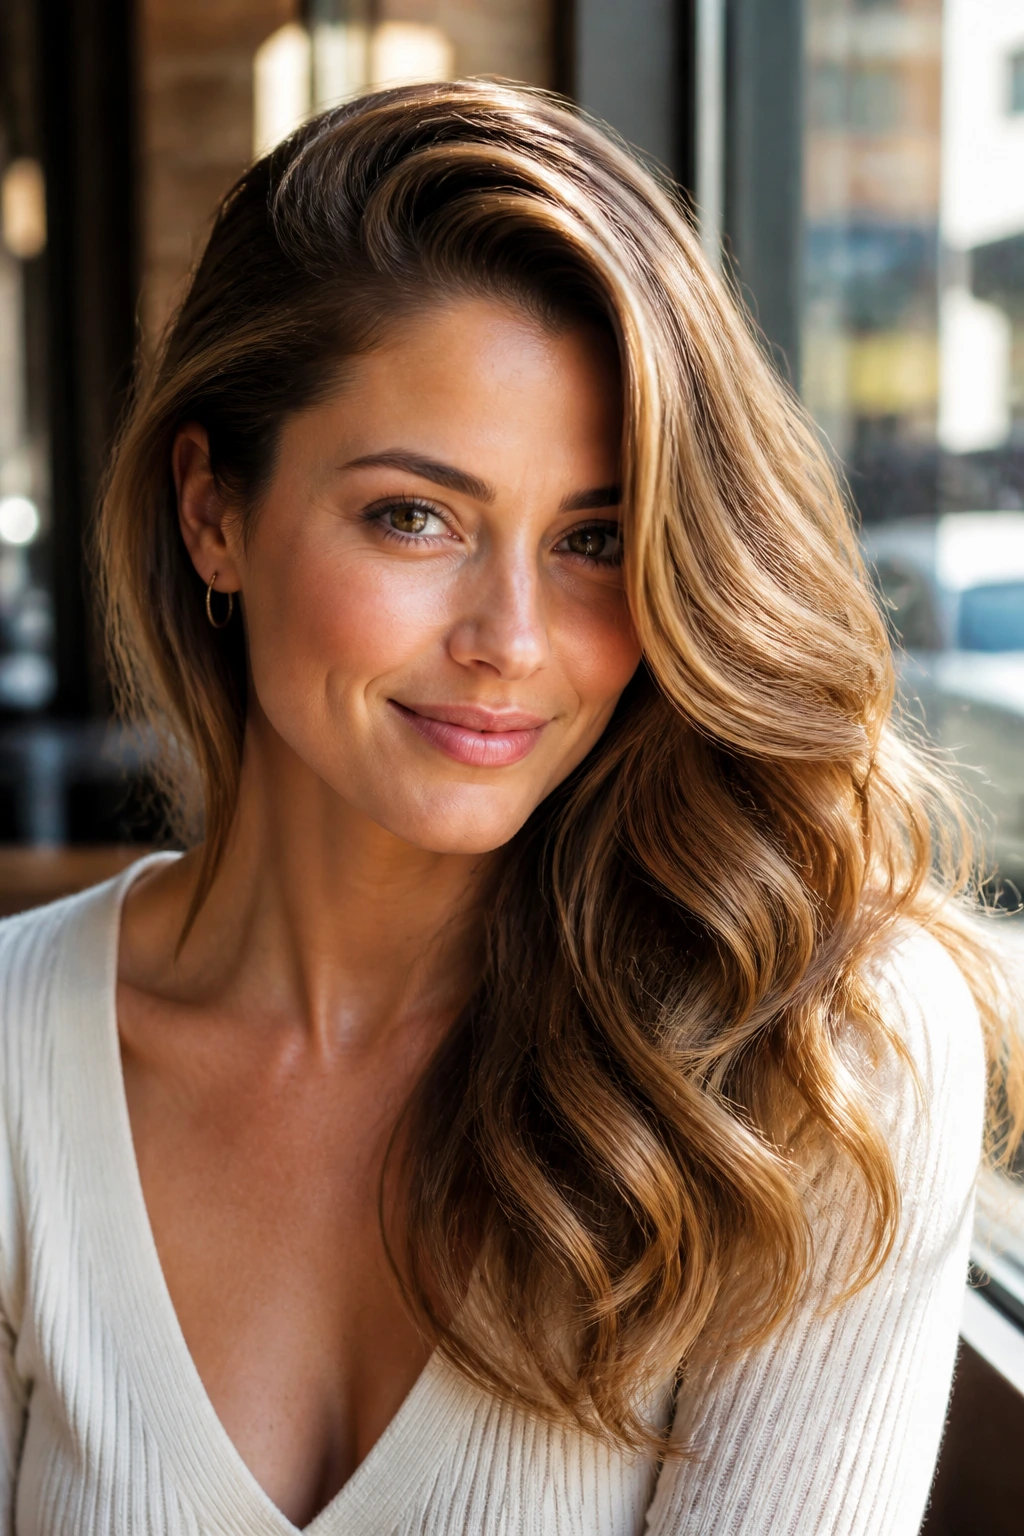
A deep side part gives fine hair instant attitude. It pushes the top section up and over, which makes the crown look taller and the side with more hair look denser. Then the brushed-out waves soften the whole thing so it doesn’t feel stiff or overdone.
Why It Looks Thicker
The shape works because the part creates a built-in lift near the front hairline. Fine hair often looks flatter when it splits evenly down the middle. Shift it over, and the hair suddenly has a direction.
How to Set It
Use a 1¼-inch curling iron, wrap medium sections away from the face, and let them cool before brushing them out. A soft-bristle brush gives a smoother wave than your fingers will. Finish with a mist of flexible-hold spray.
- Part the hair 3 to 4 inches off center.
- Clip the heavier side up while you work.
- Curl away from the face for a clean sweep.
- Brush only after the hair cools.
Best tip: clip the heavier side at the roots for 10 minutes after styling. That little bit of shape setting helps the wave stay lifted instead of collapsing into the part.
8. Long Invisible Layers That Keep Fine Hair Looking Full
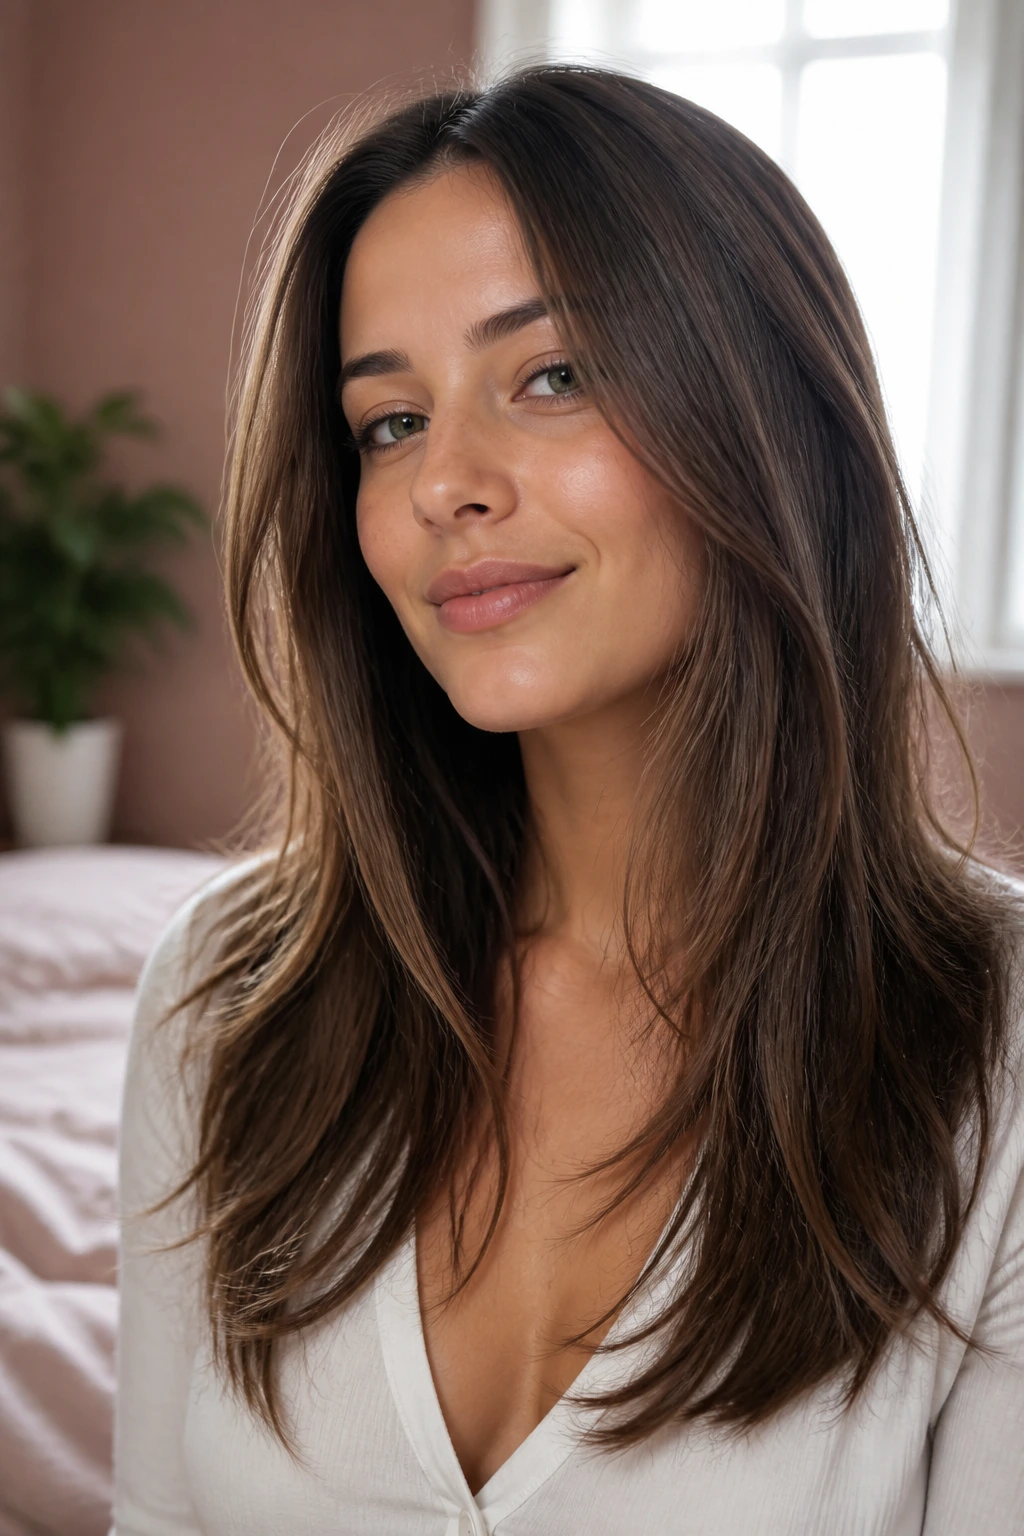
Long invisible layers are one of the smartest cuts for fine hair because they give movement without broadcasting the layering. The outline stays strong, but the hair can still bend and shift instead of hanging like a sheet. That hidden movement is the part people notice, even if they can’t name it.
The difference between invisible layers and the usual choppy layers is where the snips live. They sit inside the cut, under the top surface, and they’re usually starting lower than people expect. A good stylist will remove just enough weight to stop the ends from dragging, then leave the perimeter full.
This style is a sweet spot for anyone who wants medium hair with some swing but hates that stringy, sliced-up look. If you wear your hair straight most days, it gives the illusion of body. If you wave it, the layers help the bend fall more naturally.
The catch is simple: don’t overdo it. Too many internal layers and the whole thing starts to look see-through under bright light. Keep the face frame light, keep the bottom line intact, and let the layers do their job quietly.
9. Soft Barrel Curls With Straight Ends
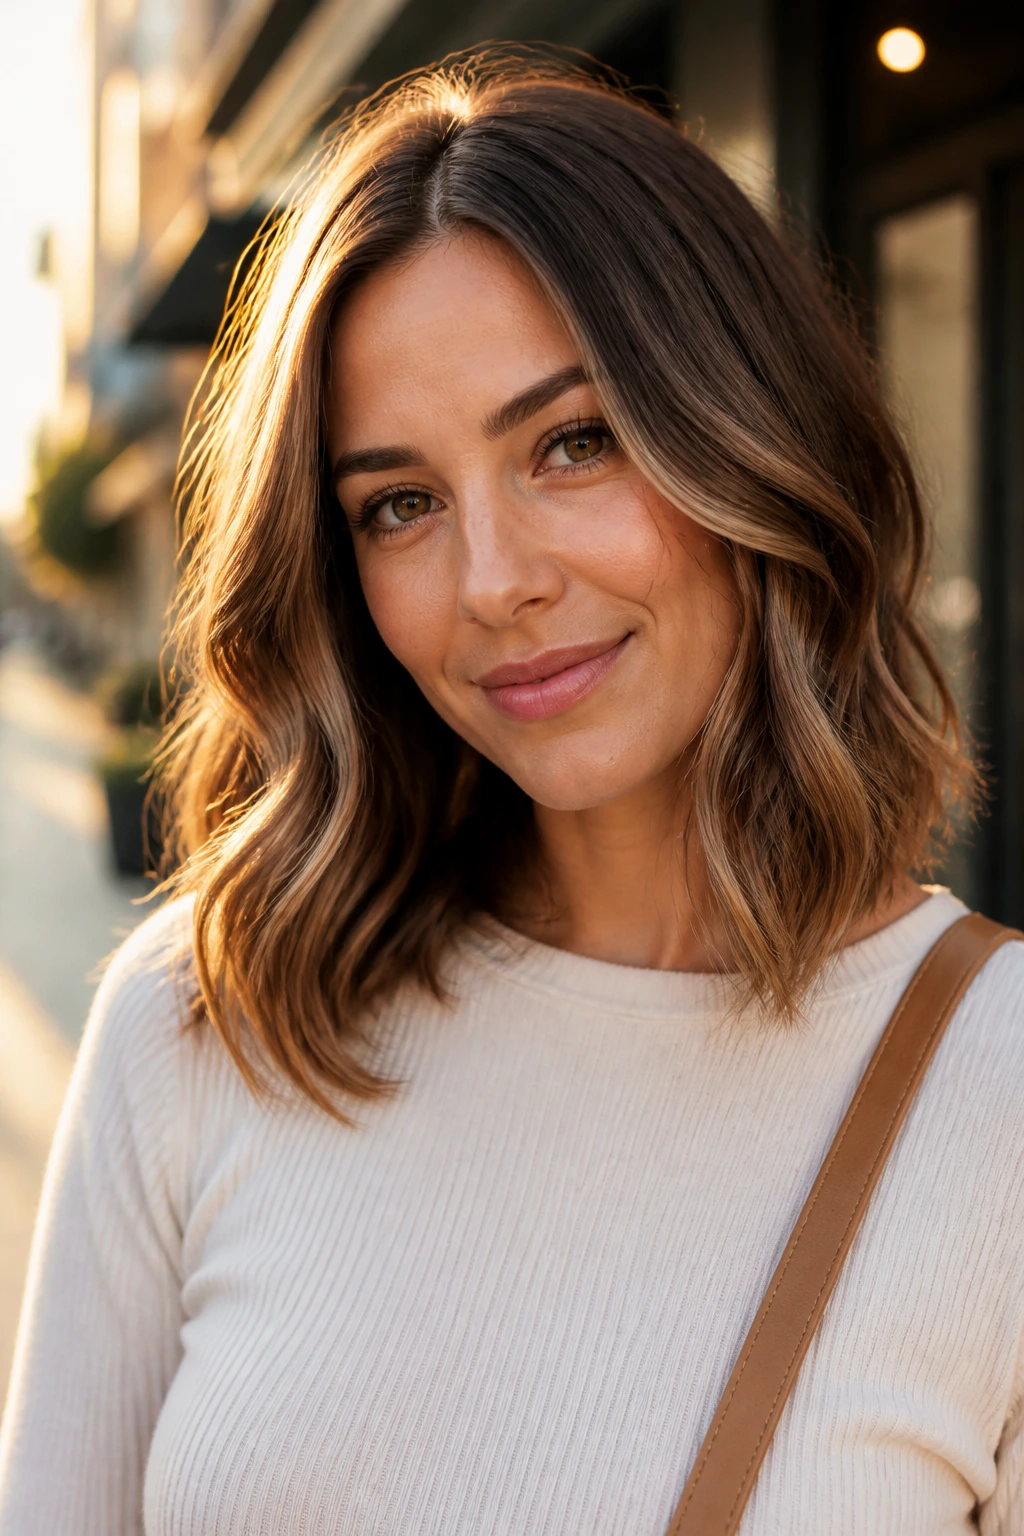
Why do barrel curls work so well on fine hair? Because a smooth, uniform curve adds body fast, and leaving the ends straight keeps the style from turning into a tiny prom curl. That contrast is the point. It makes the hair look longer, thicker, and a little more expensive to style, which is nice even if you spent ten minutes on it.
Use a 1¼-inch iron for shoulder-length hair and a 1½-inch iron if your hair sits closer to the collarbone. Wrap the mid-lengths, hold for 6 to 8 seconds, then leave the last inch out. Once the curls cool, brush them gently so they become soft barrels instead of ringlets.
How to Use It
Start with dry hair and a heat protectant that doesn’t leave slip at the roots. Clamp the iron vertically and alternate directions around the head, but keep the front pieces away from the face for a cleaner frame. That keeps the style from reading too uniform.
- Use 1-inch sections.
- Leave the last inch straight.
- Let each curl cool fully.
- Finish with a light spray, not hairspray armor.
A tiny bit of bend at the ends is enough. You don’t need a full curly look to get more body.
10. The Half-Up Crown Lift That Fakes Extra Density
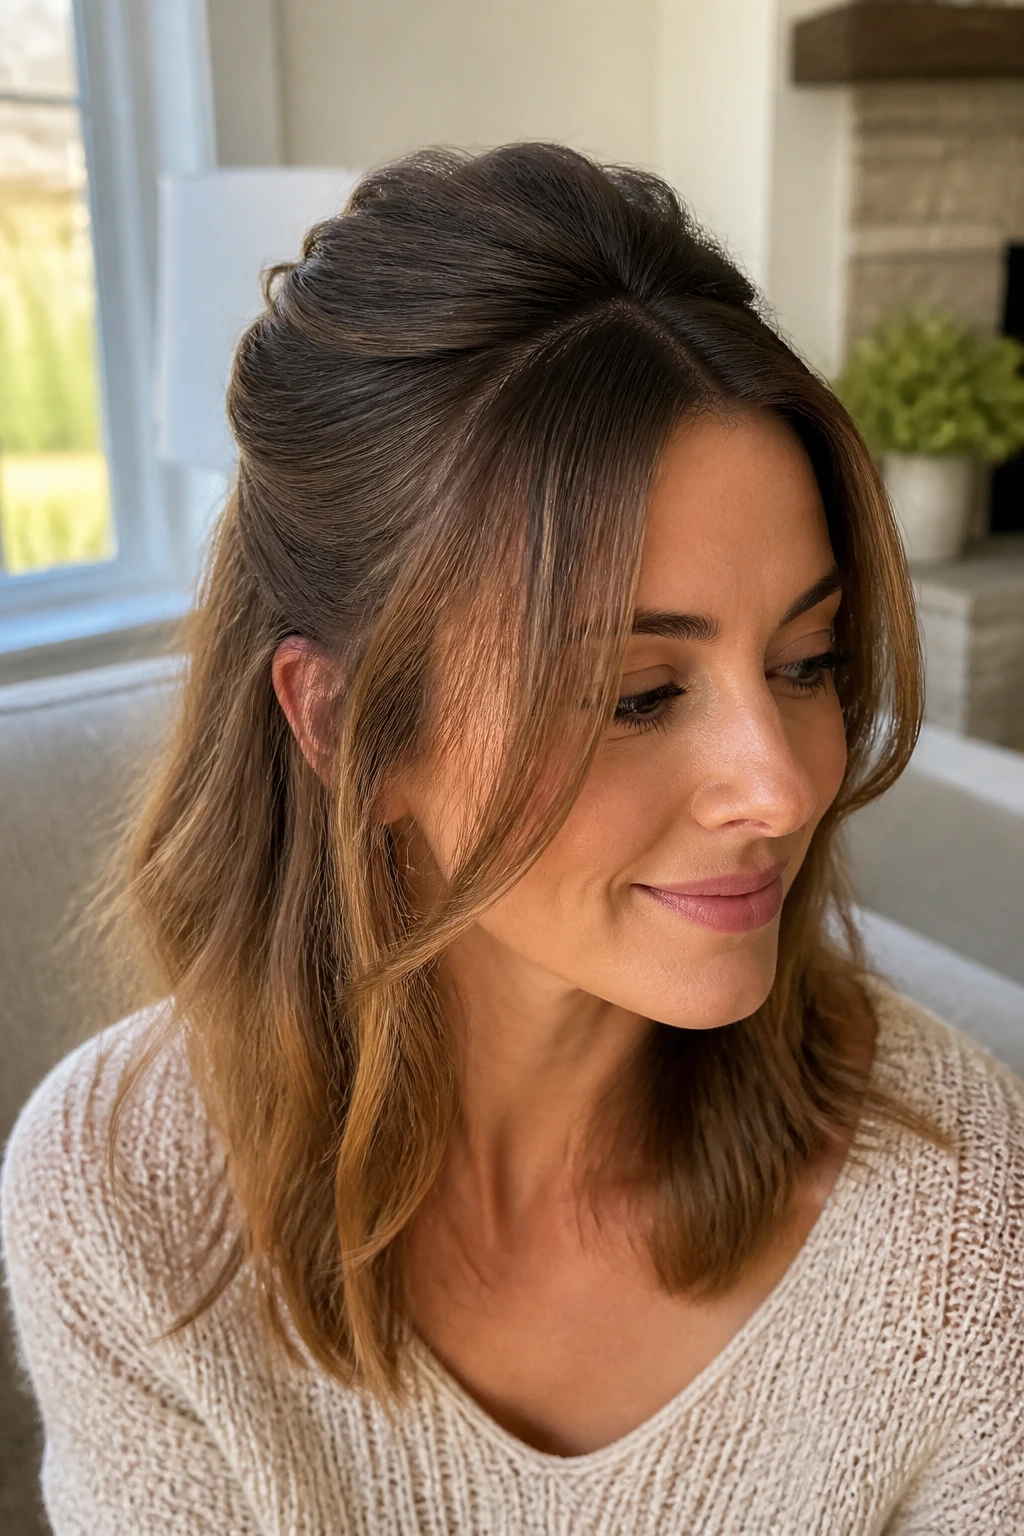
A half-up style is the fastest way to cheat a little volume into medium fine hair. Pulling up the top section gives the crown a break, and that alone changes the silhouette. The remaining hair hangs lower, which makes the top section look fuller by comparison.
I like this on hair that goes flat by lunch. It’s also one of the easiest fixes for second-day roots that have lost their shape. A half-up style doesn’t ask the whole head to look big. It only asks the top layer to behave.
The best version isn’t tight. Tease a 1-inch strip at the crown, smooth the surface lightly, then secure the half-up section with a small claw clip or a clear elastic. If you want it polished, wrap a tiny piece of hair around the elastic and pin it underneath.
- Tease the crown softly, not aggressively.
- Keep the part slightly off center for a lifted look.
- Leave the lower half loose and brushed through.
- Use dry shampoo at the roots before you start.
That last step matters. Fine hair holds a half-up shape better when it has a little grip, not when it’s silky and slippery.
11. A Low Twist Bun With Loose Face-Framing Pieces
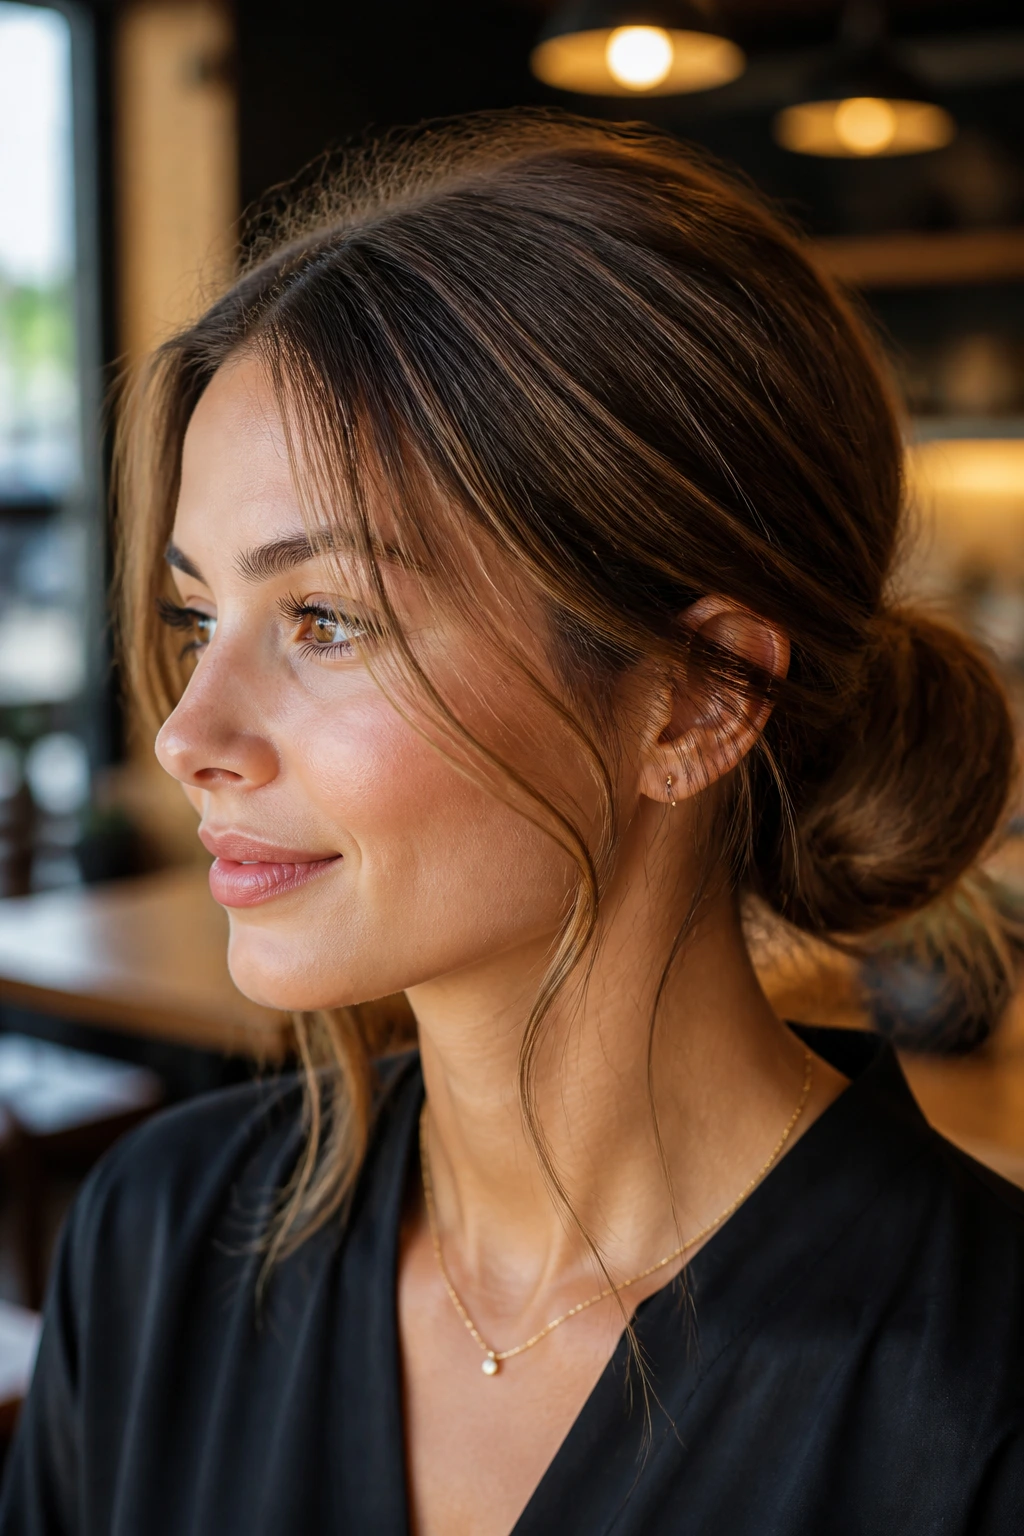
A low twist bun is one of those styles that looks simple until you try it on fine hair and realize the details matter. If the bun is too tight, it shrinks. If it’s too loose, it falls apart. The sweet spot sits just above the nape, with enough texture at the crown to keep the shape from looking pasted down.
Start with dry shampoo or texturizing spray at the roots. Then gather the hair low, twist it once or twice, and pin the coil flat against the head. Use two or three bobby pins in a crisscross pattern so the style does not slide as the day goes on.
Leave a couple of thin face-framing pieces out at the front. Not thick chunks. Thin pieces. They soften the style and keep fine hair from looking severe.
This works well for work, dinner, or any day when your hair needs to stay out of your face but still look planned. I prefer it slightly messy over perfectly sleek, because fine hair tends to show every little bump anyway. Might as well make the texture part of the look.
12. The Claw-Clip French Twist for Second-Day Hair
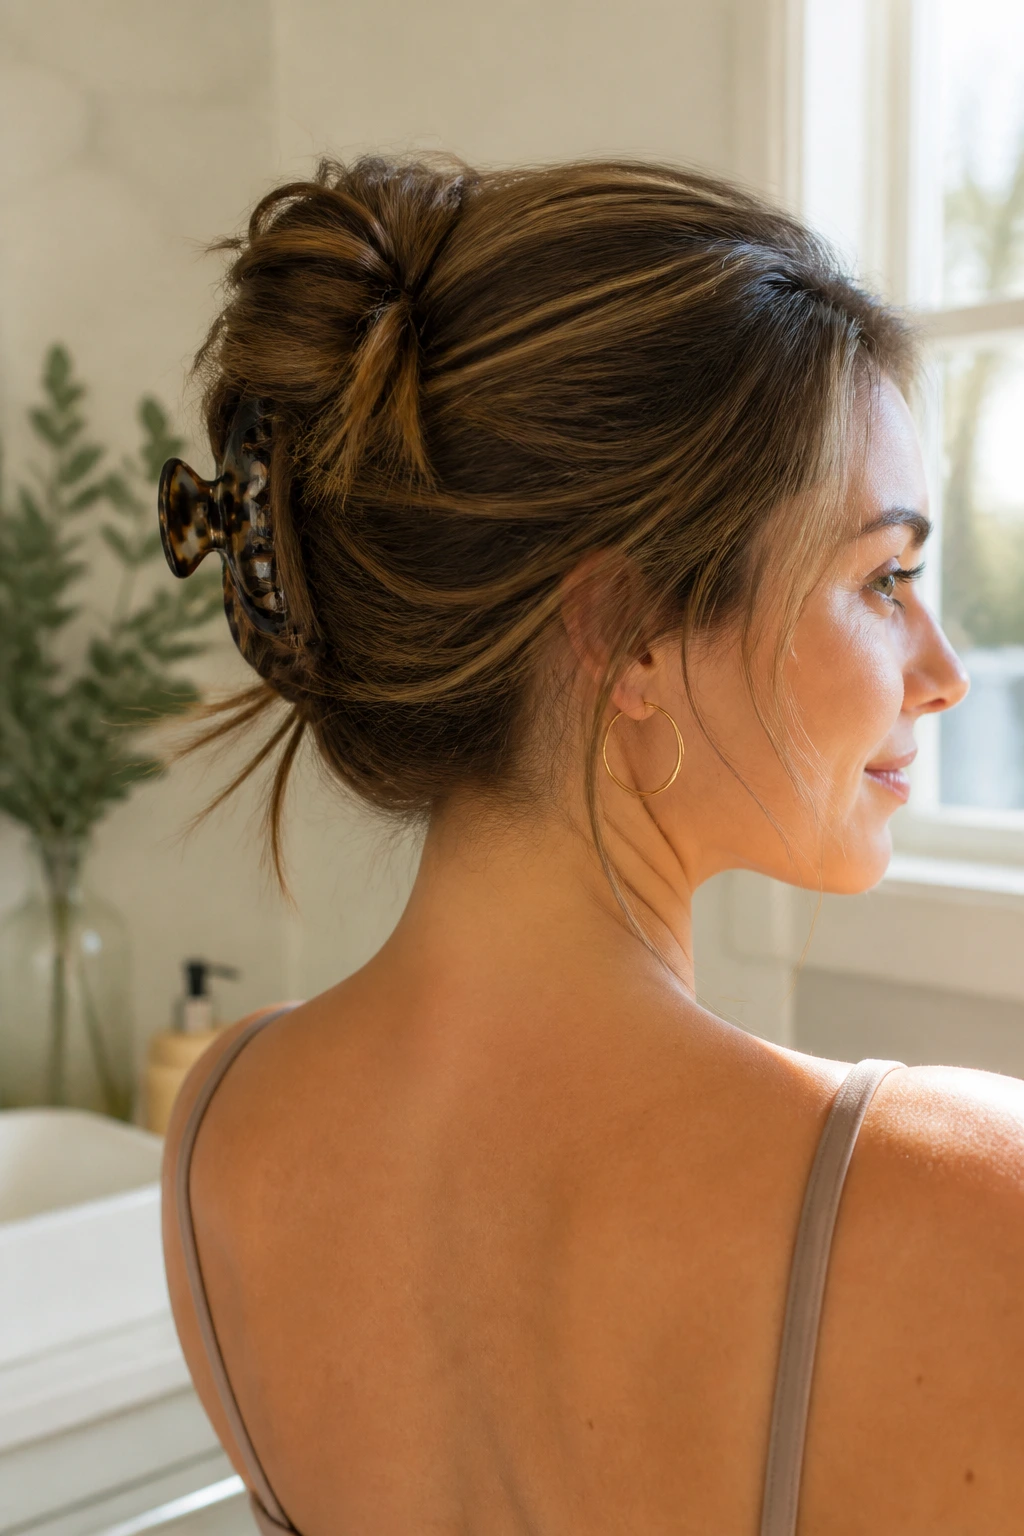
The claw-clip French twist is a gift for medium fine hair because it gives shape without asking the hair to do too much. Unlike a polished chignon, which can expose every thin spot, this version keeps the twist airy and a little undone. That looseness is an advantage.
It works best on shoulder-to-collarbone length. Too short, and the ends poke out everywhere. Too long, and the twist gets bulky at the clip. The right clip matters too: look for one about 3½ to 4 inches wide with enough grip to hold fine hair without crushing it.
Twist the hair upward from the nape, fold the length in half, and catch it with the clip so the twist sits vertically. Let a few ends peek out if they want to. That’s not a flaw; it keeps the style from looking stiff.
This is one of my favorite second-day fixes. A little dry shampoo at the roots and a small bit of texture at the mid-lengths make the twist hold far better than clean, silky hair ever will.
13. A Sleek Center Part Tucked Behind the Ears
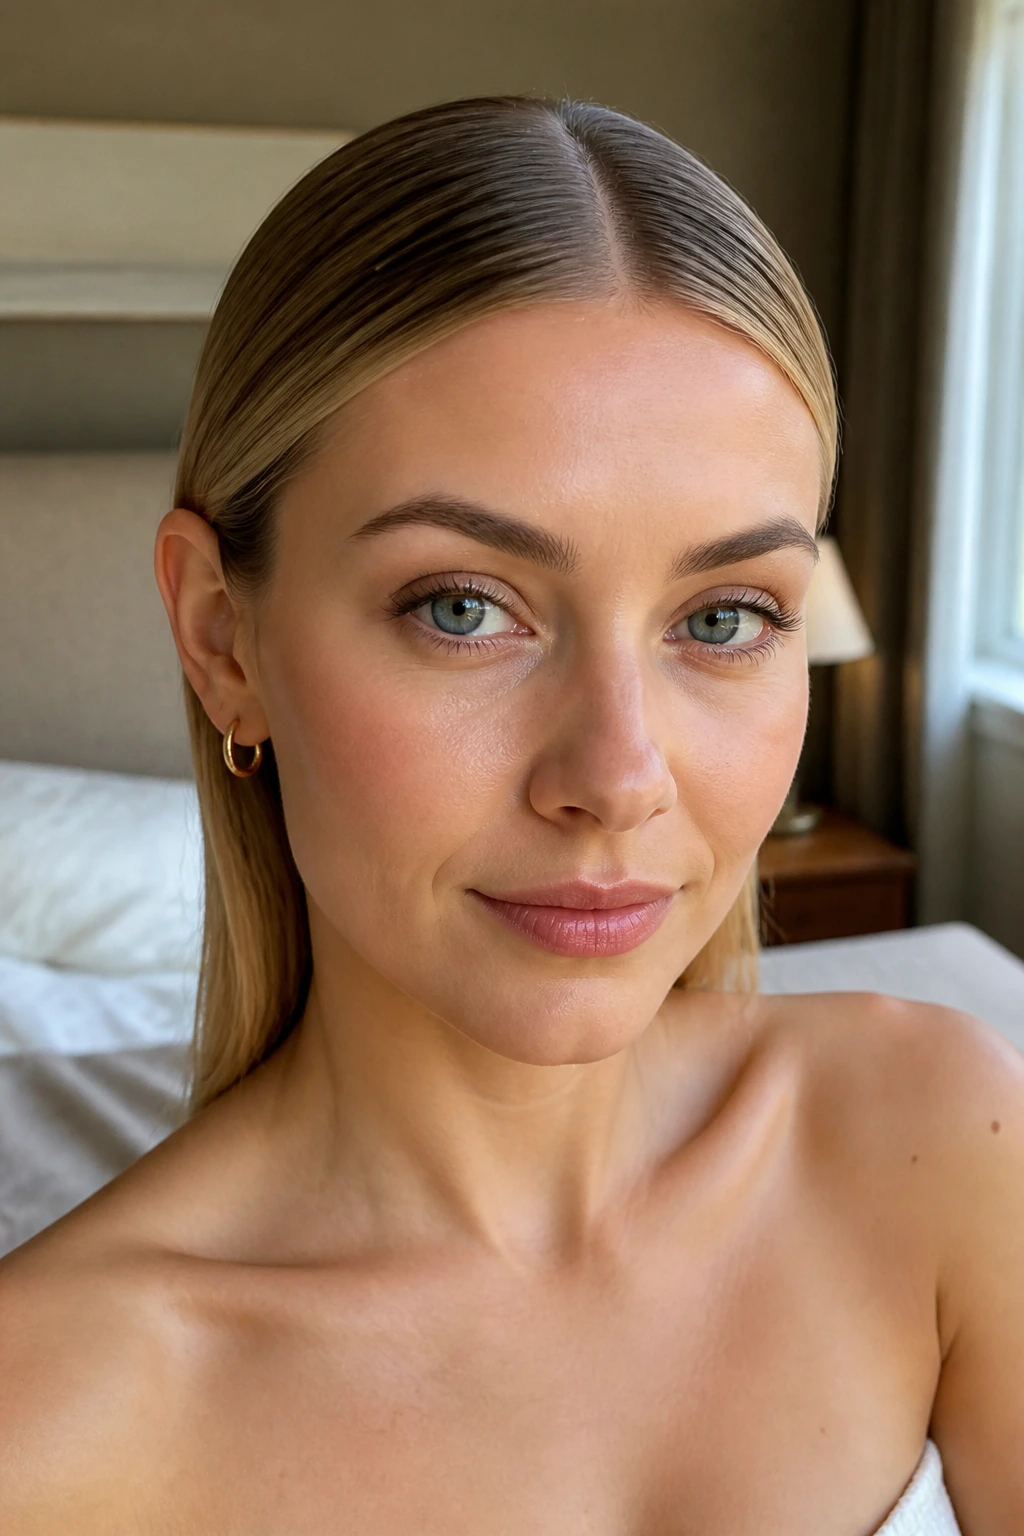
A sleek center part can be surprisingly good on fine hair when the cut has a solid outline. The style puts the emphasis on clean lines instead of lift, which sounds counterintuitive until you see how much sharper the hair looks when it sits close to the head in a controlled way. It’s neat. It’s spare. It works.
Why It Works
The center part gives symmetry, and symmetry can make hair look denser because the eye compares both sides at once. Tucking the front pieces behind the ears also creates a little fullness at the temples by exposing the hairline and letting the rest fall cleanly.
What to Watch For
Keep the roots free of heavy serum. Fine hair goes limp fast when the crown is coated in product. Use a tiny amount of smoothing cream only from the mid-lengths down.
- Flat iron at 300 to 325°F if needed.
- Use a shine spray only on the ends.
- Tuck the front pieces behind the ears while warm.
- Clip them for 5 minutes if they keep sliding out.
Small warning: if the hair is broken up into too many face layers, this style loses its power. It needs a clean front edge to feel deliberate.
14. The Bubble Ponytail That Makes a Thin Pony Look Fuller
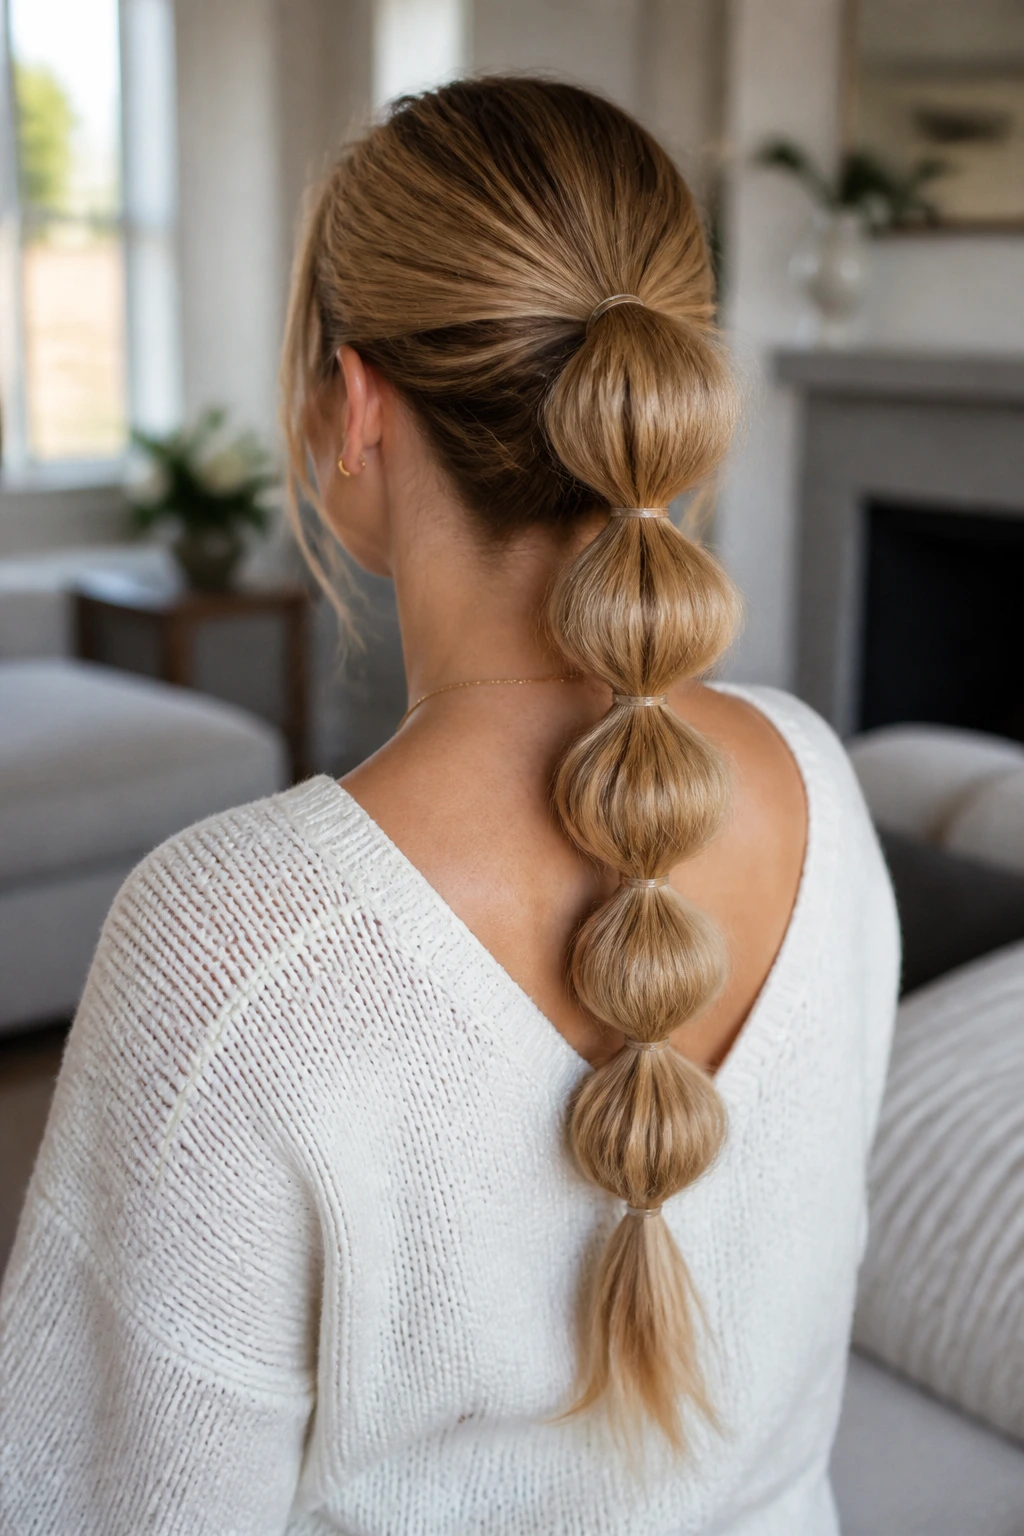
A bubble ponytail is one of the easiest ways to make a thin ponytail look a little more substantial. The shape does the work. Instead of one narrow tail hanging straight down, you get a row of soft rounded sections that create width and movement all the way through.
It also hides the fact that fine hair doesn’t always have much bulk at the end. Each “bubble” gives the pony a little visual puff, and that puff is enough to change the whole silhouette. Use clear elastics or small hair-color-matched bands every 2 to 3 inches down the ponytail.
After you place each band, pull gently at the hair between the bands to round out the section. Don’t yank hard. You want shape, not a tangled mess. A little teasing at the crown before you tie the base helps a lot too.
This style looks playful without looking juvenile. It’s good for errands, workouts, or days when you want your hair up but not boring.
15. A Rope-Braid Half Pony With Extra Width
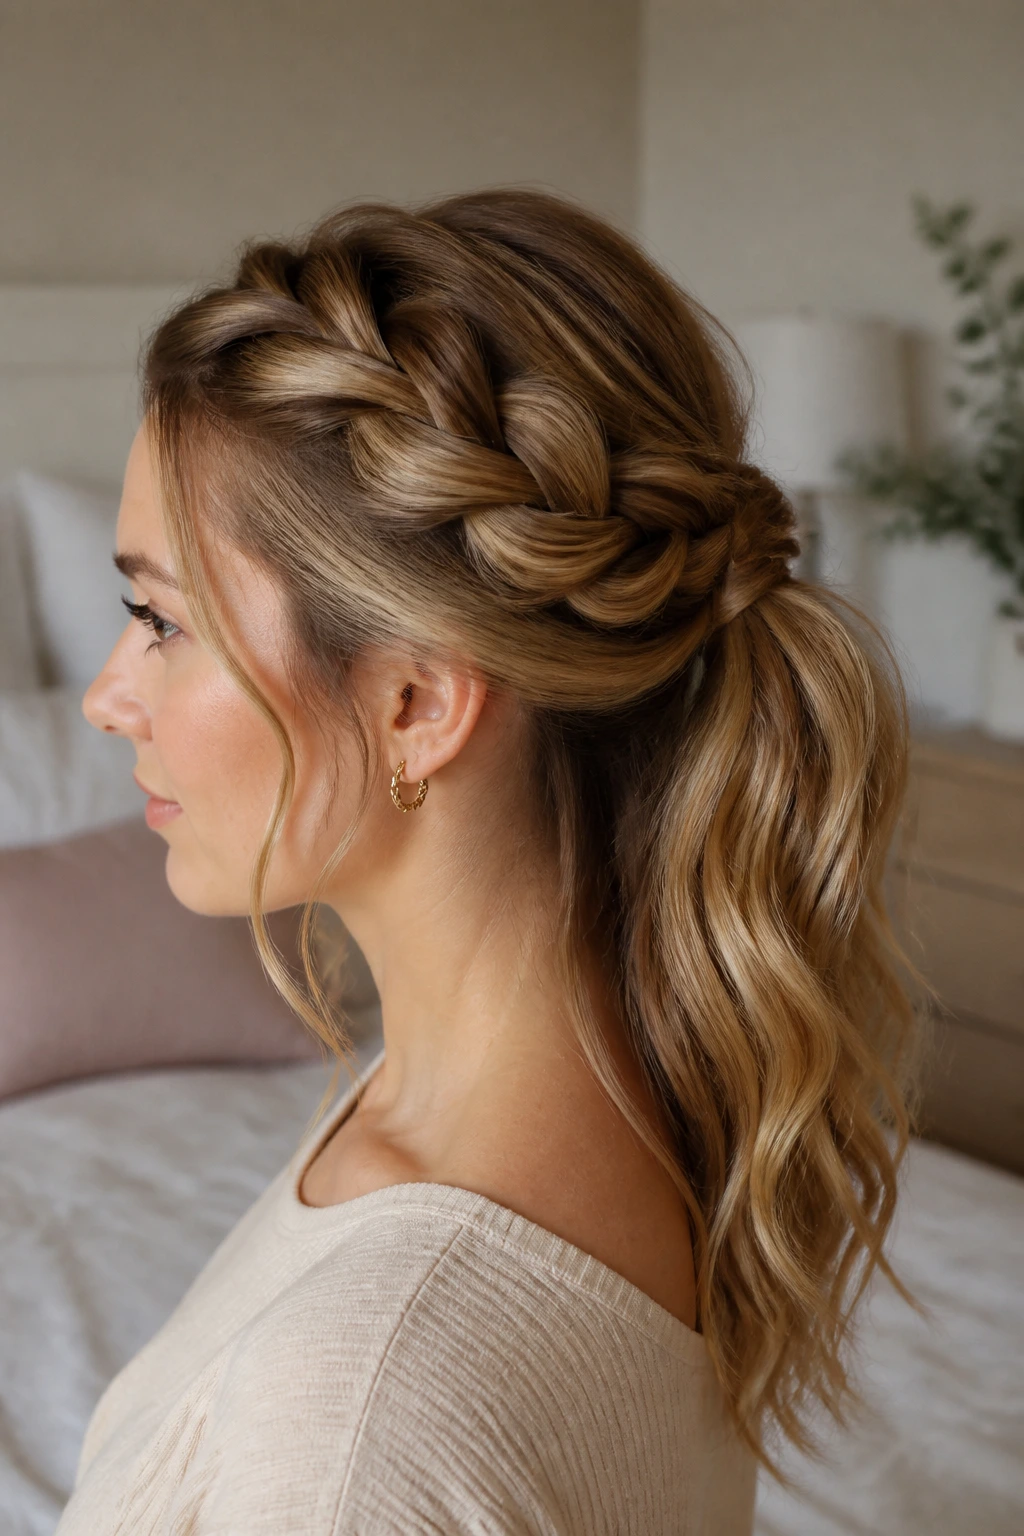
Why does a rope braid work so well on fine hair? Because it reads thicker than a regular braid. Two twisted sections create a chunky look even when the hair itself is soft and light, and that gives the half-up style more presence than a standard three-strand braid.
Start with a half pony at the back of the head, about level with the temples. Split the pony into two sections, twist each section in the same direction, then wrap them around each other in the opposite direction. Secure the end with a small elastic. That’s the whole move.
How to Use It
A bit of texture spray on the sections first helps the twist stay defined. If your hair is slippery, rough it up with dry shampoo before you begin. The style also looks better when the front pieces are left a little loose, because a tight half-up can expose the thinness at the temples.
- Use two equal sections.
- Twist both pieces the same way.
- Wrap them opposite the twist direction.
- Tug the braid gently once it’s secured.
This is a good style when you want something a little dressed up without going full braid crown.
16. Soft S-Waves Made With a Flat Iron
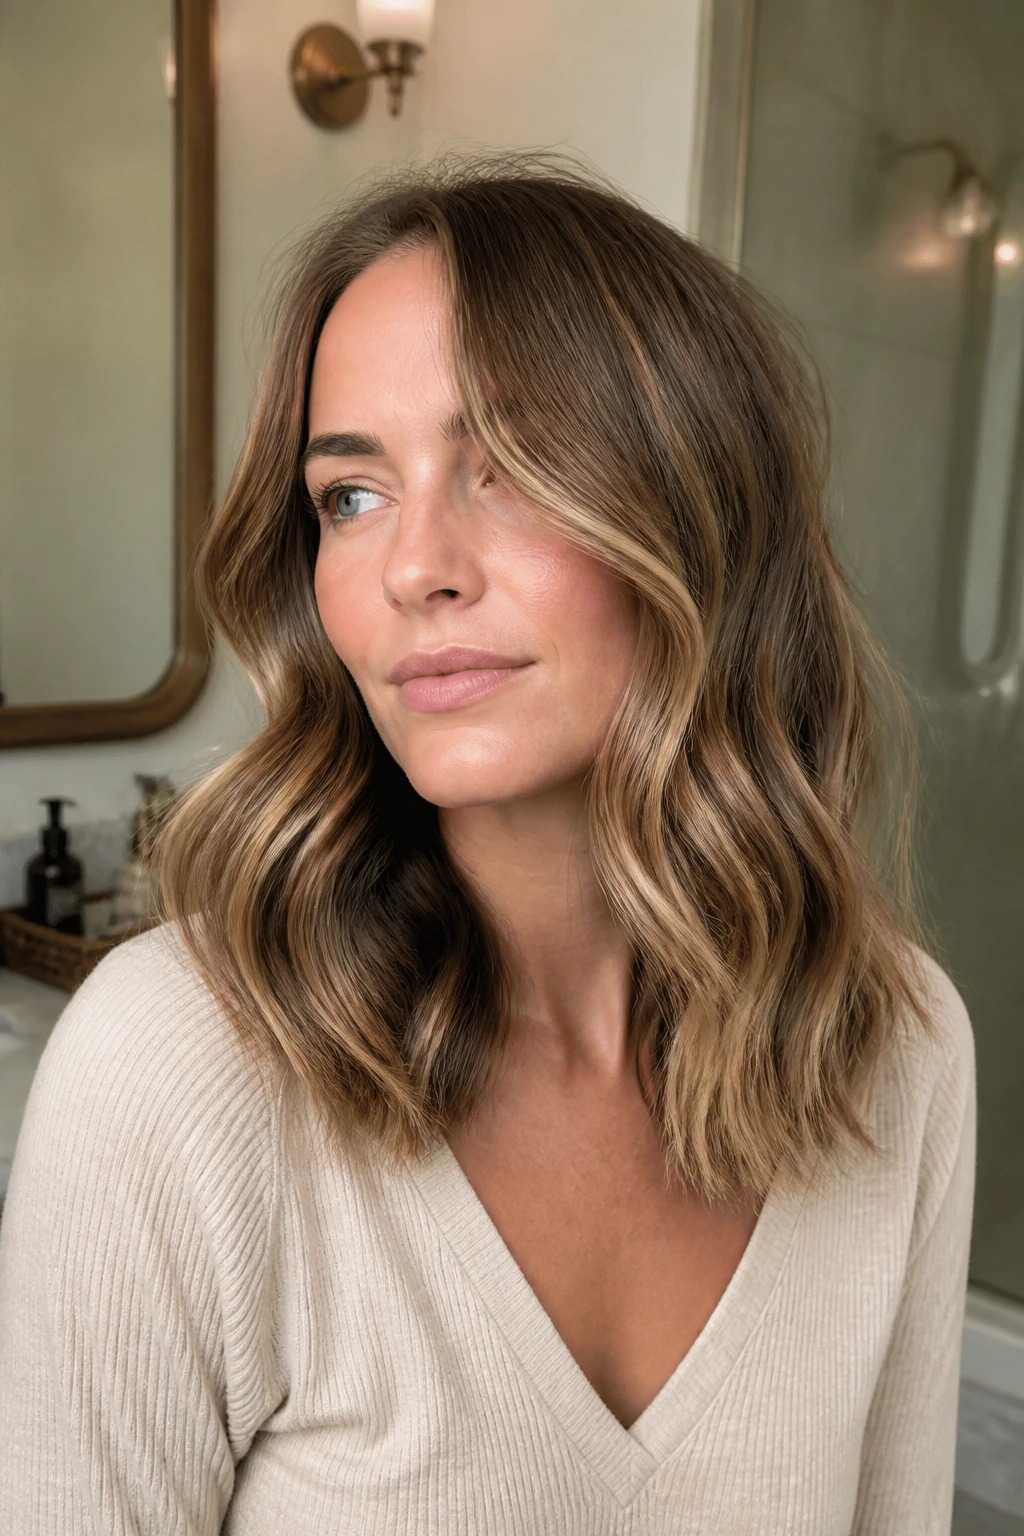
Soft S-waves are a smart choice for medium fine hair because they build width without making the hair look overly curled. The shape is flatter and looser than barrel curls, which gives the style a modern feel and keeps the ends from puffing out in a weird way.
Take 1-inch sections and clamp a flat iron near the roots, then bend the hair in a gentle S pattern as you slide downward. Alternate directions from one section to the next. The waves should look loose and fluid, not stamped into place. Once everything cools, run fingers or a wide-tooth comb through the lengths.
This style is useful when you want your hair to look fuller in photos, but still wearable in real life. It also behaves better than tighter waves when the humidity shifts. Fine hair can frizz around a tight curl pattern. A softer wave usually ages better through the day.
Use a heat protectant and stop there. Too much finishing cream will collapse the shape. The wave needs a little air around it.
17. The Textured Top Knot With a Loose Fringe
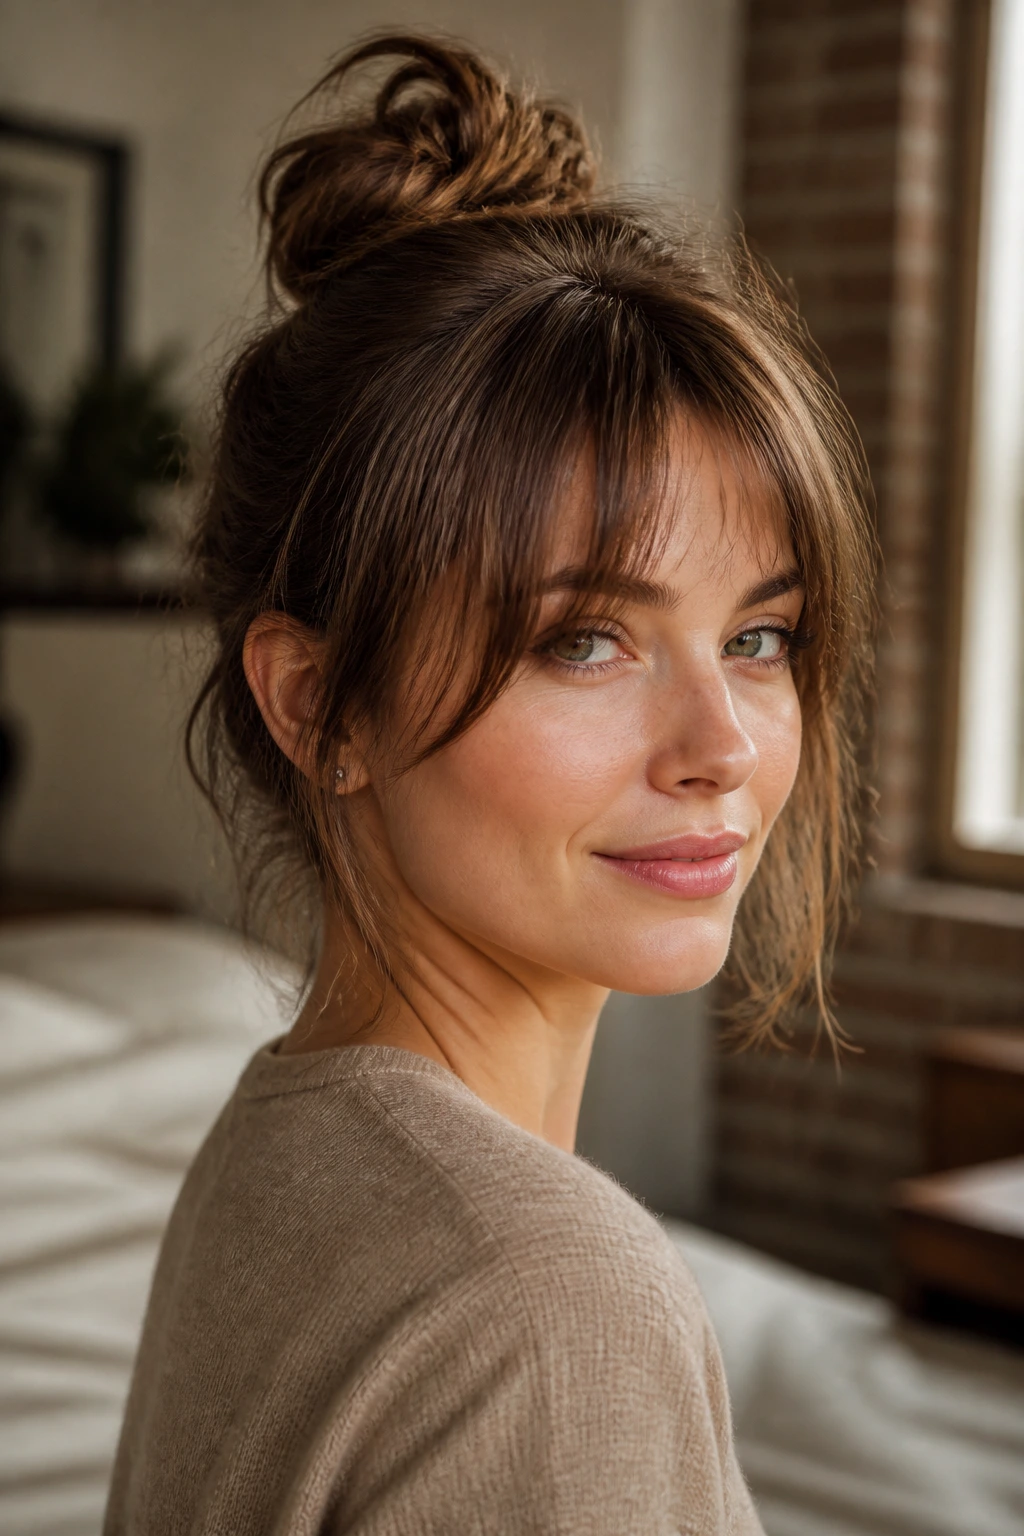
A top knot on fine hair has one big rule: do not make it huge. A giant bun on a small amount of hair can look shaky, like it’s hanging on by a thread. A smaller, textured knot sits better and looks more deliberate.
Pull the hair up to the crown or slightly above it, then twist it into a compact knot and secure it with pins or a narrow elastic. Leave a few soft pieces around the hairline, especially if your forehead or temples need a little softness. A loose fringe or a couple of side pieces make the style feel less severe.
I like this one on days when the roots are flat and the ends are a little dry. It hides both problems at once. You can also braid the ponytail before wrapping it if you need the knot to feel thicker. That small extra step makes a noticeable difference.
Use texturizing powder at the roots if the hair slips. Fine hair loves a bit of grip here.
18. The Mid-Length Blowout That Flatters Fine Hair
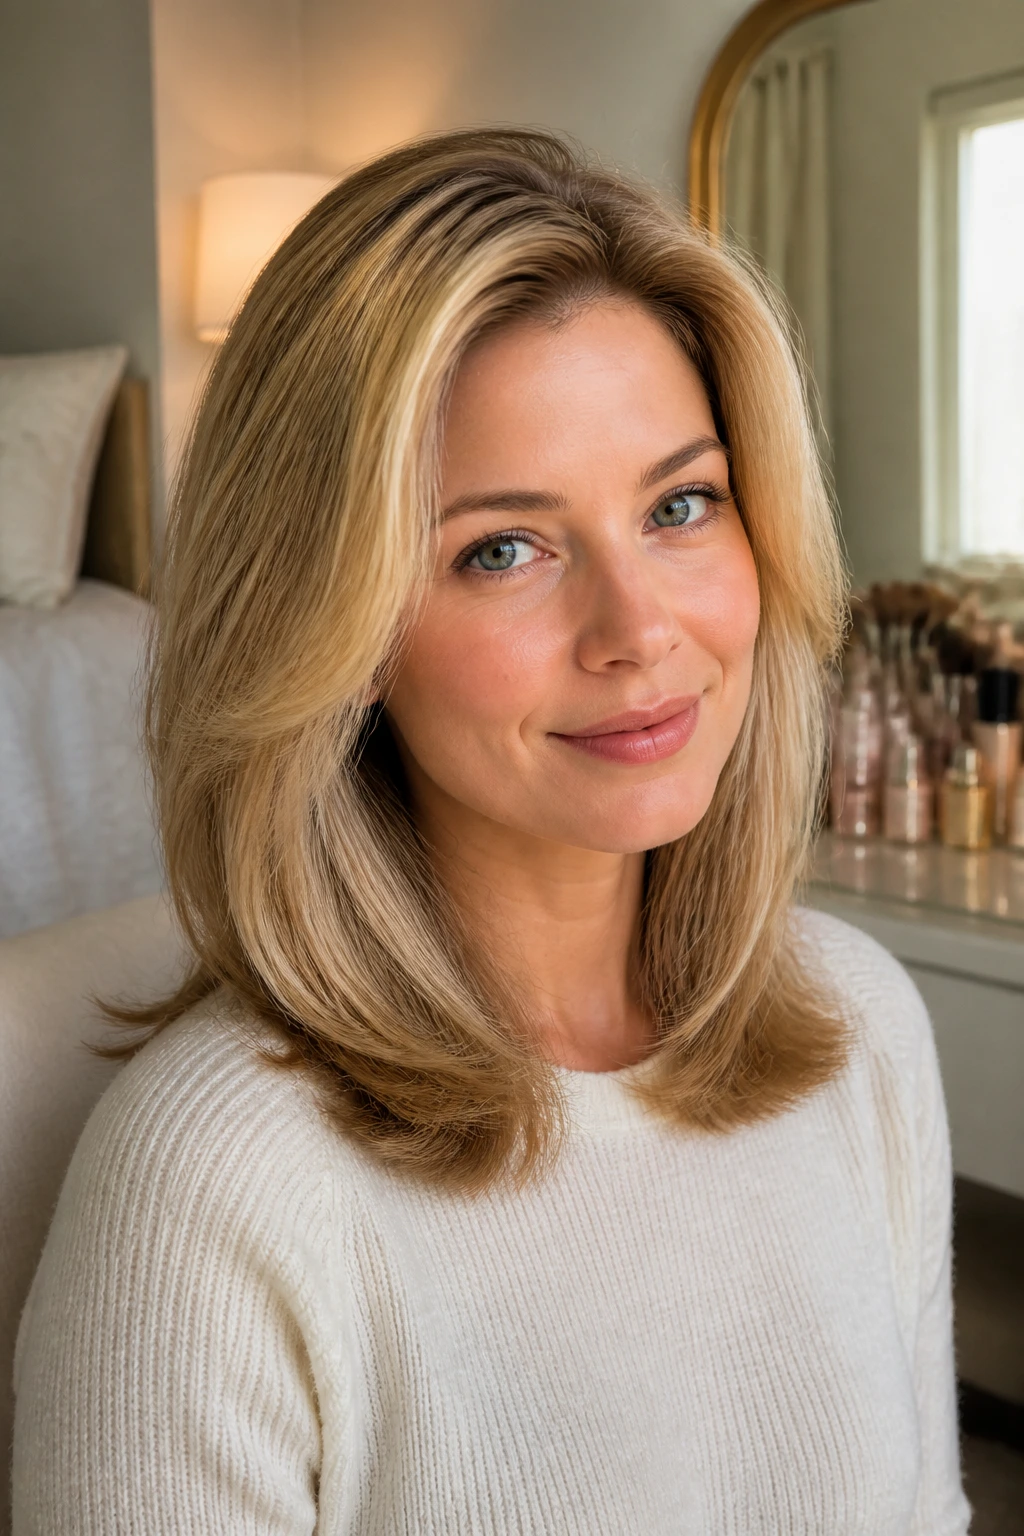
The mid-length blowout is the style I reach for when fine hair needs to look polished fast. It’s not about giant curls. It’s about lifted roots, a smooth body through the mids, and rounded ends that keep the outline full. That combination gives the hair movement without making it fragile-looking.
If you want this to hold, start with root-lifting spray at the crown and a heat protectant through the lengths. Blow-dry with a medium round brush, lifting the roots straight up and rolling the ends under for a soft finish. The hair should feel cool before you let the brush out. That cool-down is what helps the shape stay.
Velcro rollers at the crown can add a little extra lift while you do makeup or get dressed. Two to four rollers is usually enough. You do not need a whole head full unless your hair is stubborn.
This is the style I’d teach first if someone only wanted one dependable option for medium fine hair. It works for interviews, dinners, errands, and the odd day when you want your hair to look like it has been cooperating all morning. Good shape, clean ends, no drama. That’s enough.
