



Round faces don’t need hiding. They need direction.
Brown honey highlights are one of the easiest ways to add that direction without making the hair look striped, stiff, or overworked. The color sits in that sweet spot between brunette and blonde, so it reads warm and soft, but still gives you enough brightness to pull the eye where you want it. On a round face, that usually means upward, inward, and a little lower than the widest part of the cheeks.
The placement matters more than the shade alone. A few well-placed ribbons can do more than a whole head of scattered light pieces, especially when you want the face to look a touch longer and the cheek area a little less dominant. That’s the part people often miss. They ask for “honey highlights” and stop there, when the real trick is in where the light lands.
Some versions are barely there. Others are bolder, with a money piece or a stronger contrast at the ends. The best one depends on your haircut, your base color, and how much you want the roundness of your face shape to soften or sharpen. The 18 looks below each do something a little different, and that’s the fun of it.
1. Soft Chestnut Honey Melt Along the Cheekbones
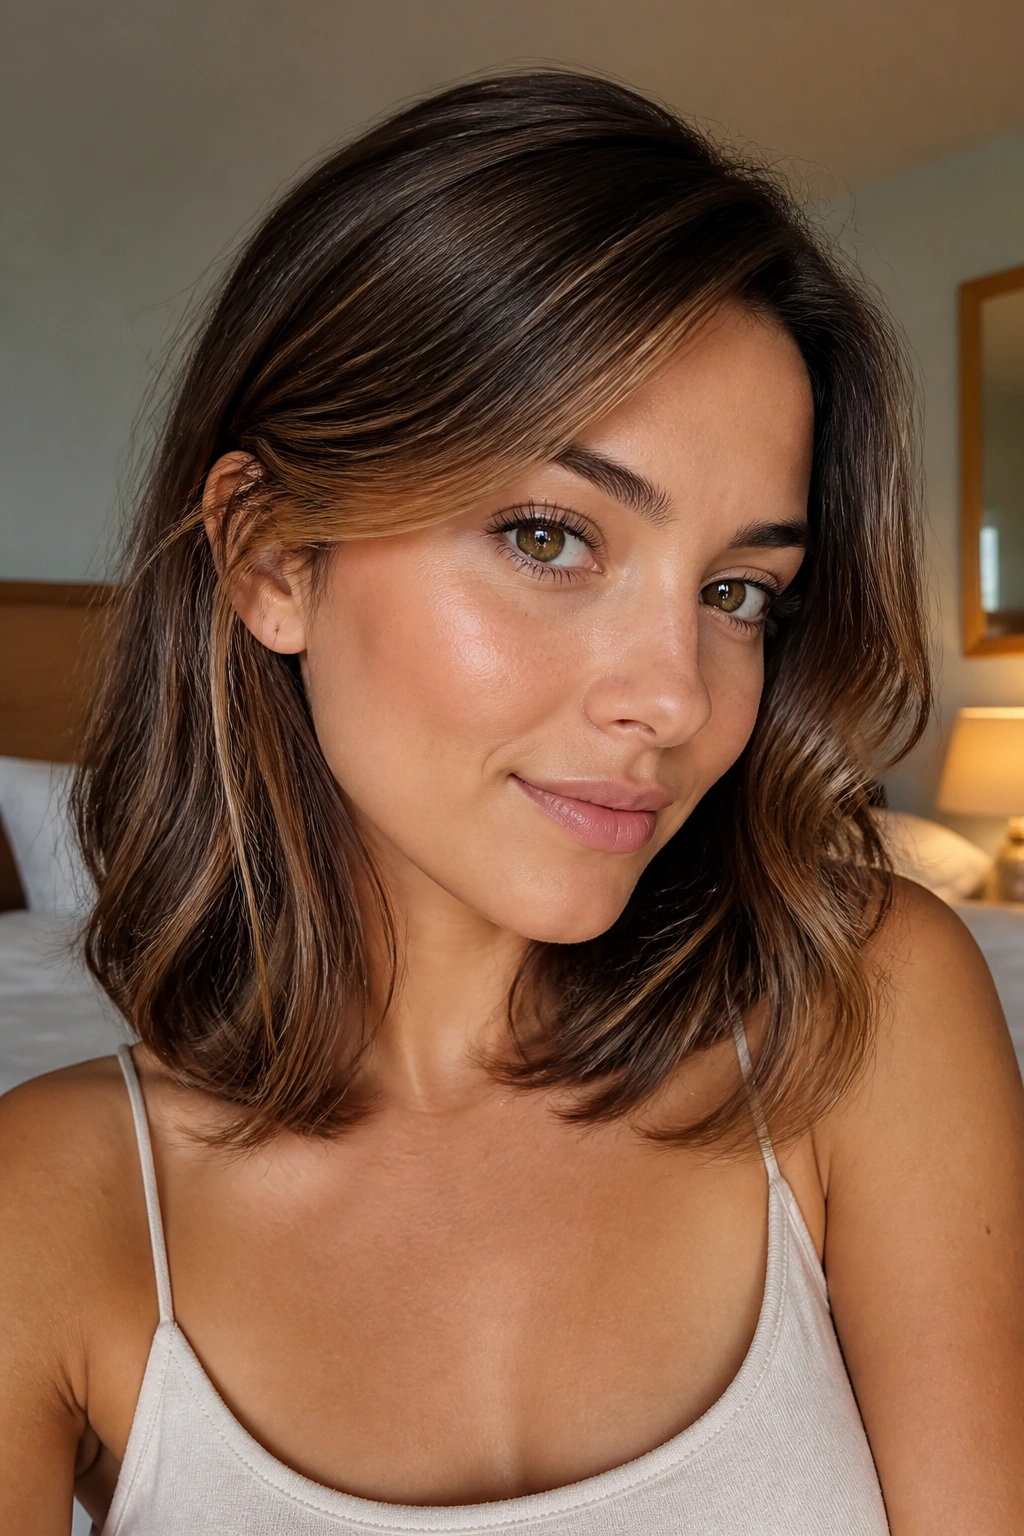
This is the safest place to start if you want brown honey highlights for round faces that feel natural and expensive-looking without trying too hard. The chestnut base keeps the whole look grounded, while the honey pieces kiss the cheekbone area just enough to lift the face visually.
Why It Flatters Round Faces
The magic is in the softness. Instead of placing the brightest pieces right at the widest part of the face, the color sits a little higher and a little narrower, which changes how the eye reads the shape. That tiny shift matters.
Ask for two to four fine ribbons around the front hairline and a softer scatter through the mid-lengths. Keep the ends one shade lighter than the face frame so the finish doesn’t look flat. Do not over-lighten the front pieces or the contrast gets loud fast.
- Best on shoulder-length cuts and long layers.
- Works well if your natural hair sits around medium brown or light brown.
- Looks especially good when the hair is tucked behind one ear.
- Needs only a soft gloss every 6 to 8 weeks to stay shiny.
My favorite part: it grows out quietly, which means fewer harsh lines near the cheeks.
2. Caramel Ribbons Starting Below the Jaw
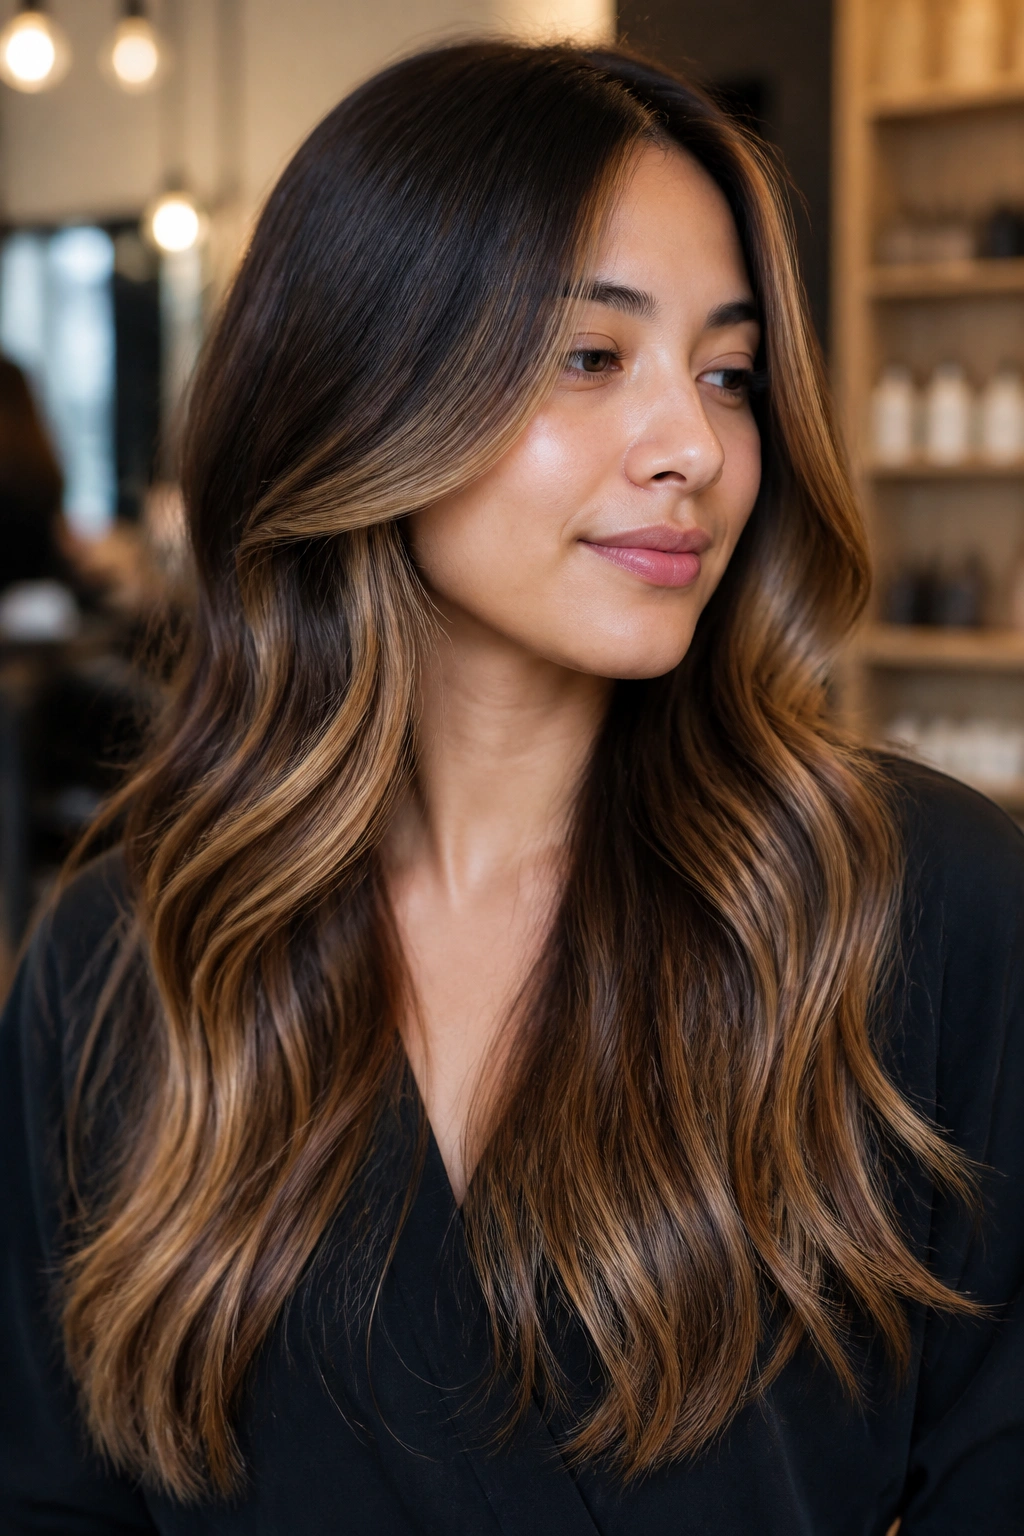
The fastest way to make a round face look a little longer is to keep the brightest hair below the cheekbone. That’s exactly what these caramel-honey ribbons do. They start beneath the jaw and move downward, so the eye follows the vertical line instead of getting stuck on the width of the face.
A lot of people ask for front highlights and end up with brightness in the wrong place. This version avoids that trap. The light pieces still frame the face, but they don’t crowd it. They feel sleeker, which is the whole point.
This look is strongest on medium-length hair with movement. Wavy layers help the ribbons separate, and a simple blowout with a round brush makes the lighter ends pop. Keep the root shadow about 1 to 1.5 inches deep so the brightness has a place to land.
It’s a good choice if you want color that reads polished, not beachy. Clean, not sugary.
3. Face-Framing Honey Panels on a Long Bob
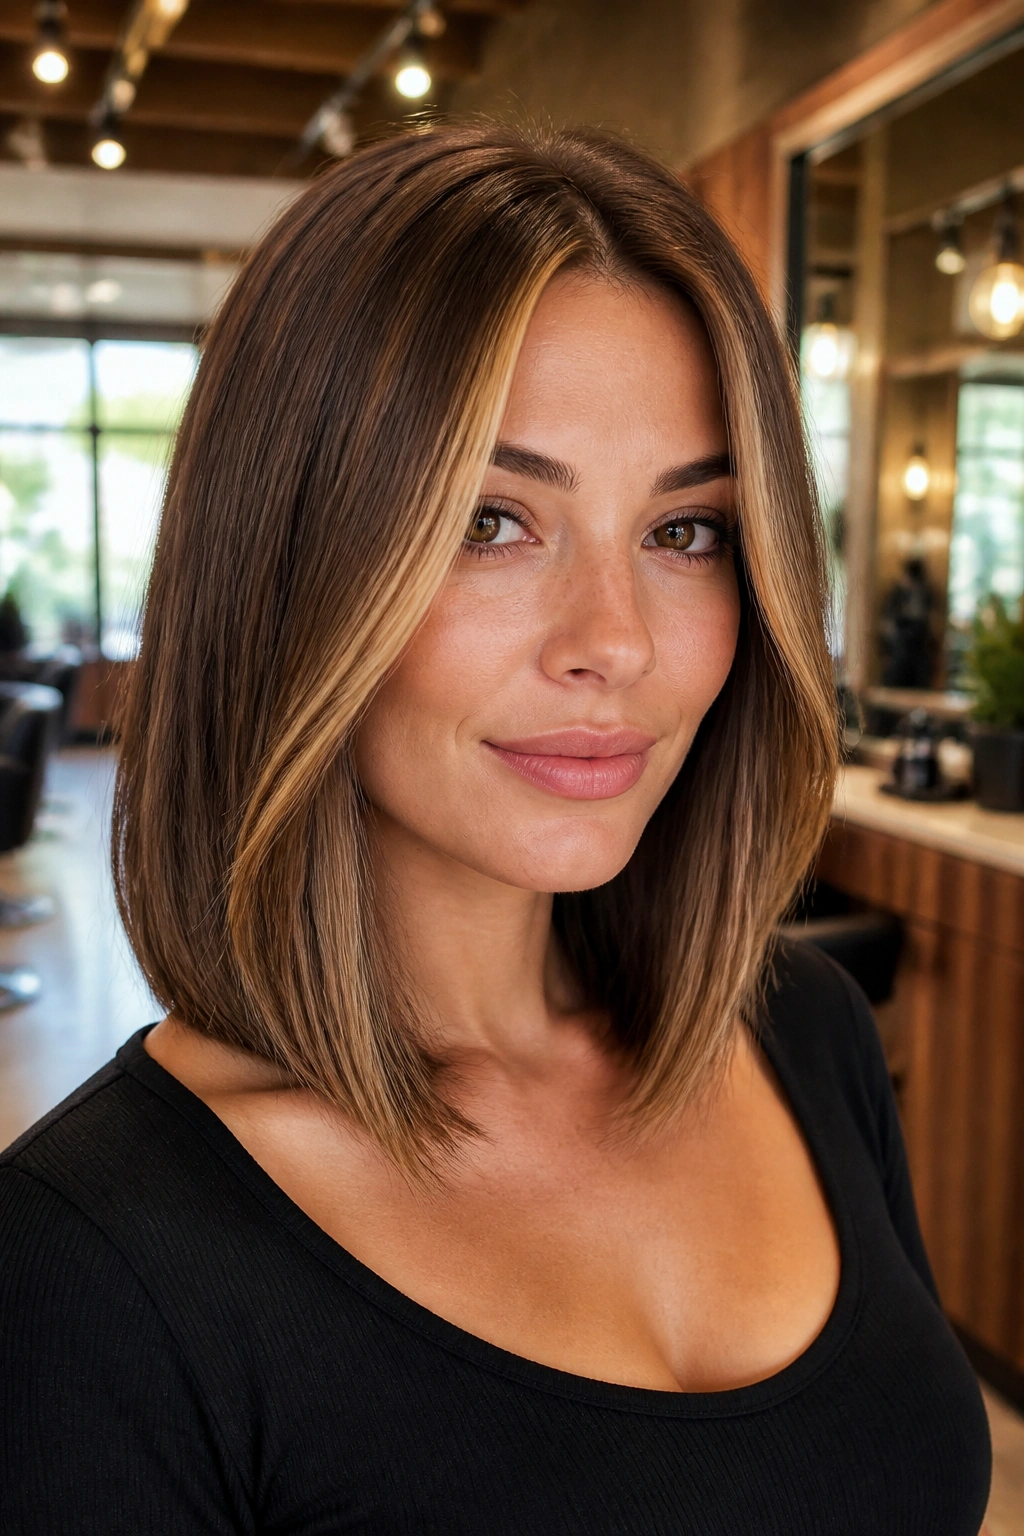
A collarbone-length lob can go from soft to sculpted with just two face-framing honey panels. I like this one because it gives round faces structure without turning the hair into a full highlight project. The shape does half the work for you.
What Makes It Different
Unlike scattered highlights, these panels act almost like built-in contour. They sit at the outer edge of the face, usually starting near the temple and dropping past the chin, which creates a little extra length where round faces need it most.
Keep the panels slightly wider than a babylight, but not chunky. Around half an inch to three-quarters of an inch is enough. If the pieces are too thick, the color starts looking blocky. If they’re too thin, you lose the shape.
- Best on straight or softly waved lobs.
- Ask for a neutral honey, not a yellow gold.
- Leave the base deeper around the crown for lift.
- Tuck one side behind the ear to show the contour.
Pro tip: pair this with a blunt-ish lob instead of a fluffy, rounded cut. The sharper edge makes the face look less circular.
4. Fine Babylights Through Chocolate Brown Waves
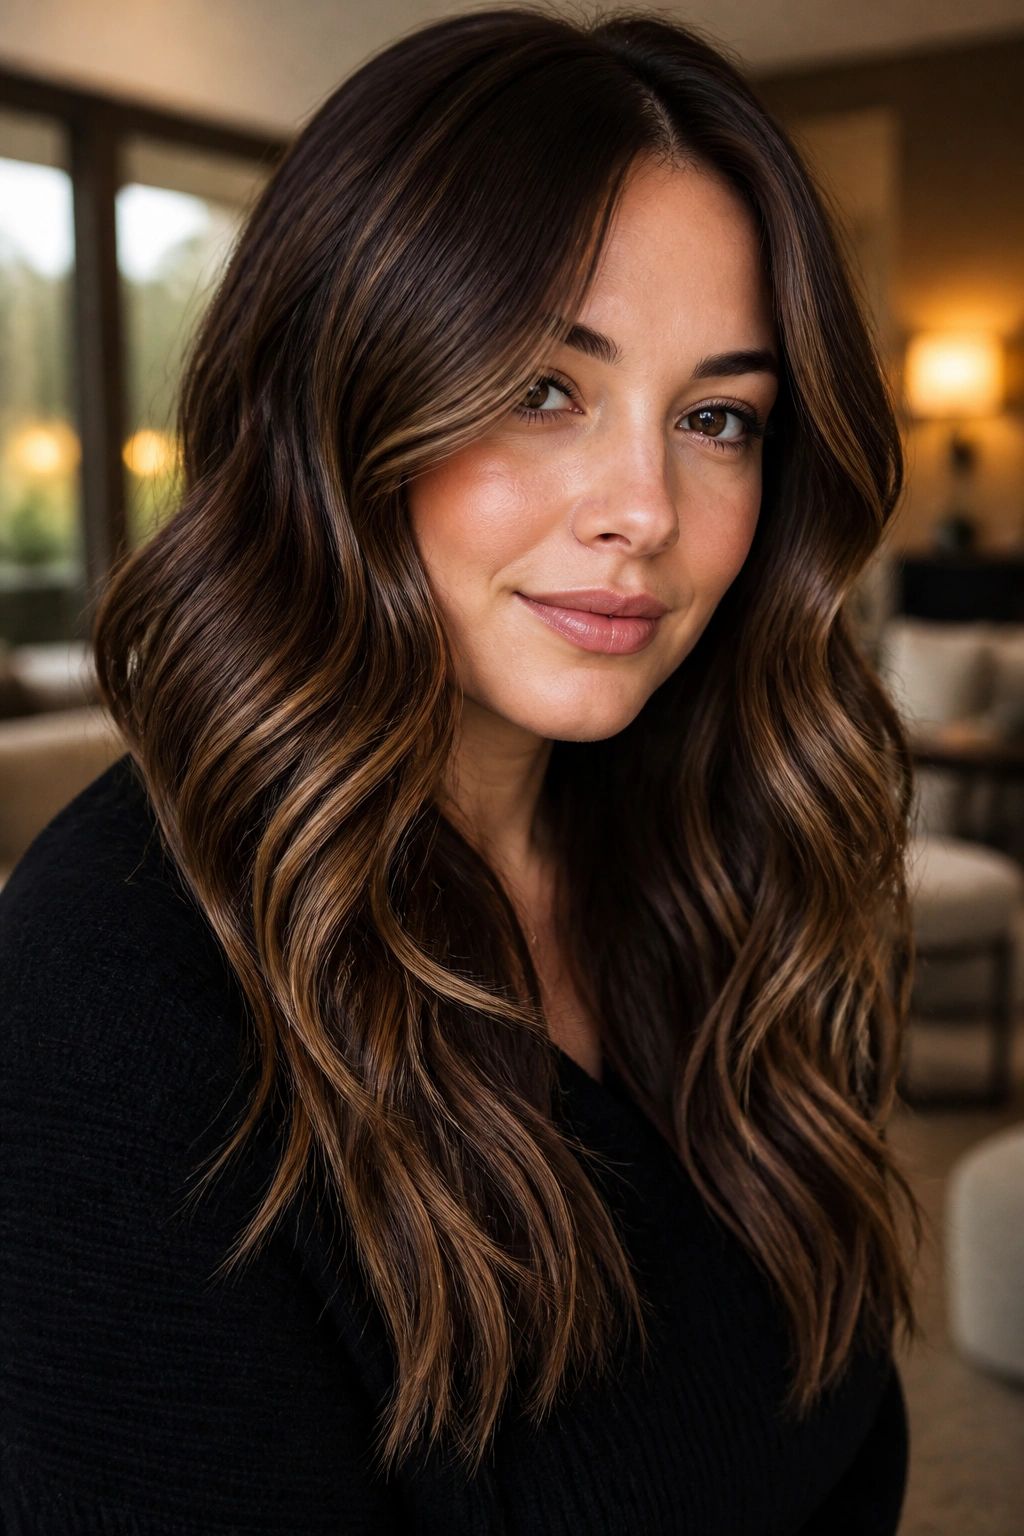
Why do babylights work so well here? Because they don’t announce themselves. They whisper. And on a round face, that whisper is often enough to make the whole haircut feel longer and lighter.
Fine honey babylights woven through chocolate brown waves keep the color from pooling in one spot. That matters. A round face can get overwhelmed by too much brightness around the cheeks, but babylights break the light into tiny threads, which makes the hair move without widening the face.
How to Wear It
Keep the pieces micro-fine through the top and slightly denser through the lower half of the head. That gives you the glow without the helmet effect. The waves do the rest; they bend the light and stop the color from looking harsh.
This is one of the better choices if you wear your hair down most of the time and want color that still looks fine when pulled back. It also works with a middle part or a soft off-center part, which helps stretch the face shape a bit. Very clean, very wearable.
5. Mushroom Brown With Warm Honey Mist
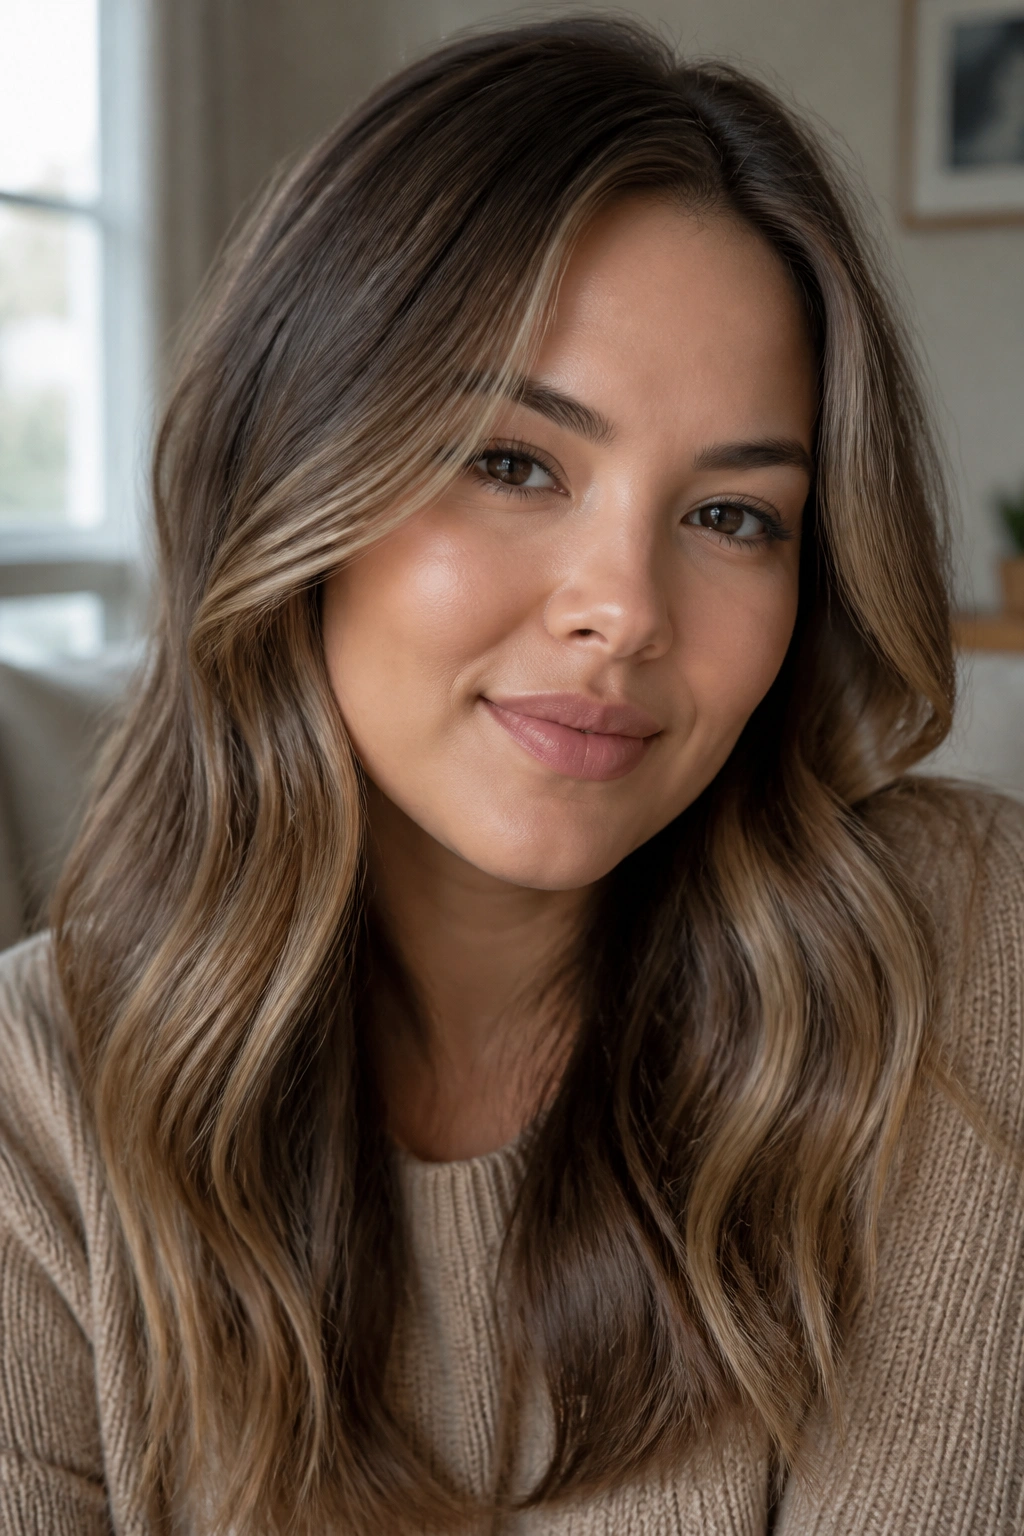
This one is quietly smart. Mushroom brown gives you that cool, muted base, and the honey comes in like a warm filter over the top. The result is dimensional without turning brassy, which is a real problem with round-face highlights when the lighter pieces get too orange or too gold.
The cooler base matters because it keeps the face from looking fuller. Too much warmth around the cheeks can make the widest part stand out. A mushroom brown base calms that down, and the honey adds life where the hair needs it.
The best version keeps the honey on the outer canopy and a little through the ends. Think of it as a mist, not a stripe. If your hair is thick, ask for slightly brighter ends and softer roots so the style doesn’t puff outward around the face.
A gloss in a beige or neutral tone helps this one stay creamy. Without it, the honey can look blunt. And blunt is the enemy here.
6. Honey Money Piece With a Soft Shadow Root
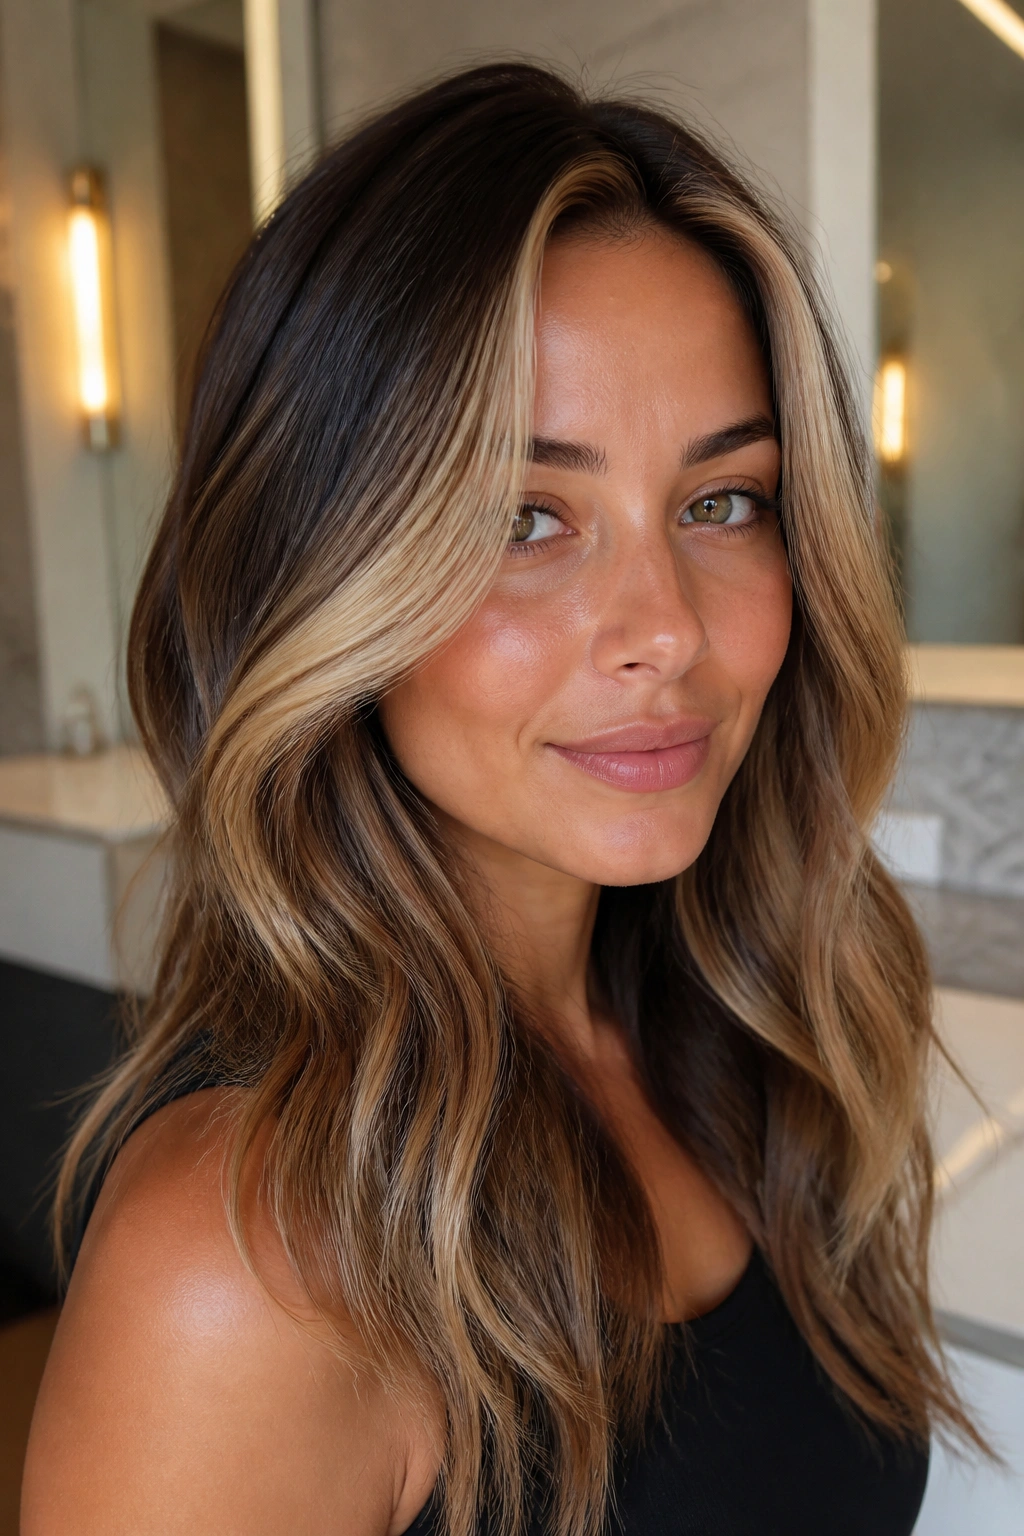
A strong money piece can look too harsh on a round face. A softened version is much better. You still get the brightness around the face, but the shadow root keeps it from sitting like a hard frame around the cheeks.
This is the version I’d send to anyone who wants a little drama without losing balance. The front pieces should be honey-bright, yes, but the root needs to stay deep enough to create contrast at the top of the head. That’s what pulls the eye upward.
Unlike an all-over blonde frame, this one keeps the face frame narrow near the temples and broader only toward the lower lengths. That creates a slimming line instead of a circle. It also grows out better, which is handy if you hate obvious regrowth.
Best for medium to dark brunettes who want brightness near the front but don’t want to commit to constant upkeep. Ask for the first inch at the root to stay soft and dark. That one detail changes the whole look.
7. Curved Balayage That Skims the Jawline
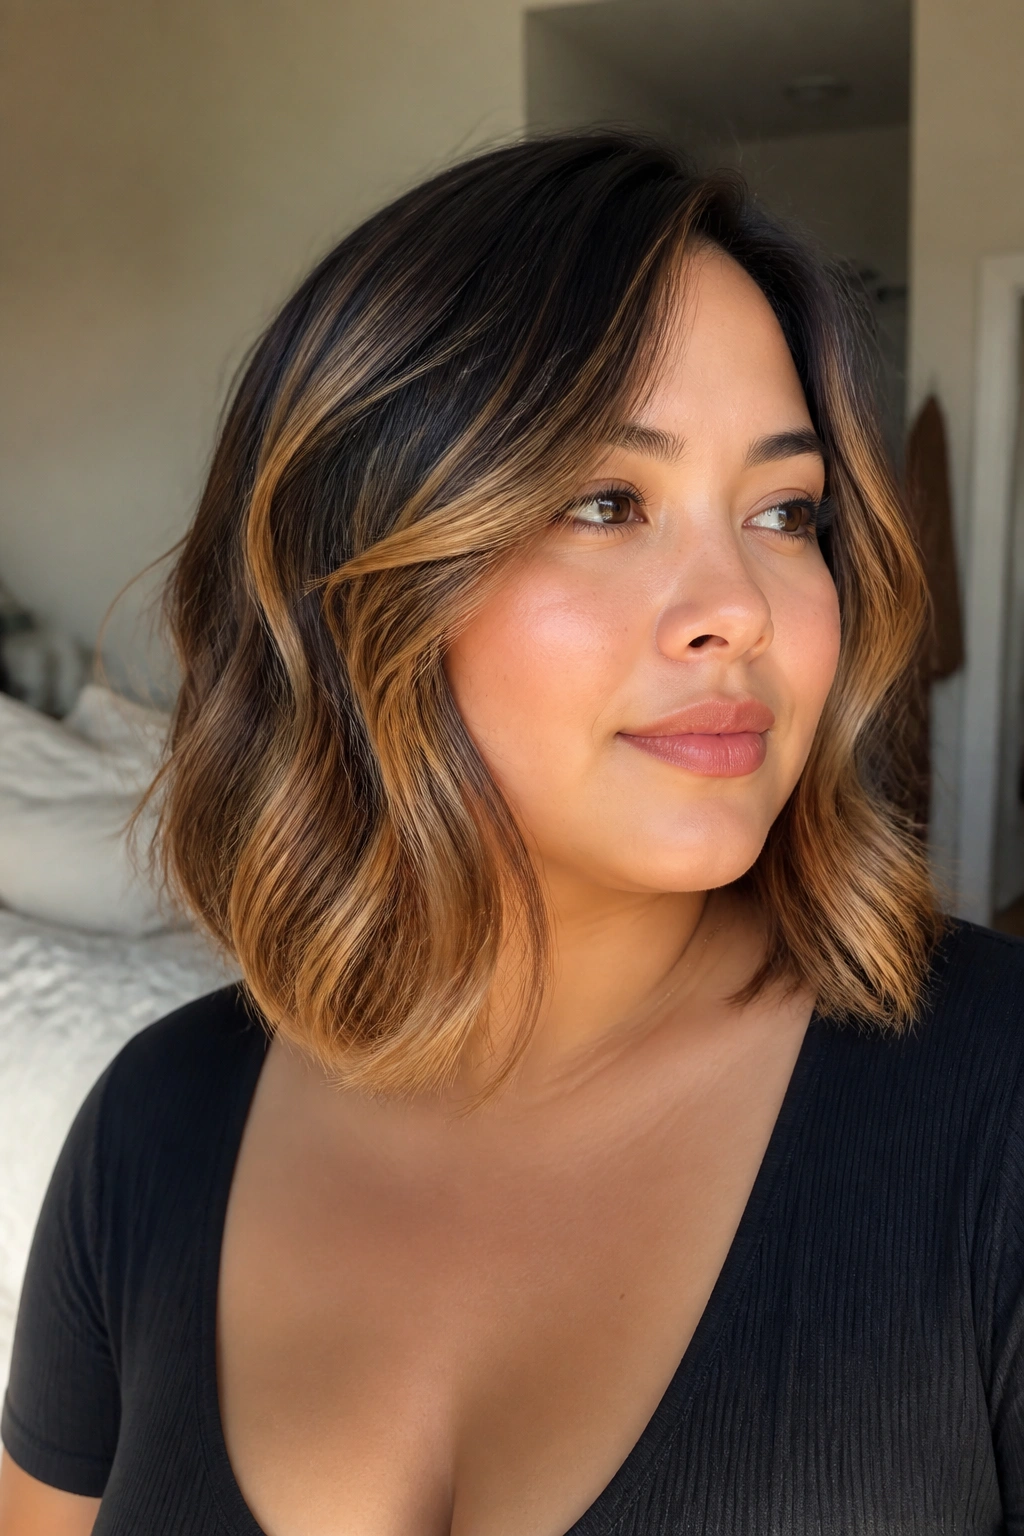
A curved balayage placement can do more than any haircut trick. It traces the jawline in a way that feels almost architectural, which sounds fancier than it is. All it really means is this: the lighter pieces follow the natural shape of the face instead of sitting straight across it.
Placement Notes That Matter
The brighter bits should start a little above the jaw, then sweep down and out. That curve creates length. It also keeps the light from gathering at the widest point of a round face, where it can make the cheeks look fuller than they are.
- Use honey and toasted caramel, not pale blonde.
- Keep the sweep diagonal, never horizontal.
- Leave the lower nape darker for contrast.
- Style with a bend, not a tight curl.
The best part is how easy this looks when it’s done right. It isn’t flashy. It just makes the hair look shaped, almost like a piece of the cut itself. If you wear side parts, this placement gets even better because the color falls naturally into that sweeping line.
8. Honey Peekaboo Panels Under the Top Layer
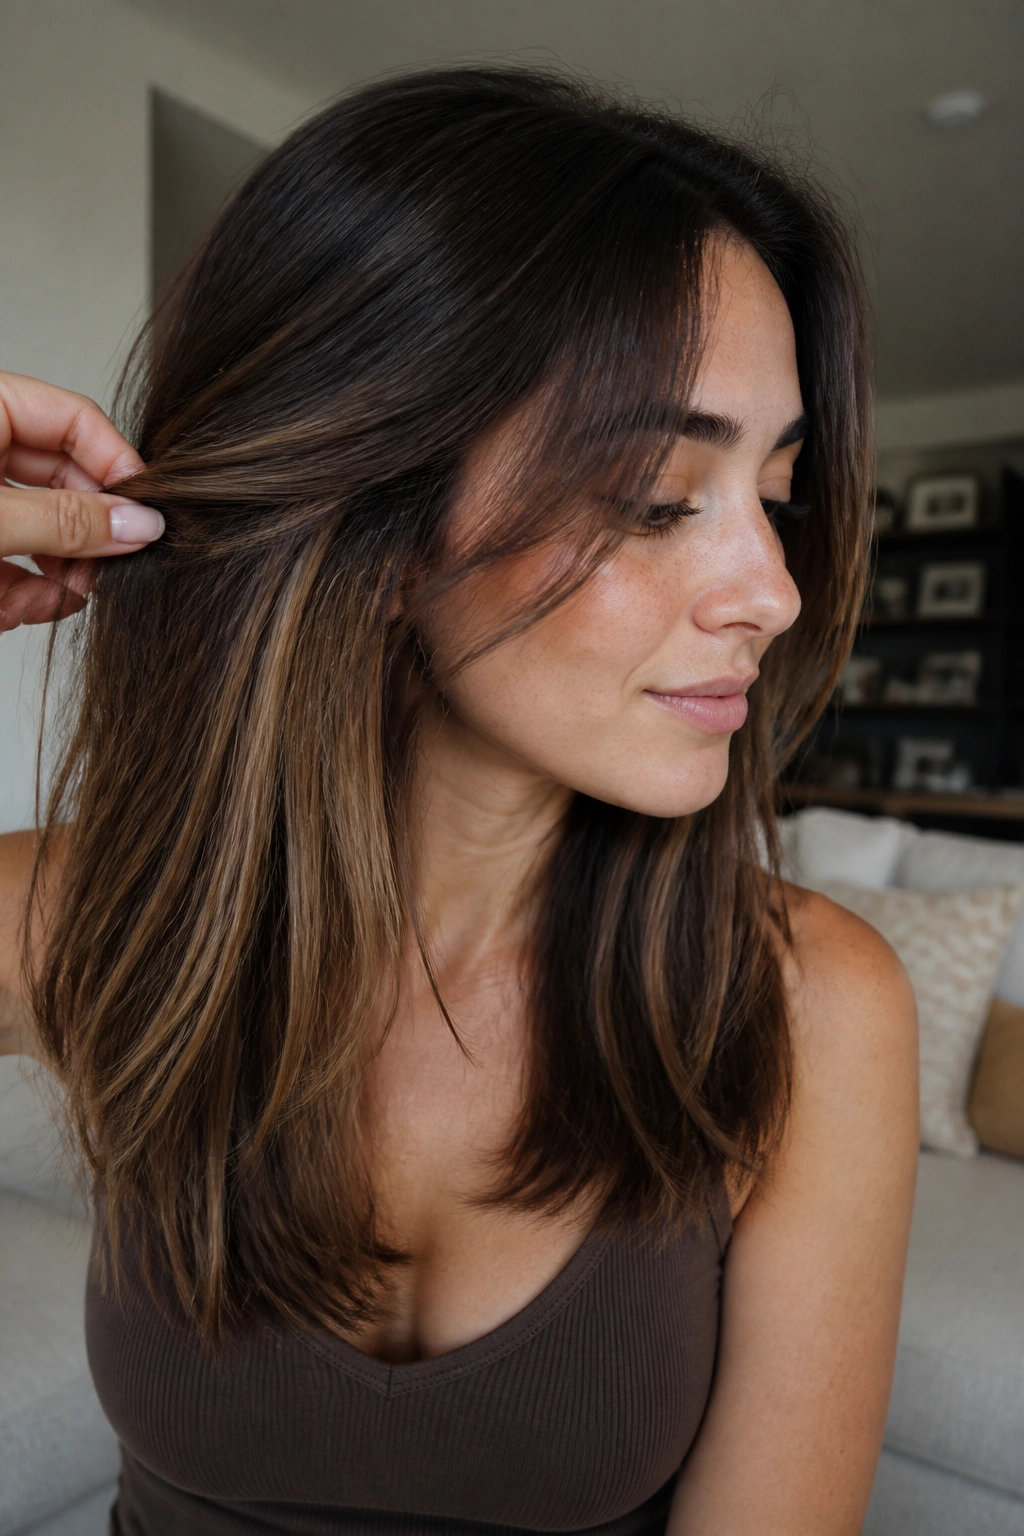
Sometimes the smartest highlight is the one you don’t see right away. Peekaboo honey panels hide under the top layer of hair, then flash through when the hair moves. That little surprise adds dimension without putting a lot of brightness around the widest part of the face.
This works especially well if you wear your hair in waves or you flip it from side to side during the day. The color shifts with movement, which gives a round face more visual length. The eye follows the motion instead of settling on one fixed shape.
It’s also a nice choice if you’re nervous about highlights turning too bold. The top layer stays rich and brunette, while the hidden honey adds warmth underneath. Think of it as a quiet upgrade.
I like this best on medium to thick hair, because the top layer has enough weight to hide and reveal the lighter sections. If the hair is too thin, the peekaboo effect can disappear. Still, when it works, it looks clever in the best way.
9. Toffee Ends With Honey Tips on a Lob
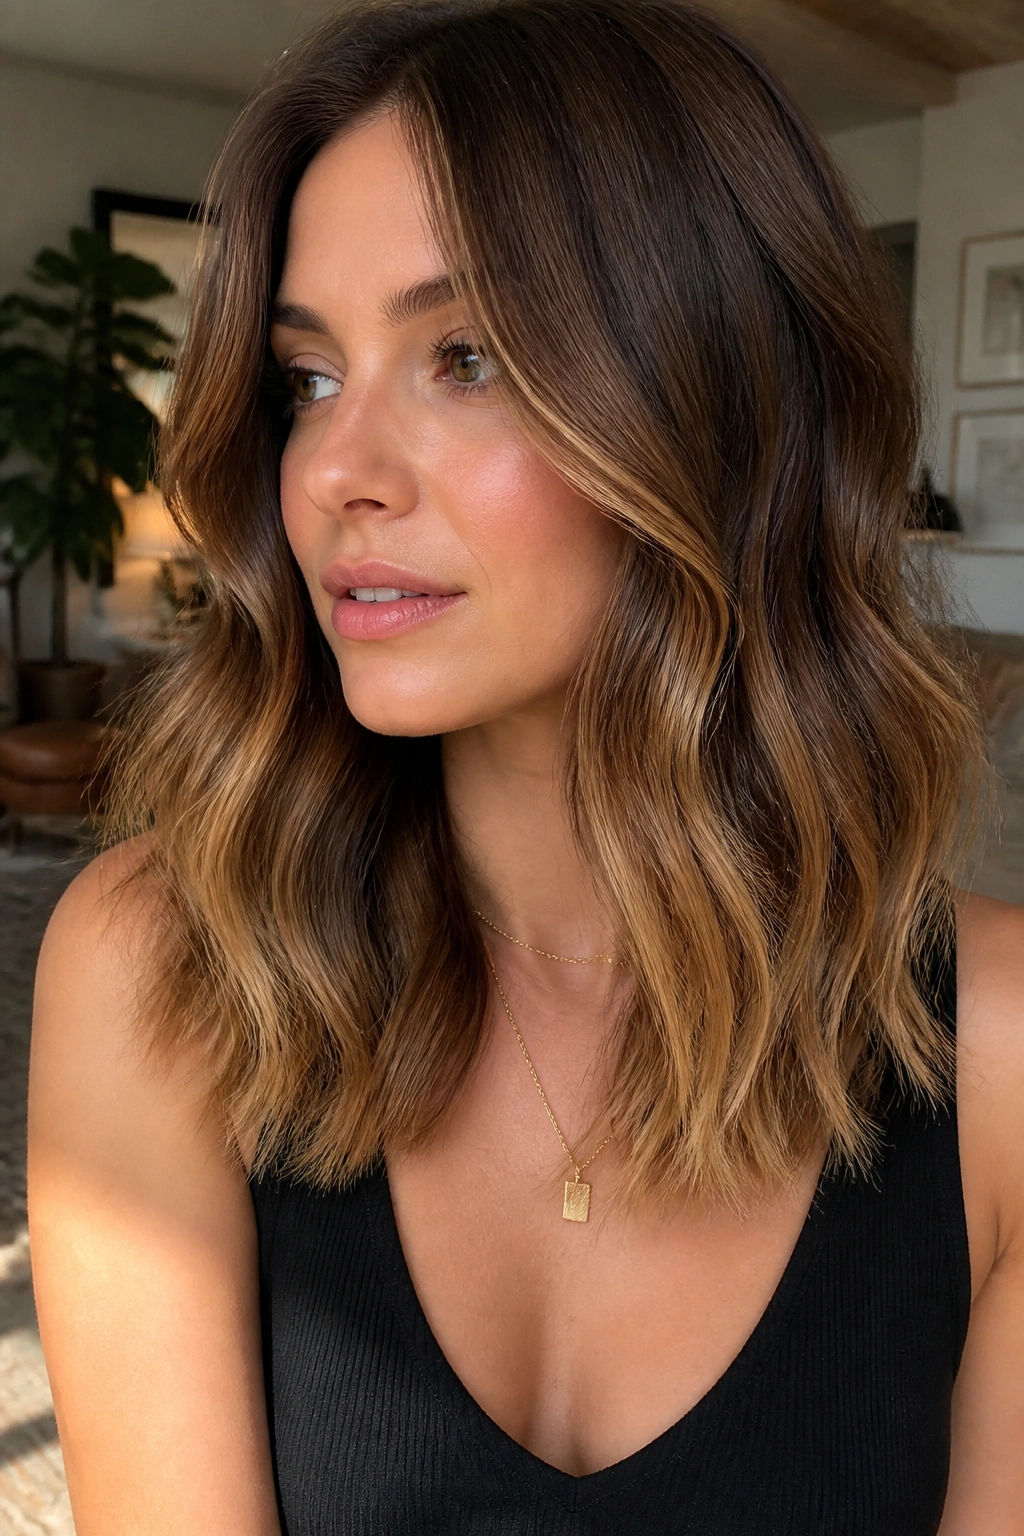
I’ve seen this style save a lot of lobs that felt too blunt. The trick is simple: keep the mid-lengths toffee brown, then brighten the last few inches with honey tips. That makes the haircut look longer and a touch lighter without putting brightness all around the face.
The reason it flatters round faces is the same reason a long hemline can make a short outfit feel taller. Your eye drops downward. It follows the color to the end of the hair, not back to the cheeks.
Best Details to Ask For
- Keep the root and mid-lengths in the same brown family.
- Place the honey only on the bottom 2 to 4 inches.
- Blend the transition so it looks painted, not dipped.
- Add a soft wave to keep the ends from looking boxy.
This is one of those styles that looks especially good on hair that touches the collarbone. Too short, and the lighter ends can feel abrupt. Too long, and you lose some of the face-lifting effect.
10. Golden Cocoa Face Frame With Curtain Bangs
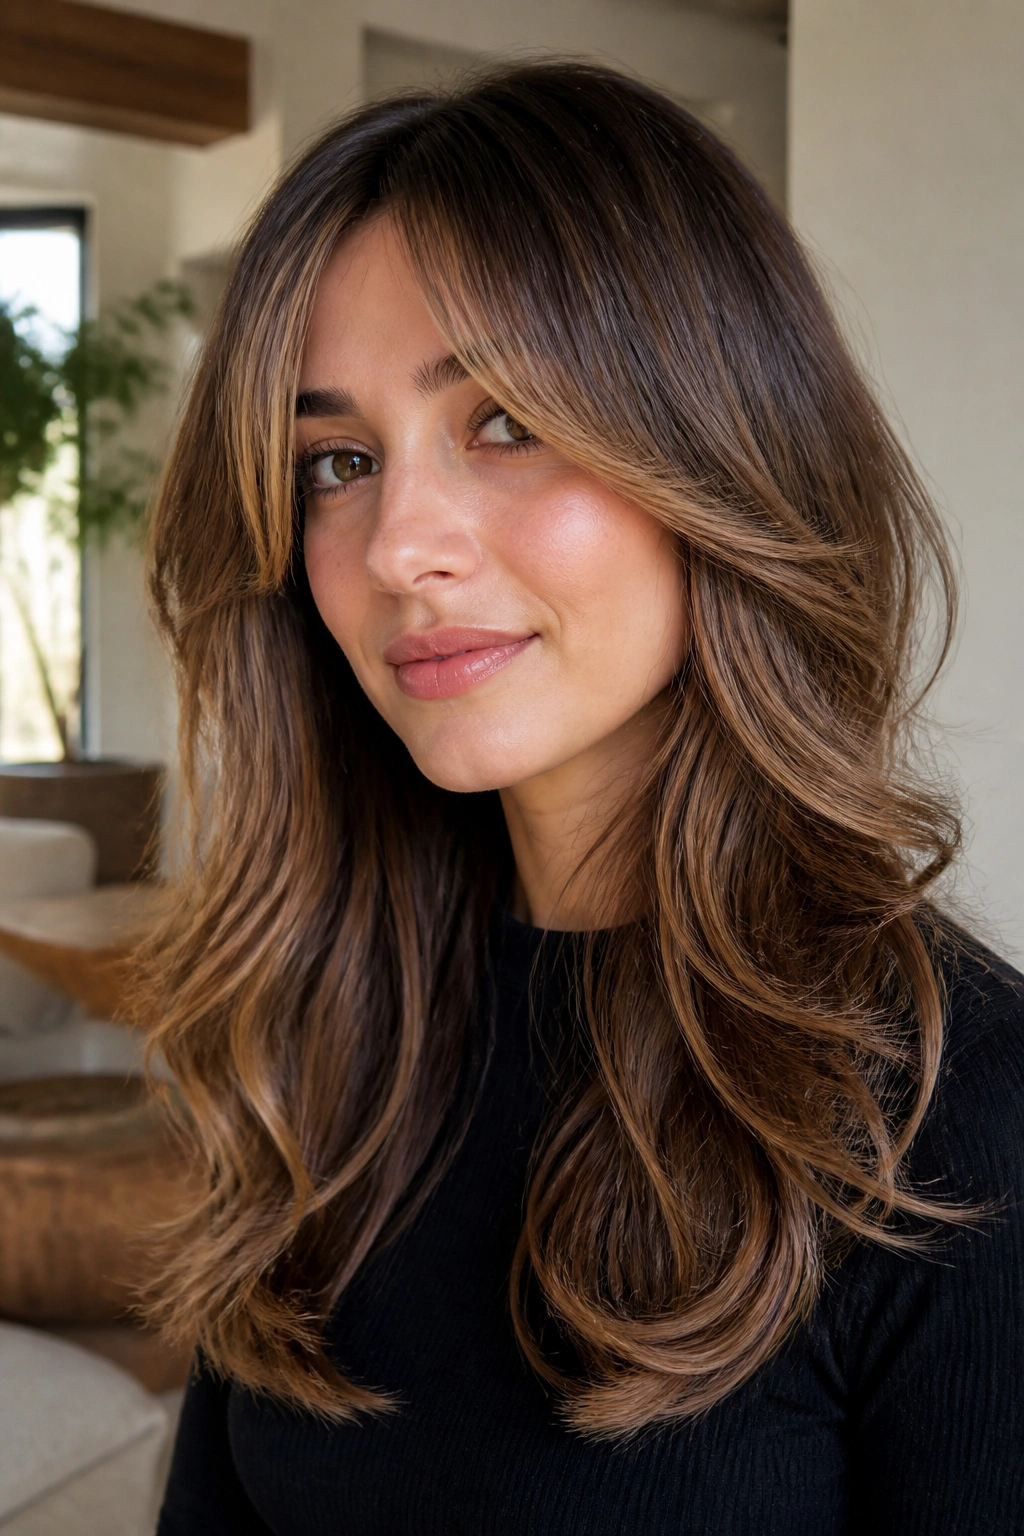
Curtain bangs can be a gift for round faces, but only if the color supports the cut. Golden cocoa with honey through the face frame gives the bangs a lighter edge, which helps open the face without chopping it in half.
Why does this work? Because the bangs split the width of the forehead, while the honey pieces around the face create length on the sides. That balance keeps the face from feeling overly circular. The bangs should stay soft and airy, not dense and blunt.
How to Style It
Blow the bangs away from the center with a medium round brush, then let the side pieces fall slightly forward. The honey should sit in those outer layers, not in the thickest part of the fringe. If the light is too high up in the bangs, the forehead can start to look wider.
A colorist can keep the roots cocoa-dark and add honey only through the bend of the curtain layers. That small decision gives the hair a lot more shape. It’s flattering, but also practical, because the grow-out stays forgiving.
11. Espresso Base With Fine Honey Veils
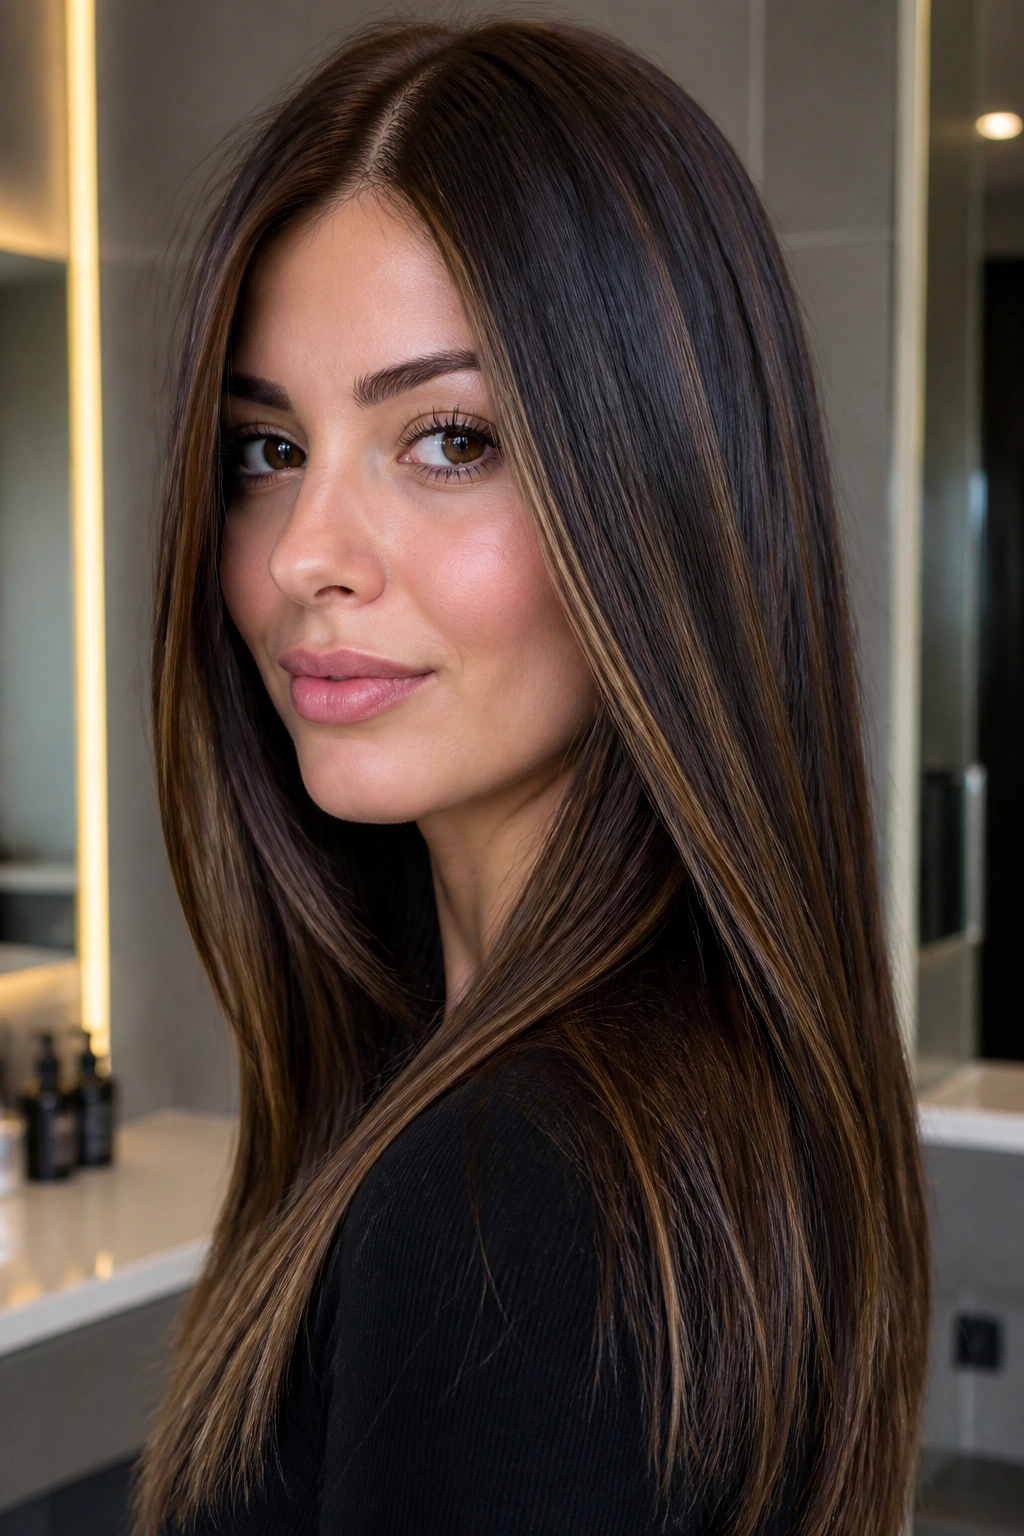
This is for the brunette who wants contrast. Not loud contrast. Just enough to make the hair look alive under indoor light and bright enough to catch shape around a round face.
The espresso base does the heavy lifting. It keeps the look deep and sleek, which is useful because round faces often look best when the hair has a little darkness near the sides. The honey veils then thread through the lengths in thin sheets, almost like light moving through a curtain.
Keep the veils narrow and irregular. Straight, equal-width streaks can look dated fast, and they do nothing helpful for the face shape. What you want is a soft scatter that breaks up the brown, not a pattern you can count from across the room.
This one shines on straight hair and loose bends. It’s also strong for people with strong brows or defined eyes, because the deeper base makes those features stand out. A glossy finish helps a lot. Flat hair and espresso brown can look heavy, and nobody needs that.
12. Ash Brown Base With Beige Honey Notes
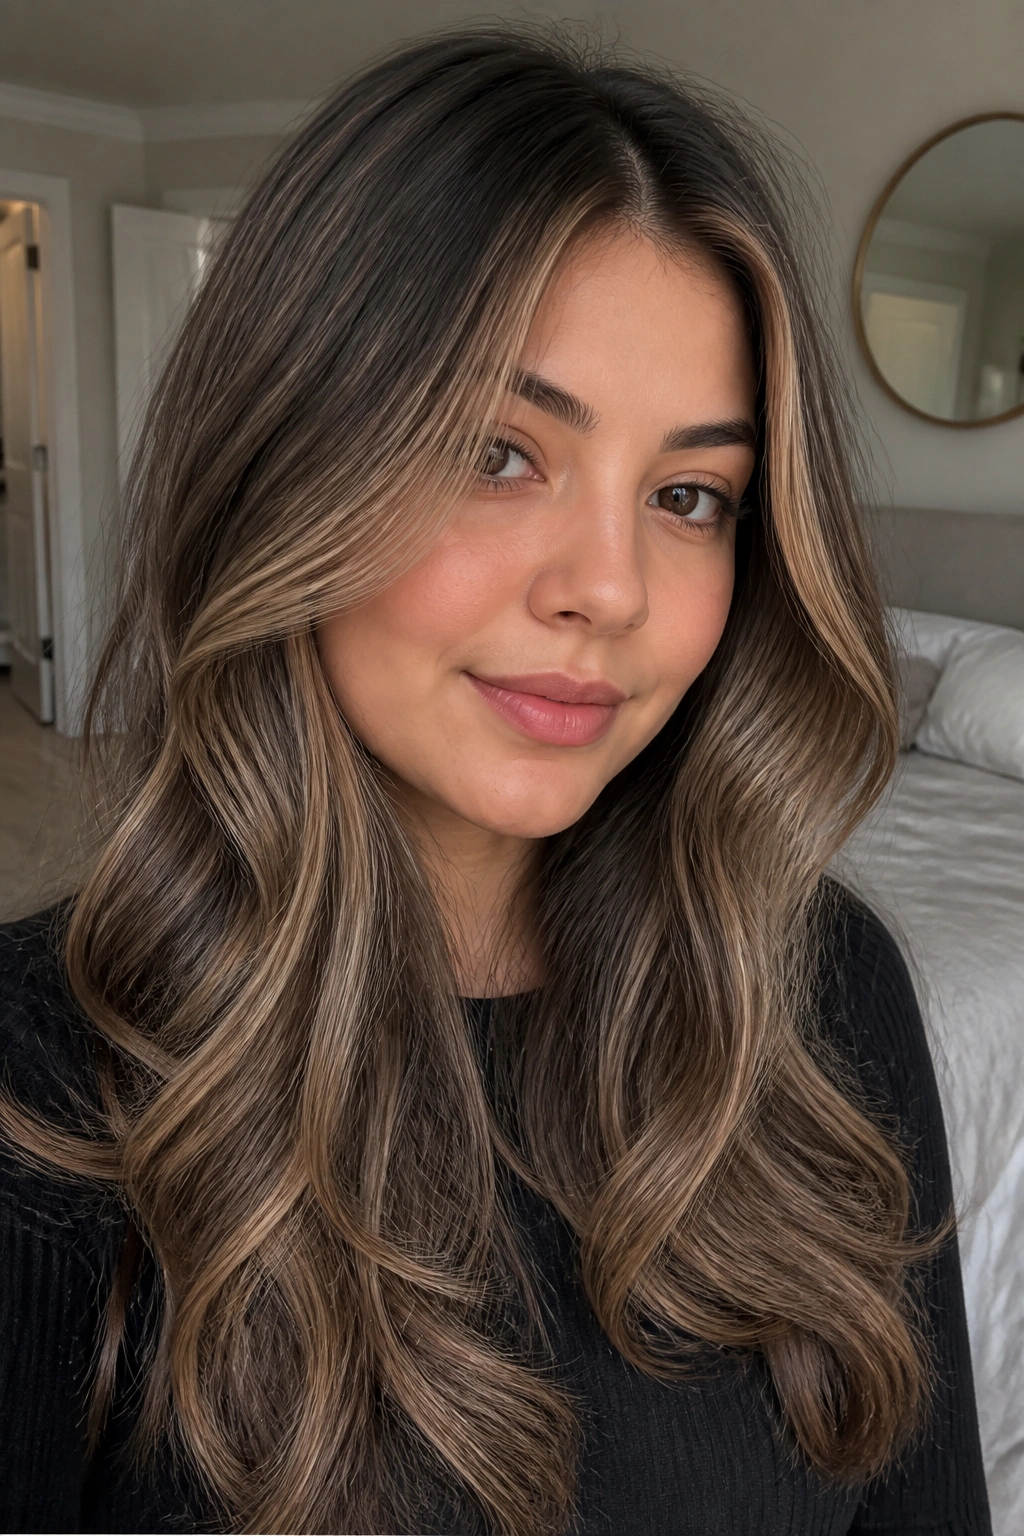
If your skin runs cool or neutral, this version is worth a close look. The ash brown base keeps the overall tone calm, while the beige-honey notes add warmth without tipping into gold. That balance is a good thing on round faces, because it avoids extra visual weight near the cheeks.
A lot of warm brunette highlights go orange when they fade. This one usually doesn’t, or at least it doesn’t as fast. The beige tone stays softer as the color grows out, and the ash base stops the hair from looking too bright around the face.
Unlike richer caramel looks, this style feels cleaner and a little more modern. It’s a nice fit if you like polished hair, subtle shine, and a color story that doesn’t scream for attention. Best on medium-length cuts, though it can work on longer hair if the layers are not too fluffy.
If your natural brown is already cool, this may be the easiest highlight family to maintain. The less brass you fight, the easier your life gets.
13. Sunlit Honey Loops on Wavy Layers
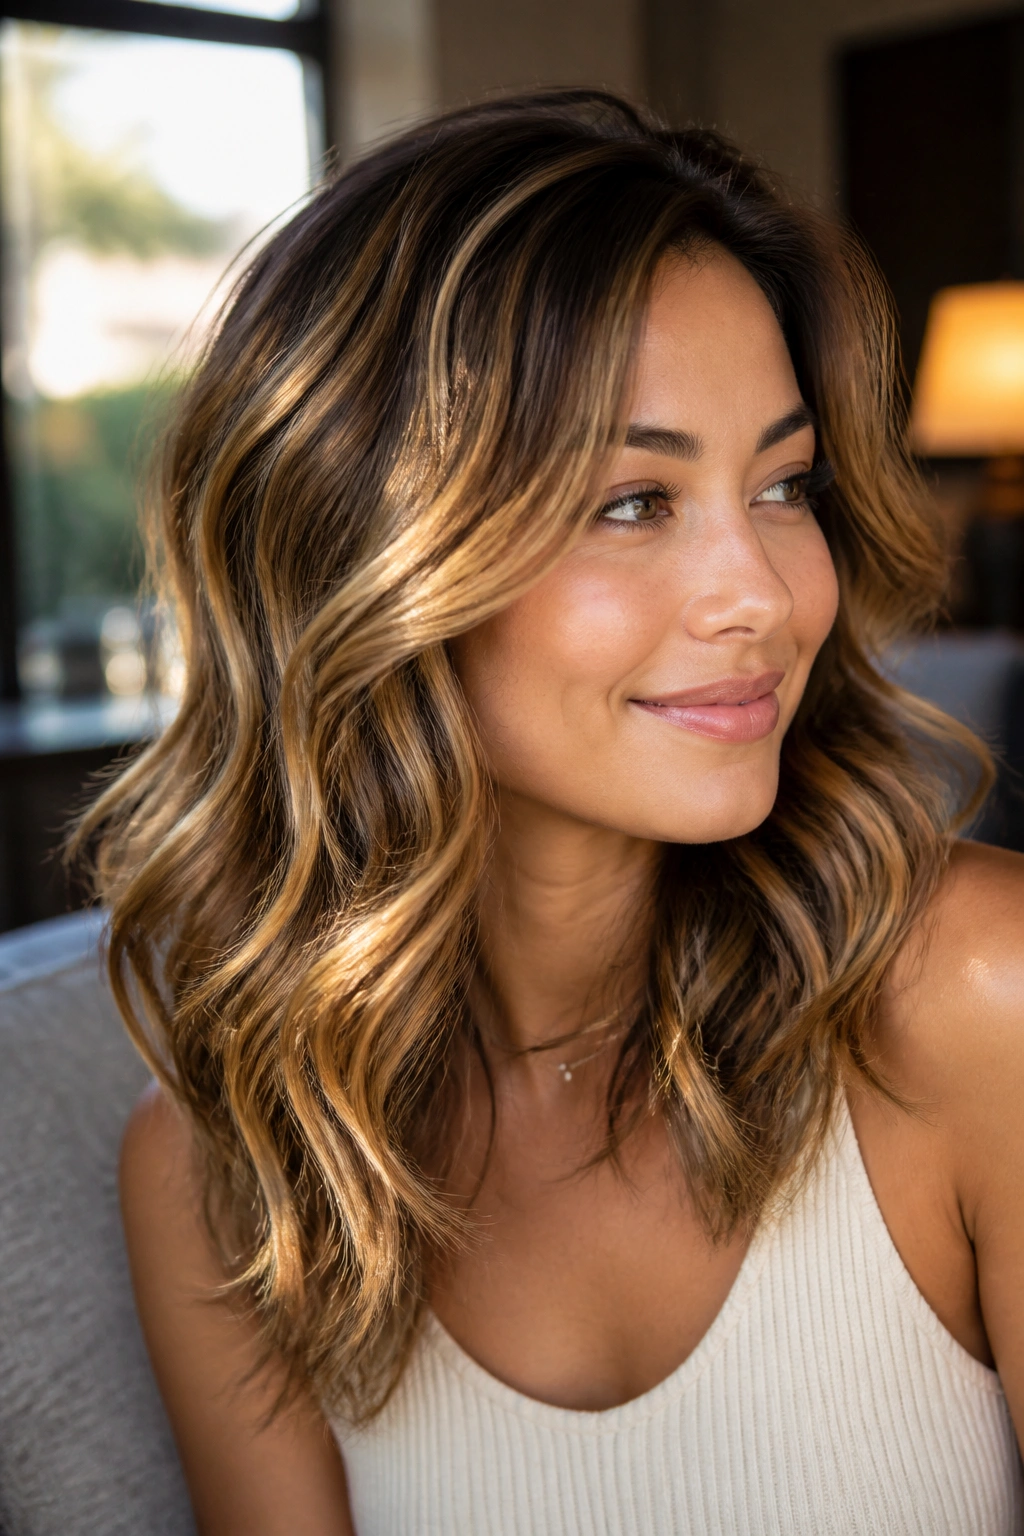
Wavy layers and honey are old friends. The bends in the hair catch light in little pockets, so each wave gets its own soft glow. On a round face, that movement helps because it draws the eye downward along the shape of the waves instead of across the width of the cheeks.
Picture the color like thin ribbons slipping through the curves of the hair. The honey should show more on the outer arcs of the waves and less in the flat inner sections. That keeps the finish from looking busy.
The best honey for this look is warm, but not yellow. Think toasted wheat, not lemon candy. It should feel sunlit in daylight and soft under indoor lamps. That difference matters more than people think.
This style is especially flattering if you air-dry your hair with a little cream or wear a soft diffuser. The texture keeps the highlights broken up, which is exactly what you want when you’re working with a rounder face shape.
14. Teasylight Honey at the Crown
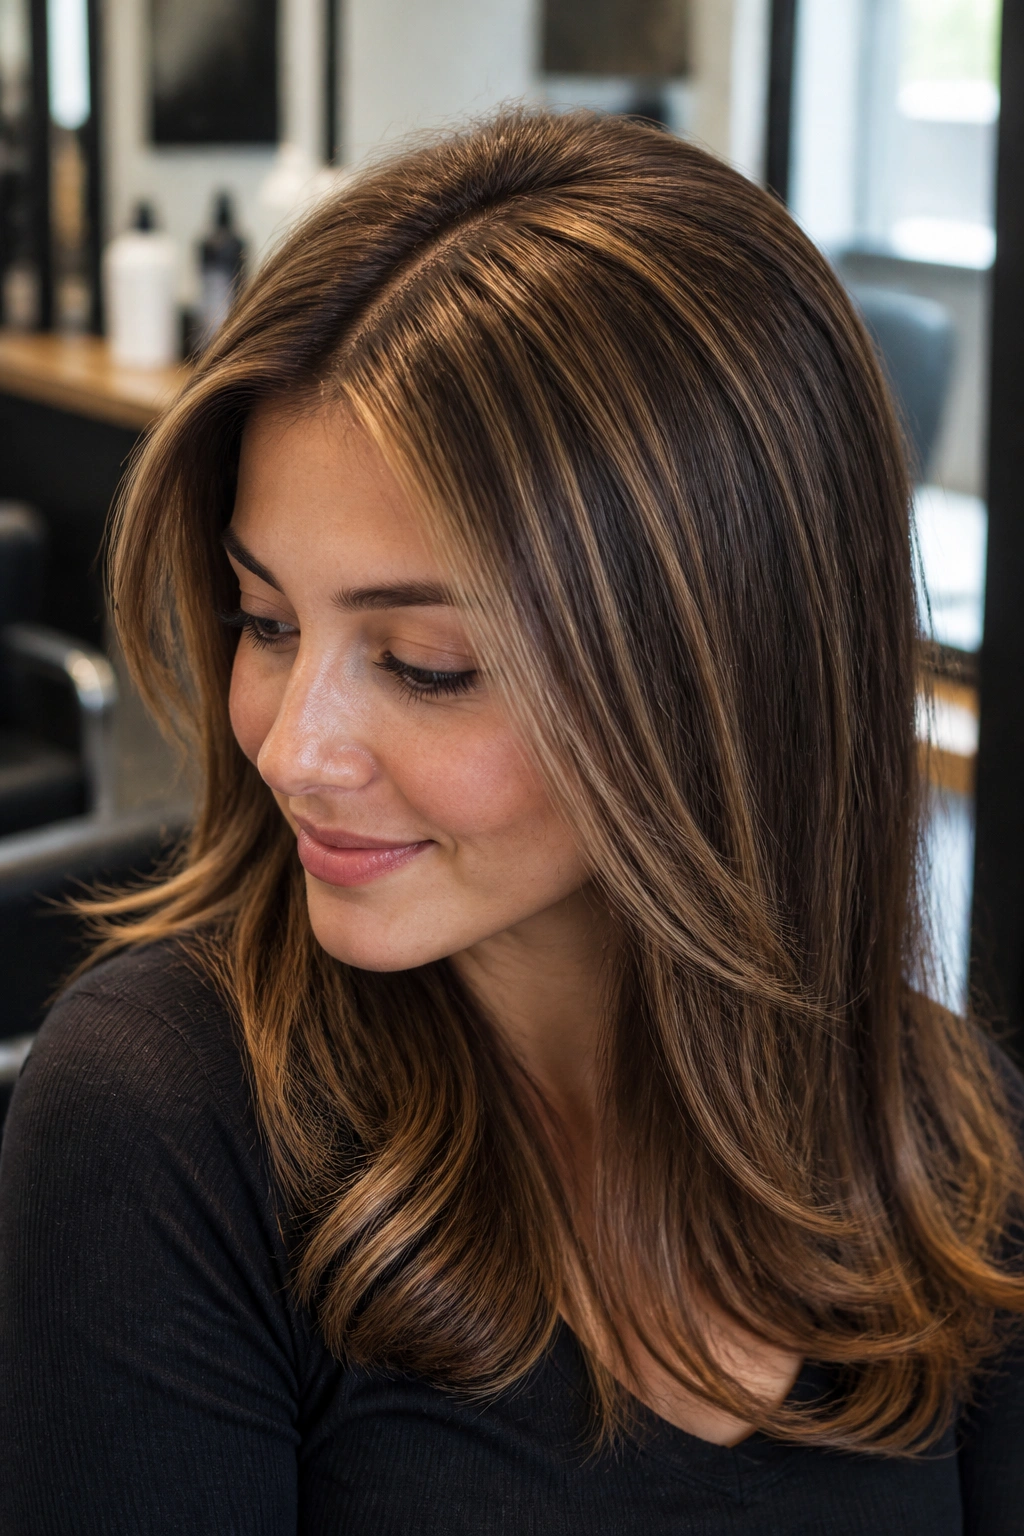
Teasylights give you fine lift at the top without making the roots look obvious. That’s useful for round faces because a little height at the crown changes the whole shape of the head and pulls the eye upward.
Why the Crown Matters
A lot of people focus only on the sides of the face. That’s understandable, but it misses half the story. If the crown stays dark and flat, the face can look wider by comparison. A soft teasylight honey placement fixes that by adding height where the head needs it.
Keep the light pieces delicate near the part and a bit denser just behind it. The result should look airy, not streaky. Teasing before painting gives you that softer blur, which helps the highlights melt into the brown base instead of sitting on top of it.
This one pairs nicely with mid-length layers, especially if your hair tends to fall flat at the roots. It also works when you want the color to look more expensive than obvious. The bright spots are there, but you have to catch them.
15. Honey Around the Temple and Outer Brow
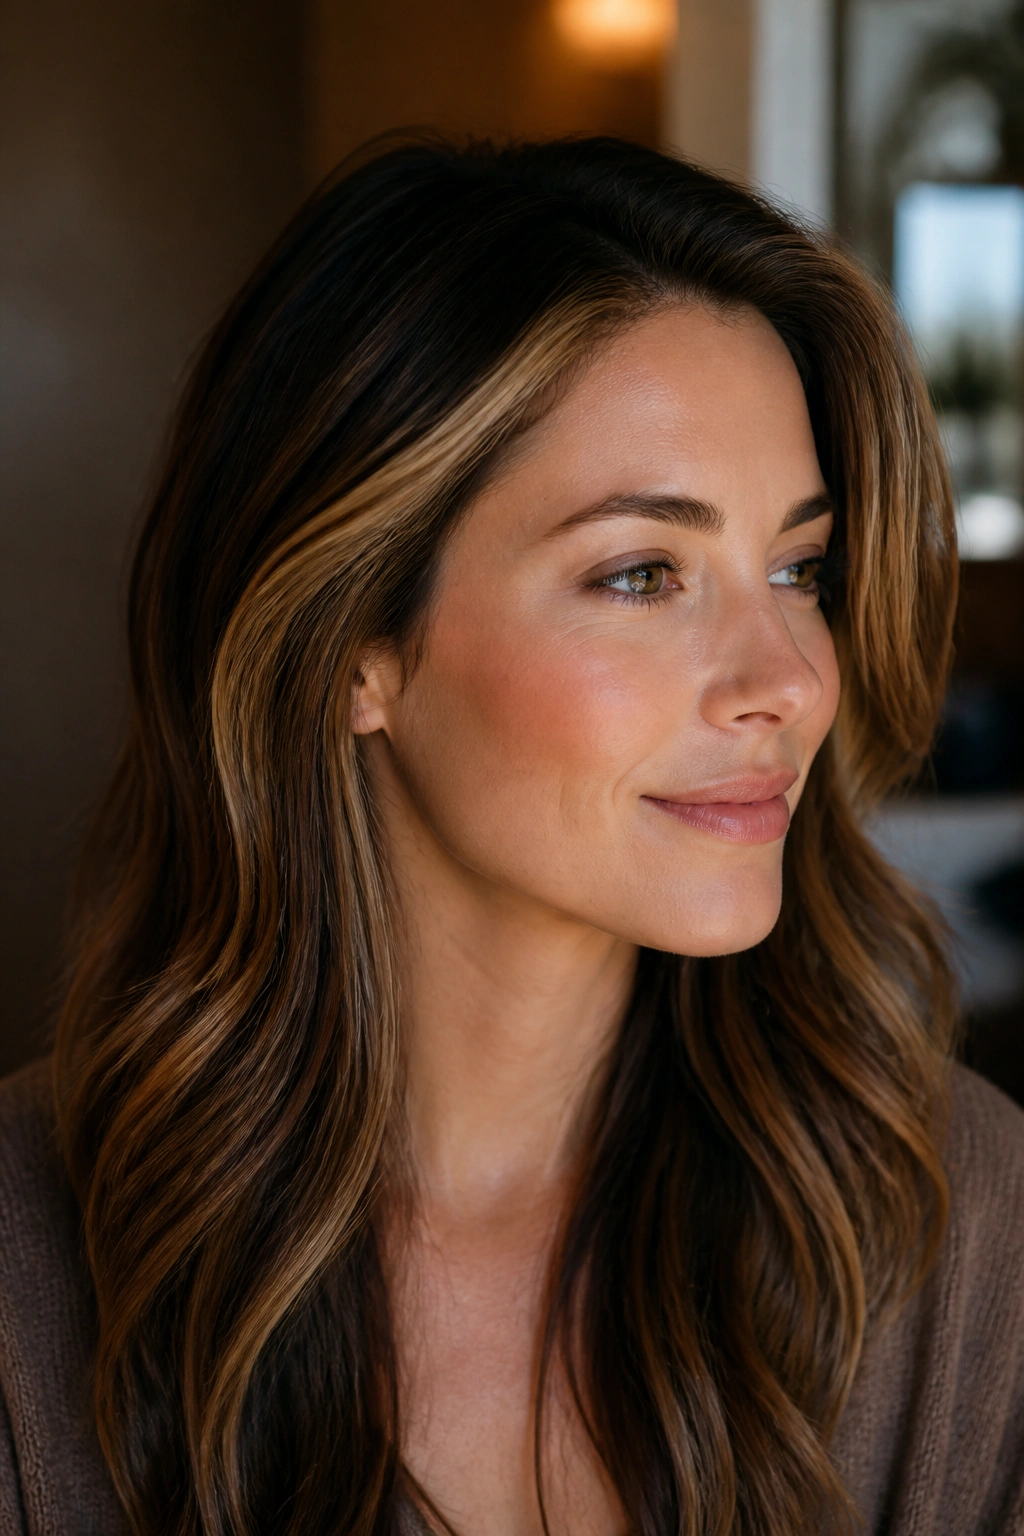
Why does this placement look so good on round faces? Because it opens the upper part of the face without flooding the cheeks with brightness. The temple area and the outer brow line create a kind of frame, and honey in that zone gives the face a little lift.
This is one of the most flattering choices if you wear your hair behind your ears a lot. The color shows where the eye already lands, which makes the whole style feel thoughtful. It’s subtle. Not boring. There’s a difference.
What to Ask Your Colorist For
- Keep the brightest honey at the temple, not the cheek.
- Use a narrow veil that blends into the front layer.
- Leave the underside darker for contrast.
- Pair it with a side part or a soft off-center part.
The outer brow piece can be a touch lighter than the rest of the frame. That tiny brightening near the upper face gives the illusion of height. It’s one of those small changes that makes a haircut feel planned instead of random.
16. Bronde Melt With Honey Ends
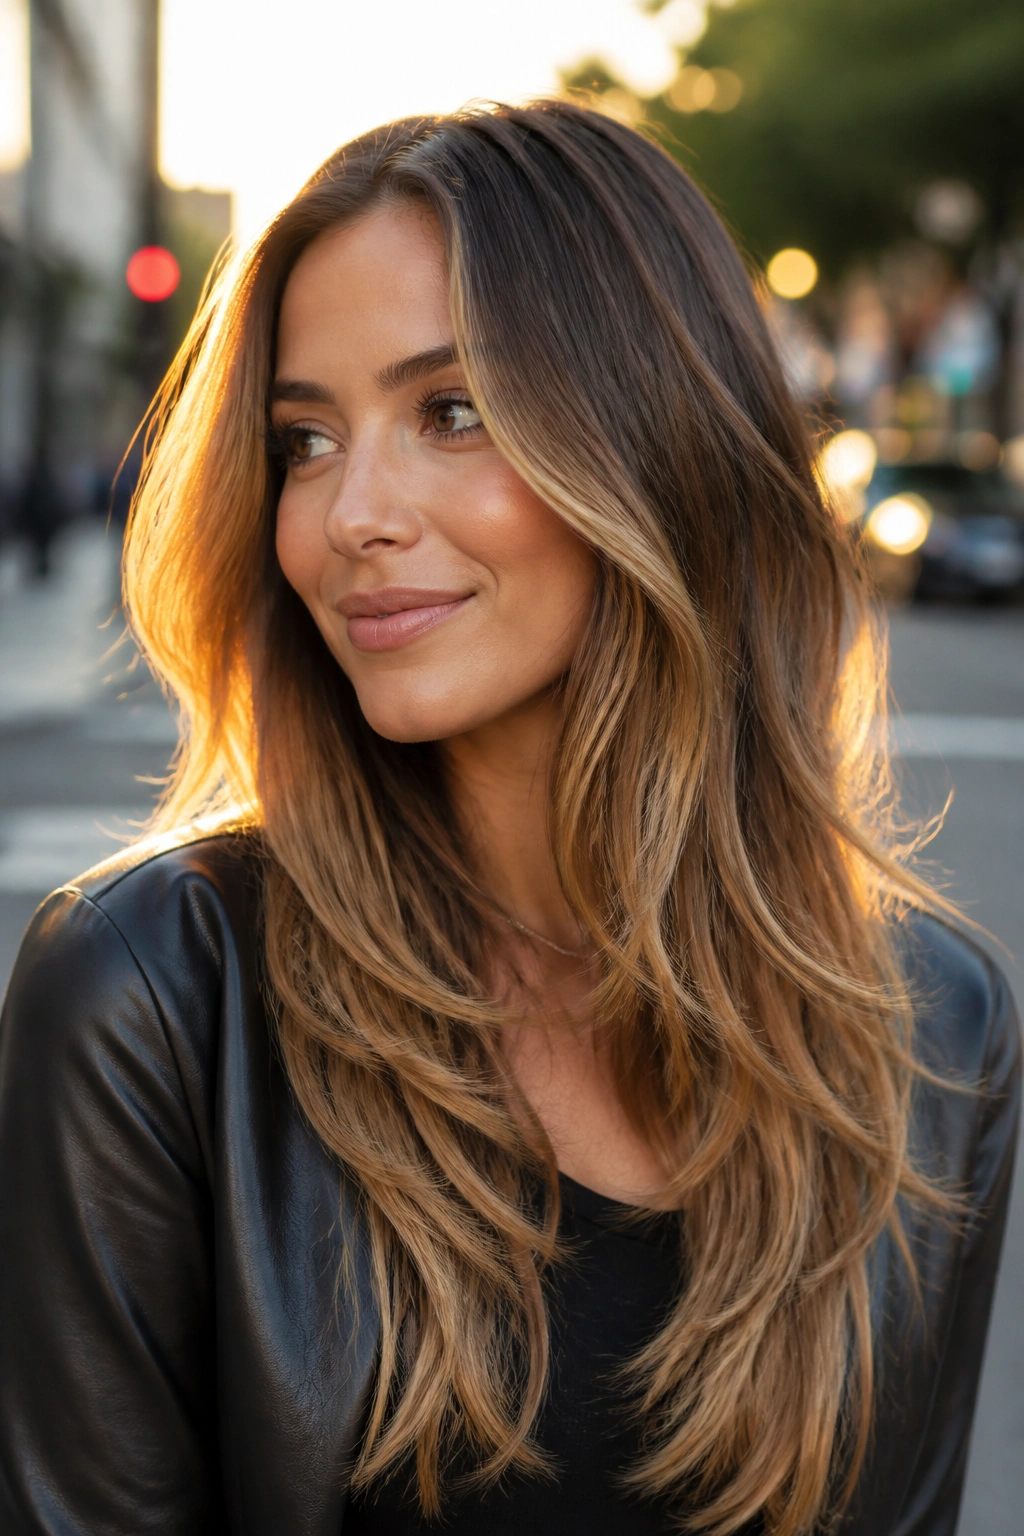
This is the easy-going version of brunette highlights. Bronde sits between brown and blonde, and when the ends are honey-colored, the whole style gets a soft lengthening effect. Round faces tend to like that because the brightness is carried downward.
The gradient should be smooth from root to tip. No line. No obvious jump. The base stays deeper at the top, the middle warms into caramel, and the ends open into honey. That sequence creates movement, which matters more than people think.
A bronde melt like this works best on long layers or a soft shag. The layers keep the ends from looking heavy, and the honey tips catch the light when the hair moves. If the cut is blunt, the lighter ends can feel stiff.
I’d choose this for someone who wants to stay brunette but doesn’t want the hair to look flat. It has enough brightness to soften the face, but it still reads like brown hair first.
17. Chunky Honey Streaks on Curls
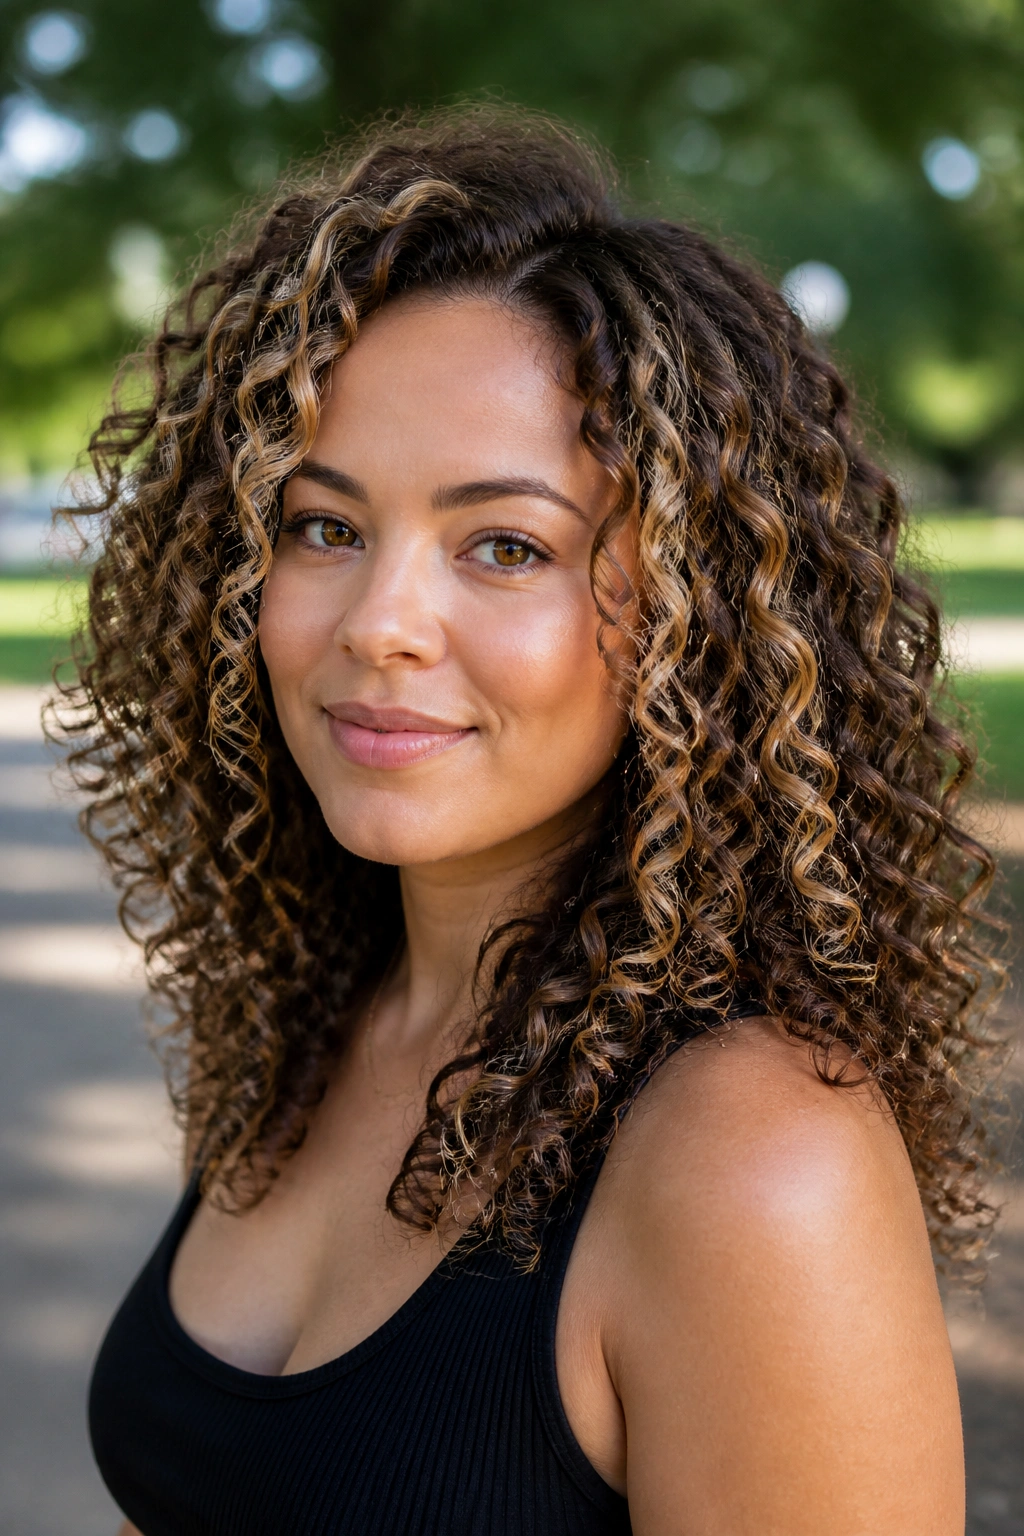
Curly hair changes the whole equation. A few bigger honey streaks can look more flattering than dozens of tiny pieces, because curls shrink up and scatter light differently. On a round face, those streaks should fall vertically through the curl pattern so the color lengthens the silhouette.
This is not the place for evenly spaced strips. Curls need room. The honey should sit in ribbons that follow the coil pattern, especially around the front and the outer layers. When the curls separate, the light shows through in a way that feels lively instead of busy.
Best for Curly Round Faces
- Ask for painted ribbons, not foiled stripes.
- Keep the lightest pieces one or two curls away from the cheeks.
- Use a brown base with honey that stays warm, not yellow.
- Refresh the curls with a gloss or glaze when they start looking dry.
The result is fuller-looking hair with shape around the face, not a puff of random brightness. It’s bolder than babylights, yes, but curls can carry it. The texture does the softening.
18. Deep Mocha Gloss With Honey Veining
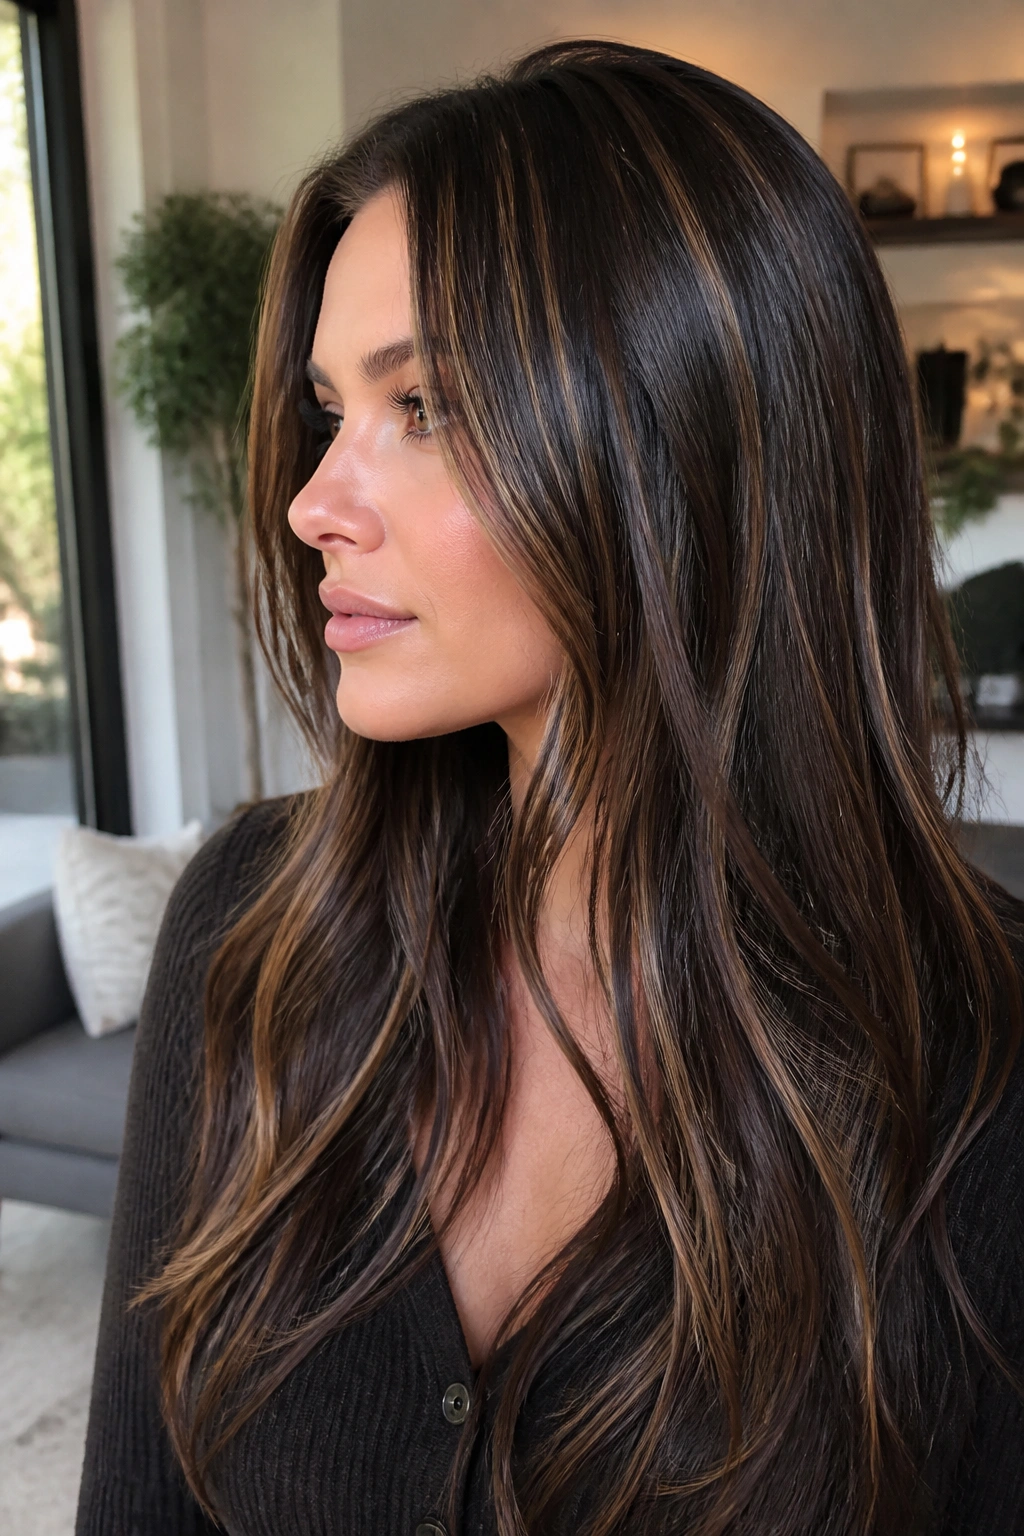
If you want the richest version of this whole idea, this is it. Deep mocha gives the hair depth and shine, while thin honey veining threads through the lengths like light under glass. It’s a strong look, but not a loud one.
Unlike softer melt styles, this version leans on contrast. That can be a smart move for round faces because the deep brown near the sides keeps the face from looking wider, while the honey veining draws the eye up and down through the hair. The shape feels longer. Sharper, too.
This is the best match for someone who likes polish. It looks especially good on straight blowouts, low buns, and loose waves with a bend at the ends. The gloss matters here more than in most other styles. Without it, the mocha can go flat, and the honey won’t have the same depth.
If you want your color to feel dark, glossy, and still dimensional, this is the one I’d point to first. It’s moody in a good way.
Last Note
The best brown honey highlights for round faces do one thing well: they pull the eye where you want it instead of letting brightness sit in the widest part of the face. That usually means softer color near the cheeks, a little lift at the crown, and light that moves vertically through the hair.
A good photo to bring to the salon helps, but the more useful detail is this: tell your colorist how you part your hair, where you tuck it, and whether you wear it straight, waved, or curly. Those habits change the placement more than any trend photo does.
And if you’re stuck between two versions, choose the one with softer roots. It grows out better and usually flatters the face for longer. That tiny decision saves a lot of regret later.
