



The contrast between deep, natural brown hair and stark, cool-toned white highlights isn’t just a trend; it is a deliberate, high-impact style choice. When you place a level-10 white blonde against a level-3 or level-4 brunette base, you create a visual drama that softens the face, adds movement, and creates an illusion of volume that warm colors simply cannot replicate. Achieving this look, however, is a technical challenge. It requires removing nearly all natural pigment from the hair strands you choose to highlight, which places a significant amount of stress on the hair shaft.
Before you commit to this level of lightening, understand that white blonde is not a single color—it is a destination. You are moving your hair from the warm, orange-yellow spectrum of the lift into the pale, almost translucent territory of a platinum finish. Because brown hair naturally possesses significant amounts of underlying warm pigment (red and gold), you cannot expect to reach a crisp white in a single session without sacrificing the integrity of your hair. This is a game of patience, multiple toning appointments, and a strict home-care regimen involving purple shampoos and moisture masks.
1. Platinum Face-Framing Money Piece
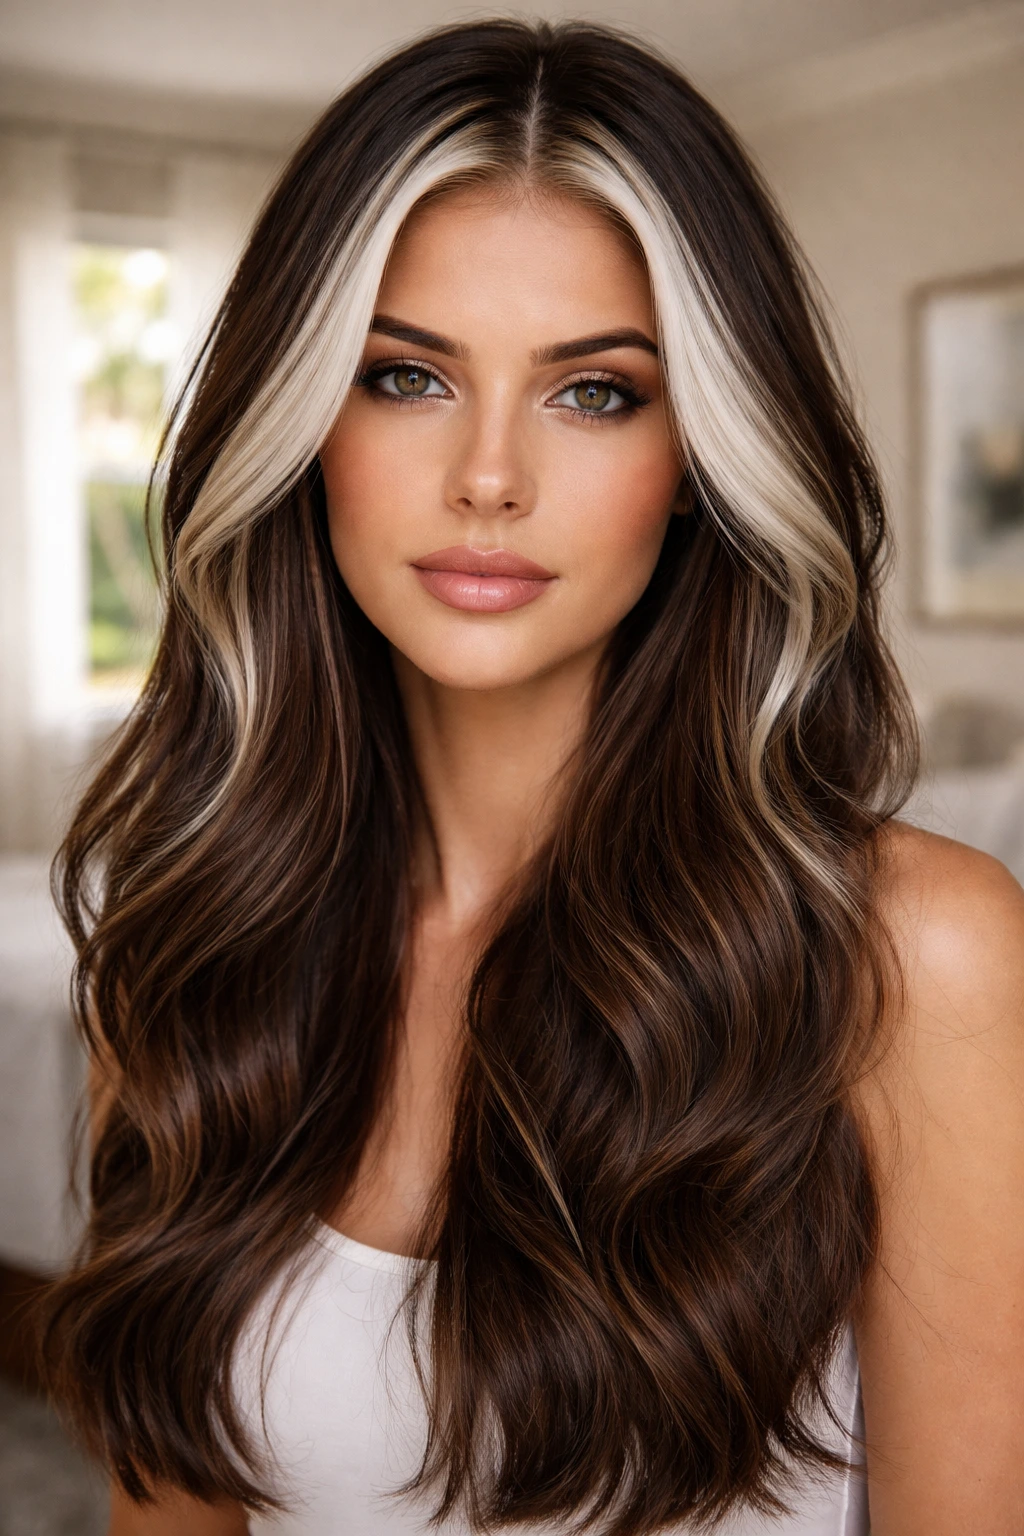
The money piece is the easiest entry point for high-contrast highlights. It involves taking the two front sections of your hair and saturating them in a concentrated platinum blonde. Because these strands are front and center, they catch the light immediately and brighten your complexion without requiring you to bleach the entire head.
Achieving the Brightest White
To get this section to a true white, a colorist will typically use a slightly higher-volume developer but will isolate the hair with precision. You want to avoid any warmth, so a toner is non-negotiable.
- Use a violet-based toner to neutralize any lingering yellow.
- Keep the roots slightly darker to create a seamless transition.
- Ensure the hair is healthy enough to handle the concentrated lightening.
Pro tip: Do not let the bleach overlap onto your previously highlighted hair, or you risk breakage. This section needs fresh, clean application to remain bright.
2. Icy White Babylights on Espresso Base
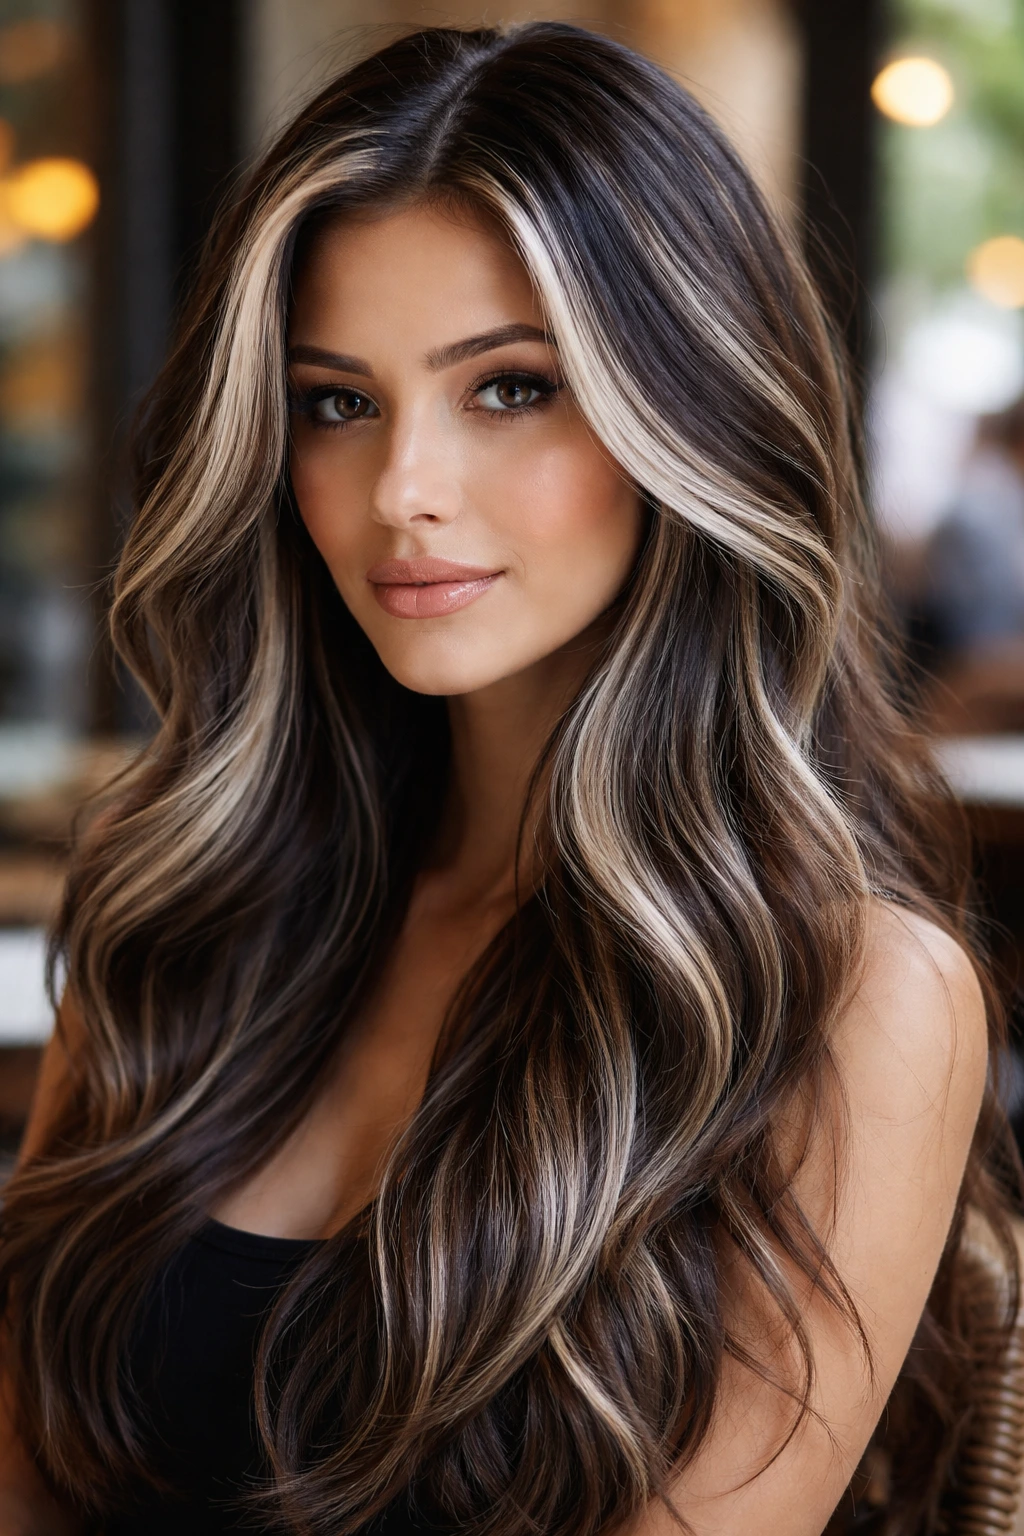
Babylights are ultra-fine, delicate highlights that mimic the way hair lightens naturally in the sun. When you pull these through an espresso-brown base, you create a soft, glittering effect that looks sophisticated rather than harsh. This technique is for those who want a change without a drastic, chunky transition.
The beauty of babylights lies in the weave. Your stylist should be picking up paper-thin sections of hair, leaving plenty of brown hair in between to keep the depth intact. This allows the white to “sparkle” against the dark background. It is a time-consuming process that requires a steady hand and a meticulous foil application. Because you are doing so many small foils, the blending usually turns out incredibly natural, growing out with a soft line rather than a harsh stripe.
3. Cool-Toned Balayage with Bright Ends
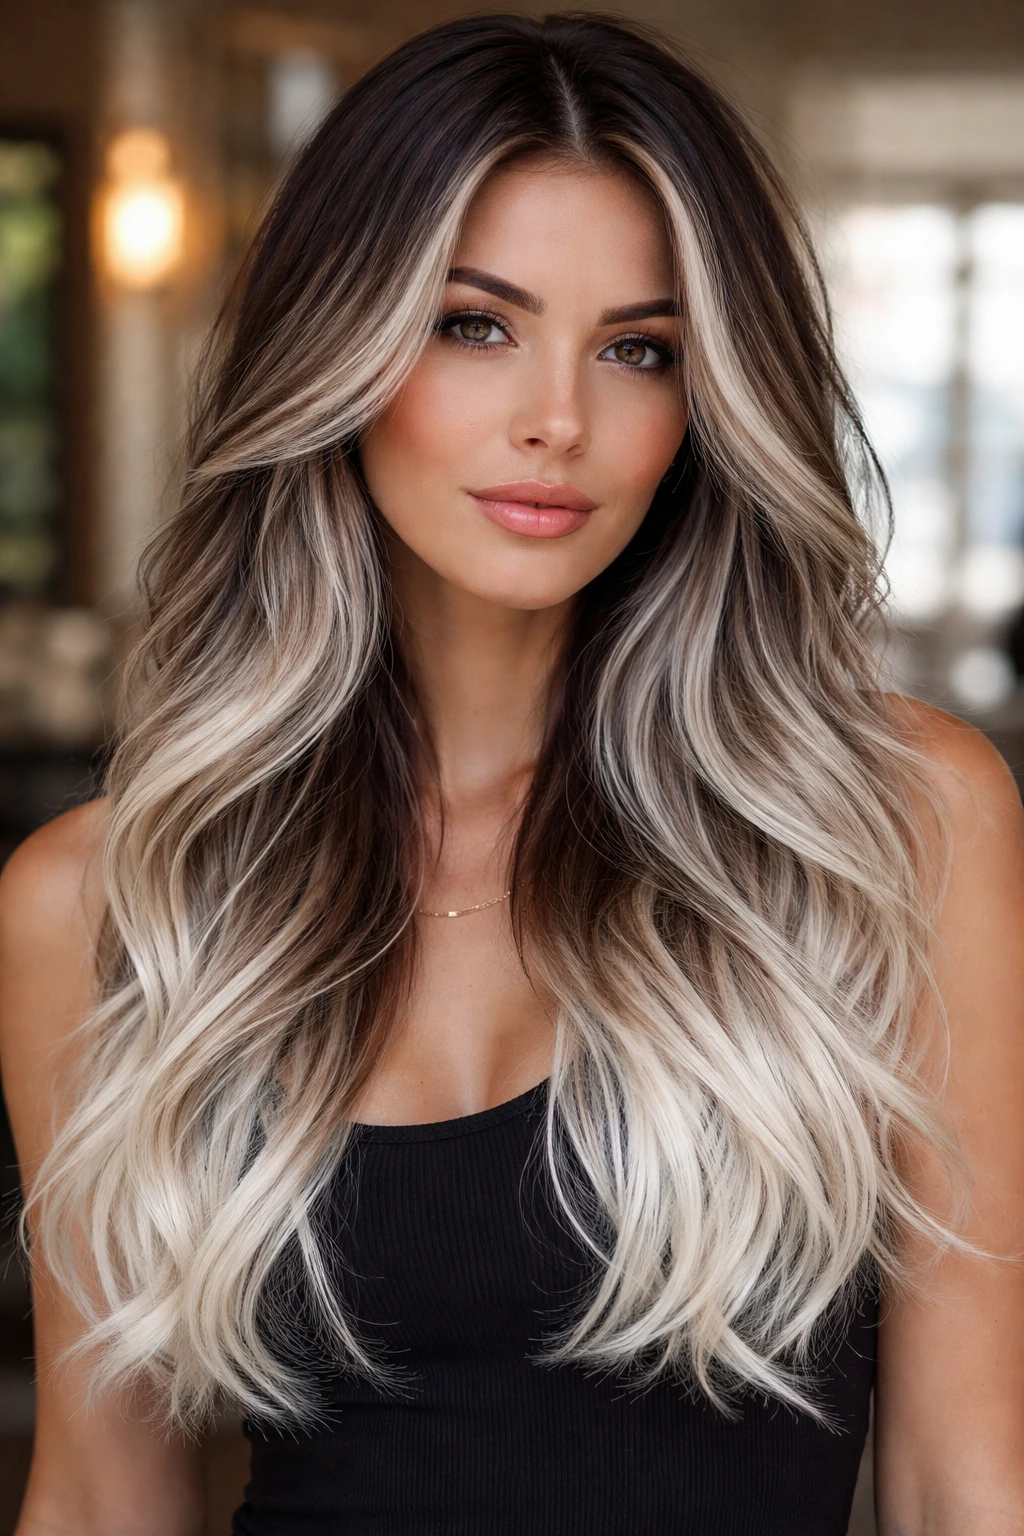
Balayage is a freehand technique where the lightener is painted onto the hair. When you push this toward a white blonde, you are essentially creating a “lived-in” platinum look. The roots remain deep, natural brown, and the color gradually intensifies as it moves toward the tips.
Why this works:
- It requires less frequent touch-ups than traditional foils.
- The root melt creates a natural grow-out period of 3-4 months.
- It highlights the ends of your hair, which is perfect if you have layers or textured cuts.
4. Silver-White Ribbons through Dark Brown
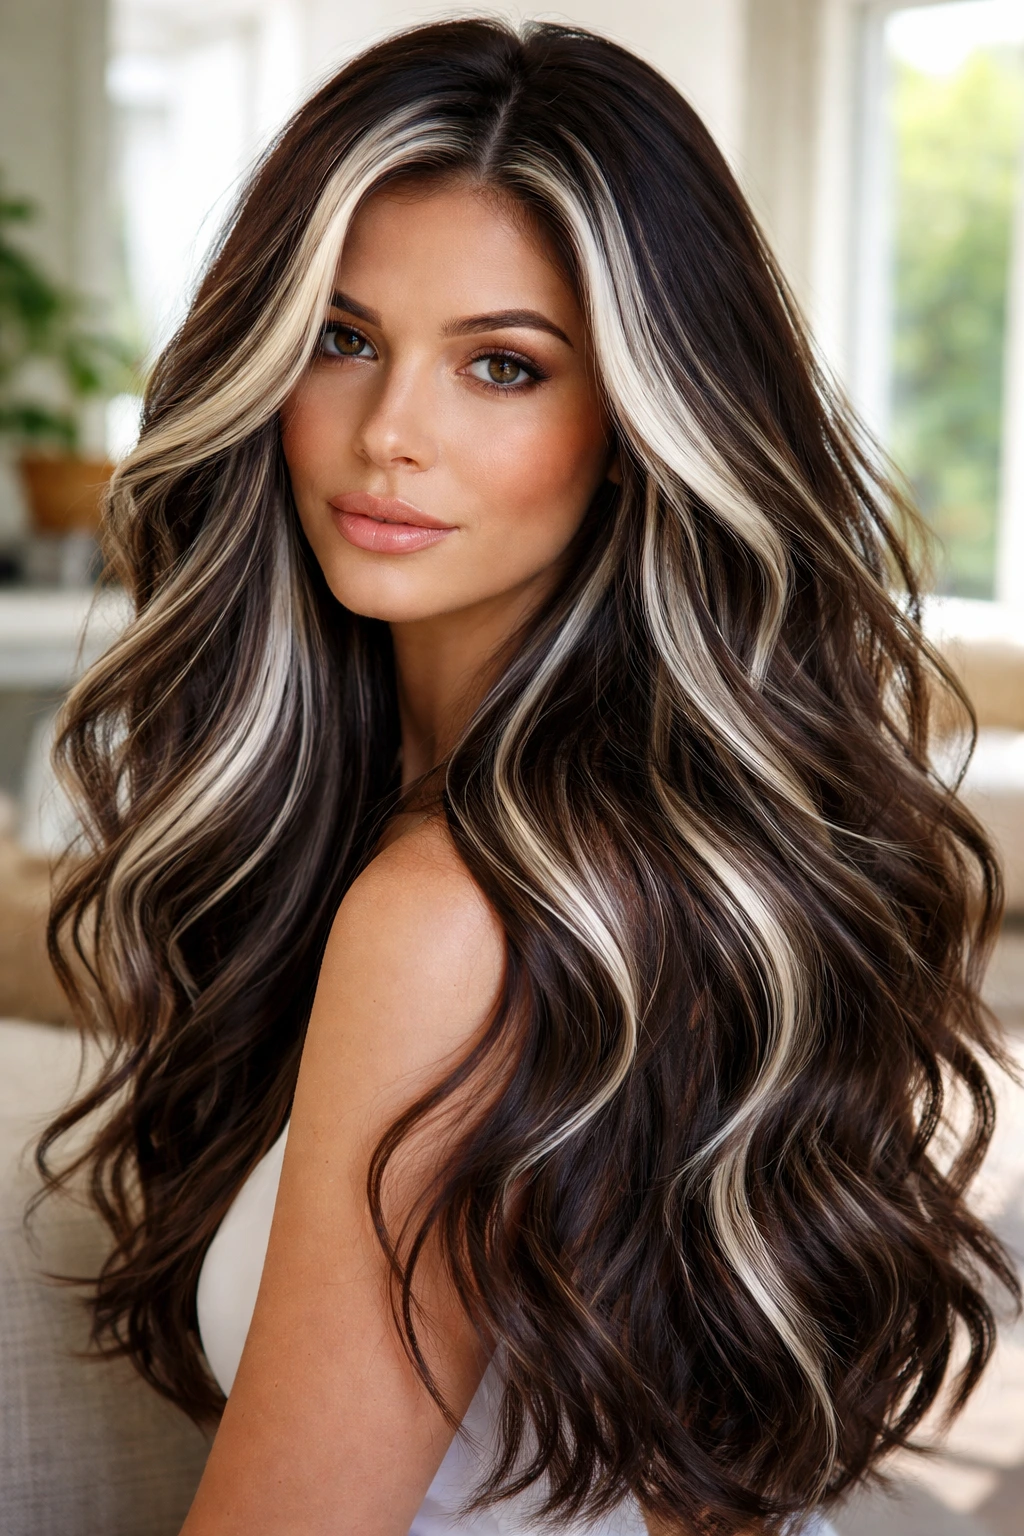
Ribbon highlights are wider and more intentional than babylights. They are designed to stand out, weaving through the darker base like silk threads. This style requires placing the lightener in “ribbons”—larger sections of hair wrapped in foils—to ensure that the white color is solid and opaque.
Styling for Maximum Effect
Because these highlights are thicker, they look best when the hair has movement. A loose beach wave or a blow-out with rounded ends will show off the dimension better than stick-straight hair. When the hair moves, the white ribbons catch the light, creating a high-fashion look that feels deliberate and bold.
5. Dimensional Ash-White Teasylights
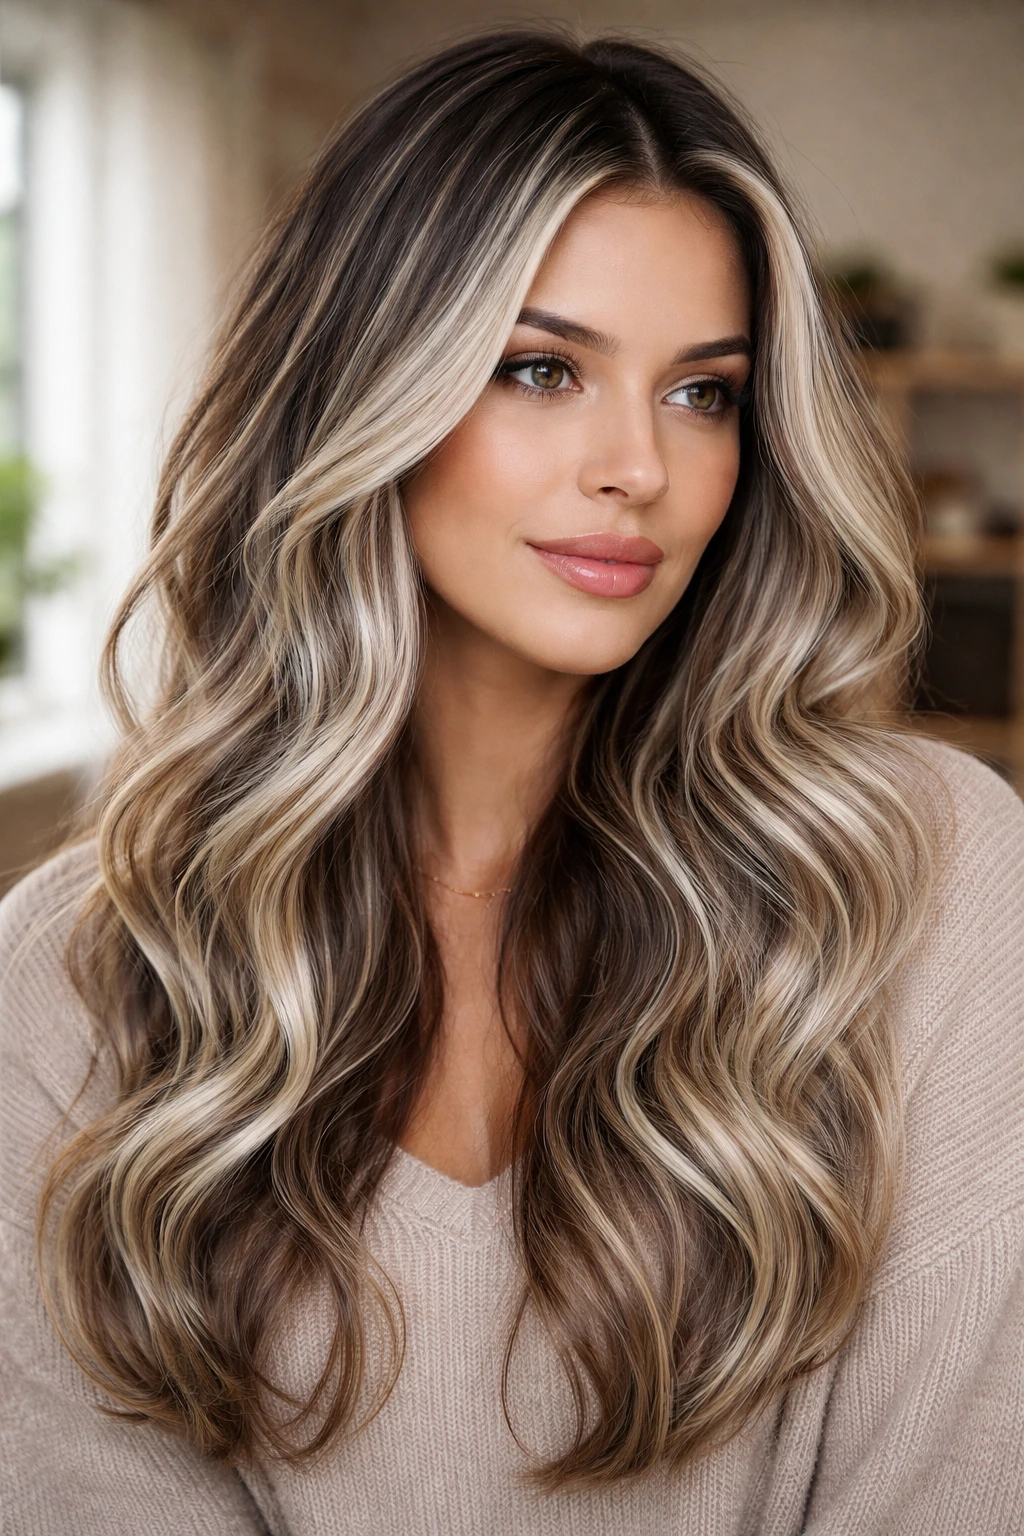
Teasylights are a hybrid technique. The stylist teases, or backcombs, the hair section before applying the lightener. The backcombing pushes the shorter hairs out of the way, ensuring that the lightener only touches the longest strands. This creates an incredibly soft, blurred root line that is impossible to achieve with standard foil work.
This is the gold standard for those who hate the “striped” look of old-school highlights. By the time the bleach is washed out and the hair is toned to a cool, ash-white, the transition from dark to light is almost invisible. It is a seamless gradient that looks like you were born with it, despite the intense color contrast.
6. Pearlescent Highlights on Chestnut Hair
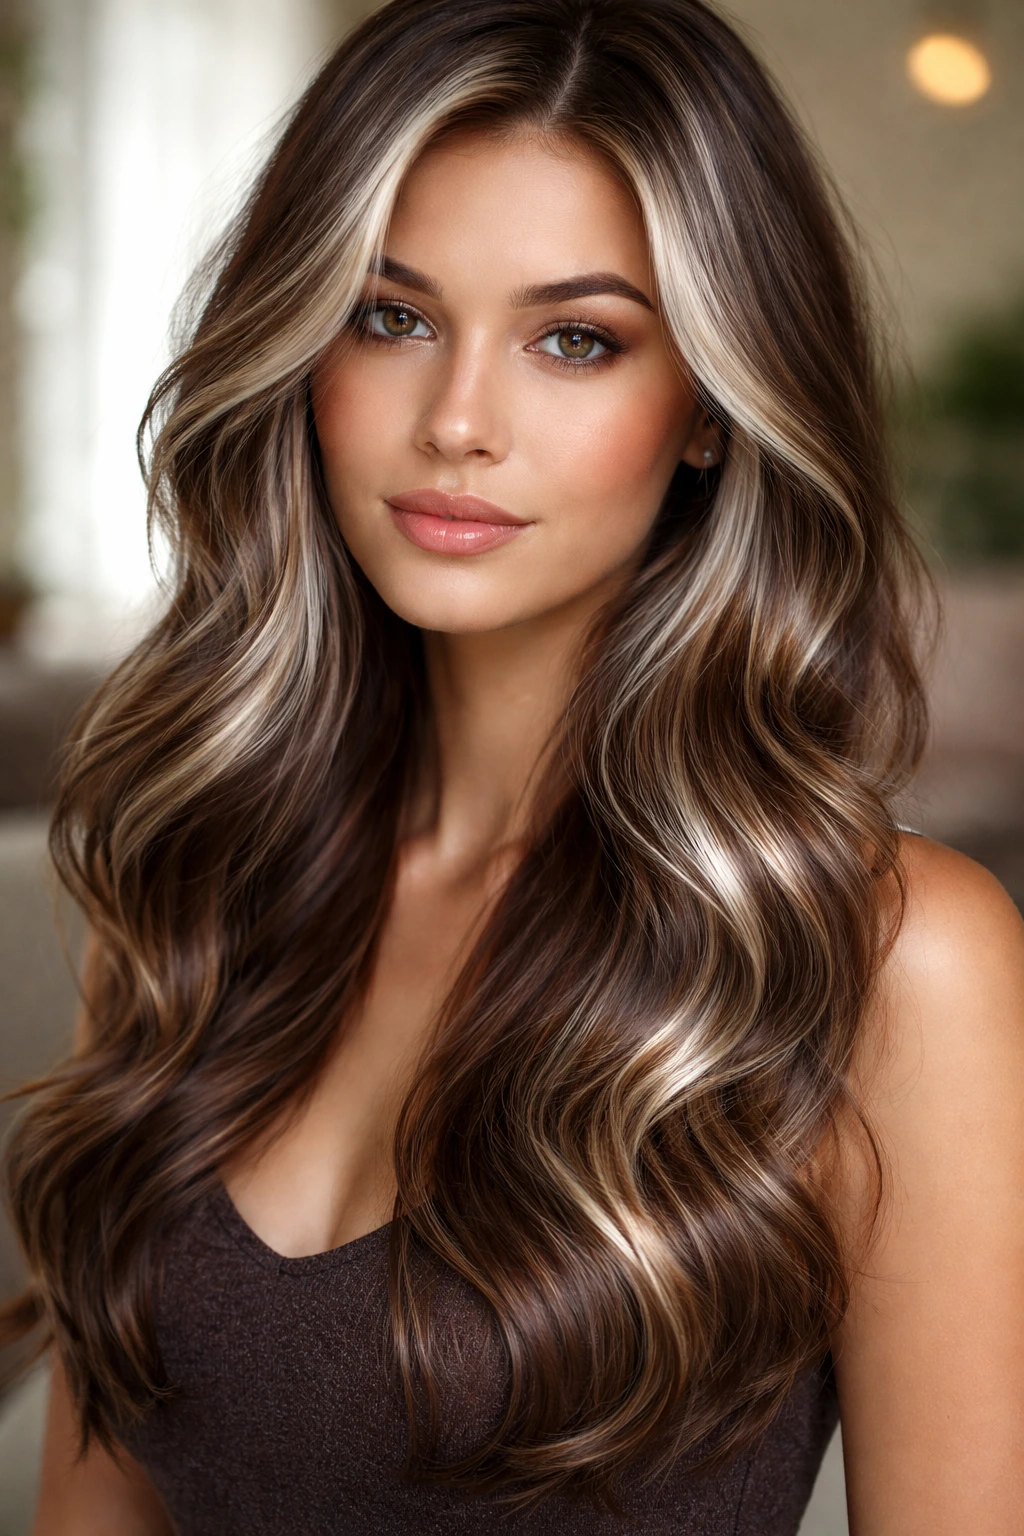
Chestnut hair has a subtle warmth that can fight against white blonde. The key here is to lean into that by using a pearlescent toner. Instead of a flat, stark white, you are looking for a finish that has a slight opalescent or silver sheen.
When your base is chestnut, you have to be careful with the toner choice. If you pick a toner that is too cool or blue, it can turn the chestnut base muddy. A pearl or champagne-white toner respects the warmth of your chestnut hair while still providing that crisp, bright highlight effect that makes the style feel premium and expensive.
7. High-Contrast Chunky White Panels
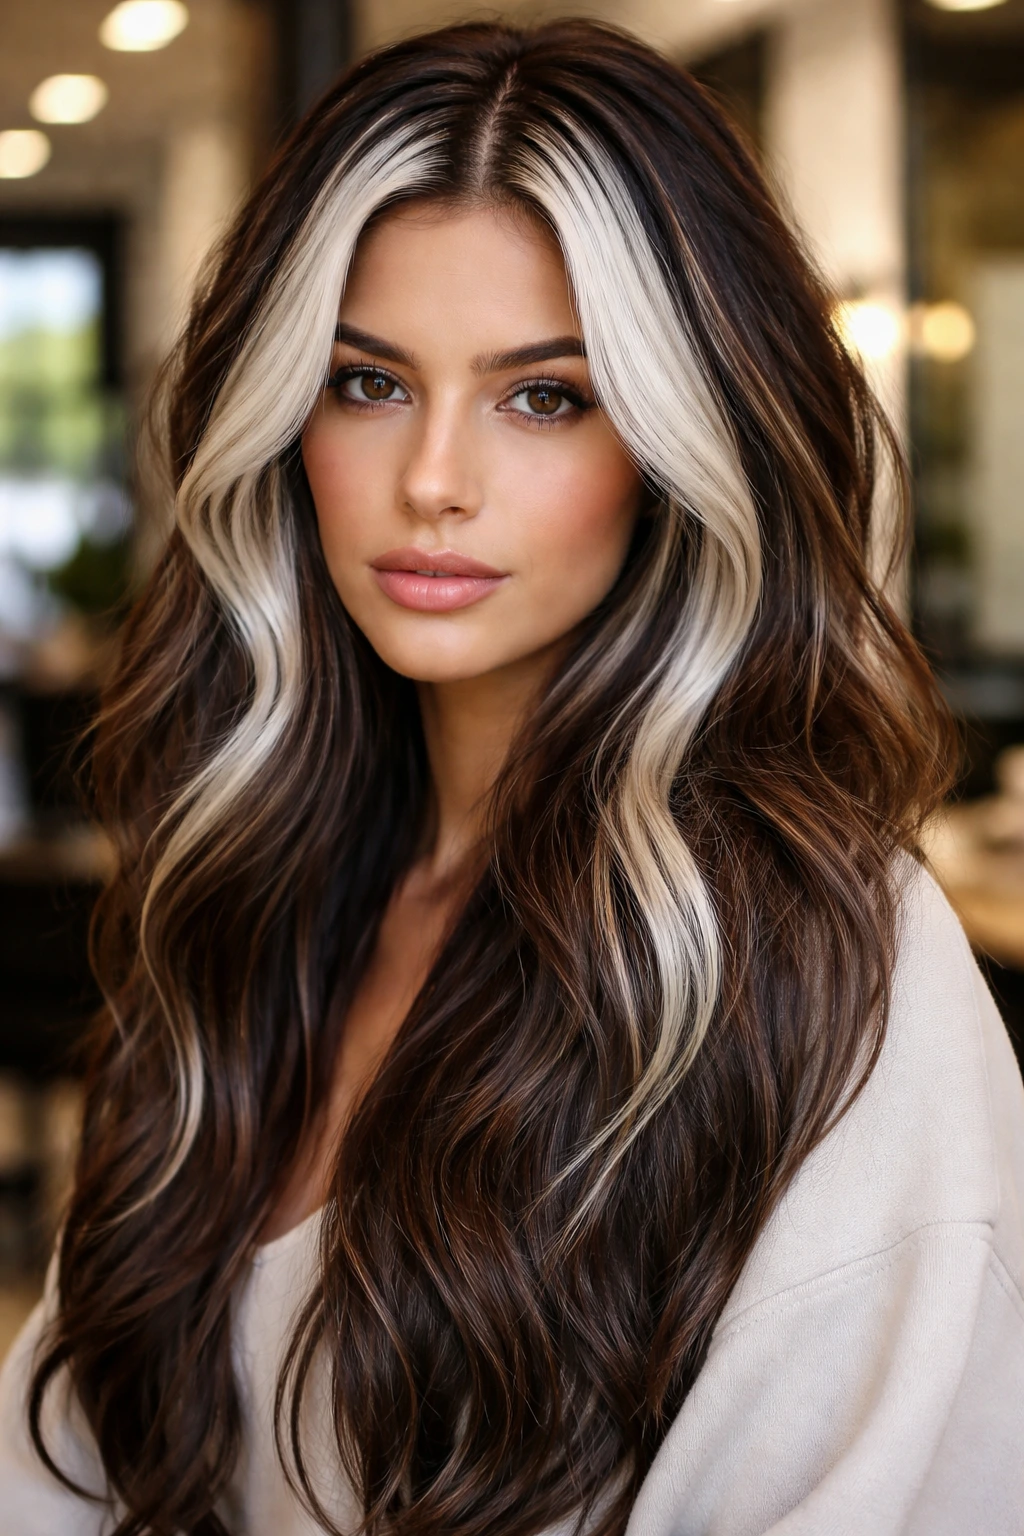
If you are looking for an edgy, 90s-inspired aesthetic, chunky white panels are the way to go. This involves taking larger sections of hair—perhaps near the ears or the crown—and lifting them to a stark white. It is not about blending; it is about deliberate, contrasting color blocks.
This style is not for the faint of heart. It is very visible, and it requires a high degree of confidence to pull off. The maintenance can be slightly easier than babylights, though, because you are only touching up specific sections. You can go weeks without worrying about your entire head, provided you keep the chunky sections bright and toned.
8. Subtle White Dusting for Subtle Lift
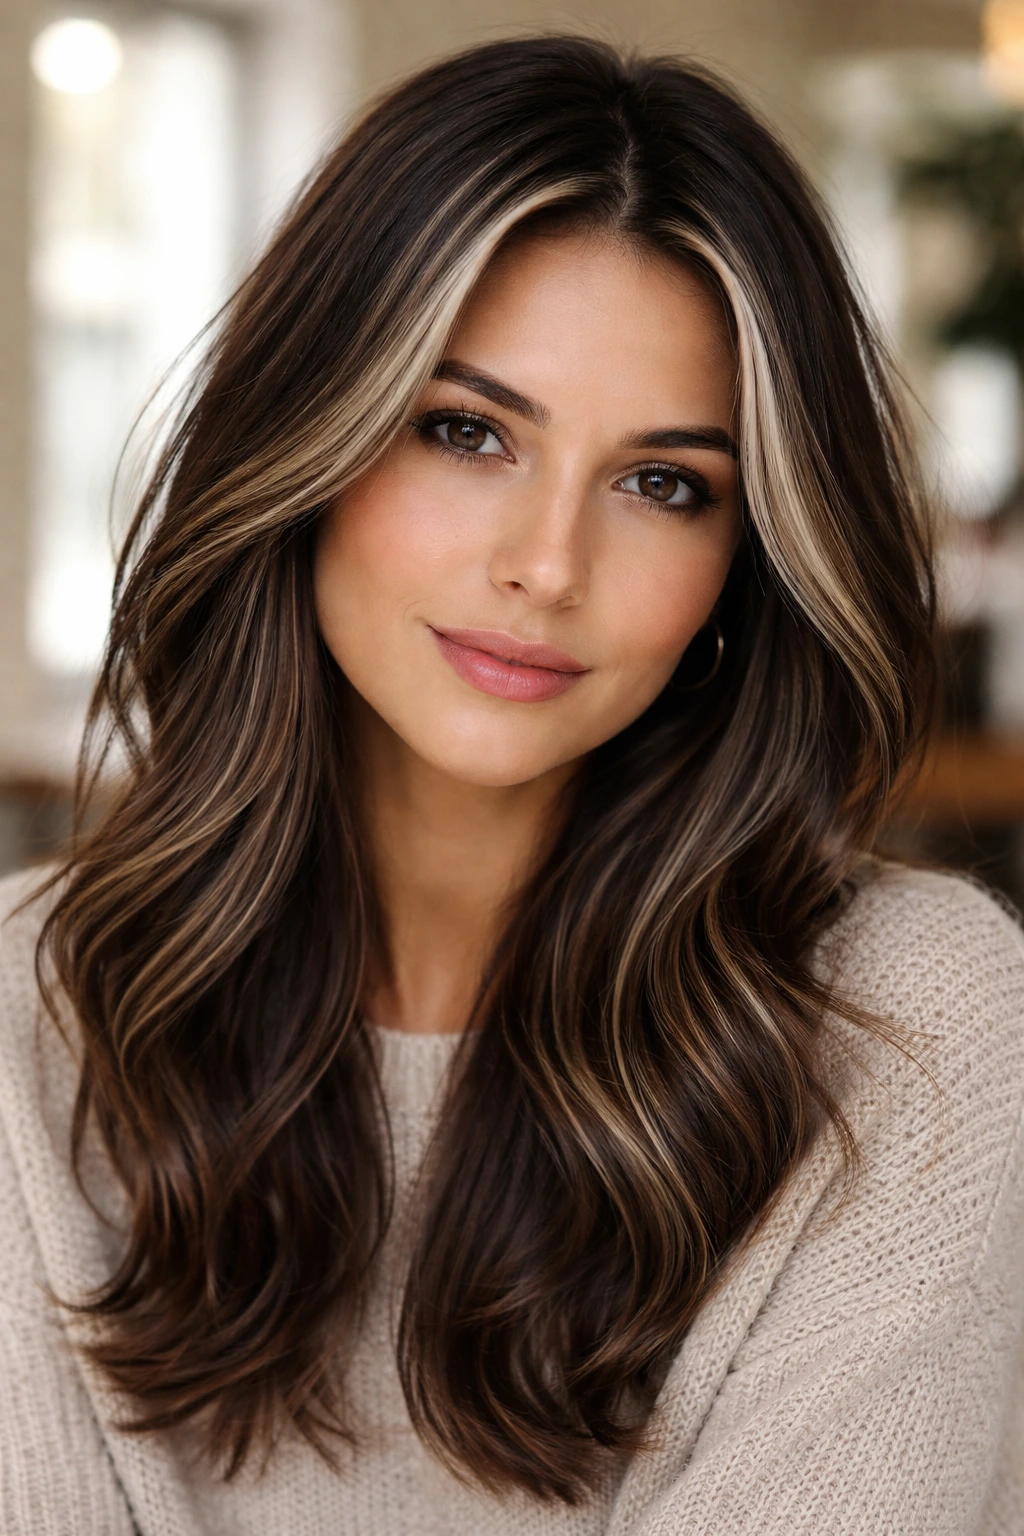
Not every white blonde highlight has to be a statement. A “dusting” involves placing very few, very strategically located highlights throughout the hair. Imagine a light sprinkling of snow on a dark landscape. This is perfect if you are a brunette who wants to brighten up your face without committing to a full color overhaul.
The goal is to trick the eye. By placing these few white highlights around the face and on the top layer, you make the whole head of hair appear lighter and cooler, even though the majority of your hair remains your natural, healthy brown. It is the ultimate low-maintenance approach to high-contrast hair.
9. Bright White Peekaboo Layers
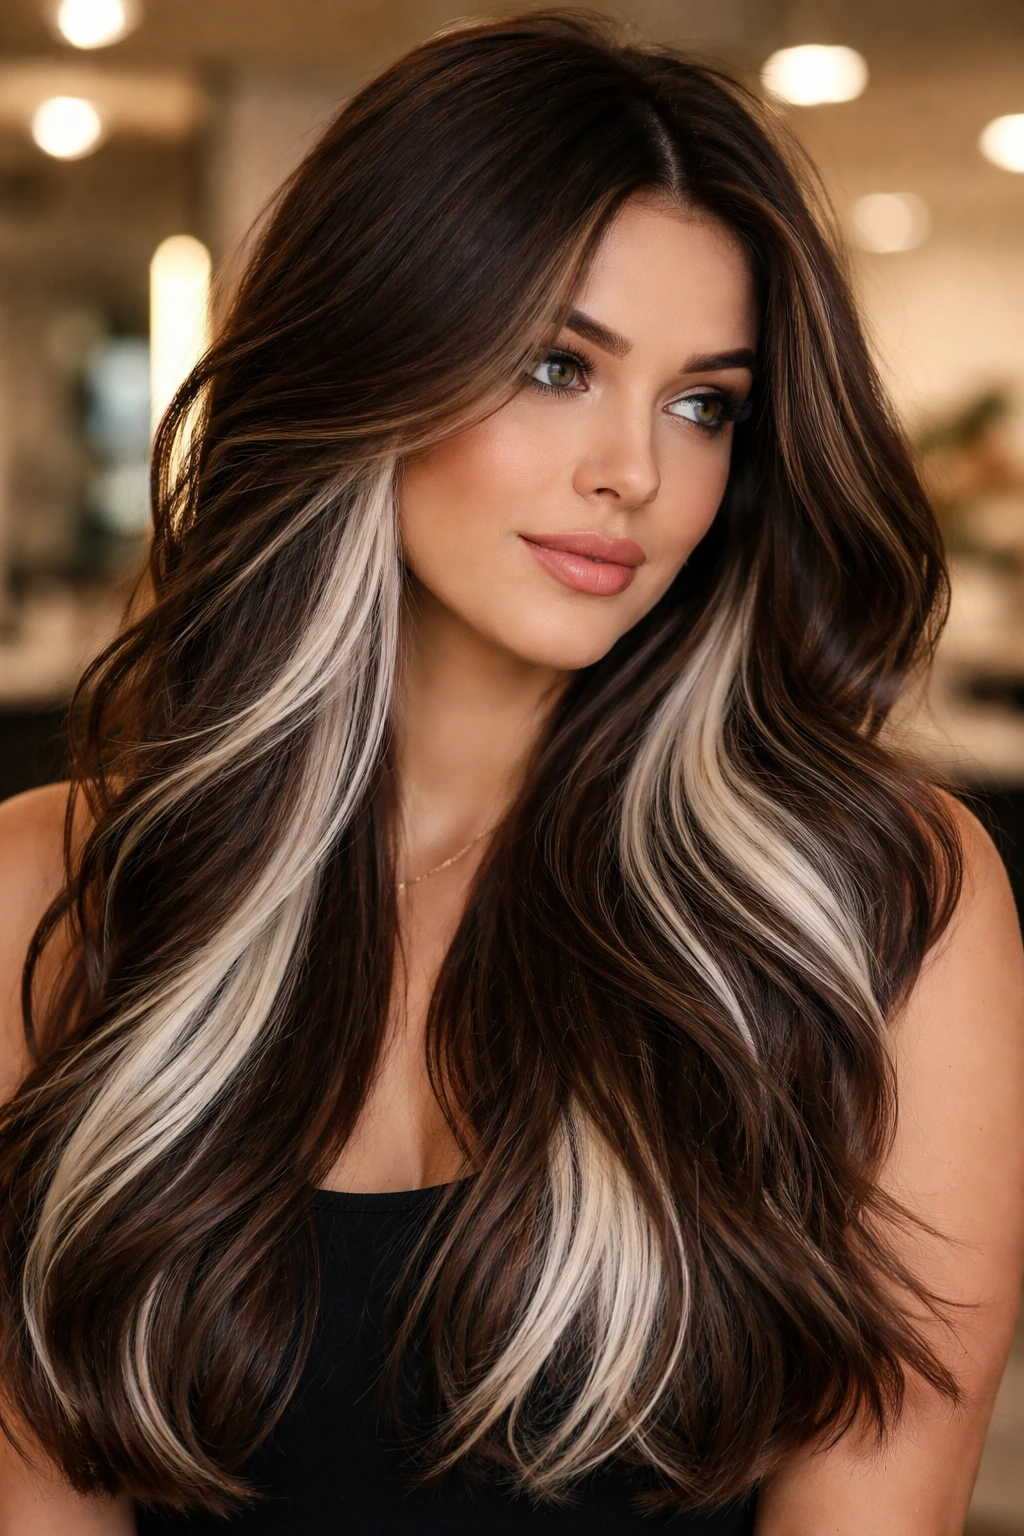
Peekaboo highlights are hidden in the bottom layers of your hair. When you wear your hair down, they are barely visible, but as soon as you put it in a ponytail, braid, or messy bun, the bright white blonde is revealed. It is a fantastic way to experiment with white blonde on brown hair without risking damage to the most visible parts of your hair.
These highlights allow for a bit more “fun” with color as well. Since they are hidden, if the white blonde eventually turns a bit yellow or brassy, it’s not the first thing people see. It’s a great style for those who work in more conservative environments but want a secret, edgy side.
10. Heavy Platinum Crown Highlights
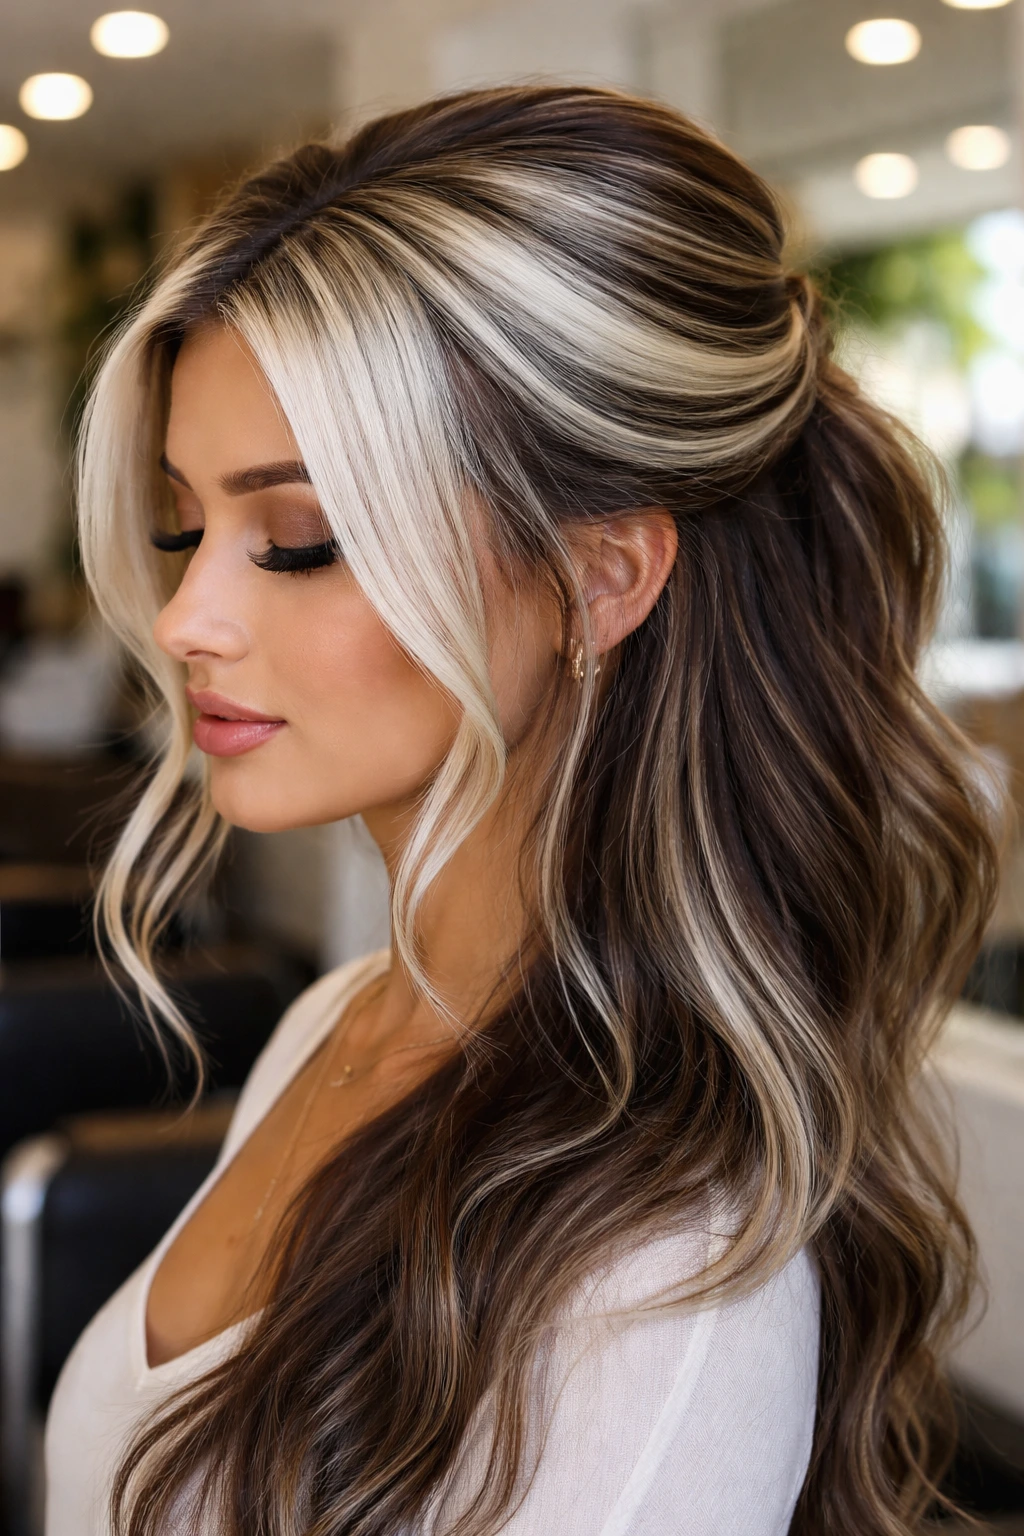
If you want the impact of being “blonde” without actually bleaching all your hair, focus on the crown. By highlighting the top layer of your hair heavily with platinum white, you create a “halo” effect. The underside of your hair remains a rich, dark brown, which provides a dramatic shadow that makes the top layer pop.
This style is particularly striking in updos. When you pull your hair back, the contrast between the dark bottom and the bright top creates a distinct, sophisticated silhouette. The key is ensuring the transition between the dark crown root and the bright lengths is soft, typically done with a root shadow or smudge.
11. Root-Melted Snowy Blonde Balayage
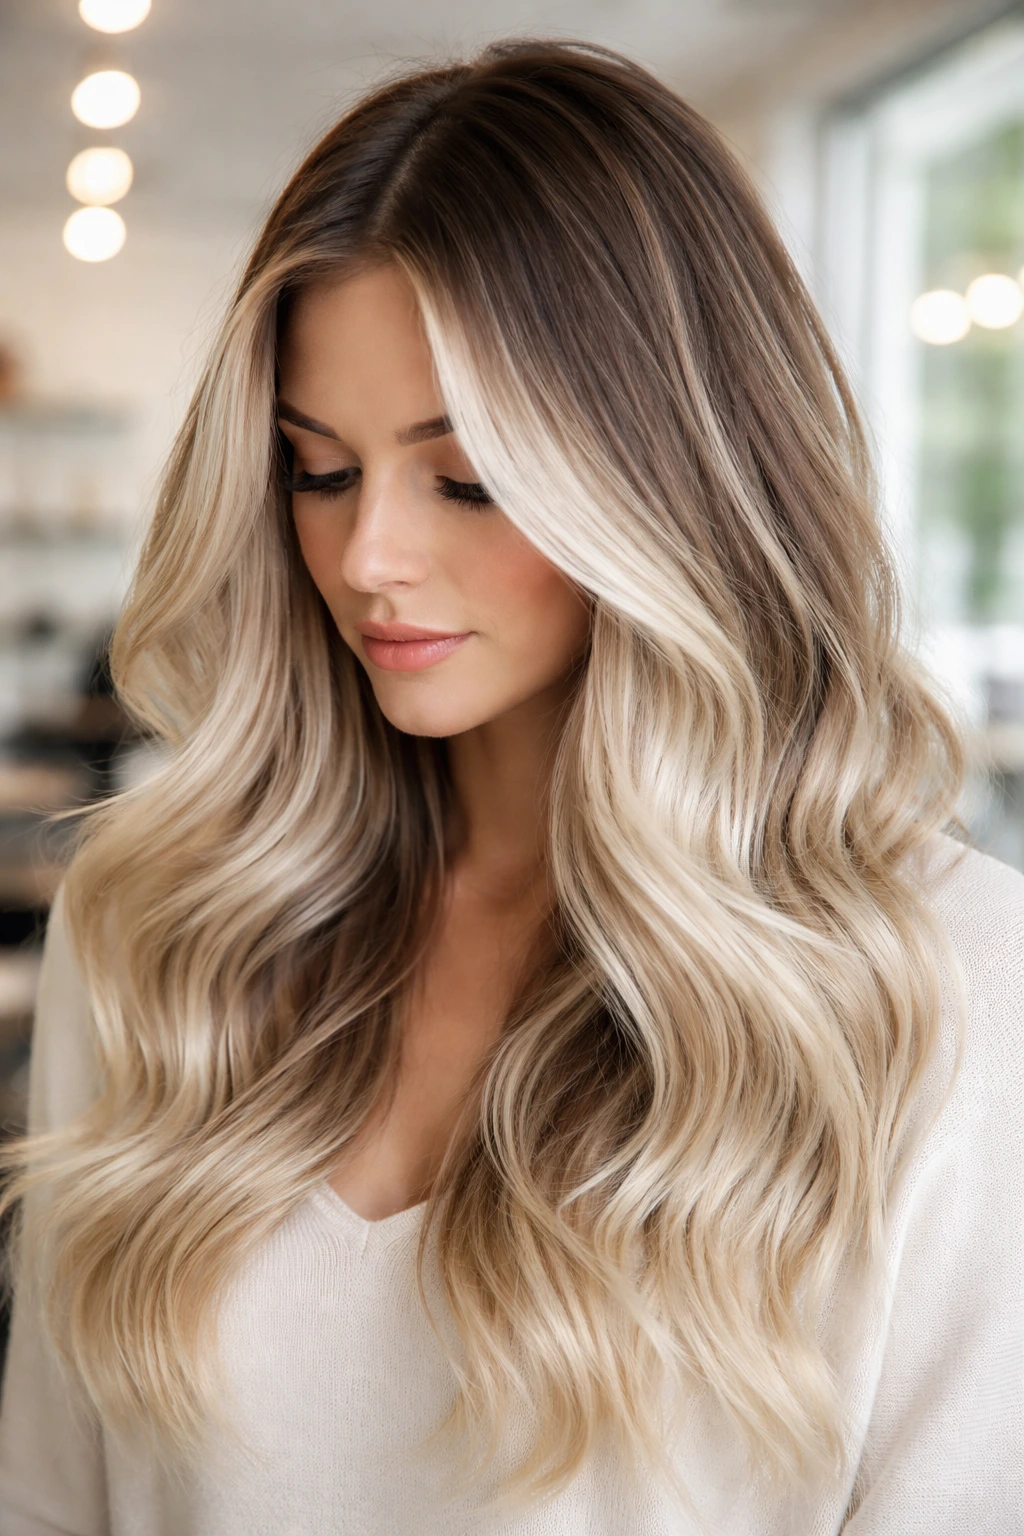
A root melt is a colorist’s best friend. It involves applying a darker shade (usually close to your natural brown) at the roots and blending it down into the white blonde ends. This blurs the line of demarcation. You don’t have a sharp line where the color changes; you have a soft, hazy transition.
How to Maintain the Melt
The “snowy” white ends need constant hydration because they are the oldest, most porous parts of your hair.
- Use deep conditioning masks weekly.
- Avoid excessive heat styling, which can cause the white ends to look fried.
- A gloss treatment every six weeks will keep the white looking shiny and reflective rather than dull.
12. Creamy White Highlights with Caramel Lowlights
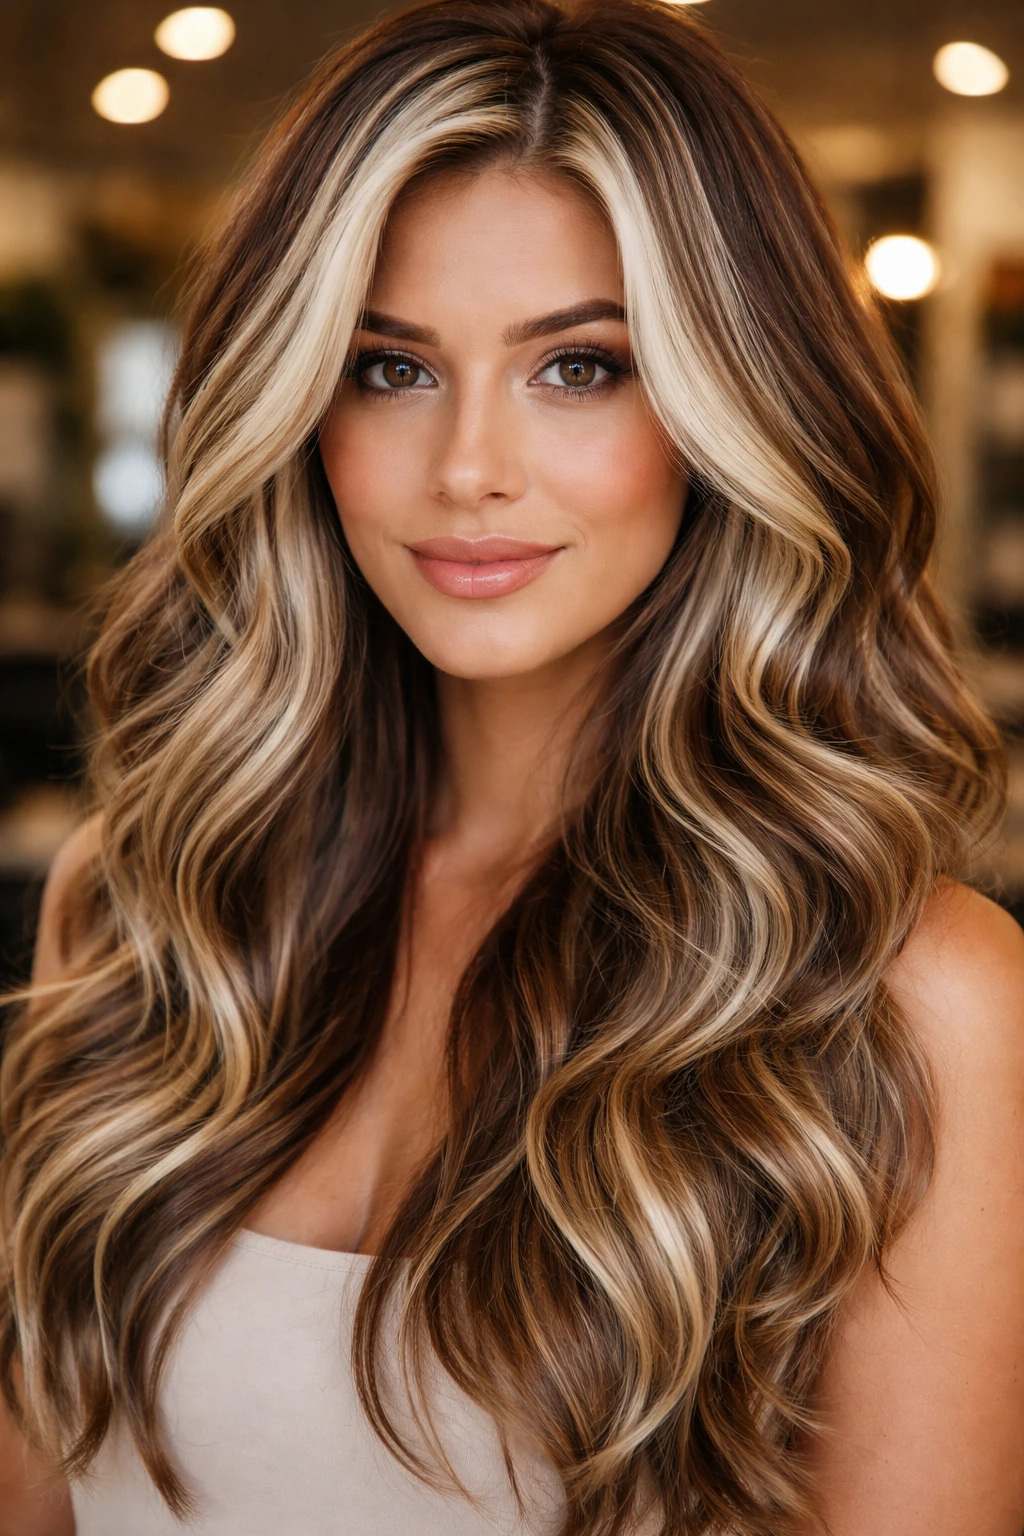
White blonde on brown hair can sometimes look too stark if your skin tone is warm. The solution? Add caramel lowlights. By weaving in a few ribbons of warm, rich caramel alongside your white blonde highlights, you bridge the gap between the dark base and the cool white blonde.
This combination creates a three-dimensional effect. Your hair won’t just look “dark and light”—it will look complex, multi-tonal, and incredibly healthy. The caramel prevents the white from looking “flat” or “ghostly” and keeps the overall color palette cohesive.
13. Sharp White-Blonde Tip Dip
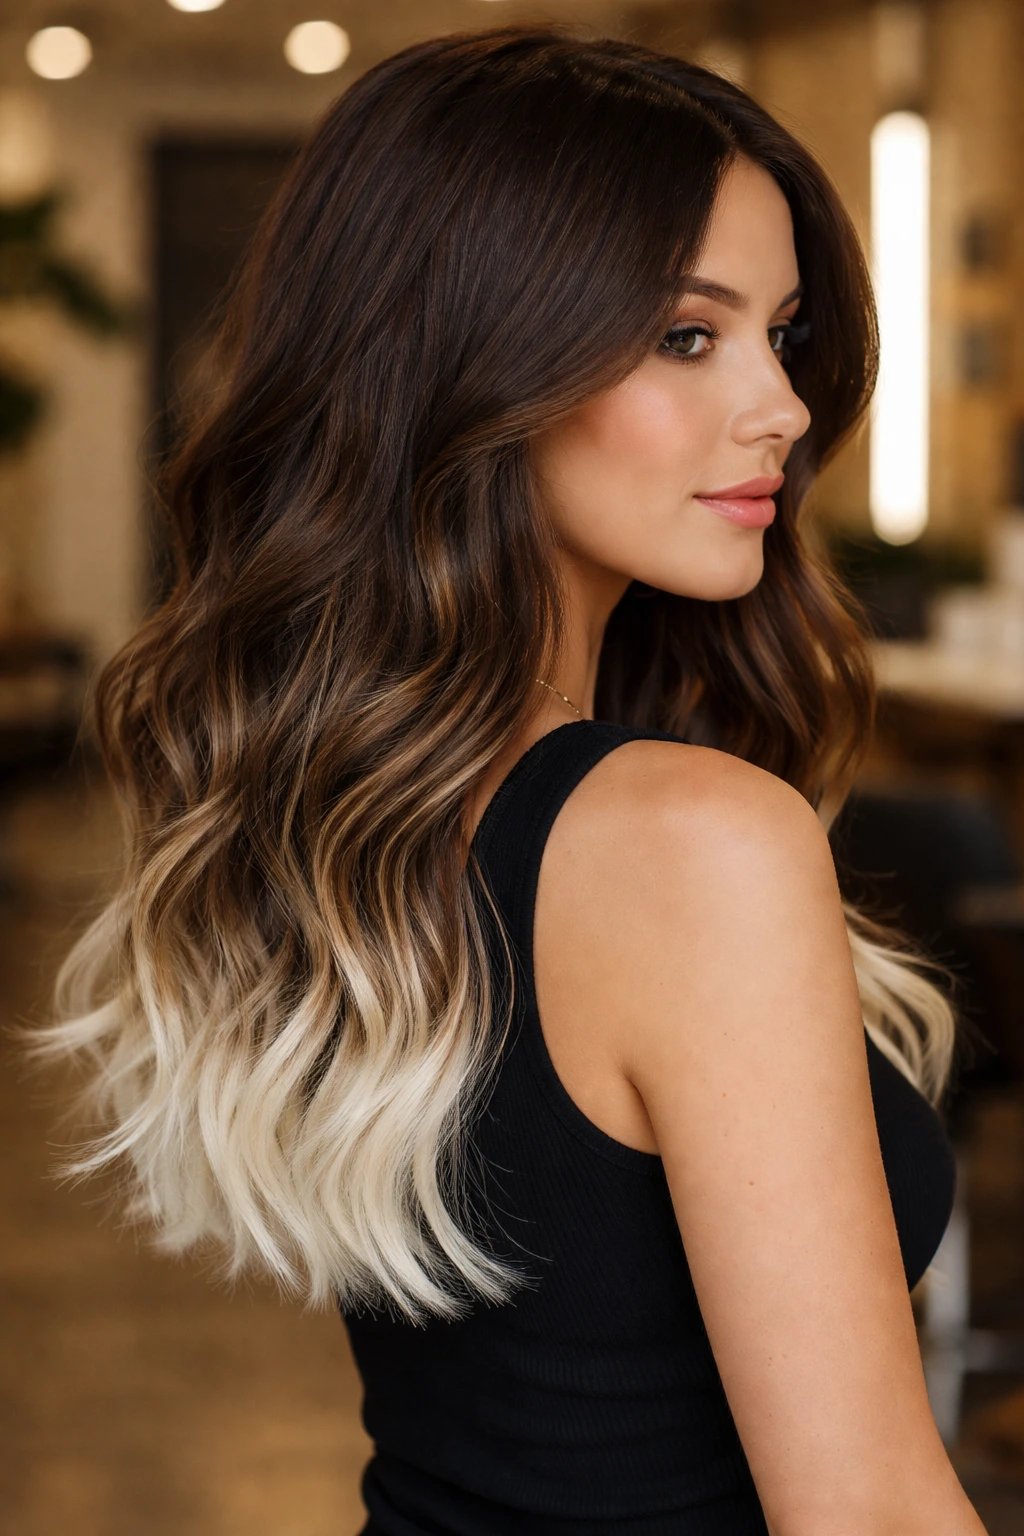
If you want to try the “dipped” look, focus all your white blonde color on the last three or four inches of your hair. This is a bold, modern take on the old-fashioned ombré. Instead of a gradual fade, it is a purposeful dip into color.
This style is great if your hair is long, as it shows off the contrast effectively. It also means the most damaged part of your hair—the ends—are the ones being bleached. If they start to break or fray, you can simply cut them off without losing the color elsewhere. It’s a relatively safe experiment that packs a big punch.
14. Fine-Weave Icy Blonde Highlights
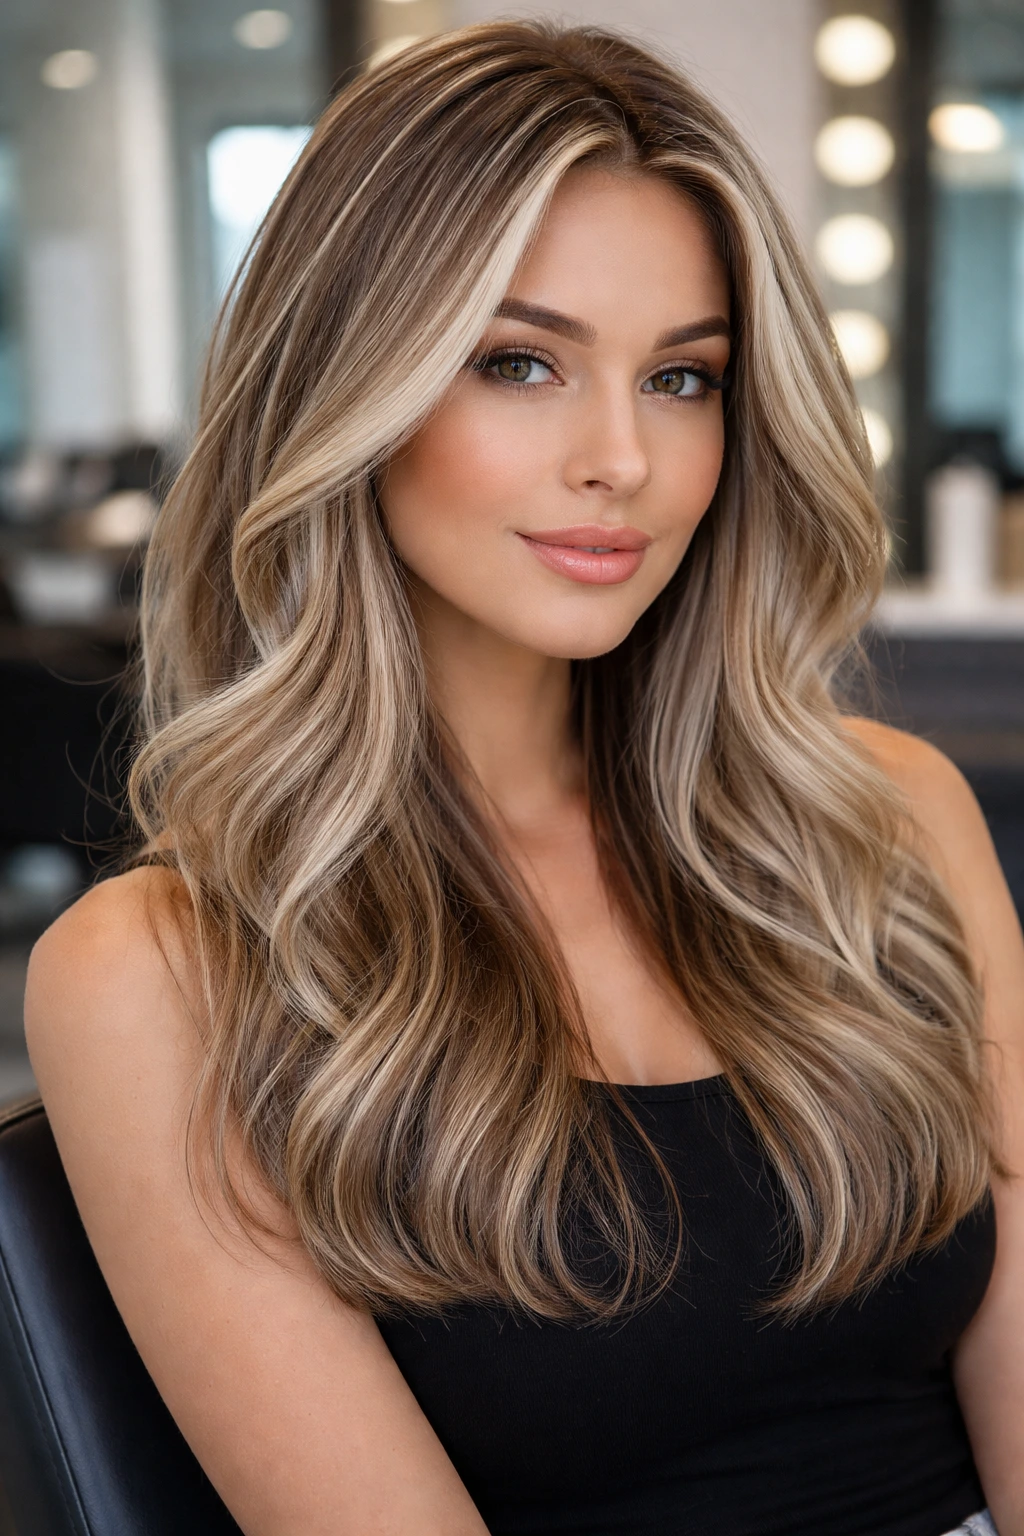
If you have fine, thin hair, chunky highlights can make your hair look like it has less density than it actually does. Fine-weave highlights are the solution. By picking up very tiny, sparse sections, you ensure the color is blended thoroughly throughout the hair, creating an overall light-blonde effect without losing volume.
The technique relies on the “weave”—the zigzag motion the colorist uses with the tail comb to pick up the hair. The tighter the weave, the more natural the result. This is time-consuming, but for the end result, it’s worth the extra hour in the chair.
15. Scattered Snow-White Accents
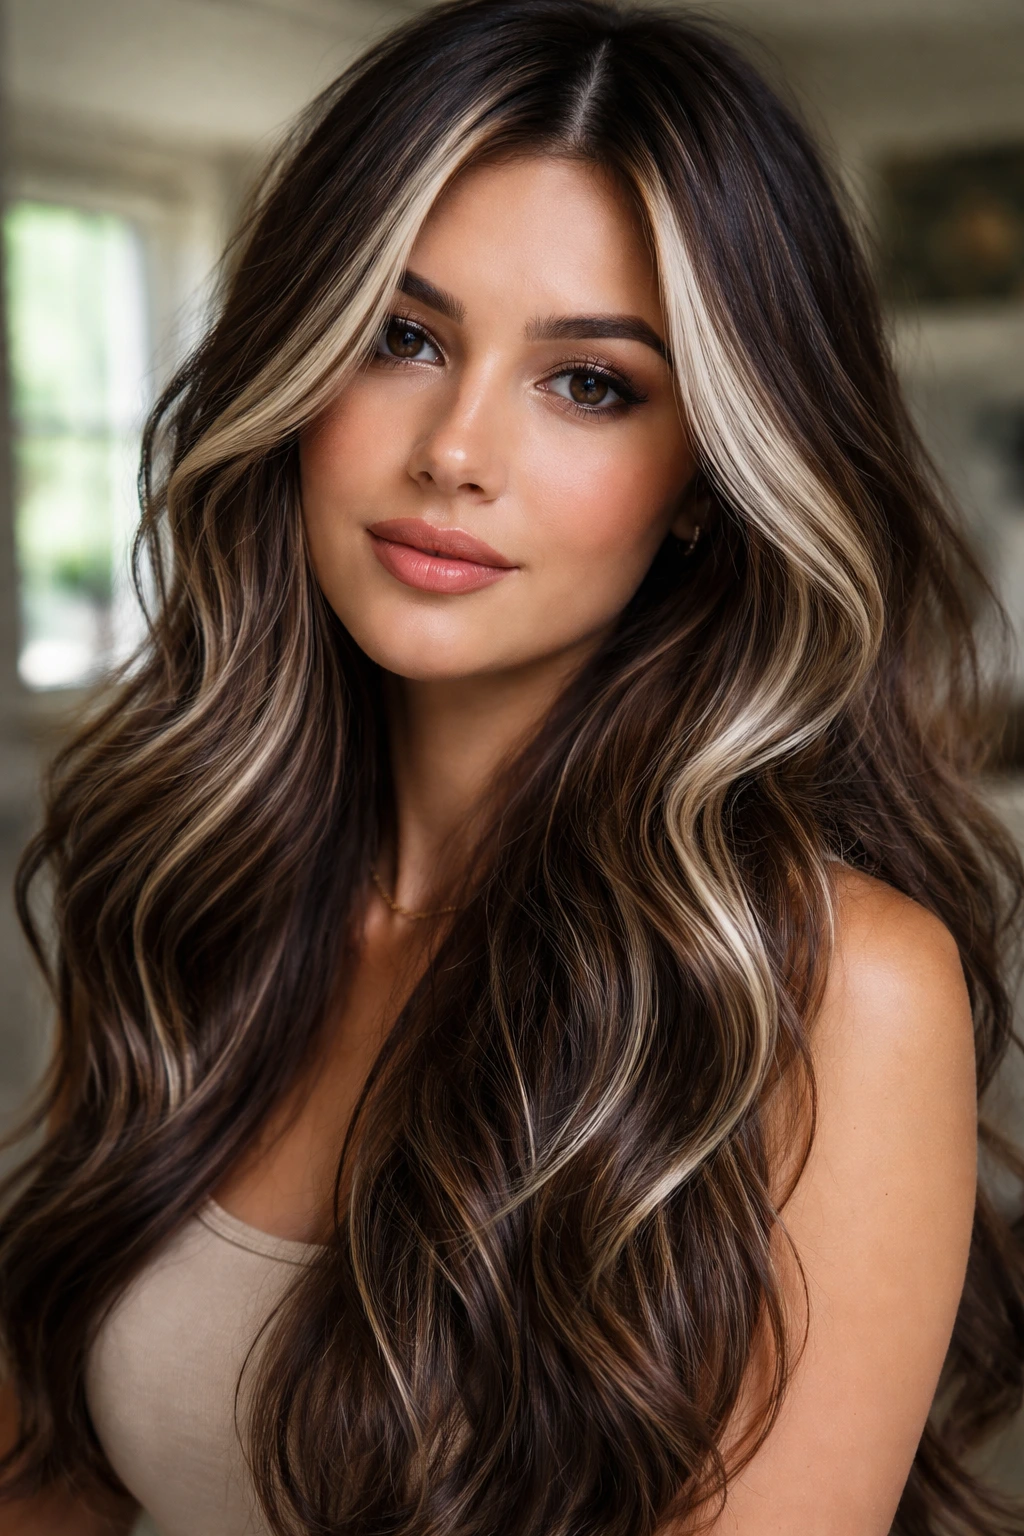
Think of these as highlights that don’t follow a pattern. Instead of symmetrical foils, your stylist randomly places white blonde accents throughout your hair. This mimics natural hair behavior, where some strands catch the light and others stay in the shadow.
It looks effortless. Because there is no rigid structure, you don’t have to worry about your roots growing out in a specific pattern. It’s a very forgiving style that looks cool, messy, and intentional.
16. Nordic White Highlights on Light Brown
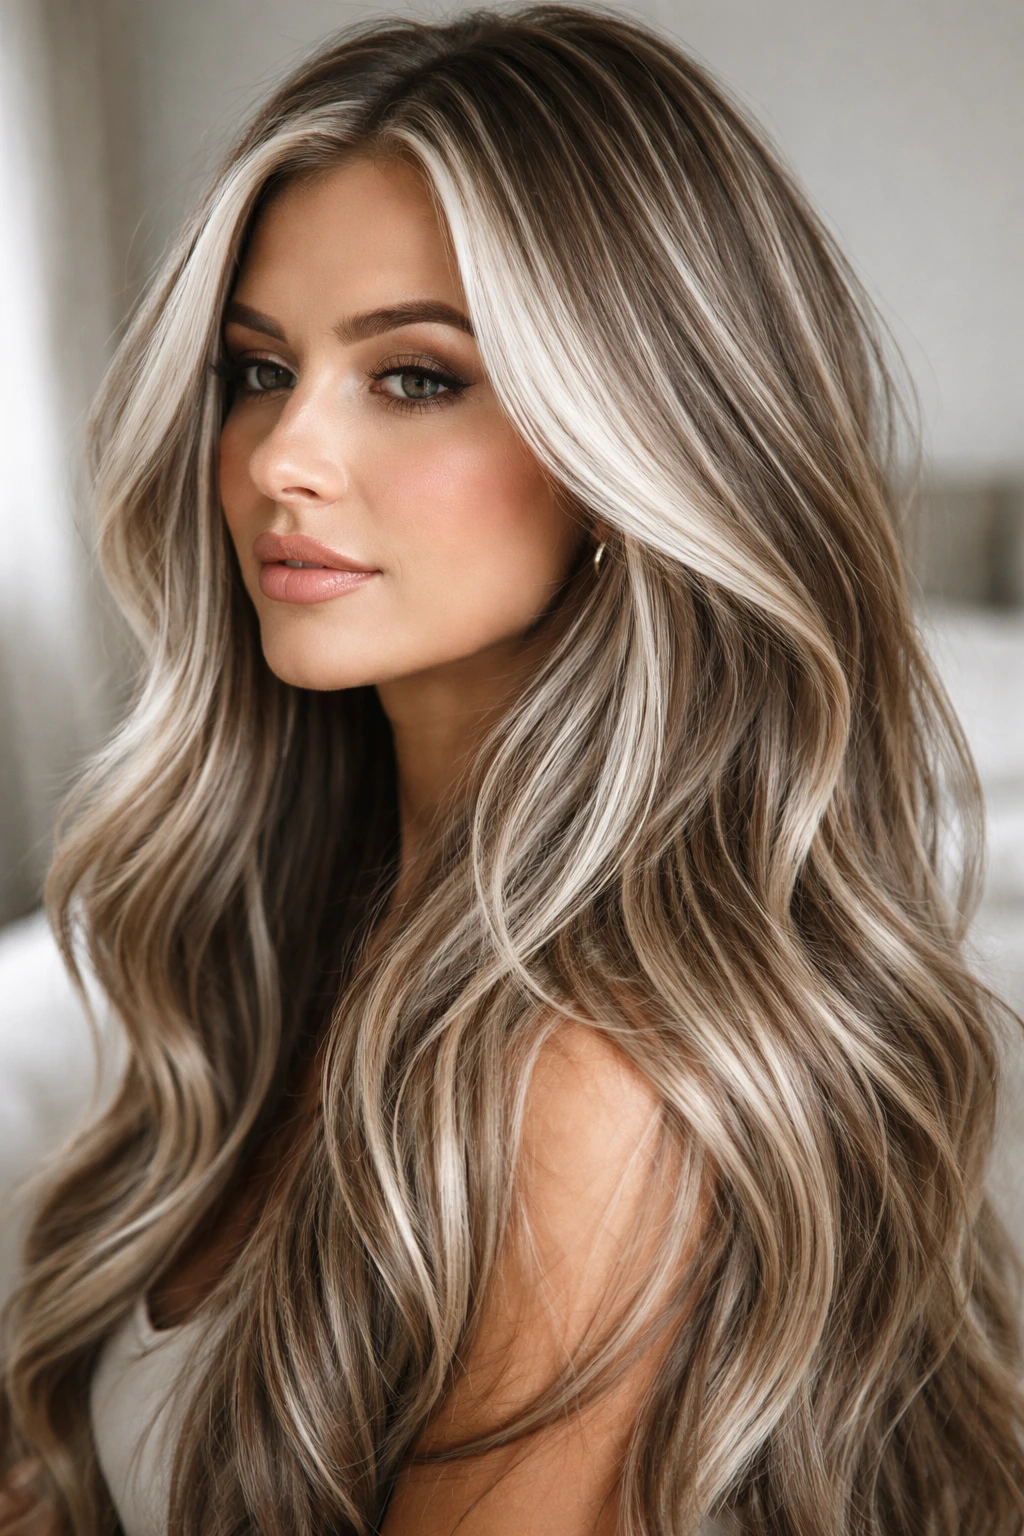
If your natural brown hair is on the lighter side (a light ash brown or “bronde”), you are in the perfect position to go Nordic white. This is a very cool-toned, pale, almost metallic blonde. Because your base color doesn’t have as much dark pigment to fight through, you can often reach this shade with less damage.
Nordic blonde is all about the tone. You need a toner that pulls toward the violet/silver spectrum. Avoid gold or honey tones entirely, as they will clash with the Nordic aesthetic. This is a high-maintenance shade that will yellow quickly if you don’t use a purple shampoo consistently.
17. Strategically Placed White Money Pieces
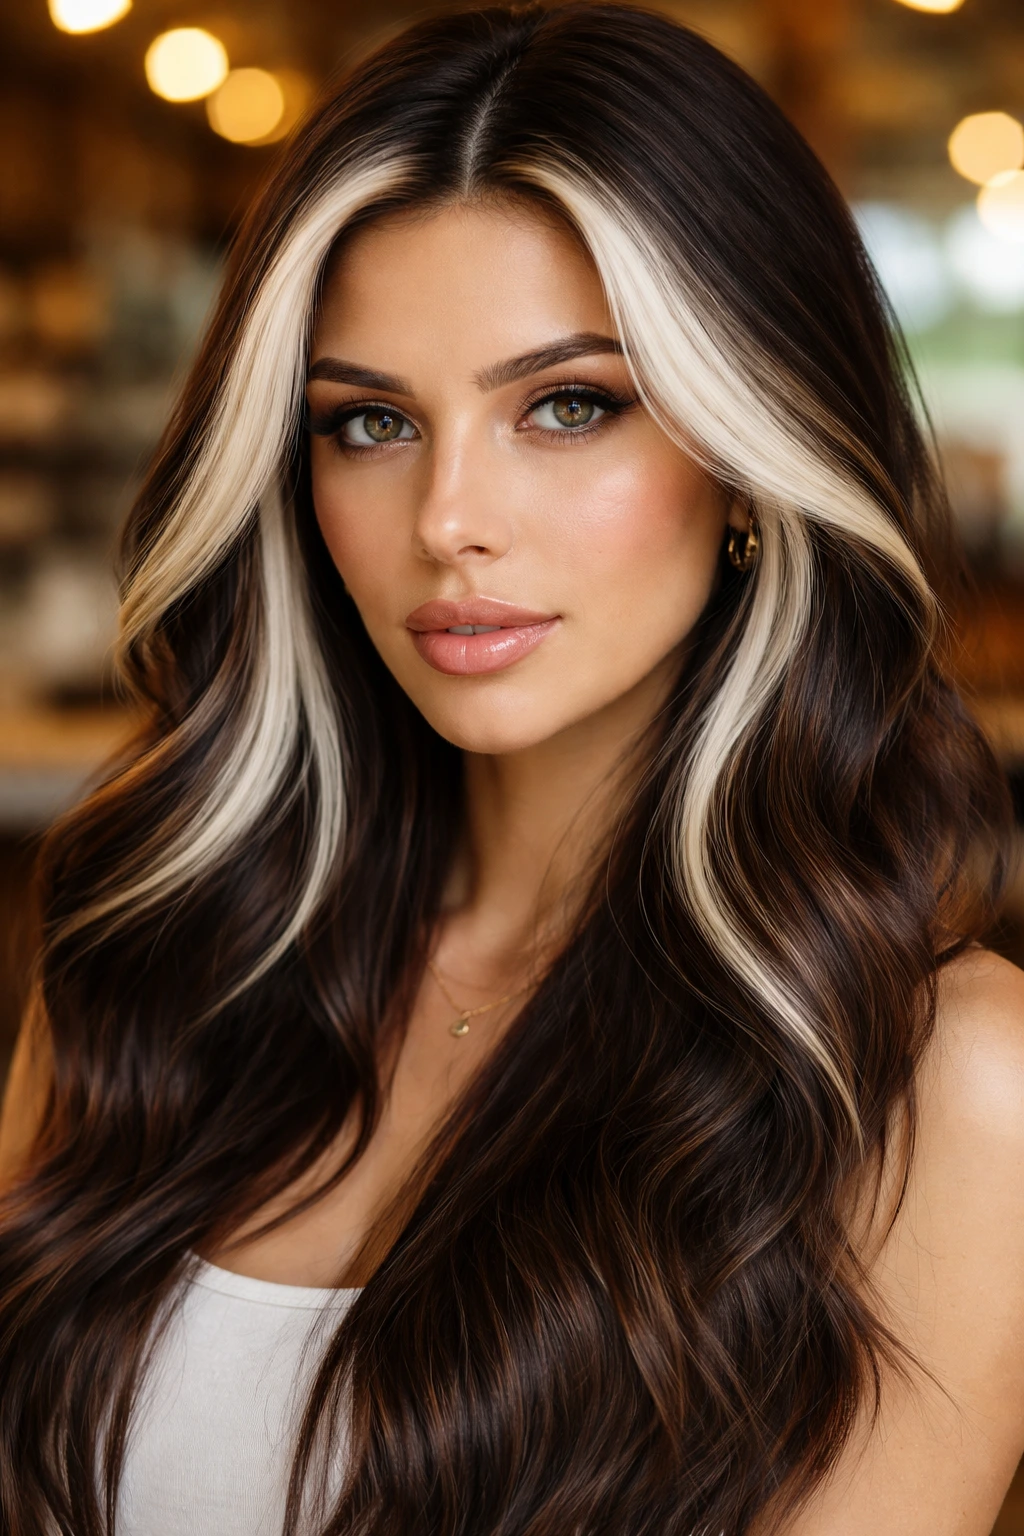
While standard money pieces focus on the very front strands, strategic money pieces involve pulling in a few extra sections around the temples and the ears. This frames the face on all sides, not just the front.
This technique is excellent for highlighting facial features. If you have a strong jawline or high cheekbones, placing the bright white pieces to frame those specific areas acts like a natural highlighter for your face. It draws the eye inward and creates a glow that lasts throughout the day.
18. Bright White Ombré Blend
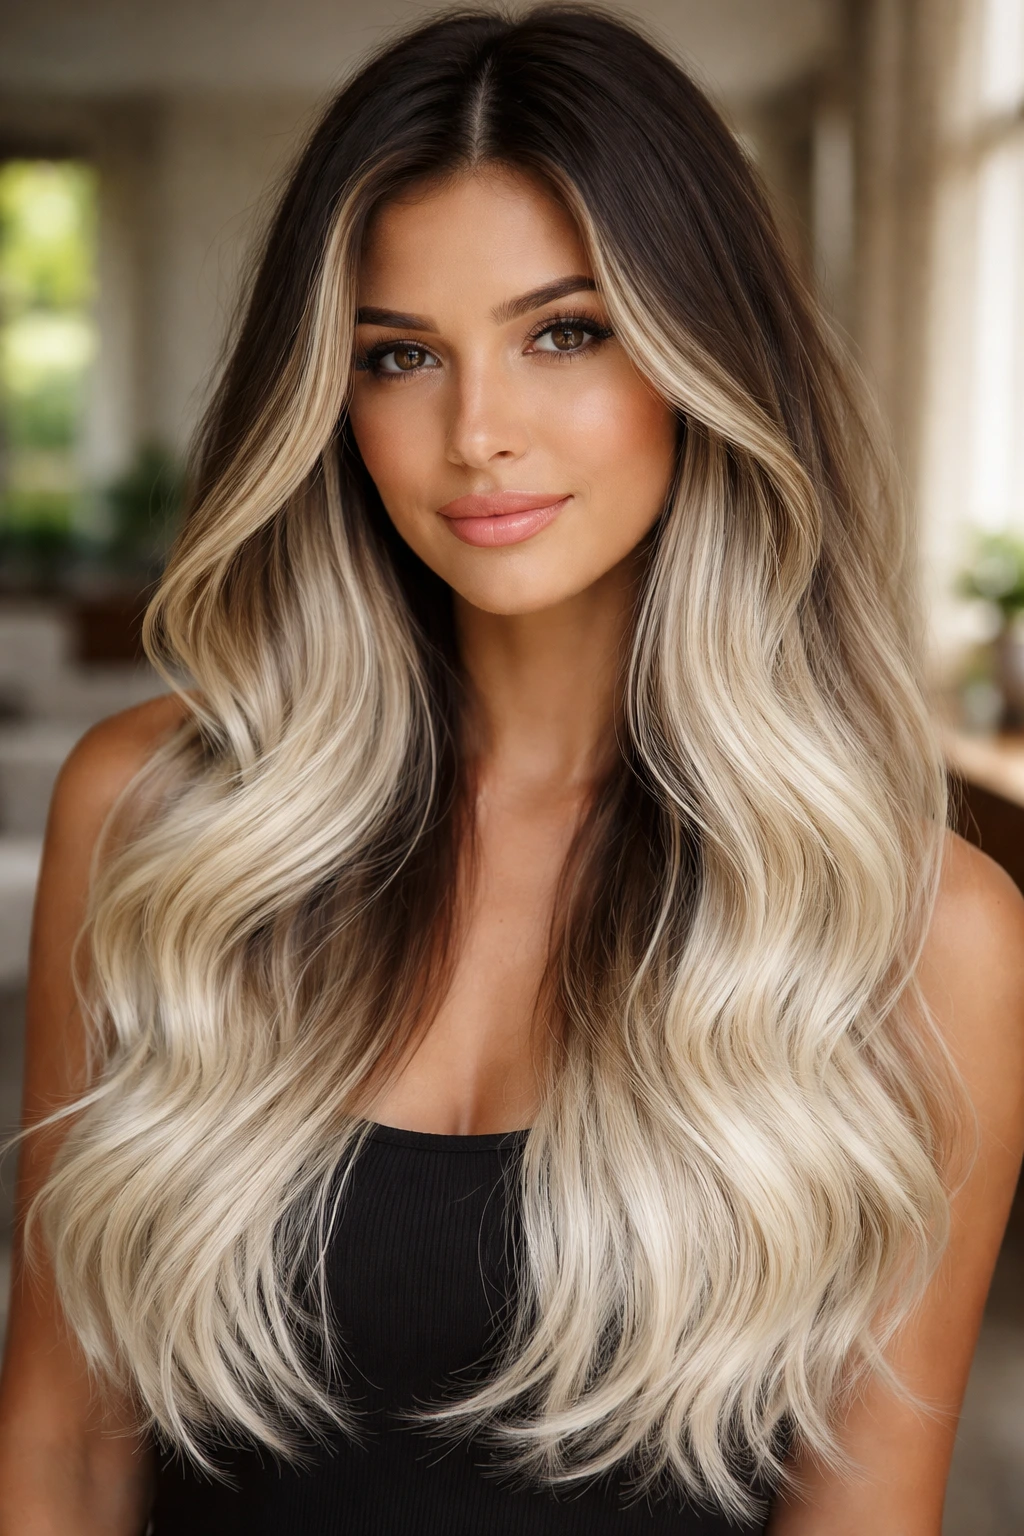
Ombré on brown hair is a classic for a reason. By starting with a dark root and fading into a bright white, you are creating a gradient. The key is in the blend. If the transition happens too abruptly, it looks like a grown-out dye job.
The best ombrés use a “teasing” technique to blend the lightener upward, creating a soft transition. The result is a seamless flow from deep brunette to white blonde. This is the perfect style for someone who wants low maintenance—you can let your roots grow out for months and it just looks like an intentional “rooty” style.
19. Ash-White Highlights with Dark Shadow Root
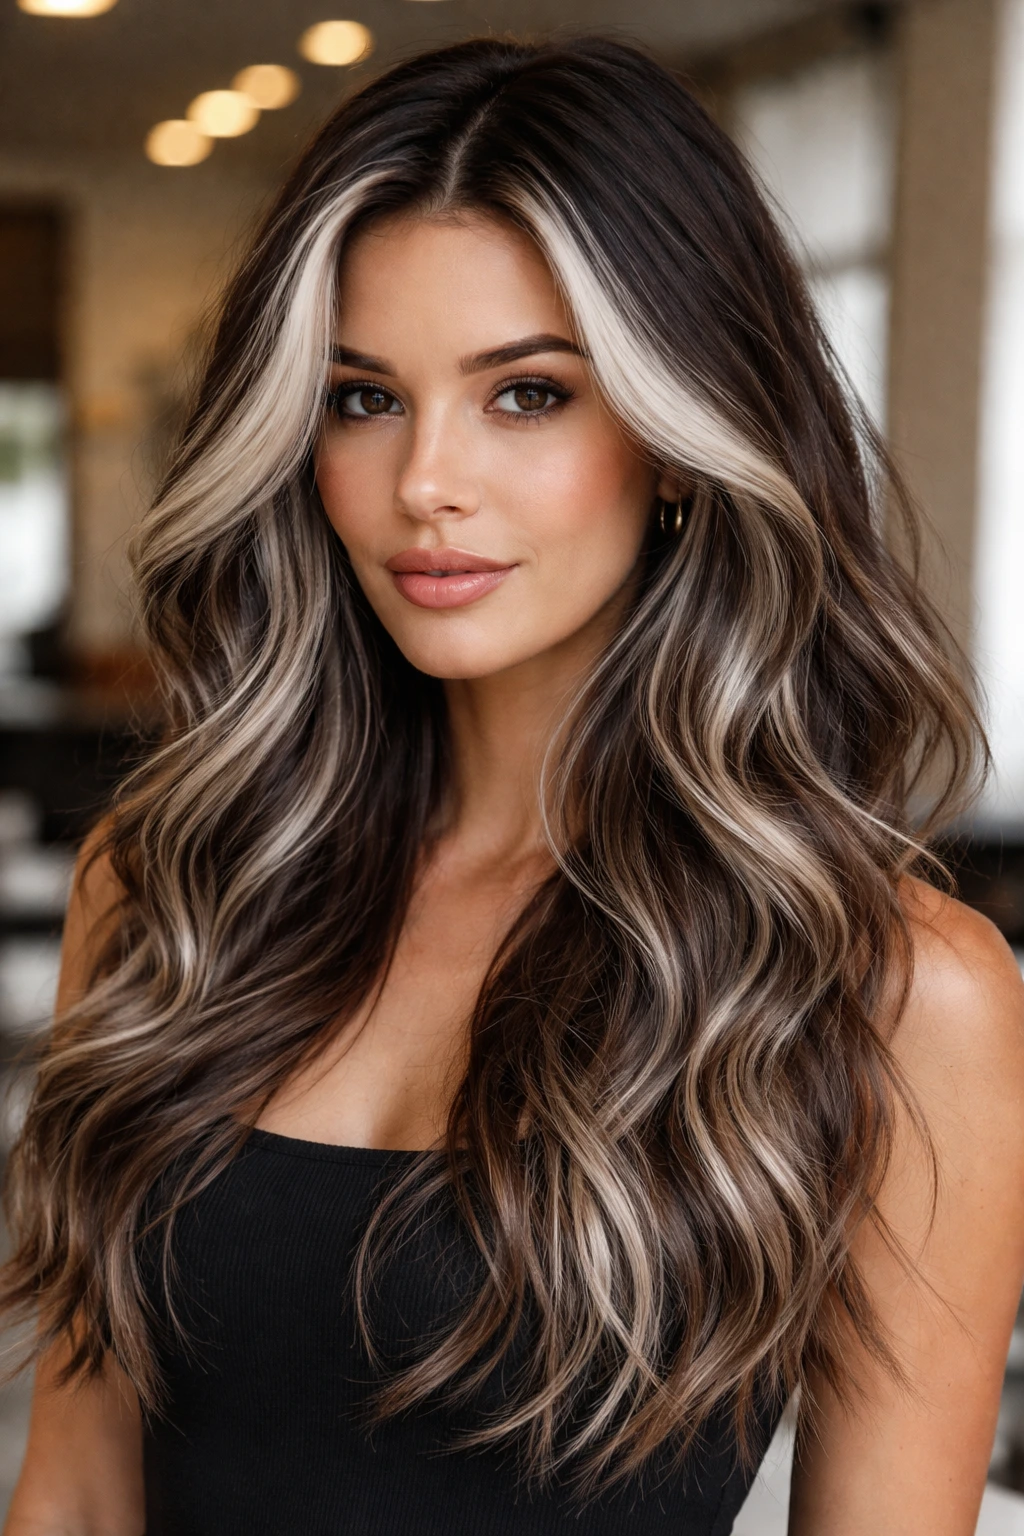
A shadow root is a darker color applied to the roots after the highlights have been processed to soften the blend. For white blonde on brown hair, this is essential. It hides the harsh line where the bleach meets your natural hair.
The Science of the Shadow
- The shadow root should match your natural hair color as closely as possible.
- It should only be applied to the first inch or two of the hair.
- This creates a “smoked out” look that makes the white blonde pop significantly more.
- It also allows you to push your touch-up appointments back by weeks, as the root line is already blurred.
20. Layered White Blonde Dimensions
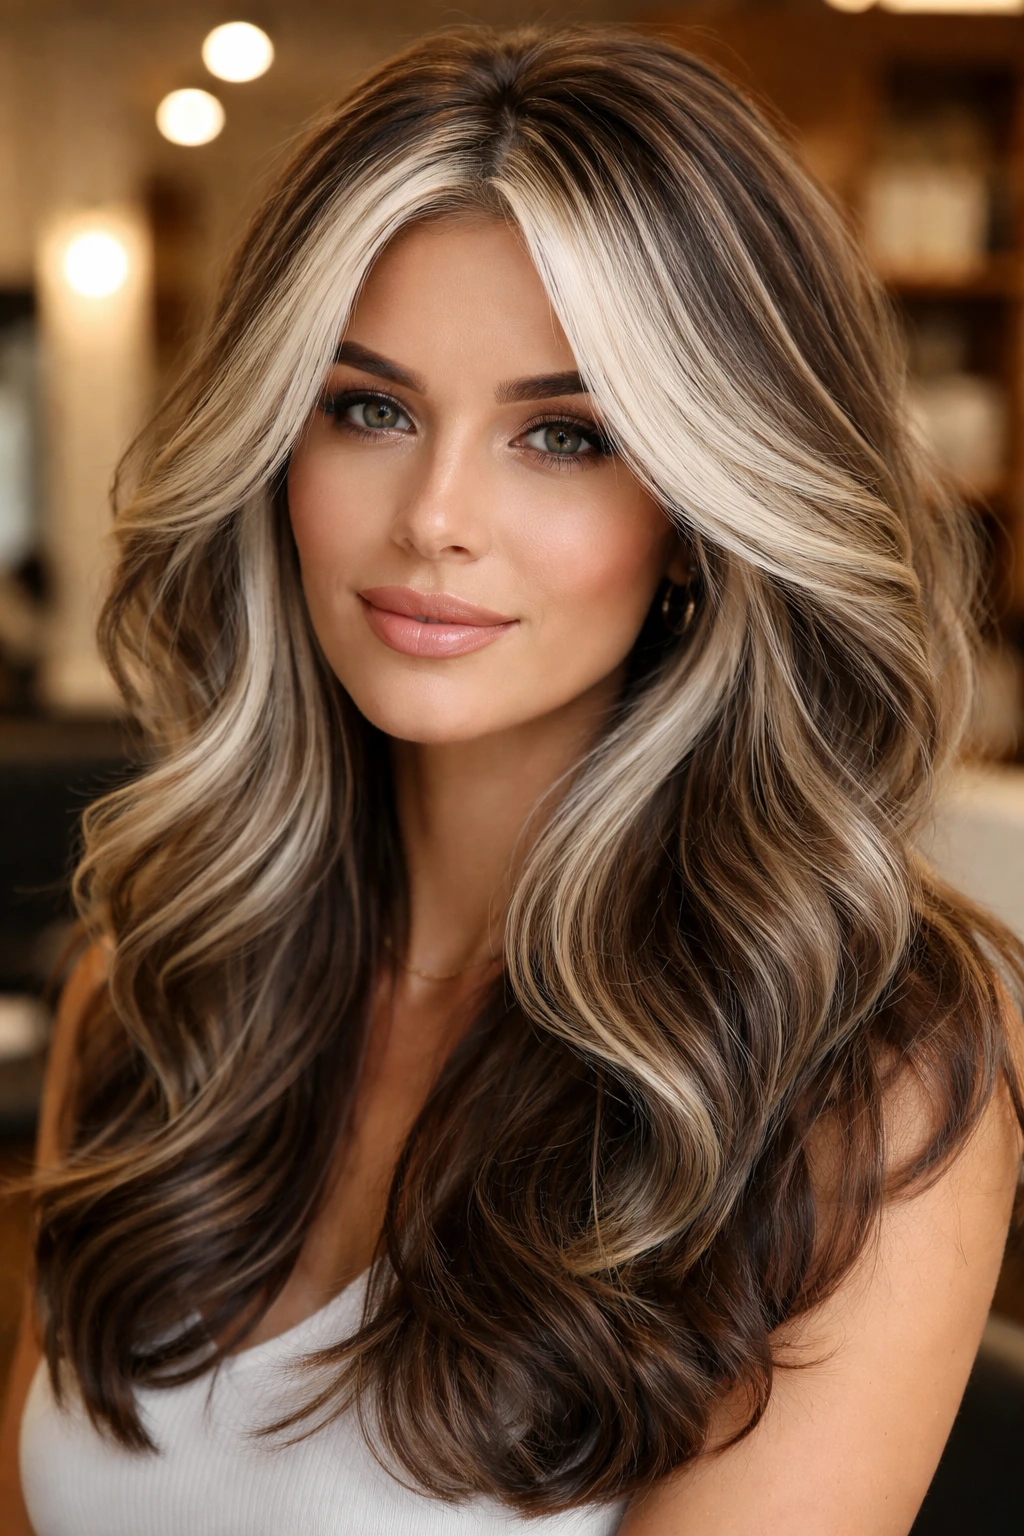
If you have a layered cut, you need to use color to emphasize those layers. By placing white blonde highlights on the shorter, top layers and keeping the bottom, longer layers darker, you create a sense of depth and movement.
When you curl the hair, the white blonde layers “bounce” and separate from the dark layers, creating a beautiful contrast. This is a master-class in using color to improve the cut. Talk to your stylist about where your layers sit before the foils are placed; the highlights need to follow the shape of the cut to look right.
21. Face-Framing Platinum Ribbons
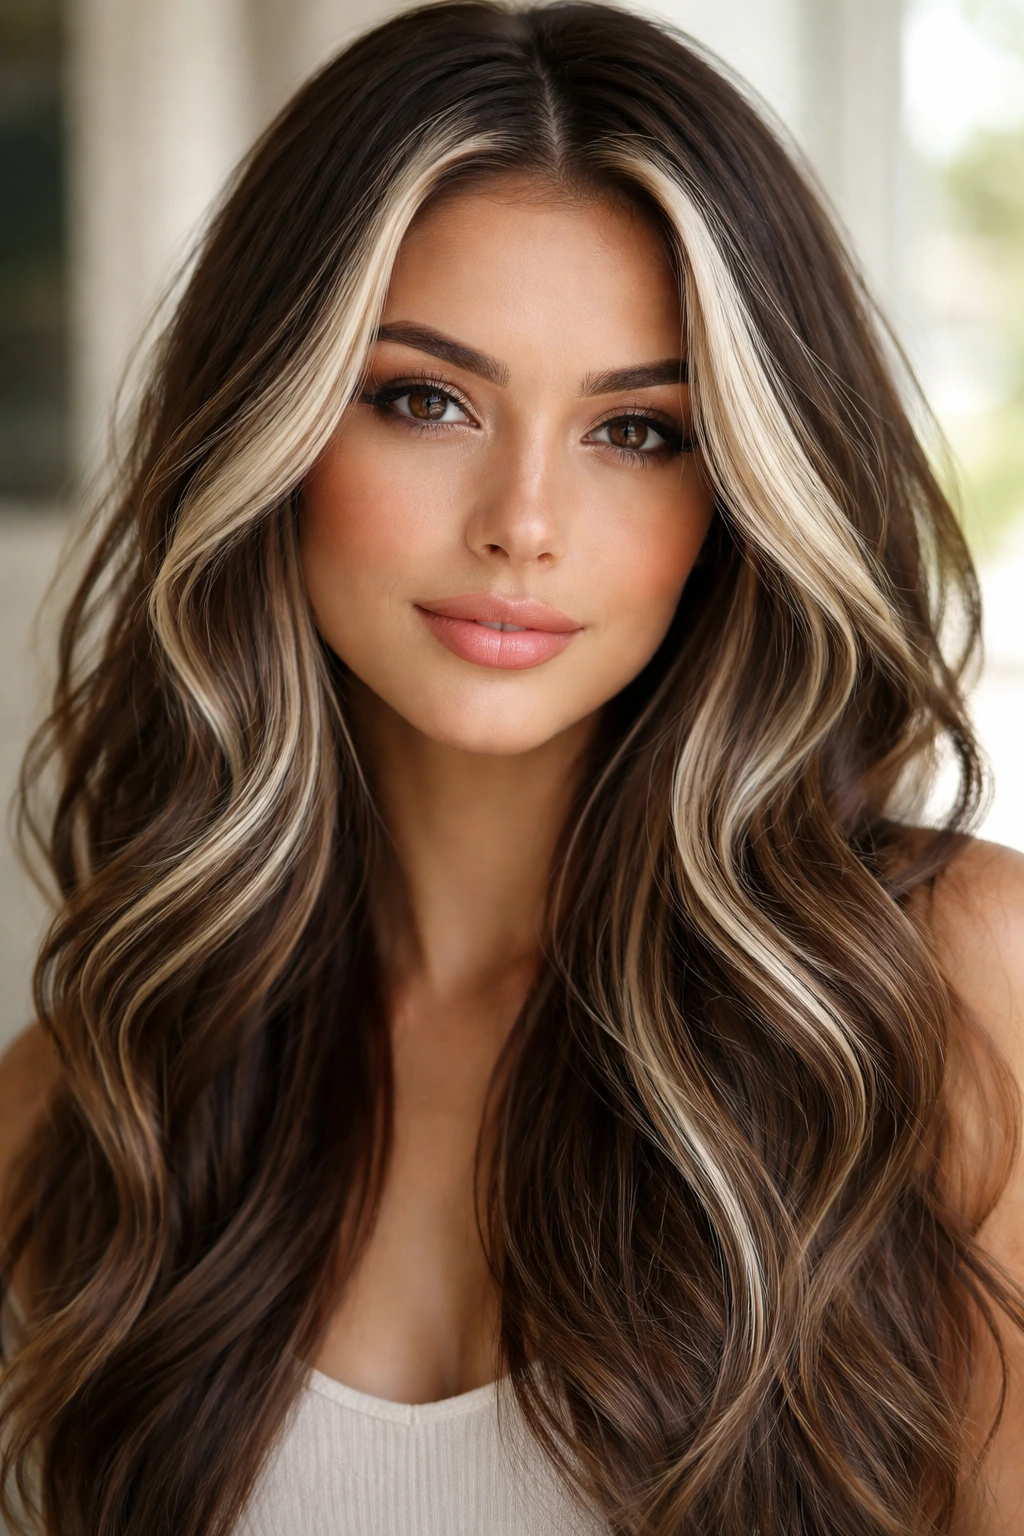
This is a sophisticated version of the money piece. Instead of just two bright strands, you use 4-5 ribbons of platinum white that weave through the front. This creates a much softer, more blended frame than the chunky 90s style, but it still delivers the same “brightening” effect.
It’s incredibly flattering on most face shapes. The ribbons draw attention to the eyes and cheekbones, effectively “lighting up” your face without you having to wear a drop of makeup.
22. Soft White Highlights on Chocolate Brown
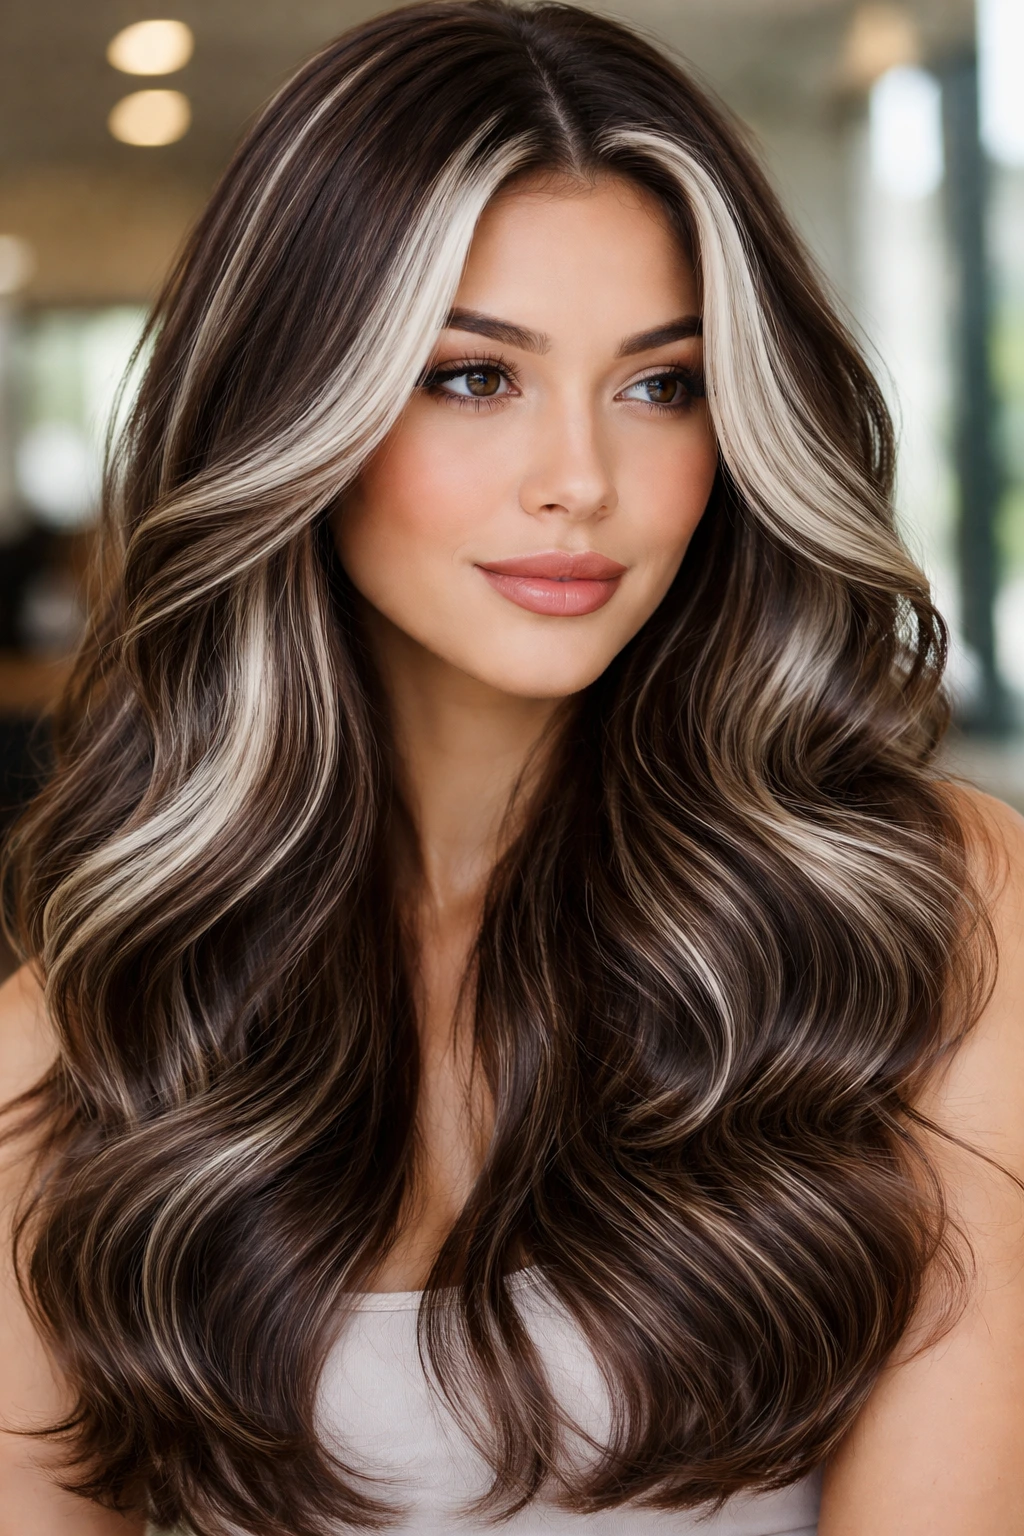
Chocolate brown is a warmer, richer base than espresso or ash brown. Adding white blonde to it creates a unique juxtaposition—the warmth of the chocolate against the cool of the white.
The trick here is to keep the white highlights cool. If you let the white highlights pick up any of the warmth from the chocolate brown (which is easy for bleach to do), you’ll end up with a weird yellow-orange color. Your colorist must use a high-lift developer and a very potent toner to ensure the white stays crisp and icy against that warm, delicious chocolate base.
23. Intense White Highlights for High Contrast
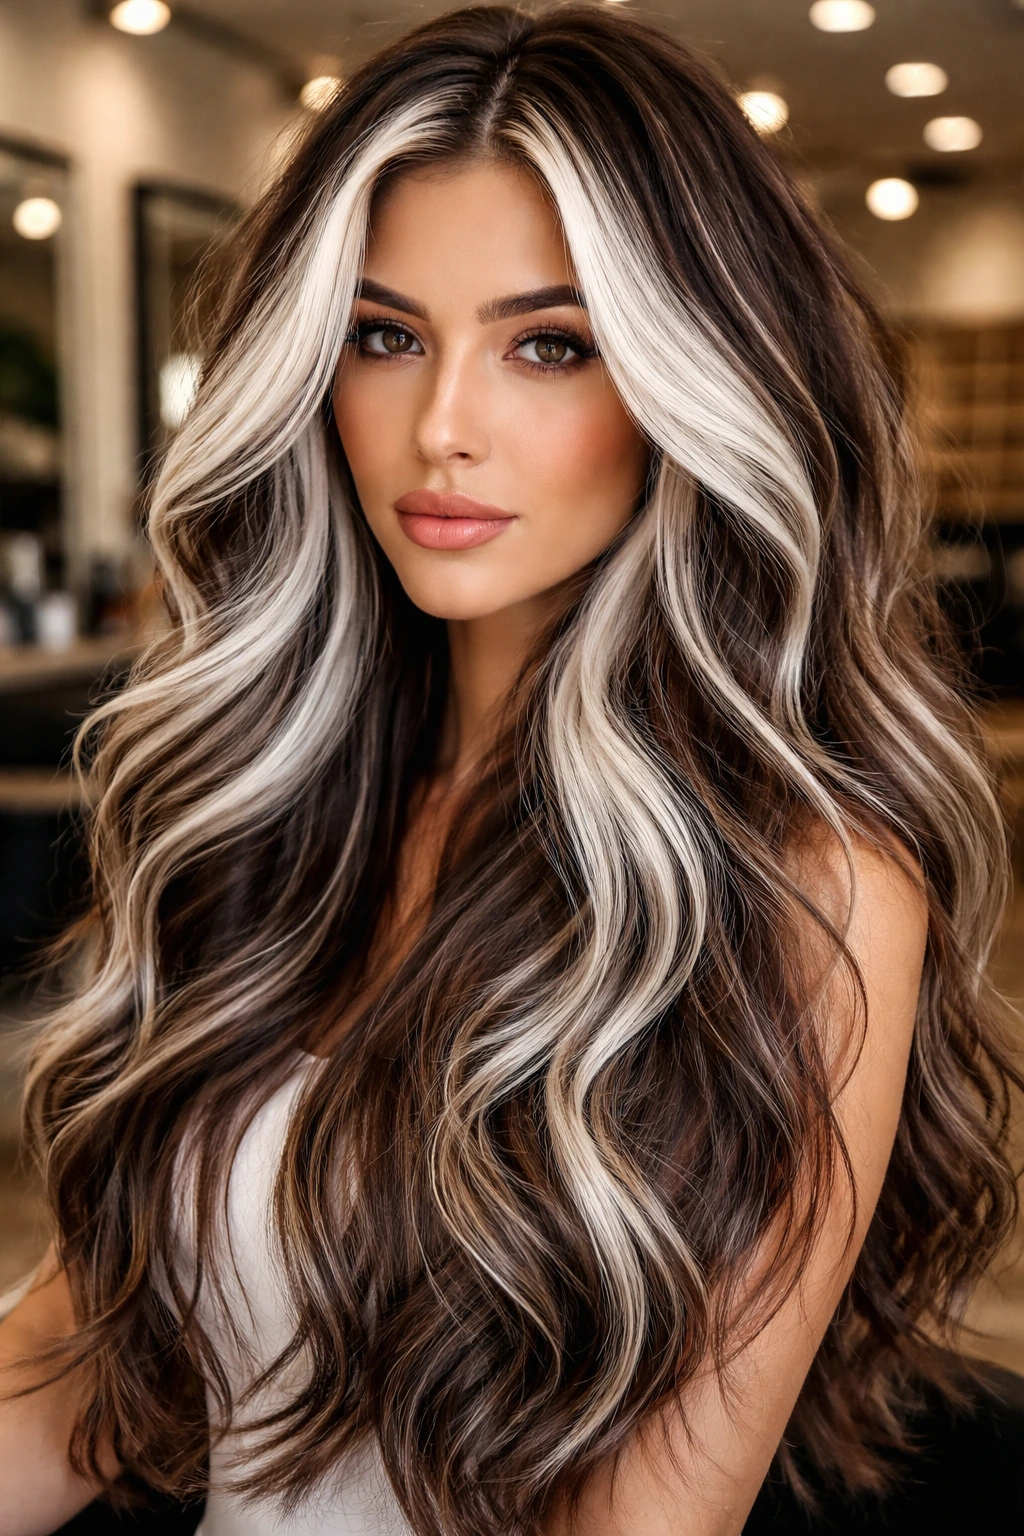
This is for the person who isn’t afraid of a “two-tone” look. We are talking heavy, dense, white highlights packed into the hair. You are essentially shifting your hair from brown to “salt and pepper” but with a much cleaner, brighter “salt.”
It requires a high-commitment colorist who is willing to spend 4-5 hours in the salon. You will need extensive toning and likely an Olaplex or similar bond-building treatment included in the bleaching process to ensure your hair doesn’t turn to straw.
24. Tonal Shift with Icy White Highlights
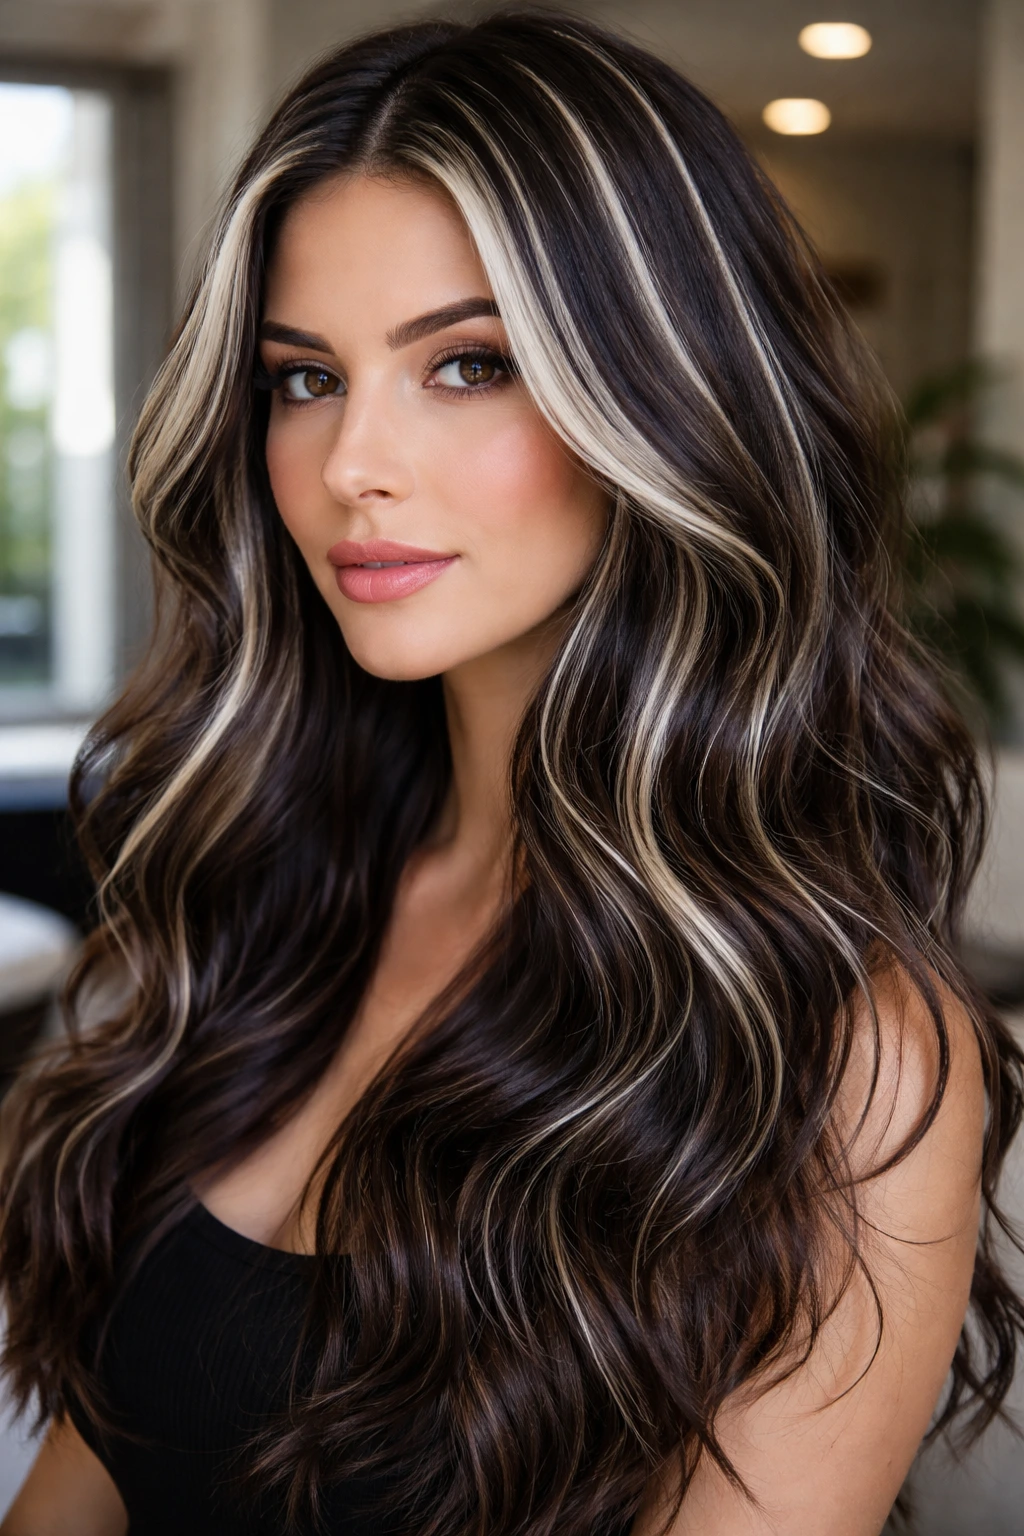
Sometimes, a tonal shift is all you need. Keep your dark brown base, but paint thin, icy white highlights over the surface layer only. This changes the tone of your hair without actually changing the color of the underlying structure.
It makes your hair look “glossy” and “cool” in photos and natural lighting, while keeping the hair beneath dark and healthy. It is the perfect compromise for someone who wants the look of white blonde without the commitment of bleaching 50% of their head.
25. Cool-Toned White Ribbon Highlights
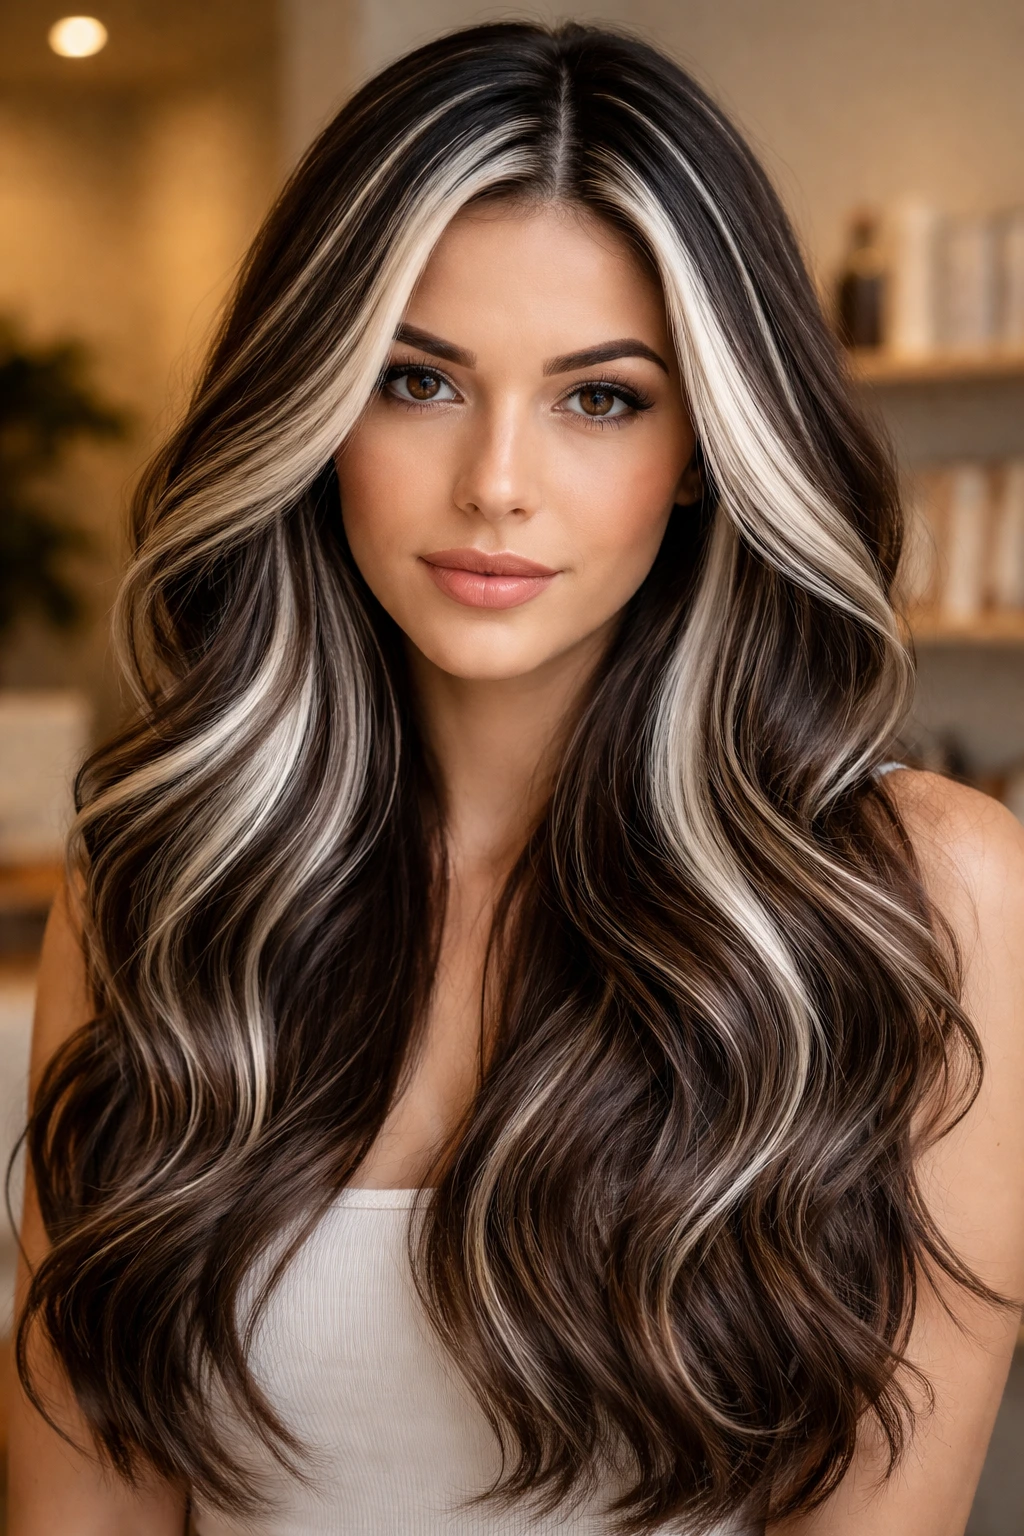
Unlike babylights, which are fine, ribbons are deliberate. By painting large, cool-toned white ribbons throughout the head, you create a modern, high-contrast look that feels very “high fashion.”
Maintenance Routine
- Use a sulfate-free, color-safe shampoo.
- Never skip the deep conditioner—bleached hair acts like a sponge for moisture, and it needs it daily.
- Avoid hot tools whenever possible, or use a heat protectant spray religiously.
- Once every two weeks, use a toning mask to keep the “cool” tone from fading into a brassy yellow.
26. Blended White Blonde Highlights
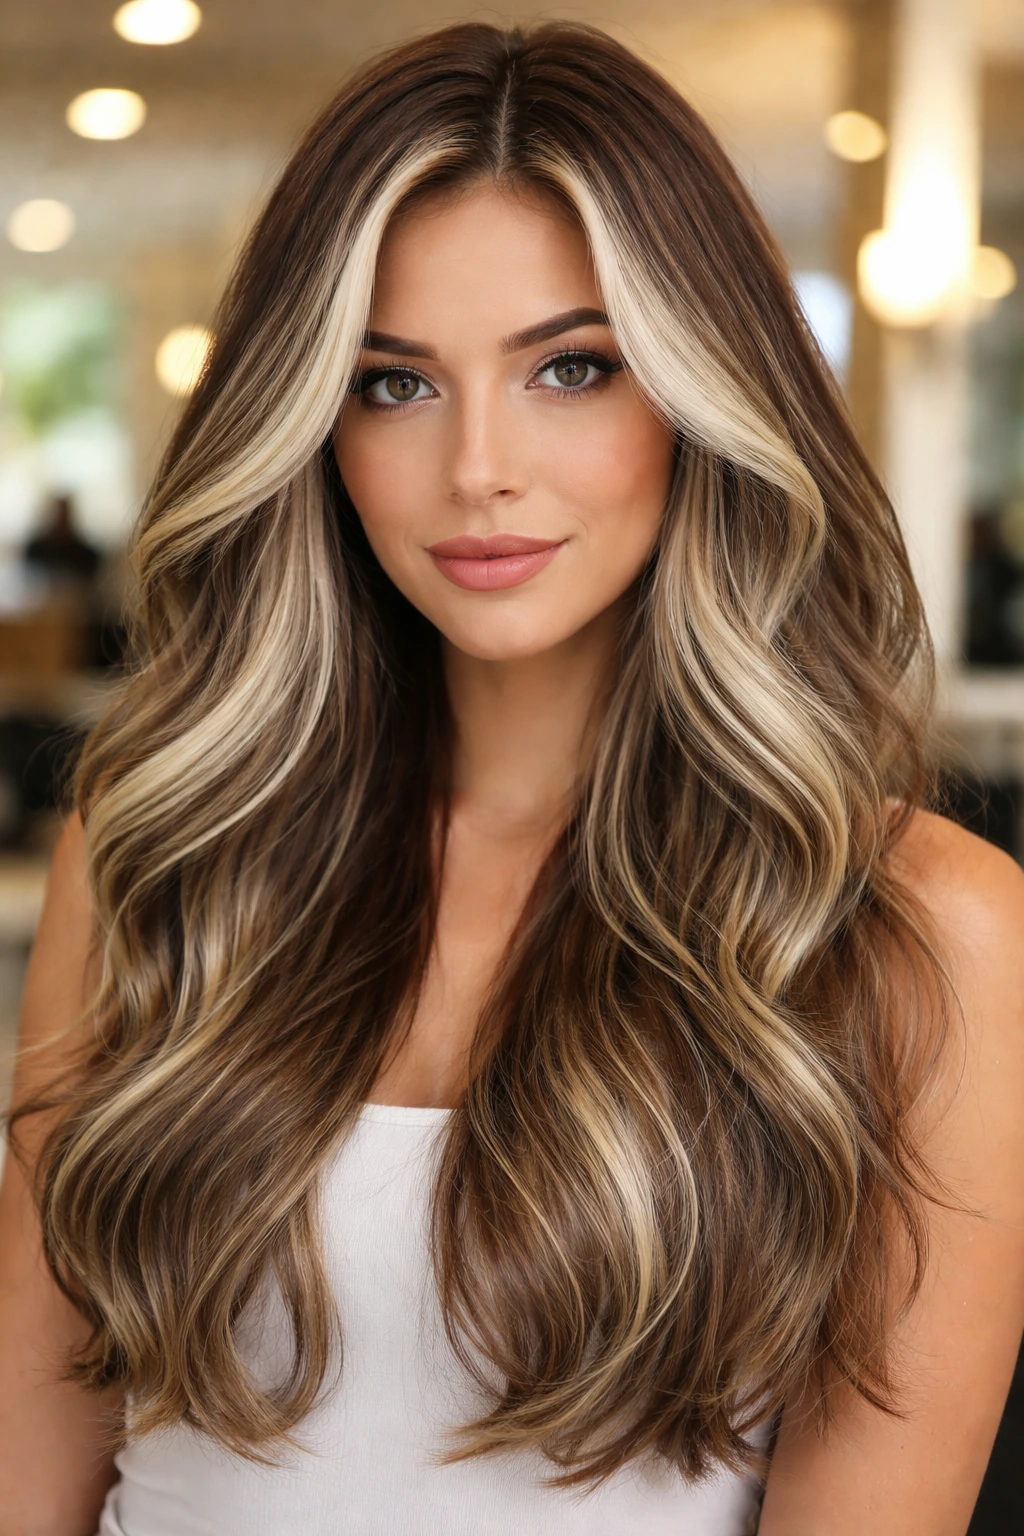
If you want the white blonde look but you’re worried about it looking fake, ask for a “blended” application. This uses a mix of highlights and lowlights. You have your dark brown base, your white blonde highlights, and then—crucially—some neutral light-brown lowlights mixed in.
The lowlights are the “bridge.” They take the jarring jump from dark brown to white blonde and make it smooth. This is the most professional, high-end technique, and it is almost impossible to mess up, provided your colorist has a good eye for color balance.
27. Textured White Accents on Waves
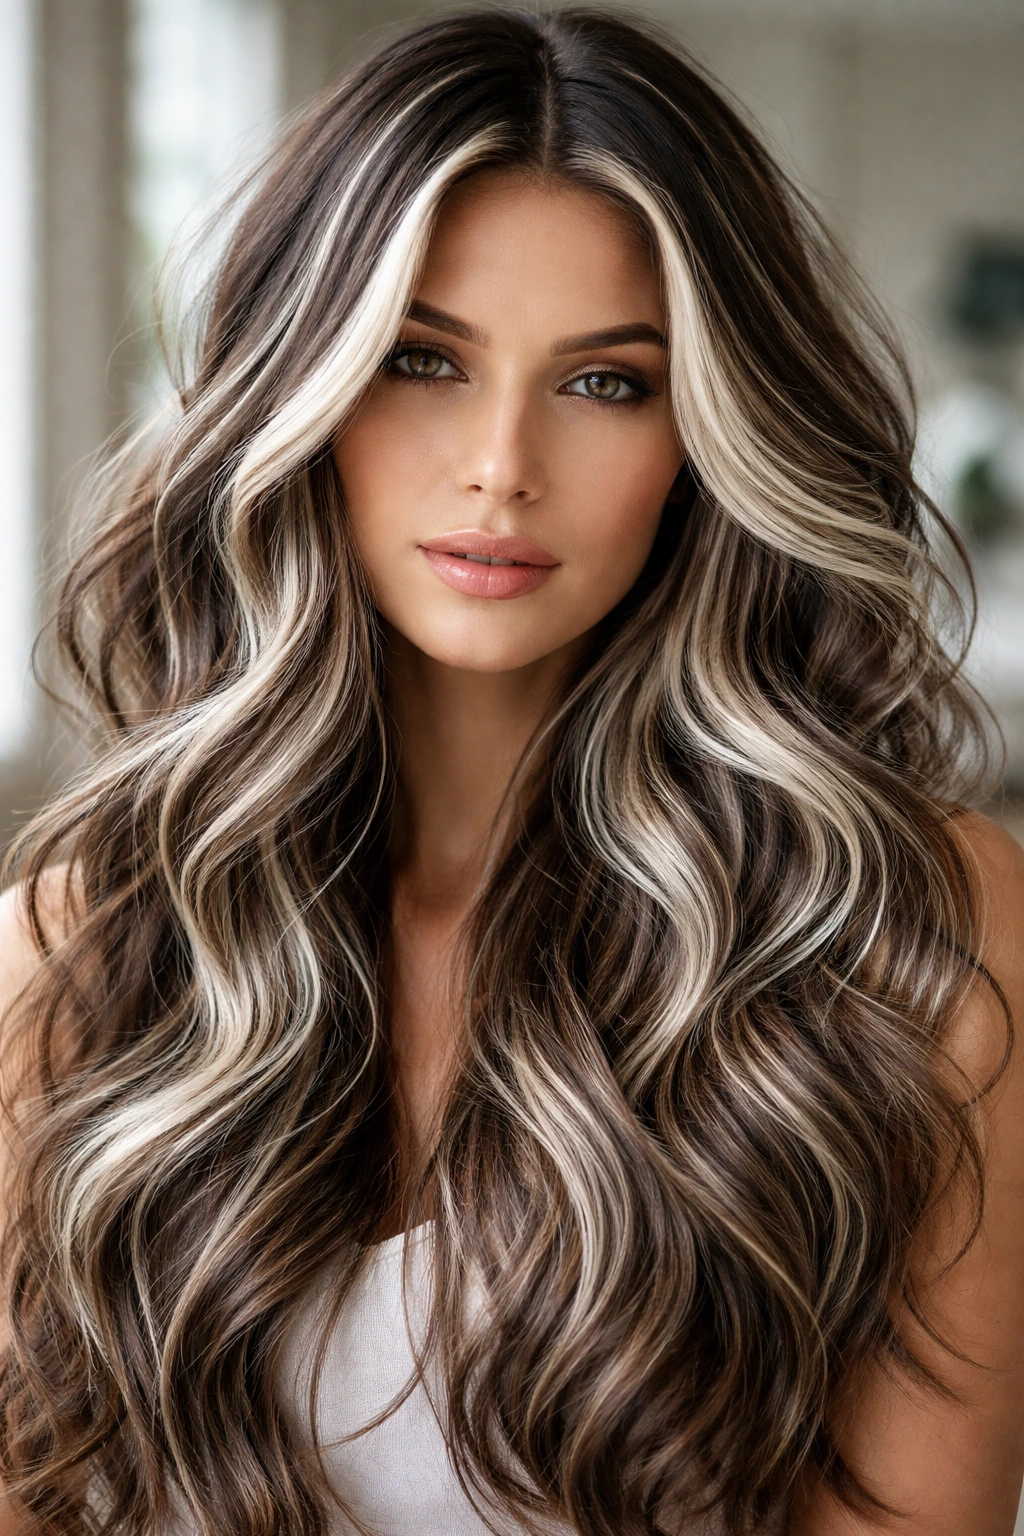
Textured hair—whether it’s naturally wavy or you style it that way—is the best canvas for white highlights. The bends and curves of the hair catch the highlights in different ways, making the color look like it’s dancing.
When the hair is styled in loose waves, the white highlights are dispersed throughout, making the hair look fuller and thicker. If you have flat hair, this is a secret hack: the bleach actually roughens the hair cuticle slightly, which adds a bit of grit and texture, making the hair easier to style and giving it a “messy-cool” aesthetic.
28. Bold White Face-Framing with Subtle Length Highlights
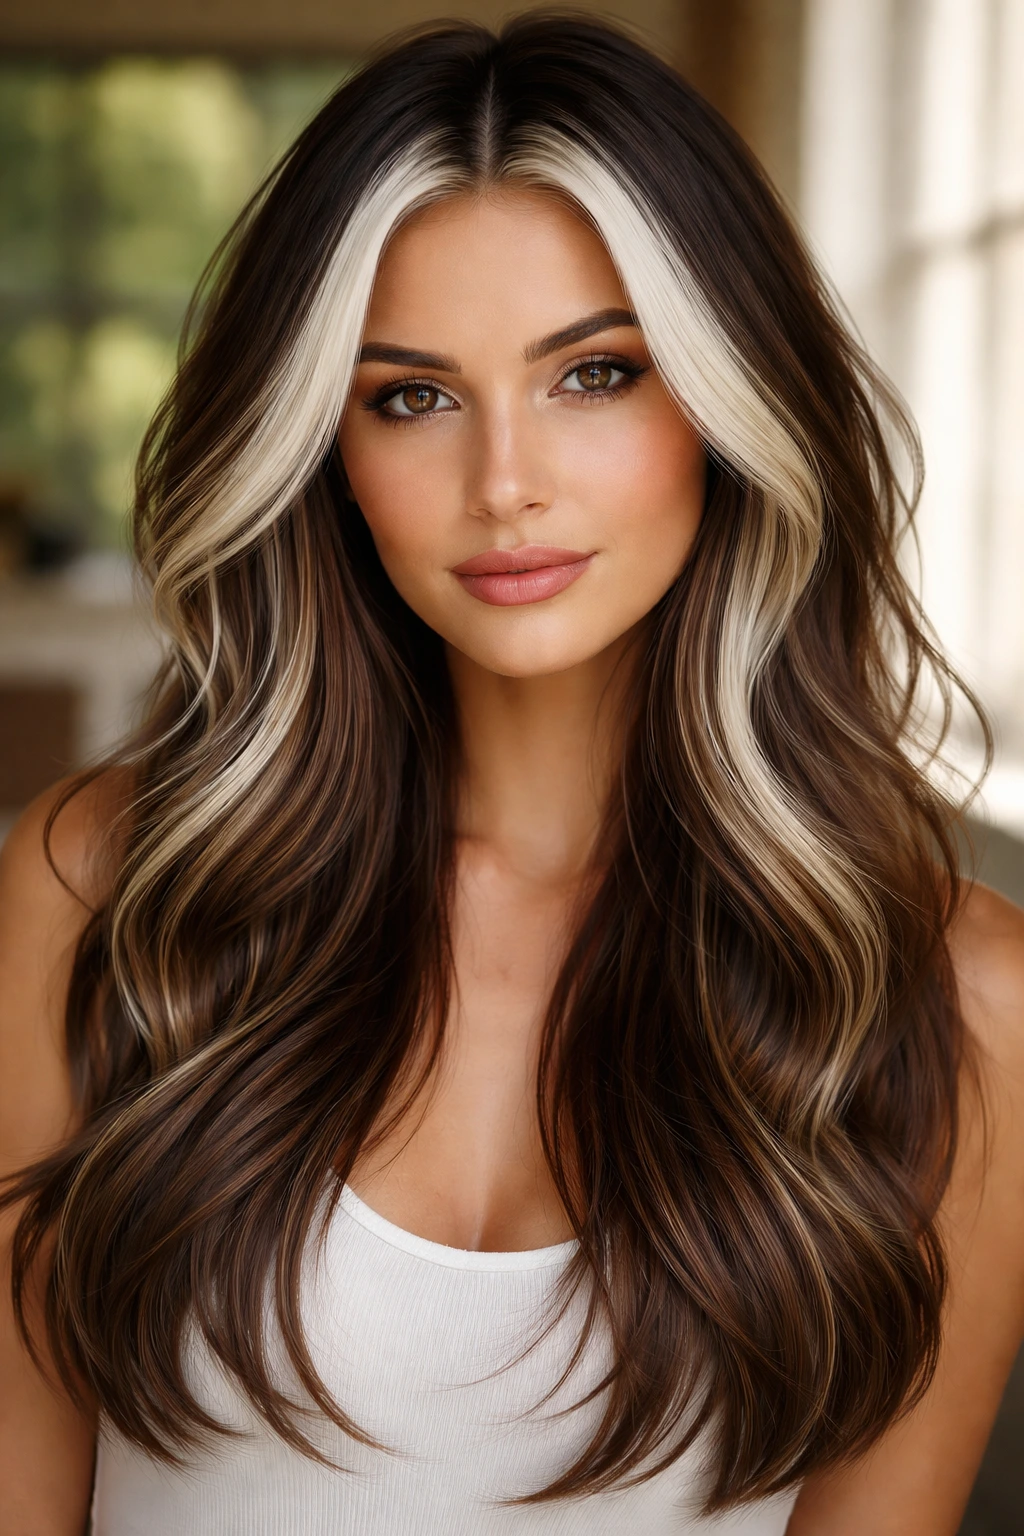
This is the ultimate combination style. You take the boldness of a face-framing platinum piece and combine it with the subtlety of fine, dispersed highlights through the rest of the length.
It gives you the best of both worlds: a strong, visible, bright look around your face (which is what people see first) and a natural, multi-dimensional look through the back. It’s a balanced style that feels both daring and classic.
Final Thoughts
Transitioning from brown hair to incorporate white blonde highlights is a major commitment. You aren’t just changing a color; you are altering the chemical structure of your hair. The most critical advice is to find a colorist who specializes in high-contrast blonde work and is honest about what your hair can handle.
Do not rush the process. If your stylist says you need two sessions to reach that level of white without damaging your hair, listen to them. Better to have slightly warmer, healthy hair than white-blonde, broken hair that snaps when you brush it. Once you achieve the look, treat your hair like the delicate fabric it is—condition often, avoid heat, and lean into the cool tones. It is a striking, beautiful style that rewards those who take the time to maintain it properly.
