



Long hair and side braids have a funny relationship. The hair does half the work, but the braid decides whether the whole thing feels soft, tidy, romantic, or slightly unruly in a way that looks intentional. Side braids for long hair can be gorgeous because the length gives the braid something to show off; it isn’t just a small detail tucked behind your ear. It becomes the hairstyle.
The catch is that long hair can also make braids heavy, slippery, and lopsided in the wrong way. A braid that looks neat on shoulder-length hair can sag halfway down the chest when there’s extra length hanging off it. Layers slip out. Fine hair falls flat. Thick hair puffs up like a rope that’s been handled too much. Same braid, different result.
That’s why braid choice matters more than people think. A classic three-strand side braid behaves very differently from a pull-through braid or a fishtail, and the finish you get depends on the shape you build at the root, the way you section the hair, and whether you want the braid to sit close to the head or drop loose over one shoulder. Tiny details. Big difference.
If you’ve ever pinned a braid in place, looked in the mirror, and thought, close, but not quite, you’re in the right place. The styles below lean practical, wearable, and long-hair friendly, with enough variation that you can match the braid to the day instead of forcing one look to do everything.
1. The Classic Three-Strand Side Braid
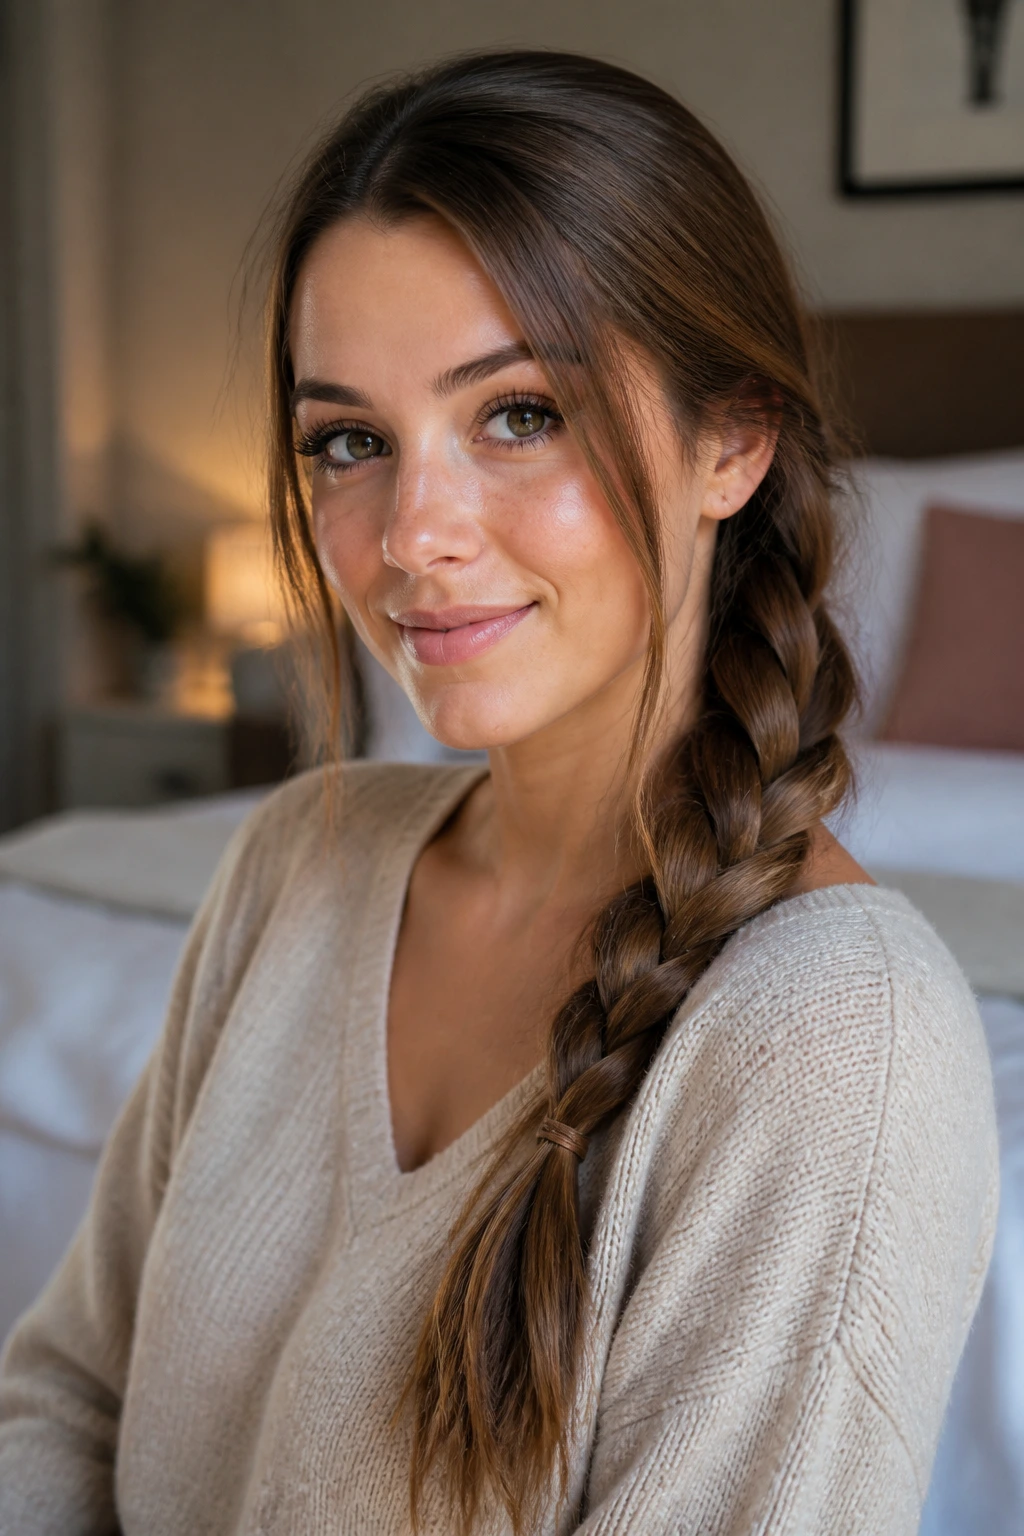
This is the braid most people picture first, and honestly, it earns its place. A three-strand side braid sits low, feels familiar, and works when you want your hair off your neck without looking too severe. On long hair, the length makes the braid look full even when the technique stays simple.
Why It Works
The shape is easy to control because you’re only handling three sections. That matters if your hair is layered or a little slippery. Start the braid just behind one ear, keep the first few crosses snug, then relax your hands once the braid passes the shoulder.
A tiny bit of texture spray at the roots helps if your hair is freshly washed. Clean hair can be too soft for this one. A clear elastic at the end keeps the braid from unraveling, and you can hide it with a small strand of hair if you want a cleaner finish.
- Best for everyday wear
- Good starting point for beginners
- Works on straight, wavy, or lightly curled hair
Tip: If the braid starts to drift forward, pin the top section just above the ear before you finish the last third.
2. The Loose Side Braid With Face-Framing Pieces

This version feels softer than the classic braid because it leaves a little room around the face. The braid still gathers the hair to one side, but two small pieces at the front stay out on purpose, and that changes the whole mood. It’s relaxed without looking messy.
People often pull too much hair back from the front, then wonder why the style feels harsh. Don’t do that. Leave two thin sections near the temples, about the width of a pencil on each side, and curl them slightly if you want the finish to bend inward. The braid itself can be a simple three-strand or a fishtail.
A loose side braid works well with long hair because the length gives the face-framing pieces something to fall against. They don’t just hang there. They connect with the braid.
If your hair is very fine, spray the front sections lightly before braiding. They’ll stay in place longer and won’t slip into the rest of the style by noon.
3. The French Side Braid Along the Part
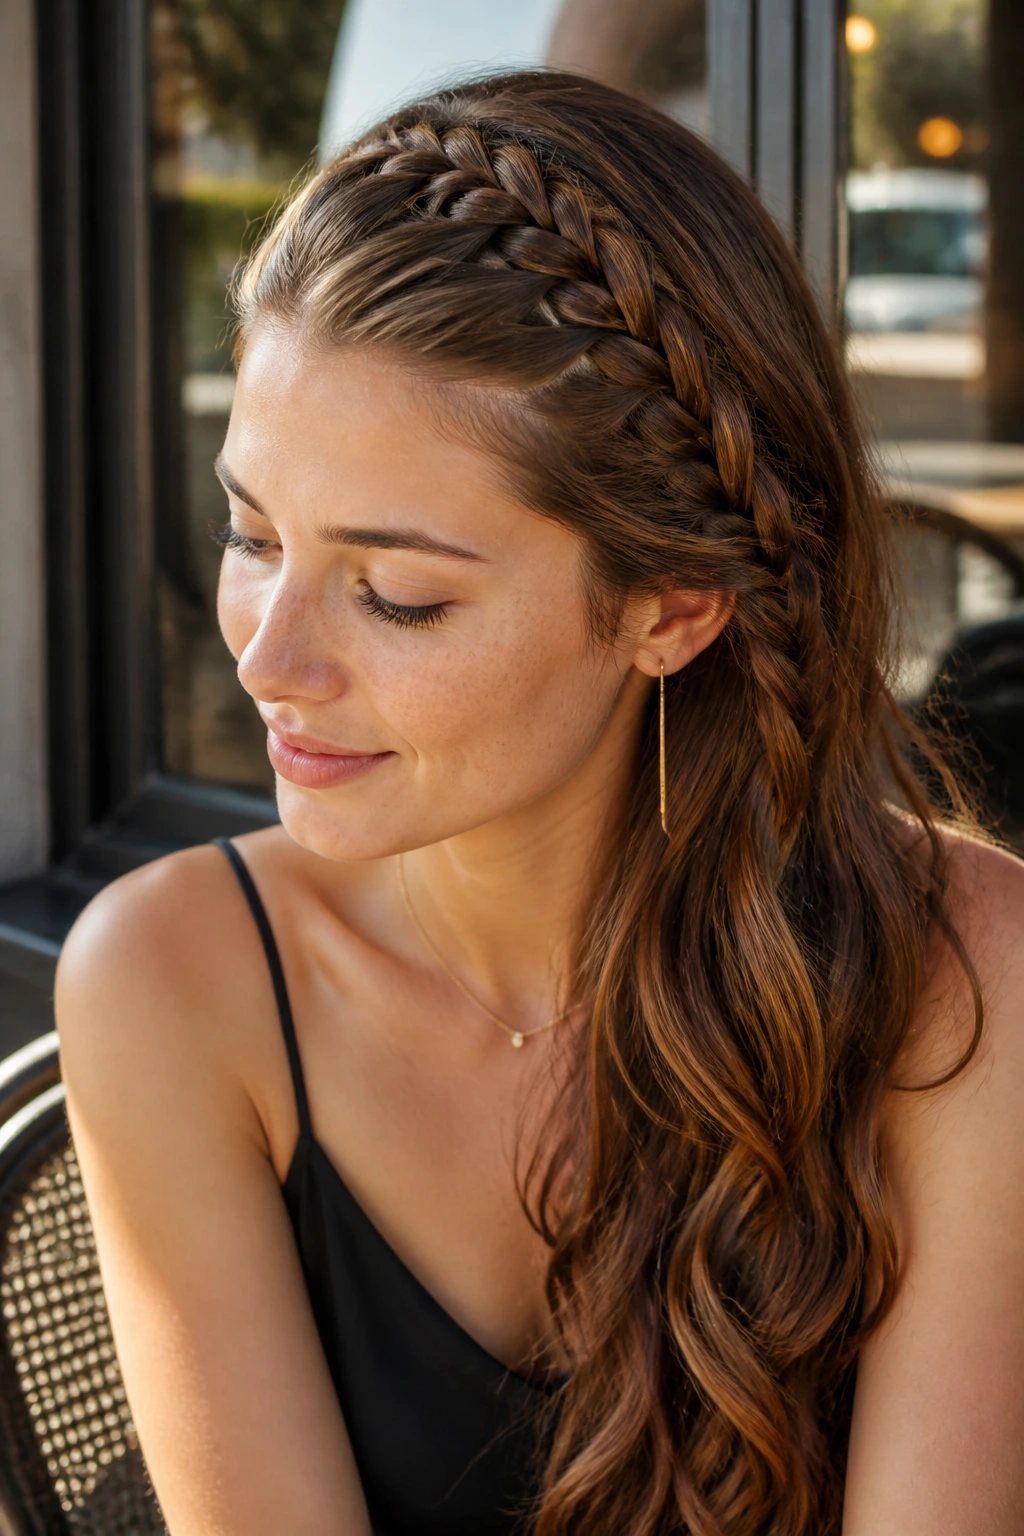
Can a French braid feel casual? Absolutely, if you move it off-center. A French side braid starts near a deep side part and gradually gathers hair as it travels downward, which gives long hair a neat spine along one side of the head.
The best part is how well it controls layers. Shorter pieces get tucked in as you go, so you spend less time chasing flyaways later. Keep the braid close to the scalp at the top, then let it loosen slightly as it drops over the shoulder. That shift keeps the style from looking too rigid.
How to Keep It Clean
Use a tail comb to make the part sharp if you want polish. If you want a softer finish, use your fingers and keep the section a little uneven. Both work.
- Start with a deep side part
- Add small sections on each pass
- Keep tension even at the crown
- Finish with a clear elastic and a light mist of hairspray
It’s a dependable choice for long hair that needs shape without a lot of fuss.
4. The Dutch Side Braid With Lifted Texture
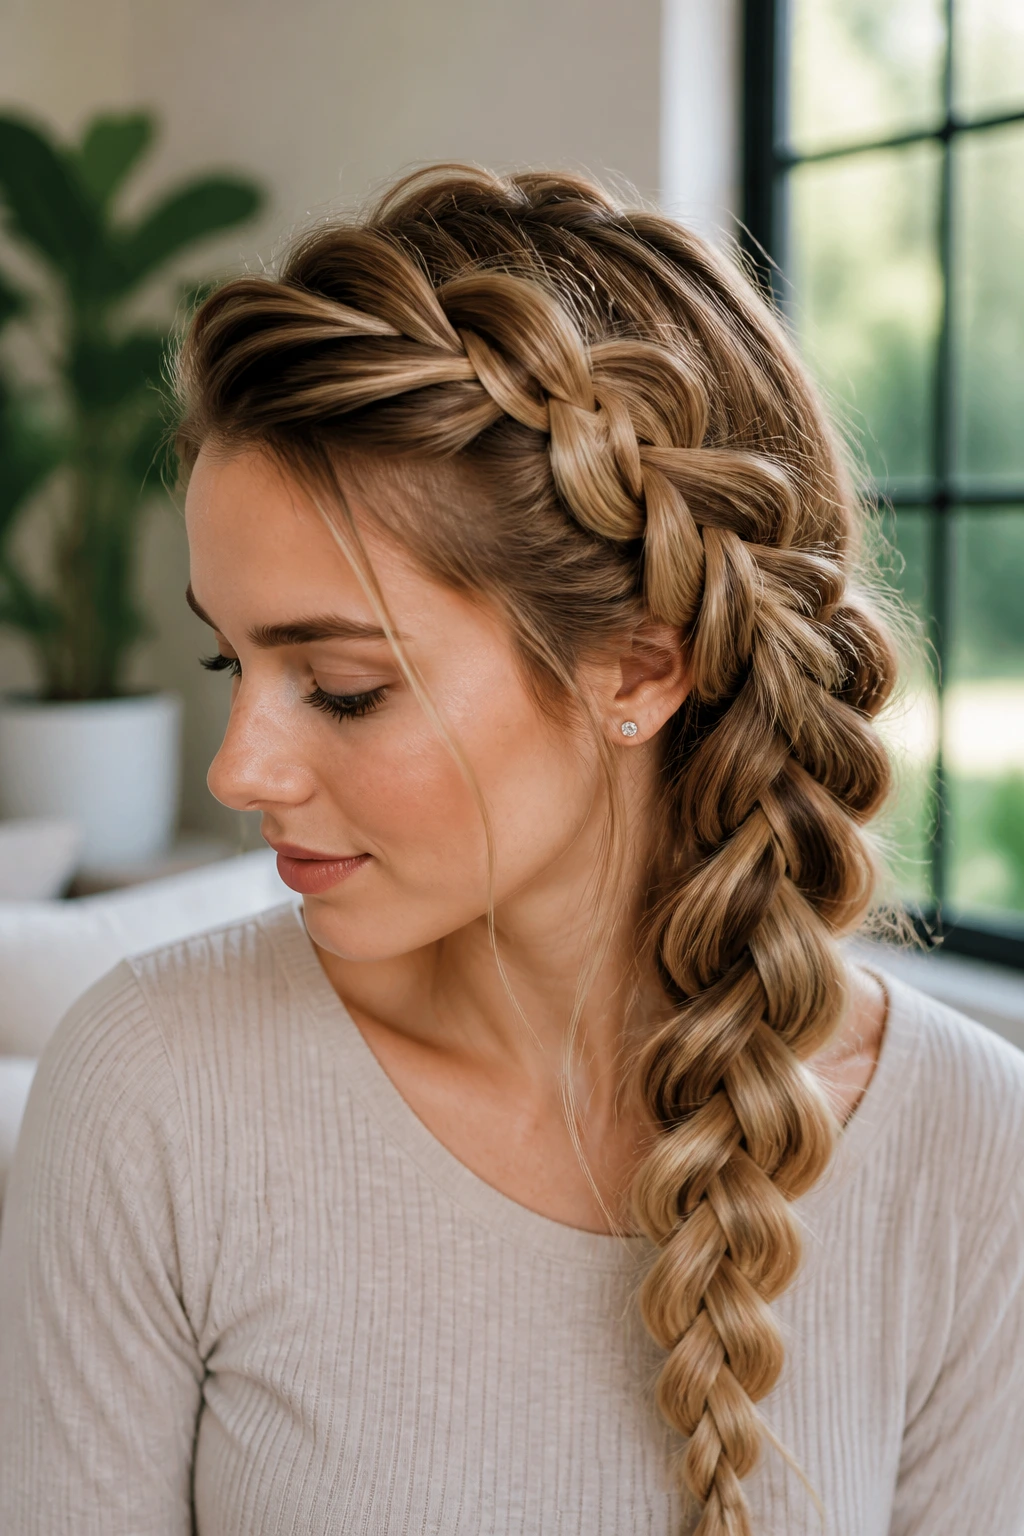
A Dutch braid flips the usual cross-under motion, so the braid sits up from the head instead of sinking into it. On long hair, that raised line is useful. You get definition, volume, and a braid that reads from across the room, not just in the mirror.
This one is especially good if your hair is thick or heavy. The lifted texture keeps the braid from disappearing into the rest of the length. Start at the side part, cross each outer section under the center, and keep adding hair as you move down and back. It sounds fussy. It isn’t, once your fingers learn the rhythm.
The main thing to watch is tension. If you pull too hard, the braid gets stiff and narrow. If you go too loose, the raised effect falls apart. Aim for firm, not tight.
A Dutch side braid pairs well with second-day hair because the slightly rough texture helps the braid hold its shape. Freshly washed hair can work, too, but add a little mousse first.
5. The Fishtail Side Braid
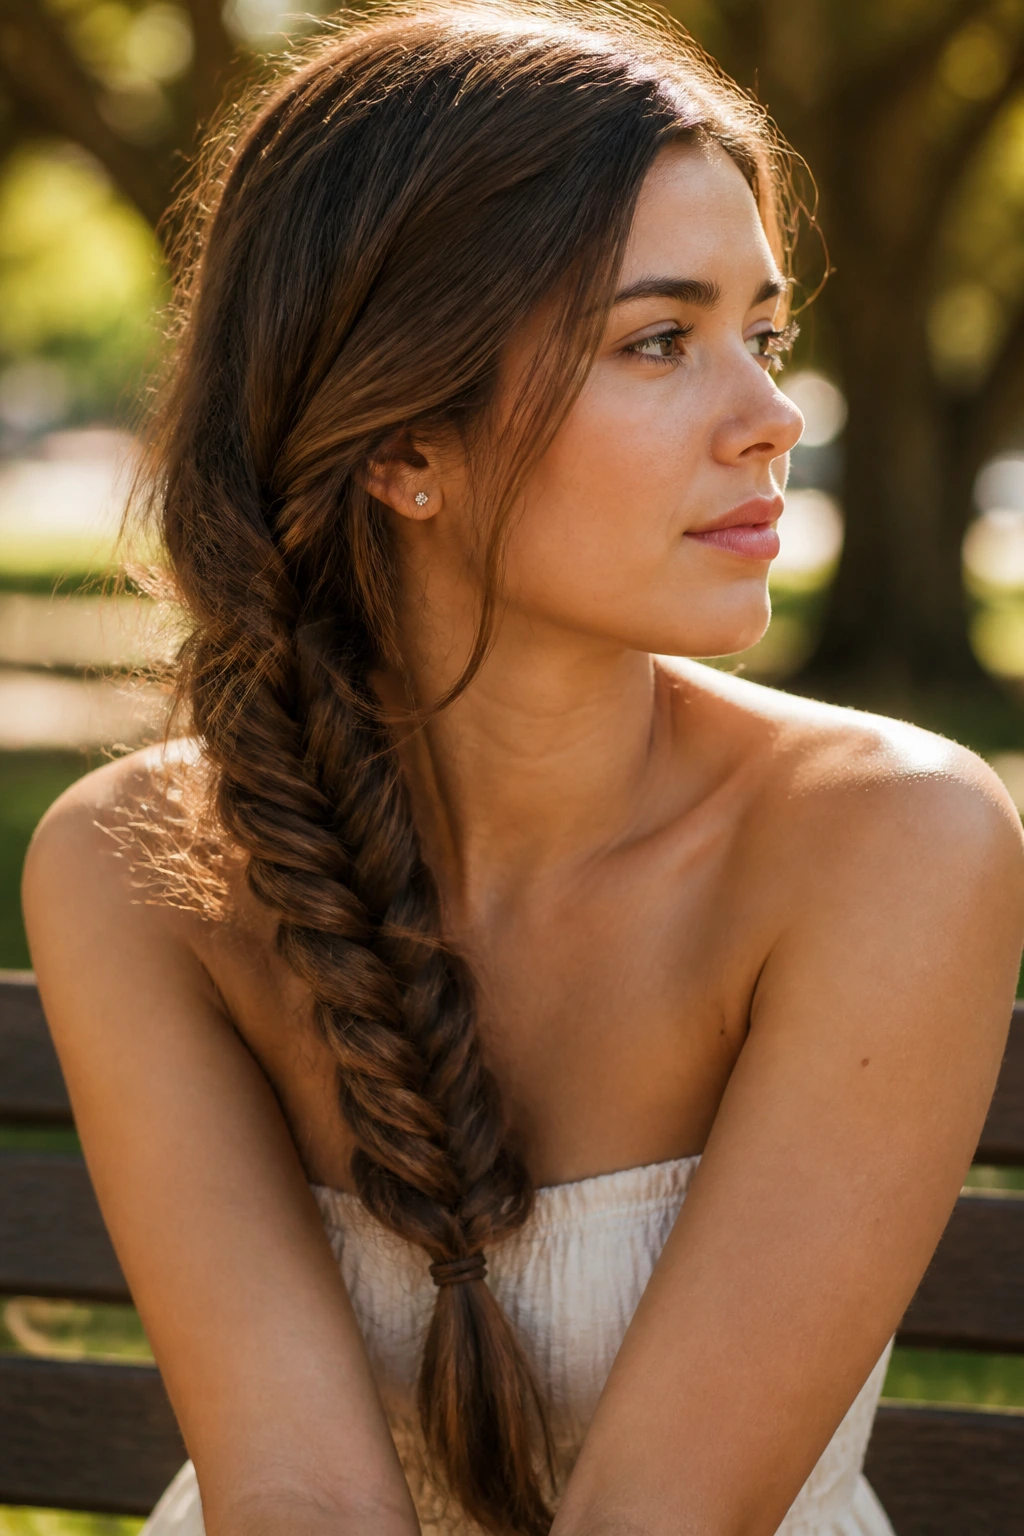
The fishtail braid has a finer, more detailed look than the standard braid, which makes it a smart pick when you want long hair to show off some texture. It isn’t actually hard once you get the hand motion down, but it does ask for patience. Tiny sections. Lots of repetition.
Unlike a three-strand braid, the fishtail only uses two main sections. You keep pulling a small piece from the outside of one section into the other, over and over, until the braid forms that woven, scaled look. On very long hair, that pattern stays visible longer, which is part of the appeal.
What Makes It Different
A fishtail side braid looks better when it’s not too perfect. If every piece is the same size, the braid can look stiff. Let the sections vary a little. That unevenness gives the braid a more natural feel.
- Use a tight starting point near the ear
- Move with small sections, about 1/4 inch at a time
- Pancake the braid gently after tying it off
- Leave the tail a little tapered, not blunt
If your hands cramp, you’re probably taking sections too thick. Smaller is easier here.
6. The Rope-Twist Side Braid
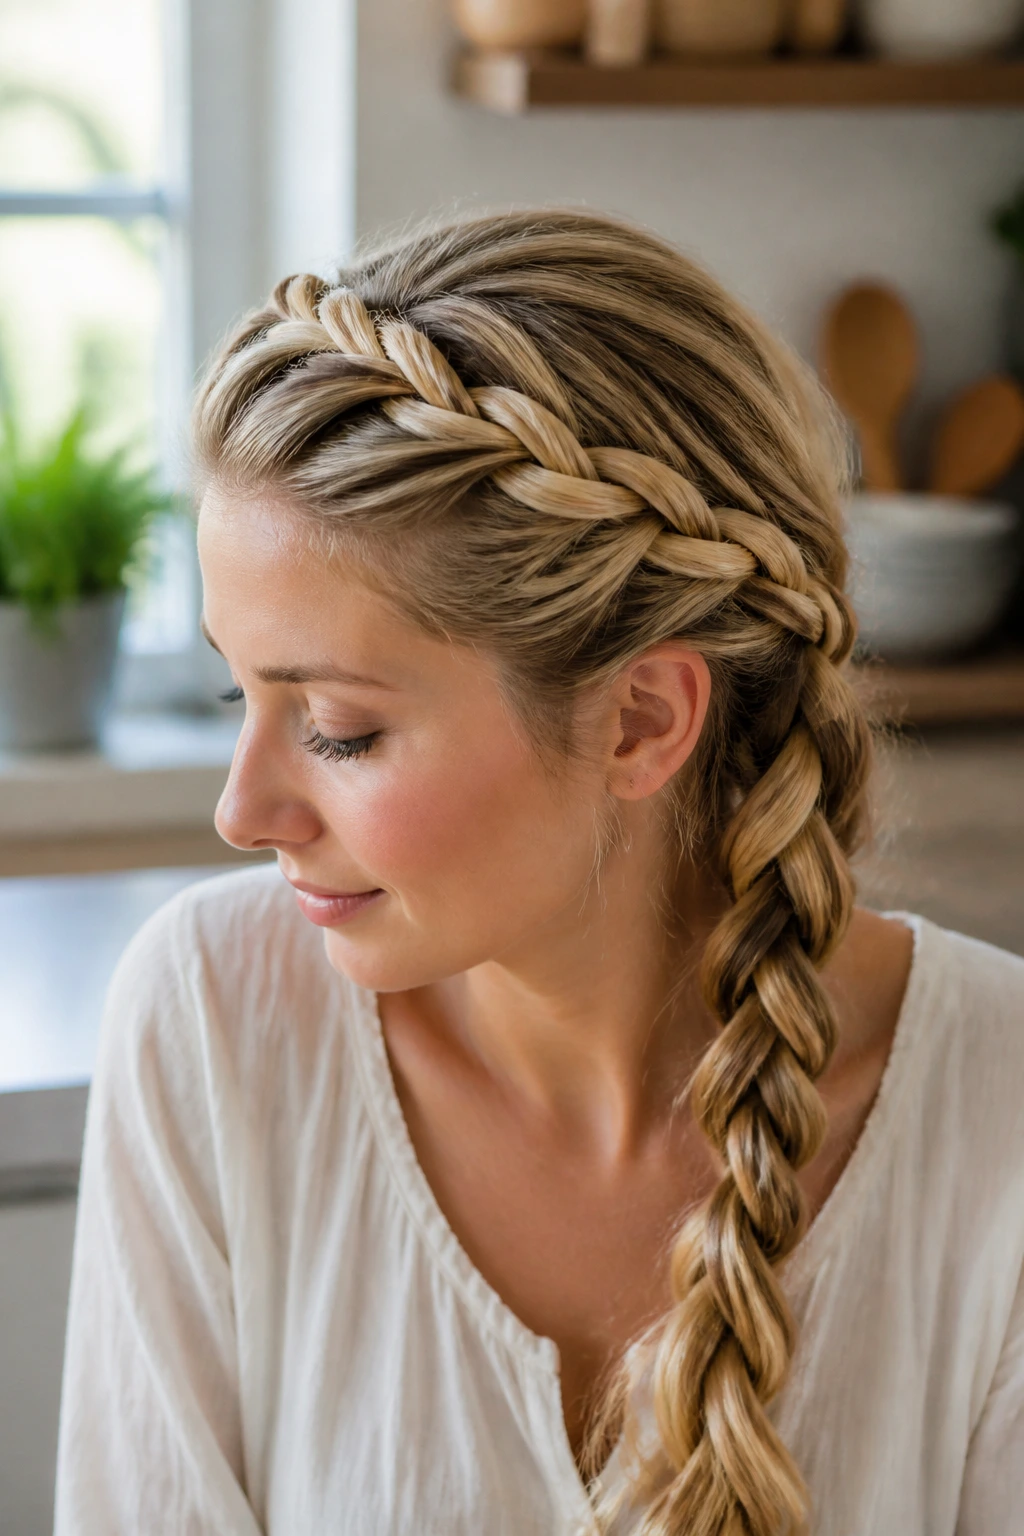
A rope-twist side braid is one of those styles that looks more complicated than it is. Two sections, a twist, and a bit of control. That’s the whole game. Long hair makes the twist look dramatic because the rope-like line stretches farther down the body.
Start with two equal sections and twist each one in the same direction before wrapping them around each other in the opposite direction. That opposite motion is what keeps the braid from spinning apart. If you forget that part, the whole thing relaxes fast. Frustrating, but fixable.
This style is a nice option when your hair is smooth and slippery. A rope twist grips better than a loose three-strand braid, especially if you’ve used a light texturizing spray first. It also dries quickly if your hair is still slightly damp after washing.
You can wear it tidy for work or tug it apart a little for a softer look. Both versions use the same basic structure. The difference is in how much you loosen the twist at the end.
7. The Pull-Through Side Braid
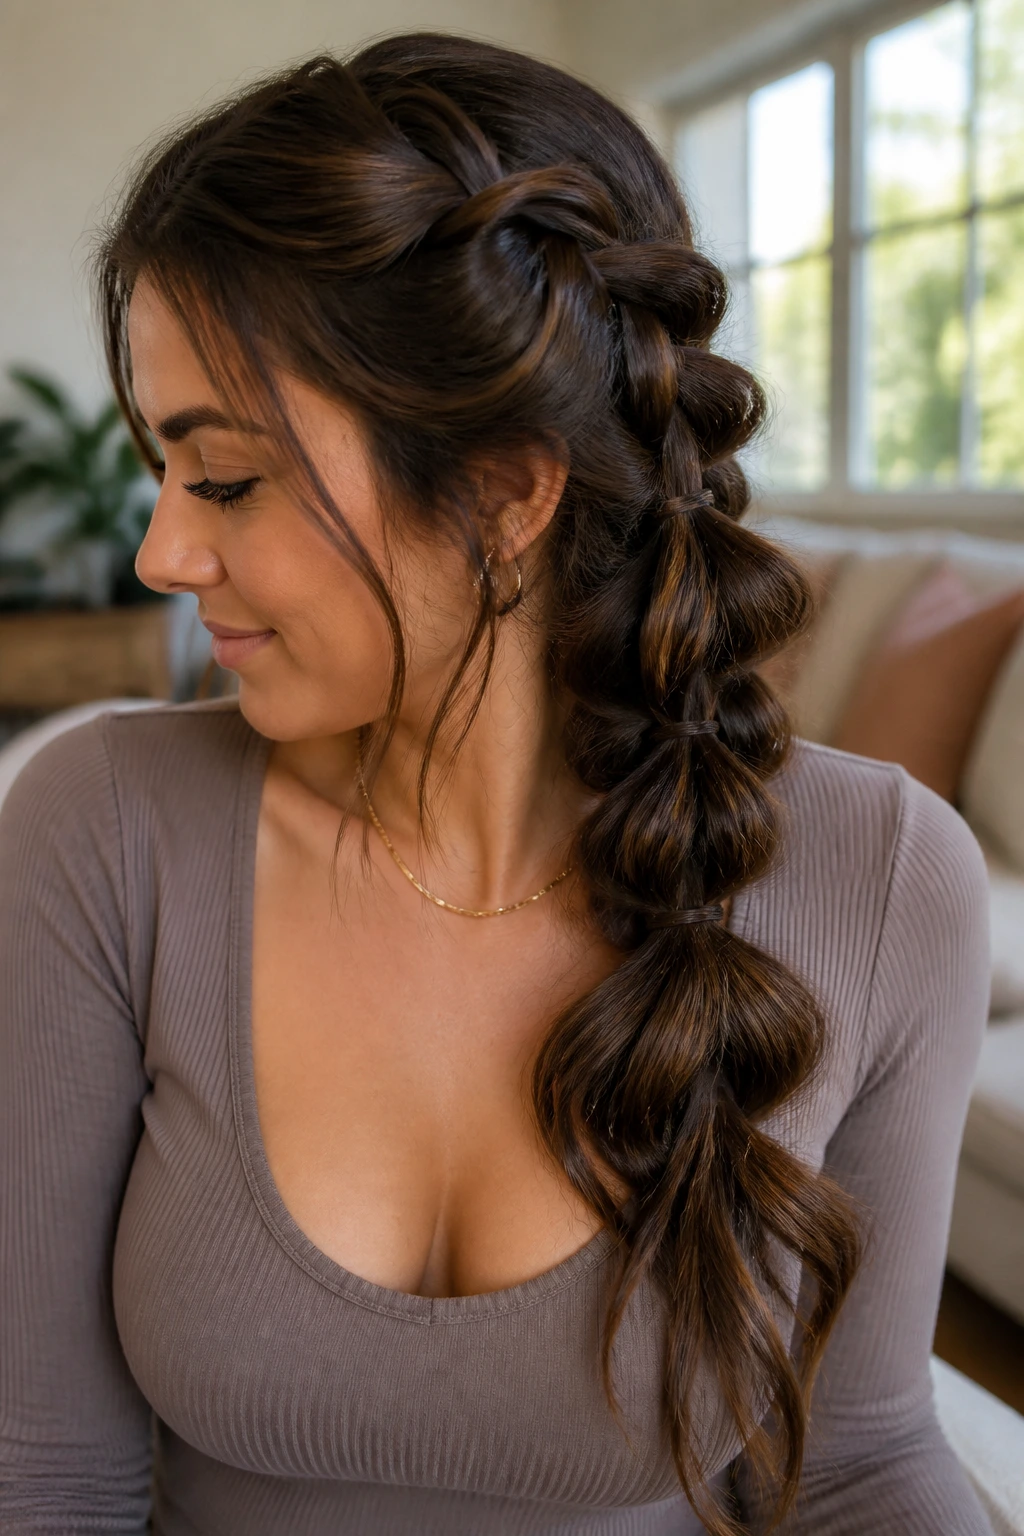
If your hair is long, thick, or hard to hold in a traditional braid, the pull-through braid is a relief. It isn’t a braid in the classic sense. It’s a chain of ponytails pulled through one another, which gives you a full, structured side braid without needing three-strand finger work.
That makes it ideal for layered hair that keeps escaping a regular braid. You create small ponytails down one side, then split each section and pull the next ponytail through the opening. It’s easier than it sounds, and the volume is almost unfair.
How to Use It Well
Keep the elastics small and close in color to your hair. Bright ties show through the gaps and make the style look clunky. A little edge-smoothing cream near the part can help, but don’t overload the roots.
- Great for very long or thick hair
- Creates a bigger braid shape fast
- Holds better than a loose braid in wind
- Takes more elastics than a standard braid
It’s not the quickest style to set up, but it pays off if you want a braid that looks full all the way down.
8. The Waterfall Side Braid
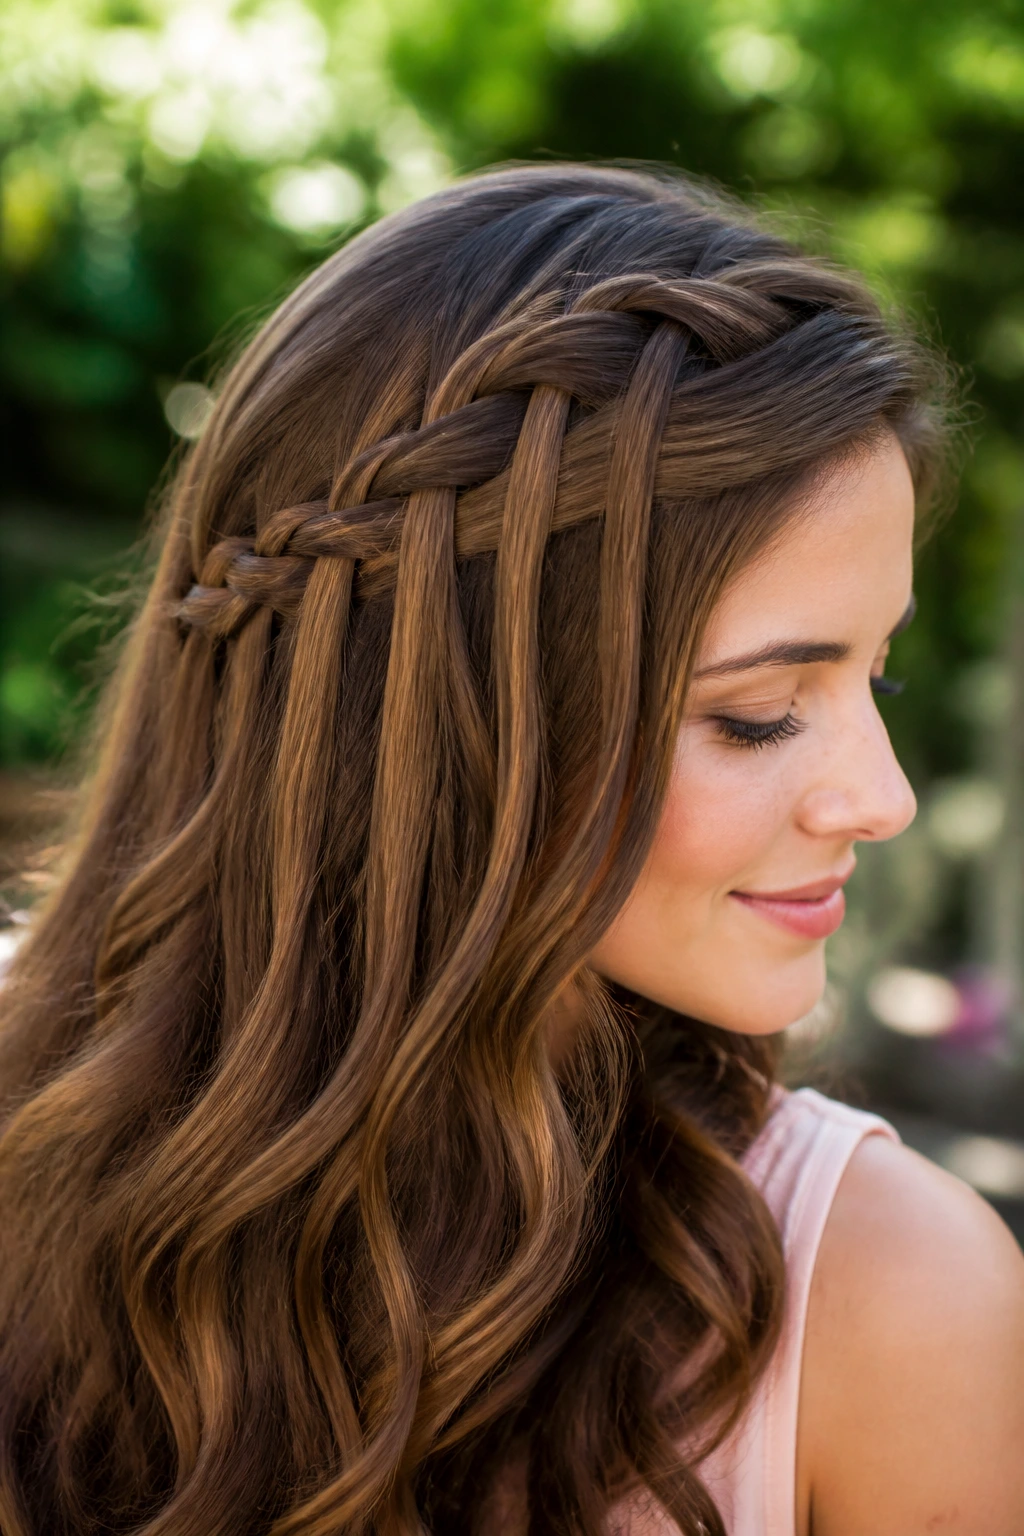
A waterfall braid is the style people notice when they want something pretty but not stiff. One strand drops through each pass, which leaves a little ribbon of hair flowing underneath the braid. On long hair, that falling section looks especially nice because there’s enough length for it to show.
This braid is usually built across the side of the head and then finished into loose hair or a second braid lower down. It’s half braid, half display piece. Good thing. The point is to let the hair breathe a little instead of locking everything into one solid woven rope.
The cleanest result comes from smooth sectioning at the top and a gentle hand as you release each dropped piece. If the braid looks tangled, the sections were probably too thick. Keep them narrow, and don’t overdo the tension.
A waterfall side braid works well for events, but it also suits days when you want long hair to stay down and still feel styled.
9. The Lace Braid That Follows the Hairline
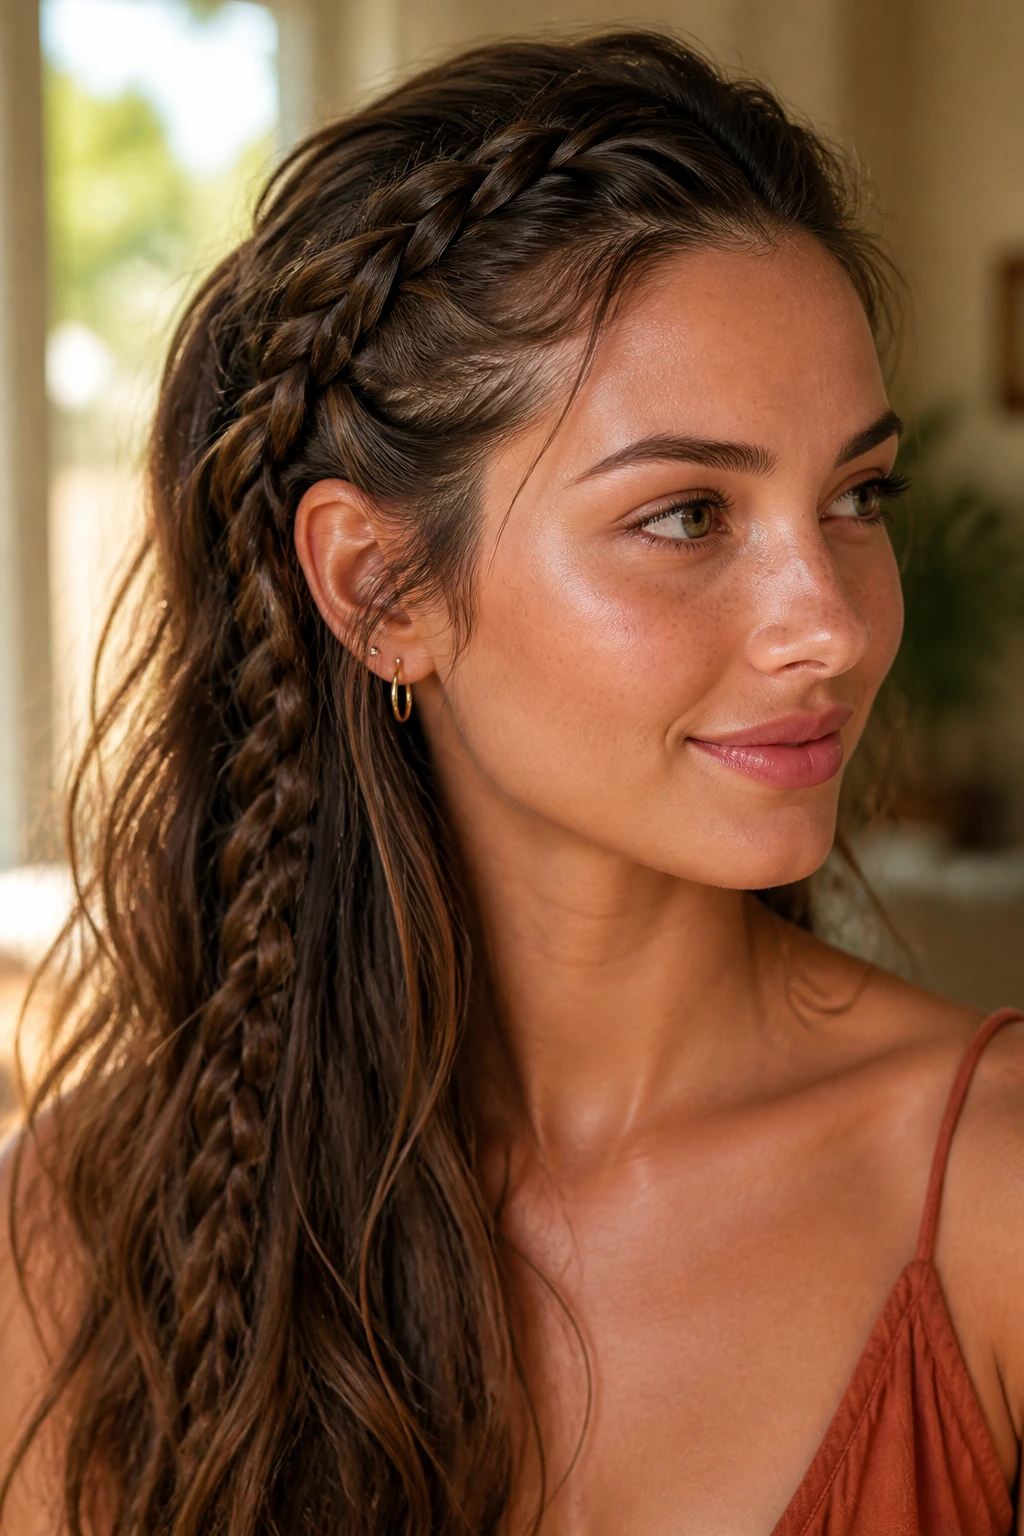
A lace braid is a close cousin of the French braid, but it only adds hair from one side as it moves along the head. That makes it perfect for a side-swept look, because the braid hugs the hairline and then releases into the rest of the length without stealing the show.
This one is especially useful when you want to keep hair off one cheek or control a heavy front layer. It gives shape without forcing a full updo. Start near the temple, keep adding hair from the top side only, and guide the braid down toward the side of the neck.
What to Watch For
If the braid starts curving too far back, you’re adding hair too high. Keep the growth line low and natural. That helps the braid sit where the eye expects it.
A lace braid pairs well with soft waves in the rest of the hair. Straight hair can make the contrast look sharp, which is fine if that’s what you want, but a small bend in the lengths makes the braid feel less severe.
10. The Side Braid Ponytail
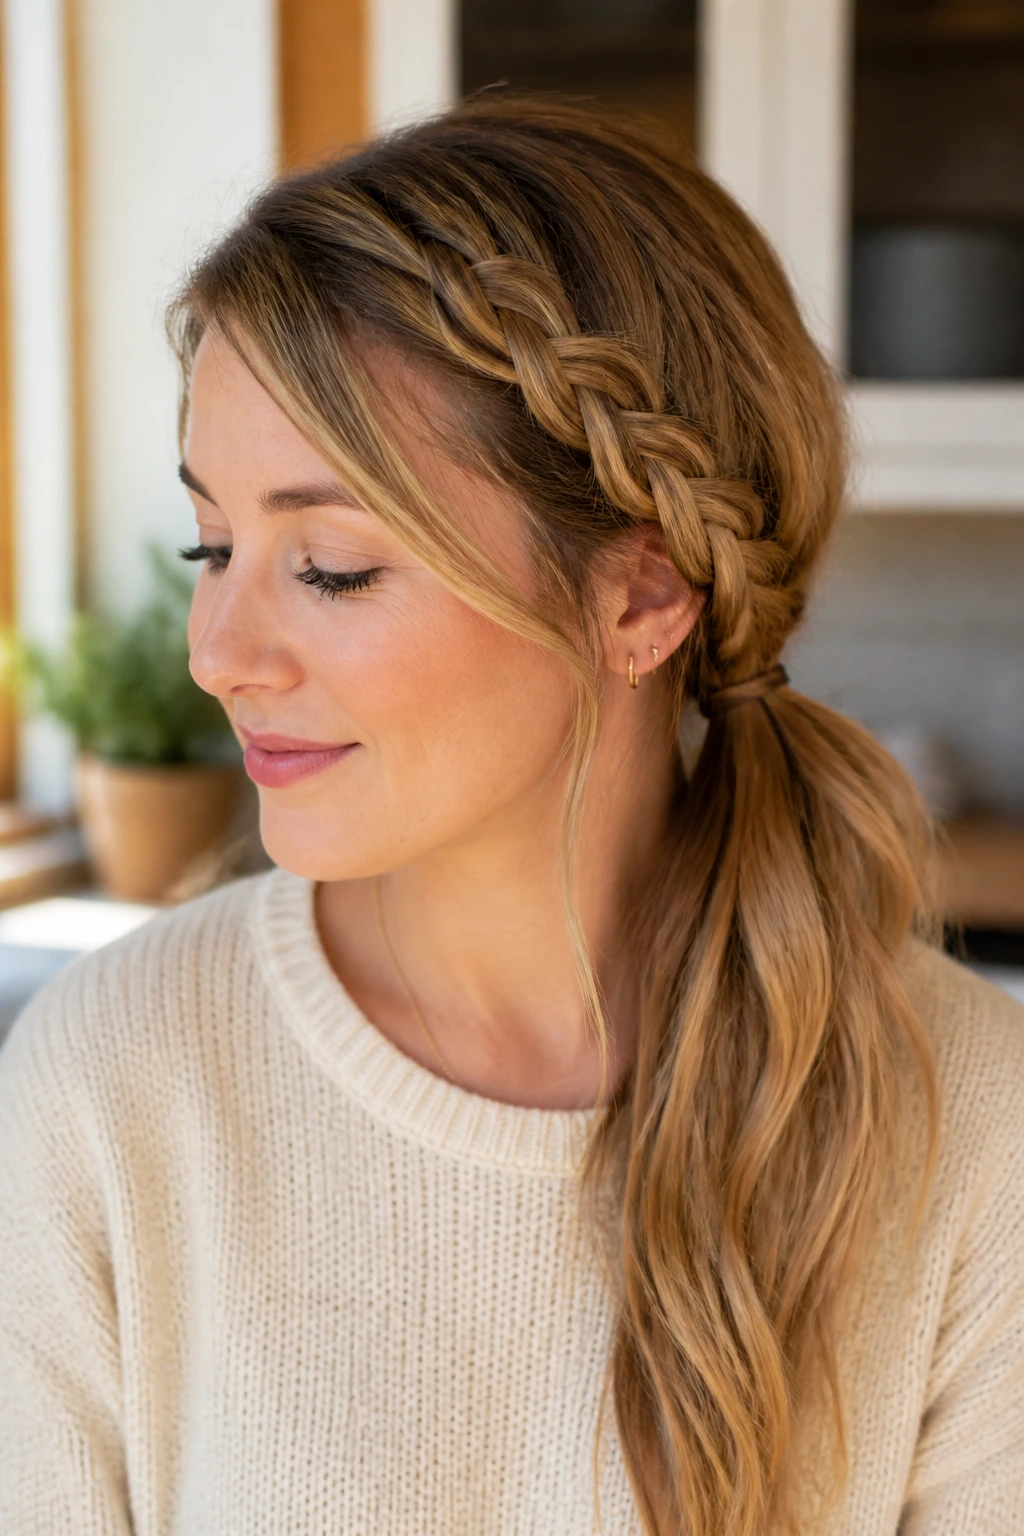
This style is practical, and I mean that as praise. A side braid ponytail gives you the hold of a ponytail with the detail of a braid, so long hair stays put without looking plain. It’s a strong choice for long days, errands, and anything that ends with you wanting your hair out of the way.
You can braid the side section first, then gather everything into a low ponytail, or you can braid the ponytail itself after securing it. Both work. The first version feels more shaped. The second gives the braid more length to show off.
The key is placement. Put the ponytail low enough that it still reads as side-swept, not centered. A wrapped elastic or a small strand of hair around the base makes the finish look cleaner. Not fancy. Just cleaner.
If your hair is thick, use two elastics stacked together at the base. One elastic often stretches too fast and lets the ponytail sag.
11. The Side Braid Into a Low Bun
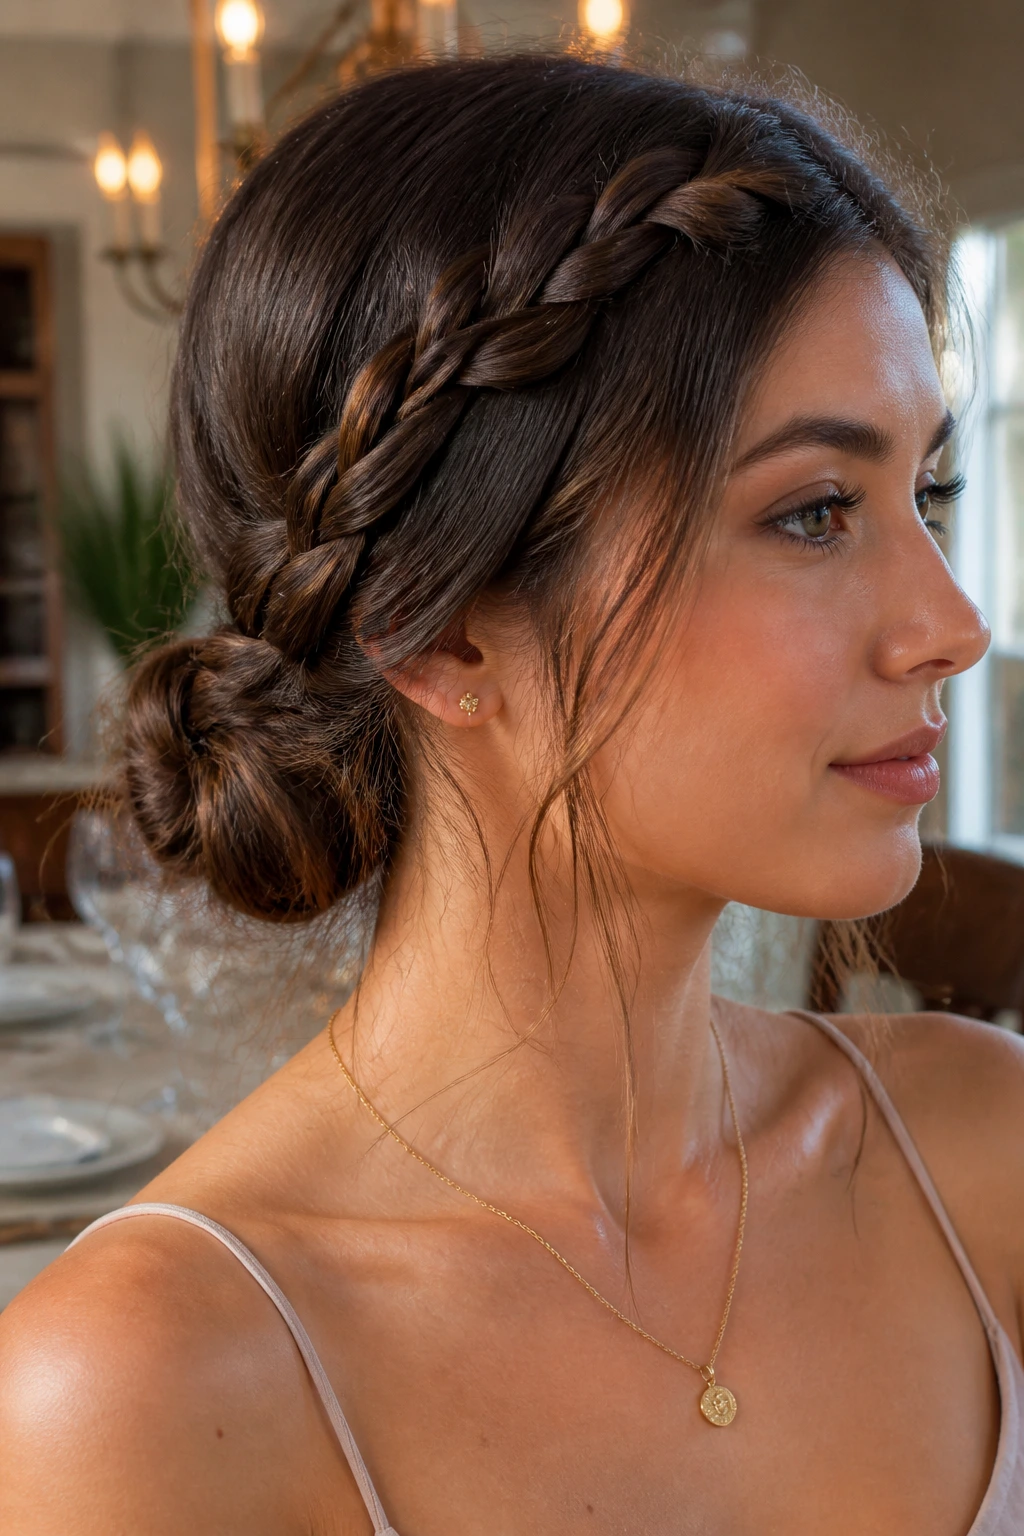
This is a good one when you want the braid to end in something neat. The side braid carries the eye downward, then tucks into a low bun near the nape. You get texture on one side and a secure finish at the base of the neck.
It works especially well on long hair because the braid gives you plenty of material to wrap. Start the braid behind one ear, keep it snug through the middle, then twist the tail into a bun and pin it flat with two or three bobby pins crossing each other. If the bun feels bulky, coil the braid tighter before pinning.
A little shine cream on the surface helps here. The bun will look smoother, and the braid won’t puff out as much at the ends. That matters if your hair is very thick, because thick braid ends can stick out like a stubborn tail.
This style is tidy enough for formal settings but not so stiff that it feels precious.
12. The Braided Side Chignon
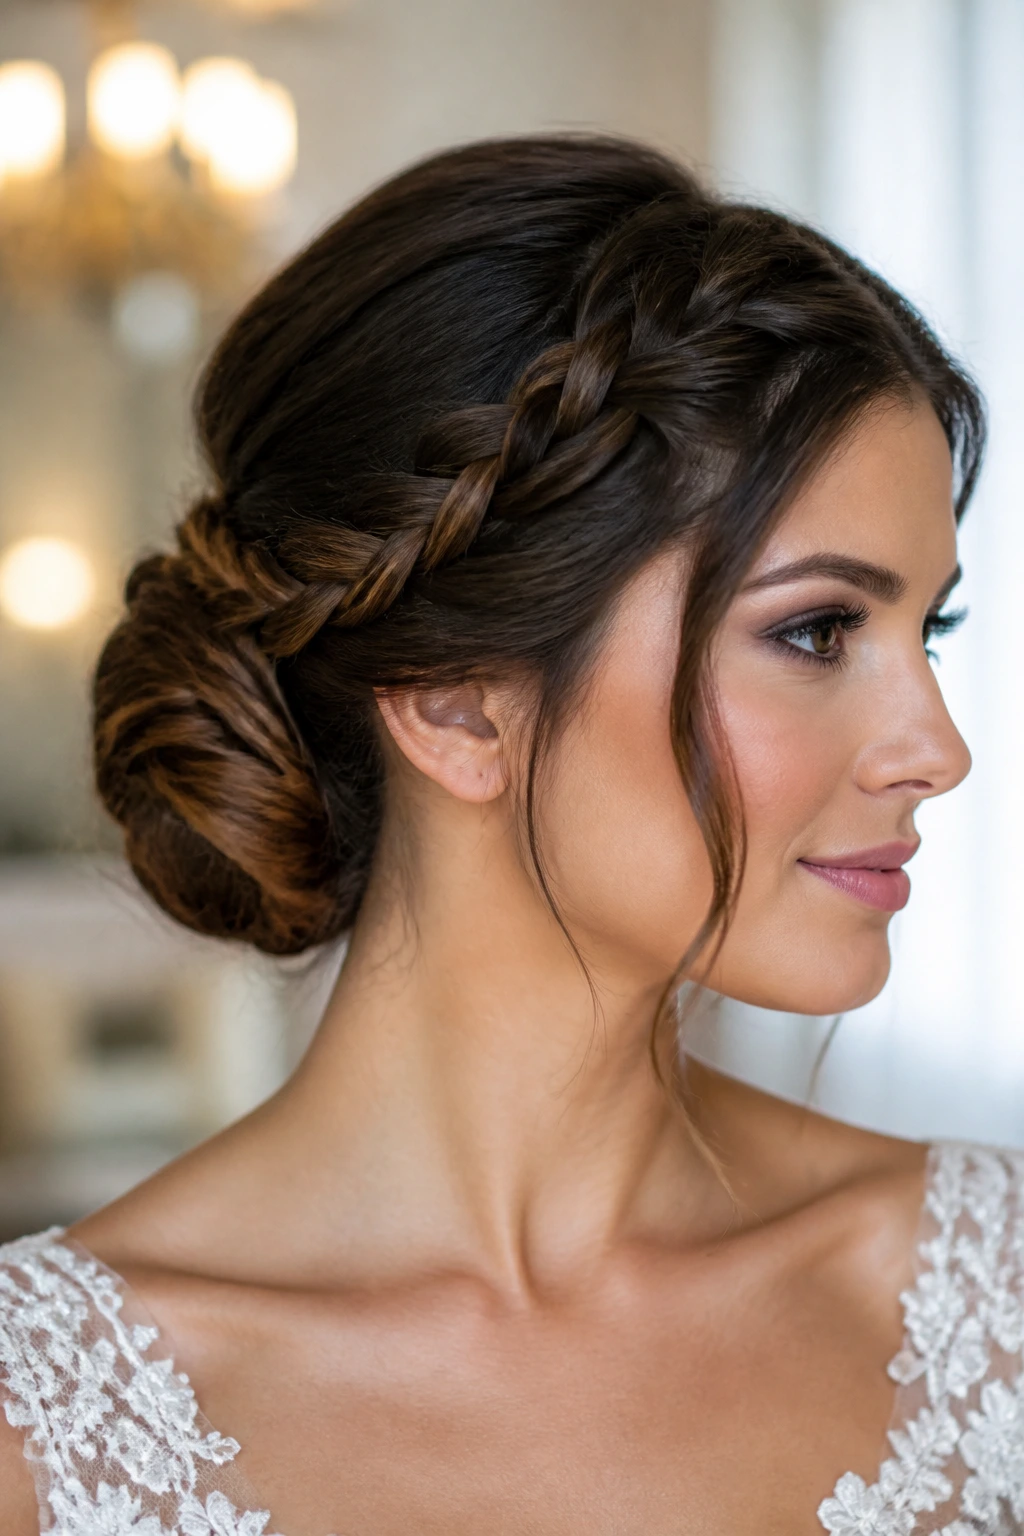
A side chignon has a more elegant shape than a basic bun. The braid winds into a low knot tucked to one side, usually just below the ear or slightly behind it. On long hair, the extra length gives the chignon more body, which keeps it from looking flat.
The nicest thing about this style is the line it creates. The braid gives you texture, then the chignon gives you a finished shape. It looks deliberate, and that’s why it works for weddings, dinners, or any time you want the hair to feel dressed up without wearing a full updo.
Keep the braid smooth at the start and a little softer toward the end. That contrast helps the bun look fuller. If needed, pancake the braid lightly before wrapping it, but don’t pull so hard that the sections lose shape.
A side chignon holds better with pins placed in an X pattern. One pin alone tends to slide out once the weight of long hair starts to settle.
13. The Crown Braid Swept to One Shoulder
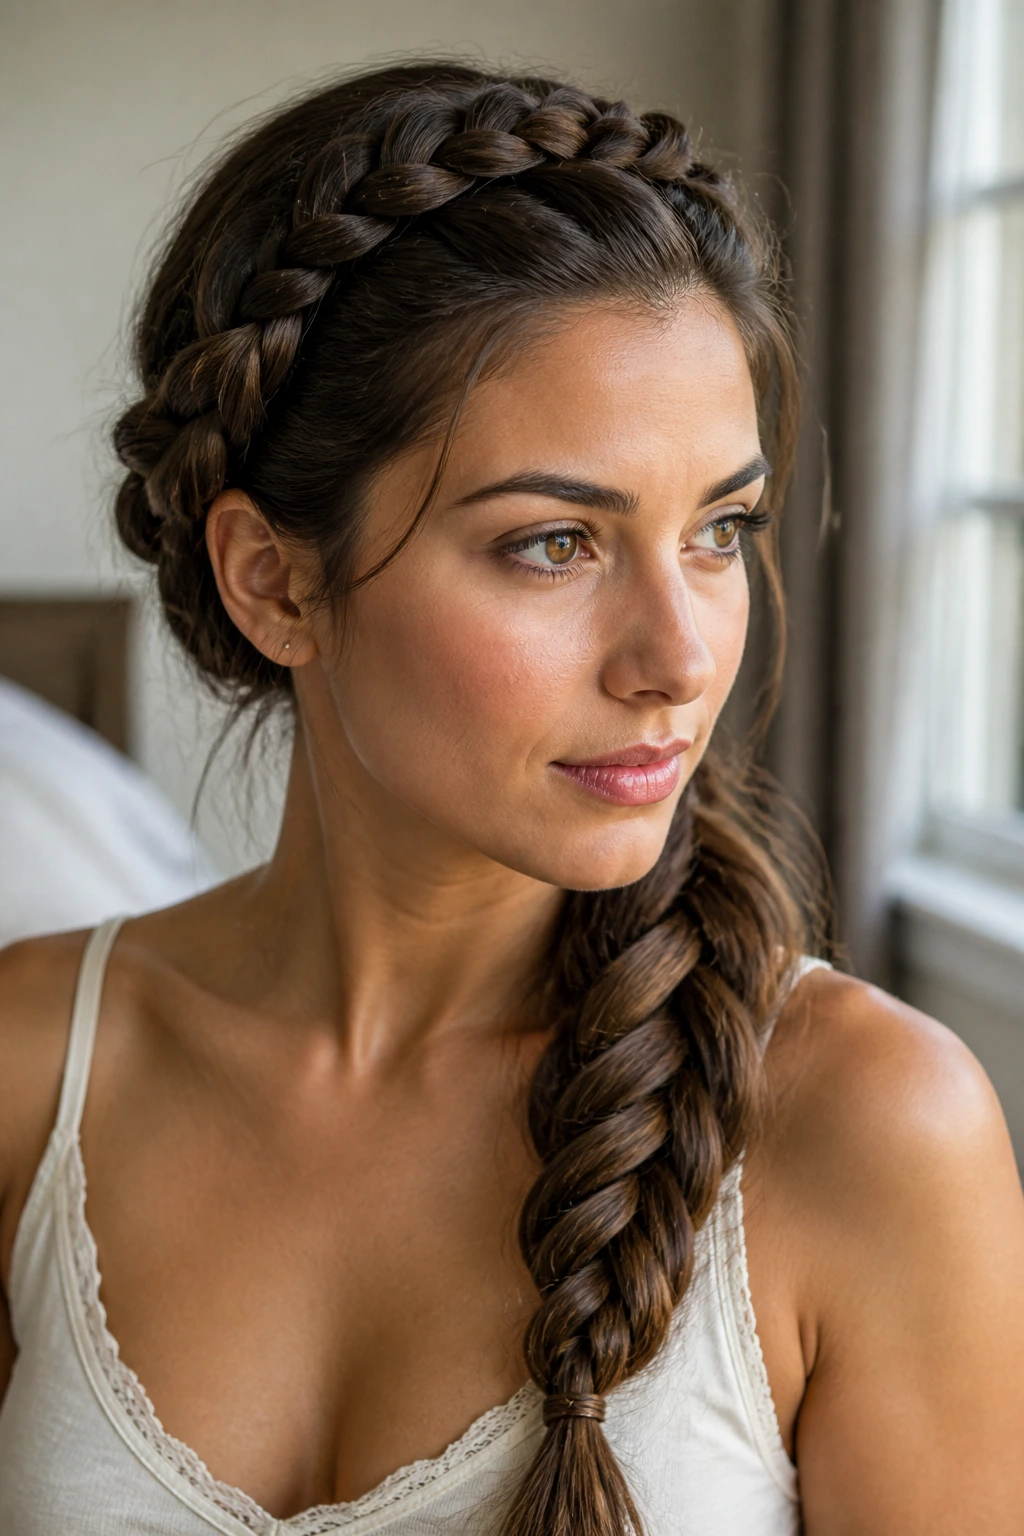
A crown braid that ends over one shoulder has a nice balance: the head gets the structure, the shoulder gets the drama. The braid travels around the hairline or slightly above it, then drops to one side instead of closing into a full crown.
That makes it useful for long hair because the braid itself becomes part of the shape, not just a border. You can keep it polished and close to the scalp or make it a little softer and more lived-in. Both versions feel good, but the cleaner one shows the braid pattern better.
Best Way to Wear It
If your hair is very heavy, anchor the braid with a few hidden pins behind the ear before letting it sweep forward. Otherwise the weight can pull the crown section down.
- Keeps hair off the face
- Shows off long lengths at the shoulder
- Works well with earrings or a high neckline
- Can be tightened for formality or loosened for a softer look
It’s one of the few braided styles that feels balanced from every angle.
14. Double Side Braids Merged Into One
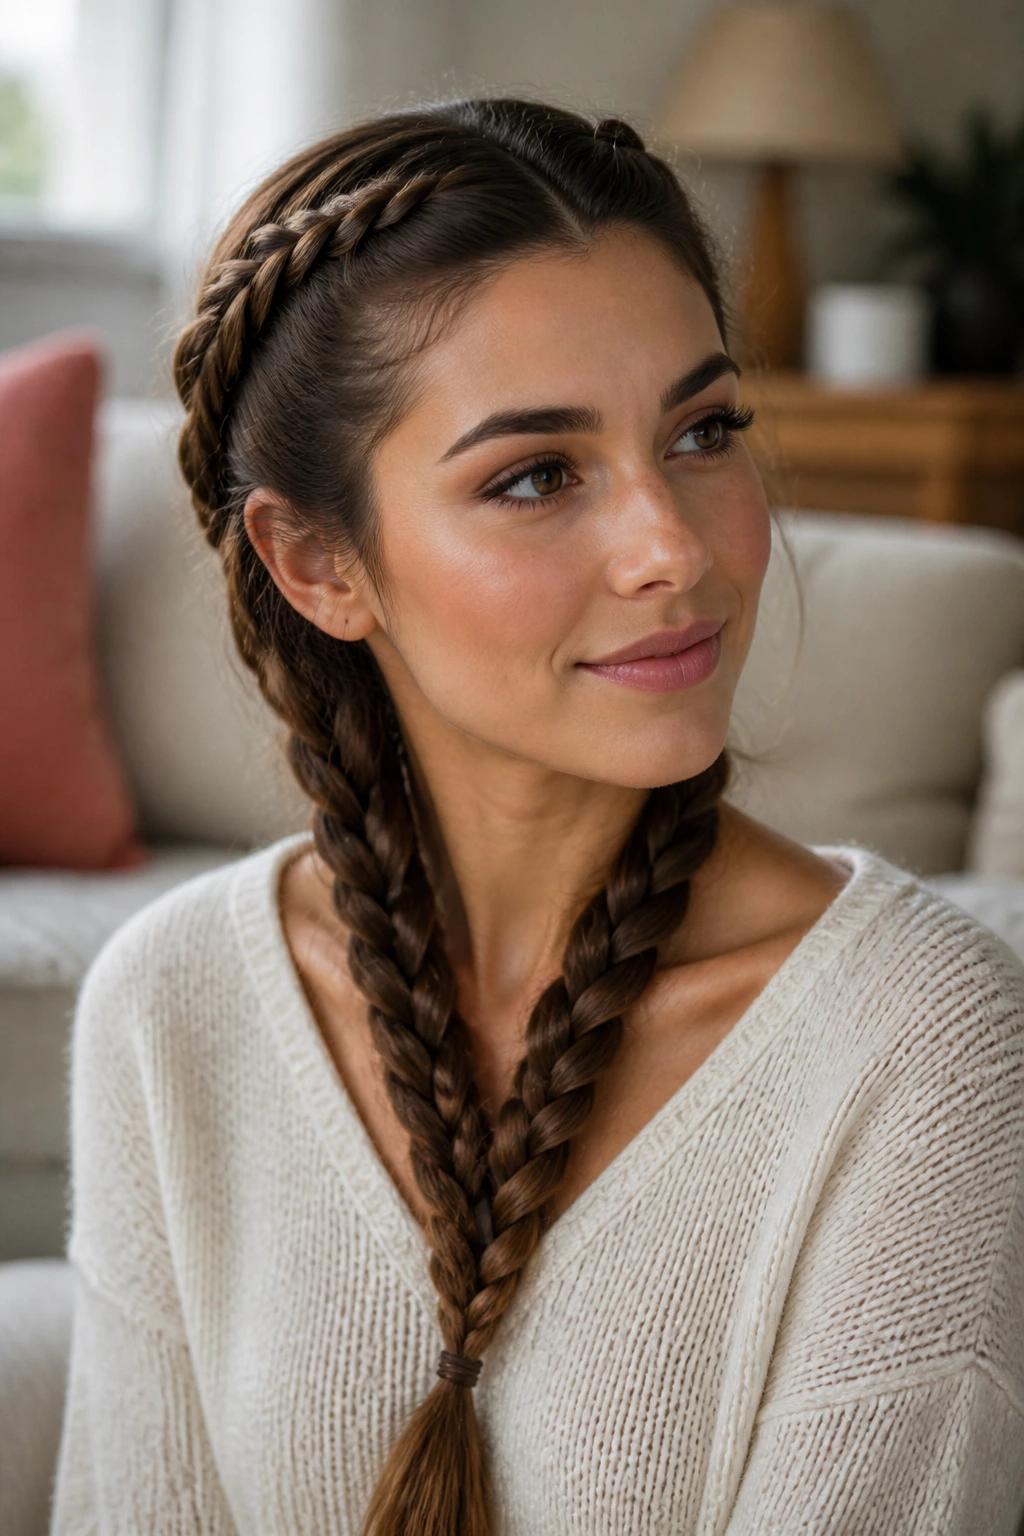
Two braids turning into one sounds a little extra, and that’s why it’s fun. You split the hair into two side sections near the front, braid each section briefly, then merge them into a single braid lower down. The result looks layered and a little unexpected.
This style works best on long hair because the transition has room to breathe. On shorter lengths, the merge can look cramped. Here, the extra length makes the style read clearly. The top section breaks up the hair visually, and the lower braid brings everything together.
The main thing to watch is symmetry. The two starter braids should be close in size so one doesn’t swallow the other. If one side looks much smaller, the merge gets lopsided and the whole style feels off.
A small ribbon or clear elastic can mark the join if you want the transition to look intentional. I like that detail. It keeps the braid from seeming like it changed its mind halfway through.
15. The Chunky Pancaked Side Braid
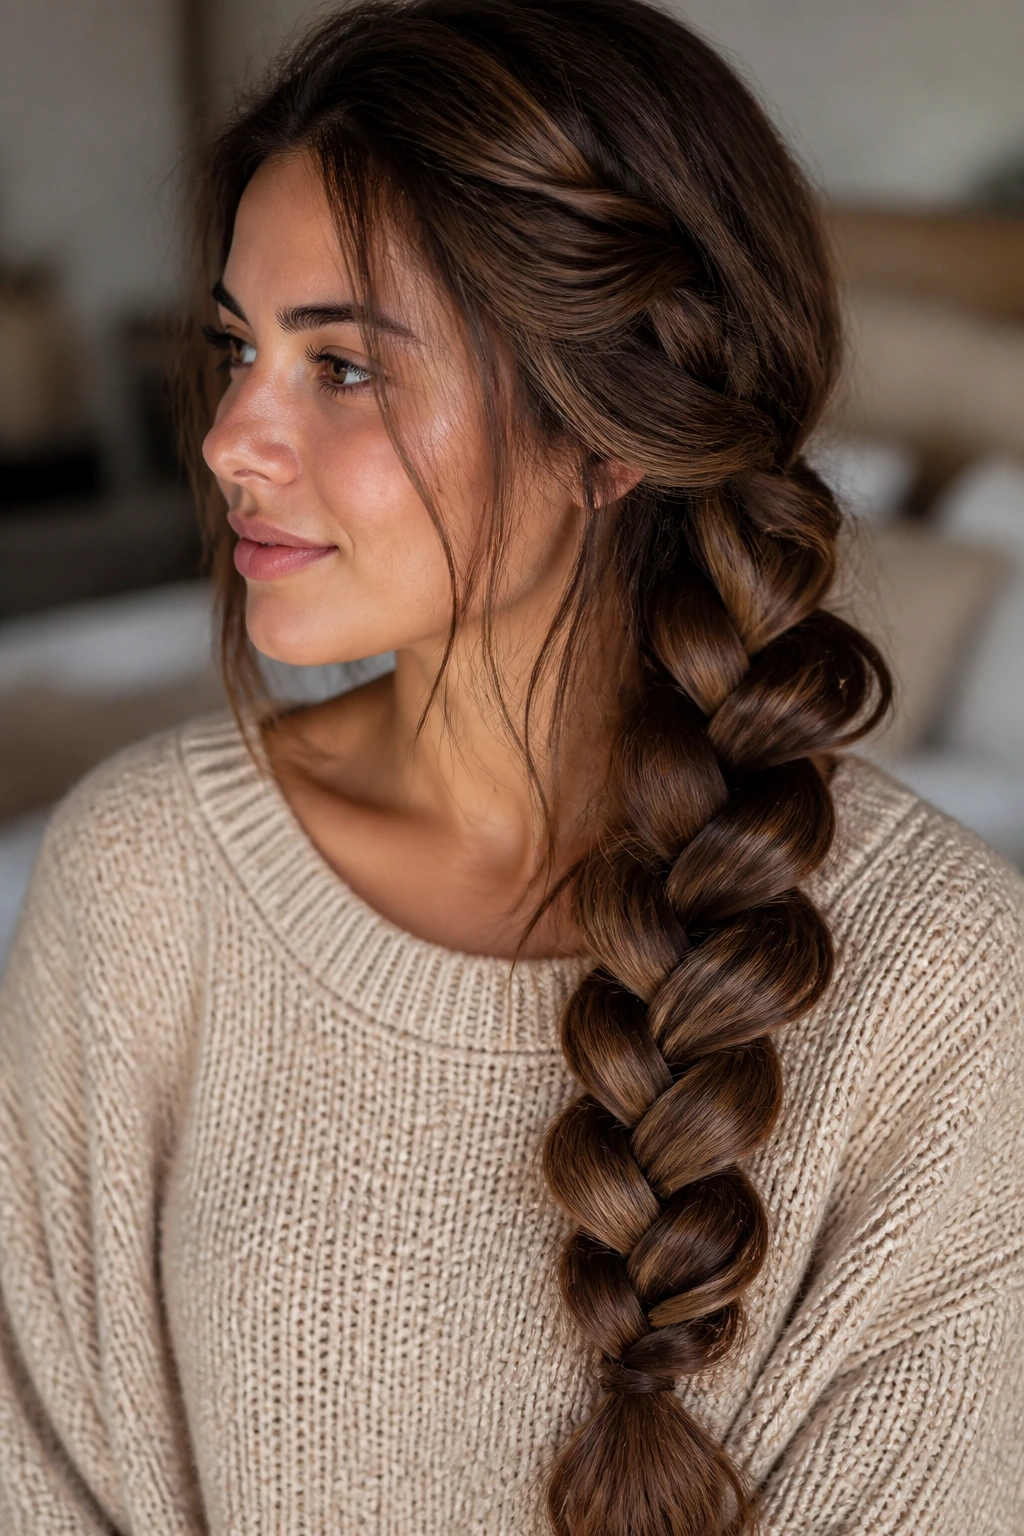
This is the braid that looks big on purpose. A chunky side braid gets wider because you braid it normally first, then gently pull at the edges of each section so the braid spreads out like folded fabric. Long hair gives you the raw material for that fullness.
The word pancake sounds odd here, but it fits. You’re flattening and widening the braid’s surface, not smashing it. Pull from the outer edges only, little by little, or the braid collapses into fuzz. That’s the line between full and frizzy.
This style suits thick hair, but fine hair can wear it too if you prep the roots with texture spray first. Without that, the loosened sections may fall apart too fast. A light mist of hairspray at the end helps lock the shape.
A chunky side braid looks especially good with sweaters, open collars, and anything that benefits from a little softness near the shoulder. It has presence.
16. The Skinny Accent Side Braid
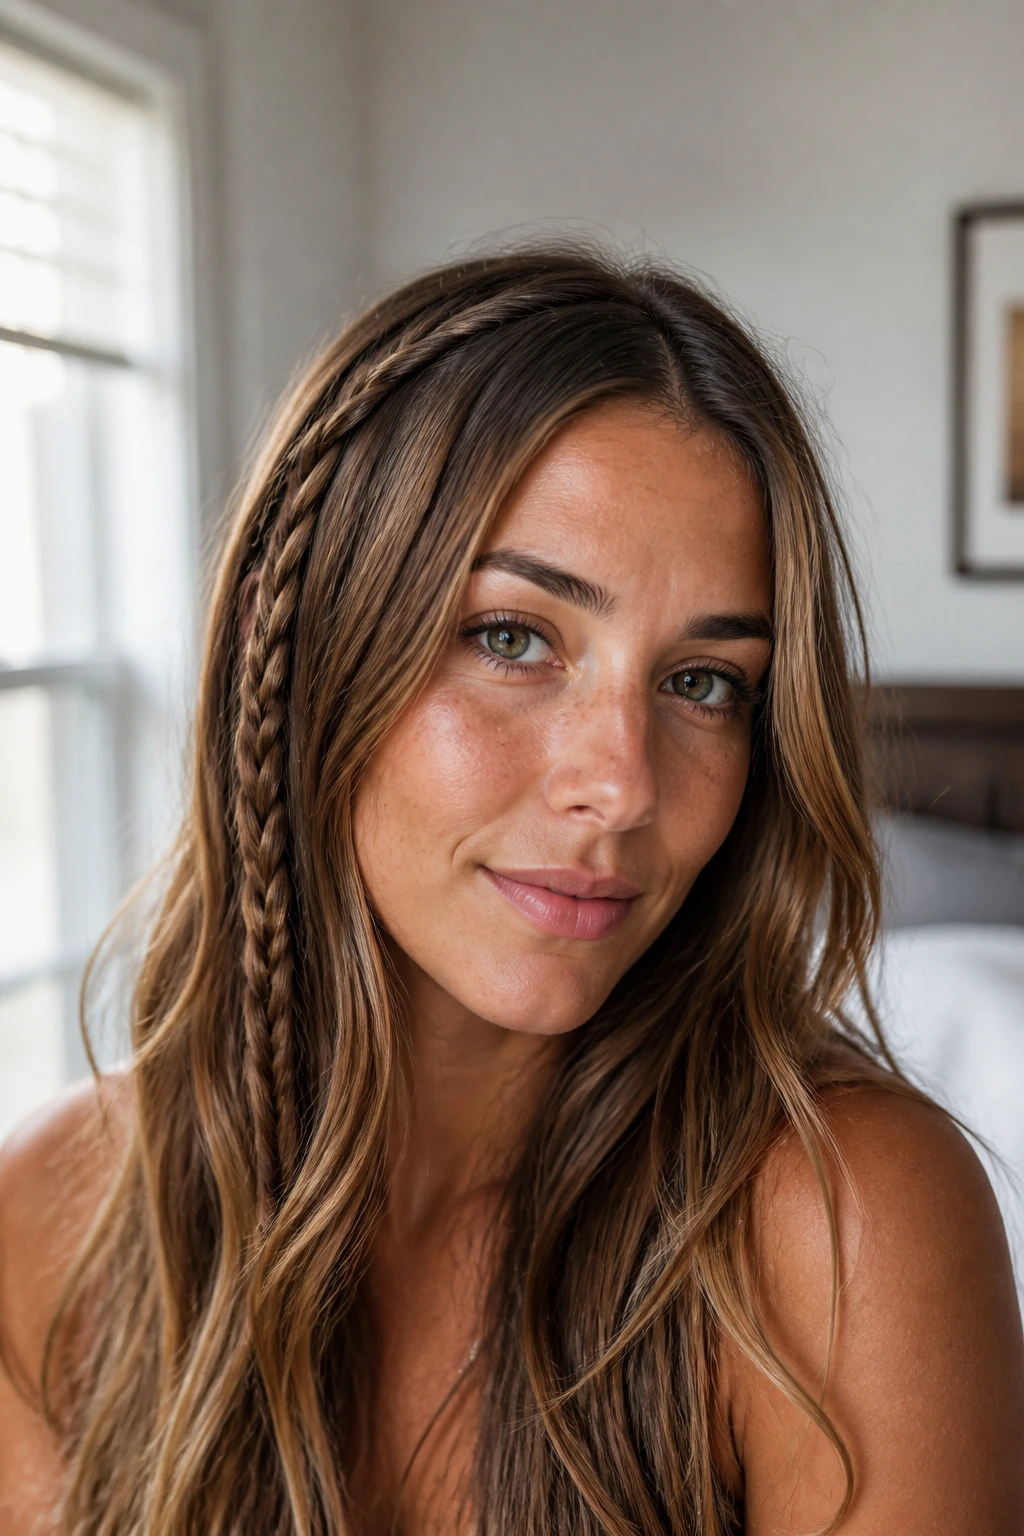
Sometimes one small braid does more than a full head of hair. A skinny accent side braid runs through the front or side section and blends into the rest of the hair, which keeps the look light and easy. It’s less about control, more about detail.
This works well when your long hair is already wavy or curled and you don’t want to hide that texture. Pick up a thin section near the part, braid it tightly, then pin or tuck it into the larger side sweep. The braid should feel like a line, not a separate hairstyle.
A skinny braid is also useful when you’re trying to manage one stubborn front layer. Instead of fighting it, braid it. Done. The rest of the hair can stay loose.
If you want more grip, rough up that small section with dry shampoo first. Tiny braids slip faster than people expect, especially if the hair is silky. A pin hidden behind the ear usually solves it.
17. The Ribbon-Woven Side Braid
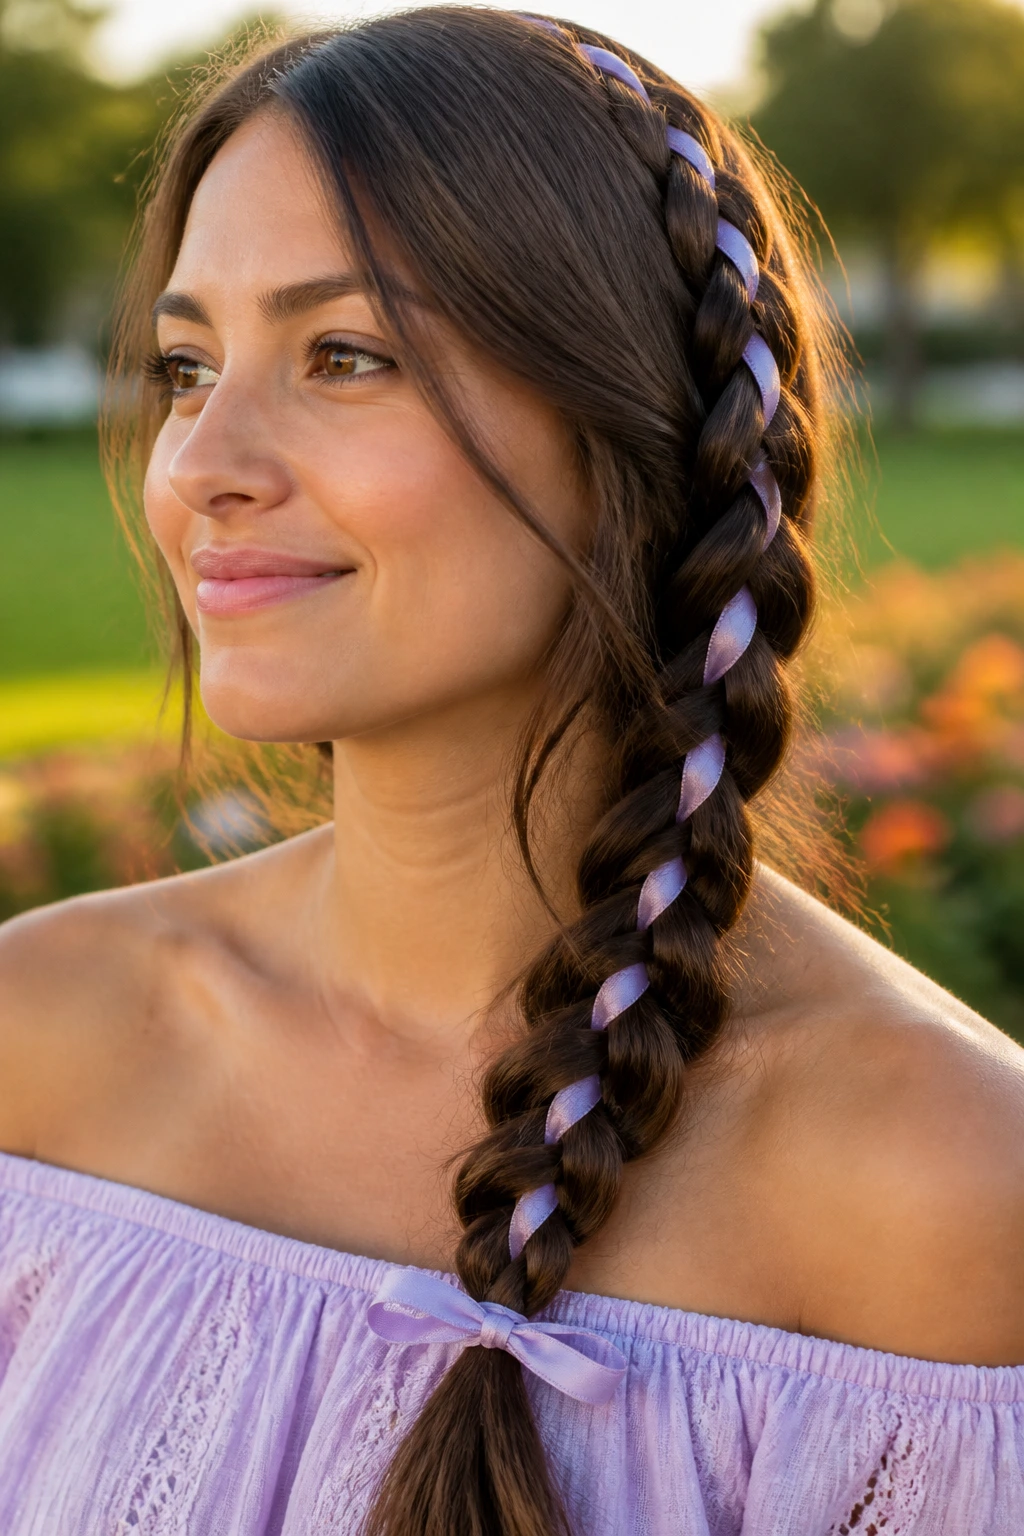
A ribbon-woven braid changes the whole feel of a side braid with one small addition. Instead of using only hair, you weave in a narrow ribbon, usually satin or grosgrain, so the braid picks up color and texture as it moves down the shoulder. Long hair gives the ribbon enough space to show.
Choose a ribbon that is about 1/4 to 1/2 inch wide. Anything wider gets bulky fast. Thread it into the first section and braid it as if it were part of the hair. The ribbon should sit flat, not twist into a knot every few inches. That usually means keeping your hands steady and not rushing the crossovers.
This style is good when you want a side braid to feel a little dressed up without adding pins or fancy accessories. The ribbon does the talking.
I prefer this one on plain outfits. A simple shirt or dress gives the braid room to stand out. If the outfit is already busy, the ribbon can look scattered instead of intentional.
18. The Scarf-Wrapped Side Braid
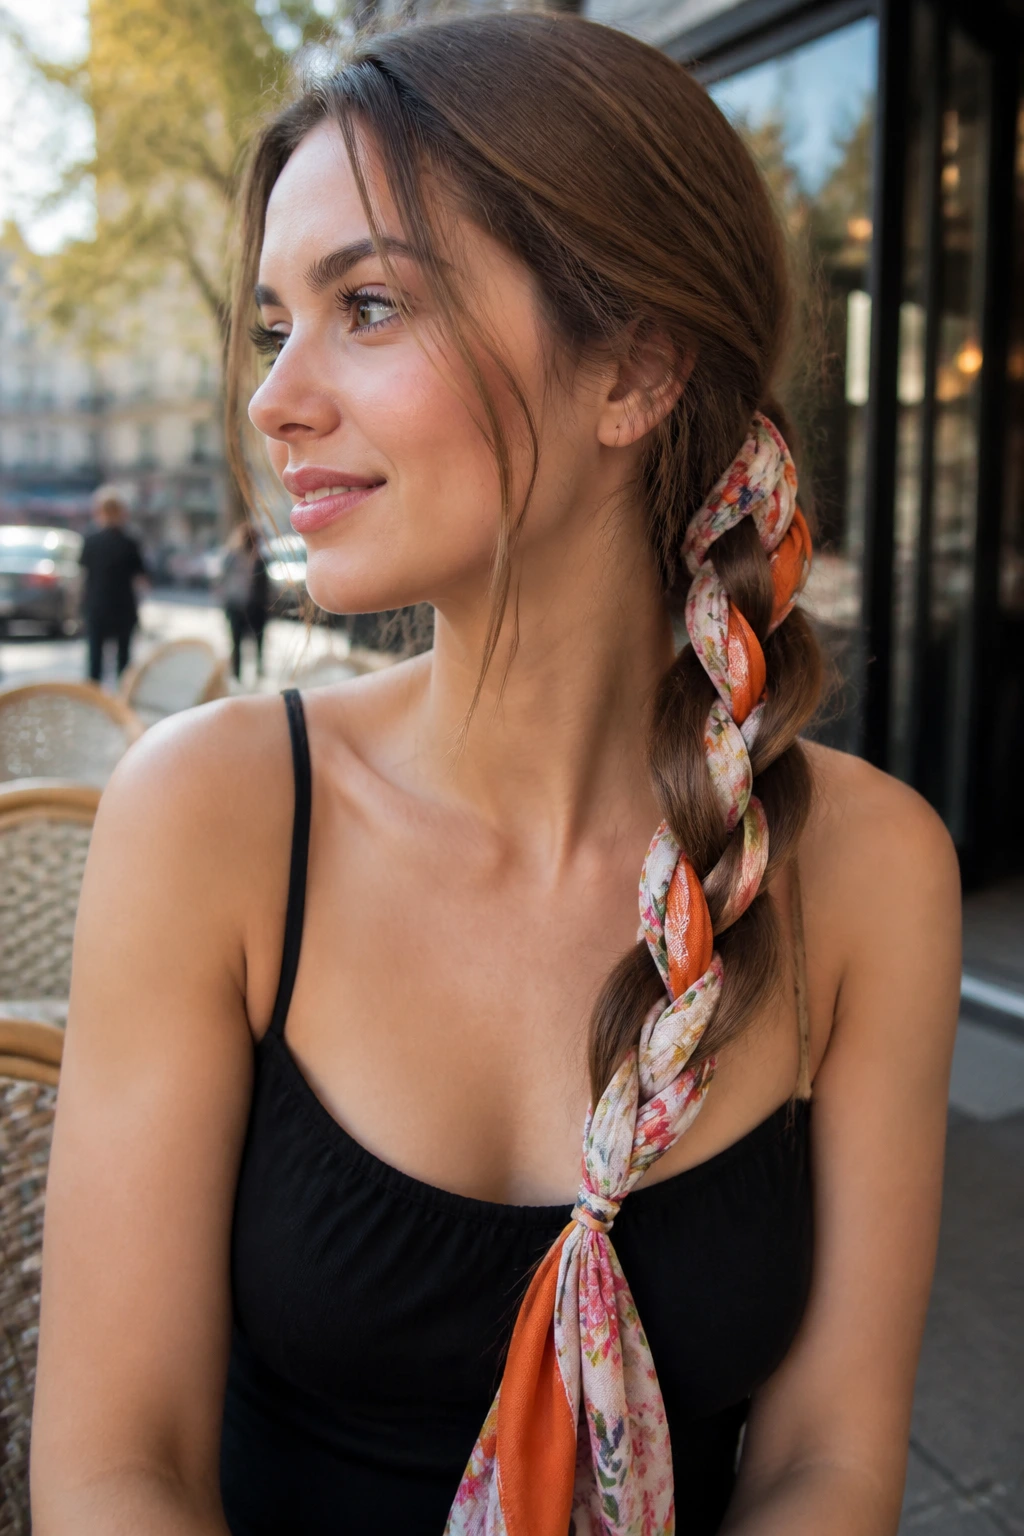
A scarf wrapped into a side braid feels less delicate than ribbon and a little more relaxed. Use a narrow scarf, fold it into a long strip, and braid it through the hair or tie it around the base before you start. The effect is softer and more casual, especially on long hair with some wave.
The best scarves for this style are lightweight. A thick cotton scarf can make the braid bulky and awkward at the neck. Silk or a thin satin finish tends to move better and sits flatter against the hair. If the scarf slides, secure the starting point with a hidden pin before you begin braiding.
This style works when you want color near the face but don’t want to commit to a full accessory moment. It’s useful for travel, warm weather, and days when you want your braid to look a little more personal.
Keep the scarf ends even at the tail if you want a tidy finish. Uneven ends can look cool, but only if they were meant to look that way.
19. The Braided Bangs Into a Side Braid
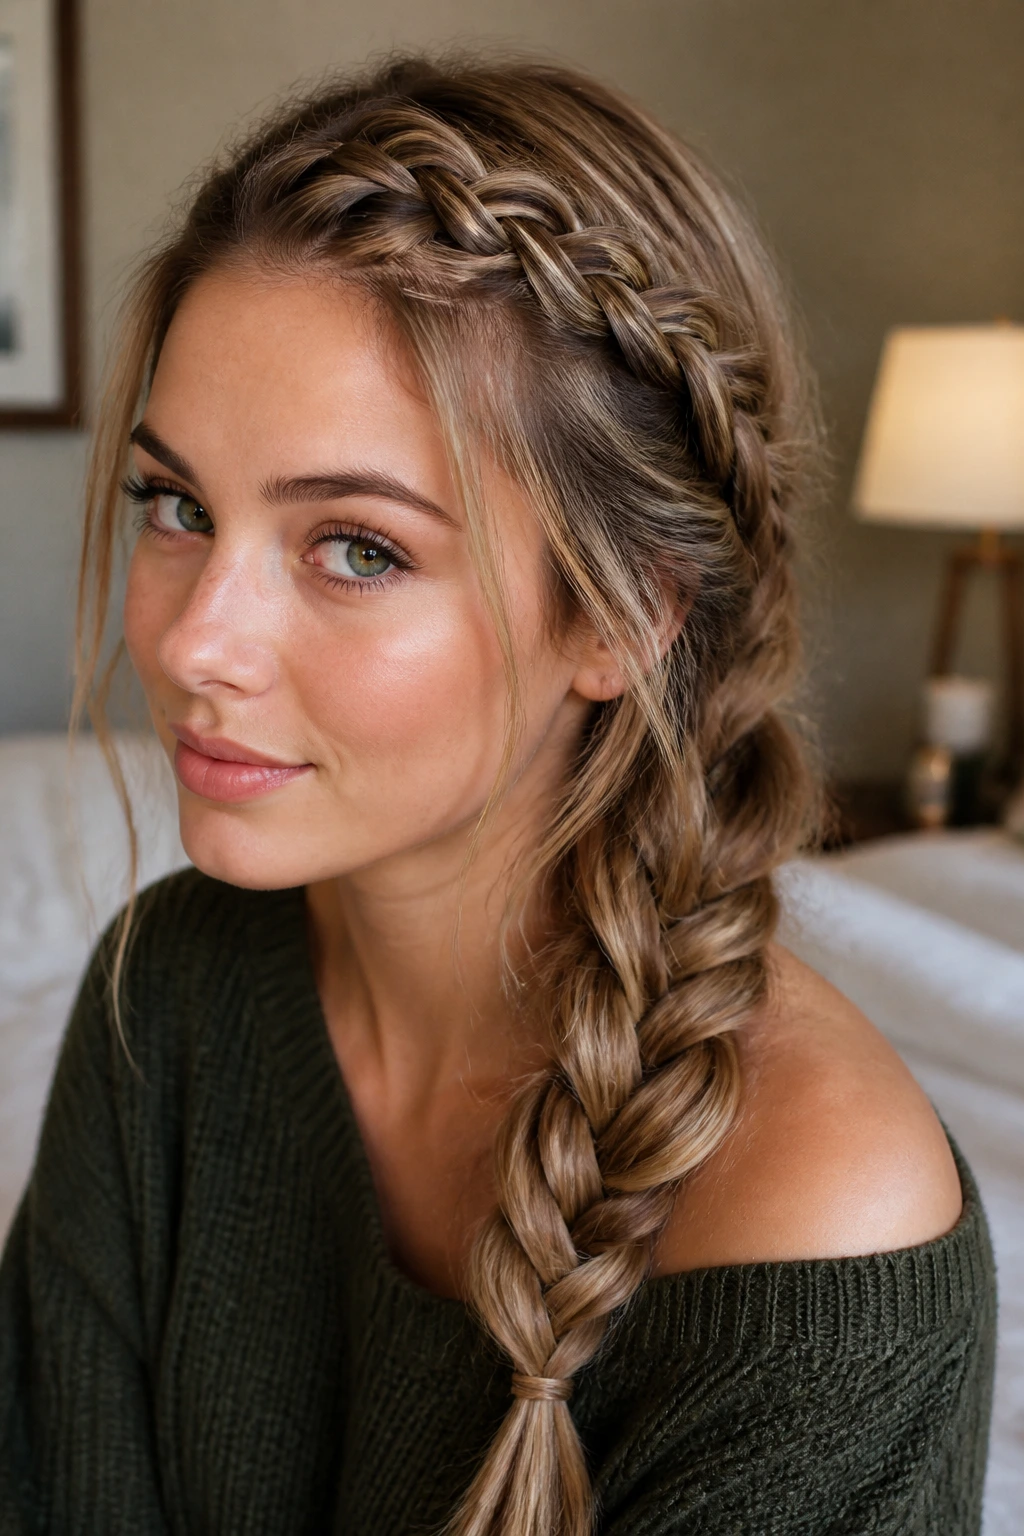
Braided bangs can save a hairstyle when the front section keeps falling into your eyes. Instead of forcing short pieces back with pins, braid them along the hairline and guide them into a larger side braid. It’s a neat solution, and it works especially well for long hair with face-framing layers.
The key is to start the braid high enough to catch the shortest pieces but low enough that it doesn’t sit like a hard line across the forehead. That balance takes a little practice. If your bangs are very short, you may need a tiny bit of pomade or edge cream just at the root area to keep them from slipping.
How to Keep It Soft
Don’t pull the braided bangs too tight. A flat, tight braid looks severe and can drag at the scalp. Leave a hairline’s worth of softness, then blend the braid into the larger side section.
This style is one of my favorites for layered cuts because it makes the front pieces useful instead of annoying. Small victory, but still.
20. The Bubble-Braid Side Hybrid
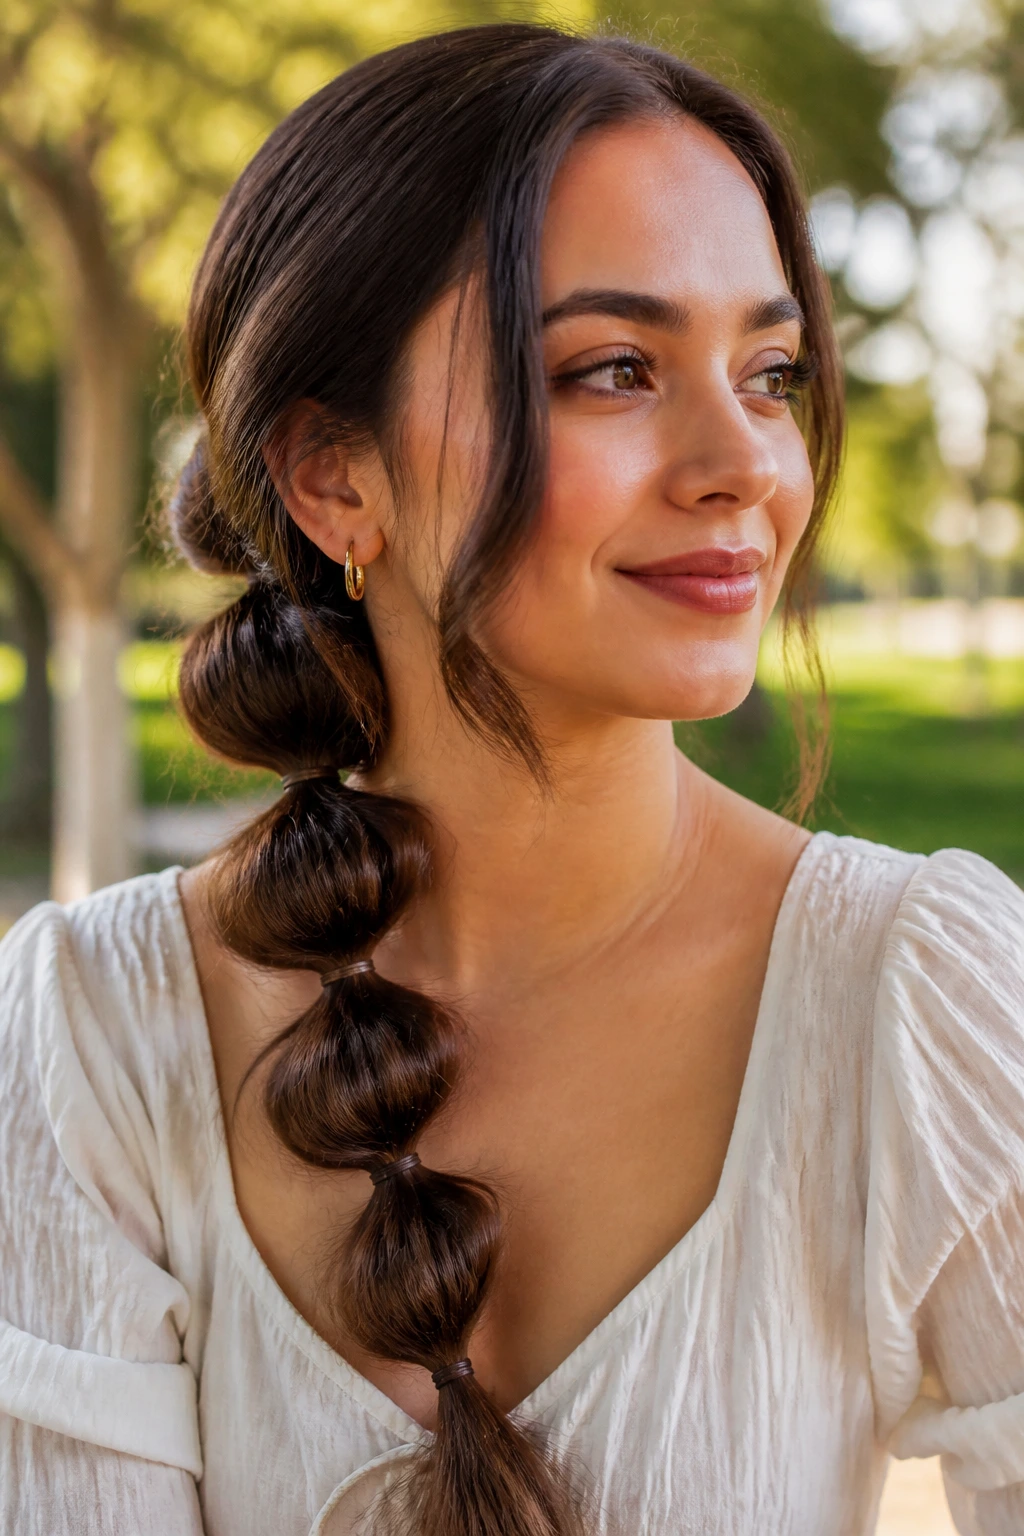
A bubble braid isn’t a traditional braid, but it earns a spot here because it gives long hair a strong side-swept shape with almost no finger fuss. You create ponytail sections down one side, then puff each segment between elastics to make round “bubbles.” It looks playful and structured at the same time.
This hybrid style is useful when your hair refuses to hold a classic braid. Very smooth hair often slips out of a regular side braid, but bubble sections stay put because each one is secured with an elastic. If you want more dimension, gently tug the sides of each bubble after tying it off.
The spacing matters. Keep the elastics fairly even, usually 2 to 3 inches apart, so the bubbles look consistent. If the gaps are too wide, the shape gets odd and stretched.
A side bubble braid works well with long lengths because the pattern keeps going. It doesn’t fade out after the first few inches. That alone makes it worth trying if your hair is heavy.
21. The Four-Strand Side Braid
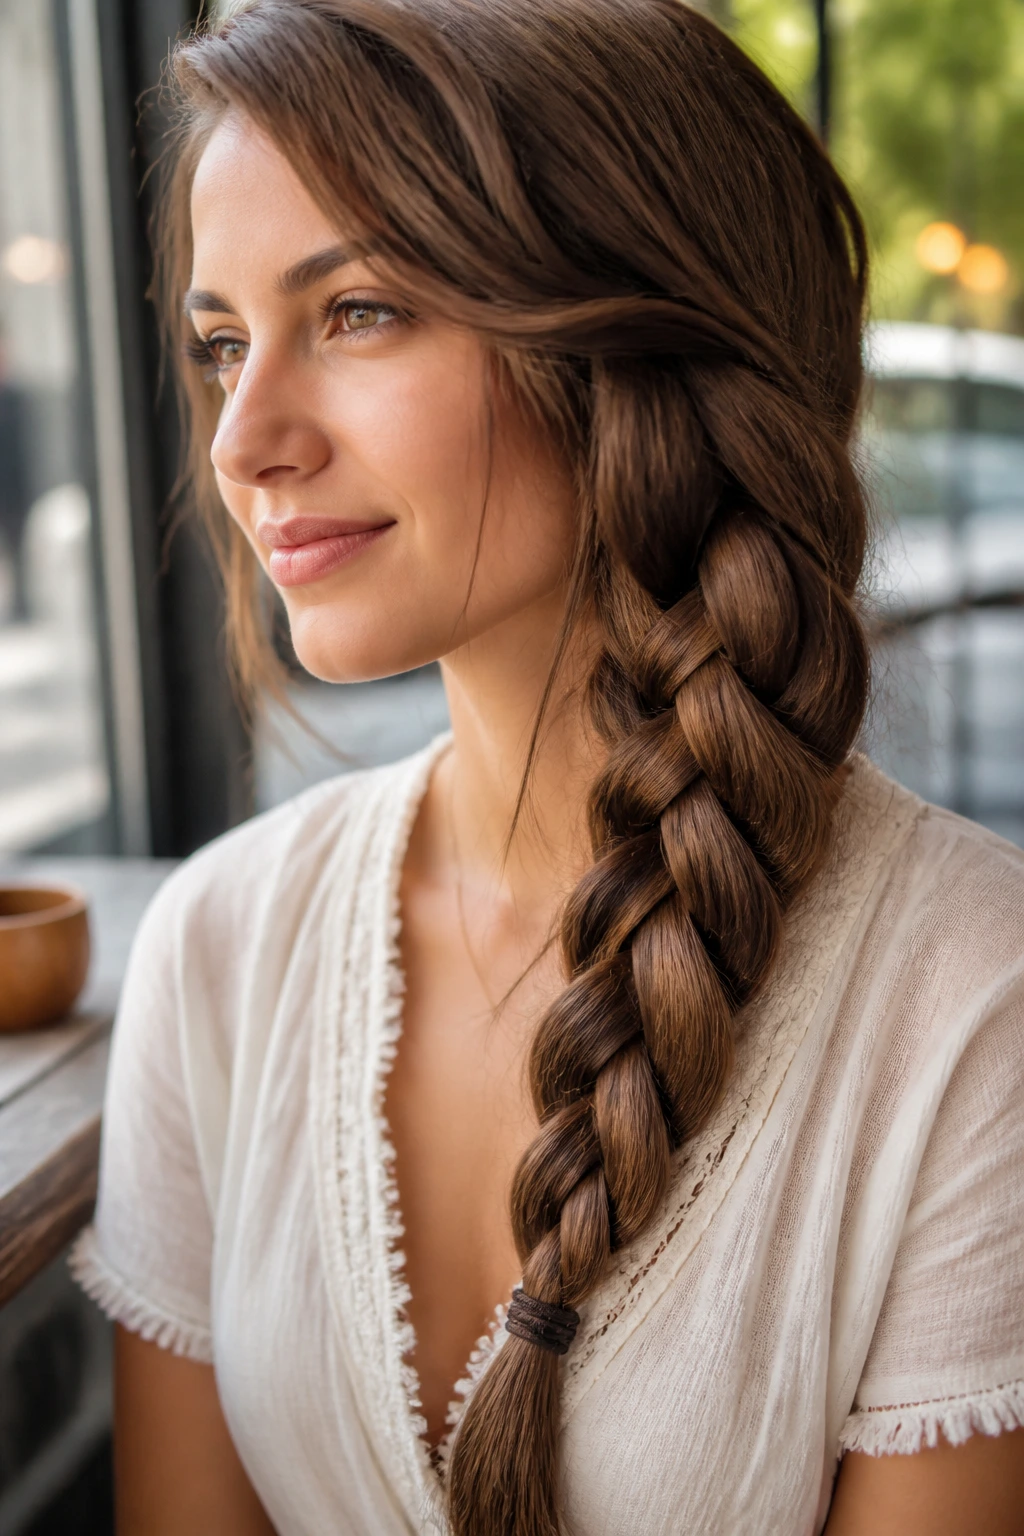
A four-strand braid has more texture than a standard braid and less of the tiny-link look of a fishtail. It feels a little richer, almost like woven fabric, which is nice for long hair because the braid itself becomes the feature.
The tricky part is keeping track of the strands at the start. Once the pattern settles, it becomes rhythmic. Cross one outer strand over the next, then continue the sequence without yanking. If you’ve ever tried one and thought it looked messy, the issue was probably tension, not the idea itself.
A four-strand side braid does best when the hair is smooth but not slippery. A tiny bit of dry shampoo or texture spray gives the strands enough grab to stay separate. Too much product, though, and the braid starts to look dusty.
This is a smart choice if you want something different from the usual side braid without going all the way into a complicated updo. It feels detailed, but not fussy.
22. The Five-Strand Side Braid
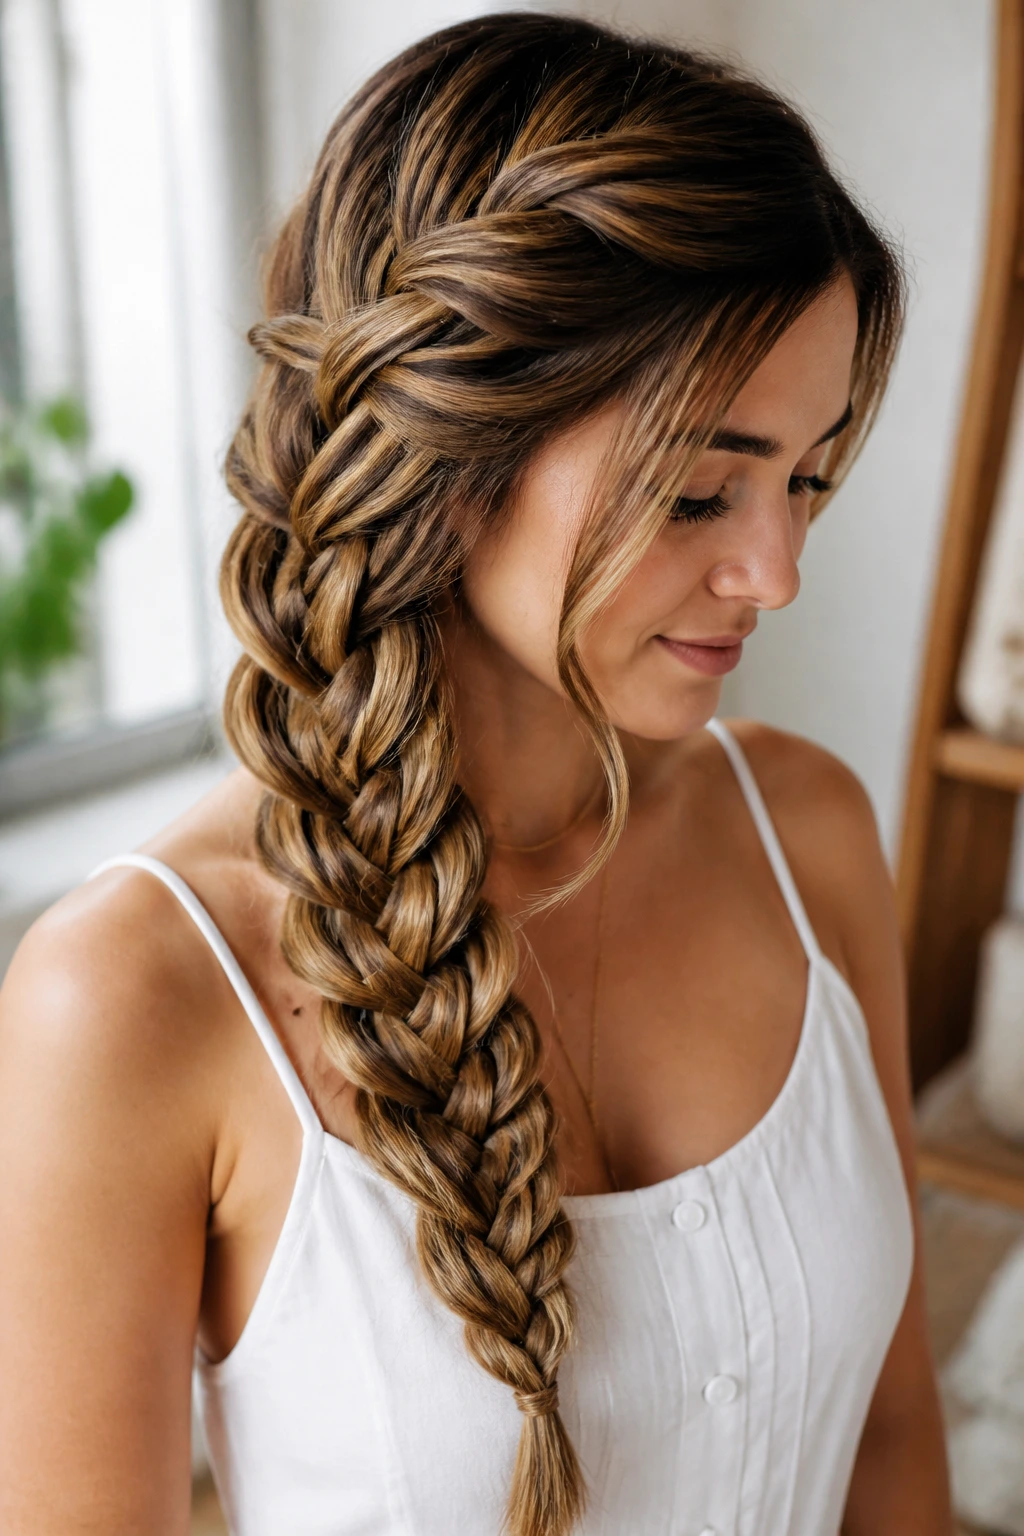
A five-strand braid is a step up in both pattern and patience. It has a fuller, more intricate surface, which looks especially good on long hair because the extra length lets the pattern breathe instead of compressing. It’s one of those styles that gets attention because it looks hand-worked.
You do not need to braid this one tight. In fact, tightness makes the pattern harder to see. Keep the sections even, hold the braid against your body for stability, and work slowly. If your fingers lose track, stop and reset. Rushing here almost always leads to uneven sections.
This braid suits long hair that’s all one length or only lightly layered. Heavy layers can break the pattern, especially near the ends. If your hair is layered, you may want to braid a little higher and finish with a ribbon or elastic to hide the thinner tail.
It’s a good style for when you want the braid itself to be the statement, not just the shape it makes.
23. The Mermaid Side Braid
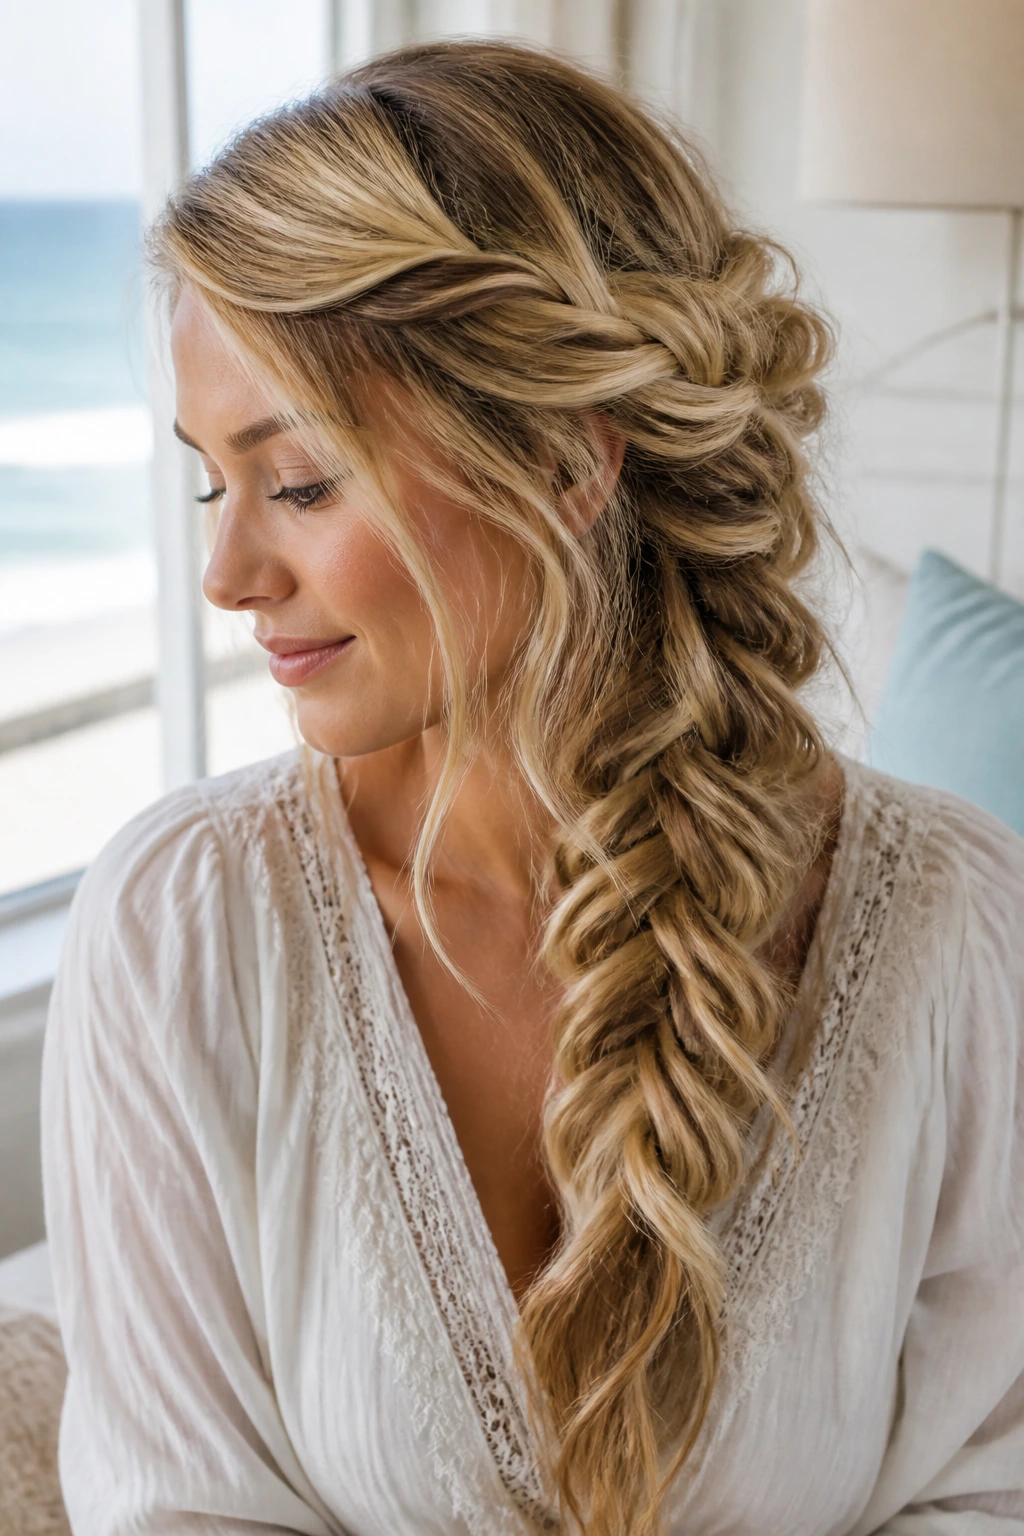
A mermaid braid sits somewhere between a fishtail and a chunky braid. The sections are wider, the texture is softer, and the overall look feels flowing rather than rigid. Long hair gives this style room to stretch, which is part of why it looks so rich.
Think of it as a braid that wants movement. Instead of pulling everything tight, you build the braid with larger sections and then loosen it lightly once it’s secured. The shape should still hold, but it shouldn’t feel locked down. That soft spread is what gives it the mermaid feel.
What Makes It Different
A fishtail can look neat and narrow. A mermaid braid looks broader, almost like the braid has been gently opened out. That makes it a good pick for thick hair, especially if you want to keep the braid visible from the side.
- Use medium-width sections
- Pancake the braid after tying it off
- Leave the lower end a little tapered
- Pair it with soft waves for extra movement
It’s dramatic without being stiff. That matters.
24. The Messy Boho Side Braid
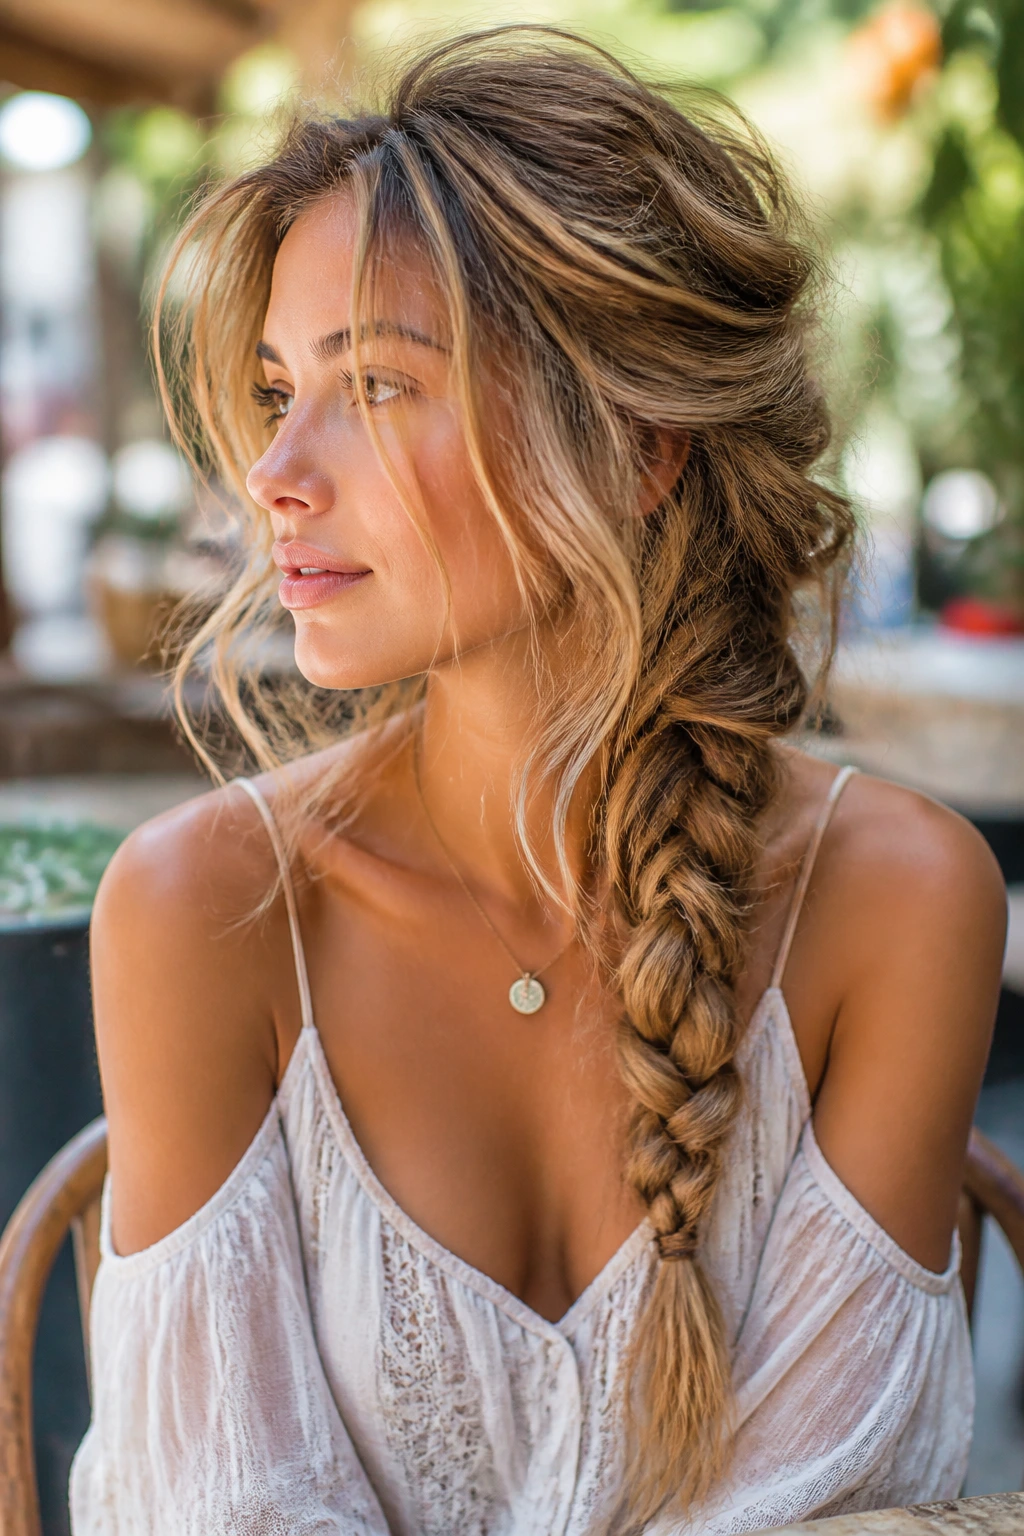
A messy boho side braid is not lazy hair. It’s controlled looseness, and there’s a difference. You braid the hair to one side, then pull out a few pieces around the crown, the temples, and the ends so the style feels airy instead of sealed shut. Long hair helps because the loose pieces still have enough length to frame the face.
This style works best when the hair has some texture already. Day-old hair, soft curls, or a little wave spray all help. Freshly washed hair can slide apart too fast unless you rough it up first. That’s one reason this braid has a better life on second-day lengths than most polished styles.
The danger is overpulling. If you tug too much at the braid, it stops looking boho and starts looking undone for the wrong reason. Keep the loosened pieces strategic.
I like this one for casual settings, denim, outdoor plans, and hair that needs to look done without acting too serious.
25. The Sleek Side Braid With Polished Edges
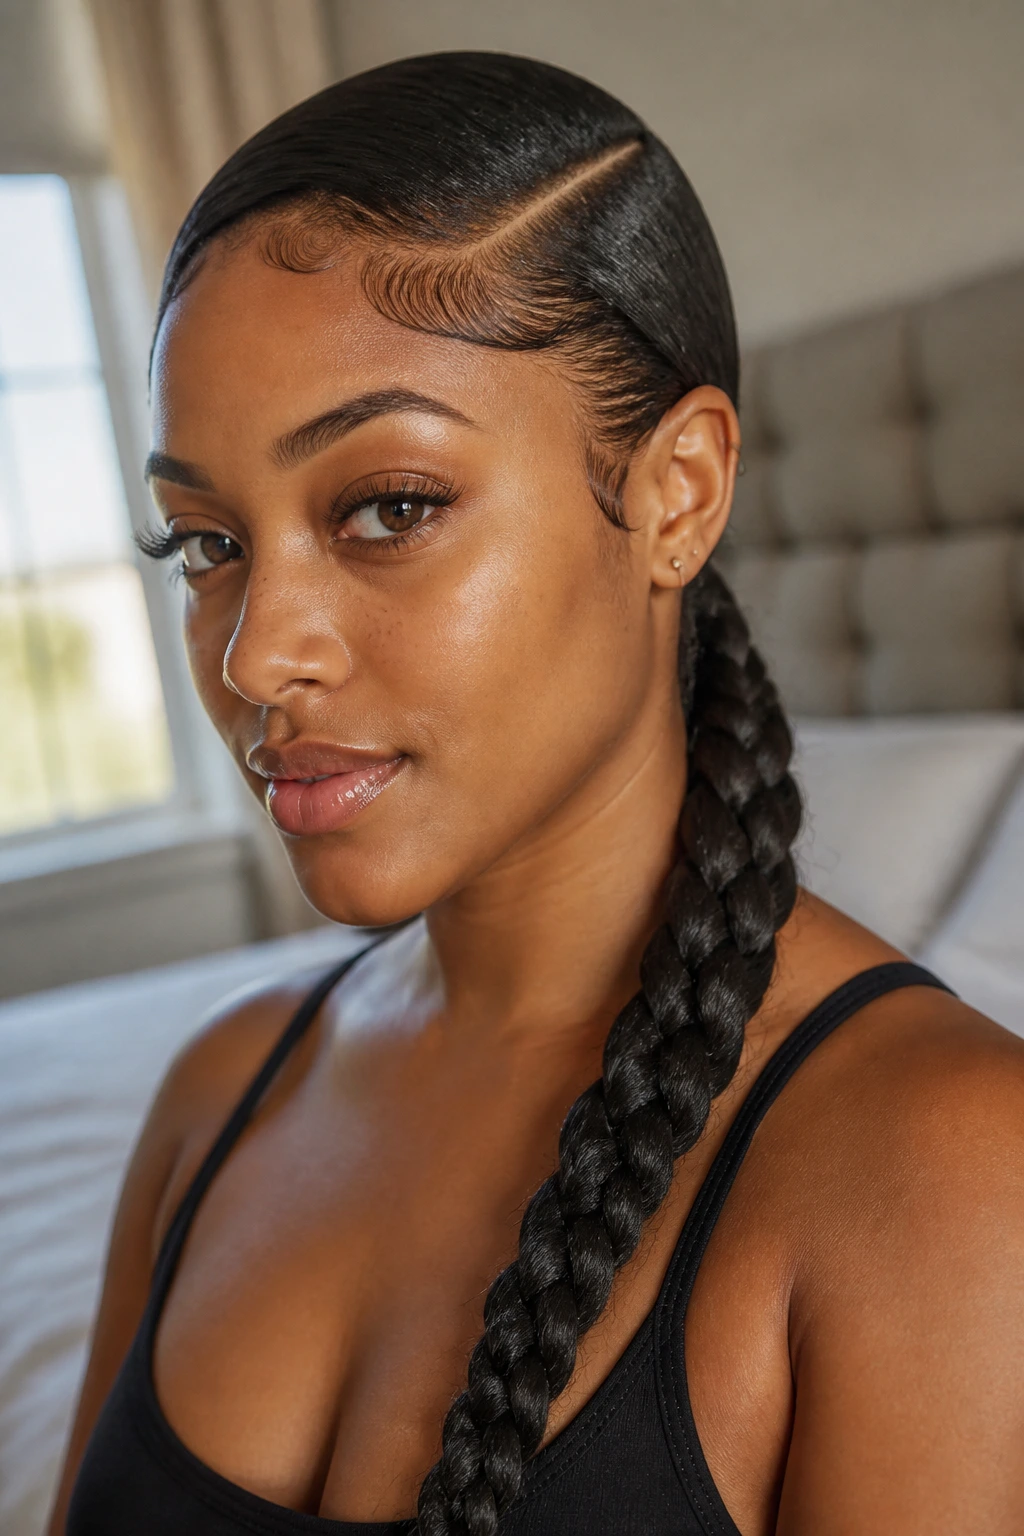
A sleek side braid can look sharp in a way the softer styles can’t. The part is clean, the edges are smoothed, and the braid itself stays tight and controlled as it moves over one shoulder. On long hair, that contrast between smooth root and long woven length feels striking.
This style is not for hair that’s fighting you on every front. Use a small amount of gel or edge control near the hairline, brush it through carefully, and make the side part crisp. Then braid firmly so the pattern stays tight all the way down. If you leave it loose at the top, the style loses its shape fast.
Keep It Looking Intentional
A polished side braid relies on neatness at the base. Once that’s set, the rest is easier.
- Smooth the crown before braiding
- Use a fine-tooth comb for the part
- Secure flyaways with a light spray, not heavy product
- Wrap the elastic with hair for a cleaner end
It’s a strong choice for formal nights or any outfit that already feels tailored.
26. The Twisted Side Braid With Knotted Sections
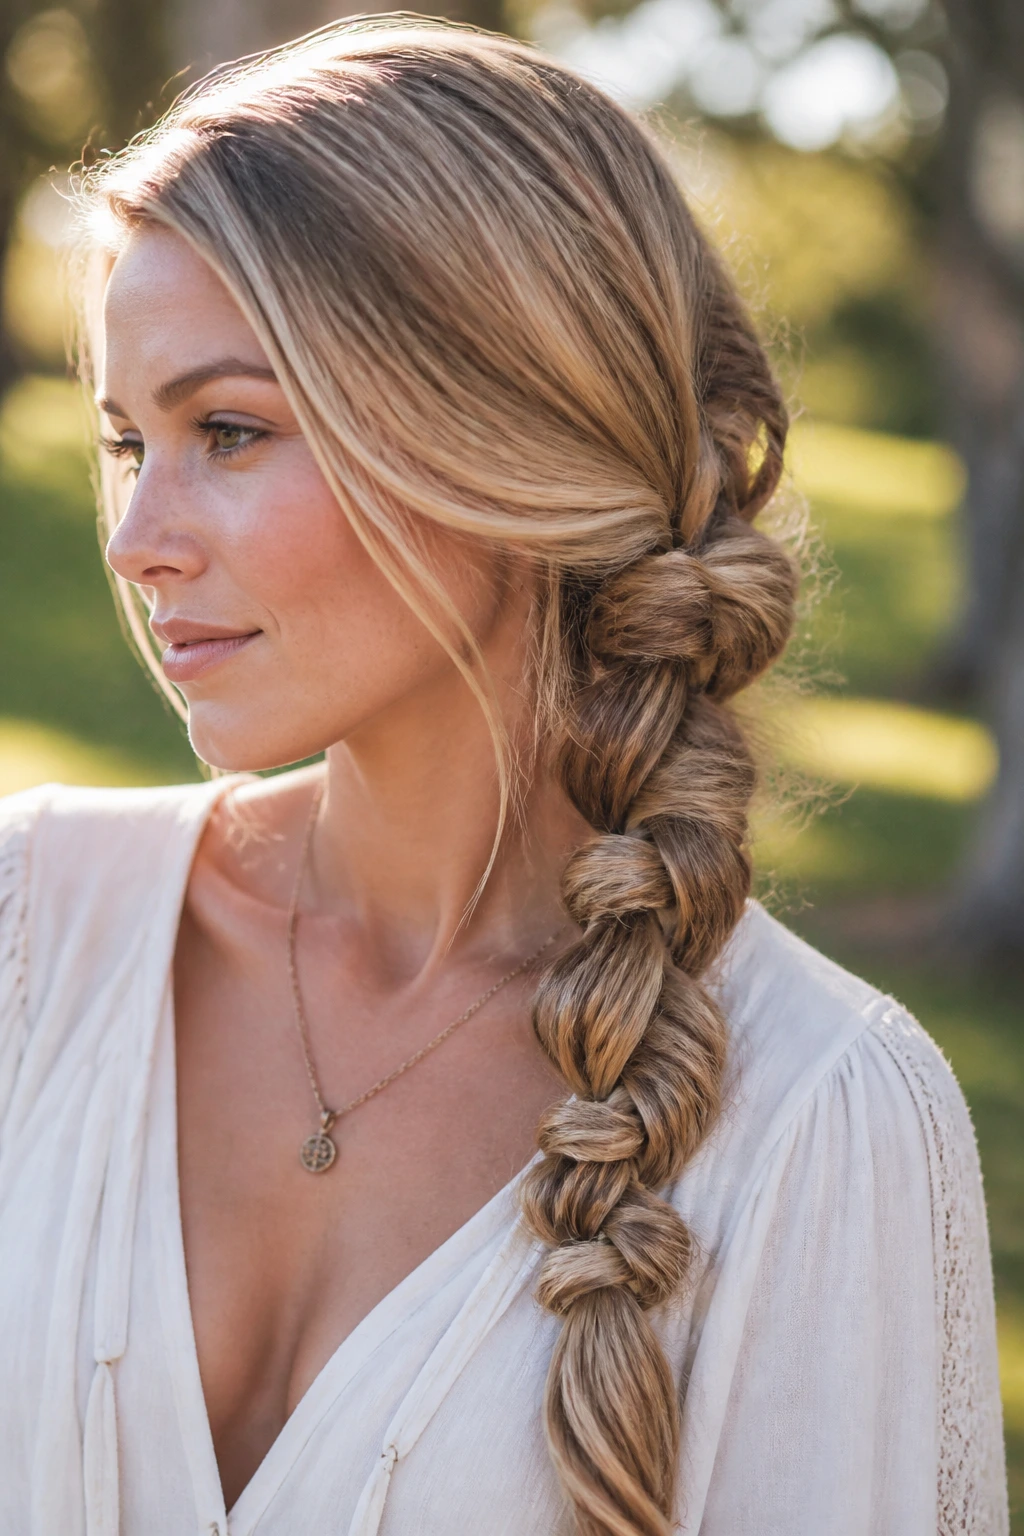
This one is for people who like a little texture but don’t want the braid to look predictable. Instead of a standard sequence, you build the side style with twists and small knot-like wraps that create a broken, organic line down the hair. It has more movement than a straight braid, less symmetry than a classic one.
It works best on long hair because the extra length gives each twist room to show. Short lengths can make the knots look cramped. If your hair is thick, even better. The sections hold their shape and the knotted details stay visible.
The important thing is not to make every twist identical. A little variation keeps the braid from looking rigid. Some sections can be tighter, others softer. That uneven rhythm is what makes the style feel handmade.
Use a few hidden pins if the knots sit far from the head. They can loosen over the day, especially if the hair is layered or very silky.
27. The Side Braid With Curled Ends
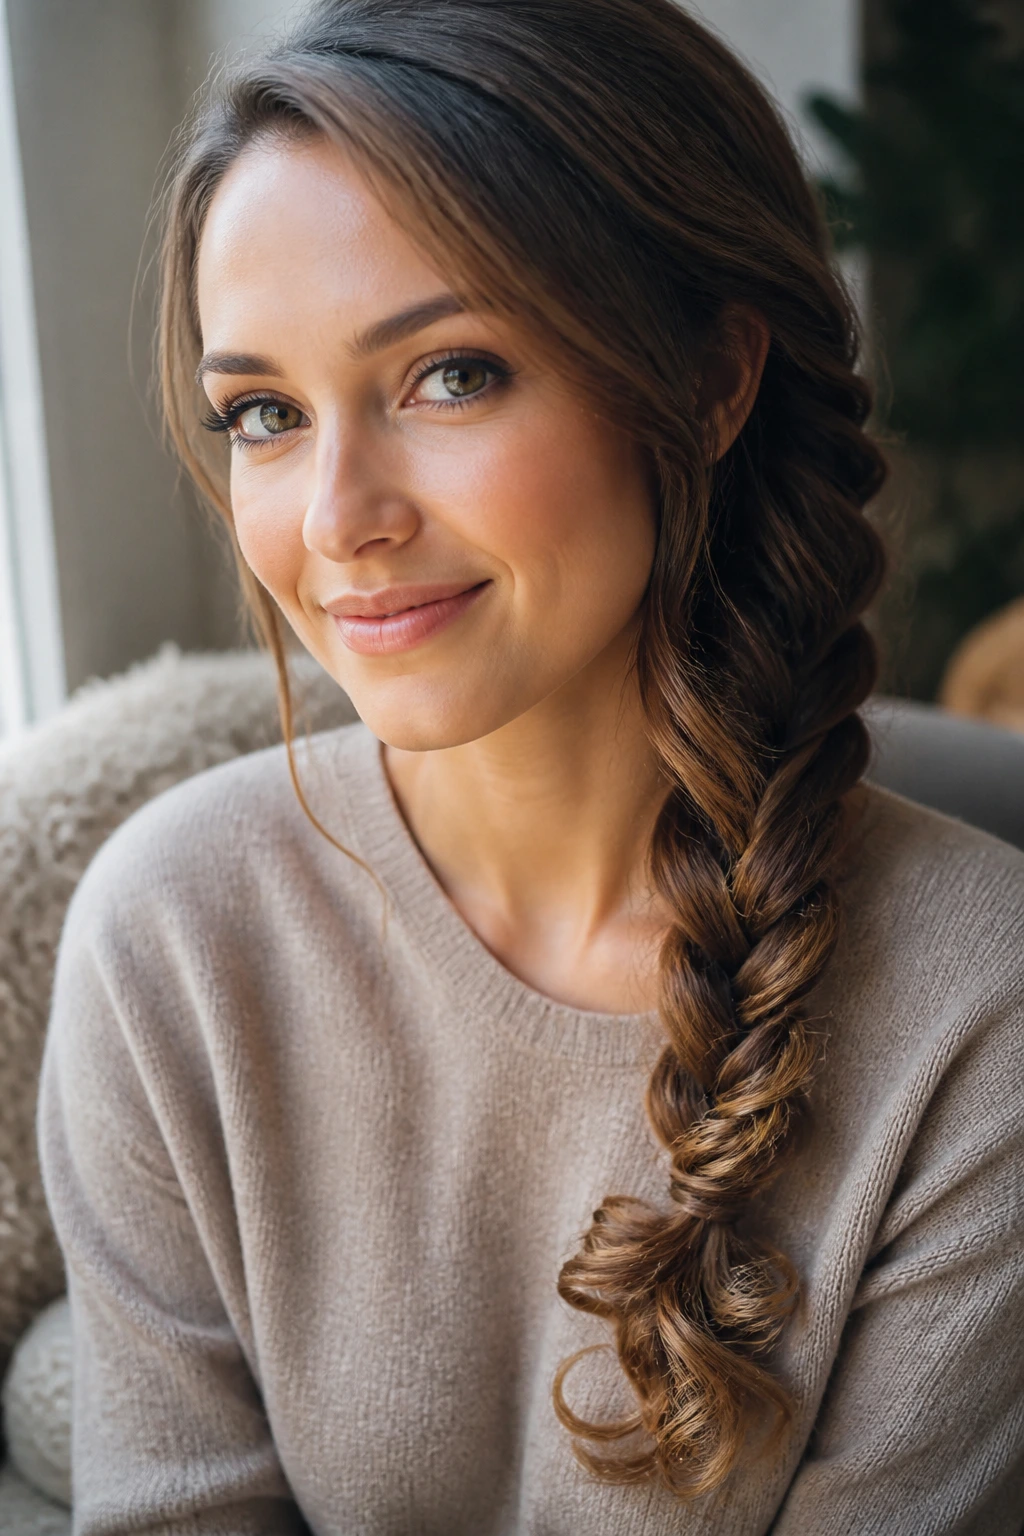
A side braid with curled ends gives you a neat top and a softer finish. The braid carries the style down from the part, then stops partway through the length so the remaining hair can fall in curls. On long hair, that contrast is useful because it keeps the tail from feeling too heavy.
The braid itself can be simple or detailed. What matters is where you stop. Leave enough unbraided hair to create a visible tail, usually the lower third of the length. Then curl the ends with a 1-inch iron or a heated styling brush, depending on how tight you want the bend.
This style is a good compromise when you like braids but still want movement at the bottom. It also helps if your ends are blunt and need a little visual softness. The curls draw attention away from a hard cut line.
If your braid keeps slipping into the curls, pin the transition point under the braid with one hidden bobby pin. Quiet fix. Works fast.
28. The Half-Up Side Braid Over One Shoulder
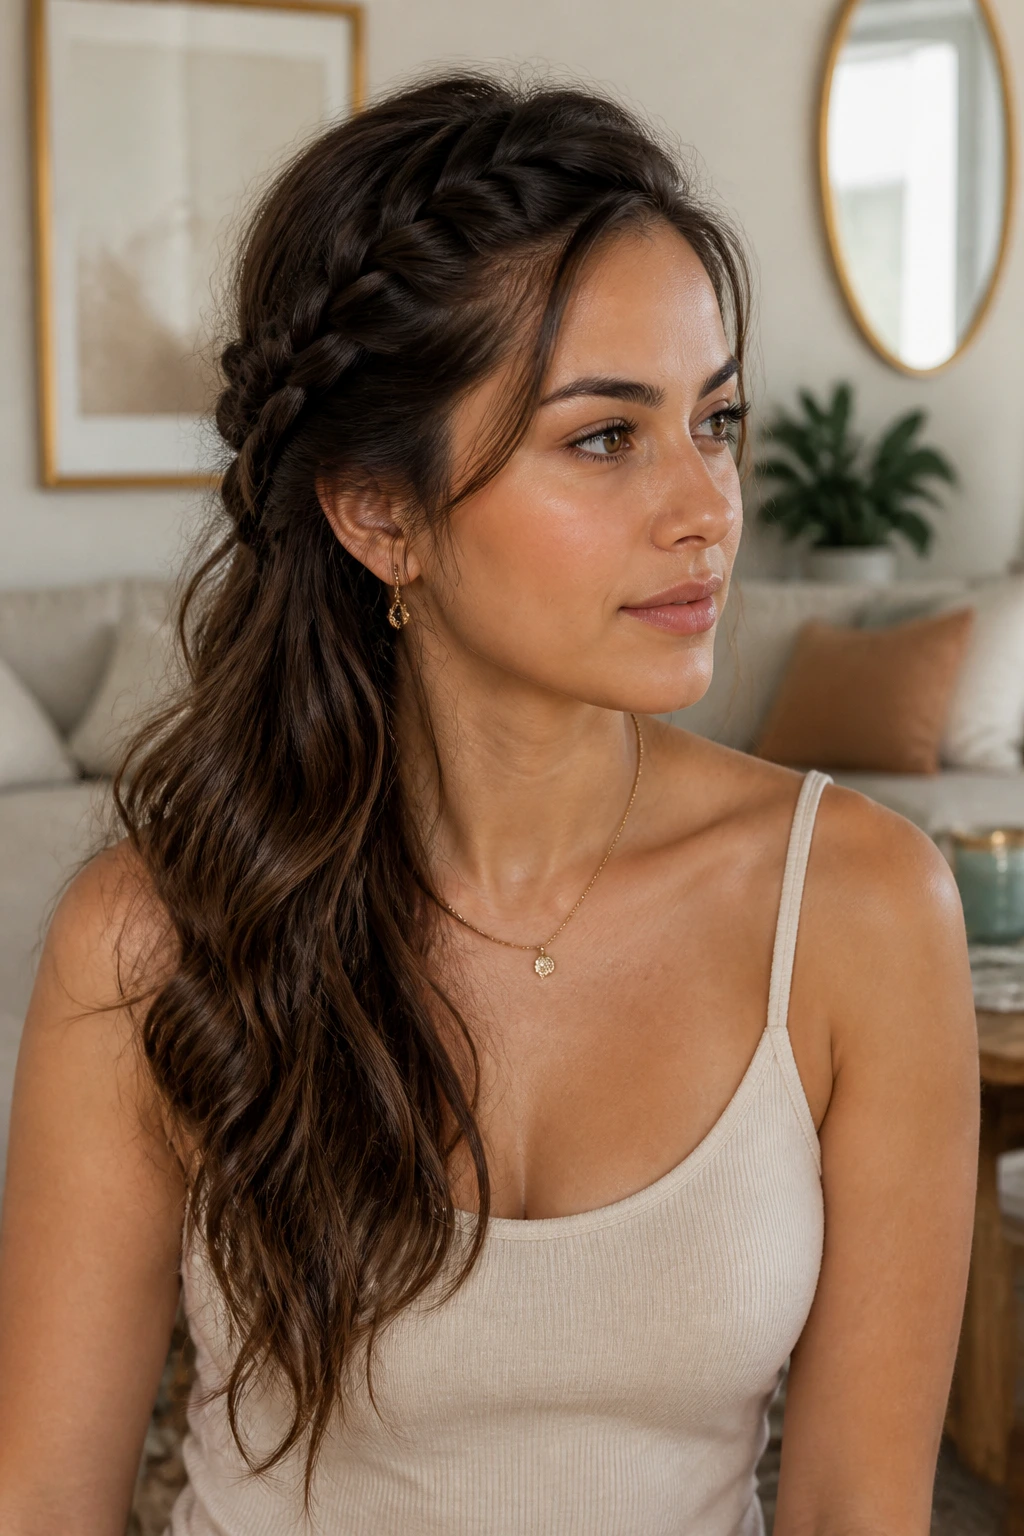
A half-up side braid keeps the top section secure while letting the rest of the hair stay down, which makes it a nice middle ground. You gather the crown area to one side, braid that portion, and leave the lower lengths loose over the shoulder or back. Long hair makes this look especially full because the braid and the loose section play off each other.
It’s useful when you want a braid but don’t want to give up the movement of loose hair. The top stays controlled, the ends stay free, and the overall shape feels easy to wear. If you have layers around the face, this style keeps them visible without letting them fall into your eyes.
Best Way to Finish It
Add a soft wave to the loose lengths if you have time. Straight ends can make the braid look detached, while a little bend helps the whole style connect.
The braid doesn’t need to be huge. In fact, a moderate-sized braid often looks better because it doesn’t swallow the rest of the hair. Keep the top section neat, then let the shoulder-length sweep do the rest.
Final Thoughts
The best side braids for long hair are the ones that match the hair you actually have, not the hair you wish you had on a good day. Thick hair likes control, fine hair likes grip, and layered hair needs a style that won’t let every shorter piece escape by lunchtime.
A small change at the root can change everything. A deeper part, a tighter first braid, a little texture spray, or a clearer elastic choice often matters more than the braid pattern itself. That’s the part people skip, and then they blame the braid.
Pick one style, wear it a few times, and tweak the tension before you move on to the next. Long hair gives you room to experiment, and side braids reward the kinds of tiny adjustments that sound boring until you see the difference in the mirror.
