Round faces can look broader than they really are when the color sits in the wrong place. A bright band through the cheeks does the opposite of what most people want. Caramel brown highlights work best when they behave a little like contour: soft at the sides, brighter where the eye should travel, and never dumped in one heavy stripe across the widest part of the face.
That’s why placement matters more than shade alone. Caramel is forgiving. It sits between blonde and brunette, so it can warm up dark hair, soften harsh lines, and still keep the result believable. But the same caramel ribbon can look sleek on one person and flat on another, depending on where it starts, how thick it is, and whether the root is left dark enough to create shape.
A round face usually wants a bit of length and vertical pull. That does not mean everything has to be thin and timid. It means the light pieces should lift the eye upward, drop it below the cheekbones, or break up width without making the face look boxed in. Little decisions matter here — a two-inch difference in placement can change the whole read of the haircut.
So the smart move is to choose highlights that work with your cut, your texture, and how much maintenance you’re willing to live with. Straight hair, curls, lobs, shag cuts, long layers — they all take caramel differently, and some placements are flattering for one shape of face while looking clumsy on another. Start with the front pieces, because that’s where round faces either win or lose the whole effect.
1. Cheekbone Money Piece in Caramel Brown
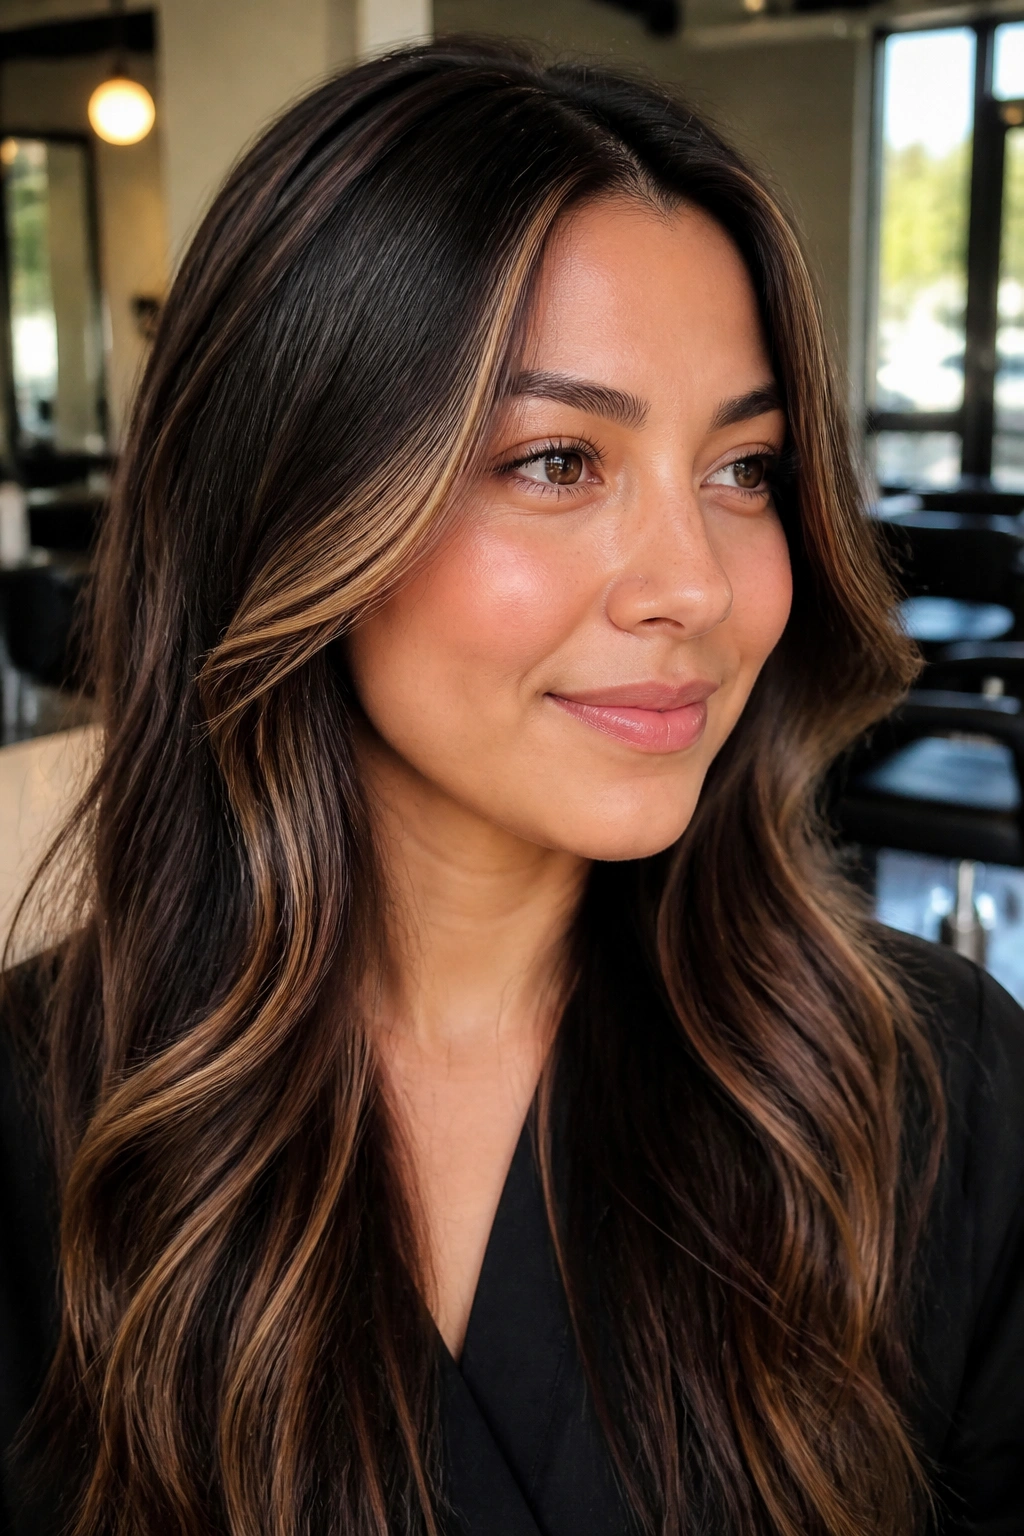
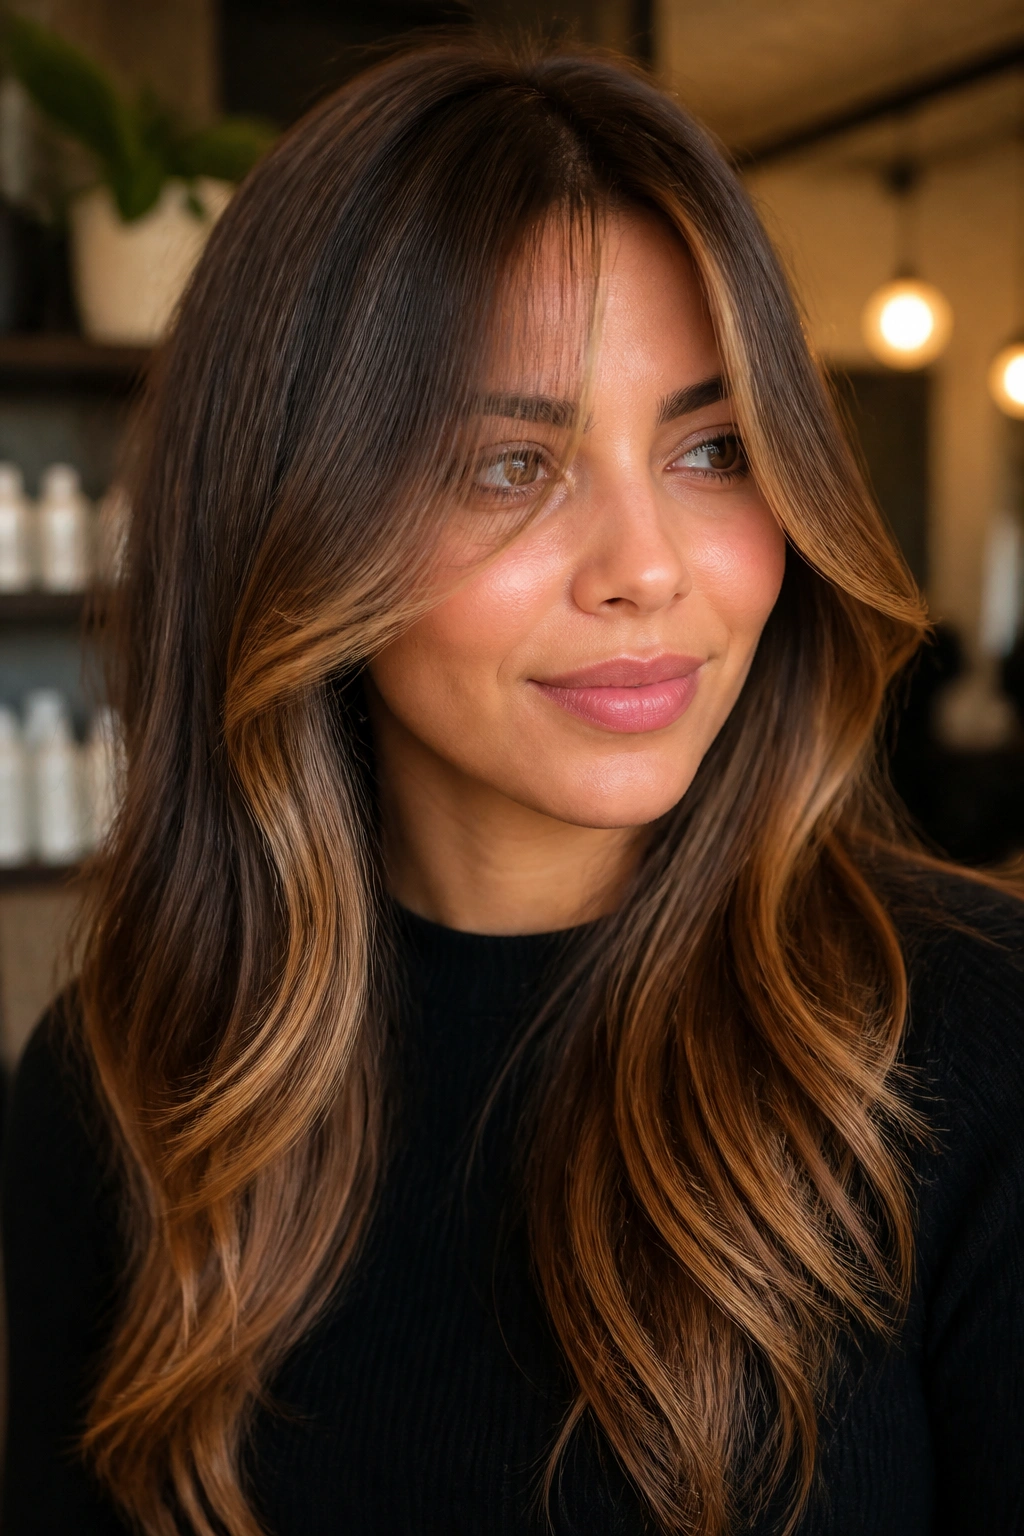
A bright money piece can change the whole face in one appointment. The trick is not making it too wide or too blunt. A slim caramel panel that starts near the top of the cheekbone and tapers downward gives a round face a cleaner line without turning the front of the hair into a billboard.
Why It Works
That front brightness pulls the eye vertically instead of letting it sit on the sides of the face. It also gives you a little lift around the brow and cheek area, which helps the whole shape feel more open. Keep the root a shade or two deeper so the money piece does its job instead of washing the face out.
- Ask for a 1 to 1.5-inch front panel on each side.
- Keep the lightest part below the cheekbone, not across it.
- Blend the root softly so the strip does not look pasted on.
- Style with a loose bend, not a tight curl, so the line stays long.
My favorite version of this look is the soft one. It reads cleaner than a harsh blonde stripe and grows out better, which matters more than people admit.
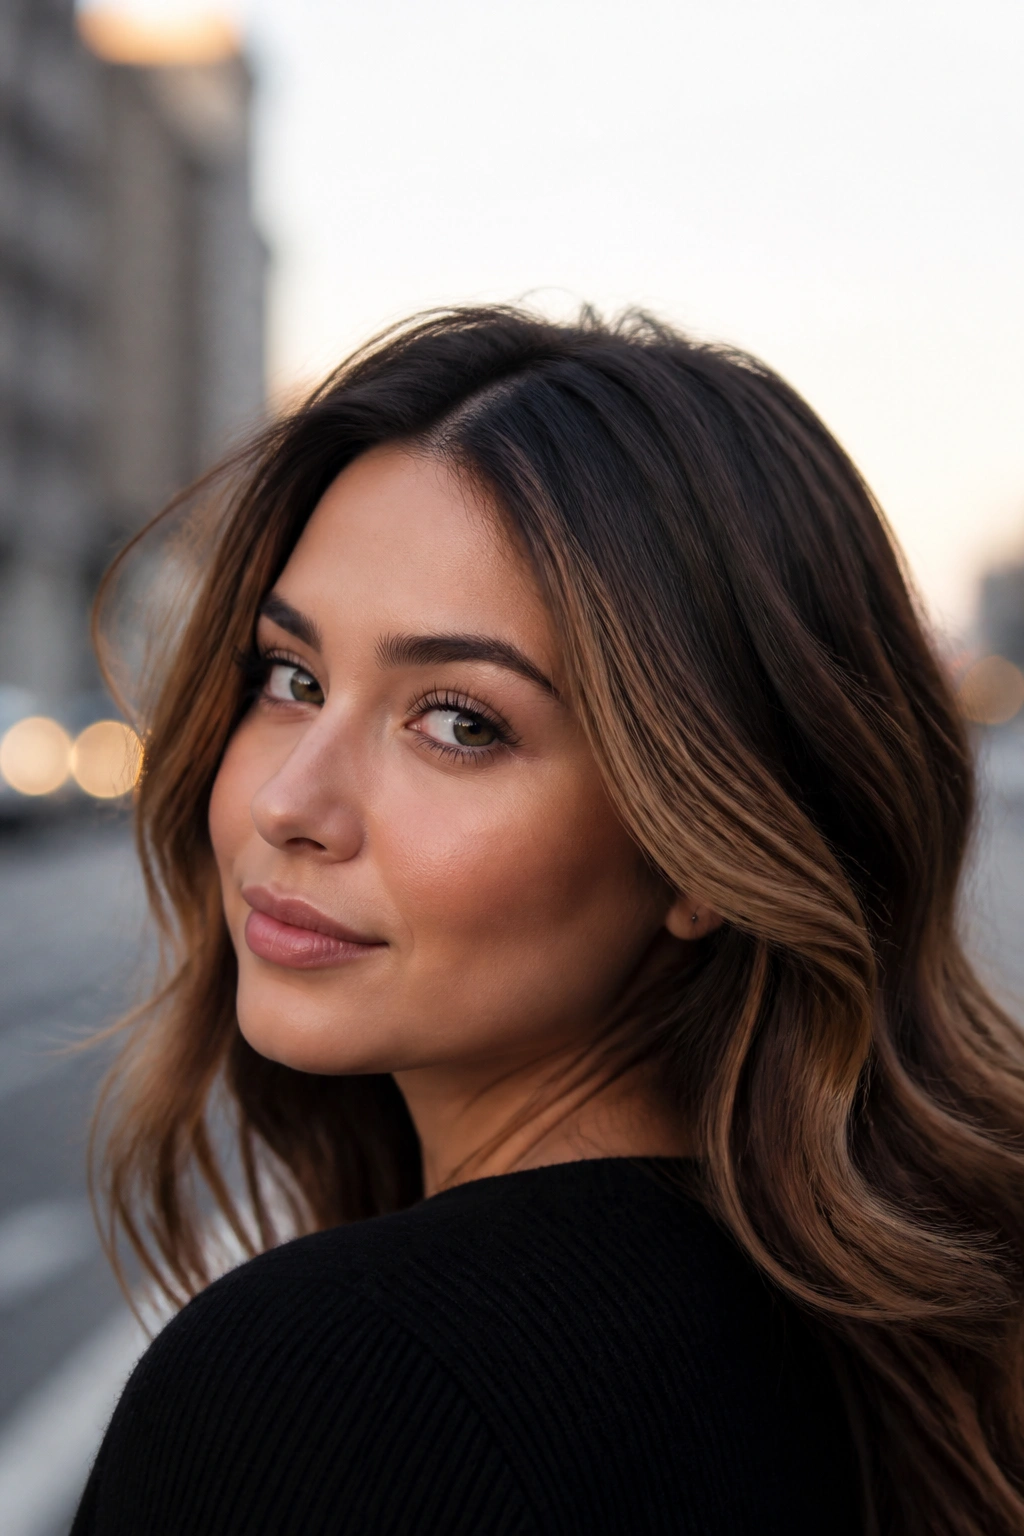
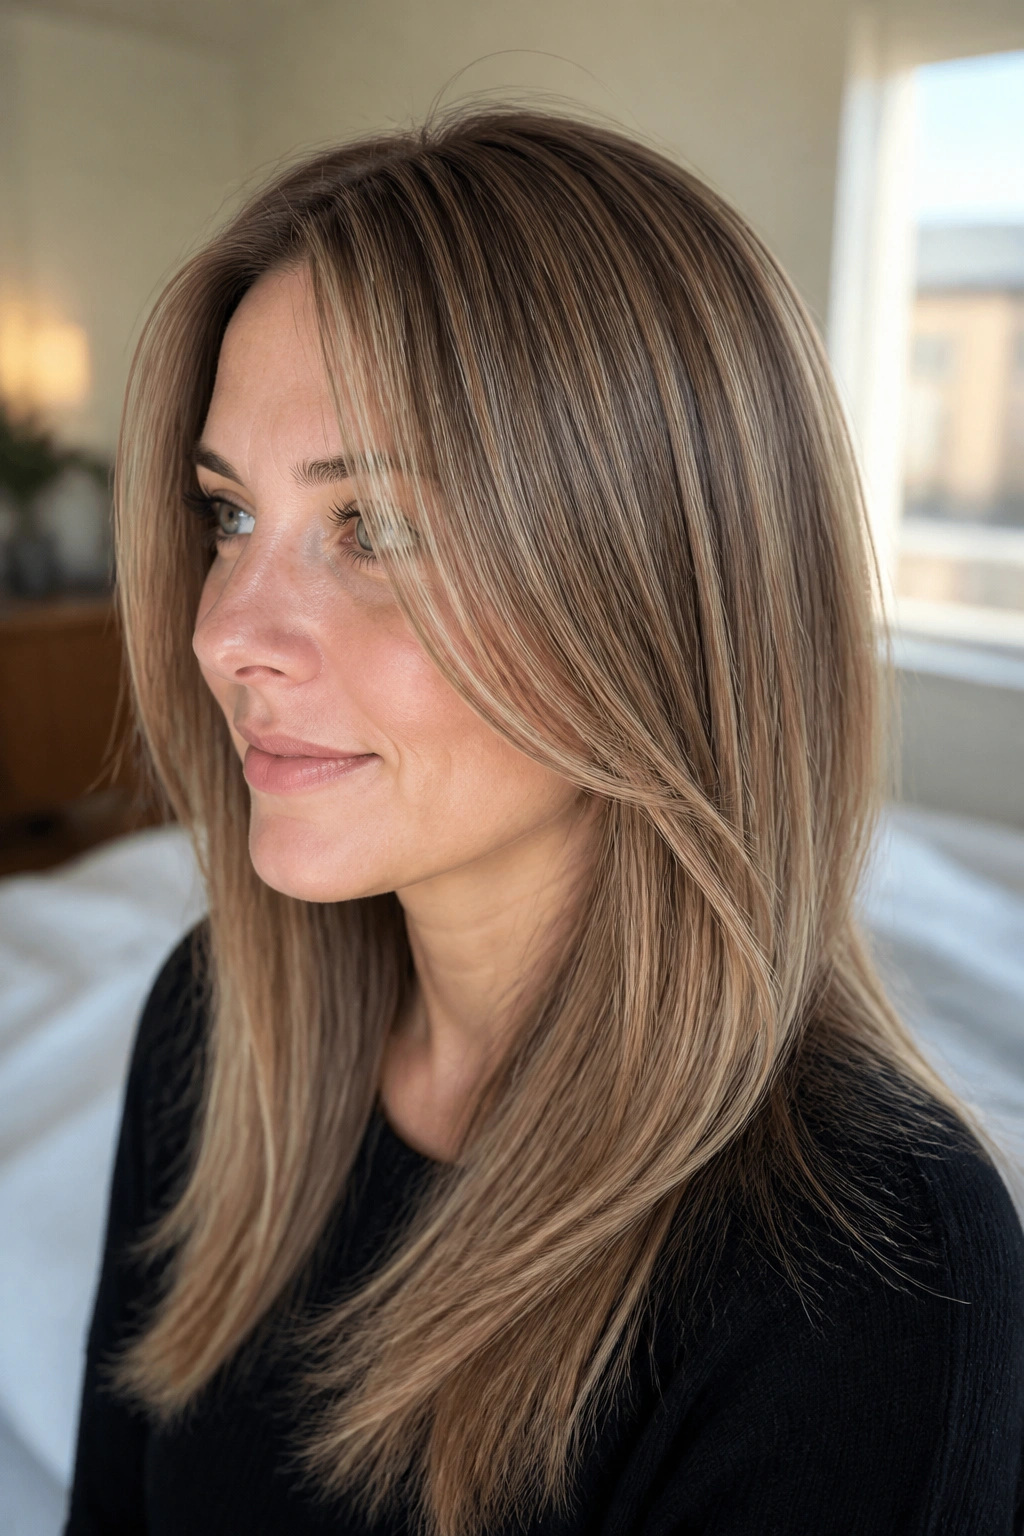
2. Caramel Brown Face-Framing Balayage Below the Chin
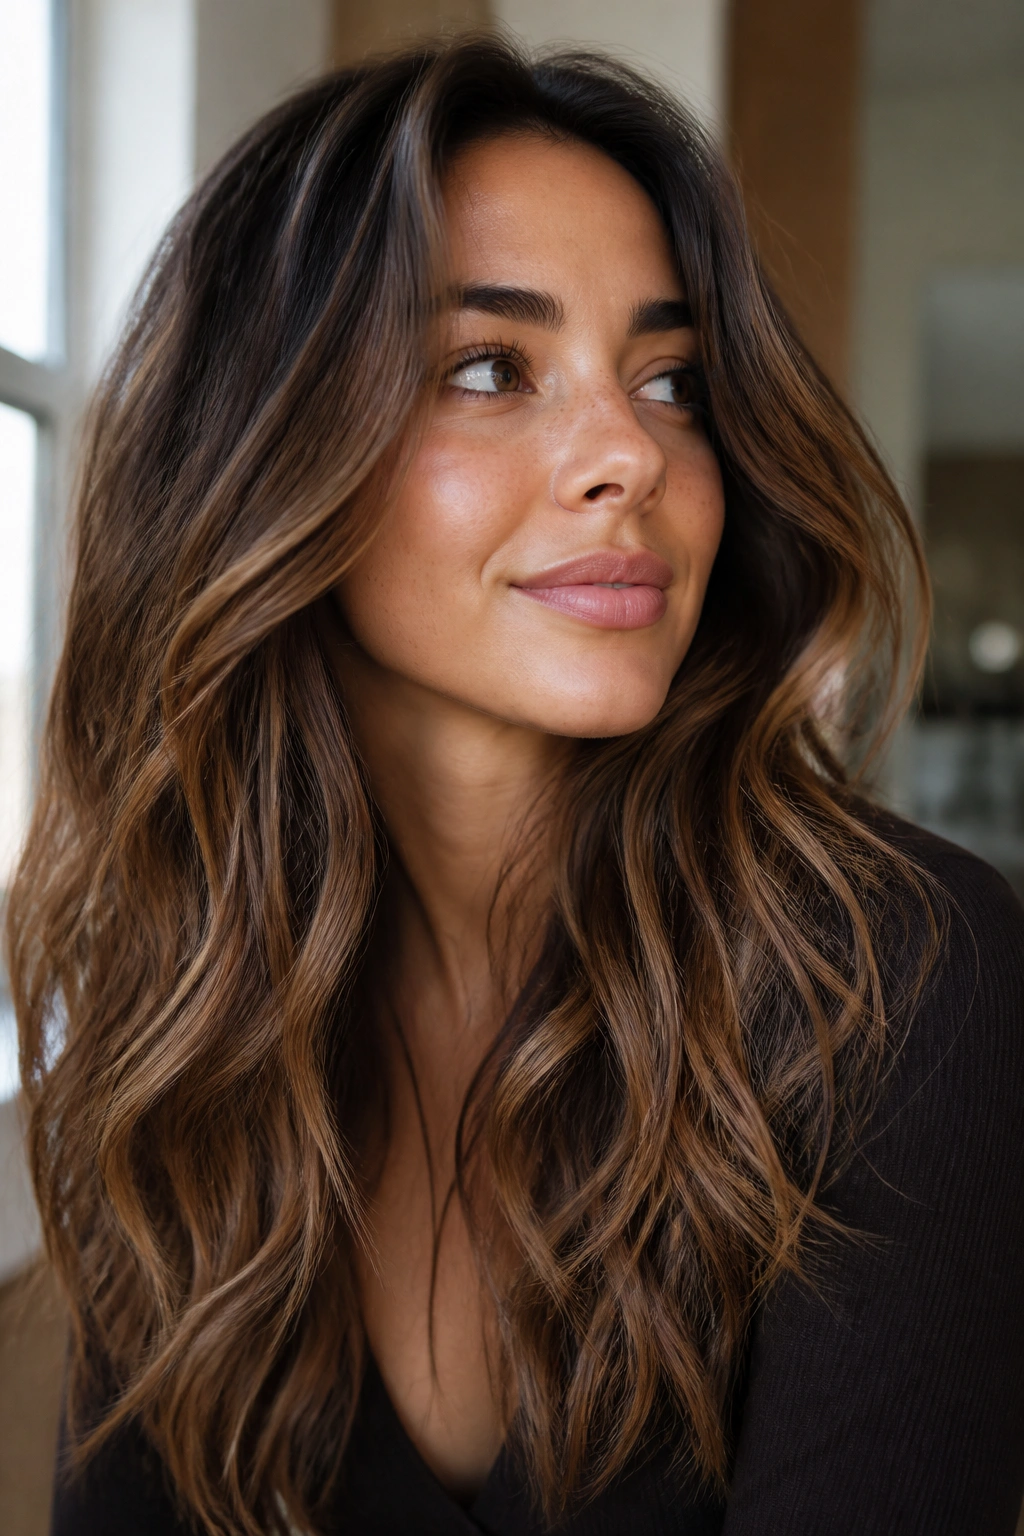
What if you want brightness, but you do not want your face to look wider? Start the light pieces lower. Face-framing balayage that begins below the chin tends to stretch a round face instead of cutting it in half at the cheeks.
The effect is subtle, and that is the point. When the highlight begins lower, the viewer sees a vertical line running down the front rather than a bright bar at the widest point. It’s a smart choice for medium and long hair, especially if your cut already has some movement near the ends.
This look is also easy to live with. Because the caramel starts lower, the grow-out stays softer and less obvious. You can wear it with a center part or a slight off-center part, and both versions keep the face looking a little longer.
3. Root-Smudged Babylights on Dark Brunette Hair
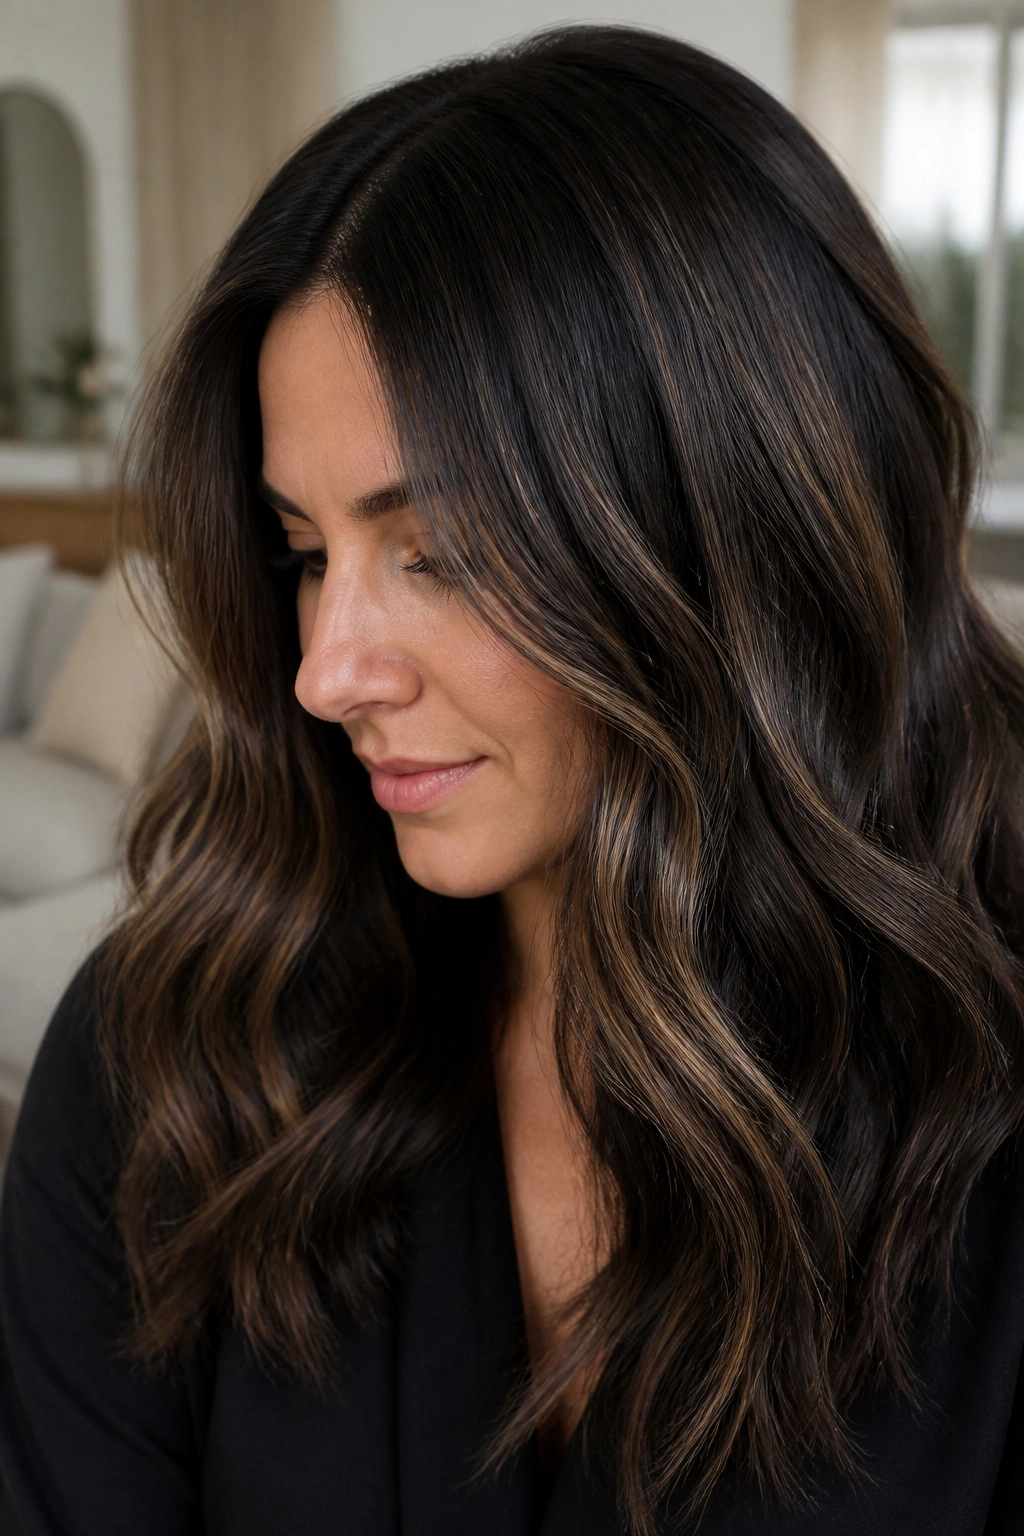
Babylights are tiny, but they do a lot of heavy lifting. A root-smudged caramel babylight on dark brunette hair gives you softness first and brightness second, which is exactly why it flatters a round face so well.
The root smudge keeps the color from jumping too hard at the hairline. That matters because an abrupt light strip at the top can make the upper face feel wider. With babylights, the brightness is woven in thinly, so the eye gets gentle movement instead of one loud line.
This is a good pick if you want caramel brown highlights that feel expensive without shouting. It works especially well when the hair is layered, because the tiny ribbons catch across the cut and make the shape look lighter. Clean, soft, believable. That’s the whole appeal.
4. Ribbon Highlights Through the Mid-Lengths

When hair has a little wave, ribbon highlights make the movement easier to see. Caramel ribbons through the mid-lengths create long S-shaped lines that help a round face look less circular. They also keep the brightness away from the cheeks, where it can do too much.
Where to Place Them
Paint the ribbons through the outer mid-lengths and let them flow toward the ends. Do not stack too many on the sides of the face. That’s where the width lives, and stuffing the area with light can make the face feel fuller.
A few well-placed ribbons beat a whole mess of thin highlights.
This look is especially good if your hair is thick. The contrast between deeper roots and caramel ribbons keeps the shape from looking puffy, and the waves make the whole thing feel soft instead of striped.
5. Glossy Caramel Melt on a Long Bob
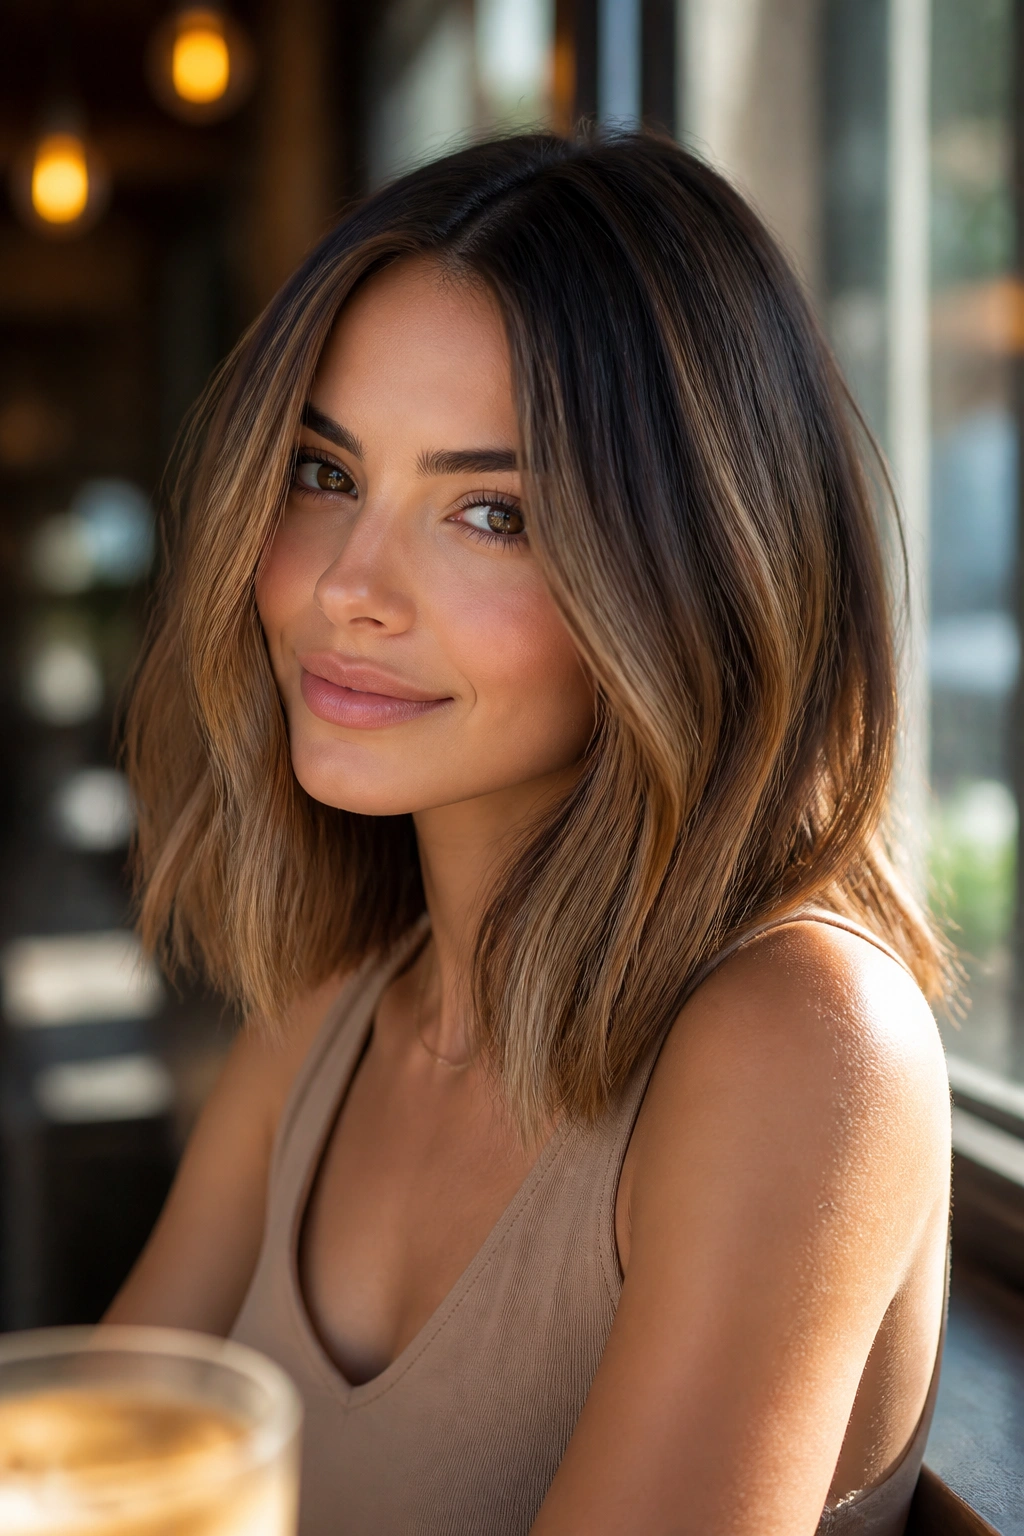
A long bob loves a melt because the cut already has a clean line. Add caramel that fades from a deeper root into buttery mid-lengths, and the roundness in the face starts to matter less. The eye goes to the sweep of the hair, not just the cheeks.
The best version has a smooth transition. No obvious stop-start color. No chunky band at the top. Just a soft shift that looks like warm light moving through the hair as it gets longer toward the front. On a lob, that gradual change helps the face read more oval.
I also like this one with a side tuck behind one ear. It shows off the color without making the front pieces sit too close to the cheeks. Small move. Big payoff.
6. Temple-to-Jawline Contour Pieces
Not every bright piece belongs right in front. Some of the best caramel placement sits a little farther back, near the temples and jaw. Temple-to-jawline contour pieces carve out the side of a round face without making the center look crowded.
That placement gives the illusion of structure. The darker hair near the cheeks acts like shadow, while the caramel at the temples and lower sides creates a frame that feels more stretched than wide. It’s a quiet trick, but it works.
This is one of my favorite choices for thicker hair because it keeps the face-opening effect while reducing bulk. If your hair tends to puff out at the sides, this placement feels calmer and more deliberate.
7. Curly Halo Highlights Around a Round Face
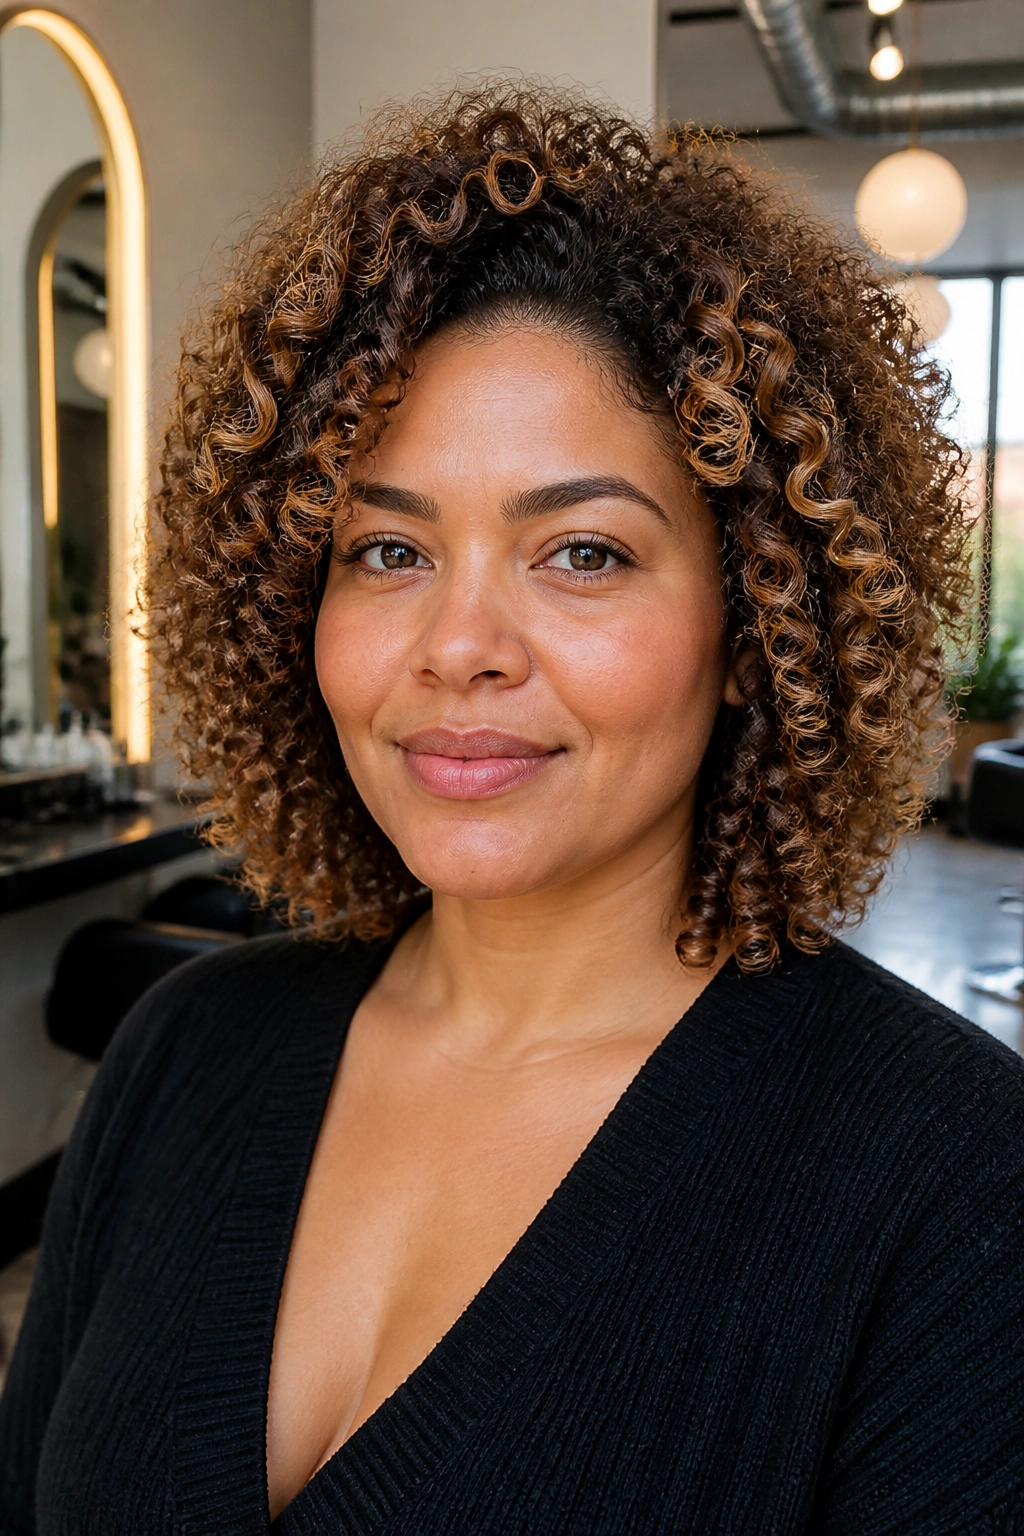
Curly hair needs a different strategy. A round face with curls can get overwhelmed if the highlights sit too low and too wide. A halo of caramel placed on the top layer and outer curve of the curls lifts the shape instead of spreading it sideways.
What to Watch For
Paint the light where the curls stack upward, not where they billow outward. That usually means the crown, the upper cheek area, and the outer ring of the curl pattern. Leave some darker depth underneath so the curls keep their roundness without making the face feel rounder.
- Use thin painted sections, not chunky panels.
- Keep some depth near the jawline.
- Let the front curls be lighter at the tips, not all the way from the root.
- Diffuse gently so the color sits inside the curl pattern.
The result is airy, not puffy. That difference matters a lot.
8. Deep Side-Part Caramel Sweep
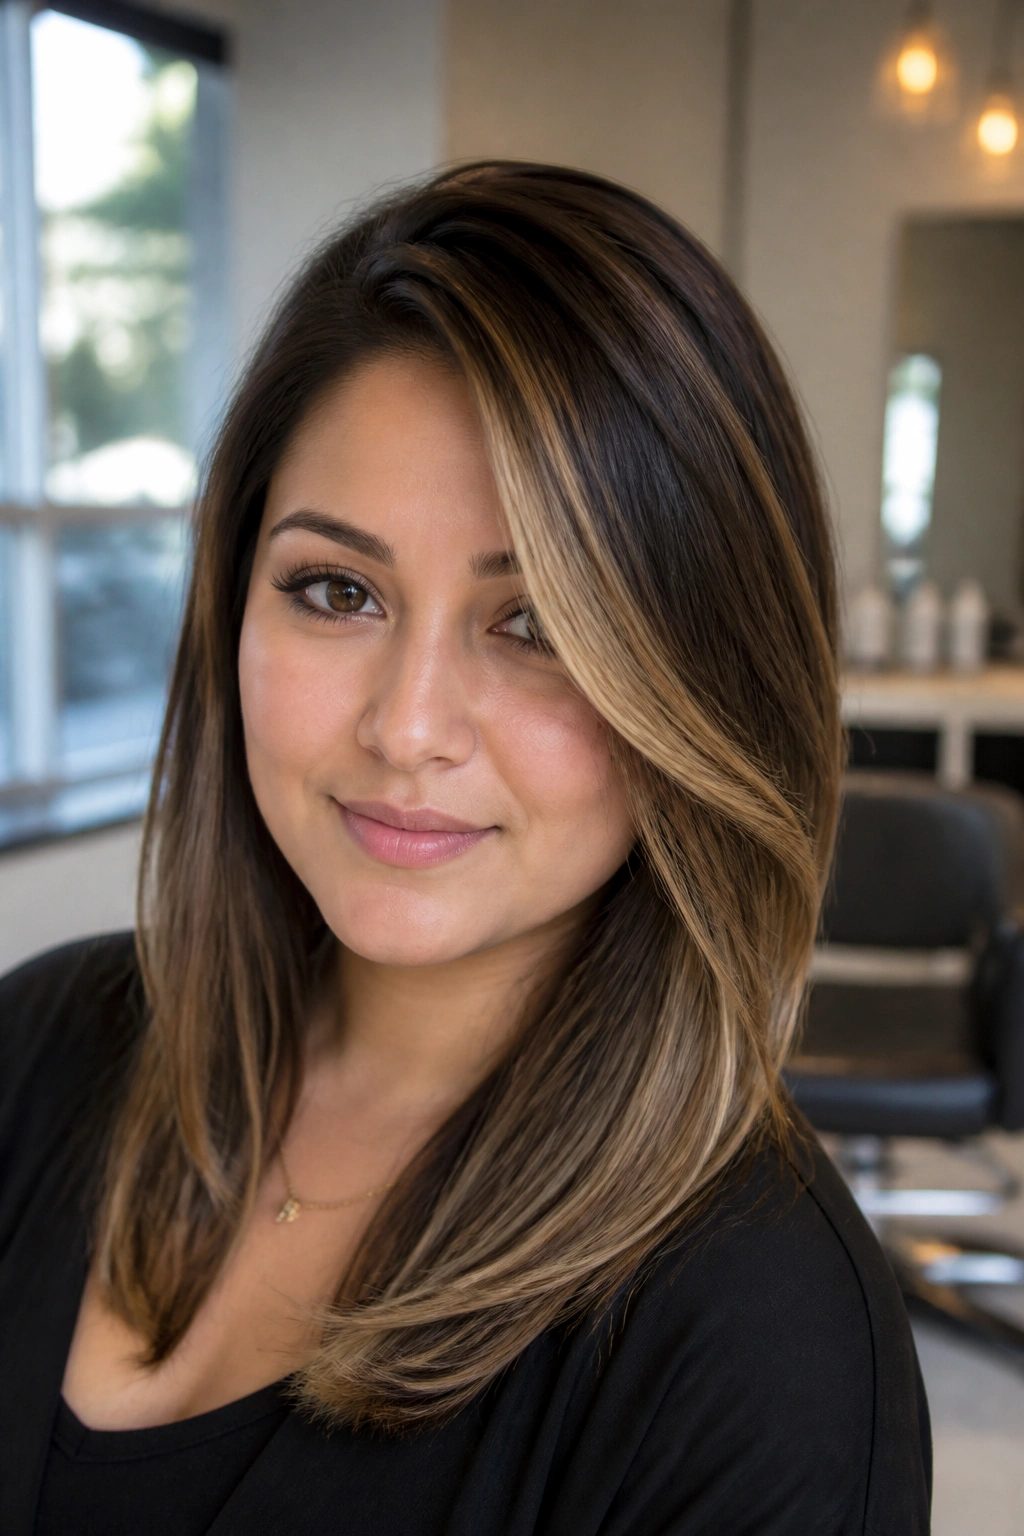
A deep side part can work wonders on a round face. It breaks the symmetry, and symmetry is what often makes the face read widest. Pair that part with one strong caramel sweep across the front, and the shape instantly feels longer.
The beauty of this look is that it does not need a ton of color to work. One side gets the brightness, the other side stays a little quieter, and the imbalance creates motion. That motion keeps the face from looking centered and circular.
How to Get It Right
Ask for the brightest section to begin near the part and slide down past the outer eye line. Keep it narrow enough to look sleek. If it fans out too much, the effect turns fluffy and you lose the slimming line.
This is a strong choice for blowouts. The hair falls in a clean diagonal, which is exactly what a round face likes.
9. Crown-Lift Foils That Open Up the Top
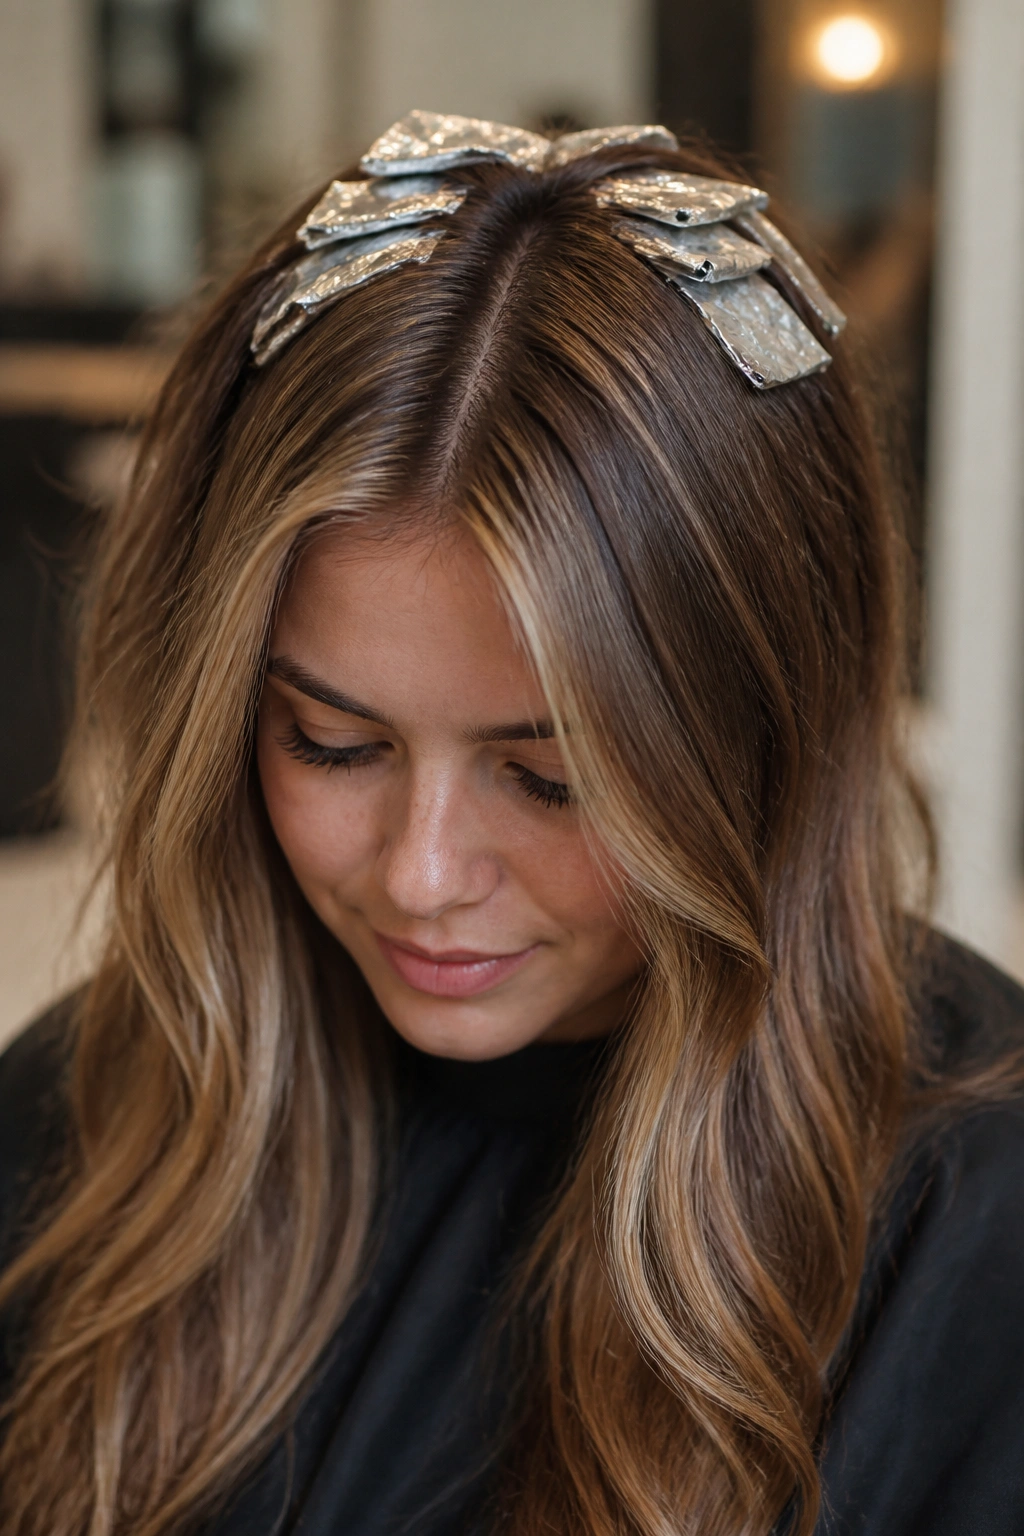
A little light at the crown changes the silhouette more than people expect. Crown-lift foils add height, and height is gold on a round face. The eye sees upward movement before it sees width.
This is not about turning the whole top blonde. That would be too much. It’s about placing caramel foils a few inches back from the hairline, so the top section feels lifted and the sides feel softer by comparison. The contrast helps the face look less compressed.
If your haircut is flat on top, this is one of the easiest fixes. It works on straight hair, wavy hair, and layered cuts. It also pairs nicely with a side part, because the lift at the top and the sweep at the front work together instead of fighting each other.
10. Curtain Bang Highlights With Soft Caramel Ends
Can curtain bangs flatter a round face? Yes — if the highlights are placed with some restraint. The bright part should sit on the outer edges of the bangs and trail into the side pieces, not sit in one thick strip right across the forehead.
That side movement matters. It draws the eye down and out, which keeps the face from looking too full in the center. Caramel ends also help the bangs blend into the rest of the cut, so the style feels intentional instead of chopped up.
I like this look on shag cuts and shoulder-length layers. The bangs break up the forehead, the light edges soften the cheeks, and the longer sides help the whole face read taller. It’s a good one if you want shape without heaviness.
11. Mocha Base With Floating Caramel Veils
A round face does not always need more brightness at the front. Sometimes a deeper mocha base with floating caramel veils gives a cleaner, slimmer line because the light is spread in thinner sheets, not concentrated in one spot.
Those veils should feel airy. Think of color that comes and goes as the hair moves, not blocks that stay visible all the time. This works especially well if your hair is dense, because the darker base holds the weight while the caramel adds motion.
The nice thing here is that the look feels polished without looking overworked. You get dimension, shine, and softness, but the face still keeps its shape. That balance can be more flattering than a brighter, louder set of highlights.
12. Soft Ombré From Root Shadow to Caramel Tips
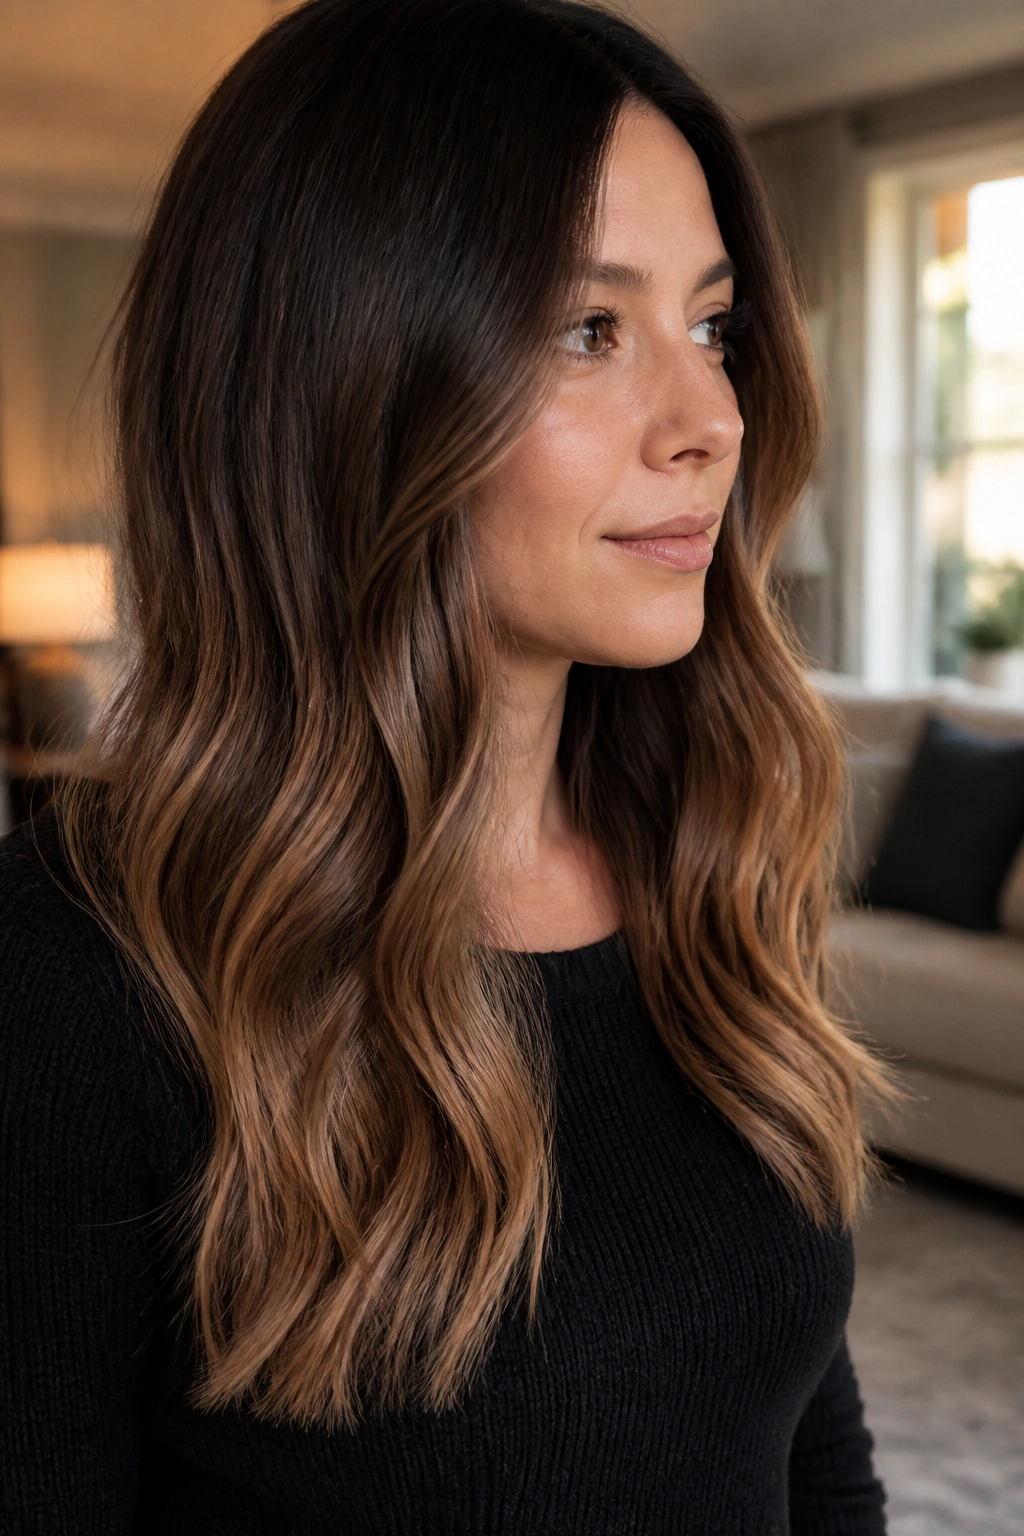
A soft ombré is one of the easiest ways to stretch a round face. The color starts darker at the roots, gets lighter through the mid-lengths, and ends in warm caramel tips that feel almost toasted. The vertical fade does the lengthening for you.
Best For Growth-Friendly Color
This is a smart pick if you do not want frequent touch-ups. The darker root gives you time, while the lighter ends keep the style from feeling heavy around the cheeks. It also works well on longer cuts, where the gradient has enough room to breathe.
- Keep the root shadow at least 1 level deeper than the mid-lengths.
- Let the caramel start below the cheek area.
- Finish with a gloss so the ends look shiny, not dry.
- Wear it with waves for the softest line.
The color should feel like it’s moving downward. That downward pull is doing a lot of the flattering here.
13. Chunky Retro Caramel Streaks
Chunky highlights can work on a round face. They just need the right shape. Vertical caramel streaks create length, while wide horizontal blocks can make the face look wider than it is.
That is the line people miss. The ’90s-inspired look gets blamed for being harsh, but the real issue is placement. If the streaks drop from near the crown and continue through the length, they can actually sharpen the whole silhouette.
This version is best when the hair is straightened or blown out smooth. You want the color bands to stay readable. A little shine serum helps the caramel pop without making the finish greasy. If you like a bolder style, this is the one that brings personality without losing the face-framing effect.
14. Micro-Babylights for Fine Hair
Fine hair can look flatter when the highlights are too big. Micro-babylights solve that problem by building a soft cloud of light instead of a few obvious streaks. On a round face, that softness keeps the sides from feeling heavy.
The smallest highlights often do the best work. They add texture where the eye needs it, especially around the crown and the front third of the hair, but they do not carve a hard line across the cheeks. The color lives inside the hair rather than sitting on top of it.
This is a strong option if you want caramel brown highlights that stay pretty under daylight and indoor light alike. They also grow out nicely. Tiny foils, careful spacing, and a gloss afterward — that’s enough.
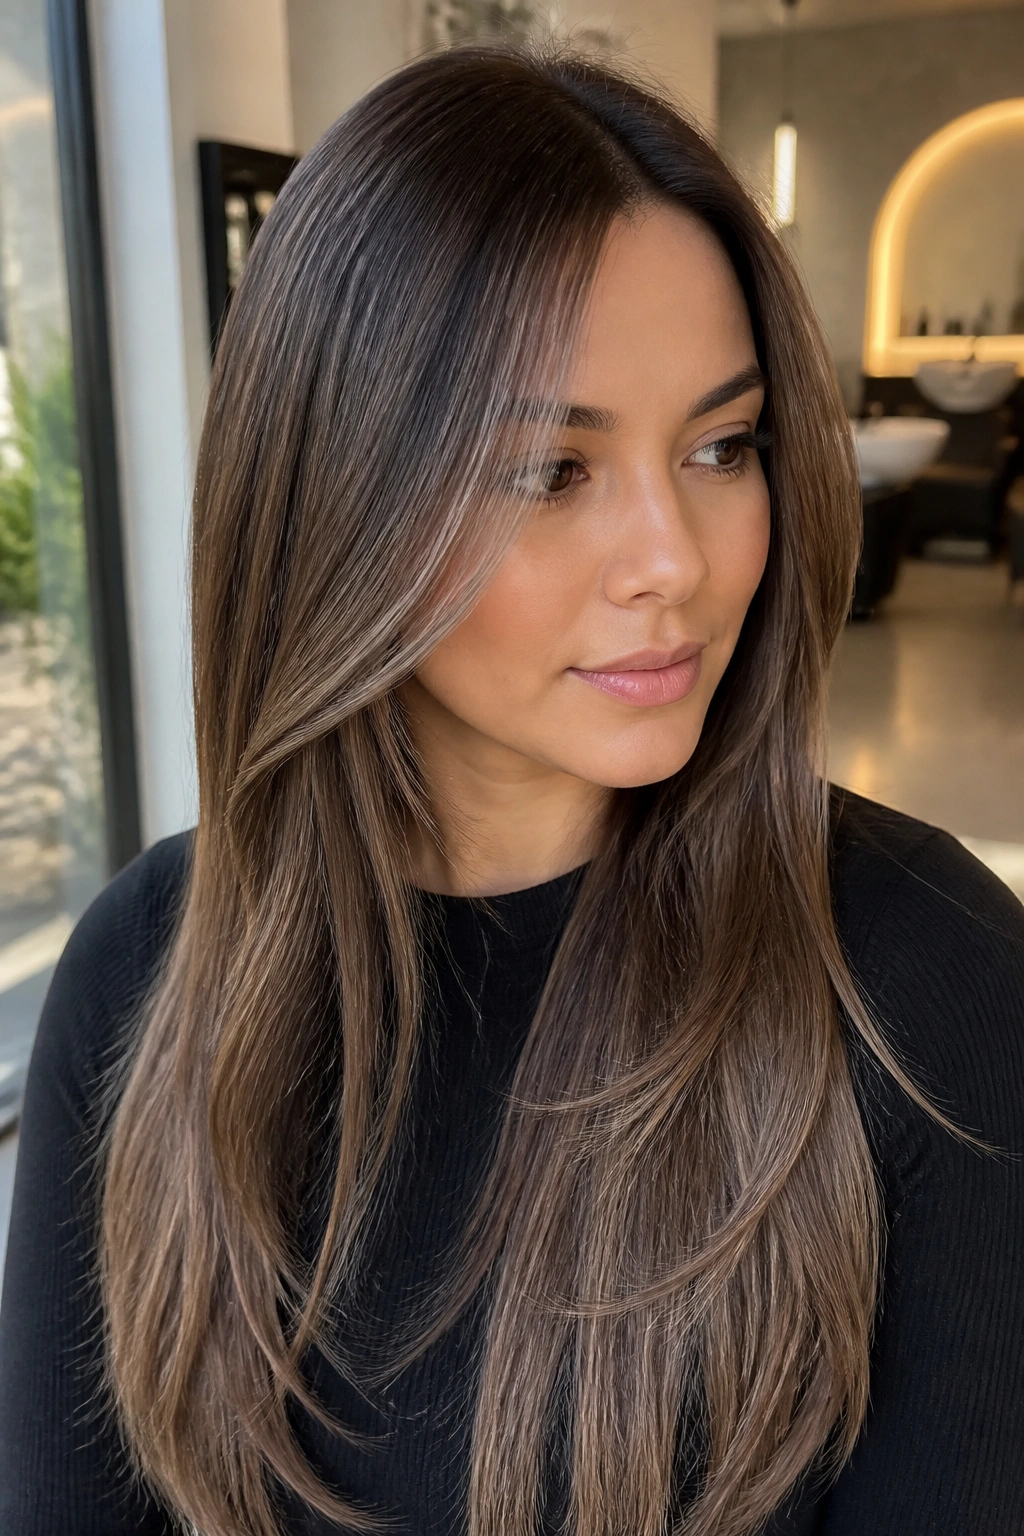
15. Caramel Brown Balayage Through Long Layers
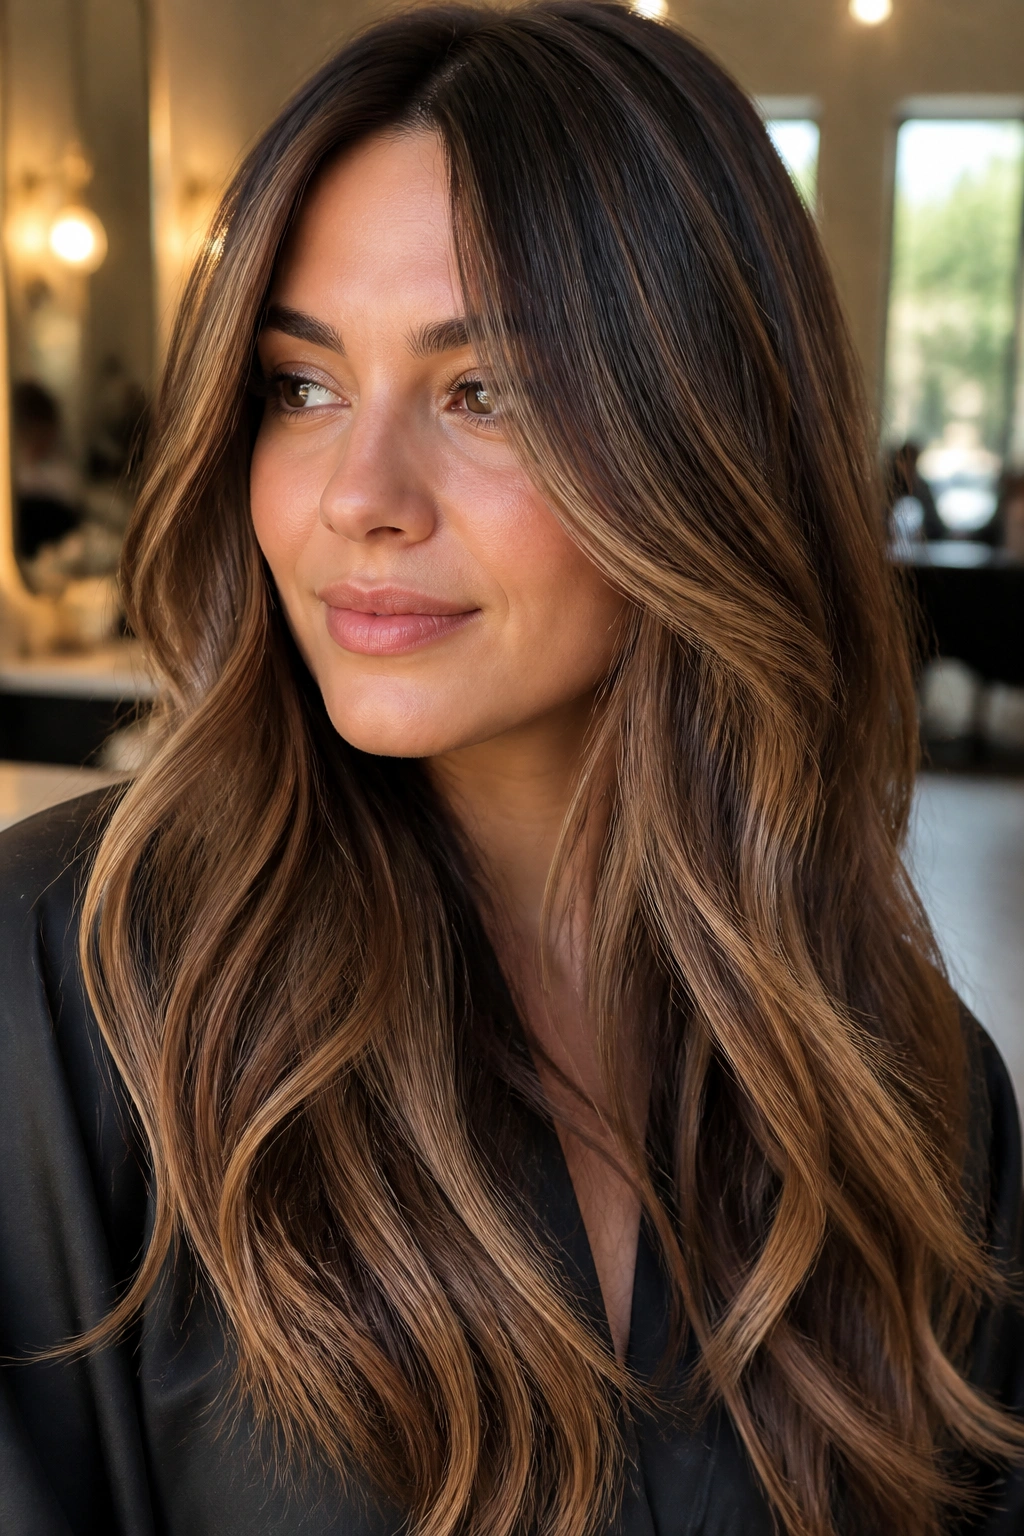
Long layers give balayage room to stretch, and that stretch is what flatters a round face. Caramel brown balayage through long layers creates a vertical flow from the top section down to the ends, which stops the face from feeling boxed in.
Where the Light Should Land
Focus the brightest pieces on the upper layers and let them drift into the mid-lengths. Keep the lower layers a little deeper so the cut doesn’t balloon out at the sides. The contrast between the top and bottom is what makes the shape look longer.
A layered cut with caramel balayage also moves well when you walk. The strands separate just enough to show the color, but not so much that the whole style turns stripy. That’s the sweet spot.
If you have thick hair, this look is especially flattering because the layers remove bulk and the balayage keeps the ends from looking blunt.
16. U-Shaped Highlight Pattern for Shoulder-Length Hair

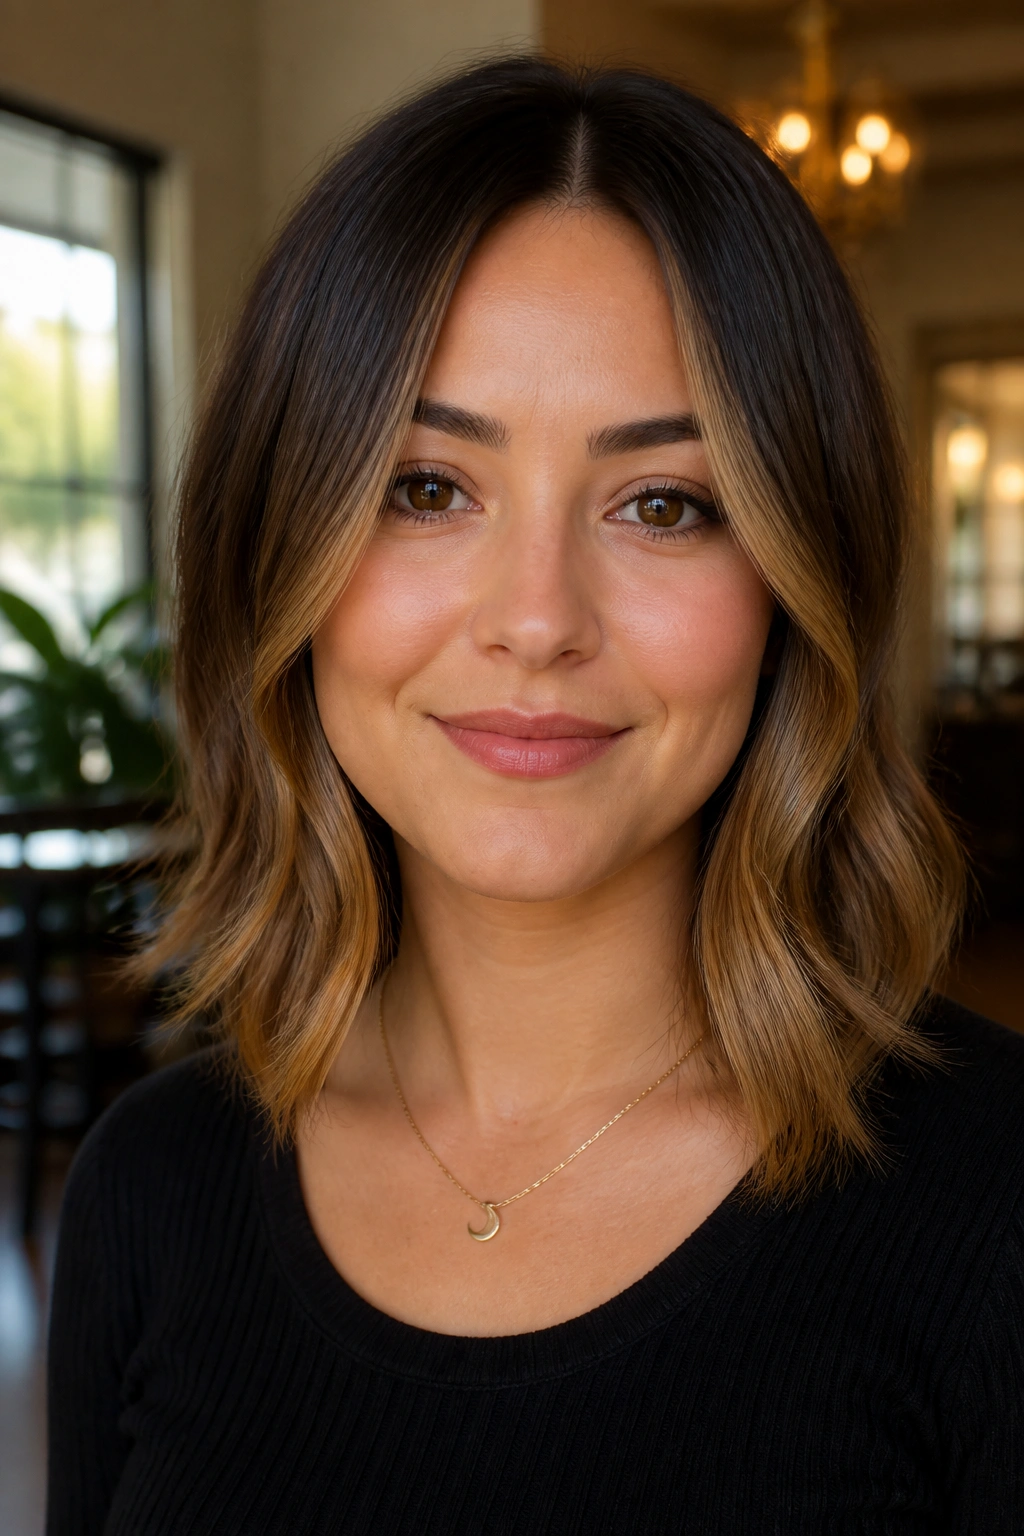
Why does a U-shape help? Because it creates brightness that opens the face at the sides without building a hard horizontal line. A U-shaped highlight pattern curves from the crown down toward the front, then drops lower at the sides and ends.
That curve matters on shoulder-length hair. It follows the natural fall of the cut and avoids the boxy look that can make a round face seem wider. The color should stay lighter through the outer lengths, with a softer root near the top.
This look feels modern without being fussy. It works on straight blowouts, loose bends, and soft curls. The best part is the shape of the color itself — it mirrors the haircut rather than fighting it.
17. Collarbone Bright Ribbons on a Wavy Lob
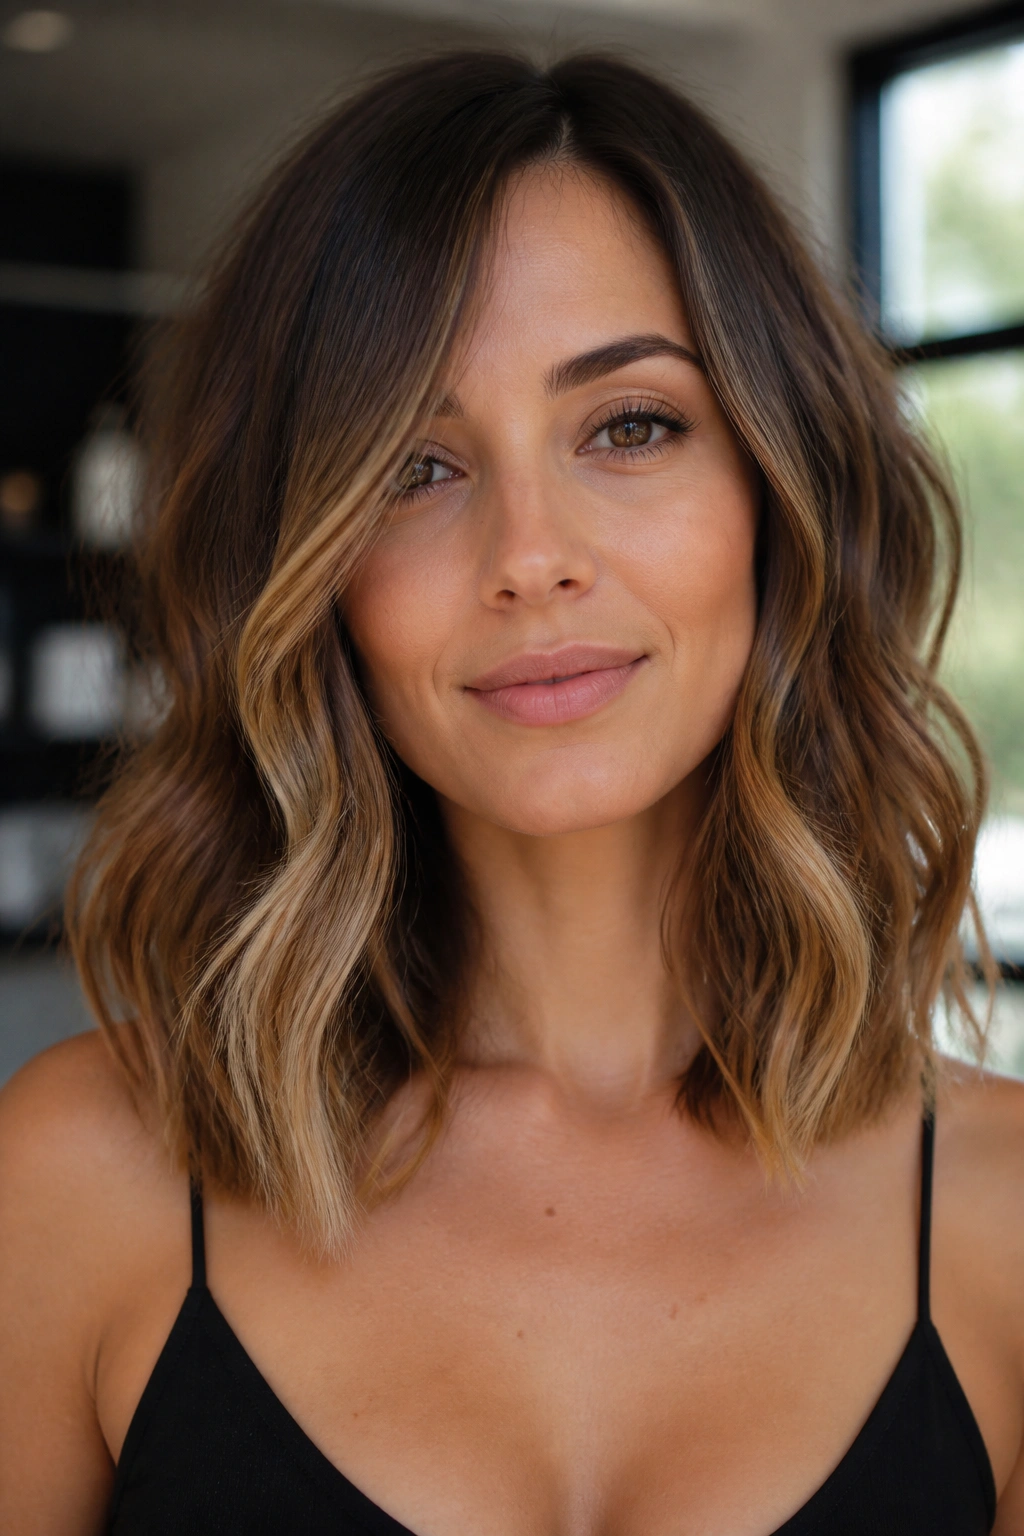
A wavy lob and a round face are a good pair when the color is handled with care. Bright caramel ribbons that sit around the collarbone drag the eye downward and make the cut look longer than it is.
The collarbone is a useful anchor point. Anything that draws attention there naturally shifts focus away from the cheeks. When the waves hit that length, the caramel bends with the hair and creates a long, soft line instead of a wide one.
I like this look best when the front pieces are a touch brighter than the rest. That gives the face a little lift without crowding the cheeks. It’s casual, flattering, and easy to wear with a tucked-behind-the-ear shape.
18. Warm Biscuit Caramel on Chestnut Brown Hair

Chestnut brown hair loves warm caramel, but the shade should be creamy rather than orange. Warm biscuit caramel has enough softness to blend, which keeps a round face from looking too loud around the sides.
How to Keep It From Turning Brassy
The danger with warm tones is that they can go too golden and lose that soft, face-slimming effect. A gentle gloss helps. So does keeping some depth at the root and around the underside of the hair, where the darker color gives the face a little edge.
- Ask for a beige-caramel glaze if the hair pulls too warm.
- Keep the lightest pieces away from the widest part of the cheeks.
- Style with loose bends so the ribbons stay long.
- Refresh with a toner when the warmth starts to feel muddy.
This look is warm, soft, and easy to live with. It never feels stiff.
19. Honey-Caramel Highlights With Quiet Lowlights
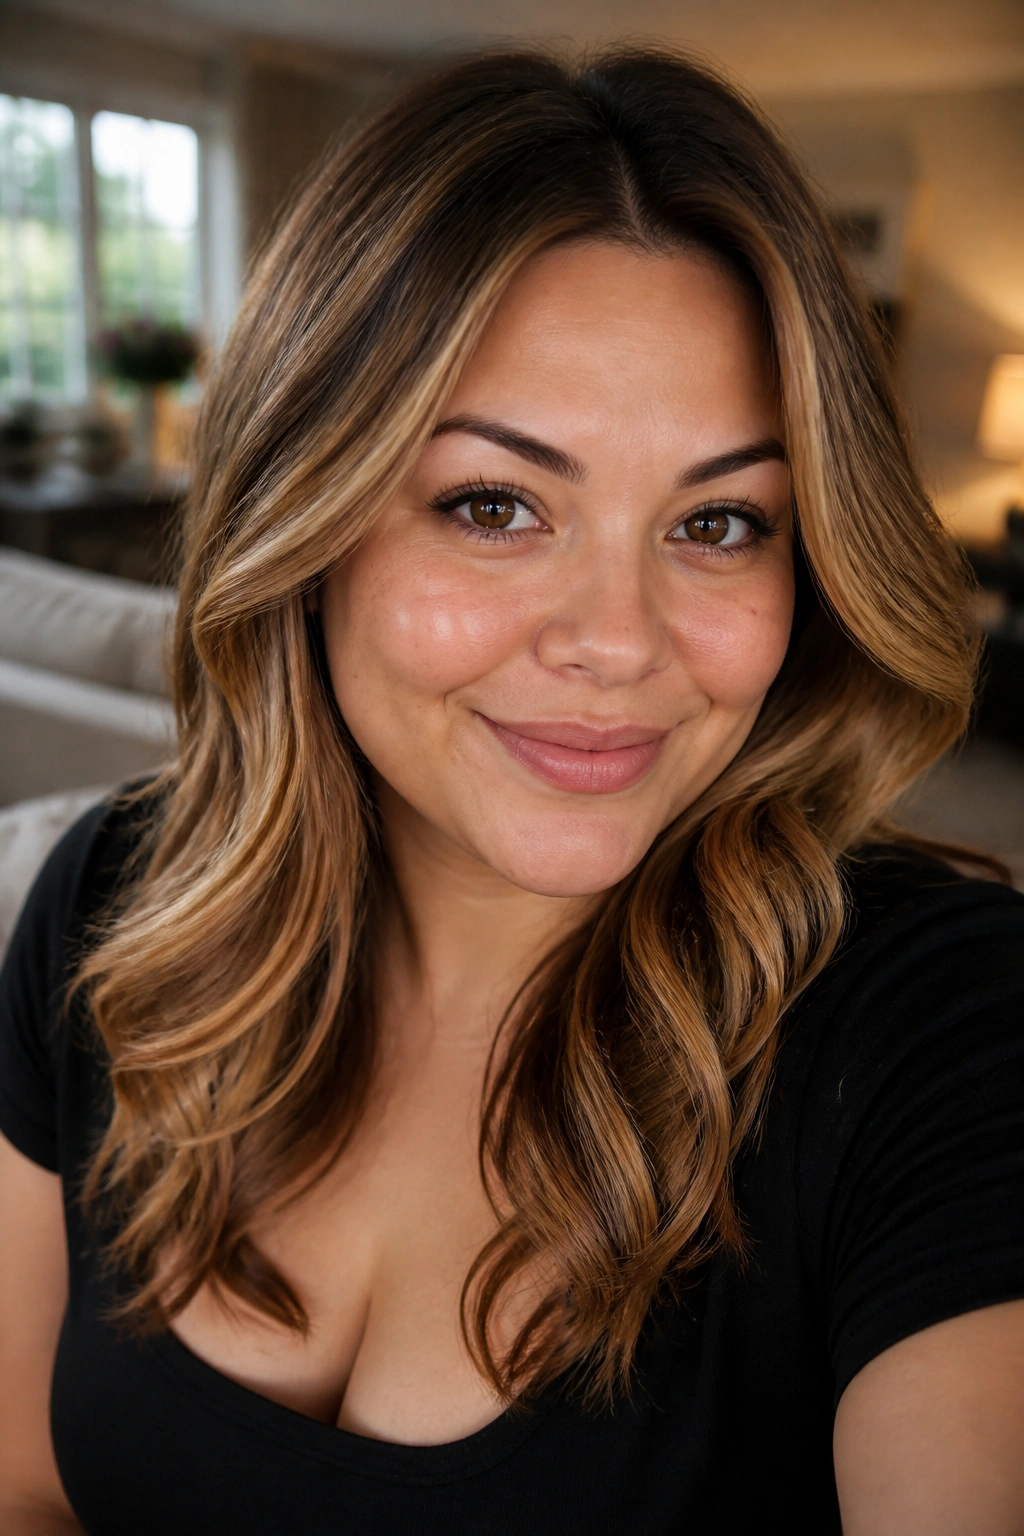
More light is not always the answer. A round face can look better with honey-caramel highlights and quiet lowlights because the darker strands carve out shape between the lighter ones.
That mix gives the hair depth, and depth keeps the sides from puffing out visually. The honey pieces can sit higher on the face-framing layers while the lowlights stay tucked into the underside and outer sides. That contrast helps the face look narrower without looking harsh.
This is one of the smartest choices for thick or medium-thick hair. The lowlights stop the brightness from spreading too far across the width of the face, and the honey pieces keep the whole thing alive. Simple idea. Strong result.
20. Ashy Caramel for a Cooler, Slimmer Look
If warm gold tends to make your face feel fuller, shift the tone cooler. Ashy caramel has a beige edge that softens the glow and can make a round face look a little leaner because the highlights read less sunny and more linear.
That cooler finish is especially helpful on medium brown or dark brown hair. The contrast stays visible, but it does not jump out. It also plays well with straight styles, where a softer tone can keep the hair from looking too thick along the sides.
What to Ask Your Colorist For
You want the caramel to sit in the beige zone, not the orange zone. A neutral or cool gloss can keep the tone from drifting warm. If the base is very rich, ask for a darker root and thin ribbons through the front so the softness stays intact.
This one is quiet, not dull. There’s a difference.
21. Copper-Caramel Mix With Soft Shine

A little copper in the caramel can be lovely on a round face, especially when the hair needs warmth and shine. Copper-caramel highlights catch the eye fast, so the placement has to stay disciplined. Too much around the cheeks and the face looks fuller. Placed well, they add glow and movement.
The finish should feel like warm metal under soft light. That sounds fancy, but the real goal is simple: a rich, reflective color that slides through the hair instead of sitting in stripes. It works beautifully on layered cuts and side parts.
This is a great pick if your skin tone likes warmth and your cut has enough movement to break up the color. The shine is part of the appeal. So is the fact that it feels alive even on a plain day.
22. Highlighted Curls With a Glossy Finish
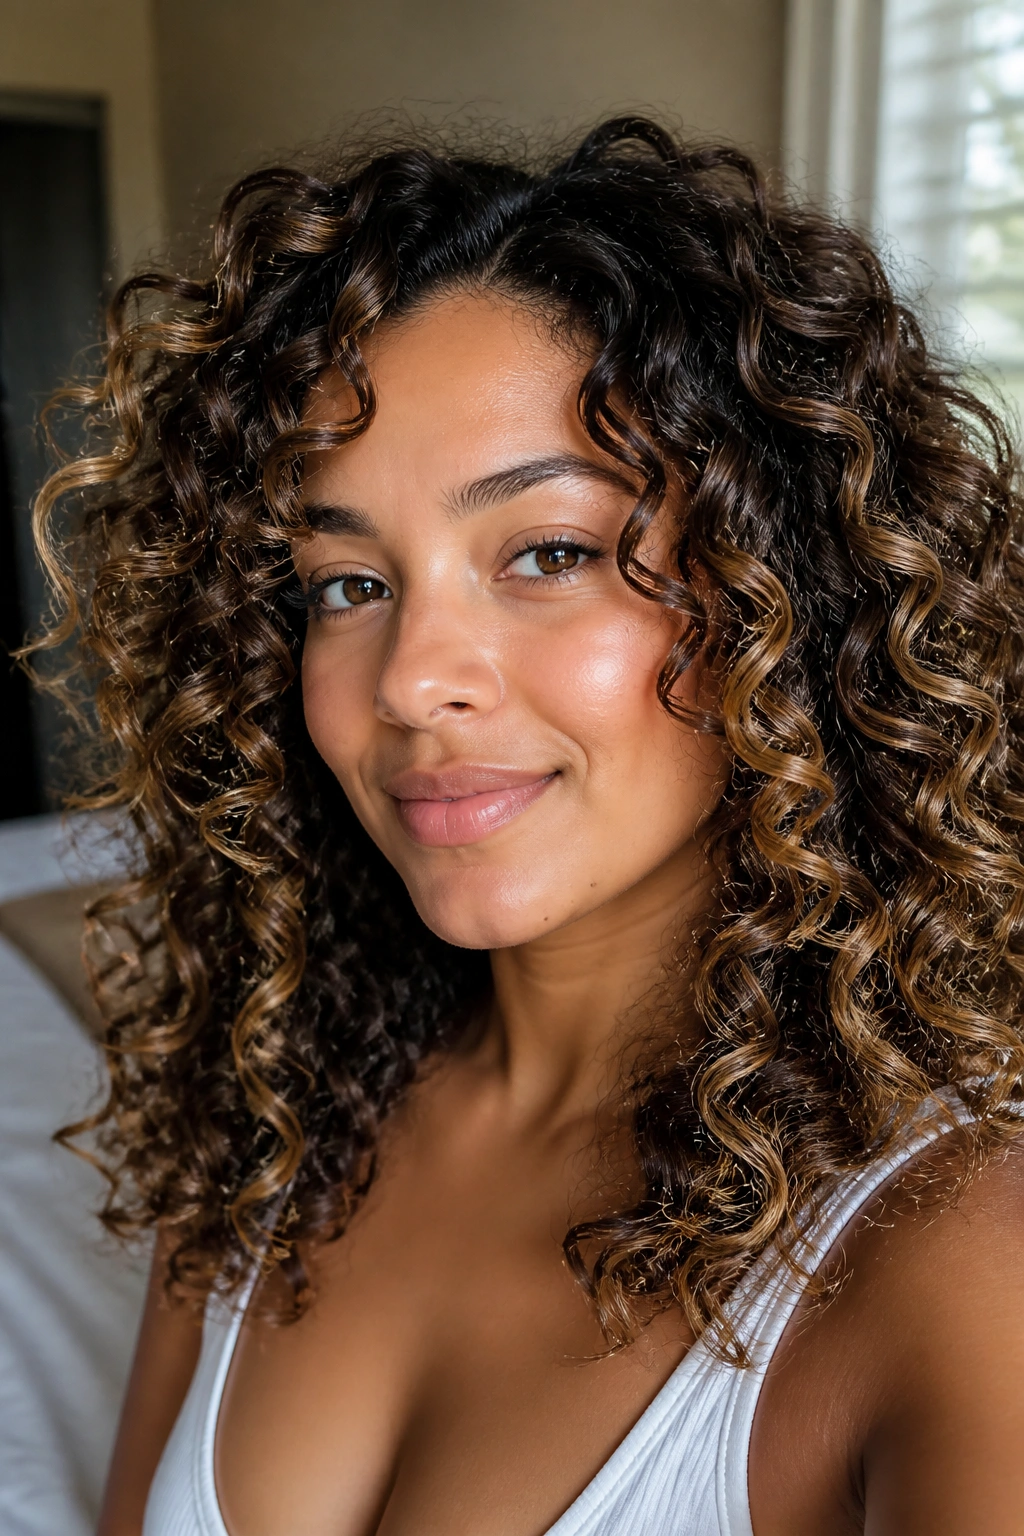
Curls need gloss more than they need noise. Highlighted curls with caramel shine look best when the color follows the curl pattern and lets the shape do the talking. On a round face, that means keeping the brightest pieces on the outer arcs and upper layers.
Where to Paint the Light
Paint where the curls lift, not where they spread widest. That usually means the top of the head, the front curl clumps, and the ends of longer ringlets. Leave enough depth underneath so the curl mass does not turn into one wide halo.
A gloss afterward helps the caramel read smooth instead of dry. It also makes the curls separate better, which is a quiet win for a round face because the eye sees defined lines instead of one big blur.
If you wear curls, this is a more flattering move than heavy striping. Every time.
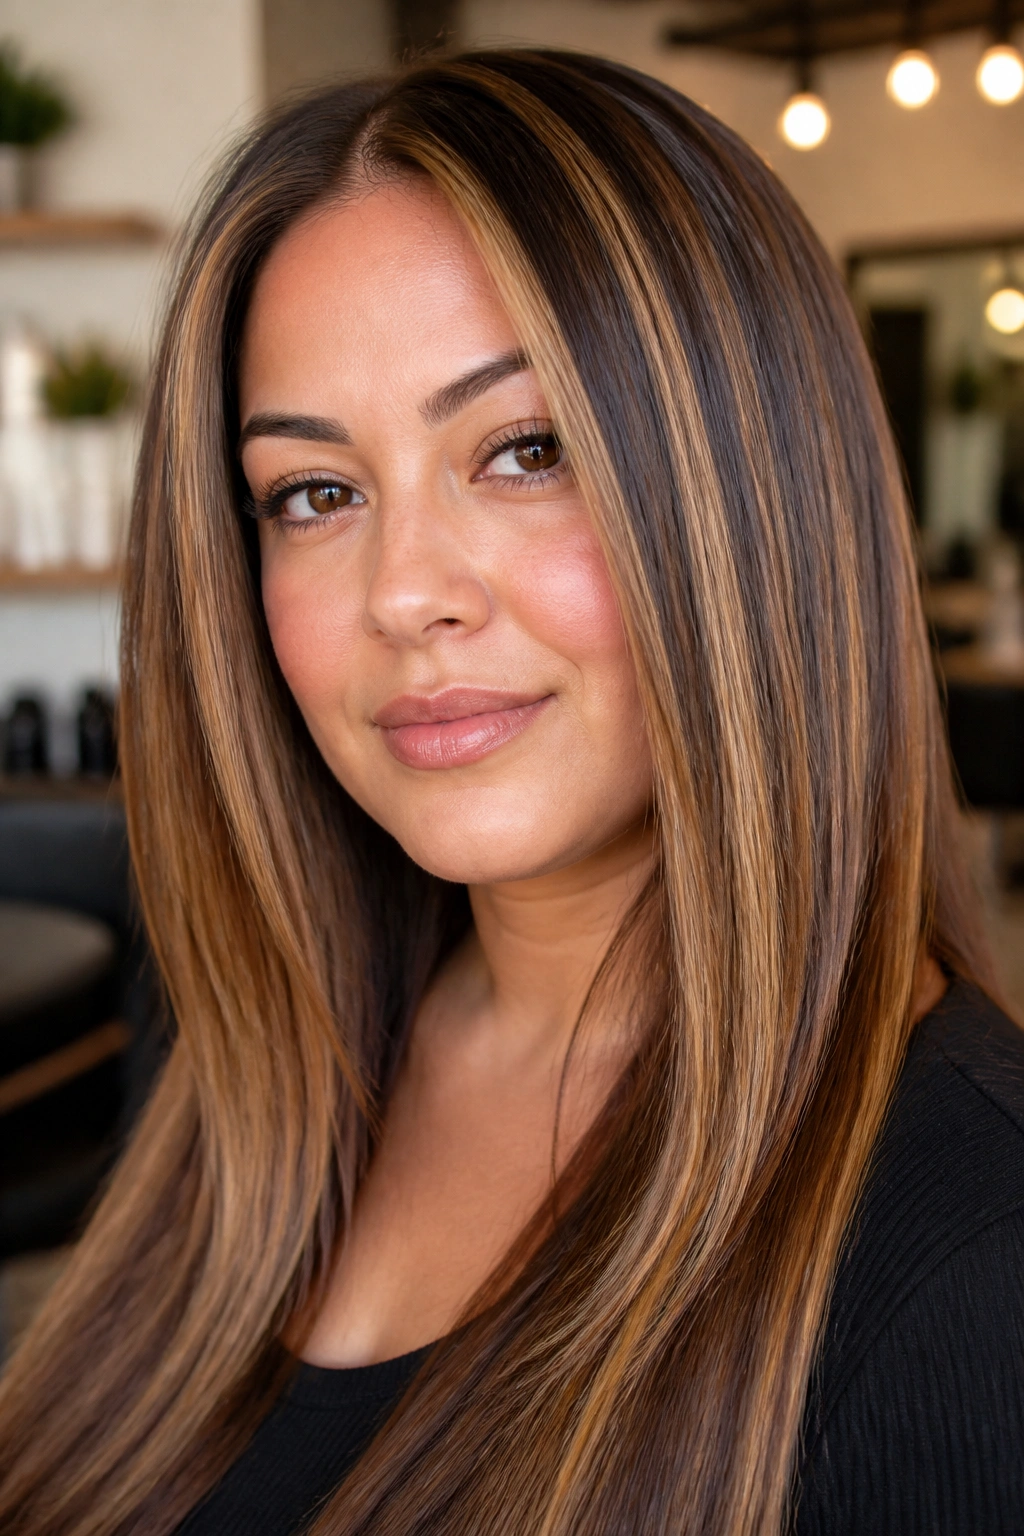
23. Straight-Blowout Caramel Stripes
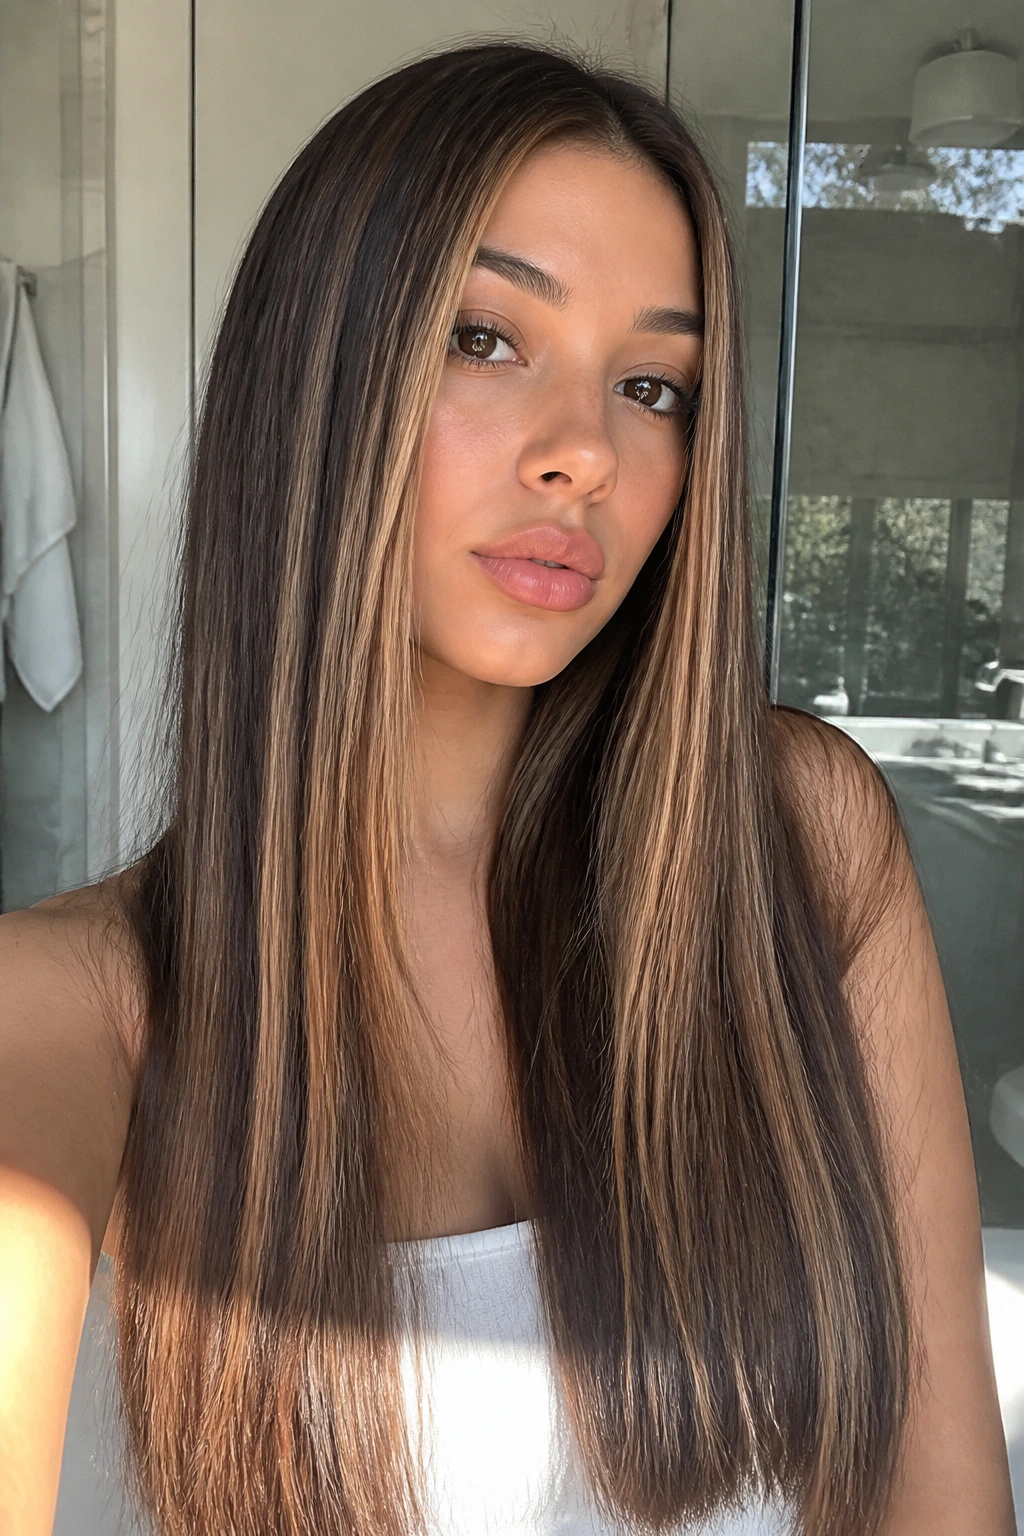
Why do straight styles need a different approach? Because straight hair shows every line. Slim caramel stripes can make a round face look longer if they run vertically from the upper section toward the ends, but thick horizontal panels can do the opposite.
The cleanest version has narrow foils placed a little farther back from the hairline and a few lighter ribbons through the front. That keeps the face open without creating a wide curtain of brightness. The straighter the hair, the more careful the placement needs to be.
This look is especially good if you like a polished blowout. The color falls in neat lines, the gloss catches on the smoother surface, and the face gets the lengthening effect without a lot of extra styling.
24. Layered Shag Highlights With Movement
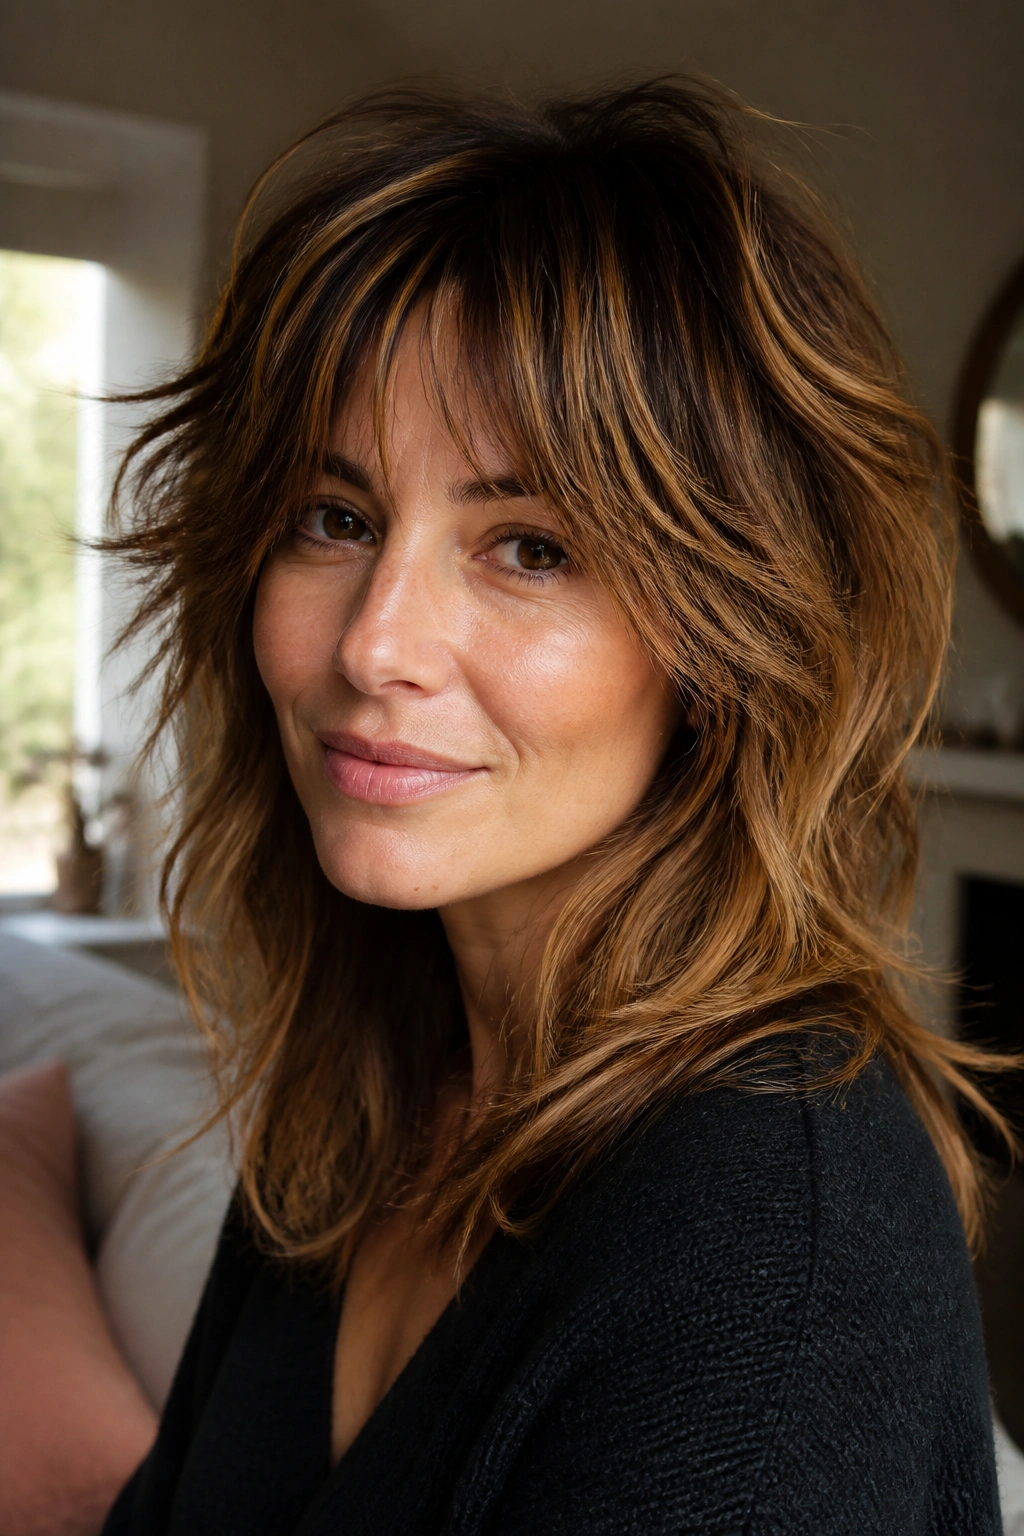
A shag cut wants color that moves as much as the haircut does. Caramel highlights scattered through a layered shag give the fringe, crown, and ends their own little flashes of light, which keeps a round face from looking too centered.
The trick is not to place the brightest pieces all in one area. Spread them through the shag so the eye keeps traveling. The texture of the cut helps here, because the layers break up the color and stop it from feeling flat.
Best Placement Zones
- The crown, for a little lift.
- The outer fringe, for softness near the forehead.
- The ends, for movement and lightness.
- A few hidden ribbons underneath, so the color shows when the hair swings.
The result is messy in a good way. Controlled, but not stiff.
25. Shadow Roots and Dimensional Caramel Ends
A darker root can do more for a round face than a brighter front ever could. Shadow roots with dimensional caramel ends create contrast that pulls the eye downward and makes the face appear longer.
This is a strong choice for long hair or medium hair that reaches past the shoulders. The darker top section gives the head shape, while the lighter ends keep the style from feeling heavy. It also helps if you want less maintenance, because the grow-out blends more easily.
I like this look because it has restraint. Not every flattering color needs to be loud at the hairline. Sometimes the smartest move is letting the brightness live lower, where it adds movement without widening the face.
26. Soft Peekaboo Panels Under the Top Layer
Hidden highlights can be the smartest choice on a round face. Soft peekaboo caramel panels sit under the top layer, so the brightness appears when the hair moves instead of sitting out front all day.
That makes the look feel playful without pushing width onto the cheeks. The top layer keeps some depth, which helps the face read narrower, while the lighter panels underneath give you flash and dimension. It’s a nice compromise if you want something interesting but not loud.
Who This Works Best For
- Clients who wear their hair half up a lot.
- People who want color without constant root touch-ups.
- Anyone with thick hair that hides light well.
- Round faces that need lift, not extra width.
The color shows when you want it to and stays quiet when you don’t. That’s a useful balance.
27. Face-Framing Foilyage for Maximum Lift
Foilyage sits between balayage and foils, which is why it’s so handy. Face-framing foilyage gives the caramel enough lift to pop while keeping the blend softer than a hard foil stripe. On a round face, that lift helps the front look taller and cleaner.
The biggest payoff comes when the brightest pieces start high enough to lift the eyes but not so wide that they spread across the cheeks. Foilyage lets you control that. You get a stronger result near the front and a softer melt through the rest of the hair.
If your hair is dark and resistant, this is one of the better ways to get visible caramel. It gives the color a little more punch, which matters when you want the face-framing pieces to do actual work instead of disappearing in the base.
28. Soft Ends-Only Caramel Dusting
If you want the most forgiving option of the bunch, keep the caramel low. A soft dusting of caramel at the ends adds light where the hair naturally thins out, which helps a round face look longer because the brightness moves away from the widest part of the head.
This is also the easiest version to live with. The grow-out is calm, the maintenance is light, and the result still gives you that warm brunette shine people like so much. On waves, the ends catch light as they bend. On straight hair, they create a narrow, neat finish. On curls, they make the shape feel airy instead of heavy.
If you’re torn between a few options, start here. It’s hard to hate, easy to wear, and kinder to the face shape than a lot of louder placements. Once you know how much brightness you actually want, you can always move the caramel higher on the next visit.