



Fine hair can go flat fast. One brisk commute, a little humidity, a scarf over your coat collar, and suddenly the shape you left the house with has vanished.
The fix is rarely more product. It’s usually better structure. The best hairstyles for fine hair keep the perimeter clean, give the crown a little lift, and avoid the kind of over-layering that turns ends wispy and sad-looking by the second day.
That’s the part people miss. Fine hair is about strand diameter, not whether you have “enough” hair, and those two things are not the same at all. A blunt edge can make a bob look denser. A deep side part can wake up a flat crown. A tiny bend in the mid-lengths can make the whole cut read as fuller, even when the actual amount of hair never changes.
Some of the styles below are cuts. Some are styling tricks. A few are a bit of both, which is usually where the smartest options live. The goal is simple: make the hair you already have look intentional, lifted, and fuller without turning it into a stiff helmet.
1. Blunt Bob for Fine Hair With Clean Ends
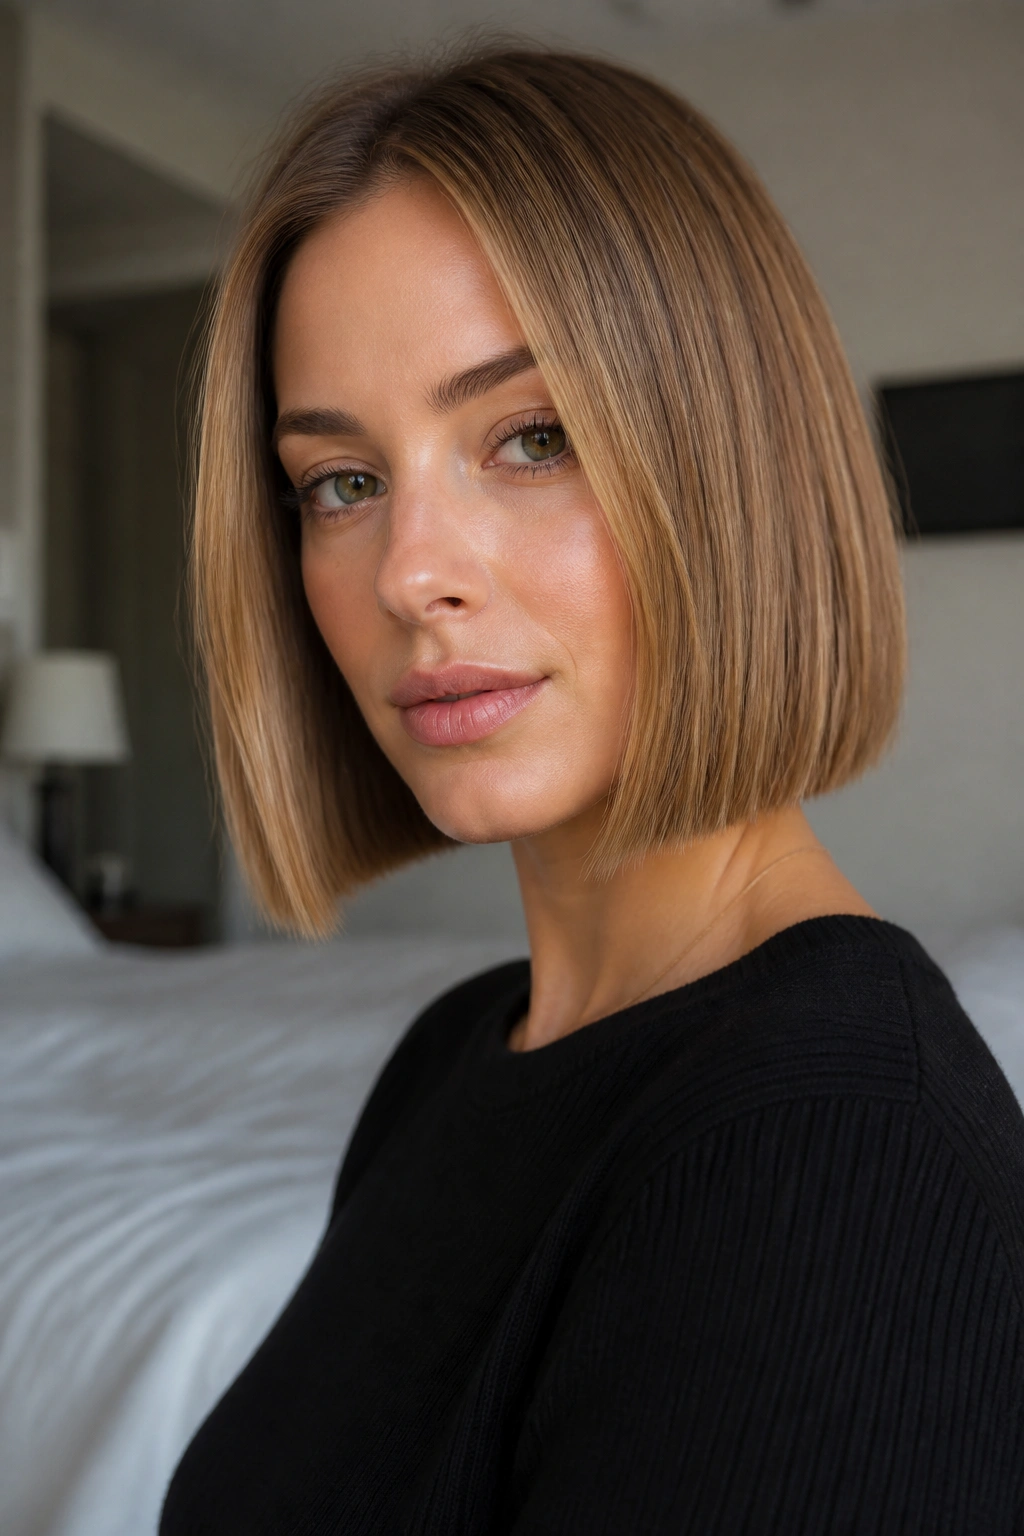
A blunt bob is the blunt answer, and that’s exactly why it works so well on fine hair. When the bottom edge is cut straight across, the ends sit together instead of feathering out into air. That creates the look of more weight, even if the hair itself is light.
Why It Works
Ask for a bob that lands anywhere from chin to jaw length, with a solid perimeter and very little thinning through the ends. If your stylist starts slicing away too much interior weight, the cut can go airy in the wrong way. You want shape, not fluff.
I also like this cut because it gives you options without asking for much. Wear it smooth and tucked behind one ear for a sharp line, or rough it up with a pea-sized dab of styling cream and a quick blow-dry. The finish should feel neat, not fussy.
- Keep the length at the jaw or slightly below if your hair tends to kick up at the ends.
- Ask for minimal point-cutting so the edges stay blunt.
- Use a round brush or paddle brush and dry the roots first for lift.
Pro tip: flip your part to the heavier side when you want the cut to look fuller in five seconds flat.
2. Collarbone Lob With a Soft Bend
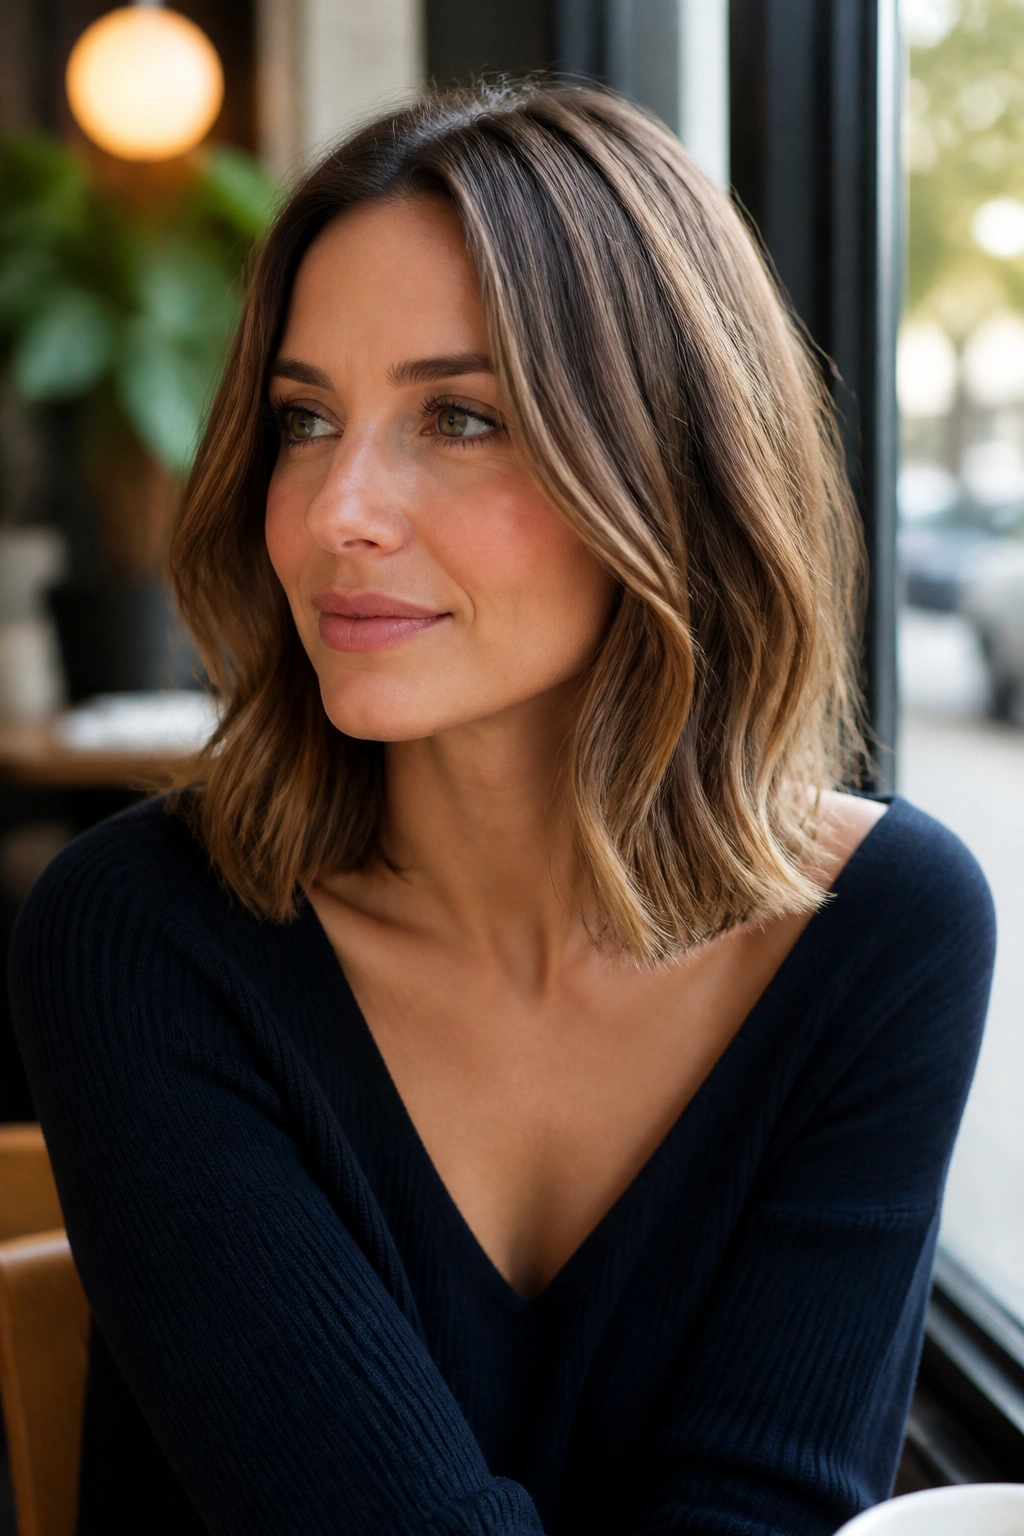
The collarbone lob may be the safest haircut for fine hair, and I mean that in the best way. It’s long enough to tuck, clip, or tie back, but short enough that the ends don’t disappear into a thin haze.
A soft bend is the part that saves it from looking plain. Instead of curling the whole head into obvious ringlets, wrap just the mid-lengths around a 1.25-inch curling iron, leave the last inch or so straight, and brush it out once it cools. That gives you movement without eating up the shape.
The lob also behaves well on second-day hair. A mist of dry shampoo at the roots, then a quick shake with your fingers, is often enough. If your hair falls flat by lunch, this is the cut I’d reach for before chasing a more dramatic shape.
3. Side-Parted Tucked Bob
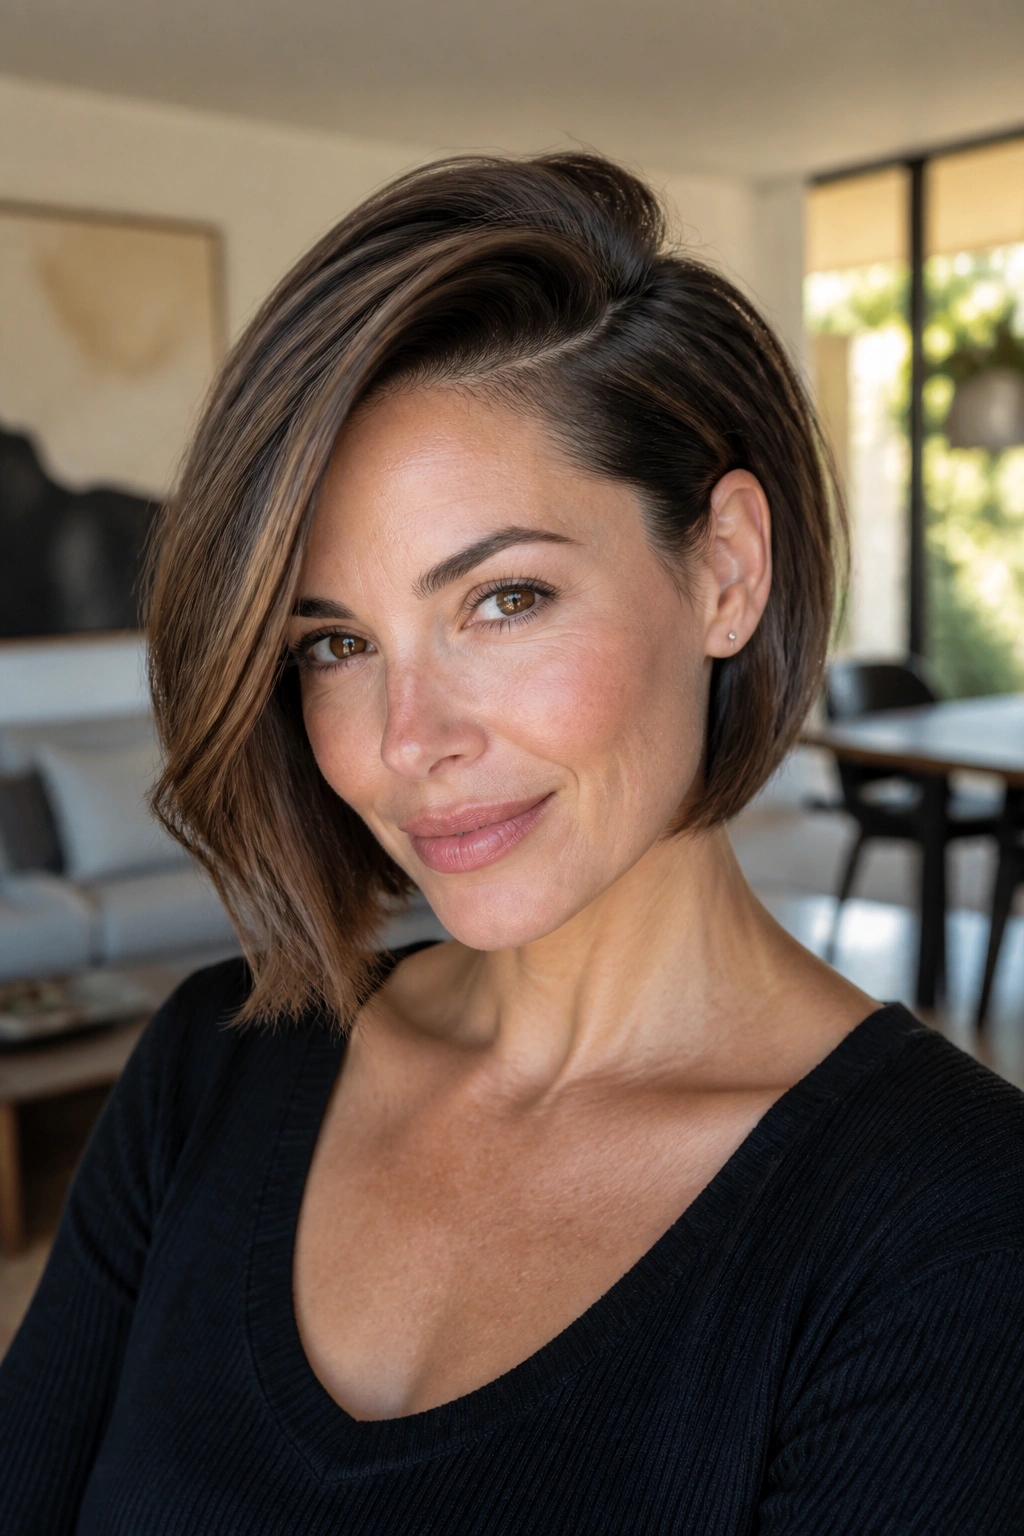
Can a part change the whole haircut? Yes. More than people want to admit.
A side-parted tucked bob works because it cheats the eye. The deep part lifts one side at the root, and the tucked side creates a little shadow and break in the outline, which makes the hairline look fuller. Fine hair loves that trick because it needs shape more than bulk.
How to Style It
Start with a root-lift spray or light mousse at the crown, then blow-dry with your head tipped to the side for the first minute. Don’t skip the cooling step. That’s where the lift actually sets.
- Create a part about 2 to 3 inches off center.
- Dry the roots in the opposite direction first.
- Tuck one side behind the ear and leave the other side loose.
What to watch for: if you keep the same side part every single day, the hair can start to lie there on its own. Switch sides every few wears. It helps more than people think.
4. French Bob With Soft Fringe

If your hair hits your chin and keeps collapsing forward, this is the fix I’d look at first. The French bob keeps the length short enough to hold body, while the fringe adds shape at the front without dragging the whole cut down.
The key is softness. You do not want a heavy, blunt curtain of bangs that swallows the forehead. Ask for a light fringe that sits around eyebrow level or just below, with slightly longer pieces at the temples. That framing draws attention upward and stops the bob from feeling boxy.
This cut tends to look best with a little natural texture. A quick air-dry plus a touch of styling paste at the ends is usually enough. If your hair is pin-straight, a fast pass with a round brush at the front gives it a cleaner finish, but don’t overwork it. The charm is in the shape, not the polish.
5. Bixie Cut With Piecey Top
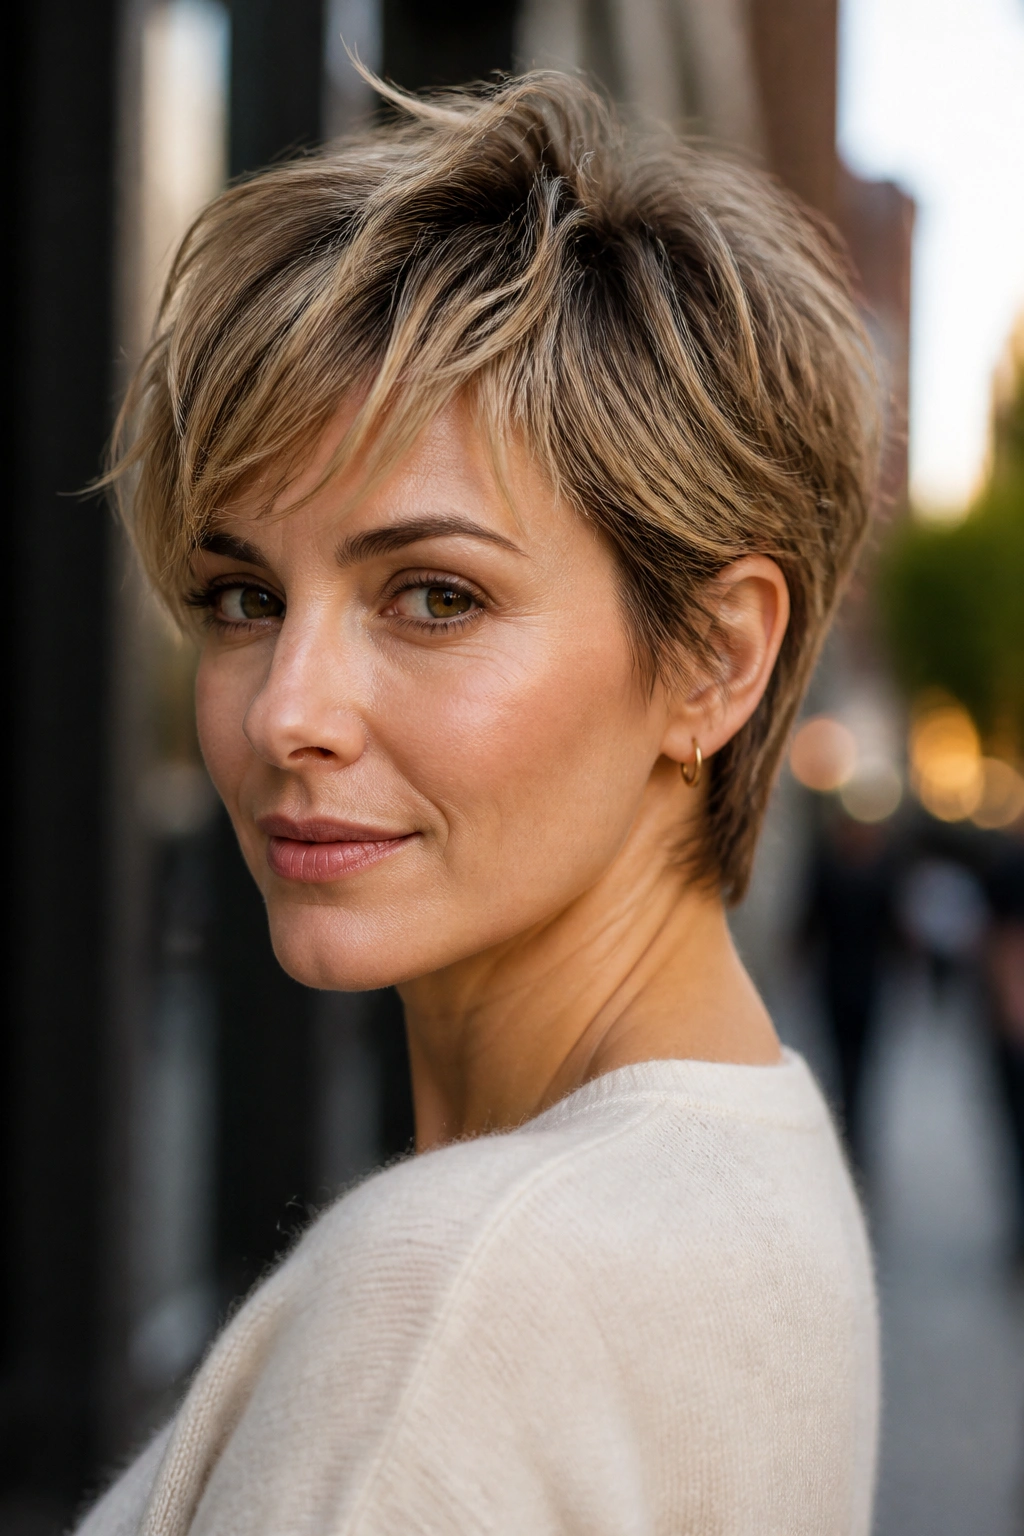
A bixie sits between a bob and a pixie, and on fine hair that in-between length is often the sweet spot. It removes the weight that drags hair down, but it leaves enough length on top to create lift and movement.
I like bixies for people who want short hair without committing to a very cropped shape. The sides stay close enough to the head to keep the outline tidy, while the top can be pushed forward, swept back, or roughed up with a small amount of styling wax. It gives you a little attitude without a lot of fuss.
The only catch is over-texturizing. If the stylist takes too much out of the interior, the bixie can start to look choppy in a thin, stringy way. Ask for piecey, not shredded. Those two things are not the same.
This is also one of the easiest cuts to grow out. That matters more than people realize.
6. Pixie With Long Crown Layers
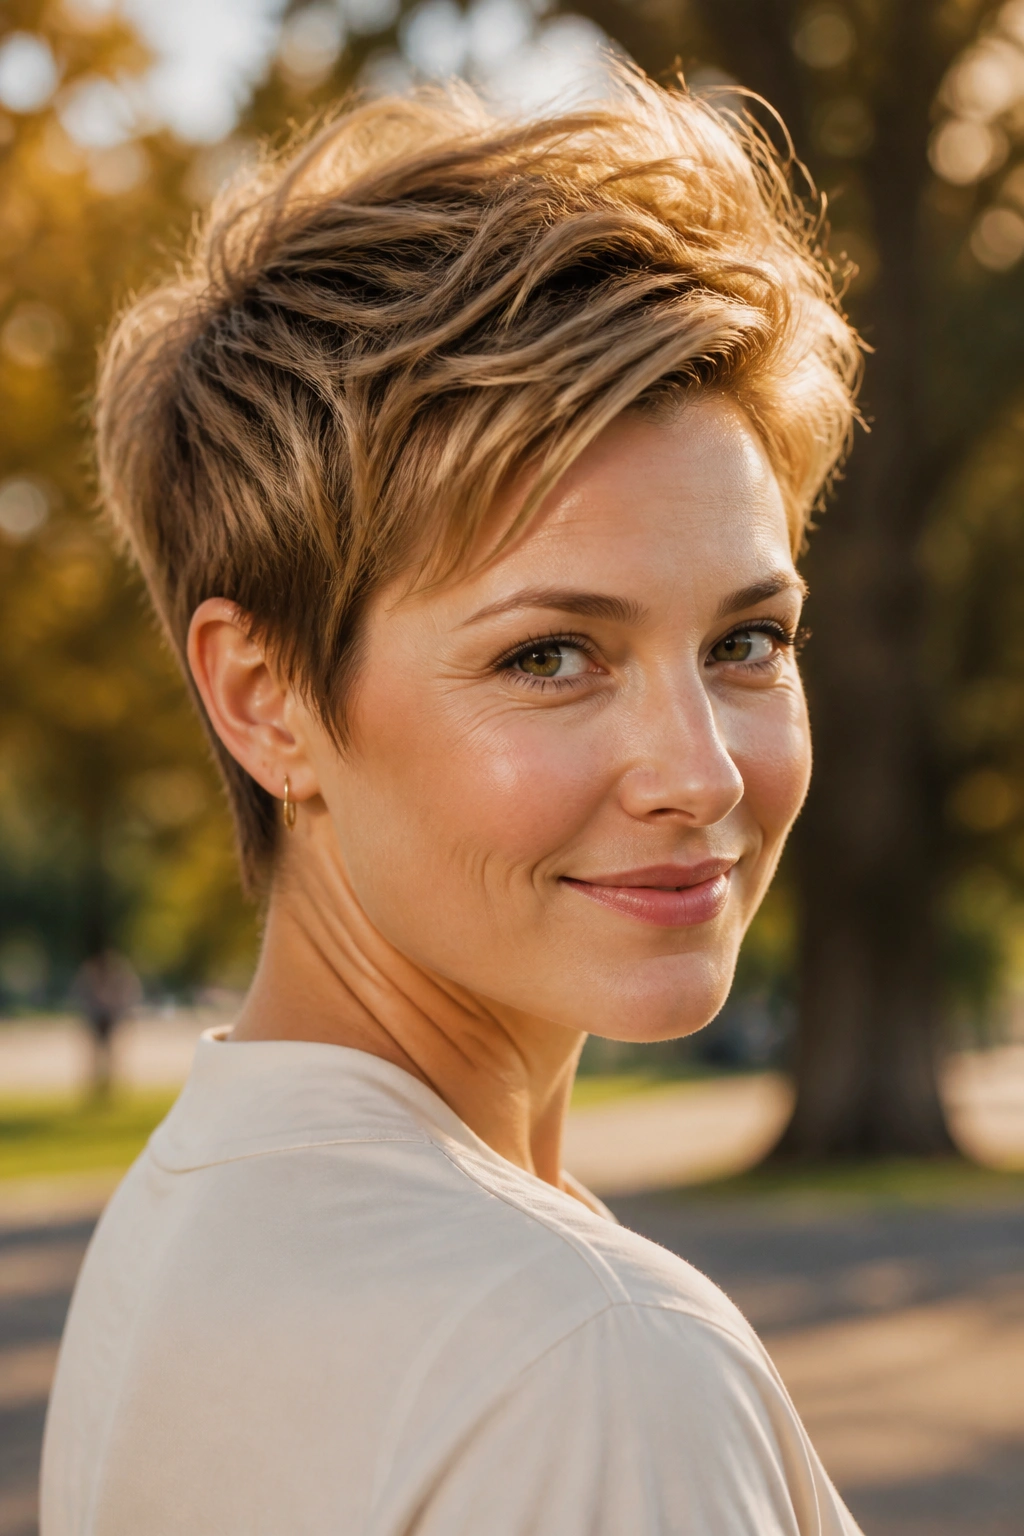
A classic pixie can look sharp on fine hair, but the version I like best keeps the crown a little longer. That extra length gives you room to lift the roots and create a more rounded shape on top.
What Makes It Different
Compared with a super-short crop, a longer crown pixie has more styling range. You can slick it close on one day, then push the top up with a dab of pomade the next. Fine hair benefits from that flexibility because it doesn’t need a lot of product to hold direction.
This cut works especially well if your hair dries straight and tends to lie flat against the head. A quick blast at the roots, using your fingers to lift the top section, is usually enough. You are not trying to make it big. You’re just trying to keep it from looking pasted down.
- Keep the sides tapered, not shaved to the skin.
- Ask for length on the crown so you can pinch and lift it.
- Use a pea-sized amount of matte paste, not a glossy cream.
My take: this is one of the strongest short options if you want shape without spending twenty minutes styling it.
7. Soft Shag With Airy Interior Layers
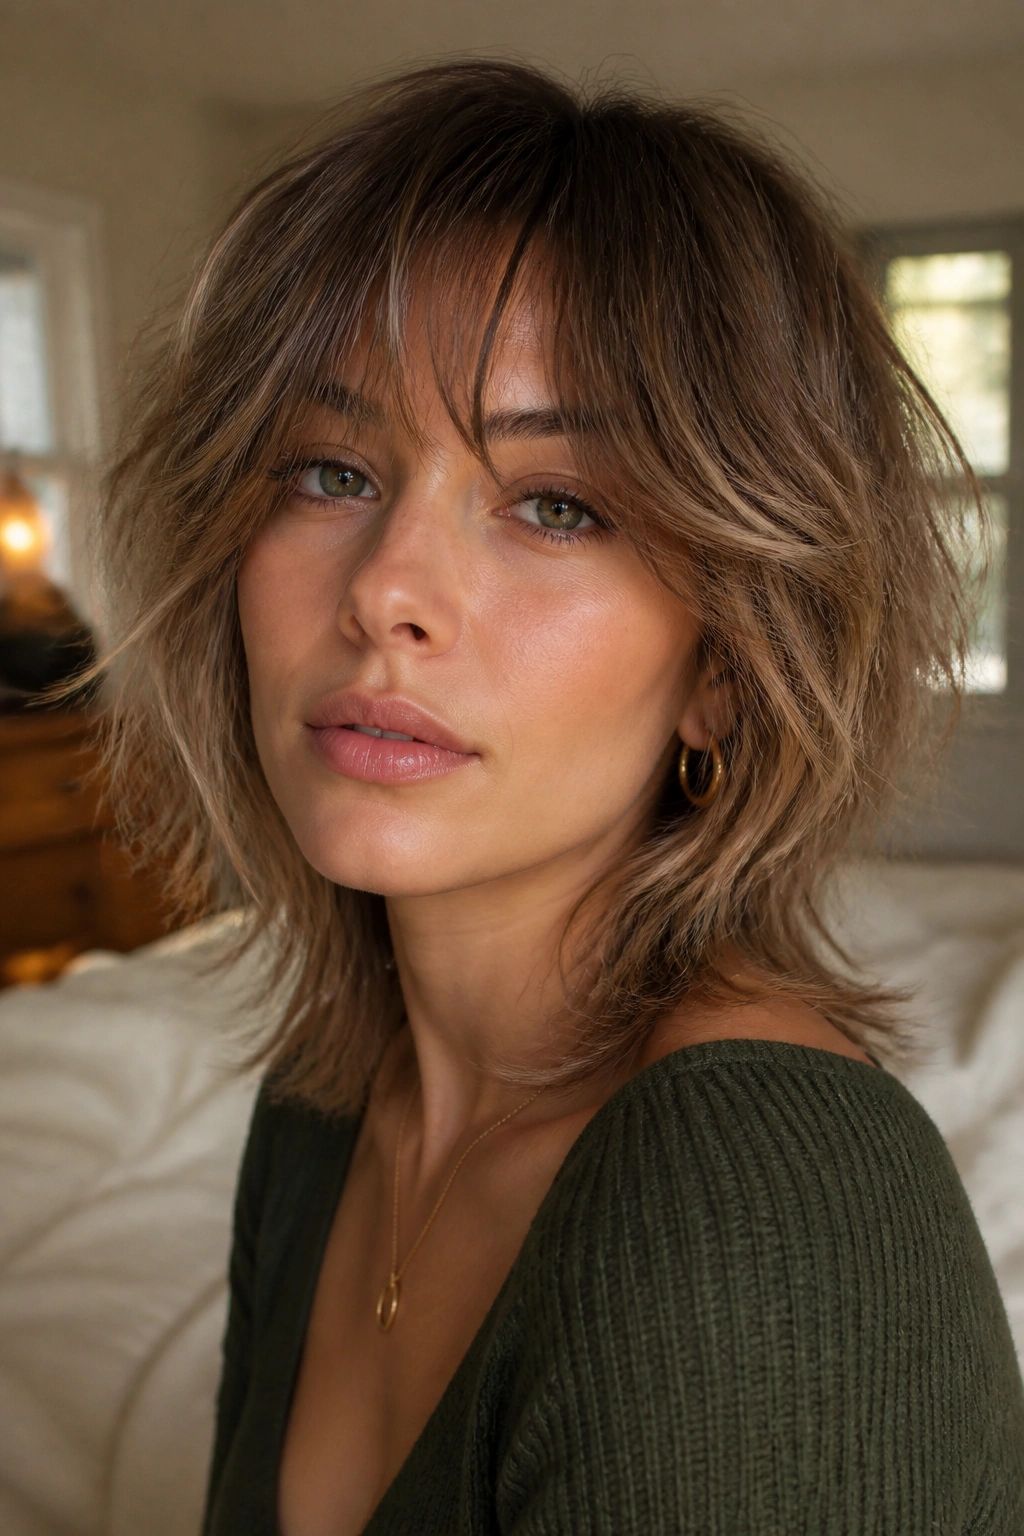
Run your fingers through a good shag and you feel movement, not gaps. That matters on fine hair, because the wrong shag can chew through the ends and leave the head looking sparse. The right one keeps the layers low enough to add swing without exposing too much scalp.
Why It Helps
The best shag for fine hair puts the shortest pieces around the cheekbones or below, then leaves the crown and top layers long enough to keep coverage. Think soft bends, not a hacked-up mess. A little fringe is fine. Too much short layering at the top is not.
This style also likes a bit of grit. A light mousse at the roots, then a diffuser or a rough dry with your fingers, gives the layers something to hold onto. If your hair is naturally wavy, even better. If it’s straight, a few bends with a flat iron are enough.
What to Watch For
- Don’t let the shortest layers sit too high on the head.
- Avoid heavy oils near the crown.
- Use a texturizing spray only at the mid-lengths and ends.
A shag should look lived-in, not tired. There’s a difference.
8. Curtain Bangs for Fine Hair
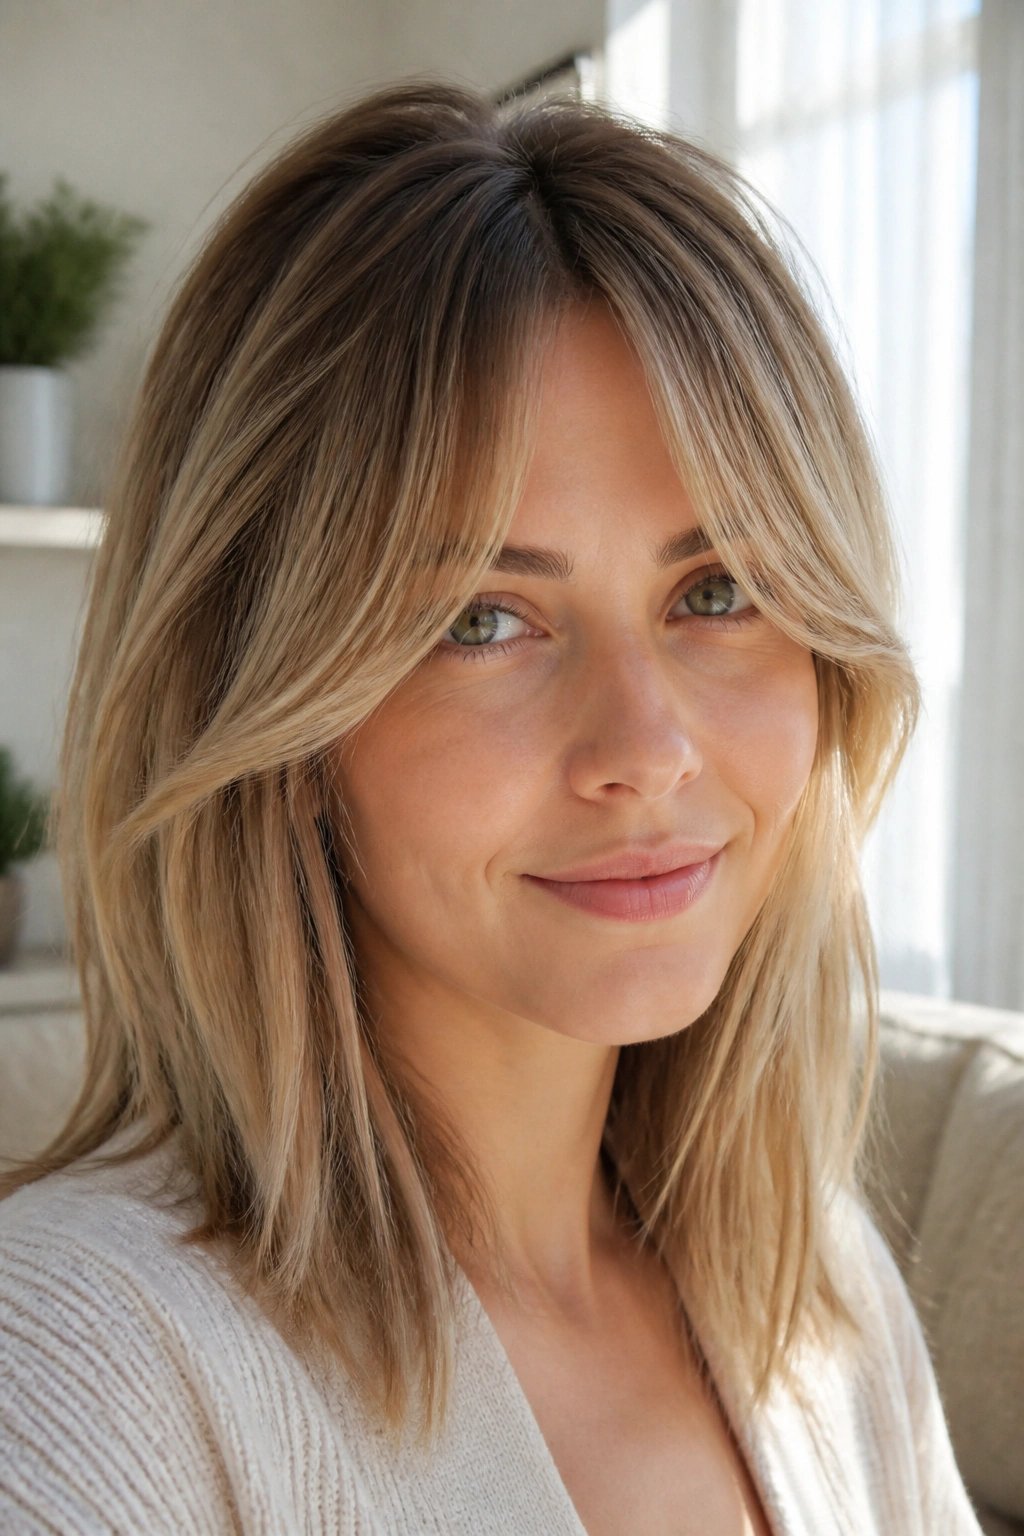
Curtain bangs can be a gift, or they can turn into two limp strips stuck to the forehead. The difference is mostly in density and length. Fine hair does best with curtain bangs that start a little longer than you think and open gradually at the cheekbones.
The reason they work is simple: they create shape around the face without demanding a lot of hair. That’s useful when the rest of the cut needs to stay full. A center-parted fringe also gives the illusion of width at the front, which helps balance a narrower-looking ponytail or a long lob.
How to Keep Them From Splitting
Use a small round brush or a velcro roller while the fringe cools. That sets the bend without making the bangs spring straight down. A touch of dry shampoo at the roots helps too, but don’t pile it on. Too much powdery product makes fine bangs look dusty and dry.
I like curtain bangs most with collarbone cuts and soft shags. They make the whole head read as more styled, even on a lazy day. That’s a nice trick to have.
9. Face-Framing Layers on Long Hair
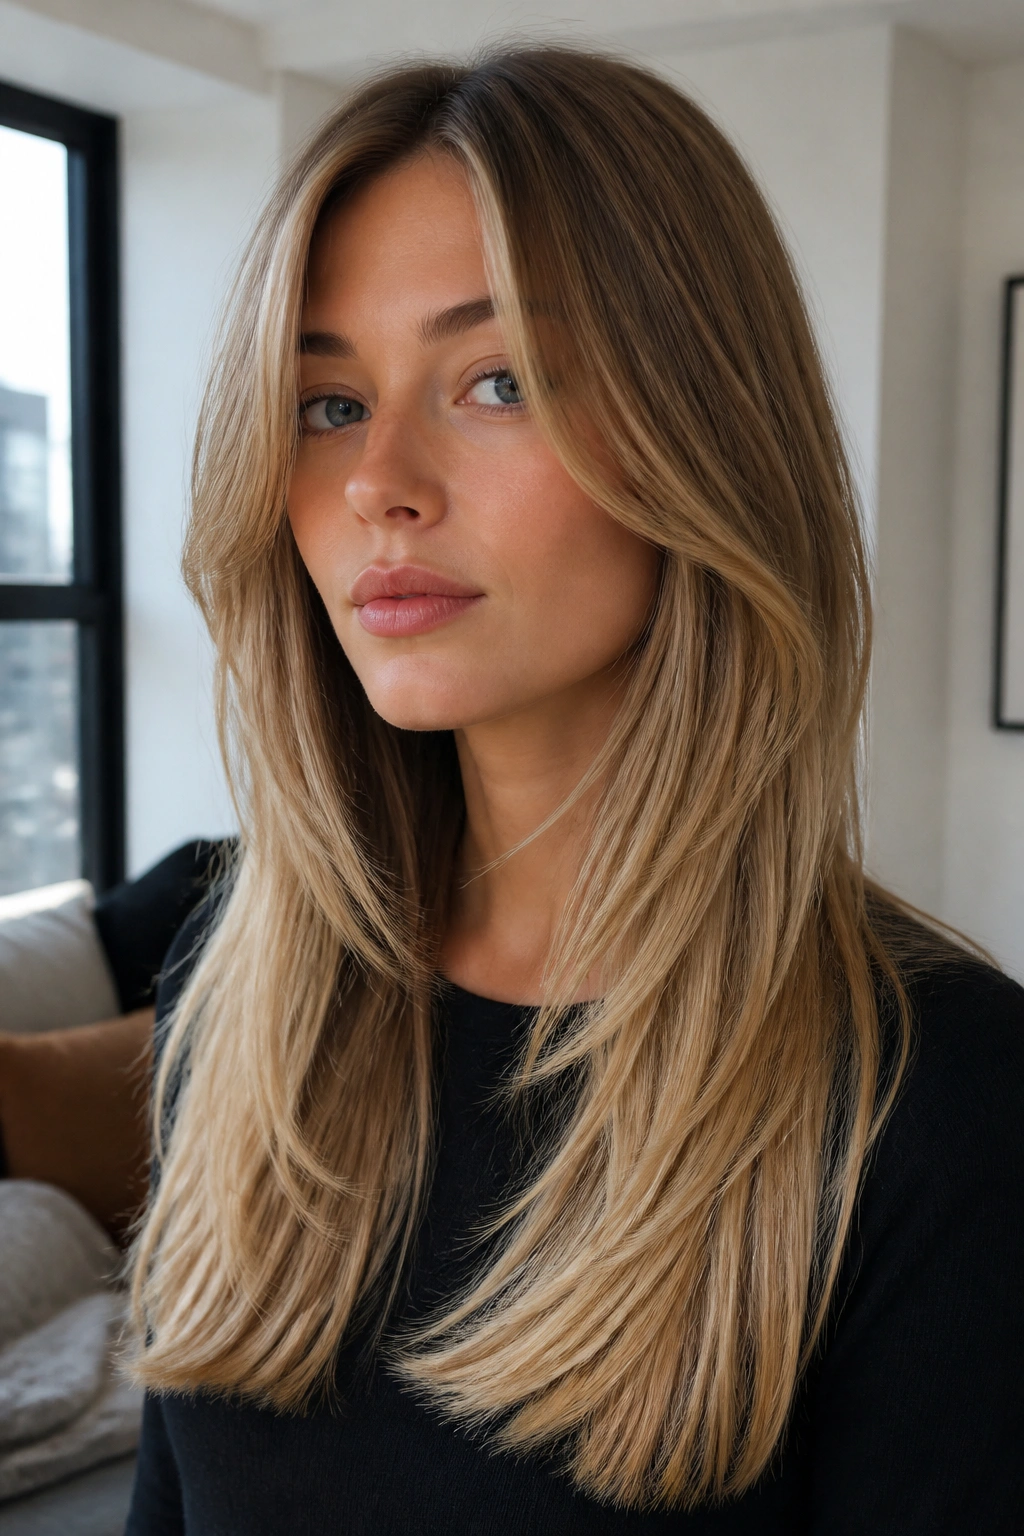
Long fine hair can look elegant, but it needs discipline. A few well-placed face-framing layers can soften the front without sacrificing the thickness that lives in the length.
The trick is to keep the layers concentrated around the face and leave the back mostly one length. That keeps the tail of the hair from looking hollow. Ask for the shortest piece to start around the jaw or collarbone, not halfway up the cheek, unless you want a more dramatic effect.
I’d also keep the ends blunt. Long, see-through tips are the fastest way to make fine hair look stringy. A soft wave through the lower half can help, but the cut should do most of the work.
- Ask for layers that begin below the chin.
- Keep the perimeter solid.
- Style with a large brush or loose wave, not tight curls.
This is one of those hairstyles that looks expensive when it’s actually just well cut. That’s the sweet spot.
10. Angled Bob That Leans Forward
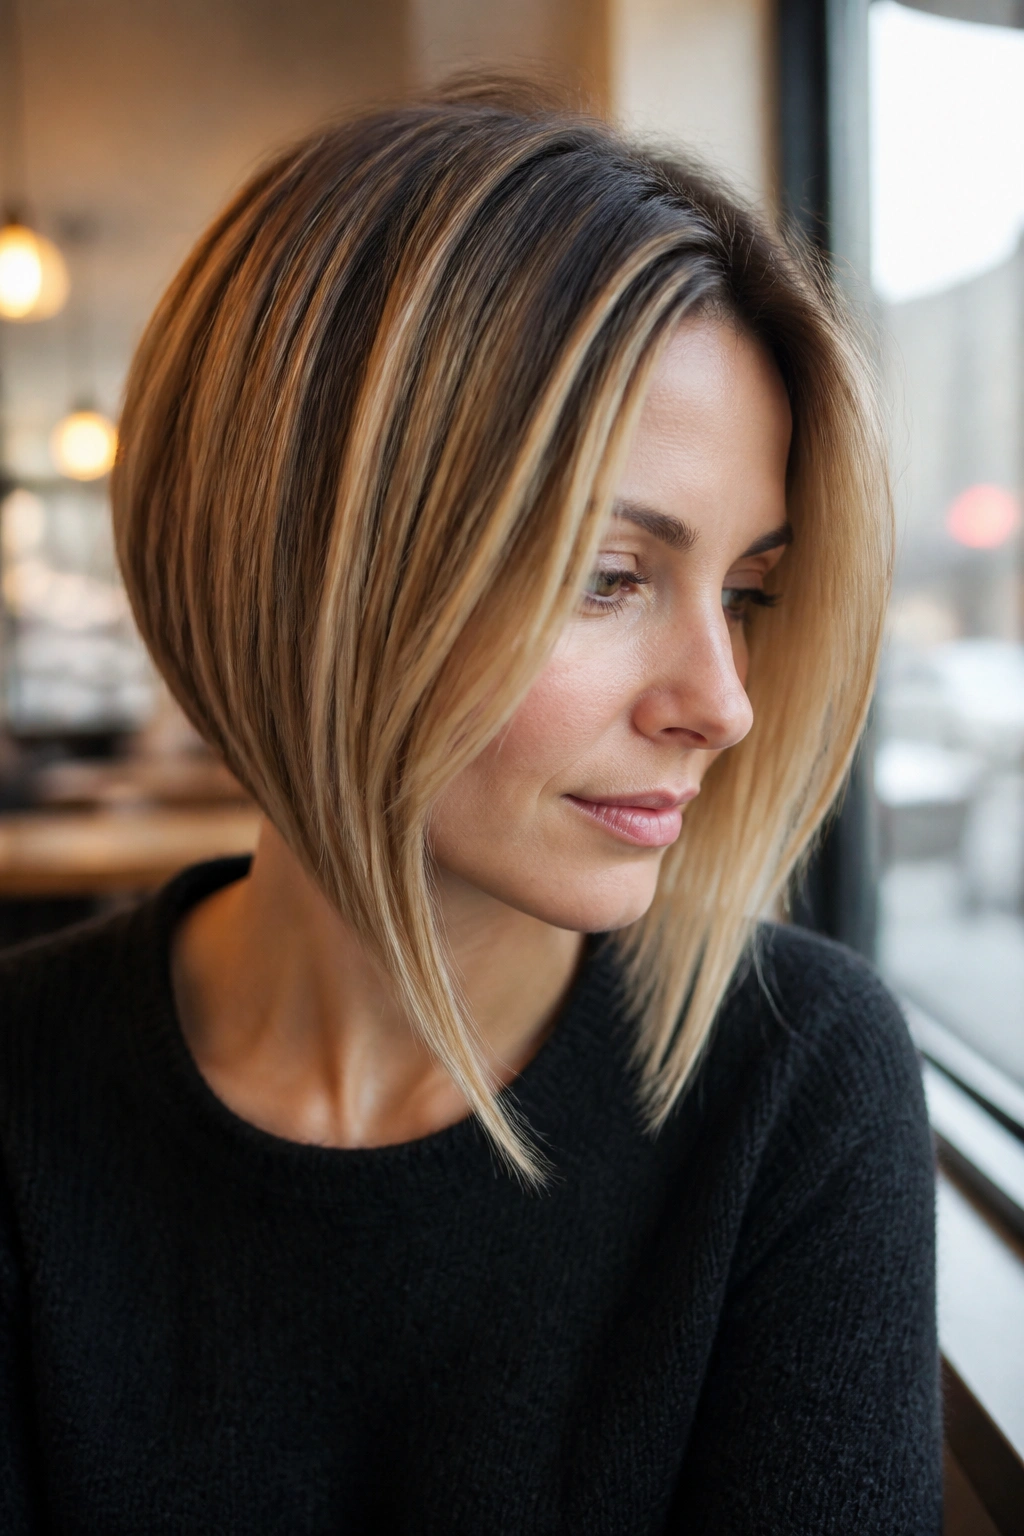
Want more shape without losing the look of density? An angled bob gives you that in one cut. The back sits a touch shorter, while the front drapes forward toward the jaw or collarbone, which makes the whole style feel lifted.
The forward angle pulls the eye toward the face and makes the ends look heavier where they land. Fine hair needs that kind of visual trick. A square bob can be lovely, but an angled version often feels a little more alive because the line isn’t static.
Styling Notes
Blow-dry the front pieces with a round brush, directing them slightly under or slightly out depending on the mood you want. A flat iron wave through the front can soften the angle if you do not want it too sharp.
This cut works best when the back is not cropped too high. If the rear section gets too short, the front can look dramatic in a way that feels disconnected. Keep the difference subtle. Subtle wins more often than not.
11. Invisible Layers on a Mid-Length Cut
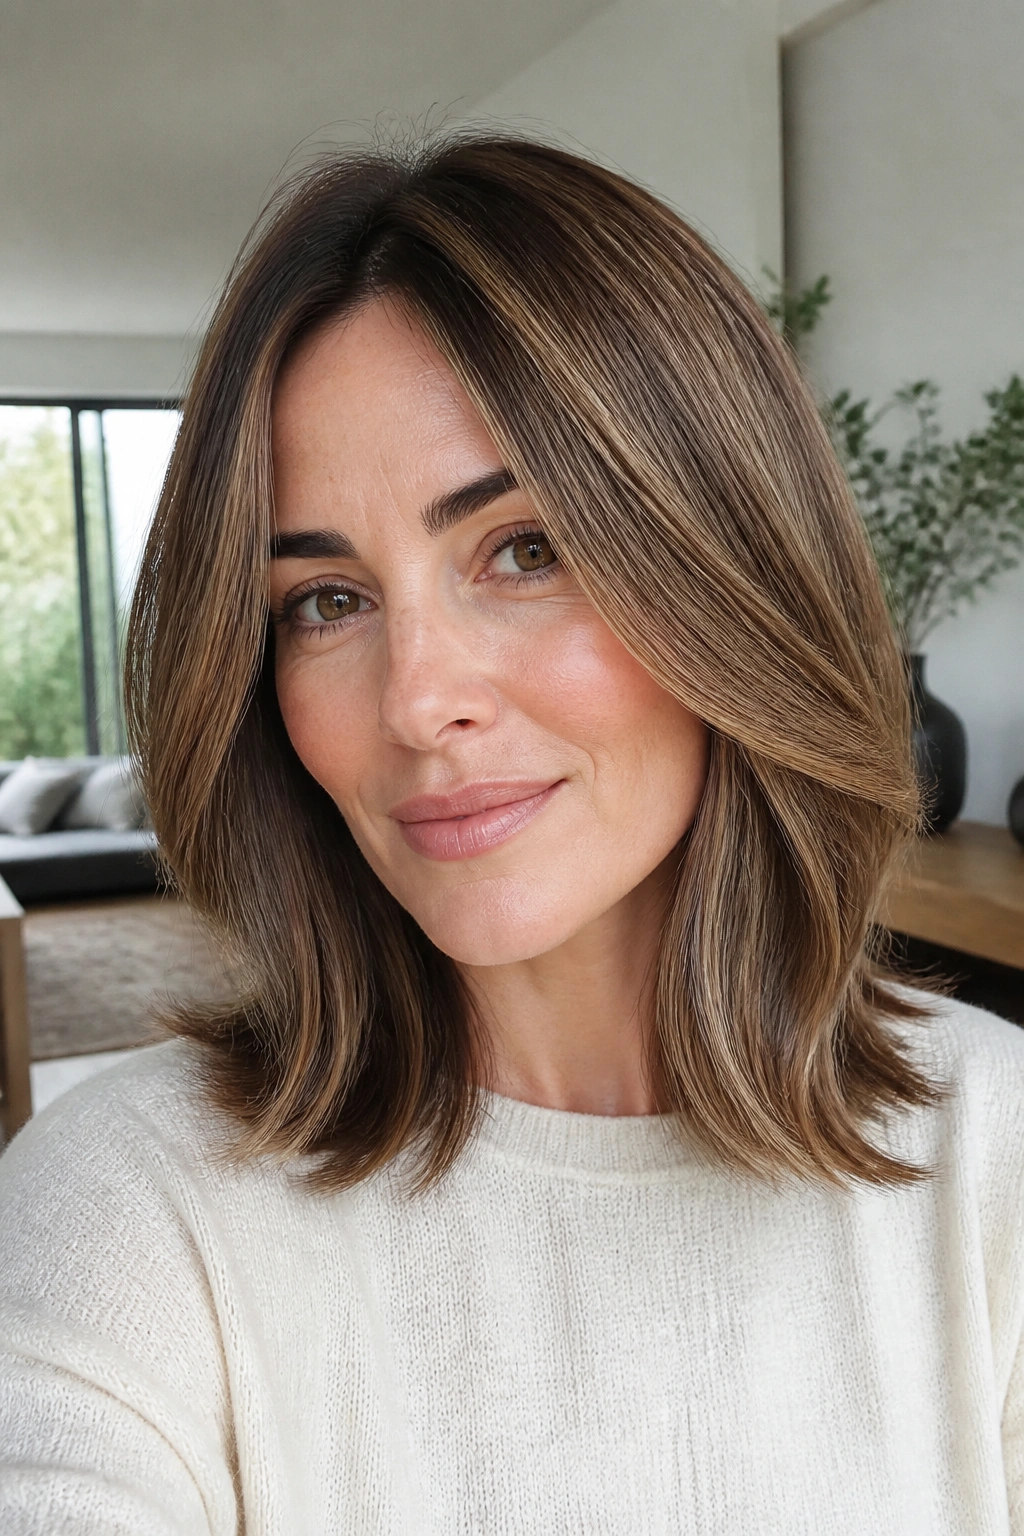
Not all layers are loud. Some of the smartest ones are buried under the top section so the cut keeps its density while the hair moves better.
Invisible layers are a good answer for fine hair that feels flat when cut all one length, but also looks thin when too many pieces are chopped away. The layers live underneath, where they remove just enough weight to let the ends swing. From the outside, the cut still reads as full.
This is one of my favorite options for people who want structure without obvious texture. The shape is cleaner, and the grow-out is easier than a heavily layered cut. Ask for long internal layers, not short face pieces that climb too high.
A mid-length cut like this also takes styling well. Air-dry it with mousse, or give it a light blowout. Either way, it keeps a little body without looking overdone. That’s a win.
12. Deep Side Part and Root-Lift Blowout
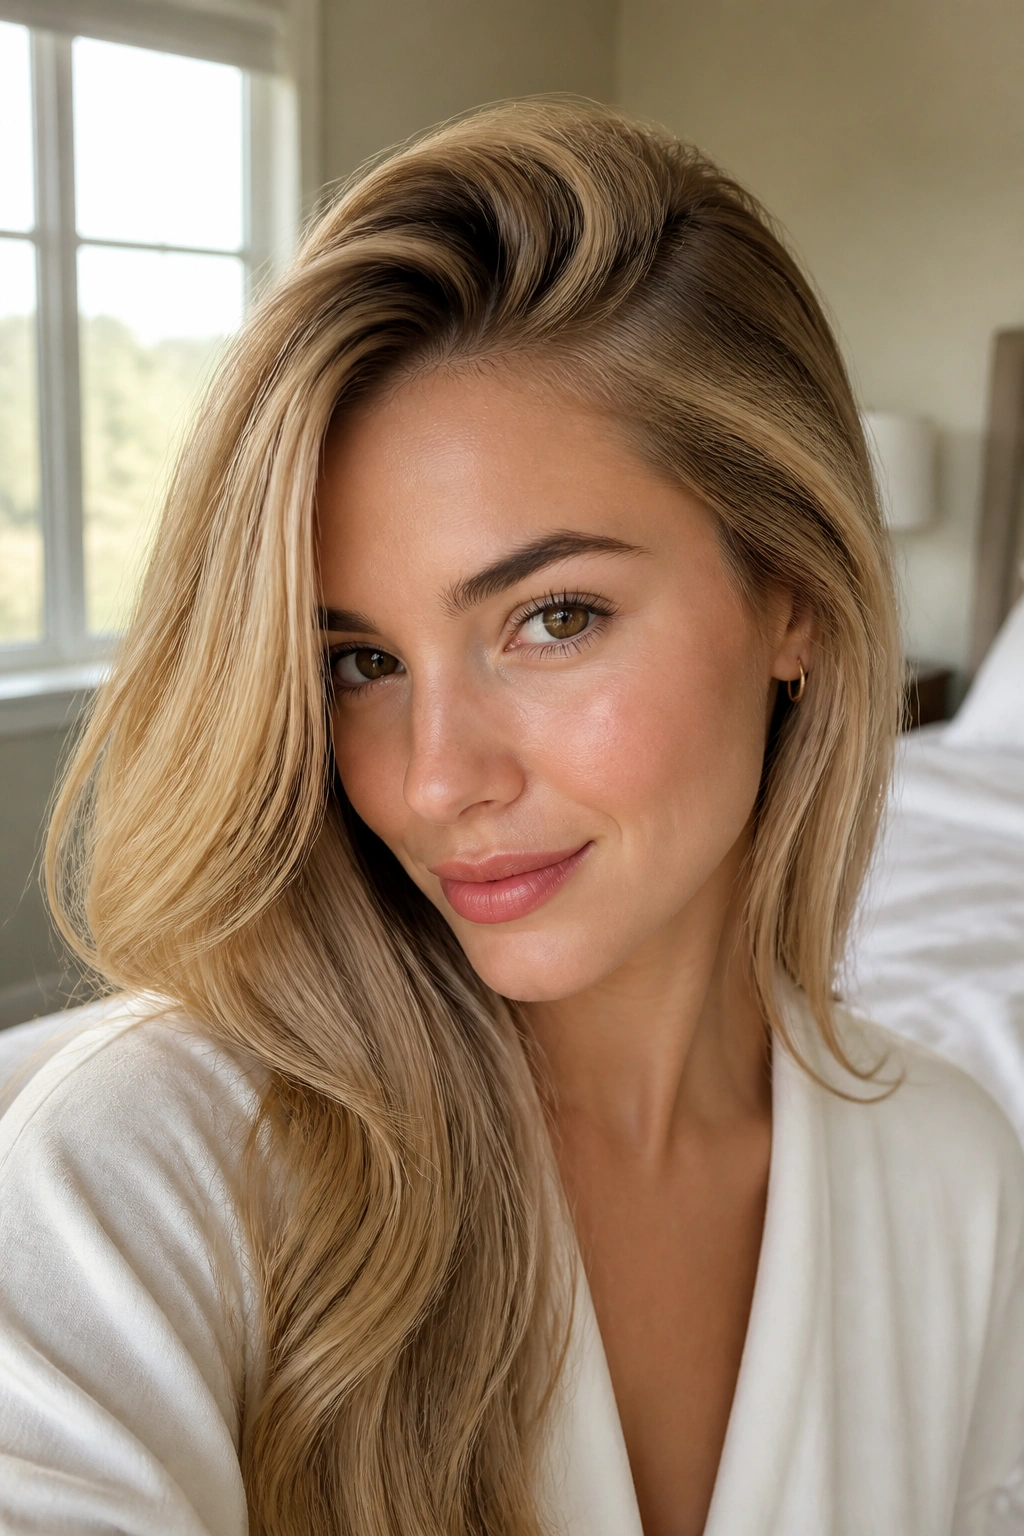
Why does a side part make hair look denser so fast? Because it shifts the weight and makes one side stand up instead of lying flat along the scalp.
A deep side part paired with a root-lift blowout is one of the quickest fixes for fine hair that falls limp at the crown. Use a volumizing mousse at the roots, then blow-dry the front section in the opposite direction first. Once the hair cools, switch it back into the deep part. That little back-and-forth is what gives the lift.
What to Use
- A round brush with a barrel around 1 to 1.5 inches.
- A root spray or mousse with a light hold.
- Two to four duckbill clips to pin the lift while it cools.
This style works especially well with lobs and medium-length cuts. I’d skip heavy oils near the scalp; they collapse the root before you get out the door. The whole point is airy lift, not slick shine.
13. Loose Waves With a Flat Iron
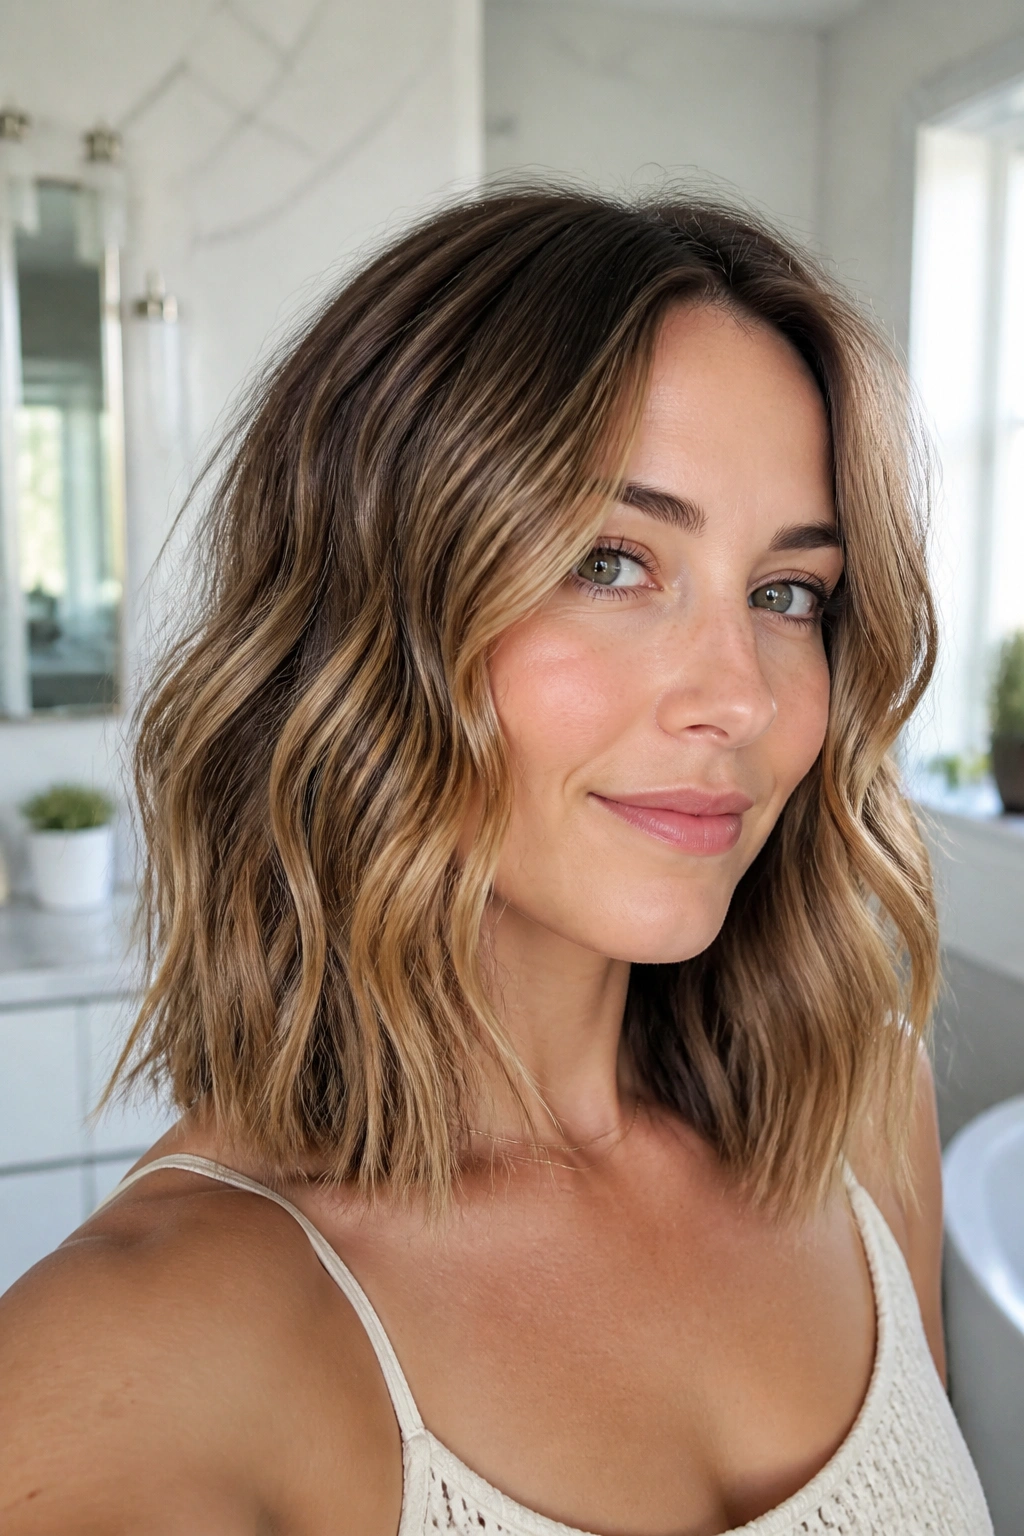
A straightener makes surprisingly good waves on fine hair because the bend is softer than a curling iron curl. That matters. Tighter curls can separate and frizz out in a way that exposes the ends, while loose flat iron waves add movement without making the hair look overworked.
The technique is simple: clamp a 1-inch section near the root, turn the iron half a rotation away from the face, then glide down slowly while alternating direction on the next section. Leave the last inch or so straighter if you want the wave to look modern rather than formal.
I prefer this on shoulder-length hair and lobs. The wave adds enough texture to bulk out the silhouette, but it still falls in a natural shape. A light mist of texturizing spray on the mid-lengths is usually enough. More than that, and fine hair can start to feel crunchy.
This is one of those styles that looks casual but takes a little precision. Worth it.
14. Large-Brush Blowout on a Lob
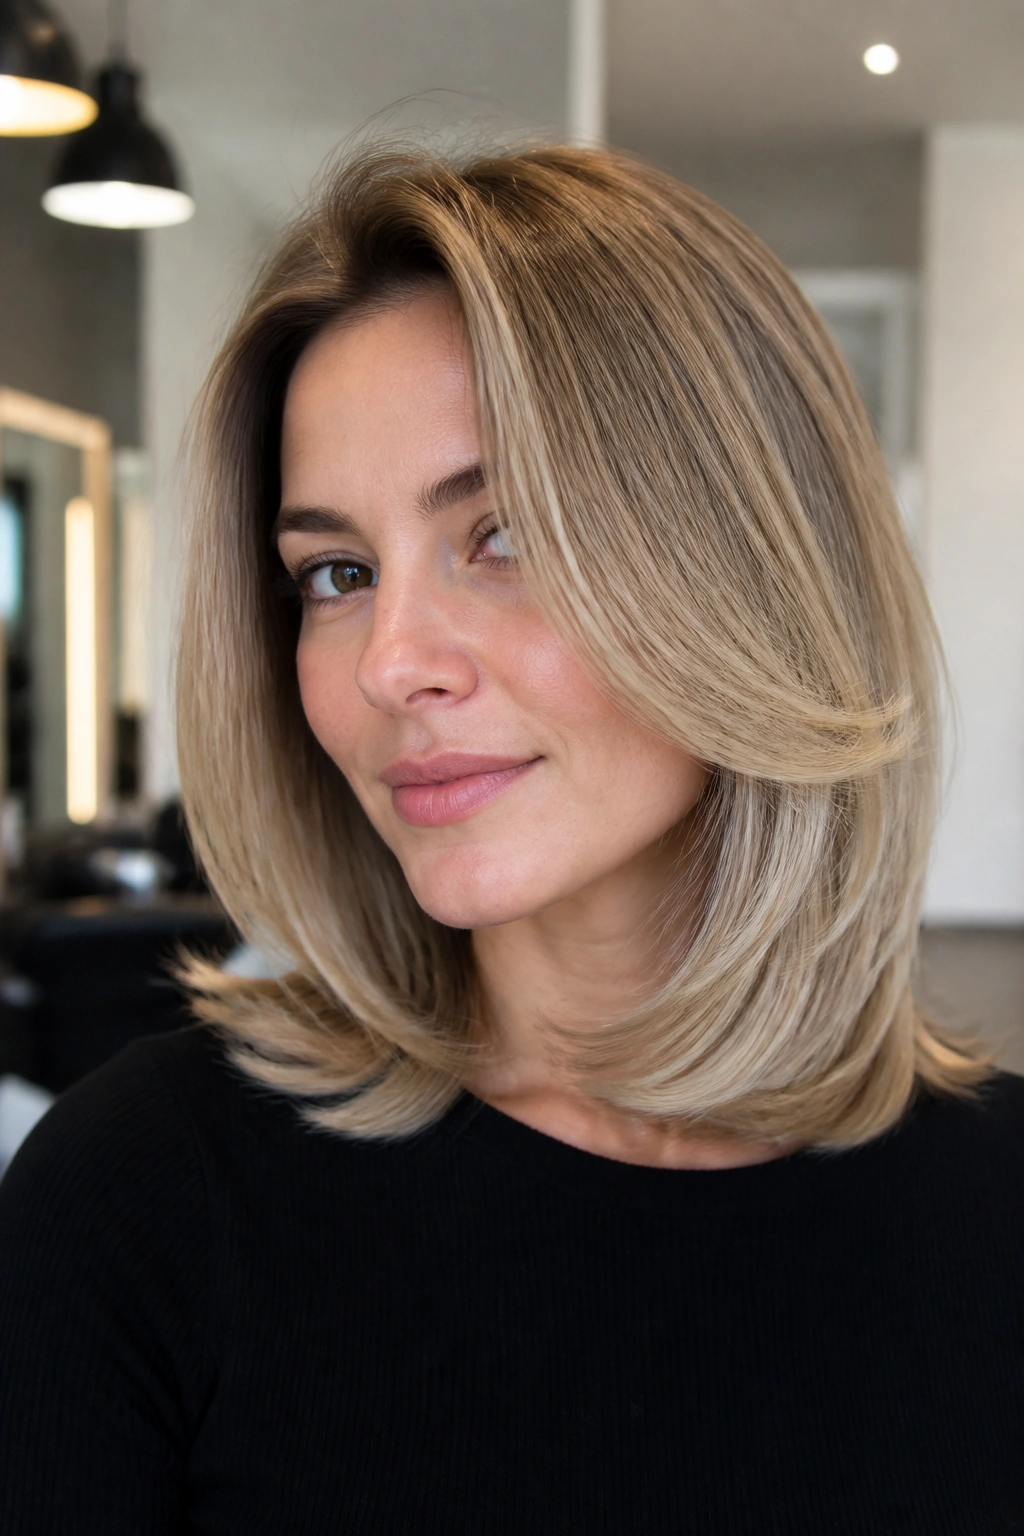
A big, soft blowout can do more for fine hair than a whole cabinet of styling creams. The reason is simple: lift comes from the root, and a large round brush lets you build it without creating tiny curls that fall apart.
How to Dry in Sections
Start with damp hair, not soaking wet hair. Saturate the roots with a lightweight mousse, then rough dry until the hair is about 70 percent dry. After that, work in 2-inch sections with a round brush and aim the dryer nozzle down the hair shaft to keep the surface smooth.
Use the brush to roll the ends under just a touch. That bend gives the cut a fuller outline. Let each section cool around the brush for a few seconds before releasing it. If you skip the cooling step, the shape drops too fast.
This style is especially useful for a collarbone lob. It makes the cut feel polished without looking stiff. And on fine hair, “polished” should always still move when you turn your head.
15. Half-Up Crown Lift
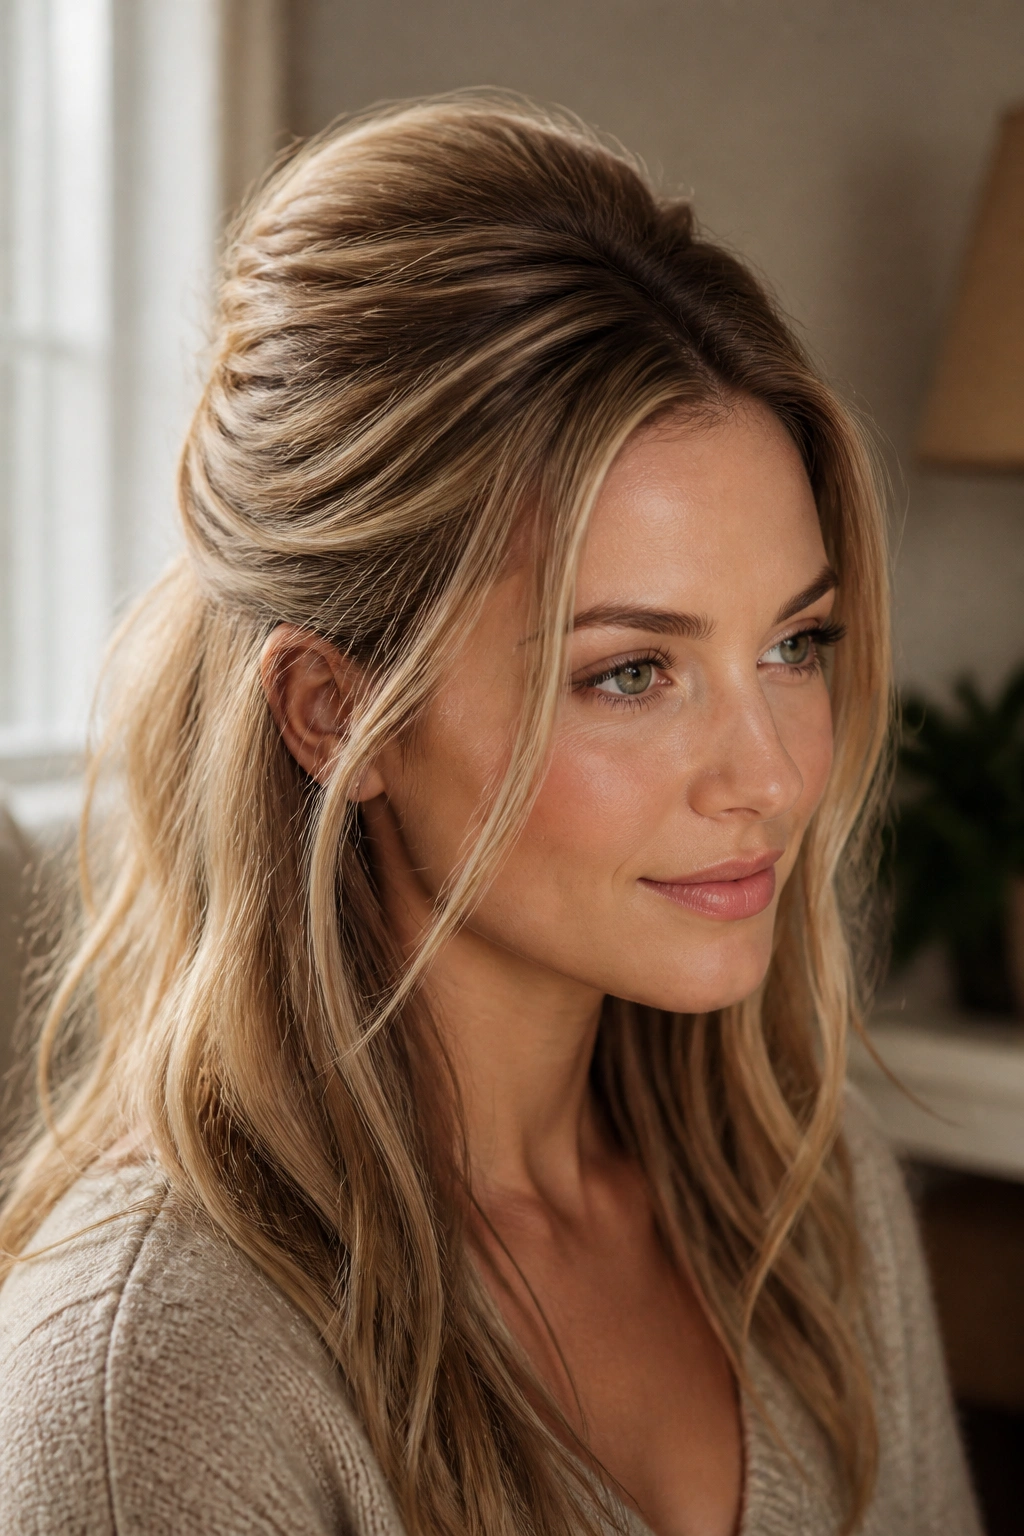
A half-up style is one of the easiest ways to fake volume without giving up the length that makes fine hair feel delicate. Pulling the top section away from the crown instantly opens up the face and gives the roots some room to breathe.
The version I like best starts with a little teasing at the crown, just enough to create a base, then a soft pullback from the temples to the back of the head. Don’t yank the sides tight. That only makes the top look thinner. Keep the half-up section loose, then pin it or clip it with something small enough to stay out of the way.
You can wear the bottom straight, waved, or lightly curled. The top does the heavy lifting. If you want more grip, mist a little dry texture spray at the roots before pinning it back.
This is one of those styles that buys you another day between washings without making you look greasy. Practical matters.
16. High Ponytail With a Wrapped Base
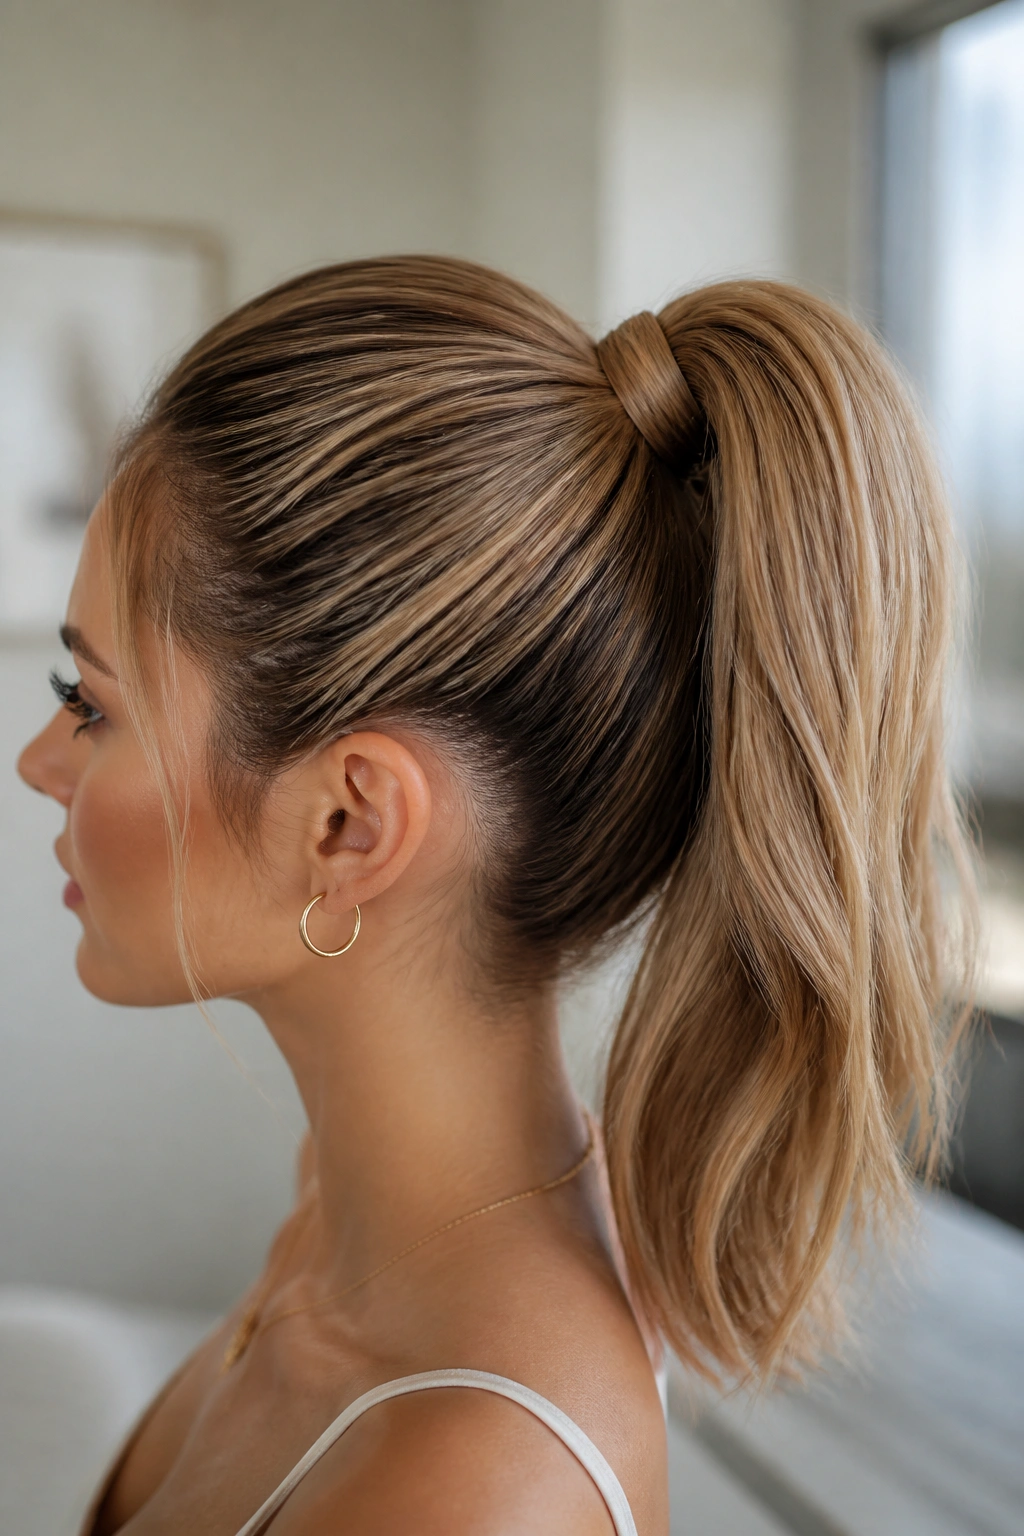
A high ponytail works on fine hair when you cheat the crown a little. Pull the hair up only after adding lift at the roots, because a slick, tight ponytail can make the ends look tiny.
Where the Volume Comes From
Start by misting the top section with a root-lift spray and blow-dry it upward. Then gather the hair with a brush, but stop before you pull it tight enough to flatten the scalp. A second elastic underneath the first can help support the pony and keep it from sagging by noon.
Wrap a 1-inch strand of hair around the base to hide the band. That detail sounds small, but it makes the style look finished instead of hurried. If the tail itself feels thin, curl just the last half of it with a 1.25-inch iron so it takes up more visual space.
I like this style for days when you want height and a clean neckline. It’s neat. It’s fast. It also shows off earrings nicely, which is never a bad thing.
17. Low Ponytail With Volume at the Crown
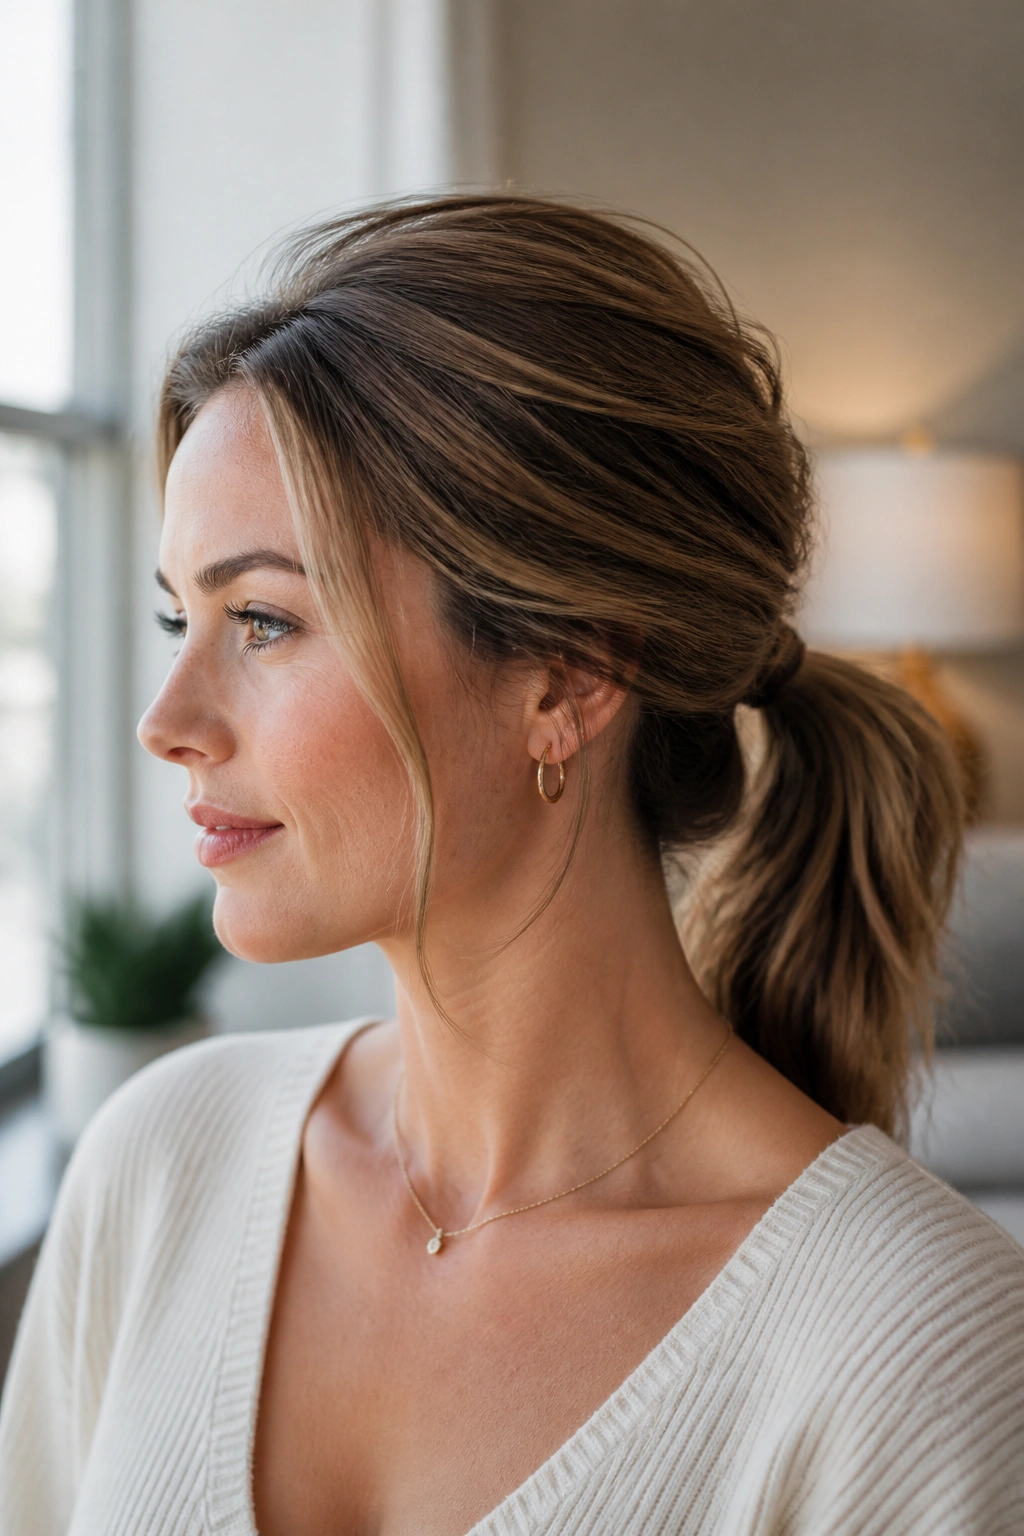
A low ponytail can look flat if you pull every hair strand straight back, which is why the crown needs a little lift before you tie it off. A soft bump at the top changes everything.
I prefer a low pony when the hair has a bit of second-day grit. Fine hair often holds this style better then than on freshly washed strands, which can be too slippery. A touch of dry shampoo, a loose side part, and a gentle tug at the crown are usually enough to give the style shape.
This one is quieter than a high ponytail. That’s the point. It works for office days, dinners, and any time you want the hair off your neck but still want some softness around the head. Leave a thin piece around the face if the look feels too strict.
The trick is not to tie it too low. Aim for the hollow just above the neck, not the nape itself. That tiny lift helps the hair read fuller.
18. Bubble Ponytail for Fine Hair
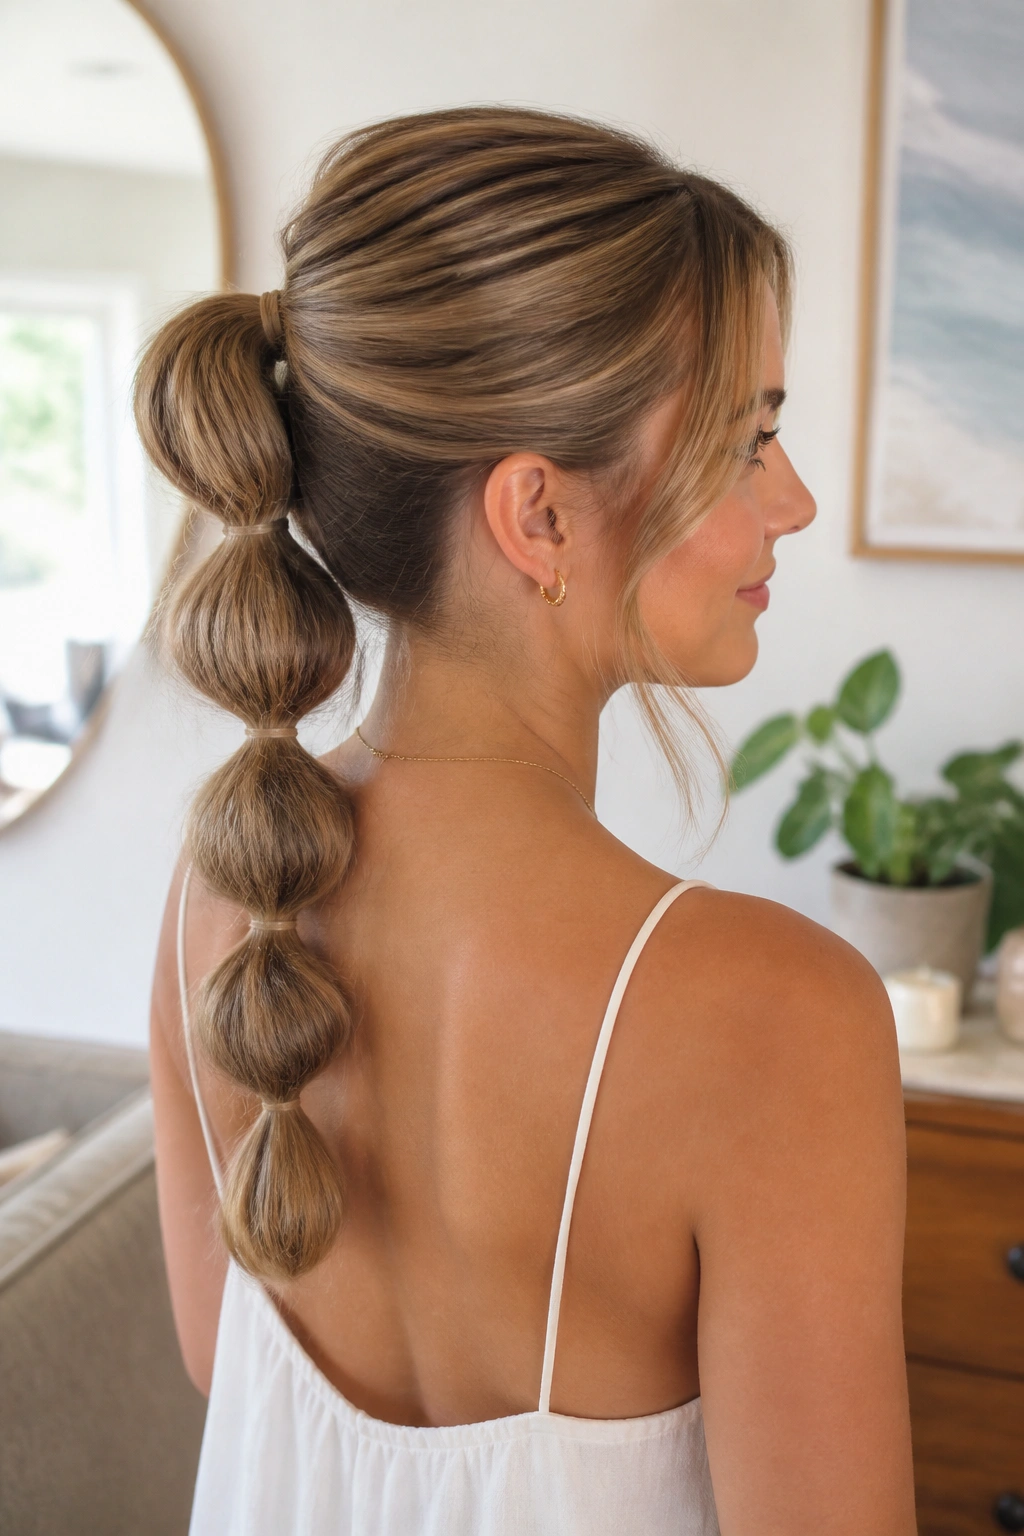
Bubble ponytails make fine hair look fuller because they break one thin tail into multiple rounded segments. The eyes see a series of shapes, not one narrow line. That is the whole trick.
Use small clear elastics every 2 to 3 inches down the length of the ponytail, then gently tug each section outward with your fingertips until it puffs into a bubble. Don’t pull so hard that the hair starts to show scalp between the bands. The goal is roundness, not gaps.
Quick Details That Matter
- The ponytail works best on medium to long hair.
- Slightly textured hair holds the bubbles better than slippery hair.
- A light mist of hairspray on the palms helps smooth flyaways without freezing the style.
This is playful without being childish, and it gives fine hair a little theatrical shape that lasts. If your usual pony feels too small, this is a cleaner fix than trying to overload it with product.
19. Claw Clip Twist With Loose Ends
A claw clip twist can be a lifesaver on hair that’s in that in-between state: not fully fresh, not dirty enough for a ponytail, and too soft to behave on its own.
The best version for fine hair is a loose twist gathered at the back of the head with a medium clip that actually grips, not one of those decorative clips that slides out by noon. Leave the ends slightly loose so the style doesn’t compress into a tiny knot. That little bit of looseness makes the shape feel wider and less severe.
Clip Placement Matters
Place the clip a little higher than you think, around the upper back of the head, so the twist creates lift instead of dragging downward. If you pin it too low, the style flattens the crown and exposes the scalp.
This is not a style that needs perfection. A few soft pieces around the temples help. So does a quick spray of texture mist before you twist. Fine hair usually does better when the clip holds on to something with a tiny bit of grit.
20. Low Chignon With Face-Framing Pieces
Can a bun work on fine hair? Yes, if you build it wide instead of tight.
A low chignon sits best when the ponytail is lightly teased before you coil it. That gives the bun a little body so it doesn’t shrink into a tiny knot at the nape. Keep the twist loose, then pin the edges outward a bit to widen the shape. The whole point is to make the bun read larger than its actual volume.
Face-framing pieces help a lot here. Let them start around the cheekbones or jaw, not the chin. If they’re too long, they just fall into the neckline and do nothing for the style. A soft chignon like this works for weddings, dinners, or any day you want your hair off your neck without looking severe.
A few people think fine hair cannot do buns. It can. The bun just has to be built with a little more care.
21. Sleek Middle-Part Lob for Fine Hair
A center part is not the enemy. On the right cut, it can look clean, modern, and full enough to hold its own.
The trick is a blunt lob that lands around the collarbone with ends that are kept solid. With that kind of perimeter, a middle part makes the two sides fall evenly and gives the hair a crisp frame. If the cut is too layered, the center part can expose the thin spots. If it’s too long, the ends can look sparse. The collarbone zone is the sweet spot.
Make It Look Intentional
Use a smoothing cream on the mid-lengths and ends, not the roots. A flat, glossy root kills the lift and makes fine hair sit down. Blow-dry with a paddle brush or use a flat iron only on the surface pieces if you want a sharper finish.
I like this style when you want something simple that still looks deliberate. It reads clean, which is harder to fake than people think.
22. Rope-Braided Half-Up Style
A rope-braided half-up style gives fine hair structure without asking for much length or density. Since the twist uses two sections rather than three, it creates a tighter-looking line with less hair, which suits finer strands nicely.
Start by taking two small sections from each temple, twist them away from the face, then wrap them around each other as you move toward the back of the head. Pin the rope where the two sides meet. Pull the twist apart just a touch with your fingertips so it looks fuller, not tight and ropey in the bad sense.
This style keeps the front pieces controlled while leaving the rest of the hair loose. That balance matters. Fine hair often looks best when only part of it is styled hard; the rest can stay soft and relaxed.
If you want the braid to look more substantial, lightly curl the loose hair underneath. It gives the whole half-up shape more presence.
23. Heatless Waves With Flexi Rods
Heatless waves can work on fine hair, but only if you treat the set like a real style and not a casual afterthought. Small sections, careful wrapping, and complete drying are what make the difference.
Use slightly damp hair and work in narrow sections around 1 inch wide. Wrap each section smoothly around the rod, keeping the tension even from root to tip. If the sections are too large, the wave won’t hold. If the hair isn’t dry all the way through before you take the rods out, the wave falls apart fast.
What to Avoid
- Don’t overload the hair with heavy cream or oil before setting.
- Don’t remove the rods until every section feels dry, including the center.
- Don’t brush the waves out immediately; let them cool for a few minutes first.
This style gives fine hair a soft, rounded texture that lasts longer than you’d expect. It also keeps heat off fragile ends, which is a nice side benefit. Nice, and practical.
24. Soft Curls With a 1.25-Inch Iron
A medium-barrel iron gives fine hair shape without making the curl too tight. Small curls can look overdone fast. Loose, brushed-out curls sit better and feel more like hair with body than hair that’s been wound onto a tool.
The Technique
Take 1-inch sections, clamp near the root, and wrap the hair away from the face. Leave the last half-inch to inch out if you want the curl to look softer. Hold each curl in your palm for a few seconds before dropping it. That tiny cool-down period helps it keep its shape.
Once the curls are cool, run your fingers through them or use a wide-tooth comb. A single spray of flexible hairspray is enough. Fine hair does not need a lacquered finish. It needs movement that stays.
This is a strong choice for parties, photos, or any day when you want the hair to look fuller without hiding the cut. It’s not subtle, but it isn’t stiff either.
25. Air-Dried Tousled Layers With Mousse
Air-dried hair can still have shape. It does not need to collapse into a triangle or a puffball.
The trick is a lightweight mousse worked through damp roots and mid-lengths, then a little finger-twisting as the hair dries. Fine hair usually responds well to mousse because it gives the strands a bit of memory without leaving them sticky. If the hair is long enough, twist a few sections around your fingers while it’s still damp to encourage a loose bend.
I like this style because it is honest. It does not pretend to be a salon blowout, and it does not need to. The best air-dried look on fine hair has a bit of lift at the crown, some separation through the ends, and no hard lines where the product sat too heavy. If the roots flatten as they dry, clip them up for the first twenty minutes so they stand a little taller.
This is the style I’d point to for anyone who wants the least amount of fuss and the most believable movement. Start here, then build outward if you need more polish.
