



Round faces often look best with color that pulls the eye downward, not sideways. Chocolate brown balayage does that well when the lighter pieces are placed with a little discipline.
The mistake most people make is putting brightness where the face is already widest. A soft ribbon at the temples can be fine, but too much lift near the cheeks tends to widen the silhouette instead of lengthening it. Move the light lower, keep the root deep, and the whole shape feels calmer.
Chocolate brown is a forgiving base because it can lean warm, neutral, or cool without losing that rich brunette depth. A good colorist can slide from dark cocoa at the root to chestnut, mocha, or toasted caramel through the ends, and the result still reads as brunette instead of stripey highlights.
That range matters. The looks below focus on placement first, then tone, because a round face needs both to work together. Some are soft and barely there; others lean bolder, but each one is built to make the hair move in a way that flatters the face.
1. Long Layers with Chestnut Ends
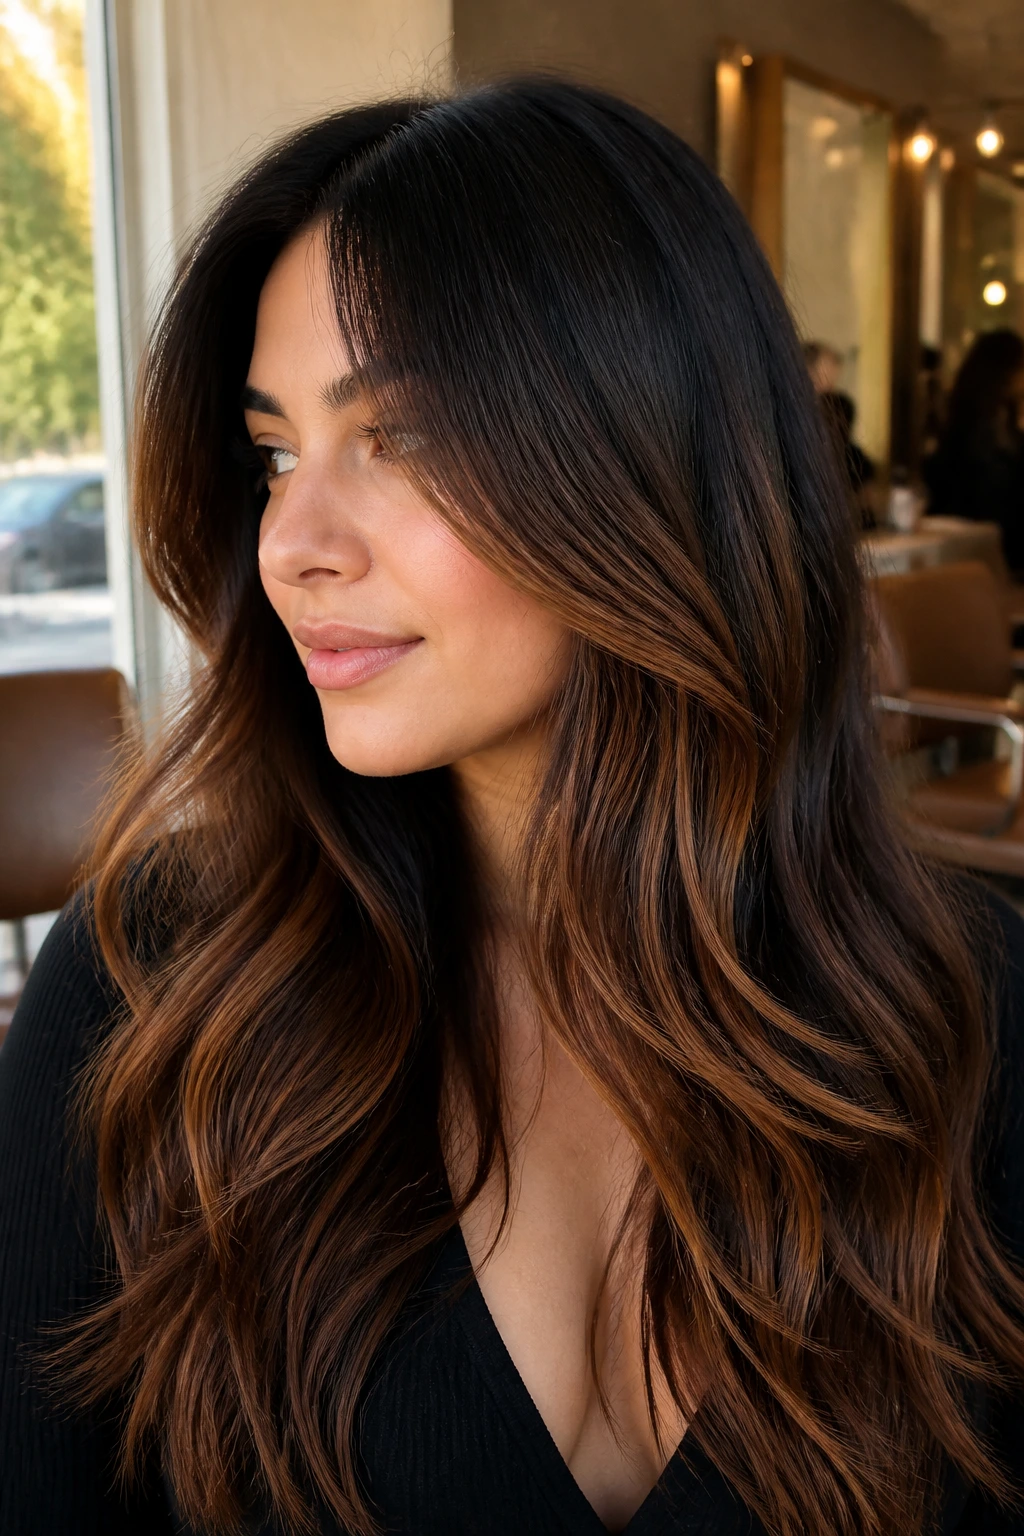
Long hair gives round faces room to breathe, and chocolate brown balayage looks best when the brightest chestnut pieces sit from the cheekbone down. Keep the root deep—think espresso or dark cocoa—then ask for ribbons that get a touch lighter as they pass the collarbone. That keeps the eye moving vertically.
Loose layers help a lot here. A blowout that bends the ends away from the cheeks keeps the shape open, while soft waves stop the length from looking heavy. This is one of the safest starting points if you want dimension without a dramatic color jump.
If your hair is pin-straight, add a little bend from the midshaft down. Straight pieces that sit right beside the cheeks can make the face feel wider than it is. With a soft wave, the chestnut ends move instead of sitting like a curtain.
Maintenance is easy too. A gloss every 8 to 12 weeks keeps the chocolate tone rich, and the darker root does most of the work in between salon visits.
2. Collarbone Lob with Caramel Face Framing
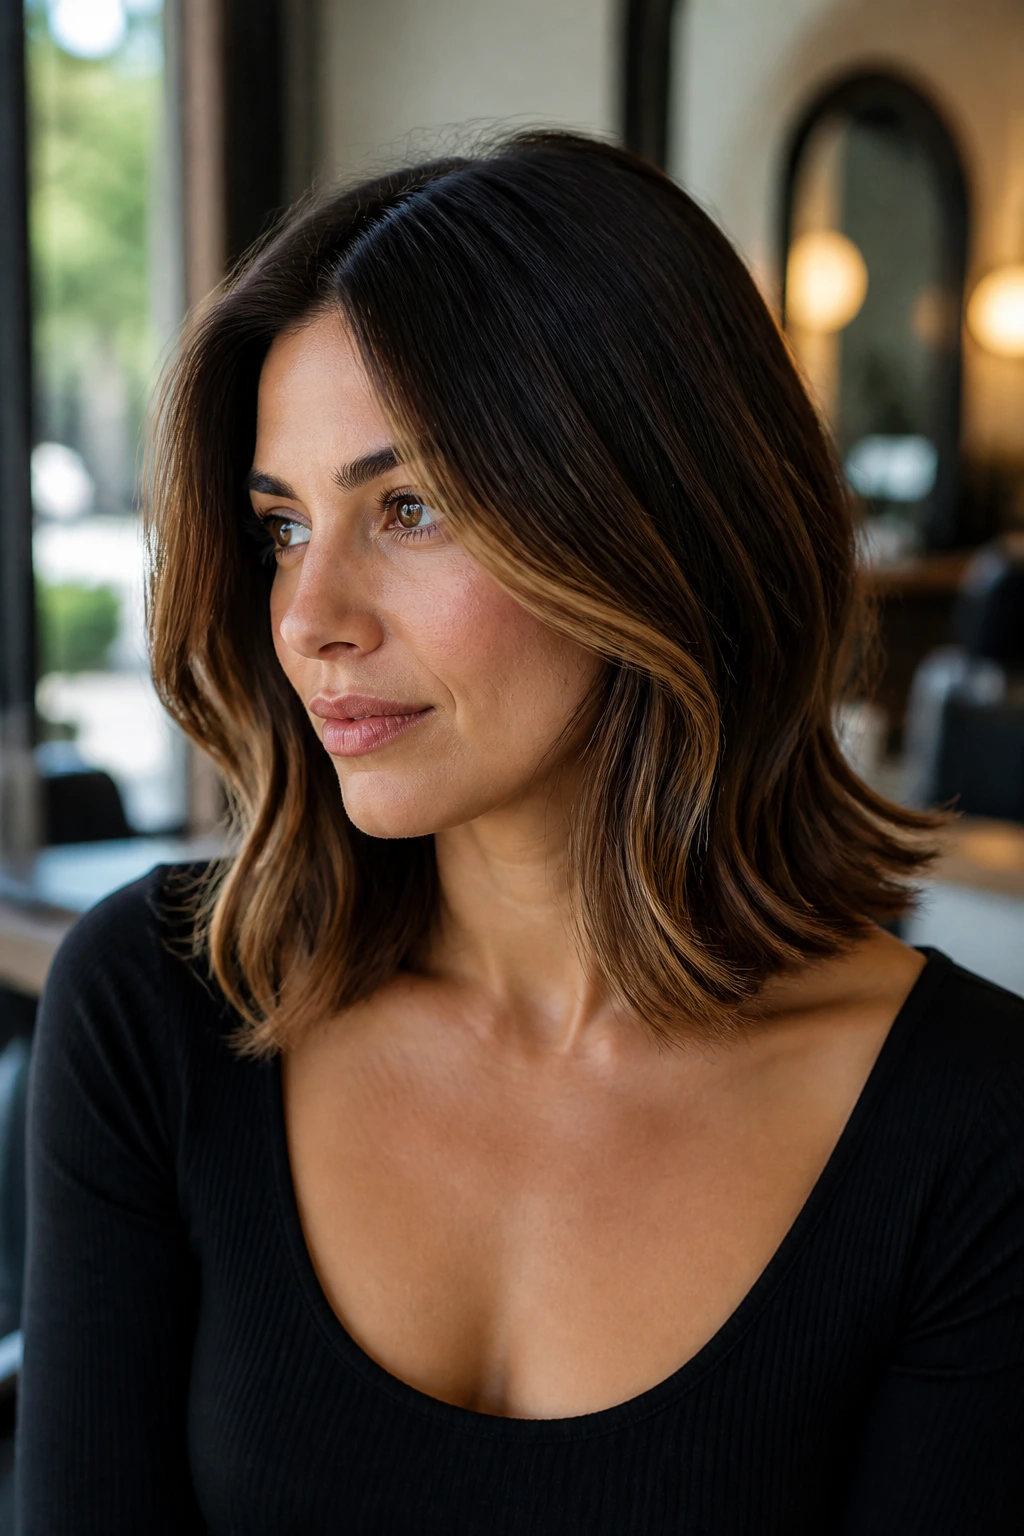
Collarbone-length hair has a nice trick: it can widen a face if the color sits too high, or slim it if the light is pushed just a little lower. A lob with caramel face framing lands in the second camp. The darker chocolate base keeps the cut grounded, while the brighter pieces skim the front and draw the eye down.
Why it flatters a round face
The strongest part of this look is the length of the front pieces. When the lightest sections begin just under the cheekbone, they don’t fight the widest part of the face. They travel past it.
What to ask for
- Ask for the lightest pieces to begin just under the cheekbone.
- Keep the front sections thin; chunky panels at the temple can add width.
- Curl the ends under one day and away the next so the shape never feels stuck.
That little bit of movement makes the cut feel easy, not fussy. It also grows out cleanly, which is a blessing if you do not want to live in the salon. A soft side part can help too, especially if you like a little lift on top without extra volume at the cheeks.
3. Curtain Bangs and a Soft Money Piece
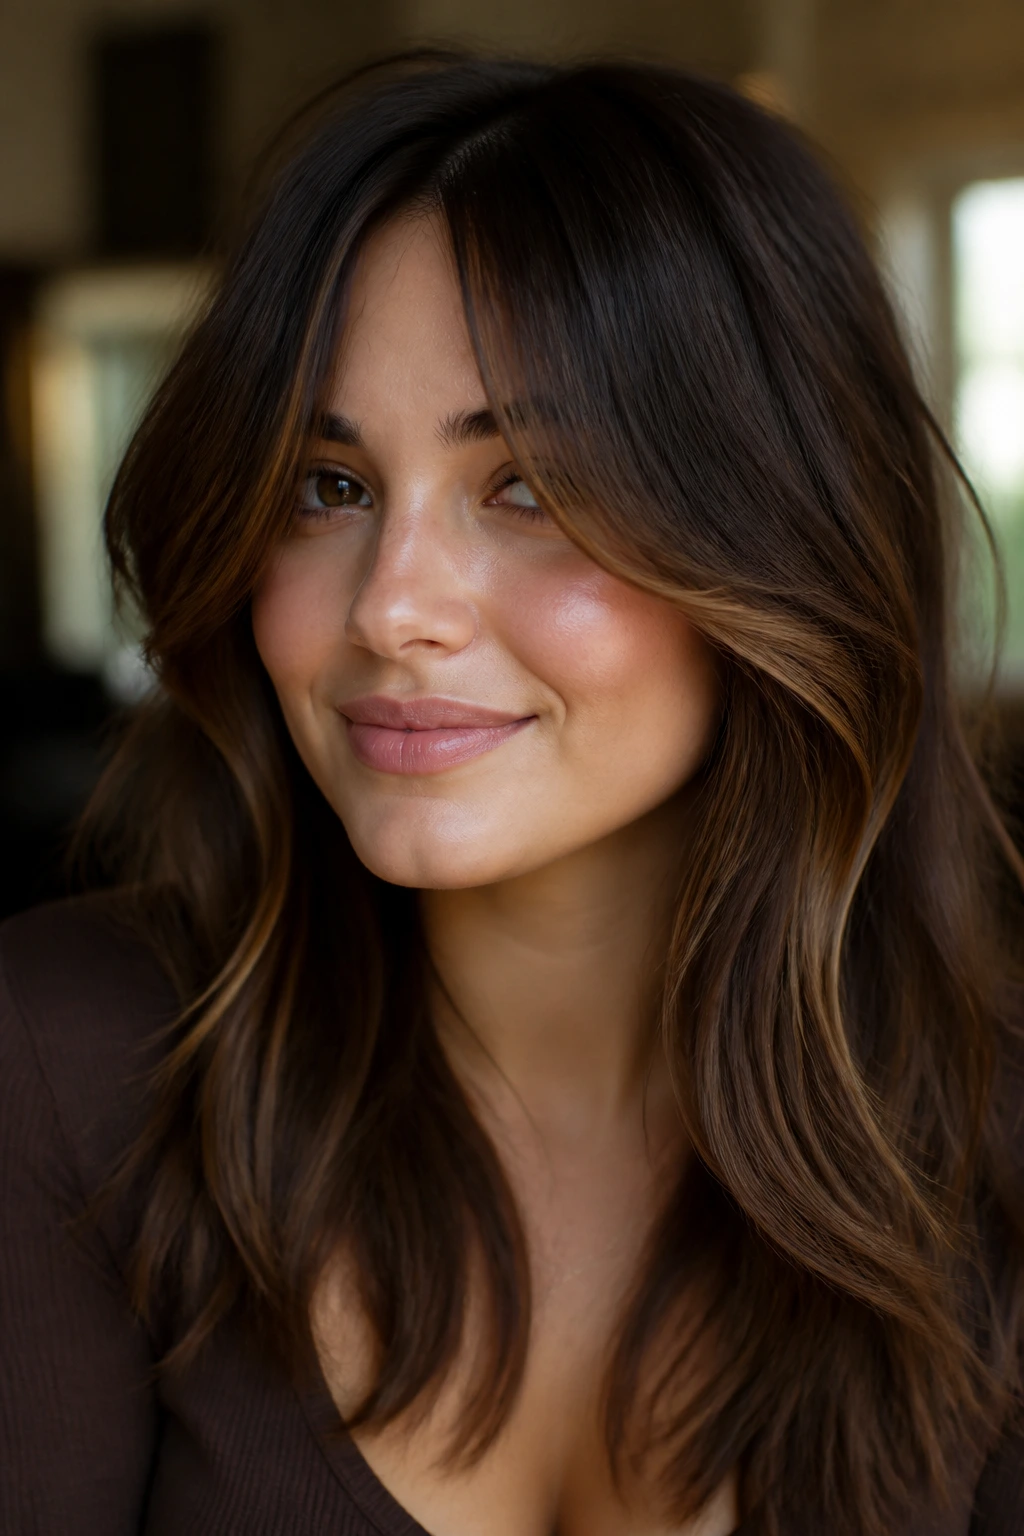
Curtain bangs can make chocolate brown balayage feel almost tailored for a round face. They break up the forehead width, then blend into a soft money piece that does not shout for attention. The key is keeping the bright front sections narrow and feathered, not heavy.
If you like a little drama, this is where to spend it. Ask for warm chestnut or soft caramel around the face, but keep the rest of the balayage quieter so the bangs stay the star. A round face looks best when the eye has somewhere to go, and the bangs give it that path.
The bangs should graze the cheekbone, not stop right on it. That tiny difference matters. Pieces that end too high can bounce the width back into the face, while longer curtain sections slide past it and create a softer line.
I also like this look on shoulder-length cuts because the color has room to move. When the layers swing, the whole style feels lighter.
4. Cool Cocoa Waves with Smoky Ends
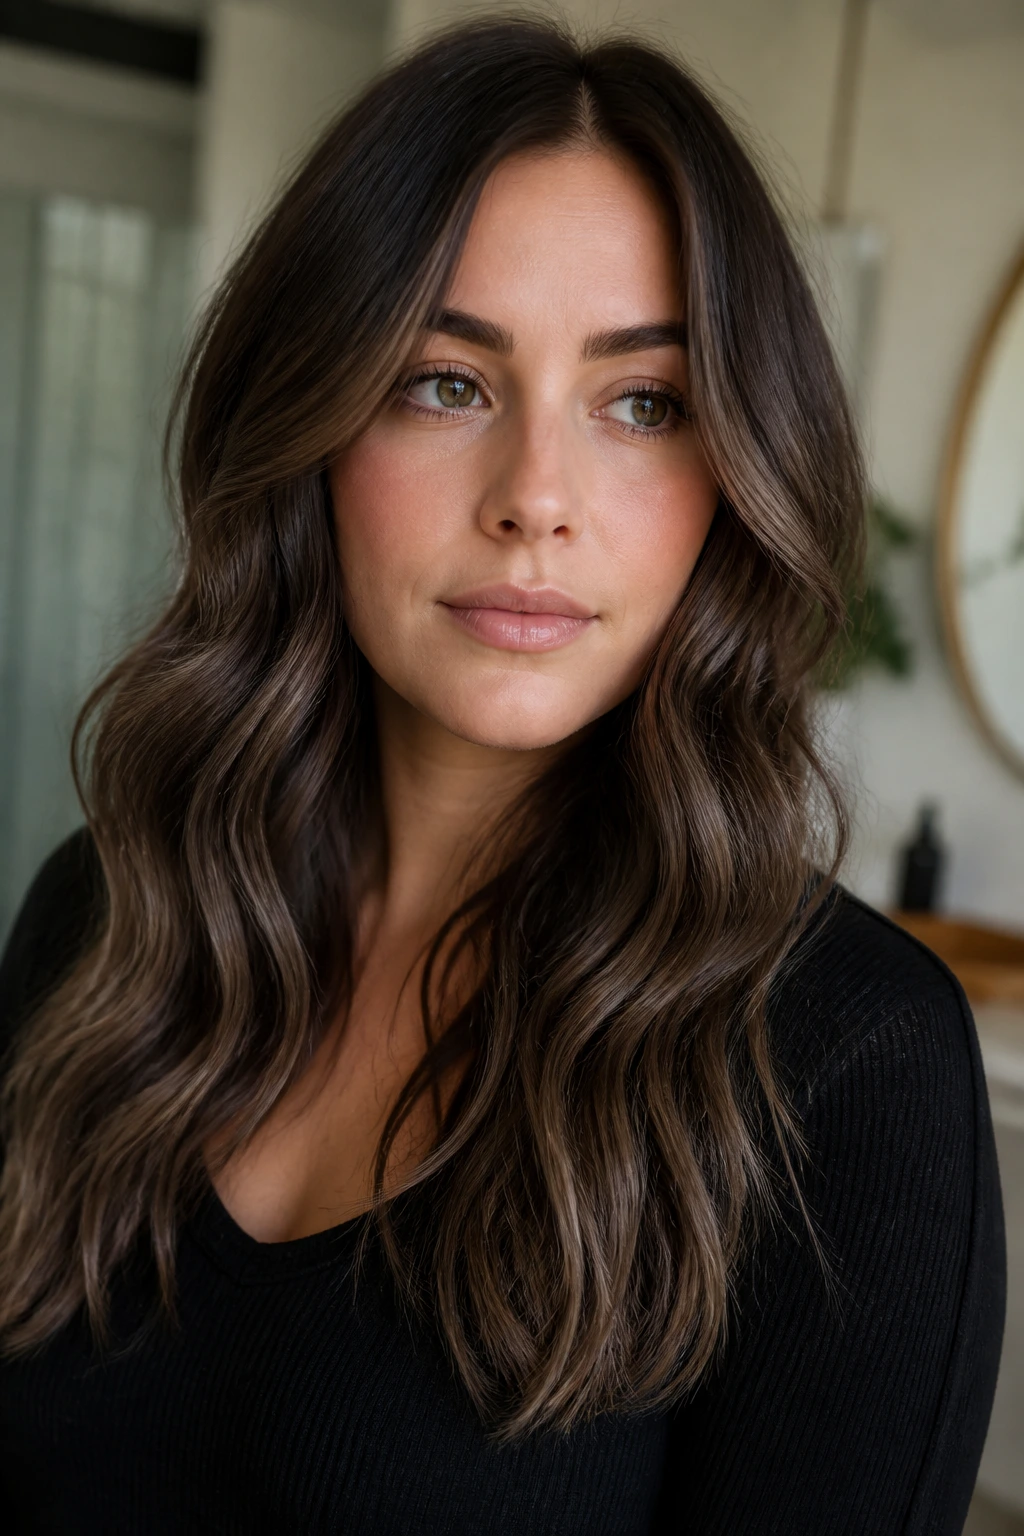
Can chocolate brown balayage look cool instead of warm? Absolutely, and it can be one of the prettiest choices for round faces when the tone stays smoky rather than muddy.
Cocoa waves with ashy ends work because the contrast is soft. You get enough lightness to show the wave pattern, but not so much that the cheeks become the widest point in the frame. A center part can work here if the front pieces fall below the jaw; if not, a slight off-center part gives the face more length.
Tell your colorist you want mocha at the root, then a cooler chocolate ribbon through the mid-lengths and ends. The finish should feel glossy, not flat. Dry hair with a diffuser or a large barrel iron, then break the curl pattern with your fingers so the color looks lived-in.
This is the kind of look that gets better when the cut is a little loose. Too much polish can make the smoky tones feel severe. A little softness keeps it wearable.
5. Butterfly Cut with Wide Chocolate Ribbons
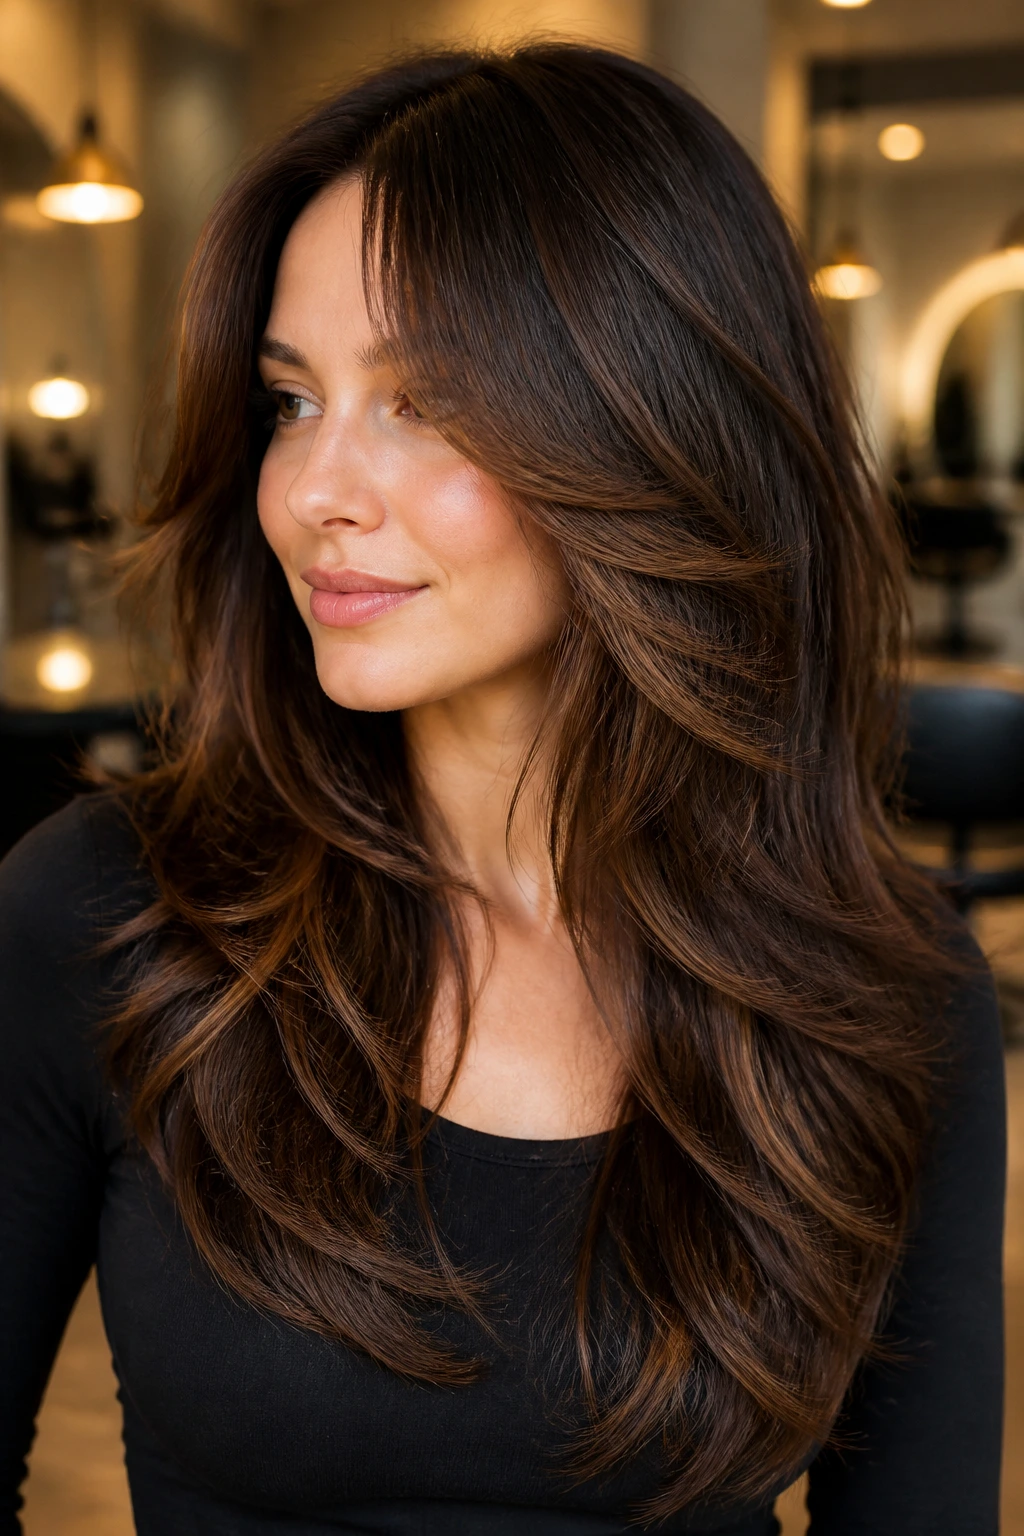
If your hair goes flat near the crown, the butterfly cut can save the whole look. Those shorter face layers lift the front, while the longer layers keep the back soft and swingy. Add wide chocolate ribbons, and suddenly the face feels more open without losing that brunette depth.
What to ask for at the salon
- Keep the shortest face layer around lip level or just below.
- Place brighter balayage pieces on the outer curve of the layers, not right at the temple.
- Finish with loose bends, not tight curls, so the cut still looks airy.
The reason this works on a round face is simple. The short front layers add height, while the long layers drop past the cheeks and pull the eye downward. It is a good mix of lift and length.
This version works best when the contrast stays moderate. Too much blonde would fight the haircut; chocolate brown balayage keeps it grounded and easy to wear. If you want more softness, ask for the lightest ribbons to stop an inch or two above the ends instead of flooding the whole midsection.
6. Rounded Bob with Mocha Lift
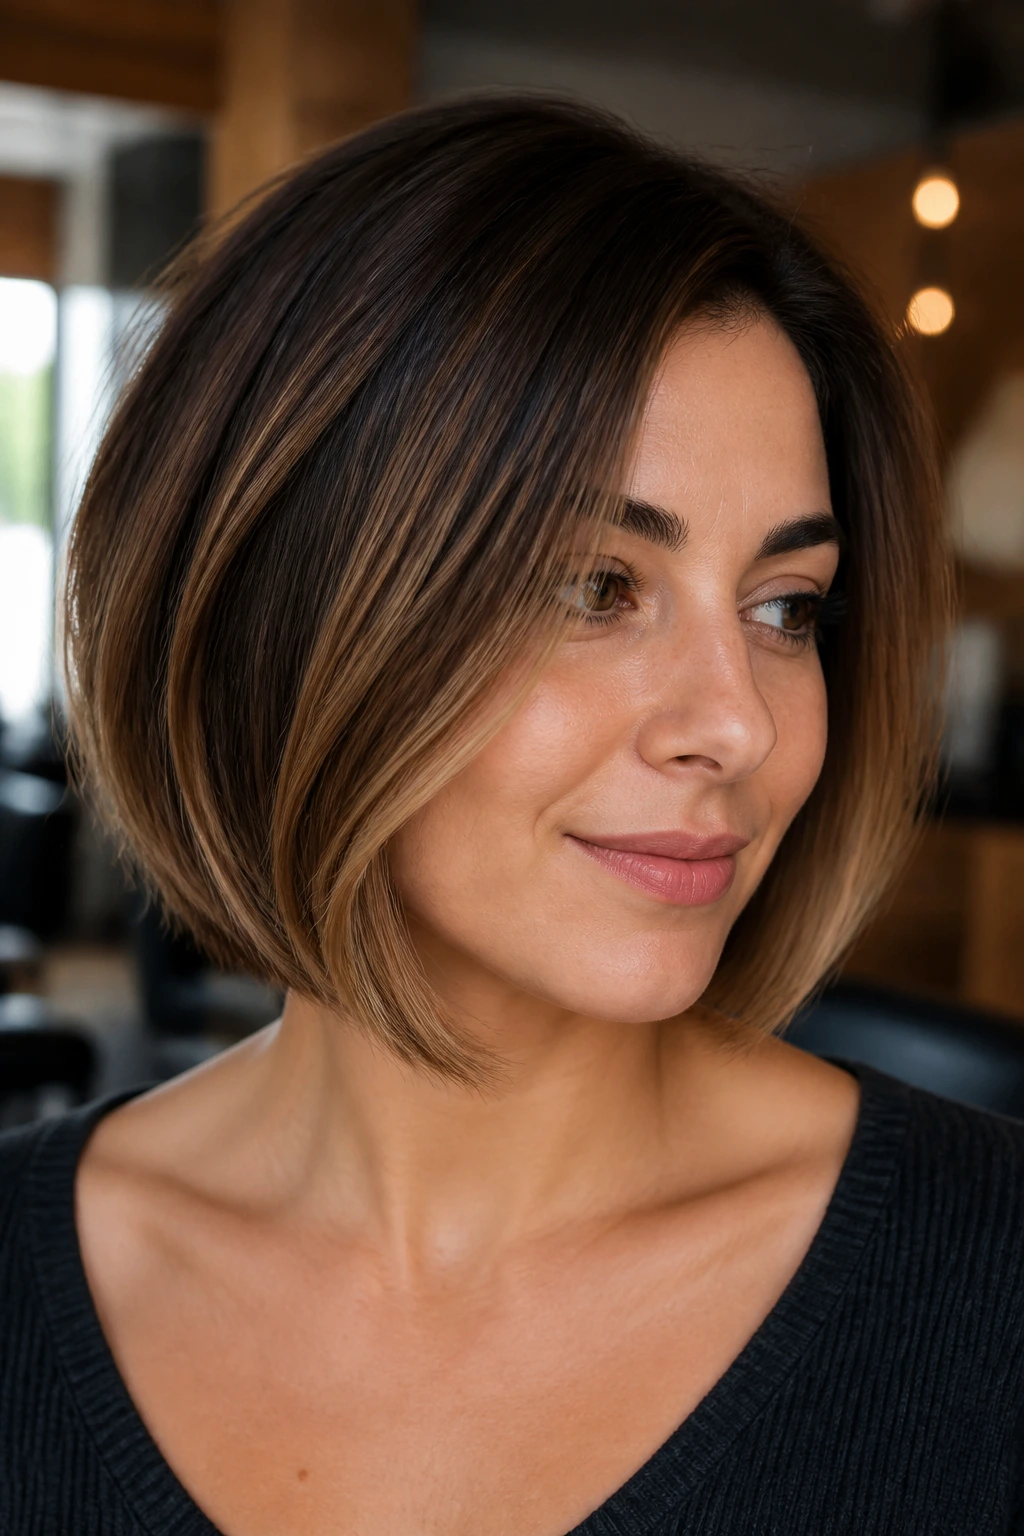
Unlike a blunt chin-length bob, a rounded bob with mocha lift does not stop the eye at the cheeks. The soft curve of the haircut and the painted light at the ends create a longer line, which round faces usually like more.
Keep the root shadow strong and the brightness at the lower third of the hair. A tiny amount of lift around the jaw is enough; you do not need bright streaks plastered across the whole front. I like this look on women who want a neat cut that still has movement when they turn their head.
A rounded bob also gives you room to play with styling. Tuck one side behind the ear for a sharper line, or wear it with a soft bend for something gentler. Either way, the mocha tones keep the shape from looking flat.
This is one of those cuts that looks expensive when the ends are blunt enough to feel clean, but soft enough to move. That balance matters more than people think.
7. Deep Espresso Roots with Cinnamon Veils
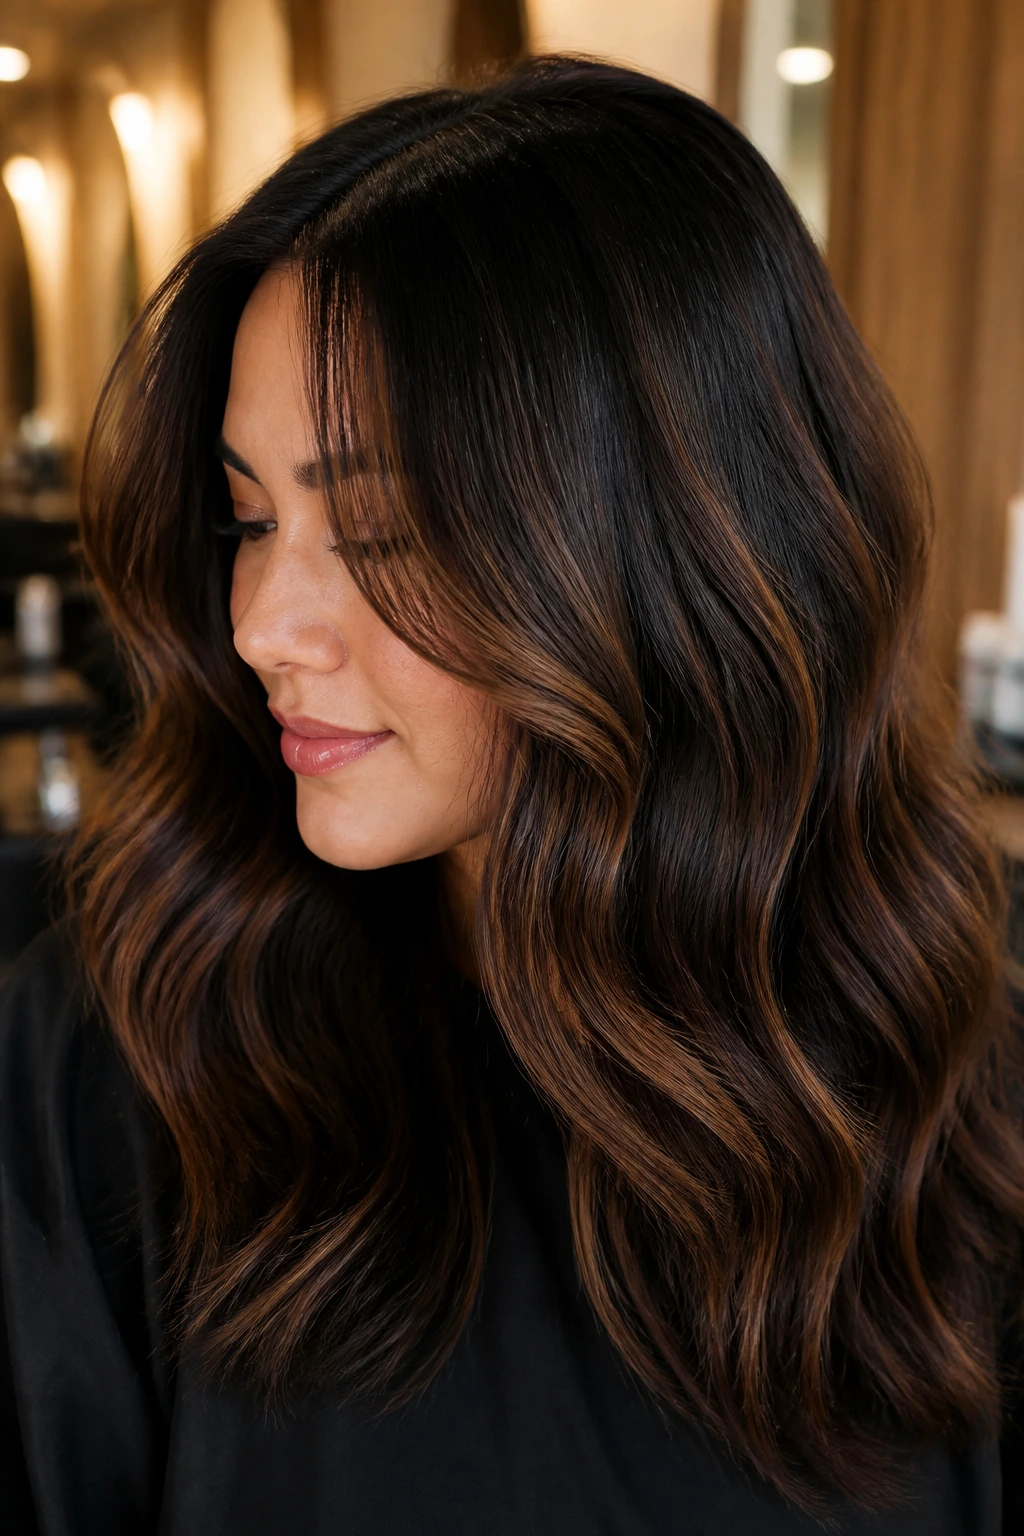
Subtle wins here. A deep espresso base with thin cinnamon veils is one of those color jobs that looks rich because it does not try too hard.
The veils are so fine that you notice them mostly when the hair moves. That matters for round faces, because the movement creates a vertical ripple instead of a wide block of color sitting beside the cheeks. The eye sees depth first, light second.
Ask for a color melt, not a stripe pattern. The root should stay dark, the mid-lengths should shift softly, and the ends should carry the warmest tones. If you wear your hair curled, this look gives you depth without the puffy halo that can happen when highlights are too chunky.
It is also one of the easiest styles to keep fresh. A gloss between lightening appointments can revive the warmth fast, and that cinnamon tint stays pretty even as it fades.
8. Mid-Length Waves with Midshaft Brightening
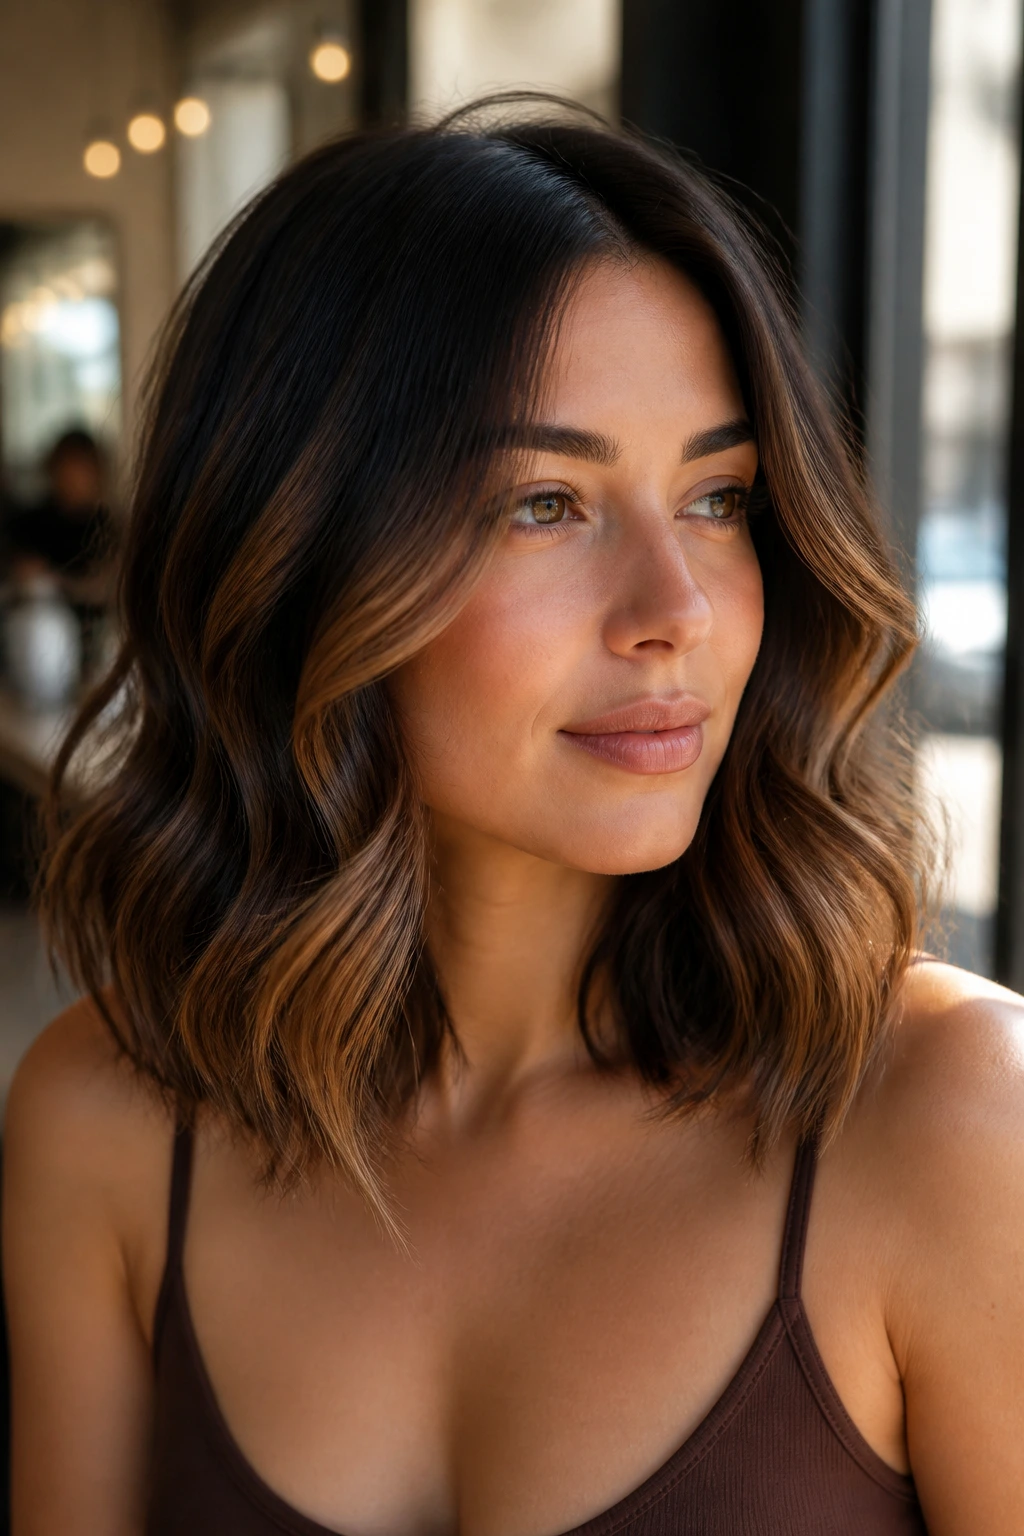
Mid-length waves are where chocolate brown balayage starts to feel playful. The trick for a round face is moving the brightest pieces an inch or two lower than you think you need. That small shift changes the whole silhouette.
What to ask your colorist
- Keep the root at a deep cocoa level.
- Paint the brighter bits through the midshaft, then feather them into the ends.
- Leave a few darker lanes around the face so the color has contrast.
Those darker lanes matter. Without them, the hair can spread outward visually, especially if you have a fuller cheek or a soft jawline. With them, the wave pattern feels longer and the face looks a little leaner.
This is a good cut if you like hair that can go from casual to polished with one pass of a curling iron. The color does not have to be loud to work. It just needs enough placement to keep the mid-lengths from reading as one flat block.
9. Straight Hair with Narrow Vertical Ribbons
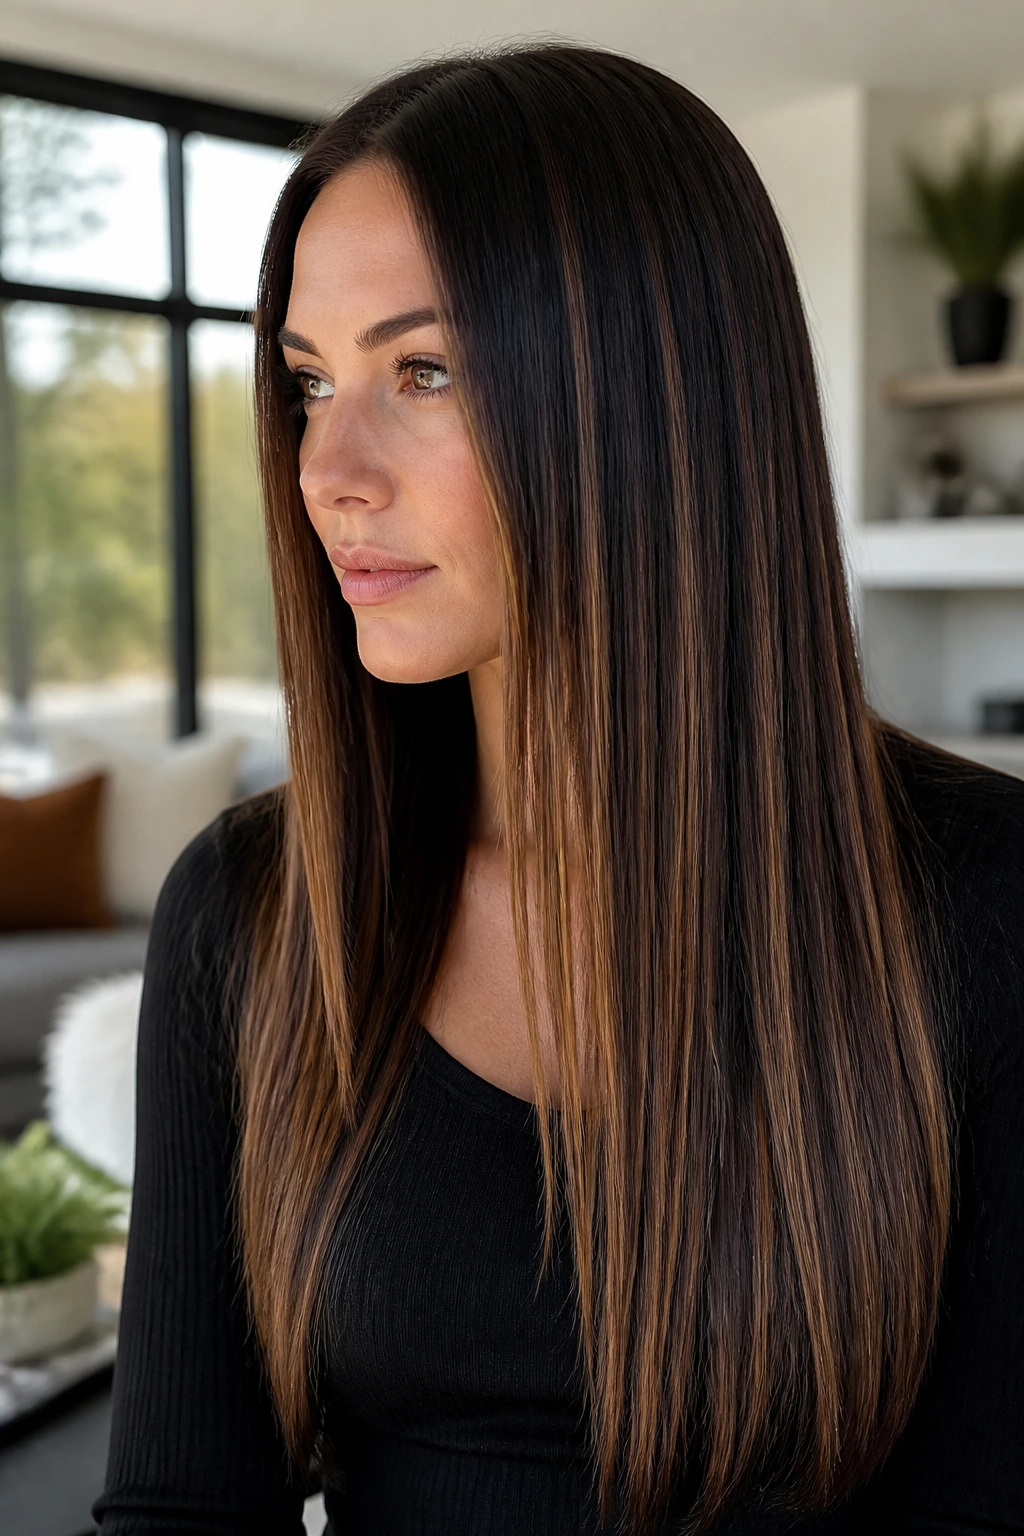
Straight hair punishes sloppy placement. Every line shows, which is why narrow vertical ribbons work so much better than broad panels on a round face.
Ask for chocolate brown balayage that starts off-center and drops toward the ends, not color that sits like a band across the cheek. When you wear your hair sleek, those long ribbons act almost like seams in a good jacket—they guide the eye where you want it to go.
If you tuck one side behind the ear, even better. That little asymmetry keeps the style from feeling boxed in. A glossy serum on the ends helps the lighter pieces look intentional instead of dry.
The best part is how clean this looks in motion. A breeze, a head turn, even a simple over-the-shoulder shift shows the vertical shape of the color. That is where the length comes from.
10. Shaggy Layers with Piecey Chocolate Ends
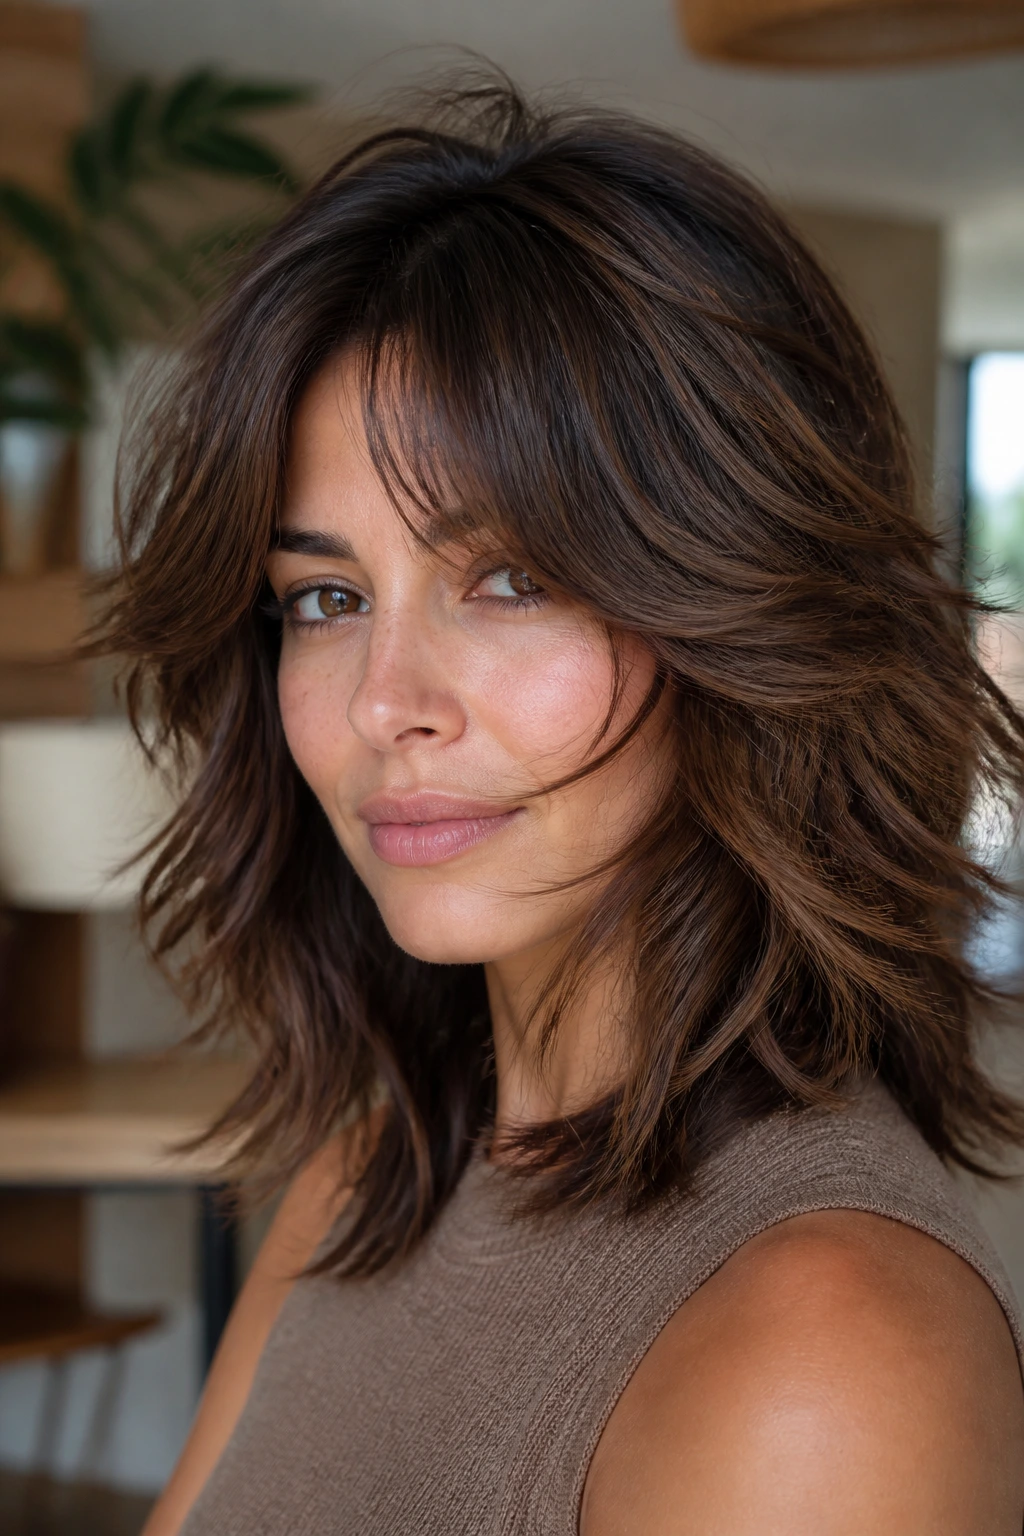
The first thing you notice is the movement. A shag with piecey chocolate ends has that airy, broken-up texture where the lighter bits flash only when the layers separate.
That texture is a gift for round faces because it stops the silhouette from looking too smooth and circular. The shag needs a bit of grit—spray, paste, or a light mousse—and the balayage should follow the texture rather than fight it. Paint the lighter pieces through the top and outer layers, then leave the underlayer deeper and darker.
I like this one for people who do not want polished hair every day. It looks better with a little mess. A center part can work, but a soft off-center part gives the layers a more directional shape and keeps the width from sitting evenly on both sides of the face.
The ends should look chipped, not choppy in a bad way. That irregular finish makes the chocolate tones feel alive.
11. Deep Side Part with One-Side Brightness
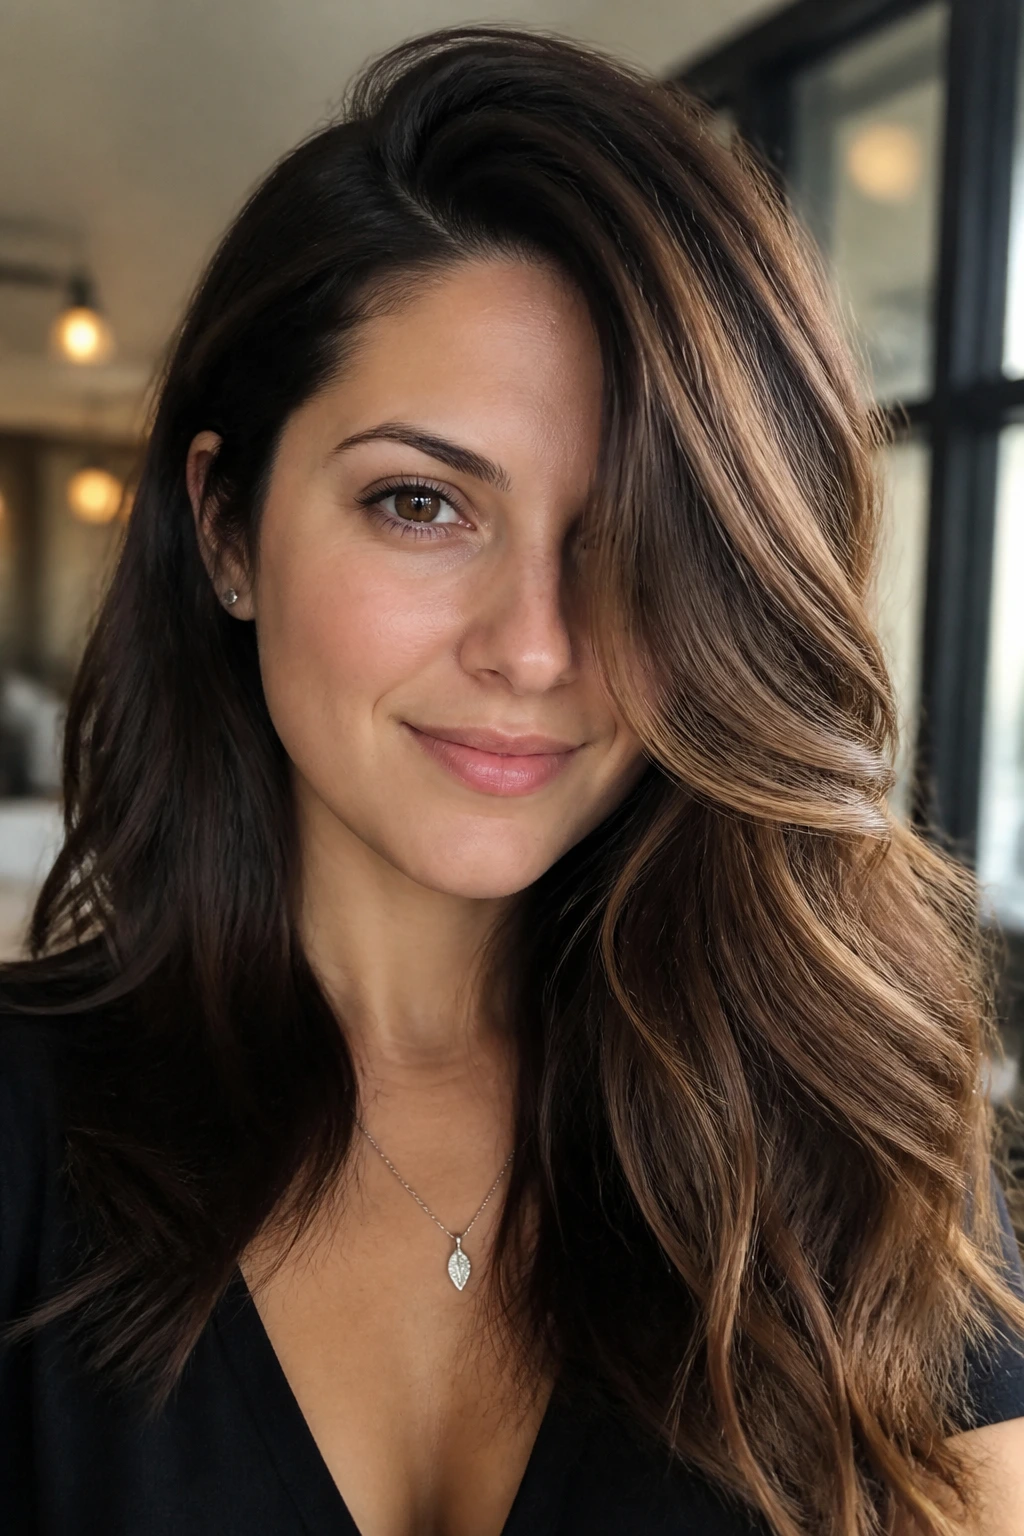
A deep side part changes the whole game for round faces. One side falls close to the cheek, the other side sweeps away, and the chocolate brown balayage can play up that shape by putting more light on the lifted side.
Keep the brighter ribbon on the side with more volume and let the other side stay darker. That asymmetry adds length without needing a dramatic cut. It also works nicely with waves, since the bend in the hair keeps the line soft instead of severe.
Straight hair can wear it too, but I prefer it with a soft bend at the ends. The part does the shaping; the color just helps it along. If your hair tends to collapse, a root-lifting spray at the crown can keep the side part from falling flat by noon.
This is one of the smarter tricks in the whole list because it changes shape without changing length. Low effort. Good payoff.
12. Soft Curls with Hidden Dimension
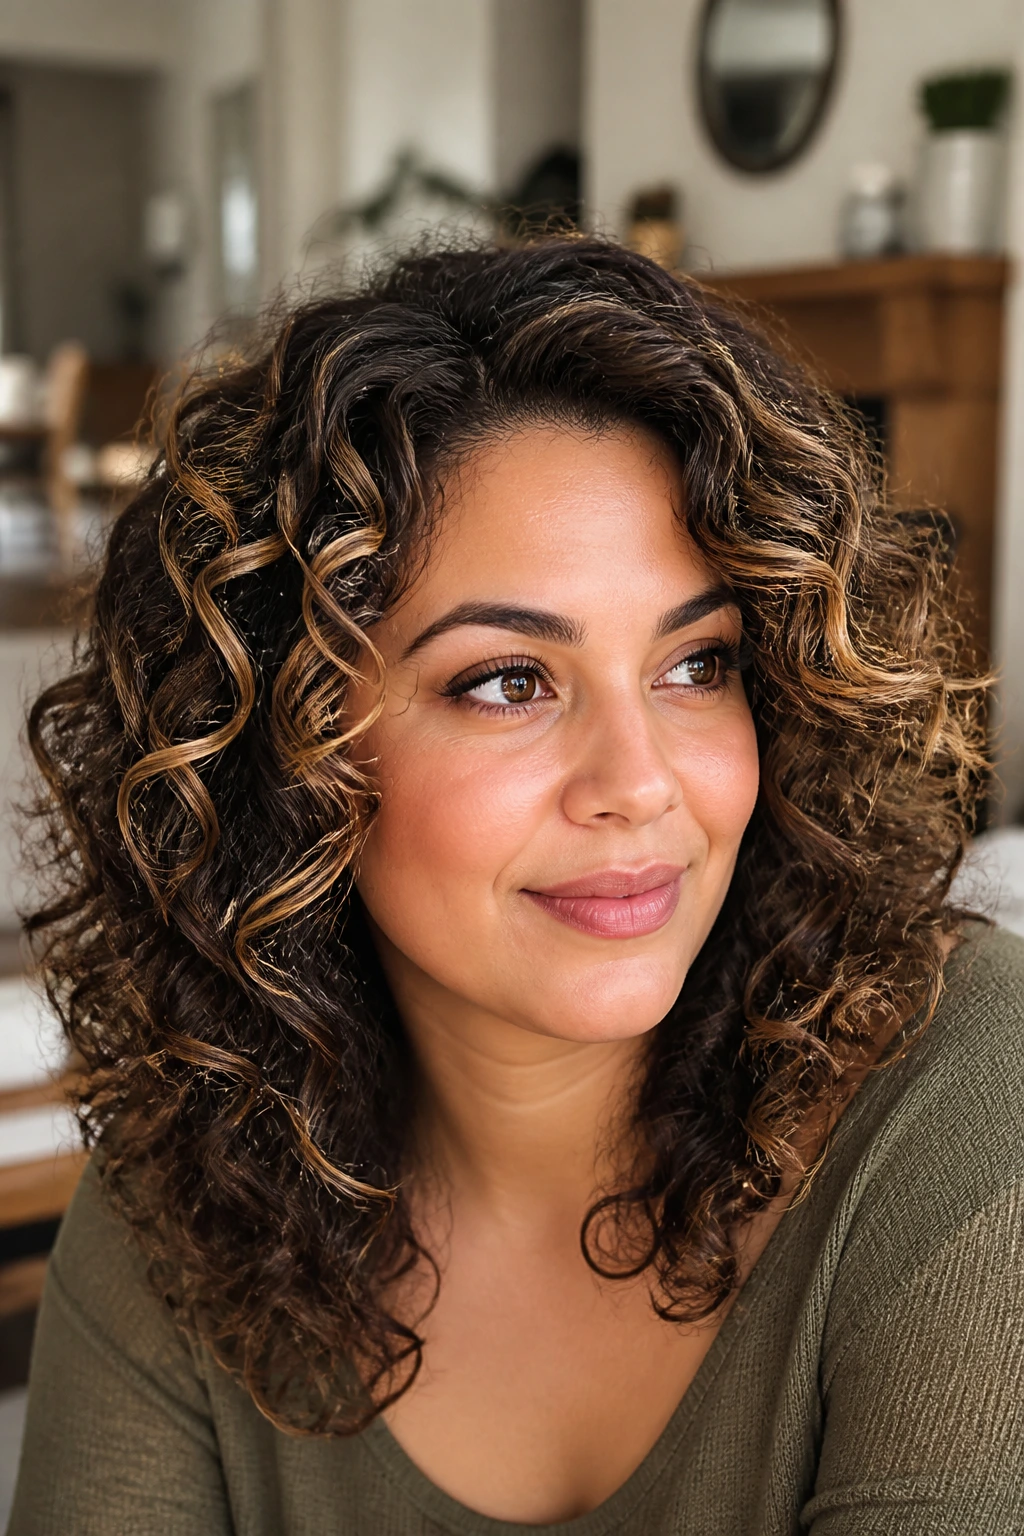
Why paint curls all over when the outer layer is the only part most people notice? That approach can make round faces look wider. Internal dimension fixes that.
How the color should sit
Paint the darker chocolate underlayers first, then add lighter brown or caramel touches where the curls fold over each other. Leave the very widest point of the face a shade deeper. The contrast shows up when the curls bounce, and the bounce is where the shape starts to feel lifted.
This is a smart choice if your curls are medium to tight and you wear them big. The color should follow the curl clumps, not the outline of your head. Small detail, big difference.
I like this when someone wants dimension without a lot of obvious streaks. The color seems to appear and disappear as the curls move, which keeps the look soft around the cheeks. A curl cream with enough hold to separate the clumps will help the placement show up better.
13. Thick Hair with Low-Contrast Balayage
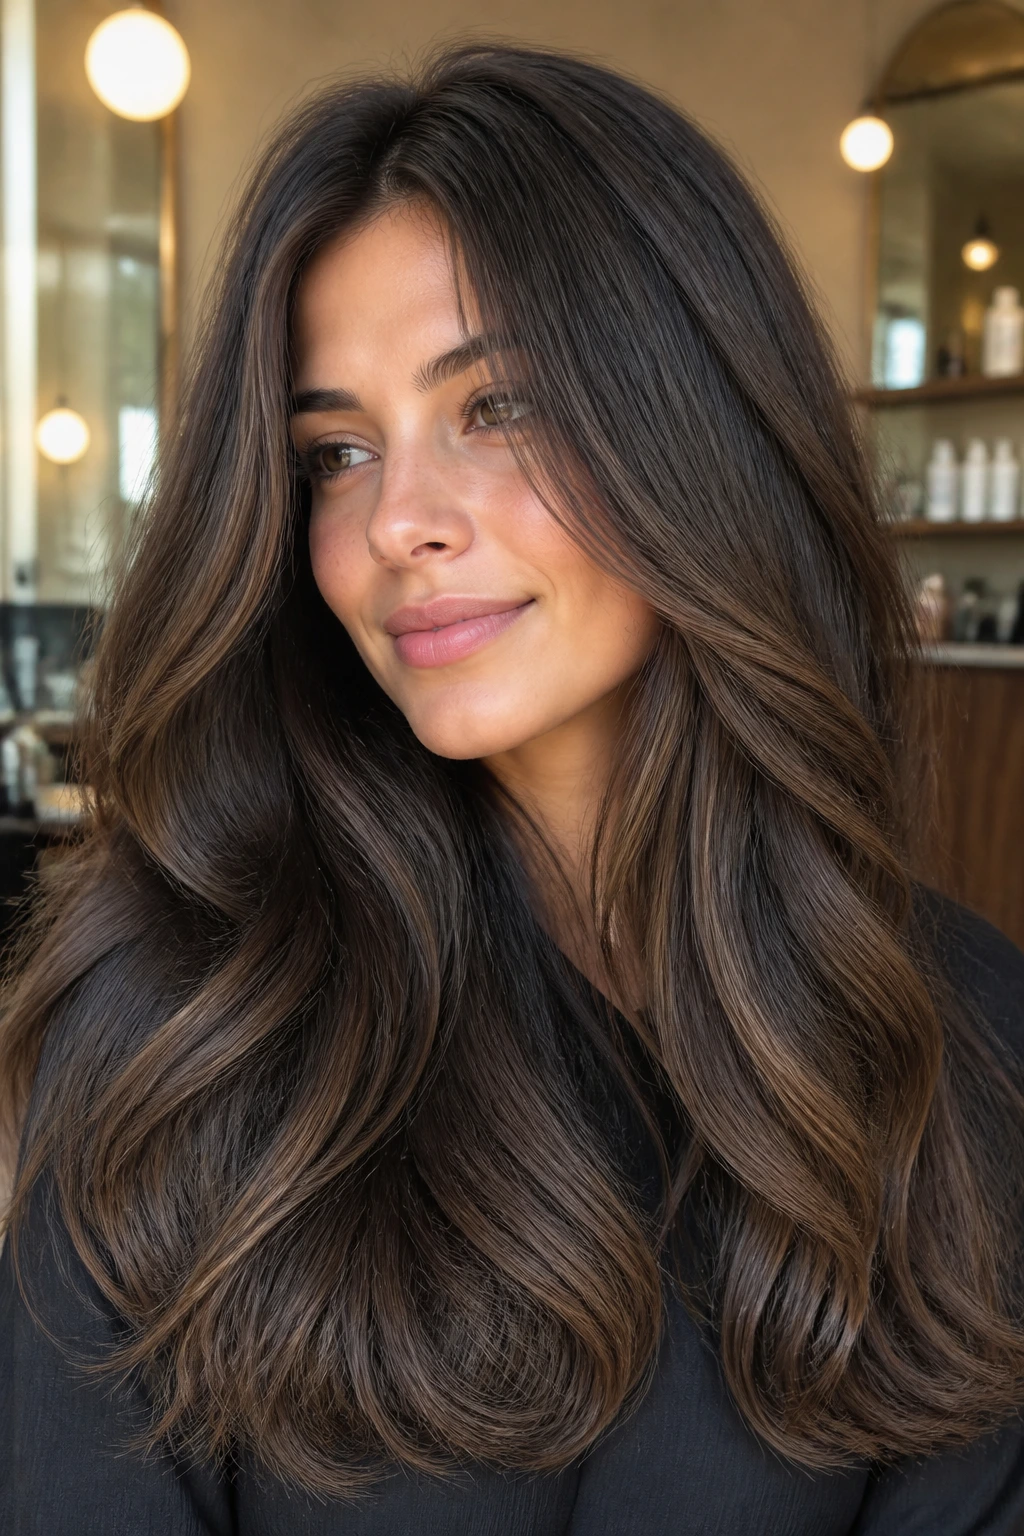
If your hair is thick, low-contrast chocolate brown balayage is your friend. Big contrast can make thick hair look wider than it already is, while softer shifts from dark cocoa to milk chocolate keep the bulk under control.
Ask for broader painted sections through the mid-lengths and a gentle lift at the ends. Avoid too much brightness around the temples. When thick hair expands in humidity, the face-framing pieces can move outward, and that is not the place you want all the light.
A smoothing cream or a light oil on the ends helps the color read as glossy instead of puffy. Thick hair can take a little more saturation, so do not be afraid of a rich base. The depth is what makes the lighter pieces feel believable.
This version is practical. It grows out well, it styles easily, and it does not demand a ton of attention every morning.
14. Fine Hair with Micro-Ribbons
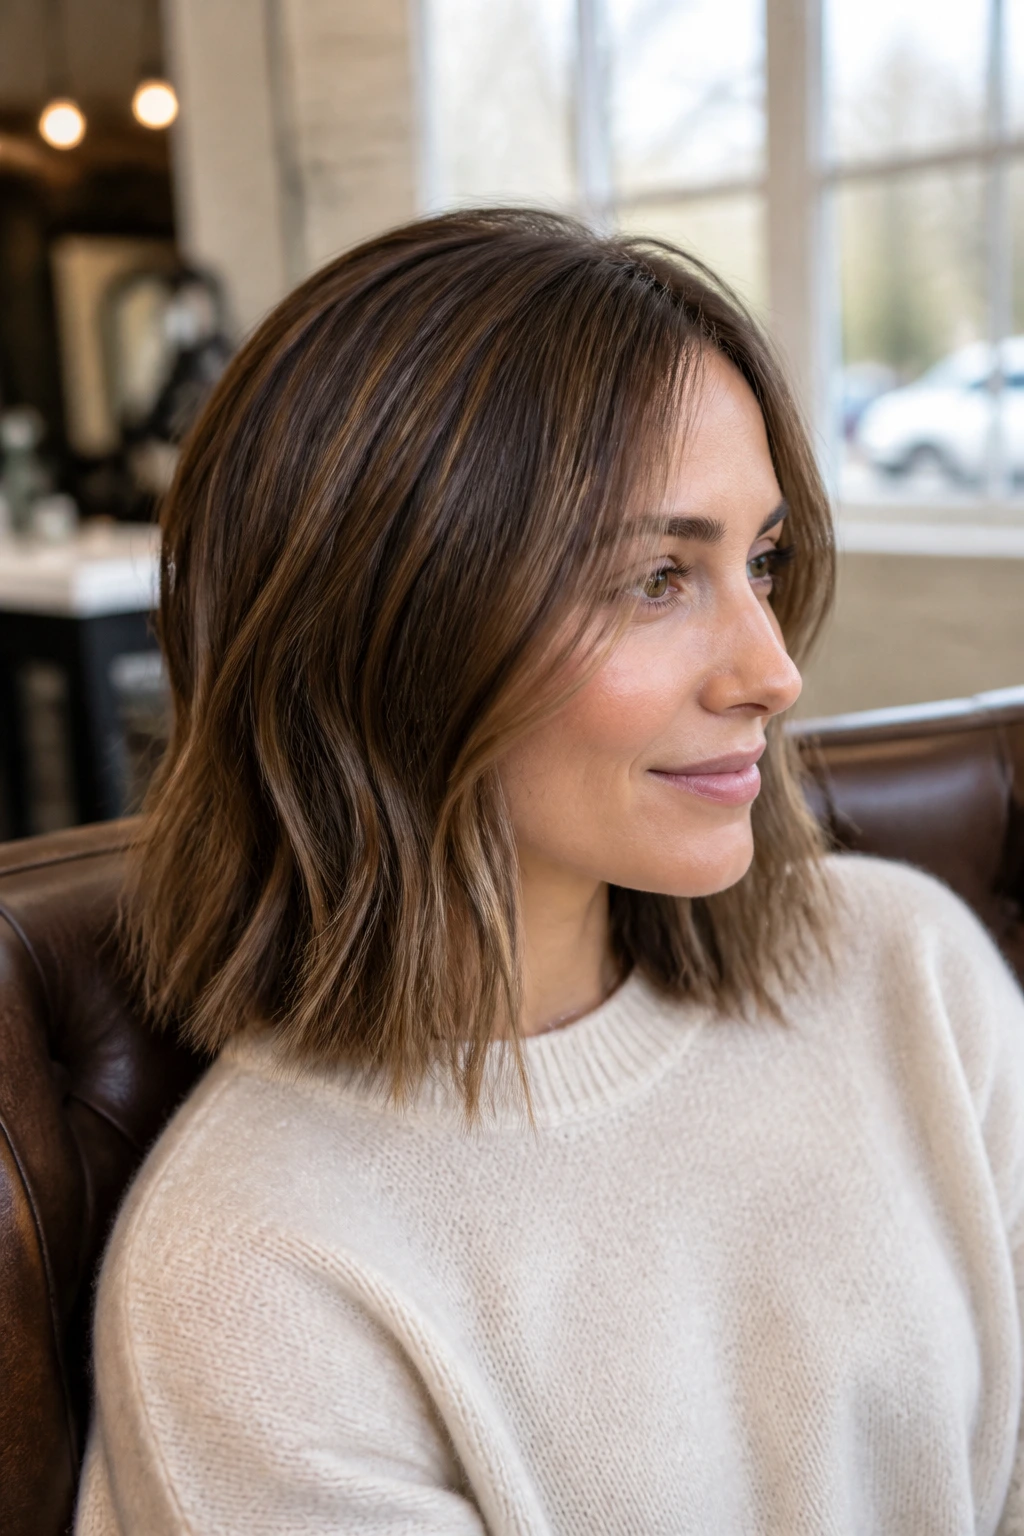
At the chair, this is the look that sounds boring and then ends up being the smartest one. For fine hair, micro-ribbons of chocolate brown balayage give you depth without stealing density.
Tell your colorist you want tiny, soft strokes—not stripes, not money piece drama, just a few delicate shifts that catch the light when the hair moves. The root stays rich, the mids get a whisper of warmth, and the ends look fuller because the eye sees texture.
Why it works on round faces
The small size of the ribbons matters. Big panels can make fine hair look thinner between the highlights, and that thinness can also widen the face. Micro-placement keeps the shape soft and close to the head.
I have a soft spot for this version on shoulder-length cuts. It gives fine hair a little body without making the front look busy.
15. Warm Chestnut Balayage with Toffee Tips
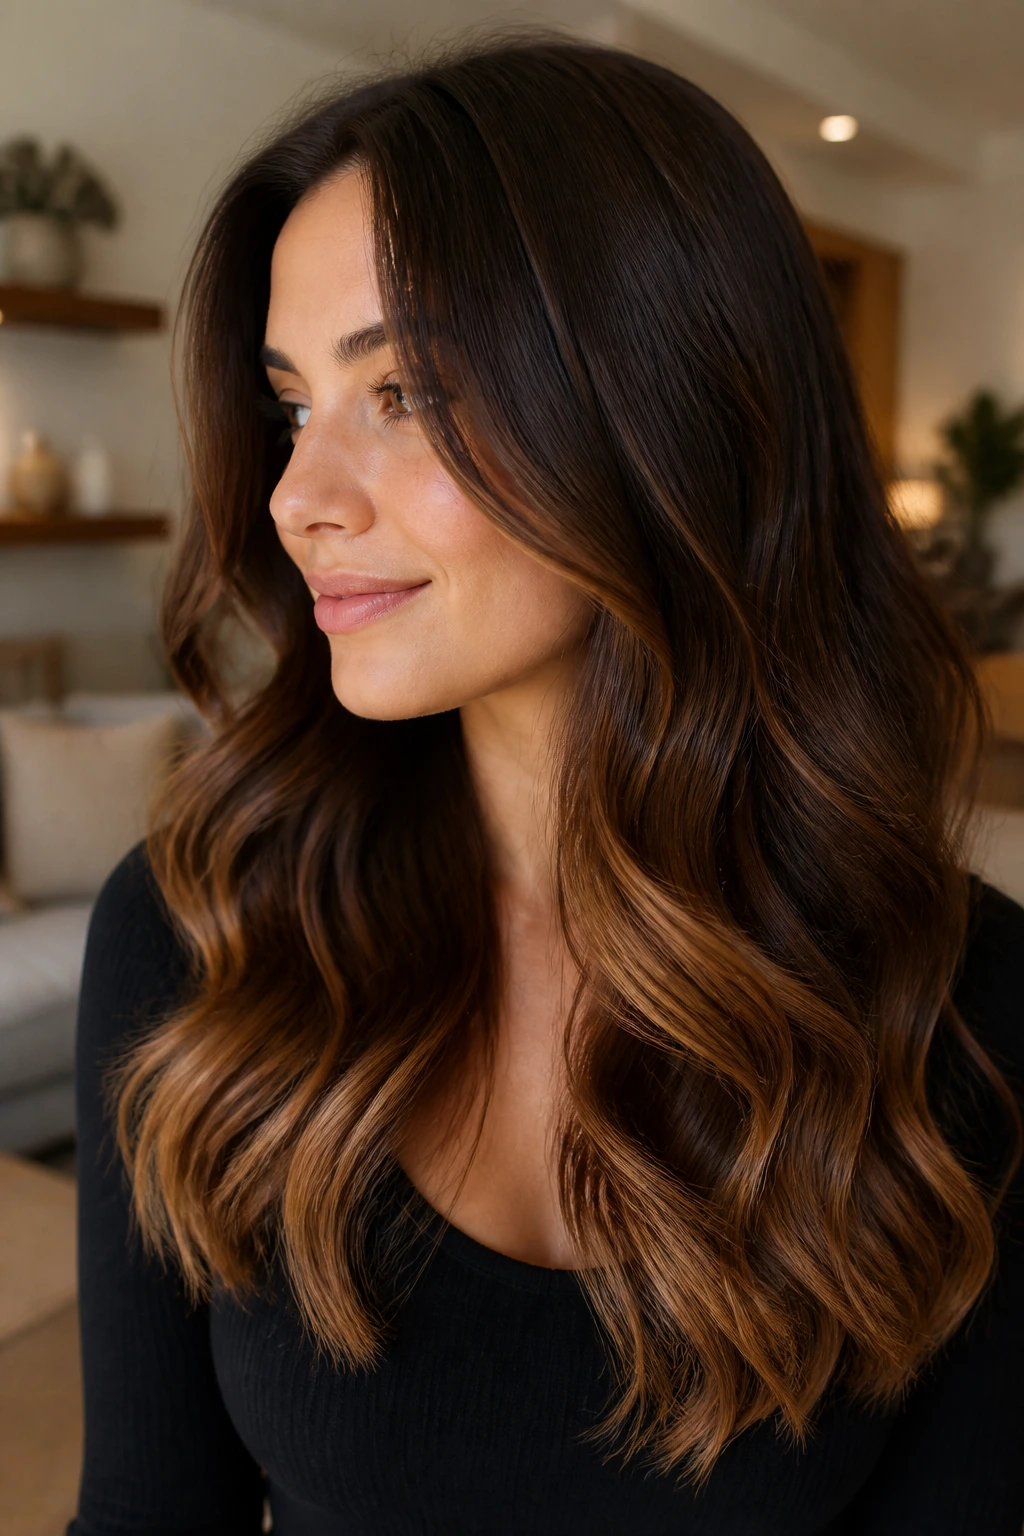
Warm chestnut can be gorgeous on a round face, but only if the lighter pieces stay under control. Too much warmth at the cheek makes the face read fuller; warmth pushed lower gives the hair glow instead of bulk.
Toffee ribbons should live mostly in the lower half of the hair and around the ends. If you want brightness around the face, keep it thin and feathered. The finish should feel soft enough that you notice the shine before you notice the color placement.
This is one of those looks that can turn orange if the toner is rushed. A gentle beige gloss after lightening keeps it rich and brown, not brassy. If your natural color is already warm, your colorist may need to cool the ribbons slightly so the chestnut does not run too copper.
The best result is full, warm, and touchable—not loud.
16. Soft Ombré from Dark Root to Milk Chocolate
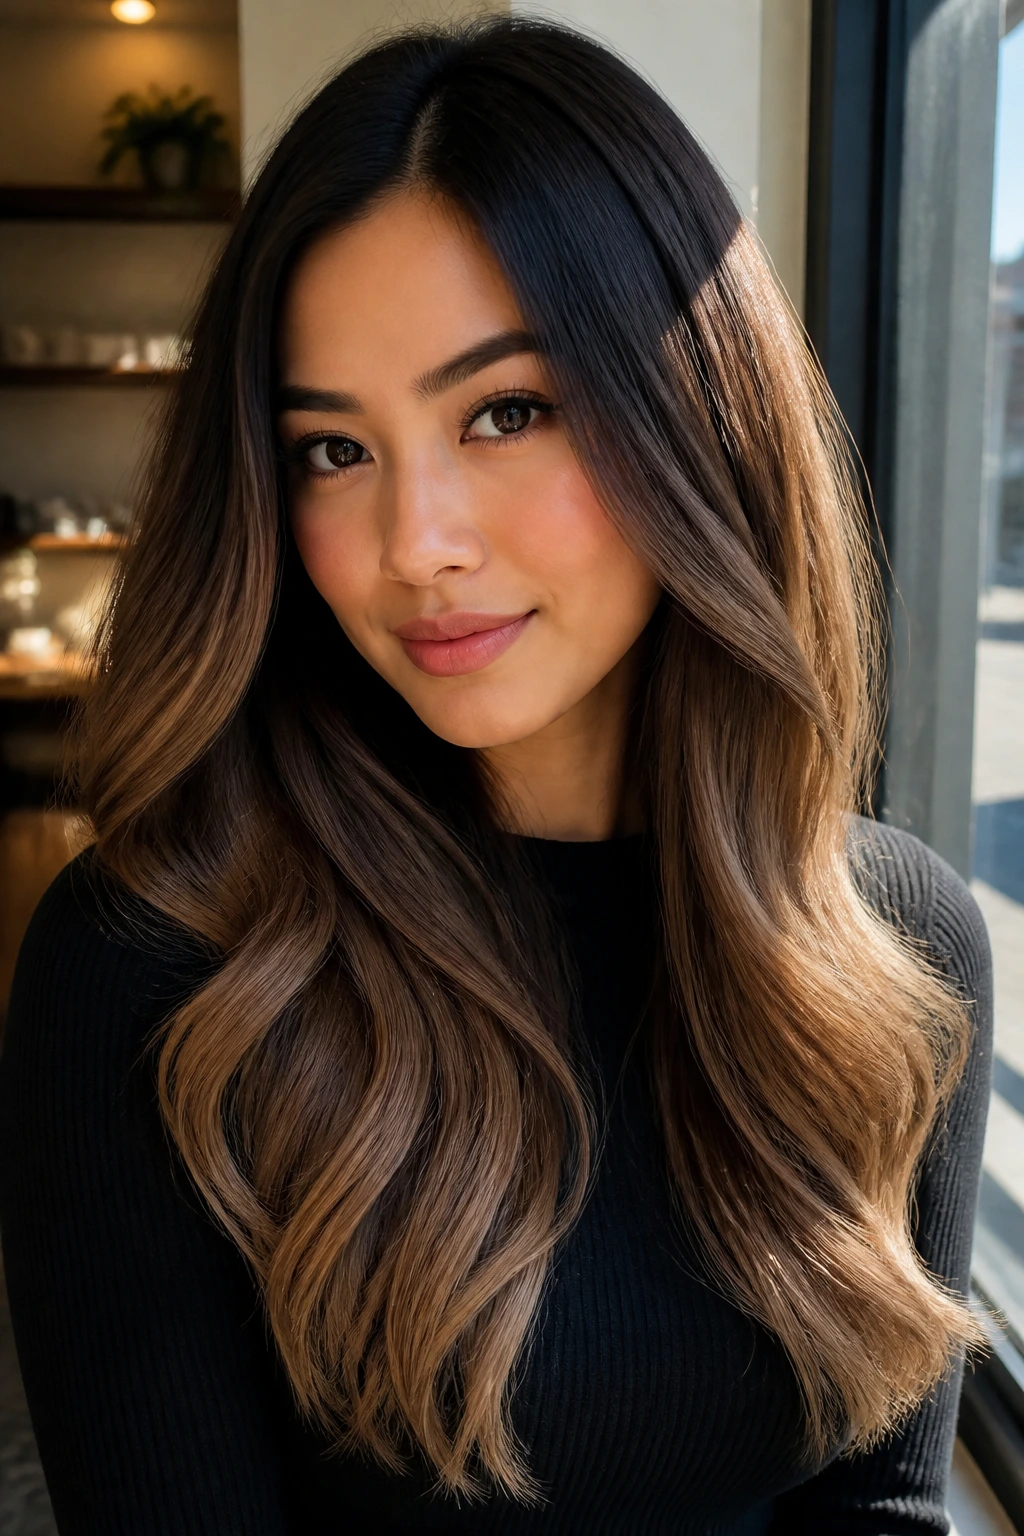
Soft ombré is not the same as flat, one-note dark hair. The difference is in the transition: a dark root melts into milk chocolate ends with no hard line, which gives round faces a longer vertical read.
What makes it different
The root area stays deep enough to slim the top of the face, while the ends carry most of the lighter tone. That means the brightest section sits where the eye already wants to travel—downward. It is a good pick if you like low-maintenance color and do not want to chase every root shadow.
Keep the lightest part a touch cooler if your skin runs pink, or warmer if your complexion likes golden brown. The shape of the color matters more than the exact name on the tube. A clean melt is what makes this version feel smooth.
I like this on long hair, but it works on shoulder length too. You just need enough length for the fade to read clearly.
17. Long Curls with Face-Opening Arcs
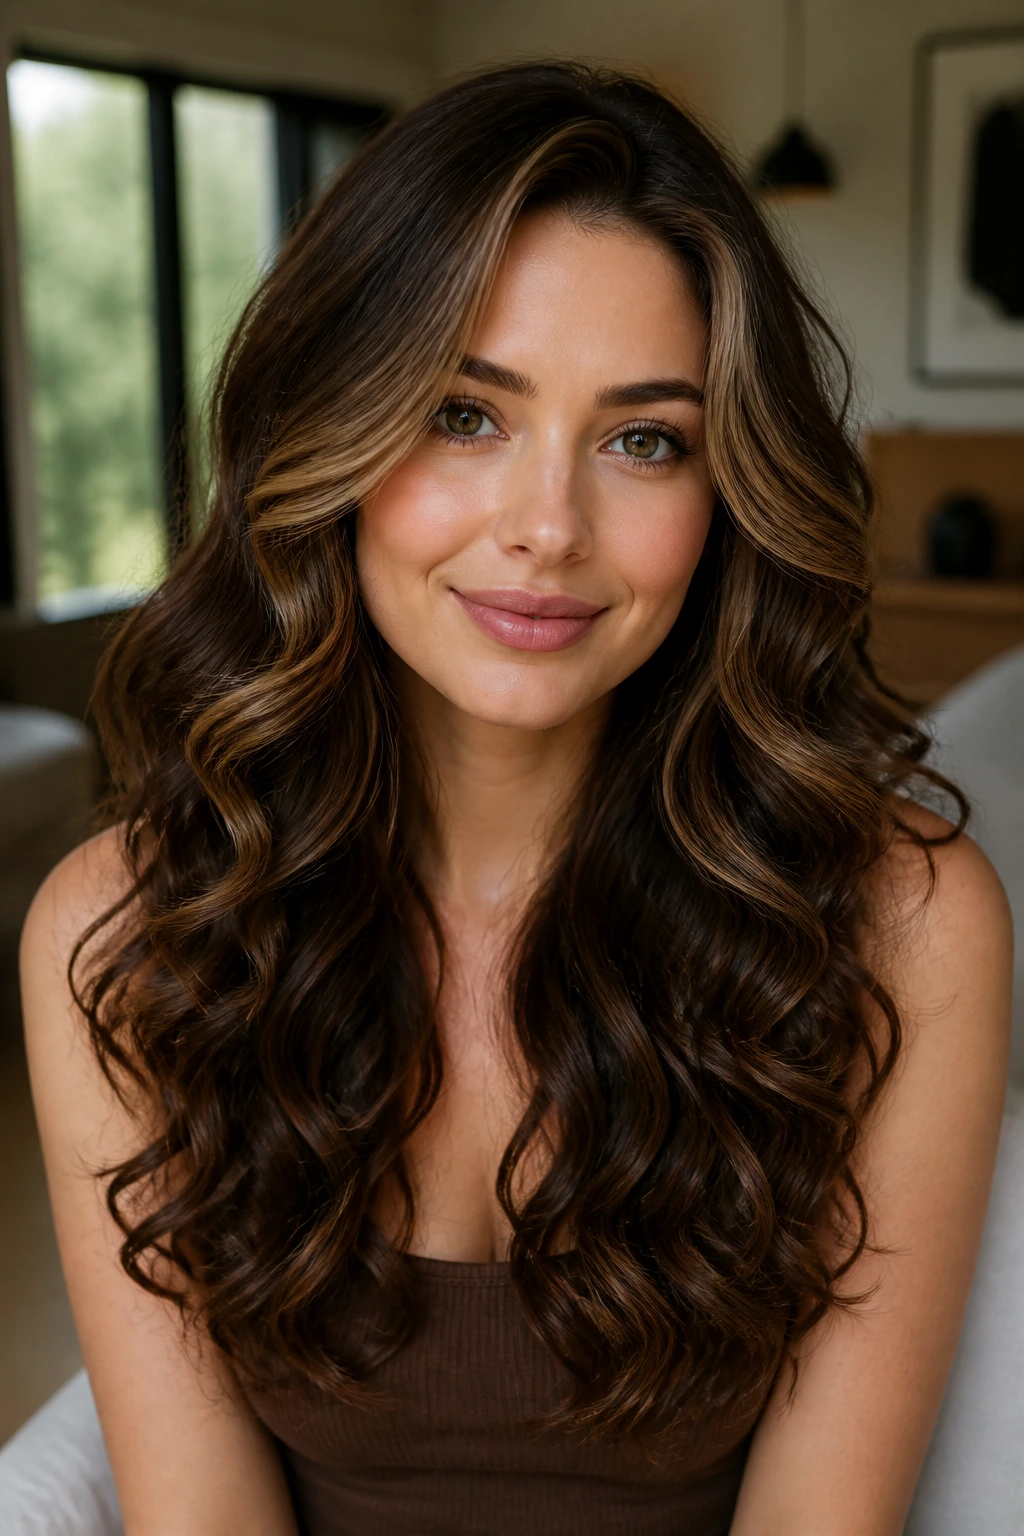
Center parts can drag the eye straight down, which sounds good on paper but can make a round face feel heavier if the color is too uniform. Face-opening arcs at the temples fix that by creating two soft vertical paths instead of one blunt center line.
Long curls carry this look well because the curls themselves help the highlight pieces separate. Ask for the lightest pieces to begin below the brow and sweep past the cheekbone, then keep the lower length slightly brighter. The result is open, airy, and easy to wear with a middle or off-center part.
The face-opening pieces should not be thick. If they are too bold, they can widen the upper face. Thin arcs are better. They feel softer, and they let the rest of the chocolate brown balayage do the heavy lifting.
This is a good one if you like hair that looks styled even on a low-key day.
18. U-Shape Cut with Seamless Lightness
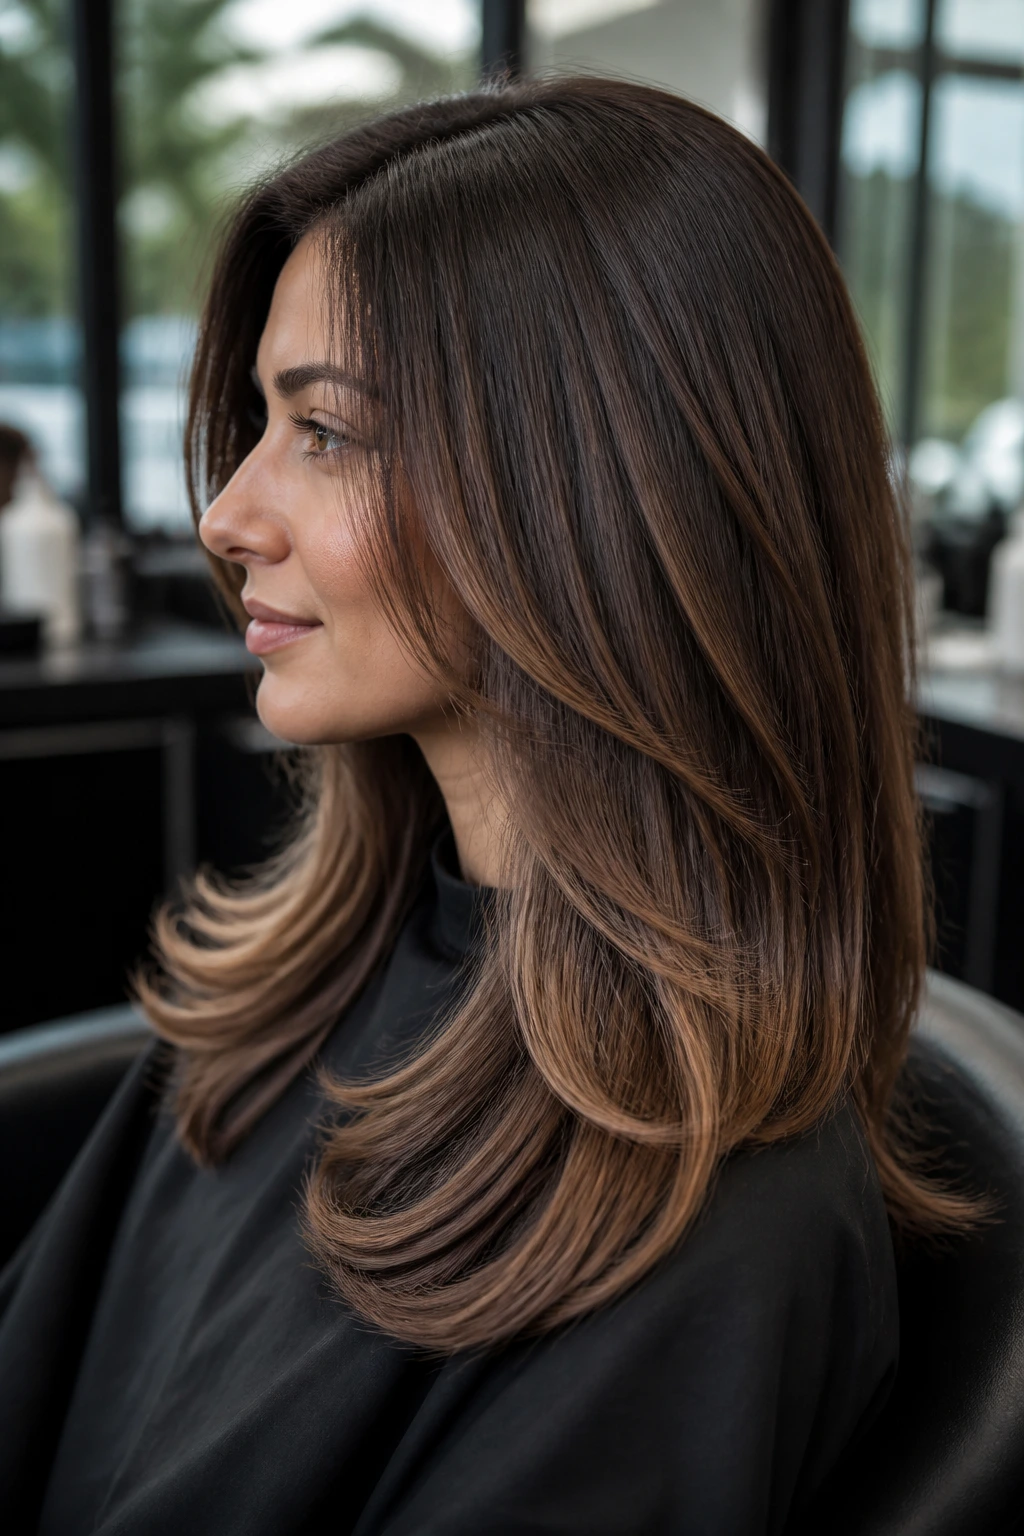
A U-shaped cut gives chocolate brown balayage a nice frame to follow. The sides stay a little shorter than the back, so the hair curves around the body instead of sitting in one wide wall.
That shape helps round faces because it adds movement without bringing extra width to the cheeks. Paint the brighter ribbons through the lower sides and the last few inches at the back, and the cut suddenly feels longer and lighter. It is a quiet look, which I like. Quiet color often lasts longer in real life.
A U-shape also behaves well when curled. The outer curve catches the light, while the center back keeps its depth. That contrast is subtle, but it makes the whole style feel finished.
If you want something polished enough for work but soft enough for weekends, this is a good lane to stay in.
19. Lived-In Lob with Sandy Chocolate Blending
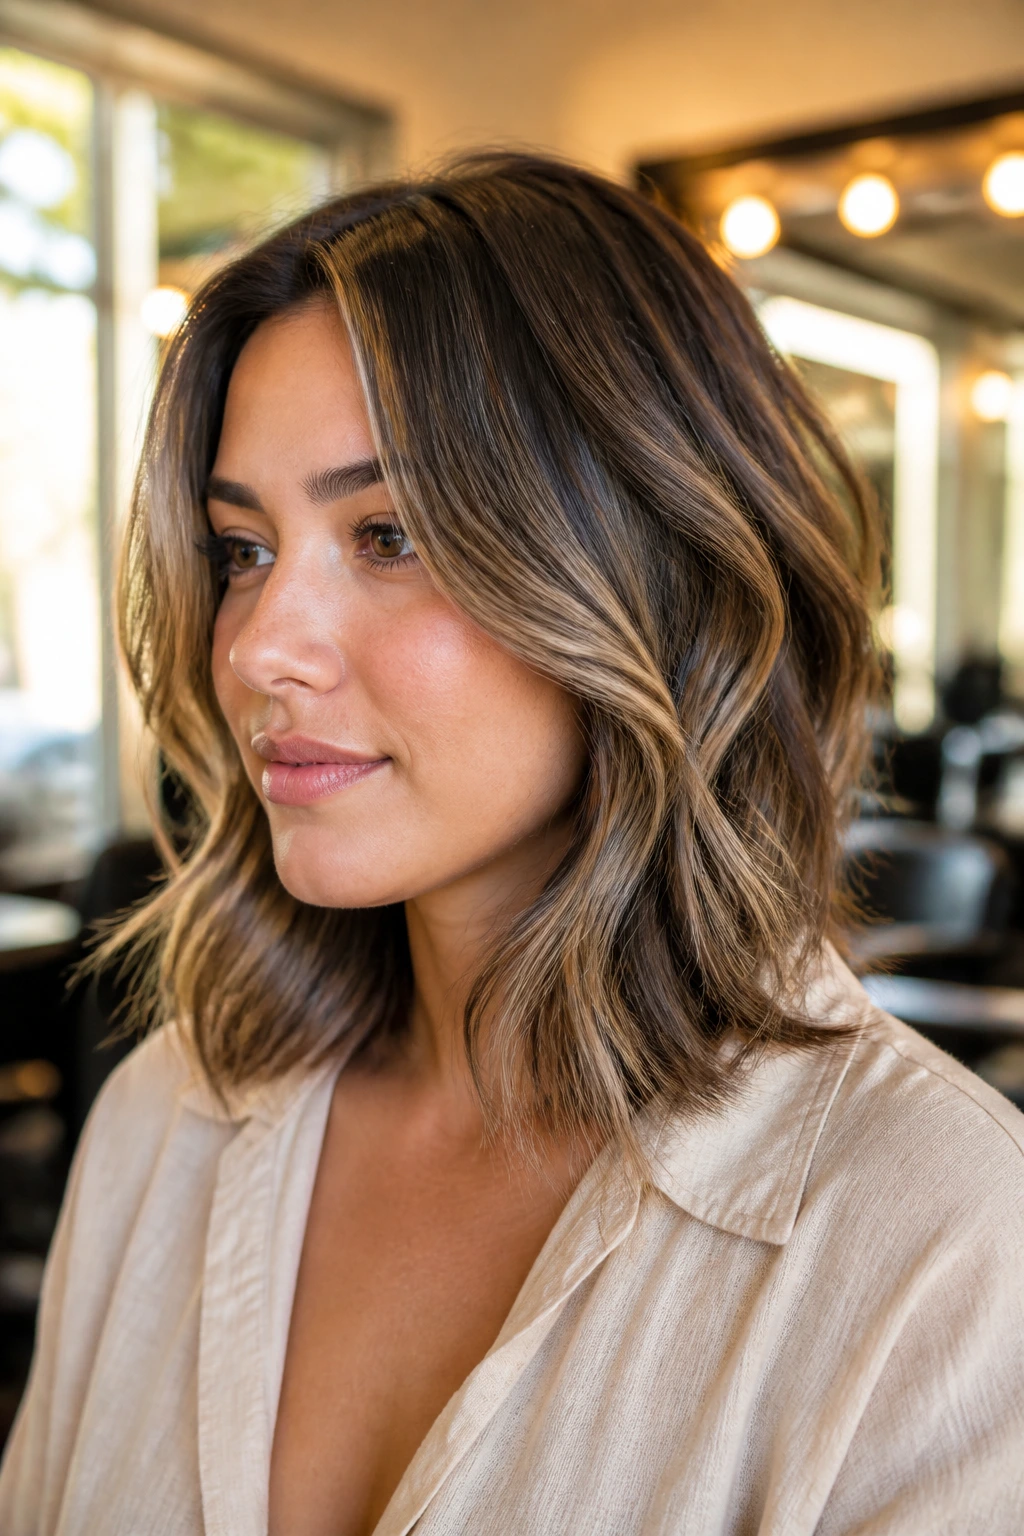
A lived-in lob with sandy chocolate blending is the one I suggest to people who want dimension but hate obvious regrowth. The color sits in that sweet middle ground where the base is still clearly brunette, but the surface has enough lightness to break up the shape.
The best part is how forgiving it is around a round face. Keep the front pieces softer and the lightest threads below the jaw, and the lob will feel longer than its actual length. A loose wave or even a quick bend from a flat iron is enough.
Sandy tones keep the look from going too warm, which helps if your skin gets a little flushed. If you want more depth, ask for the base to stay one shade deeper near the nape. That tiny pocket of darkness adds shape without calling attention to itself.
This is a quietly good haircut-color combo. No fuss. No drama. Just good hair.
20. Brow-Grazing Bright Pieces and Loose Waves
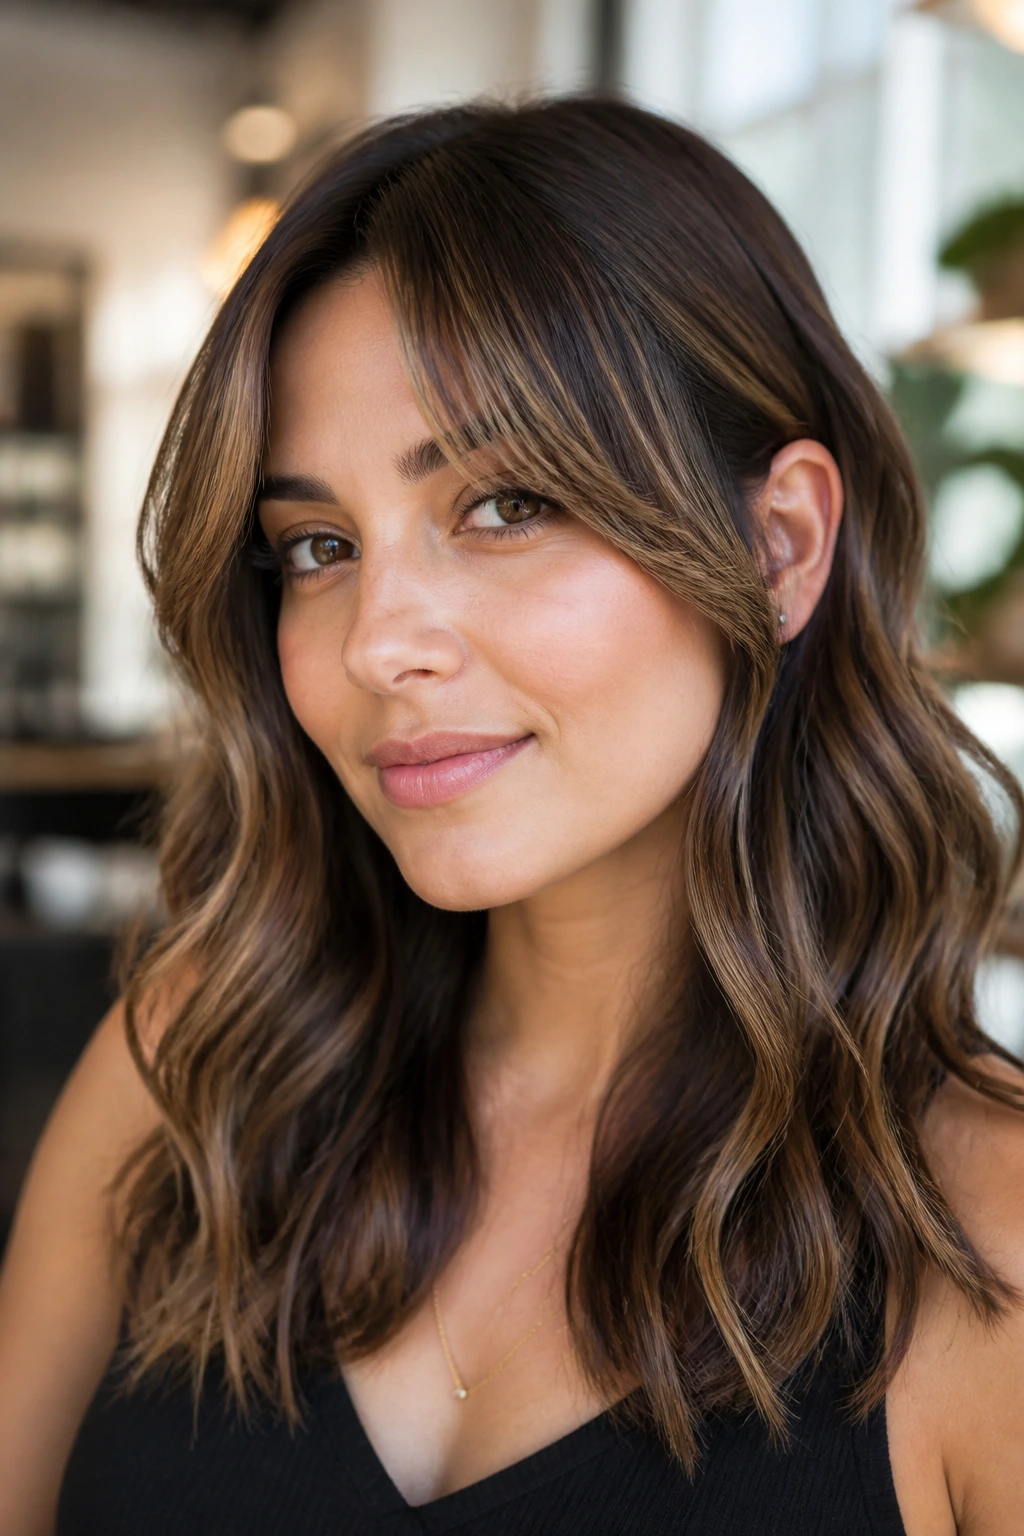
Bright pieces that start at the brow, not the temple, can change a round face fast.
That is why brow-grazing brightness works so well. The eye sees a lifted frame around the upper face, then follows the lighter chocolate ribbons downward. Keep the root shadow deep and the brightness soft, and you get that open look without widening the cheeks.
I like this on hair that already has a little wave. The bend helps the front pieces fall in a diagonal line instead of ballooning outward. If you wear your hair tucked behind one ear, the shape gets even cleaner.
This is the kind of placement that can look dramatic in motion and quiet when still. That’s the sweet spot.
21. Thick Coils with Painted Surface Glow
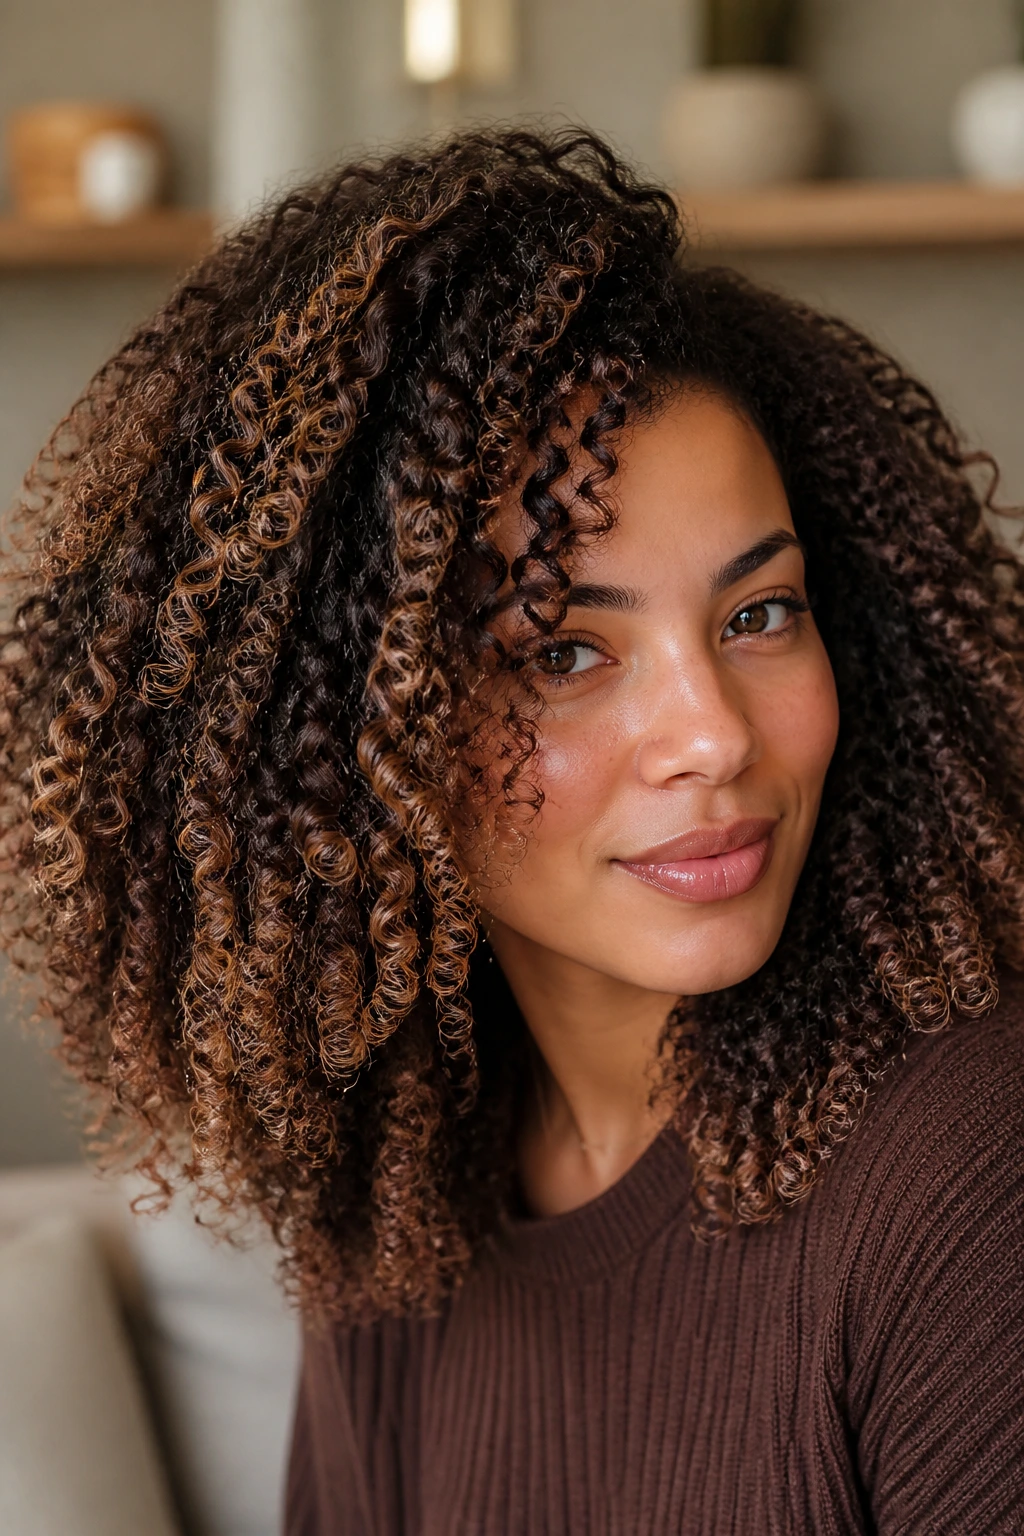
Thick coils need a different hand. Chocolate brown balayage looks best here when the color is painted on the outside of the curl pattern and kept darker underneath, so the shape stays round without turning into a color block.
Who should try this
- People who wear their coils stretched, diffused, or shingled.
- Anyone who wants shine along the surface more than bright streaks everywhere.
- Clients who can handle a slightly longer appointment, since coil placement takes patience.
- People who like dimension that shows in motion instead of sitting flat.
Ask for the lighter pieces to stay away from the widest part of the cheek. The result is fuller-looking hair that still feels shaped, not puffy. A good leave-in cream and a diffuser help the color catch light on top while the underside stays rich and deep.
This is one of my favorite looks for texture because it respects the pattern instead of fighting it.
22. Dark Chocolate Balayage with a Halo Frame
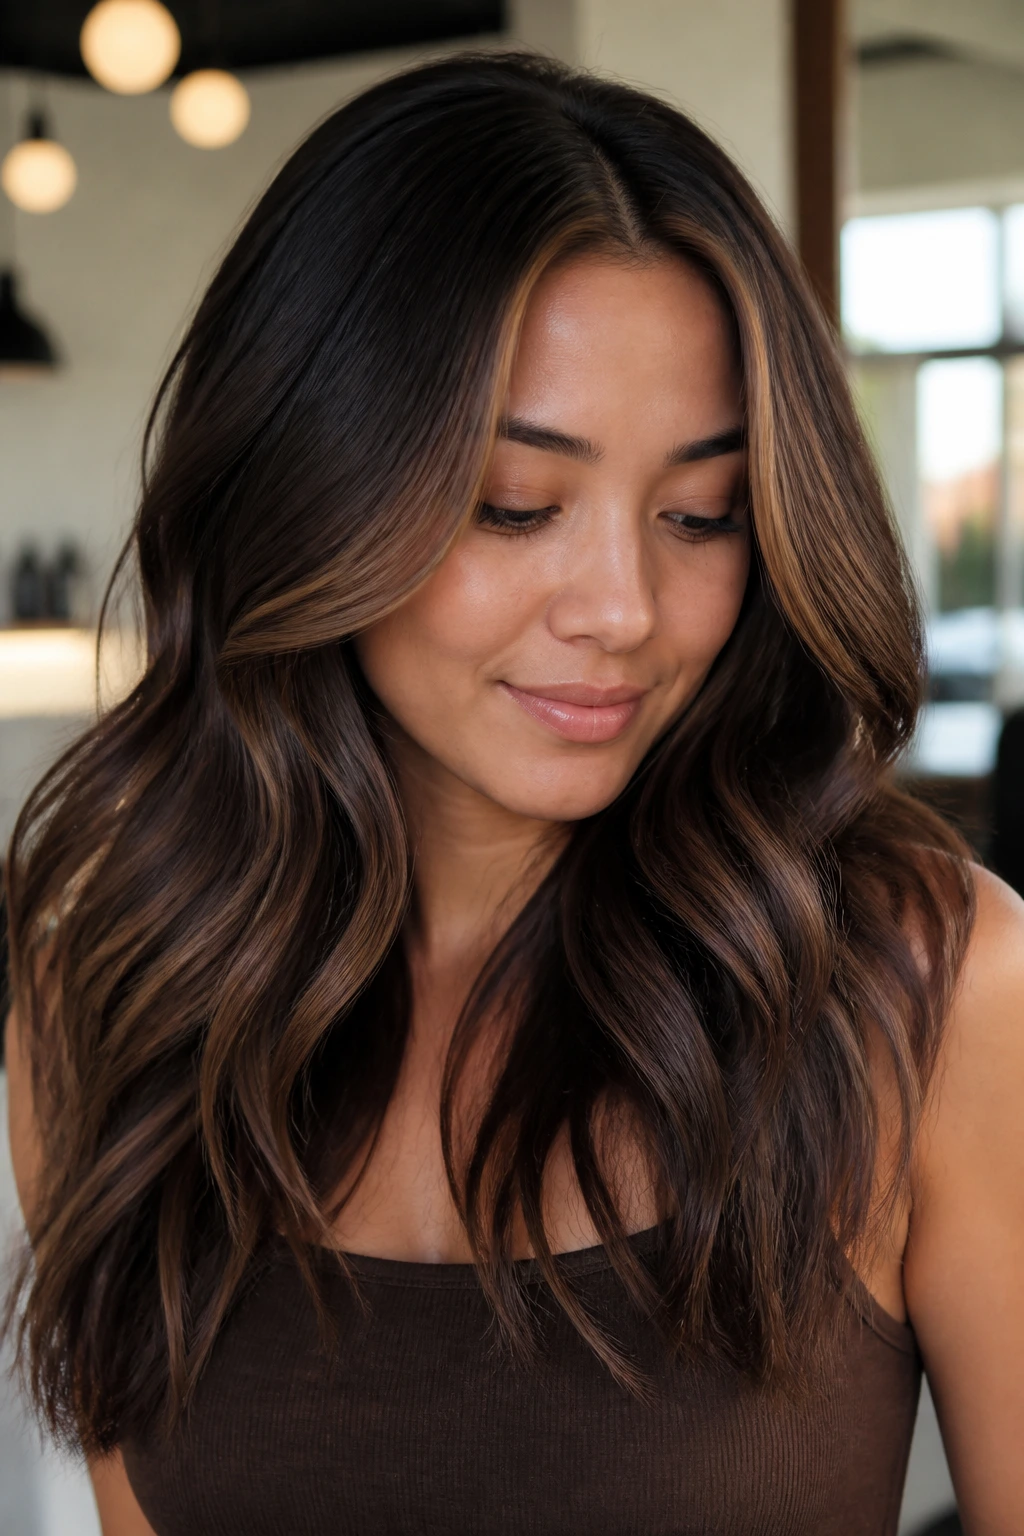
Dark chocolate balayage with a halo frame is the softest option on this list, and maybe the easiest to wear if you like brunette depth first and color second.
The halo pieces should sit around the crown and upper sides, not right on the cheek. That keeps the face open while the hair still looks rich and dark from a distance. If you want the effect to stay subtle, choose a gloss that adds shine more than lift. The whole thing should read as movement, not contrast.
This is the look for someone who wants a little light without the upkeep of a brighter face frame. It photographs cleanly, grows out softly, and works with straight hair, waves, or loose curls.
If you prefer your hair to look expensive in a quiet way, this is the one to save.
Final Thoughts
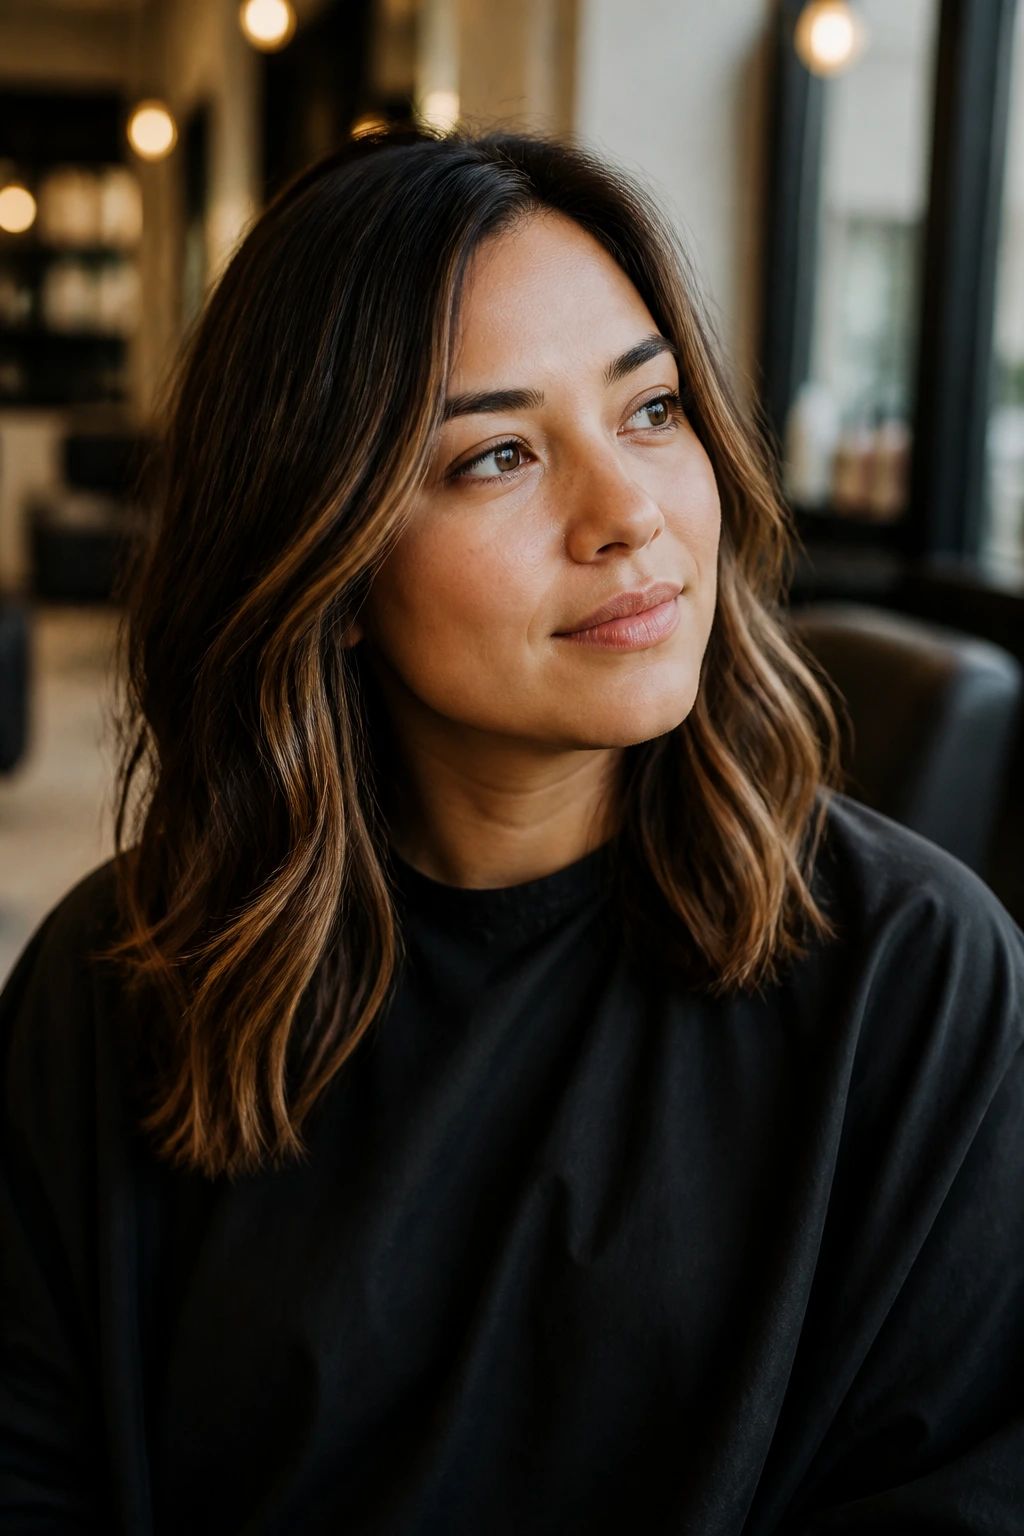
Round faces do not need loud color. They need placement that respects the shape, which is why chocolate brown balayage works so well when the lightness stays a little lower and a little softer than instinct might suggest.
If you are torn between a bolder front piece and a subtler melt, start subtler. You can always add more brightness later; it is much harder to take it back once the cheek area gets crowded with light.
Bring one photo of the cut and one photo of the color placement you like. That small bit of prep makes the salon conversation easier, and it usually keeps the finished result closer to the shape you had in mind.
