



When you have a round face, the goal of a great haircut isn’t to hide your features, but to create the illusion of balance. You are looking for vertical lines, angles, and length that pull the eye downward rather than expanding the face outward. While many people think shorter bobs are the standard for round faces, length is actually a secret weapon. A long, sleek style can provide a beautiful, framing effect that sharpens your jawline and elongates your neck.
It is about geometry. A round face typically features width and length in equal measure, often with softer, less defined cheekbones and a rounded chin. When you add length, you are playing with the proportions of your silhouette. The trick is to avoid styles that add width right at the ears or cheeks, as those will just accentuate the roundness. Instead, you want to focus on sleek finishes, strategic partings, and layers that draw attention vertically.
I have spent years working with clients who think they are limited to specific, “safe” cuts, but long, sleek hair is versatile. You can go from a polished office look to a night-out glam without needing to sacrifice length or style. The following list features twenty of the best long hairstyles specifically curated to work with the natural curvature of a round face, emphasizing structure, sophistication, and that effortless, straight-off-the-runway finish.
1. Center Part with Face-Framing Layers
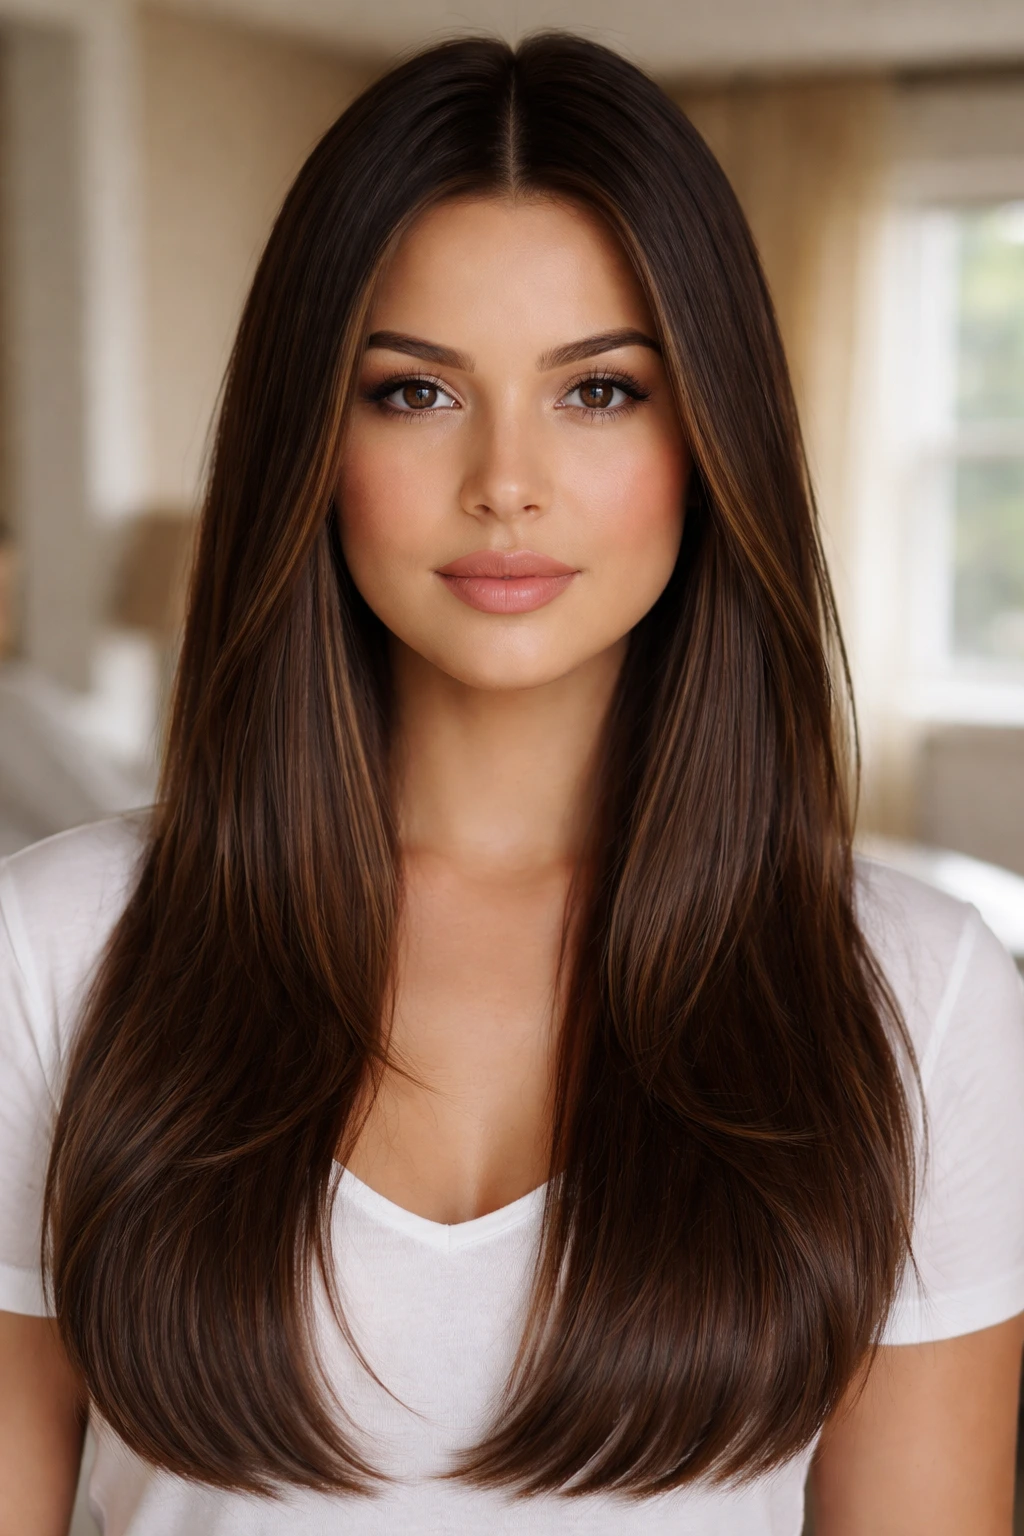
The center part is often feared by those with round faces because it feels like it might highlight the symmetry of the face. However, when paired with long, face-framing layers that start below the chin, it does the exact opposite. By creating two long vertical lines on either side of your face, you are effectively “slicing” into that roundness, making your face appear narrower and longer.
Why This Style Works
The key here is the length of the layers. If you cut them too short, they will sit right at your cheekbones, which is exactly where you do not want to add width. Ensure your stylist starts the layers at the jawline or collarbone. This guides the eye down toward your chest and away from the widest part of your cheeks.
Styling Tips
To get this look right, you need a high-quality flat iron. Start by blow-drying your hair with a round brush, pulling the hair taut to ensure the roots are smooth. Once dry, take a fine-tooth comb and create a perfectly sharp center part. Use the flat iron to straighten the lengths, turning the very ends of the layers slightly inward. This small detail helps frame the face without creating bulk.
2. Slicked-Back High Ponytail
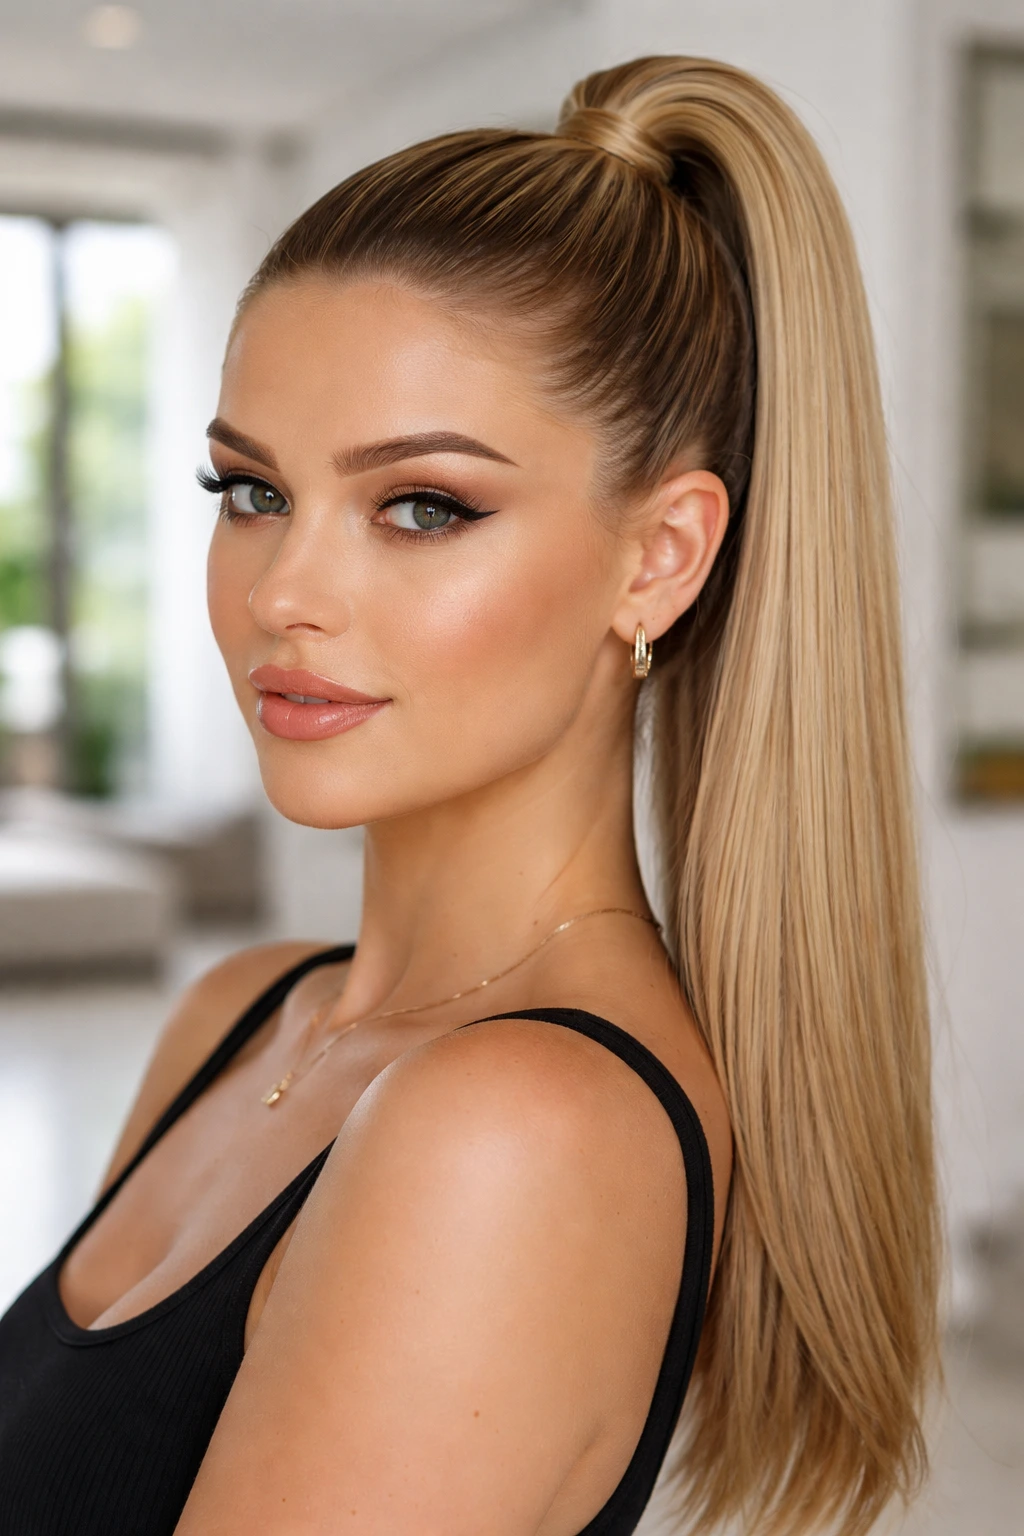
A high ponytail is a classic for a reason: it creates an instant facelift. By pulling the hair up and back, you physically stretch the skin slightly, which tightens the features and draws the focus upward toward the top of the head. For a round face, this is invaluable because it removes hair from the sides of your face entirely, eliminating any “curtain” effect that might widen your cheeks.
How to Execute the Perfect Slick
This style relies heavily on product. You want a high-shine pomade or a smoothing gel, but stay away from anything that will leave your hair crunchy or flaky. A little goes a long way. Apply the product to your roots and use a boar-bristle brush to gather the hair.
The Finishing Touch
Make sure the ponytail sits high enough on the crown of your head so that it is visible from the front. If it sits too low, you lose that elongating effect. Wrap a small section of hair around the elastic to hide it; this makes the style look expensive and intentionally groomed rather than like a quick, “I’m late for the gym” updo.
3. Deep Side Part with Cascading Waves
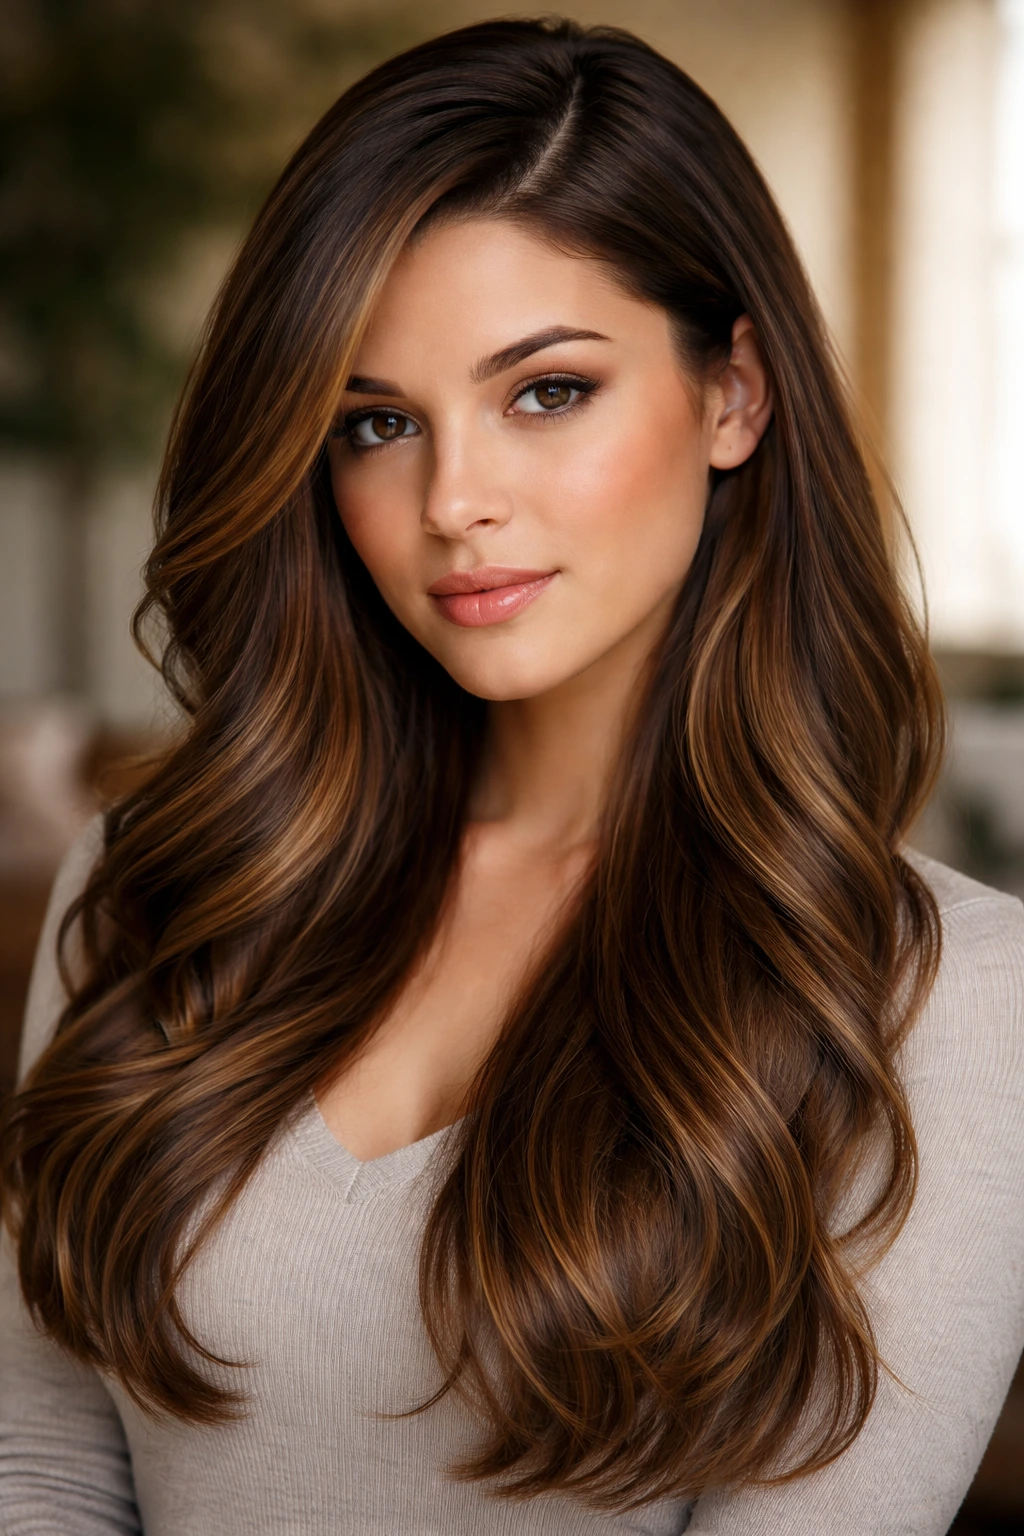
If you are not a fan of the center part, the deep side part is your best friend. This is perhaps the most effective way to break up the circular shape of the face because it creates instant asymmetry. By shifting the bulk of your hair to one side, you introduce a diagonal line that slants across the forehead, which immediately draws the eye across the face rather than just around it.
Why Asymmetry Wins
Asymmetry is a secret tool for rounder faces. When everything is perfectly balanced, the circle is emphasized. When you throw a deep side part into the mix, you introduce an angle. That angle is your best friend. It creates a “sweep” that makes your face look more oval and defined.
Essential Styling
Do not make the part perfectly straight. Use the arch of your eyebrow as a guide for where to start the part, angling it back toward the crown of your head. For the lengths, avoid tight, uniform curls that add volume to the sides of your face. Instead, go for long, loose waves that start well below the chin. This keeps the hair sleek near the face and adds movement only at the bottom.
4. Blunt Cut with Minimal Texture
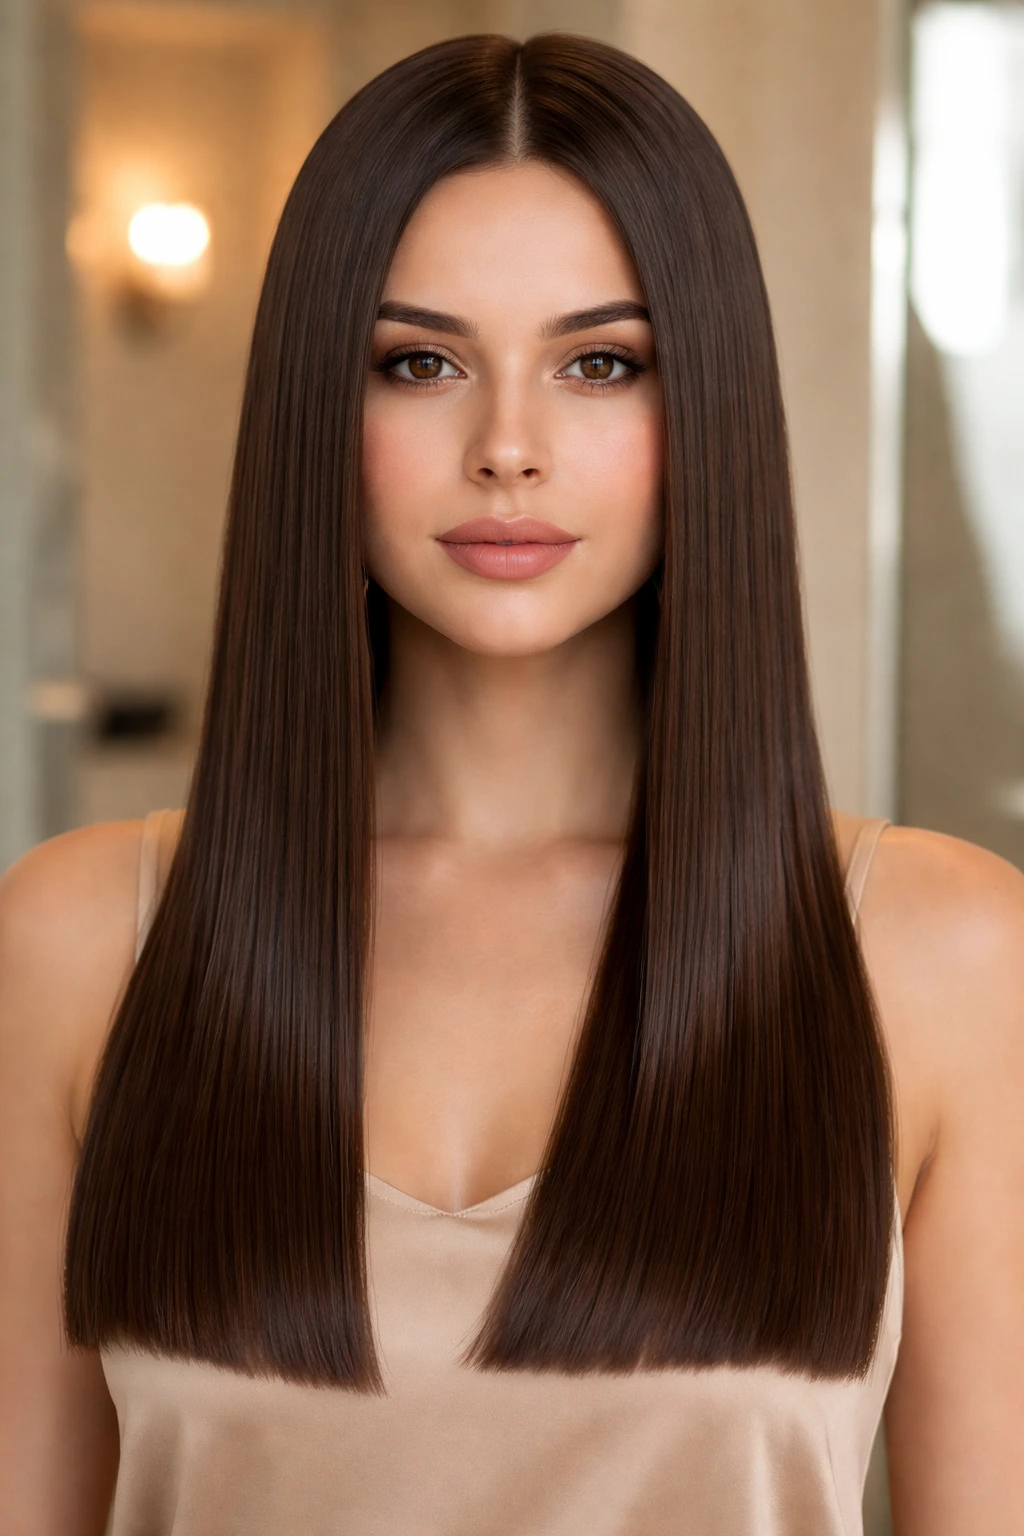
There is a misconception that round faces need layers to look good, but a blunt, heavy-bottomed cut can actually provide a sense of weight that pulls the hair down. When your hair is one solid, long length, gravity does the work for you. The weight of the hair helps it hang straighter and flatter against the sides of the face, which creates a narrowing effect.
The Visual Effect
Think of this as a “weighty” style. Because there are no layers to create volume, your hair stays compact and sleek. It acts like a frame that sits straight down, emphasizing the length of your neck rather than the width of your face.
Maintaining the Look
The trade-off here is maintenance. Because the cut is blunt, split ends will show up almost immediately. You need regular trims—every eight to ten weeks—to keep those ends sharp. Use a smoothing serum on the ends daily to ensure that the line of the hair stays crisp and clean.
5. Long Curtain Bangs with Straight Ends
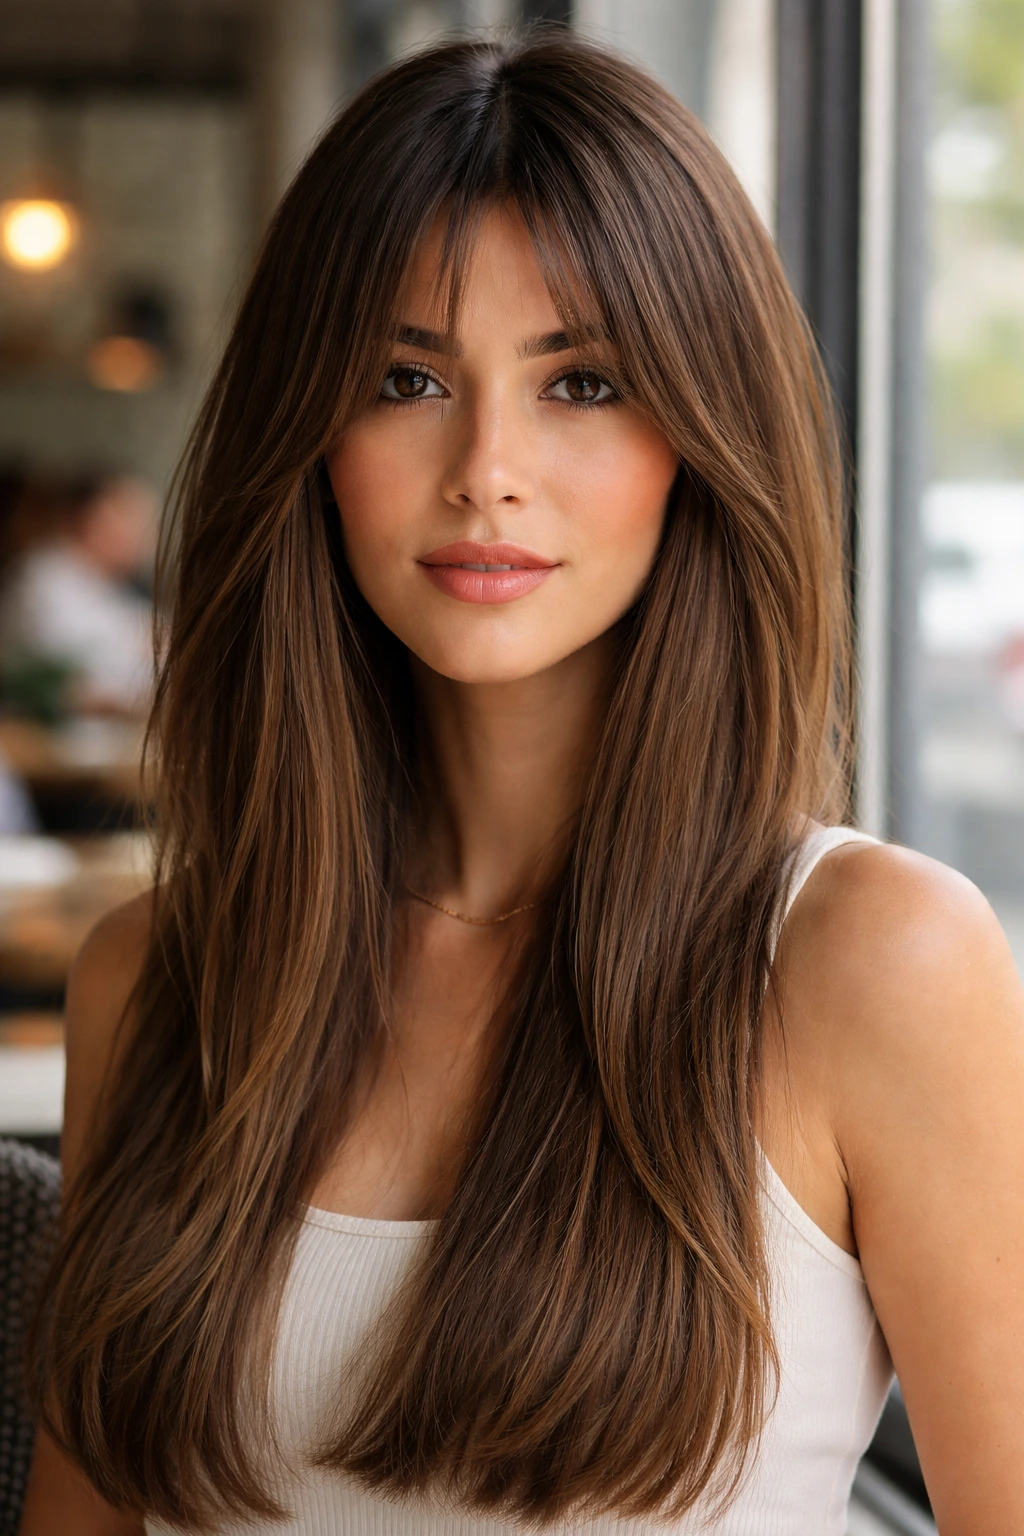
Curtain bangs are universally flattering, but for a round face, they need to be cut with purpose. If you cut them too short or too wide, they will frame your cheeks and make them look wider. The goal is to keep the bangs long—at least hitting the cheekbone or below—and ensure they have a slight taper that blends into the rest of your long hair.
The Mechanics of the Cut
The “curtain” part is important. You want the center to be slightly parted so it doesn’t create a solid bar across your forehead. A solid bar of hair across a round face can cut off the top of the head and make the face appear even more circular. The gap in the middle creates a “V” shape that points upward, which is exactly the direction you want to move the eye.
Product Selection
Use a lightweight volumizing spray at the roots of the bangs, but keep the rest of your hair serum-heavy for that sleek, straight finish. You want the bangs to have a bit of bounce and lift, while the rest of the hair remains liquid-smooth.
6. The “Glass Hair” Look
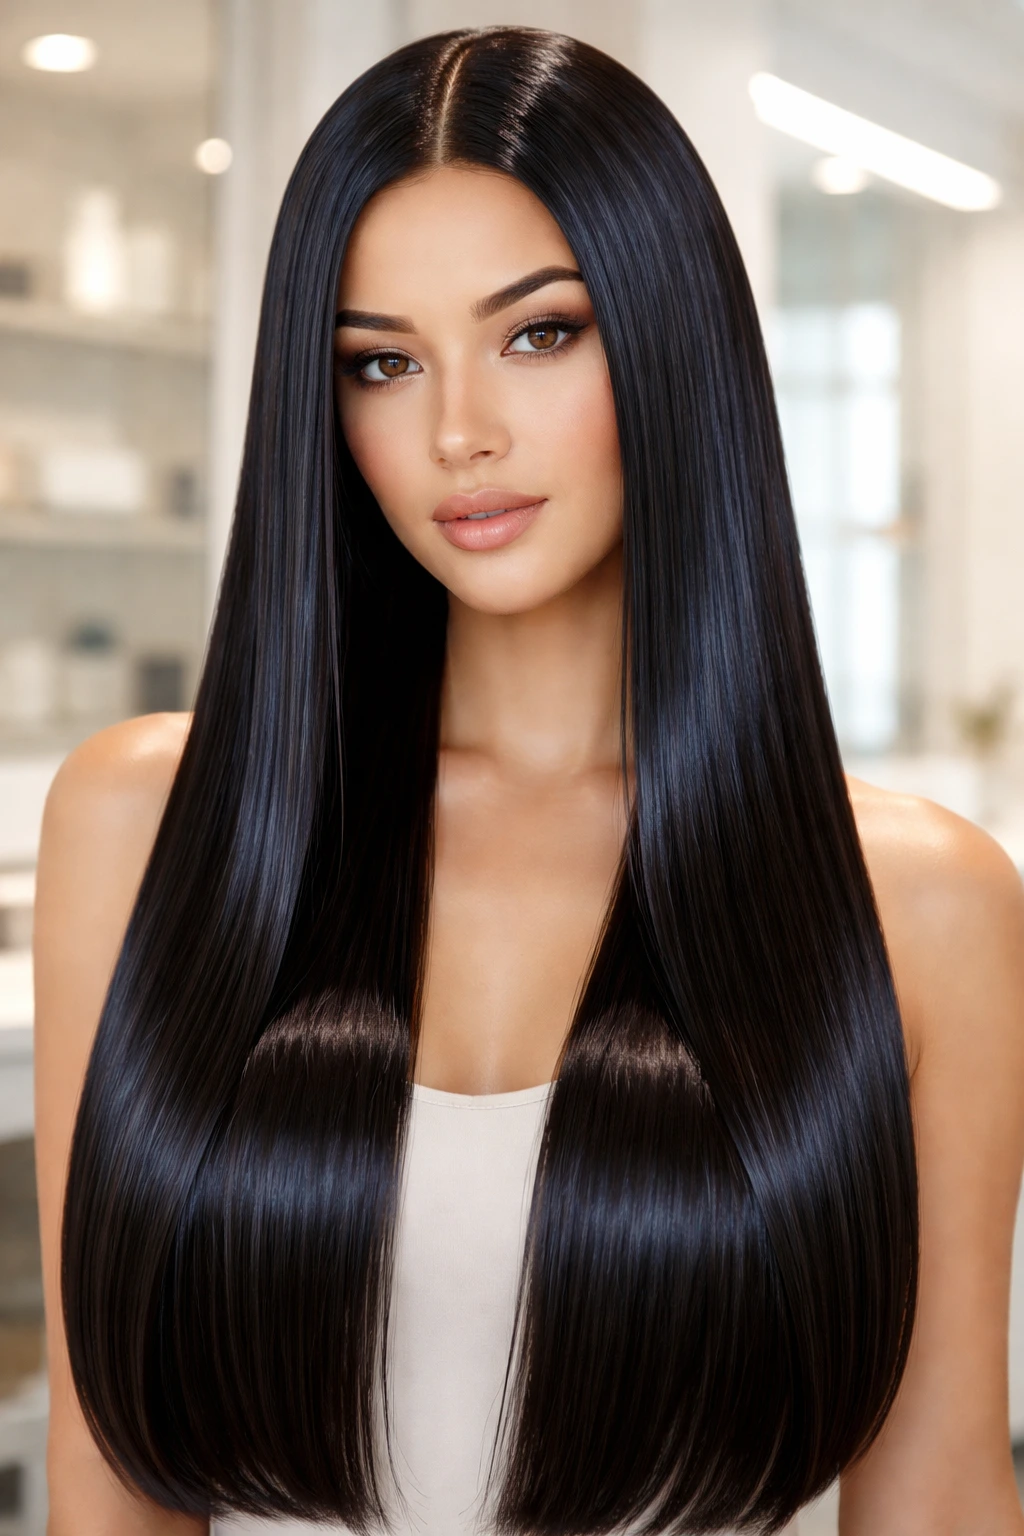
“Glass hair” is a term used to describe hair that is so straight and shiny it looks like a sheet of glass. It is a very intentional, high-gloss style that works incredibly well for round faces because it is extremely sleek and completely devoid of volume on the sides. By eliminating volume, you eliminate the possibility of the hair pushing your face out and making it look wider.
Achieving the Shine
This look is 80% preparation and 20% styling. You need to focus on hair health. Deep conditioning treatments used twice a week will ensure your hair is smooth enough to reflect light. When you are heat styling, use a heat protectant spray that also contains a silicone-based smoothing agent.
The Ironing Technique
Use a professional-grade flat iron with titanium plates. Take very thin sections of hair—no thicker than half an inch—and pass the iron over them slowly. If you move too fast, you won’t get that consistent, polished shine. The result should be hair that looks heavy, dense, and perfectly straight from root to tip.
7. Half-Up, Half-Down with Height
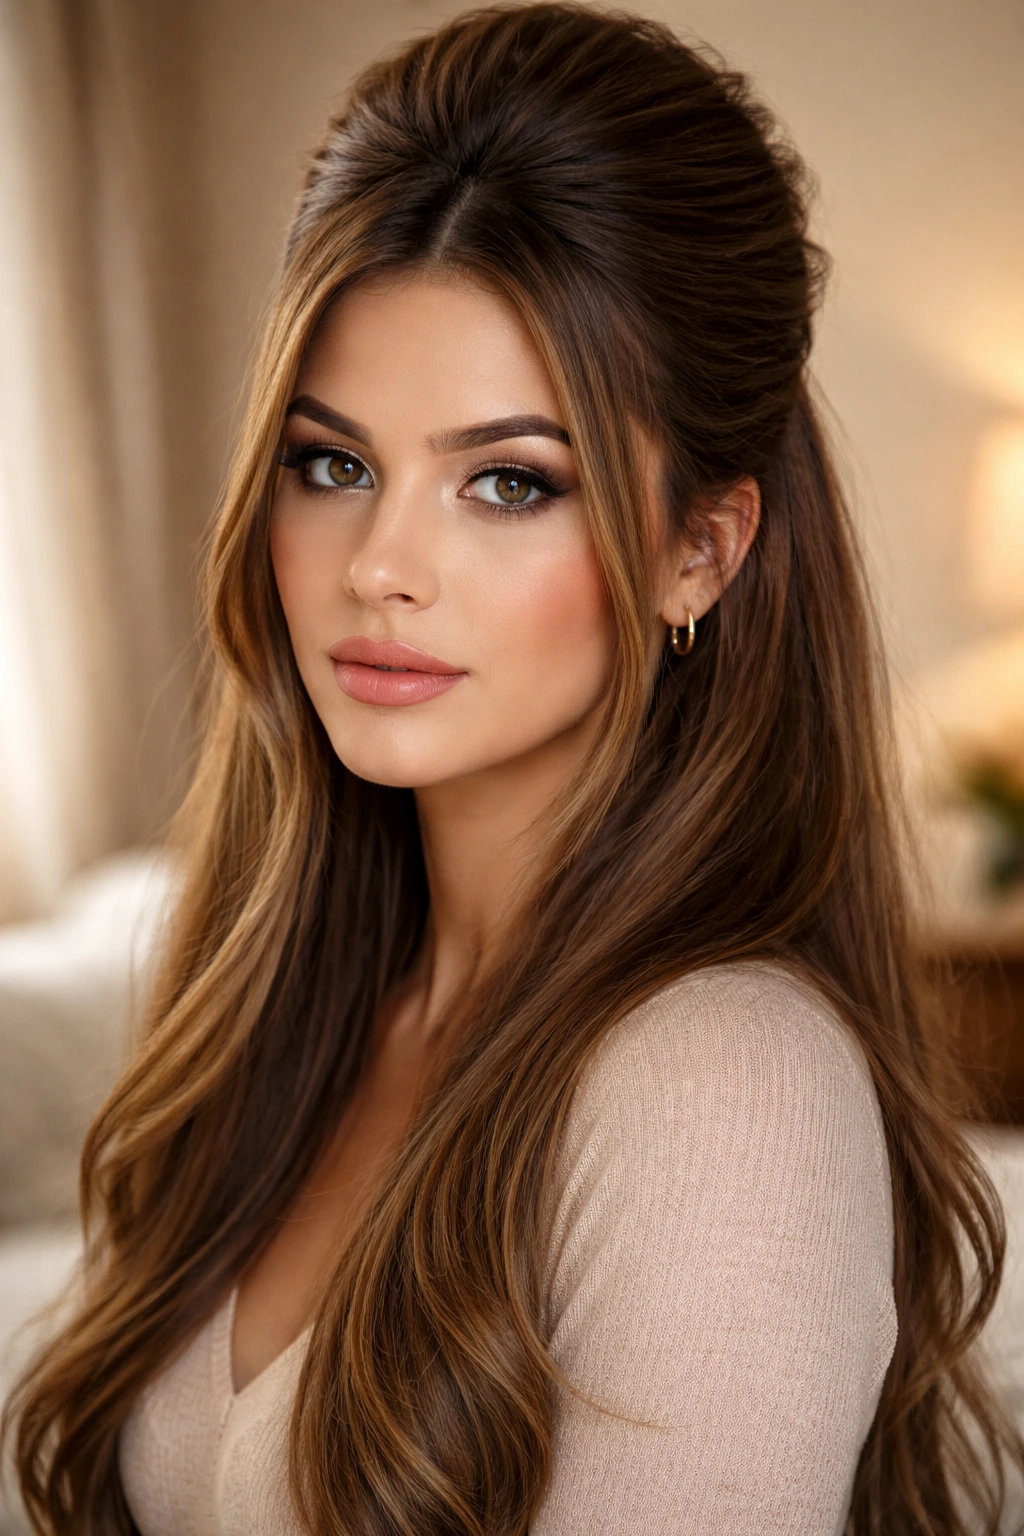
The half-up, half-down style is the perfect compromise between wearing your hair down and dealing with the struggle of hair in your face. For a round face, the trick is to add volume at the crown. By pulling the top section of your hair up and securing it with some height at the back, you are effectively lengthening the appearance of your head.
The “Bouffant” Trick
Do not just pull the hair back tight against the skull. Use a teasing brush to backcomb the hair at the crown before securing the top section. You want a small “bump” of volume right at the top. This pulls the vertical axis of your head upward, creating an oval shape out of a round one.
Securing the Style
Use a clear elastic or a chic gold clip. If you leave some strands down in the front to frame your face, keep them straight. Avoid curling those front pieces, as that will add width right at the jawline, which is the opposite of what this style is trying to achieve.
8. Slicked-Back Low Bun with Tendrils
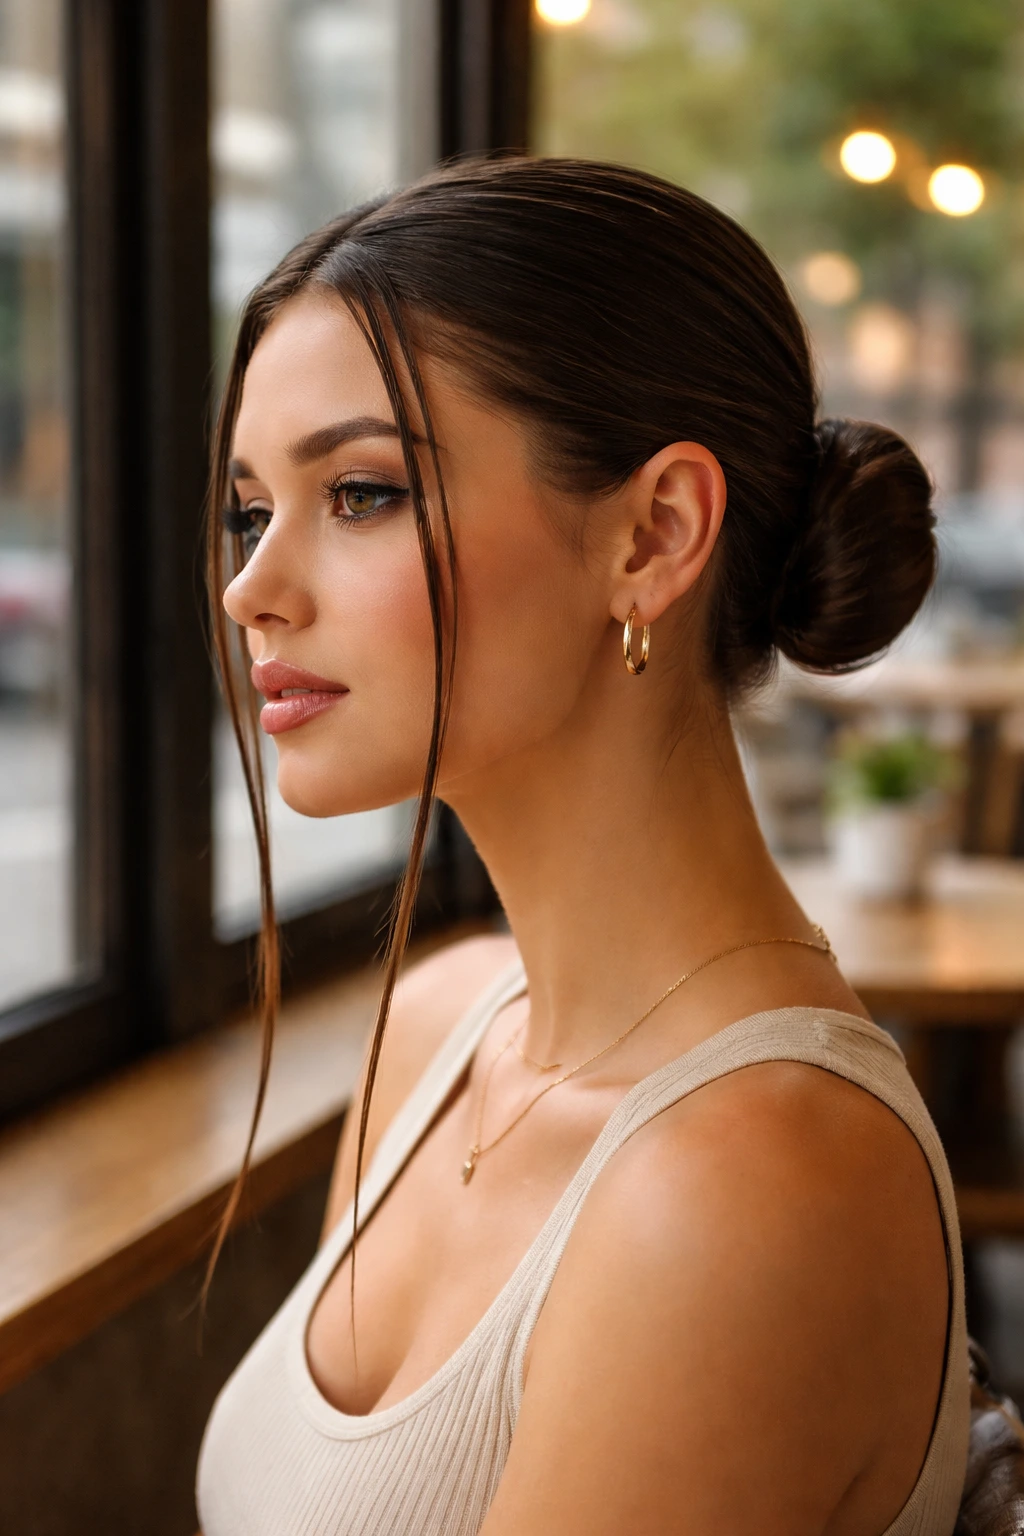
Sometimes you just need to get the hair off your face entirely. A low bun can be tricky for round faces if it is too messy or sits too low without any framing. The key to making this work is to leave two long, thin tendrils of hair out at the front. These tendrils should be perfectly straight and extend past the jawline.
Why Tendrils Are Necessary
When you pull all your hair back, a round face is completely exposed. By letting two thin, straight pieces of hair fall down the sides of your face, you create two distinct vertical lines. It softens the entire look and provides that necessary “slicing” effect that makes the face look leaner.
Styling the Bun
Keep the bun itself very sleek. Use a bit of hair oil to smooth down any flyaways at the hairline. A messy, voluminous bun will look unbalanced against a round face; a tight, clean, ballerina-style bun looks sophisticated and draws attention to your facial features rather than competing with them.
9. Choppy Long Layers
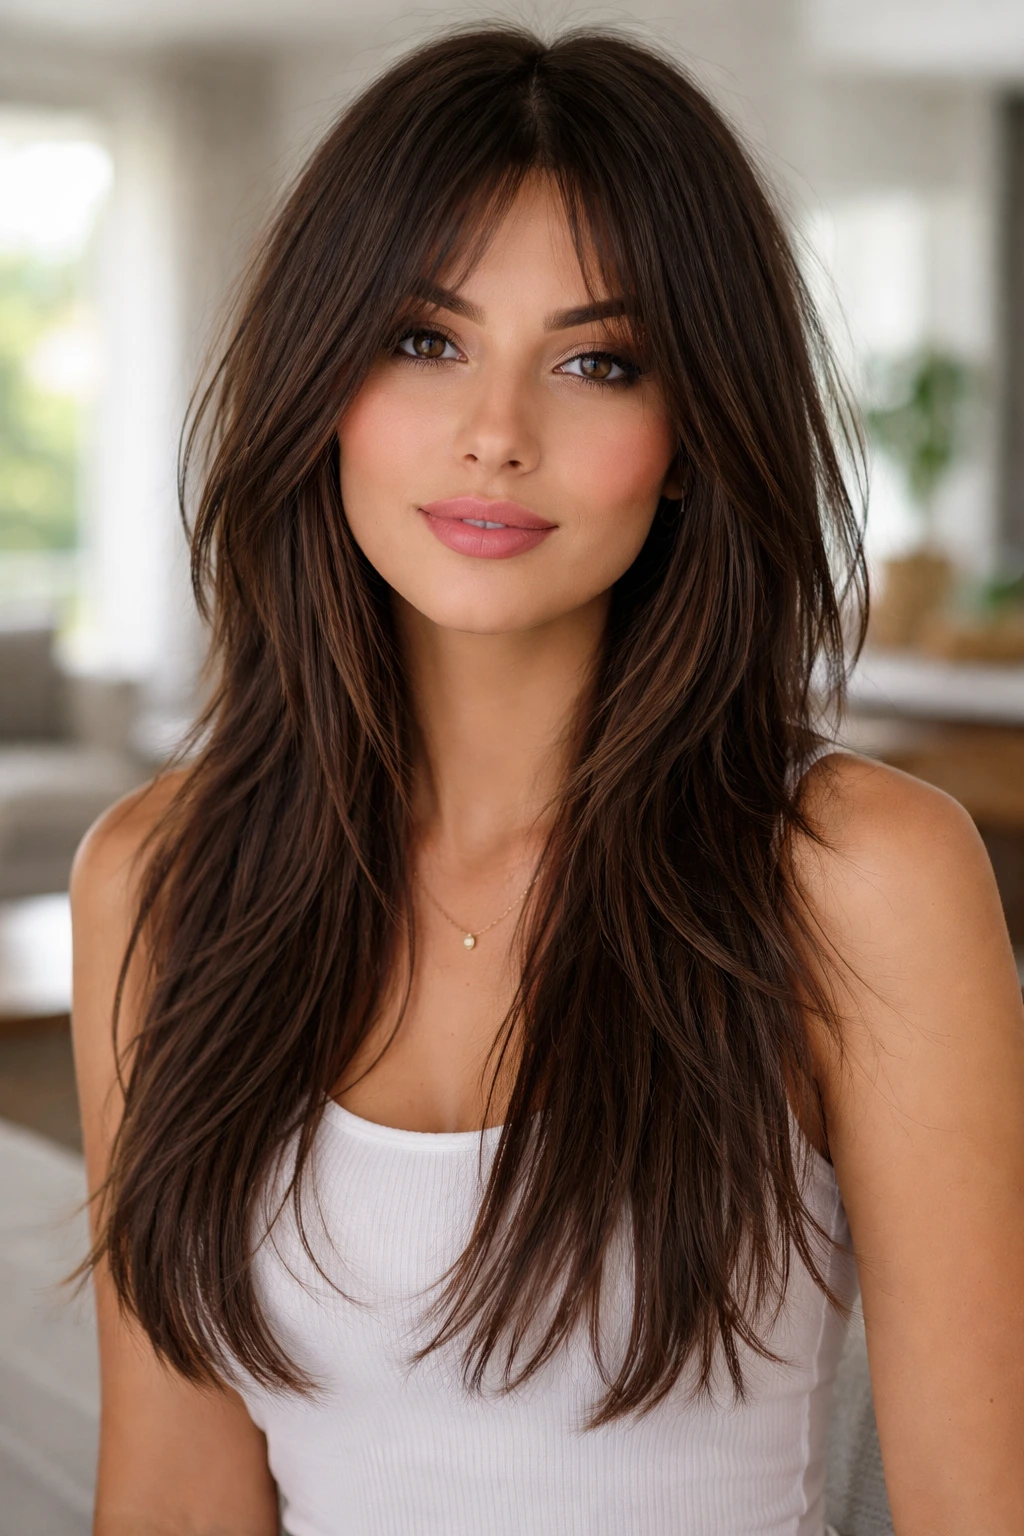
If you love the idea of layers but fear they will add too much volume, “choppy” layers are the solution. Unlike traditional, feathered layers that curl outward, choppy layers are cut with a razor or point-cutting shears to remove weight. They sit flat against the head rather than puffing out.
The Difference in Technique
Point-cutting is the secret here. Your stylist should take the ends of your hair and cut into them vertically with scissors, rather than straight across. This creates a soft, shattered edge that doesn’t bunch up. Because the layers are “choppy” and thin, they don’t add the side-volume that you are trying to avoid.
Maintenance
These layers grow out faster than a blunt cut, so you need to keep up with your appointments. The moment the ends get too thick, the style will lose its sleekness. This is a “cool girl” style—it looks slightly lived-in but remains polished due to the length and the sleekness of the hair shaft.
10. Deep Side Part with Sweeping Bangs
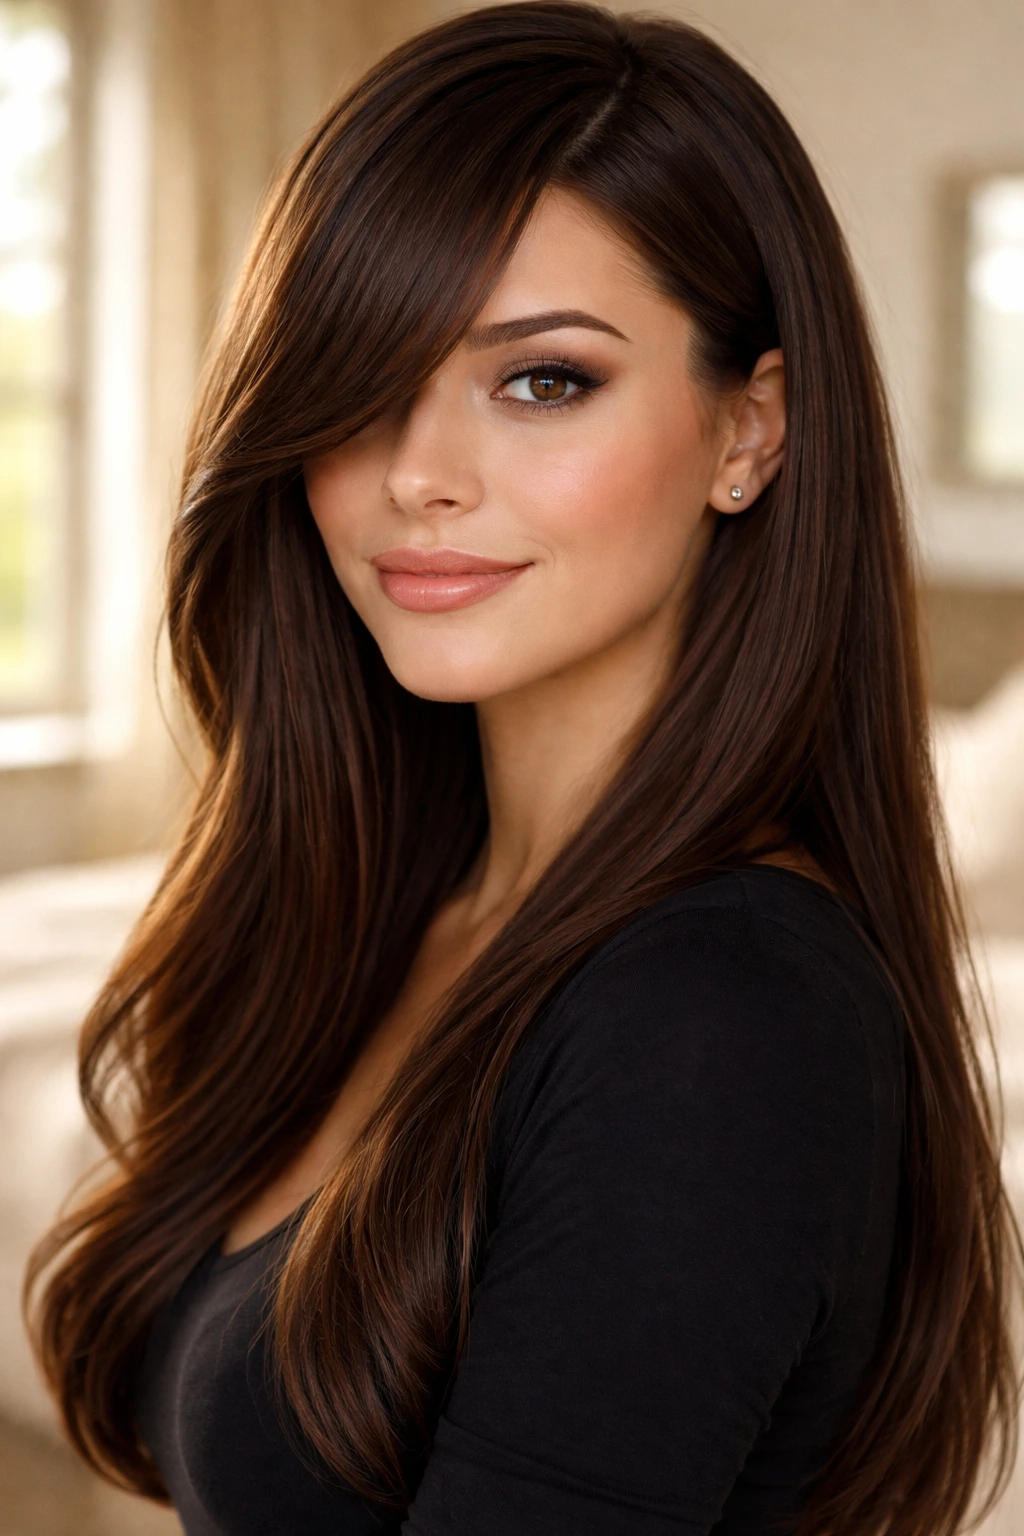
This is essentially the “glamour” option. A side-swept bang that blends into the length of your hair creates a beautiful, diagonal silhouette that covers part of the forehead and leads the eye down. This drastically reduces the appearance of roundness in the face.
The “Sweep” Factor
The bang needs to be long enough to tuck behind your ear if necessary. If it’s too short (like a classic brow-skimming bang), it might make your face look shorter. You want a long, sweeping motion that starts at the part and flows toward the cheekbone before disappearing into the rest of the hair.
Styling the Bang
Use a round brush to blow-dry the bang section away from your face. You want it to have a slight curve, not a tight curl. The curve should be gentle, creating a soft frame that draws the eye toward your eyes and cheekbones rather than the jawline.
11. Long Bob (Lob) with Asymmetric Ends
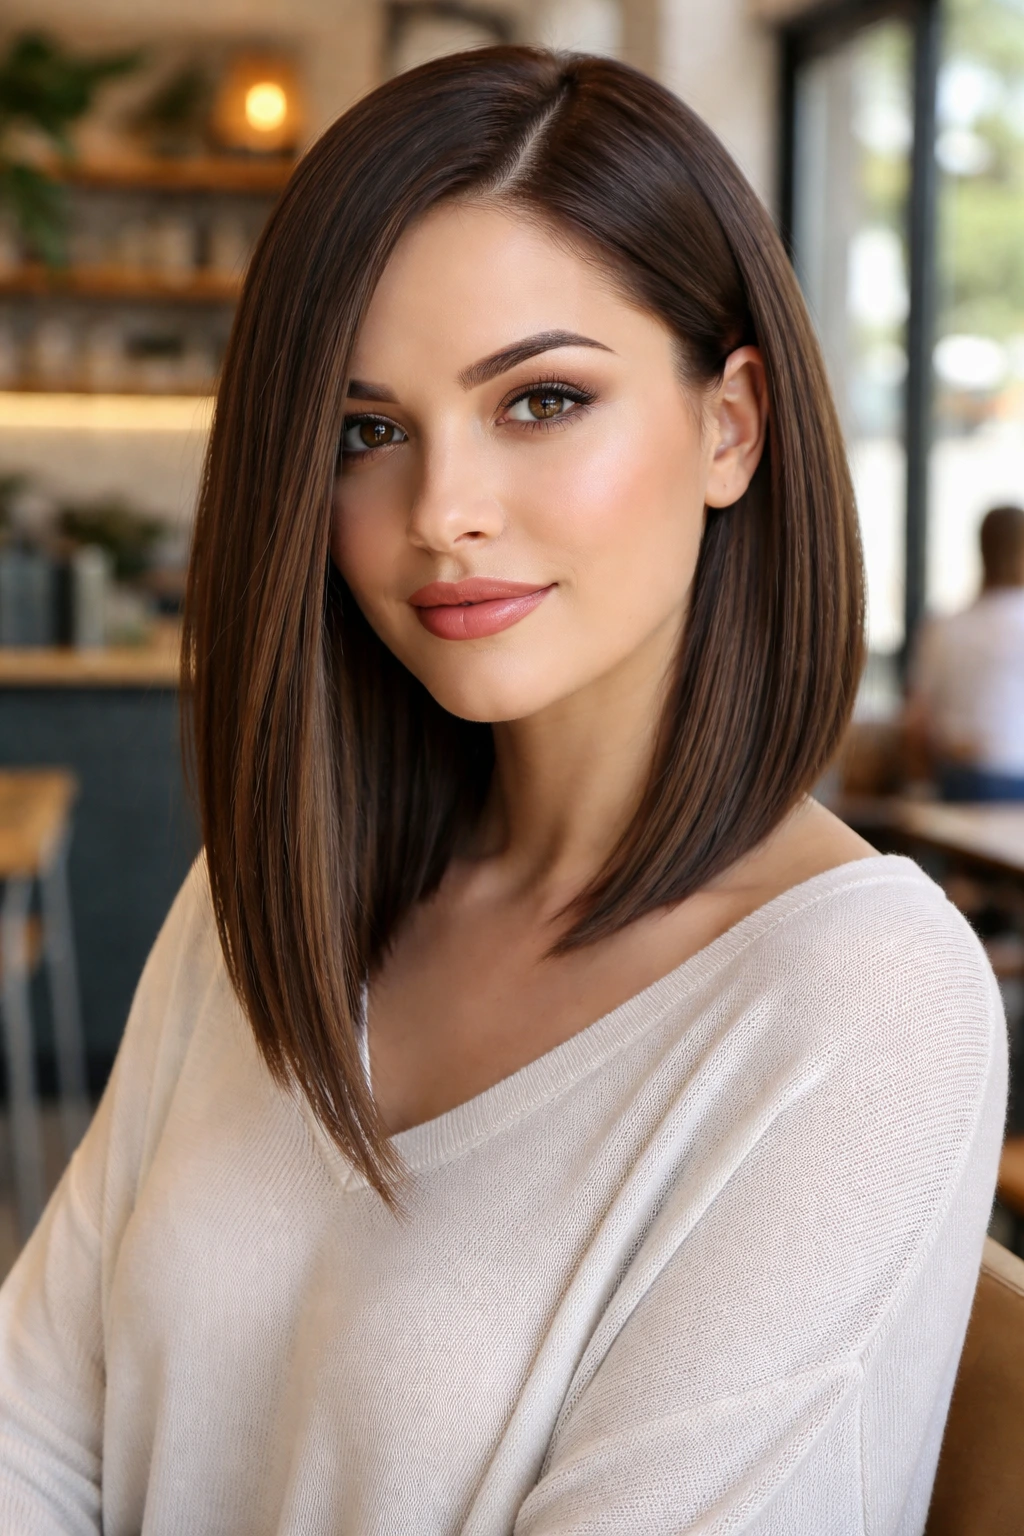
Okay, technically this is a long bob, but it is long enough to count as a “long” hairstyle. If you want to keep the length but lose the weight, an asymmetric lob—where the hair is slightly longer in the front than in the back—is incredibly effective for round faces.
The Angle is Key
The angle creates an automatic point. Because the front is longer, it creates a downward line that points toward your shoulders. This does an amazing job of elongating the face. The back of the hair stays shorter, which prevents the style from feeling too heavy or dragging your features down.
Pairing with Texture
Keep this style straight. If you curl it, the angle disappears. This cut is all about the line, so a flat iron is your best friend. Make sure the front pieces are sharp and straight; any wave will ruin the geometry of the cut.
12. Tucked-Behind-the-Ears Straight Style
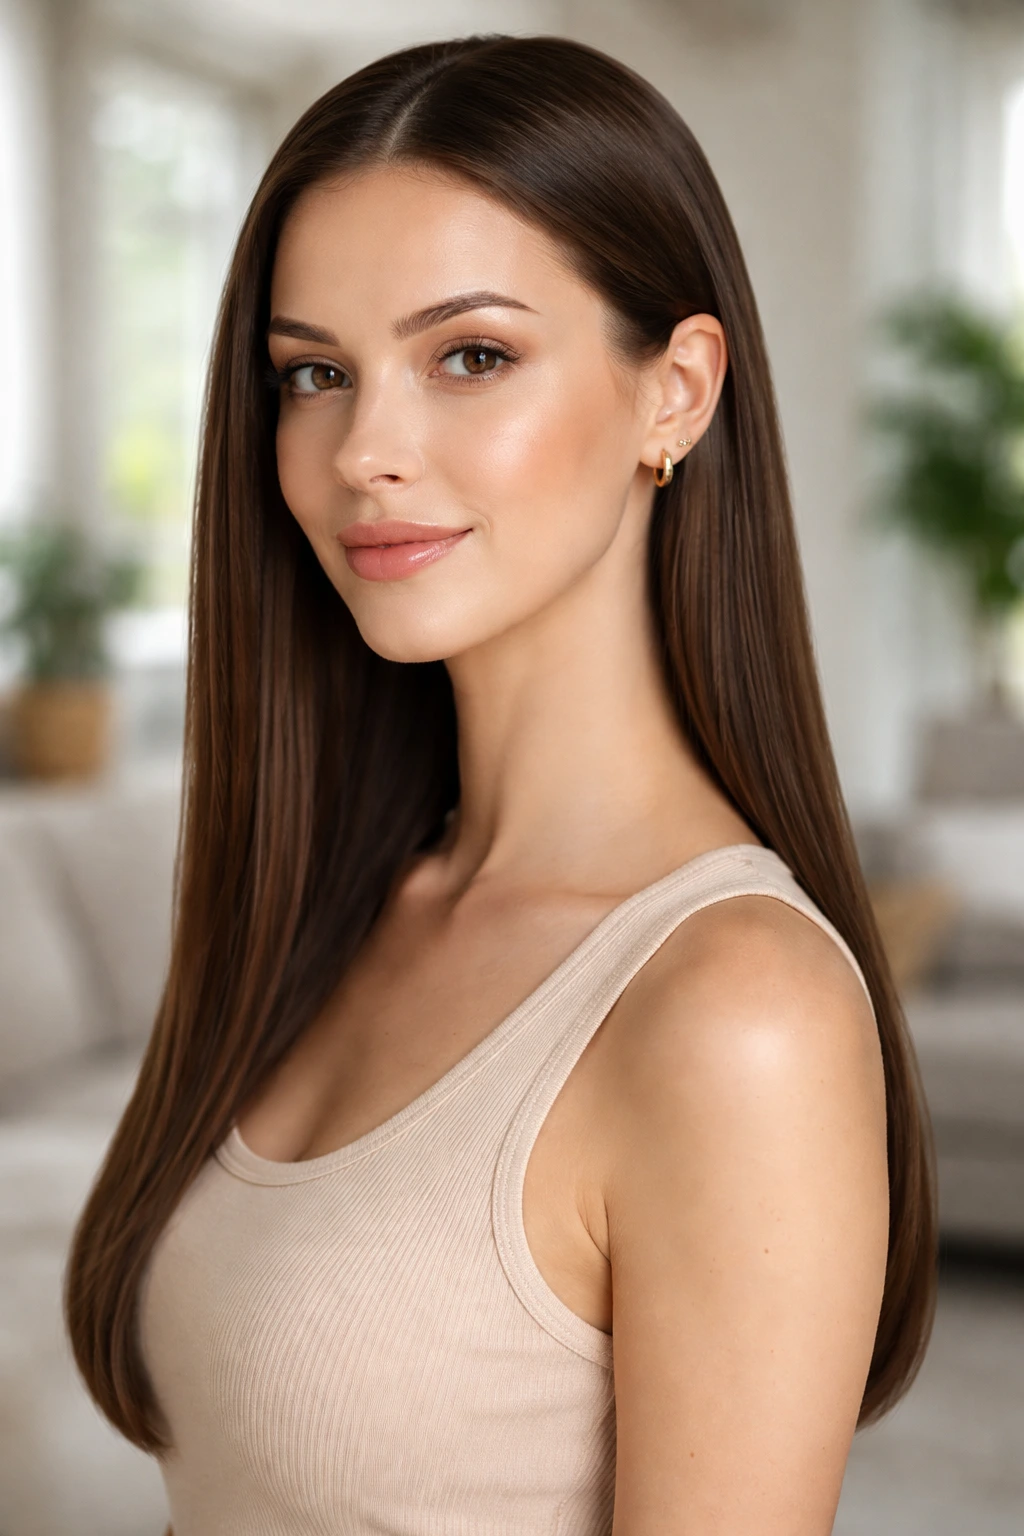
This is the simplest, most minimalist approach, but it is often the most striking. Taking long, straight hair and tucking both sides behind your ears immediately exposes your jawline and neck. It creates a clean, vertical canvas that makes the face look longer.
Opening Up the Face
By exposing the ears, you change the silhouette. Most people with round faces try to hide behind their hair, thinking it will “cover” the roundness. In reality, letting your hair hang forward on both sides often frames the face and creates a circle around it. Tucking the hair back breaks that circle.
The Balance
If you are worried about your ears sticking out, don’t be. The hair still covers the back of the head, and you can pull a few face-framing pieces out to soften the look. The goal is to keep the hair flat against the scalp, avoiding any poufy volume at the sides of the head.
13. Sleek Low Ponytail with a Wrap
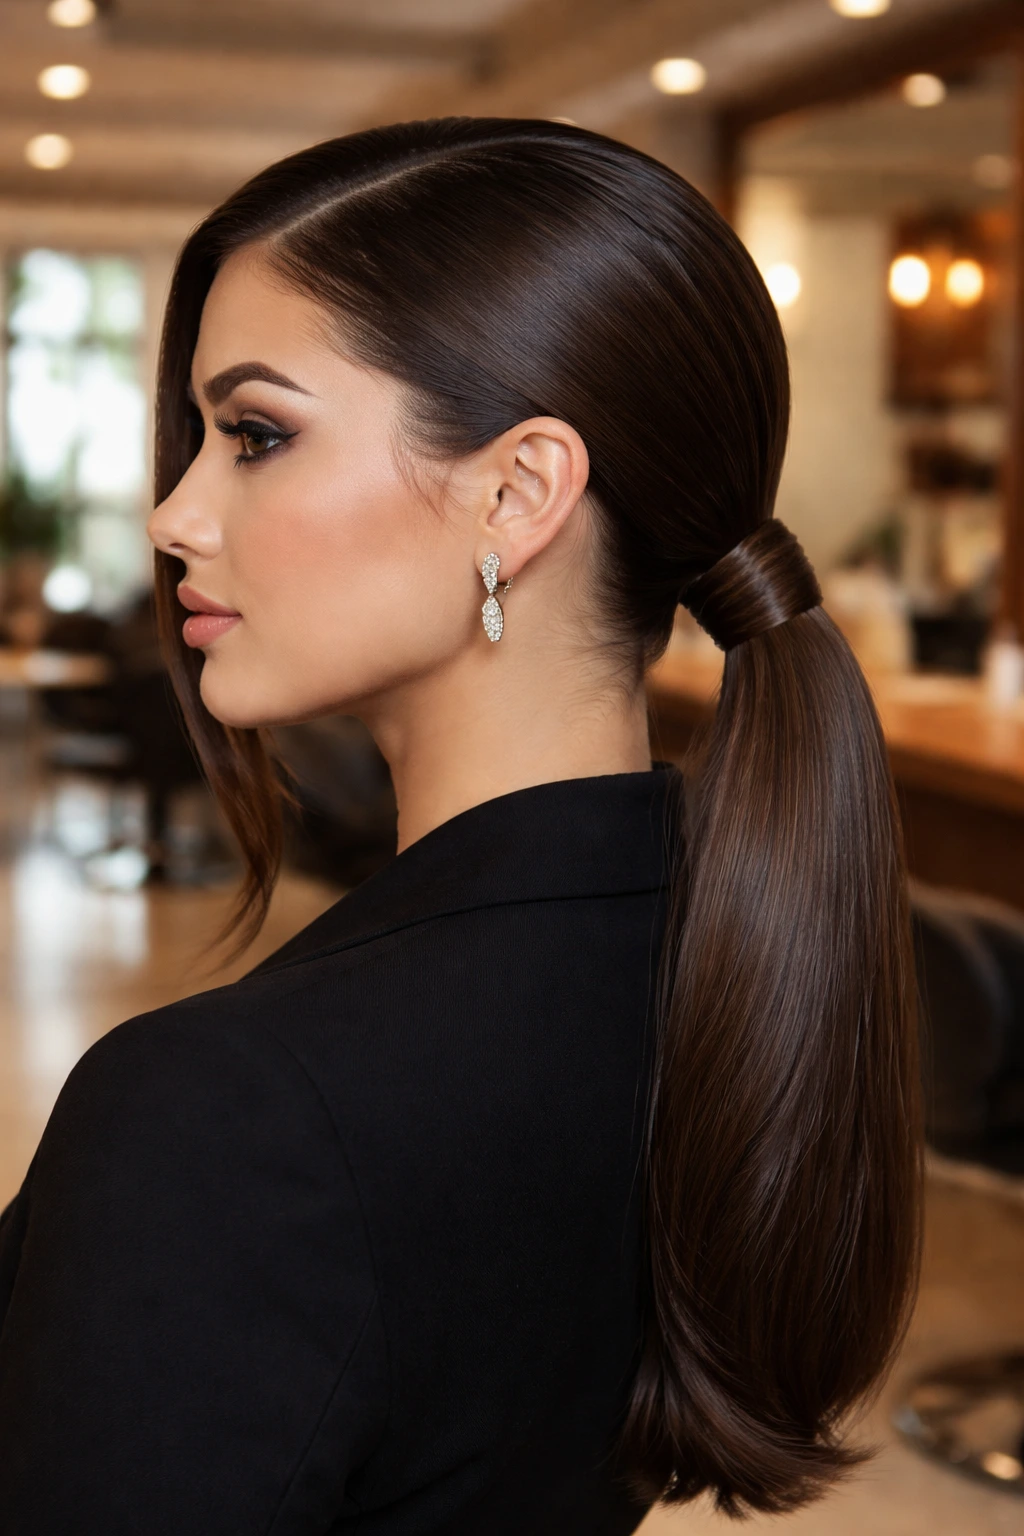
Similar to the high pony, a low pony can work for a round face, provided you elevate the style. The key here is to keep it incredibly low—at the nape of the neck—and ensure the hair is super sleek. Use a piece of hair to wrap around the base to hide the elastic; it makes the whole style look purposeful.
Avoiding the “Low and Loose” Trap
Stay away from low ponytails that are loose, messy, or have tons of volume at the crown. That “undone” look can make a round face look a bit droopy. You want tension and shine. The slickness of the hair pulls everything into a sharp, defined line.
Parting Considerations
Pair this with a deep side part. The combination of the off-center part and the low, sleek ponytail creates an elegant, balanced look that is perfect for professional settings. It is authoritative, clean, and highlights your facial features without framing them in a way that emphasizes width.
14. Soft Face-Framing Tendrils
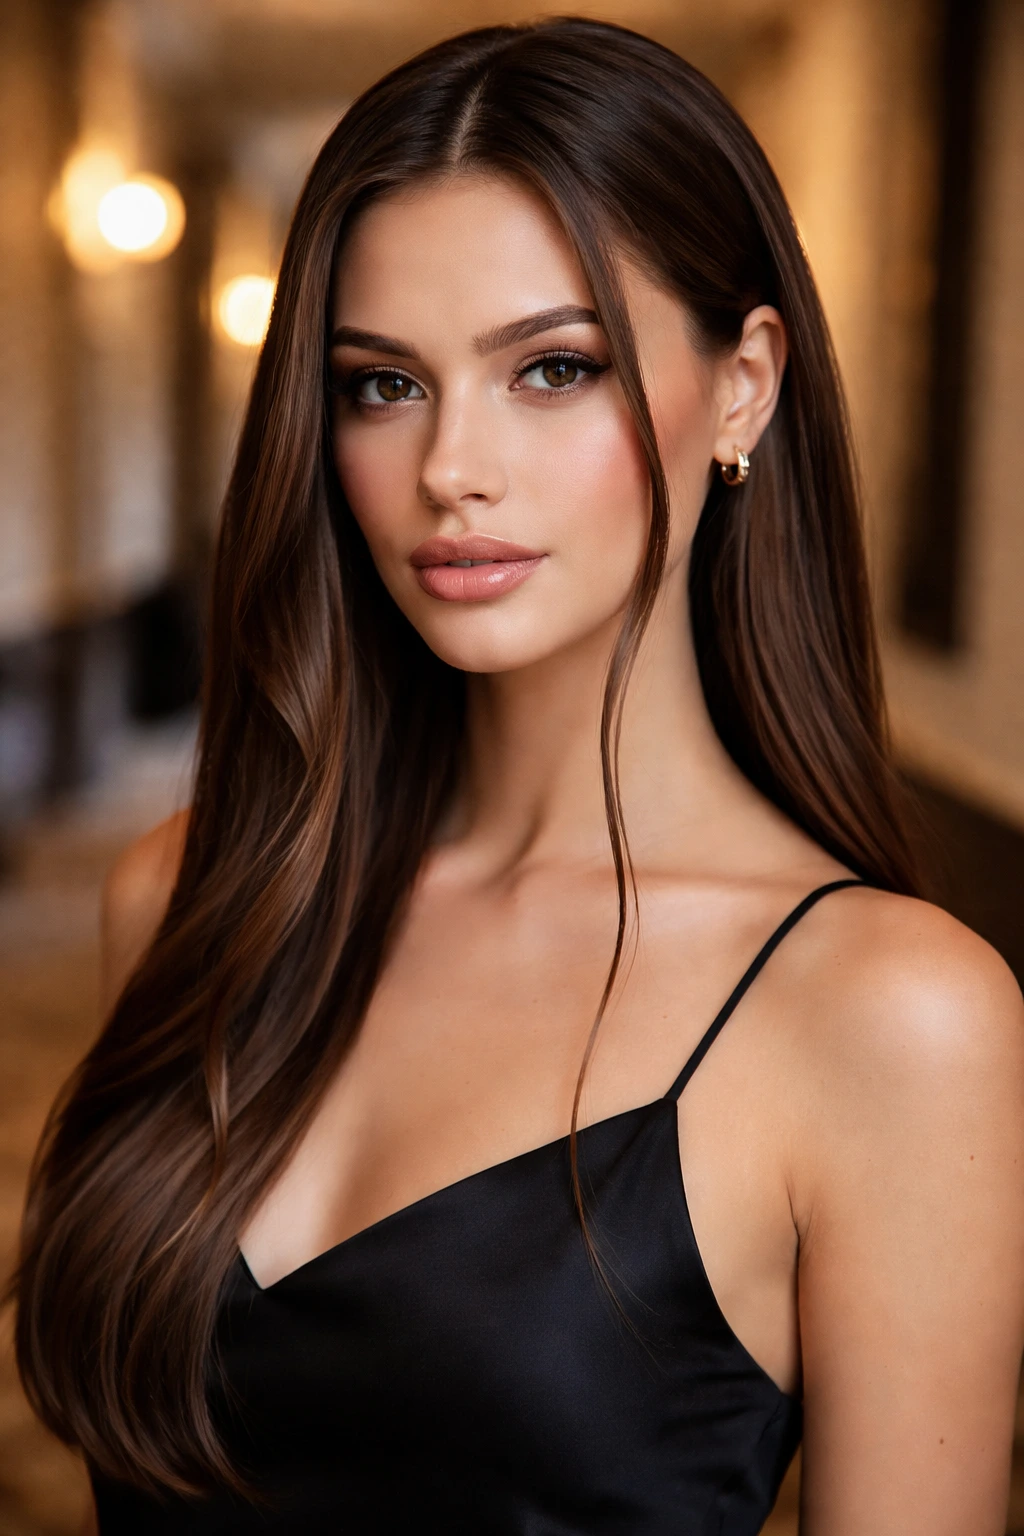
If you like the idea of wearing your hair down but find it just feels like “too much hair” around your face, try keeping the main length behind your shoulders and pulling two thin, sleek sections of hair to the front. This is a very specific styling choice that is common in red-carpet looks.
How to Style
Use a hair oil to coat the tendrils so they stay separate from the rest of your hair. They shouldn’t be big chunks; think of them as thin, intentional ribbons of hair. They should fall straight down, landing just below the collarbone.
The Effect
This style gives you the benefits of long hair while maintaining the open, elongated look of an updo. It works because the “frame” is very narrow. Since the hair is kept thin and straight, it doesn’t add bulk to the sides of your face, but it does add a vertical line that draws the eye downward.
15. The “Sleek Slept-In” Look
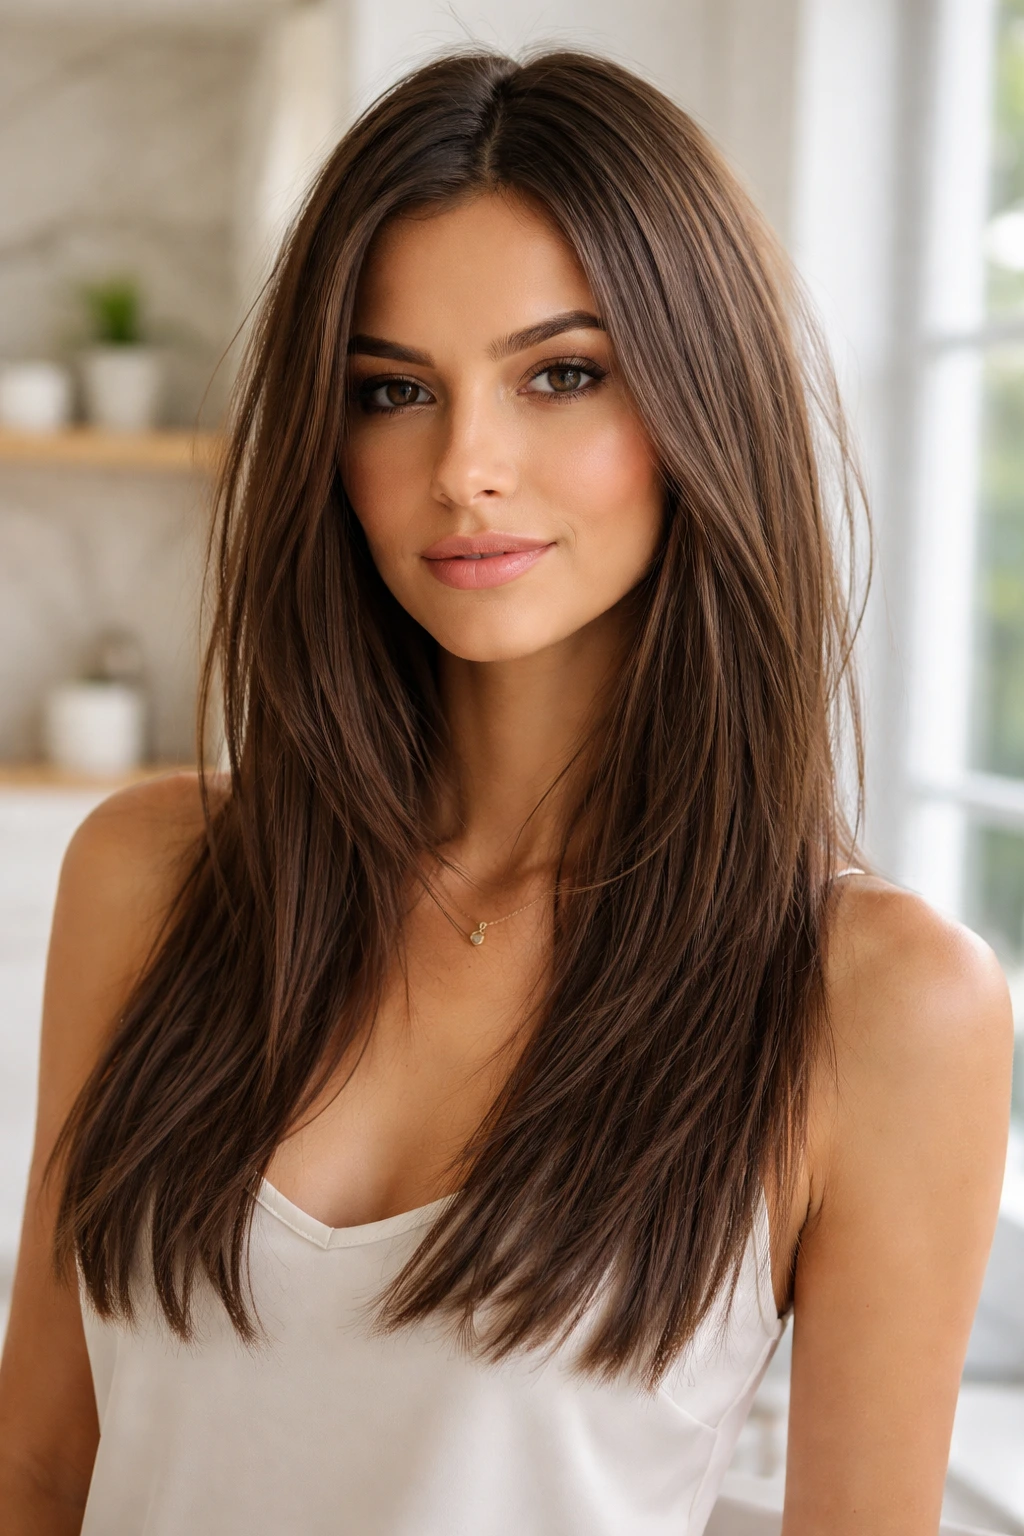
This might seem contradictory to the “sleek” requirement, but the “sleek slept-in” look is about texture, not chaos. It’s hair that has been straightened but has a bit of weight and natural separation, perhaps from a high-quality sea salt spray used very sparingly or a light texturizing cream.
Creating the Texture
You don’t want volume. You want definition. Use a texturizing cream on the mid-lengths and ends of your hair. It makes the hair look a bit denser and more “piecey” rather than fluffy. This creates vertical lines within the hair itself, which can actually help distract from the roundness of the face.
Why It Works
It breaks up the “curtain” of hair. When hair is too perfectly straight and thick, it can look like a wall. By adding a tiny bit of separation, you make it look more natural, while keeping the silhouette slim and close to the head. It’s a great “off-duty” style that still respects the need for vertical elongation.
16. Long Layers with Texture at the Ends
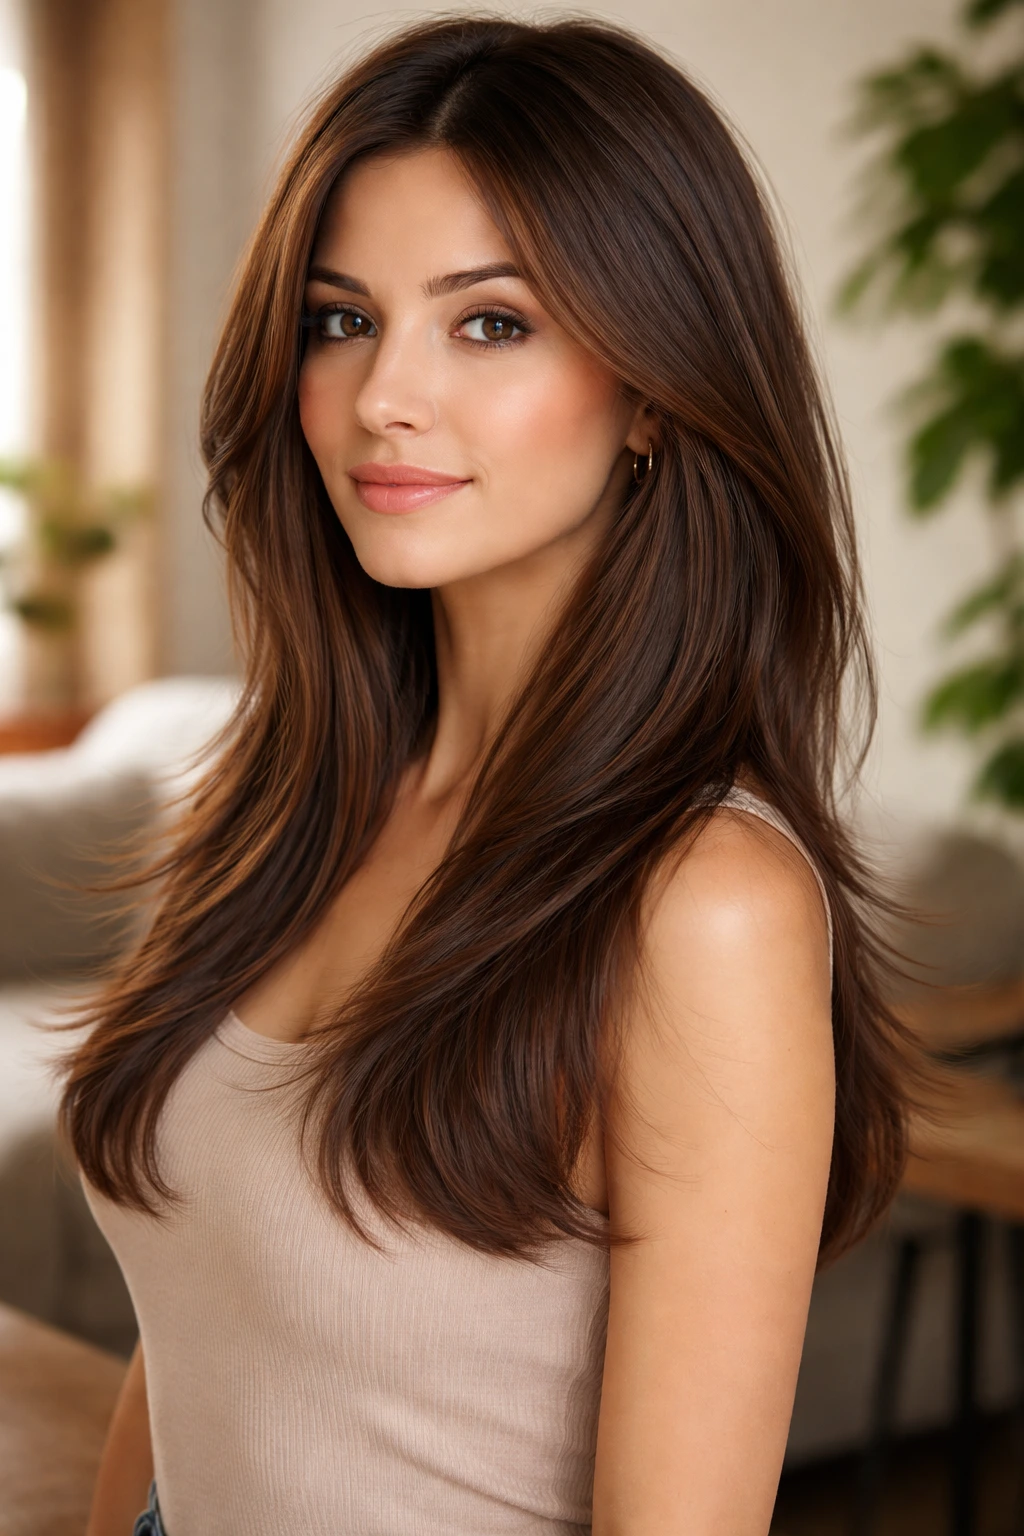
If you are set on having layers, ensure they are concentrated at the very ends of your hair. When layers start at the chin, they create volume where you don’t want it. When they start at the collarbone or below, they add movement to the bottom of the style, which is actually helpful.
The Weight Distribution
By keeping the hair around your cheeks and jawline solid and heavy, you create a “weight” that drags the eye down. By adding the layers at the bottom, you create interest and lightness where it doesn’t impact your face shape.
Avoiding “The Poodle”
Be careful with the blow-dry. If you use a round brush on the ends of these layers, you might get a “flip” that adds width. Use your straightener to keep the ends straight or just slightly curved inward, never outward. The goal is to maintain that long, narrow silhouette.
17. Braided Half-Up Style
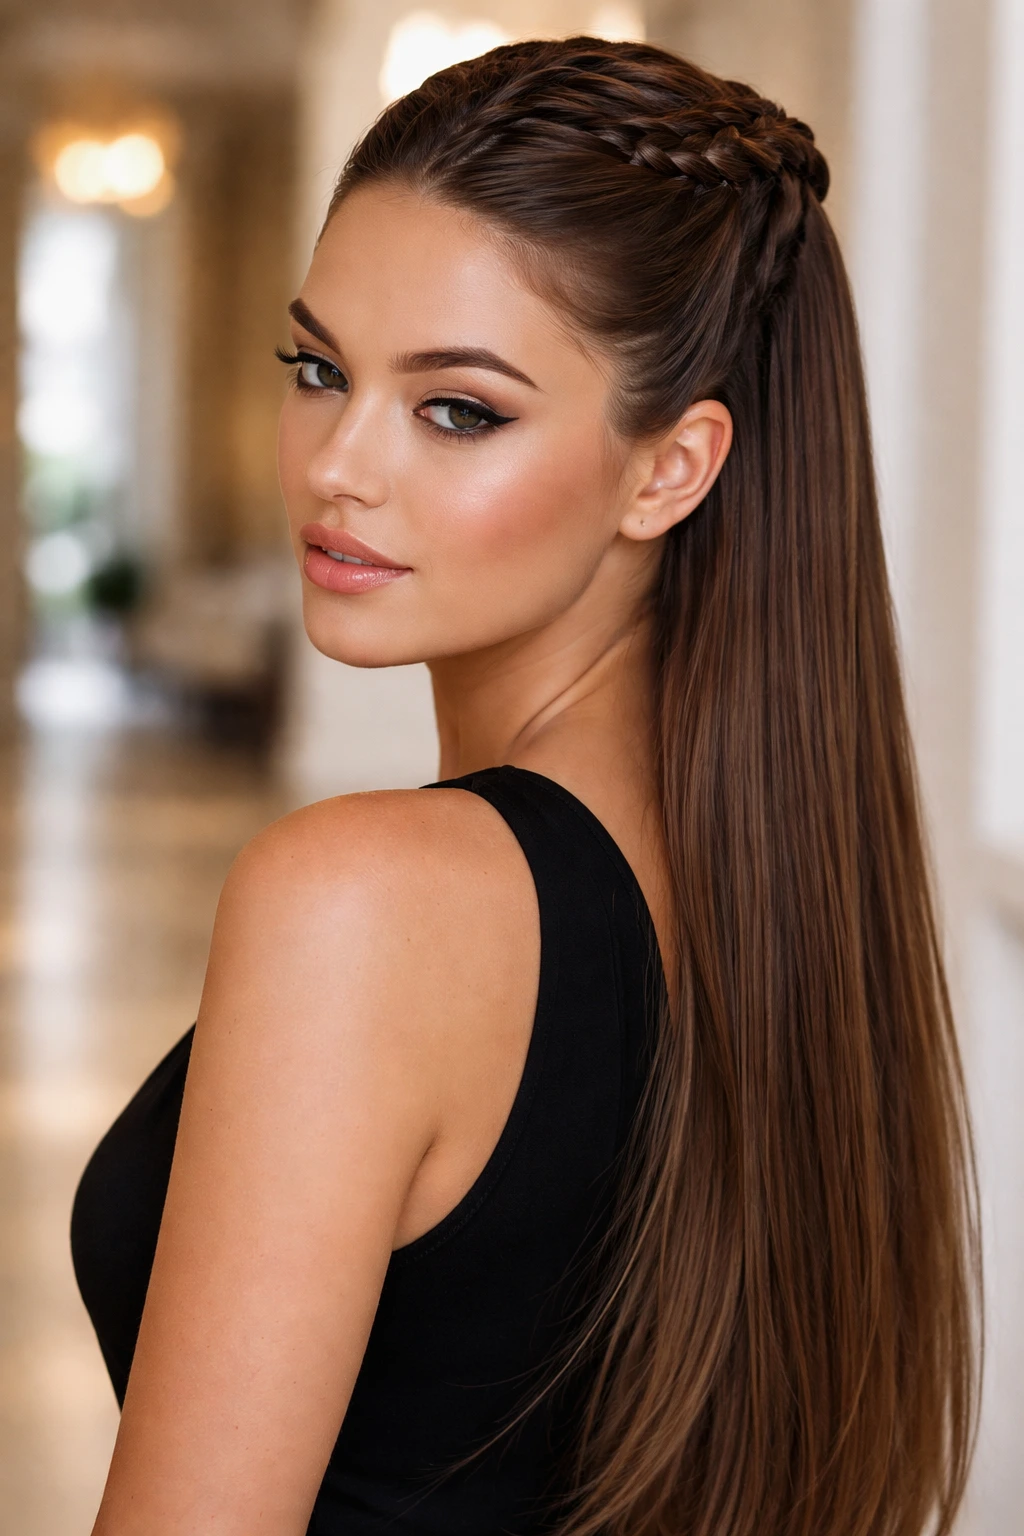
Braids are a great way to add detail without adding width. A simple, sleek braid that pulls the top section of your hair back creates a clean line that leads the eye toward the back of the head, rather than letting it linger on the sides of your face.
The Braiding Technique
Go for a tight, sleek braid—like a French braid or a Dutch braid—that sits flat against the scalp. Avoid the “boho” loose, messy braid that is meant to look large and airy. That volume will work against you. A tight, polished braid is essentially a vertical design element on the top of your head.
The Length
Leave the rest of your hair long and straight. The contrast between the intricate, tight braid and the smooth, long lengths creates a sophisticated look that is perfect for formal events or just upgrading your daily style.
18. Center-Parted Low Bun
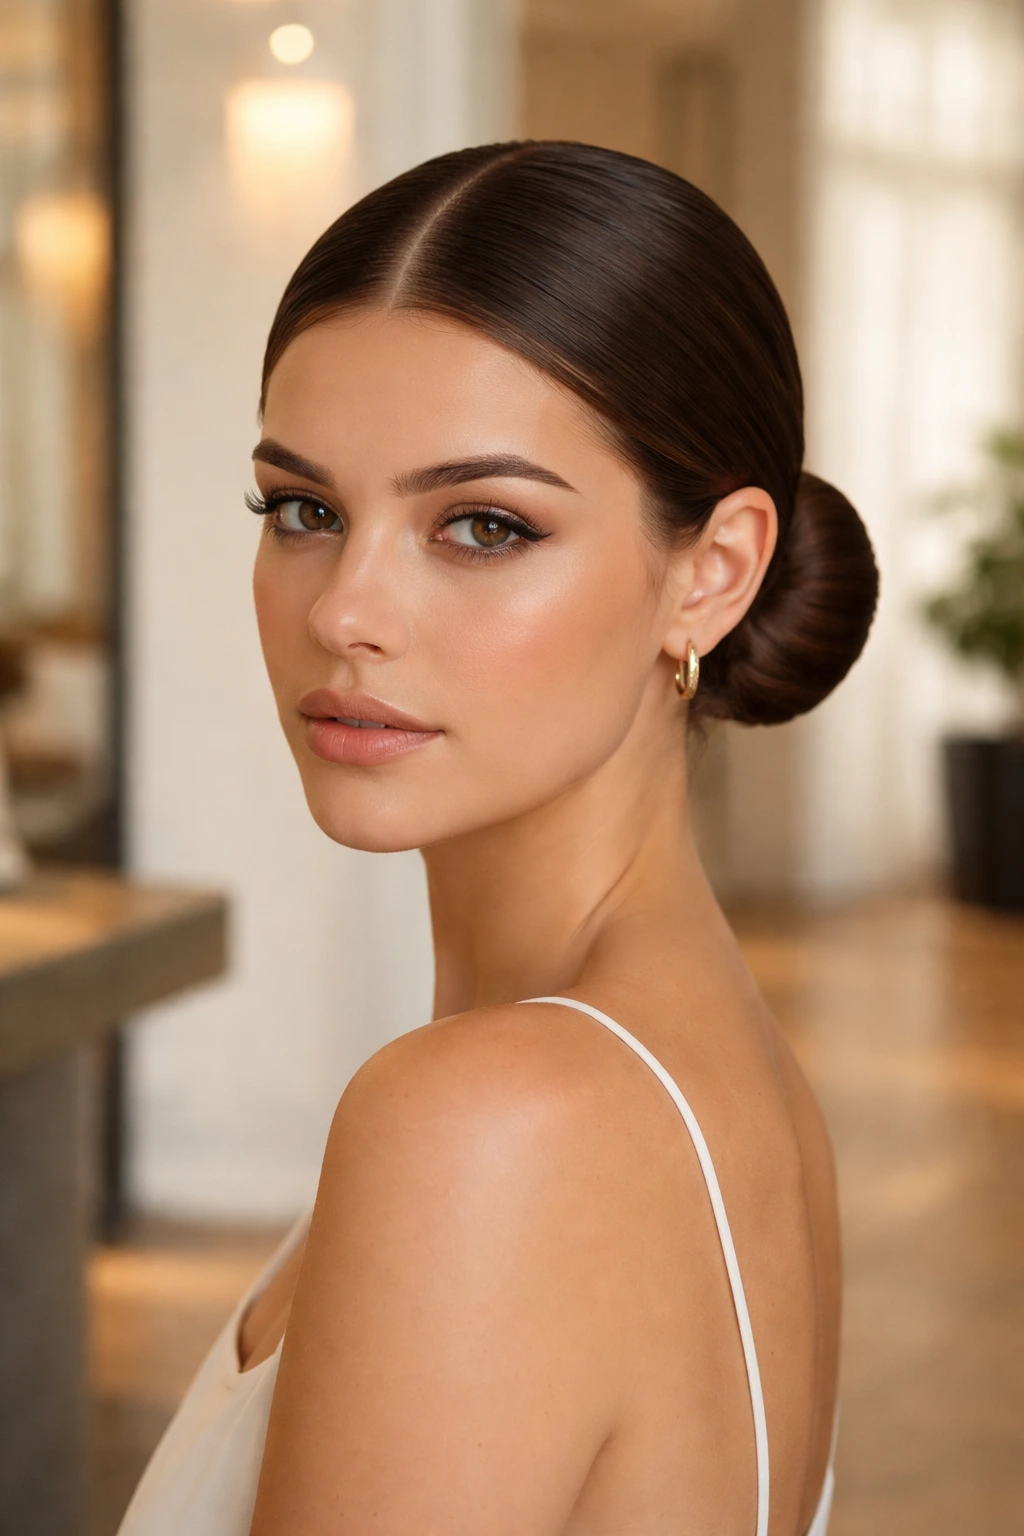
The center-parted low bun is the height of minimalist sophistication. By parting your hair down the middle and pulling it into a low, sleek bun, you create a very strong, symmetrical look that works well if you want to emphasize your facial features.
Why This Style Works
It relies on absolute control. Because the hair is parted in the center and pulled tight, it creates two symmetrical lines that frame the forehead and upper face, leading directly down to the bun. It is a very structured look, and structure is always the enemy of “roundness.”
The “Sleekness” Factor
You need a strong-hold product to keep this look from falling apart during the day. Use a gel or a styling cream to ensure that every hair is in place. If you have any baby hairs at the hairline, smooth them down. The perfection of the style is what makes it so flattering for a round face.
19. Sleek High Bun
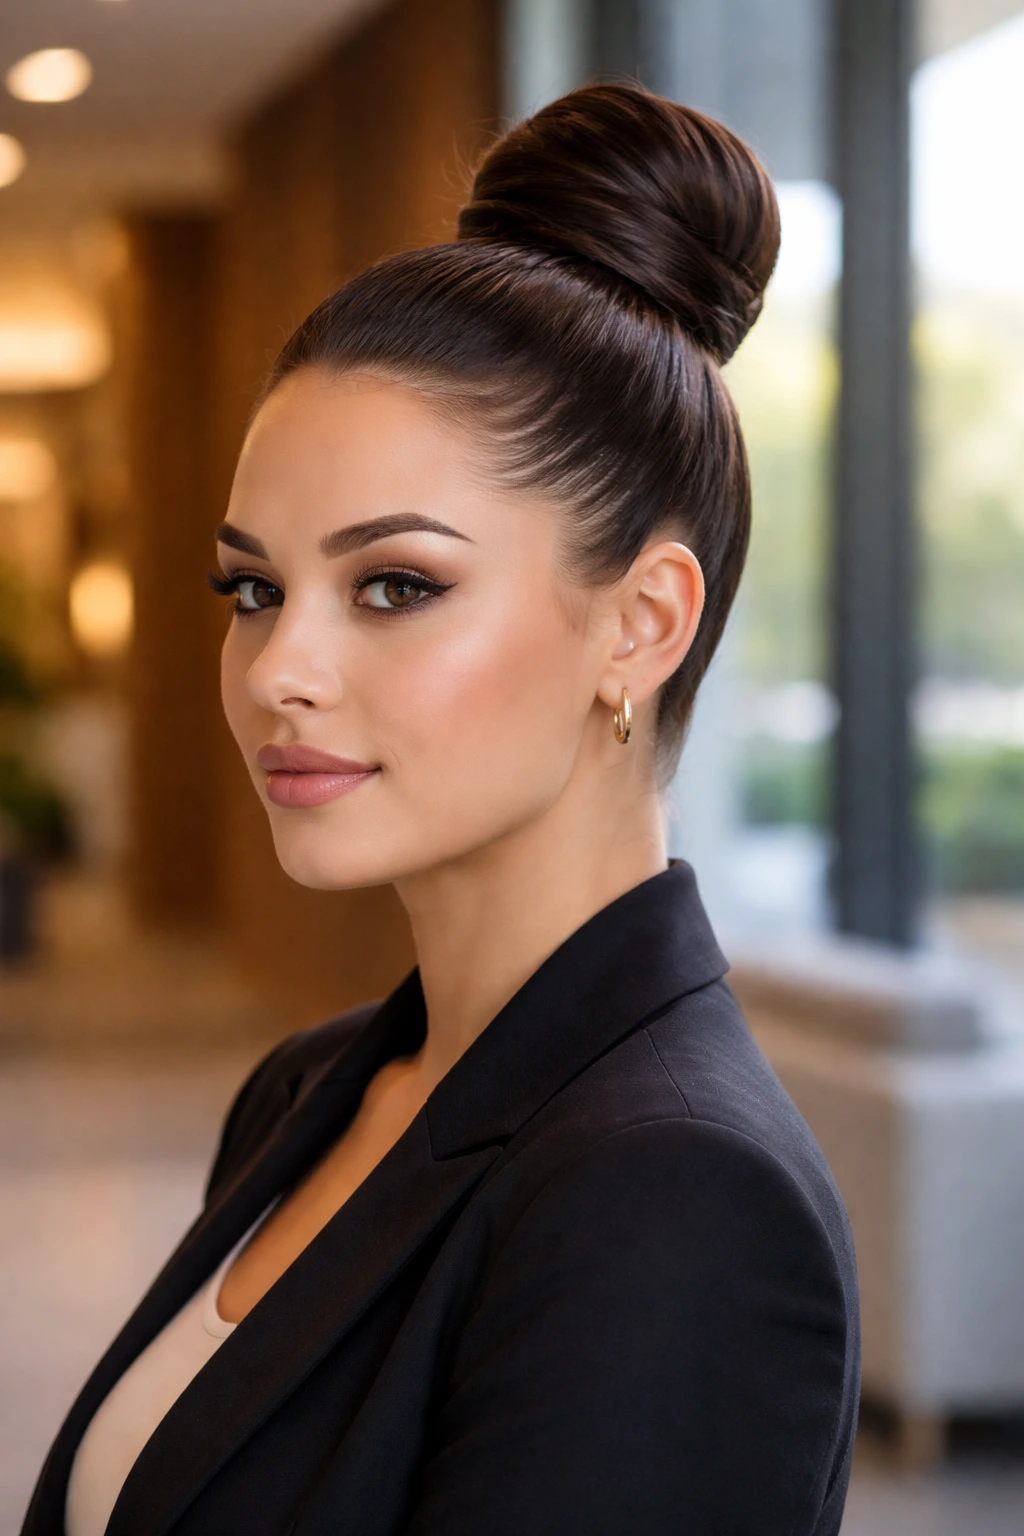
We’ve talked about the high ponytail, but the high bun takes the vertical elongation a step further. By wrapping the ponytail into a bun at the very top of your head, you add actual height to your physical silhouette.
Elevating the Face
This is the ultimate “tall” hairstyle. It visually adds inches to your height, which creates a more oval appearance for the head. It is incredibly clean, professional, and draws all the focus upward, completely removing any hair from the sides of the face.
Styling for Success
Make sure the bun is not too wide. If you create a giant, messy “donut” bun on top of your head, you are adding width to the top, which isn’t quite as effective for elongation. A smaller, tighter, sleeker bun creates a more vertical point. Think of it as a flame—a tall, narrow shape.
20. Long, Wispy Bangs with Sleek Sides
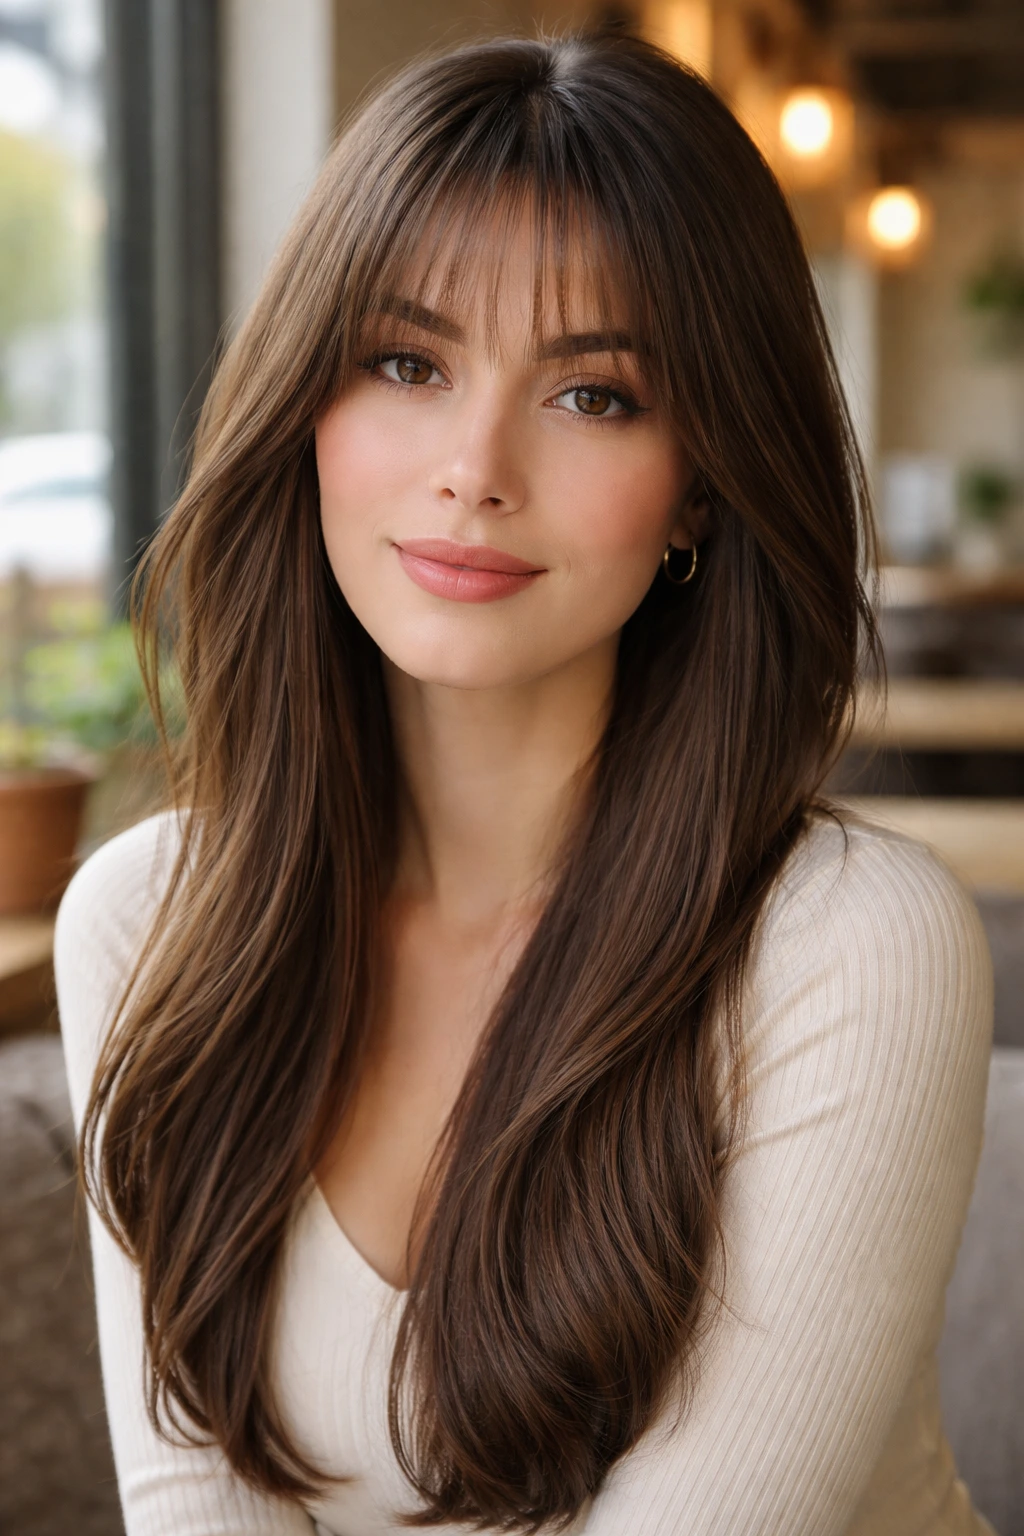
We mentioned curtain bangs earlier, but wispy bangs are a different animal. These are lighter, thinner, and less “heavy” on the forehead. They allow some skin to show through, which keeps the face from looking cut off.
Why “Wispy” is Better
Heavy, blunt bangs can create a “box” around a round face. Wispy bangs are soft and airy. They provide a bit of forehead coverage and framing without creating a heavy, solid line that shortens the face. When paired with long, sleek sides, they offer a very romantic, soft look that is still polished.
Maintenance
These bangs require a bit of styling every morning. Use a small round brush to give them a tiny bit of lift, but don’t over-curl them. You want them to be mostly straight, just with a little bit of movement so they don’t look glued to your forehead.
Final Thoughts
The key to choosing a long hairstyle for a round face comes down to a few basic principles: verticality, asymmetry, and weight. You are always trying to combat the natural tendency of the face to look wider by creating lines that lead the eye up or down, rather than side-to-side. Whether you choose a sleek, high ponytail or a center-parted style with long, straight layers, the goal remains the same: create a frame that mimics the elongated shape you want to achieve.
Do not be afraid to experiment with your part or your styling products. A simple change, like moving your part from the center to a deep side, can completely transform how your face is framed by your hair. Trust your instincts, invest in a quality flat iron, and prioritize hair health so that your sleek styles always look glossy and intentional. Your hair is the most effective accessory you have for balancing your features, so have fun with the process.
