



Straight hair has a reputation for being easy, and that reputation is only half right. It can be quick to brush, quick to dry, and quick to show off a sharp cut, but it can also fall flat in a way that leaves you staring at the mirror wondering why it suddenly looks so plain. The best hairstyles for straight hair solve that problem fast. They give the hair shape, direction, and a little attitude without fighting the texture you already have.
What straight hair does well is clean lines. What it does badly is hide mistakes. A crooked part, a heavy layer, or a loose pin shows up immediately, which is why the difference between “done” and “blah” often comes down to one or two small moves: where the part sits, how the ends are finished, whether the crown has lift, and whether the style has enough hold to last past lunch.
That’s the part people often miss. Straight strands do not need a lot of fuss, but they do need intention. A blunt bob can look sharp and expensive-looking. A low ponytail can look polished instead of rushed. Even a basic half-up twist gets better when the crown is smoothed properly and the base is hidden.
1. Blunt Bob for Straight Hair
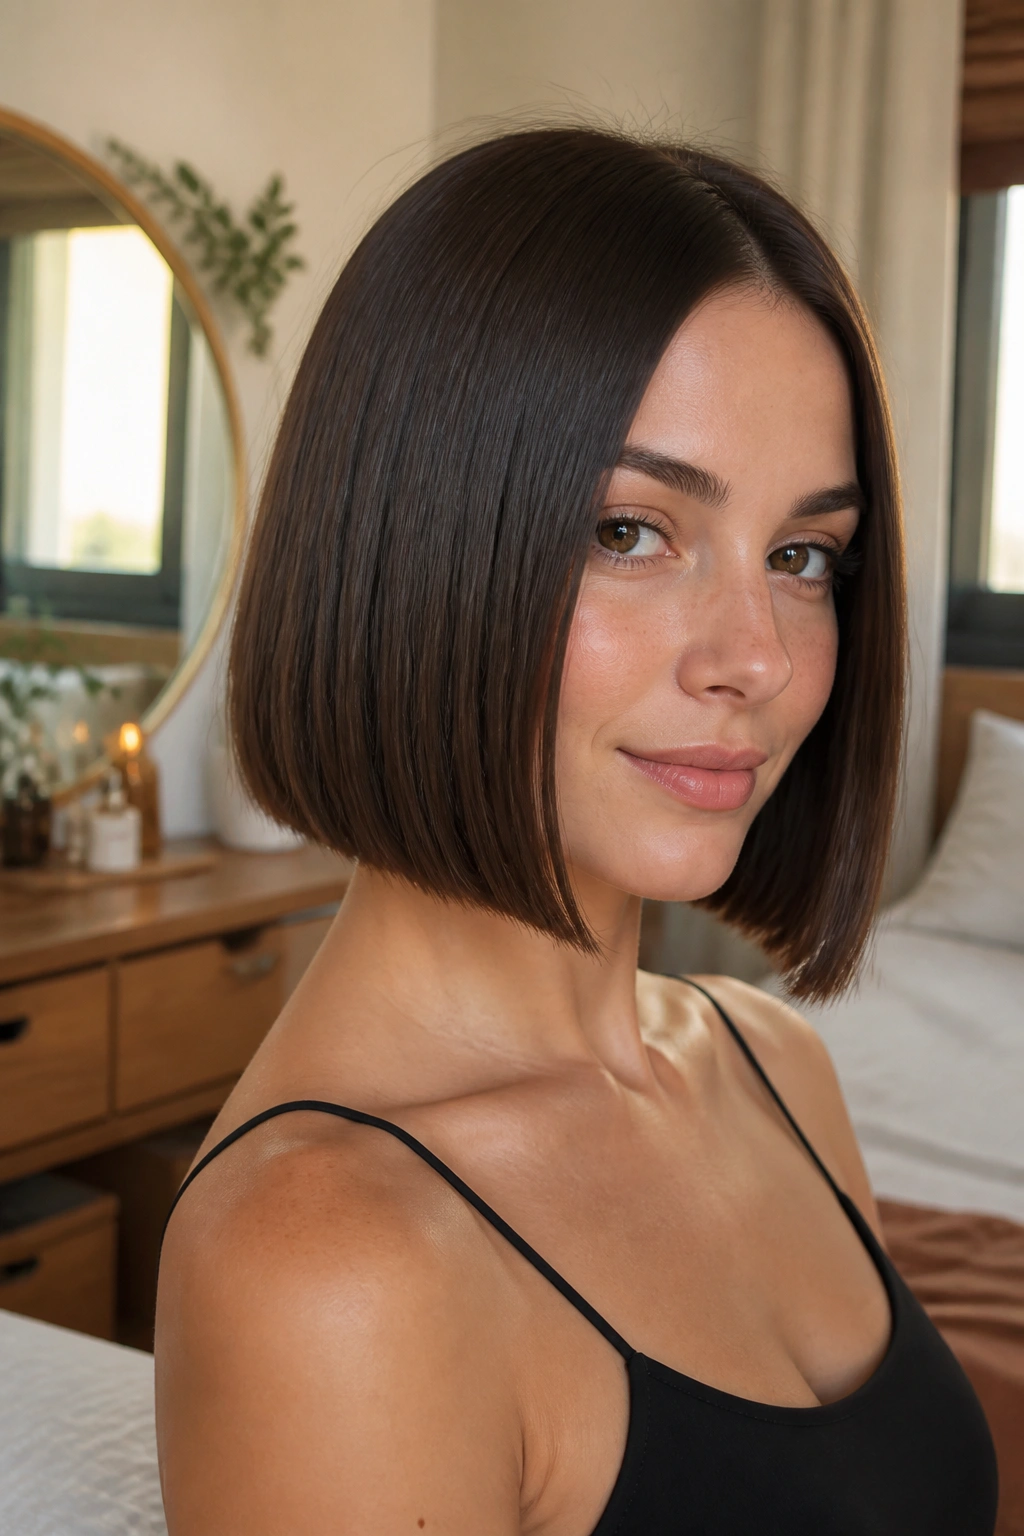
A blunt bob is one of the strongest shapes you can give straight hair. No soft excuses, no wispy ends trying to fake volume. The clean edge does the work for you, and that edge looks especially good when the hair falls naturally from root to tip without much bend.
Why It Works
Straight hair makes a blunt line look crisp instead of fuzzy. That matters. On fine hair, a one-length bob can make the ends look fuller because nothing is being thinned out at the bottom. On thicker hair, it keeps the shape strong and stops the style from ballooning out into something awkward.
Ask for a length that lands somewhere between the jaw and the collarbone if you want the cut to sit neatly. Shorter bobs feel sharper. Slightly longer ones feel softer and easier to tuck behind the ears.
Best detail: keep the ends as even as possible and let the part stay simple.
If you style it with a paddle brush and a light blow-dry cream, the shape will hold without looking stiff. That’s the whole trick.
2. Sleek Middle Part
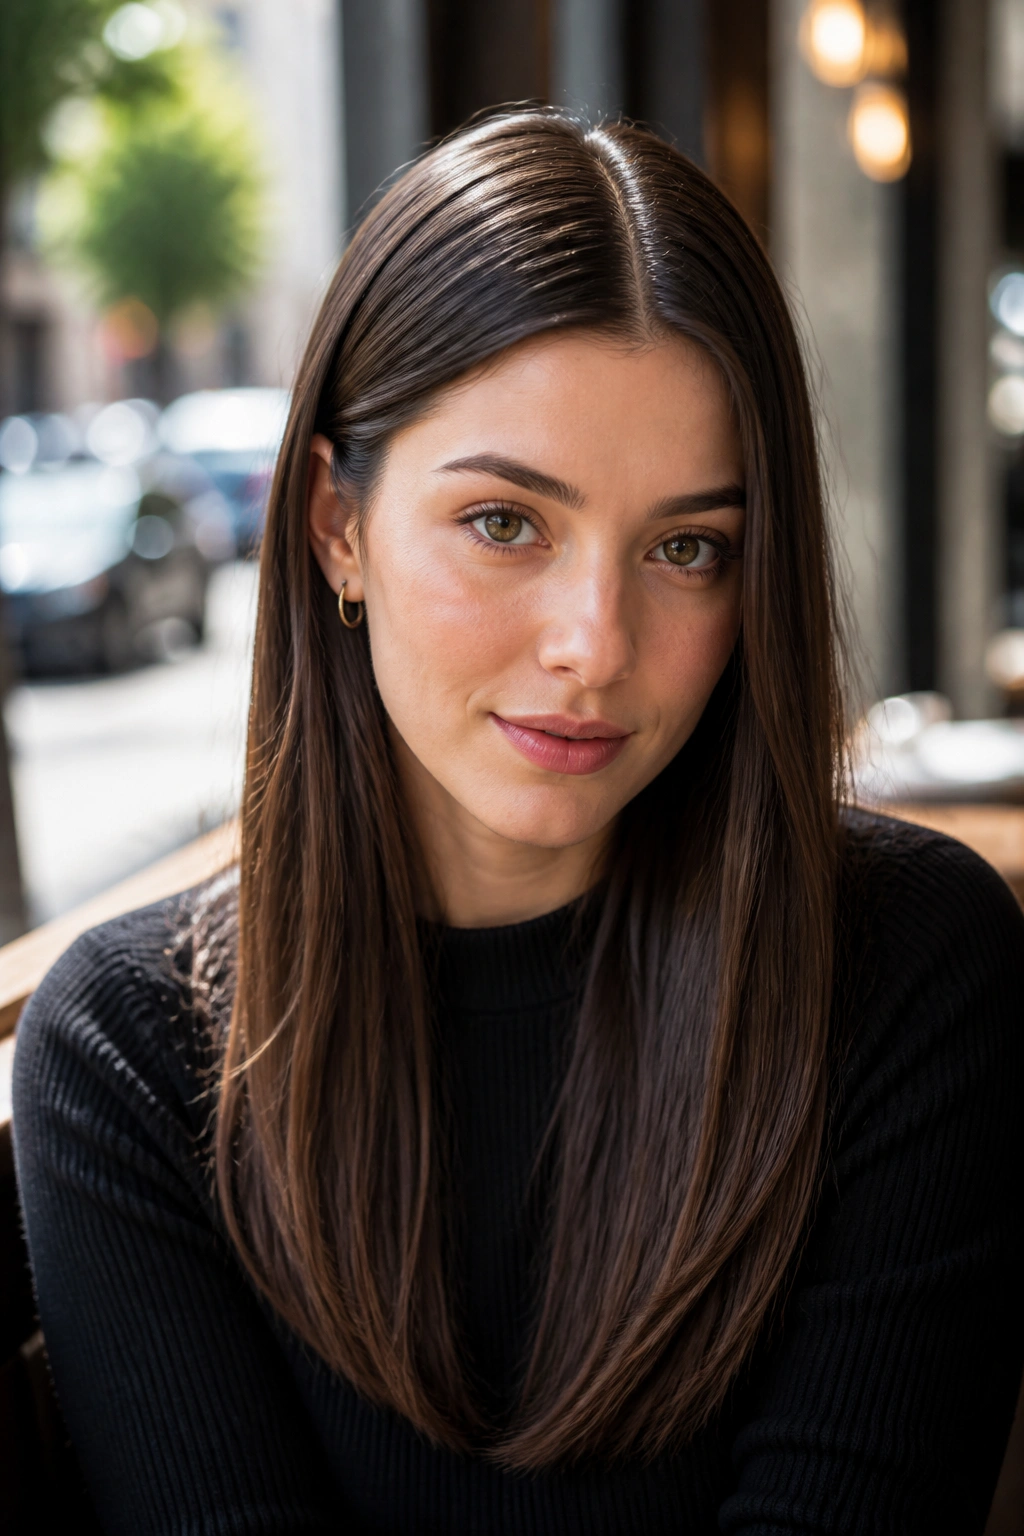
Why do straight-haired people keep coming back to the middle part? Because it gives the hair a clean frame without asking for much. It’s calm, balanced, and weirdly good at making the rest of your face stand out.
A middle part works especially well when the hair is naturally smooth at the roots. You get that neat line down the center, then the lengths fall on either side like curtains that actually behave. If your hair has a habit of puffing up at the crown, a quick pass of serum over the top layer settles it down fast.
Small Moves That Help
- Use a tail comb to draw the part straight from the center of the forehead to the crown.
- Tuck both sides behind the ears for a sharper finish.
- Add a touch of shine spray only from the mid-lengths down.
- Keep the roots light so the part does not collapse.
This style looks best when the hair is clean or only slightly lived-in. It can turn greasy fast if you pile on too much product. Less is more here, and that is not a slogan — it’s the whole style.
3. Long Layers for Straight Hair
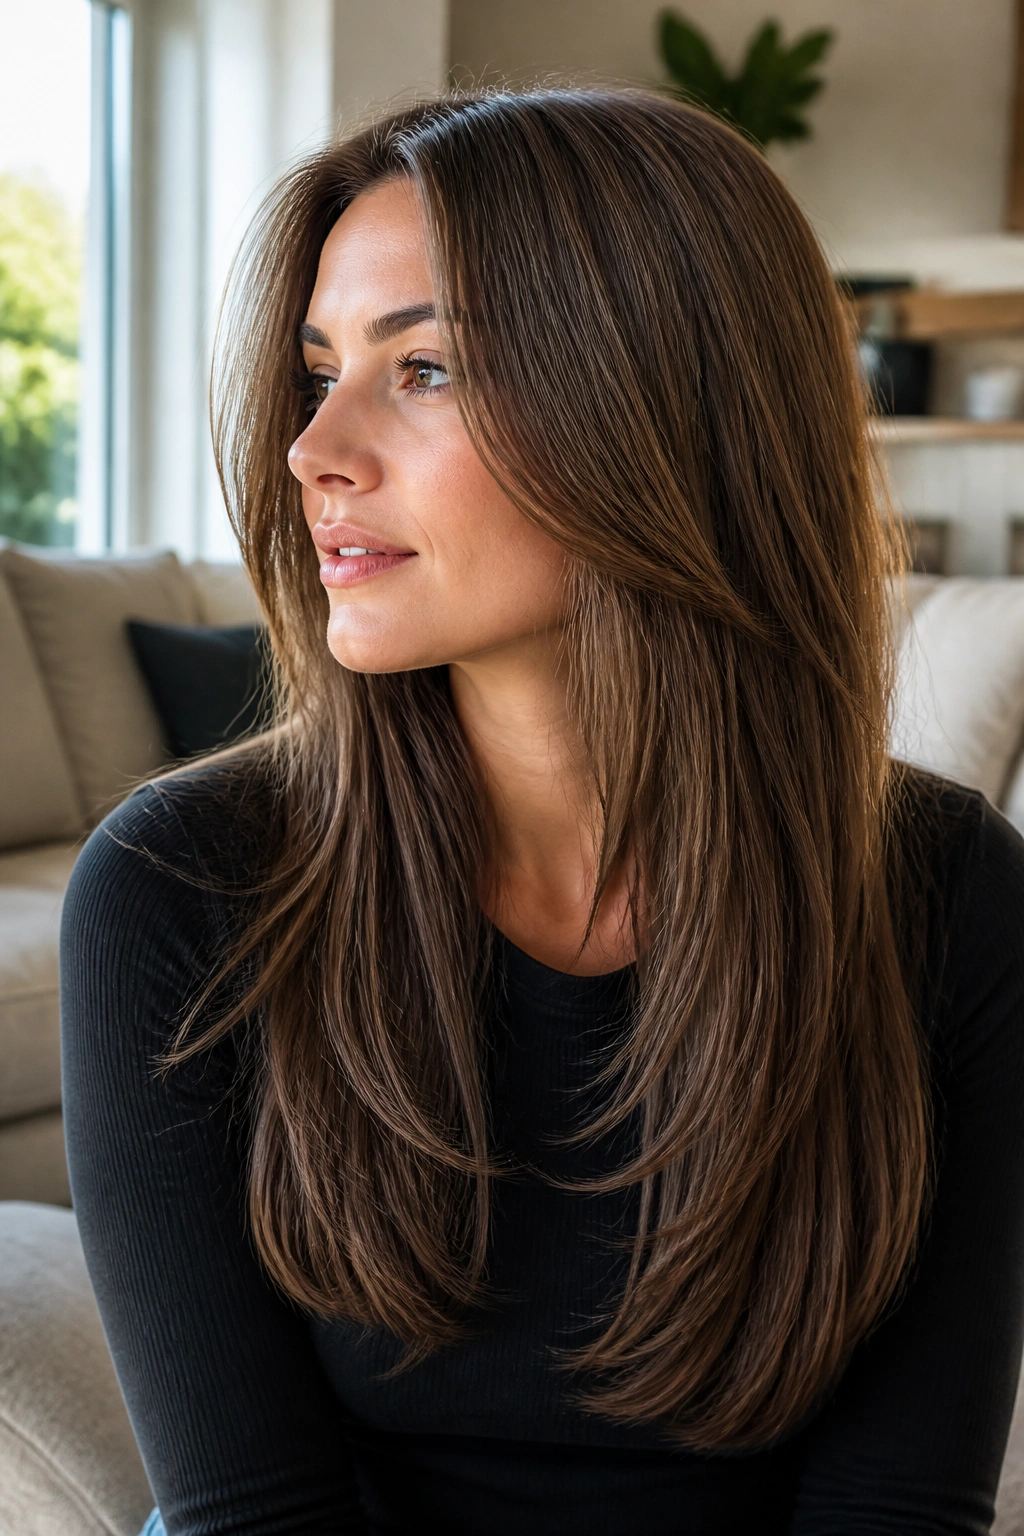
Long layers save straight hair from looking like one heavy sheet. That’s the real reason people ask for them. The cut keeps the length, but it removes some of the drag that makes straight hair hang too close to the head.
The best version starts with face-framing pieces around the cheekbone or lip line, then blends into longer layers through the back. That shape lets the hair move when you walk, which sounds minor until you compare it to hair that just sits there like a curtain rod.
If your hair is thick, long layers make it easier to wear down without feeling weighed down. If your hair is fine, keep the layers subtle. Too much slicing can leave the ends looking thin in a way that nobody wants.
What to Ask For
- Face-framing pieces that start around the cheekbone
- Soft layers through the mid-lengths
- A clean, blunt perimeter if you still want fullness at the bottom
This is one of those haircuts that pays you back every day. You do not need a lot of styling. A round brush at the front and a smooth blow-dry are enough.
4. Low Ponytail with a Wrapped Base
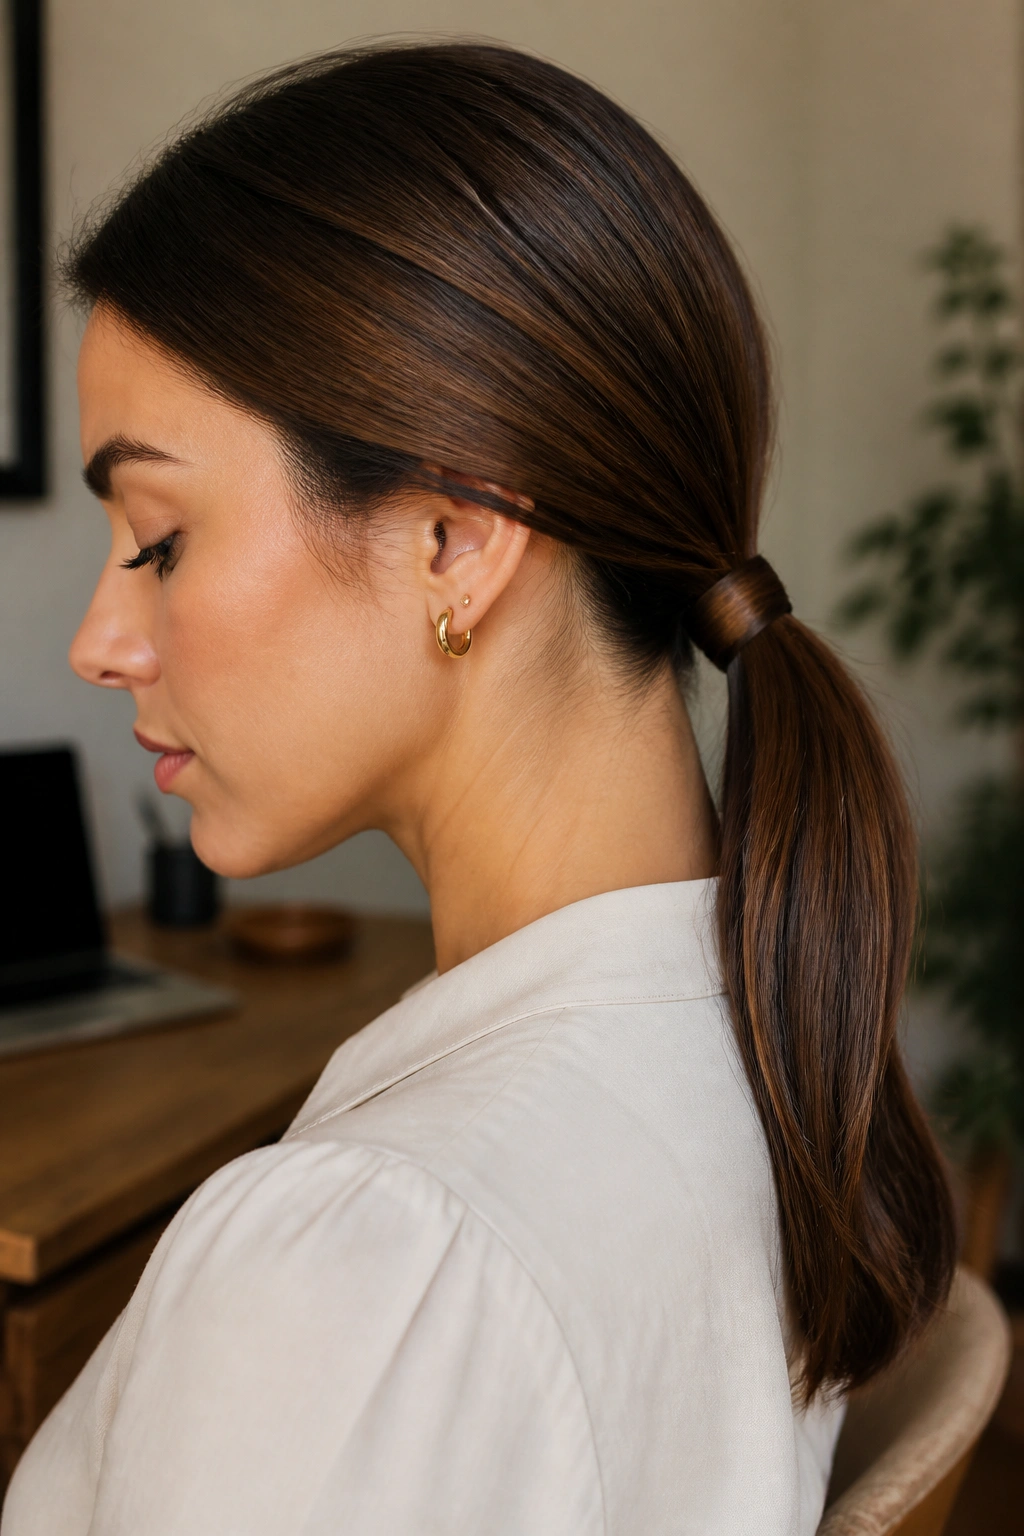
A low ponytail is boring only when people stop halfway through it. Add a wrapped base, and suddenly it looks deliberate. The style sits close to the neck, which makes straight hair look neat instead of limp, and the wrapped section hides the elastic so the whole thing reads cleaner.
The best version starts with a smooth brush-through and a tiny bit of anti-frizz cream on the top layer. Gather the hair at the nape, secure it with a strong elastic, then take a 1-inch strip from underneath and wrap it around the band until nothing shows. Pin the end underneath the ponytail with one bobby pin.
Keep It From Sagging
- Use a firmer elastic if your hair is thick.
- Place the pony slightly off-center if your face looks too long in a dead-center version.
- Pull a few millimeters of hair at the crown for softness if you want a less strict feel.
This style works for work, dinner, and those mornings when your hair is clean but not cooperative. It’s practical. That’s the appeal.
5. High Ponytail with Crown Lift
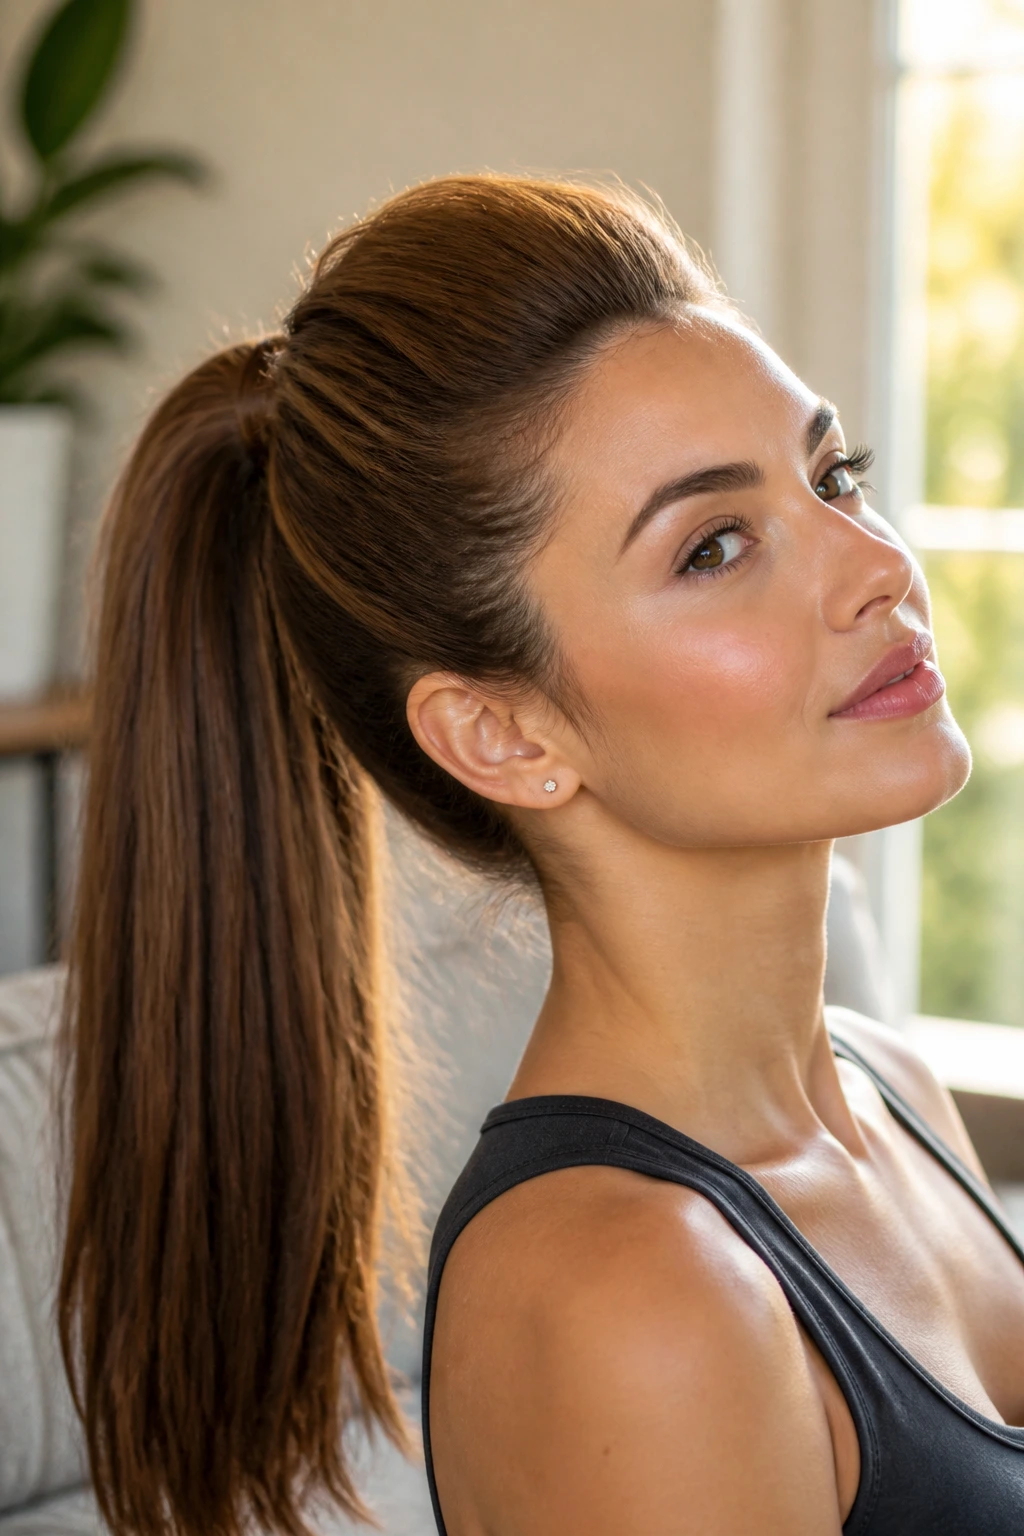
Straight hair can make a high ponytail look sleek in a way curly hair can’t match. But the crown has to be lifted a little, or the whole thing sits too flat and too honest. Nobody wants that.
The easiest way to build height is to brush the hair upward while you tip your head back slightly, then secure the pony with two elastics stacked close together if the hair is heavy. Before tying it off, tease the crown with a few light backcombed strokes underneath the top layer only. Keep the top smooth.
A high ponytail like this looks sharper when the lengths are pinned straight and the base is tight. If you want a softer finish, wrap a thin section of hair around the elastic instead of leaving the band exposed.
One small note. This style can pull at the scalp if you over-tighten it, especially on very straight, slippery hair. You want lift, not a headache.
6. Half-Up Knot
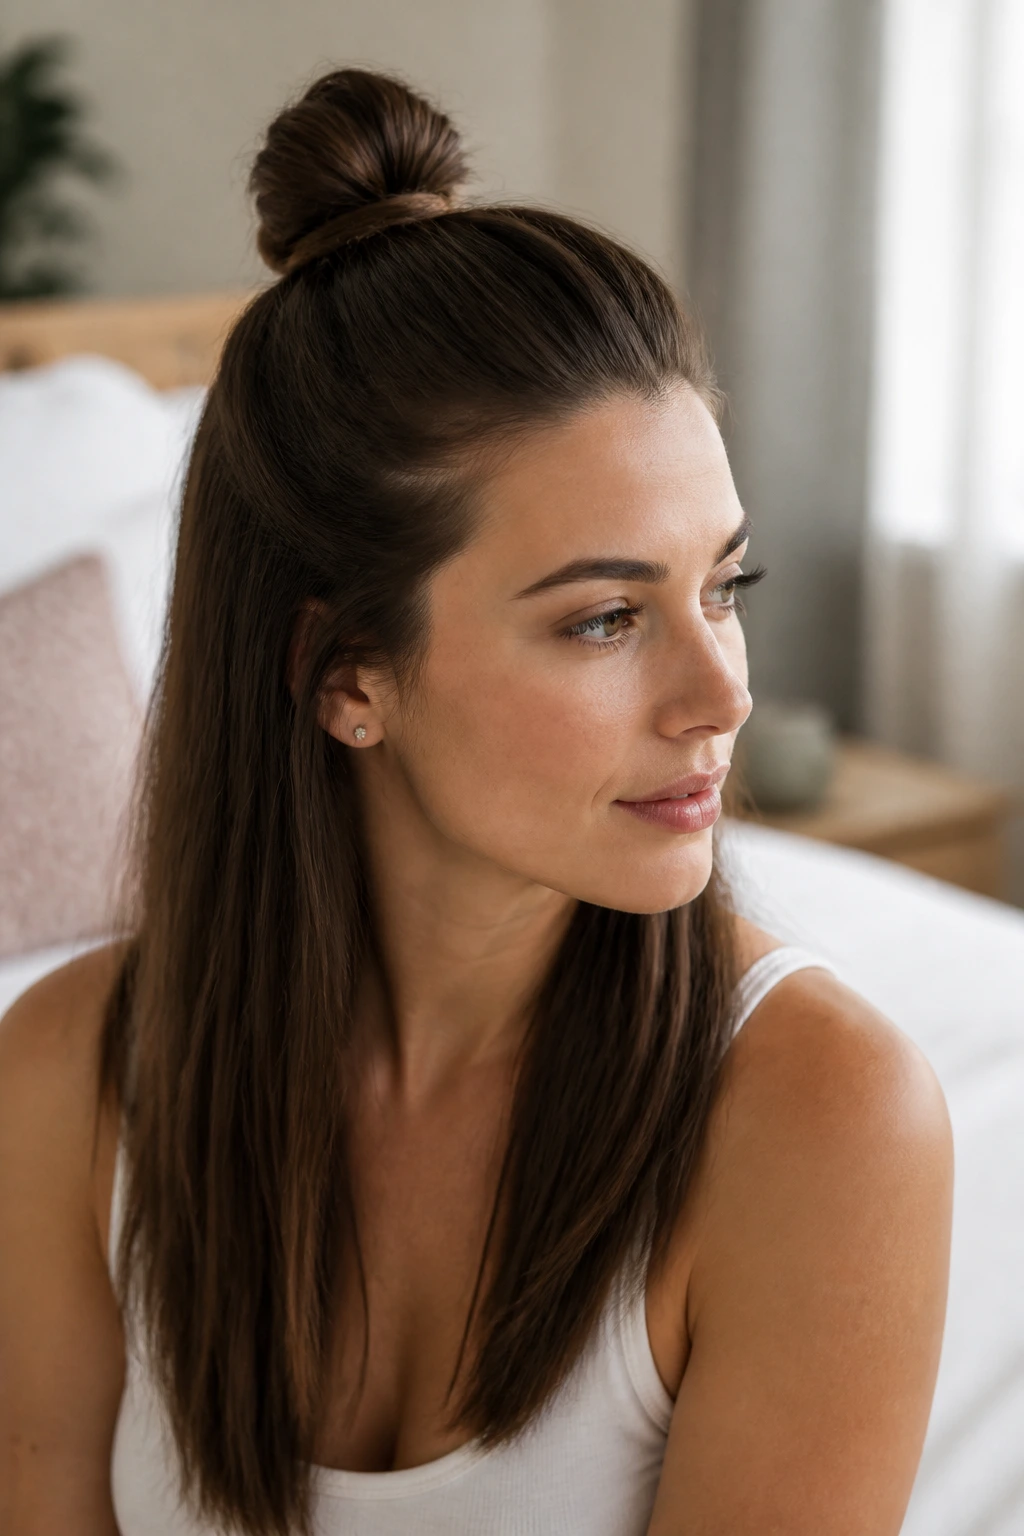
A half-up knot is the move when you want your hair out of your face but do not want the full commitment of an updo. Straight hair is good at this style because the top section stays smooth and the ends hang neatly instead of puffing in random directions.
Start by taking the hair from temple to temple and tying it into a small ponytail at the crown. Twist that pony into a knot, then pin the loose tail under the loop with two bobby pins crossed in an X. If the knot feels too tiny, make the section a little wider and leave the lower hair loose.
Best When
- Your hair is second-day clean
- You want volume without teasing the whole head
- You need a style that looks done in under five minutes
This is one of the most forgiving straight-hair looks. It does not need perfection. A slightly messy knot often looks better than a tight one that tries too hard.
7. Claw Clip Twist
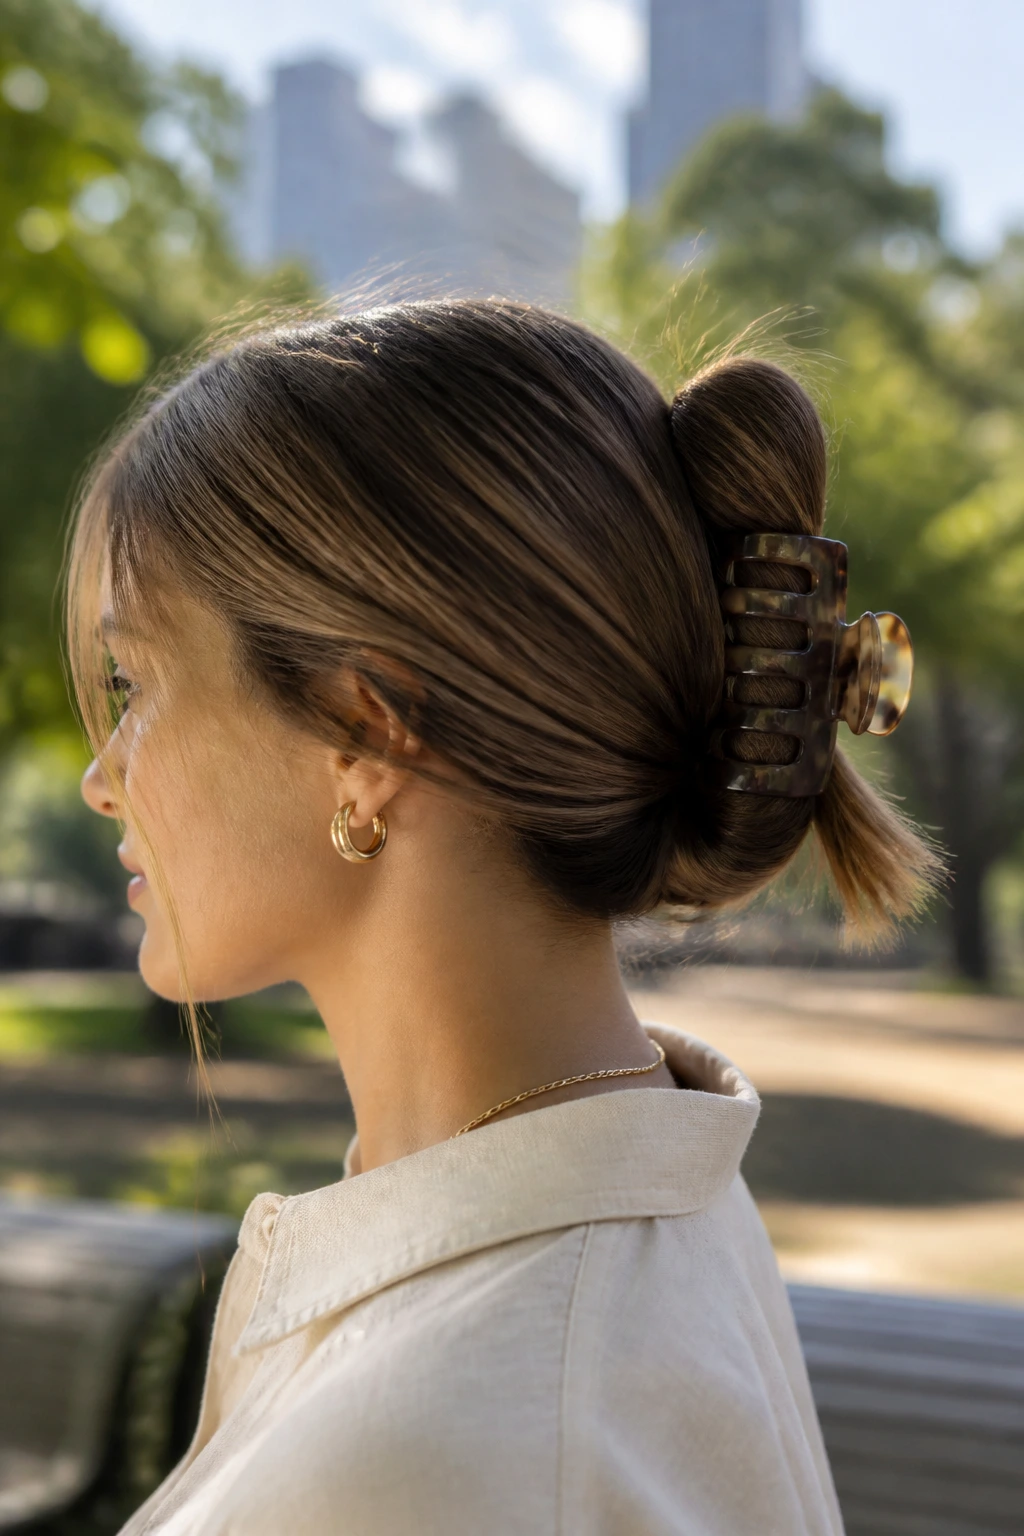
A claw clip twist is the kind of style that looks effortless only if the clip is the right size. Too small, and the hair slips out. Too large, and the whole thing droops like you borrowed it from someone else. Straight hair needs a clip with enough grip to catch the smooth strands.
Twist the hair upward from the nape, fold the length back against the head, then clamp the clip over the twist. Leave a few ends sticking out if your hair is long. That gives the style some movement instead of making it look boxed in.
The neat part about this style is how fast it changes tone. Same hair, different attitude. You can wear it with a blazer and boots, or with a T-shirt and wet hair on a lazy afternoon.
If your hair is very fine, mist the underside with a little dry shampoo first. It gives the clip something to hold onto.
8. Slicked-Back Bun
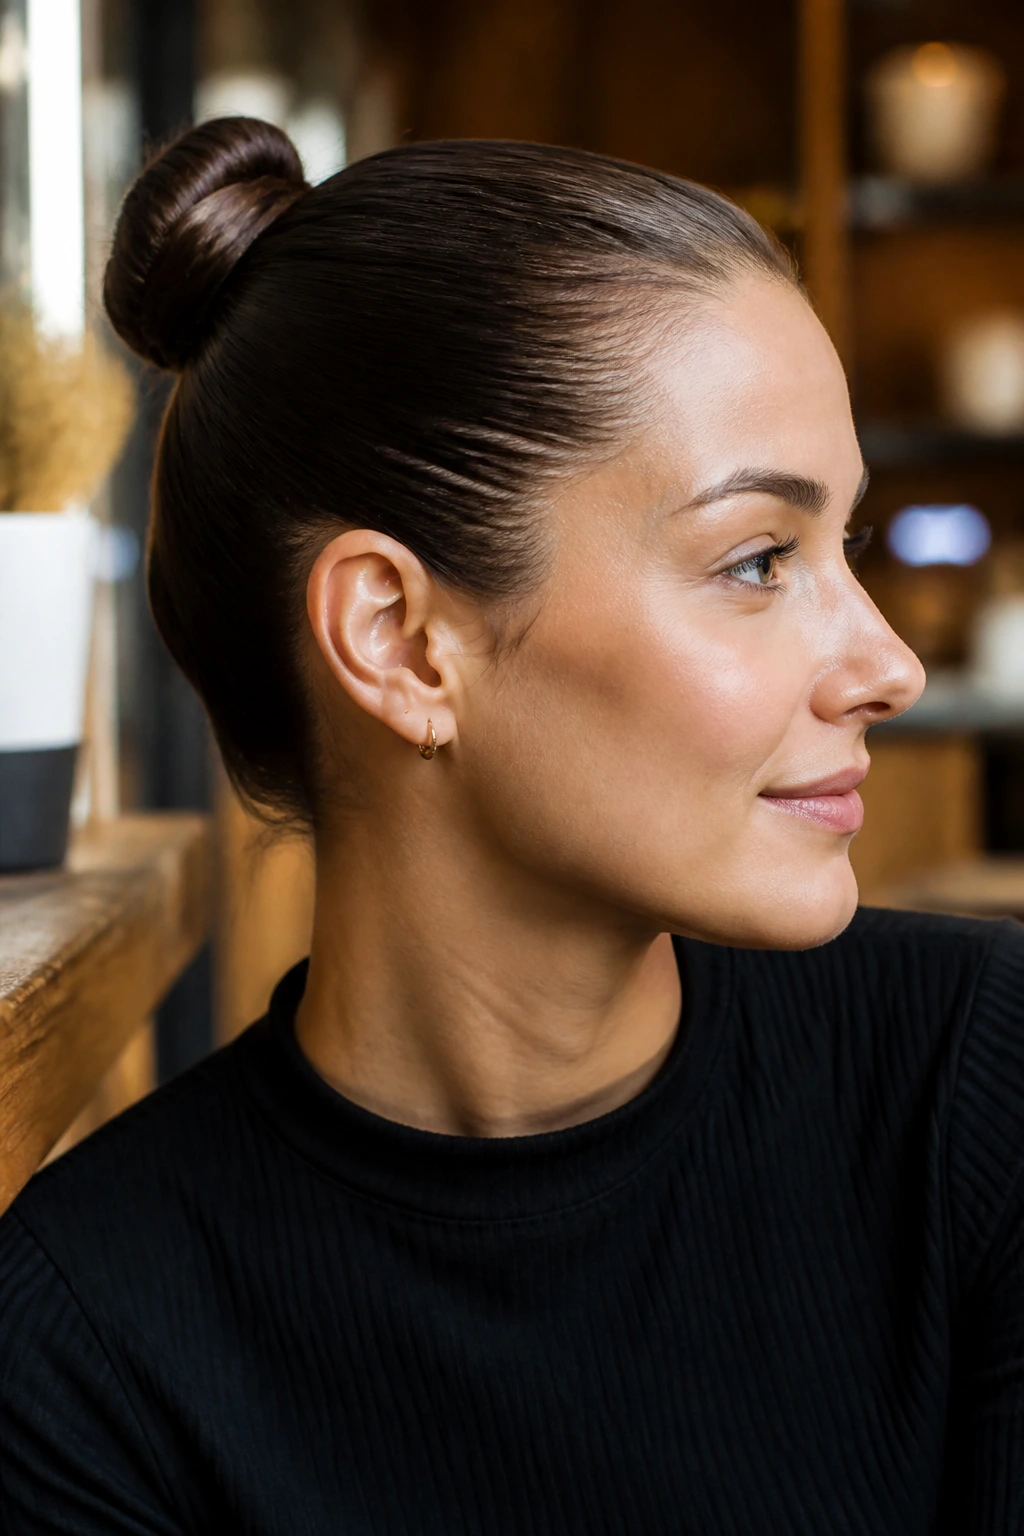
A slicked-back bun is one of the best styles for straight hair when you want clean, sharp, and slightly severe in the best way. It works because straight strands naturally settle close to the head, which makes the surface look smooth once you corral it.
Use a little gel or styling cream on damp hair, then brush it straight back with a bristle brush. Gather it at the crown or lower at the nape, depending on how strict you want the look to feel, twist it into a bun, and secure it with pins. The key is getting the front flat before you coil anything.
This style can look too wet if you use too much product. A thin layer is enough. The hair should look shiny, not greasy.
It is also a forgiving style on day two or three, when the roots have a bit of natural grip. That helps a lot. Straight hair often needs that tiny bit of roughness to stop things from sliding.
9. Deep Side Part
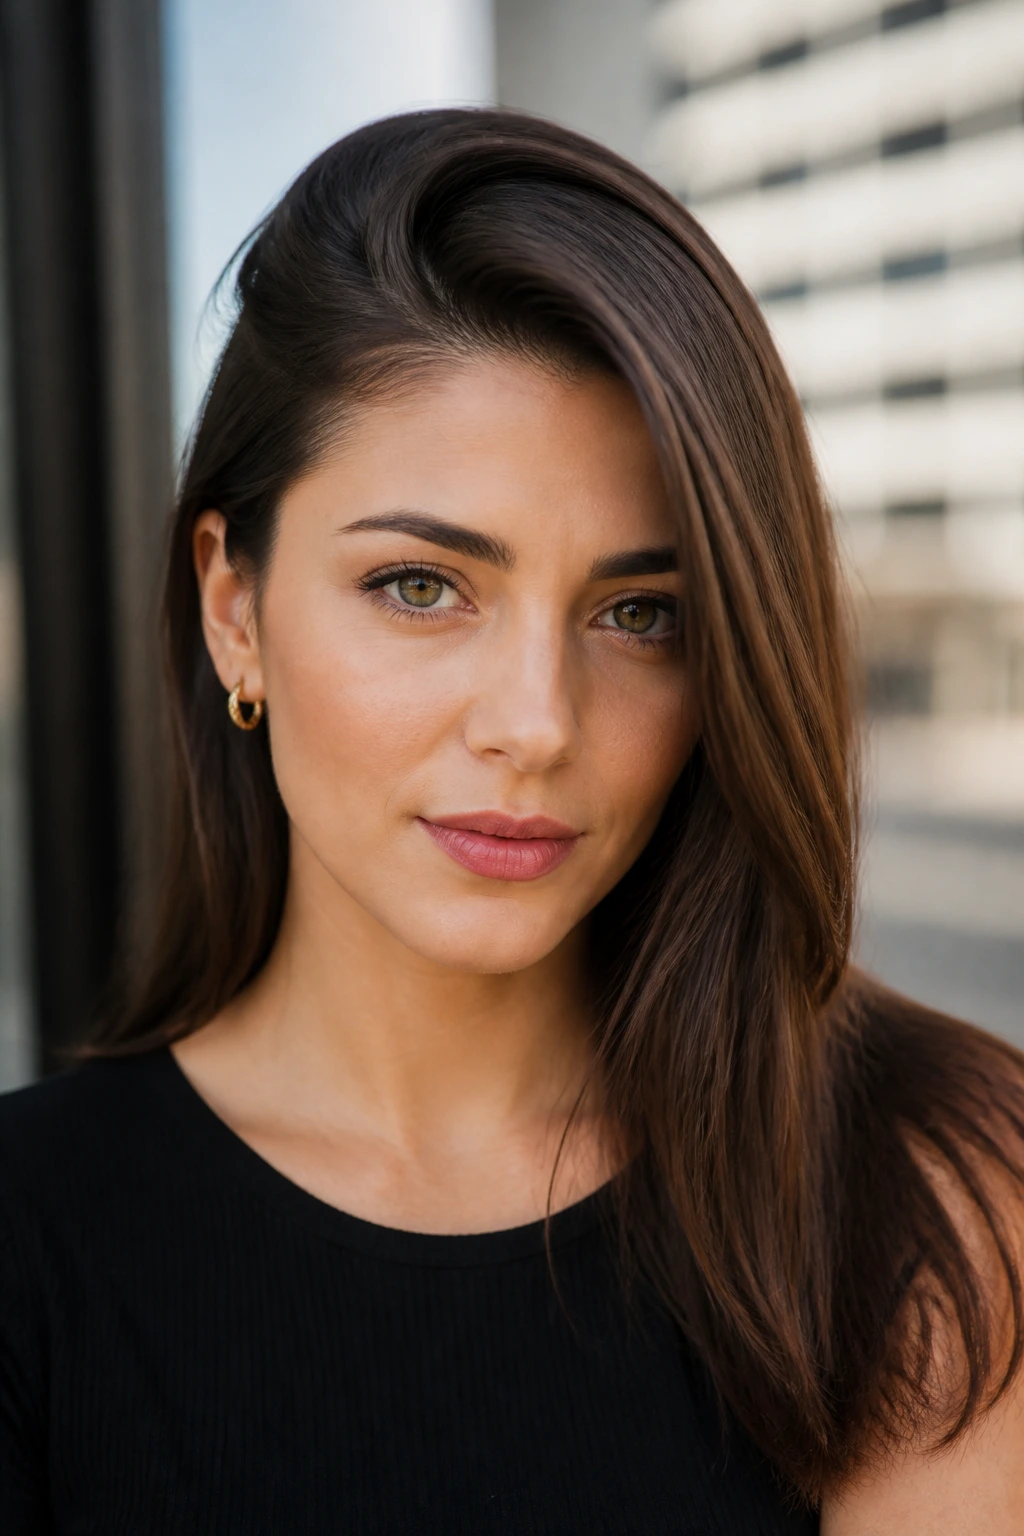
A deep side part changes the whole shape of straight hair. It adds lift at the root, creates asymmetry, and gives you a little more drama without a haircut or heat styling. That’s a lot from one small shift.
The placement matters. Move the part about 2 to 3 inches off center, then use the tail of a comb to draw it cleanly back. If you want more volume, blow-dry the lifted side upward for a few seconds before letting it fall. That little bit of root memory helps.
Where It Helps Most
- Fine straight hair that lies too flat at the crown
- Rounder face shapes that need a longer line
- Styles that feel too plain with a center part
A deep side part also plays nicely with tucks, clips, and low ponytails. It gives the style a starting point. Without it, straight hair can feel like it was parted by accident.
10. Straight Lob with Soft Curve Ends
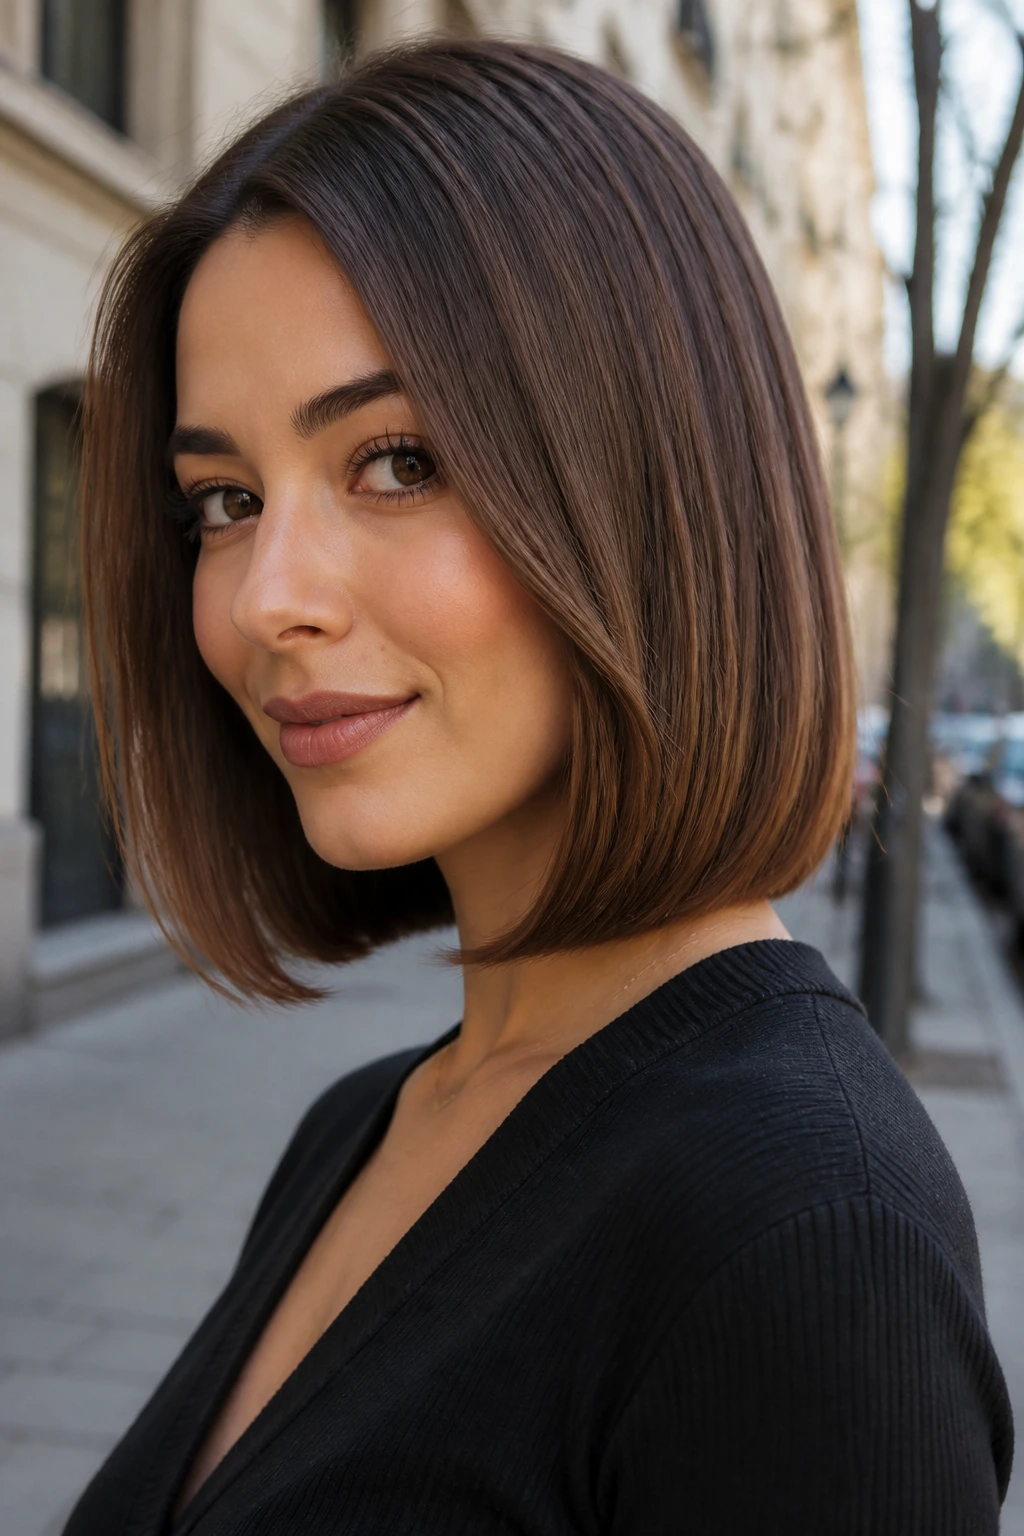
A lob is not the safe choice. It’s the smart one. The cut sits somewhere around the collarbone, which gives straight hair enough length to feel easy while still keeping the shape close enough to the face to look intentional.
What makes this version different from a blunt lob is the ends. Instead of leaving them pin-straight, add a soft inward curve with a round brush or a flat iron bend. Nothing dramatic. Just enough to keep the ends from sticking out in a hard line.
That tiny curve matters more than people think. Straight hair at one length can look boxy fast, especially when it starts to grow. A lob with soft ends buys you more grace between trims.
This style is also friendly to people who want low maintenance. Wash, dry, and go. If your hair cooperates, that may be all you need.
11. Bubble Ponytail
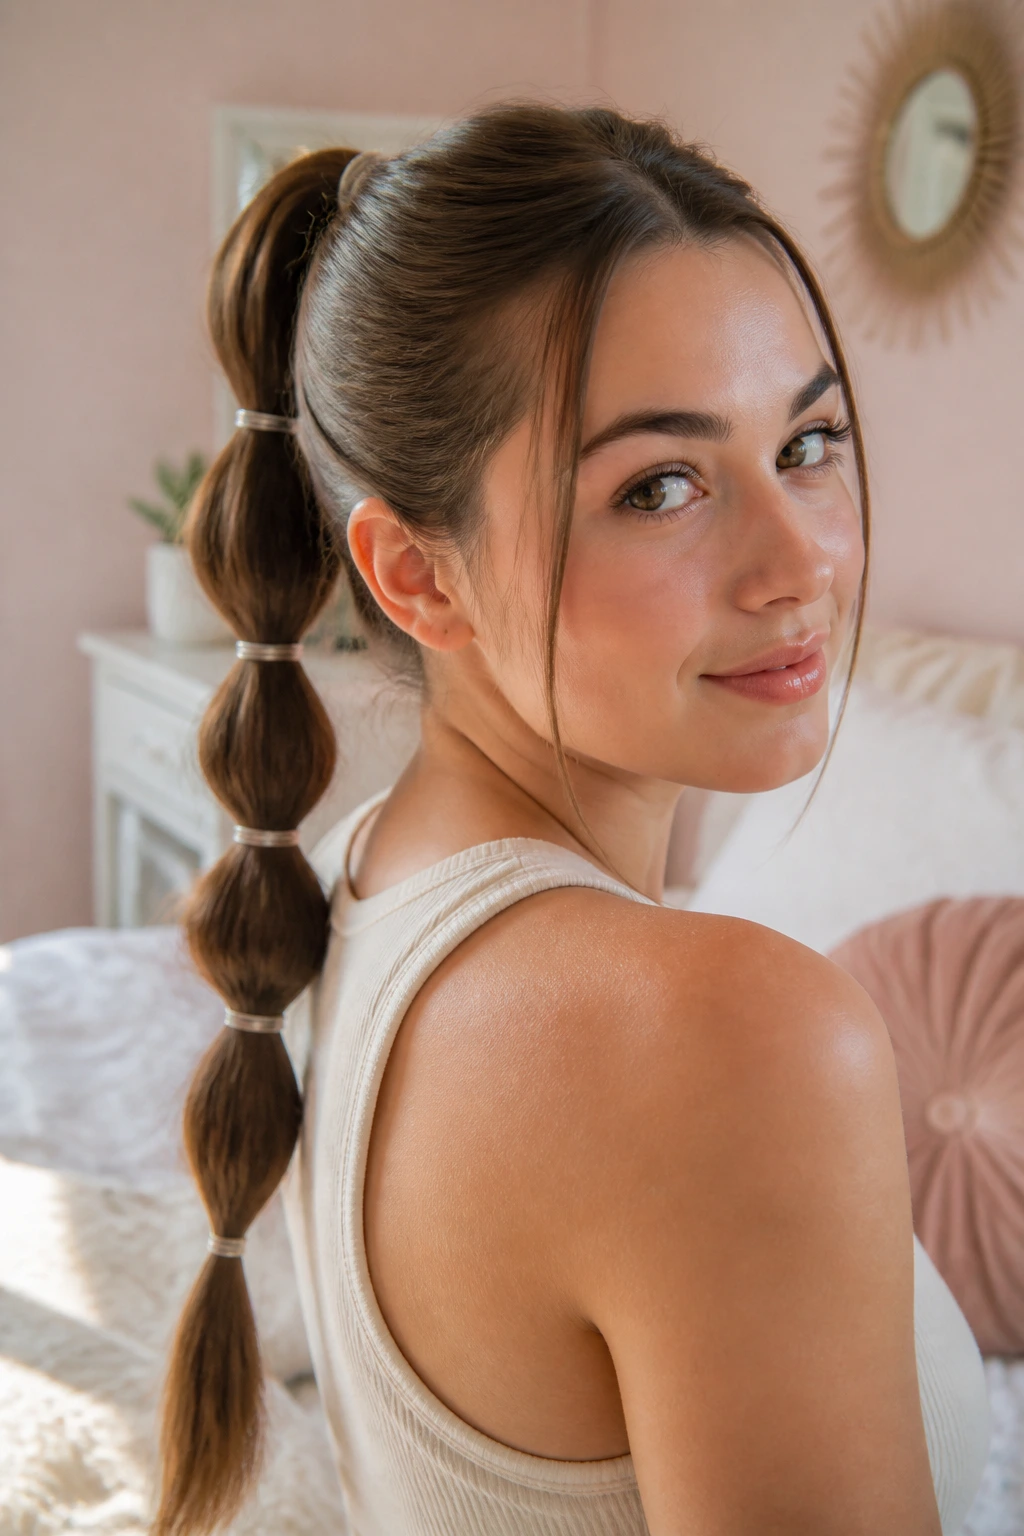
Three elastics can change the whole mood of a ponytail. That’s the appeal of a bubble ponytail on straight hair: it turns one long section into a shape that feels structured and playful, not flat.
Start with a regular ponytail, then add clear elastics every 2 to 3 inches down the length. After each section is tied, gently tug the hair between the elastics to create a rounded bubble. The spacing does the work. Keep the bubbles even, or lean into slightly uneven sections if you want a more relaxed look.
A Few Useful Details
- Works best on medium to long straight hair
- Clear elastics keep the look cleaner
- A bit of dry shampoo at the roots helps the top stay lifted
This style is especially good when your hair is long enough to feel heavy. The segmented shape breaks up the weight. It also photographs well, which matters less than it used to, but still matters enough.
12. Curtain Bangs and Straight Lengths
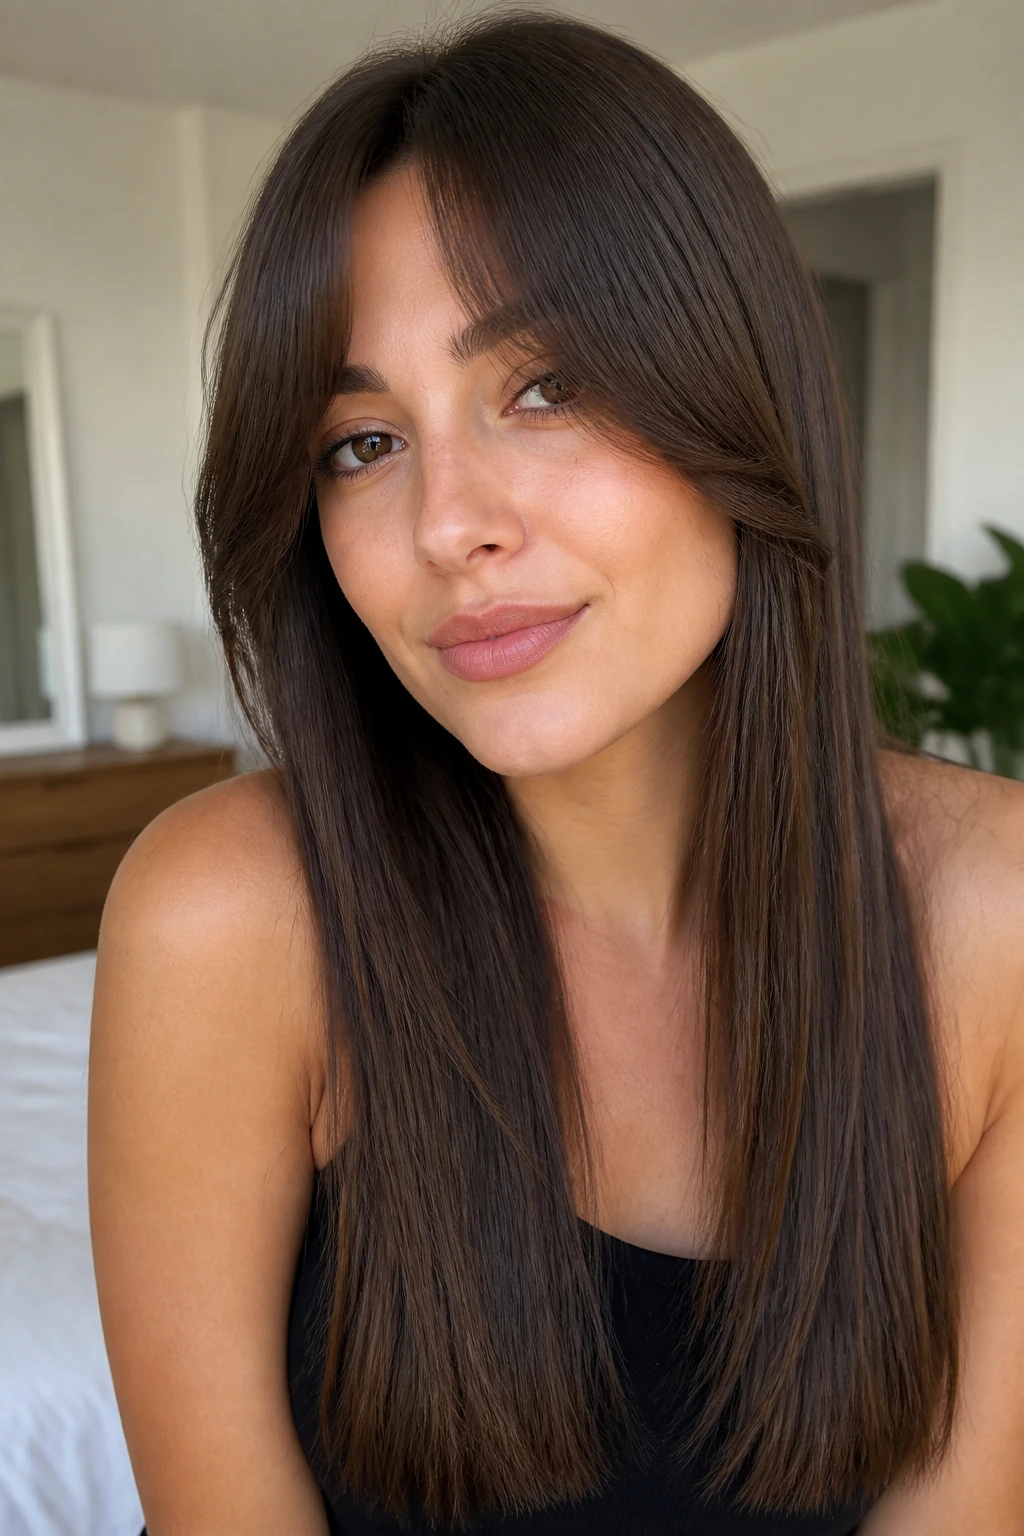
Curtain bangs can be a gift on straight hair when the cut is done well. They frame the face without swallowing it, and they soften a long straight line that might otherwise feel too severe.
The trick is the length. Curtain bangs should usually start shorter near the center and sweep longer toward the cheeks. When you blow-dry them, bend them side to side with a round brush or even just your fingers and a dryer nozzle. If you let them dry completely straight down the middle, they can split in a way that looks awkward rather than cool.
What to Expect at the Mirror
- Bangs need regular trimming to keep the shape open
- A little dry shampoo helps them stay lifted
- Straight lengths behind the bangs keep the whole style balanced
Curtain bangs are not a lazy choice. They take more upkeep than people expect. But on straight hair, the payoff is real because the line stays clean and the face-framing shape is easy to see.
13. Rope Braid Ponytail
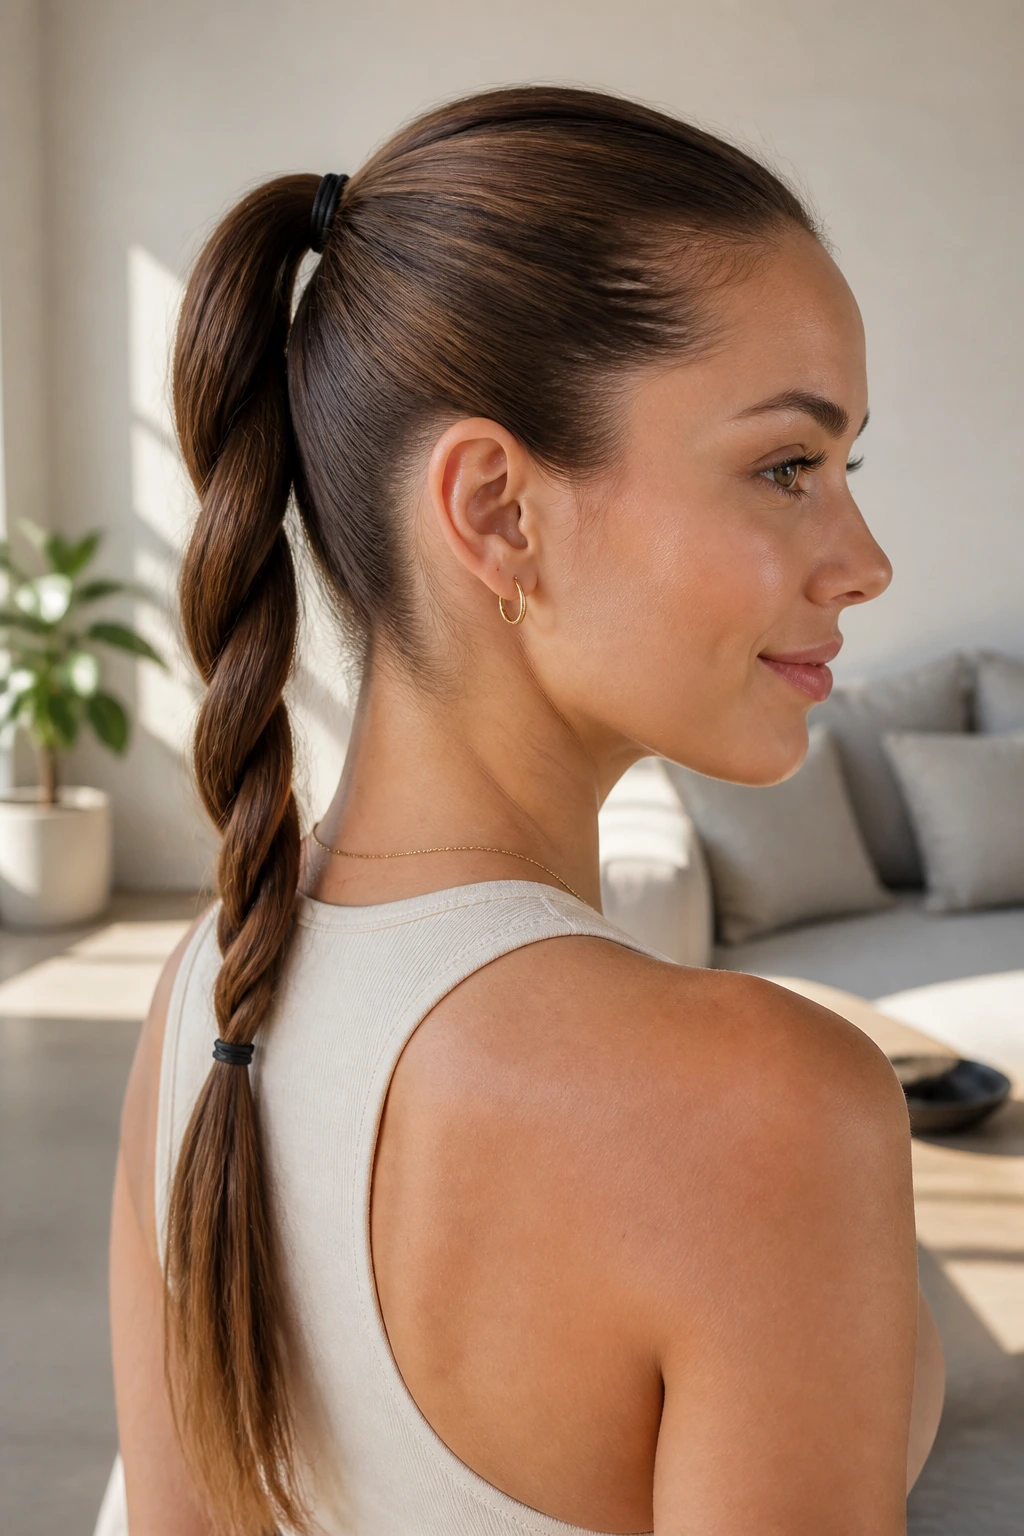
Braids are not only for hair with natural texture. Straight hair can make a rope braid look cleaner than almost any other texture because the strands stay smooth and the twist shows up clearly.
Pull the hair into a ponytail first, then split it into two equal sections. Twist each section in the same direction, usually outward, then wrap them around each other in the opposite direction. Tie the end with a small elastic. If you do it right, the braid looks like a twisted cord instead of a classic plait.
The style works well when you want something more interesting than a ponytail but less fussy than a full braid. It also holds better on straight hair than people expect because the twist creates its own grip.
A little hairspray on the palms before you smooth the top can help if your hair slips. Tiny detail. Big difference.
14. Braided Crown
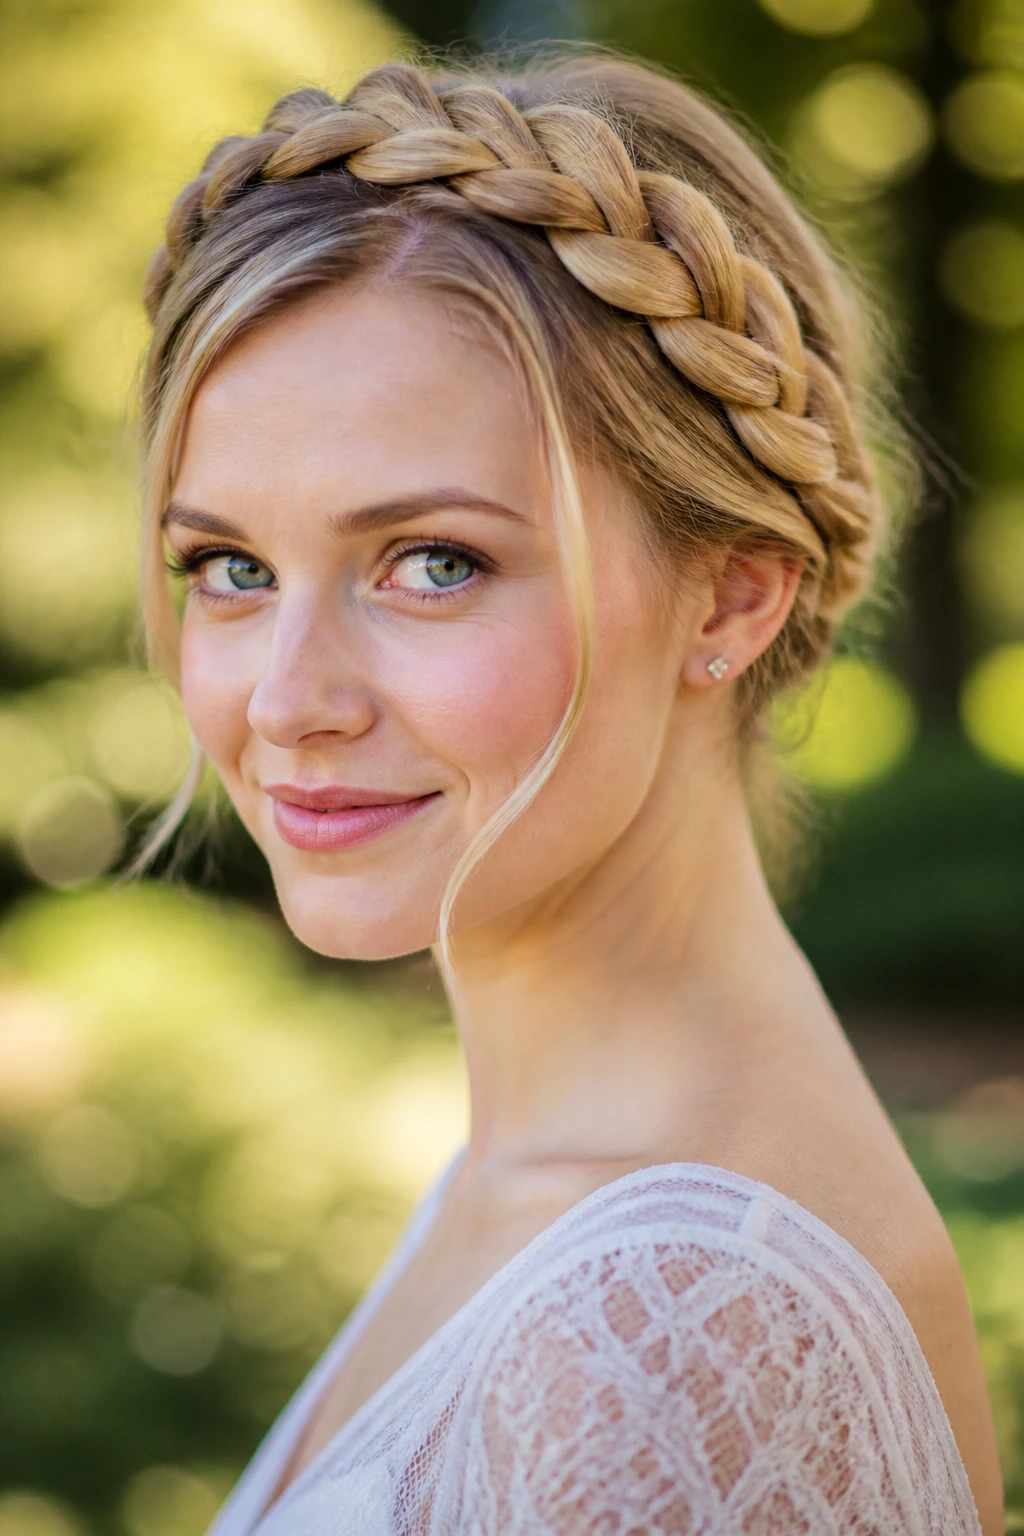
Need your hair off your face without a hard bun line? A braided crown does that job nicely. It wraps the hair around the head in a way that feels softer than a French braid and more finished than a simple clip.
Start a braid just behind one ear, following the hairline around the back of the head. As you move across, keep the braid snug but not tight. Pin the end under the braid on the opposite side so the finish disappears. The hair left loose in the back can stay straight, which is part of the charm.
Pin Placement Matters
- Use small bobby pins that match your hair color
- Hide the first pin under the braid itself
- Cross the final two pins for better hold
This style shines on medium to long straight hair because the smooth texture keeps the braid visible. If the hair is very slippery, a mist of texture spray before braiding makes the whole thing easier to manage.
15. Half-Up Braided Crown
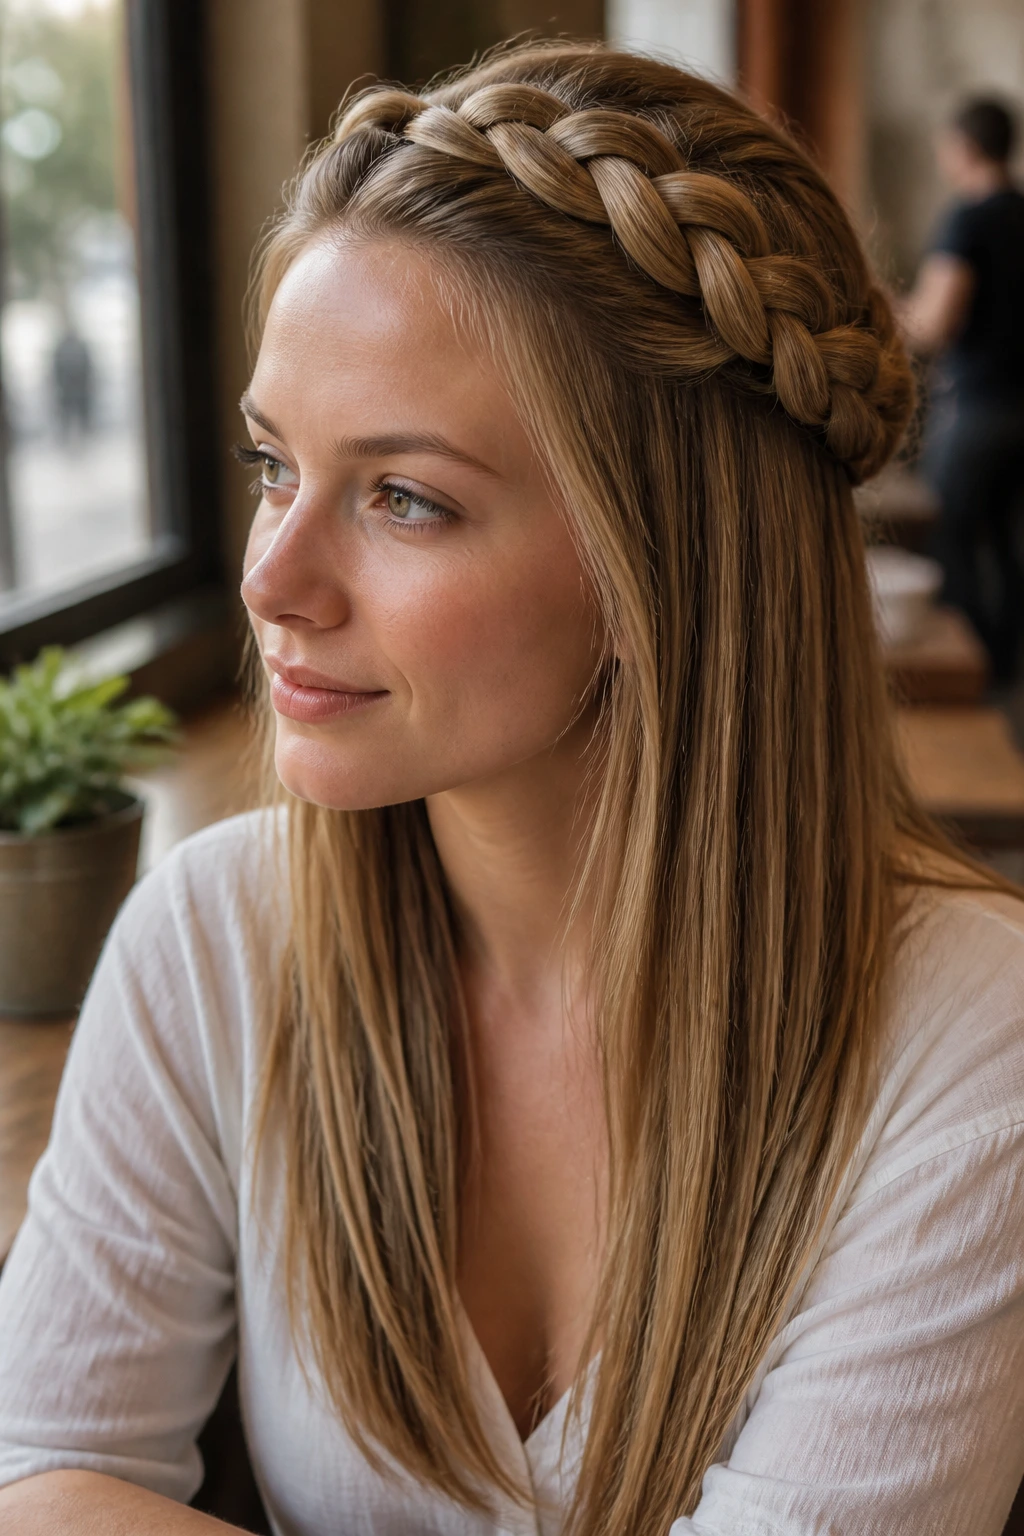
A half-up braided crown gives you the shape of a crown braid without tying up the whole head. Straight hair often looks especially good with this because the loose lengths below stay sleek while the braided top section adds pattern.
Take the top half of the hair, split it into two sections, and braid each side back toward the center. Pin them together behind the crown, then leave the rest straight. You end up with a soft frame at the top and clean length below. It’s pretty, but not fussy.
This is a solid choice when you want some detail near the face but still want to show off the length. It also works on hair that is too short for a full crown braid. That’s useful. A lot of styles forget about that middle zone.
A few face-framing pieces left out near the temples can soften the whole thing. Keep them thin. Thick pieces make the braid lose its shape.
16. French Twist
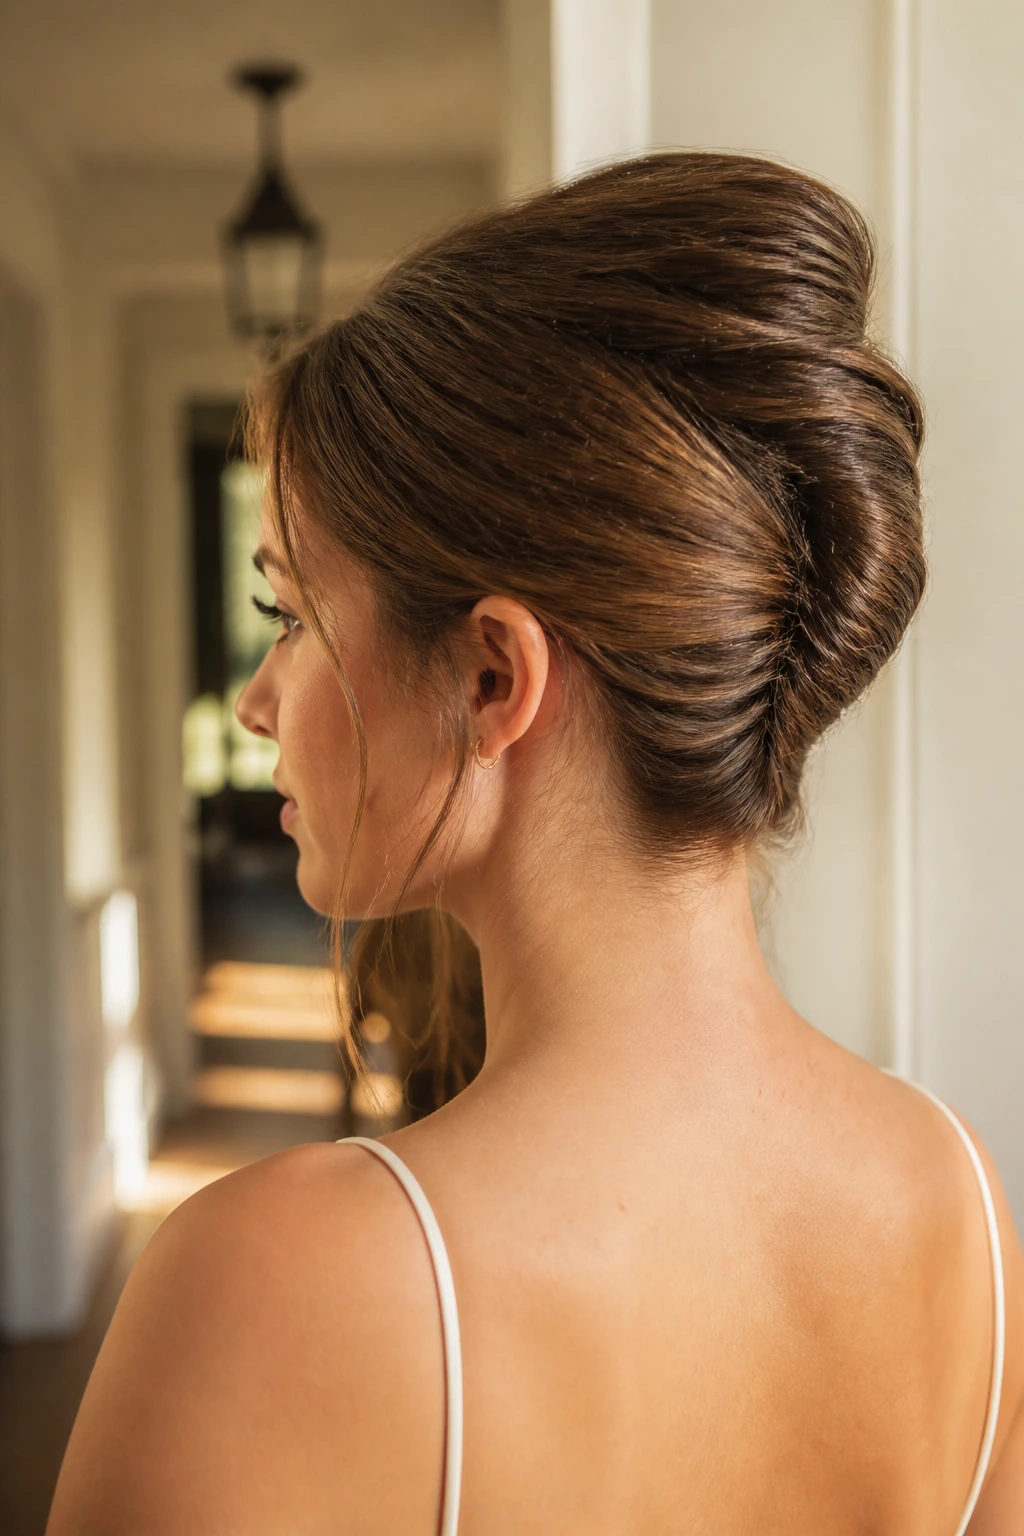
A French twist sounds formal because it is formal, but straight hair makes it easier than many people think. Smooth strands slide into place neatly, which helps the twist stay clean instead of lumpy.
Gather the hair at the back, twist it upward, and tuck the ends into the fold. The shape should sit vertically, like a narrow roll against the head. Use bobby pins along the seam, not just at the top, so the weight is spread out. A little texture spray at the roots helps the hair grip before you start.
What Helps It Stay Put
- Lightly rough up the crown with a comb
- Use pins in the direction of the twist
- Keep the nape tight before folding upward
The French twist is a good reminder that straight hair does not need extra fluff to look polished. It needs clean lines and a bit of hold. That’s it. The rest is just pinning.
17. Top Knot with Loose Front Pieces
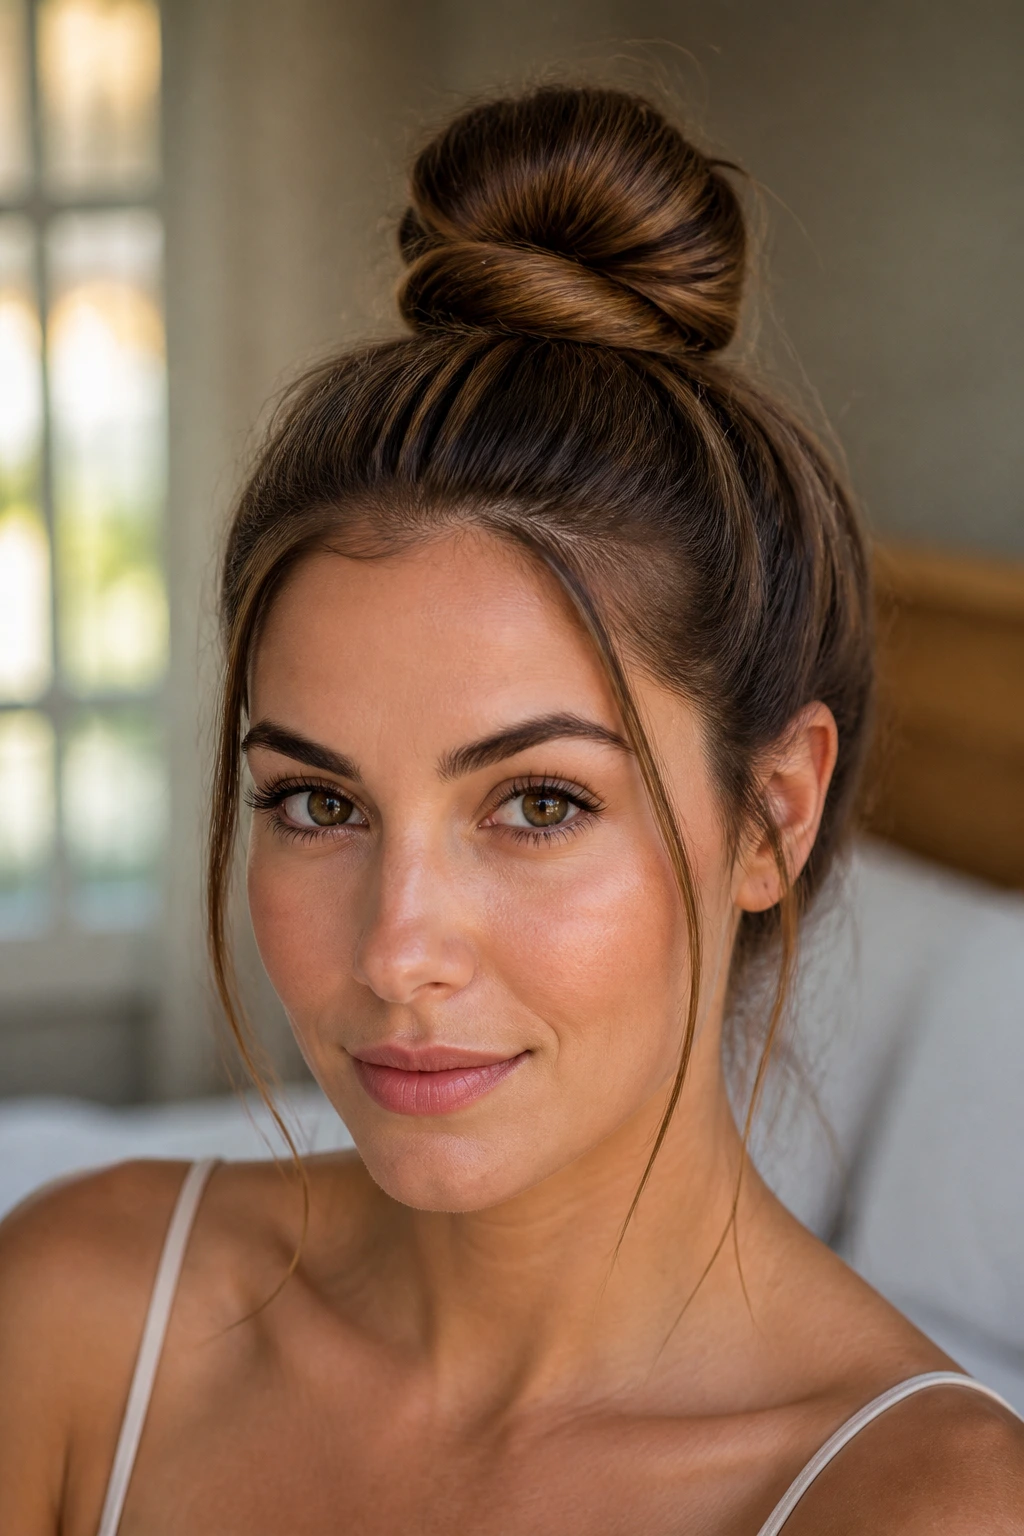
A top knot can look lazy, or it can look deliberate. The difference usually comes down to the front pieces. Leave two thin sections out near the temples, and the whole style softens without losing shape.
Pull the rest of the hair high on the head, twist it into a knot, and secure it with an elastic and a couple of pins. Then tuck the loose pieces around the face so they fall naturally. If the knot sits too flat, gently lift it once it’s secure and let a few strands loosen around the base.
Keep the Shape Up
- Use a small elastic first, then pins
- Don’t over-tighten the crown
- Let the knot stay slightly textured
Straight hair can make a top knot look compact and neat, which is useful if you want something fast but still clean. It’s one of those styles that works for errands, work, and dinner without needing a change in between.
18. Pin-Straight Glass Hair
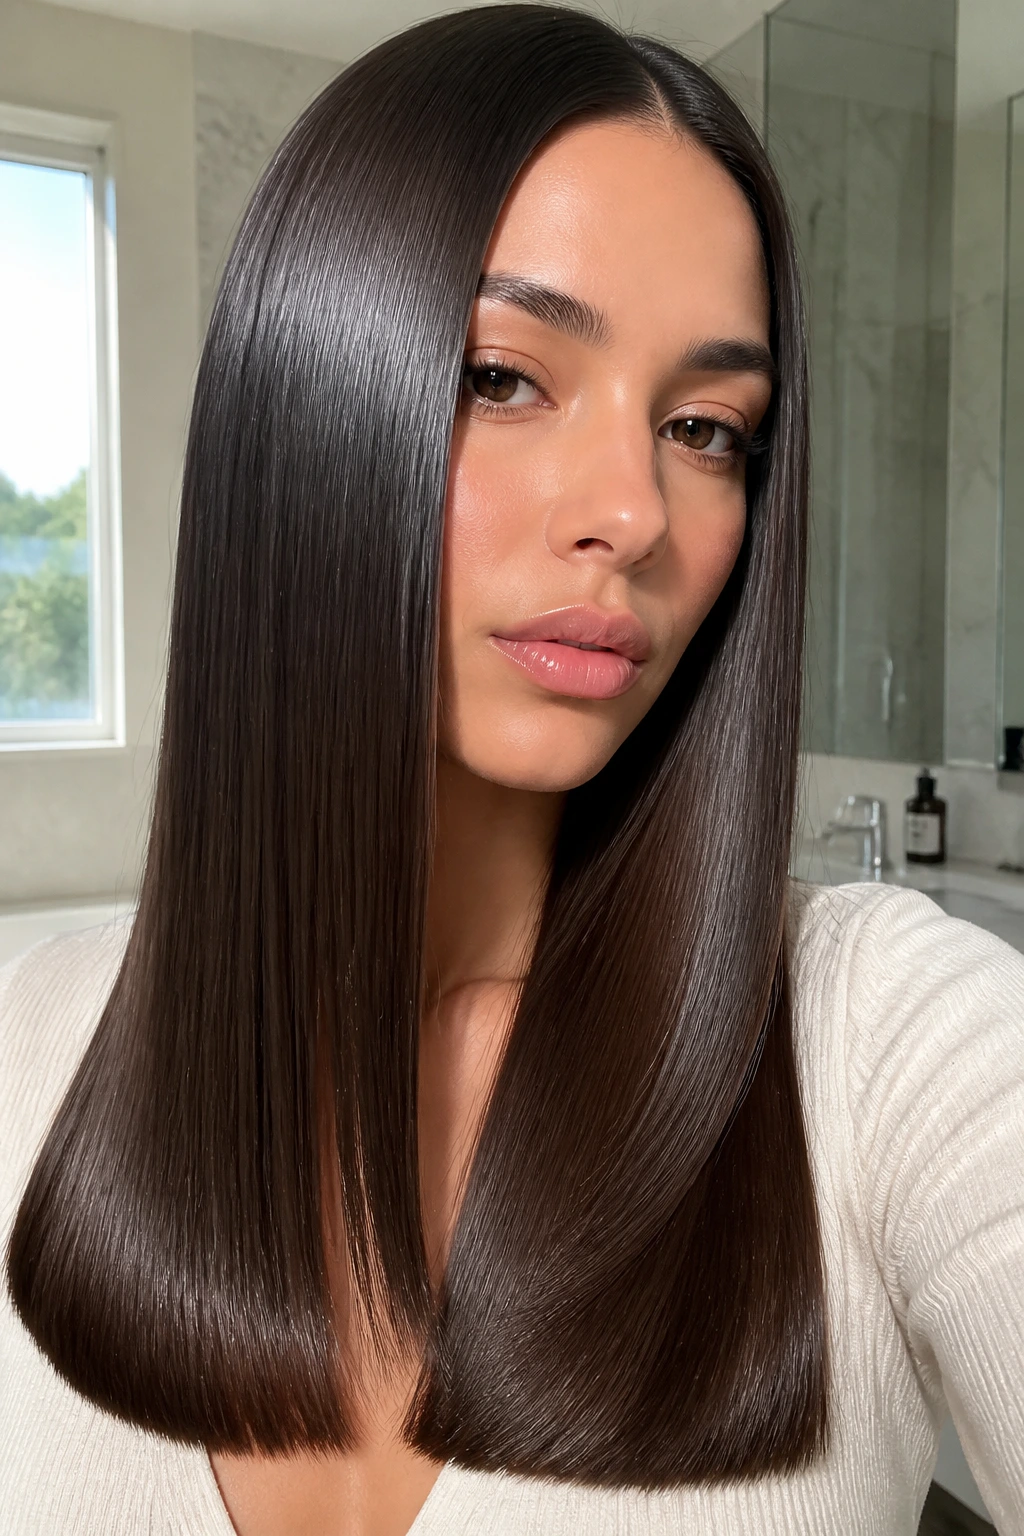
Smooth, cool, and almost mirror-like. That’s the effect people chase with glass hair, and straight hair is the texture that gets there most naturally when the cut and finish are good.
Start with heat protectant on damp hair, blow-dry with a nozzle for direction, then use a flat iron in 1-inch sections. Move slowly enough to smooth the strand, but not so slowly that the hair gets cooked. Finish with a pea-sized amount of shine serum on the mid-lengths and ends only. The roots should stay light.
This style looks best when the haircut is healthy. Split ends interrupt the shine fast. So do heavy layers that fray at the bottom. If your ends are dry, trim first and style second. That order matters.
Glass hair is not about piling on products. It’s about clean prep, a good cut, and patient heat work. The result is quiet, sharp, and harder to fake than people assume.
19. Flat-Iron Bend at the Ends
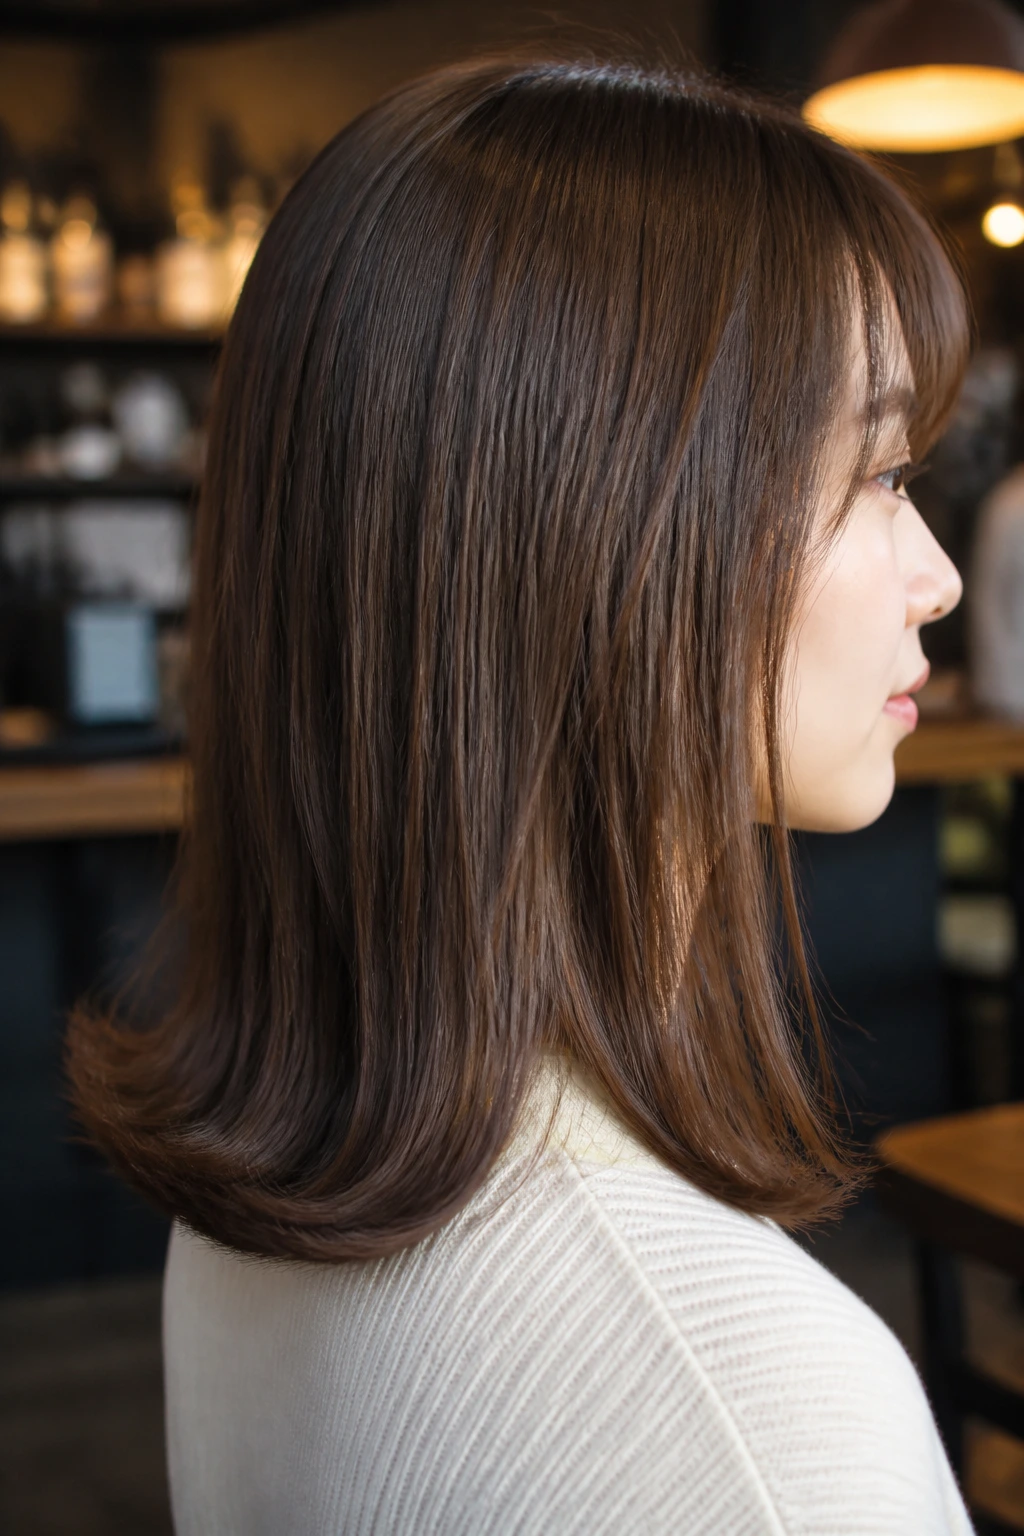
Straight hair does not need to be stick-straight from root to tip. A tiny bend at the ends can stop it from looking stiff, and that’s especially useful when the cut feels too rigid on its own.
Use a flat iron to bend just the last inch or two inward, outward, or alternating direction from section to section. The effect is subtle, but it breaks up the line enough to give the hair a bit of movement. Keep the bend soft. You’re not making waves.
A Simple Way to Do It
- Clamp the iron about 1 to 2 inches from the end
- Rotate the wrist slightly as you pull through
- Change direction on the next section for a natural finish
This style works well on medium and long hair, especially if the ends need a little life. It’s the kind of detail that makes straight hair look styled even when everything else stays simple.
20. Side-Barrette Finish
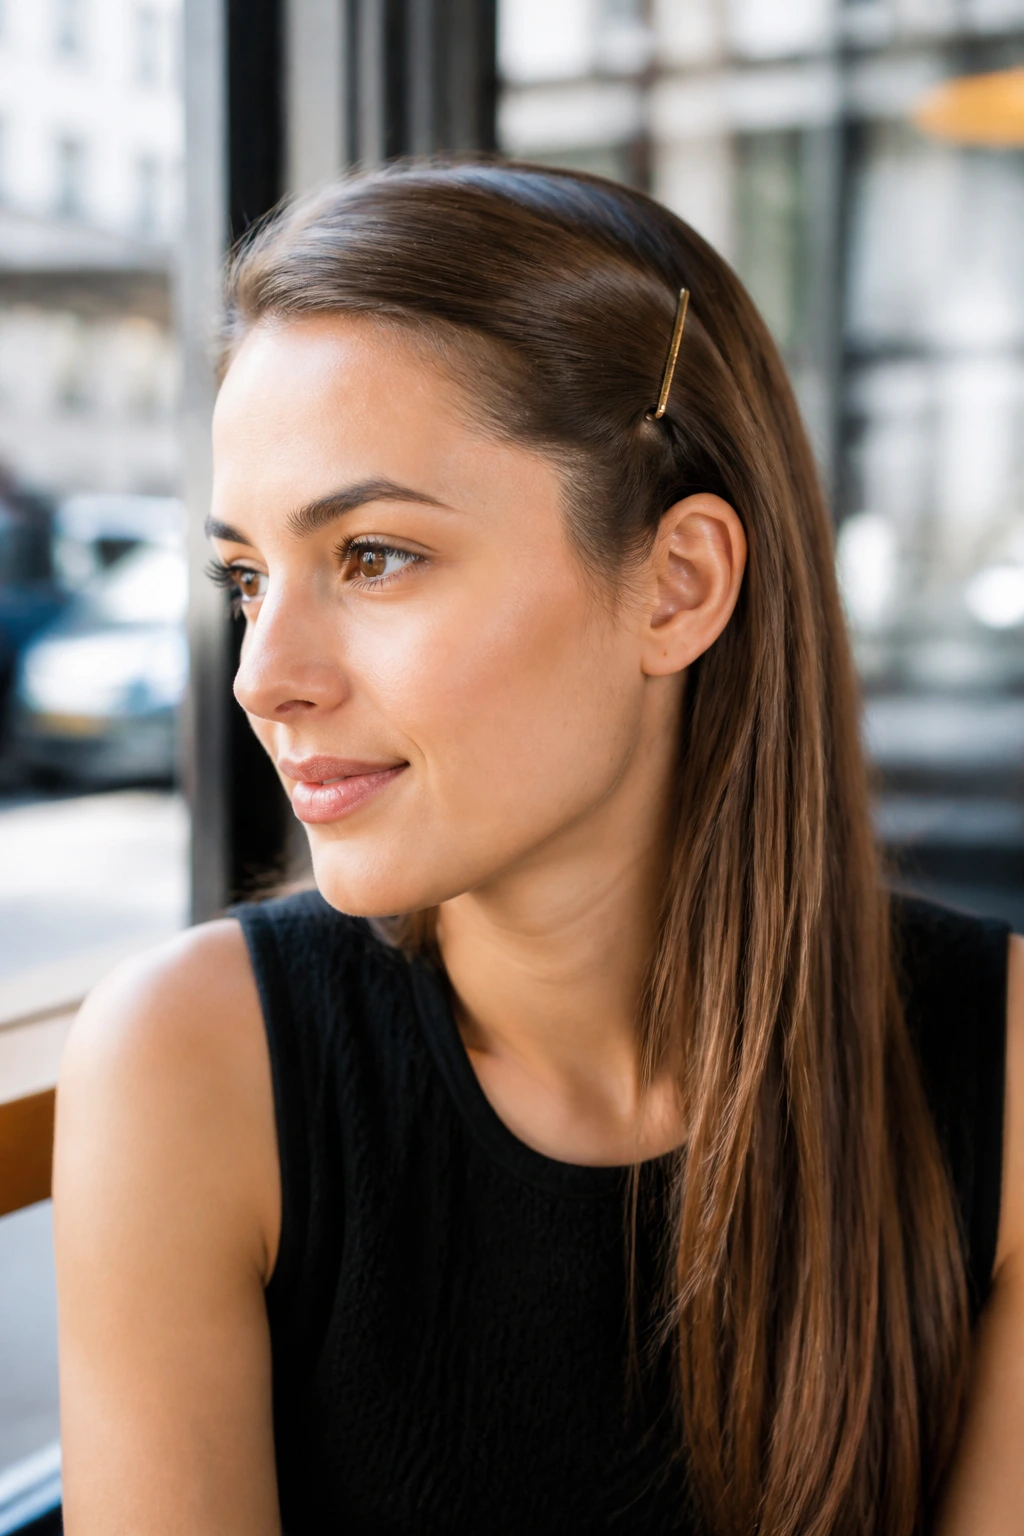
Sometimes the smallest change does the heavy lifting. A side-barrette finish takes straight hair, moves it off one side, and pins it with one strong clip or a pair of slim barrettes. That’s enough to turn basic hair into something that looks finished.
The part can be deep or only slightly off center. Gather one side back near the temple or just behind the ear, then secure it with a barrette that can actually hold the hair, not just sit there. If the hair is very smooth, mist the section lightly with texture spray first so the clip does not slide.
This style works on short bobs, long lengths, and everything between. It also makes a good last-minute fix when the rest of the hair is behaving but the front needs control. That happens more often than people admit.
If you want a cleaner finish, tuck the hair behind the ear on the clipped side and leave the rest glossy and straight. Small move. Big payoff.
