



Side hairstyles for round faces work for one simple reason: they move the eye off center. That small shift changes a lot. Add a deep part, a sweep across the cheek, or a bun that sits a touch to one side, and the face reads longer, leaner, and more sculpted without looking overdone.
I’ve always thought round faces get unfair advice. People say “add volume” or “keep it soft,” and then stop there, which is not much help when you’re staring into a mirror with a brush in one hand and a bobby pin in the other. The real trick is placement. Volume at the crown helps. Width at the cheeks usually does not. A strong diagonal line can do more than a dozen little styling tricks.
Hair texture matters too. Fine hair needs lift so the style doesn’t collapse by lunch. Thick hair needs direction so it doesn’t balloon out at the sides. Curls need shape control. Straight hair needs enough bend or tuck to keep it from going flat and wide. The styles below cover all of that, from quick weekday looks to polished updos that hold their own in a photo or under a little wind.
1. Deep Side Part With Loose Waves
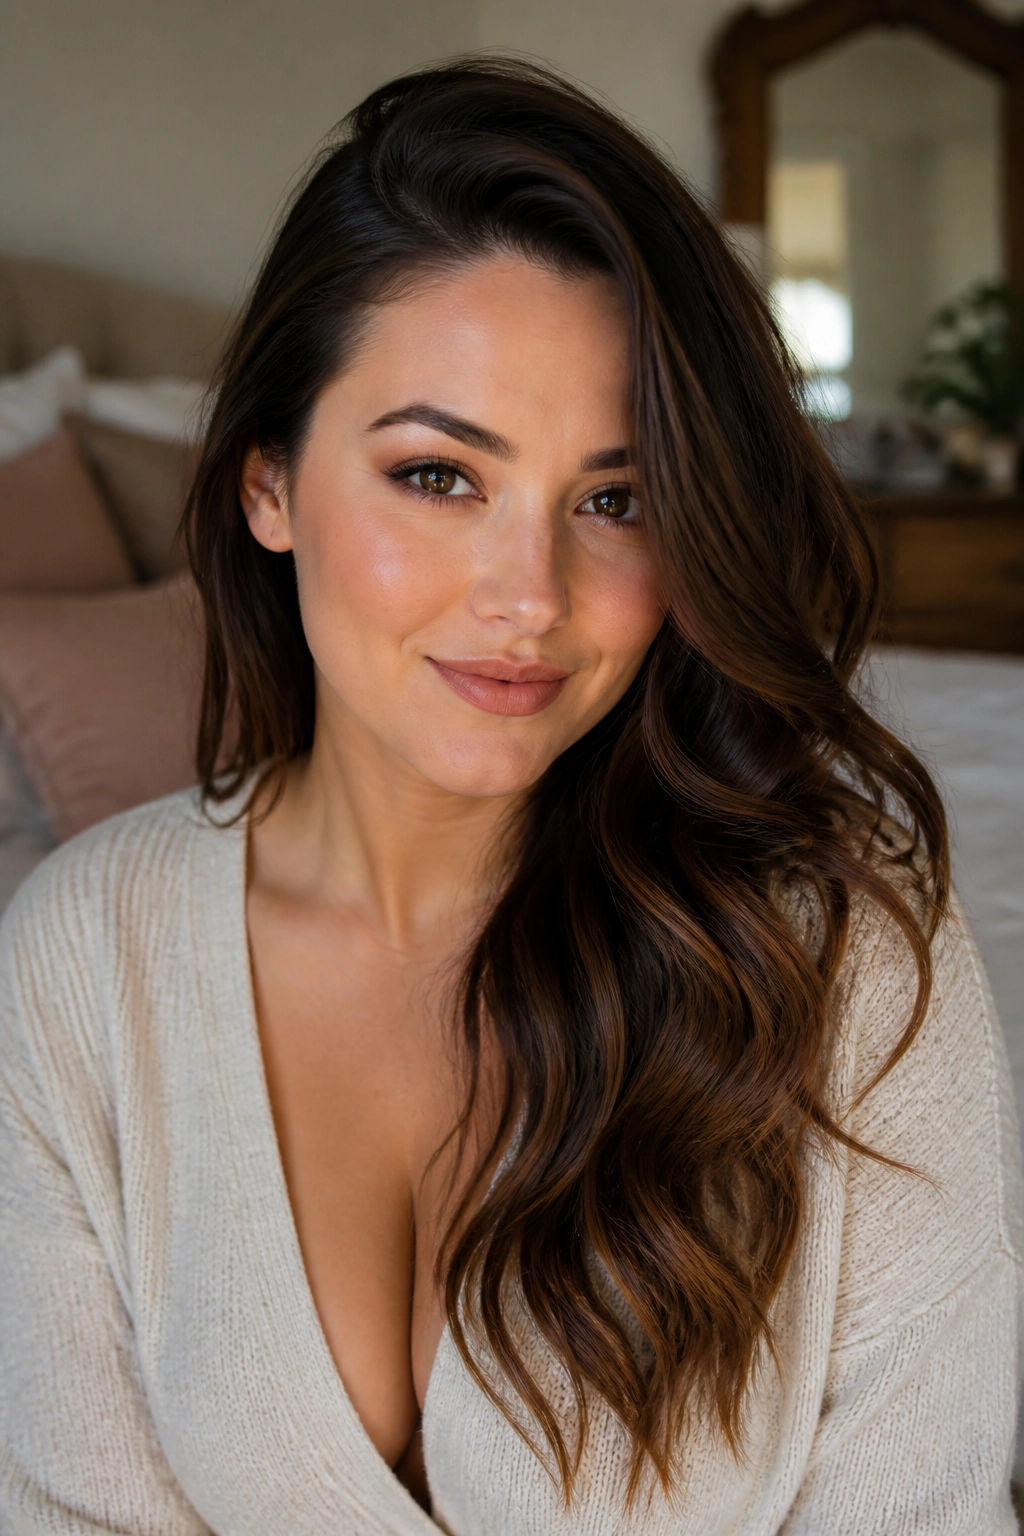
A deep side part is one of the easiest ways to change the shape of a round face fast. It draws a clean diagonal from the crown, then loose waves keep the style soft instead of boxy. The face looks a little longer because the eye keeps following that slant.
Why It Flatters a Round Face
The part should sit about 1 to 2 inches off center, ideally above the arch of your eyebrow rather than directly over the pupil. That tiny shift is doing the heavy lifting. The wave pattern should start below the cheekbone, not right at it, so the widest part of the hair doesn’t land exactly where the face is broadest.
Loose bends work better than tight curls here. Tight ringlets can add width. Soft, brushed-out waves give movement without puffing out at the sides.
- Use a 1.25-inch curling iron or wand.
- Curl sections away from the face for the first layer.
- Leave the last 1 to 1.5 inches straight for a relaxed finish.
- Mist the roots lightly, then use a flexible-hold spray at the ends.
Best trick: keep the bigger wave mass on the side with less cheek width. It sounds fussy, but it changes the whole balance.
2. Side-Swept Pixie With Piecey Texture
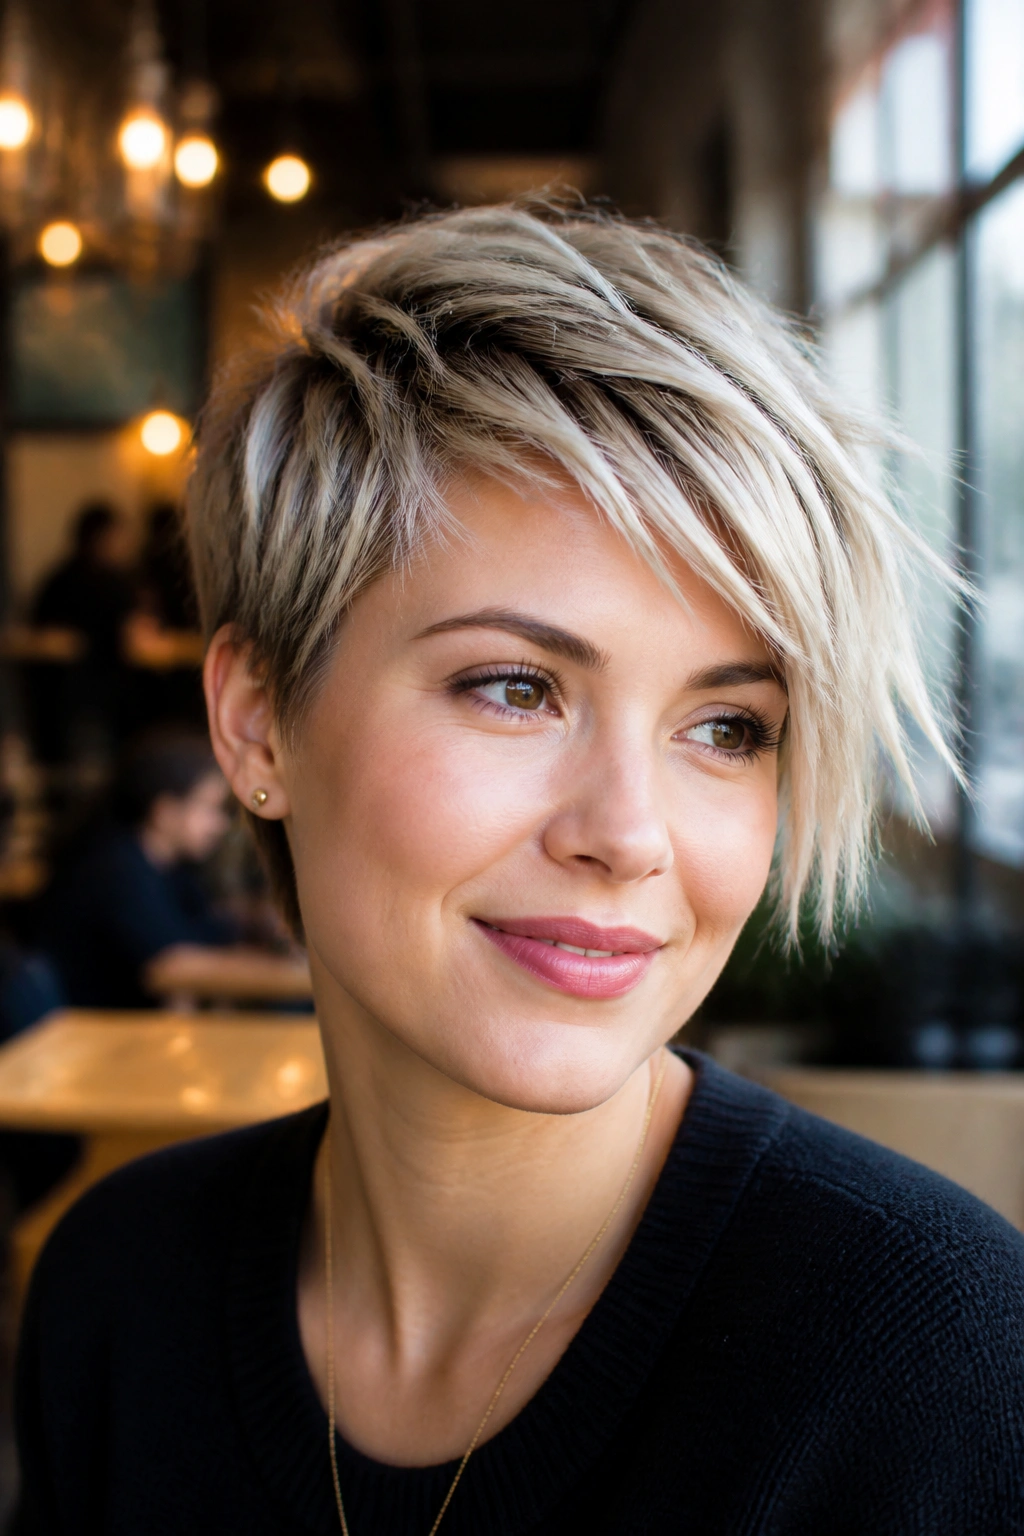
A pixie can flatter a round face better than a lot of longer cuts. Seriously. The reason is the shape: short sides, longer top, and a sweep that breaks up the face instead of framing it evenly on both sides. That unevenness is your friend here.
The top should have enough length to brush across the forehead, usually around 2 to 4 inches, depending on the cut. Too short and it turns choppy in the wrong way. Too long and it starts to flop. The sweet spot is a little messy, a little sharp, and never too neat.
Work a pea-sized amount of matte paste through dry hair, then push the front section to one side with your fingers. A comb can make it look too stiff. Fingers leave it softer, which matters on a round face because hard edges can look severe.
If your hair grows fast, schedule a trim every 4 to 6 weeks. Pixies lose their shape quickly when the nape gets bulky.
3. Asymmetrical Bob With One Tucked Side
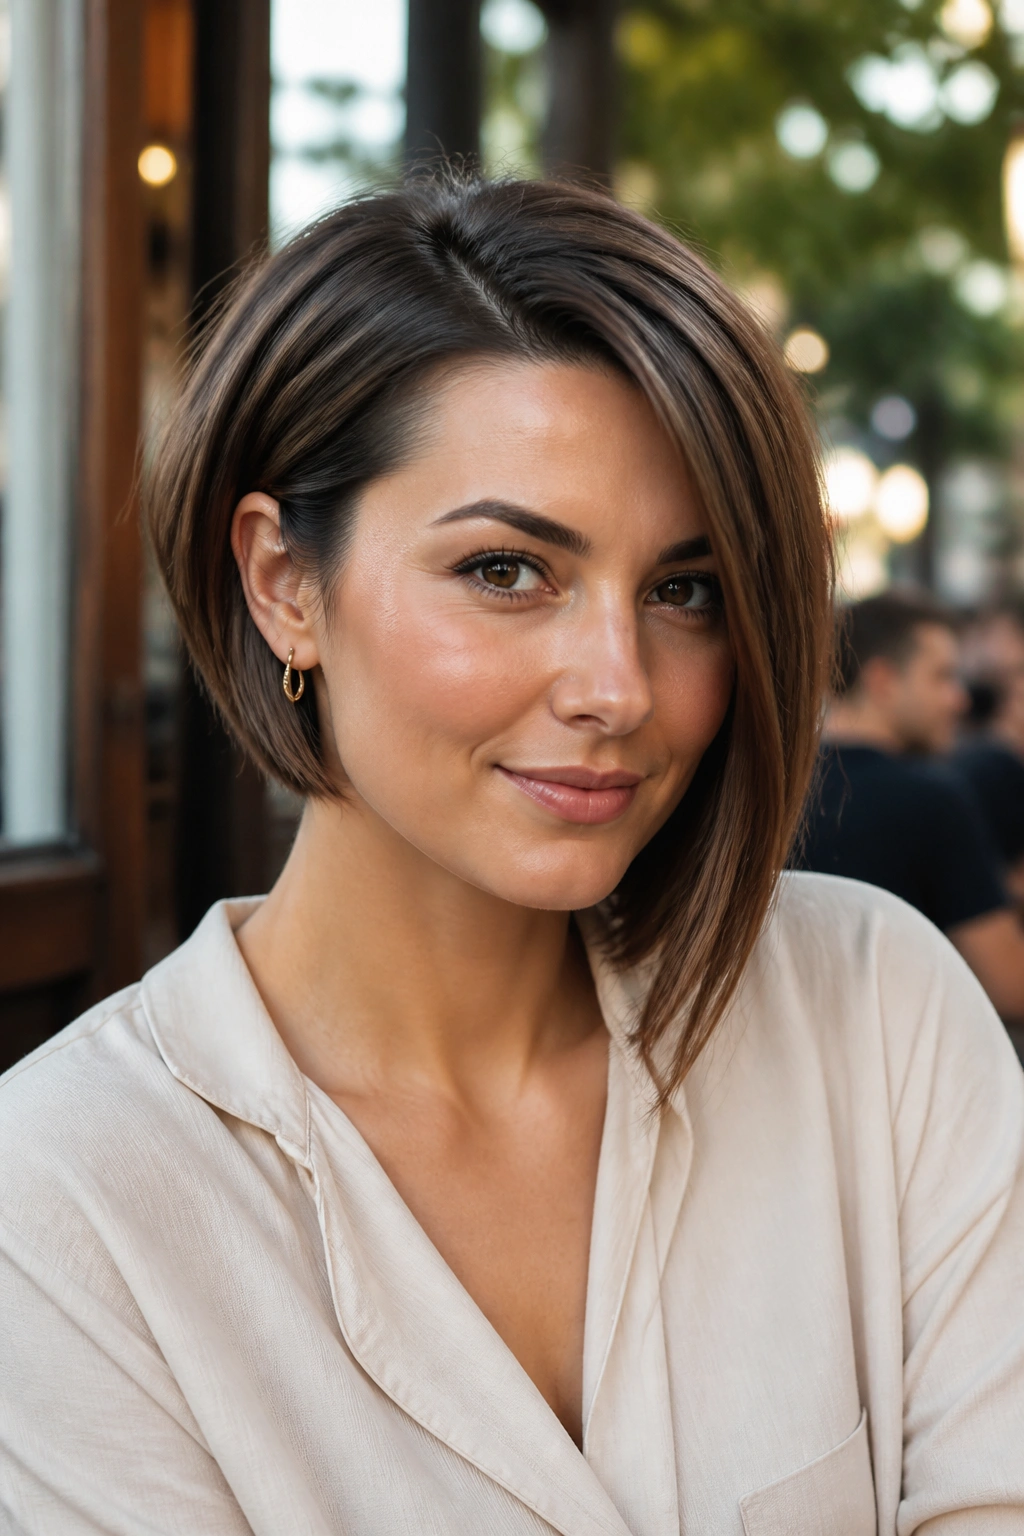
Why does one longer side make such a difference? Because the eye follows the line of the hair before it studies the face. An asymmetrical bob gives you that long diagonal immediately, which is exactly what a round face responds to.
The longer side should usually skim somewhere between the jaw and collarbone, while the shorter side can sit closer to the cheek or just below the ear. That contrast keeps the shape from feeling too even. Evenness is what makes a bob read wider.
How to Style It
Blow-dry with a round brush, turning the ends under just a little. Then tuck the shorter side behind the ear and leave the longer side loose. If your hair is flat, mist a root-lift spray at the crown before drying. That keeps the head from looking wide at the sides.
A tiny bend at the ends works better than a full curl. You want movement, not a little helmet. If you wear earrings, this is one of those cuts that makes them matter more because the tucked side opens the face.
4. Low Side Bun With Soft Tendrils
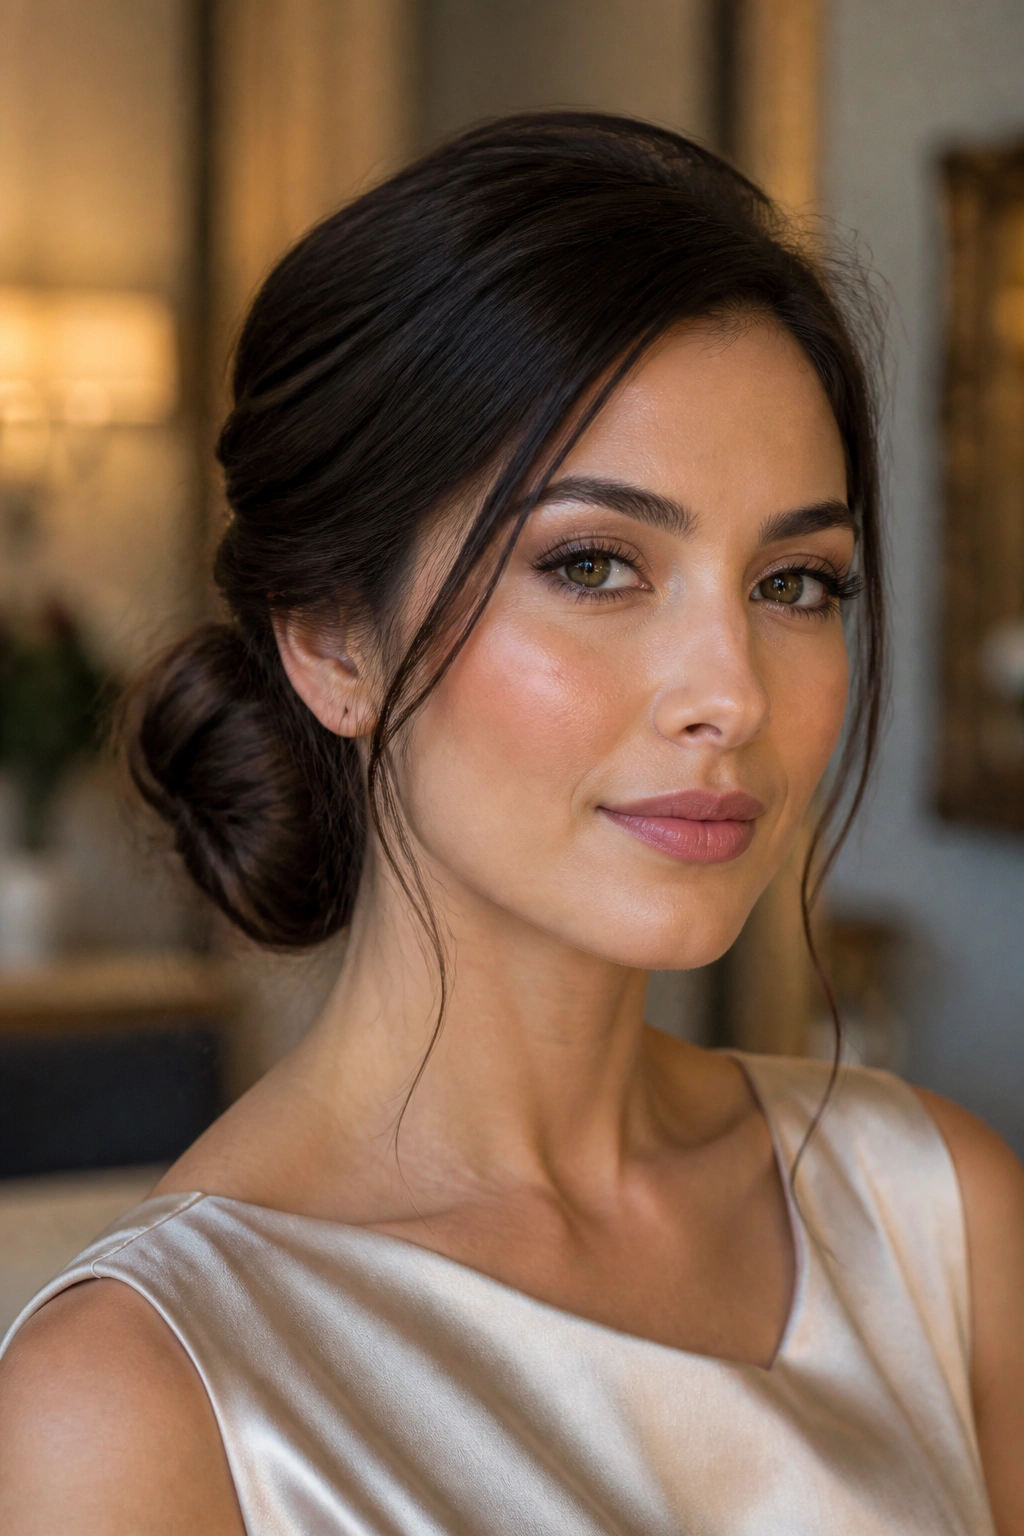
If you need something polished for an event and you do not want your face trapped inside a tight center-part bun, this is the move. A low side bun gives the face a gentle diagonal line and keeps the whole style sitting lower and softer than a classic top bun.
The bun should live just below one ear, not at the back of the head. That placement matters. A bun parked in the middle can make the face look broader. One shifted to the side gives you shape and a little attitude without feeling dramatic.
- Leave 2 thin tendrils near the temples.
- Keep the crown lightly lifted before you pin.
- Use 6 to 10 bobby pins, crossing them in an X if your hair is thick.
- Smooth the top with a small amount of cream, not heavy gel.
If your hair is slippery, prep with texture spray first. Otherwise the bun can slide lower than you planned, and that is never a fun surprise halfway through the night.
5. Side Braid That Starts Behind the Ear
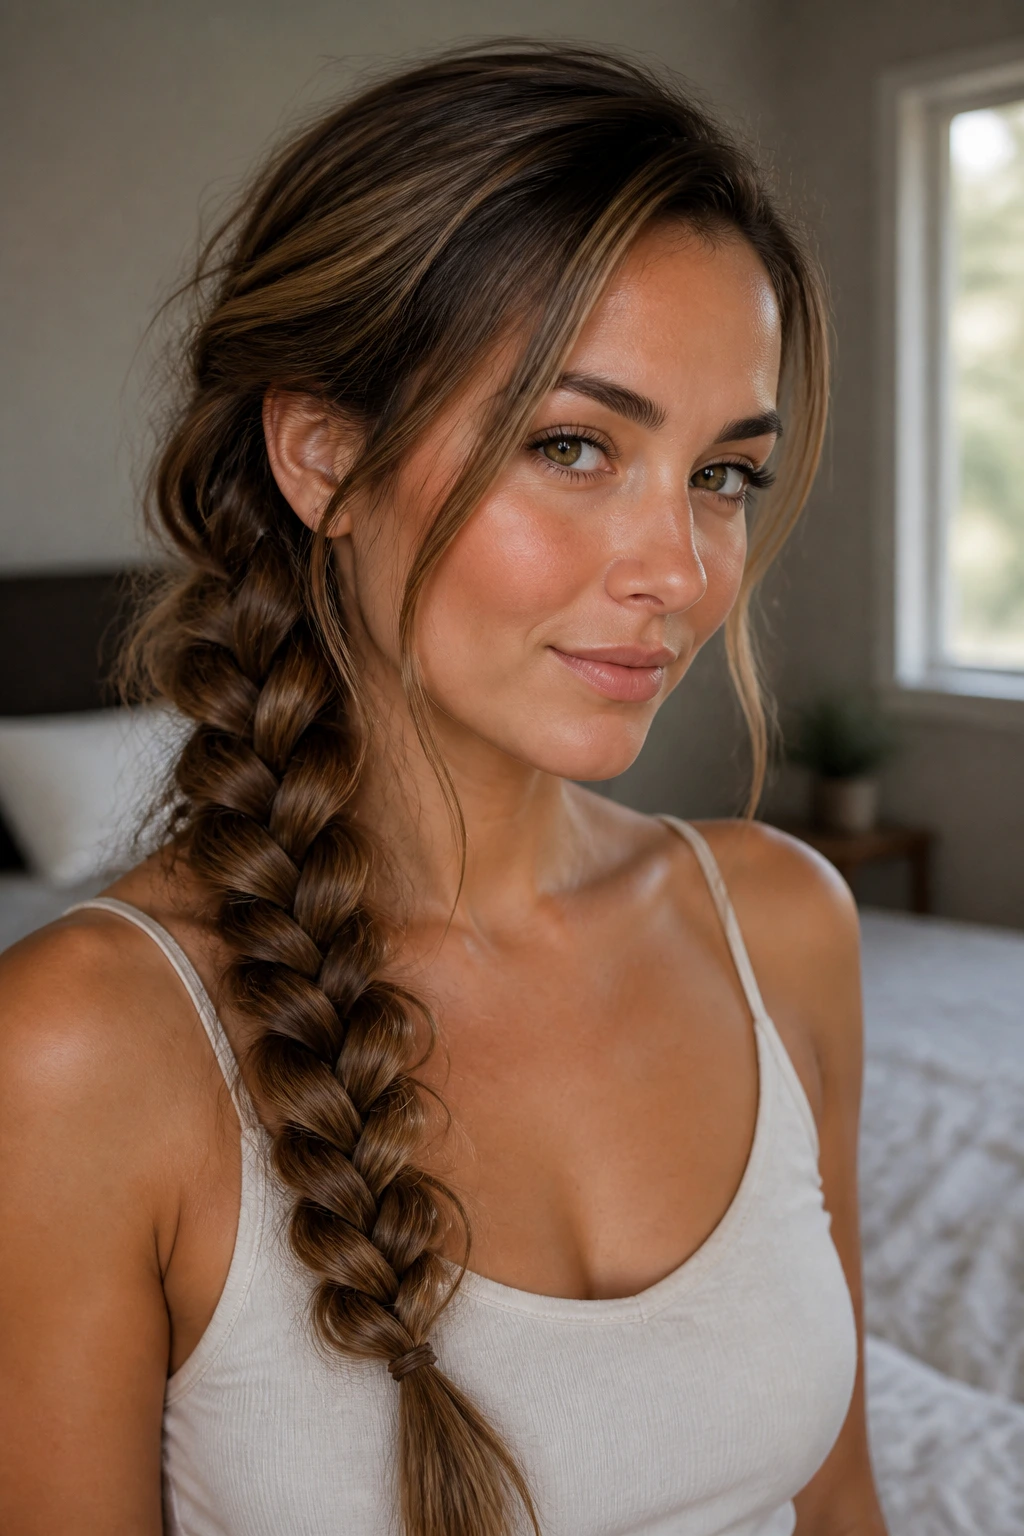
A side braid sounds simple, and it is, but the placement changes everything on a round face. Start it behind the ear rather than right at the temple, and the braid falls in a long line that travels down the body instead of spreading across the cheeks. That line is doing subtle face work.
Loosen the braid after you finish it. Not so much that it falls apart, but enough that it has thickness. A tight braid can feel severe. A gently pancaked braid looks fuller and softer, which is especially useful if your hair is fine.
This style works nicely on second-day hair because a little grit helps the braid hold. If your hair is freshly washed and slippery, rough-dry the roots first or dust a dry texturizing powder near the crown. The braid will sit better and stay more controlled.
Keep the first few sections loose around the hairline. If you pull the braid too tight at the side of the face, it can create the very width you were trying to avoid. Funny how that happens.
6. Side Ponytail With Crown Lift
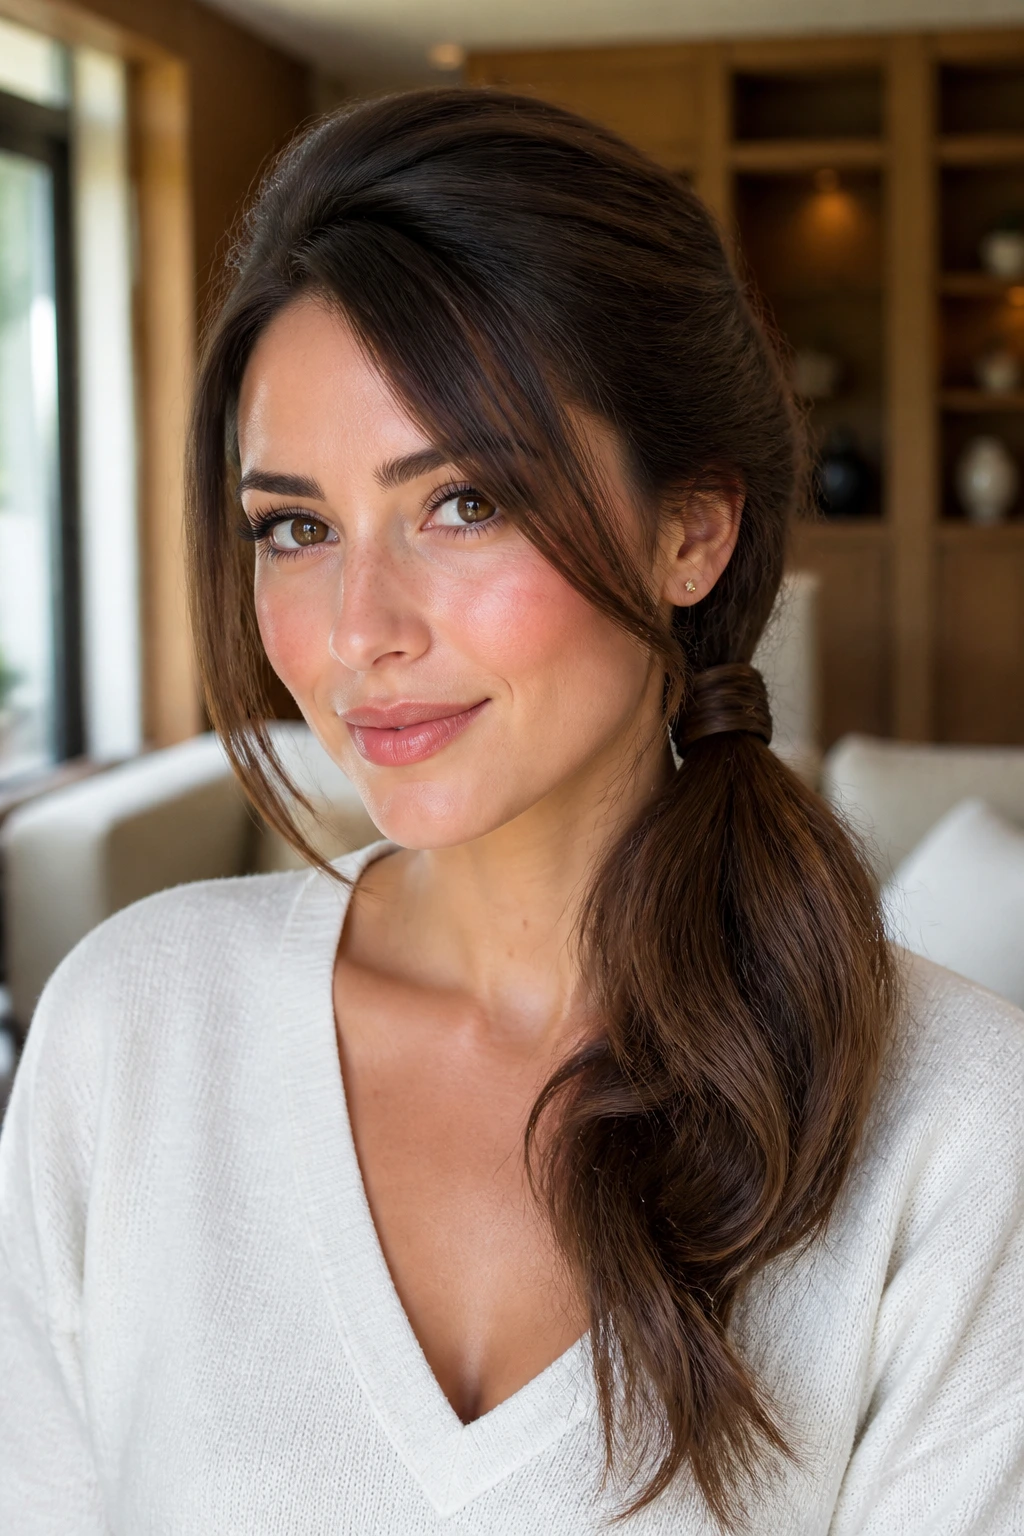
A side ponytail is basically a regular ponytail with more personality and less symmetry. That matters. Round faces usually look better when the hair travels in one direction instead of sitting evenly on both sides of the head.
The crown needs a little lift before the ponytail goes in. You do not need giant tease or a crunchy finish. Just a light push at the roots, enough to keep the top from collapsing. Then bring the ponytail over one shoulder or just below the ear, depending on how formal you want it to feel.
What makes this version better than a low center ponytail is the shape near the face. A center ponytail can create a straight horizontal line. A side ponytail makes the hair fall diagonally, which is softer and more flattering for a fuller cheek area.
Wrap a small strand around the elastic if you want it to look finished. That tiny detail does more than people think. It makes the ponytail look intentional instead of rushed.
7. Hollywood Waves Swept Over One Shoulder
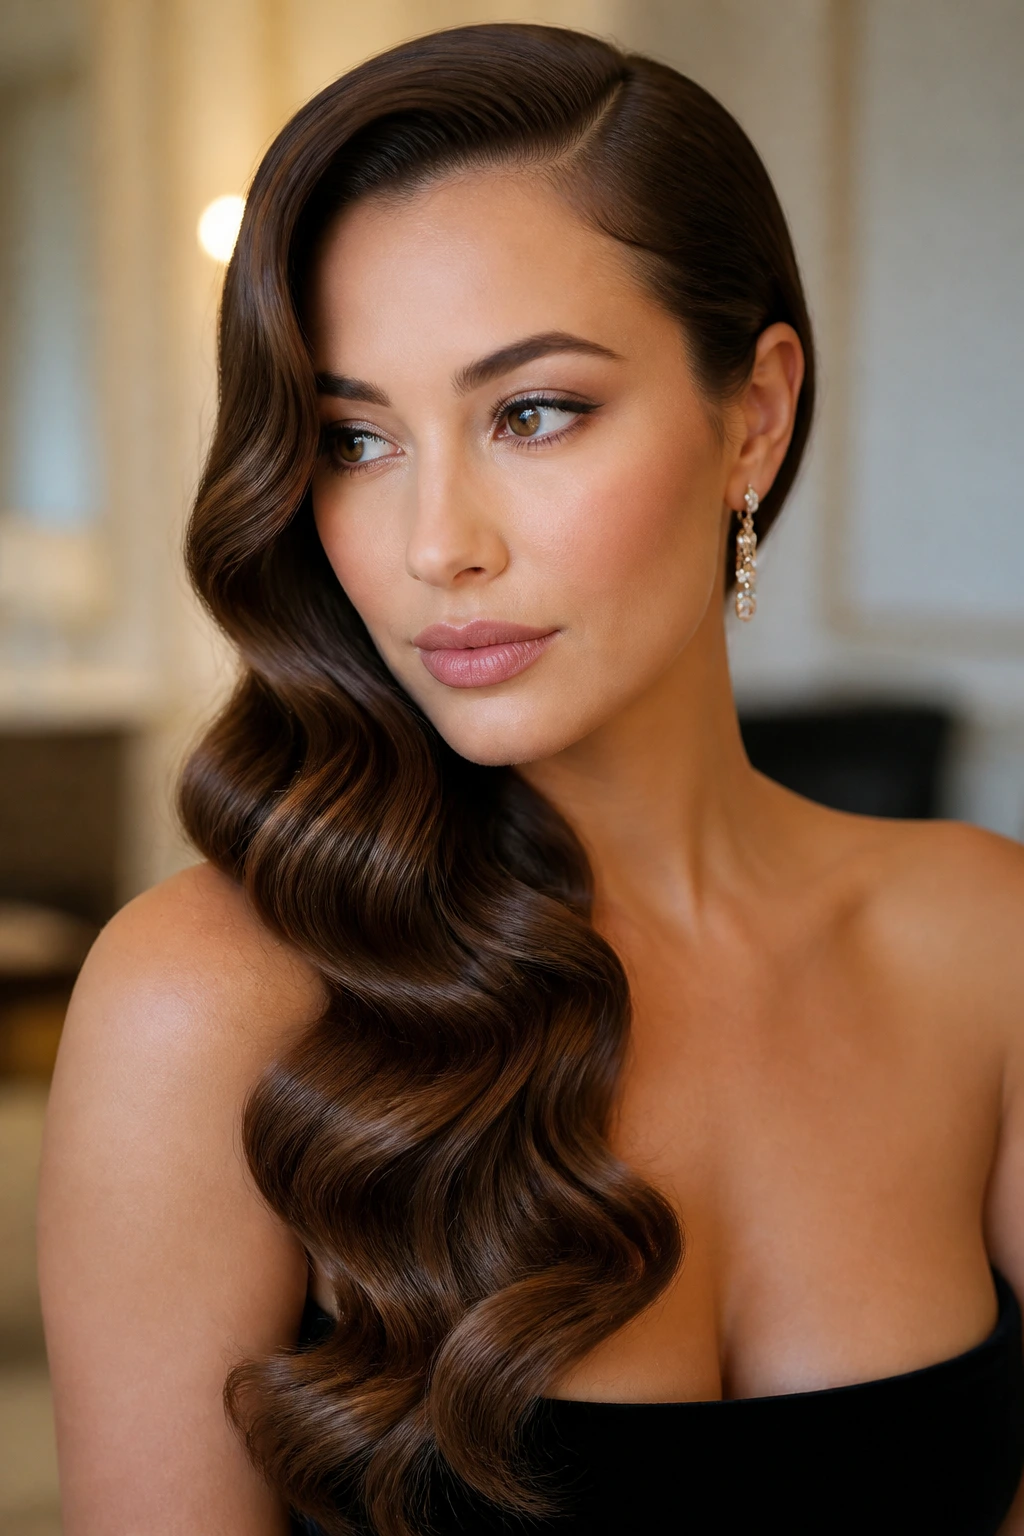
Hollywood waves are old-school for a reason: they know how to carve shape into a face without screaming for attention. Sweeping the entire wave pattern over one shoulder gives you a long, elegant line that works beautifully on round faces.
What Makes It Work
The trick is consistency. Curl each section in the same direction, then let the hair cool completely before brushing it out. If you brush too soon, the wave turns fluffy at the sides, and fluffy is not the goal here. You want a smooth S-shape that falls in one direction.
Quick Style Notes
- Use a 1-inch curling iron for a tighter, more polished wave.
- Pin each curl flat while it cools.
- Brush with a boar-bristle brush or wide paddle brush.
- Finish with a light shine spray, not a heavy gloss.
Good move: pin the denser side behind one ear with a flat clip. It keeps the wave from spreading across the face and helps the style stay one-sided.
8. Textured Shag With Side Fringe
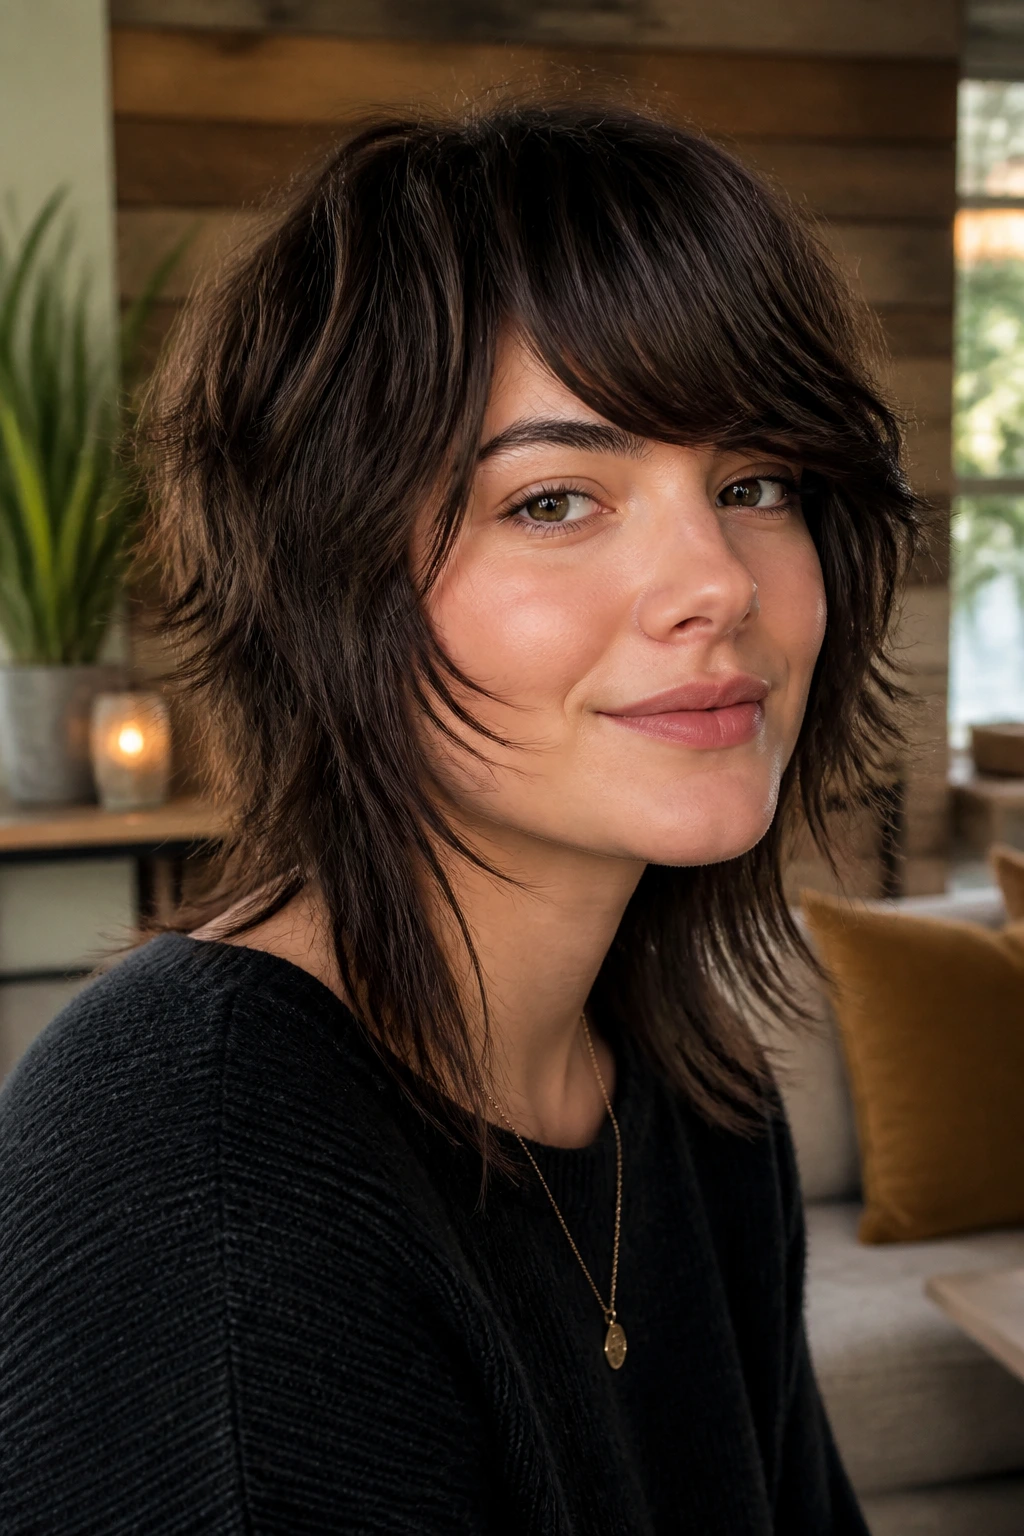
A shag can be the safest haircut in the room for a round face. That sounds backward, but it makes sense once you see how the layers sit. Instead of building width at one level, the cut breaks the outline into pieces and lets the hair move around the face.
The side fringe should start a little higher than a blunt bang would, then fall across the forehead with uneven ends. That prevents a heavy horizontal line. The layers around the cheek should be soft, not bulky. Too much fullness there will push the face outward. Too little and the shag loses its point.
Use a salt spray or lightweight mousse on damp hair, then scrunch and diffuse until it’s about 80% dry. After that, shake the roots loose with your fingers. Don’t brush it out unless you want the whole shape to puff up.
This cut is especially good if you like a bit of mess. It does not need to look perfect. In fact, perfect would be the wrong mood.
9. Sleek Side-Parted Straight Hair With Ear Tuck
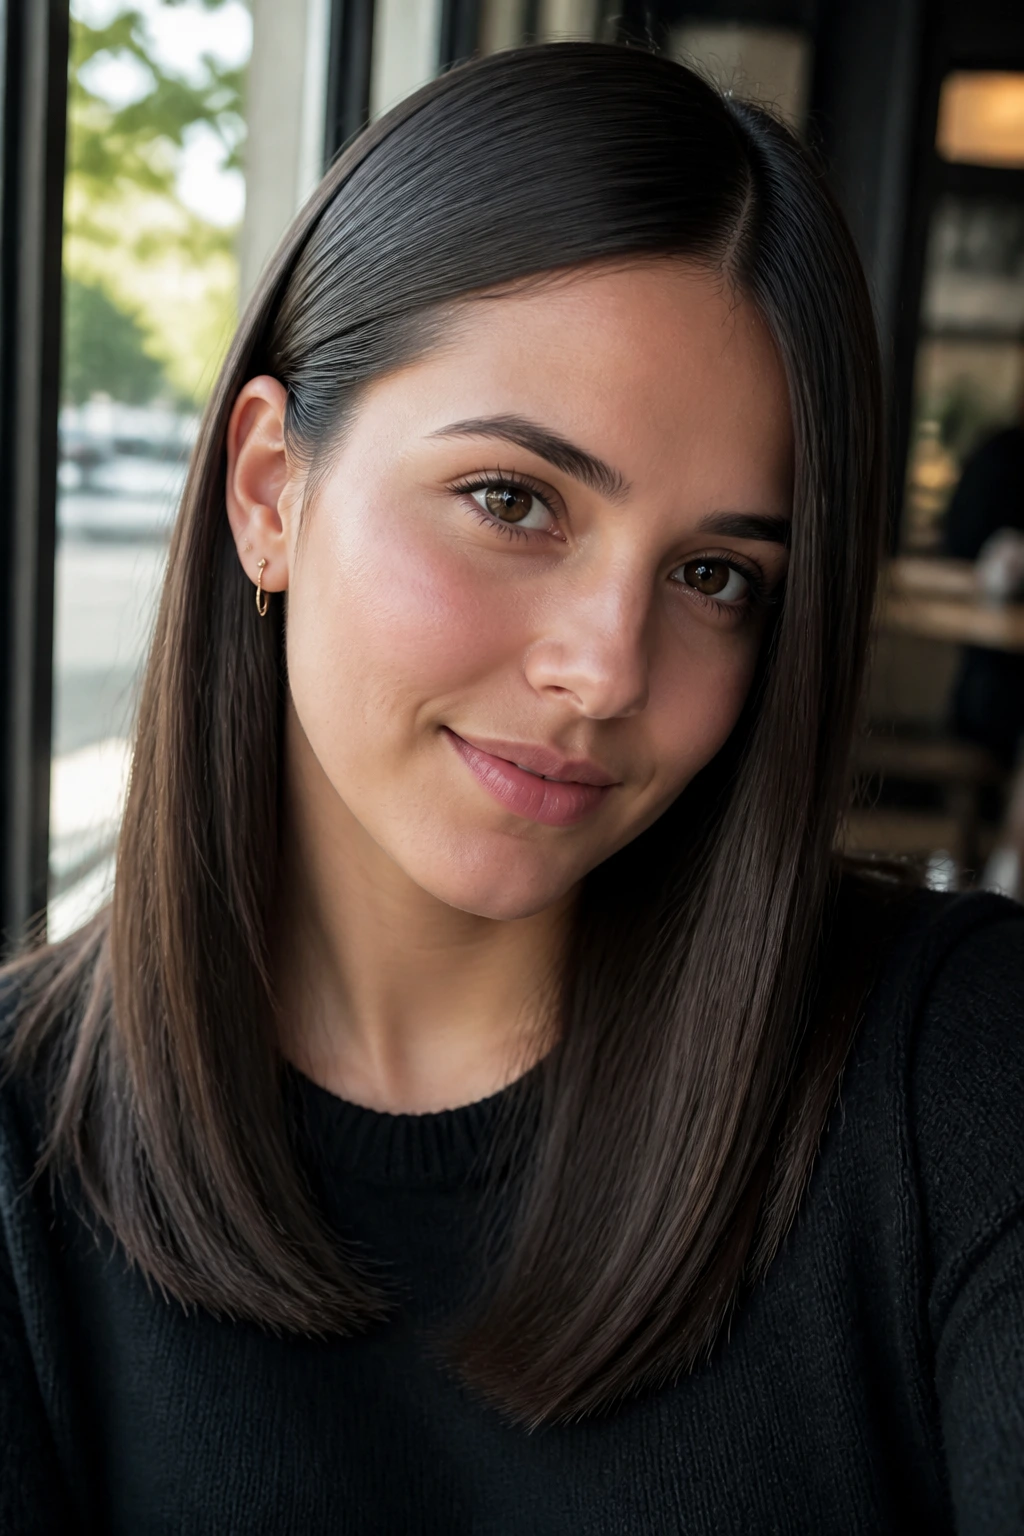
Can straight hair work for a round face without making it look wider? Absolutely, if the line is right. A deep side part and one tucked side can make straight hair feel sharp instead of flat.
The hair should be smooth at the roots but not pin-straight from scalp to ends. A tiny bend at the mid-lengths keeps the shape from looking stiff. Leave one side tucked behind the ear and let the other side fall forward. That imbalance is the whole point.
How to Wear It Without Losing Shape
Blow-dry with the nozzle pointed downward, then pass a flat iron through in small, single sections if needed. Focus on the top layer only. If you over-flatten the whole head, it can sit too close to the cheeks and lose its edge.
A side tuck works even better when the tucked side has a little shine cream on it. The exposed side can stay looser and fuller. That contrast keeps the style from feeling heavy. And if you wear glasses, this is one of the easiest styles to pair with them because the frames and the tuck do not fight each other.
10. Half-Up Twist Swept to One Side
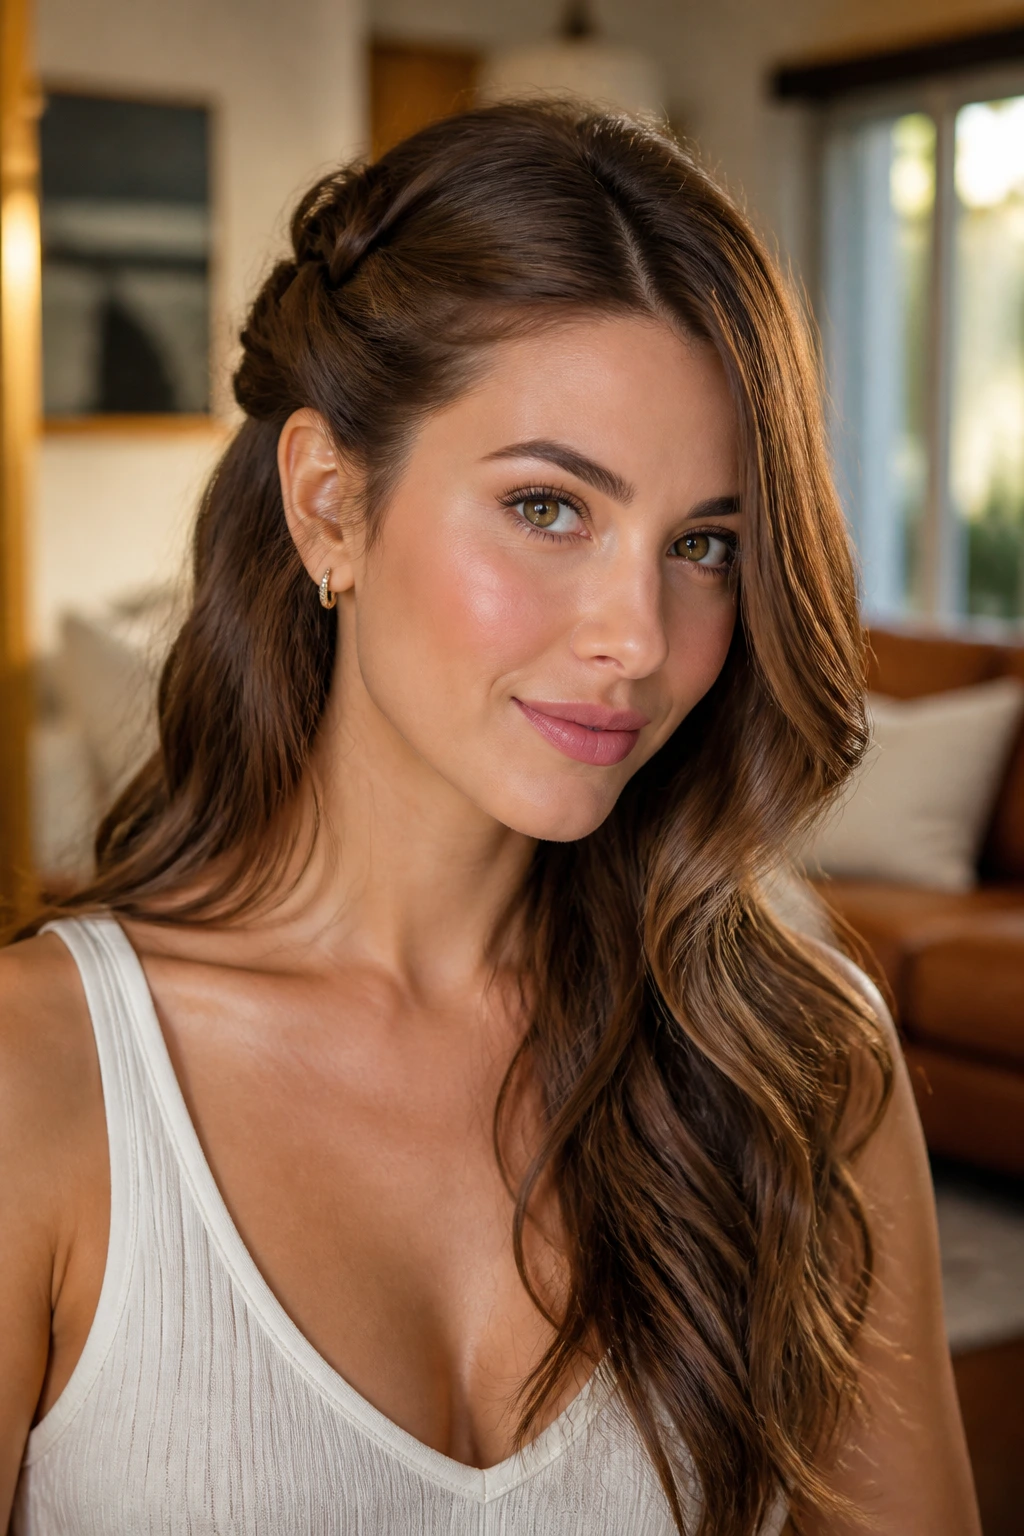
A half-up twist gives you a little lift at the crown and keeps hair off the cheeks without pulling everything back. That makes it a smart choice for round faces, especially when you want something casual that still looks done.
Twist the top section back and angle it toward one side before pinning it. The twist should sit slightly above the ear, not dead center. That off-center placement keeps the face from looking too boxed in. Leave the lower lengths loose and a little wavy if you can.
- Twist from the temple, not the part line only.
- Secure with 2 small pins crossed under the twist.
- Pull a few face-framing pieces free.
- Add texture spray to the loose lengths for grip.
This is one of those styles that looks better after a few minutes. The twist settles, the pieces loosen, and the whole thing gets softer. If you make it too neat, it loses the charm.
11. Curly Side Sweep for Natural Texture
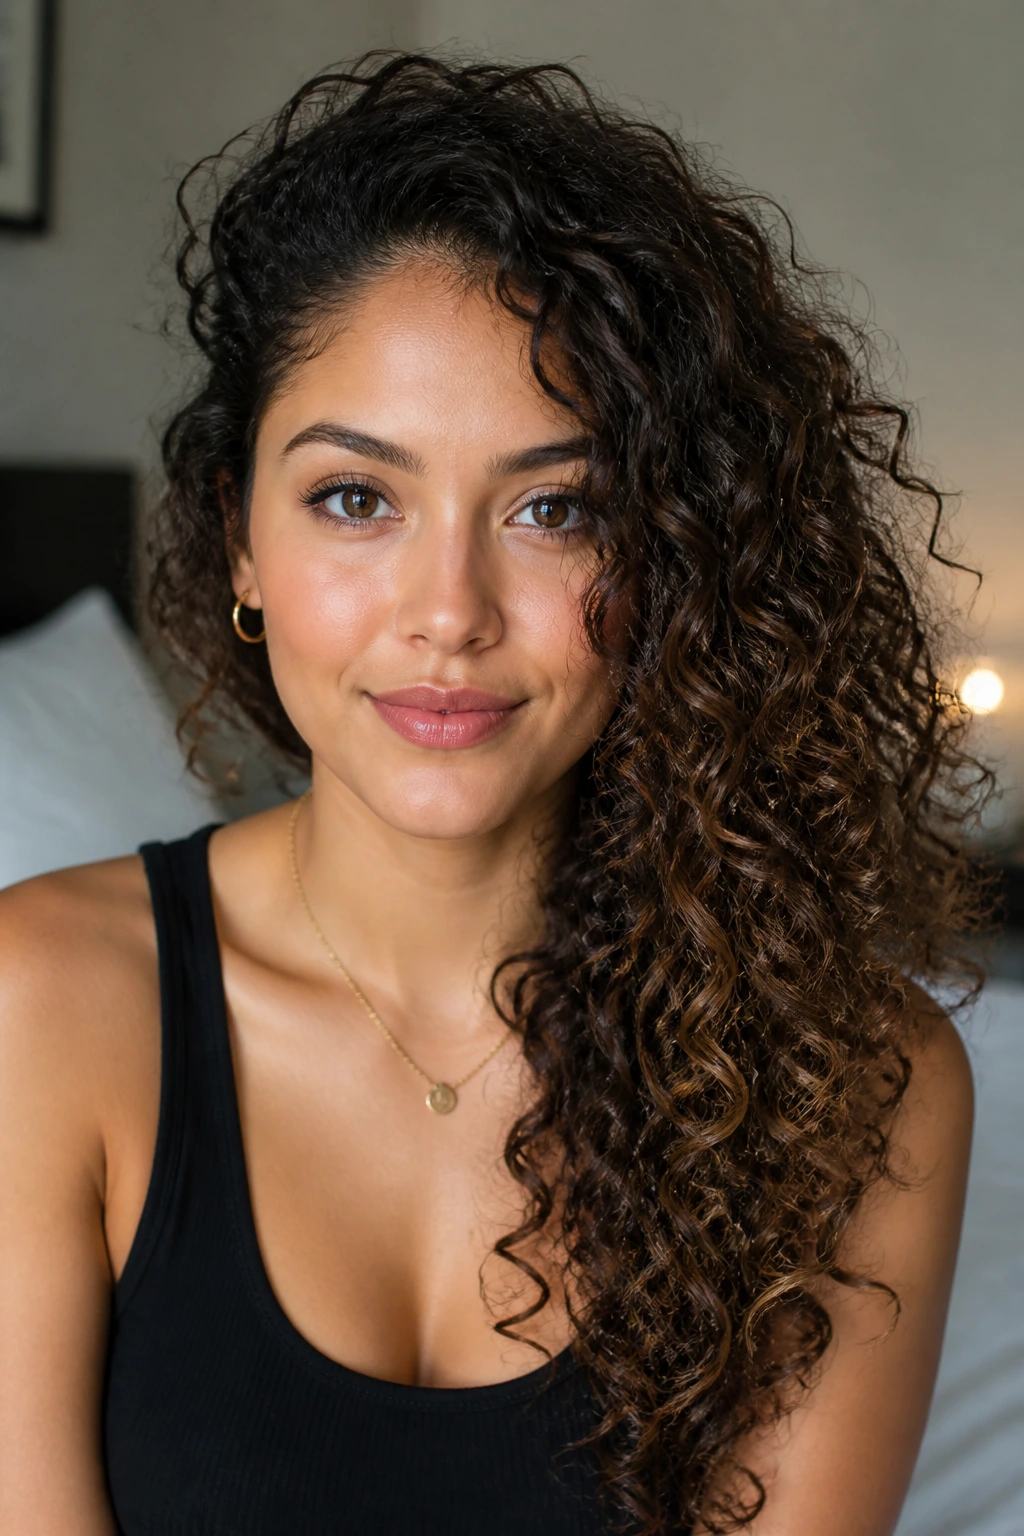
Curly hair looks especially good swept to one side when you keep the root shape intentional. The curls do not need to be forced into a tight mold. They need direction. That direction gives the face a long curve instead of a wide halo.
Start with a deep side part while the hair is still damp. Add curl cream first, then a small amount of gel where you need hold. Diffuse on low speed, tipping the hair toward the side you want it to fall. Once dry, pin the opposite side back near the temple if it starts drifting.
If your curls are tight, leave more height at the crown and let the length gather over one shoulder. If your curls are loose, a side sweep can sit a little lower and still hold the shape. Either way, the side placement keeps the face from being framed too evenly.
A satin scarf can help if you need the style to last overnight. Wrap the crown loosely and leave the curls tucked to one side. Not fancy. Very effective.
12. Braided Crown Into a Side Fall
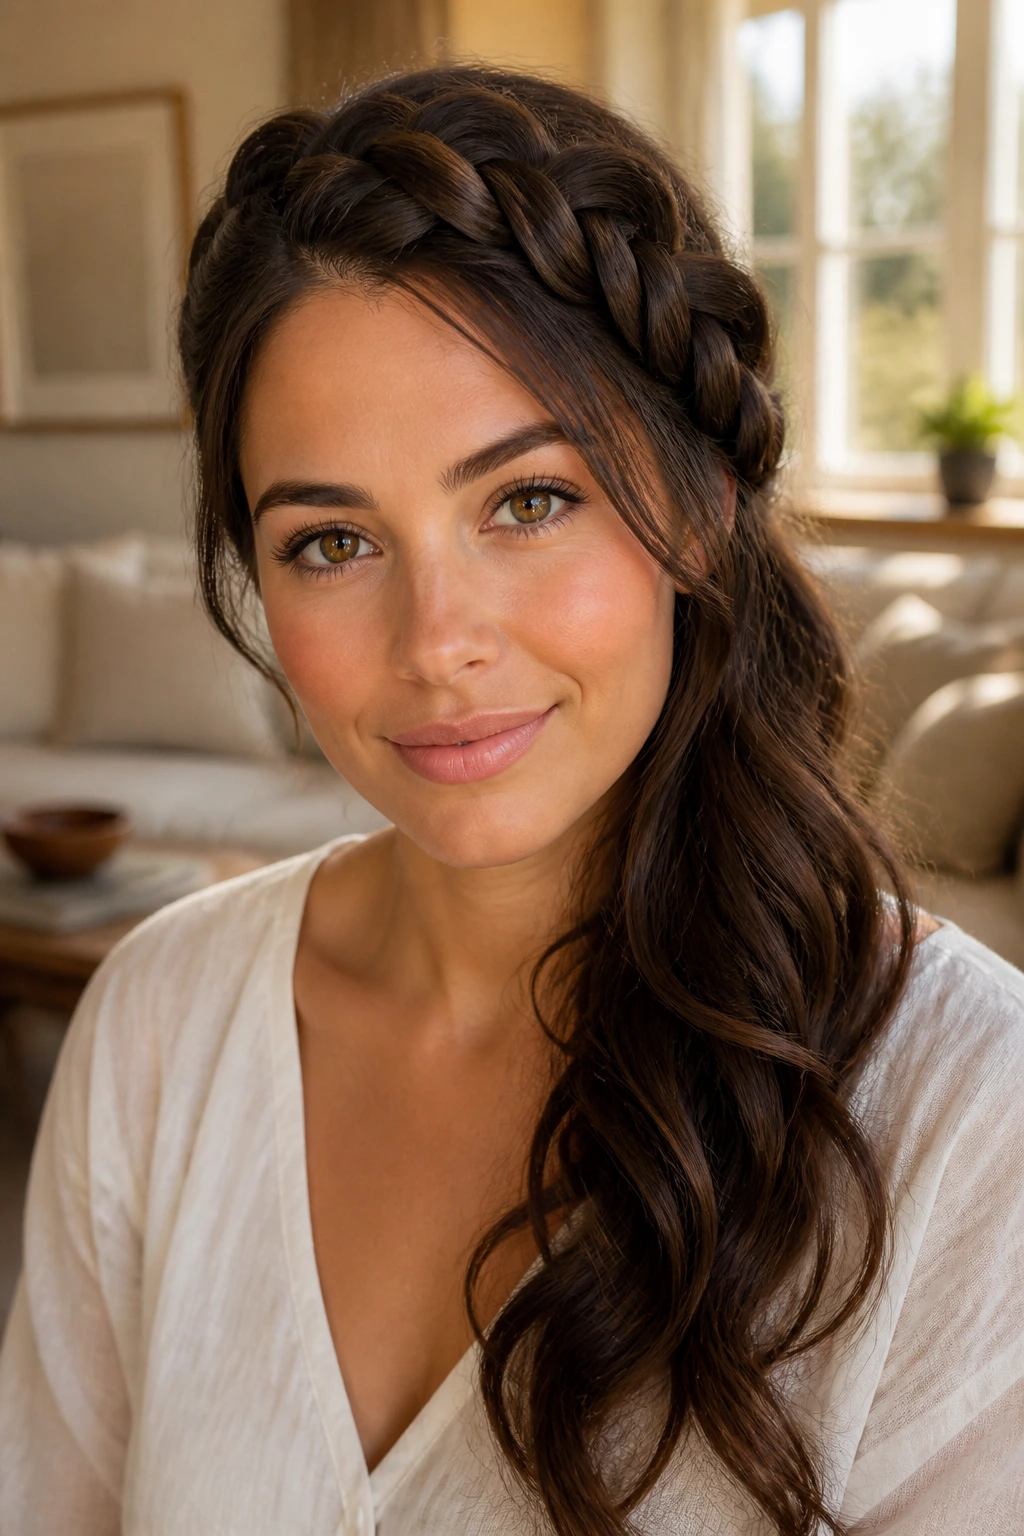
Unlike a full crown braid that wraps the entire head, this version gives you structure at the top and then lets the rest of the hair fall to one side. That asymmetry is the part that flatters a round face. It keeps the eye moving instead of circling the face.
The braid can start near one temple and travel across the top of the head, then stop before it closes the loop. Pin the end just behind the opposite ear and let the remaining length fall over one shoulder. If your hair is long enough, add a loose wave to the hanging section so it doesn’t look too plain.
This style is a good pick for people who want braid detail without committing to a fully braided head. It feels romantic, but not fussy. And if your hair is layered, a few shorter pieces will escape. That is fine. Those bits soften the outline around the cheeks.
A little hair oil on the braid keeps it from looking dry. Use very little. Too much and the braid goes flat.
13. Messy French Twist Positioned Low
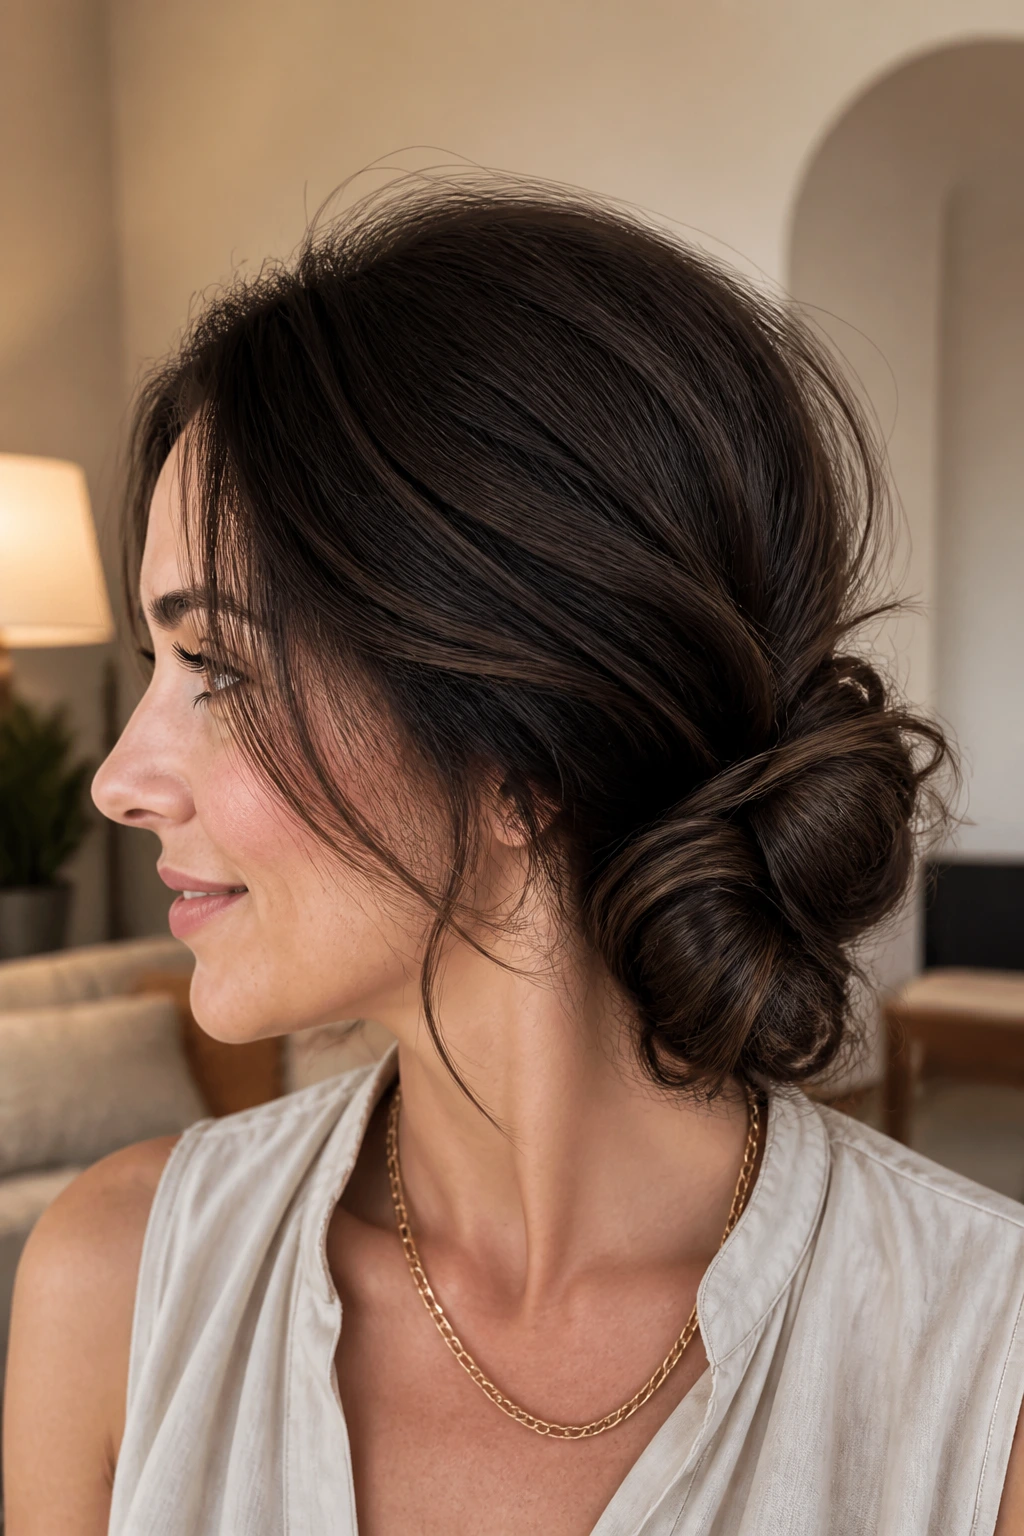
A French twist does not have to sit high and severe. Push it lower, off center, and let a little texture stay in the top section, and suddenly it works much better for a round face.
Why Low Placement Matters
A high twist creates more vertical height, which sounds useful, but it can also make the face feel open in a way that draws attention to width. A lower twist pulls the structure down and to one side. That softens the line around the jaw.
Styling Details That Help
- Start with hair that has a little grip, not freshly washed silkiness.
- Backcomb the crown gently at the roots only.
- Pin the twist with 6 to 8 bobby pins hidden inside the roll.
- Leave one thin piece out near the temple if the face needs softness.
If the twist looks too perfect, rough it up with your fingers. Not much. Just enough to give it a lived-in look. A rigid twist can feel formal in a harsh way, and round faces usually do better when the edges are a little less strict.
14. Rope Braid Side Ponytail
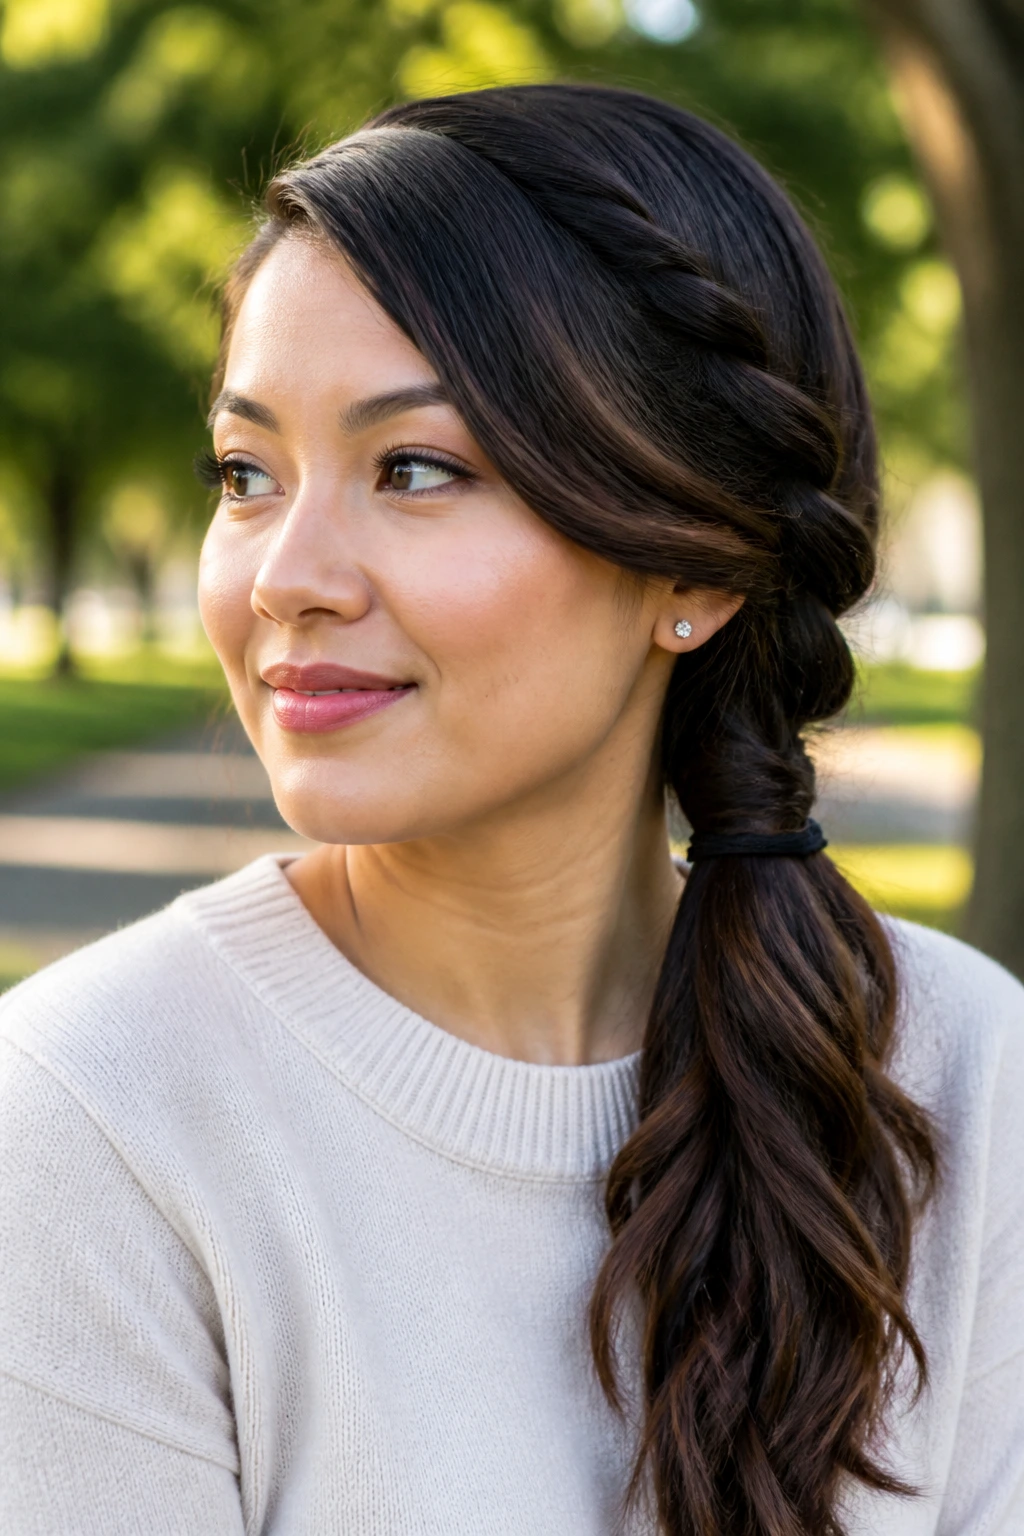
A rope braid looks more complex than it is, which is part of why I like it. Two twisted sections create a neat, clean line that falls down the side of the face without adding bulk where you do not want it.
The ponytail should sit low and off center. Gather the hair first, secure it with an elastic, then divide the ponytail into two pieces and twist each one in the same direction before wrapping them around each other in the opposite direction. That detail matters. If you twist both pieces randomly, the rope braid falls apart faster.
This style is especially good for thick hair because the rope shape keeps the mass controlled. It also works on layered hair better than a regular braid sometimes, since fewer pieces poke loose. Still, a little smoothing cream on the lengths helps.
Pull the braid gently apart at the edges if you want it fuller. Not too much. A rope braid can look fluffy in a bad way if you overdo it. Keep the top slick and the braid defined.
15. Clipped-Back Side Sweep for Short Hair
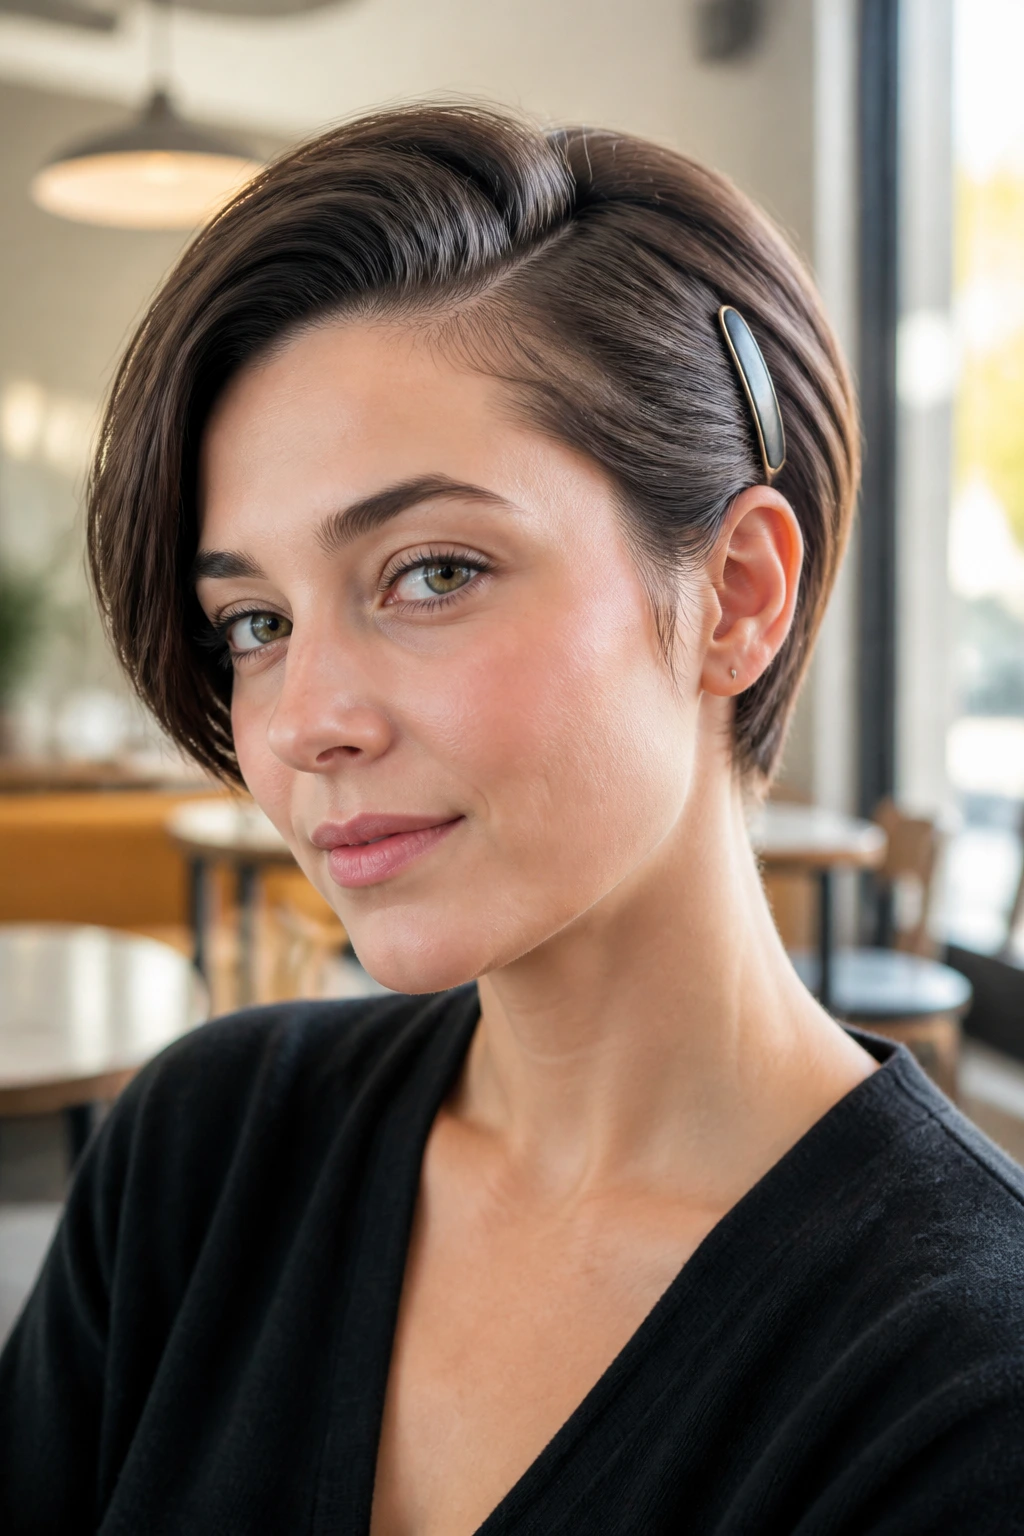
Can short hair still do side styling? Absolutely. In fact, a round face often benefits from short hair that is swept and clipped rather than cut in a shape that sits evenly around the cheeks.
How to Keep It from Falling Flat
The front should be parted deeply, then brushed across the forehead or temple and pinned with 2 to 3 bobby pins or a flat barrette. If your hair is a pixie or cropped bob, the back can stay sleek while the front stays soft and directional.
A root spray or light mousse at the crown helps the top hold a bit of lift. Short hair lies down fast, so don’t skip the prep. Blow-dry the front in the direction you want it to sit, then cool it with your hand for a few seconds before clipping.
One good clip can do the work of a whole complicated style. That is the nice thing here. No wrestling. No fuss.
16. Waterfall Braid to One Side
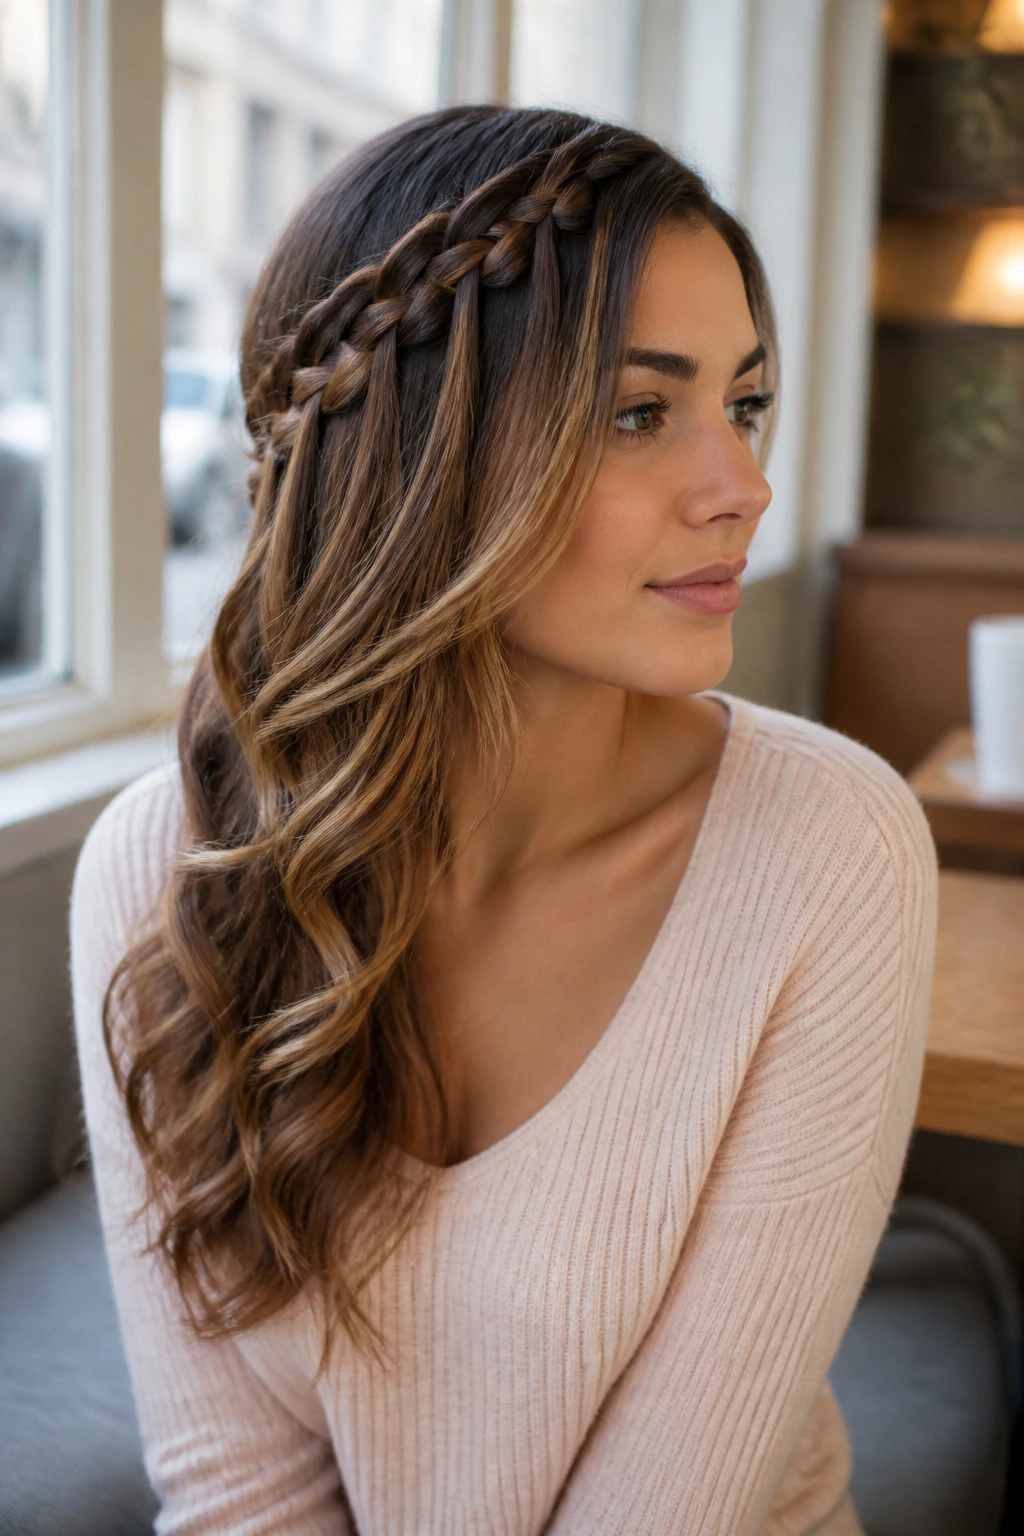
A waterfall braid is a softer braid choice when you want detail without locking the whole head into a tight pattern. Swept to one side, it gives a round face a pretty diagonal line and keeps the hair from sitting like a curtain across the cheeks.
Start the braid above one temple and let the dropped strands fall through the braid as you move toward the opposite side. That creates the waterfall effect. Then bring the rest of the hair over one shoulder. If the loose hair is straight, add a few bends to the ends so it blends with the braid instead of looking like two separate ideas.
- Best on hair that reaches at least the collarbone.
- Use a small clear elastic to hide the ending point.
- Curl the loose lengths after braiding if you want softness.
- Keep the braid loose enough to show the pattern.
This style is a little more work than it looks, but it stays lovely in motion. Even a bit of movement makes the braid read better.
17. Voluminous Blowout With Side-Swept Ends
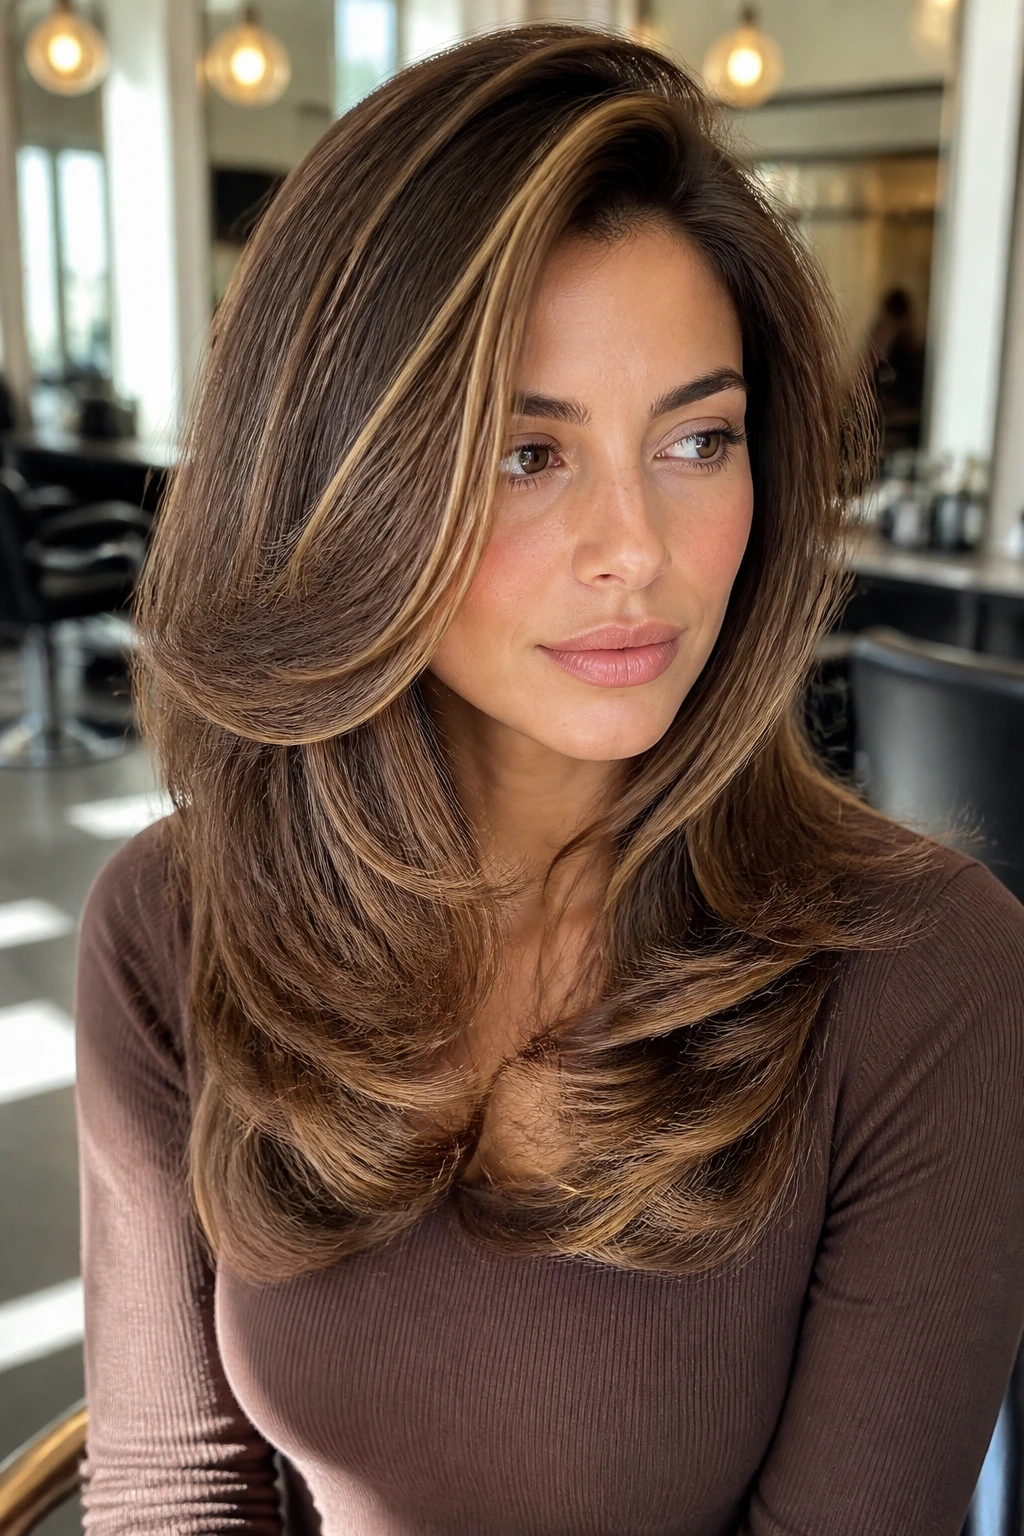
A blowout with side-swept ends is one of those styles that looks expensive even when it is not trying to. The shape matters most: lift at the roots, smoothness through the middle, and ends that bend away from the face in one direction.
Use a round brush that matches your hair length. A 2-inch brush works well for medium and long hair. Pull the top sections up and back as you dry them so the crown gets height. Then angle the front pieces over to the side and finish with a soft flip at the ends. You do not need hard curls. You need shape.
This is especially useful for shoulder-length hair, which can land in a awkward place if it hangs straight. The side sweep gives that length a purpose. It keeps the hair from sitting wide at the cheeks and makes the whole cut look cleaner.
A little velcro roller at the crown for 10 to 15 minutes can help if your hair falls flat. No shame in that. It works.
18. Soft Roll-Up Updo With Side Volume
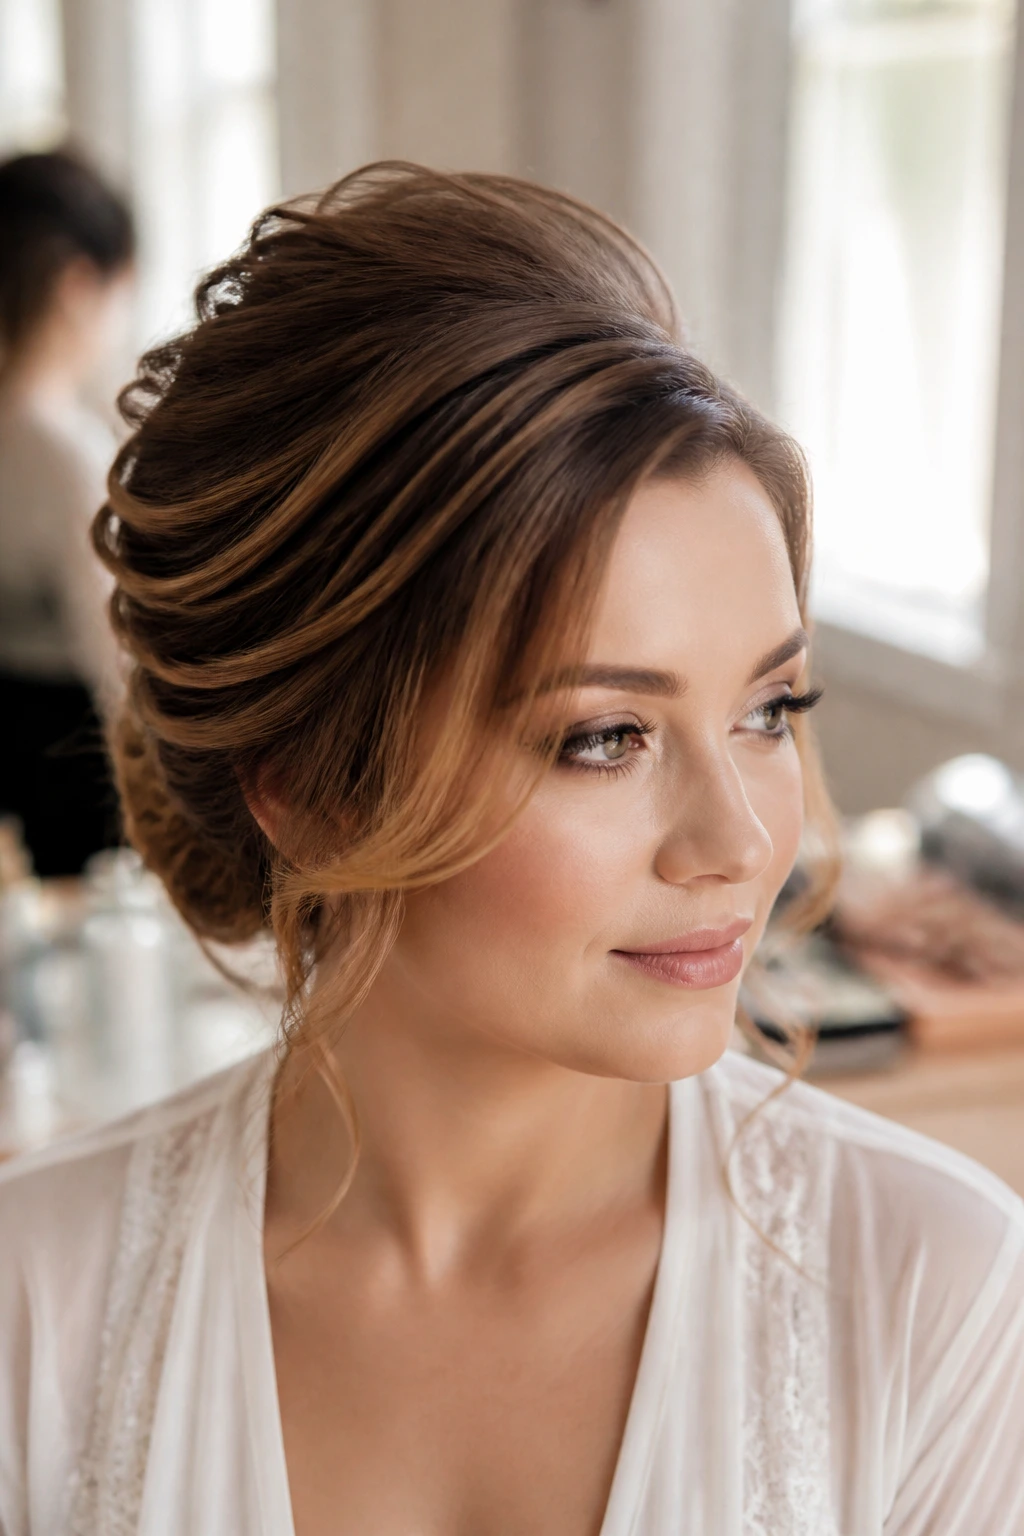
This style sits between a bun and a twist, and that in-between space is exactly why it flatters round faces. It lets you build height where you want it while keeping the sides smooth and contained.
Unlike a top-heavy updo, the soft roll-up stays lower and leans slightly to one side. The result is cleaner near the cheeks and more open through the neckline. That balance is useful if you want polish without the hard lines of a tight chignon.
What to Ask For or Copy
- Keep the roll just above the nape.
- Leave the crown with a little lift.
- Pin the shape inward so the edges stay soft.
- Pull out two wisps near the temples if the face needs a gentler frame.
This works well for weddings, dinners, and anything where you want hair off your shoulders but still want a little softness around the face. It also holds up better than people expect if you prep with texture spray first.
19. Long Layered Cut With a Dramatic Side Flip
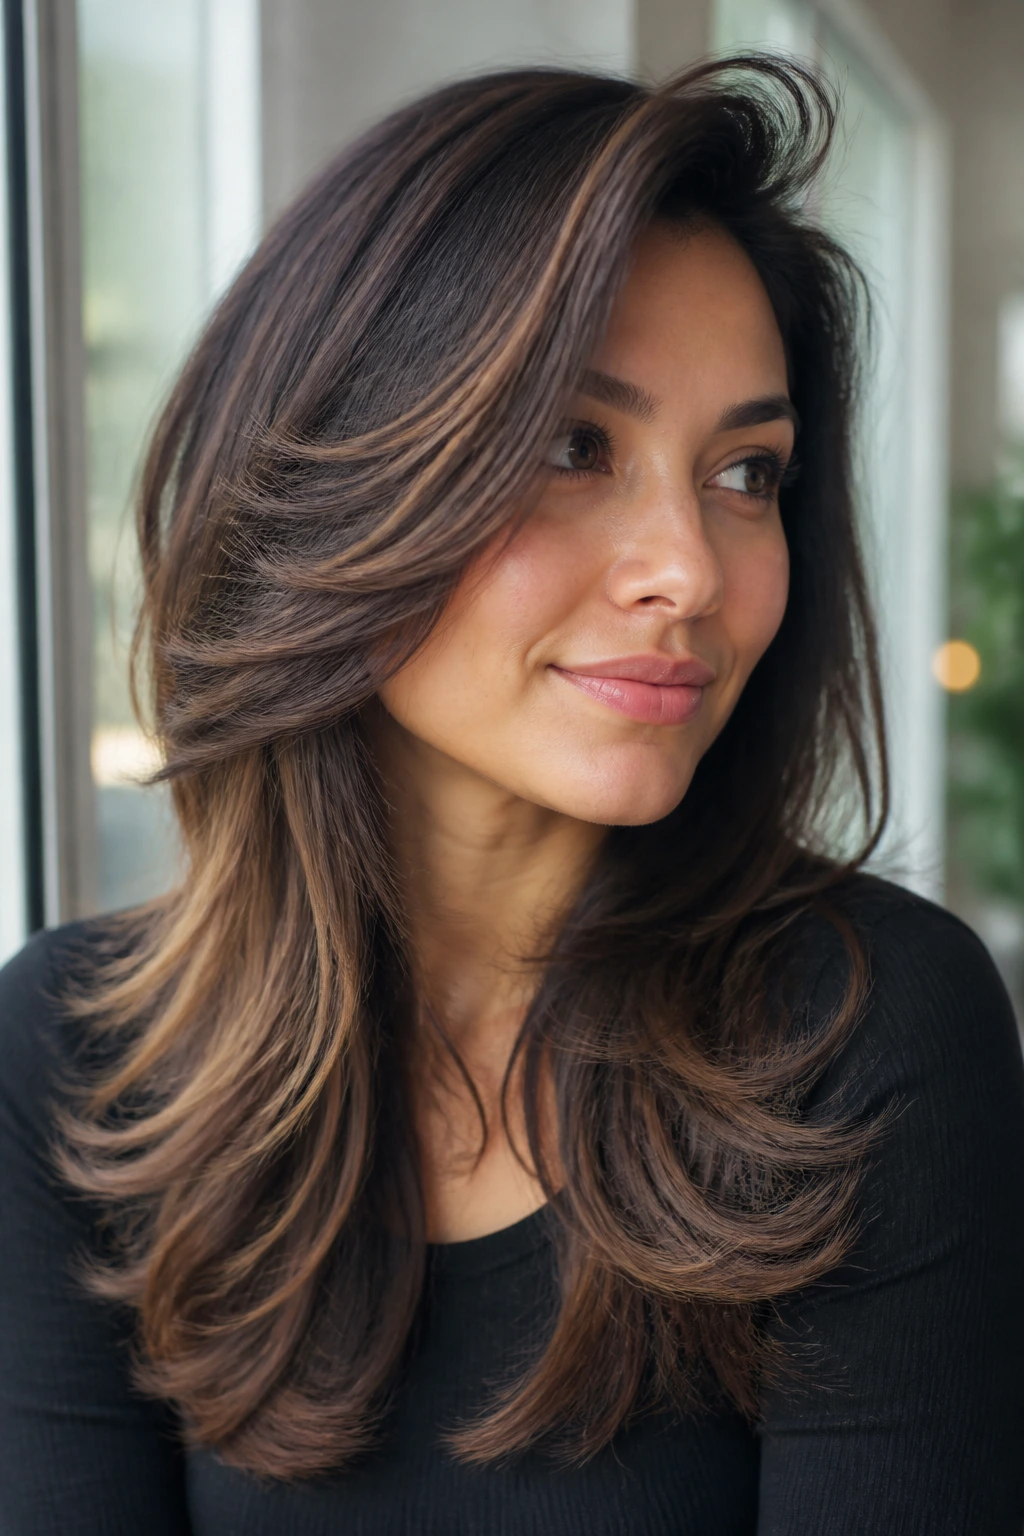
A long layered cut gives you the most room to play with side styling. The layers can be worn straight, waved, pinned, or flipped, and the side sweep keeps the face from getting buried under too much length.
Where the Cut Matters
The shortest layers should not land right at the widest point of the cheek. That is the mistake. Ask for layers that start a little below the cheekbone so they skim rather than sit on top of the face. A side flip at the front then carries the eye downward and outward in a good way.
Styling Notes
- Blow-dry the front pieces over a large round brush.
- Turn the ends away from the face.
- Use a light serum only on the last few inches.
- Add one tucked side if the shape starts feeling too wide.
This is a solid everyday option because it gives you flexibility. You can wear it loose, then pull just one side back with a clip when you want more shape. That kind of range is worth a lot.
20. Side-Parted High Bun With Face-Framing Pieces
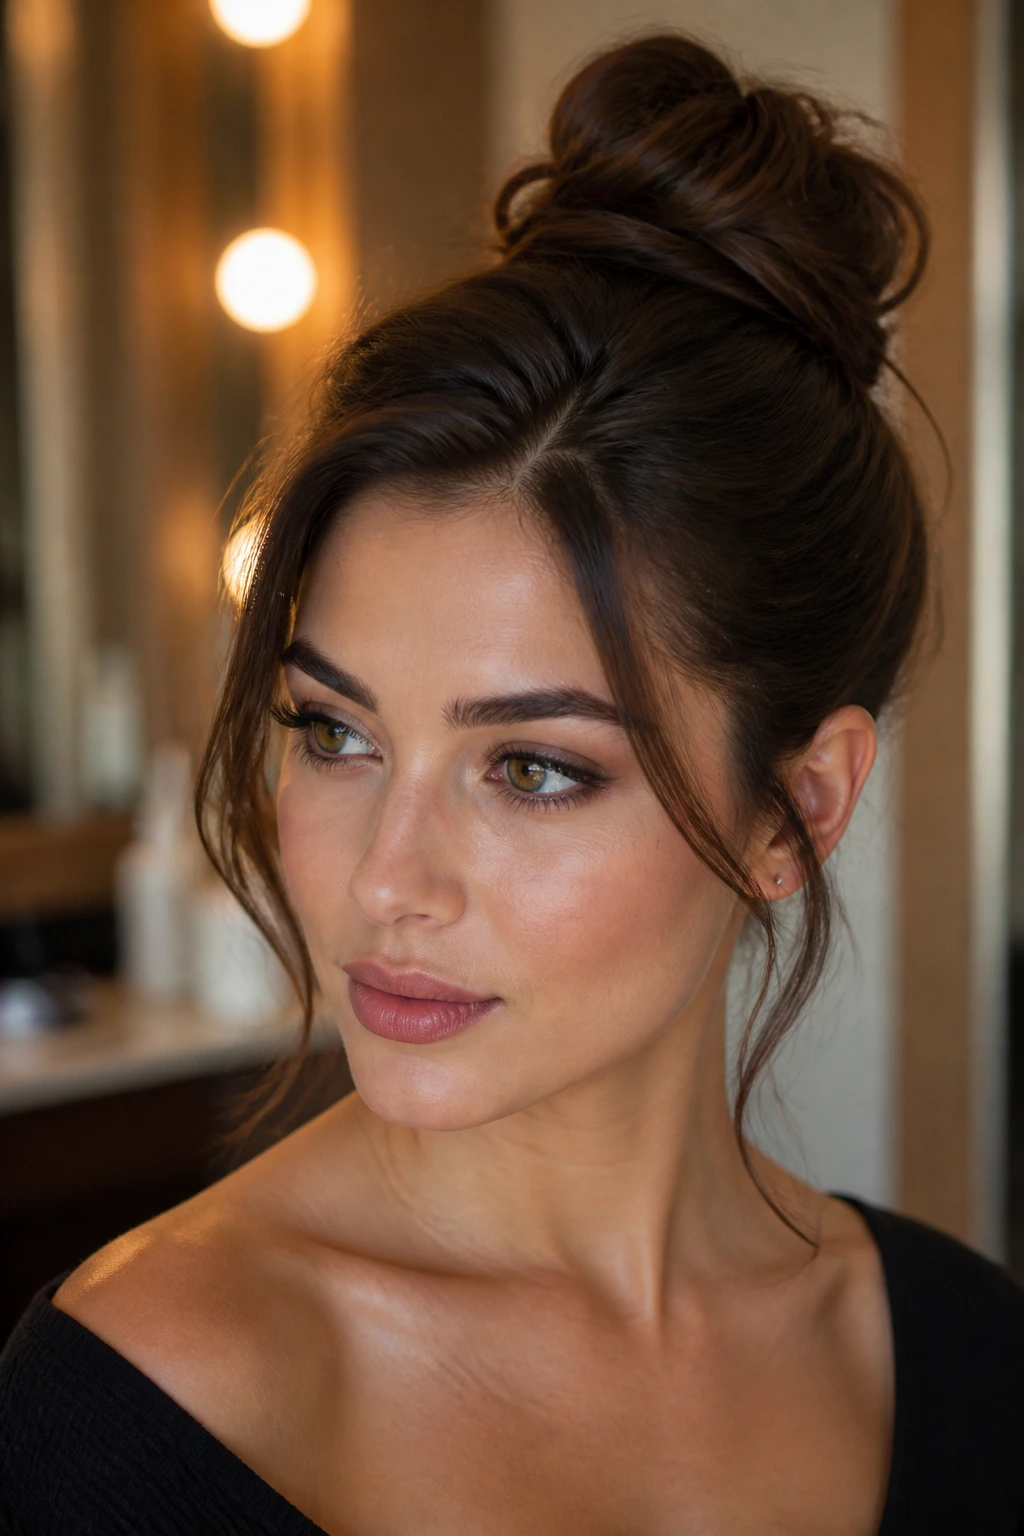
A high bun can work on a round face if you stop putting it dead center. Shift the part to one side, lift the crown first, and leave a couple of face-framing pieces loose. The whole style changes.
The bun itself should sit a little off center rather than squarely on top of the head. That off-center placement gives you more diagonal movement. The height still helps elongate the face, but the side part keeps it from feeling too symmetrical or too obvious.
A few pieces around the temples are enough. You do not need a curtain of hair hanging down. In fact, too much can pull the eye back to the cheeks. Keep the tendrils light, smooth them with a touch of cream, and let the rest of the bun stay a little textured so it does not feel rigid.
This is one of those styles that looks best when the top is lifted first and the bun is built second. If you reverse that order, the crown usually goes flat. And flat is the last thing a side style wants.
Round faces do not need to be hidden behind hair. They need lines that guide the eye. A side part, a soft diagonal, or a piece tucked behind one ear can do more than a heavy layer of styling ever will.
The better side styles are not trying to shrink anything. They create balance. That is the part people miss, and it is usually the part that makes the biggest difference when the mirror is not being kind.
