



A long side bang can do more for a round face than a blunt fringe ever will. The reason is simple: diagonal lines pull the eye downward and across, while a straight-across cut tends to sit right on the widest part of the face.
Too short is risky. So is too heavy. If the bang lands at the fullest part of the cheek and sits there like a shelf, it can make the face look wider instead of longer — and that is exactly why the best versions usually graze the eyebrow, then taper as they travel past the cheekbone.
I like side bangs that look soft first and styled second. They should move when you turn your head, not sit there like a hard strip of hair that needs constant rescue.
These 20 long side bangs for round faces cover sleek, shaggy, curly, thick, fine, and grown-out versions, because the cut only works when it fits the texture sitting under it.
1. Classic long side bangs for round faces
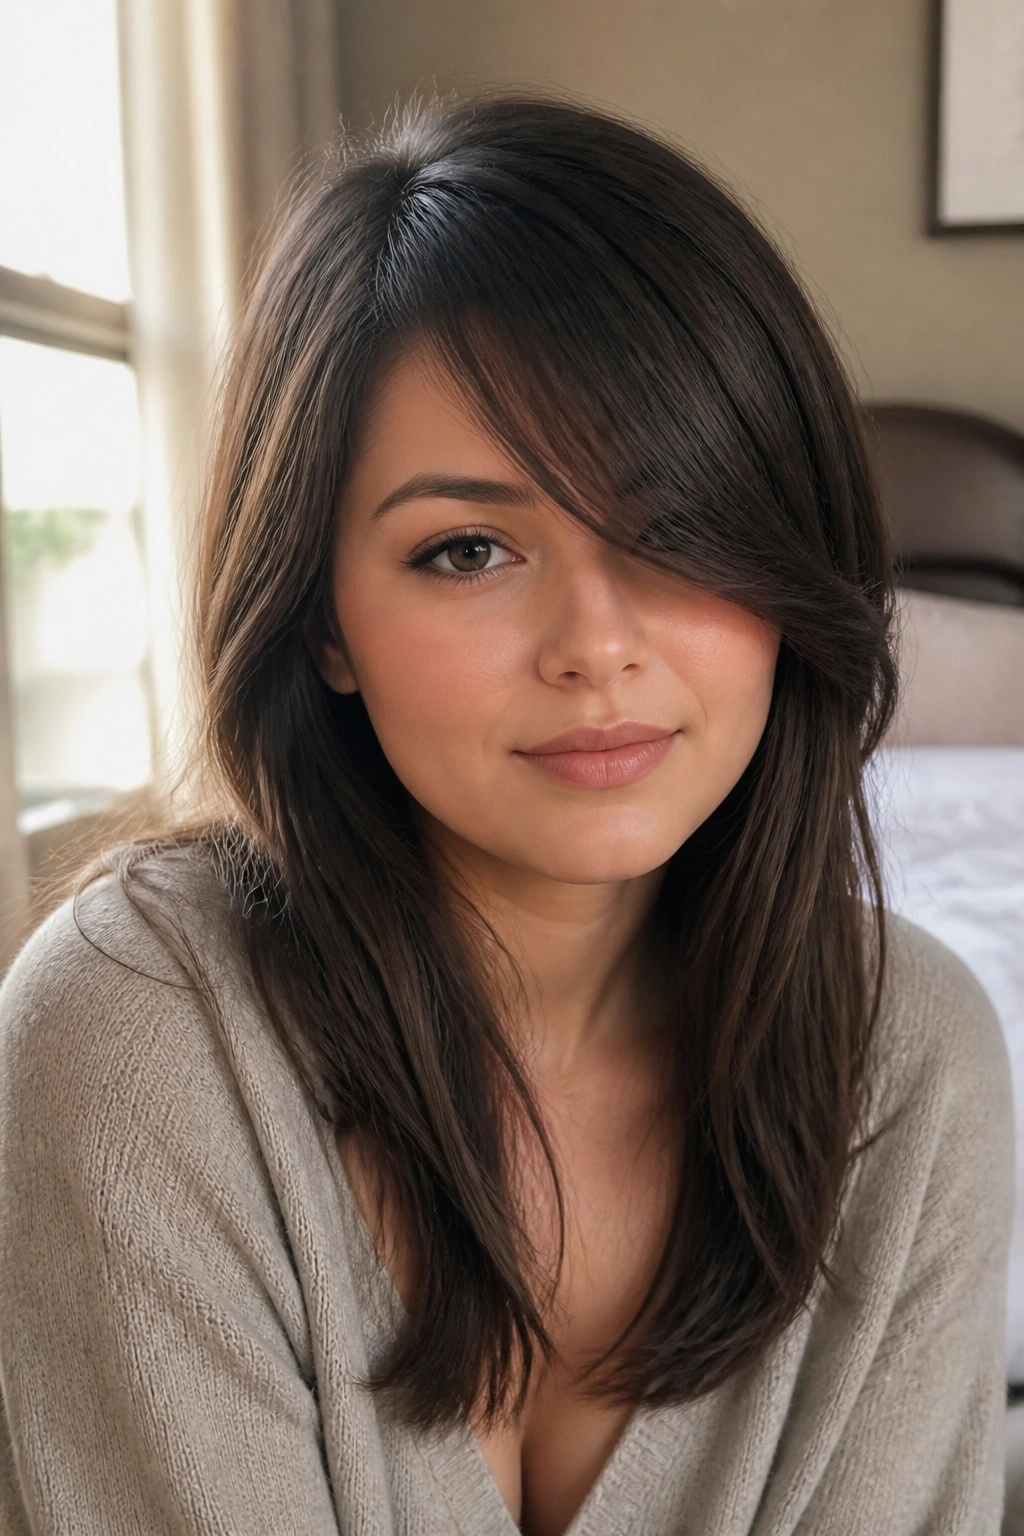
The classic version is still the one I reach for first. It’s the clean diagonal sweep that starts near the part, falls across the forehead, and finishes around the cheekbone or just below it.
Why It Works
A round face usually looks best with a line that breaks the width. This cut does that without shouting about it. The shortest point can sit near the outer brow, while the longer edge slides toward the top of the cheek, which gives the face a little more vertical lift.
- Ask for the bang to start at a deep side part or just off center.
- Keep the shortest piece at the outer eyebrow, not the middle of the forehead.
- Let the longest piece skim the upper cheek or lip line.
- Use a round brush only at the root; don’t curl the whole bang under.
My favorite rule: if you can feel the bang sitting on the widest part of your face, it’s probably too short.
2. Curtain-to-side hybrid with a soft cheekbone bend
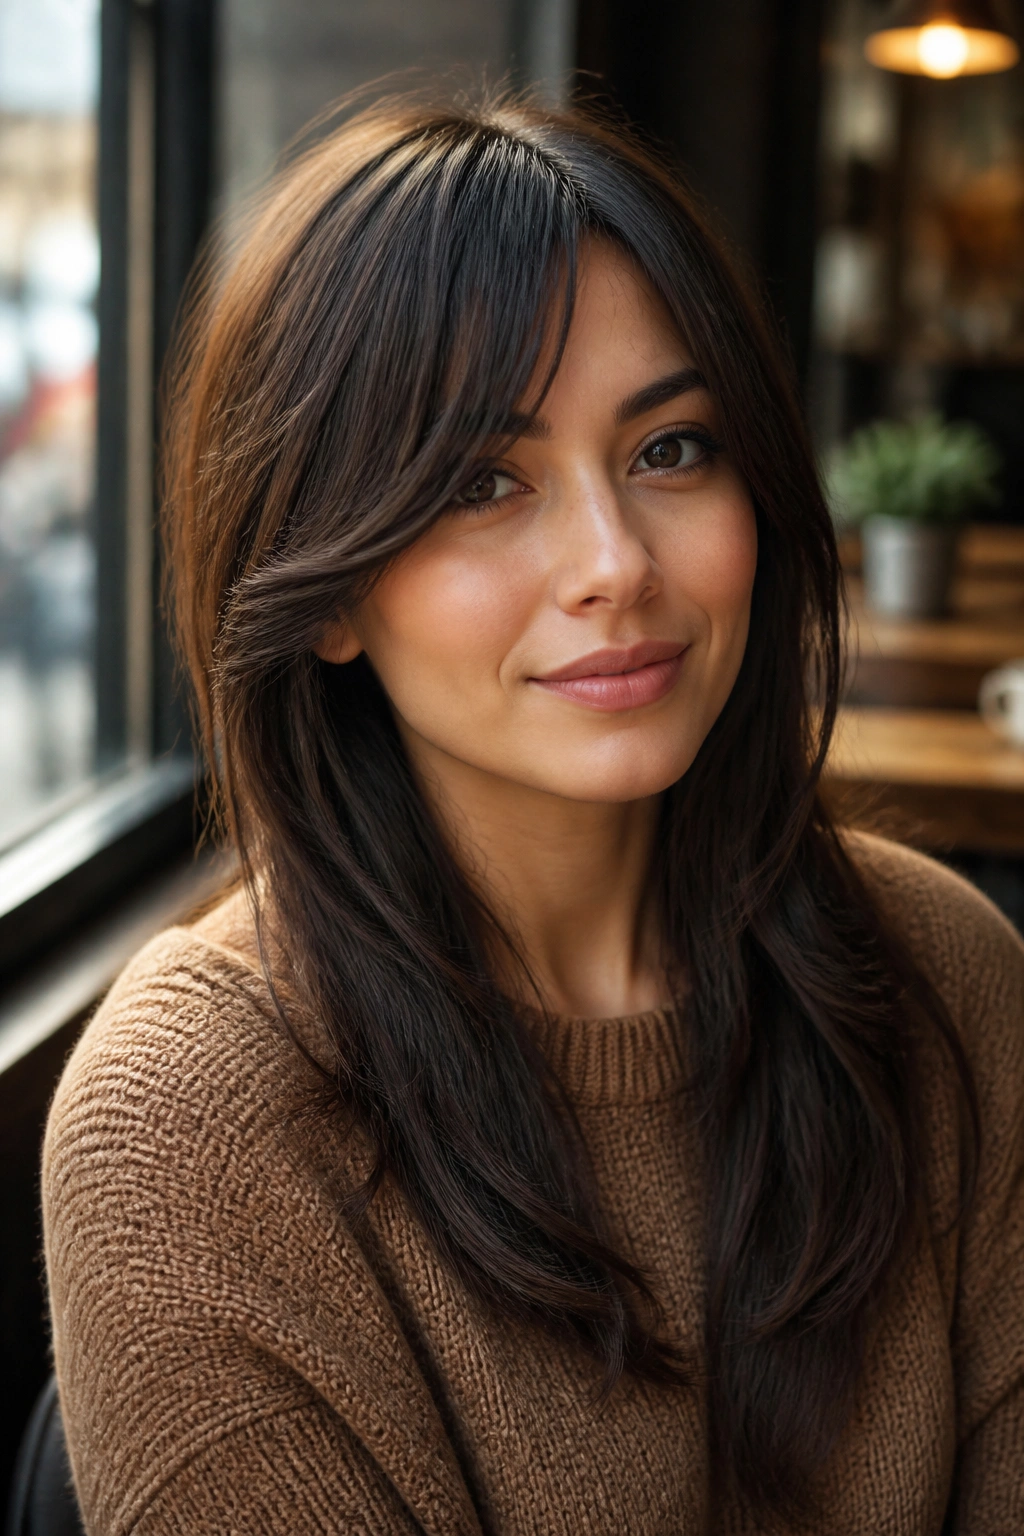
This is the style for anyone who likes the idea of curtain bangs but does not want the center split every day. It starts with that open, airy shape, then gets trained over to one side so the whole front stays soft and easy.
The beauty of this cut is that it never looks stiff. The hair falls away from the face in a gentle arc, which gives rounder features some breathing room around the eyes and cheekbones. It’s also forgiving on mornings when you do not have much patience.
What I’d ask for is a longer center point that blends into side-swept pieces on both sides, with the heavier weight shifted toward your stronger side part. Dry it forward first, then sweep it over with your fingers and a little heat. That small bend near the cheek does most of the work.
3. Feathered side bangs with a light, air-dried finish
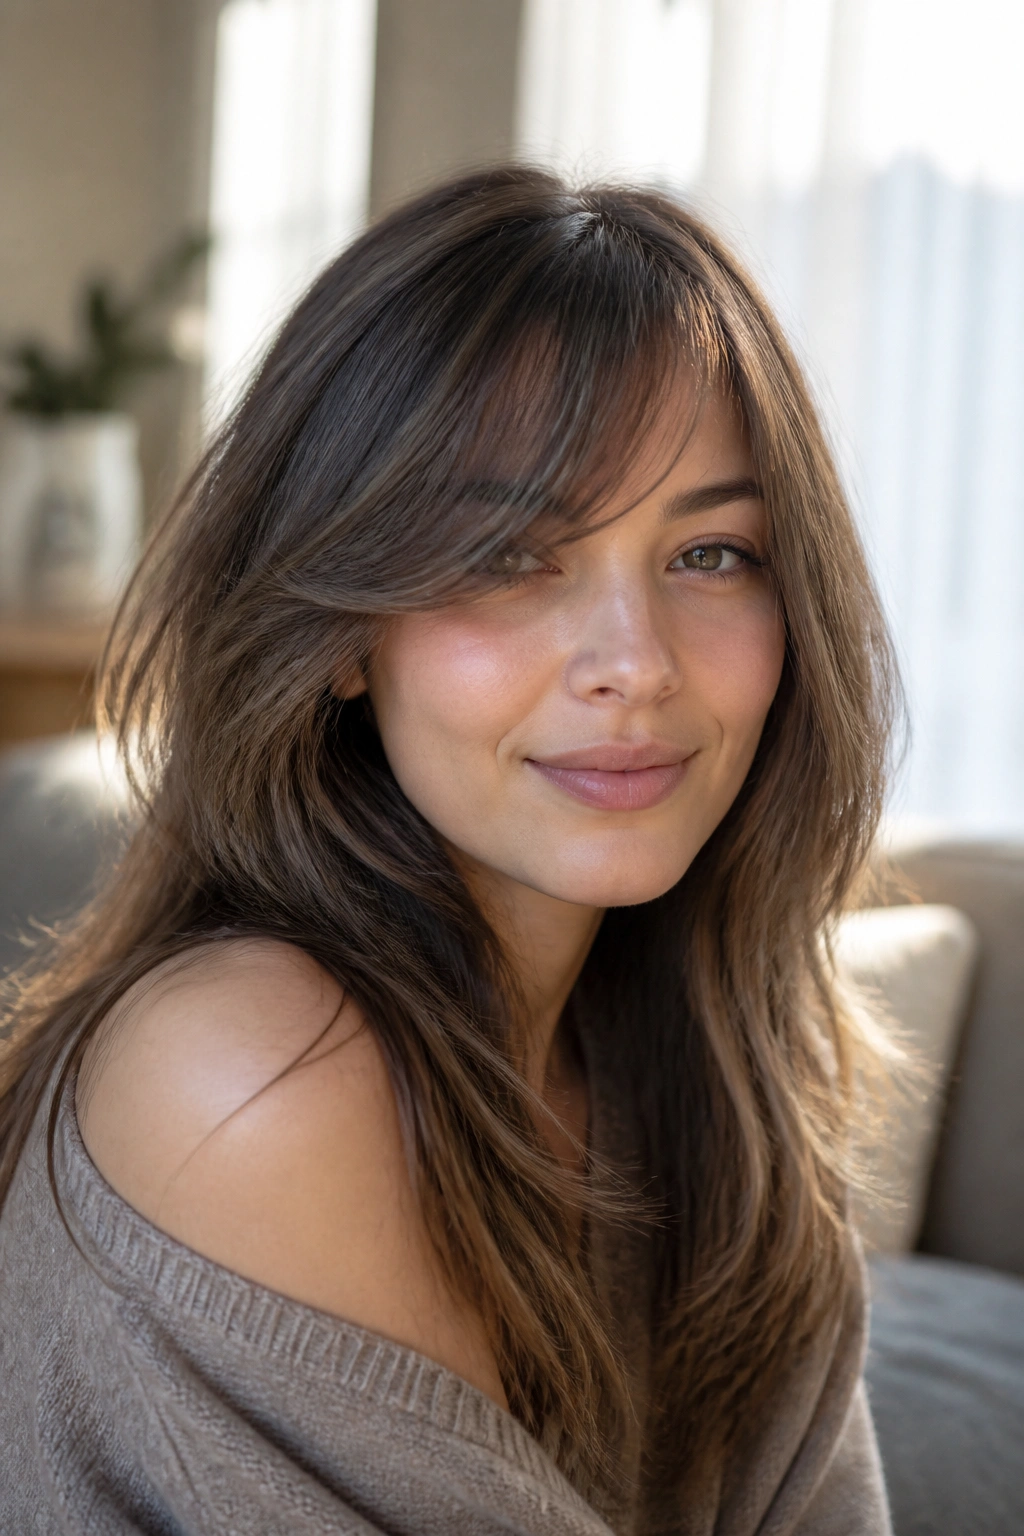
Why does this one feel so easy to wear? Because the ends are sliced into soft, separated strands instead of one solid block. That feathered finish keeps the bang from making the face look boxed in.
A round face can take a lot of hair around the cheeks, but not a lot of heaviness. Feathering fixes that. The bang still gives shape, yet the movement between the strands keeps everything from looking flat or bulky.
How to Style It
What to ask your stylist for
- A light point-cut through the ends.
- A length that reaches the cheekbone when dry.
- A soft side angle, not a blunt line.
How to wear it
- Mist with a light leave-in.
- Scrunch or twist the front away from the face.
- Let it air dry, then separate the strands with your fingers.
That little bit of separation makes a huge difference. One clean line can look severe fast. A feathered line looks lived-in.
4. Deep side-part fringe that starts high on the crown
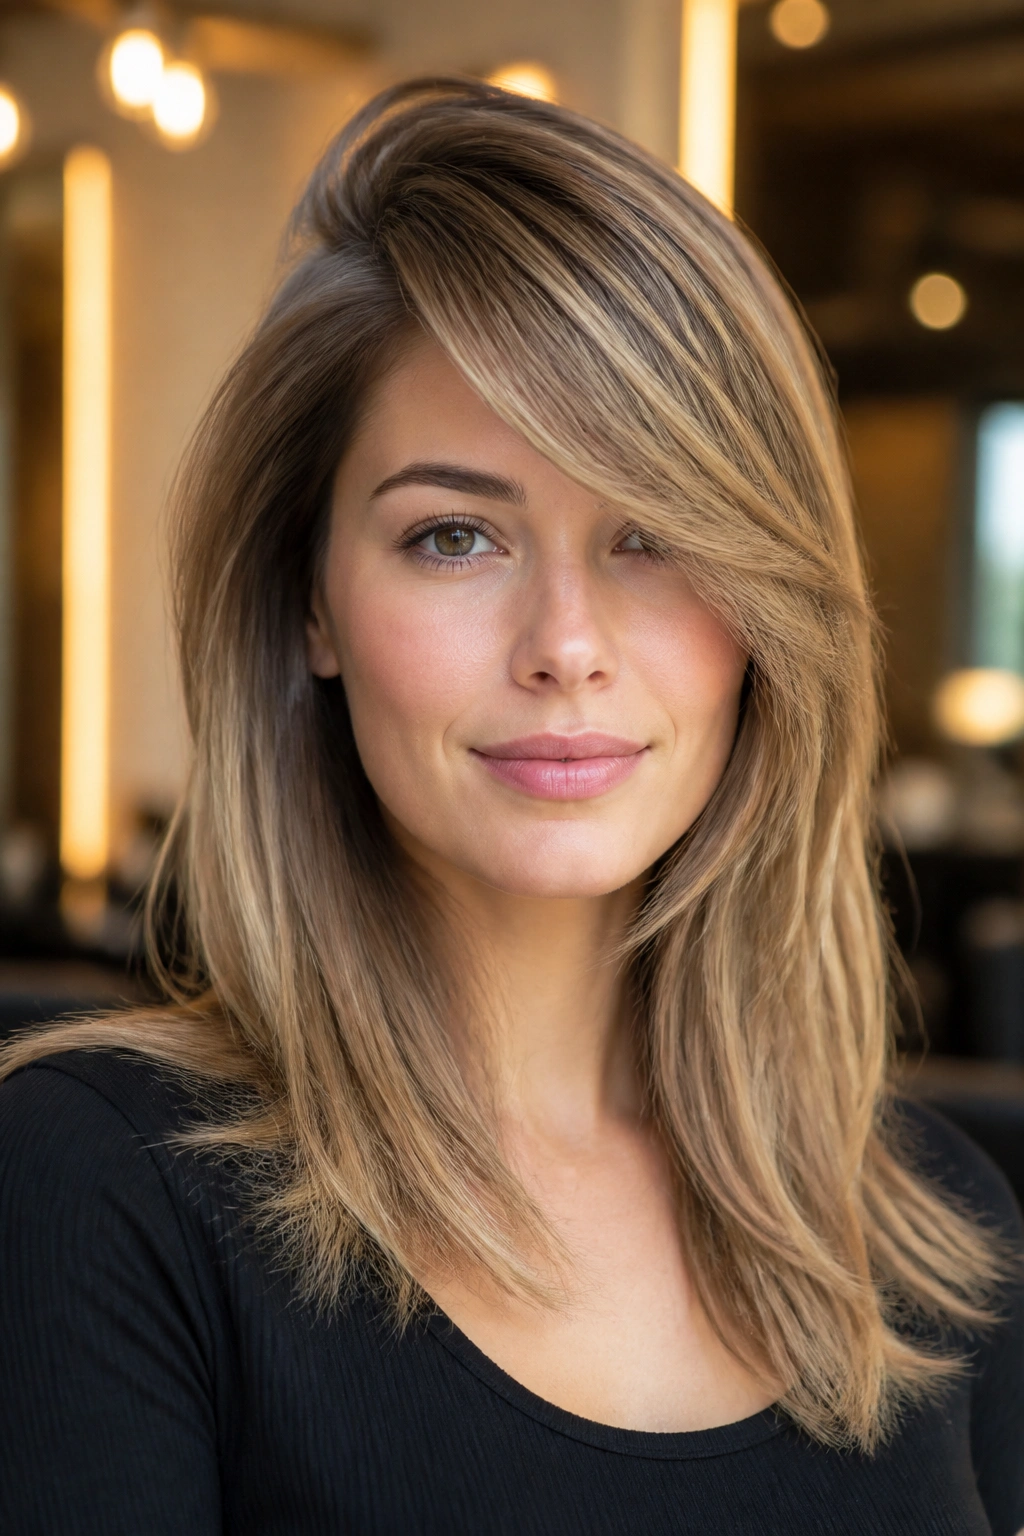
If your bangs keep falling flat, this is the fix I’d look at first. A higher side part creates lift at the root, and that lift is what stops the front from collapsing into the cheeks.
The cut works especially well when the bang needs a little drama. The hair travels farther across the forehead, so the diagonal line is stronger and the eye moves upward before it moves down. That helps a round face feel longer at a glance.
Some stylists will keep the front too thick here, and that’s the trap. You want the root volume, not a heavy curtain. A clean part, a lifted crown, and a soft taper through the front give you the right shape without flooding the face with hair.
A quick dry with a vent brush can help, but don’t overwork it. The bend should look relaxed, not set in place.
5. Long side bangs with jaw-skimming face-framing layers
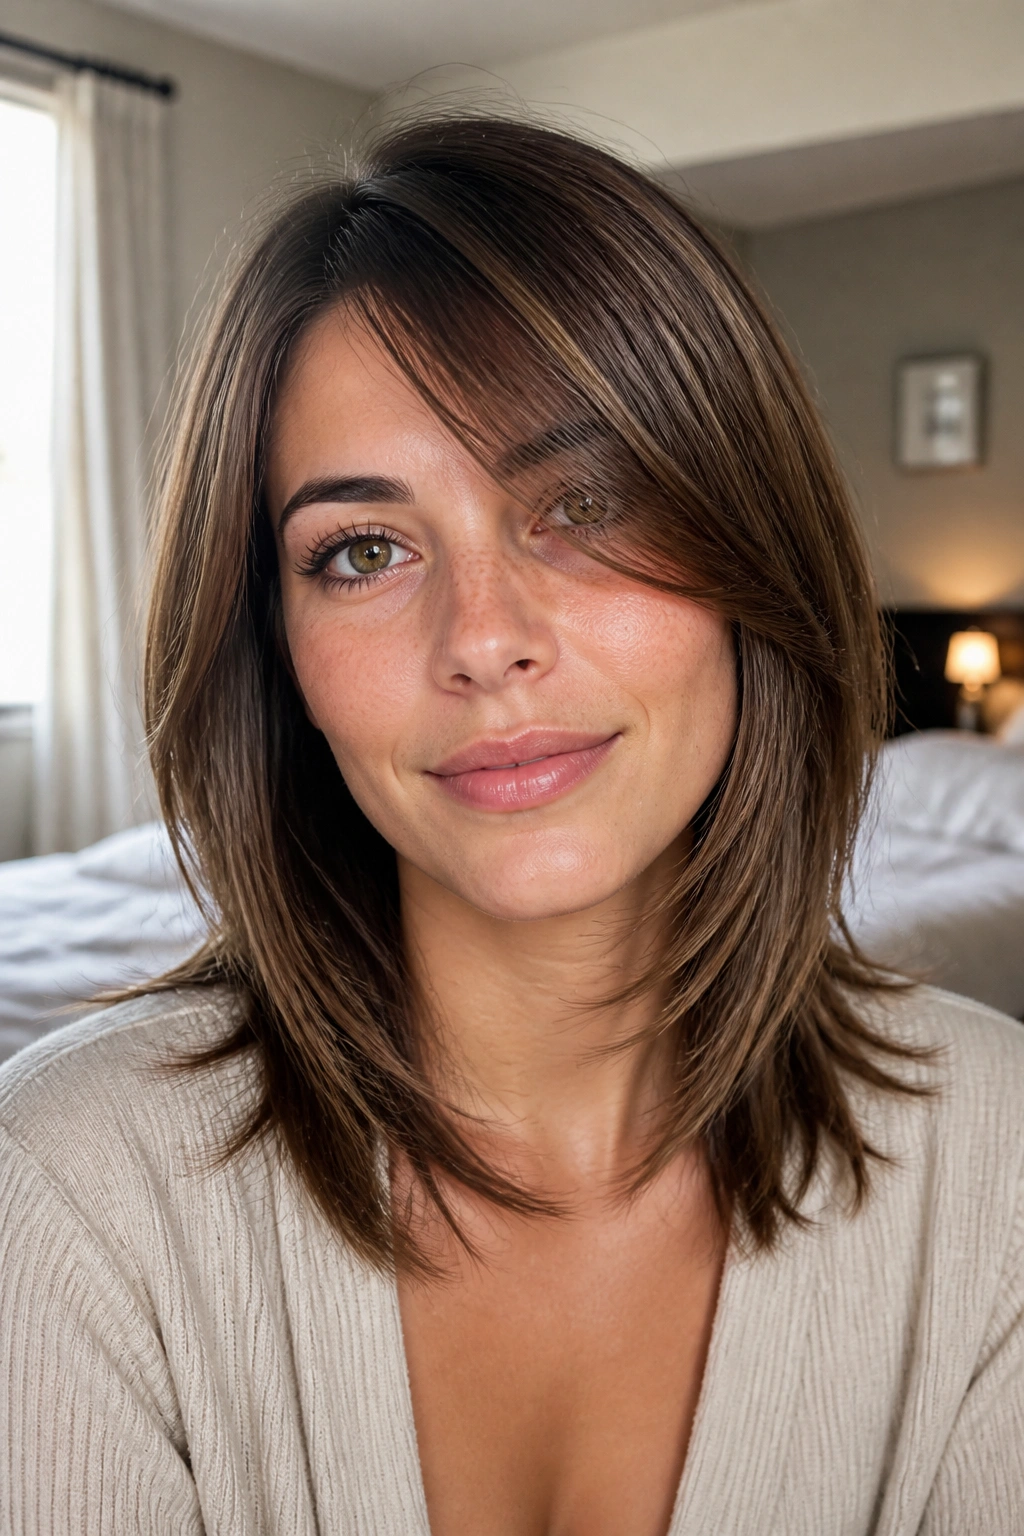
This is one of my favorites because the bang does not have to work alone. The front pieces and the side fringe melt into each other, so the whole haircut feels like one shape instead of two separate ideas.
The longest front pieces should brush the jawline or sit just beneath it. That gives the face a longer outline, which is exactly what many round faces want. If the layers stop at the cheekbone and then suddenly end, the haircut can puff out in the wrong place. Better to let the line travel.
I also like this version on medium-length hair, especially if you wear it down most of the time. It gives movement around the face without forcing you into high-maintenance styling. Ask for soft internal layering rather than chunky steps, and keep the bang angled enough that it can fold into the rest of the cut.
There’s no hard edge here. That’s the charm.
6. Razor-cut piecey side bangs
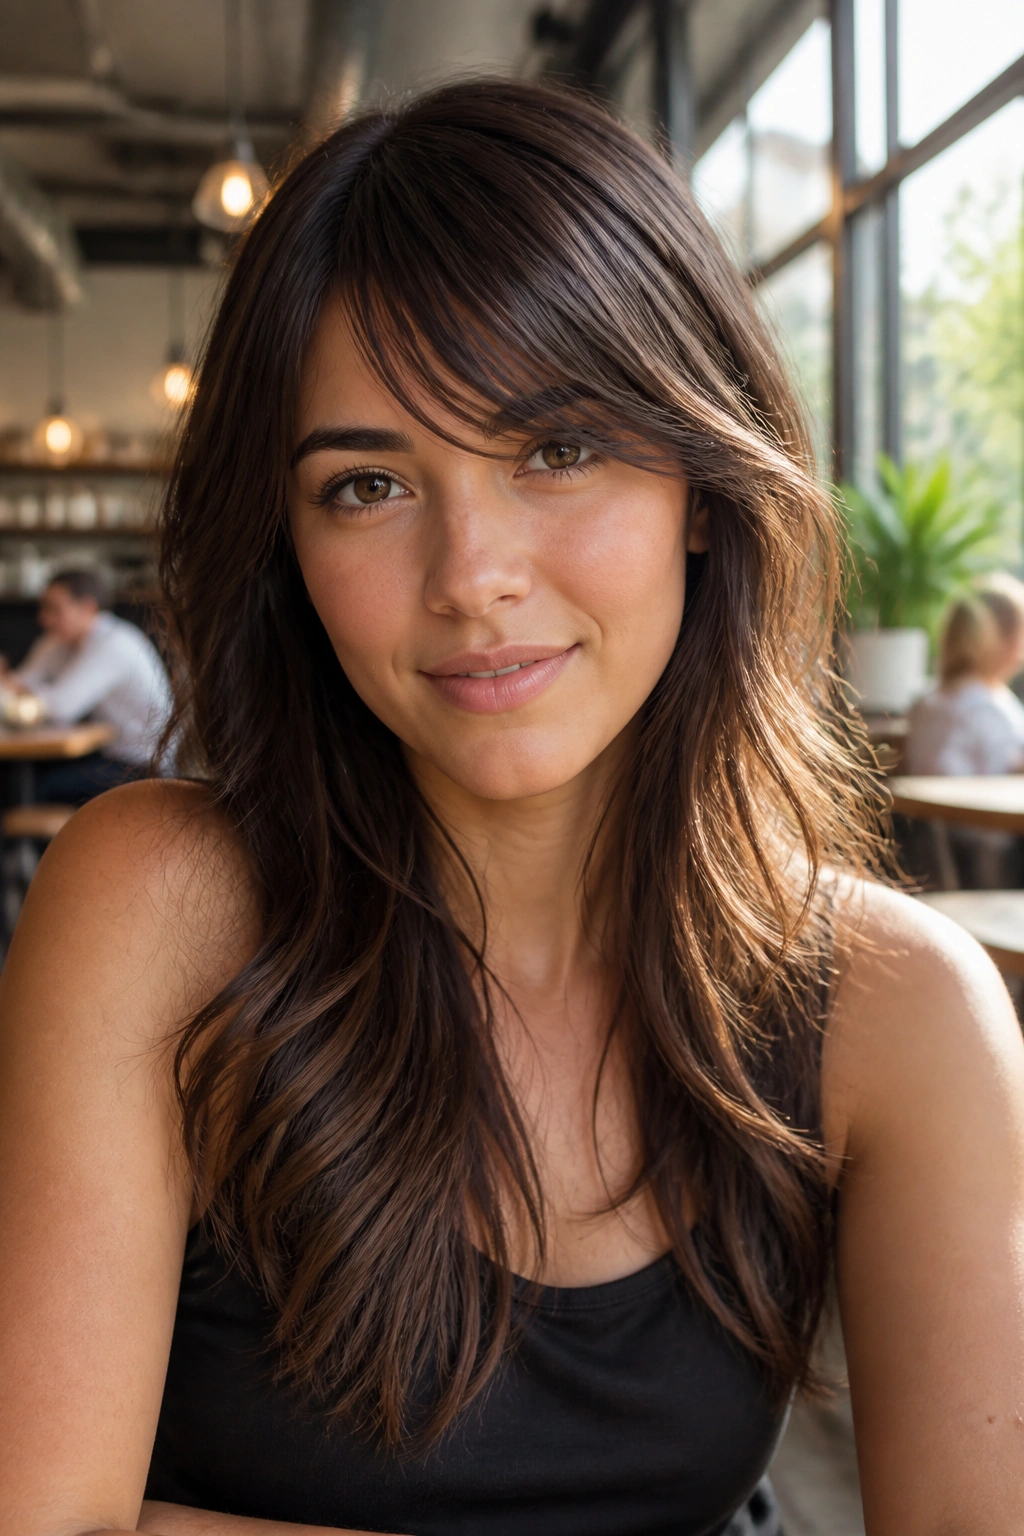
Unlike a dense side bang, this one lives on separation. The razor creates soft little edges that let light and air between the strands, which keeps the front from looking heavy.
That matters on a round face because bluntness can work against you. A piecey bang softens the forehead area while still drawing the eye down the diagonal. It feels a bit more modern, sure, but the real win is practical: it grows out in a very forgiving way.
This shape is best if your hair is straight to slightly wavy. It also looks better when the finish is a little imperfect. A touch of texturizing spray near the ends is enough. Skip thick creams; they make the separation disappear and turn the bang into one flat strip.
If you like a bit of edge without going full shag, this is the one.
7. Side bangs with a shag haircut
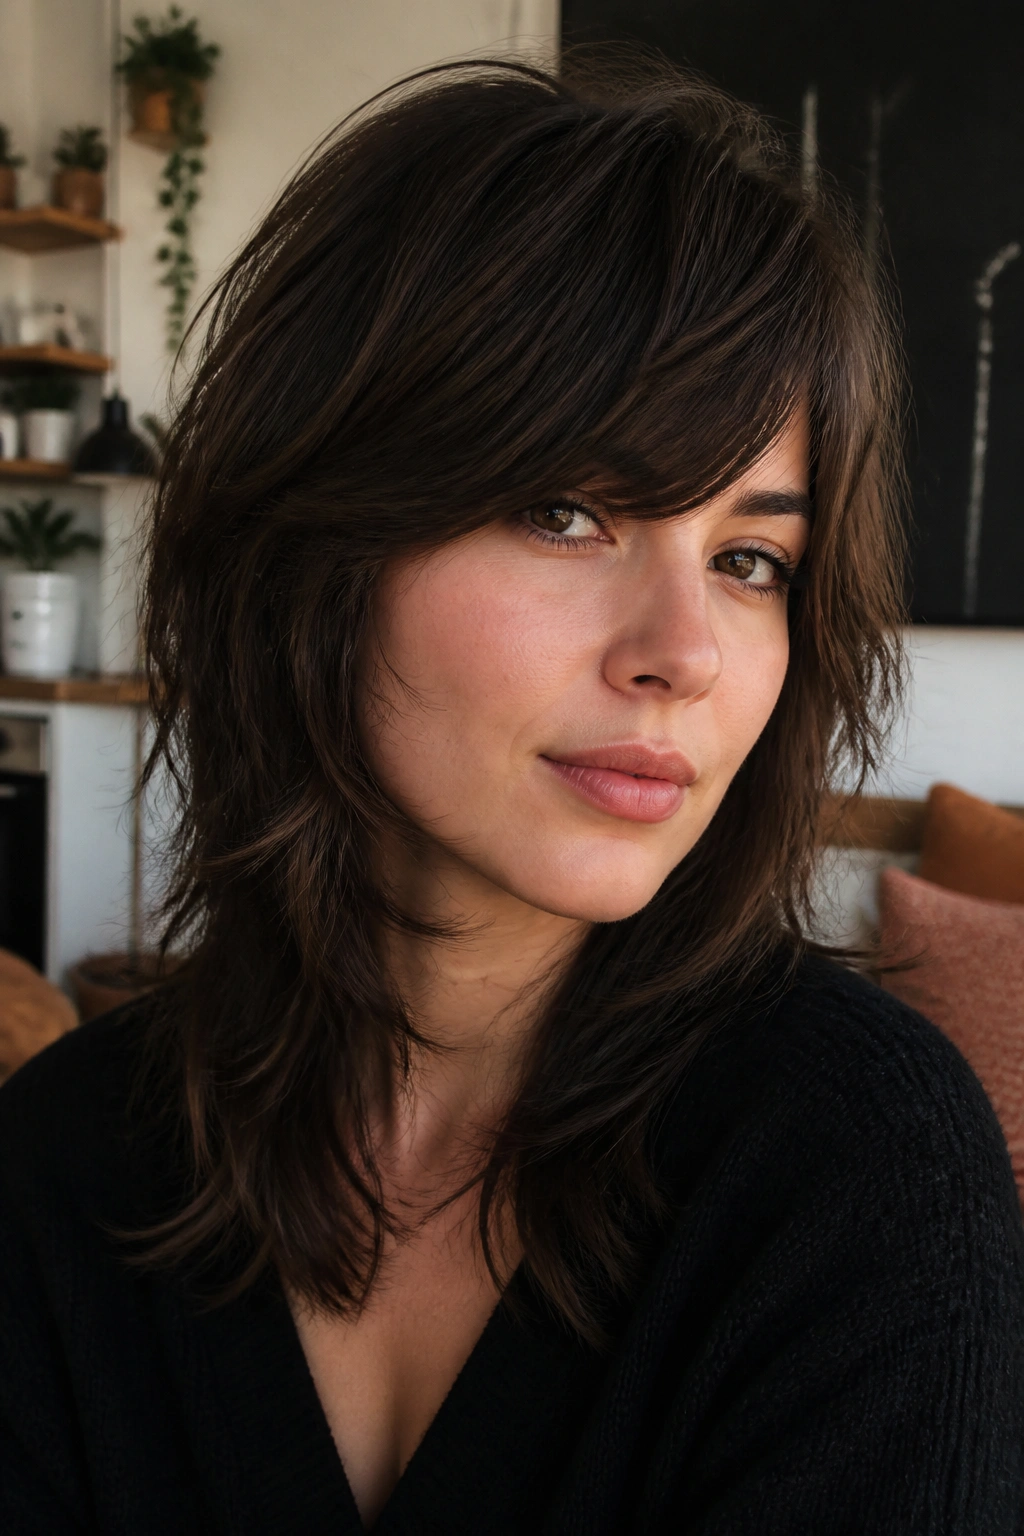
A shag and side bangs are old friends for a reason. The cut already has movement built in, so the bang doesn’t need to do all the heavy lifting on its own.
For round faces, the best part is the vertical energy. The layers push the eye up and down instead of side to side, and that helps balance fuller cheeks. The fringe should feel loose, not pasted on. You want the front to break apart in a few soft pieces as it dries.
Best fit
- Medium to thick hair that can hold texture.
- People who like a low-fuss style.
- Anyone who wants a cut that grows out without looking awkward.
What to avoid
- A shag with a bang that stops too high.
- Too much bulk right at the temples.
- Over-smoothing, which kills the whole point.
A little mousse, a rough blow-dry, and finger-combing are usually enough. Messy is fine here. Controlled mess is better.
8. Side-swept bangs on a collarbone lob
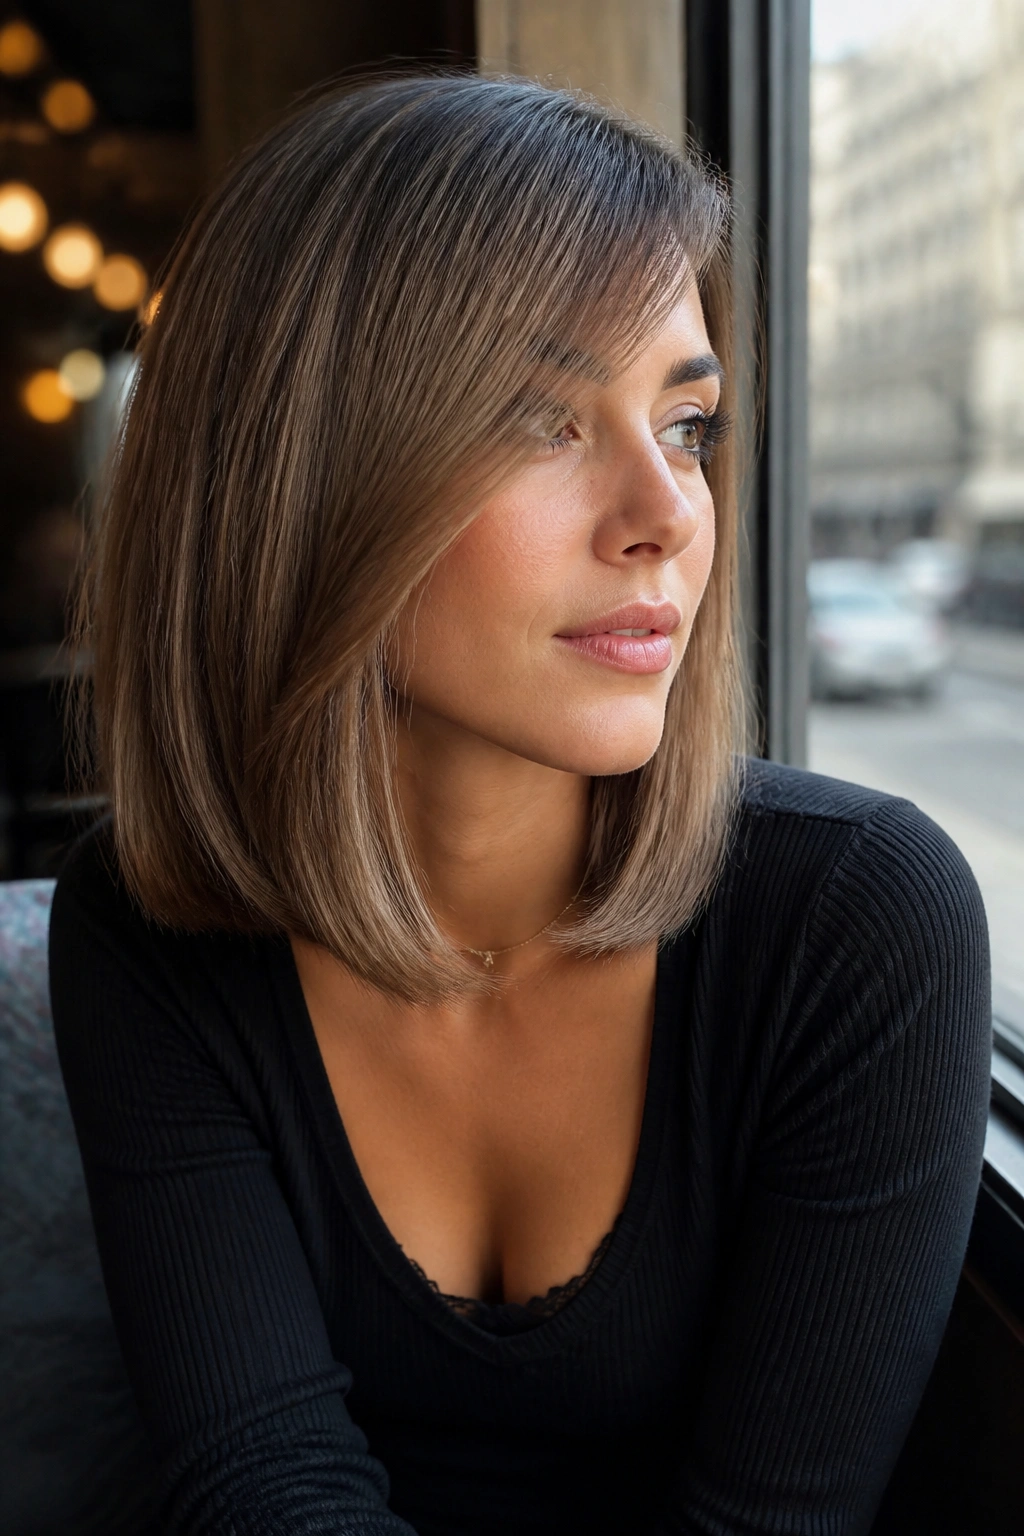
If you want shorter hair but you worry about roundness, this is a smart place to land. The collarbone lob already gives the face some length, and the side bang adds a diagonal line on top of that.
The combo works because the hair doesn’t stop at the widest part of the face. It drops below the chin and keeps going, which helps the whole silhouette feel longer. I especially like it when the front angle starts around the lip or jaw and slides into the bang rather than cutting off sharply.
A round brush and a quick blow-dry are usually enough. Aim the front away from the face, then let it cool before you touch it again. That cooling step matters more than most people think. It keeps the bend from falling out in ten minutes.
Sleek, airy, easy. Hard to argue with that.
9. Long side bangs for round faces and curly hair
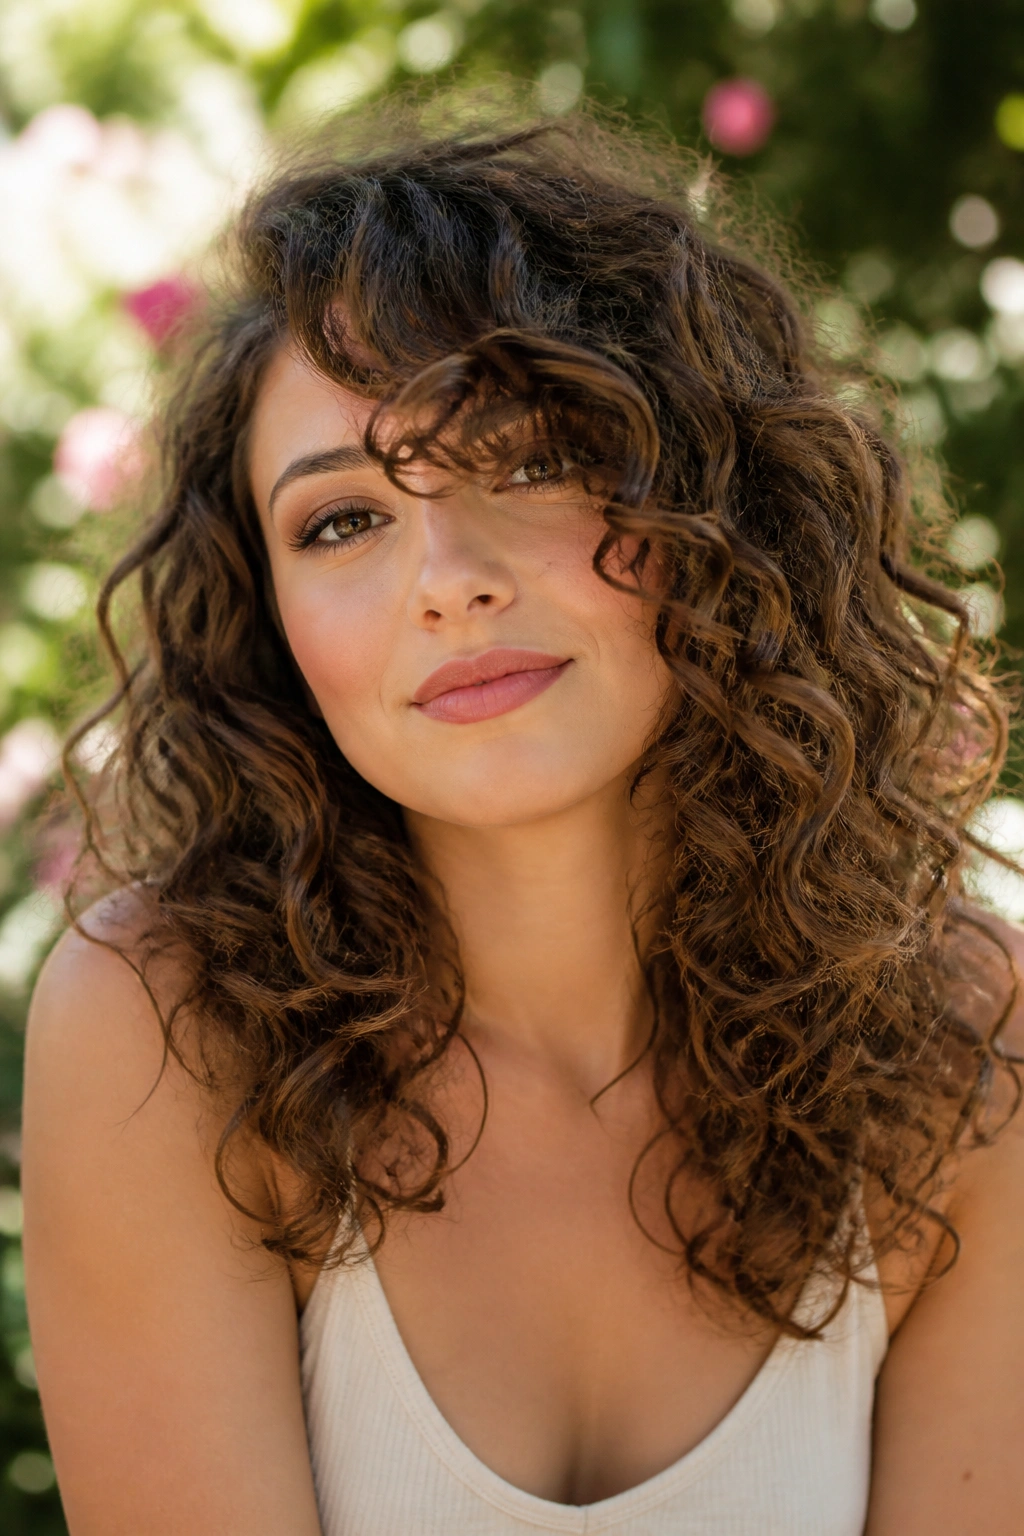
Curly hair changes the rules a bit. The bang needs more length than straight hair does, because curl spring will pull it upward once it dries.
That is why this style should be cut dry, or at least checked dry before the final snip. If you cut a curly side bang too short while it’s wet, you’ll usually end up with something sitting much higher than you wanted. And on a round face, that can shift the shape upward in a way that feels boxy instead of flattering.
How to cut and wear it
The cut
- Leave the shortest point longer than you think.
- Let the bang follow the natural curl group.
- Ask for soft shaping, not aggressive thinning.
The styling
- Use a curl cream that gives slip, not crunch.
- Diffuse on low heat or air-dry with the bang clipped to one side.
- Don’t separate the curl too much while it’s wet.
Curly side bangs can be gorgeous. They just need room to spring.
10. Wispy side bangs with blunt ends
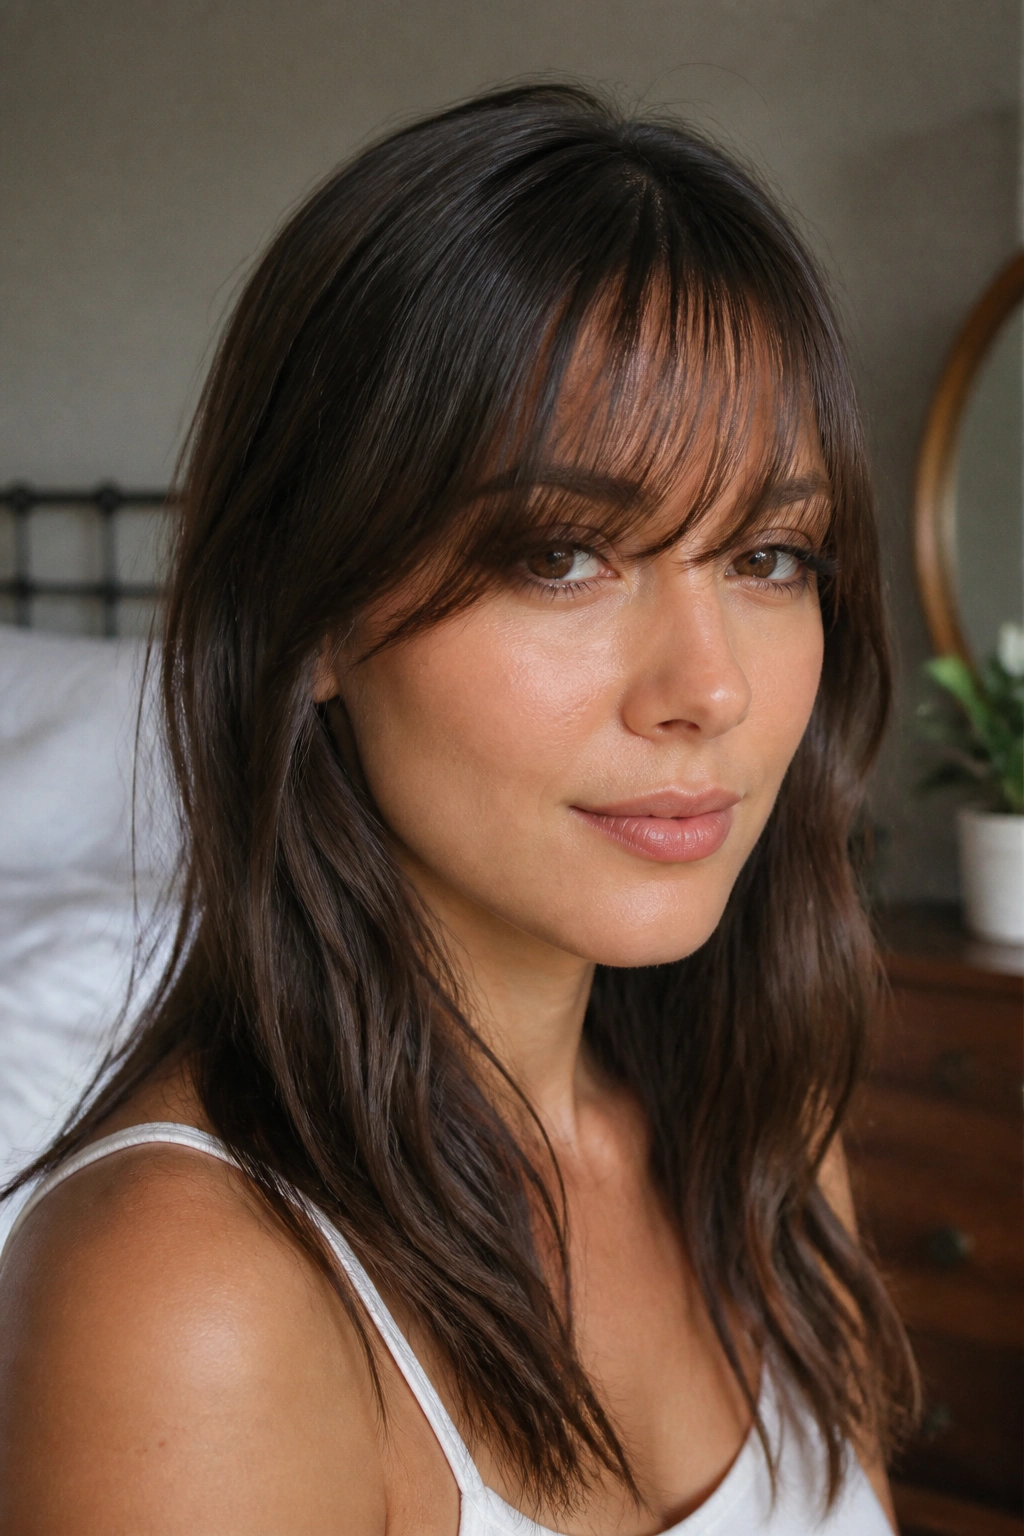
This one sounds contradictory, and that’s why it works. The bang looks light and airy overall, but the ends still land in a defined place, which keeps the shape from vanishing.
That balance is handy for fine hair, or for anyone who wants fringe without a lot of fullness at the forehead. A wispy bang can soften the face while the blunt end gives it enough presence to read as a real style, not a leftover trim.
The trick is density. You want less hair in the bang section, not over-thinned ends that disappear by noon. A lot of stylists go too far with thinning shears and leave the front stringy. Better to keep the shape clean and let the movement come from the sweep, not from a lot of broken-up texture.
I like this on round faces when the shortest point stays high enough to lift the eye, but the longest piece still travels past the cheekbone. That’s the whole game, really.
11. Side bangs that tuck cleanly behind one ear
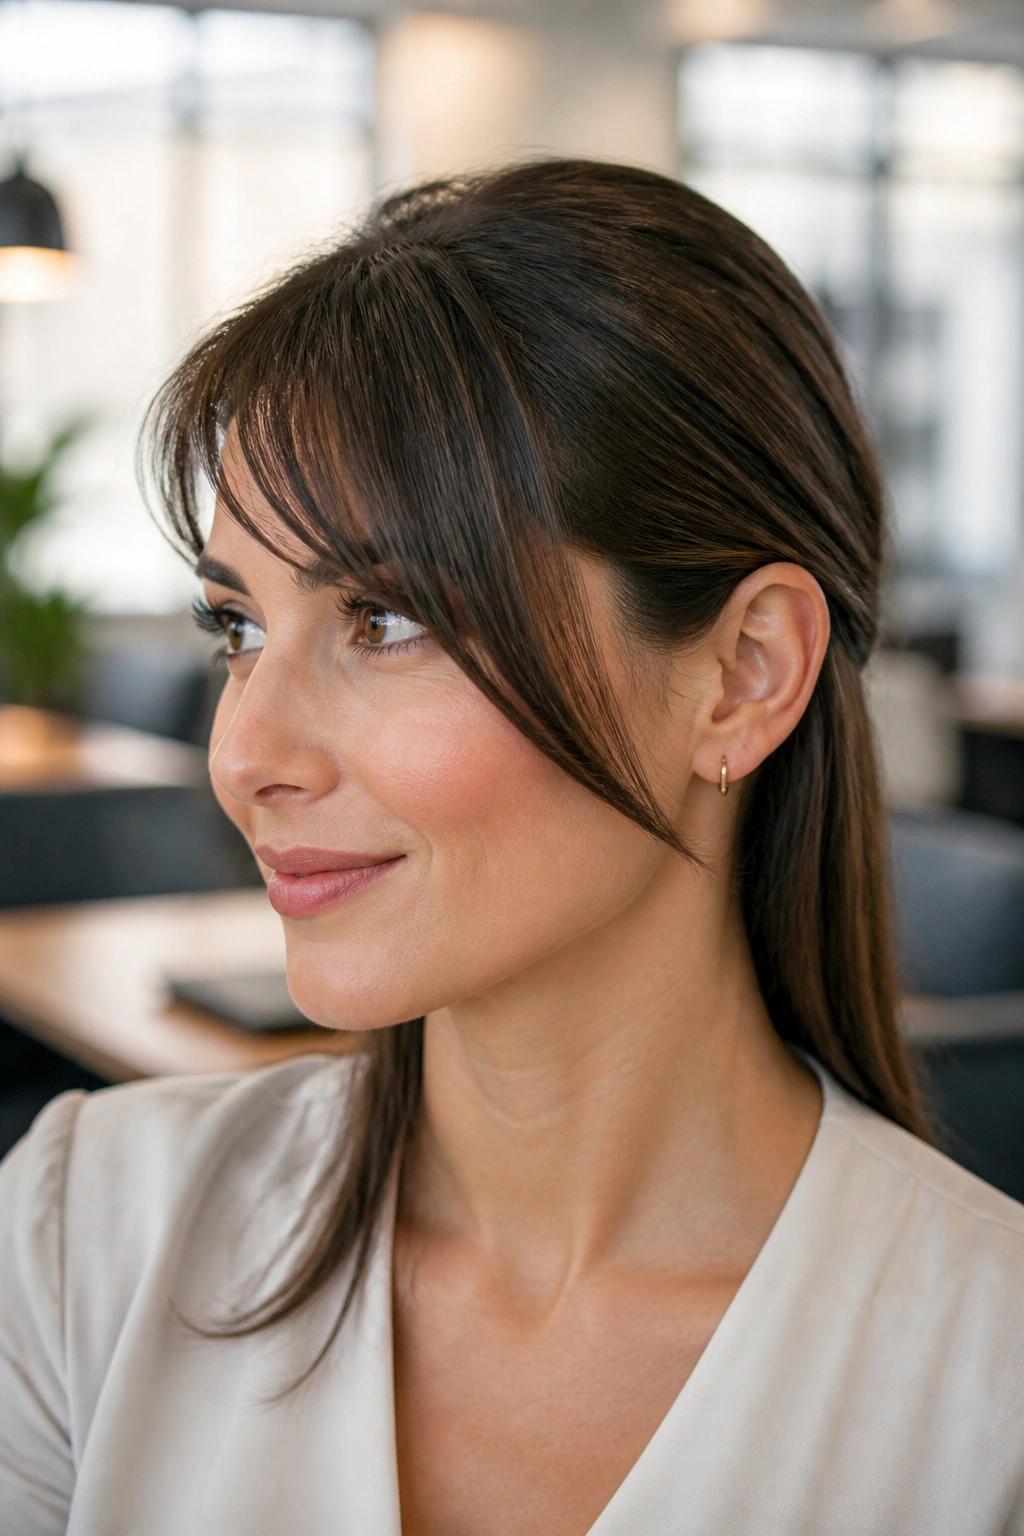
Not every bang needs to stay in front of your face all day. Sometimes the best long side bangs are the ones that can tuck behind one ear, then fall back into place when you want them to.
That makes this cut useful for work, errands, or any day when you want your hair out of the way without losing the line around the face. The length should be generous enough to tuck, but not so long that it turns into an awkward side layer.
What gives the style its shape is the way it slides from the part across the forehead, then curves down toward the cheek. Even when it’s tucked, the front still leaves a soft frame. That matters on round faces because the side bang keeps the face from looking cut off at the temples.
A little bend with a flat brush helps. So does tucking only the very front section, not the whole bang.
12. Side bangs with a bottleneck-inspired shape
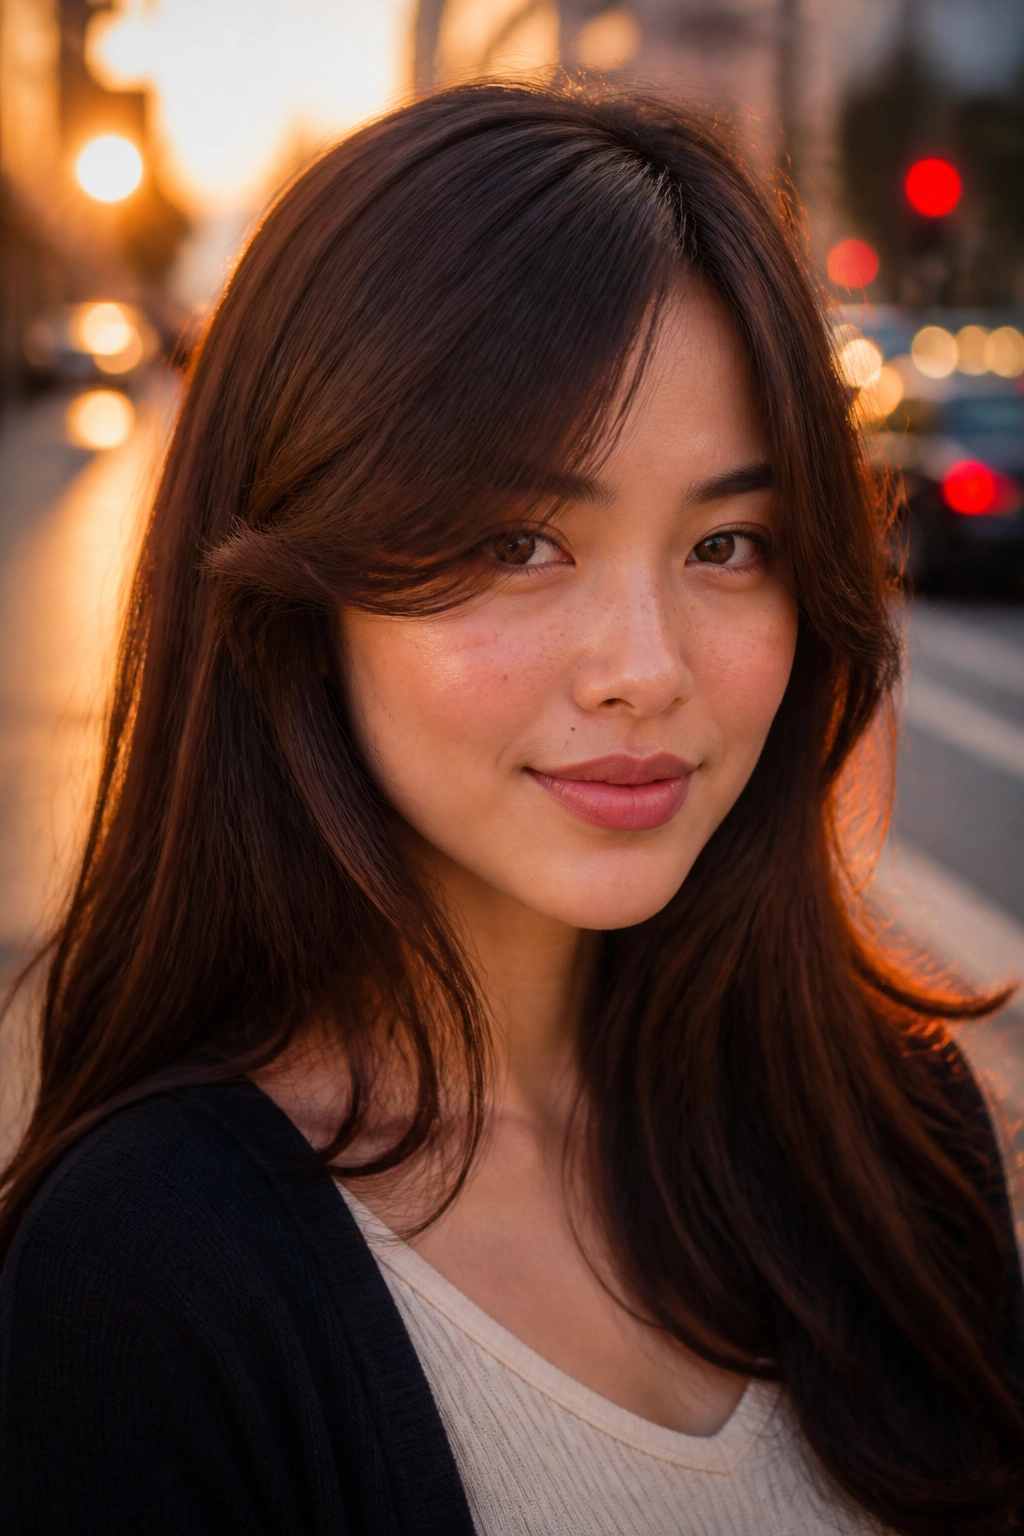
The bottleneck idea works because it starts narrower near the center, then opens out wider near the cheekbones. That shape is softer than a straight side bang and less heavy than a full curtain.
For a round face, that opening matters. It gives the forehead some air while still creating a strong diagonal at the front. The eye follows the narrow start, then lands farther down near the cheek, which gives the face a longer feel without needing a drastic cut.
This version is especially good if you want softness but hate the feeling of hair sitting all over your face. It keeps the center lighter and the outer edges more substantial. That’s a smart trade.
Ask for a longer center transition, then a soft sweep that broadens as it reaches the side. A blow-dry brush can help, but fingers work too if your hair naturally bends. I’d avoid a stiff under-curl here. The whole point is movement.
13. Temple-start side bangs with extra length
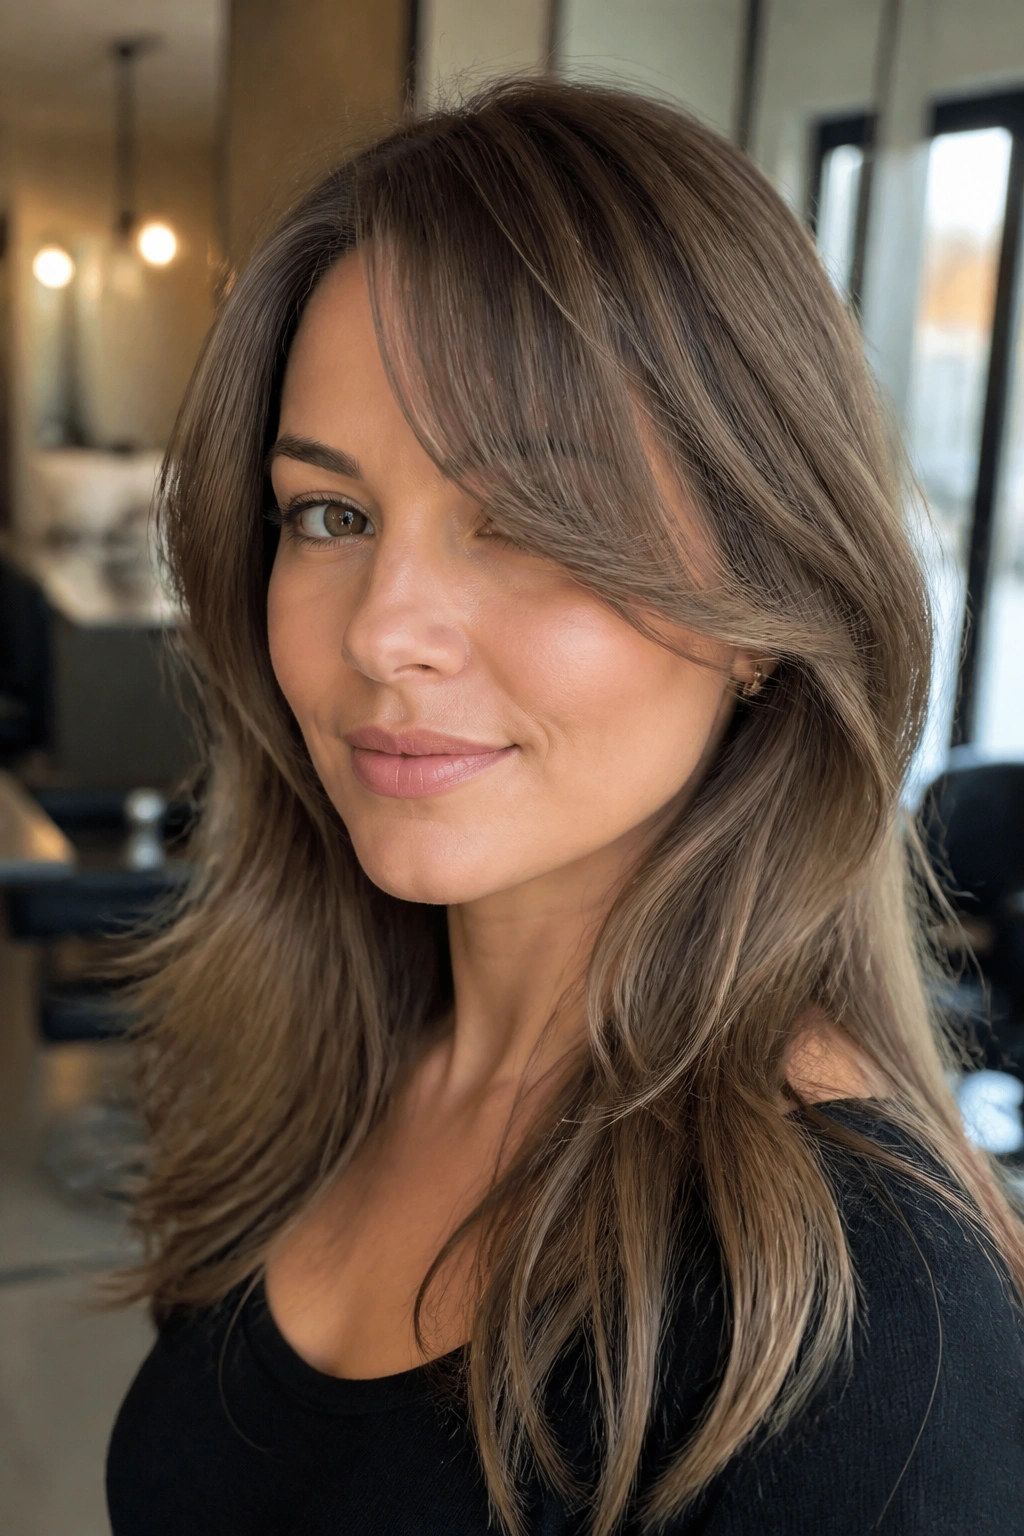
A bang that begins at the temple can feel much easier to wear than one that starts lower on the forehead. It leaves more skin showing up front, which helps the face look open instead of crowded.
Why the temple start matters
The shortest point sits far enough back to create a clean diagonal, and that diagonal is what gives a round face some length. You also get more control over density, which is useful if your hair is thick or if you’ve had bangs before and found them too heavy.
What to ask for
- A starting point at the temple or just behind it.
- The shortest piece near the eyebrow arch.
- The longest piece grazing the cheek or lip.
Who should try it
- Thick hair that needs a soft frame.
- People who like a part with visible lift.
- Anyone nervous about cutting too much into the front.
My opinion: this is one of the safest ways to wear side bangs without feeling trapped by them.
14. Side bangs paired with mid-length layers
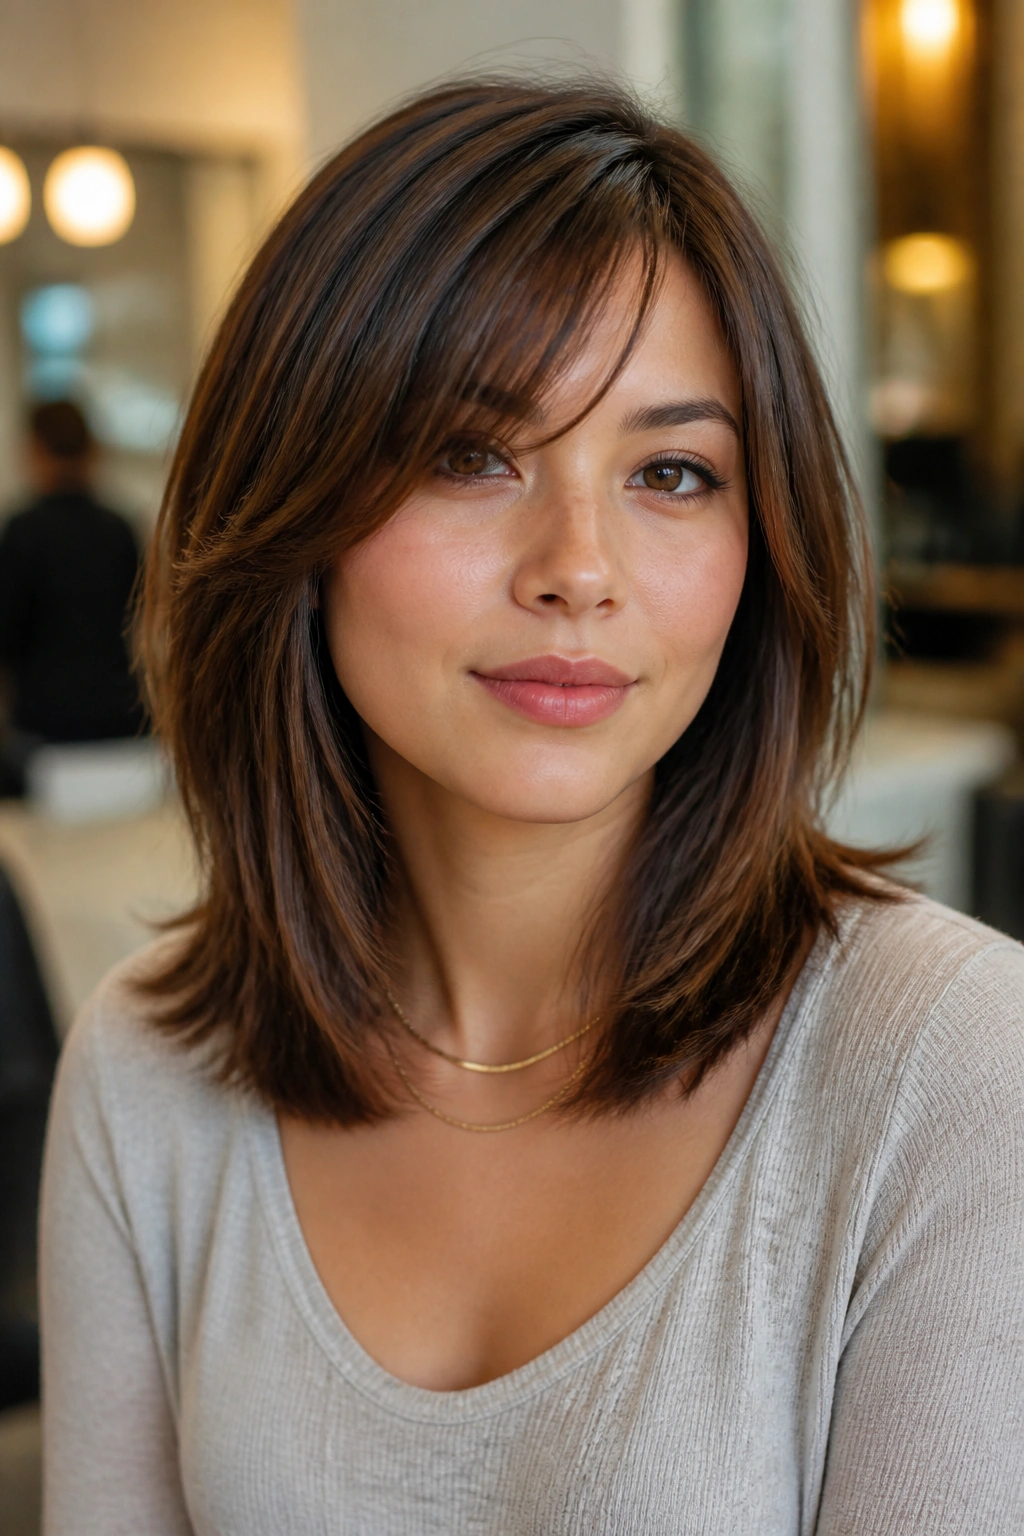
Here’s the part most people miss: the bang should not look like a separate object sitting on top of the haircut. When it blends into mid-length layers, the whole shape feels smoother and slimmer around the face.
That matters a lot for round faces. A disconnected fringe can make the front look heavy, especially if the rest of the hair is thick or the layers stop too abruptly. Mid-length layers give the bang a place to land, so the front doesn’t balloon out at cheek level.
I’d ask your stylist to connect the bang to the shortest face-framing layers, then soften the line below the cheekbone. Point cutting helps, but only a little. You still want enough weight that the bang holds its shape between washes.
This is one of those cuts that looks calm when it’s done right. No obvious jump. No sharp shelf. Just a clean fall of hair that follows the face.
15. Side bangs that flow into a layered bob
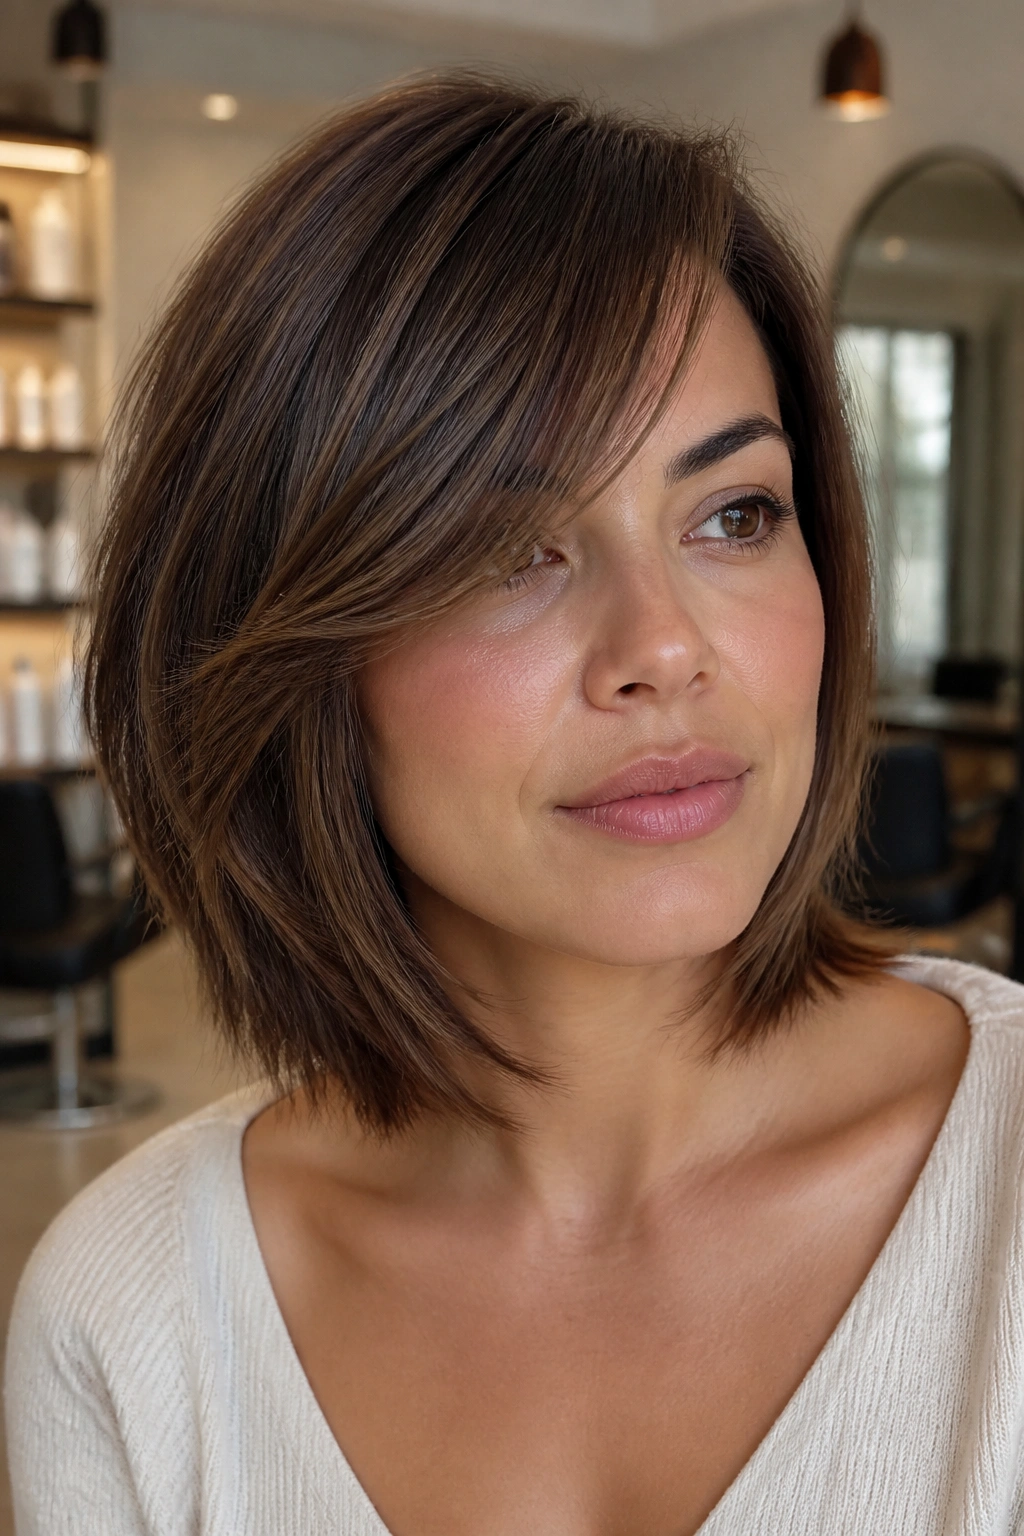
Can a bob work on a round face? Yes — when the front has a long side sweep and the bob itself stays below the chin or just skims it.
The reason is simple. A blunt bob that ends at the cheek can widen the face fast. A layered bob with side bangs does the opposite. The bang pulls the eye diagonally, and the layers keep the bottom edge from feeling heavy. Together, they make the haircut feel lighter and longer.
How to keep the shape slim
- Keep the front longer than the back.
- Let the shortest bang piece stay near the eyebrow.
- Ask for soft layers, not a stacked triangle.
A little bend toward the cheek is enough. You do not need a full curl. In fact, too much curl at the ends can puff the shape out and undo the whole effect.
This is a tidy, polished option when you want shorter hair without losing softness around the face.
16. Side bangs for thick hair with internal thinning
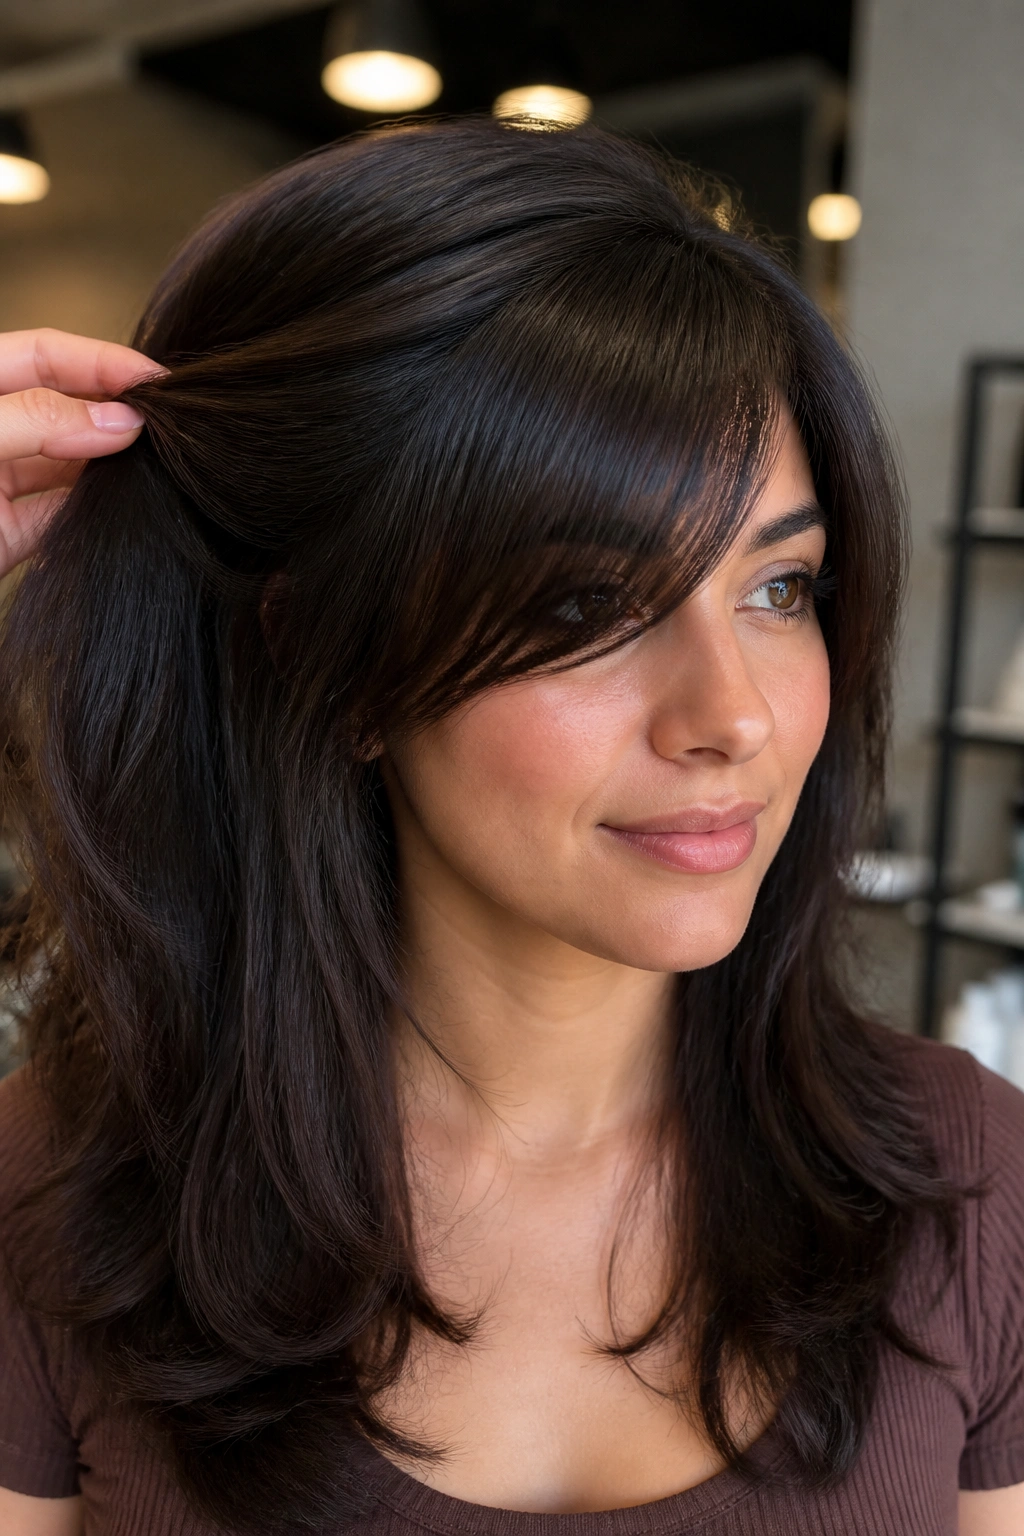
Thick hair can make side bangs look luxurious, but it can also make them feel blunt and bulky if the inside is not handled well.
That’s why the thinning should happen underneath the visible top layer, not across the whole bang. If the stylist removes too much from the surface, the front gets frizzy and sticks out in odd places. Hidden weight removal is the safer move.
What to ask your stylist for
- Internal thinning, not aggressive thinning shears across the top.
- A long diagonal line that stays full enough to control.
- Soft texturizing at the ends, especially near the temple.
How to style it
- Blow-dry the roots first.
- Use a medium round brush to direct the bang across the forehead.
- Finish with a tiny amount of smoothing cream on the ends only.
Thick hair side bangs can look gorgeous. They just need discipline. Skip the heavy product. It only makes the front collapse into a lump.
17. Side bangs for fine hair with airy lift

Fine hair needs a different kind of help. Too much layering can make the bang vanish, and too much product can make it fall flat before lunch.
What works here is a lighter cut with a clean diagonal and just enough root lift to keep the shape visible. The bang should move, but not disappear. That line between airy and thin is narrow, and I’d rather err on the side of a little more weight at the end than too much thinning at the top.
A side part can help a lot because it gives the roots a natural push. Blow-dry the bang in the opposite direction for a few seconds first, then sweep it across and let it cool. That small bit of tension gives the front more body than brushing it straight down ever will.
Light mousse, root spray, and a touch of hairspray at the roots are usually enough. Heavy oils are not your friend here. They make fine side bangs separate in sad little strings.
18. Side bangs with soft waves and a bent finish
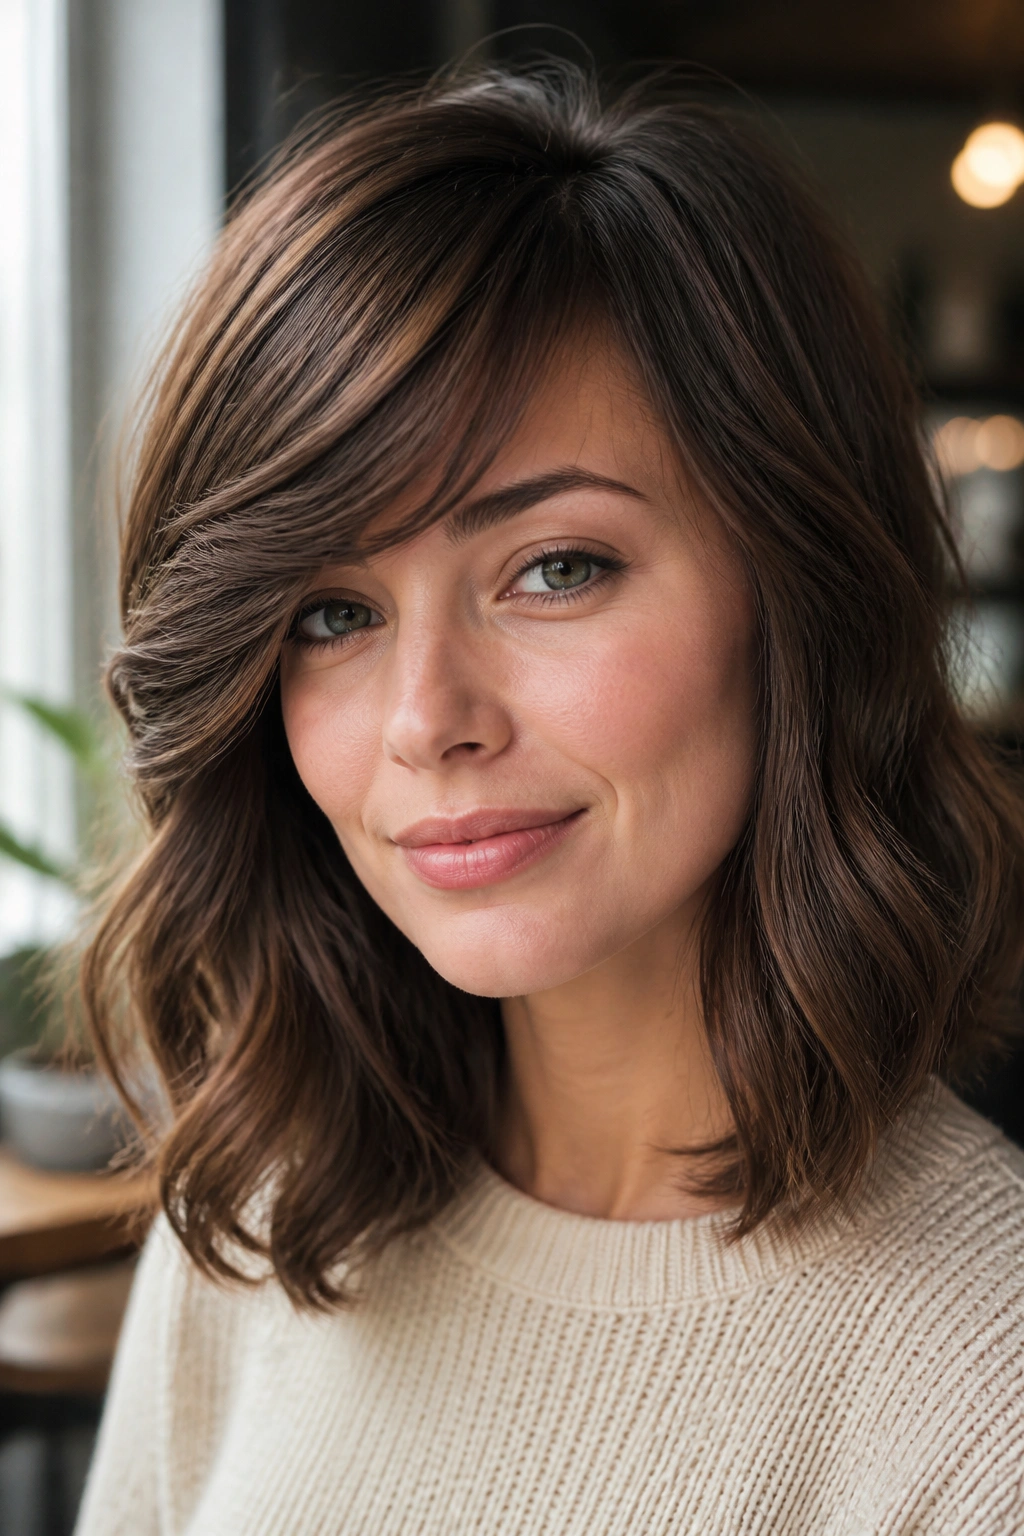
This style sits somewhere between polished and undone. The bang is not pin-straight, and it is not fully curled either. It just has a soft bend that matches the rest of the waves.
That bend is useful on round faces because it breaks up the width without making the front look harsh. A straight bang can sometimes feel too flat against the forehead. A loose curve gives the face more shape around the eyes and cheeks.
The easiest way to get it is with a 1-inch curling iron or a large hot roller. Wrap only the middle section of the bang, leave the ends loose, and brush through once it cools. You want movement, not a tight spiral. A wave that folds away from the face is enough.
This one looks especially good with shoulder-length hair and soft layers. It has that easy feel people like, but the shape is still doing a job.
19. Grown-out side bangs that hit the cheekbone
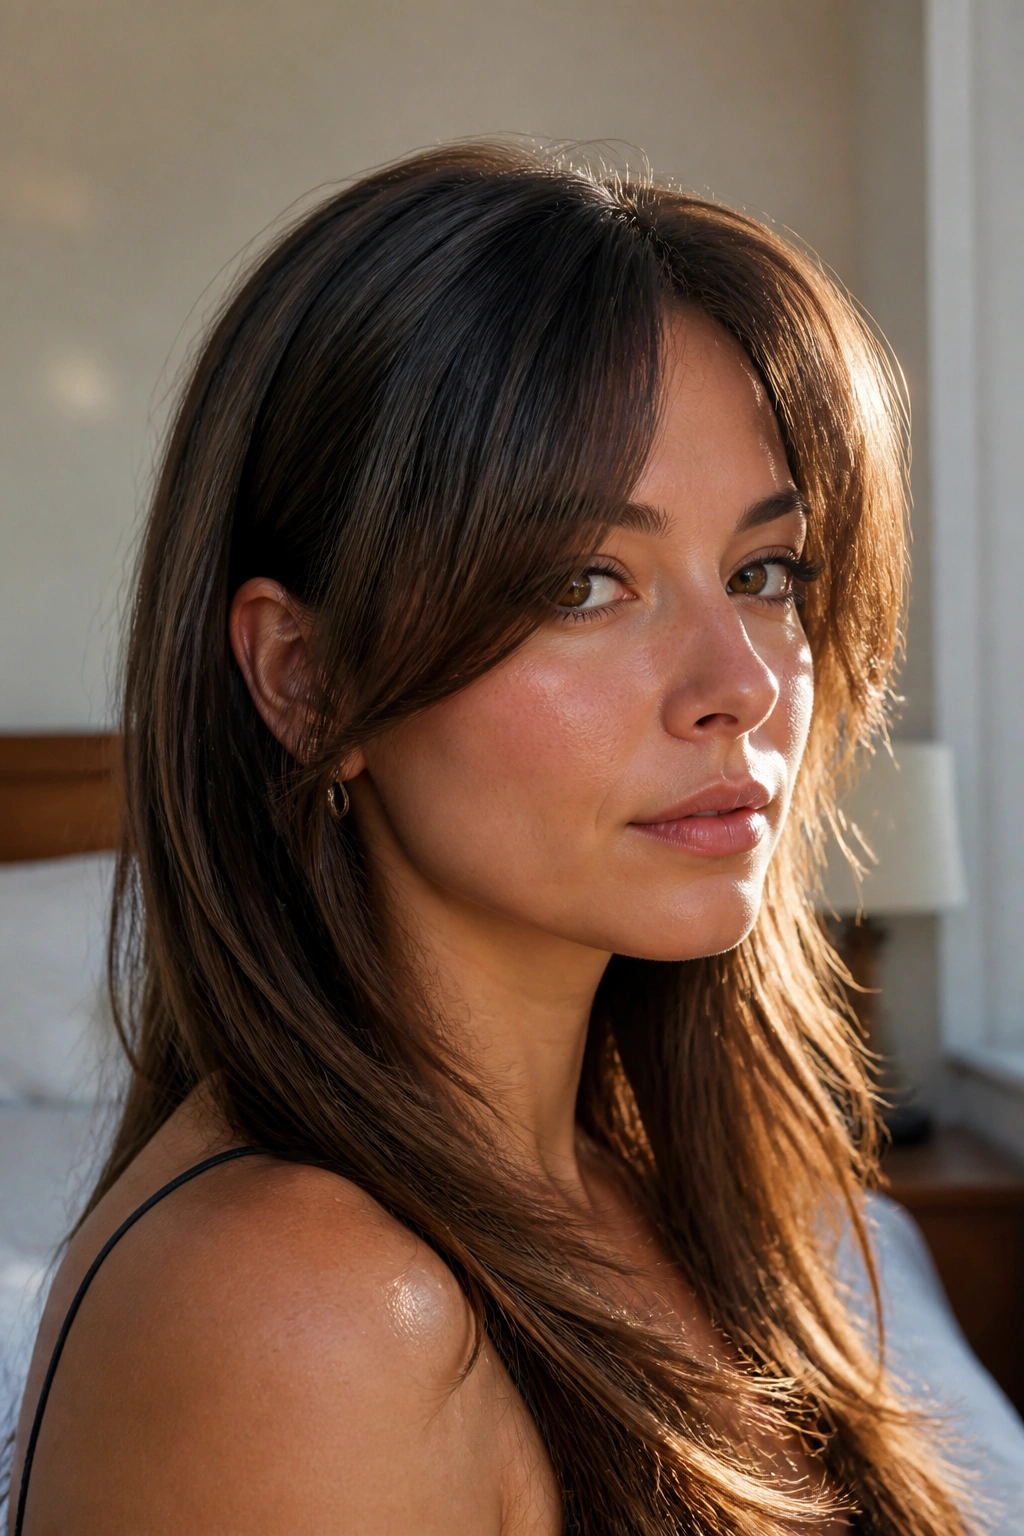
Sometimes the best fringe is the one that’s already halfway grown out. A grown-out side bang can sit right at the cheekbone, which is a sweet spot for round faces because it draws the eye down without crowding the forehead.
It also tends to be easier to live with. You can tuck it, pin it, sweep it, or let it fall loose. The cut should still have intention, though. If the front grows too long without shape, it becomes a random face layer instead of a bang with purpose.
A few things make this stage work well:
- The shortest piece should still have a clear angle.
- The longest piece should pass the cheekbone.
- The front should blend into the rest of the haircut, not stop dead.
- A quick bend with a brush keeps it from splitting in odd places.
I like this one for anyone nervous about committing. It gives you the softness of bangs without the feeling of a strict haircut.
20. Polished side bangs with a sleek blowout
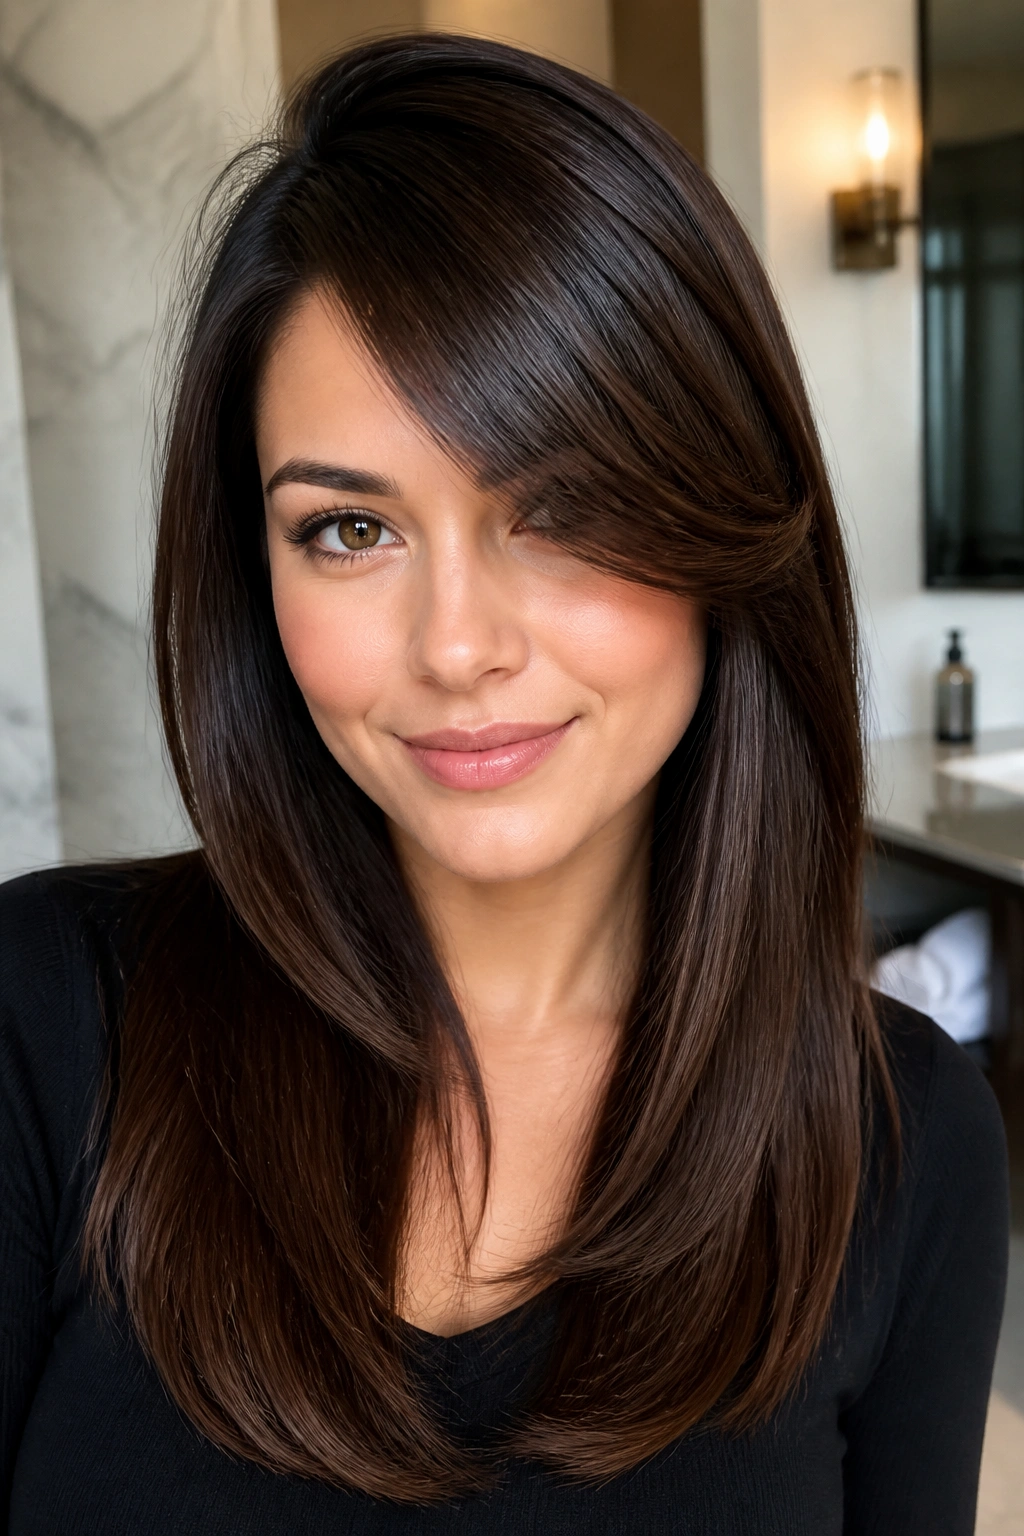
A sleek blowout sounds formal, but it can be one of the most flattering ways to wear long side bangs for round faces. The clean line from temple to cheekbone gives the face a longer frame, and the smooth finish keeps the front from puffing out where you do not want it.
This is the version I’d pick for straight hair, or for anyone willing to spend a few extra minutes with a brush and dryer. The roots should be lifted first, then the bang should be guided across the forehead and cooled in place. A little heat protectant, a round brush, and a cool shot are enough.
The important thing is not to over-slick it. If the front gets too tight against the head, the style can lose life. A bit of movement near the ends keeps it from looking stiff. I like a tiny amount of serum only at the last inch or two — enough to tame frizz, not enough to flatten the shape.
Final Thoughts
If you’re choosing between two options, go longer and softer. Bangs are easier to shorten later than they are to grow back overnight, and round faces usually look best when the front keeps a clean diagonal instead of stopping short.
Texture matters just as much as length. A side bang that looks perfect on straight hair can sit in a whole different place on curls or waves, so the cut should follow the hair you actually live with.
Bring a photo, but more useful than that: point to where you want the shortest piece to land. If it sits near the eyebrow arch and moves toward the cheekbone, you’re usually in the right zone.
