



Round faces can wear long hair with more drama than people usually give them credit for. The problem is rarely length itself. It is bulk in the wrong place.
The best messy long hairstyles for round faces do a few smart things at once: they add a little height at the crown, they create diagonal movement instead of a hard horizontal line, and they let the ends fall below the widest part of the cheeks. That last part matters more than people think. Hair that sits right at cheek level can make a face feel wider, while hair that drops past the jaw and moves a little when you turn your head feels lighter and longer.
I’ve always liked hair that looks touched, not trapped. A style with a bit of bend, a few loose pieces, and some uneven texture usually feels friendlier on round features than a stiff shape that has been sprayed into place and never allowed to move. Clean lines have their place. So does softness. But softness does the better job here.
The 18 styles below lean into that idea in different ways. Some are quick fixes for second-day hair. Some need a curling iron, a claw clip, or ten patient minutes in front of the mirror. All of them keep the focus on length, lift, and movement, which is exactly where round faces tend to look strongest.
1. Soft Face-Framing Layers with a Deep Side Part for Round Faces
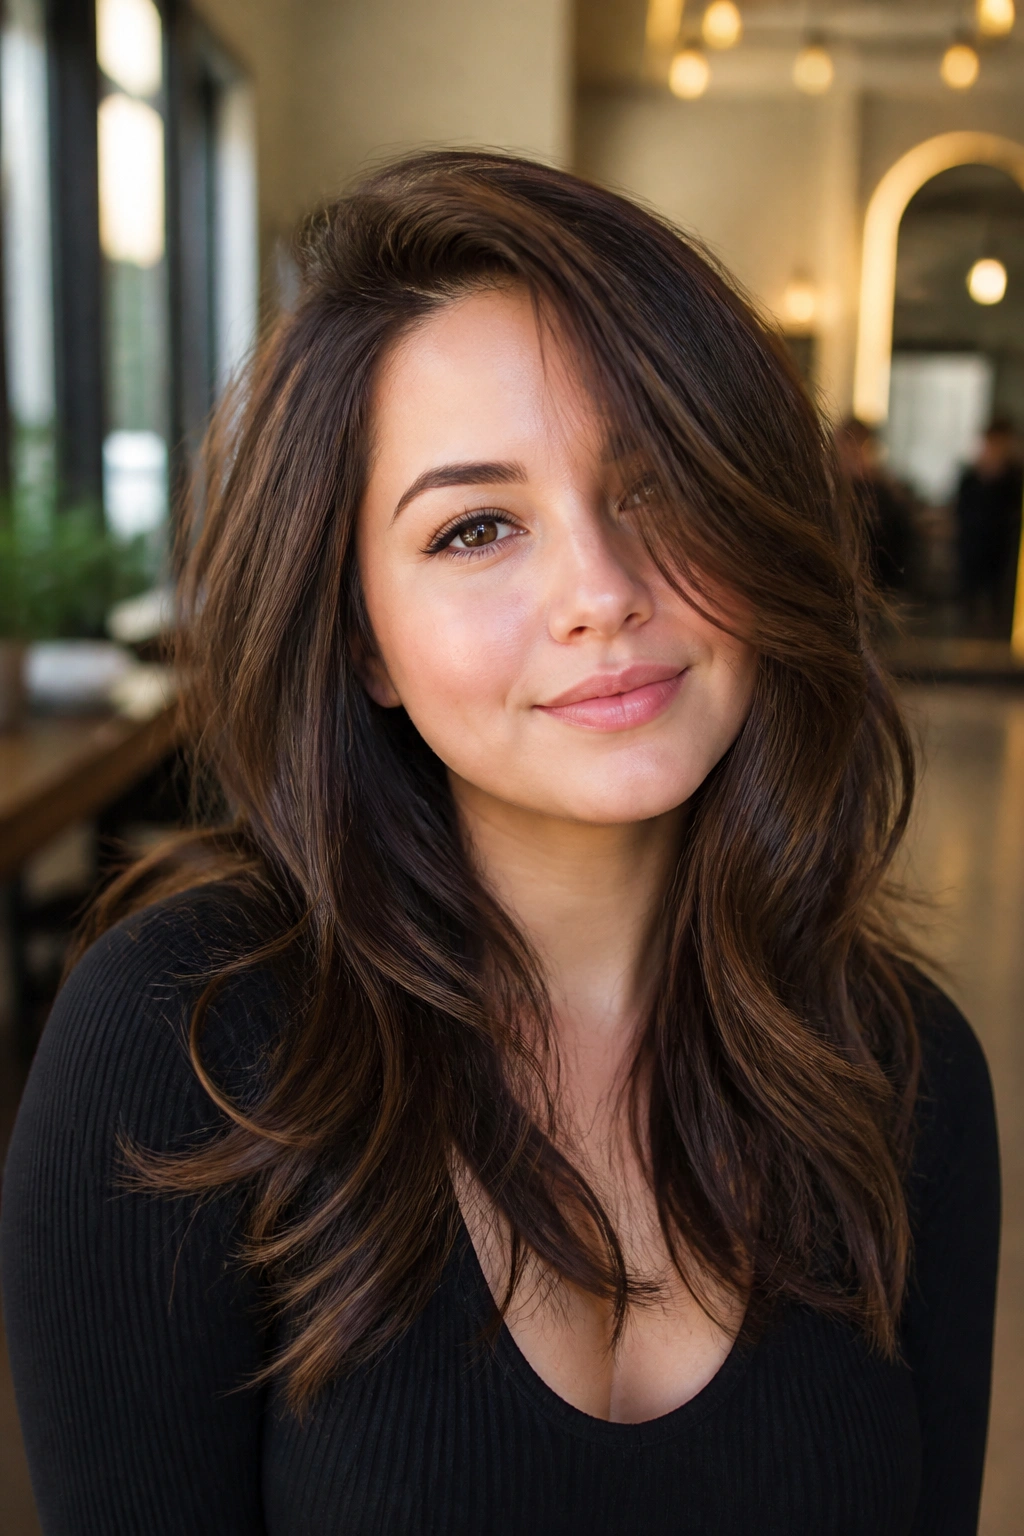
If you want one style that does a lot of work without looking fussy, start here.
Long face-framing layers are the quiet hero of messy hair on a round face. The trick is to keep the shortest pieces below the cheekbones, then sweep the part a little off center so the whole shape tilts instead of sitting flat. That diagonal line matters. It breaks up the width of the face and makes the hair feel longer before anyone even notices the layers.
Why It Flatters Round Faces
The best version has long, feathered pieces starting around the jaw or collarbone, not a blunt layer that stops at the widest point of the cheeks. If the hair is fine, keep the layers soft and long so the ends do not go see-through. If the hair is thick, ask for internal removal of weight so the shape moves instead of puffing out at the sides.
A loose bend through the mid-lengths helps too. Not curl, exactly. More like a soft wave that starts under the face and relaxes toward the ends.
- Part the hair 2 to 3 inches off center for instant asymmetry.
- Ask for face-framing layers that hit at least at the jawline.
- Use a 1.25-inch curling iron only from the mid-lengths down.
- Finish with a light mist of texture spray, then rake it through with your fingers.
My one rule: do not let the shortest layer land right at cheek level. That is where the shape starts to fight the face.
2. Curtain Bangs with Loose S-Waves
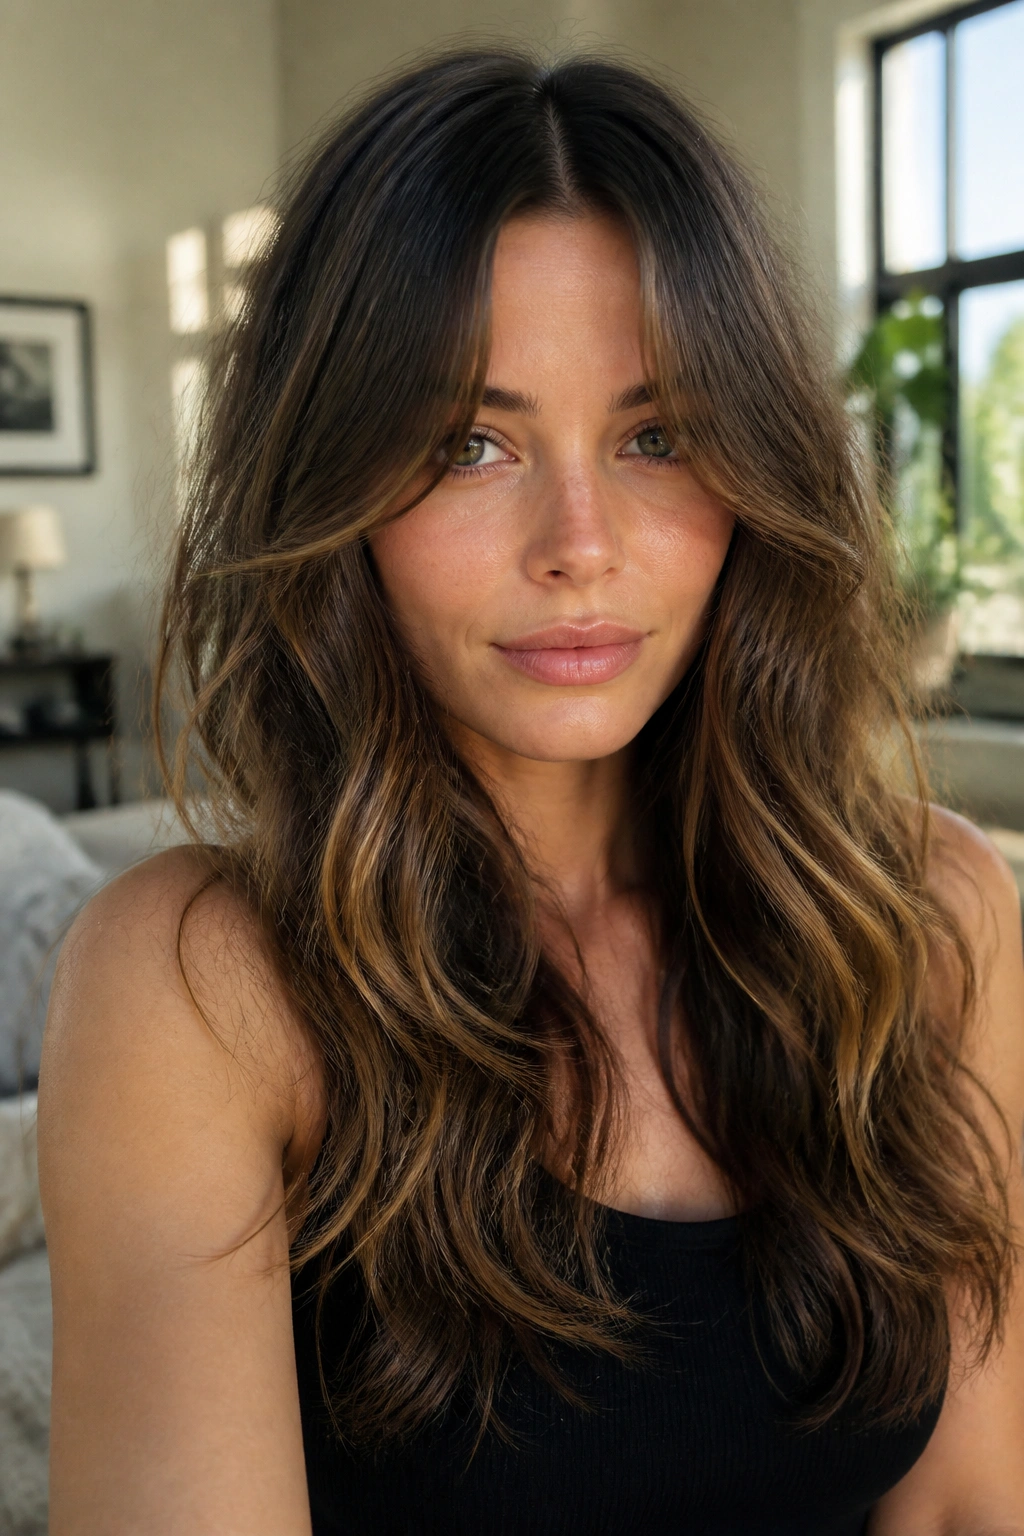
Can bangs work on a round face? Yes, if they open instead of closing in.
Curtain bangs are one of the easiest ways to soften a rounder shape without hiding the forehead. The split down the middle gives the face a vertical lane right away, and the longer outer pieces slide into the cheeks and jaw in a gentle way. When they are paired with loose S-waves, the result feels relaxed rather than styled within an inch of its life.
The part is everything here. Curtain bangs that begin around the eyebrows and taper longer toward the cheekbones look airy. Bangs cut too short or too straight can box in the face, which is the opposite of what you want. You want a little swing, a little drape, and room for the hair to part naturally when it dries.
I like this look best with a round brush blowout at the front and a soft bend through the rest of the hair. Let the bangs fall away from the center, then pinch a tiny bit of cream through the ends so they do not frizz out. A clean center opening and some mess in the lengths. That balance is the whole point.
3. The Half-Up Messy Top Knot with Long Lengths
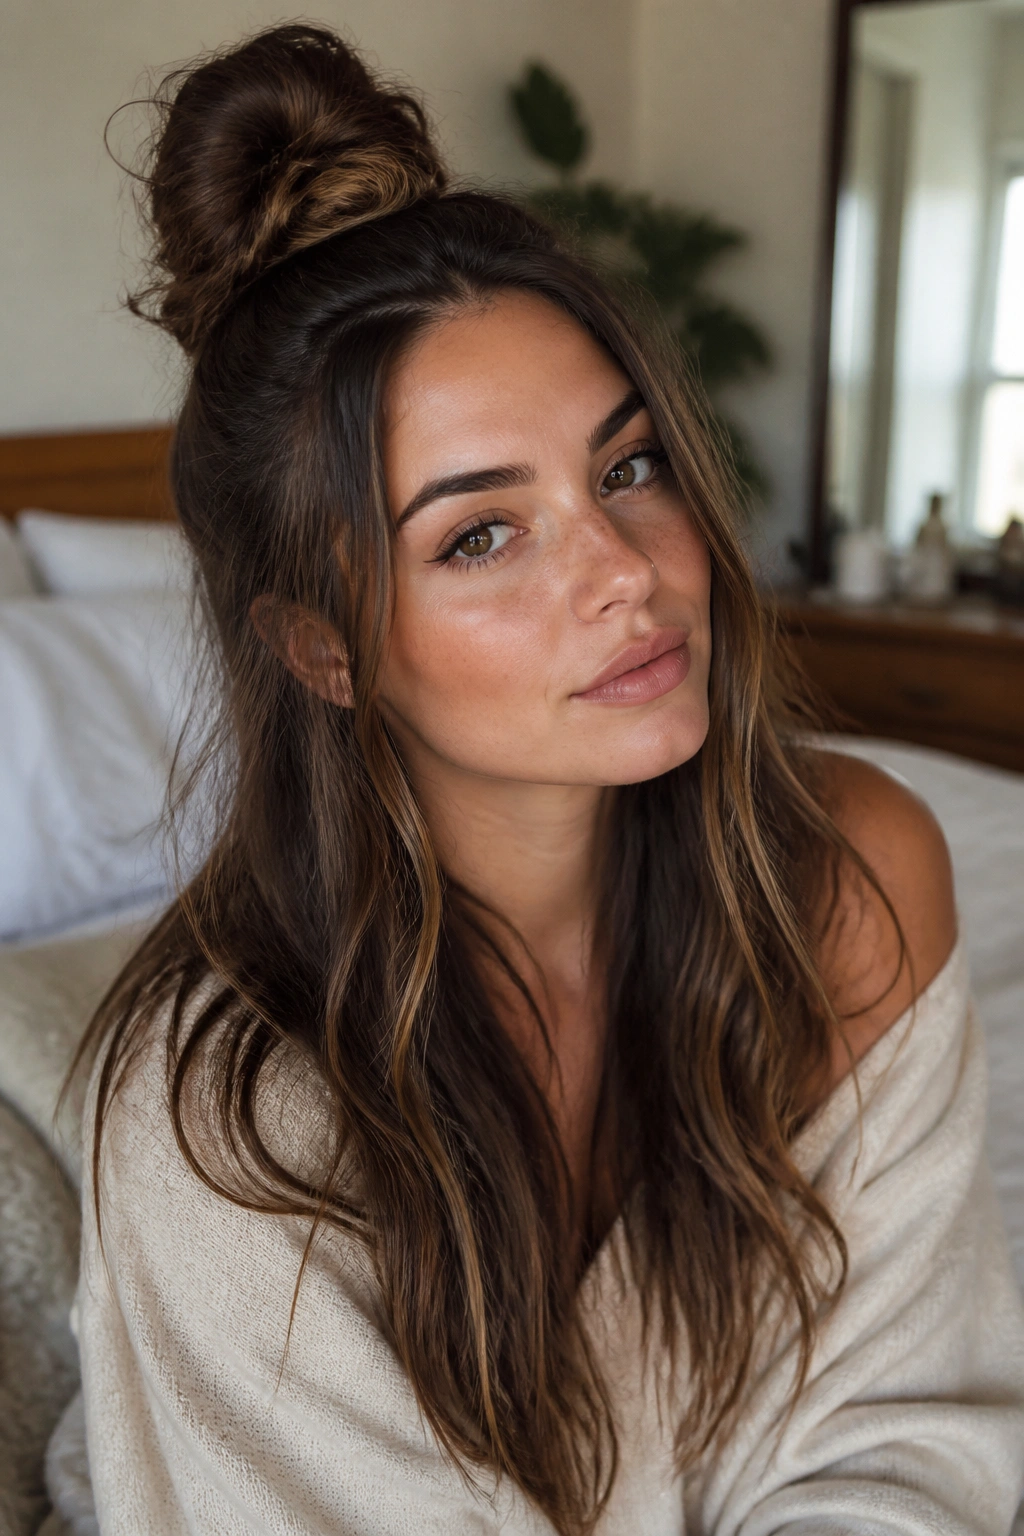
This is the style I reach for when hair feels flat at the roots but the lengths still have life left in them.
A half-up messy top knot gives a round face a little lift where it needs it most: at the crown. That vertical height pulls the eye upward, while the loose hair below keeps the overall line long. It is especially good on second-day hair, because a bit of texture makes the knot hold without turning into a hard little ball on top of the head.
The best version is not high and tight. It sits slightly back from the hairline, with a few pieces left out around the temples and ears. Those loose strands stop the style from feeling severe. They also give the face a softer frame, which matters when you do not want the cheeks to read as the widest point in the look.
A little dry shampoo at the roots helps a lot here. So does a quick backcomb under the section you plan to twist. Keep the knot loose, pin it from underneath, and let the rest of the hair stay wavy or slightly undone.
One sentence version: lift on top, softness around the face, length everywhere else.
4. Boho Braids Woven Through Undone Waves
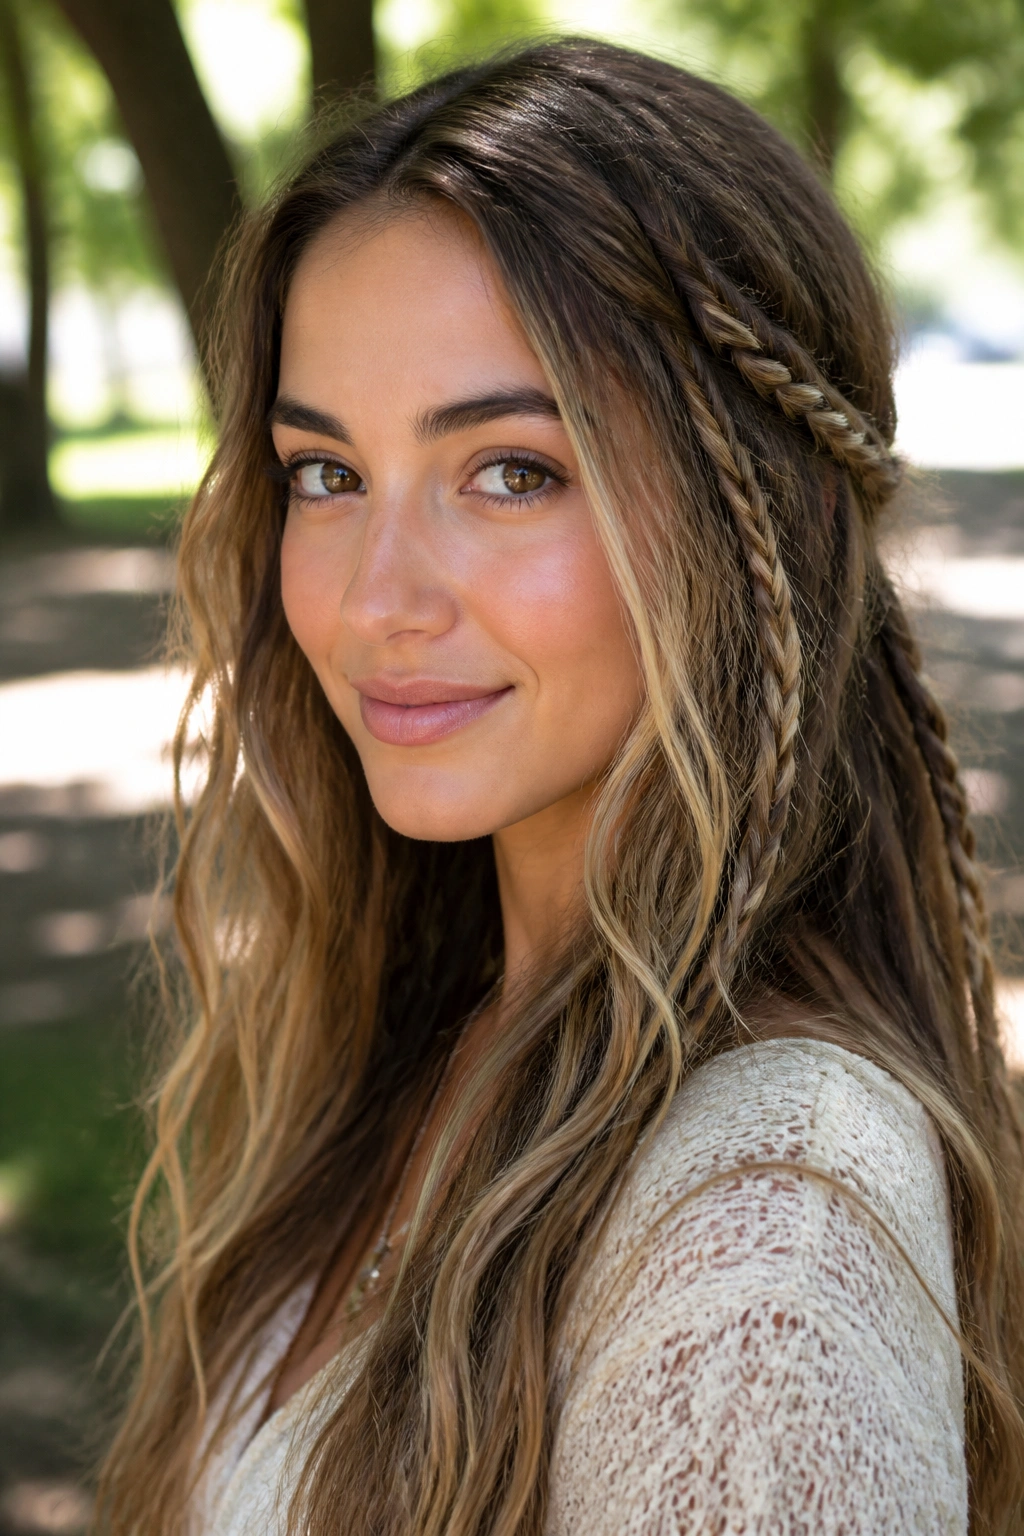
Braids can be tricky on round faces, but the loose boho kind are a different story.
The reason this style works is simple: braids add structure without needing to swallow the whole head. A thin braid tucked along one side, or two small braids woven into loose waves, creates tiny lines that pull the eye down and across at the same time. That beats a big thick braid sitting right at cheek level, which can add width fast.
Where the Braids Should Sit
Keep the braids low and soft, not pinned tight against the temples. A braid that starts near the ear and slides into the rest of the hair feels more forgiving than one that travels straight across the widest part of the face. If your hair is very layered, braid only the top section and let the ends blend out on their own.
Small Details That Make It Work
- Use 1-inch sections for thin accent braids.
- Pull the braid apart gently so it looks fuller and less formal.
- Leave two face-framing pieces loose, especially if the hair is parted off center.
- Finish with a dry texture spray, not a shiny serum.
The best boho braid is a little imperfect. If every strand is neat, the style loses the easy, broken-up feel that makes it flattering.
5. A Tousled Blowout with Flipped Ends
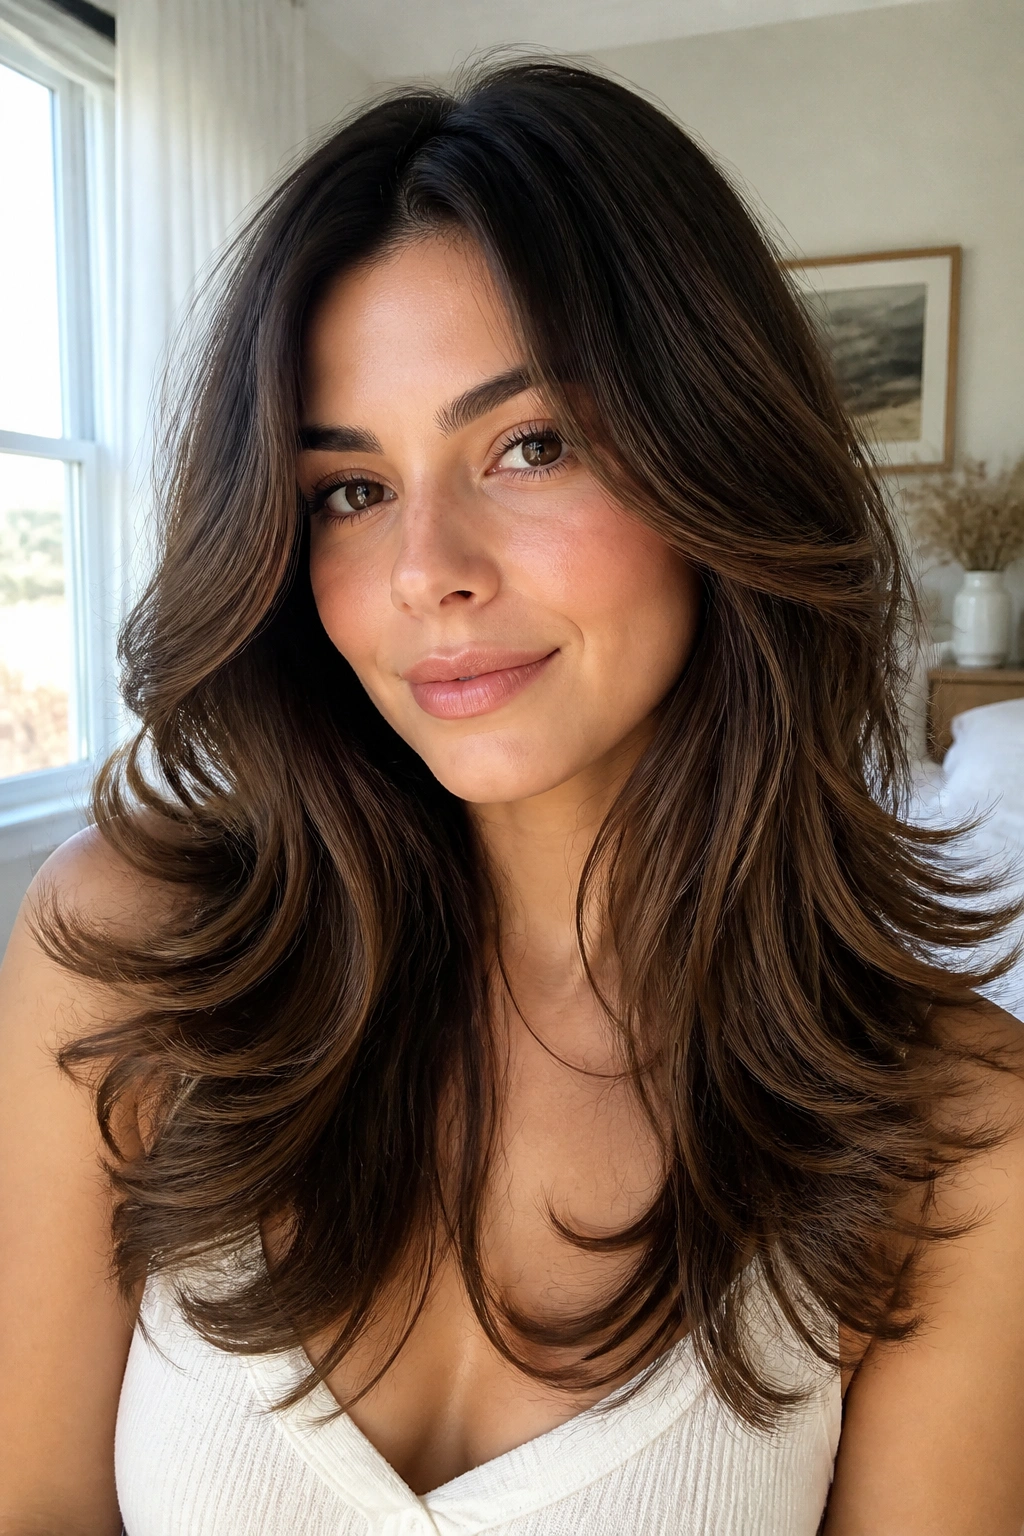
A tousled blowout can make long hair look polished without getting rigid.
For round faces, the key is where the bend lands. You want volume at the roots and movement through the ends, but you do not want a huge bubble of hair sitting at the cheeks. So the brush should guide the front sections away from the face, then flip the ends slightly outward or under in a soft, uneven way. Not uniform. Never uniform. That is what makes it look like a salon blowout instead of a pageant helmet.
The mess comes after the blow-dry, not during it. Once the hair cools, rake through the roots with your fingers, shake the lengths loose, and tap a tiny bit of texturizing spray through the bottom half. A flat iron can touch up a few bends if the ends need help, but keep the movement irregular. The unevenness is the charm.
This style is one of my favorites for people who want hair to look fuller around the face without ballooning out. It gives you that soft, brushed feel that holds up well in real life. The best part? It still looks good when the day gets messy.
6. The Low Messy Ponytail with Crown Lift
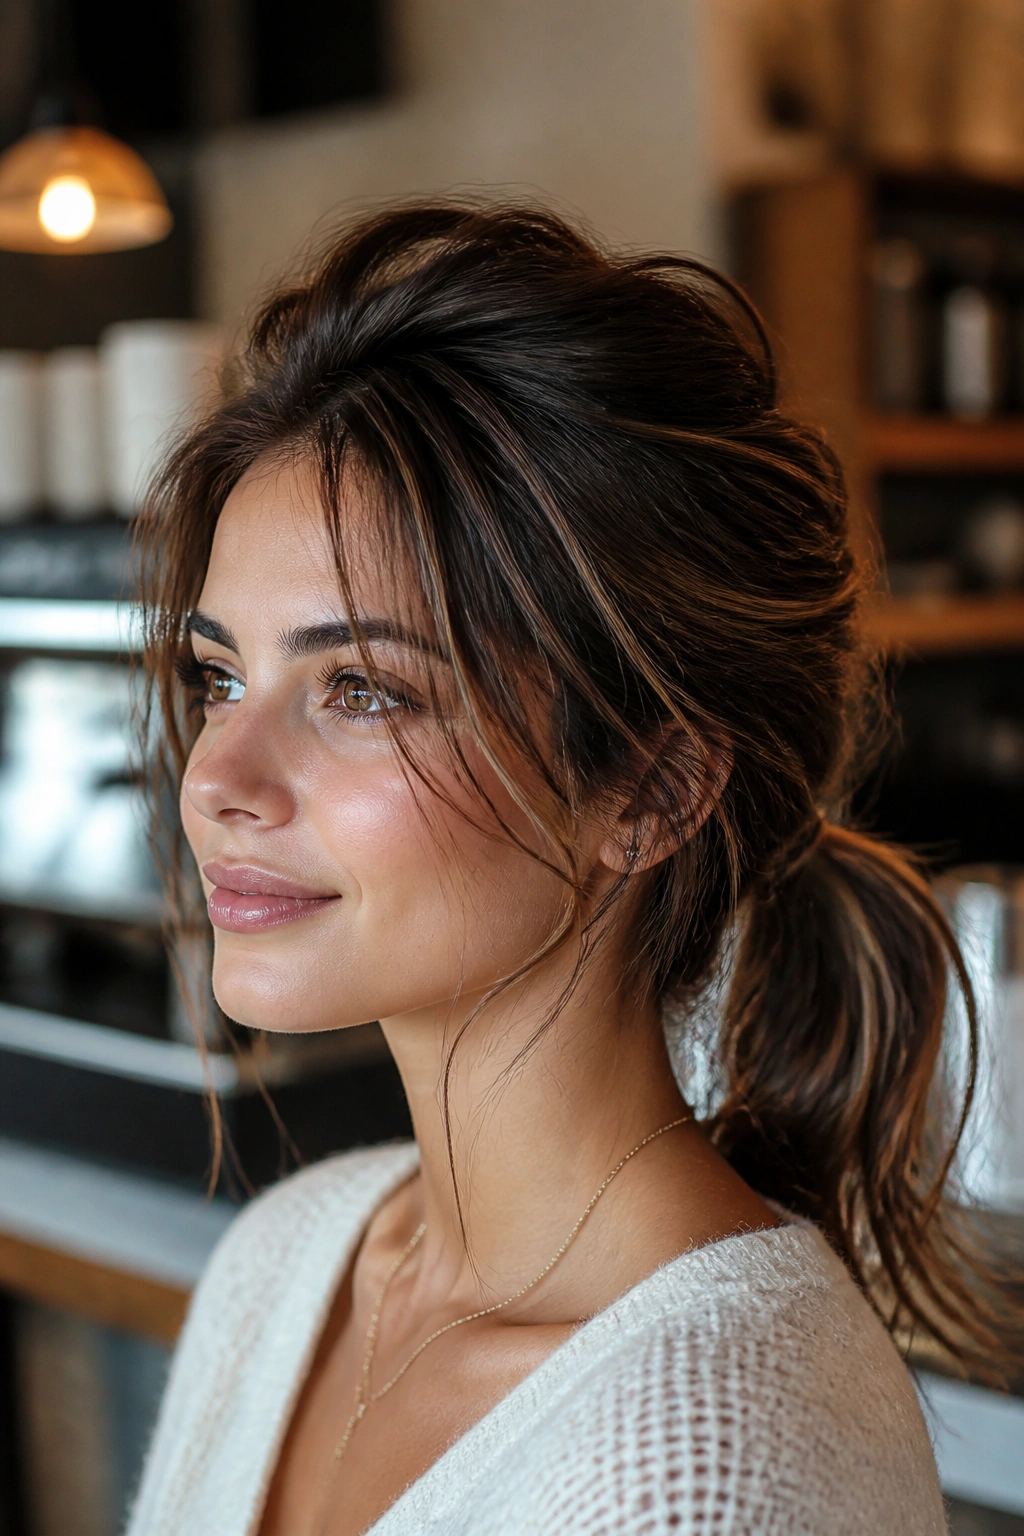
Unlike a slick ponytail, this one does not press everything flat and leave the face doing all the work.
A low messy ponytail with crown lift is one of the easiest ways to keep long hair off the neck while still flattering a round face. The lift at the crown adds height, the low placement keeps the style calm, and the loose pieces near the front stop the shape from feeling too severe. It is a good choice for work, dinner, or any day when you want hair out of the way but still want softness.
I prefer the ponytail to sit just above the nape rather than right on it. That tiny bit of height changes the line of the hairstyle. Wrap a small section of hair around the elastic, then tug a few pieces free at the temples and around the ears. If the hair is thick, flatten the crown only a little. If it is fine, a quick tease under the top layer gives the style enough structure to last.
The ends should stay textured. A ponytail that is brushed glass-smooth often looks too strict on a round face. Let some waves stay. Let the tail move.
7. Mermaid Waves with Shattered Ends
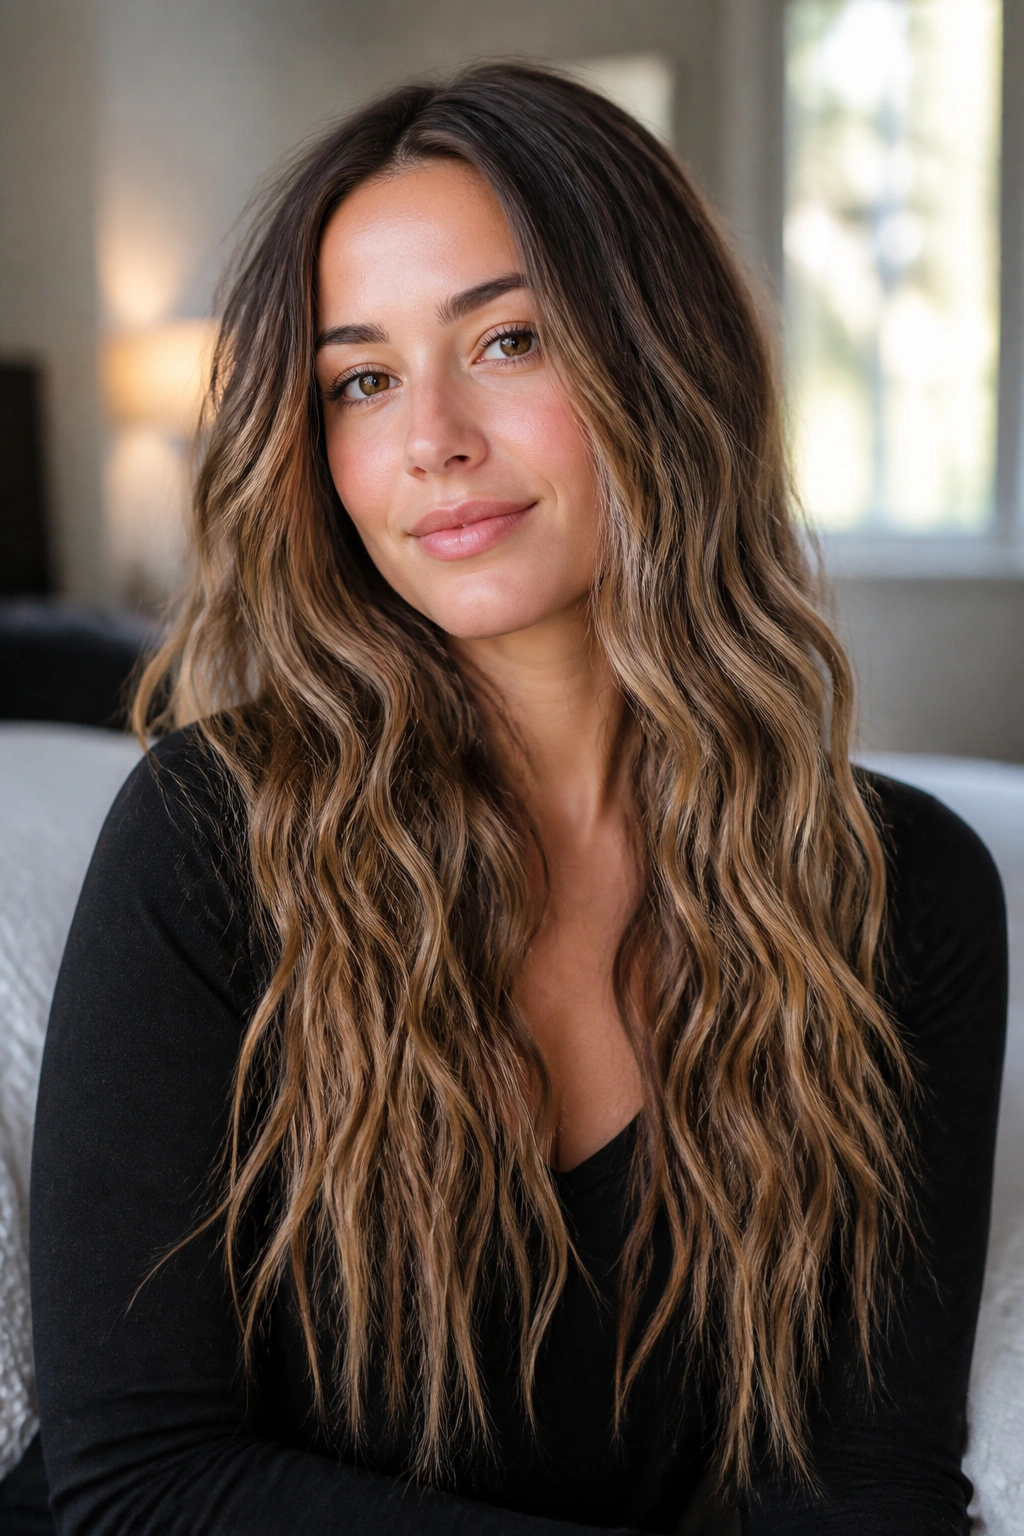
Why does this style work so well on round faces? Because the wave pattern gives the eye a long path to follow.
Mermaid waves are more broken up than a classic curled style. They have that rippled bend through the mid-lengths, then slightly pieced-out ends that stop the bottom from looking heavy. On a round face, that matters. You are creating vertical rhythm, not one giant puff of hair sitting at the sides.
How to Keep Them Light
Start the wave below the cheekbone, not at the root. Use a 1.25-inch iron or a triple-barrel tool if that is what you like, but leave the last inch or so straight so the ends feel shattered rather than curled under. Alternate the curl direction every few sections. If every wave points the same way, the style starts to look too neat.
A wide-tooth comb can soften the shape once the hair cools. Then add a small amount of spray wax or dry texture spray to the ends only. That gives the finish some bite without turning the roots sticky.
Do not overdo the face-framing pieces. Two softer strands are enough. Too many and the face starts to disappear into the style, which is not the goal here.
8. The Claw-Clip Twist with Loose Lengths
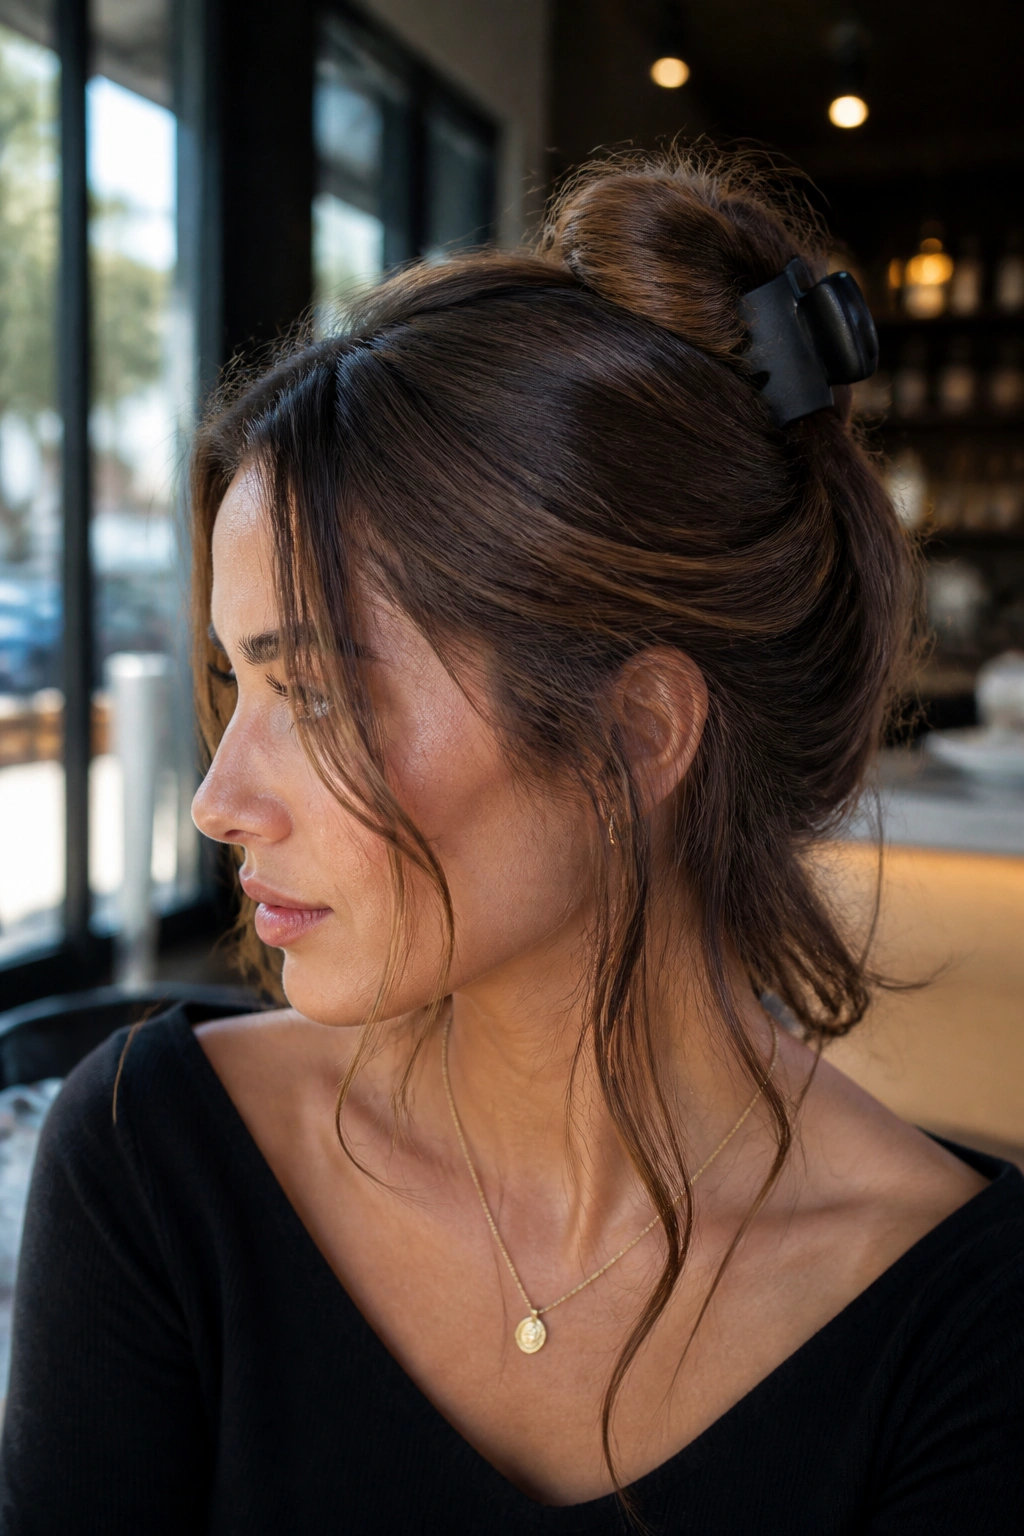
You know the look: hair clipped up in a few seconds before you run out the door, but it somehow still looks planned.
The claw-clip twist is a smart option for round faces because it lifts the hair away from the cheeks without making the whole head look narrow or slick. The clip sits high enough to give the crown some shape, while the loose tail left below keeps length visible. That visible length is doing real work. It helps pull the eye down.
A bigger matte clip usually looks better than a tiny shiny one. Tiny clips can pinch too much hair and make the twist sit awkwardly close to the head. Gather the hair from the temples back, twist once or twice, and let the ends spill out. The loose ends can stay straight, bent, or wavy. All three work.
If a few front pieces escape, leave them. Seriously. The stray strands are what keep this from looking stiff. A round face usually benefits from a style that feels a bit undone around the edges anyway, and this is one of the easiest ways to get there without heat.
9. The Long Shag with Airy Fringe
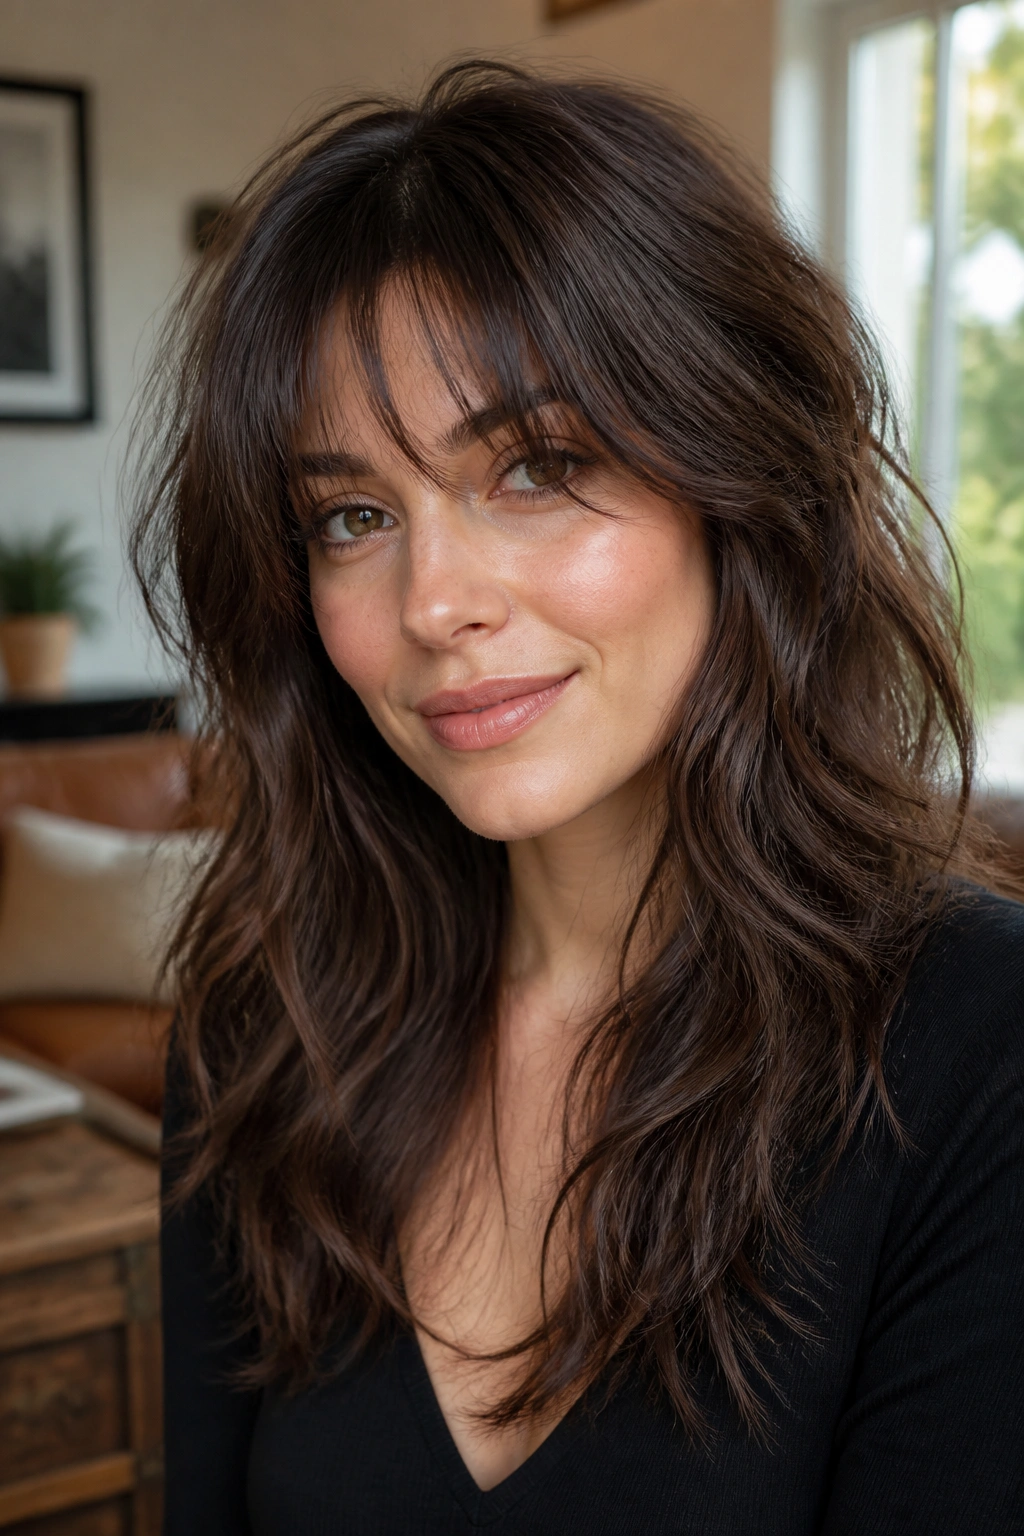
A long shag does not hide a round face. It reshapes it.
Unlike one-length long hair, a shag removes weight from the lower sides of the head and puts more movement through the whole cut. That means less bulk at the cheeks and more motion along the neck and shoulders. The fringe matters too. An airy fringe, cut piecey and light, can soften the forehead without crowding it.
The best shag for a round face is not a short rock-and-roll cut that ends at the chin. That can widen the middle of the face. A longer shag keeps the layers falling past the jaw and into the chest, where they create a longer line. It works especially well on wavy hair, though straight hair can wear it too if the layers are kept soft and not overcut.
I like this style because it looks good even when it is not styled much. A little bend at the front, some flatness at the crown, and a few rough ends are enough. The cut does the heavy lifting. If your hair is fine, keep the fringe wispy. If it is dense, ask for internal layering so the top does not puff out.
10. Side-Swept Glam Waves for Round Faces
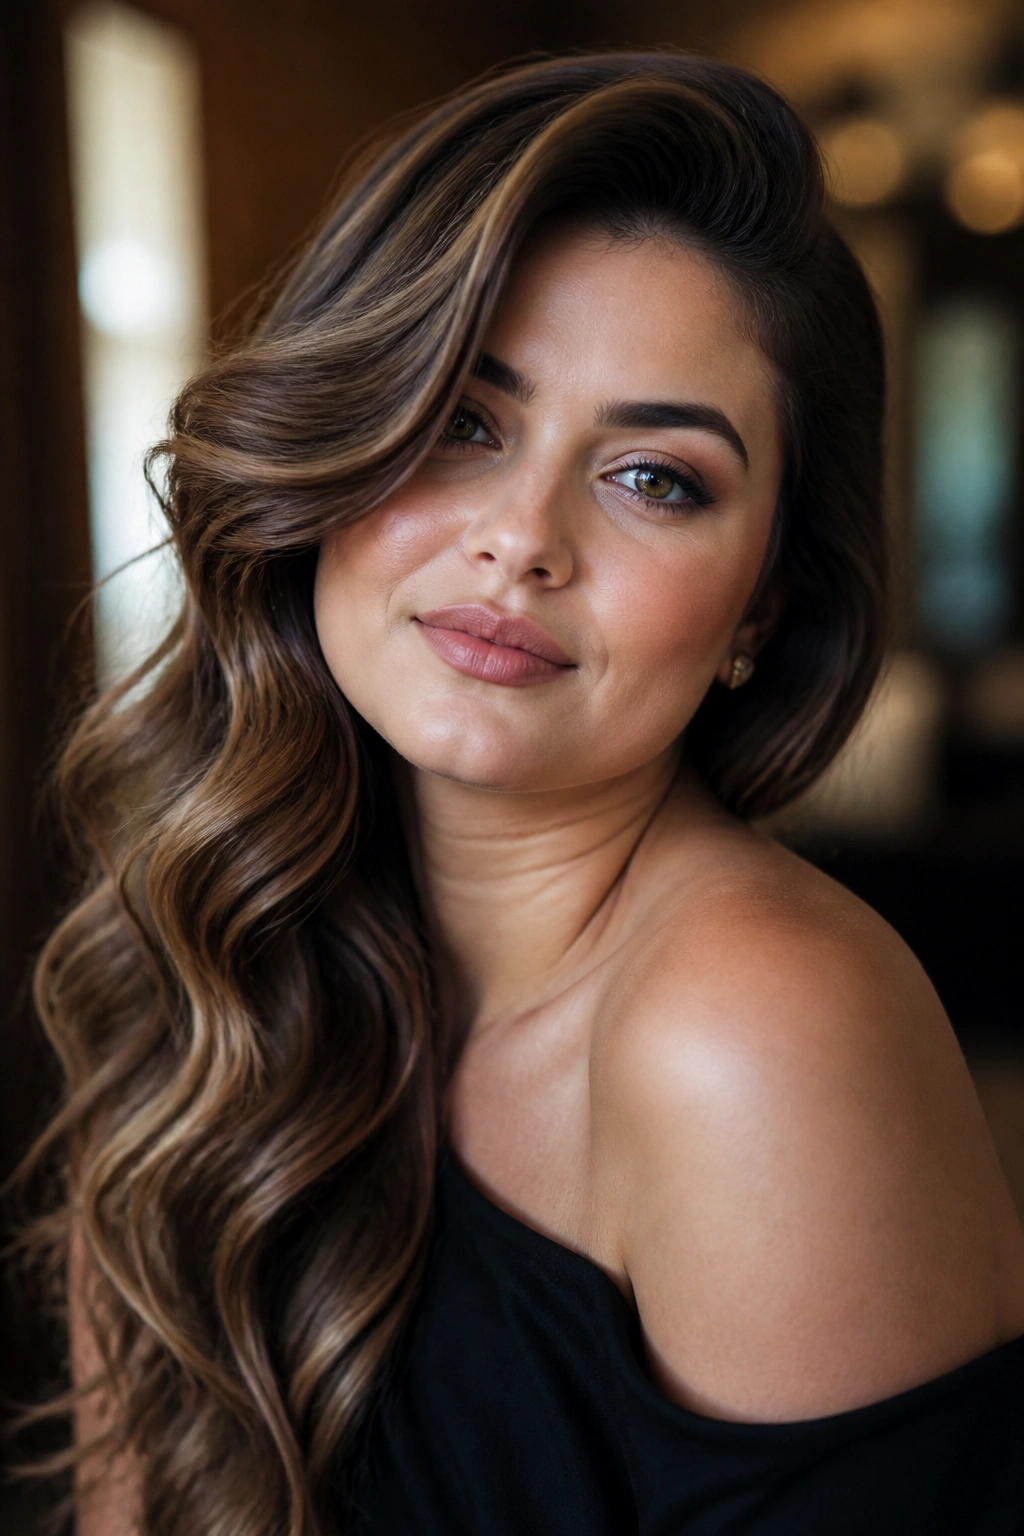
A deep side sweep can do more than another layer ever will.
When a round face is framed with waves that drape to one side, the shape immediately feels more angled. The asymmetry changes everything. One side of the face gets a little more coverage, the other side opens up, and the eye stops reading the face as a circle. It is a small shift with a big effect.
What Makes the Side Part Matter
The part itself should sit a few inches off center, not almost in the middle and not shoved to the hairline. Too extreme looks theatrical. Too centered looks flat. The sweet spot gives the roots lift and leaves enough hair to sweep over one shoulder.
- Curl the front sections away from the face.
- Pin the heavier side at the crown for 5 to 10 minutes while it cools.
- Brush the waves into one broad shape, then separate only the ends.
- Keep the side with more hair slightly fuller and the other side softer.
This is one of the better styles for events, photos, or any day you want the face shape to look a little narrower without seeming like you tried to engineer it. The glamour is in the drape, not the stiffness.
11. The Bubble Ponytail with Rough Texture
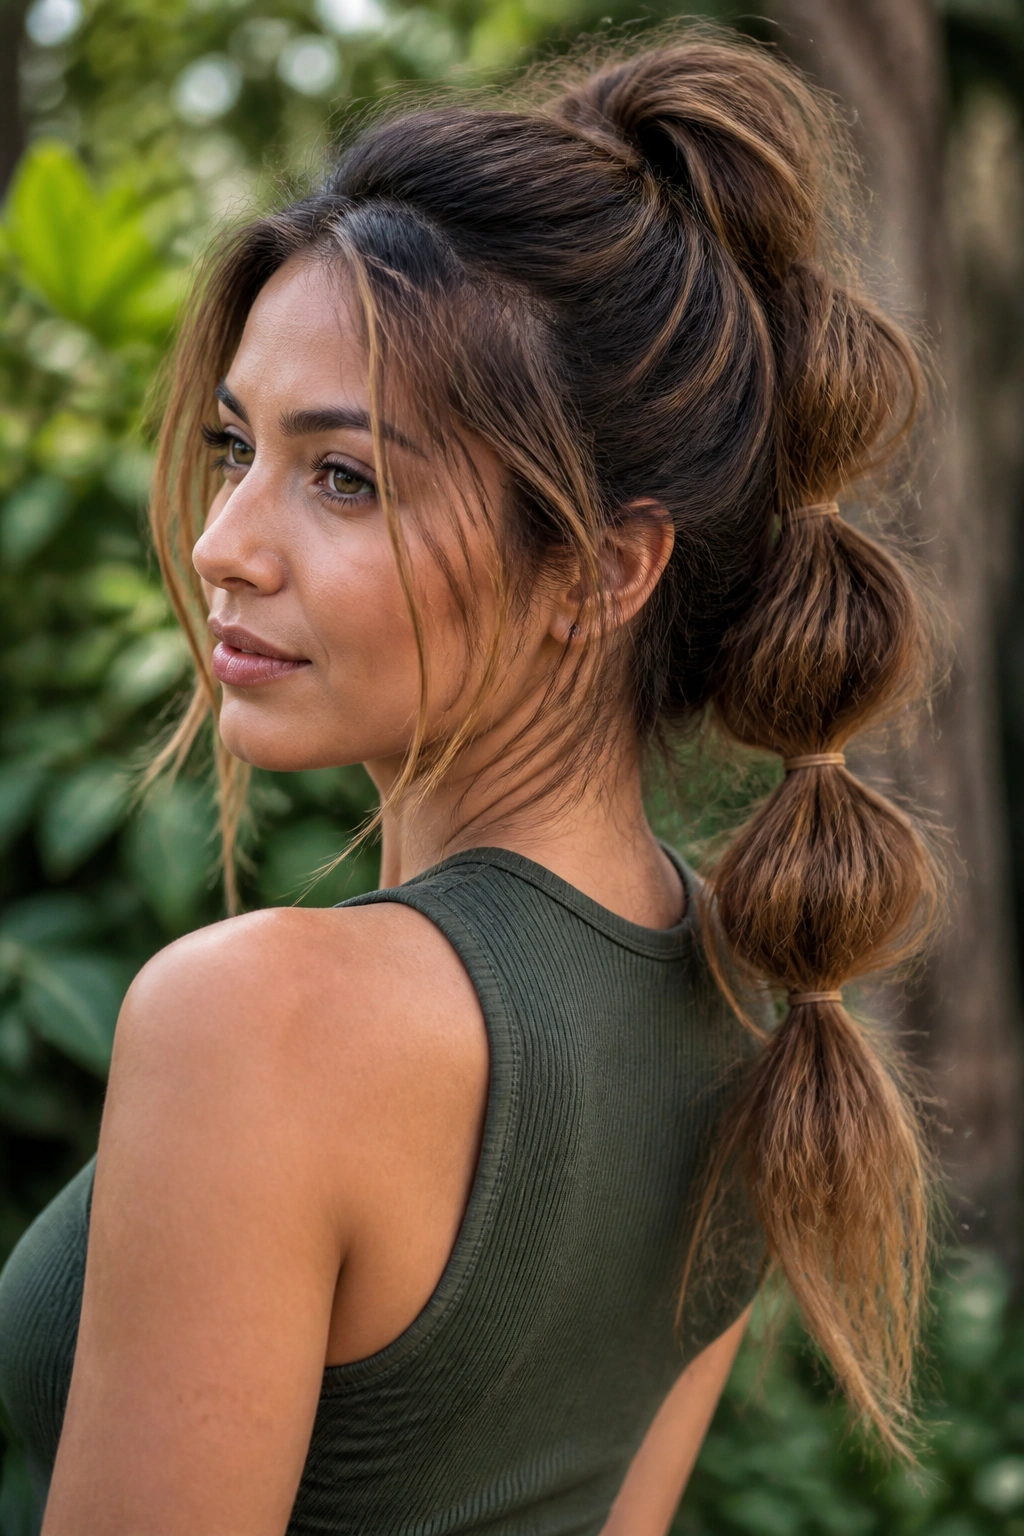
A bubble ponytail can look childish if every section is the same size and the finish is too tidy.
Make it rougher, and it changes completely. On round faces, the bubble ponytail works because it creates repeated vertical shapes down the length of the hair. That draws the eye lower, which stretches the silhouette. The trick is to keep the top a little puffed and the bubbles a little uneven so the style feels lived in, not costume-like.
Tie the ponytail first, then place small elastics every 2 to 3 inches down the tail. Gently tug each section outward to create the bubble. Do not pull it into a perfect sphere. That can make the style look stiff. Let a few face pieces stay loose, and if your hair is layered, allow some shorter strands to fall out around the crown. Those bits help the ponytail feel relaxed.
This one suits thick hair especially well, but fine hair can wear it too if you tease each bubble slightly before widening it. A dry texture spray helps the shape stay visible. If the ponytail starts too sleek, it loses the whole point.
12. A Fishtail Side Braid with Loose Face Pieces
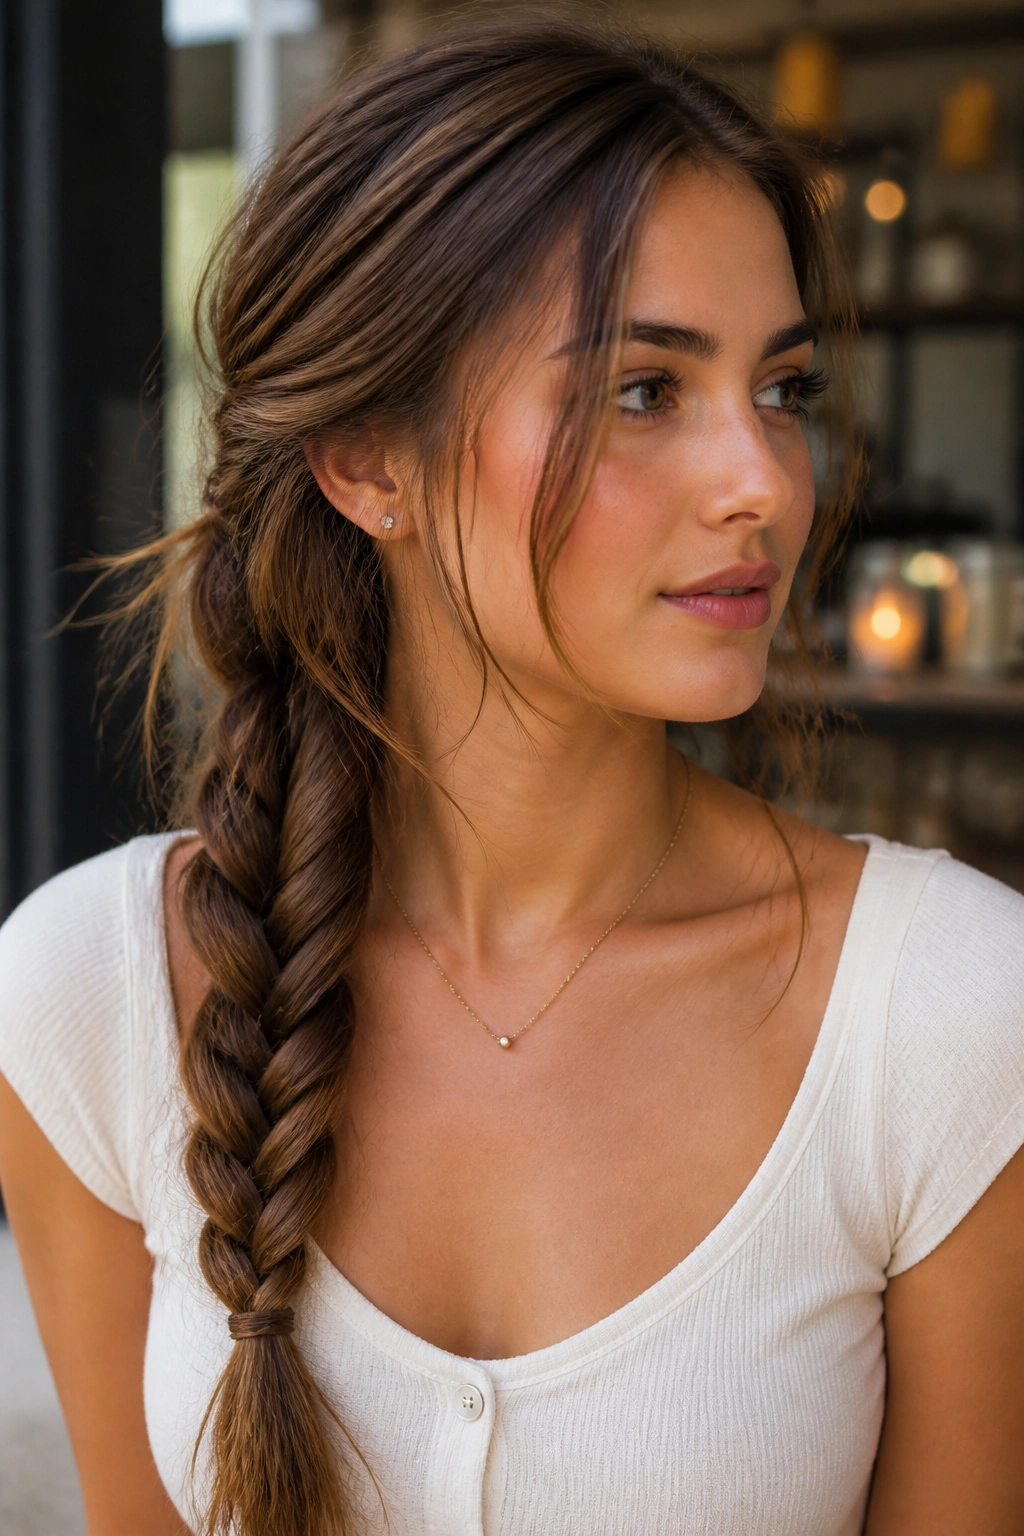
Why choose a side braid instead of a braid straight down the back? Because diagonal lines are kinder to a round face.
A fishtail braid brings fine texture that a classic three-strand braid does not always have. It looks more detailed, a little broken up, and a little softer around the edges. When it sits over one shoulder, it also gives the face an angle to lean on. That diagonal fall makes the whole look feel longer.
The braid should start low, usually behind one ear or just under it. Keep it loose enough that the hair still shows some movement inside the plait. A braid pulled tight can look severe and can add width around the upper cheeks if it starts too high. Let the end stay a little messy. A few shorter pieces slipping free is not a mistake here.
I like this style for days when long hair needs to stay controlled but not flat. It works with slightly wavy hair, brushed-out curls, or even straight hair with some grit added first. The important thing is the placement. Low, soft, and off to one side. That’s the shape.
13. The Messy Braided Crown with Long Back Length
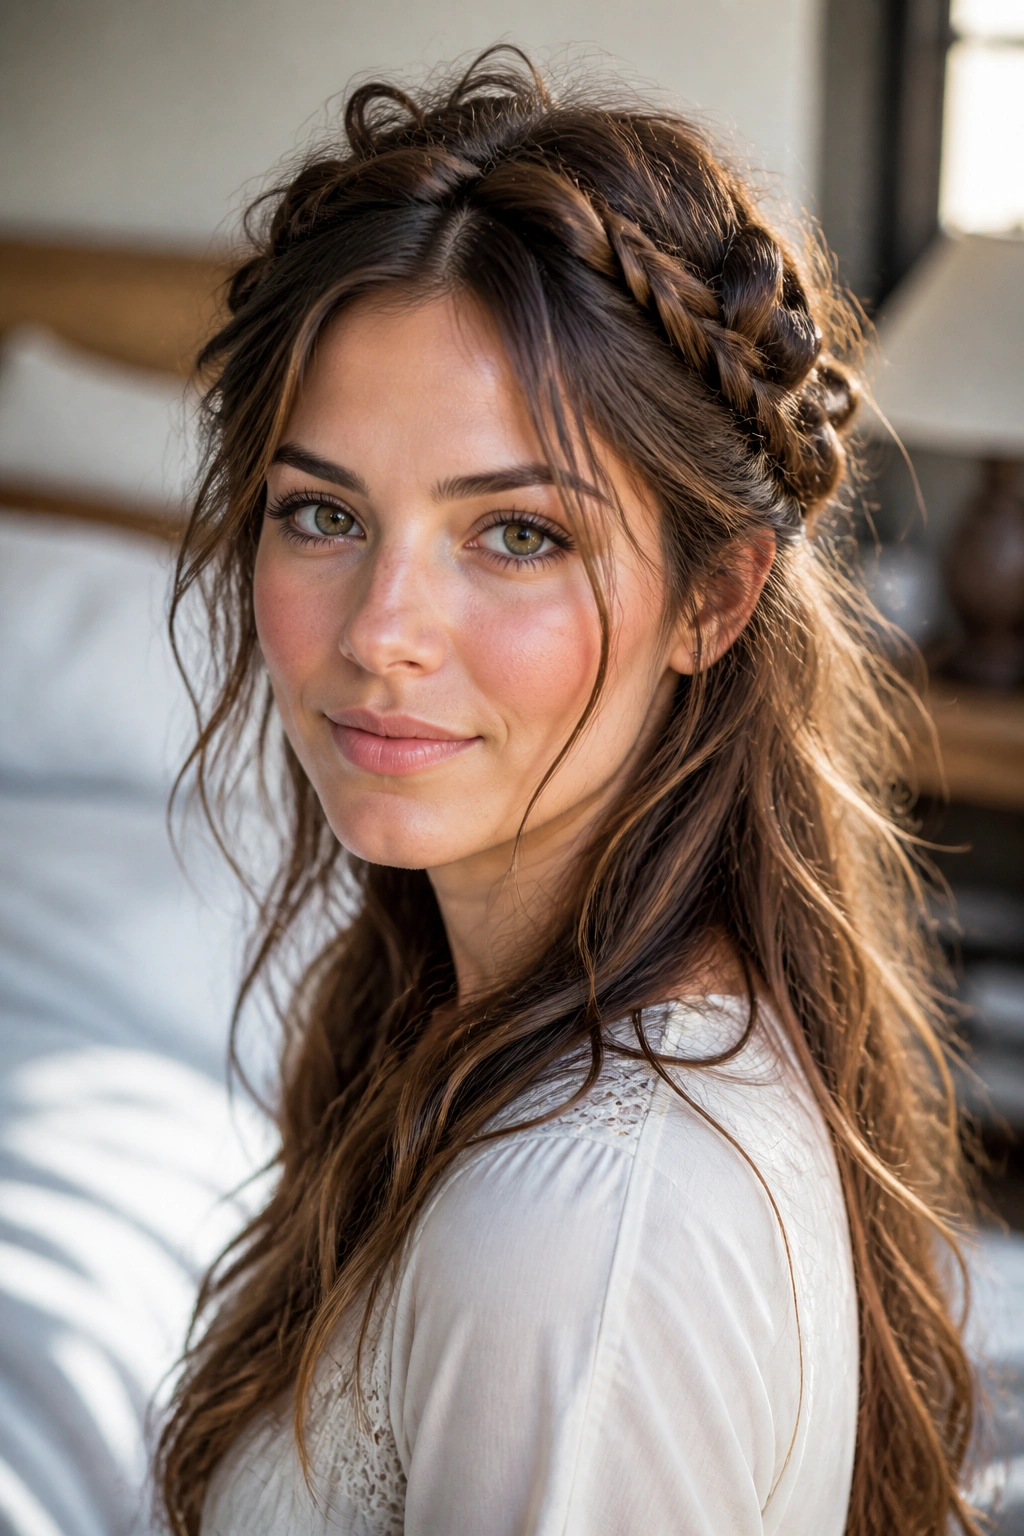
There is a reason people keep coming back to braided crowns. They solve a real problem.
A messy braided crown gets hair off the face, adds a little height around the top of the head, and leaves the lengths free so the whole style still reads as long. For a round face, that combination is useful. You get control without losing the vertical line that long hair gives you.
What Keeps It From Looking Heavy
The braid should not travel tightly along the scalp like a school-uniform headband. Leave it a touch loose, and stop it before it wraps too far down around the widest part of the head. The back lengths can stay wavy or softly curled. That keeps the style from turning into one big block of hair.
A few small details matter a lot:
- Pull the braid apart lightly after it is secured.
- Leave soft pieces near the temples.
- Keep the braid sitting slightly above the ears.
- Let the back fall in separate pieces, not one brushed sheet.
This style works especially well on thicker hair, because the braid has enough body to hold its shape. Fine hair can do it too, but it may need a bit of texture spray first so the braid does not collapse.
14. Air-Dried Bends with Salt Spray
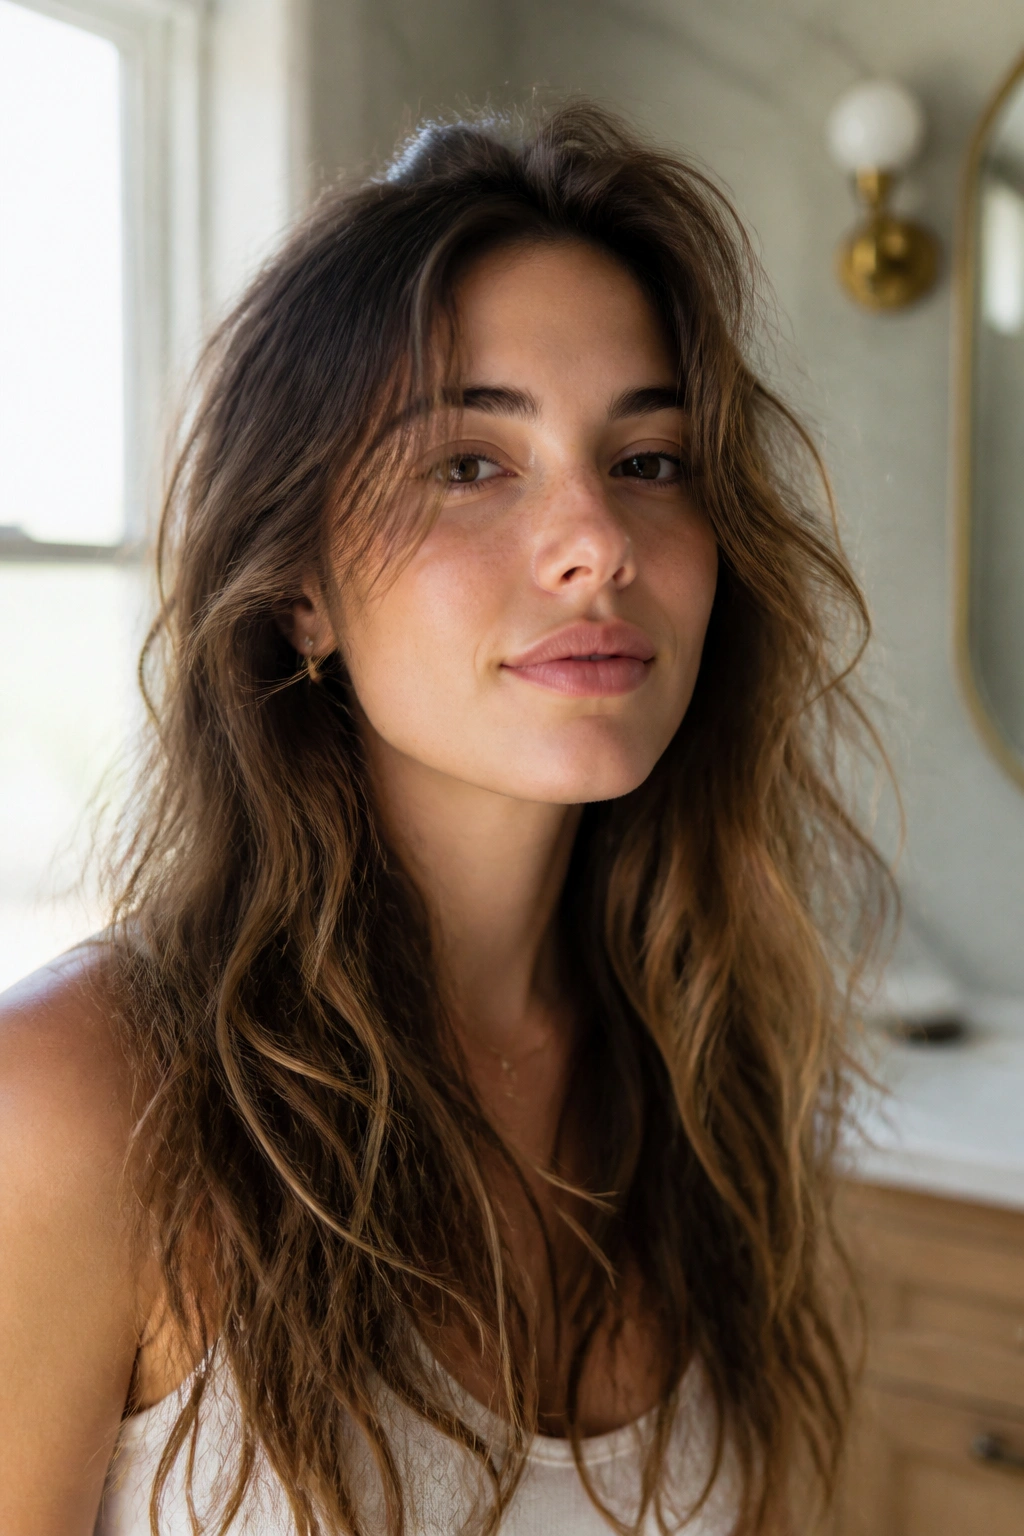
Air-dried hair can be a round face’s best friend if you keep the shape under control.
What you want is bend, not puff. Salt spray or a light wave cream can give the mid-lengths some texture, but the roots should stay a little lifted and the sides should not balloon out near the cheeks. That balance is what makes the style feel casual instead of frizzy.
I usually think of this look in three parts: roots, mids, ends. The roots need a little mousse or spray foam worked in while the hair is damp. The mid-lengths can take a mist of salt spray, scrunched in with the hands. The ends should be twisted into a few loose sections so they dry with shape instead of spreading out.
No brushing once it starts drying. That is where people mess it up. If you keep touching it, the hair turns bigger in the wrong place. Let it set, then break it apart only when it is dry. A tiny bit of cream on the palms can calm the fuzz without killing the texture.
The best air-dried style feels easy, not accidental. There is a difference.
15. A Sleek Crown and Textured Lengths
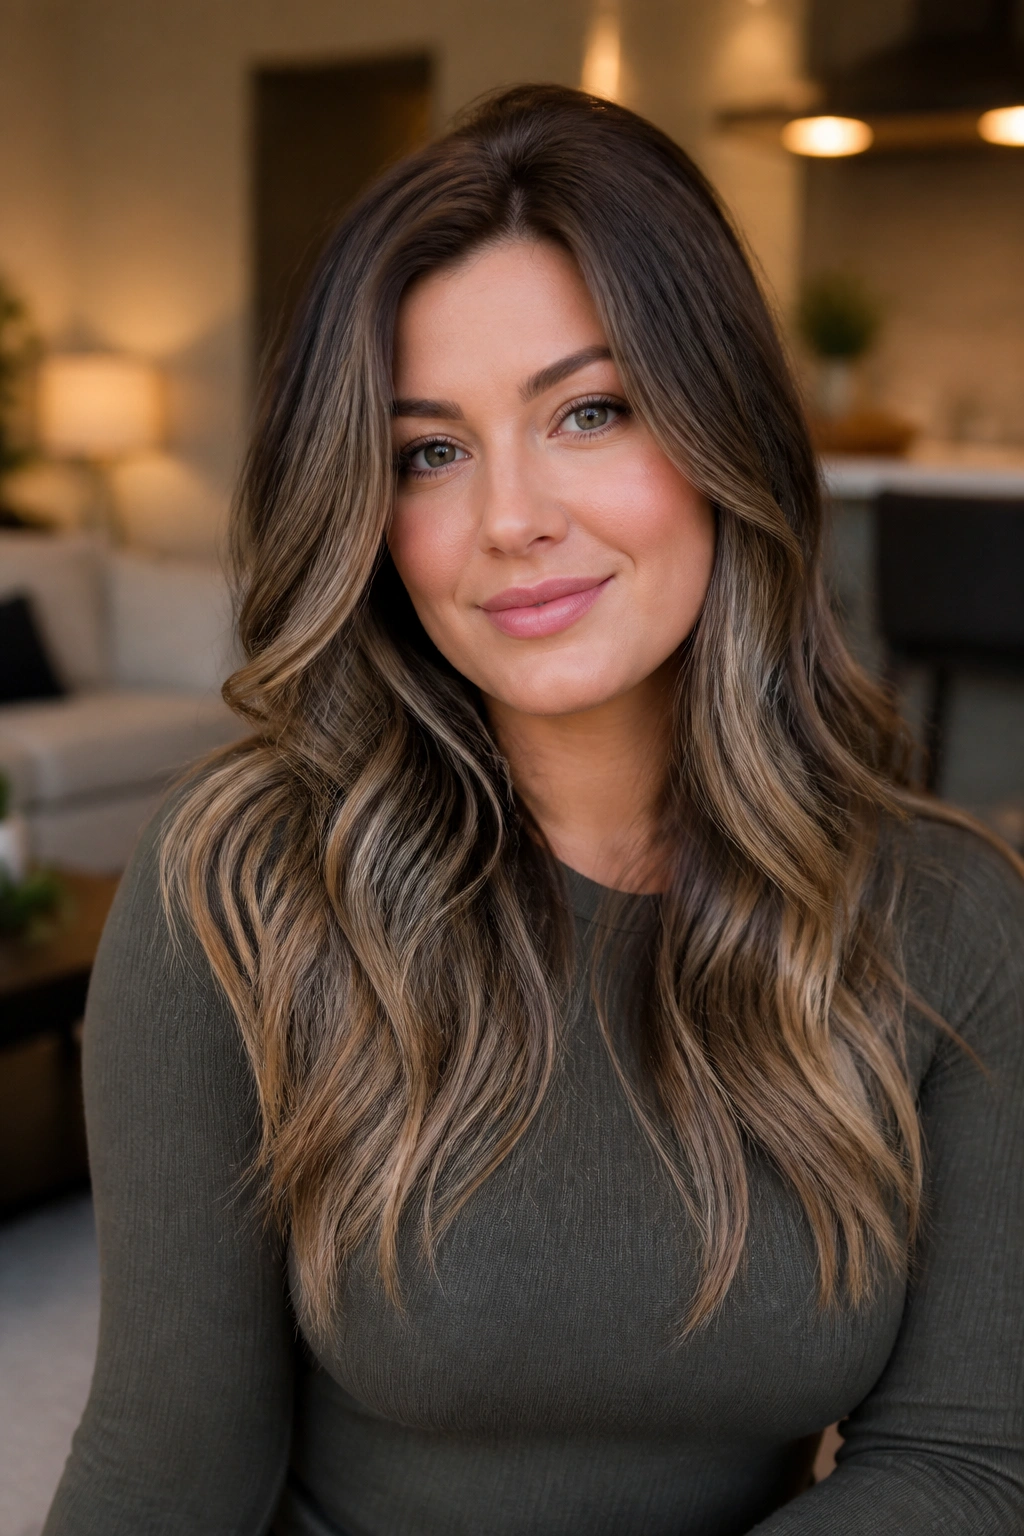
Sleek does not automatically mean severe.
For a round face, a smooth crown can actually sharpen the look as long as the lengths stay broken up and soft. The top section pulls the face open, while the textured ends carry the softness farther down. That contrast is what makes this style work. Flat top, messy bottom. Clean line up top, movement below.
I would not do this with a dead-center part unless the face is already very long. A slight off-center part gives the style a little tilt and stops it from feeling too exact. Smooth the hair from the hairline to just past the ears with a brush or a small amount of styling gel, then leave the lower half with loose waves or a rough bend.
This is also a good style if your hair gets puffy near the roots. Keeping the crown sleek can tame that without sacrificing shape through the rest of the length. The ends can still have personality. They should.
The contrast can be a little dramatic in a good way. That is the appeal here.
16. V-Cut Layers with Loose Curls
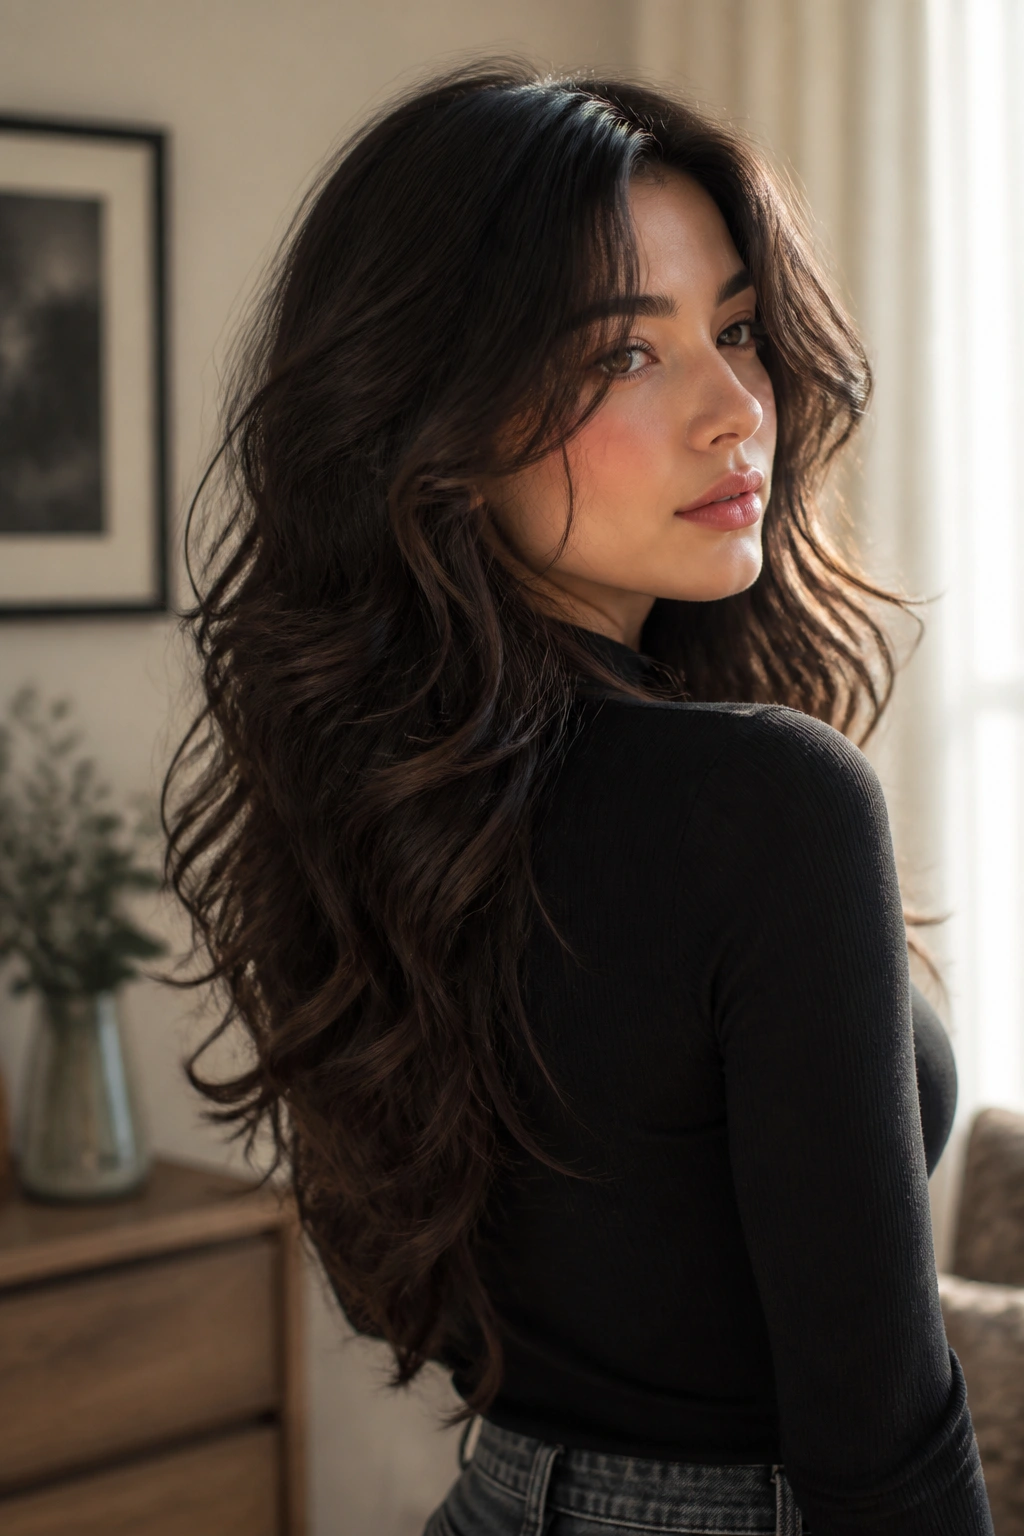
A V-cut can be a smart shape on long hair when the goal is to keep the silhouette narrow through the sides.
Instead of a blunt bottom edge, the hair falls to a point in the center back. That long center line helps the eye travel downward. On a round face, that downward pull is useful. It makes the whole head look a little longer and keeps the sides from flaring out too much. Loose curls then soften the outline without filling in every inch of space.
What to Ask For
- Long layers that keep the point of the V visible.
- Side pieces that begin below the cheekbones.
- Enough internal weight removal that the hair does not puff at the sides.
- Ends that stay soft, not carved into a hard triangle.
Loose curls work better here than tight ringlets. Tight curls can widen the shape too much, especially around the cheek line. A loose curl or brushed wave keeps the V visible and gives the style more air. If you wear your hair straight, the V still helps, but the curl adds movement that round faces usually wear well.
This cut is a favorite of mine for thick hair because it gives the length somewhere to go. No blocky bottom. No heavy shelf.
17. Long Curls Brushed Out into Soft Volume
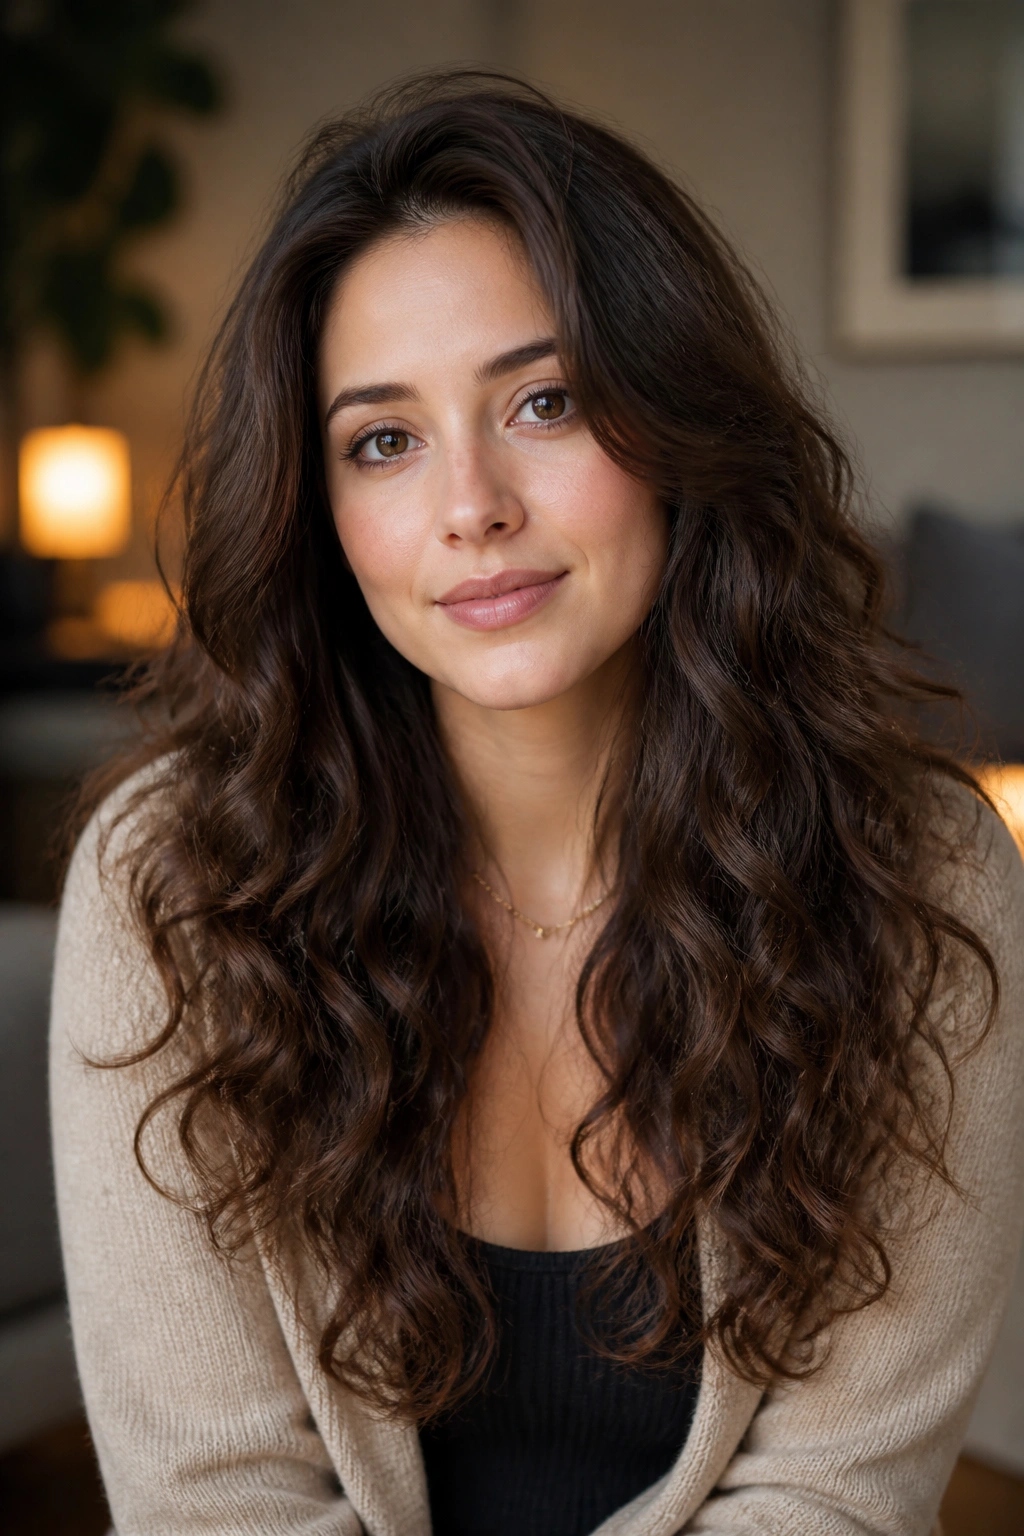
Not every curl needs to stay ringleted.
When curls are brushed out after they cool, they turn into soft volume that feels much looser and less formal. On a round face, that soft cloud of hair can work beautifully if the crown stays a little flatter and the volume lives from the jaw down. That way the face gets framed, not buried.
The key is to set the curls first, then disturb them on purpose. Use a medium-barrel iron or hot rollers, let the curls cool fully, then brush gently with a paddle brush or wide brush. The hair should expand into a softer wave, not into a frizz cloud. A drop of light oil on the palms helps the ends stay separated and keeps the shine where it belongs.
If your natural texture is curly, this style is basically a polished version of what you already have. Diffuse until the hair is about 80 percent dry, then separate a few clumps with your fingers once it is set. If the curls are too tight around the cheeks, stretch them a little at the sides.
It is a forgiving look. And honestly, it tends to feel more grown-up than curls that stay too perfect.
18. The Loose Twist Half-Up with a Pin for Round Faces
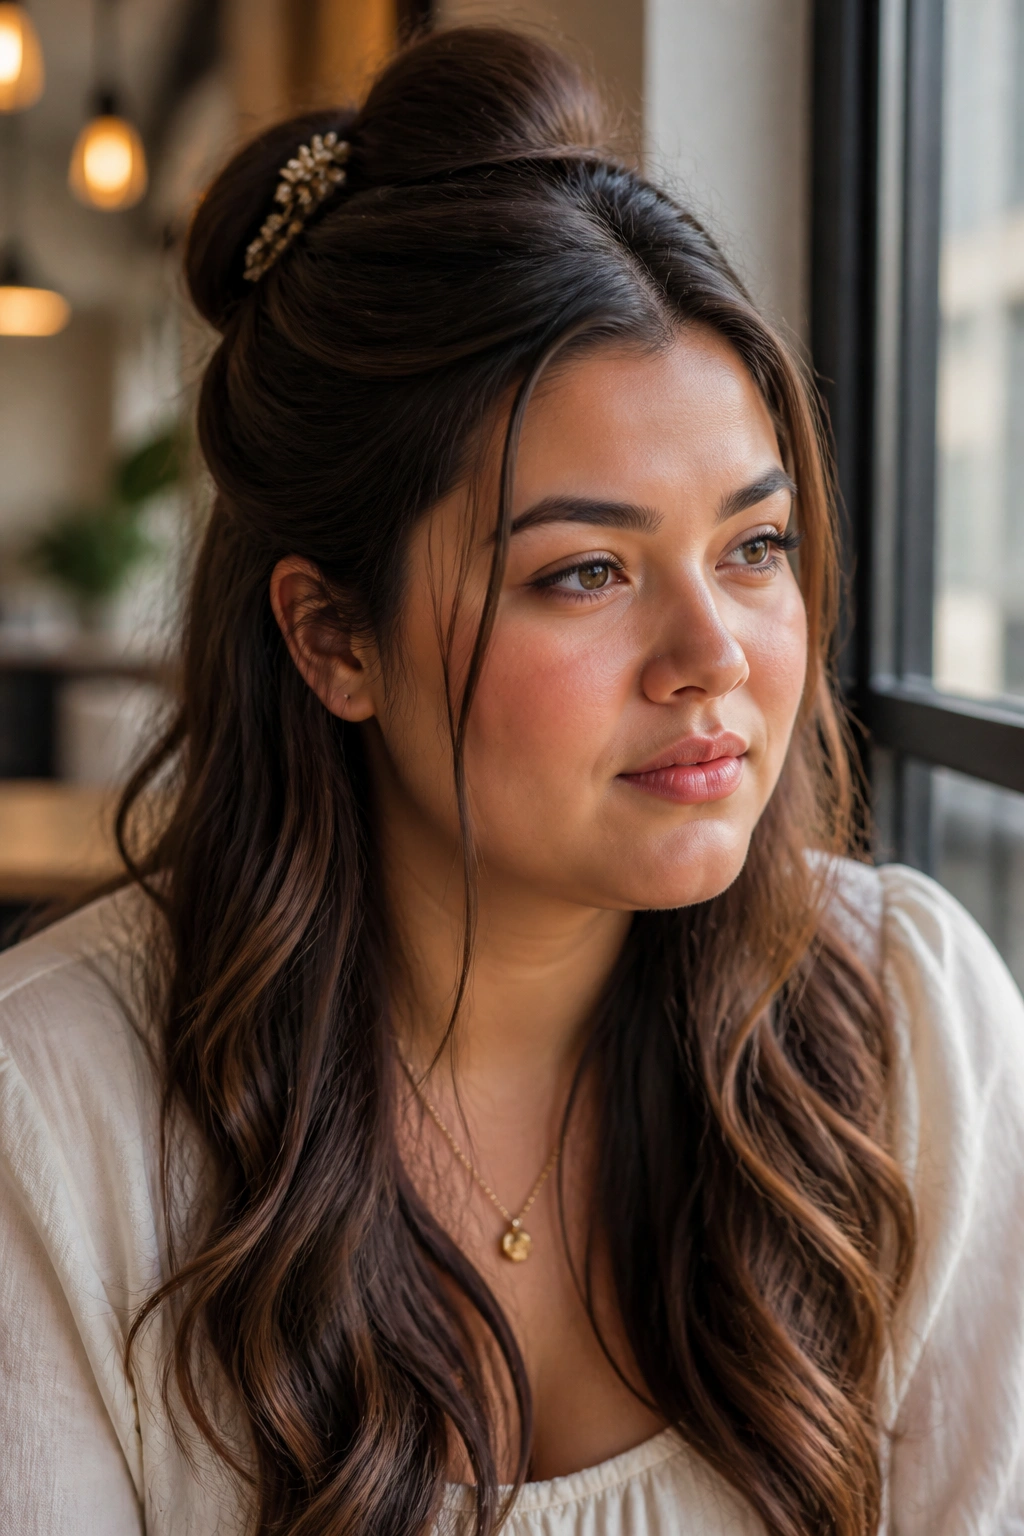
If you want one style that works for brunch, a work call, and dinner without looking overdone, this is the one I’d reach for.
A loose twist half-up gives a round face a lift at the crown and a clean line through the middle, while the hair left down keeps the overall shape long. The twist should sit high enough to open the face, but not so high that it turns into a tiny bun perched on top. A decorative pin, a metal clip, or even crossed bobby pins can hold it in place.
How to Keep It Soft
- Take two sections from above the ears and twist them back loosely.
- Pin them slightly above the back of the head, not flat against the skull.
- Leave two thin face-framing pieces out.
- Add texture spray only to the twist and the lower half of the hair.
The neatness should live only in the pinned section. The rest can stay wavy, brushed out, or even slightly air-dried. That contrast is what keeps the style flattering. If everything is too tidy, the face reads wider and the hair loses its movement.
This is the style I would hand to someone who says they want easy hair but does not want boring hair. It has shape. It has lift. And it still looks like hair, which is better than looking like a project.
