



The wrong wave pattern can make a round face look wider than it is. The right one—especially in hair waves for round faces—pulls the eye downward, skims the cheeks, and gives the whole shape a cleaner line without turning the hair stiff or overworked.
That’s why I care less about whether the wave is beachy, glam, or brushed out, and more about where it starts, where it lands, and how much lift lives at the crown. A wave that begins at the cheekbone is a different animal from one that starts below the jaw. Small shifts matter.
Round faces do not need to be hidden. They need structure. A side part, a bit of height at the top, and softer movement along the lower half of the hair can do more than a blunt cut or a flat, center-parted wave ever will.
Some wave patterns add width right where you do not want it. Others carve a slim line, make the neck look longer, and give the face a little breathing room. The styles below are the ones that actually earn their keep.
1. Deep Side-Part Hollywood Waves for Round Faces
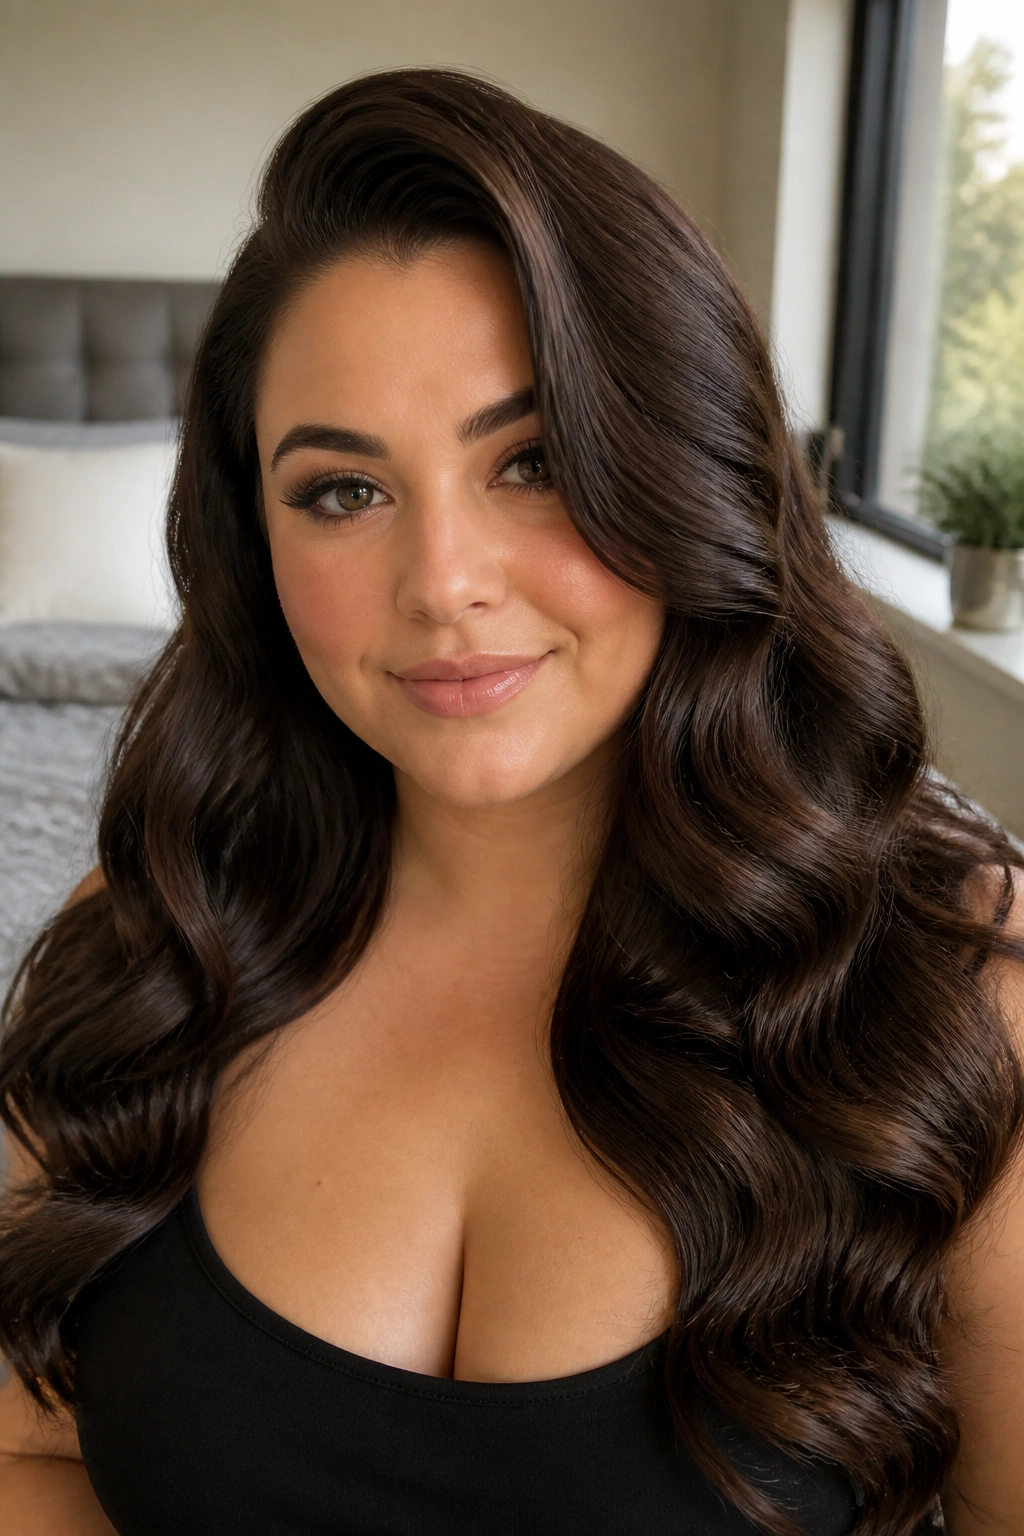
A deep side part is the fastest way to change the shape of a round face without touching the length at all. It breaks up symmetry, adds lift on one side, and keeps the eye moving instead of parking right at the center of the face.
Why It Works
Hollywood waves give you that polished bend, but the side part is the real trick here. When the hair sweeps across the forehead and drops in long curves, the face looks more oval. That happens because the strongest volume sits above one brow instead of flaring out at both cheeks.
I like this look on medium to long hair because the waves have room to fall. If your hair is shoulder-length or shorter, the effect can still work, but the bend needs to stay soft. Tight ringlets? Wrong move. Loose, brushed curves? Much better.
Quick details that matter:
- Part the hair about 2 to 3 inches off center.
- Curl the front pieces away from the face.
- Let the wave start below the cheekbone if you can.
- Use a 1¼-inch curling iron for a softer bend.
- Brush once the hair is fully cool. Not before.
Pro tip: Keep one front section slightly longer than the other. That tiny asymmetry does more for a round face than a lot of people expect.
2. Collarbone S-Waves for Round Faces
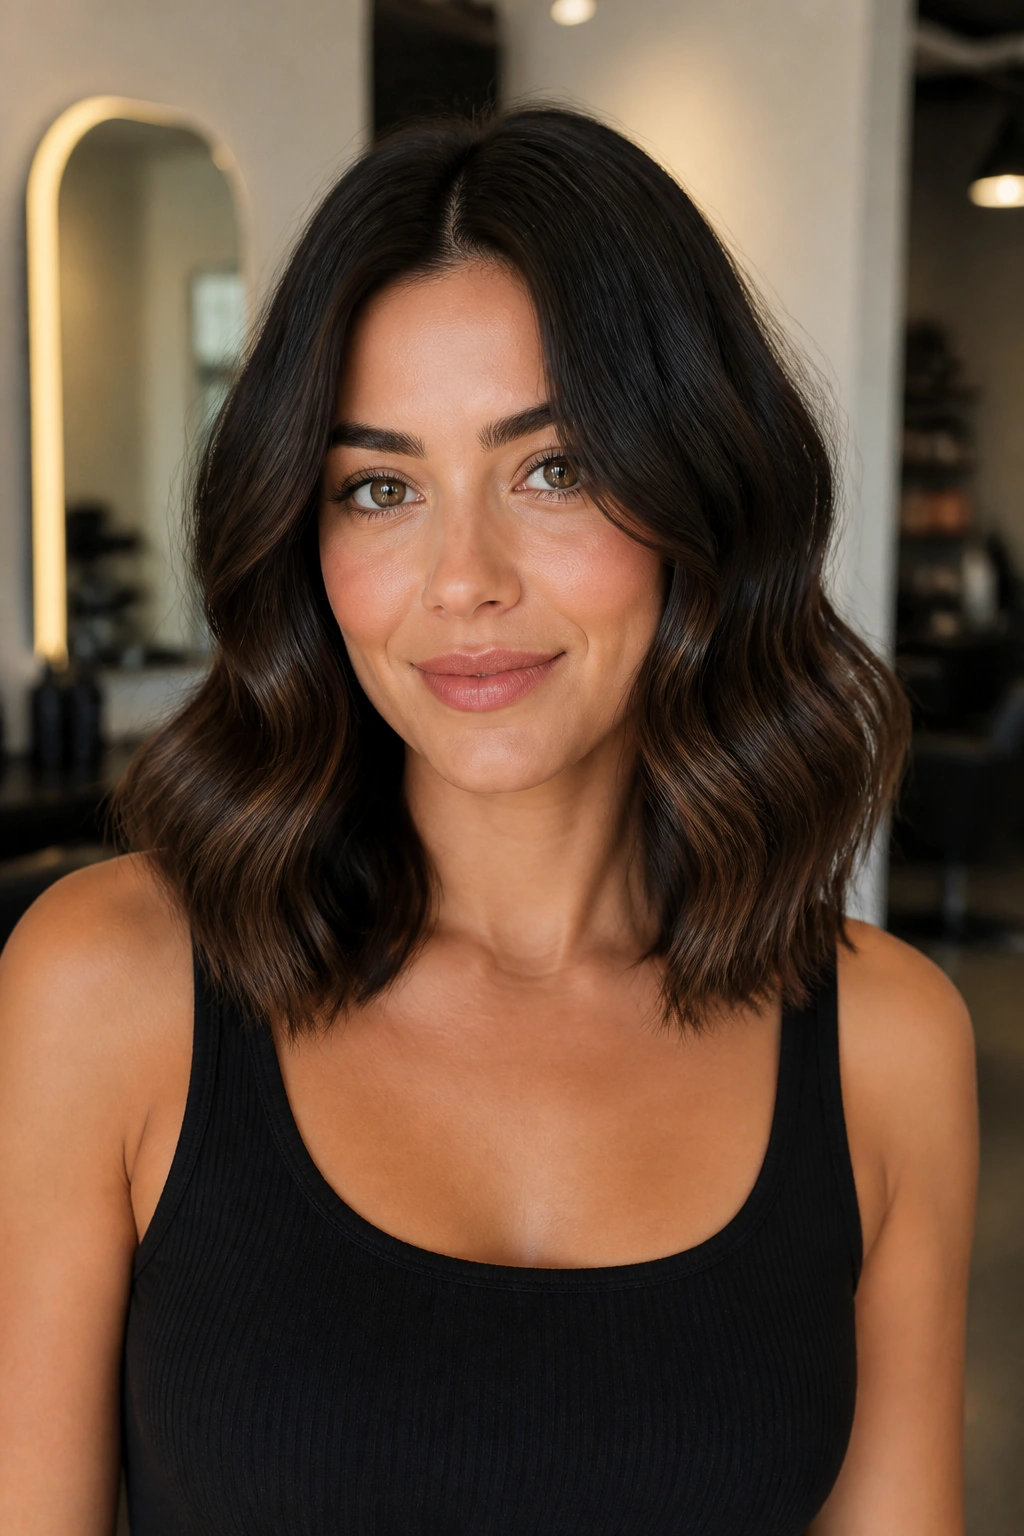
Collarbone-length waves sit in a sweet spot. They give shape without stopping at the widest part of the face, which is where a lot of cuts start to go sideways.
The collarbone acts like a visual arrow. Hair that lands there pulls attention down, not out. That’s why this length works so well with soft S-waves instead of round, puffy curl patterns. The line feels longer, cleaner, and a little sharper around the jaw.
I’m also partial to this style because it behaves. It looks put together with minimal effort, and it does not need giant volume to make sense. Fine hair gets movement. Thicker hair gets control. Everybody gets a little more length in the silhouette.
A blunt collarbone cut can still feel heavy on a round face, so ask for invisible layering or soft internal texture. That keeps the ends from sitting in one solid block. A blocky line can widen the lower face fast.
3. Off-Center Waves with Crown Lift
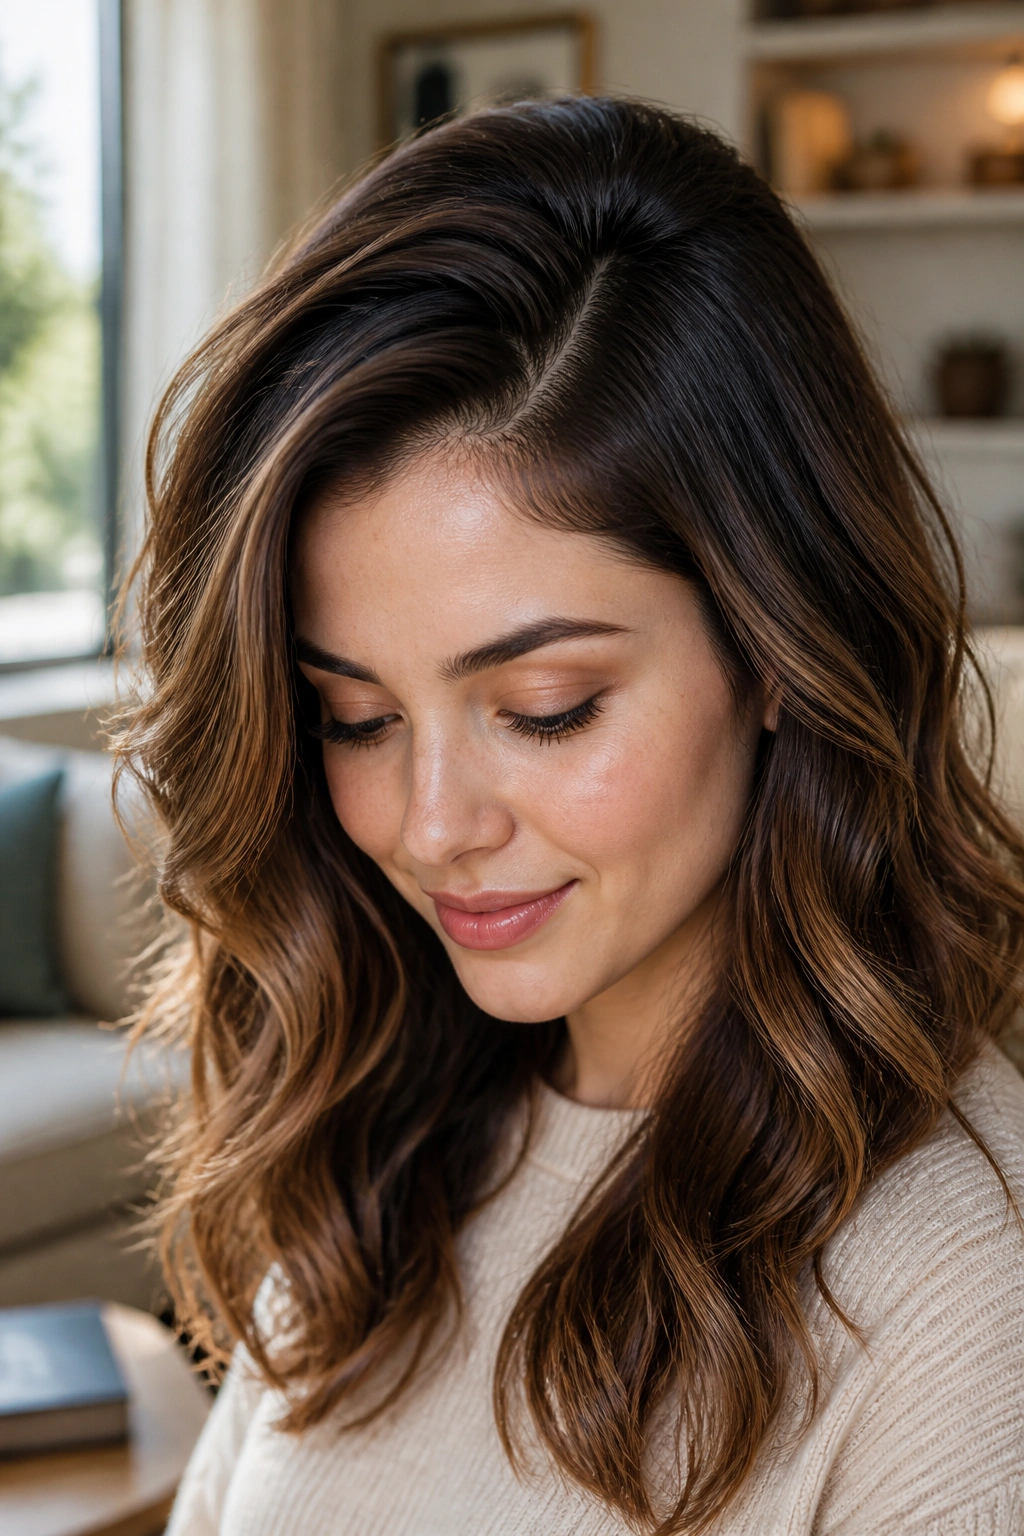
Why does an off-center part work so well? Because it changes the balance of the whole head, not just the top layer of hair.
When the part shifts a little off the center line, the crown gets a touch more height on one side and the face stops feeling boxed in. That matters for round faces, which usually look best when the top half has some lift and the sides stay calmer. Flat roots make the face look shorter. Puffy sides make it look wider. Neither is the goal.
How to Get the Lift
Start the part just past the arch of one eyebrow. That gives you enough asymmetry without making the style look severe. Then create soft waves with a medium barrel and clip the front section up while it cools so the root sets with a little bend, not a hard crease.
For a better shape, mist the roots with a light volumizing spray before blow-drying. Use a round brush only at the crown, not everywhere. That keeps the lift where it helps most.
- Part slightly off center.
- Blow-dry the crown upward.
- Clip the front bend for 5 to 10 minutes while it cools.
- Keep the sides smooth near the cheek line.
One warning: don’t over-tease the crown. You want height, not a helmet.
4. Face-Framing Waves for Round Faces That Start Below the Cheekbones
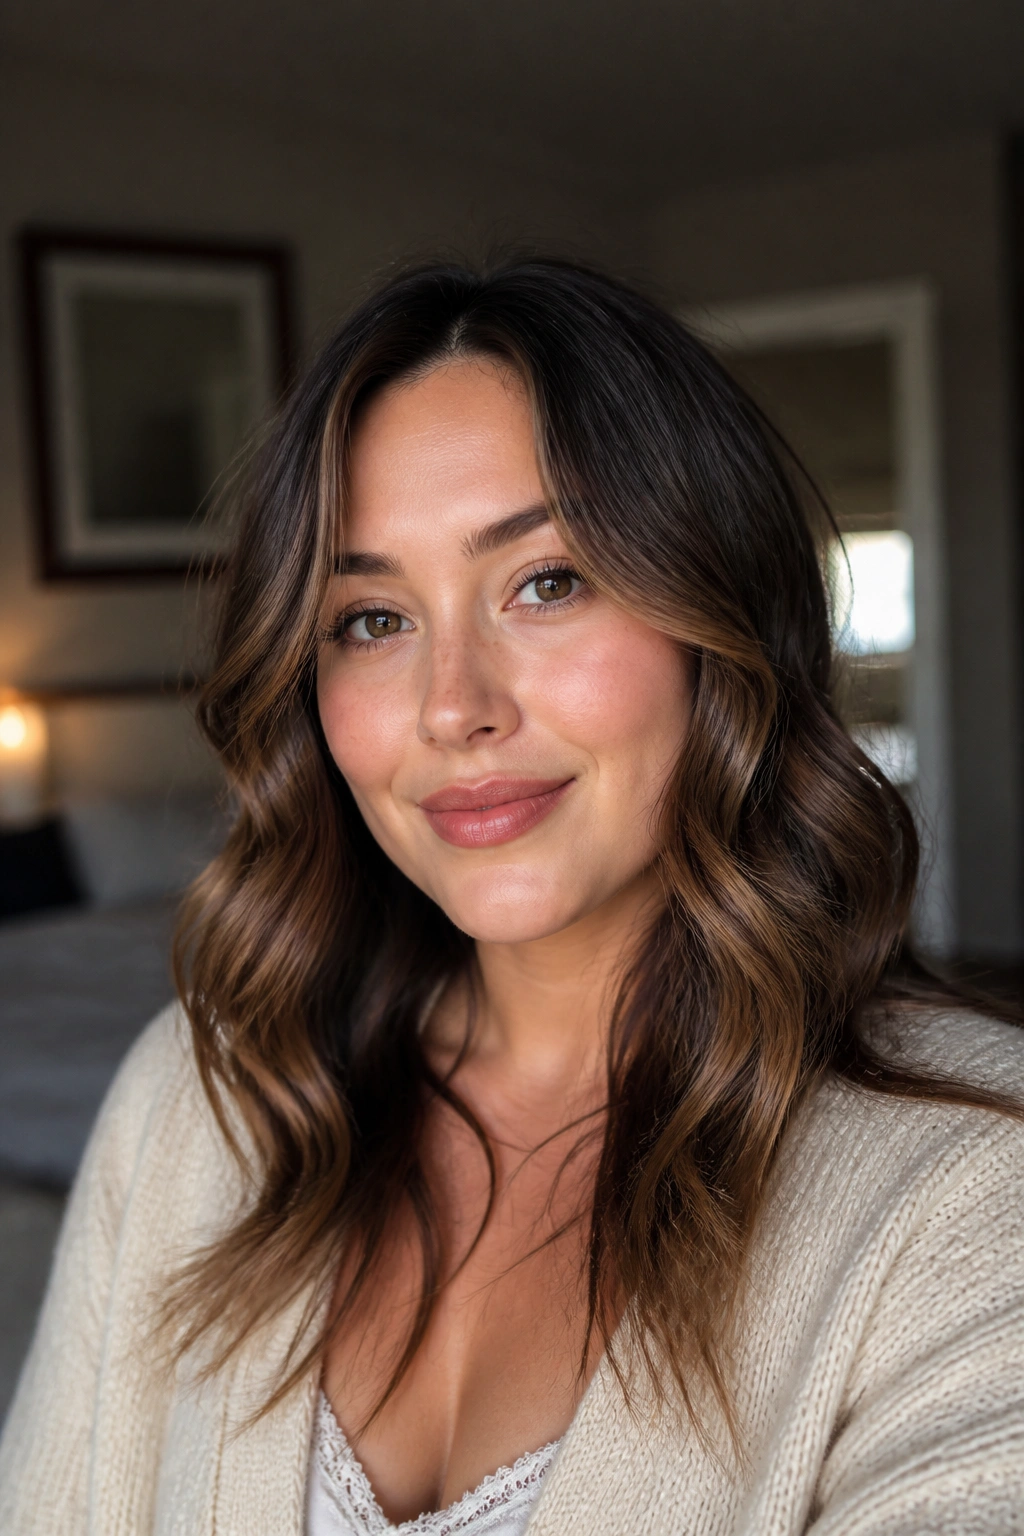
I have seen plenty of waves fail for one simple reason: they start too high. The bend sits right at the cheeks, and the face gets wider instead of longer. It is a tiny mistake, but it changes the whole read of the style.
The smarter version starts the movement lower, closer to the jaw or even just below it. That leaves the cheek area cleaner, which is exactly what round faces usually need. The result is softer, but also leaner through the center line.
Think about the front pieces as a frame with a purpose. They should sweep down, not fan out. A long face-framing layer that curves inward near the chin can make the jaw look more defined. Shorter pieces that hit mid-cheek do the opposite.
What to Ask For
- Front layers that begin below the cheekbone
- Soft bend through the mid-lengths
- Ends that stay slightly loose, not curled under hard
- No chunky layer sitting right at the widest point of the face
This is one of those styles that looks simple on purpose. It is not. The cut and the wave placement are doing a lot of quiet work.
5. Brushed-Out Glam Waves
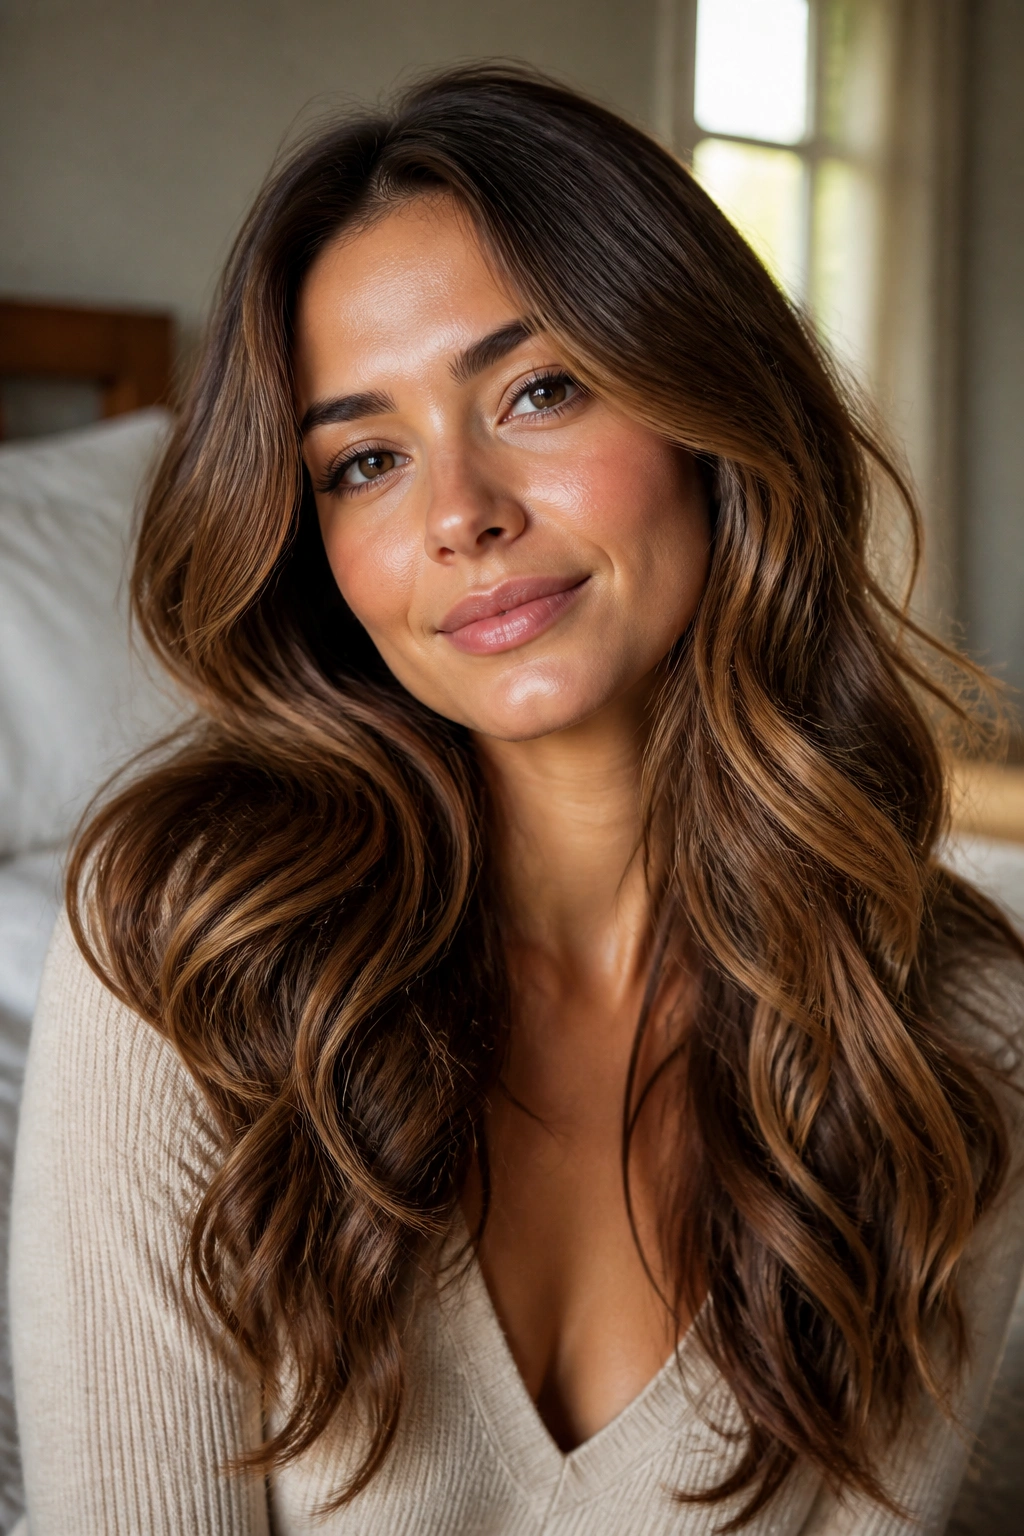
Brushed-out glam waves are a favorite of mine for round faces because they erase that bubble shape curls sometimes create. The wave softens into a flowing shape, and the outline of the face feels longer and less circular.
The trick is patience. Curl the hair, let it cool completely, then brush it out with a boar-bristle brush or a wide, soft paddle brush. If you brush too early, the wave collapses into frizz or loses definition before it has set. If you skip the brushing step, the curls can sit too round around the cheeks.
A tiny bit of shine serum helps here, but only on the mid-lengths and ends. Put it too close to the roots and the style goes limp. One pump is often enough for shoulder-length hair. Maybe two if the hair is thick or coarse.
The reason this style flatters round faces is simple: it creates flow. The eye travels down the hair instead of getting stuck on a bunch of little rounded bends. That gives the whole face a longer read.
6. Beach Waves With Sleeker Ends
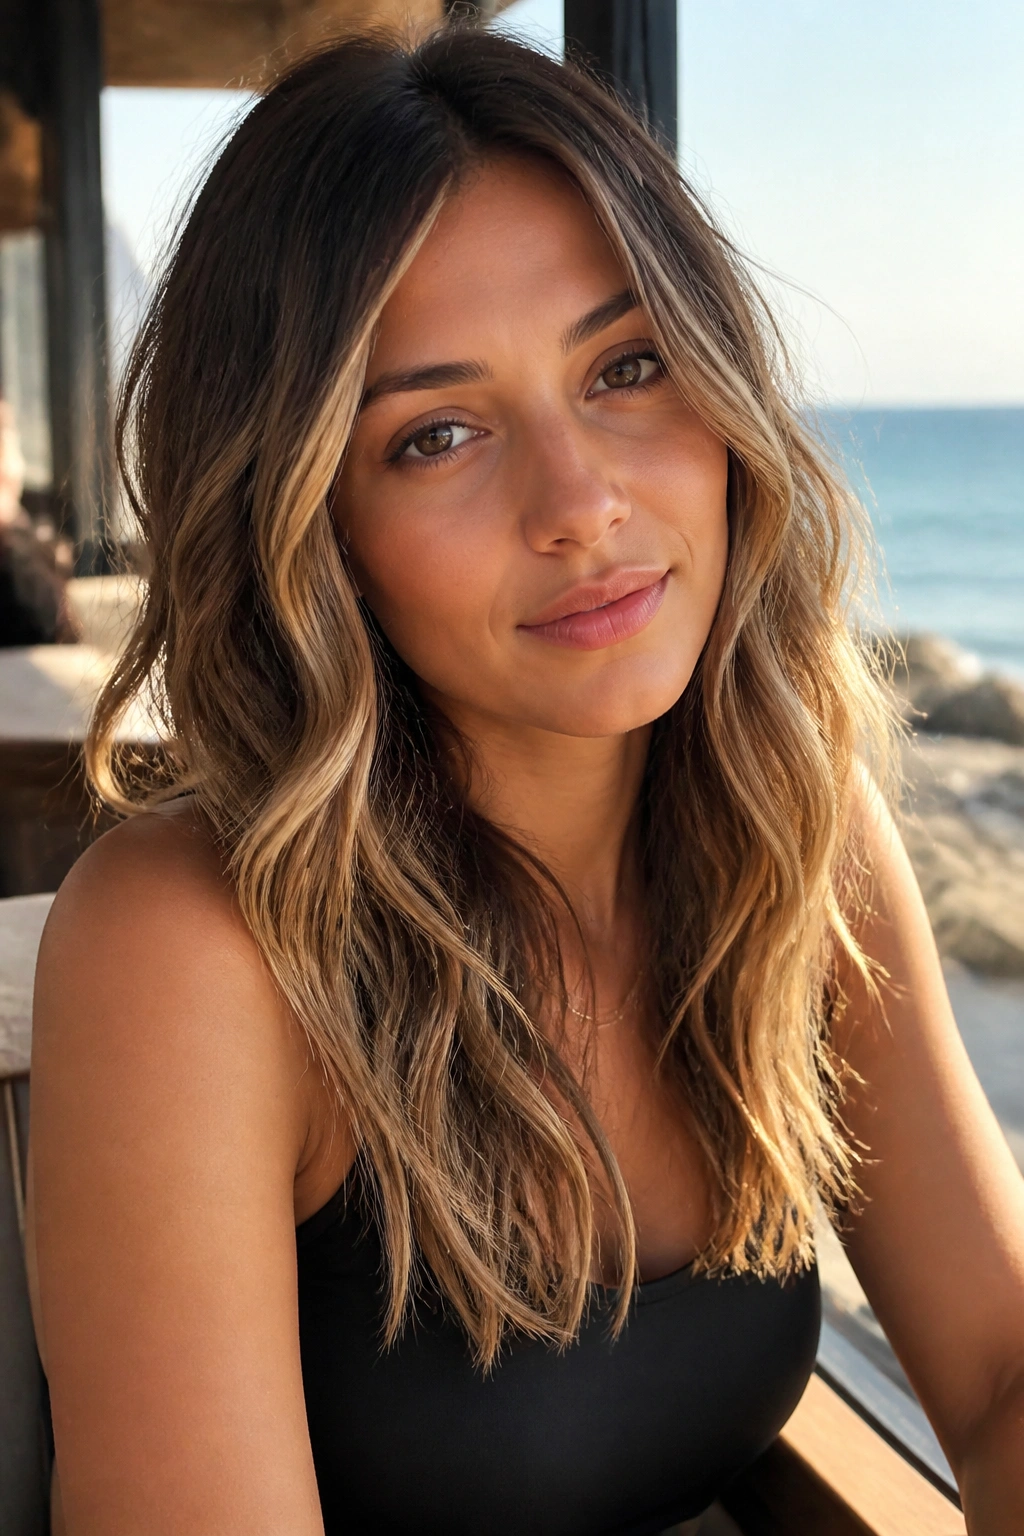
Beach waves can work for round faces, but only if they are controlled. The common mistake is adding texture everywhere, from roots to ends, until the whole head balloons out. That kind of wave reads wide, not slim.
A better version keeps the roots flatter and the ends a little sleeker. You still get movement and that slightly undone feel, but the shape stays narrow through the sides. It’s a small adjustment, and it makes a big difference in photos and in person.
Use a 1-inch wand and leave the last 1 to 1½ inches of each section out. That gives the wave a softer drop instead of a full spiral. Alternate the direction of each section, then shake it out with your fingers rather than brushing it into fluff.
Best for: fine to medium hair, lob lengths, and anyone who wants texture without extra width.
Don’t do this: start the wave too close to the scalp. That’s how the style turns mushroom-shaped.
7. Long Layers and Cascading Waves
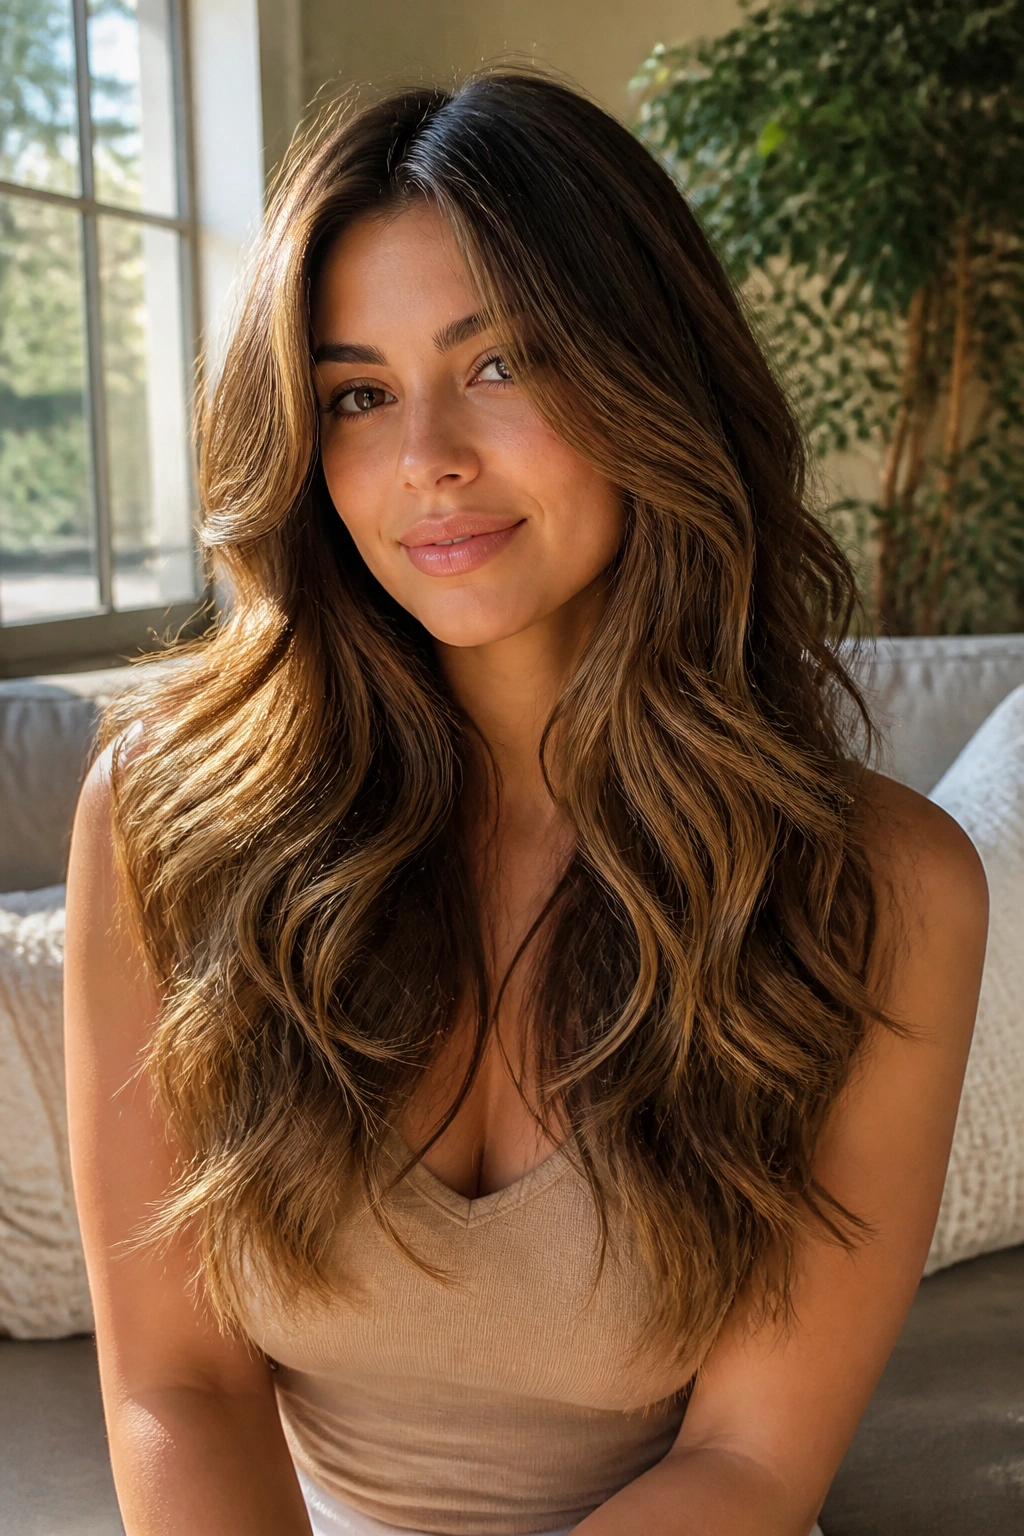
Layers are doing more work here than people think. Long layers keep the hair from hanging in one heavy curtain, which is exactly what can make a round face look fuller on the sides.
The nice thing about cascading waves is that they move in separate bands instead of one thick block. That separation gives the face room. It also helps the waves fall in a vertical line, which feels longer and cleaner. I prefer long layers over short choppy ones for this face shape, hands down. Short layers can puff out at the cheeks if the hair has any natural body.
What to Tell Your Stylist
- Keep the shortest face-framing layer below the cheekbone
- Build movement through the lower half, not the widest part of the face
- Avoid bulk at the chin line
- Keep the back layered enough that the waves do not sit flat
If you already have thick hair, this cut can be a relief. The waves move instead of stacking up. If your hair is fine, ask for softer, fewer layers so the ends do not look see-through.
8. Half-Up Waves with Height at the Crown
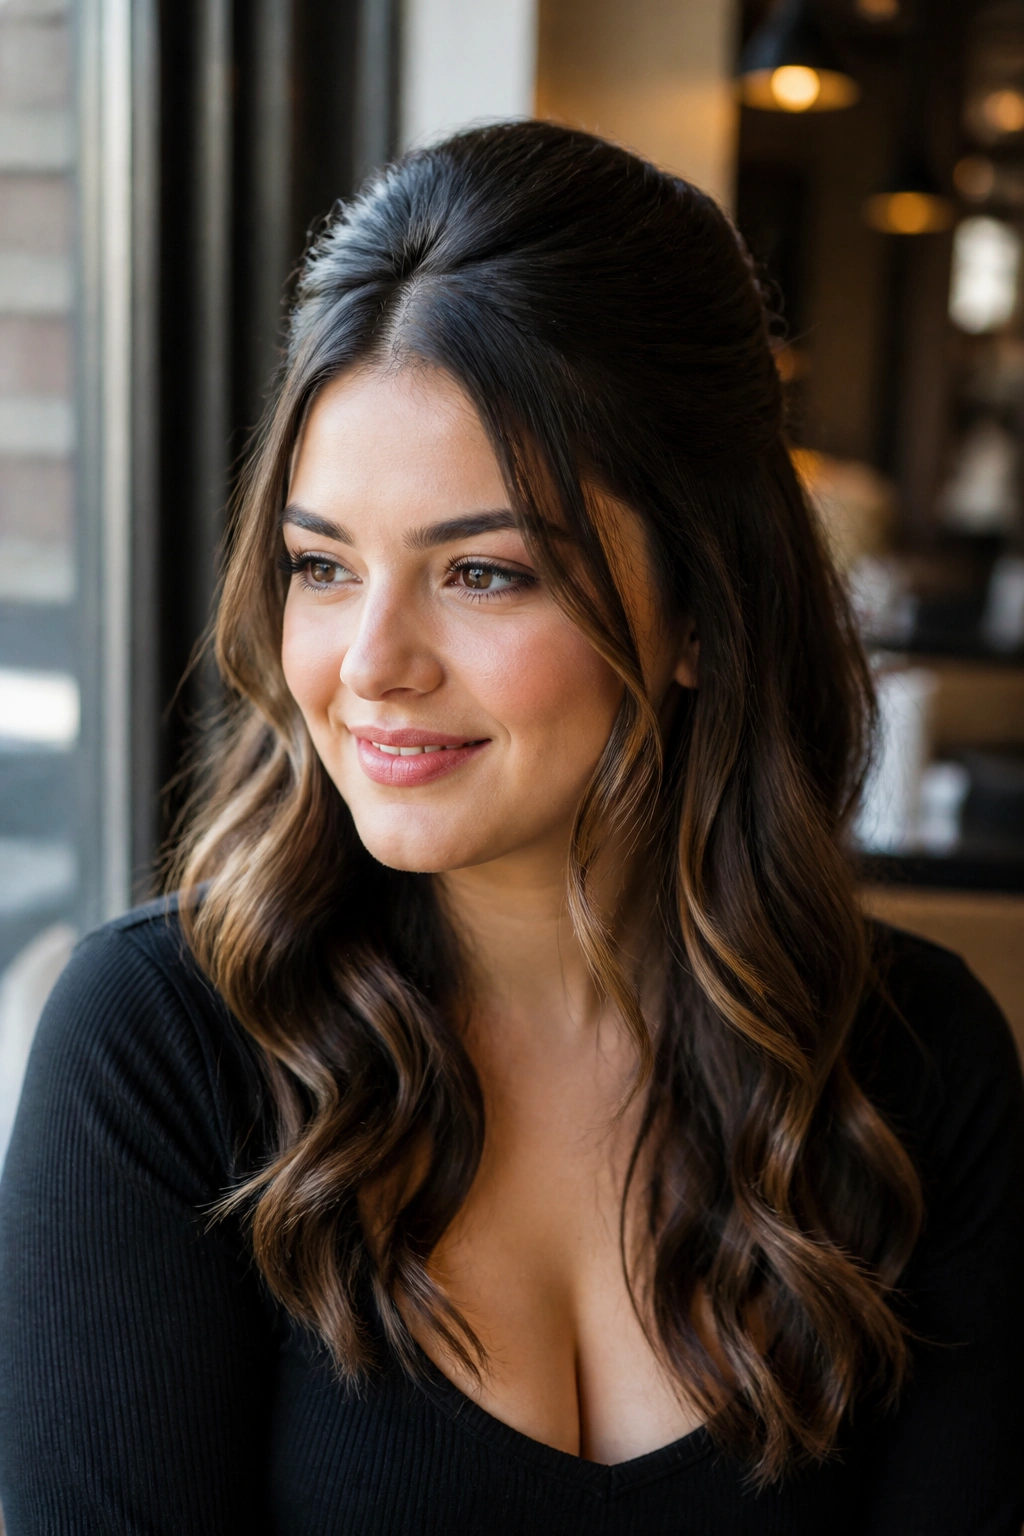
Half-up waves are sneaky good on round faces. They pull part of the hair up and back, which gives the crown height and exposes more of the face. That little bit of lift changes the balance in a way a fully down style cannot.
The version I like best keeps the top section loose, not slicked tight. A little looseness around the temples is important. If you pull the hair too taut, the face can look even rounder because the width at the sides becomes more obvious. A soft twist or a clipped half-up section works better than a hard pony.
This style also gives you a place to park accessories. A simple barrette, a small claw clip, or a wrapped elastic can make the whole thing feel finished without adding bulk at the cheeks. That part matters more than people admit.
If you want extra length, leave two narrow tendrils out in front. Keep them long enough to skim the jaw, not stop at the cheekbones. Short pieces in that area can cut the face in an awkward place.
9. Shoulder-Length Soft Waves
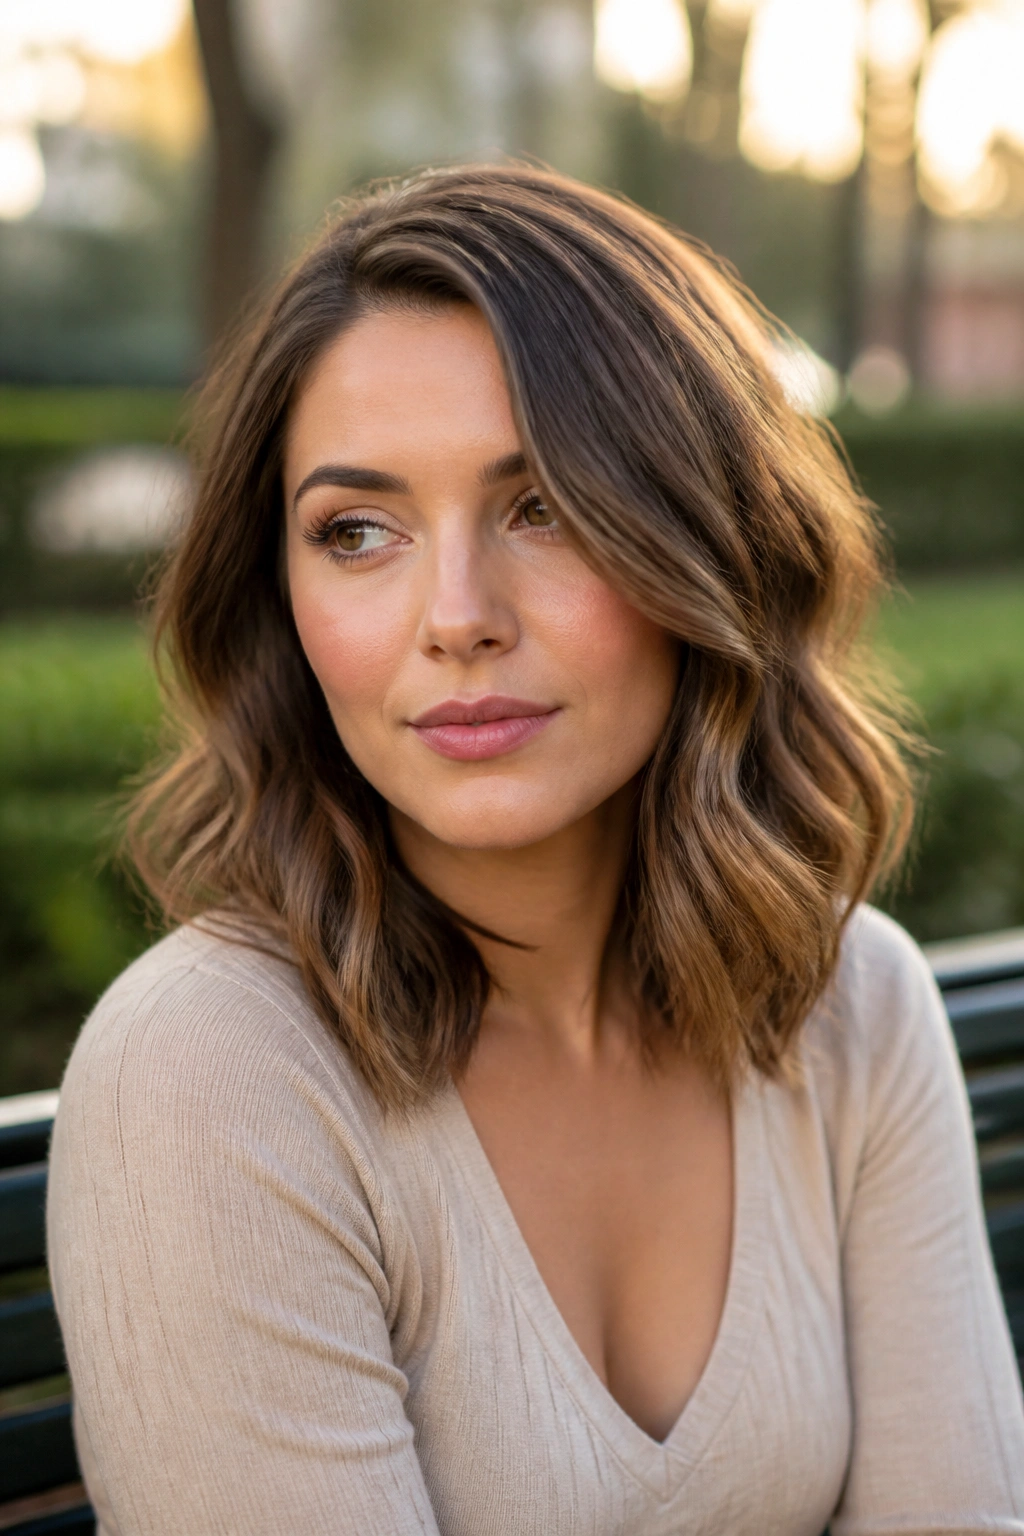
Shoulder-length waves can be either fantastic or annoying on a round face. There is almost no middle ground. If the cut ends right at the shoulders and the waves puff outward, the silhouette gets broad. If the ends taper and the wave is soft, the result looks fresh and light.
The shoulder line is tricky because it sits near the widest part of the upper body on many people. That means the hair has to work a little harder to create a slim line. The best shoulder-length waves skim the collarbone, bend gently, and avoid that heavy triangle shape some medium cuts fall into.
I like a side part with this length because it interrupts the circle effect. A center part can still work, but only if the volume stays controlled and the front pieces are long enough to frame the jaw. Otherwise, the face can feel too open.
A shoulder-length wave also suits people who do not want to spend half their morning styling. It is forgiving. You can rough-dry it, add a few loose bends with a curling iron, and go.
10. Ripple Waves With Narrow Texture
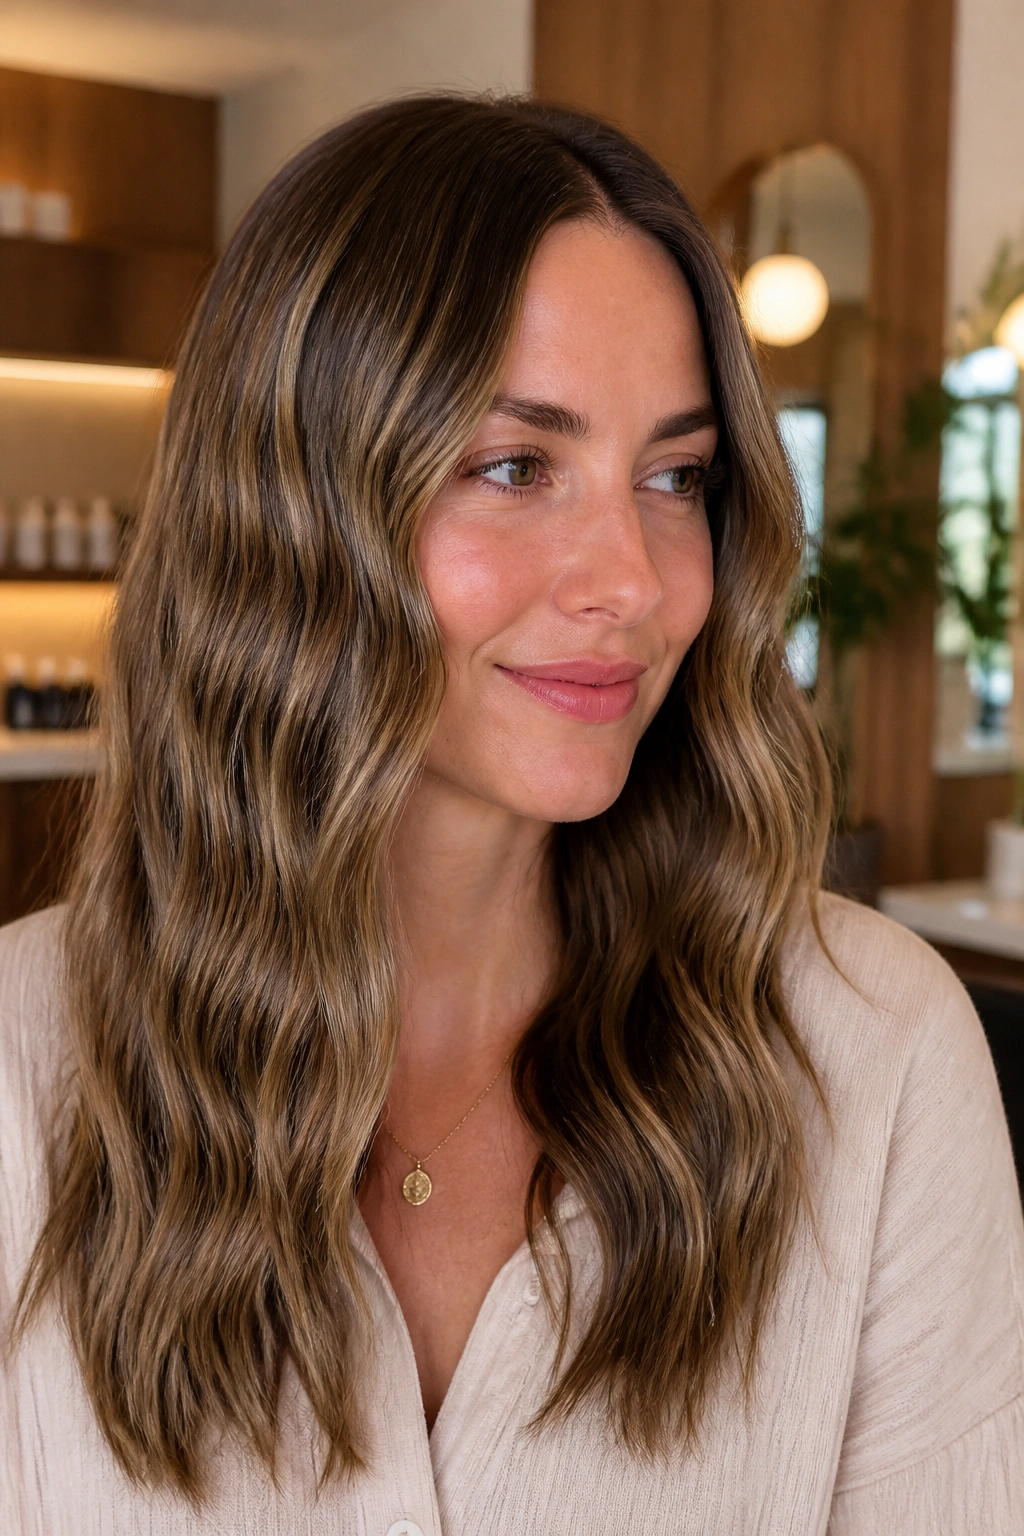
Ripple waves look different from the bigger, glam styles above. They have a narrower bend, almost like a soft zigzag, and that shape can be excellent on round faces because it creates vertical rhythm instead of side-to-side fluff.
The important thing is restraint. Too much ripple texture can look crimped. Too little and it disappears. The sweet spot is a controlled bend through the mid-lengths with the ends left a touch looser so the style does not widen out at the bottom.
This pattern works especially well on medium to thick hair, where a large curl can feel heavy. Narrower waves break up the mass and keep the hair from sitting as one solid curtain. On finer hair, the style can still work, but you may need a texturizing spray to keep the bends visible.
What Makes It Different
- The bend is more linear than round
- The outline of the hair stays slimmer
- The style reads modern without looking messy
- It gives volume without the wide curl halo
It’s not the first wave pattern I’d pick for someone who wants soft romance. It is one of the better choices if you want a sharper shape.
11. Loose Blowout Waves
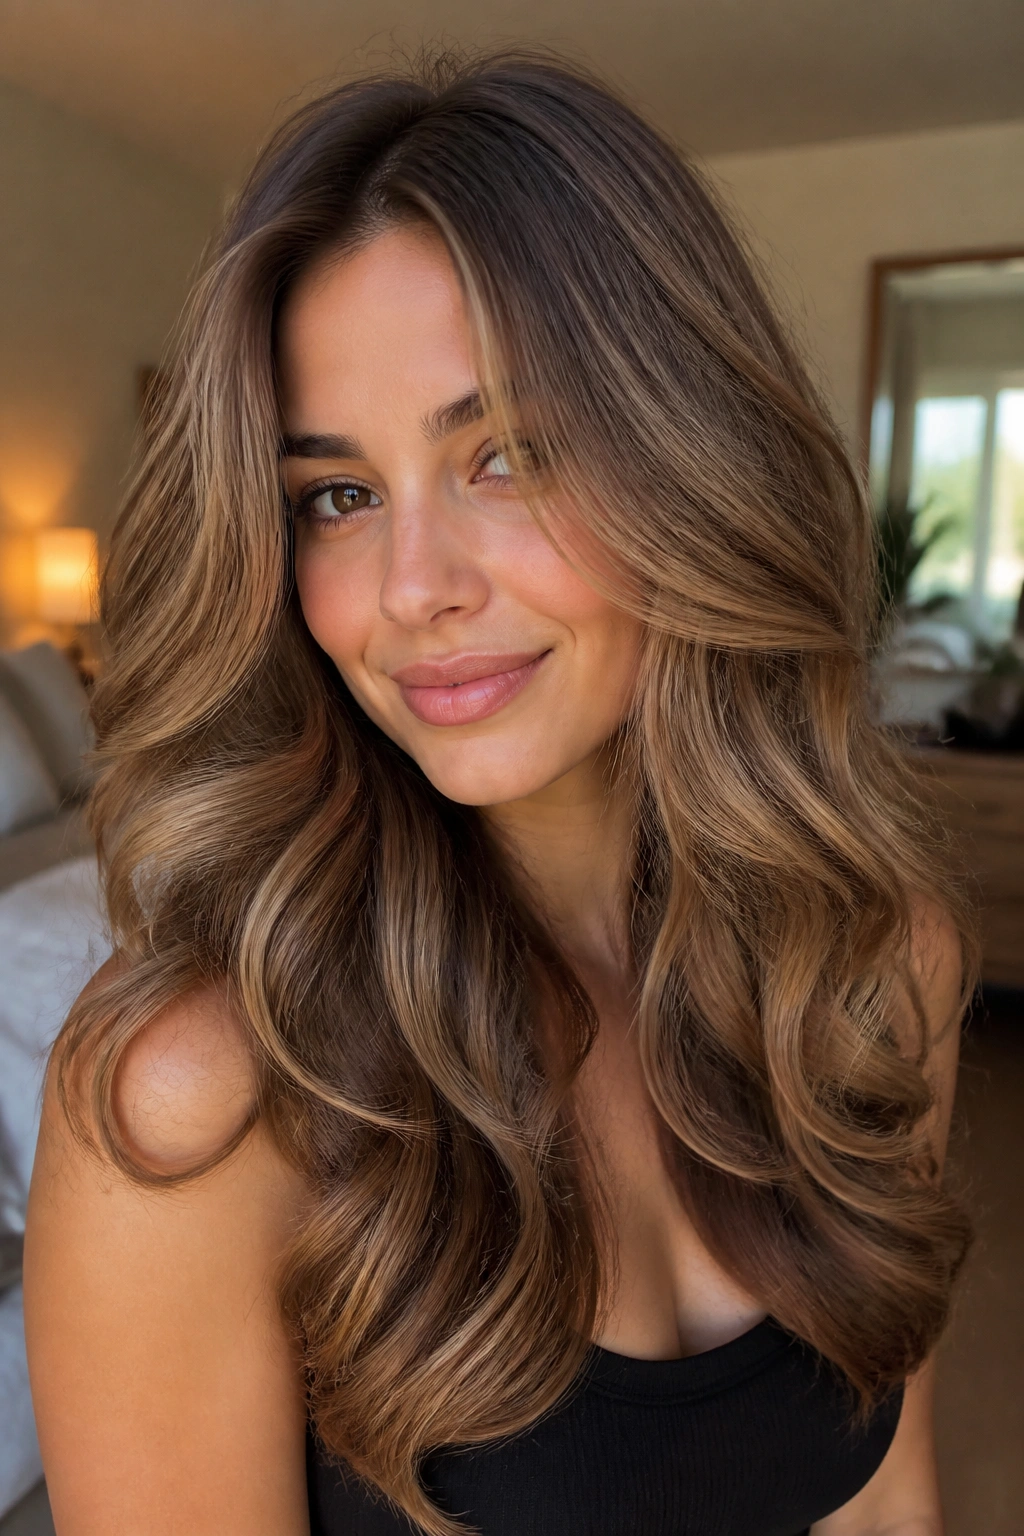
Loose blowout waves are the answer when you want body at the roots but not a pile of curls around the cheeks. The hair moves, the ends curve, and the top has a little airy lift that keeps the face from feeling boxed in.
A round brush or a blow-dry brush can create this look without much trouble. The main job is to keep the barrel shape loose. Wrap the ends around the brush, roll them under slightly, then release before they get too set. If the ends curl too tightly, the line gets round again, which is not what we want here.
This style flatters round faces because the volume lives high and soft, not wide. The roots rise, the mid-lengths bend, and the bottom stays light. That gives the face a longer silhouette. It also pairs well with layered cuts, since the layers help the wave settle naturally.
I would reach for this look when the hair feels flat at the scalp or when a polished-but-not-formal finish makes sense. It has a little bounce, but it does not scream for attention.
12. Asymmetrical Waves With One Side Tucked
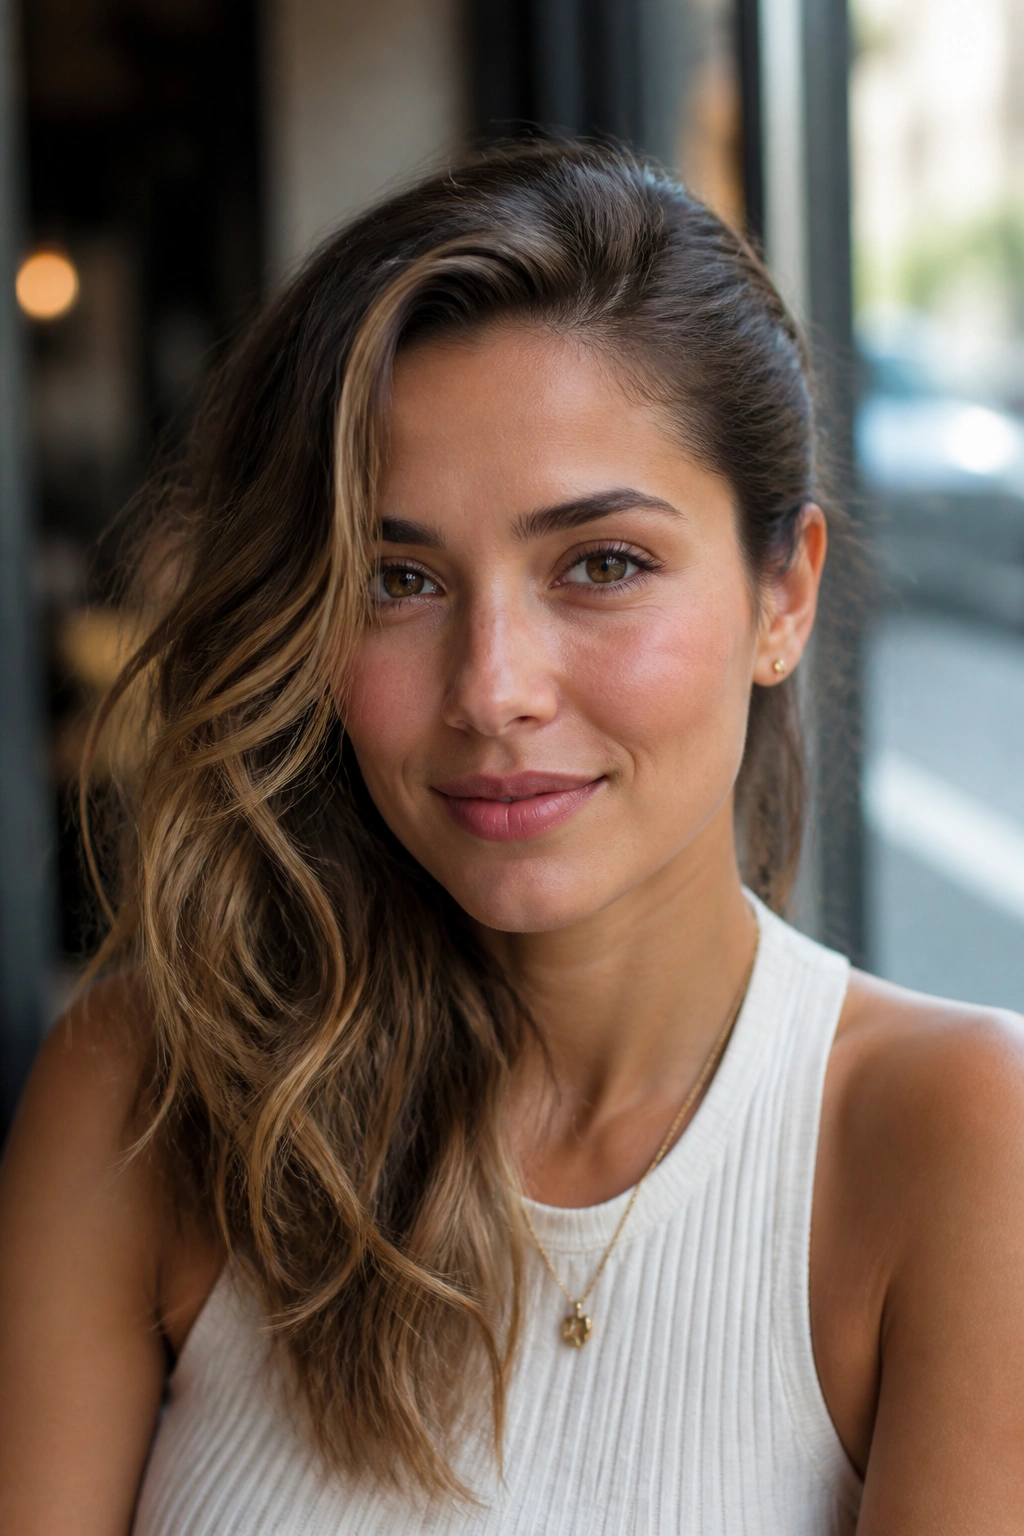
Symmetry is overrated on round faces. A tiny break in balance can do more than a perfectly even wave pattern, and a simple tuck behind one ear is enough to prove the point.
When one side stays loose and the other side is tucked or pinned back, the face looks a little longer and the jawline gets more visual space. That asymmetry pulls the eye across the face instead of letting it sit in one round loop. It also shows off earrings and makes the neck look a touch longer, which is never a bad thing.
Best Way to Wear It
- Keep the untucked side with soft movement around the jaw
- Tuck the other side low, just behind the ear
- Leave one front wave free so the style does not feel over-controlled
- Use a light pin if the hair slips easily
This works best when the wave itself is loose and shiny, not frizzy or over-textured. The tuck should look deliberate, not like you were fighting your hair all morning.
It’s a simple style. That’s the charm.
13. Curtain Bang Waves for Round Faces
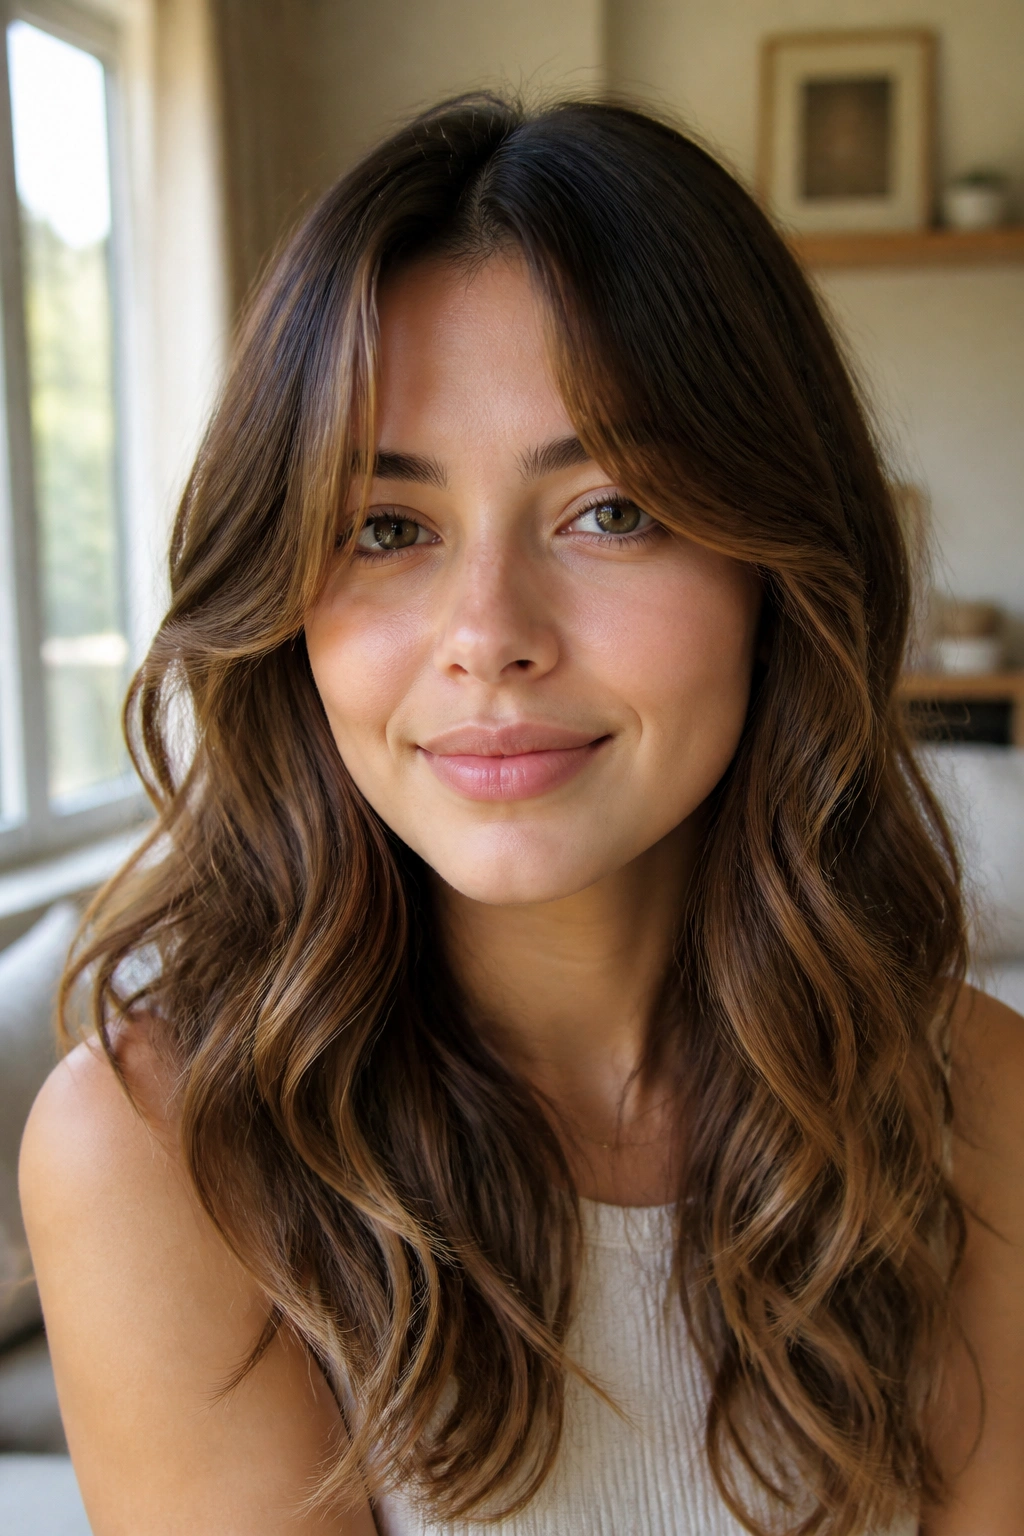
Curtain bangs can be excellent with waves, but only if they are cut with enough softness. A heavy, blunt fringe sitting straight across a round face can make the face feel shorter and fuller. Curtain bangs do the opposite when they are long, airy, and split at the center.
The reason they work is that they create a vertical line right down the front of the face. That line helps stretch the shape visually, especially when the bangs blend into side waves that move away from the cheeks. Keep the shortest point around the bridge of the nose or a little lower, and let the pieces fall into the cheek and jaw area.
This pairing is especially good if your forehead is a bit wider or if you like to wear your hair down often. The bangs soften the front without hiding the face. They also hide a bad hair day better than most people expect.
A small warning: bangs need regular trimming. If they grow out too far and start sitting heavy, the shape loses that airy effect fast. Not a dealbreaker. Just maintenance.
14. Vertical Wand Waves With a Broken Bend
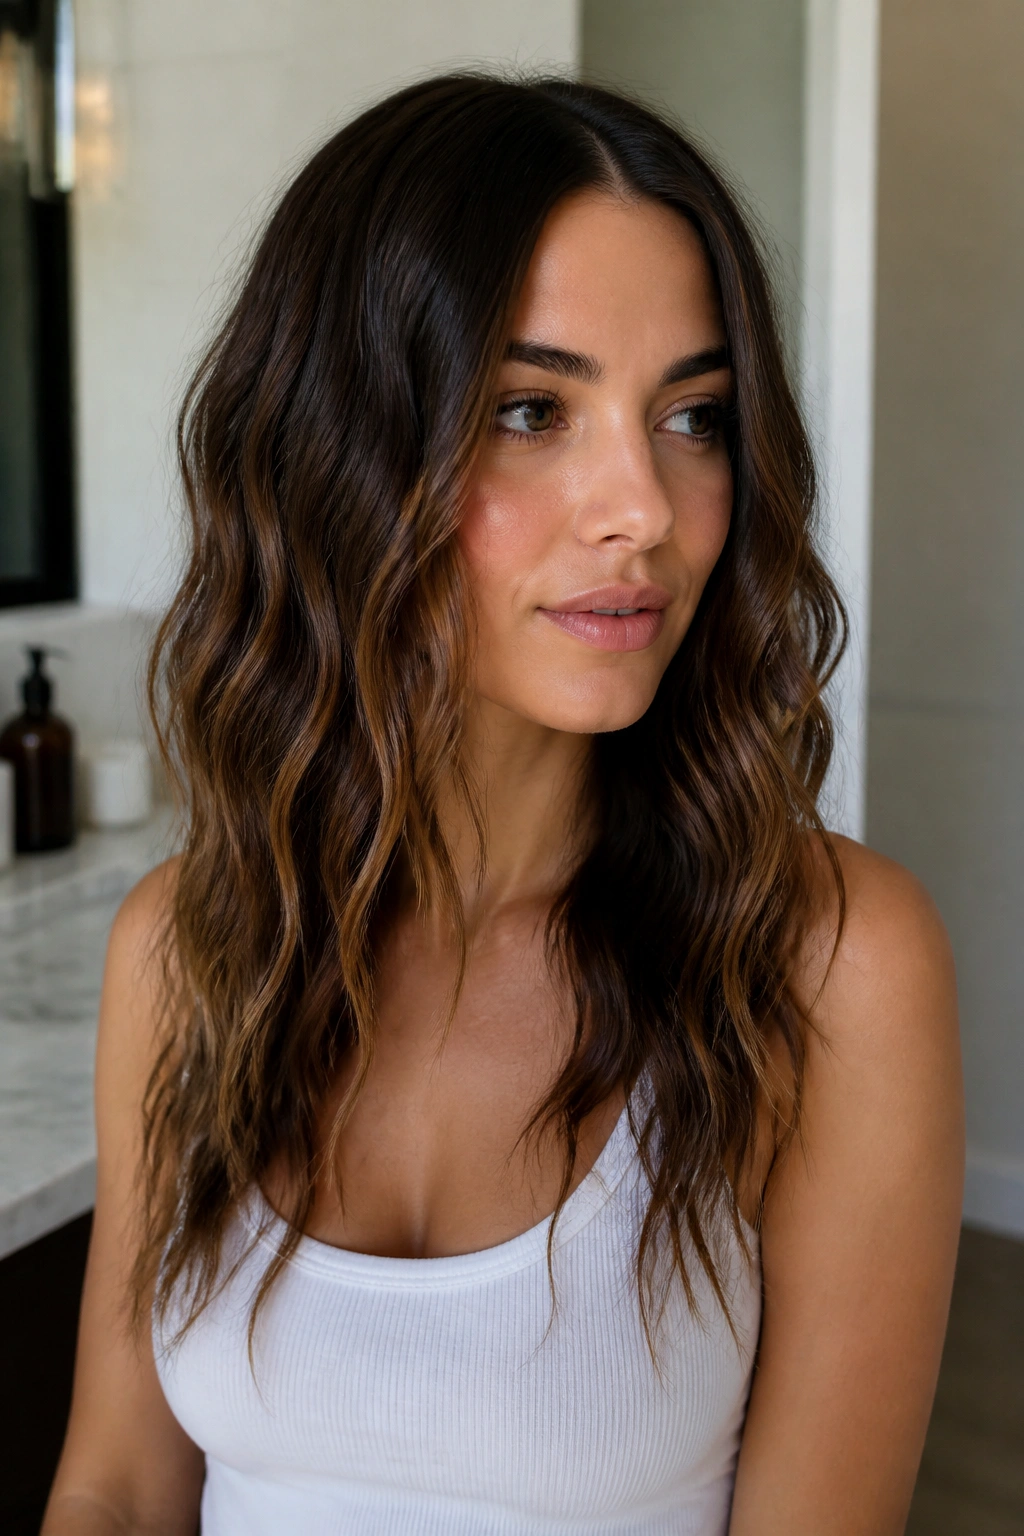
Vertical wand waves are one of the smartest choices for round faces because they keep the curl pattern narrow. The hair wraps in a straight up-and-down line around the wand instead of spreading outward in big horizontal loops, so the silhouette stays longer.
The trick is to leave the last inch or two of the hair out. That broken bend at the ends keeps the style from turning into one giant circle. I like this look on medium to long hair, especially when the hair is thick and tends to puff outward with bigger curls. The slimmer wave pattern reins that in.
Use a 1-inch wand, take sections about 1 inch wide, and alternate the direction of each wrap. Hold each section for 5 to 7 seconds, then release into your palm and let it cool before touching it. That cooling step is where the shape sets. Skip it and the wave falls apart fast.
Watch For This
- Don’t curl too close to the scalp
- Don’t use huge sections
- Don’t brush it into fuzz
- Keep some separation between the waves
This style has a little more structure than beach waves, which is exactly why it works.
15. The Best Everyday Hair Waves for Round Faces
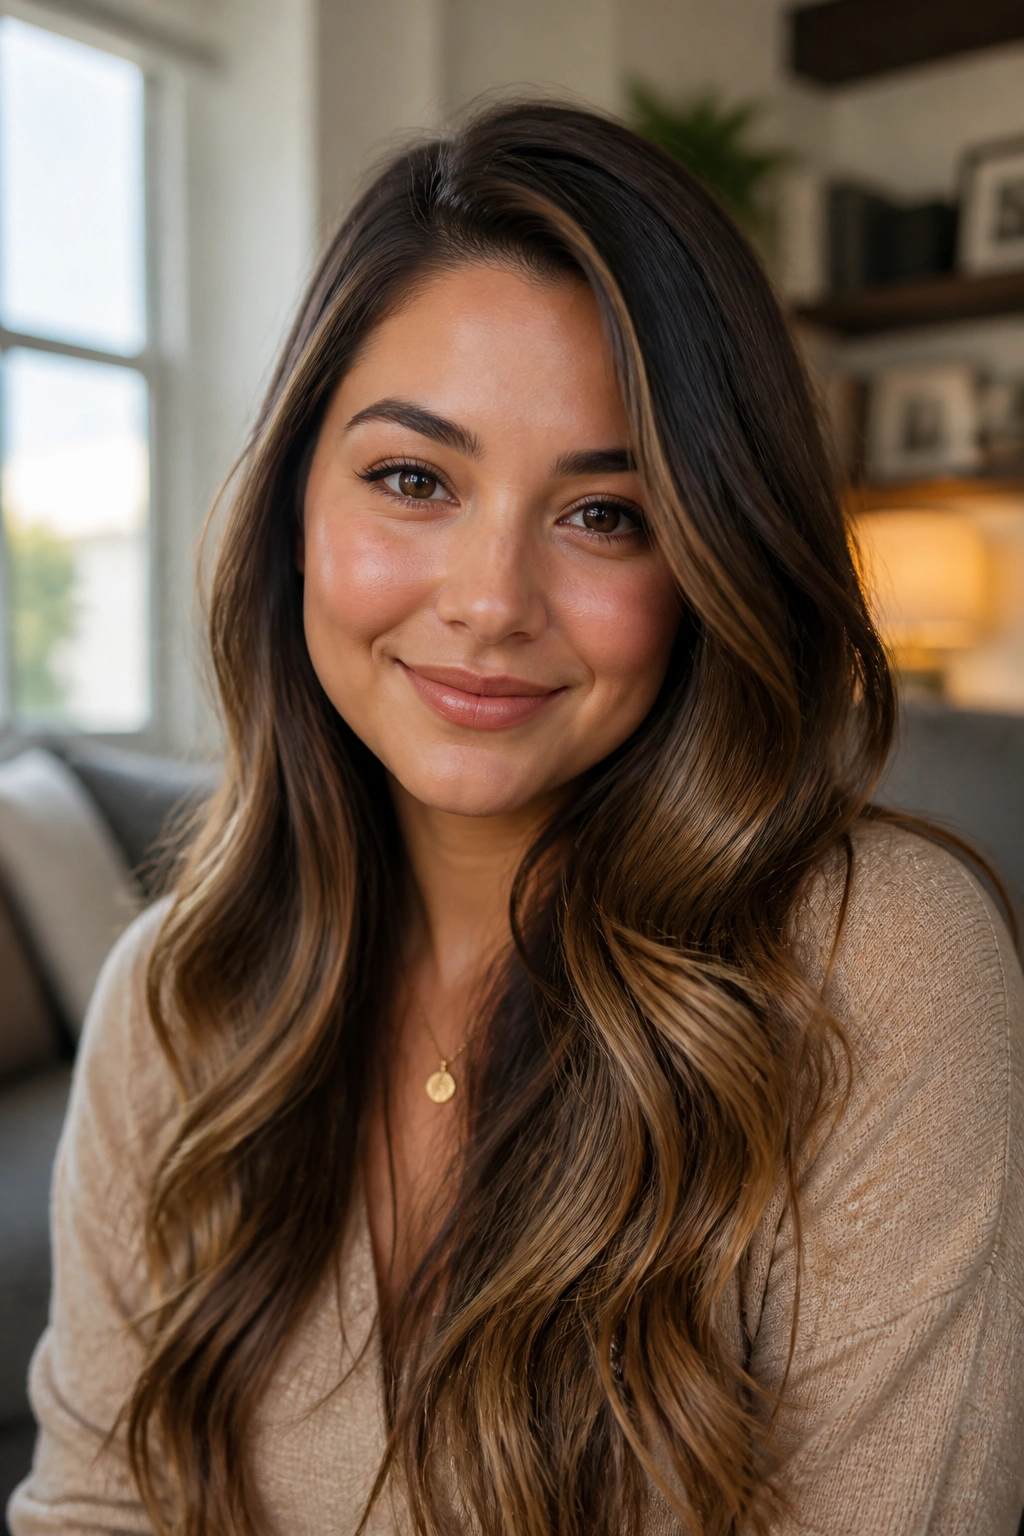
If you only want one wave pattern in your back pocket, make it this one: long, loose waves with a side part, a soft crown lift, and movement that starts below the cheekbones. That combination does almost everything a round face usually needs without looking fussy.
It is not the flashiest look on the list. Good. Flashy is not always flattering. The strength here is balance. The top gets just enough lift to lengthen the face, the sides stay controlled, and the ends move enough to keep the style from feeling heavy.
I think this is the easiest version to live with, too. You can wear it with jeans, a blazer, or a dress and it doesn’t fight the outfit. If your hair tends to drop waves fast, set the front pieces with clips while they cool and leave the crown alone for a little extra root memory.
A simple formula helps: offset part + low starting wave + long face-framing pieces + soft brush-out. That’s the whole game, really. Keep the wave away from the widest point of the face, and the rest gets much easier.
Choose the style that gives you the most length, the least width, and enough movement to look like your hair has a pulse. That usually wins.
