



Long hair and top knots have a funny relationship: the more hair you have, the easier it is to make the style look full — and the harder it is to keep it where you put it. Top knots for long hair can look polished in two minutes or turn into a drooping knot that feels heavy by lunchtime. The difference is usually not talent. It’s shape, tension, and where the weight sits.
That weight changes everything.
A knot that works on collarbone-length hair can collapse on waist-length hair because long strands tug downward like a rope under strain. A few smart pin placements, a better elastic, or a slightly different twist pattern can fix that fast. And if your hair has layers, even the prettiest knot can sprout little ends that refuse to stay tucked. Annoying? Yes. Normal? Also yes.
The styles below are not all the same knot wearing different shoes. Some are sleek and tight. Some are soft and loose. Some are for thick hair that needs support, and some are for fine hair that needs the illusion of fullness. You’ll also see which ones hold up best with clean hair, second-day hair, curls, or a lazy morning when you need something that works without a whole production.
1. The Classic High Top Knot
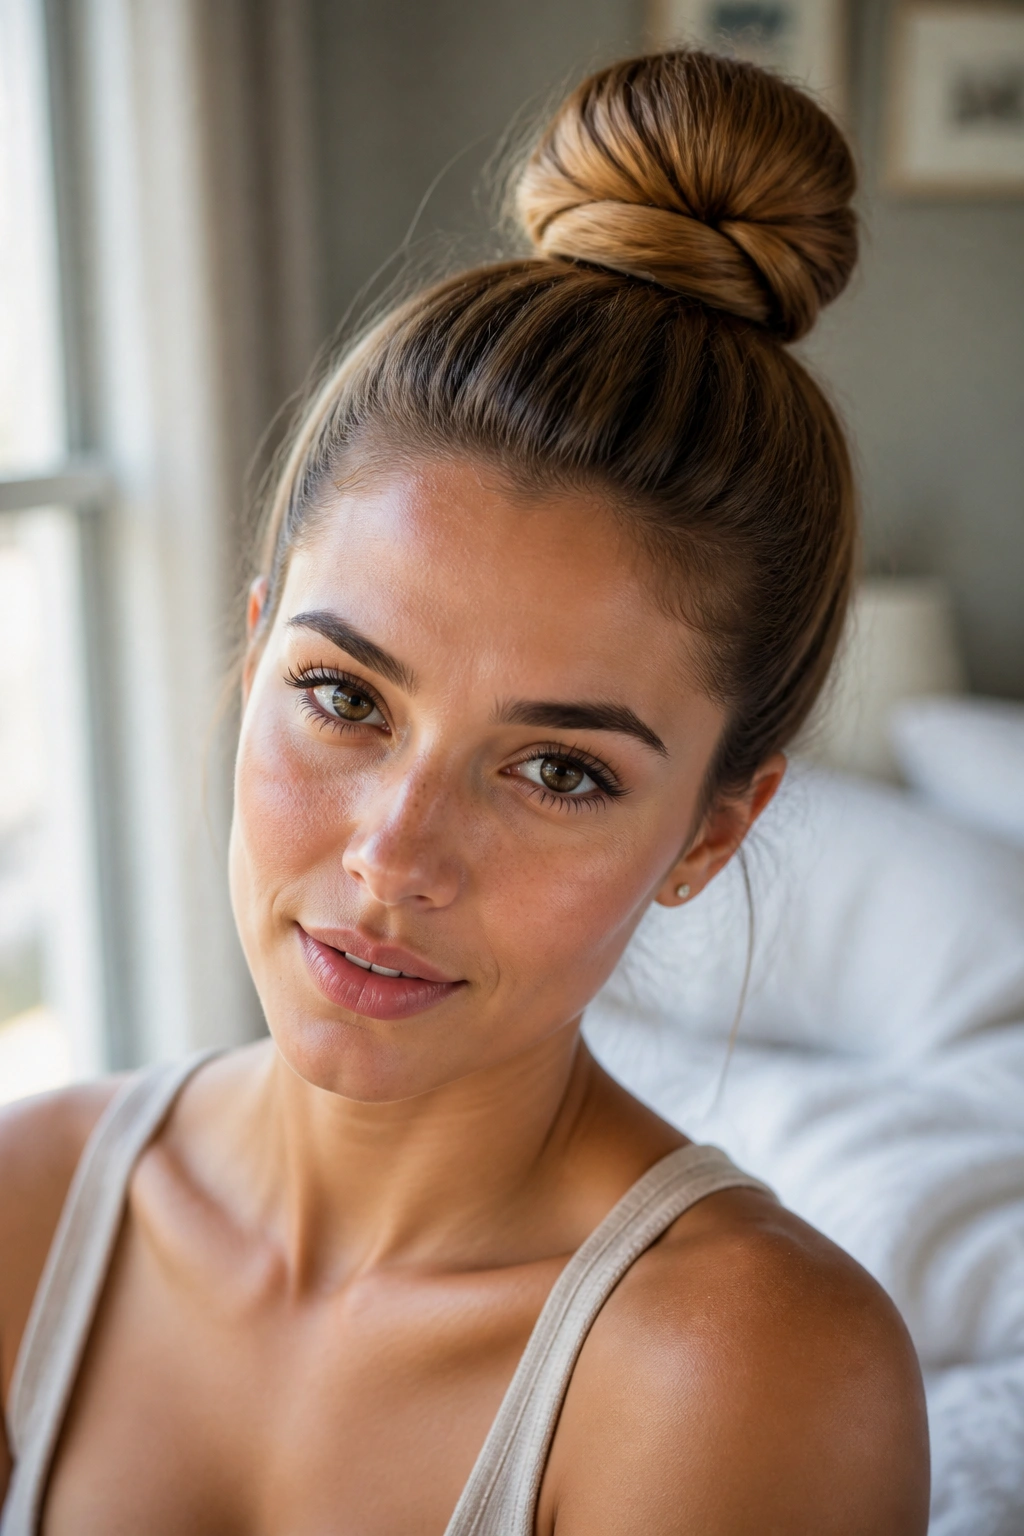
The classic high top knot is still the one I’d call first when long hair needs to disappear fast and stay put. It works because the weight sits directly above the crown, where your head gives the knot a natural anchor. If you place it too low, the bun starts dragging backward. Too high, and it can feel like a tiny helmet. Right in the crown area is the sweet spot.
How to keep the shape clean
Brush the hair into a high ponytail first, then twist the length once or twice before wrapping it around the base. If your hair is very long, split the ponytail in two and wrap each half in opposite directions. That keeps the bun from becoming one thick lump on one side.
A few details make this style hold better than it looks like it should:
- Use one strong elastic and 3 to 5 bobby pins.
- Pin the ends toward the scalp, not outward.
- Leave the ponytail slightly loose at the base if you want a softer finish.
- Wrap the knot around 1 to 2 inches above the top of the ears for a balanced look.
Best tip: if the bun keeps sliding, move the ponytail an inch higher and pin the base first. That tiny shift changes the whole day.
2. The Sleek Ballet Top Knot
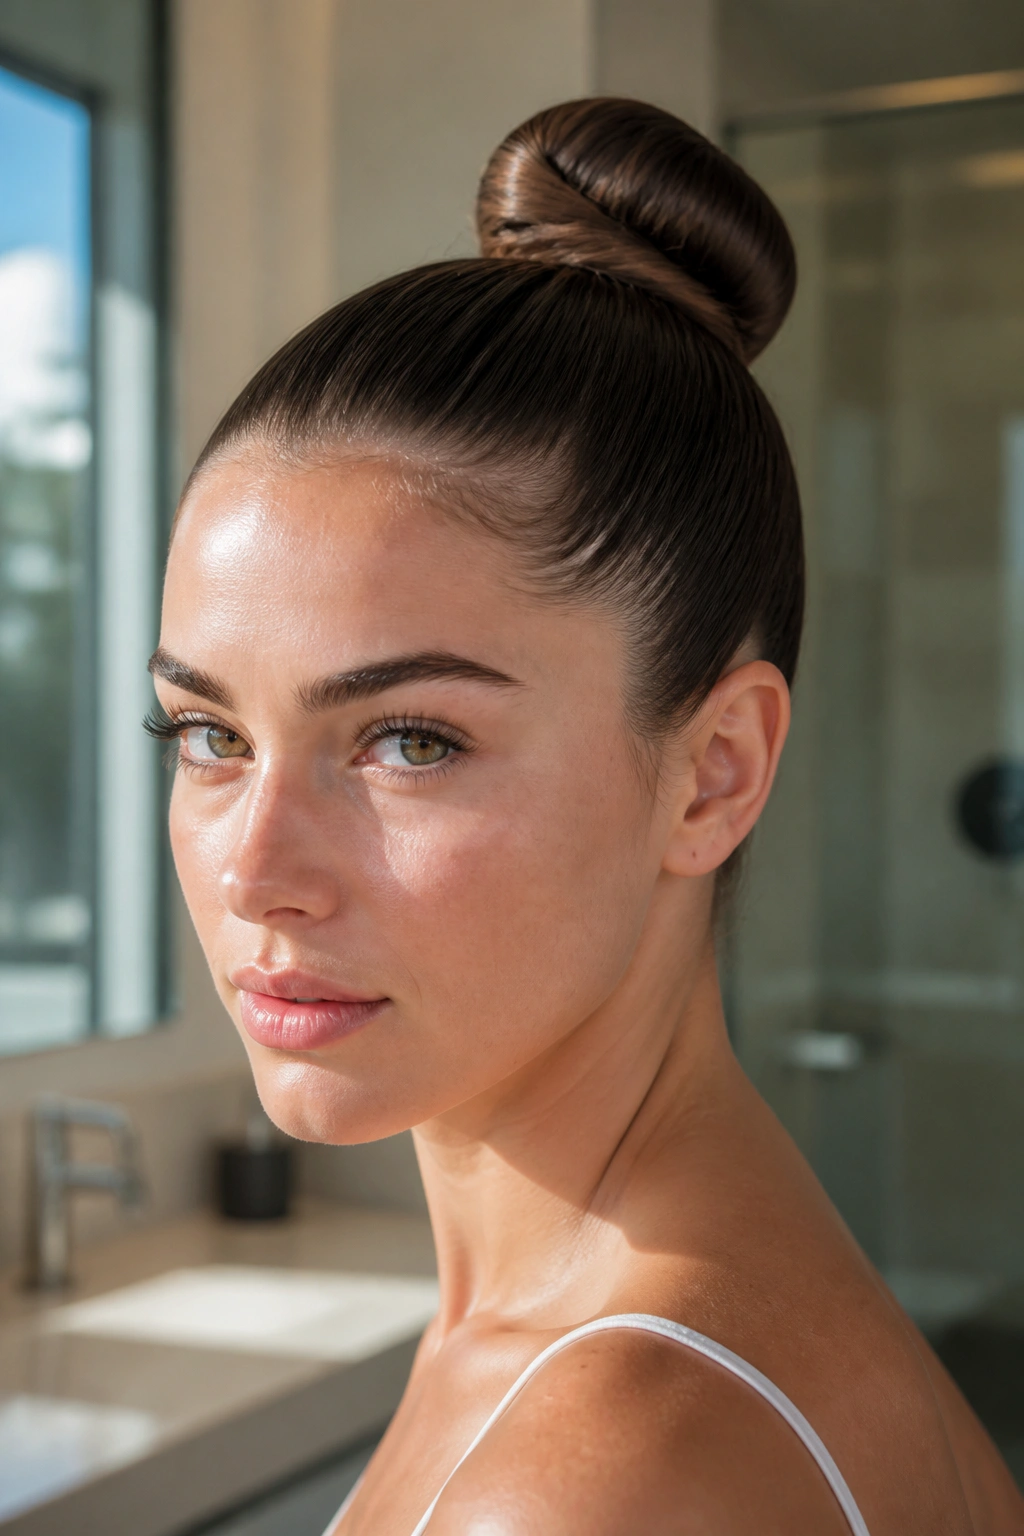
A sleek ballet knot is a different animal. It’s the same basic shape, but the mood is cleaner, sharper, and a little more controlled. This version loves straight hair, damp hair, or hair with a touch of styling cream, because every strand gets pulled into the same direction before the knot is wrapped.
Why the smooth finish works
A boar bristle brush does more here than a round brush ever will. It lays the hair flat without puffing up the sides, and that matters when you’re trying to keep long hair from bulging at the crown. A pea-sized amount of gel at the hairline helps, too, but don’t drown the front in product. Too much and the knot starts feeling greasy before lunch.
What to use
- Fine-tooth comb for the part and the smoothing.
- Light gel or styling cream for flyaways.
- One elastic with a strong grip — the stretchy kind that does not feel gummy.
- U-pins or two crossed bobby pins for the finish.
This is the knot I’d wear when I want the hair to look intentional from the back, not just presentable from the front. Clean lines. No fluff. No drama. And if you have very long hair, tuck the ends under the knot instead of wrapping them all the way around; otherwise the bun grows into a lopsided oval.
3. The Messy Piecey Top Knot
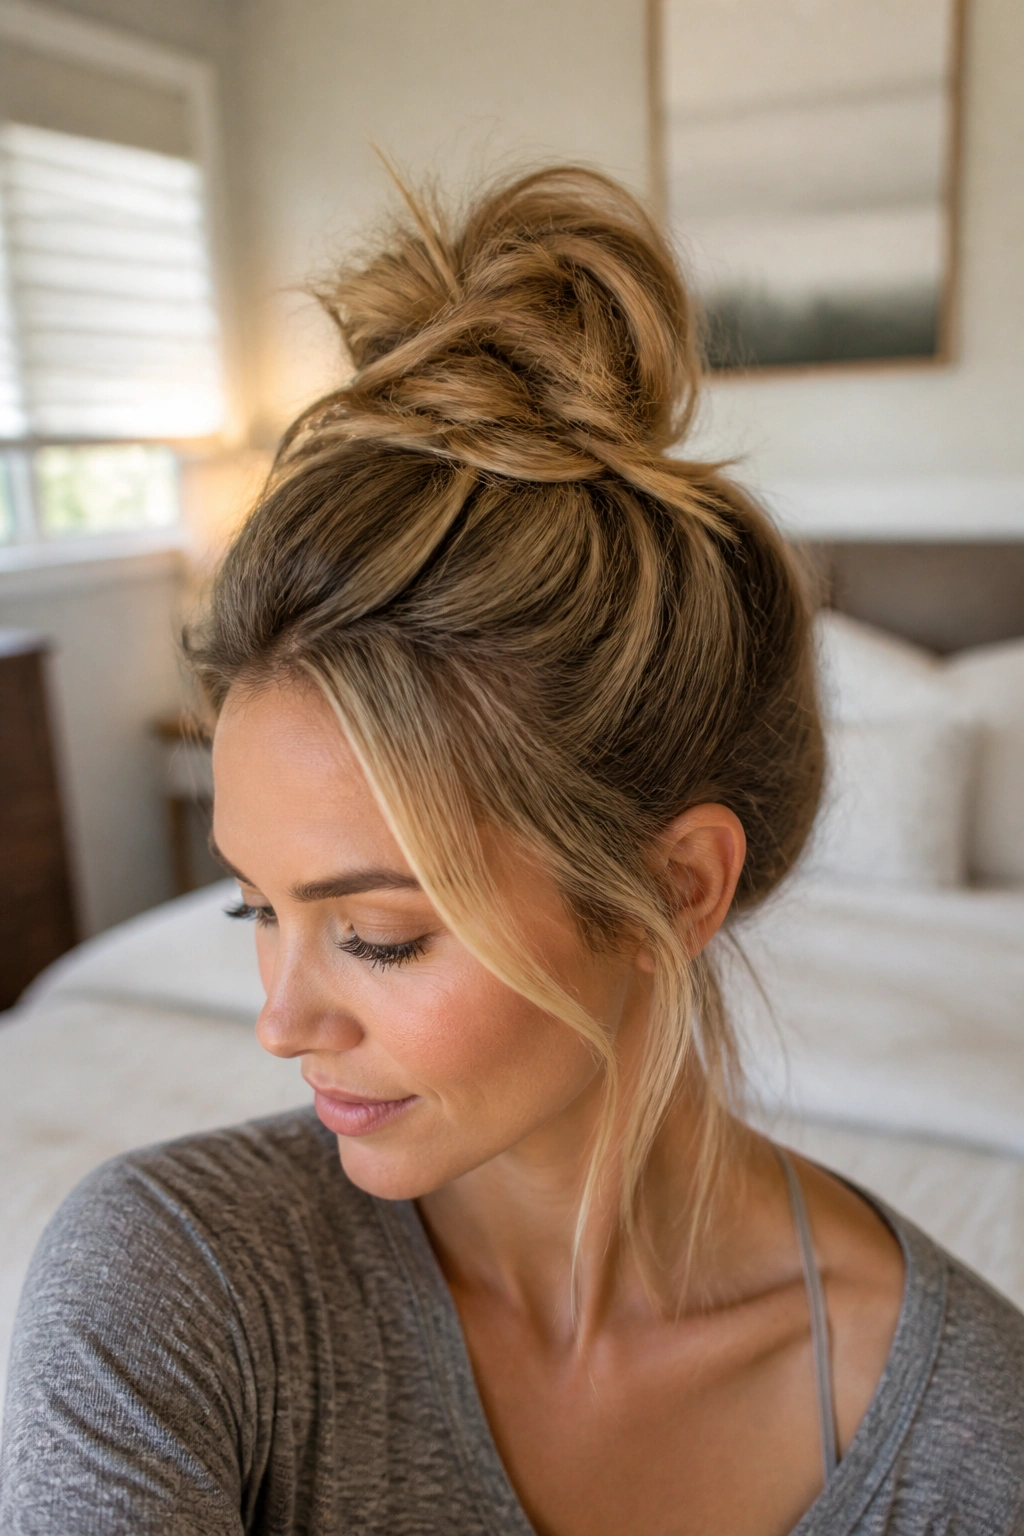
Messy does not mean random. It means controlled looseness, which is a very different thing. The best messy top knot for long hair keeps enough shape at the base to survive the day, while the top and sides stay soft enough that it doesn’t look overworked.
A good messy knot starts with texture. Dry shampoo, texture spray, or even a little sea-salt mist on the mid-lengths gives the hair enough grit to stay in place. Clean, silky hair can still do it, but it needs a bit more help. If your hair is freshly washed and slippery, you’ll fight it the whole time.
The trick is to stop twisting before the knot looks “done.” That sounds odd, but it’s the point. Leave a few ends out. Pull on a few pieces near the temples. Tug at the crown with your fingertips, not a brush, until the knot looks soft but still anchored.
What keeps it from looking sloppy
- Keep the base tight, even if the outer shape is loose.
- Leave two or three thin face-framing pieces out in front.
- Pin the tucked ends in two spots, not one.
- Add a tiny drop of serum only to the very ends if they look dry.
One-sentence rule: if it looks like you slept on it by accident, tighten the base and loosen the top again.
4. The Braided-Base Top Knot
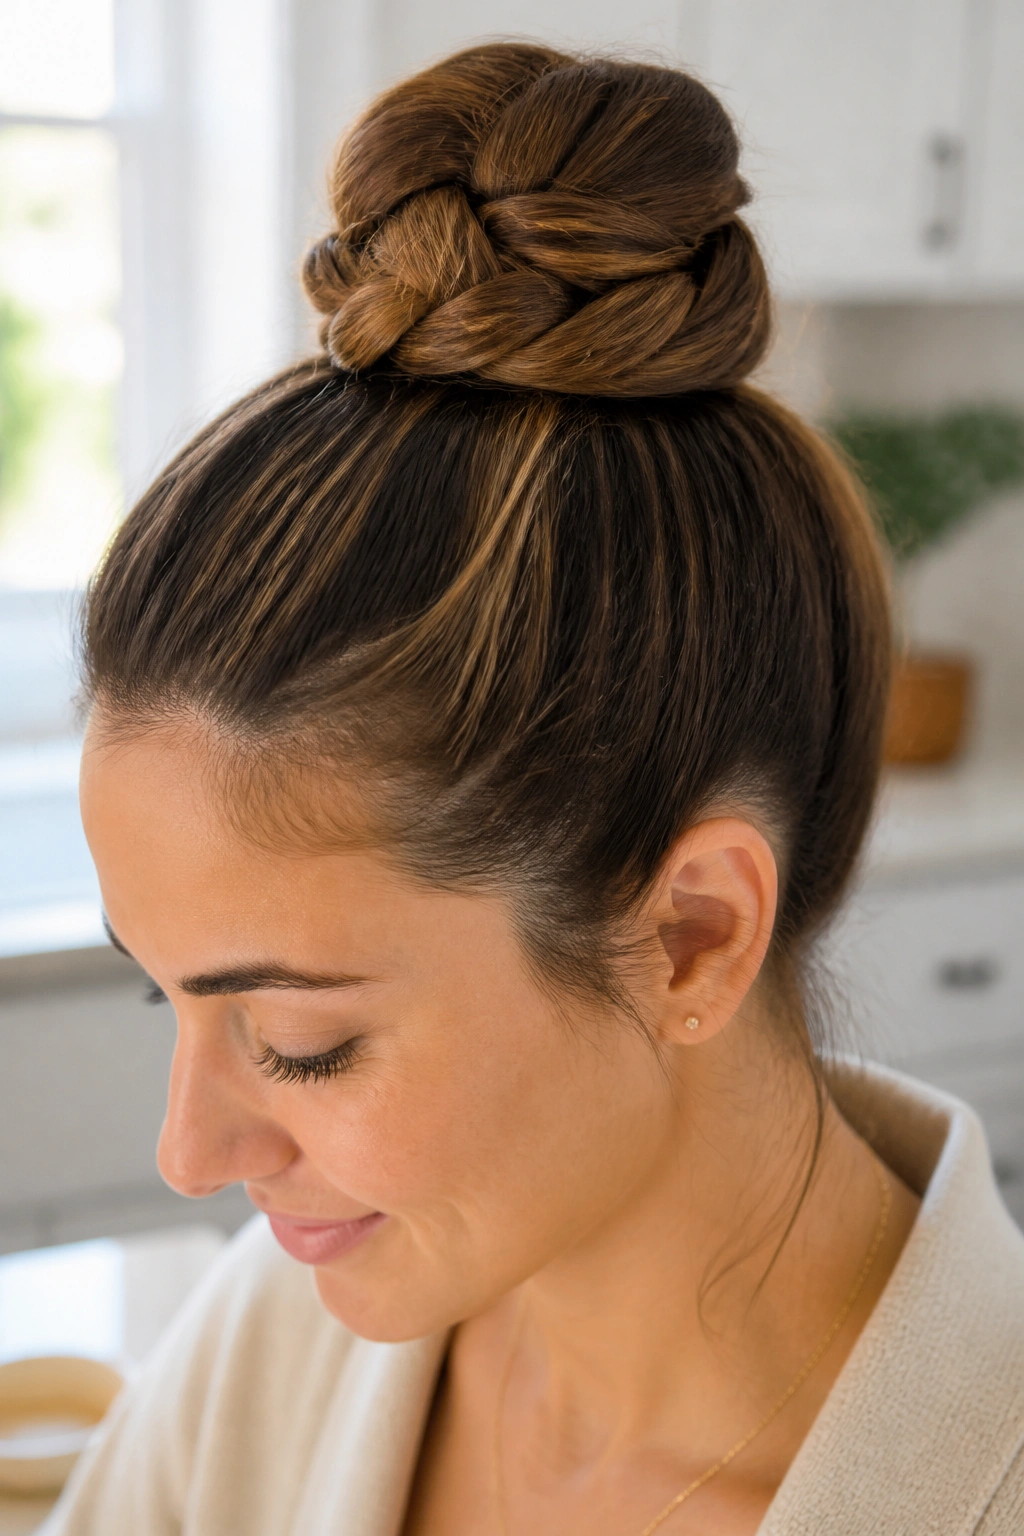
Why braid the ponytail before wrapping it? Because braid ridges give the pins something to catch. That’s the whole trick. A braided-base top knot holds heavy hair better than a plain twist, especially when your strands are slippery or layered and want to escape the second you move.
Start with a ponytail, braid the tail all the way down, then coil the braid around the base. The braid makes the knot look more detailed without adding extra fuss. It also distributes bulk better, which matters when your hair is long enough to feel heavy in one section.
If you have thick hair, this style is a relief. The braid compresses the length before it becomes the bun, so the knot sits flatter. If you have fine hair, it adds visible texture. Either way, the result is tidy without looking stiff.
Who this one suits
- Hair that slips out of simple knots
- Hair with layers that shed ends
- Days when you want more hold than a loose bun gives
- Long hair that feels bulky in a single wrap
Practical note: a three-strand braid works better here than a fishtail if you want speed. The fishtail looks pretty, but it takes longer and can eat up your patience.
5. The Half-Up Top Knot
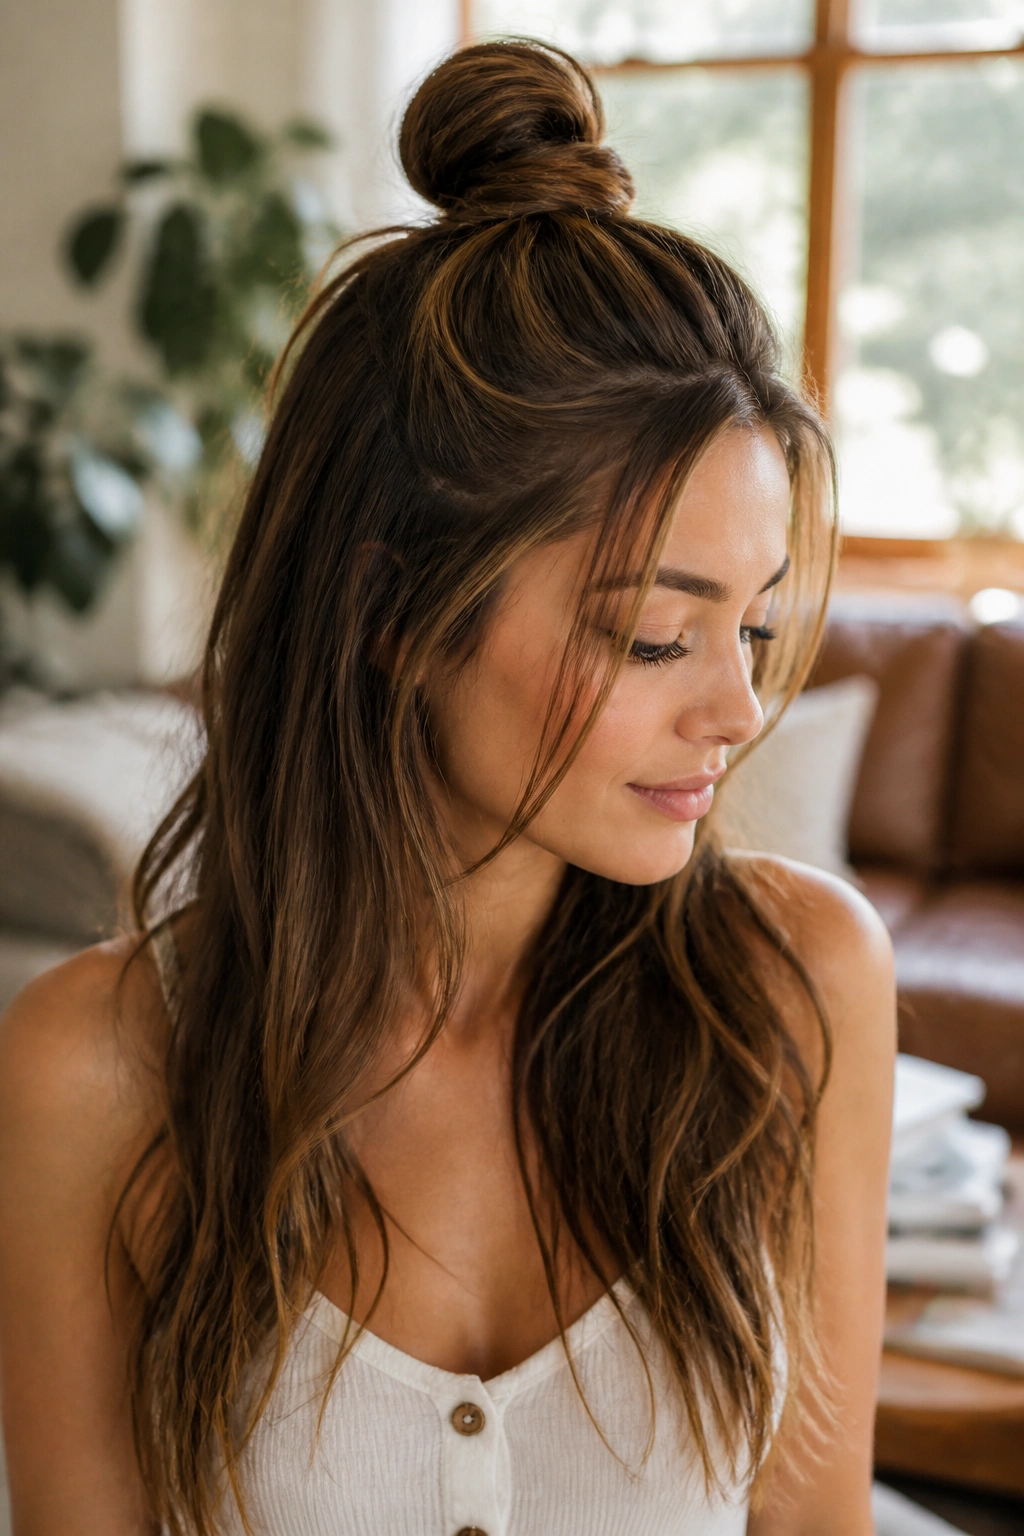
The half-up top knot is what you reach for when you want your hair out of your face but you do not feel like giving up the length you’ve got. It keeps the top section contained and lets the rest of the hair hang loose, which makes it one of the easiest long-hair styles to wear all day.
This one is especially good if your hair is layered. The shorter pieces around the crown get lifted into the knot, while the longer lengths stay down where they can still show off. It also works well on second-day hair, when the top is a little flatter and the mid-lengths have just enough bend to hold shape.
Section from the temples back to the crown, not all the way down the head. That keeps the knot from becoming too big. Then twist the top section into a small bun and pin it low enough that it does not sit like a helmet.
One thing people miss: the half-up knot is not meant to look identical from every angle. It’s softer in back. That is fine.
6. The Off-Center Top Knot
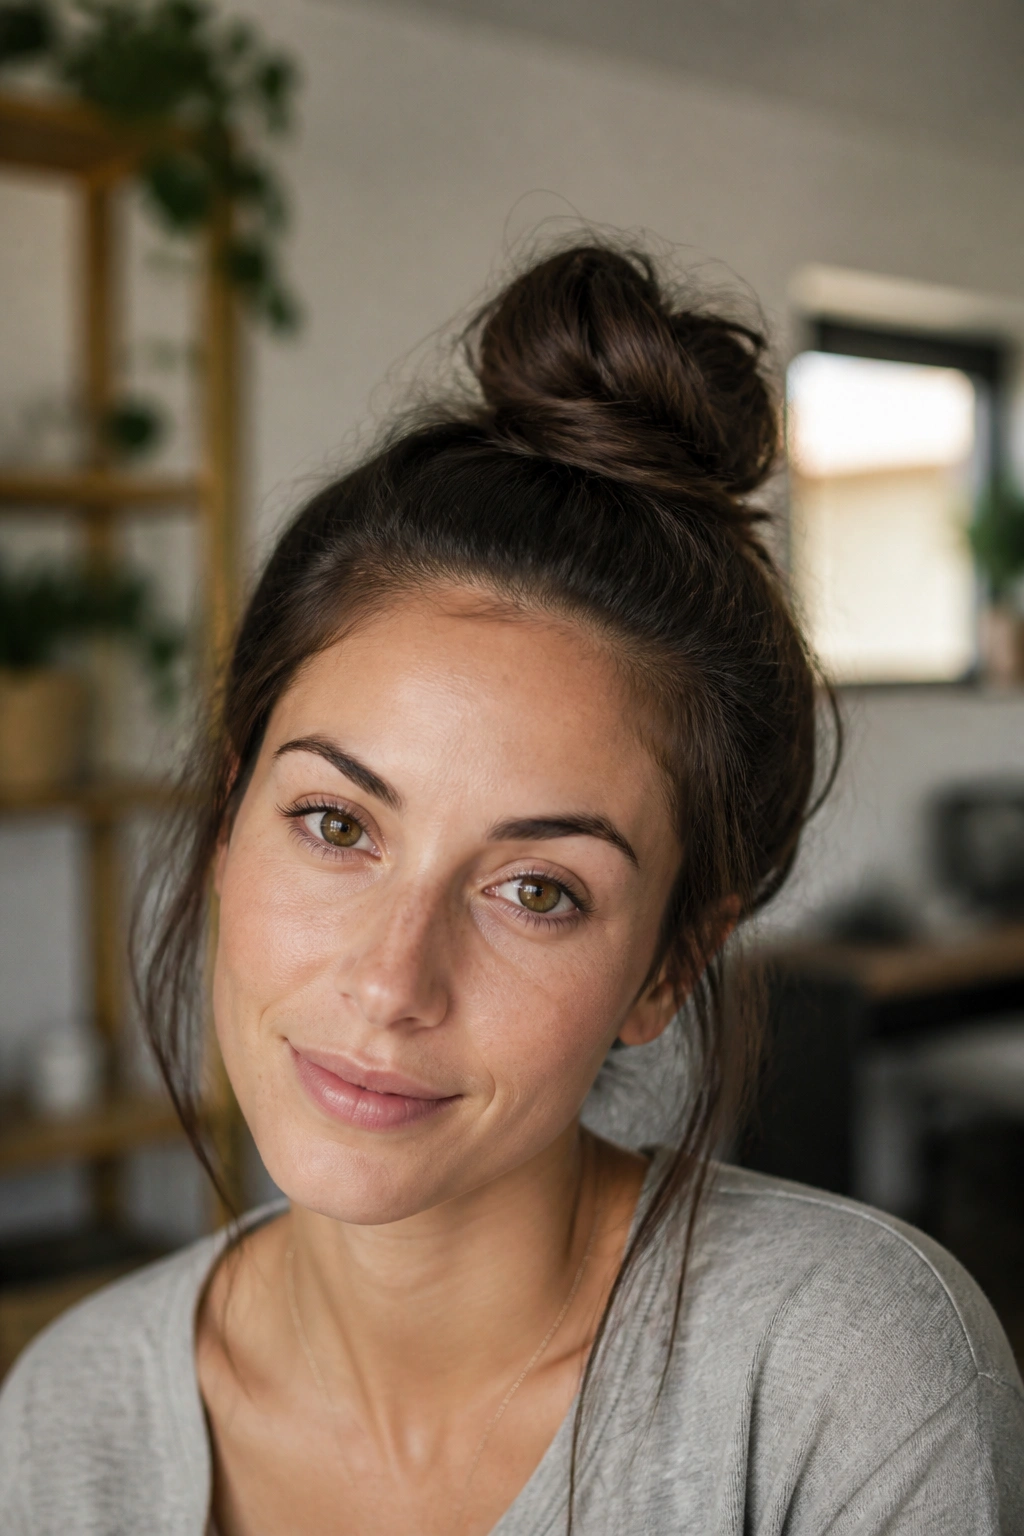
A knot does not have to sit in the middle to work. An off-center top knot softens the whole look, especially on very long hair, where a centered bun can feel a little too formal or too severe. Move it a bit left or right and the shape suddenly looks easier to wear.
This version is one of my favorites for thick hair because the weight shifts off the exact center of the head. That tiny change makes the bun feel less heavy in one spot. It also helps if you wear glasses, because the knot does not compete as hard with the line of the frames.
Keep the placement only slightly off-center — about an inch is enough. Too far to one side and it stops reading as a top knot. The goal is balance, not novelty. Twist the ponytail in the same direction you usually would, then wrap and pin as usual. The shape is familiar, just less rigid.
The best part? It looks like you did something deliberate without making the style look precious. Clean, but not strict.
7. The Rope-Twist Top Knot
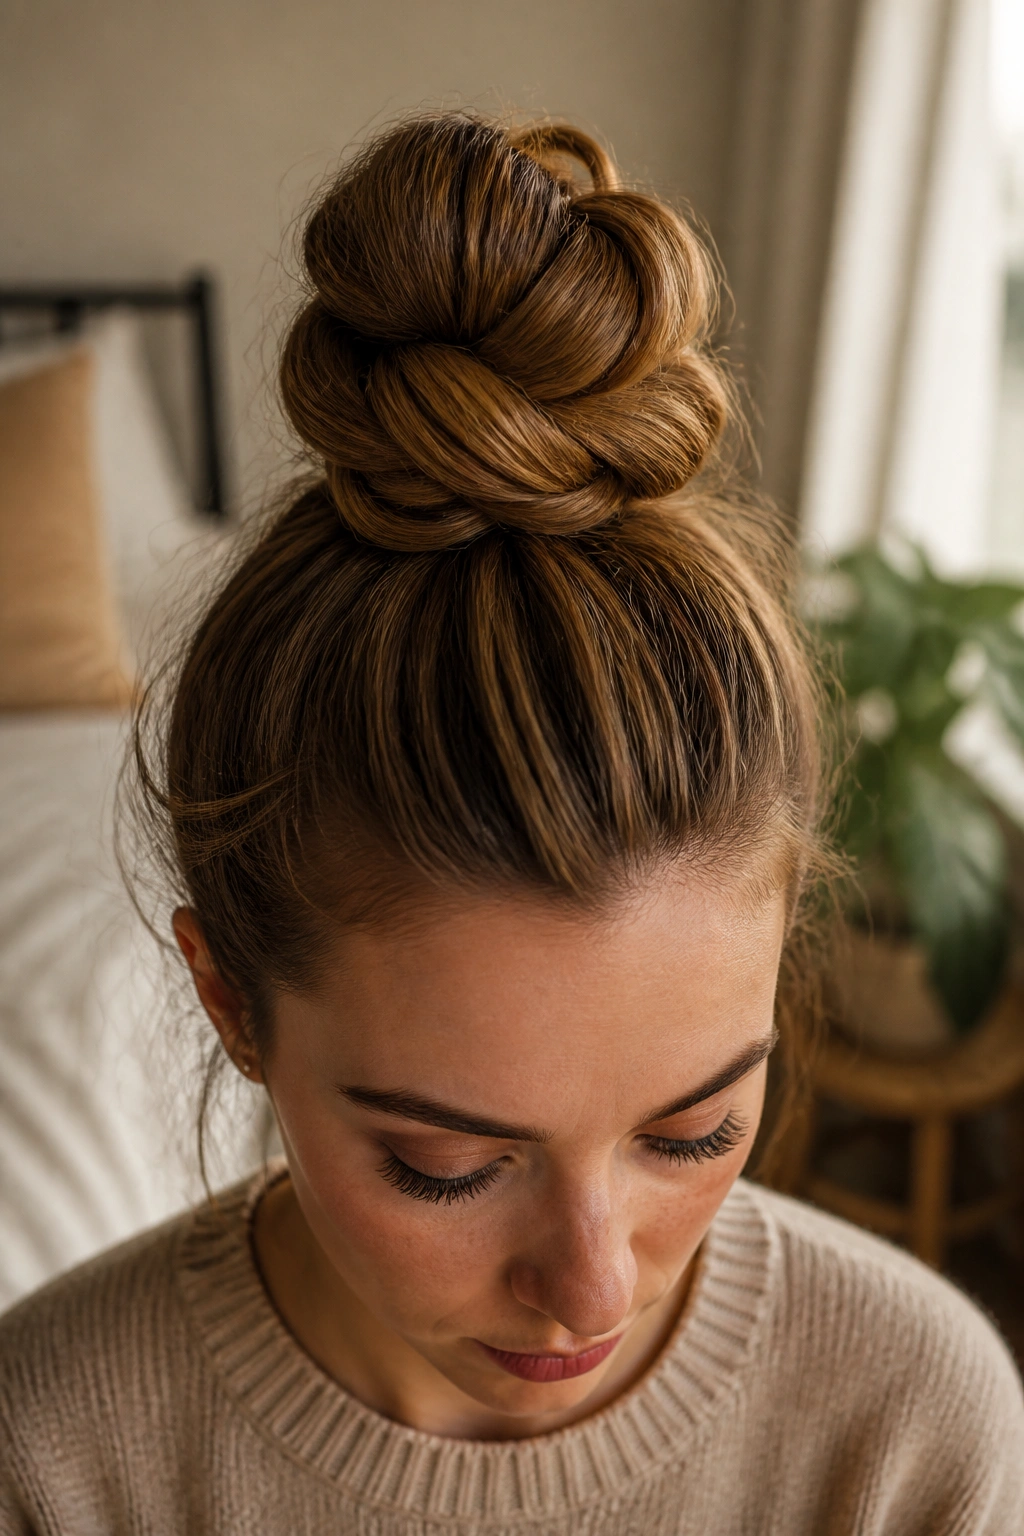
Two strands twisted together can hold long hair in a way one thick coil sometimes cannot. A rope-twist top knot spreads the tension more evenly, which is useful when your hair is dense or heavy and a single wrap keeps loosening.
Divide the ponytail into two sections, twist each one in the same direction, then wrap the two twisted sections around each other as you coil them into the bun. The twist gives the knot a ridged look, and those ridges catch pins better than smooth hair does. It is a small thing, but it matters.
How to get the cleanest wrap
- Twist both sections with steady tension.
- Keep the twists close together as you wrap.
- Pin the base first, then the outer loop.
- Use U-pins if your hair is very thick; they grip better than standard bobby pins.
This is one of those styles that looks more complex than it is. The finished knot has a little more texture than a plain bun, and that texture makes it feel handmade in a good way. Not fussy. Just more interesting.
8. The Sock-Bun Top Knot
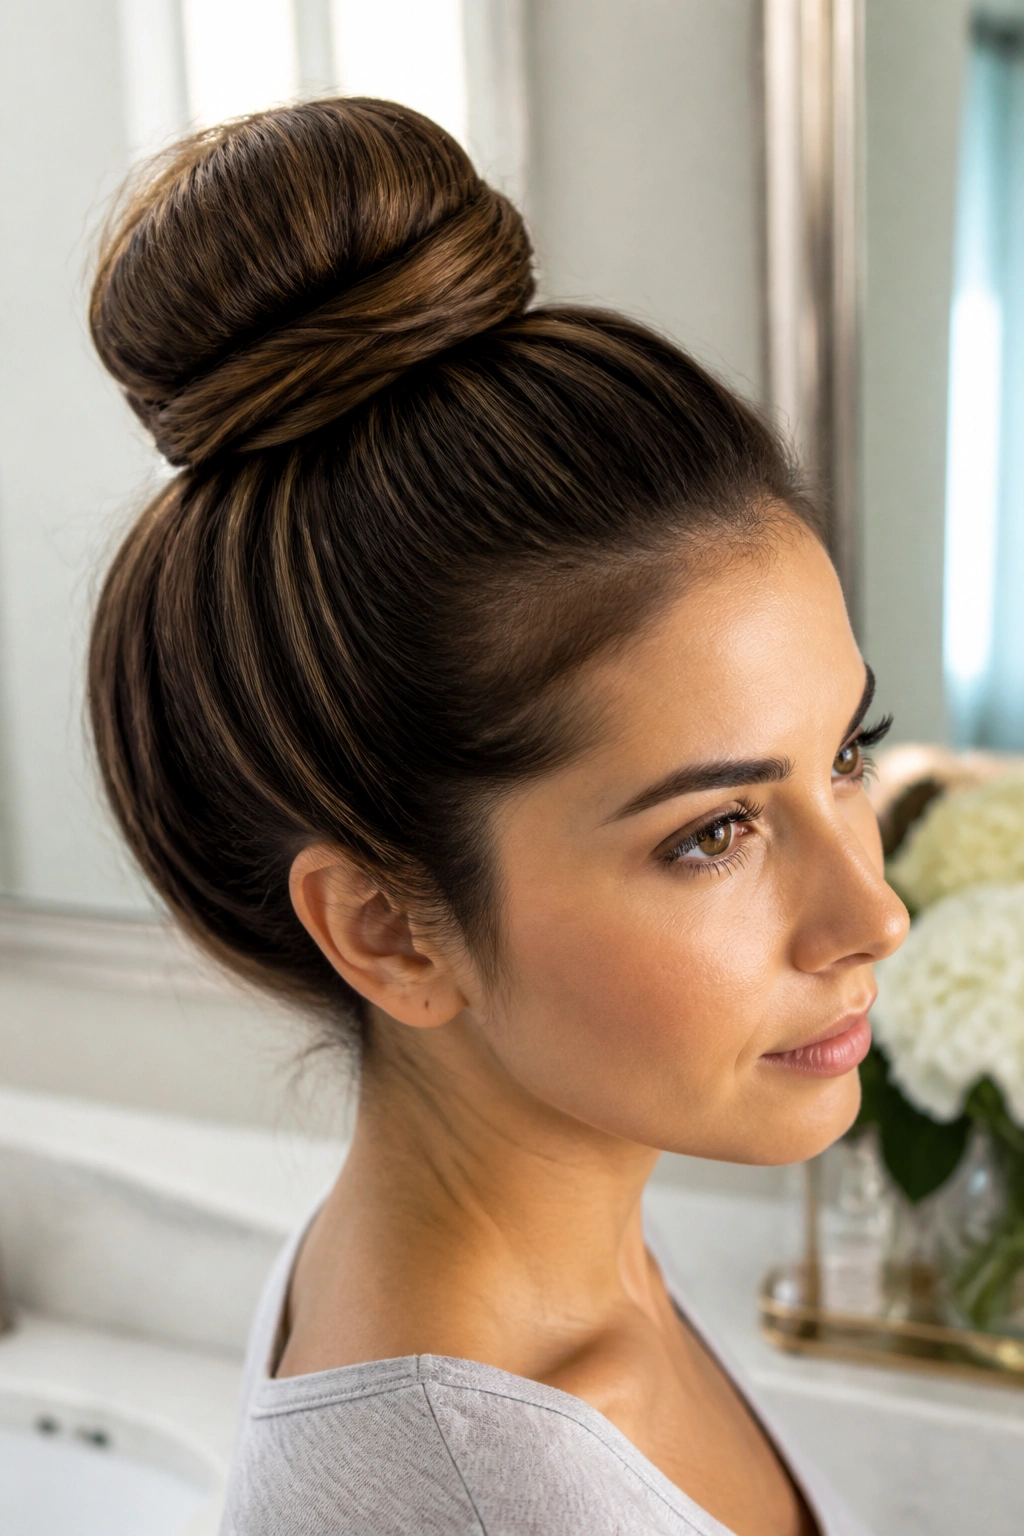
A sock bun gets teased a lot, but I’ll defend it. For very long hair, it solves a real problem: too much length with nowhere to go. The donut shape gives the hair something to wrap around, which turns heavy strands into a full, round knot instead of a stubby lump.
You do not need an actual sock if that idea makes you cringe. A foam donut or a bun ring does the same job. Pull the ponytail through the center, fan the hair around the ring, then tuck and wrap until the base disappears. On long hair, this usually takes less time than trying to sculpt the knot freehand.
The result is fuller than a plain bun and usually neater, too. If you want a formal look, this is one of the easiest ways to get it without pinning a thousand tiny pieces. If your hair is layered, a little spray at the outer edge helps the shorter pieces stay in line.
The one downside? It can feel a bit stiff if you over-tighten it. So do not. Let it breathe a little.
9. The Curly Pineapple Top Knot
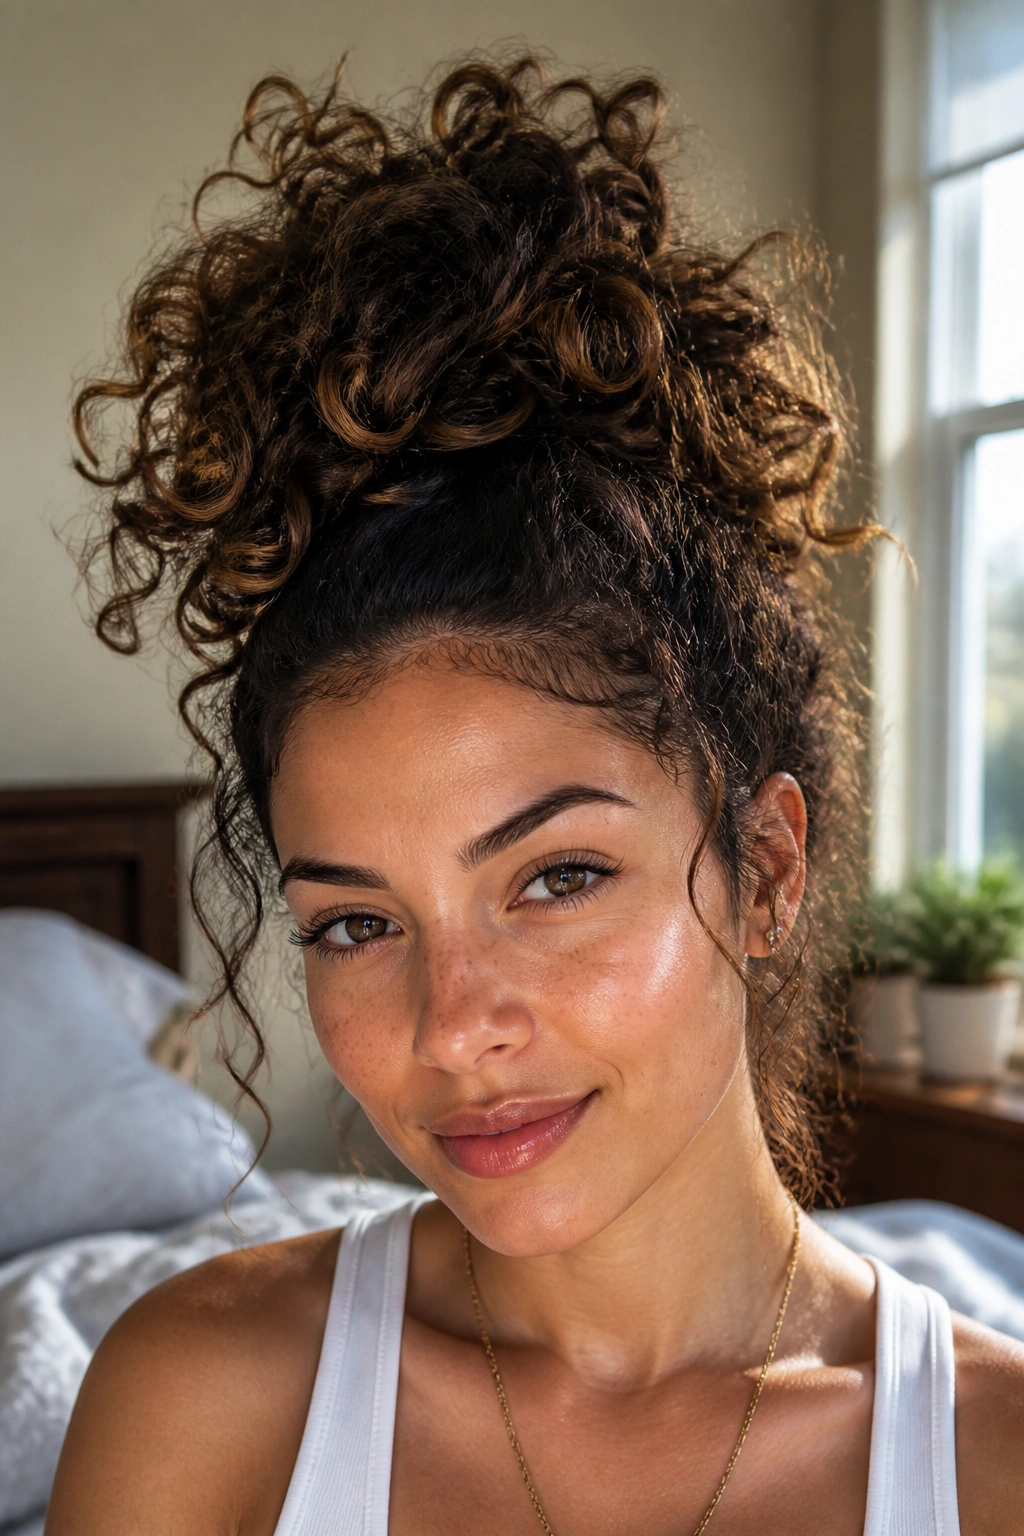
Curly hair changes the game. Brushing it into a tight knot can crush the pattern, and nobody needs that. The pineapple top knot keeps the curls lifted without flattening them, which is why it’s a favorite for long curly hair that needs shape and volume at once.
Gather the hair high on the crown with a soft scrunchie or a coil elastic, but do not drag it tight. The curls should sit on top like a loose fountain, not be stretched into a flat ponytail. If some curls spill around the sides, let them. That spill is part of the look.
A few curly-friendly rules
- Work with dry or mostly dry curls.
- Skip heavy brushing.
- Refresh the roots with a light mist of water and leave-in if they’re frizzy.
- Use a satin scrunchie if you want less breakage.
This style also works overnight, which is a nice bonus. The top knot keeps the curl clump from getting crushed while you sleep. In the daytime, it feels airy and a little playful. That mix is hard to beat.
10. The Claw-Clip Top Knot
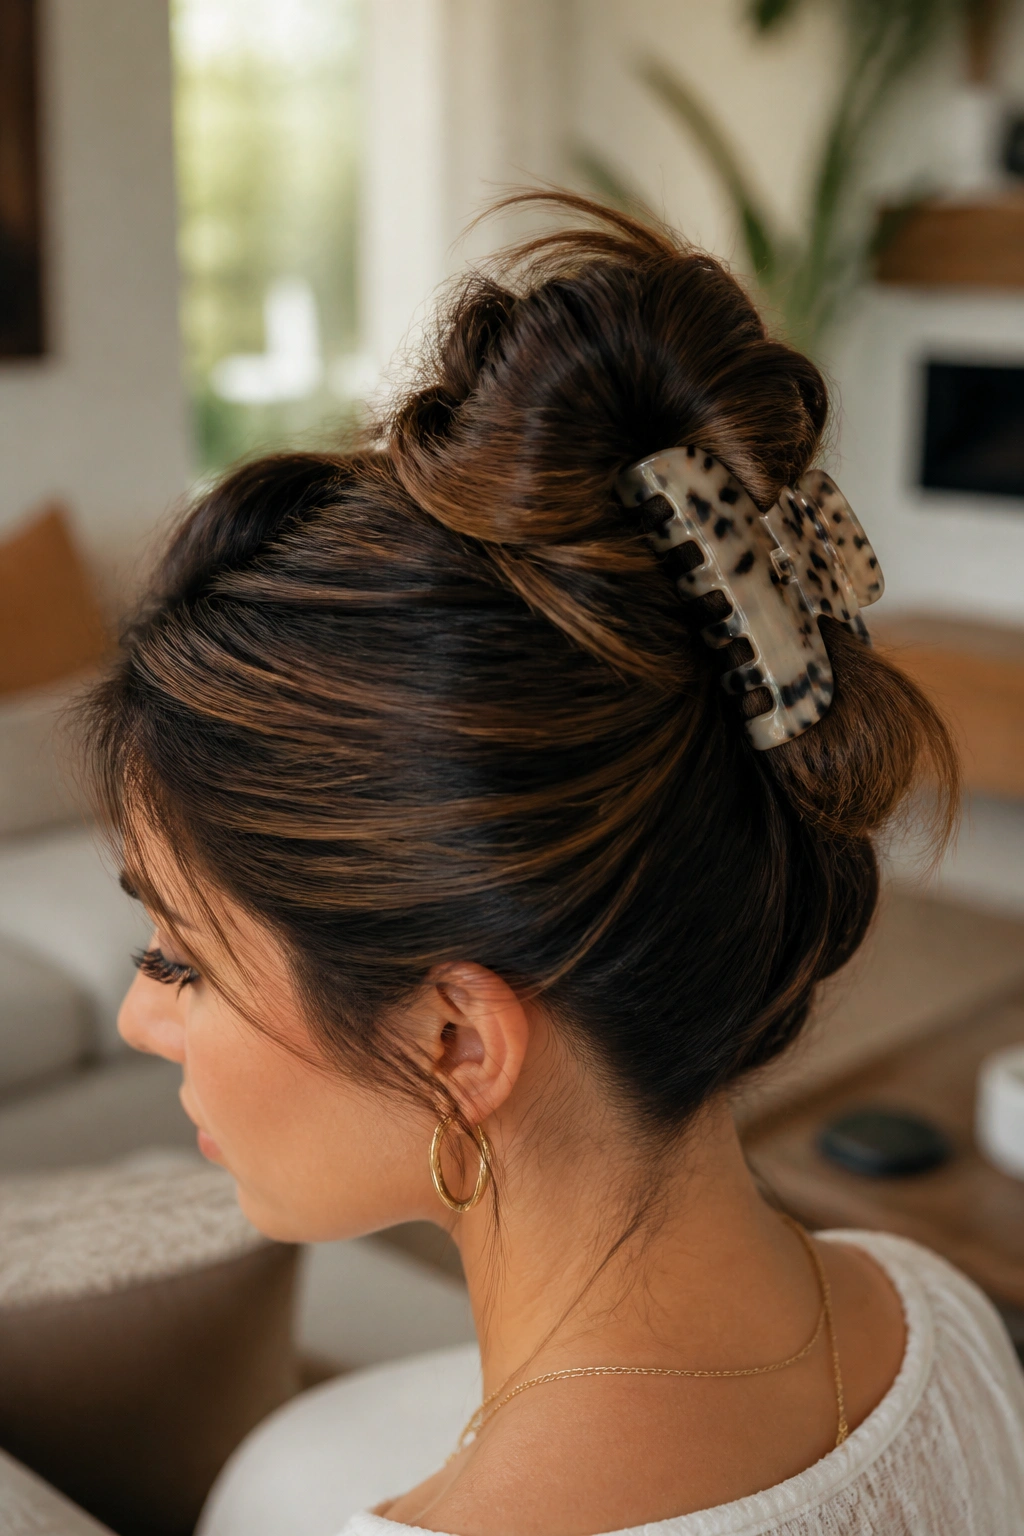
Some days, the claw-clip top knot is the only honest answer. You’re in a hurry. Your arms are tired. The hair needs to go up, and it needs to happen now. A large claw clip can hold long hair well if you coil it first instead of just folding it once.
Start by twisting the ponytail upward, then fold the length back toward the crown. Press the coil flat against the head and clip vertically or slightly diagonally, depending on where the clip grips best. A clip with teeth that are at least 3 inches long usually handles long hair better than the tiny decorative ones that look cute and then fail immediately.
This is not the most secure version in the world. Let’s be honest. It is a convenience style, not a fortress. But with the right clip, it holds well enough for errands, desk work, and any afternoon when you want the weight off your neck without using ten pins.
Best clue: if the clip slips when you shake your head once, the coil is too smooth. Rough it up a little first.
11. The Scarf-Wrapped Top Knot
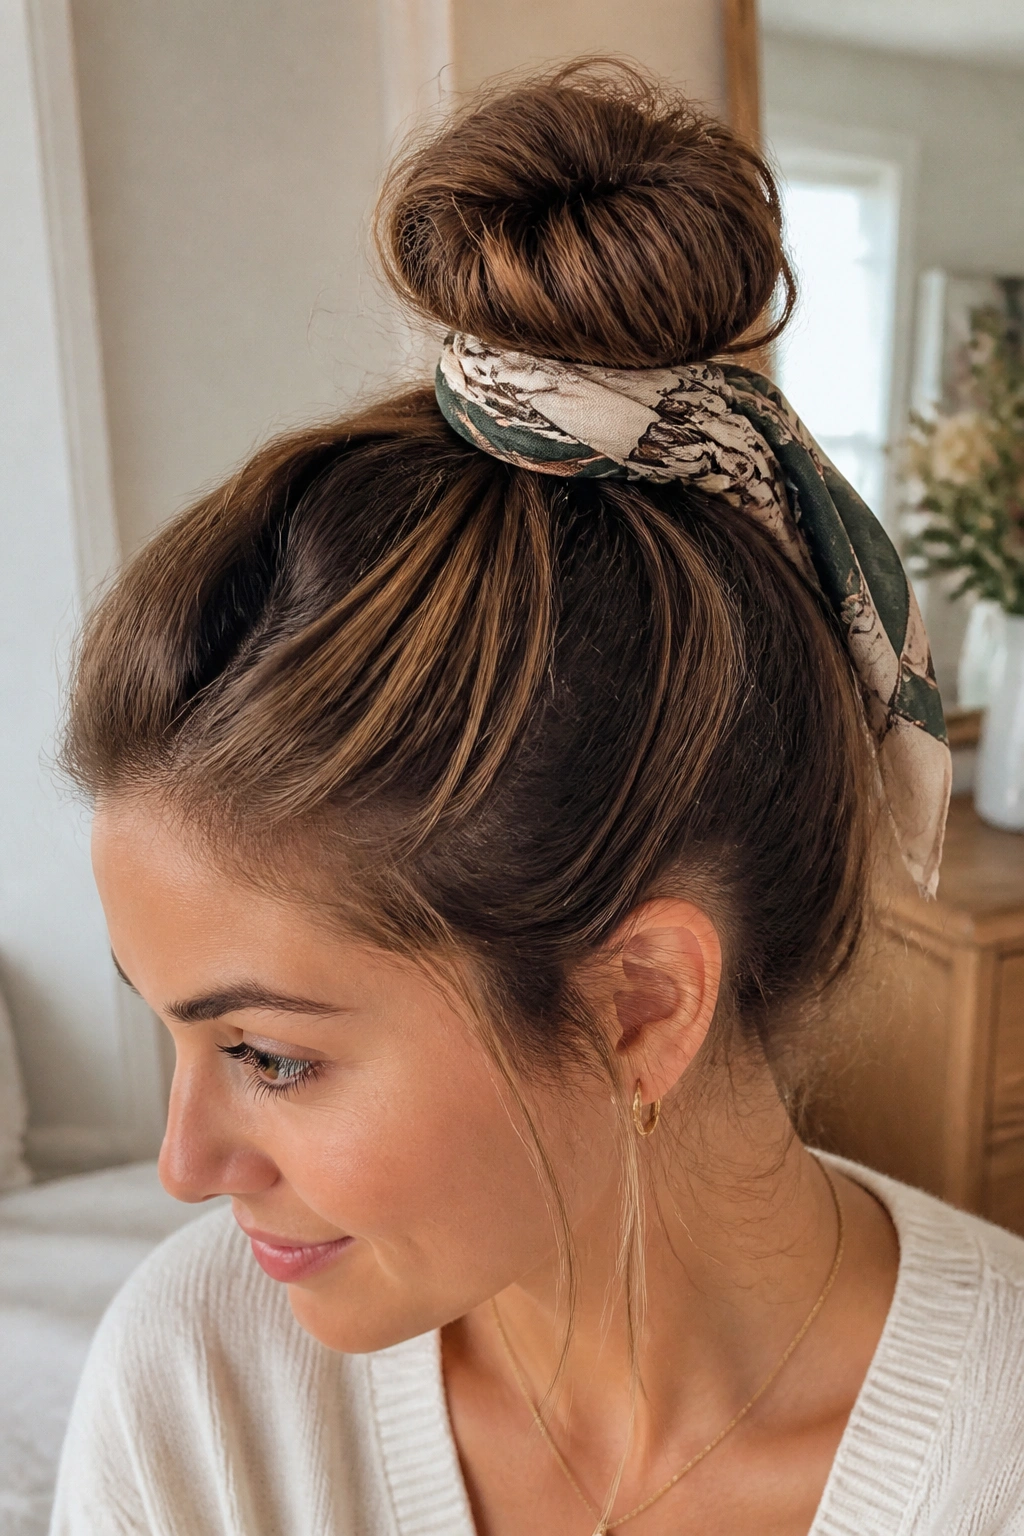
A scarf changes the whole knot. It adds grip, covers the elastic, and makes long hair look finished without much effort. If your ends are dry or your bun base looks a little messy, a scarf can hide a lot of sins.
Use a narrow scarf if you want a neater wrap, or a wider one if you want more coverage. Cotton tends to grip better, while silk feels softer against the hair. Tie the knot first, then wrap the scarf around the base and secure it underneath or to the side so the tail does not hang awkwardly.
Fabric choices that actually matter
- Cotton or linen for grip and a slightly casual look
- Silk if you want less friction on dry ends
- Narrow length for smaller buns
- Longer scarf tails if you want visible movement in the style
This is the knot I pull out when the hair is doing average things and needs a little help. It reads as styled, not overworked. And that is the part I like most. The scarf does half the talking.
12. The Braided-Crown Top Knot
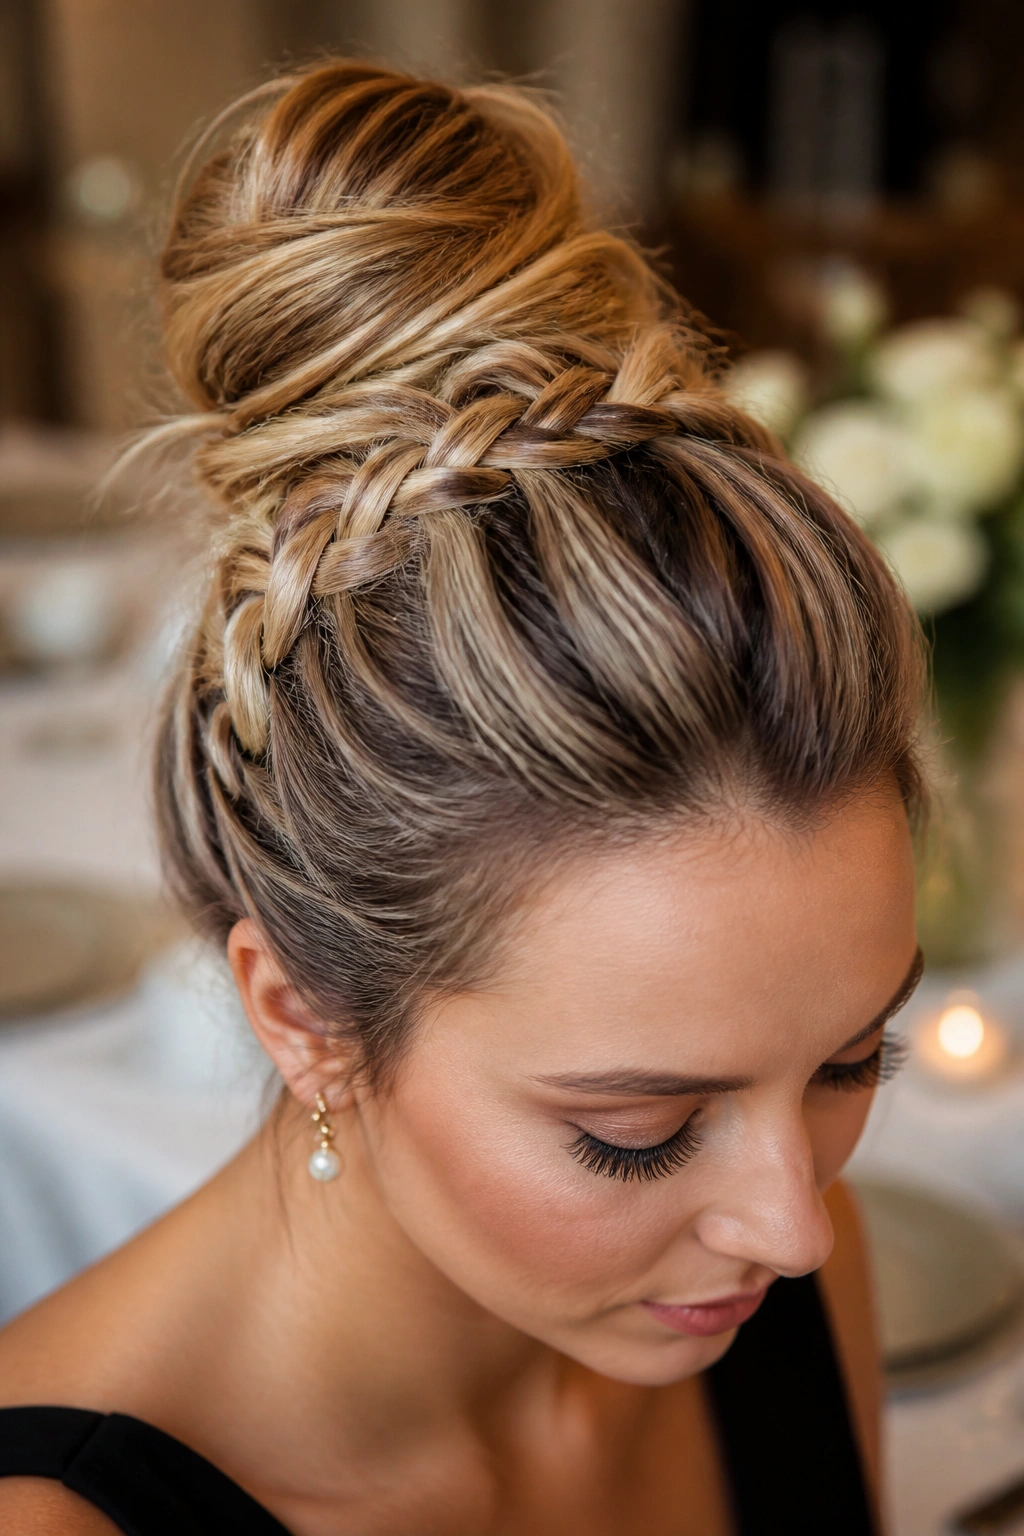
This one has more presence than a plain bun. A braided crown feeds the hairline into the knot, which keeps short layers from flying away and gives the style a more finished edge. It works especially well on long hair because the braid keeps the front tight while the knot holds the bulk.
Start with a braid from one temple, across the front or along the hairline, then bring it toward the crown before gathering everything into a top knot. You can do one braid on each side or keep it to one crown braid if you want the look softer. Either way, the braid acts like a frame for the bun.
The style takes longer than the everyday knot, no question. But it pays off when you need the hair to stay put and look a little more dressed up. Good for dinners, events, or a day when you want your hair to feel intentionally arranged instead of merely tied up.
A tiny detail makes a big difference here: keep the braid snug, but not flat. If it’s too tight, the crown can feel harsh.
13. The Double-Twist Knot
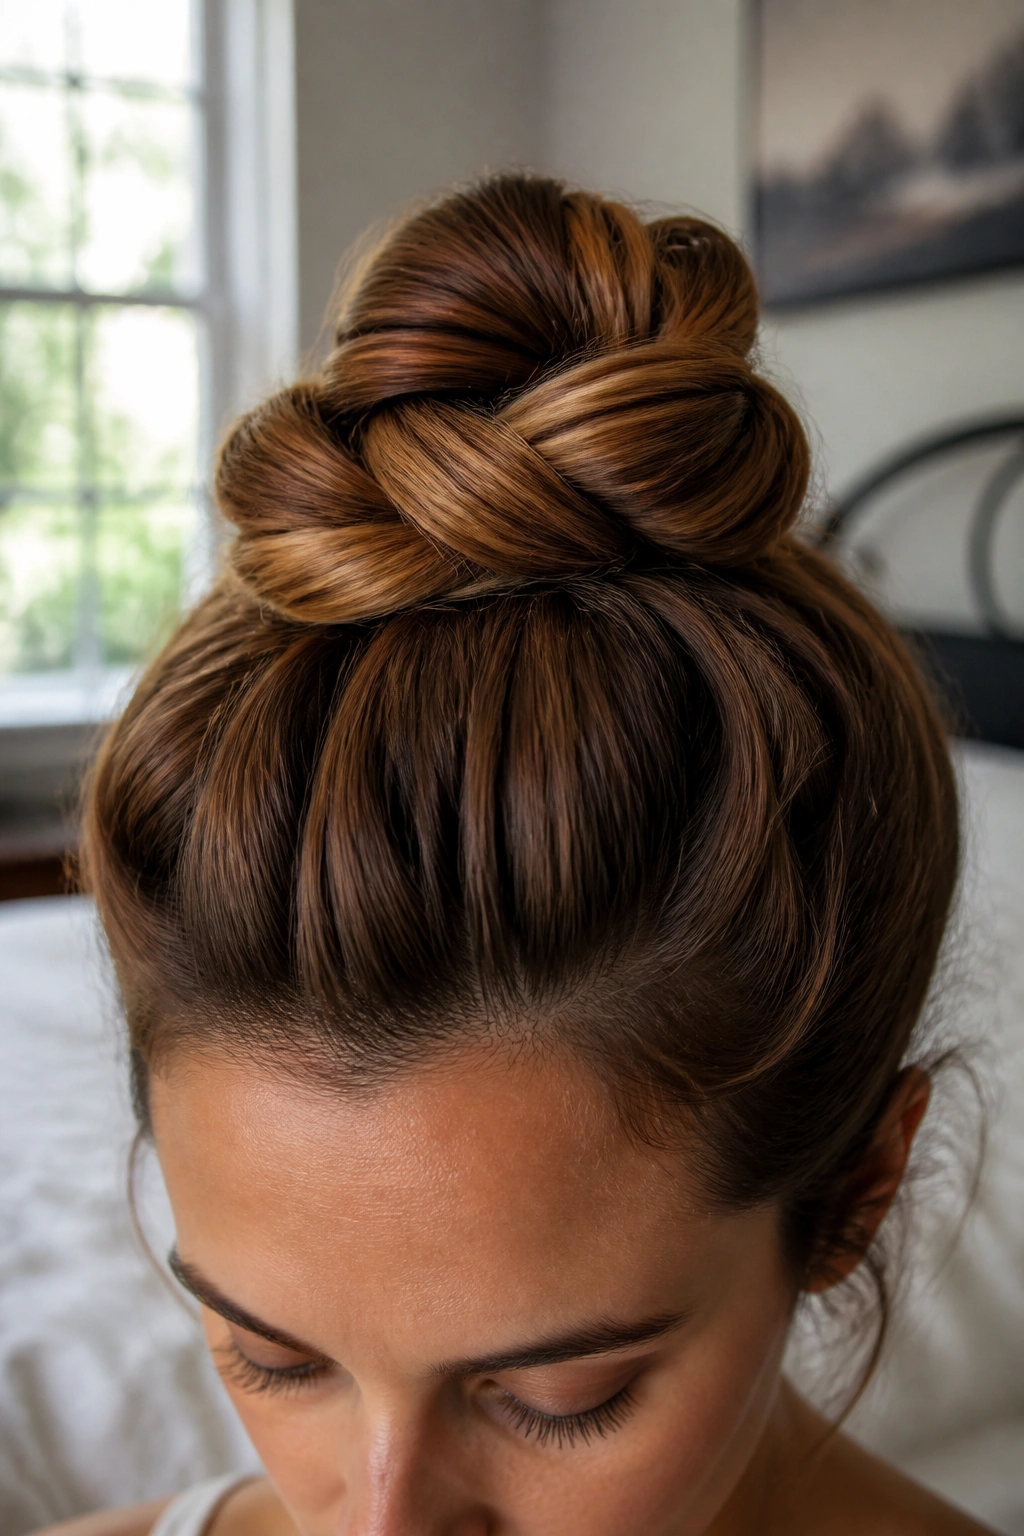
Two twists beat one giant coil when the hair is long and thick. The double-twist knot breaks the bulk into two balanced sections, which keeps the bun from looking overloaded on one side. It also feels lighter on the head, which you notice fast if you wear your hair up all day.
Split the hair into left and right sections, twist each one back toward the center, then wrap both around the base in opposite directions. The finished knot has a more rounded profile than a simple twist-and-wrap bun. It also holds better on hair that has a bit of natural bend, because the sections lock into each other instead of slipping into a smooth loop.
This style is useful when you want volume without the giant-bun effect. It looks full, but not puffy. Structured, but not rigid. That balance is a little tricky with long hair, and this knot gets there without asking for much extra work.
If one side keeps overpowering the other, stop and pin that side first. Don’t keep wrapping and hoping. That never helps.
14. The Bubble-Section Top Knot
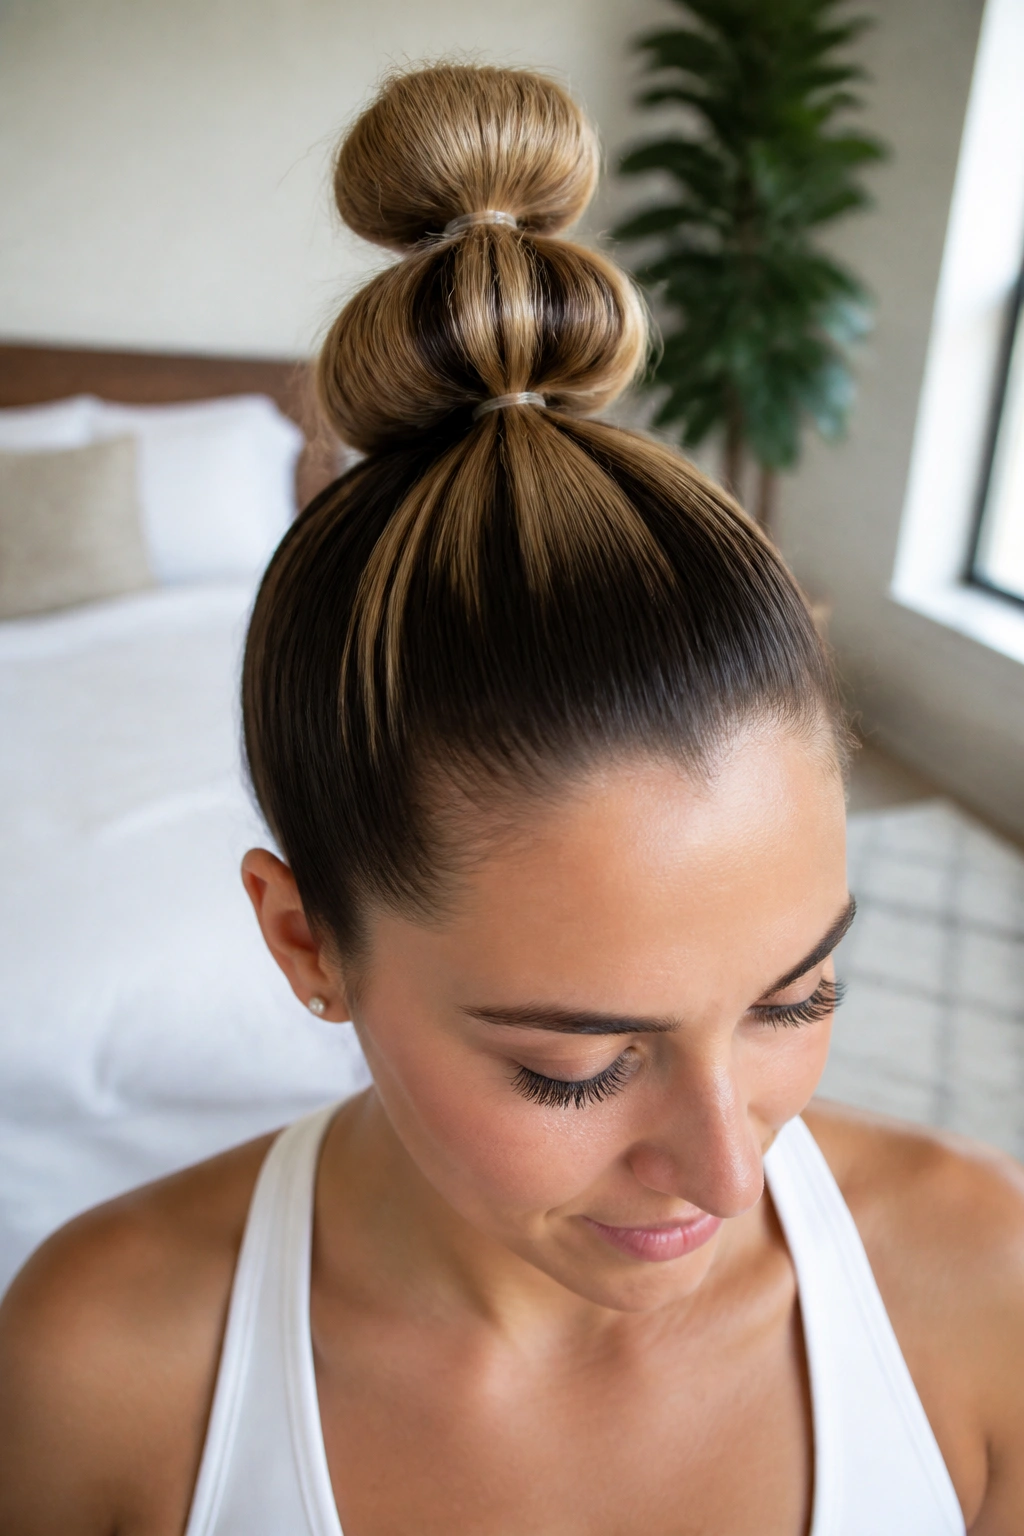
A bubble ponytail turned into a knot is playful in a way that still feels grown-up. The bubble sections reduce bulk before the hair hits the bun, which makes this style especially useful for very long hair that wants to spread out and take over the whole head.
Start with a ponytail and add small elastics every 1½ to 2 inches down the length. Gently pull each segment until it puffs into a bubble. Then coil the bubble tail around the base and pin it in place. The segmented shape gives the knot a little architecture, which means you can keep some fullness without a giant ball sitting on top of your head.
Where it works best
- Long hair that is too heavy for a plain coil
- Styles that need a little visual interest
- Hair with enough length to make three or four bubbles
- Days when you want something less formal than a sleek bun
The bubble knot also handles extensions well, which makes sense. It divides the mass before it gets wrapped, so the result feels lighter than it looks. That is a nice trick. A useful one, too.
Final Thoughts
The best top knot for long hair is the one that respects your hair’s weight instead of fighting it. That can mean a classic high knot with a strong base, or it can mean a braided version, a scarf wrap, or a bubble-style bun that spreads the bulk around.
If a style keeps slipping, don’t blame the hair right away. Change the base, change the placement, or give the ponytail more grip before you wrap it. That usually fixes more than extra hairspray ever will.
And if you’re stuck between two styles, choose the one that makes the back of your head feel lighter. Long hair has opinions. The right knot listens to them.
