



Long hair can make a low bun look rich and polished, or it can turn the whole thing into a sagging knot that droops by lunch. The difference usually has less to do with talent and more to do with structure: where the weight sits, how the ends are tucked, and whether the base has enough grip.
A good low bun for long hair does not fight the length. It uses it. That means working with the natural heaviness of the hair instead of forcing every strand into one tiny twist, which is how you end up with a bulky knot and a headache.
The other thing people miss is texture. Bone-straight, freshly washed hair tends to slip, especially if it is silky or very long. A little grit helps a lot — second-day hair, a light mist of texturizing spray, or even a dab of styling cream through the mid-lengths can give the bun something to hold onto without making it crunchy.
And that is the real trick with low buns for long hair: different bun shapes solve different problems. Some keep fine hair from unraveling. Some tame thick hair without making it look like a helmet. Some soften a sharp jawline. Some are the kind you can pin up in five minutes and still walk into dinner looking put together.
1. Sleek Center-Part Low Bun for Long Hair
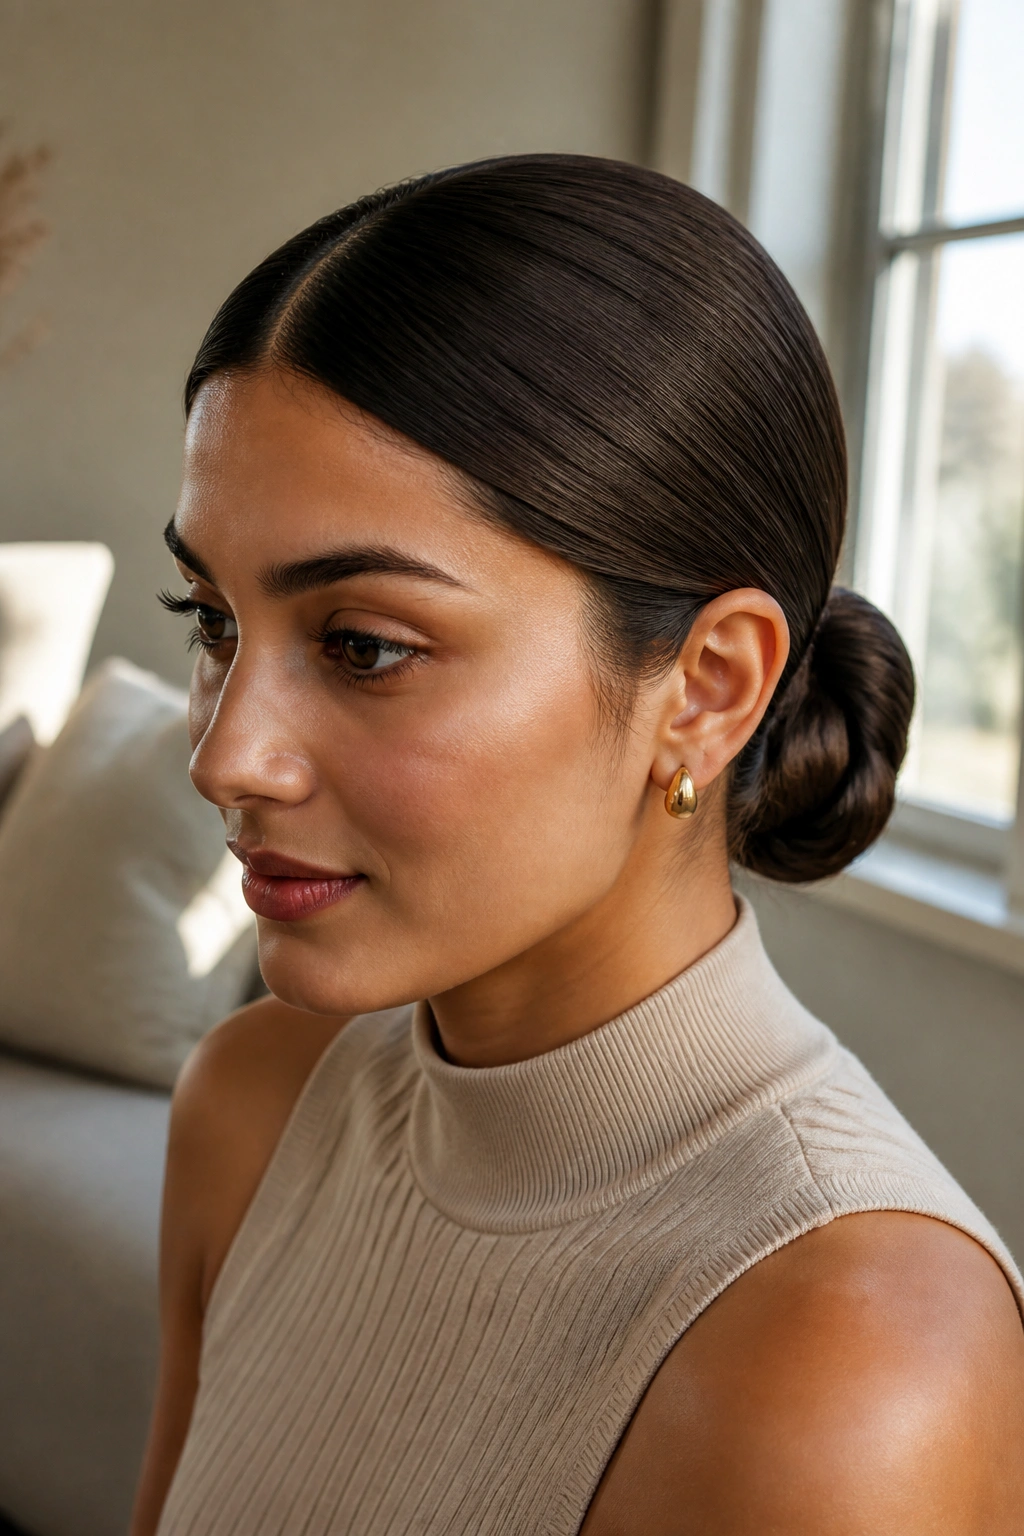
A center part changes the whole mood. It makes the bun feel cleaner, sharper, and more deliberate, which is exactly why it works so well when your hair is long and you want the length to look controlled instead of heavy.
I like this version when the hair needs to look neat for a full day. The center part frames the face, the low placement keeps the weight off the crown, and the smooth finish makes long hair look glossy rather than bulky. Boring? Not really.
What keeps it from slipping
The part matters, but the base matters more. Brush the hair flat with a boar-bristle brush, then gather it at the nape with your head level, not tilted back. If you tip your chin up while making the ponytail, the bun often ends up too high. That small detail changes the whole shape.
Use a clear elastic to make a low ponytail, then twist the tail tightly and wrap it around the base. Pin the bun with 4 to 6 bobby pins, pushing them in where the hair already crosses over itself. That gives the pins something to bite into.
- Smooth the front with a pea-sized amount of styling cream.
- Keep the part straight from forehead to crown, not slightly off to one side.
- Wrap the tail clockwise or counterclockwise, but stay consistent.
- Finish with a light mist of flexible-hold hairspray from about 10 inches away.
Best for: straight hair, fine hair that needs structure, and long layers that fall apart fast.
2. Soft Twisted Low Bun
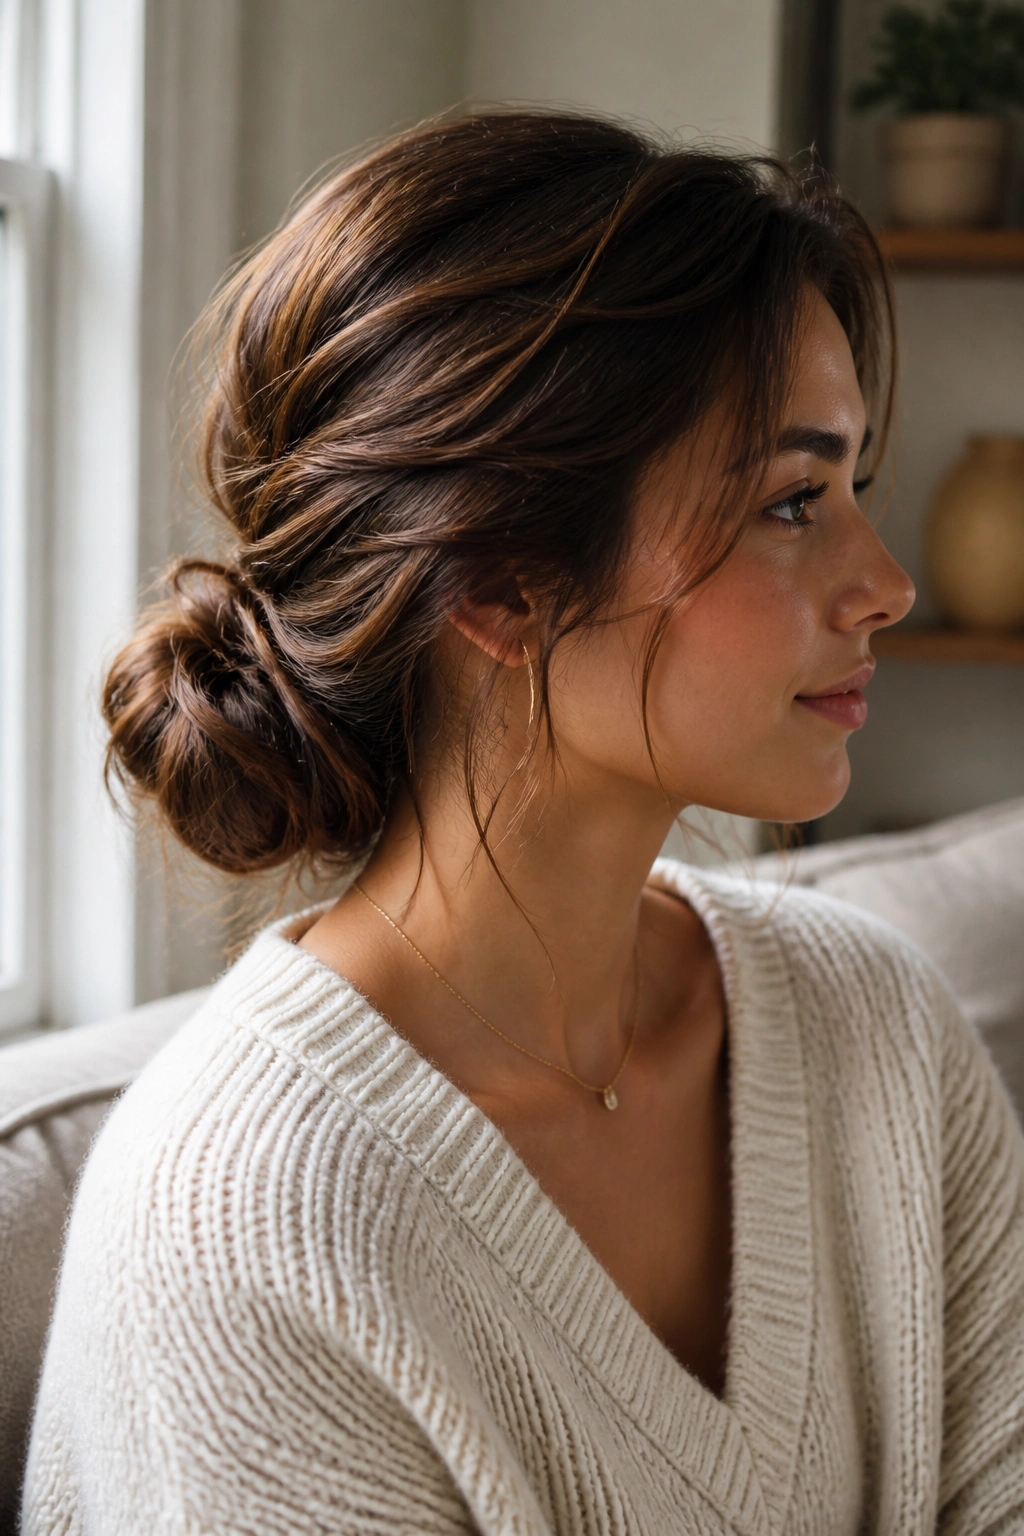
This is the low bun I reach for when I want softness instead of a hard line. The whole style depends on a gentle twist rather than a tight coil, so the finished shape looks relaxed even when the hair underneath is long and thick.
It starts with a low ponytail, but the ponytail is only the starting point. Split it into two sections, twist each section loosely, then cross them over each other and tuck the ends under the base. That little fold makes the bun look fuller without turning it into a giant knot.
One nice thing about this style: it forgives layers. If your hair has shorter pieces around the face or at the nape, they blend in instead of sticking out like little flags.
Why it stays soft
The twist should feel like you are turning the hair between your fingers, not wringing a towel. Tight twisting makes the bun small and stiff. Loose twisting gives it shape and keeps the texture visible.
Pull a few strands free near the temples if you want it less polished. Not too many. A couple of wispy pieces are enough. Too much and the bun starts to look unfinished rather than soft.
A medium hairpin or two usually holds this style, but I’d still add one hidden pin at the base where the ends tuck under. That is the spot that usually gives up first.
3. Braided Low Bun for Extra Hold on Long Hair
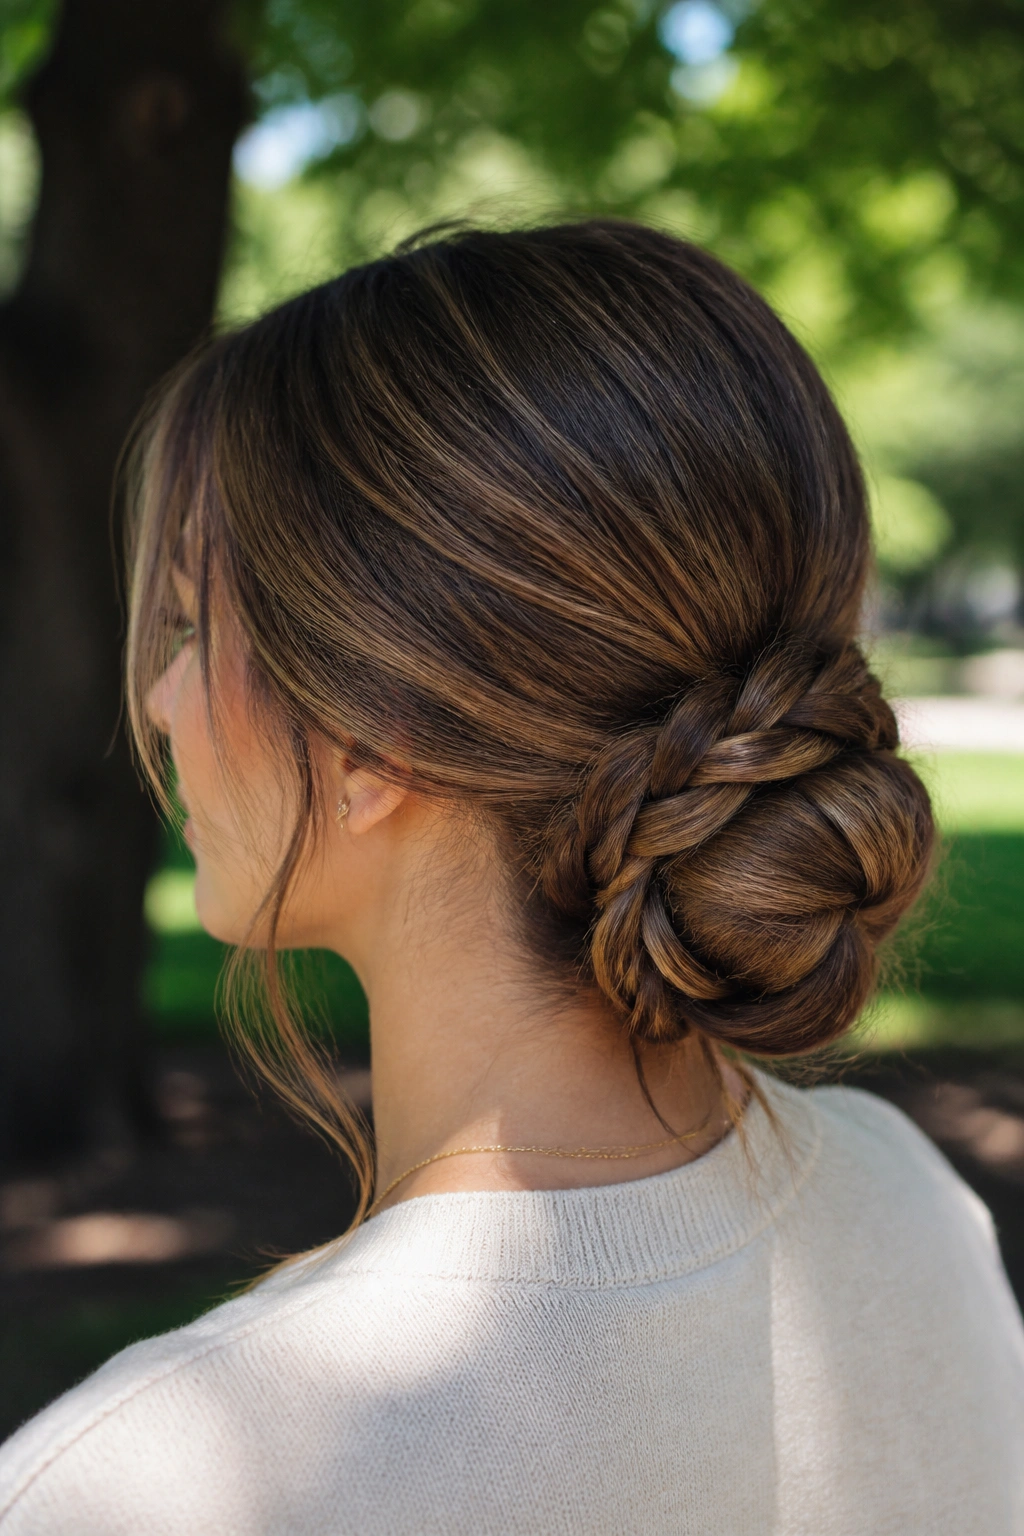
Why does a braid help so much? Because it shortens the length before you try to wrap it, and that makes the whole bun easier to control. Long hair can feel slippery when it is all one tail; a braid gives it some grip and stops the ends from swinging around.
This is the style I’d pick for hair that is long, straight, and a little too cooperative. Nice problem to have. Still annoying when you want a bun to stay put.
How to use it on slippery hair
Make a low ponytail first, then braid the tail all the way down. If your hair is very fine, a three-strand braid is enough. If it is thick, keep the braid a bit loose so it does not become a tiny rope that refuses to wrap.
After that, wrap the braid around the base like a coil. Use 6 to 8 pins if the hair is waist-length or heavily layered. Place the pins through the braid and into the ponytail base, not only through the outer shell.
- Mist the hair with texturizing spray before braiding.
- Pancake the braid slightly by tugging the outer edges.
- Tuck the very end of the braid underneath before pinning.
- If the bun feels too large, fold the braid in half before wrapping.
What makes it different
A braided bun does not have to be formal. It can look polished, but it also works on regular days when you want a style that survives a commute, wind, or a long stretch at a desk. That practicality is the whole point.
4. Wrapped Chignon at the Nape
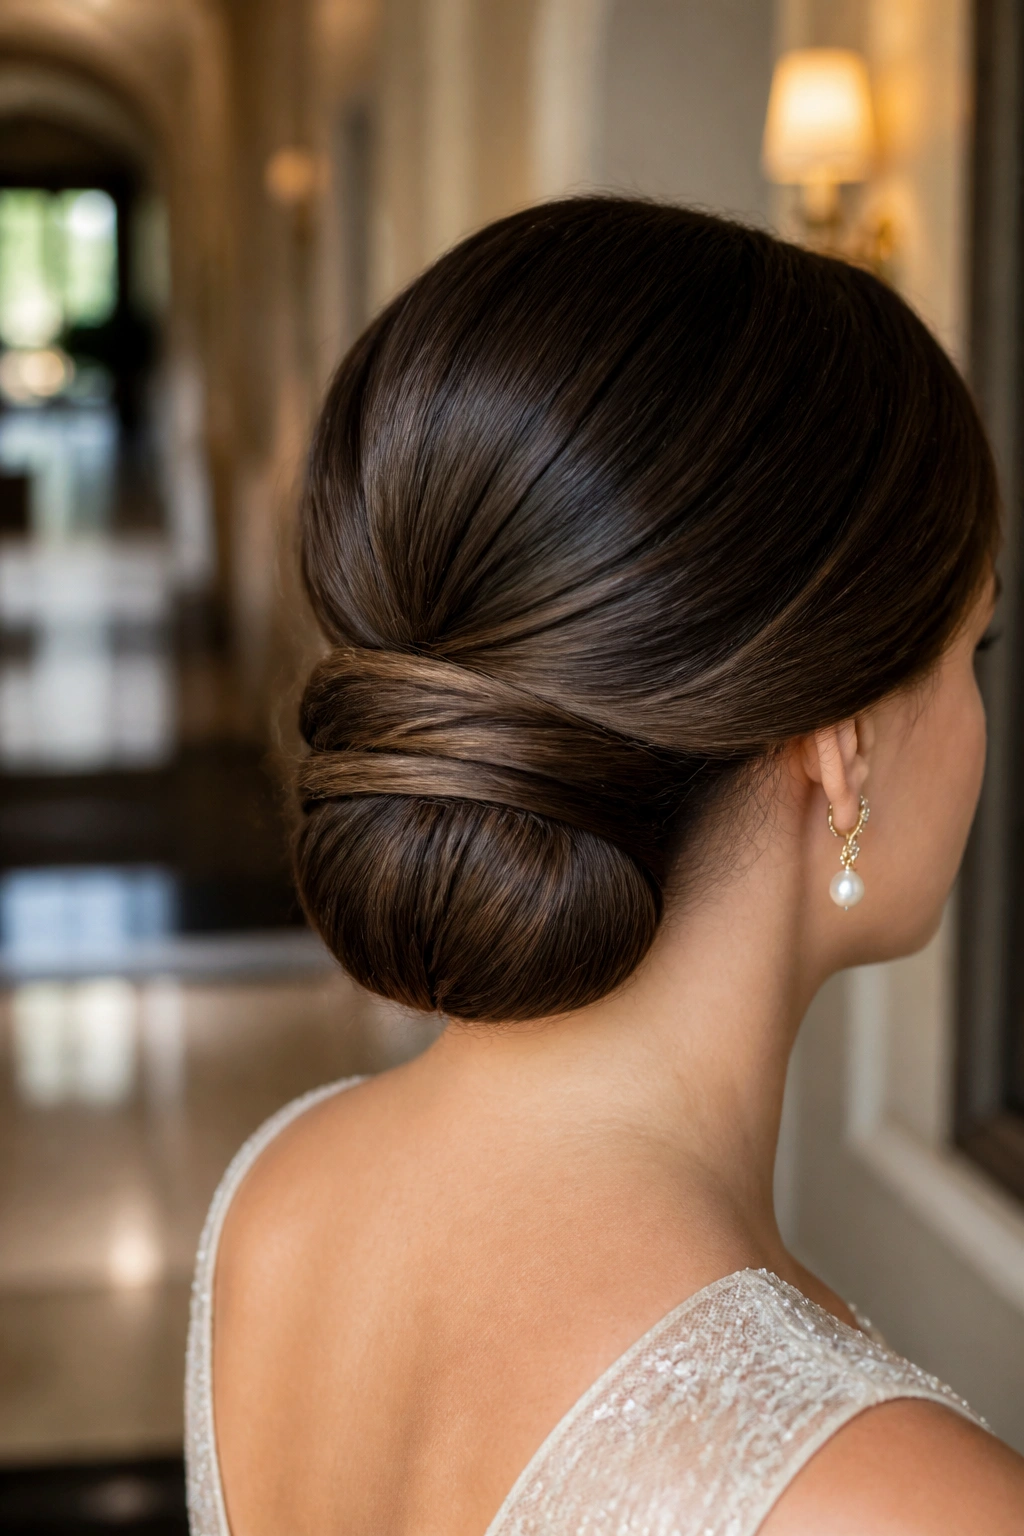
If your ends keep slipping out of everything, the wrapped chignon is the fix. The style tucks the hair under itself instead of asking the whole tail to circle around the base, which is exactly why it behaves better on long hair that likes to fight back.
There is a reason this one shows up in wedding hair and office hair alike. The shape sits low, the silhouette stays neat, and the bun does not need a lot of volume to look finished. It just needs careful tucking.
A blunt-cut tail can be folded in half before pinning. Layered hair usually needs a little more help, so I’d make the first fold tight and then pin the outer shell flat over it. That keeps the bun from looking puffy in the wrong way.
What to watch for
The chignon can slide if the ponytail base is too loose. So start with a snug ponytail, but do not yank the scalp. A low, secure base is enough. After that, roll the tail upward and under itself, like you are hiding the ends from view.
Use long bobby pins or U-pins if the hair is dense. Short pins can pop out once the bun warms up and settles. That is the sort of thing people notice halfway through the day, not at the mirror.
A clean side part or center part both work here. I prefer a slight side part when the goal is softness, and a center part when the bun needs to look crisp.
5. Bubble-Section Low Bun
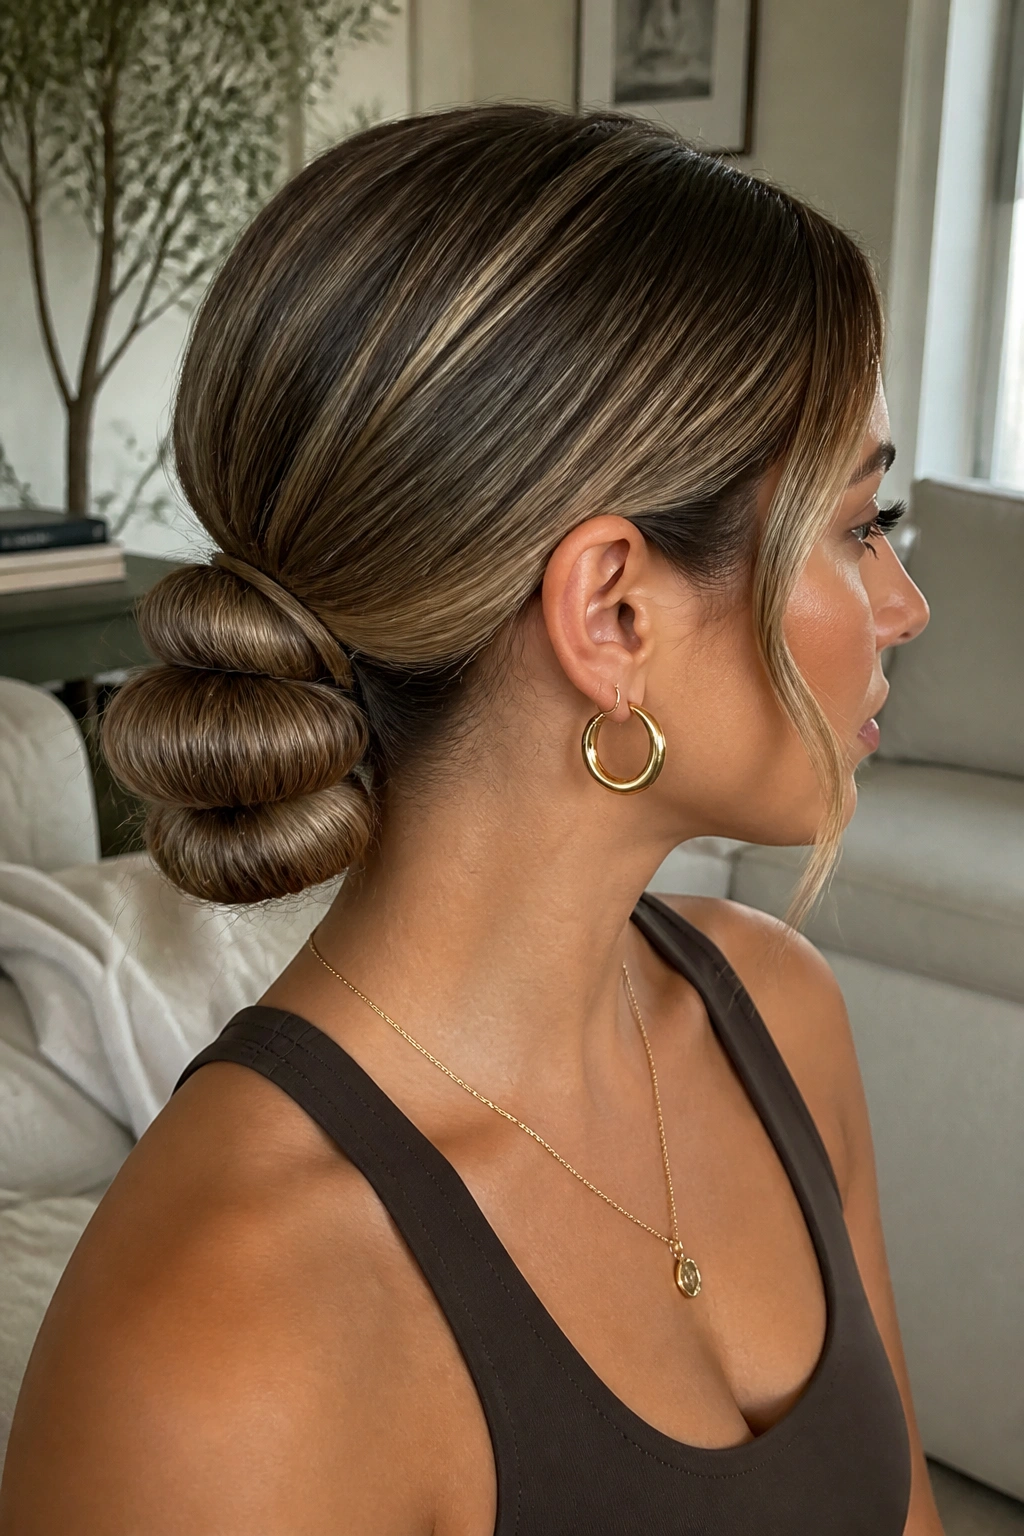
Bubble sections are not subtle. That’s the point.
This style makes long hair look sculpted without demanding a perfectly smooth finish, which is a relief if your hair has a little natural wave or if you want the bun to read as intentional rather than fussy. The bubbles add shape before the hair even reaches the bun.
Start with a low ponytail and add small clear elastics every 1½ to 2 inches down the tail. Gently tug each section outward until it rounds into a soft bubble. Then fold the whole length upward and tuck it into a low bun shape at the nape.
It sounds extra. It really isn’t.
The bubbles do two useful things. They create bulk in a controlled way, and they keep long ends from becoming one dense, impossible knot. That matters a lot if your hair is thick enough to feel heavy when it is all pulled into one place.
How to keep it from looking stiff
The bubbles should be puffed, not ballooned. Pinch each section just enough to round it out. If you pull too hard, the elastic shows and the style starts looking handmade in the wrong way.
This version is good for long hair that needs texture without curls. It also gives straight hair some shape, which can be useful if you do not want to heat-style anything. A little strand separation is enough.
Finish with a light spray and press the top flat with your palm for two seconds. That tiny move smooths the crown without crushing the bubbles.
6. Side-Part Low Bun with a Loose Swoop

A side part softens a low bun in a way a center part never quite can. The line is less severe, the shape has a little movement, and the front section can sweep across the forehead instead of sitting in a straight frame.
I reach for this one when long hair needs to look a little romantic without turning into a messy knot. It keeps the bun low and tidy, but the asymmetry gives it a less formal feel. That matters if you want the style to work with a sweater, a suit jacket, or a dress with a wide neckline.
The swoop in front should be curved, not curled into a ringlet. Use a 1-inch iron or a round brush just to bend the front section away from the face. Brush it out once so it sits softly, then pin the bun slightly off-center at the nape.
Why the side part changes the shape
A center part pulls the eye straight down the face. A side part breaks that line, which can be flattering on long faces and square jawlines because it shifts the visual weight. It also gives the bun a little more motion from the front, even when the back stays tight.
Keep the bun low and modest. If the bun itself gets too big, the swoop and the bun start competing. One of them has to lead. I’d let the front do the talking.
Use a pin under the swoop if the front section keeps sliding. That single hidden pin can save the whole style.
7. Rope-Braid Low Bun
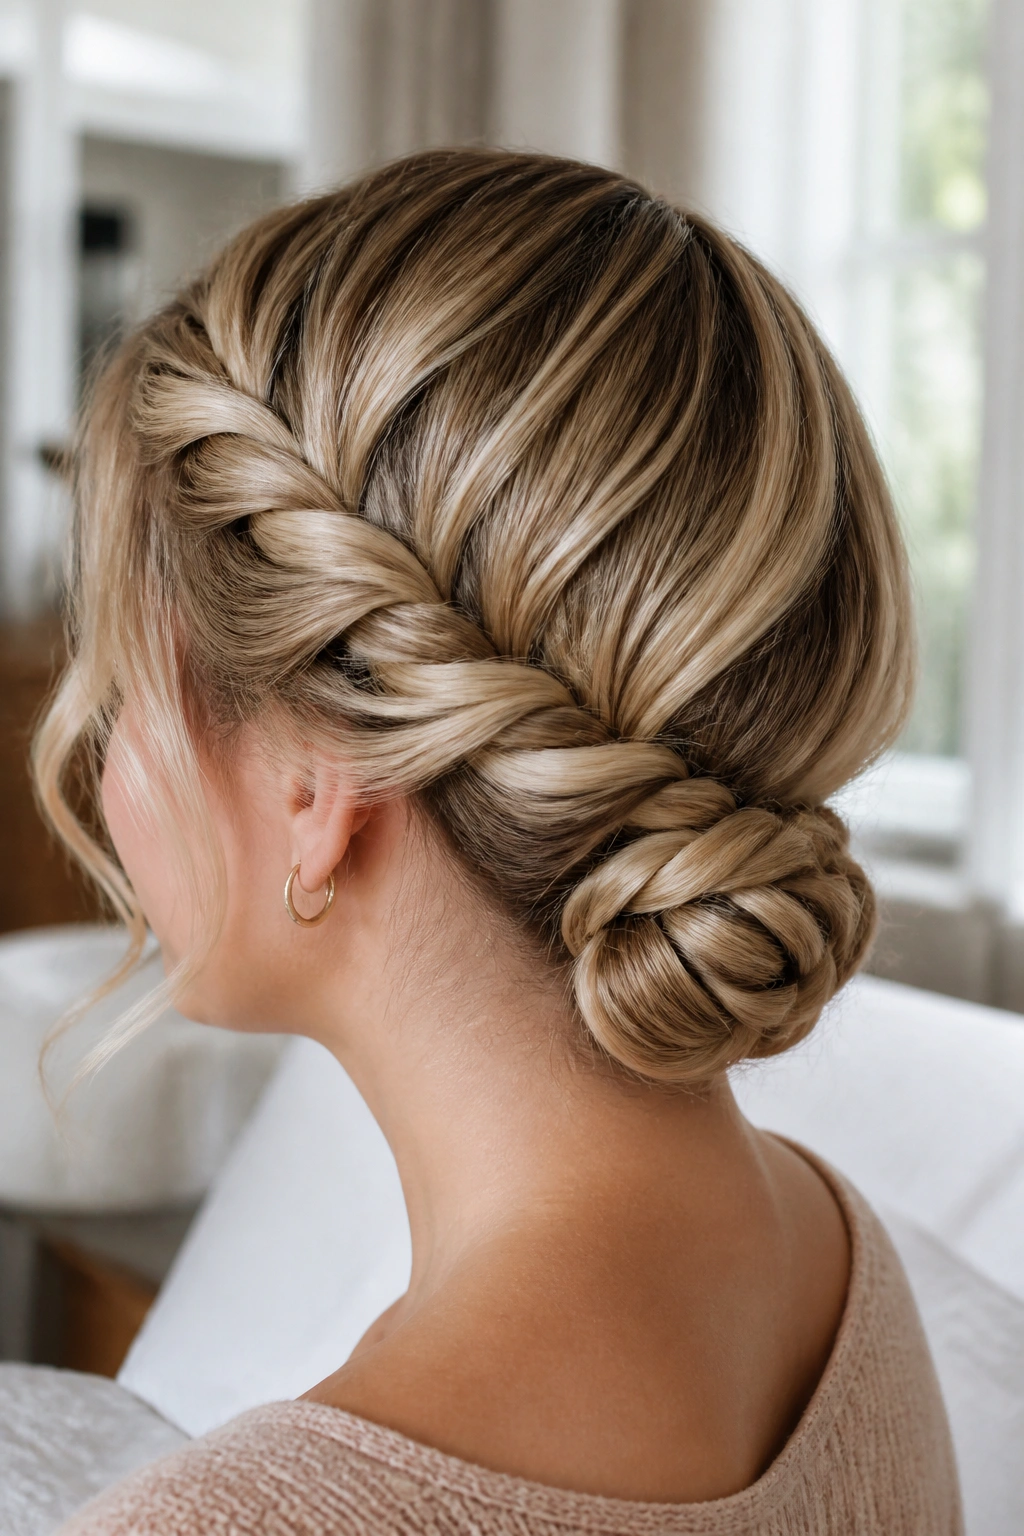
Unlike a three-strand braid, a rope braid gives the bun a smooth spiral look. It feels a little cleaner, a little sharper, and it holds surprisingly well on long hair because the twist locks the length into place before you even start pinning.
This is one of those styles that looks more complicated than it is. Two sections. Twist them in one direction. Then twist them together in the opposite direction. That is the whole mechanic, and it works because the opposing turns keep the rope from unwinding too fast.
The rule that matters
Twist each section the same way first. If you twist both strands clockwise, then cross them counterclockwise over each other. Reverse it if that feels more natural in your hands. What matters is consistency, not the direction you choose.
A tiny bit of styling balm on the palms helps if the hair is silky. Not much. Too much product and the rope turns slick, which defeats the whole point. If the ends are layered, tuck them under the rope before you start wrapping around the base.
- Best for fine-to-medium long hair.
- Good when you want visible texture without curls.
- Usually needs 4 to 5 pins because the rope structure holds itself well.
- Looks neat with no face-framing pieces, or softer with one tucked strand.
If you want the bun to sit flatter, spread the rope a little as you wrap it. If you want more shape, keep the twist tight and let the coil lift off the neck just slightly.
8. Relaxed Low Bun with Face-Framing Pieces
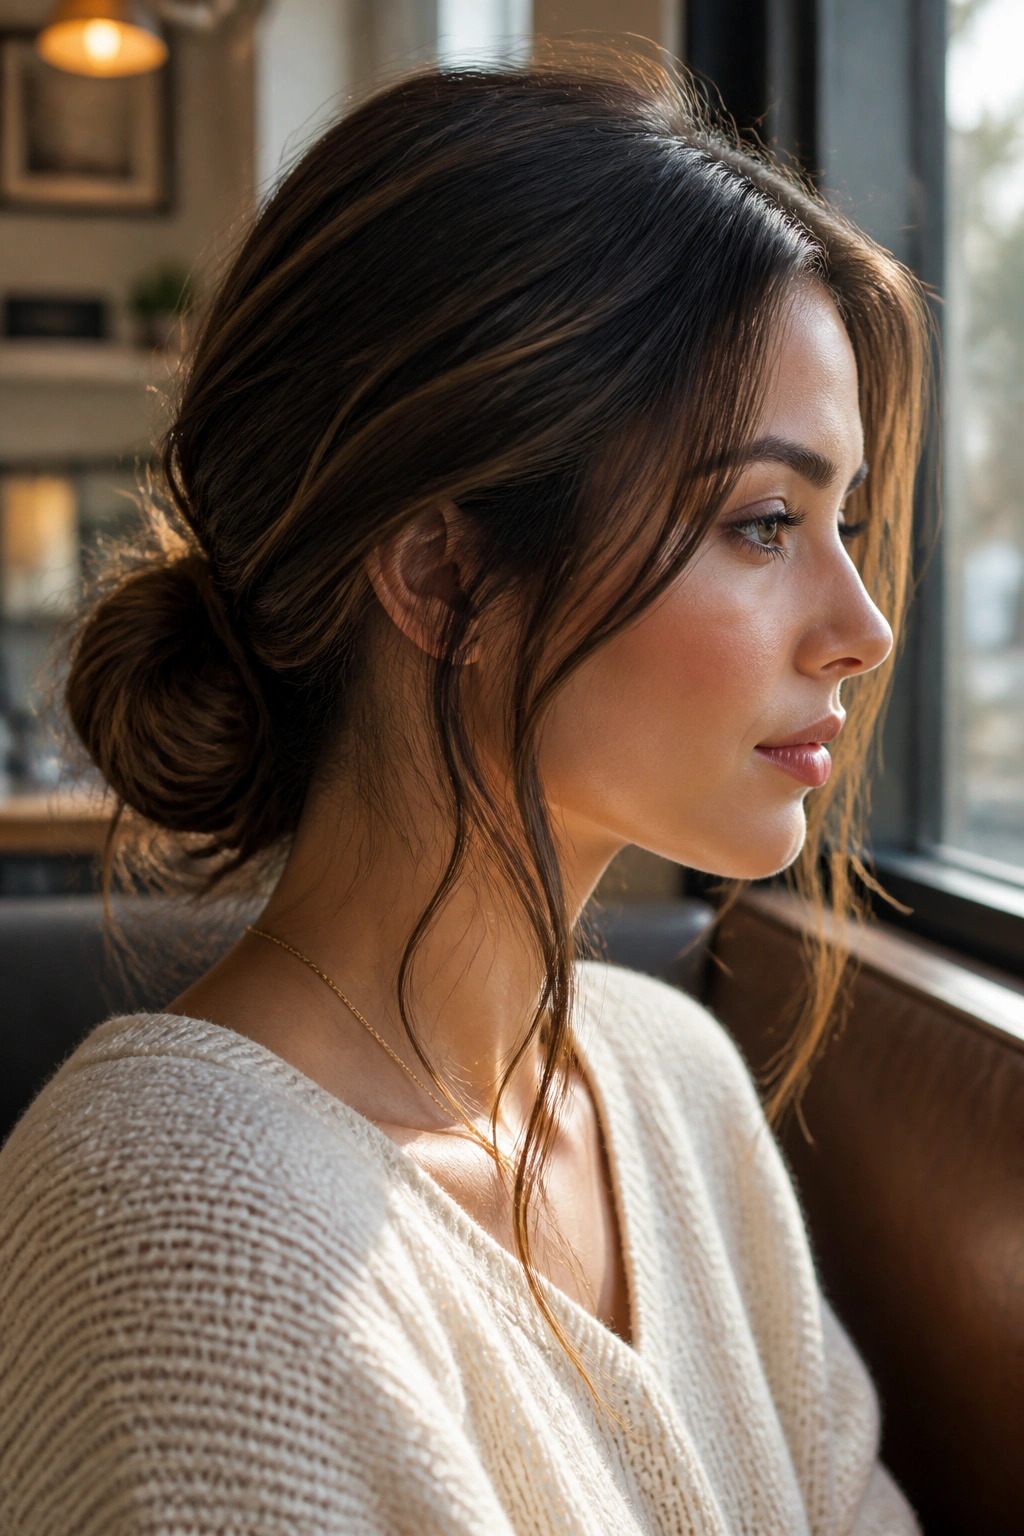
Some low buns need to be sleek. This one does not.
It is the style I’d choose for long hair when I want the bun to feel lived-in, not severe. The loose pieces around the face keep it from looking too formal, and the low placement keeps the overall shape grounded. That combination matters more than people think.
Start by leaving out two front sections, one on each side, each about 1 to 1½ inches wide. Curl them away from the face or bend them with a flat iron, then brush them out so they sit in soft arcs. Gather the rest into a low bun that is a little loose at the edges.
The trick is restraint. If you pull too many pieces free, the style starts falling apart. If you leave none, the bun can read stiff even when the shape is good.
What to do with the front pieces
Keep the shorter piece slightly higher and the longer piece slightly lower. That unevenness looks more natural than matching strands. Also, let the ends taper. A hard line near the cheek can look awkward, especially on long hair.
If your layers are short, tuck the shortest front pieces behind the ear and leave only the longer face-framing bits visible. You do not need a lot. Two soft lines are enough.
This bun tends to look better after ten minutes than right after you pin it. The hair settles a little, the edges soften, and the whole thing stops looking freshly assembled.
9. Folded Low Bun for Thick Long Hair
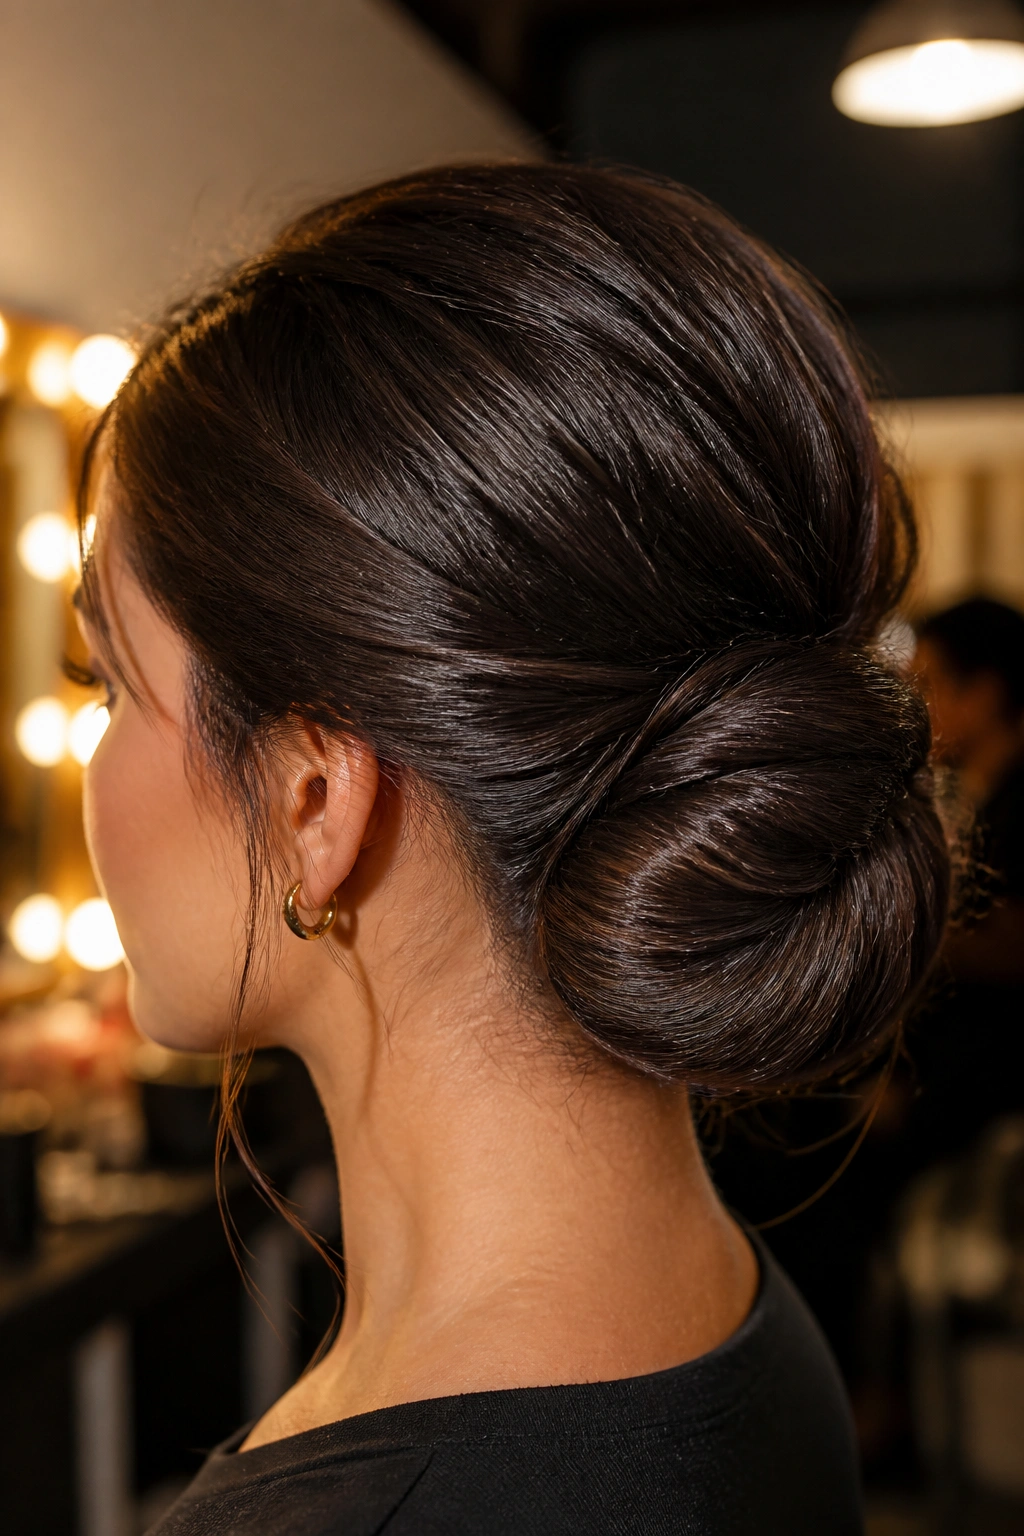
Thick long hair usually does not want to be coiled into one giant circle. That’s where this folded version comes in. Instead of winding the tail around the base over and over, you fold it into flatter sections and pin each one down.
This style is one of the smartest options for very dense hair because it spreads the bulk out. A tight coil on thick hair often ends up too wide, too heavy, or both. The folded bun keeps the shape closer to the head and uses the hair’s own thickness as structure.
Why the fold beats the coil
Make a low ponytail with two stacked elastics if the hair is heavy. That double base helps a lot. Then divide the tail into two or three sections, fold each section upward toward the elastic, and pin it flat against the head. Think of it like stacking soft ribbons rather than wrapping a rope.
You will probably need more pins here — 8 to 10, sometimes more if the hair reaches the lower back. Use long pins and push them in at slightly different angles. Straight pins all pointing the same way usually fail first.
A few quick notes:
- Leave the tail ends hidden under the last fold.
- Pin the folds into each other, not only into the hair tie.
- Press the bun flat with your hand before spraying.
- If the bun feels too tall, spread the folds sideways instead of upward.
This is not the most delicate low bun. It is the one that respects heavy hair.
10. Low Bun with a Silk Scarf Wrap
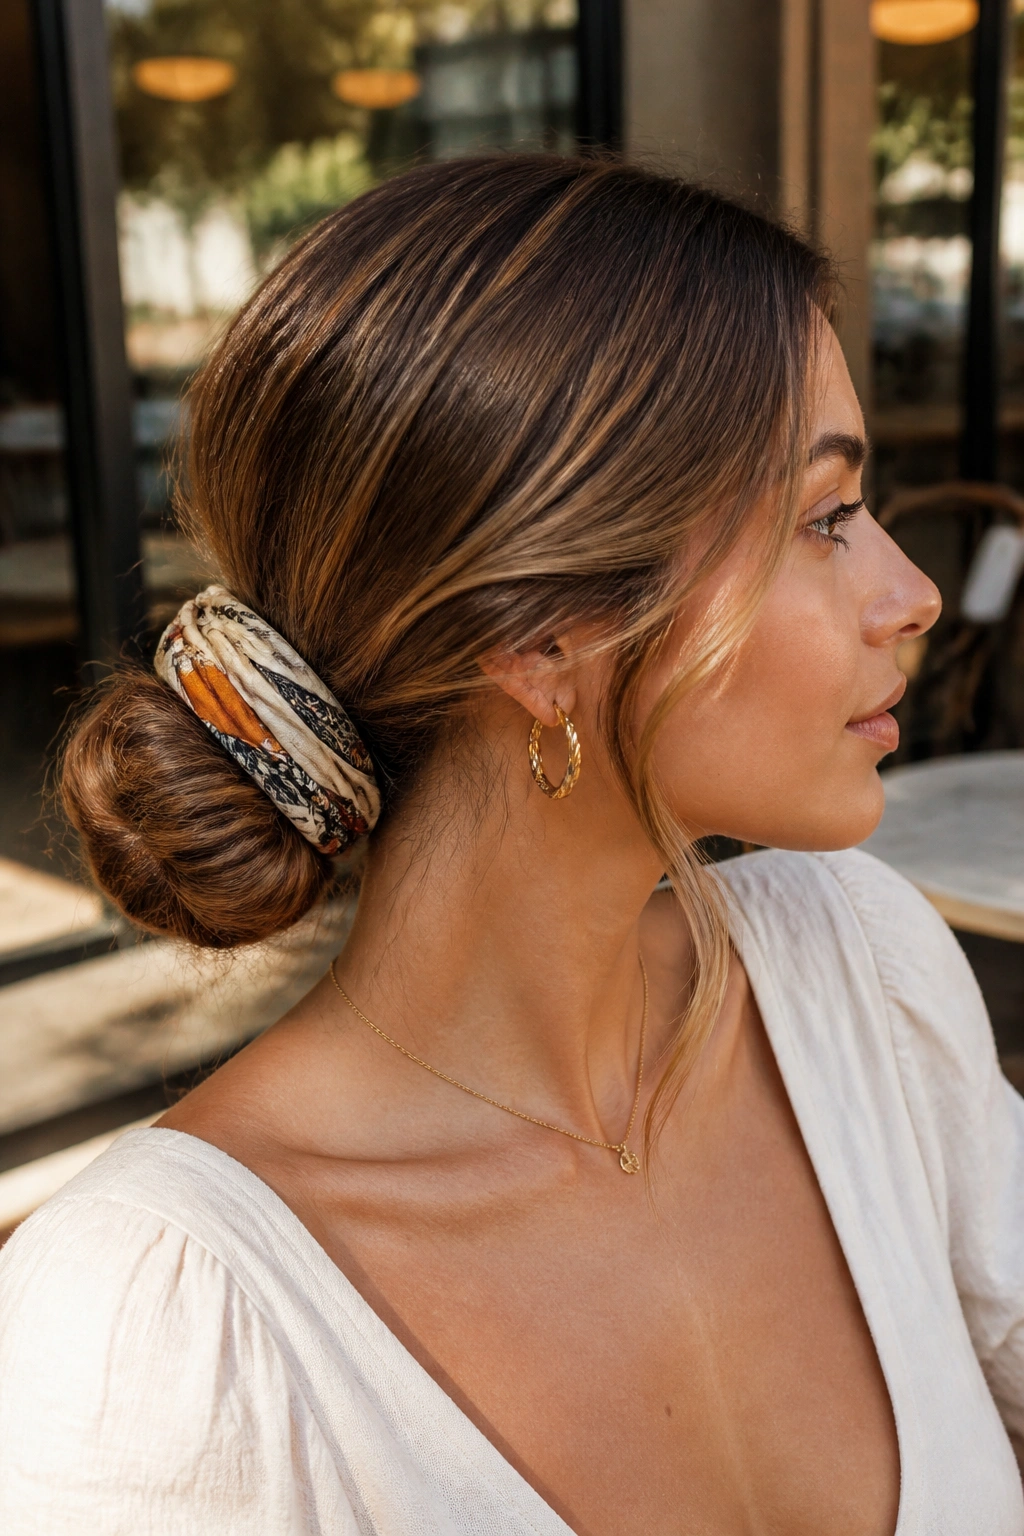
Sometimes the scarf is the whole style.
A silk or satin scarf changes a simple low bun from plain to specific, and it does so without needing extra pinning or fancy shaping. It also helps control frizz around the bun, which is useful when long hair puffs up the second it sees humidity or a wool sweater.
Start with any low bun you already like. Sleek, twisted, braided — they all work. Fold a narrow scarf, about 2 to 3 inches wide, and wrap it around the base of the bun once or twice. Tie it underneath or off to the side, depending on how much of the knot you want to show.
The scarf should feel like part of the hairstyle, not an afterthought. If it slips, pin the knot under the bun with one hidden bobby pin. If the fabric is too bulky, fold it thinner. Simple.
When this works best
This style is especially good when the hair is long enough to feel heavy but you still want movement at the nape. The scarf lets you keep the bun compact while hiding the less tidy parts underneath. It also gives you a way to dress up a very plain bun without changing the structure.
Choose a scarf with a smooth edge, not one that sheds or frays. Thin silk glides better than stiff cotton, and it sits closer to the head. That matters because thick fabric can make the bun feel lumpy fast.
I like this with simple earrings and a plain neckline. The hair gets the attention, and it does not need much else.
11. Coiled Low Bun for Formal Events
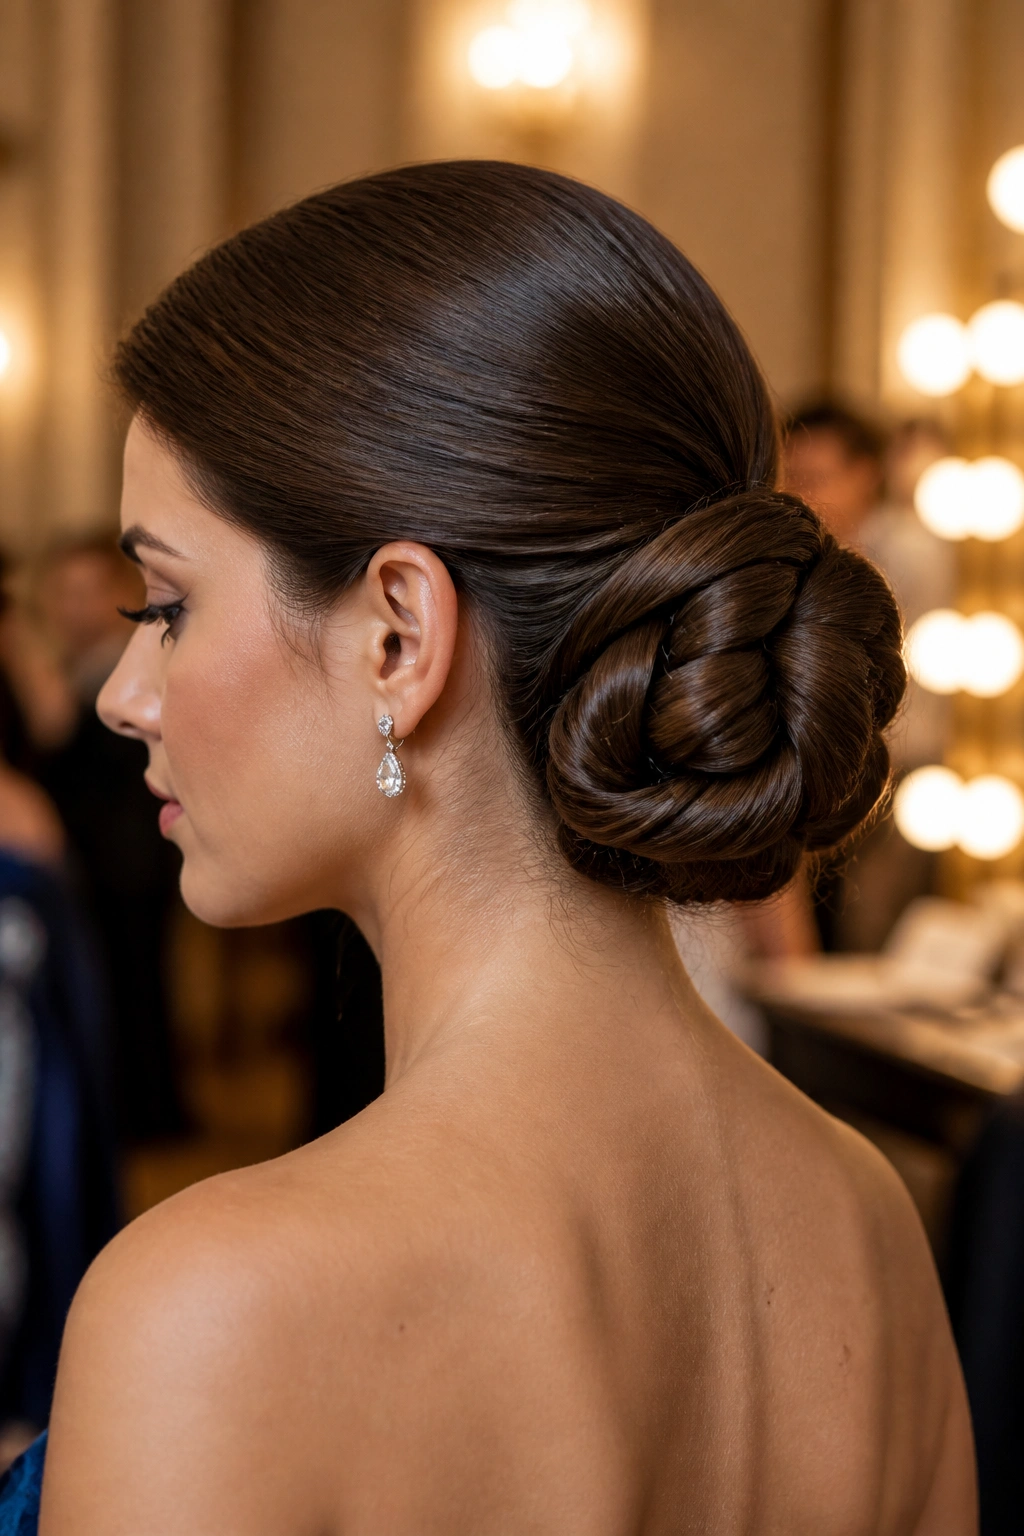
A formal low bun looks best when the shape is deliberate and the surface is smooth enough to catch light without looking sprayed into place. The coiled version does that well because it spreads the hair into neat loops around the nape instead of one heavy roll.
Long hair needs support here. If you skip the base work, the bun can slip downward as the evening goes on, and that is not a small issue when you are wearing it for hours. So start with a snug low ponytail and a little texture through the mid-lengths.
Split the tail into three equal sections. Coil each section around the base one at a time, pinning each coil as you go so the bun grows in layers. That gives the style a round, compact shape without making it look stuffed.
What makes it hold through a long night
Use pins in a triangle pattern: one at the top of the coil, one at the bottom, and one crossing the side. That three-point hold keeps the shape from sagging when the hair gets warm and settles.
A medium-hold spray helps, but do not drown it. The surface should feel controlled, not stiff. If you touch the bun and it feels like a shell, there is too much product on it.
This is one of the better choices for formal dresses, sharp collars, or any look where the neckline matters. The bun stays low enough to show the shape of the clothes and neat enough to keep the whole outfit from looking too busy.
12. Polished Everyday Low Bun
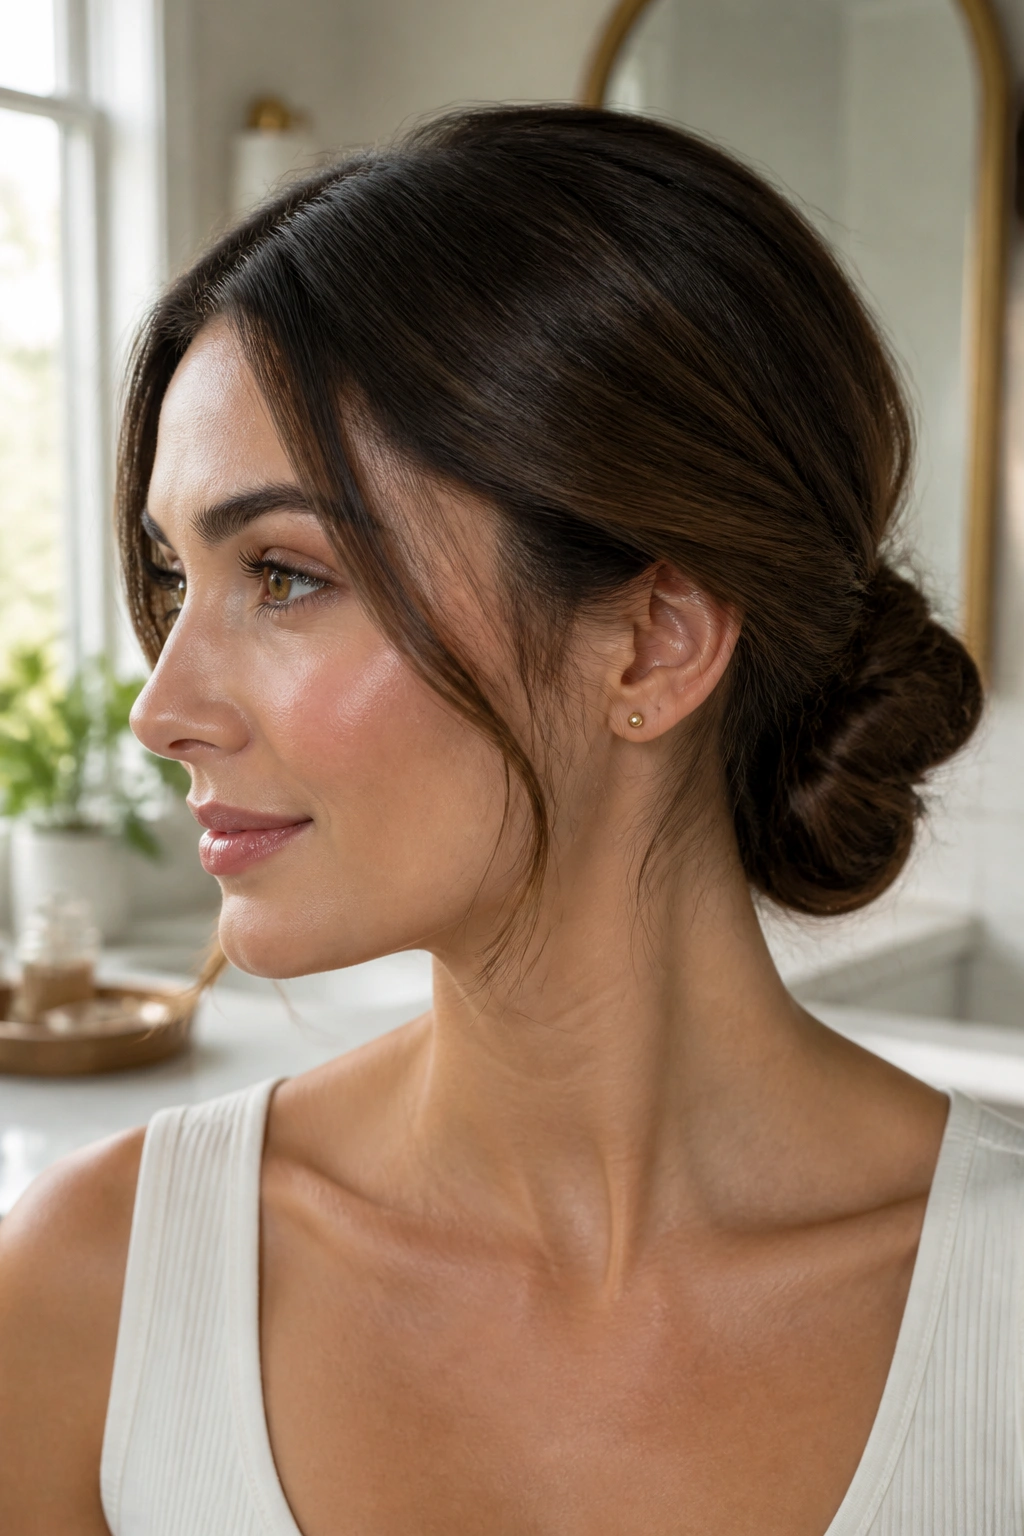
The best everyday low bun is the one you can build quickly without making it look rushed. That means fewer clever tricks and more good habits: clean sectioning, a secure base, and a shape that sits where the hair naturally wants to rest.
I keep coming back to this style because it does not ask for perfect hair. Long hair can be a mess in the morning, and this bun still works if the roots are a little oily or the ends have already been brushed three times. In fact, a bit of lived-in texture helps.
Brush the hair back into a low ponytail, twist the tail once, fold it under itself, and pin it in place. That is enough for many days. If the bun needs a little more body, tug the sides out by a quarter inch. Not more. A tiny looseness makes it look intentional.
My quick 5-minute version
- Gather the hair at the nape with a smoothing brush.
- Secure a low ponytail with a clear elastic.
- Twist the tail once or twice, then fold it into a compact bun.
- Pin the base first, then the outer edge.
- Finish with a light spray and smooth flyaways with clean fingertips.
This is the low bun I’d send someone to first if they said, “I need something neat, but I do not want to spend twenty minutes on my hair.” It is practical, calm, and hard to mess up if the base is secure.
And honestly, that’s the charm of low buns for long hair. The style does not need to be dramatic to work. It just needs to sit well, stay put, and make the length look like it belongs there.
