



Chunky blonde streaks can age a haircut fast. Subtle highlights for older women work better when they soften the hairline, blur gray, and keep the color looking like light instead of stripes.
That matters more on mature hair than on glossy salon photos. Fine strands show hard lines quickly, and dry ends grab bleach like a sponge if the placement is too heavy or the tone is too icy.
The smartest highlight jobs do three things at once: brighten the face, keep the root soft, and leave enough depth underneath so the hair still looks full. One shade too light in the wrong place can make the whole head look thinner. Too much warmth can do the same, only in a different way.
The good news is that subtle color does not have to be boring. Caramel ribbons, champagne babylights, silver blending, and rooted glosses can all look polished without turning into a maintenance project. The trick is less about going blonde and more about choosing the right kind of light.
1. Subtle Highlights for Older Women: Soft Babylights Along the Hairline
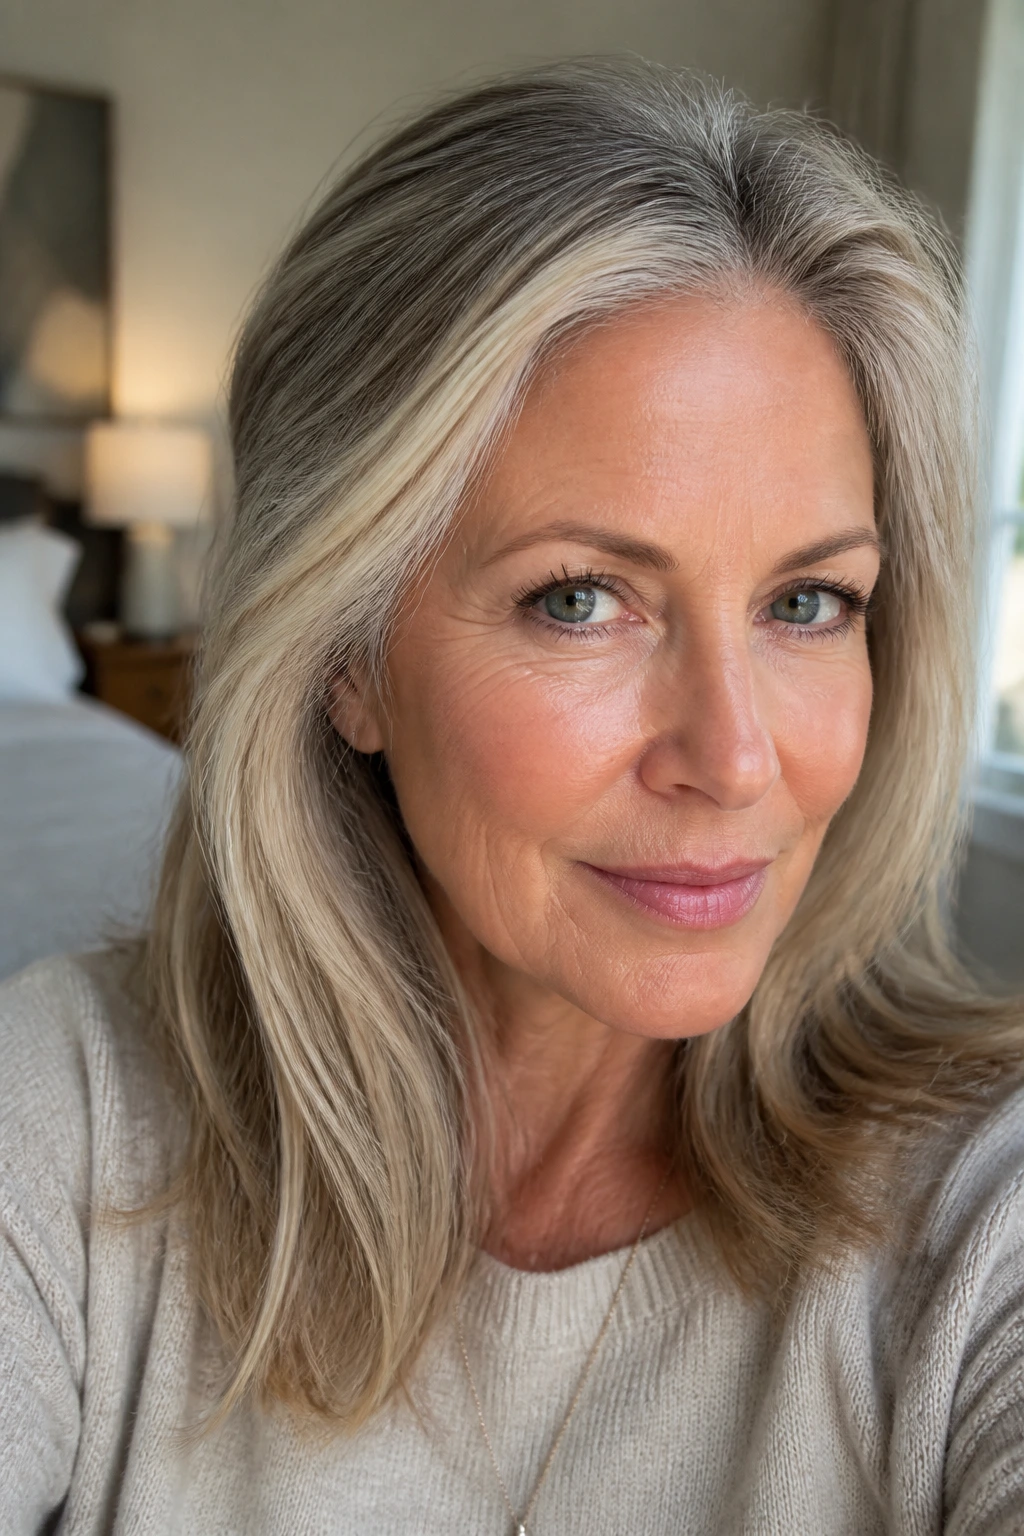
Babylights are the closest thing to natural lightening. The strands are so fine that they look like sunlight rather than dye, which is exactly why they work so well around the face and part line.
The hairline is where color gets judged first. If that area is too dark, the face can look tired. If it’s too bright, the effect gets harsh fast. Babylights solve both problems because they give a faint lift right where the eye lands, and they do it without a chunky line.
What to Ask For
- Ask for micro-fine foils or hand-painted slices around the front hairline.
- Keep the lightness one to two levels above your base color if you want the result to stay soft.
- Leave the pieces around the temples a touch deeper than the center front so the color fades naturally.
- Request a beige or neutral gloss after lifting if your hair tends to pull yellow.
This style is especially kind to fine hair. Thick highlights can split the hair into obvious stripes; babylights blend like they were always there. They also grow out quietly, which matters if you do not want a salon visit every few weeks.
A tiny detail makes a huge difference here. The colorist should keep the brightest pieces no wider than a pencil lead near the part, then slightly widen them only if the hair is dense. That keeps the front from looking blown out.
2. Beige Blonde Ribbons That Keep Hair Looking Soft
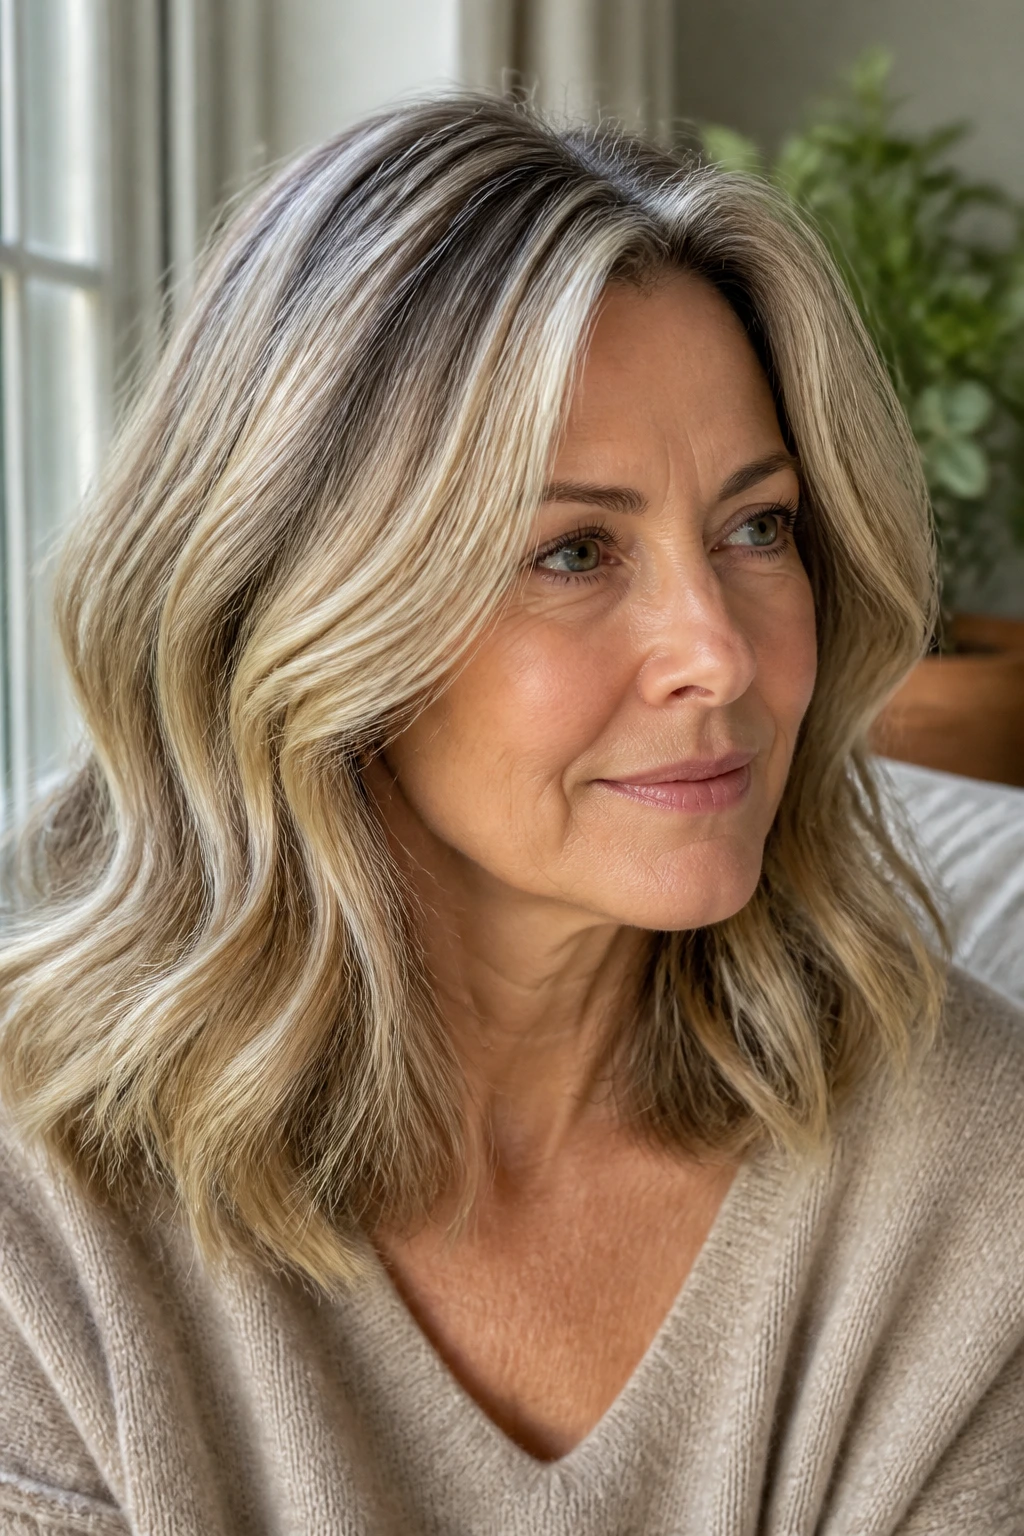
Beige blonde is one of those shades people overlook because it sounds plain. It isn’t. In real life, beige blonde has a soft sand-and-cream feel that flatters mature skin far better than a sharp platinum stripe.
Chunky pale streaks can make lines on the face look harder. Beige ribbons do the opposite. They break up the base color just enough to add movement, but they still leave a little warmth in the hair, which keeps the whole look gentler.
This is the highlight choice I reach for when someone wants brightness but hates the idea of looking “done.” Beige sits in that sweet spot between golden and ash. It doesn’t shout. It just keeps the hair from looking flat under indoor light, which is where a lot of color falls apart.
The best placement is usually through the mid-lengths and the outer layer, not packed tightly at the scalp. That keeps the grow-out soft and stops the head from reading like one bright cap of color. A gloss every 6 to 8 weeks helps keep the beige tone from drifting brassy, especially if your hair sees a lot of sun or hard water.
One-sentence rule? Beige blonde is for women who want light without the glare.
3. Caramel Balayage on Brunette Hair
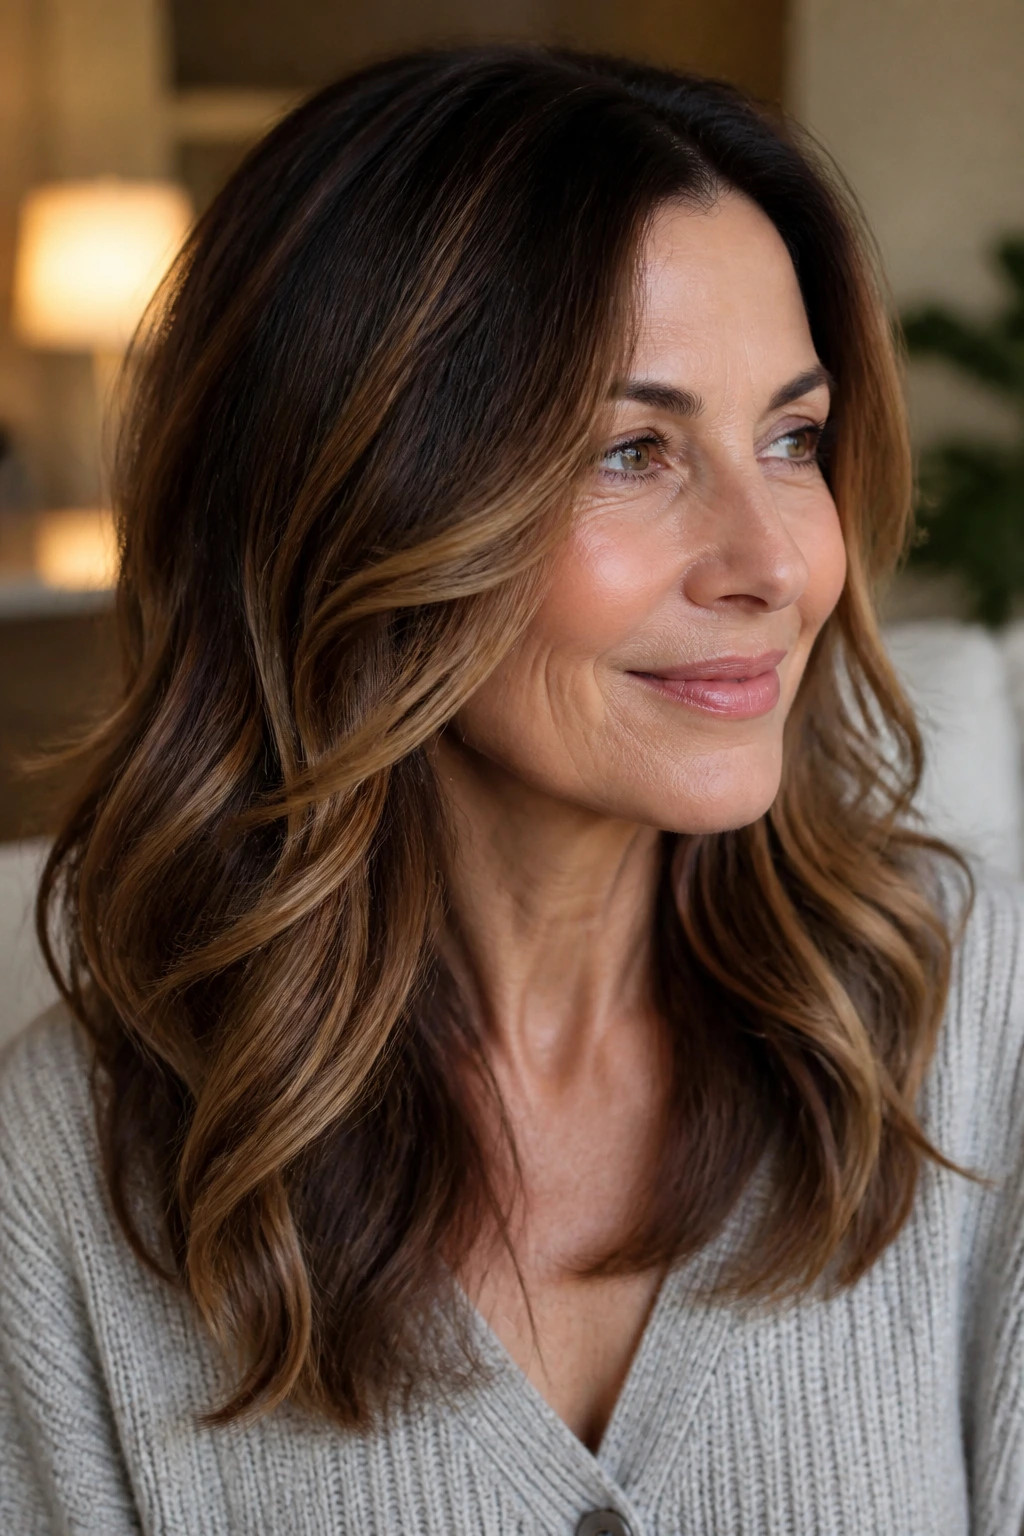
Why does caramel work so often on darker bases? Because it gives the hair warmth and movement without pretending the hair is something it isn’t. On brunette hair, caramel balayage looks richer than blonde and softer than copper, which is a useful middle ground.
The placement matters more than the shade name. Caramel painted mostly through the mid-lengths and ends can make layered hair look thicker, while keeping the root area deeper helps the color stay believable. If the caramel starts too high, the whole look can turn striped. If it stays too low, you barely see it.
How to Keep It Subtle
- Ask for hand-painted pieces, not full saturation from root to tip.
- Keep the lightest ribbons around the face and through the outer layers.
- Choose a golden-beige caramel, not a bright orange tone.
- Blend the finish with a soft gloss so the highlights look sunk into the base.
Caramel is especially good for hair that has lost some of its old warmth. Gray blending can make brunettes feel cooler than they want; caramel brings the life back without forcing a dramatic color shift. It also helps layered cuts read more clearly, which is useful if the ends have gotten wispy.
Nope, it does not have to be loud. The prettiest caramel balayage is often the quietest one.
4. Champagne Pieces for Gray Blending
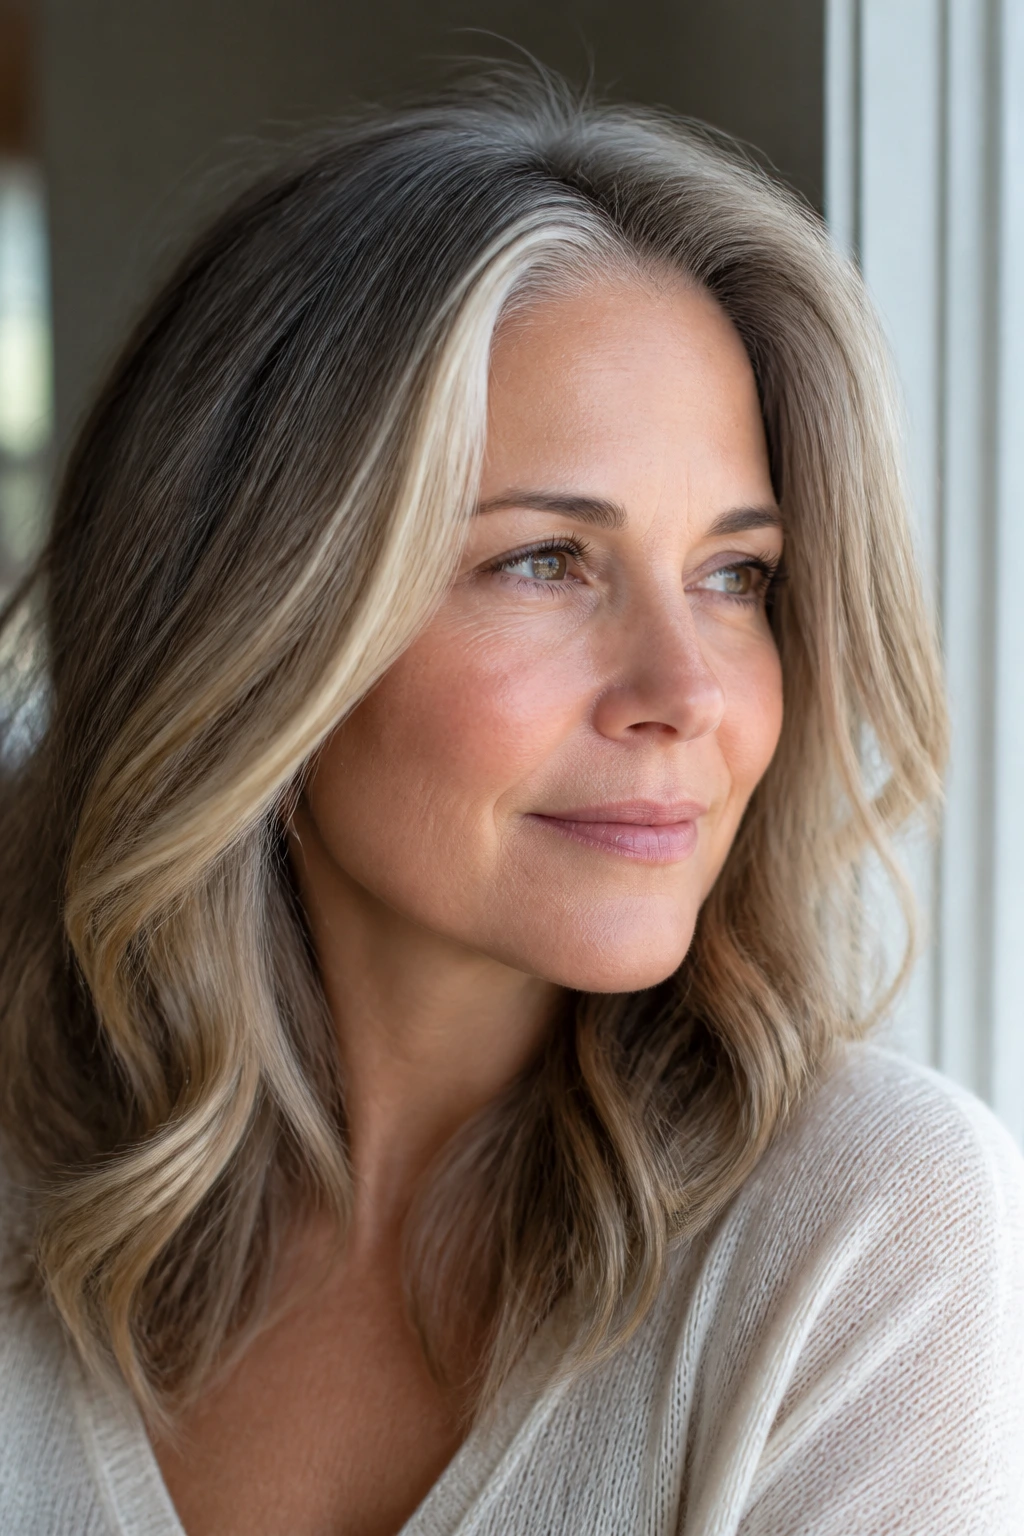
A lot of women are not trying to hide gray anymore. They just want the gray to stop looking abrupt. Champagne pieces do that beautifully because they sit in the middle of silver, beige, and soft gold.
Picture the gray at the temples or along a side part. If the rest of the hair is darker, the contrast can feel harsh, almost like two different heads of hair are competing. Champagne highlights soften that line. They echo the brightness of gray without turning the whole head into silver.
Why Champagne Works
- It has enough warmth to keep skin from looking flat.
- It has enough coolness to sit beside natural gray without clashing.
- It reflects light in a gentler way than icy blonde.
- It works well with glosses, so the tone can be adjusted later.
This is one of my favorite choices for women who are growing in gray but still want polish. The goal is not total disguise. The goal is harmony. Champagne pieces scattered near the face, the crown, and the part line can make regrowth look deliberate instead of unfinished.
Ask for a soft blend, not a stripe. That small difference changes everything. If the pieces are too chunky, the gray stops looking elegant and starts looking like a contrast problem.
5. Honey Face-Framing Highlights That Lift the Eyes
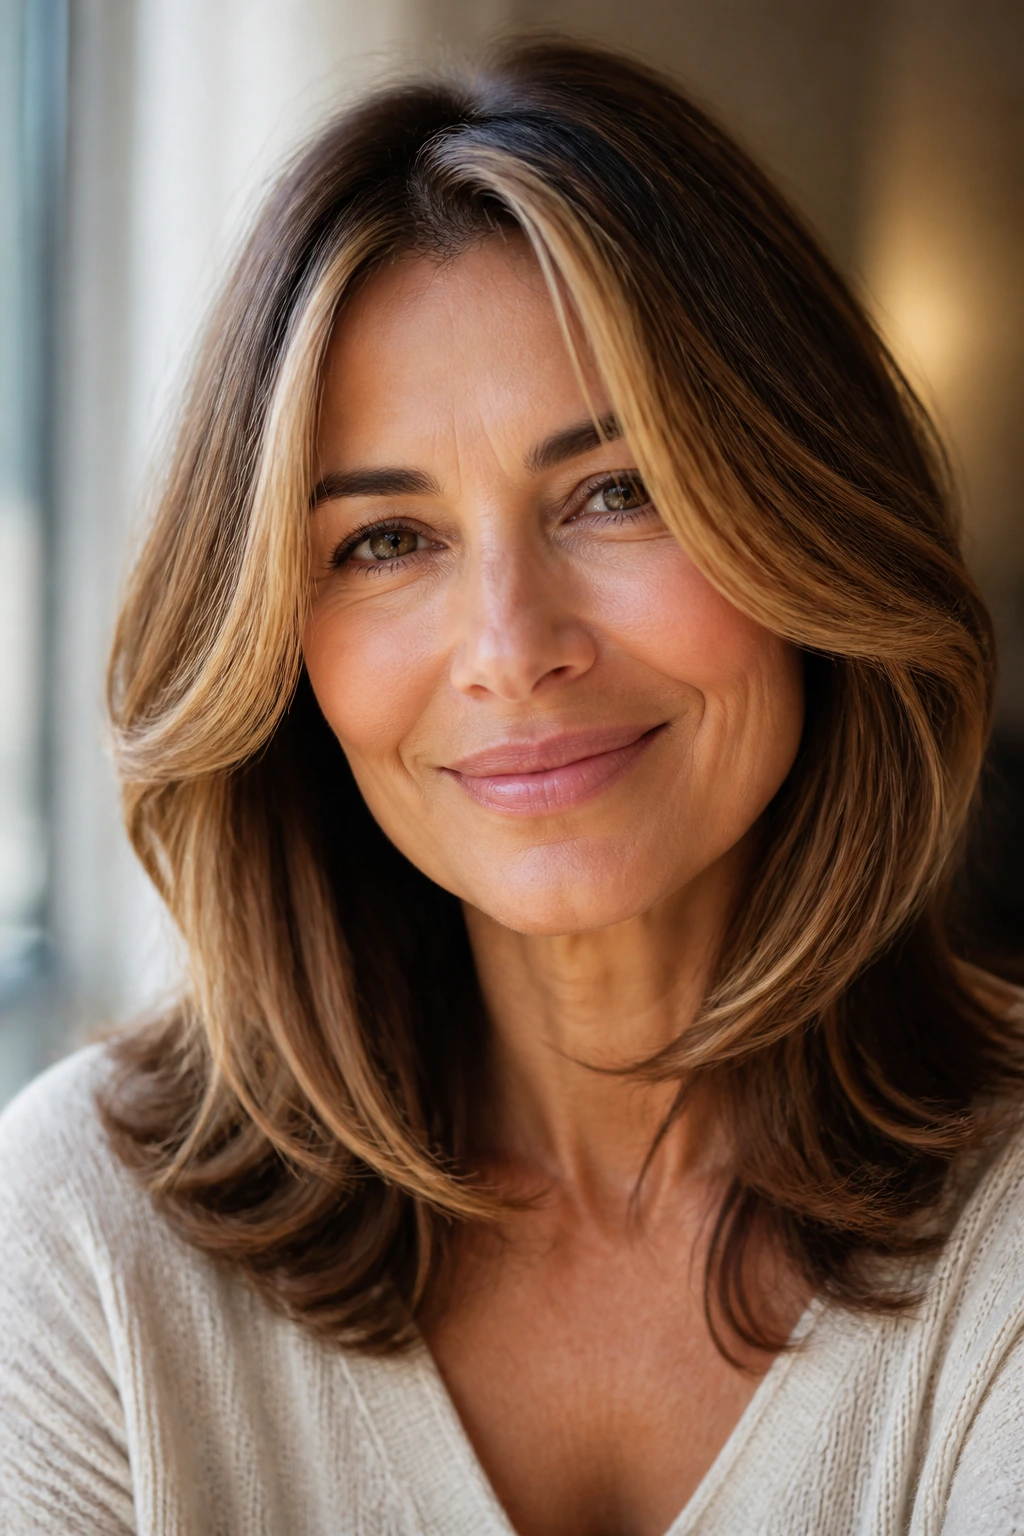
Honey is warmer than beige and softer than gold, which is why it flatters so many mature faces. A few honey pieces around the front can wake up the skin in a way that makeup sometimes tries to do and misses.
The trick is restraint. Honey should live around the face, the first few inches of the part line, and maybe the top layer of a layered cut. It doesn’t need to travel all the way through the underneath sections. In fact, I’d avoid that unless the hair is very dense and naturally dark.
Think about where the eye lands first. The cheekbone area, the outer corners of the eyes, the temples. Honey highlights placed around those spots give the face a little lift without making the color scream for attention. They also play nicely with warm-toned lipstick and cream blush, which is a small thing but does matter when you’re trying to keep the whole look pulled together.
A little warmth goes a long way here. If the base is medium brown, honey can feel fresh and flattering. If the base is already light, too much honey can look yellow, which is exactly the wrong direction. The best version is soft, shiny, and a bit translucent at the edges.
6. Mushroom Brown Lowlights for Cooler Skin Tones
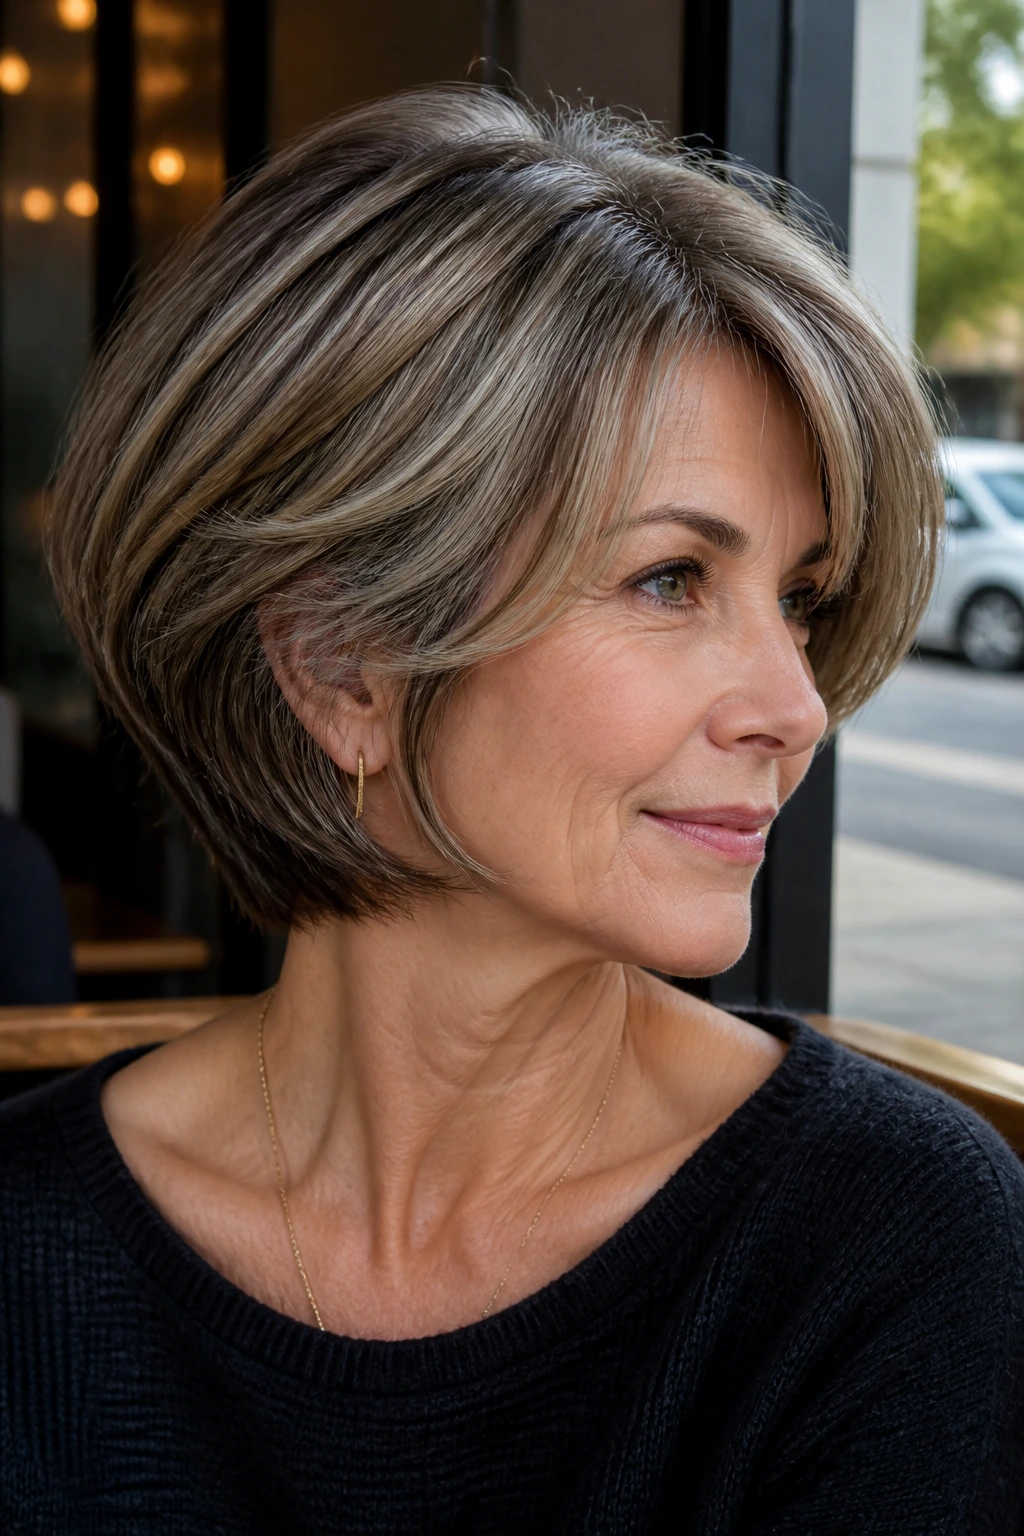
Unlike warm blonde streaks, mushroom brown lowlights add shadow instead of brightness. That sounds less exciting than it is. On the right head of hair, it gives a soft, smoky finish that keeps lighter hair from washing out the face.
This is a smart move for women with cool or pink undertones, especially if the hair has been lifted too much over the years. A few mushroom lowlights can bring the base back down and make the brighter pieces look intentional again. The result is calmer, not darker in a heavy way.
The shade itself should feel earthy and muted. Think taupe, soft brown, a little ash, a little beige. If it gets too green, it misses the mark. If it gets too warm, it turns muddy. That balance is the whole point.
Best Places to Put It
- Under the crown, where it can create depth.
- Around the nape, where hair often looks thin.
- Behind the ears, where a little contrast can keep the cut from flattening out.
- Under brighter face-framing pieces, so the front still pops.
This works especially well with shoulder-length cuts and layered bobs. Those shapes need some depth to keep from looking puffy at the top and see-through at the ends. Mushroom lowlights solve that without making the hair darker all over.
7. Pearl-Silver Blending for Natural Gray
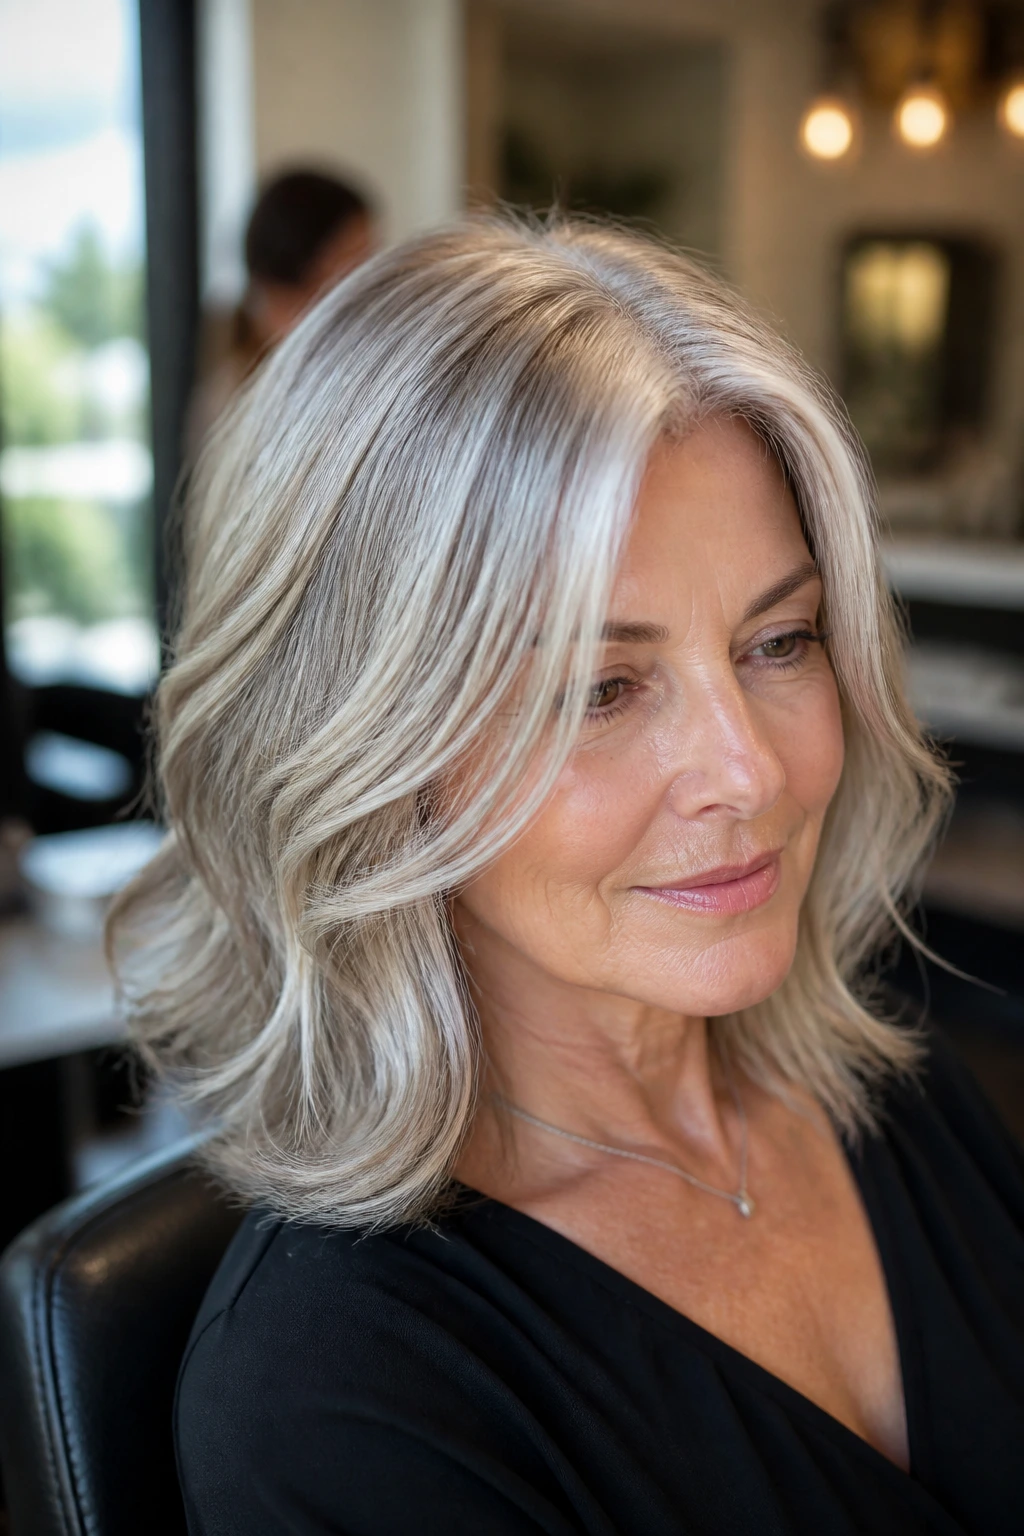
Pearl-silver blending is for the woman who likes her gray but doesn’t want it to look patchy. The finish should feel soft and misty, not metallic. Think light reflected on satin, not foil.
This approach works best when a colorist paints very fine pale pieces through the gray and then softens everything with a cool gloss. The result is less “dyed silver” and more “expensive gray,” for lack of a better phrase. The trick is keeping the pieces tiny and spaced out so the hair still reads as one color family.
What to Tell the Colorist
- Keep the brightest pieces very fine and irregular.
- Use a cool beige or pearl toner, not a stark blue-violet finish.
- Leave some natural gray untouched so the blend doesn’t look overprocessed.
- Avoid broad blonde panels near the part.
This is a lovely option for women with straight hair, because straight hair shows every color line. On curly or wavy hair, the movement hides a lot, so you can sometimes get away with slightly bolder placement. Straight hair needs the softer hand.
A lot of people think silver has to mean icy. It doesn’t. The best silver blending still has some softness at the root and around the face, which keeps the hair from looking drained.
8. Foilyage When You Need a Little More Lift
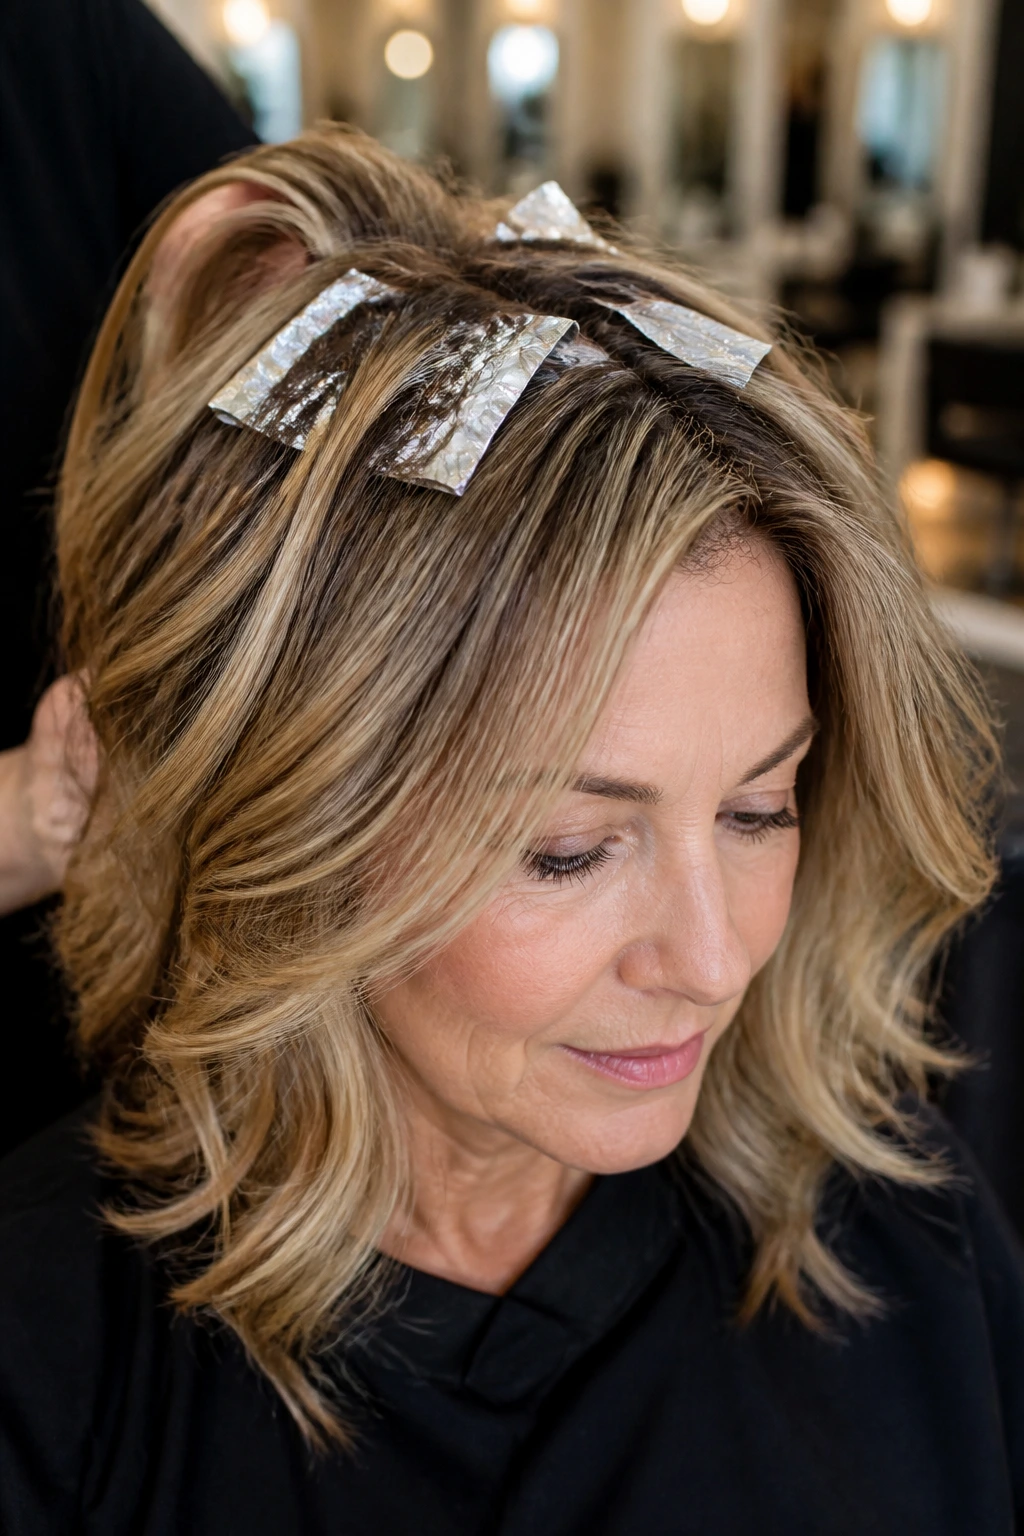
Two or three foils near the crown can matter more than a full head of color. That’s the part most people notice from across a room, and it’s also the part that flattens first when hair starts to thin.
Foilyage sits between foil highlights and freehand balayage. The hair is painted, then wrapped in foil so it lifts a little more evenly and a little lighter than open-air painting alone. For mature hair that resists lightening in some spots and lifts too fast in others, that control is useful.
The crown is where foilyage earns its keep. A few well-placed foils can add height, break up a heavy solid color, and make the top of the head look fuller. That sounds cosmetic, but it matters. Hair that catches light near the crown often looks denser than hair that is bright only at the ends.
When Foilyage Makes Sense
- Your hair is dark and a little stubborn.
- You want brightness, but not a blocky highlight pattern.
- Your cut has layers that need a bit more lift to show shape.
- You don’t want the grow-out line that comes with classic foil highlights.
The key is restraint. If the foils are too wide, foilyage stops looking soft. If the lift is pushed too far, the ends can look dry and hollow. A good colorist uses it as a precision tool, not a default setting.
9. Soft Copper Around Warm Complexions
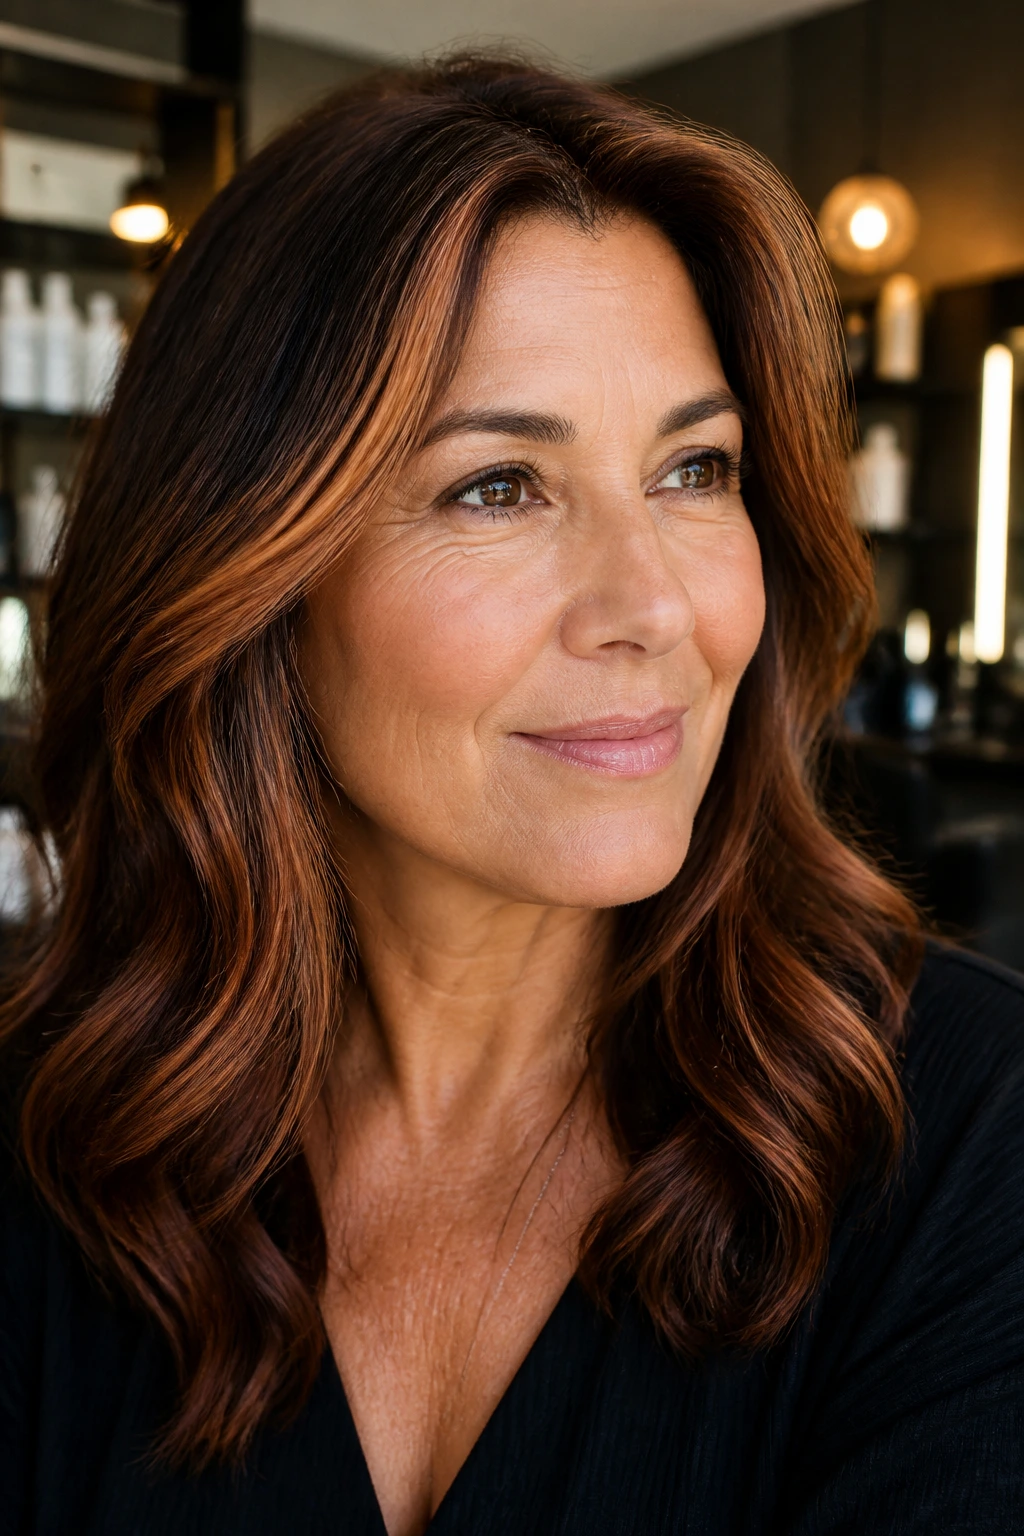
I like copper in small doses. Big copper can feel loud, but a few muted copper ribbons around the face can wake up warm skin in a way blonde often cannot.
This works especially well when the complexion has peach, gold, or olive undertones. Soft copper makes those tones look richer, not redder. The hair should still read as brown or dark blonde first, with just a flicker of copper in the light. That’s the line to hold.
A tiny bit near the temples can be enough. So can a couple of painted ends around the front layers. You do not need to flood the head with orange. In fact, that usually looks less expensive and less flattering than a restrained copper veil.
The finish matters a lot here. Ask for a copper glaze that leans soft and brown, not fire-engine bright. If the hair has grays, copper can be used as a whisper around them rather than a full cover-up. That gives warmth without making the root line obvious.
It’s a good choice for women who feel washed out by ash tones. Not everyone wants cool blonde. Some faces wake up faster with warmth, and copper, when handled lightly, gives exactly that.
10. Chestnut Lowlights Under Lighter Hair
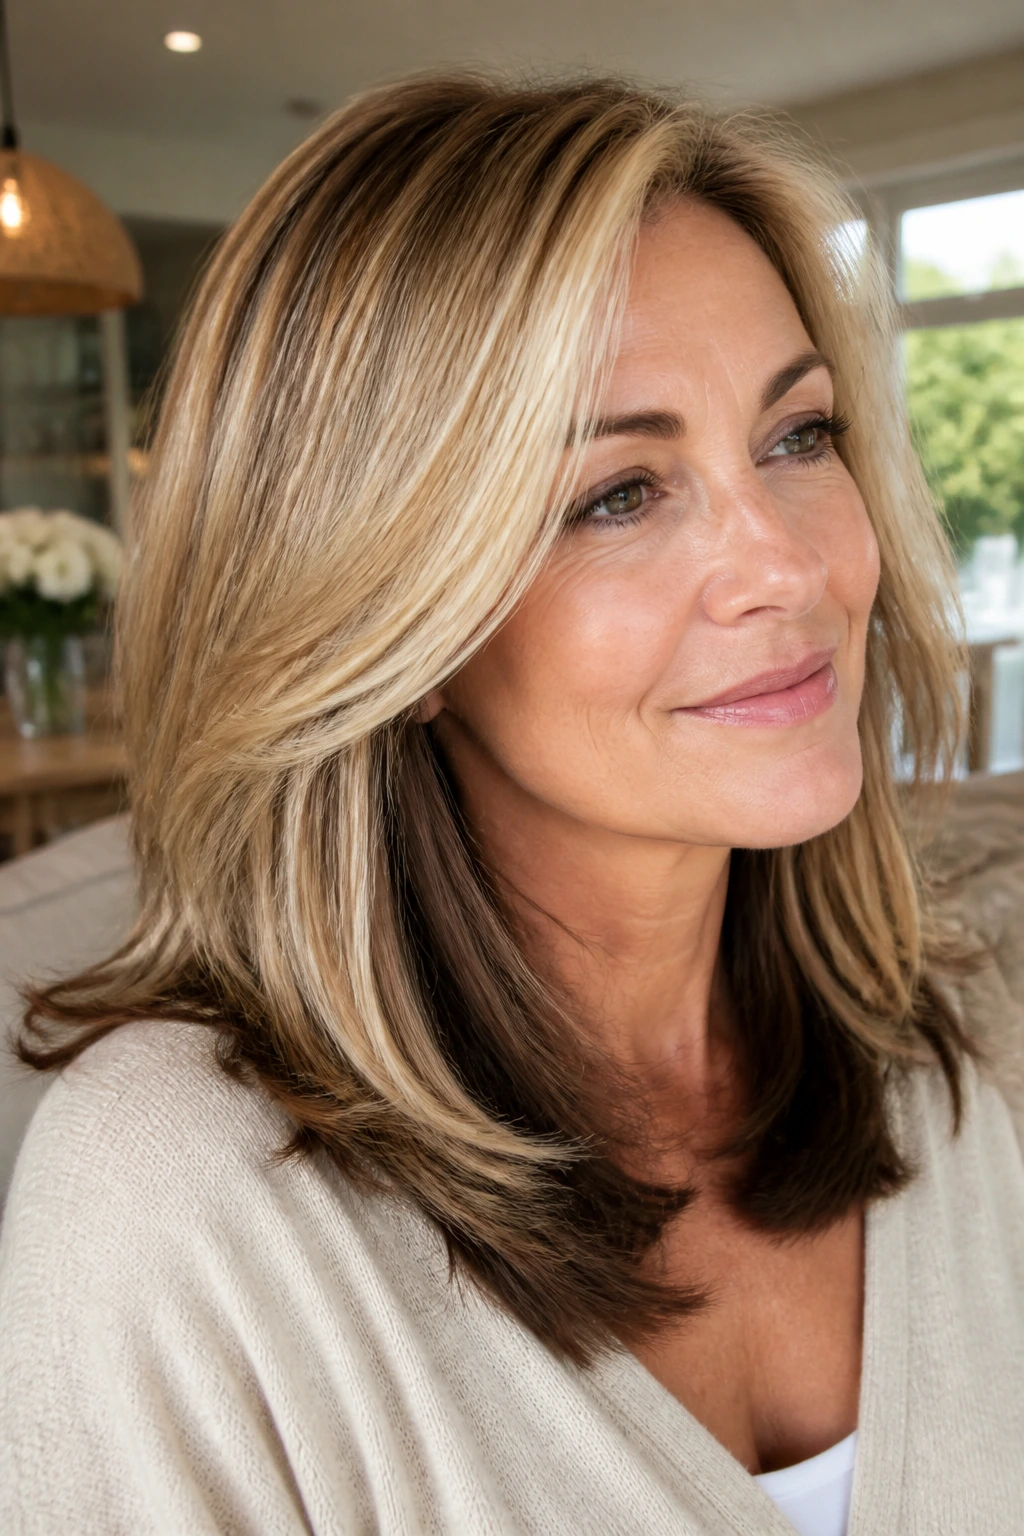
When blonde hair starts to look see-through, adding lowlights is often smarter than making it lighter again. Chestnut lowlights bring back depth, and depth is what makes hair look thicker.
This is especially useful on fine hair that has been highlighted too much over the years. The ends can start to look soft in the wrong way, almost wispy. A few chestnut pieces underneath and through the mid-lengths stop that from happening. The lighter pieces still show, but they have something to sit against.
Chestnut is richer than ash brown and softer than espresso. That middle zone is what makes it so wearable. It gives contrast without making the hair look painted on. Around the perimeter of a cut, chestnut can sharpen the outline just enough to make the shape read clearly.
Who It Suits Best
- Women with pale blonde hair that has gone too flat.
- Fine hair that needs visual thickness.
- Layered cuts that lost their shape.
- Anyone who wants to keep blonde, but make it less fragile-looking.
A lot of people ask for more blonde when what they really need is more shadow. Chestnut lowlights are the fix. Quiet one. Effective too.
11. Sun-Kissed Ends on Bobs and Lobs
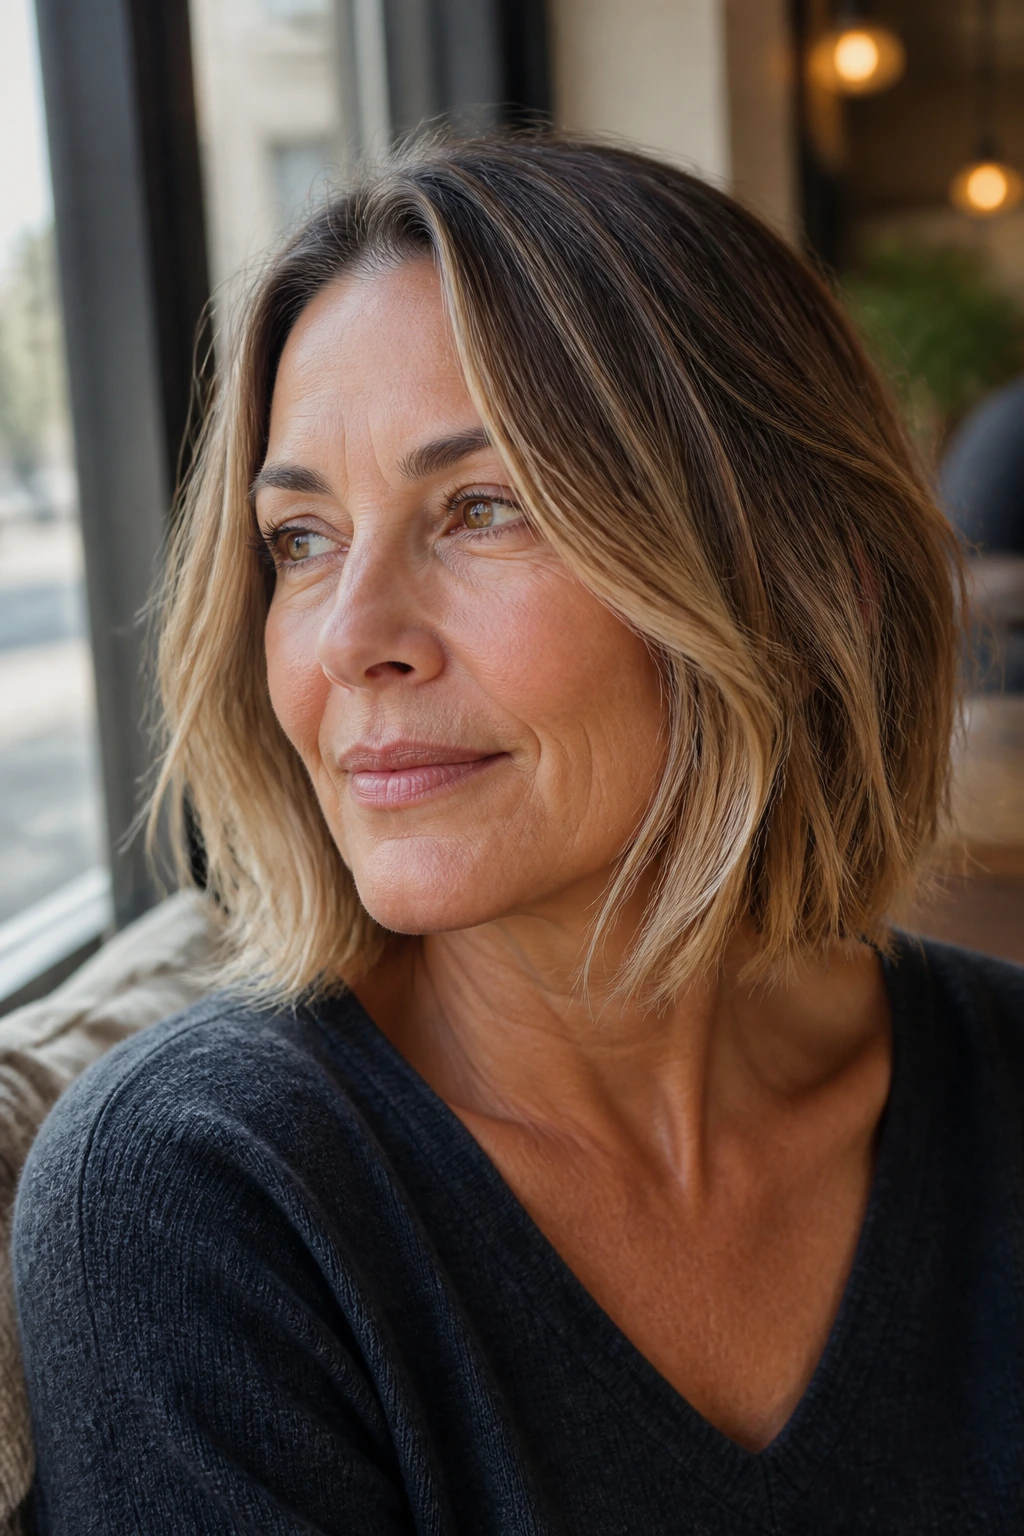
Short hair can carry highlights, but it does not need much. A bob or lob looks best when the light is concentrated near the ends and outer surface, where it catches movement and keeps the cut from feeling heavy.
This approach is simple, and that is the point. A few sun-kissed ends can make the shape look lived-in without turning the whole head into a color project. On a blunt bob, the lighter ends soften the edge. On a lob, they keep the hair from falling flat against the shoulders.
The placement should stay low. If the light starts too high on a short cut, the color can overwhelm the style and make the root area look busy. A restrained lift on the ends lets the haircut stay in charge.
A small detail matters here: the lightest pieces should never all land in one band. Spread them out. Let a few sit near the front, a few at the nape, and a few in the outer corners so the color moves with the haircut instead of sitting on top of it.
This is one of the easiest ways to make a shorter style feel fresh without making it high-maintenance. And honestly, that is half the battle.
12. Subtle Highlights for Older Women: Root Melt Highlights That Grow Out Gracefully
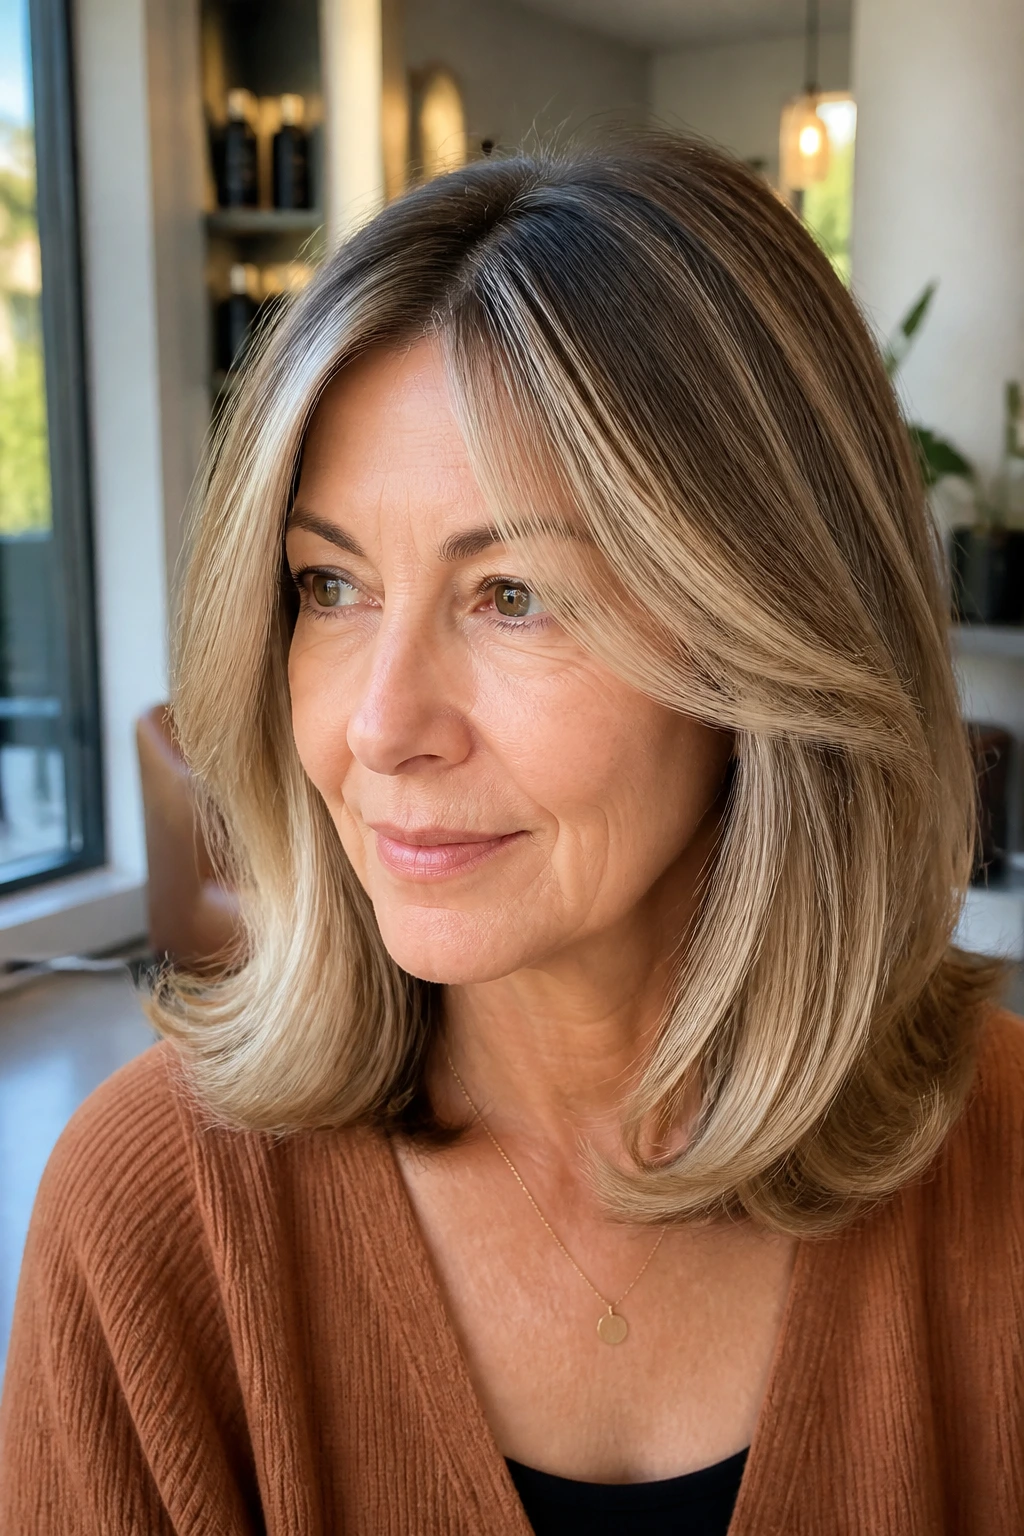
If you hate harsh grow-out, ask for a root melt. It’s one of the best tricks for subtle highlights for older women because it softens the line between your base color and the lighter pieces, so nothing looks stamped on.
The idea is simple. Keep the root a shade or half a shade deeper, then melt it into the highlights through a gloss or toner. That creates a gradual shift instead of a hard stop. When the hair grows, the transition stays soft for weeks.
How to Ask for the Blend
- Request a shadow root or root smudge that matches your natural base closely.
- Keep the brightest pieces away from the scalp unless the hair is very dense.
- Ask for a gloss finish so the colors blur into each other.
- If you have gray at the part, let the root stay a touch translucent rather than fully opaque.
This works especially well for women who do not want to be in the salon every few weeks. The grow-out is part of the style, not a problem to fix later. That’s a relief if your hair grows fast or if you simply don’t enjoy constant upkeep.
Root melts can also make the hair look fuller because they preserve depth at the scalp. Flat blonde from root to tip often makes mature hair look thinner than it is. A soft root keeps the shape anchored.
A Softer Finish
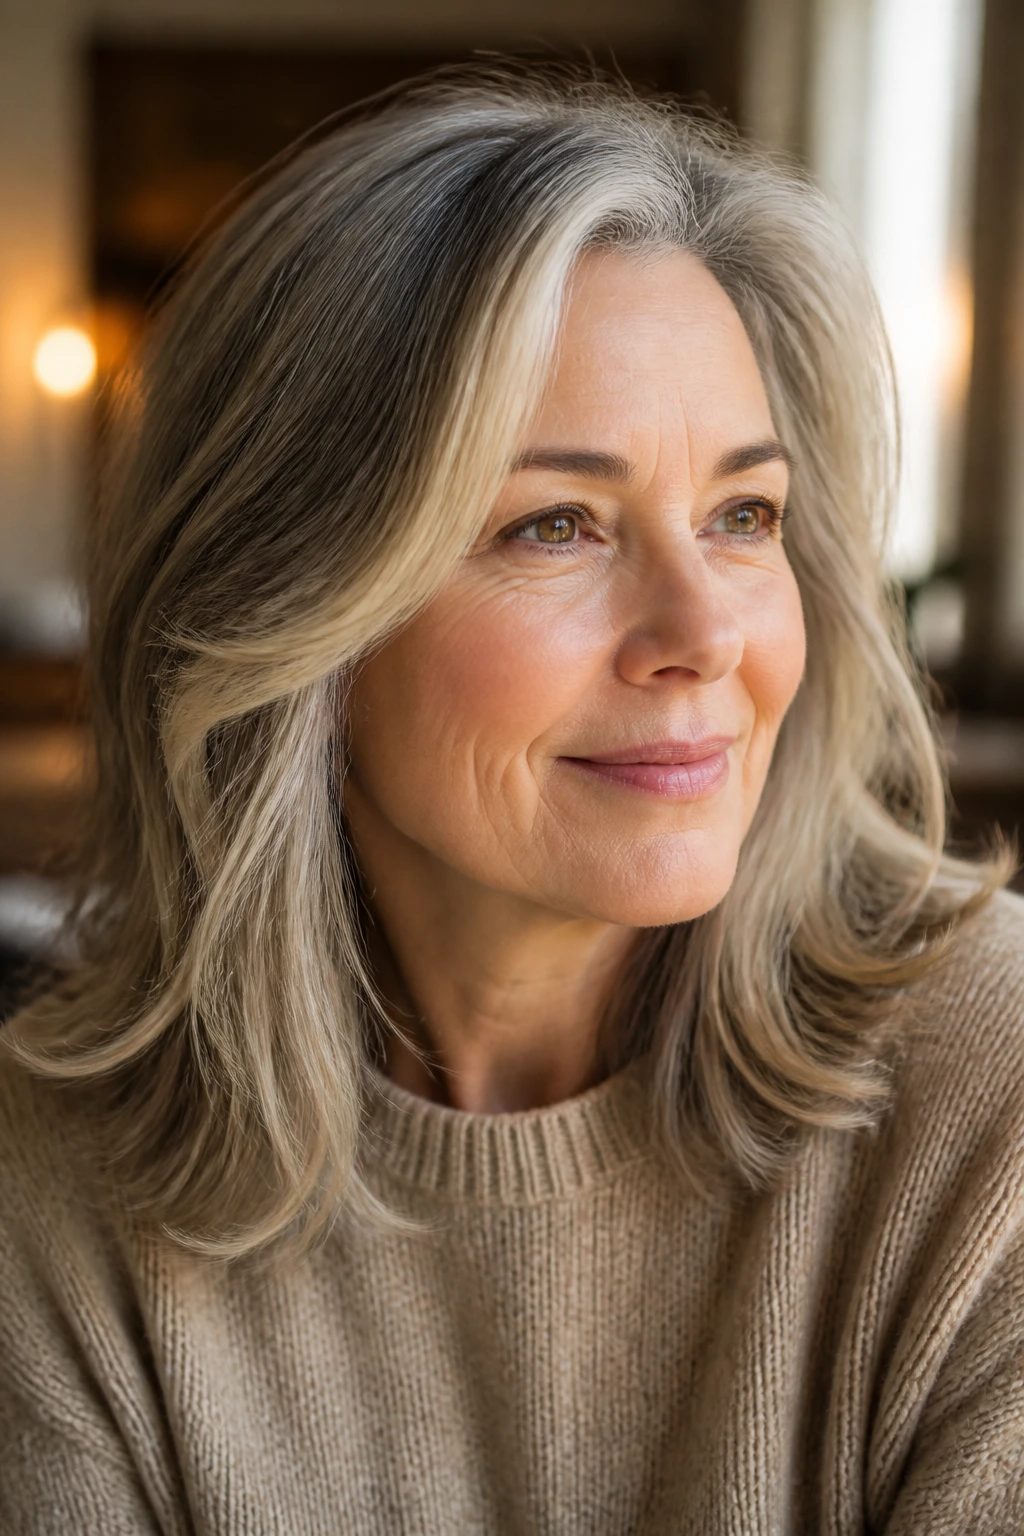
The prettiest highlight jobs on mature hair are rarely the brightest ones. They’re the ones that look like light found its way into the hair and stopped before it got rude about it.
That is the real point behind subtle highlights for older women. You want softness near the face, enough depth to keep the cut full, and a tone that doesn’t fight your skin. Anything louder usually grows old fast.
Bring photos, yes. But bring one photo of the placement and one of the tone. Those are not the same thing, and confusing them is how people end up with color that looks close in the chair and wrong the first time they wash it.
The best result is never a single trick. It’s the right light in the right place, with enough restraint to keep the hair looking like yours.
