



There is a specific kind of freedom that comes with knowing how to manipulate your own hair texture. It is not just about the final look in the mirror; it is about the hours reclaimed on a Sunday afternoon, the reduction in daily friction, and the quiet satisfaction of a style that holds its own against humidity, wind, and the inevitable wear of a busy week. Natural hair is not a monolith, and the way you approach styling depends entirely on your specific curl pattern, density, and personal tolerance for tension.
When you master the art of the twist, you are essentially unlocking a modular system for your hair. Twists offer the perfect middle ground between the time-intensive process of cornrowing and the high-maintenance requirements of a full wash-and-go. They are protective, versatile, and—most importantly—they are inherently forgiving. If you have ever felt defeated by a complex braiding pattern or a twist-out that fell flat by midday, it is likely because the technique did not account for the specific elasticity of your strands. Understanding the mechanics of the twist is the first step toward styles that actually last.
1. Two-Strand Twists
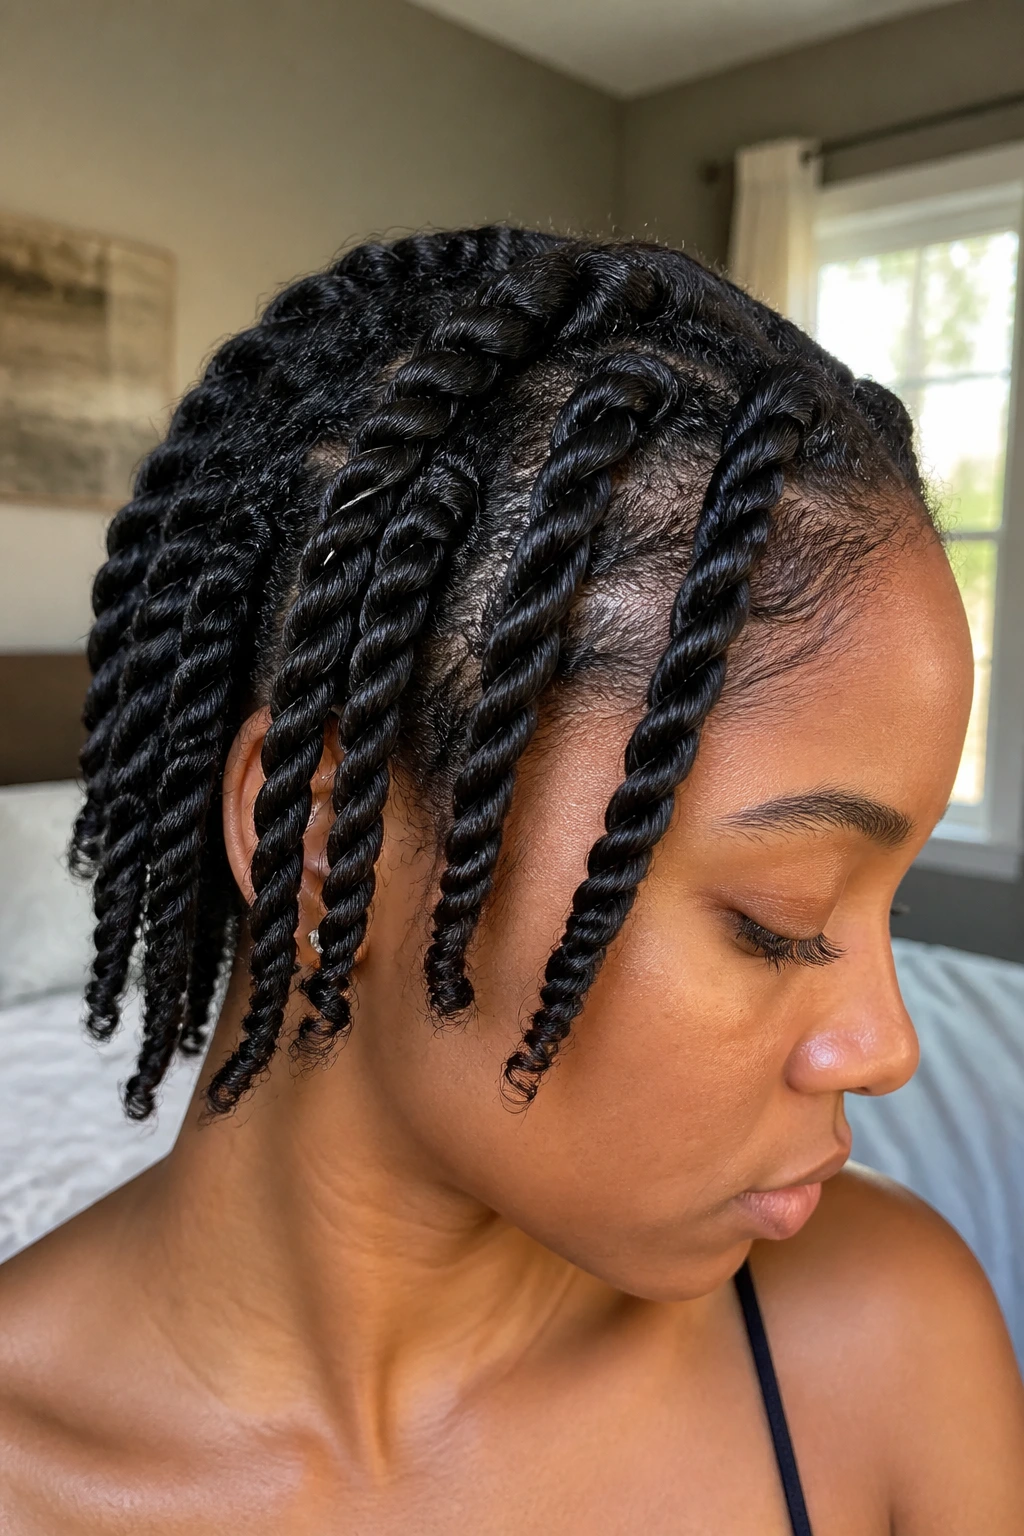
This is the foundational technique that serves as the basis for almost every other style on this list. You take two sections of hair and coil them around one another, essentially locking the strands together. For the best definition, the hair needs to be damp and saturated with a high-quality leave-in conditioner or a creamy butter base.
Why This Technique Works
The two-strand method creates a rope-like texture that mimics the natural coil pattern of tighter hair types. It is not about simply wrapping hair; it is about rotating the strands in a consistent direction while pulling them taut. If you do not pull them taut, the result is a frizzy, loose mess that loses shape within hours.
Pro Maintenance Tip
To keep these looking fresh for more than a few days, focus on the roots. Friction at the crown of your head is the enemy of a crisp twist. Using a silk or satin scarf at night is not optional—it is a functional necessity to keep those twists from unravelling while you sleep.
2. Flat Twists
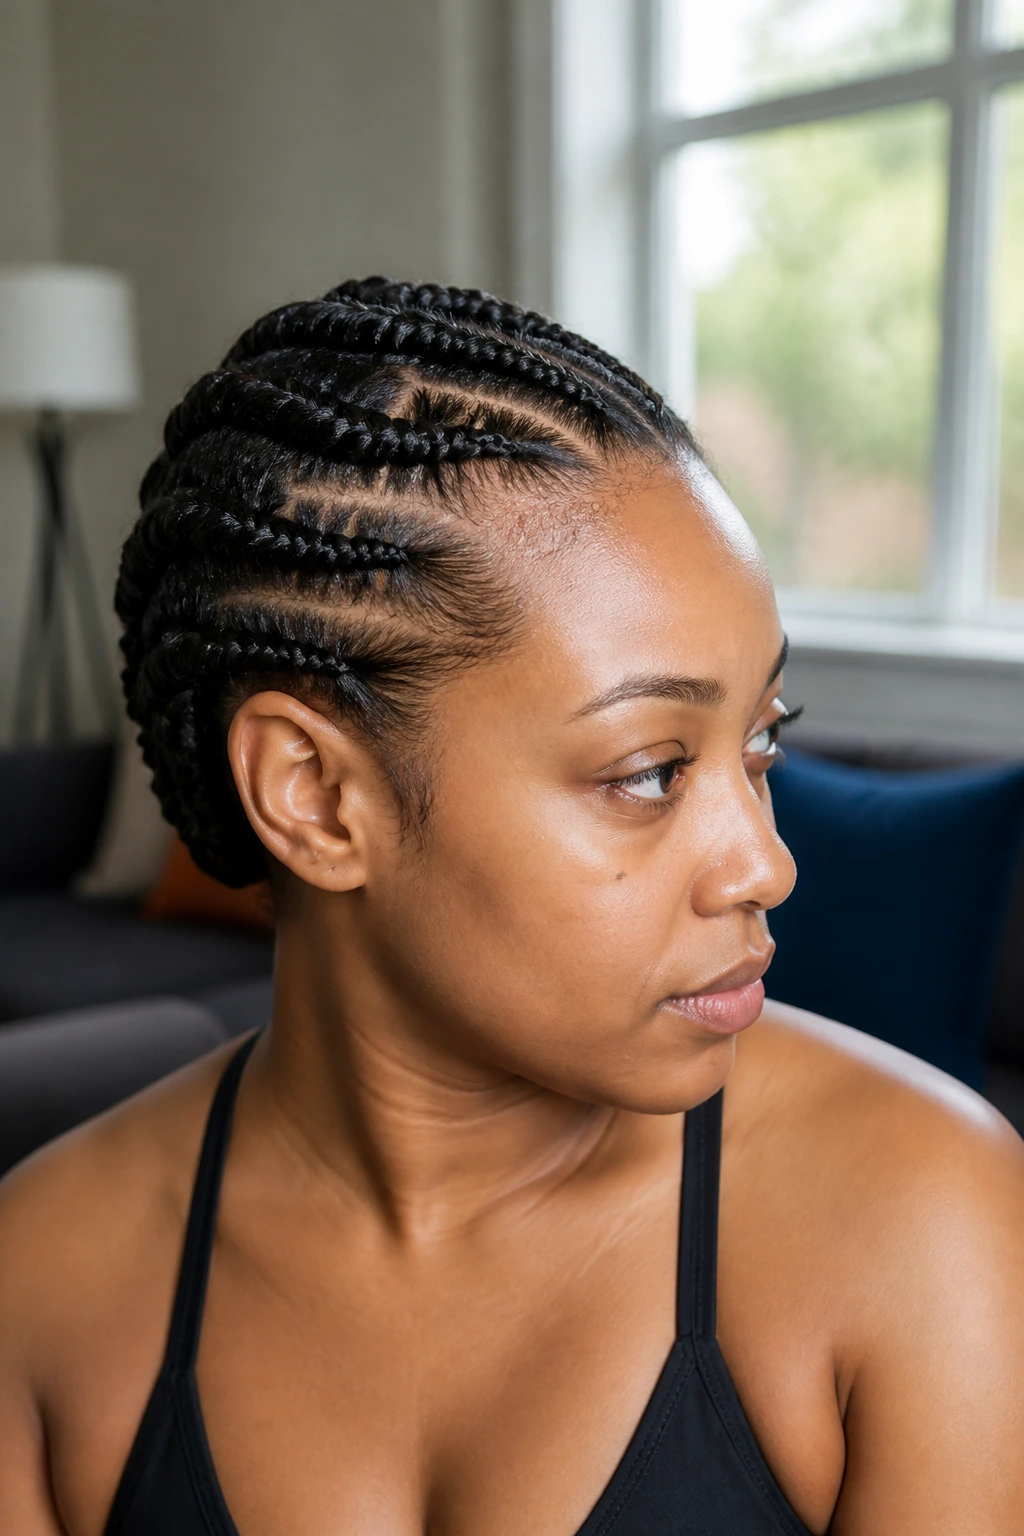
Think of this as the natural hair version of a cornrow, but without the high tension on the scalp. You create the twist directly against the scalp, grabbing small amounts of additional hair as you work your way back. It provides a flat, sleek appearance that can transition into a beautiful twist-out once taken down.
Managing Tension
Many people pull too hard when starting the base of the flat twist. You want the hair to be secure, but if you can feel your skin being pulled backward, you are going to pay for it later with thinning edges. Keep the base loose and rely on the twist technique, not brute force, to keep the style in place.
3. Mini Twists
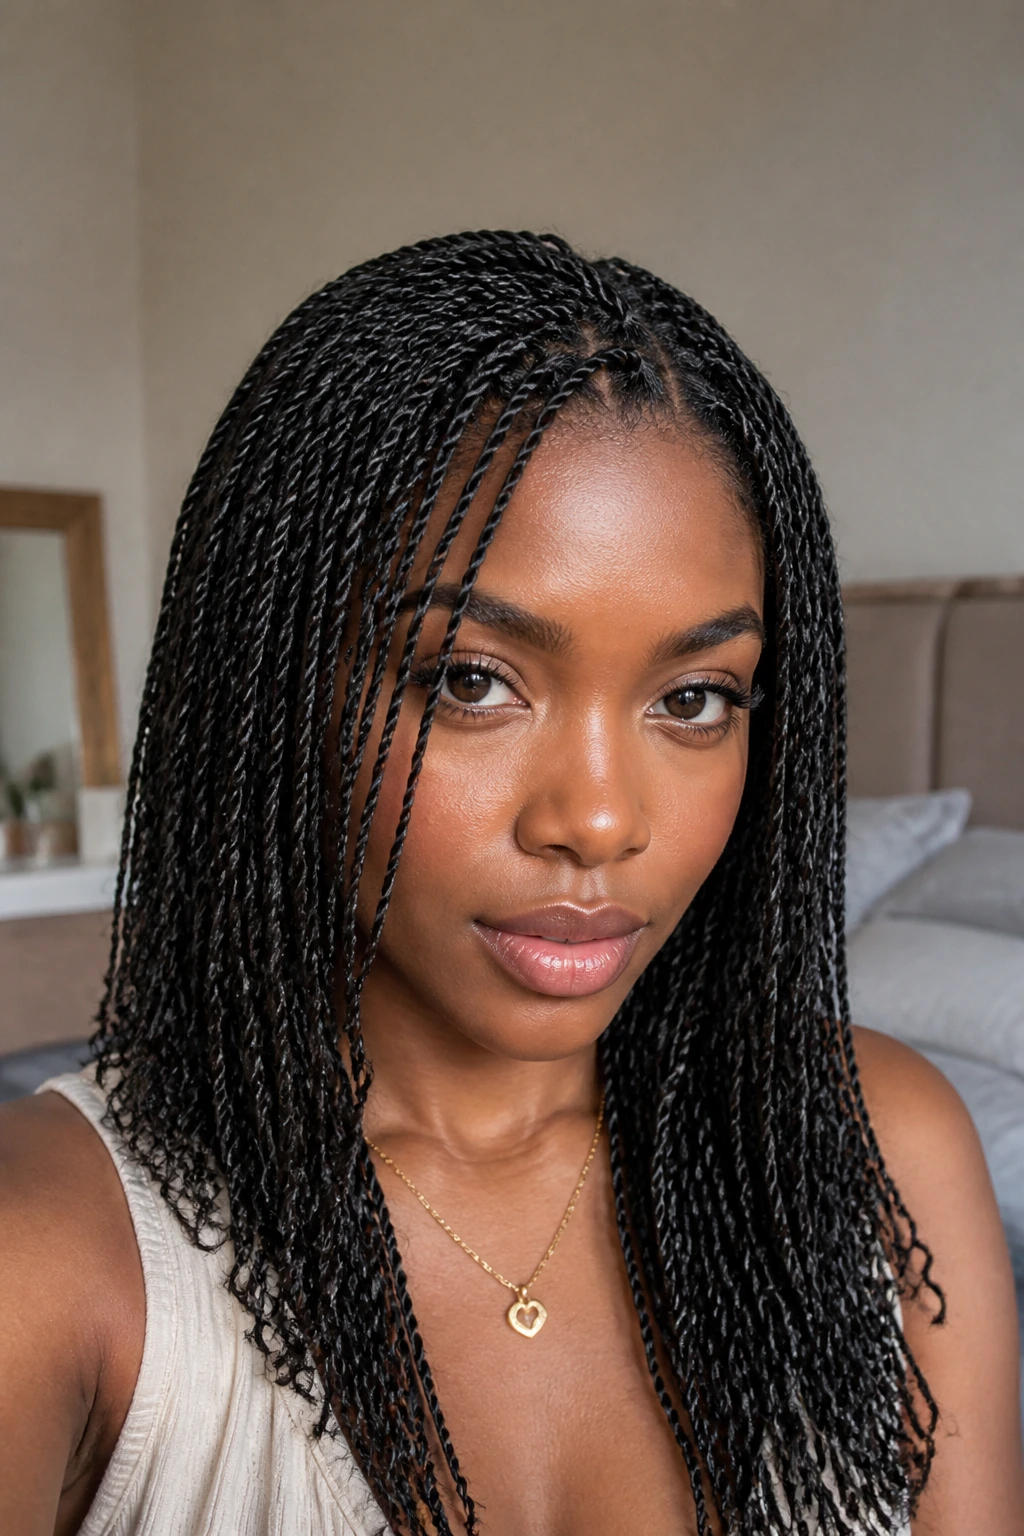
If you are looking for a protective style that can last for weeks, this is the gold standard. Mini twists are exactly what they sound like—tiny, pencil-thin sections of hair twisted from root to tip. The sheer volume of twists creates the appearance of density and makes styling incredibly easy.
The Commitment Factor
These are not a “quick fix” style. Installing them can take anywhere from four to eight hours, depending on your hair length and density. However, once they are in, you are effectively done with your hair routine for the next three to six weeks. Just be prepared for the takedown process, which requires patience and a good detangling conditioner.
4. Senegalese Twists
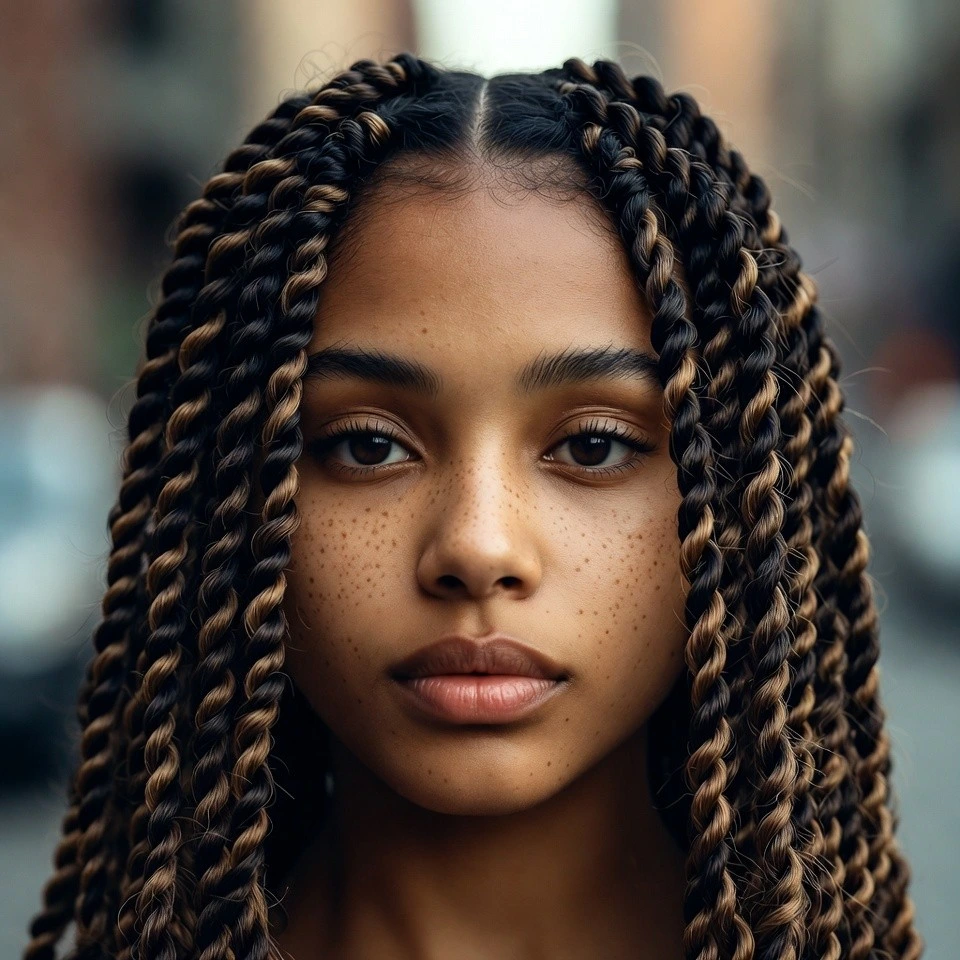
Often categorized as rope twists, these usually involve extensions to achieve that smooth, uniform look. The hair is twisted tightly and ends in a tapering point. The result is a polished, professional aesthetic that works just as well in a corporate office as it does on a casual weekend.
Choosing the Right Extension
The key here is the type of synthetic hair you use. Look for Kanekalon hair that has a slightly coarse texture. If the hair is too silky, the twists will slip out before you can even finish the back of your head. You want hair that “grips” itself.
5. Havana Twists
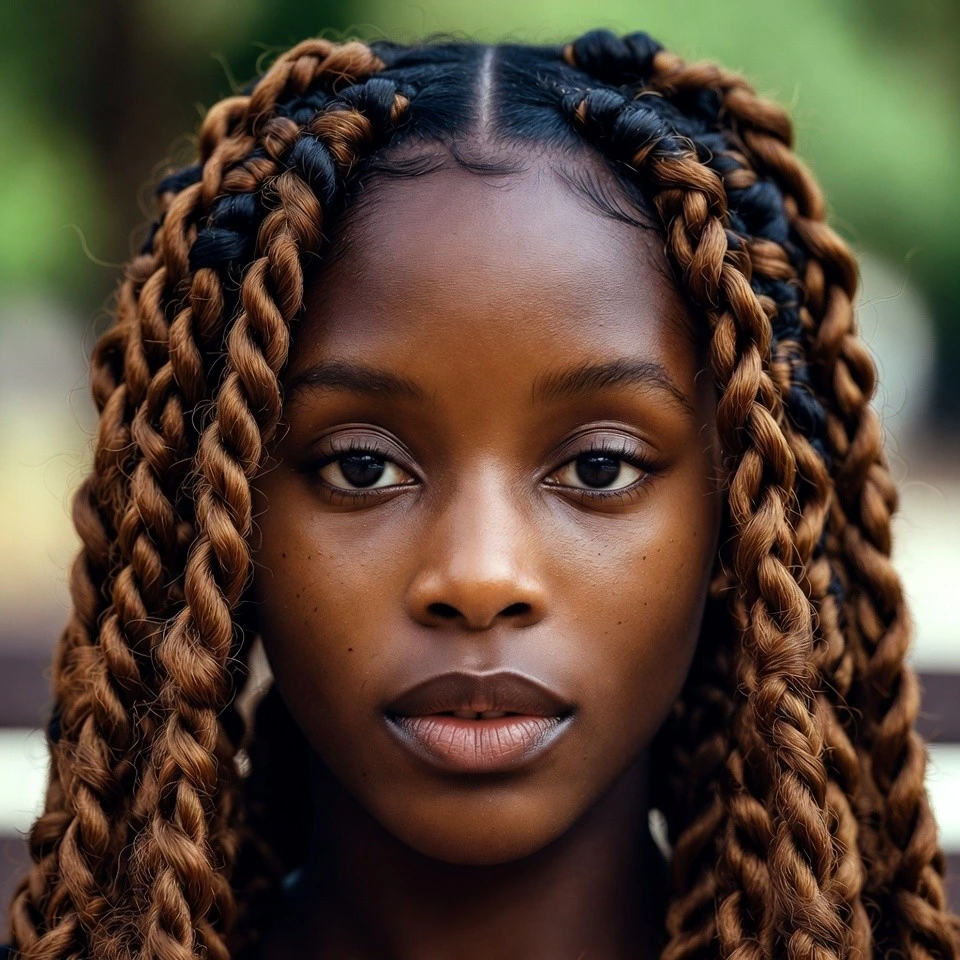
These are the larger, chunkier cousins of the Senegalese twist. They are much lighter than they look, mainly because they are installed using the “invisible root” method, which avoids a heavy, bulky knot at the scalp. They offer a more bohemian, relaxed vibe compared to the precision of tighter rope twists.
Why They Are Popular
The biggest advantage of Havana twists is the installation speed. Because the sections are so large, you can complete a full head in a fraction of the time it takes for mini twists or smaller braids. It is the perfect choice for those who value volume and speed over intricate detail.
6. Passion Twists
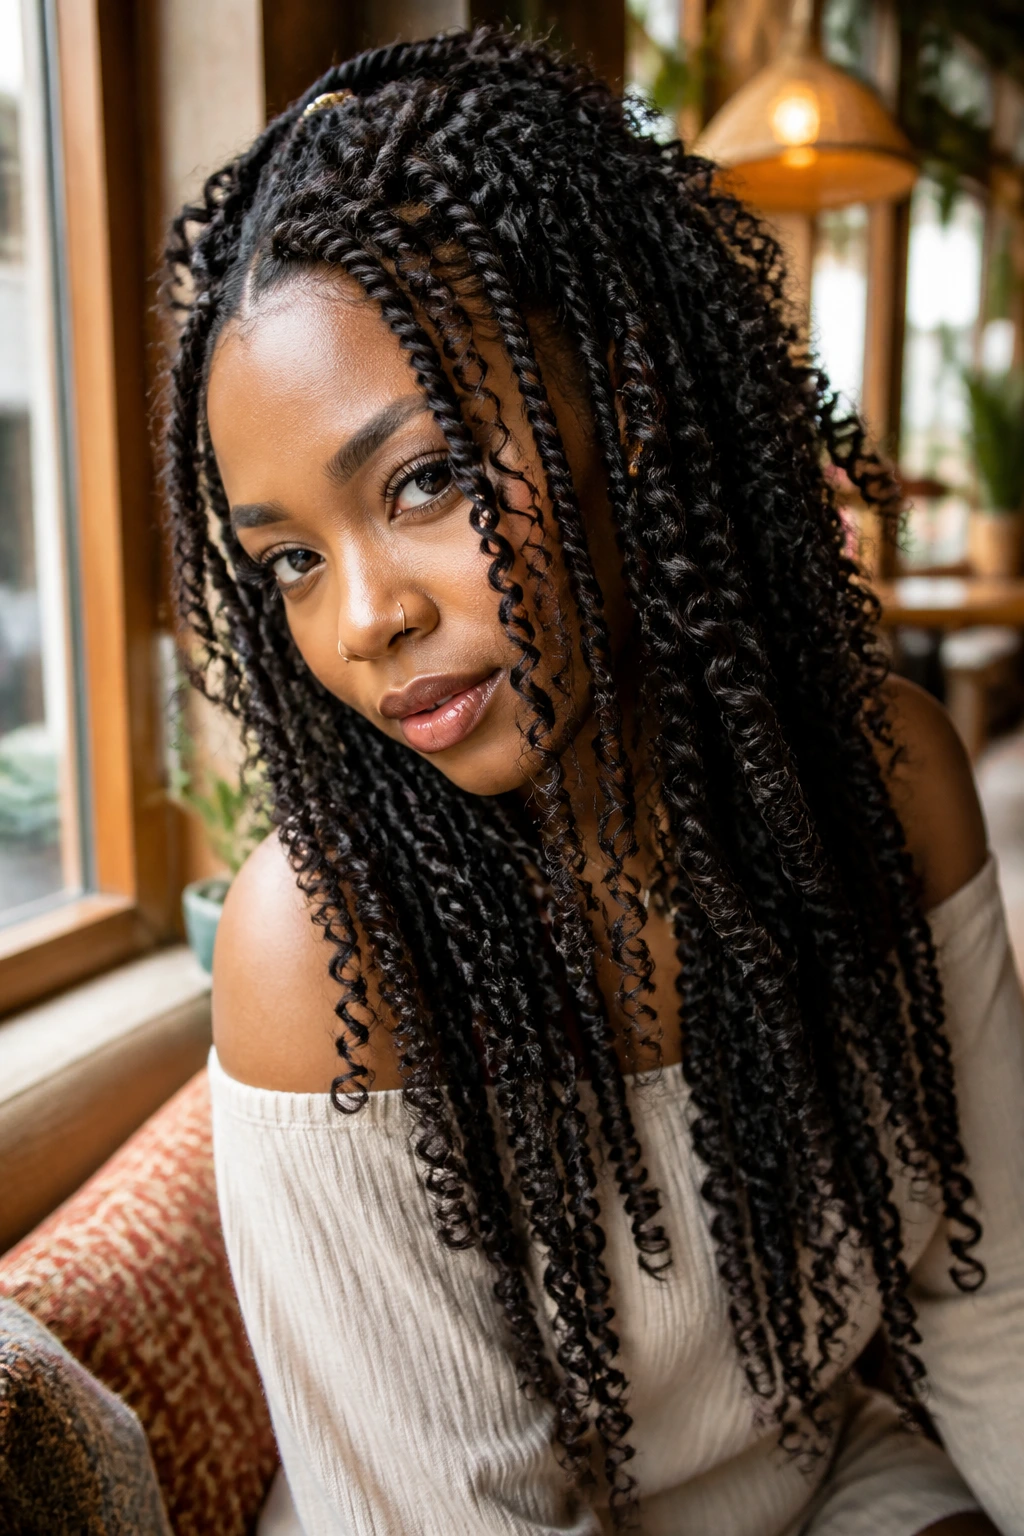
This style became a staple for a reason: it blends the texture of a twist with the curly, whimsical aesthetic of a deep-wave crochet style. The creator of this style wanted a look that was “distressed” and intentionally messy, rather than perfectly neat and uniform.
Styling the Ends
The beauty is in the curl. Most people leave the ends of the twists curly or use a crochet hook to pull the extension hair through, leaving a curled tail. When buying hair for this, make sure it is pre-looped or pre-curled to save yourself the nightmare of trying to force synthetic fibers into a coil shape.
7. Marley Twists
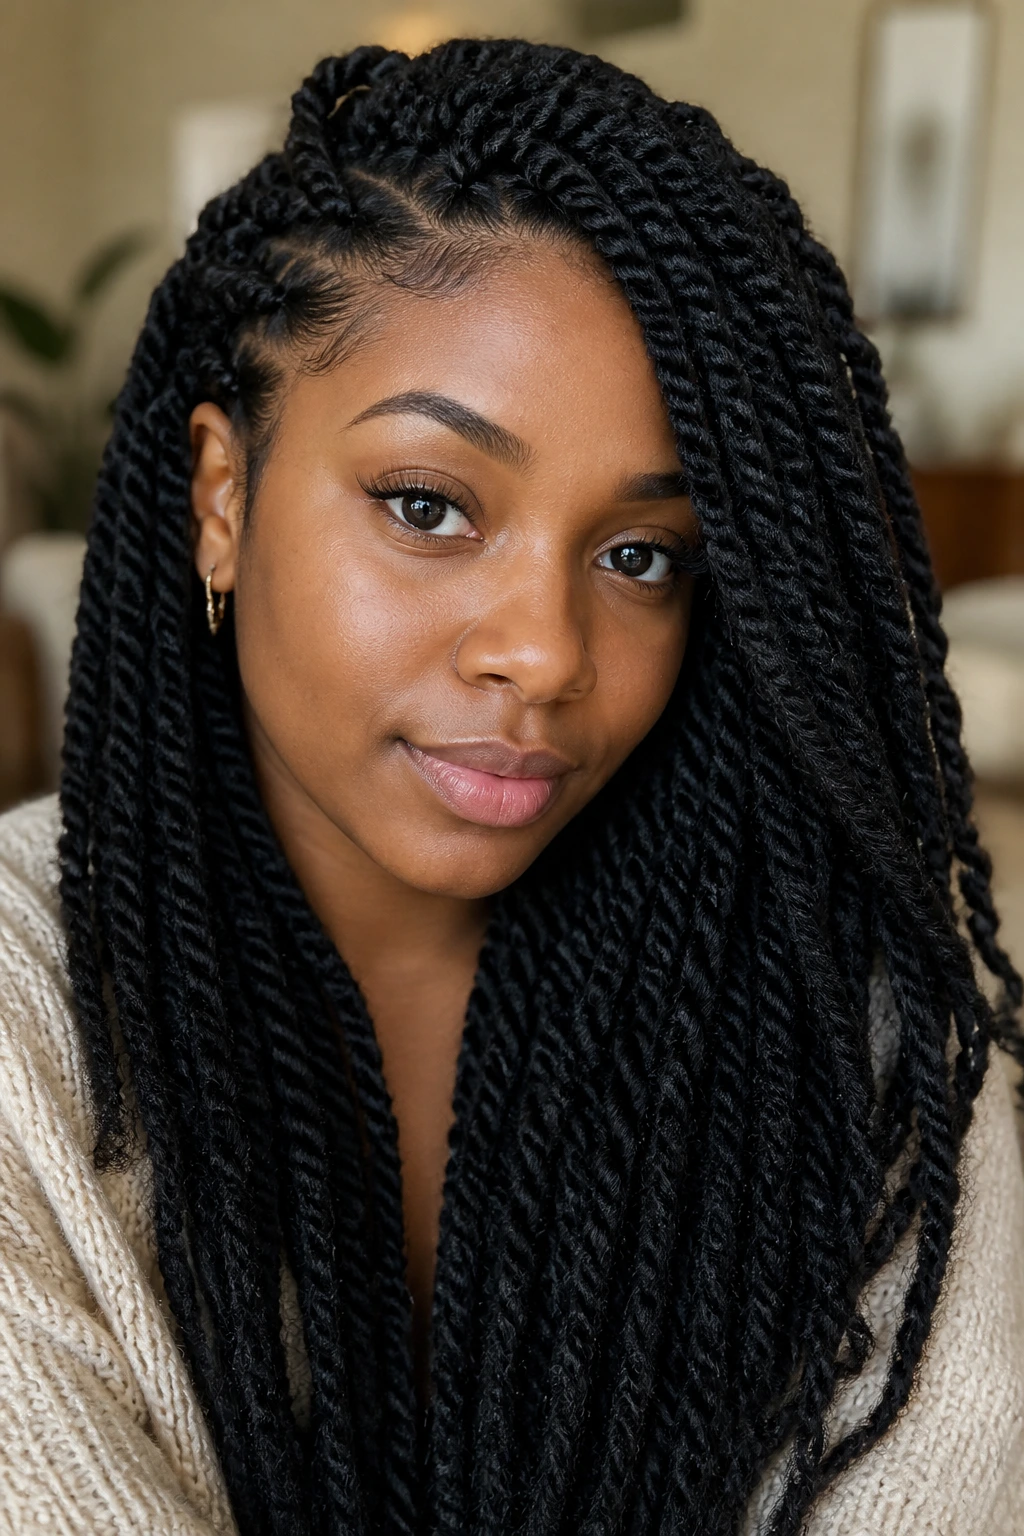
Marley hair has a very specific, matte texture that mimics the look of natural Afro-textured hair. These twists are meant to look like your own hair, just extended. They are coarser, lighter, and more durable than smooth, synthetic options, making them a fantastic choice for a rugged, natural look.
The Texture Advantage
Because Marley hair is so matte, it holds knots exceptionally well. You do not have to worry about the hair unravelling as much as you would with smooth, shiny extensions. However, this texture can also be a bit rough on your fingers during installation. Wear gloves if your skin is sensitive.
8. Jumbo Twists
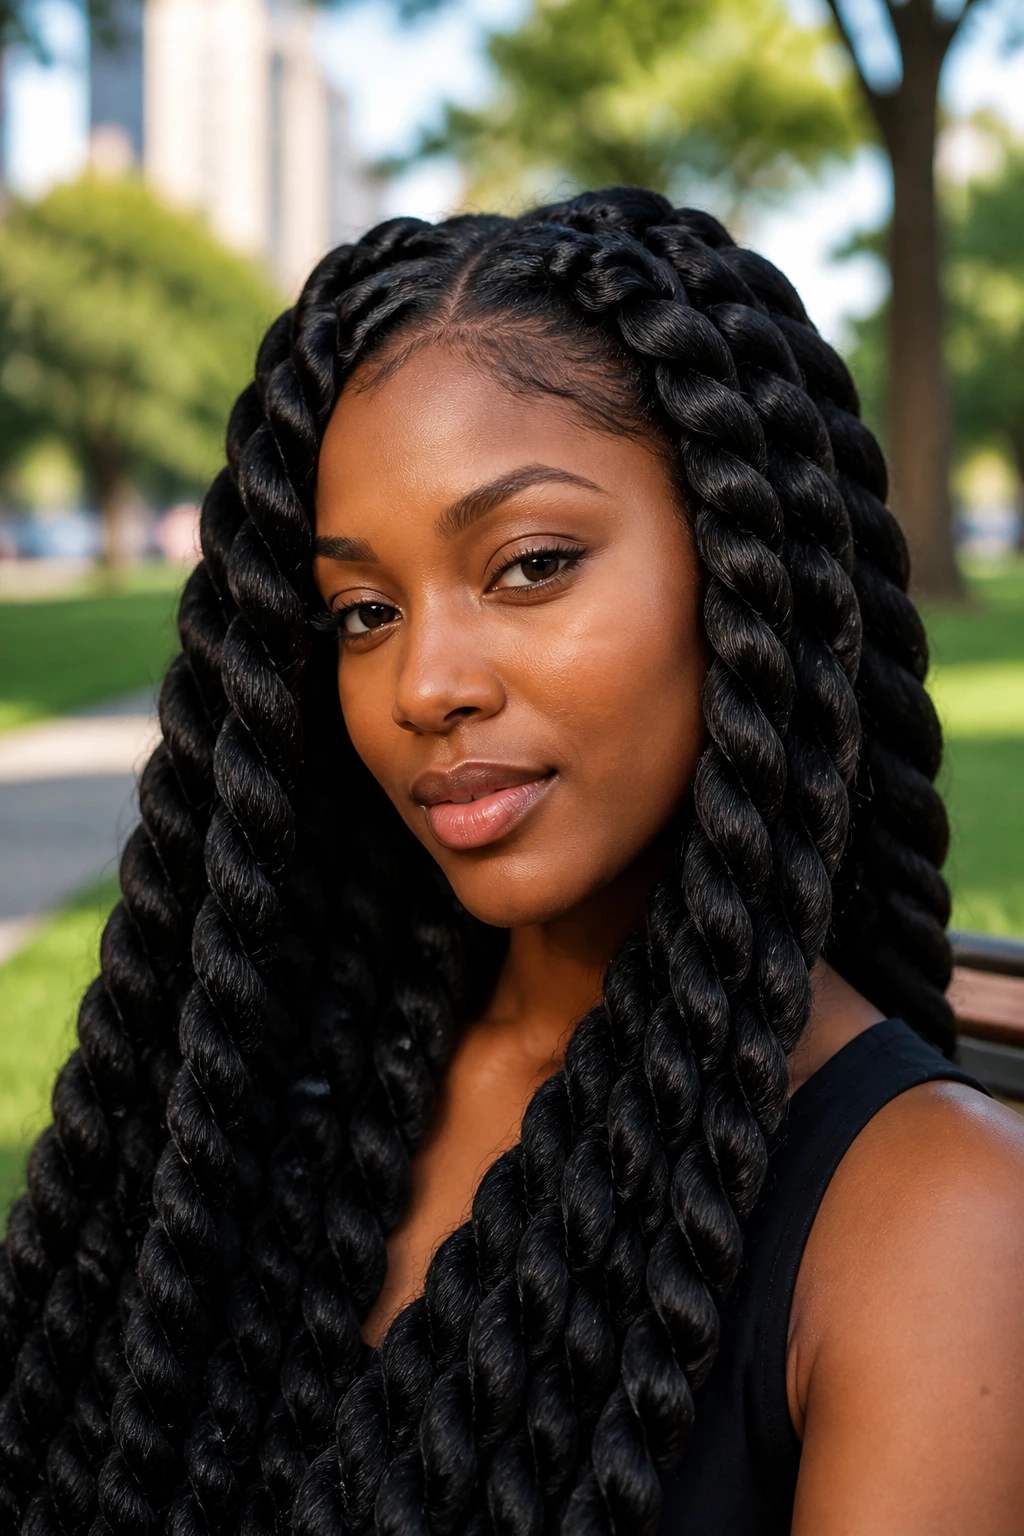
Jumbo twists are the ultimate low-effort, high-impact style. We are talking about big, sectioned twists that make a statement. They are excellent for protecting the hair because the sheer size of the sections means there is less manipulation of the actual strands.
The Weight Issue
Be careful not to make the sections too big, or you end up with heavy “ropes” that put unnecessary strain on your hair follicles. Use more hair to create width, but keep the root section size moderate to ensure the weight is distributed properly across your scalp.
9. Kinky Twists
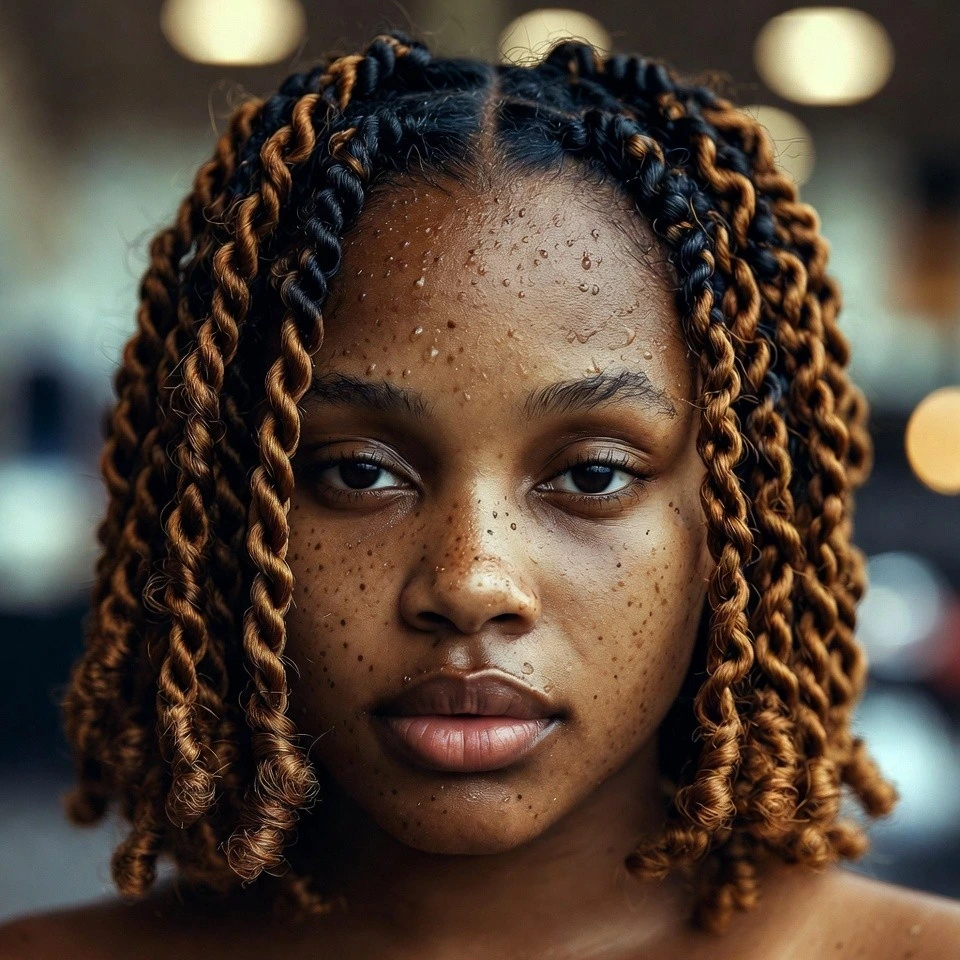
These were the rage in the 90s and early 2000s, and they are back because they are incredibly reliable. They use hair that is essentially “kinky” or “afro” textured to create a twist that looks like thick, healthy natural hair. They are usually shoulder-length or slightly longer and have a distinctive, choppy appearance.
Why They Last
The texture of the extension hair is the secret sauce here. It mimics the structure of natural hair, so the twist doesn’t feel like a foreign object on your head. They are also incredibly resilient—you can swim, sweat, and live in them, and they still look decent.
10. Crochet Twists
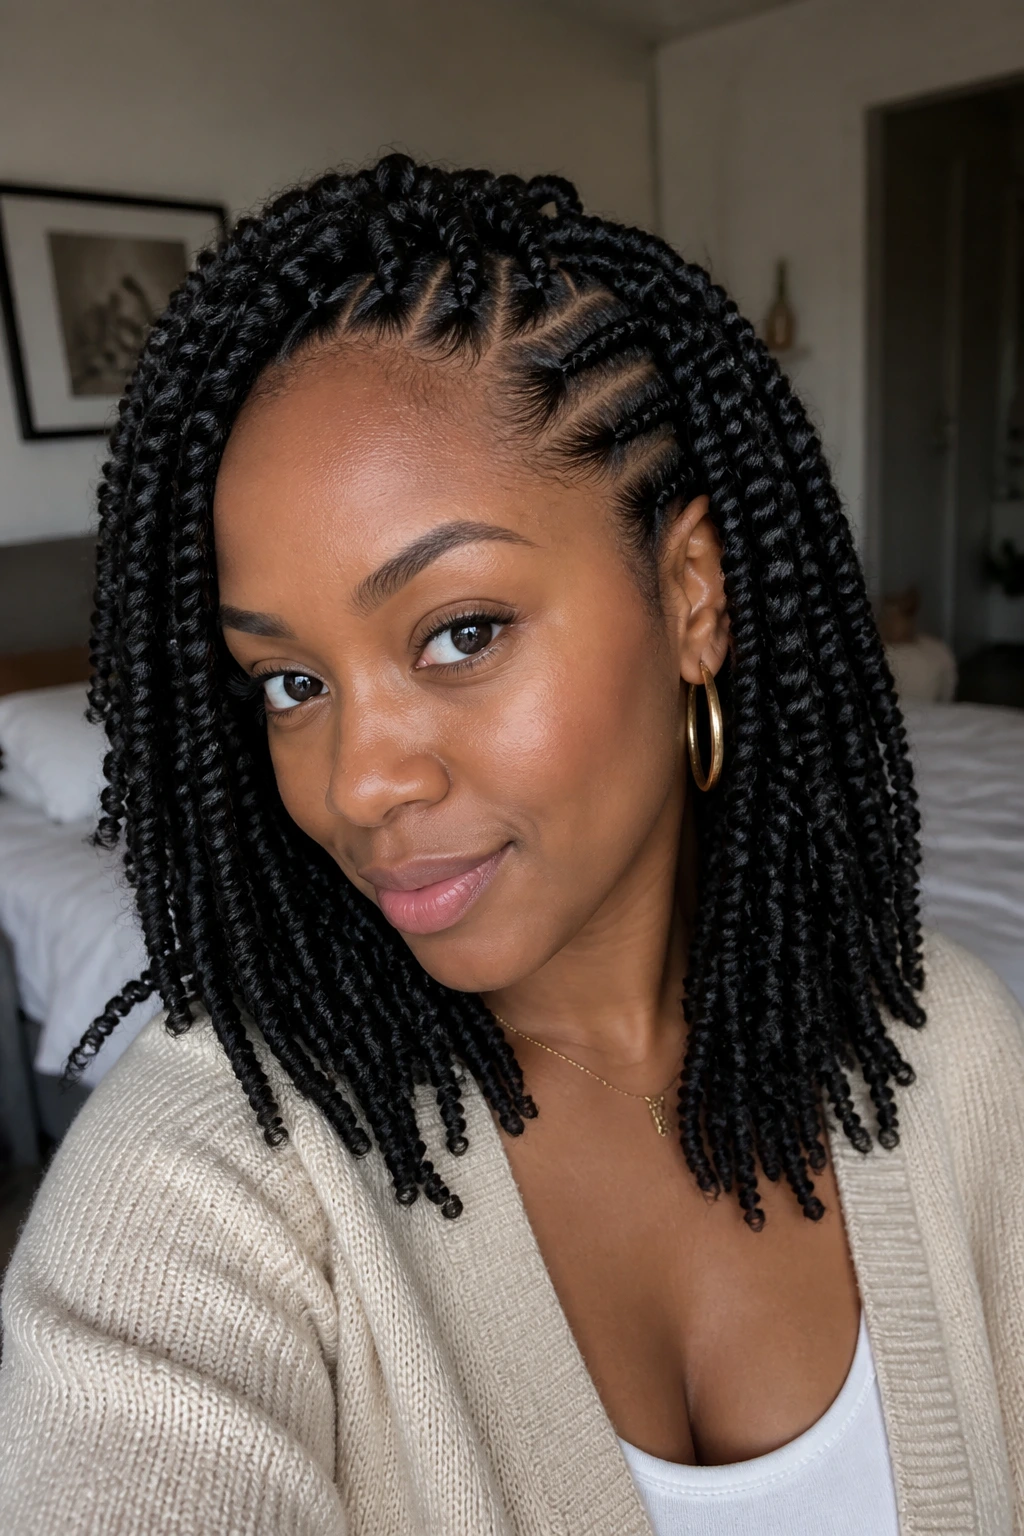
Technically, this is an installation method rather than a specific twist style, but the result is a distinct look. You cornrow your natural hair back and use a crochet needle to pull pre-twisted hair through the cornrows. It is a massive time-saver.
The Prep Work
Your cornrow pattern dictates how the hair lays. If you want a natural-looking side part, you must plan your cornrows with that part in mind. Do not just braid straight back and expect the hair to miraculously flip to the side; the roots will show.
11. Yarn Twists
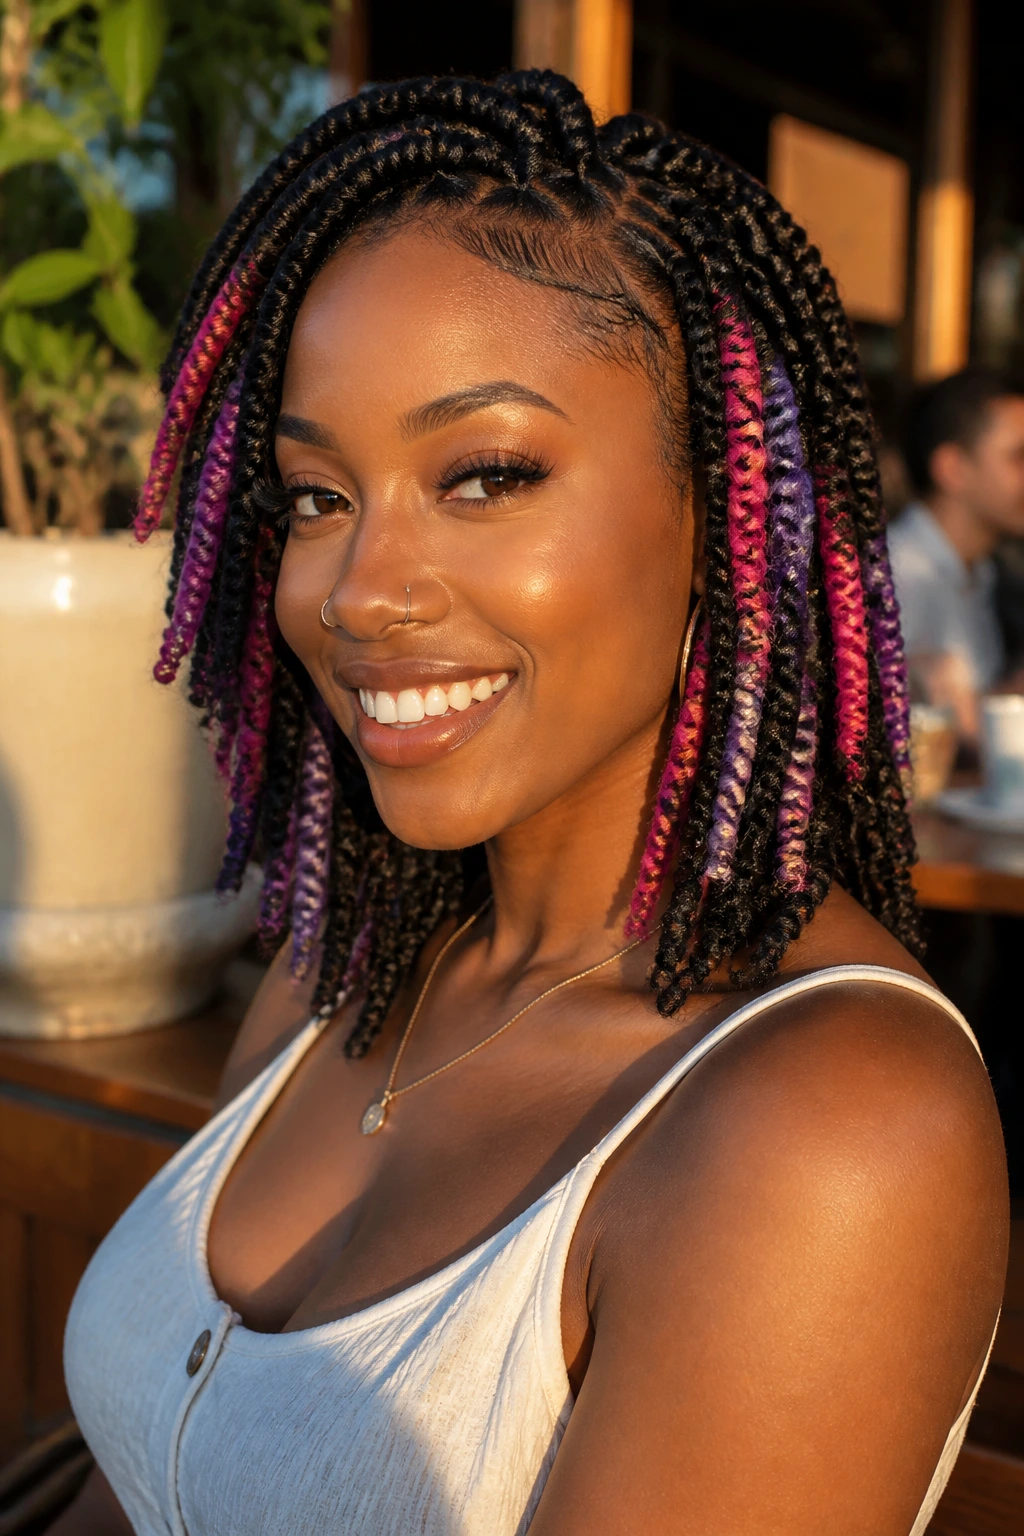
If you are on a budget or looking for a lightweight option, yarn is a brilliant alternative to synthetic hair. Yes, actual acrylic yarn. It comes in any color imaginable, costs pennies, and is incredibly light.
The Moisture Myth
There is a persistent rumor that yarn dries out your hair. This is only true if you do not moisturize your natural hair before twisting it. If you coat your hair in a deep leave-in cream, the yarn is just a protective covering. It will not “suck” the moisture out of a well-hydrated strand.
12. Goddess Twists
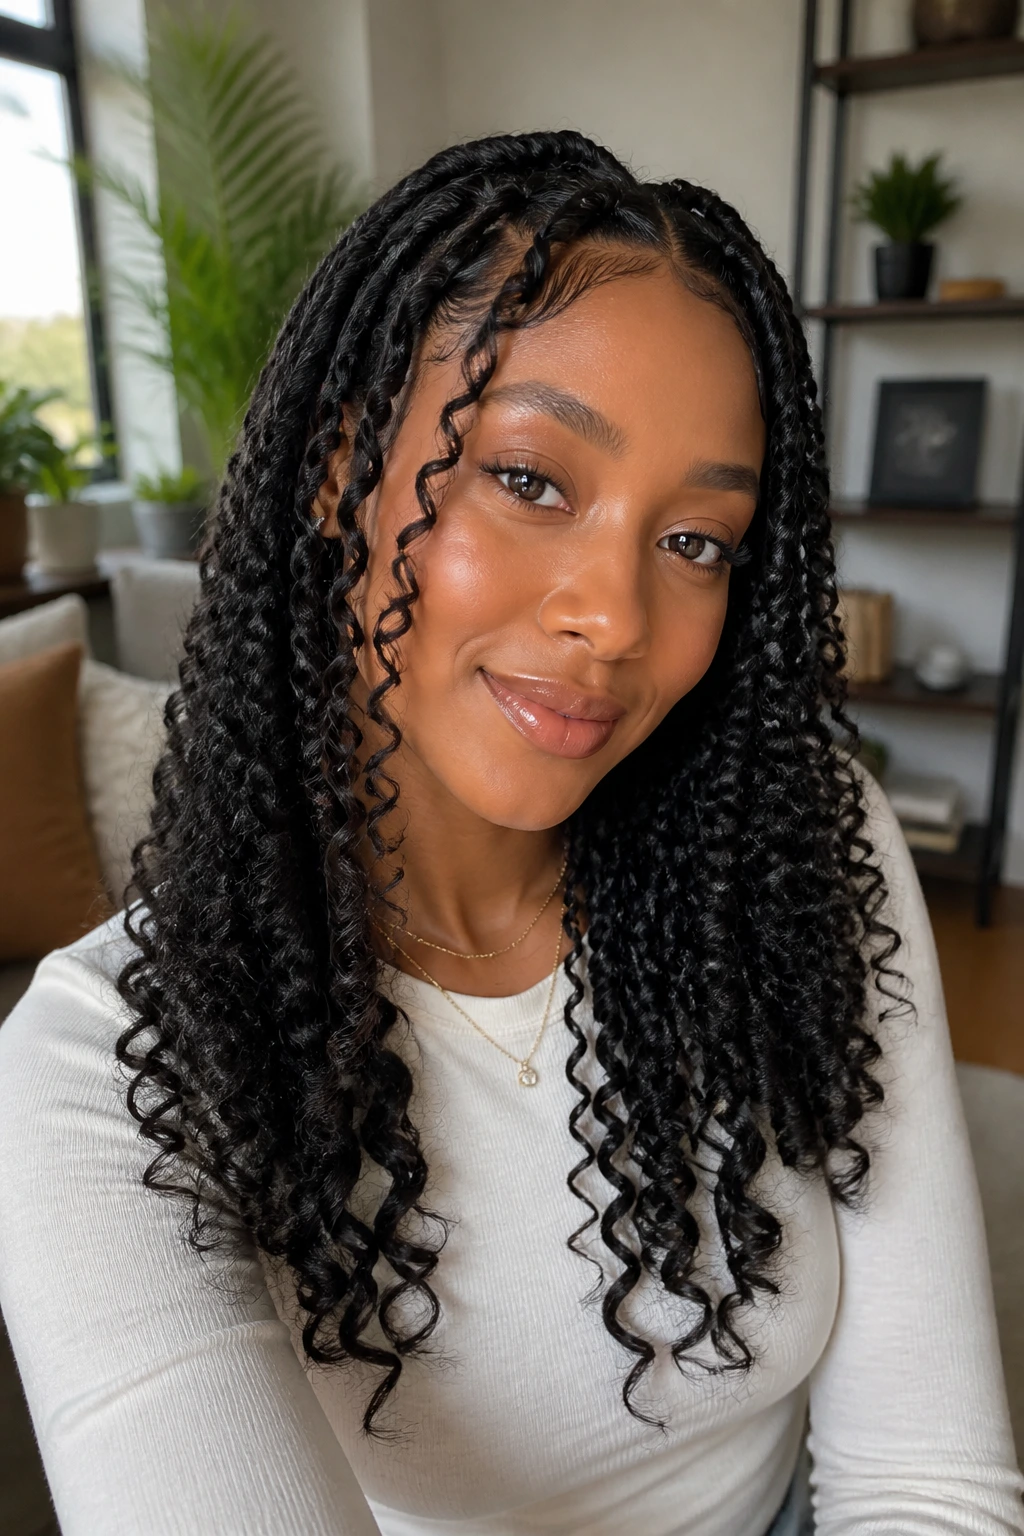
Goddess twists are essentially twists with a little extra flair—specifically, curly strands left out throughout the length of the twist. It creates a soft, feminine, and ethereal look. It requires more maintenance than a standard twist because the loose curls can get tangled if you are not careful.
Maintenance Strategy
Keep a lightweight hair oil handy. The curly pieces left out are prone to dryness because they are exposed to the air. A quick spritz of water and a light oil application every couple of days will keep those curls bouncy instead of matted.
13. Spring Twists
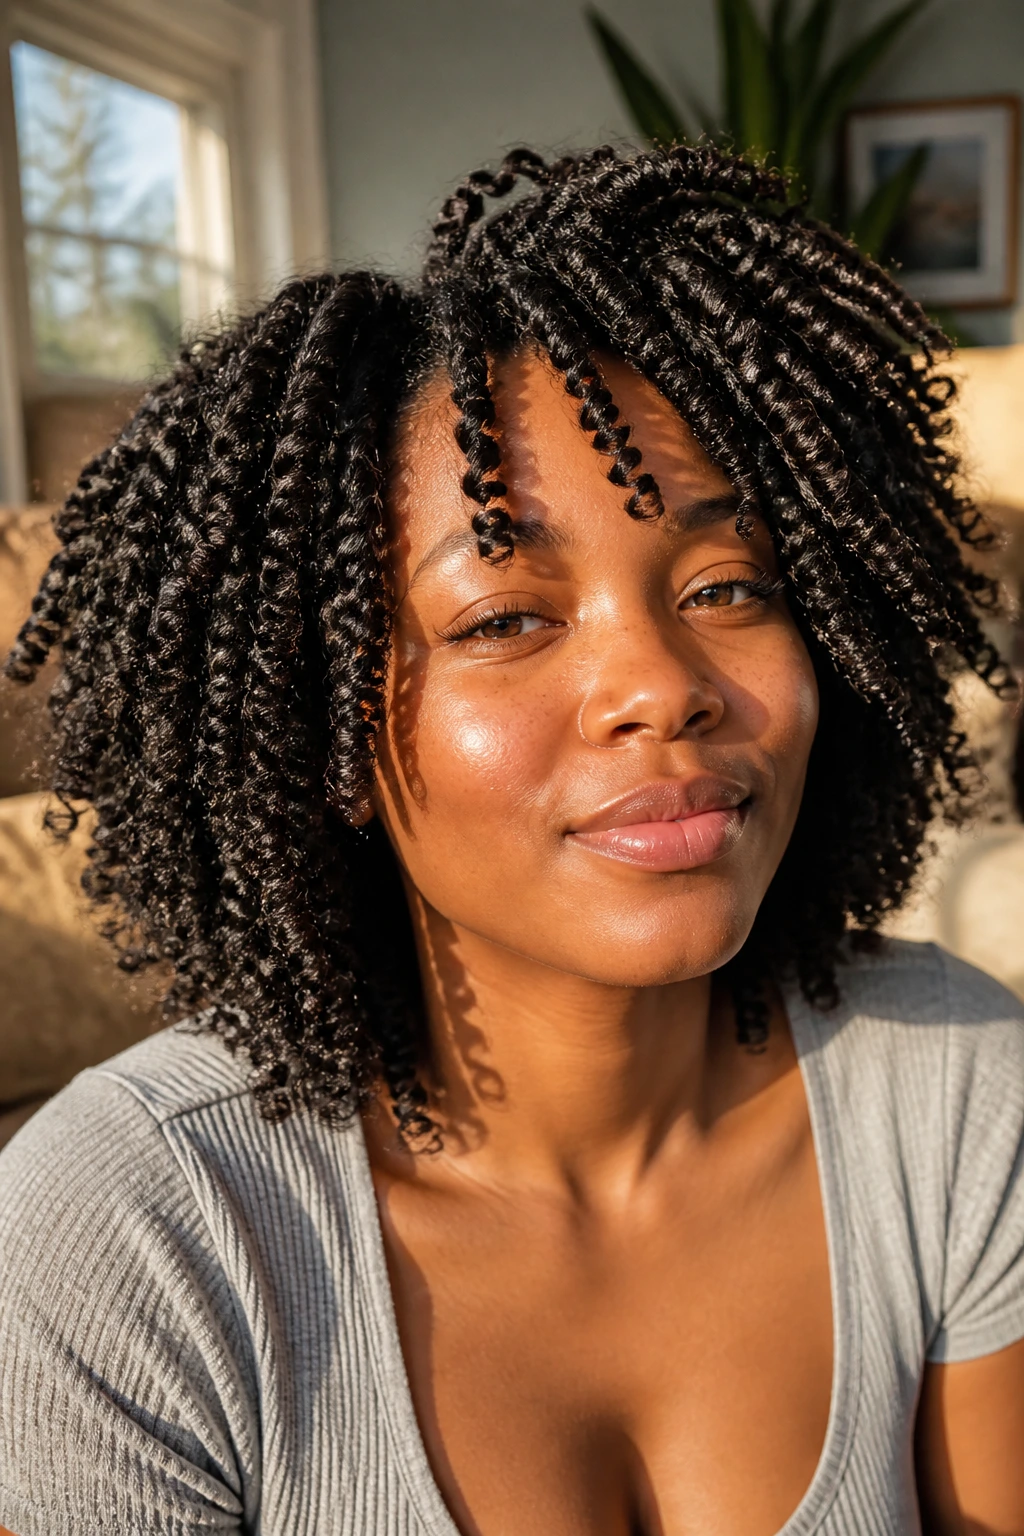
These are bouncy, coiled, and incredibly lightweight. They are made using a specific type of extension hair that is pre-coiled, similar to a slinky. When you twist them, they retain that springiness, giving the hair a lot of movement.
The Bounce Factor
You do not want to pull these too tight. The whole appeal is the bounce. If you twist them too tightly, you lose the coil pattern and the hair looks like a regular, stiff twist. Let the hair do the work for you.
14. Butterfly Twists
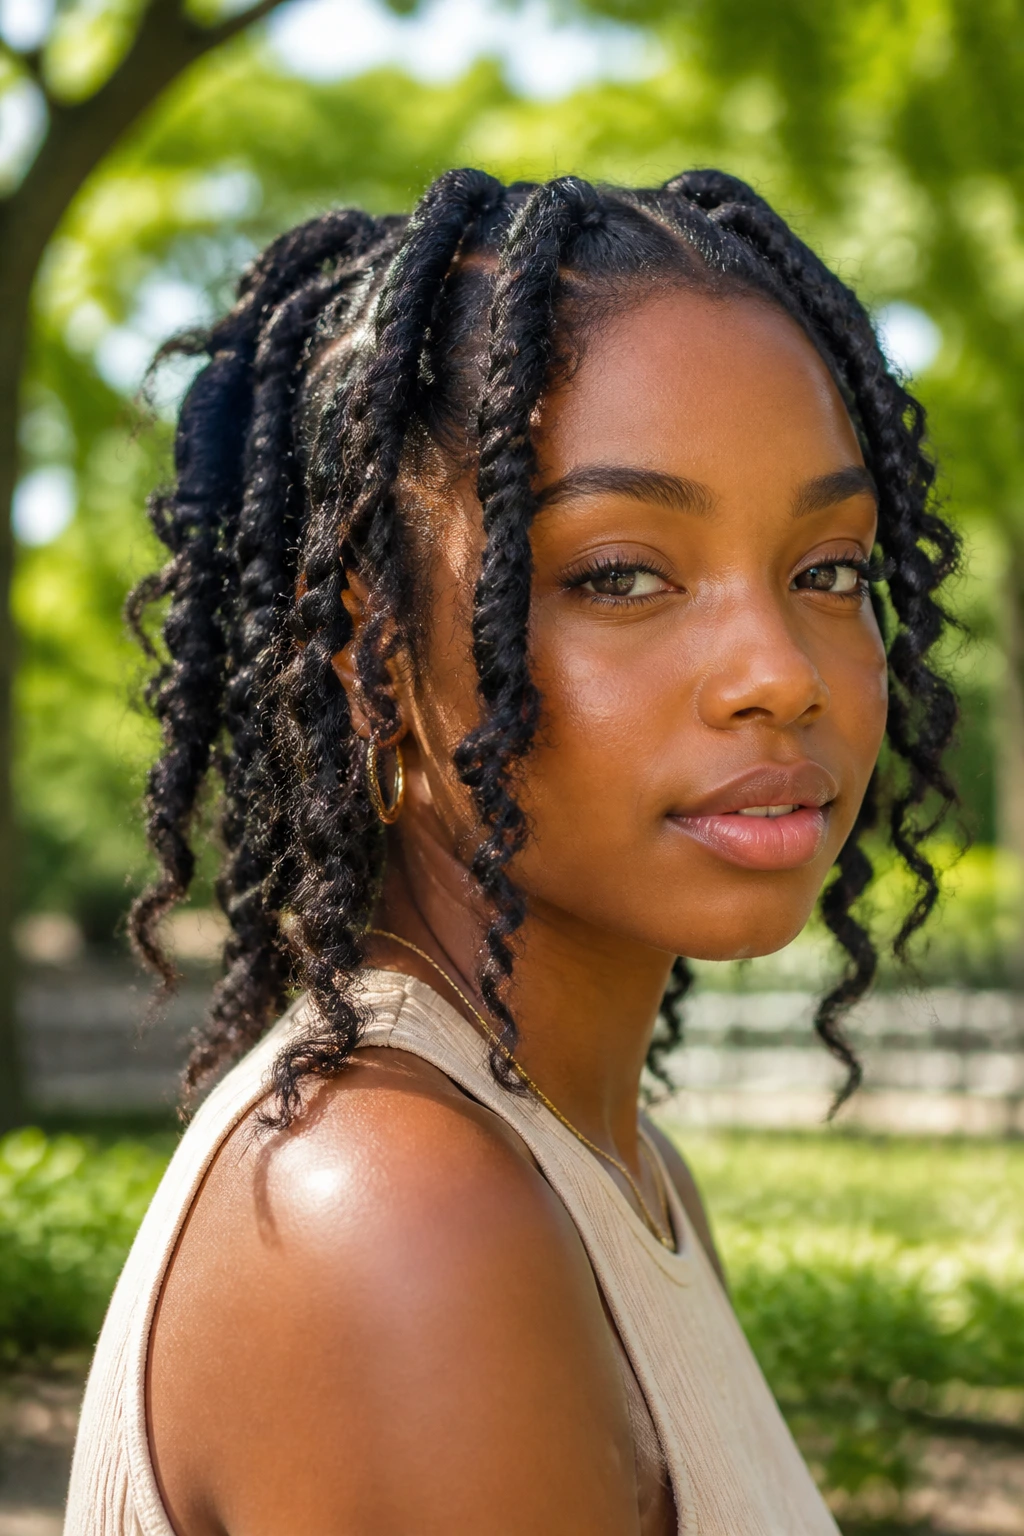
This style is all about “distressing.” You create a standard twist and then pull small loops of the hair out along the length of the twist to create a frayed, bohemian, butterfly-wing effect. It is a highly textured style that looks better the “messier” it gets.
The Artistic Approach
This is not a style for the perfectionist. If you spend time trying to make every loop perfectly symmetrical, you will defeat the purpose. The goal is an organic, effortless, lived-in look. Embrace the frizz; it adds to the aesthetic.
15. Bohemian Twists
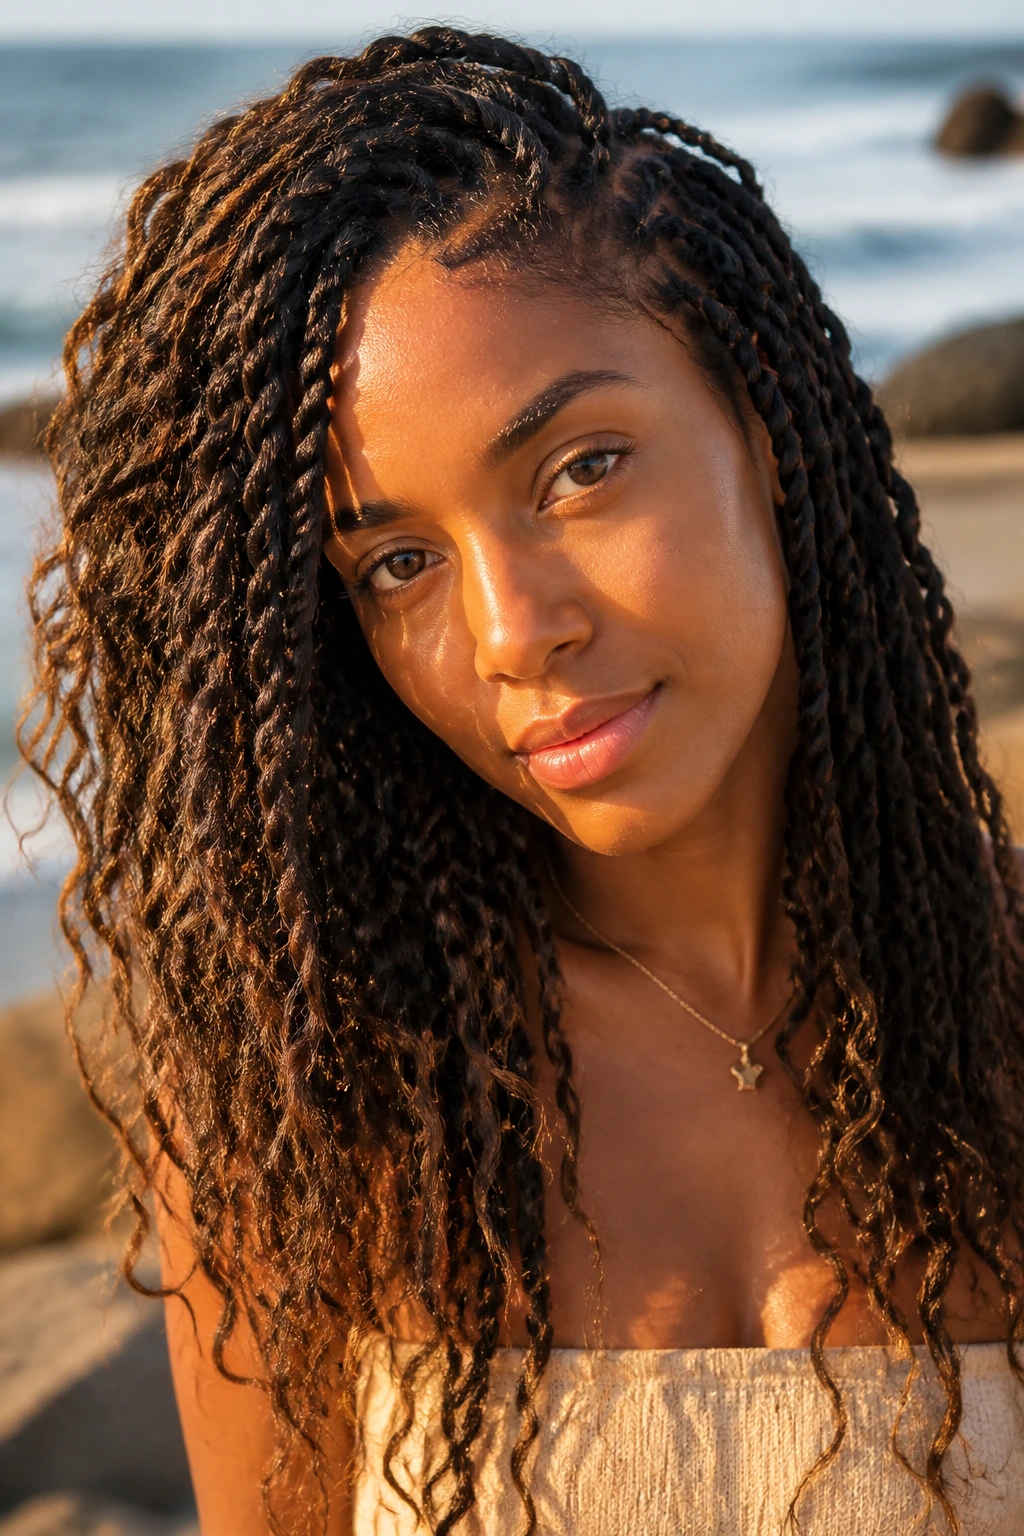
Similar to goddess twists, these focus on a carefree, beachy vibe. They are usually done with a mix of human and synthetic hair to achieve a very natural, wavy texture throughout. It is the “I just woke up looking like this” style of the natural hair world.
The Tangle Risk
Because these often involve human hair or blended hair to get that soft wave, they are prone to tangling. You cannot just wrap your hair in a scarf and sleep on a cotton pillowcase. A satin bonnet is mandatory to keep the waves from becoming a knotted mess by morning.
16. Rope Twists
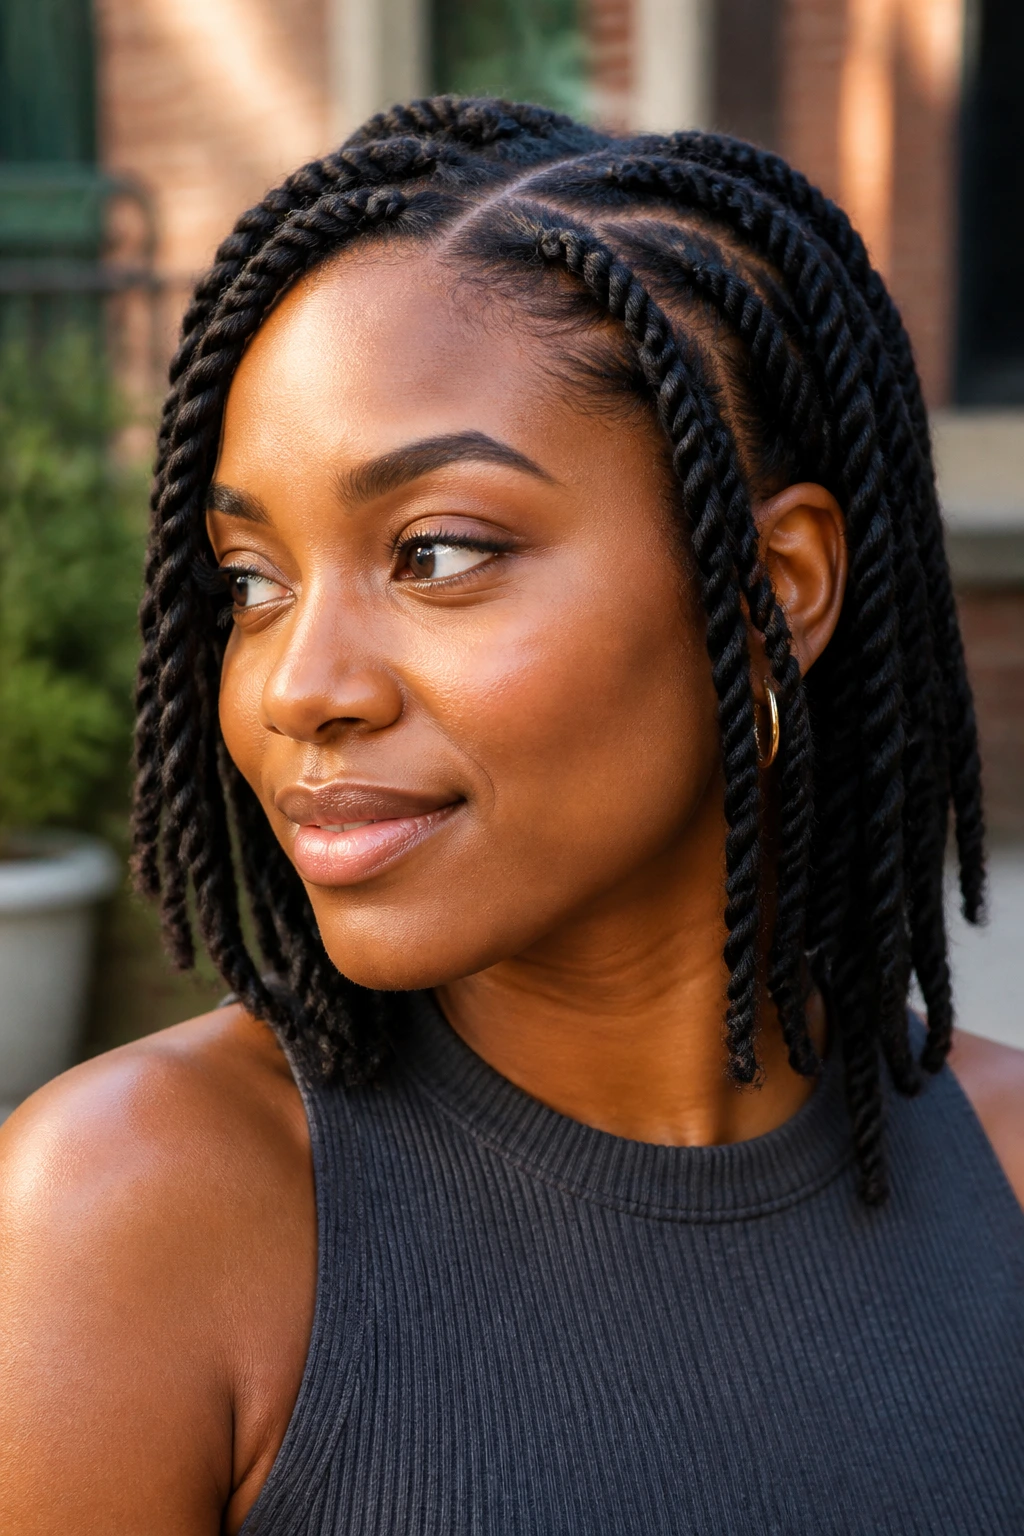
While similar to Senegalese twists, rope twists specifically refer to the technique of twisting two strands tightly in one direction and then wrapping them together in the opposite direction. This creates a very tight, solid “rope” appearance that is distinct from a standard two-strand twist.
The Tension Technique
The trick is the tension. You need to keep consistent pressure throughout the entire length of the twist. If you loosen your grip halfway down, the twist will unravel. This style is excellent for those who want a very neat, clean-cut appearance.
17. Bantu Knot Twists
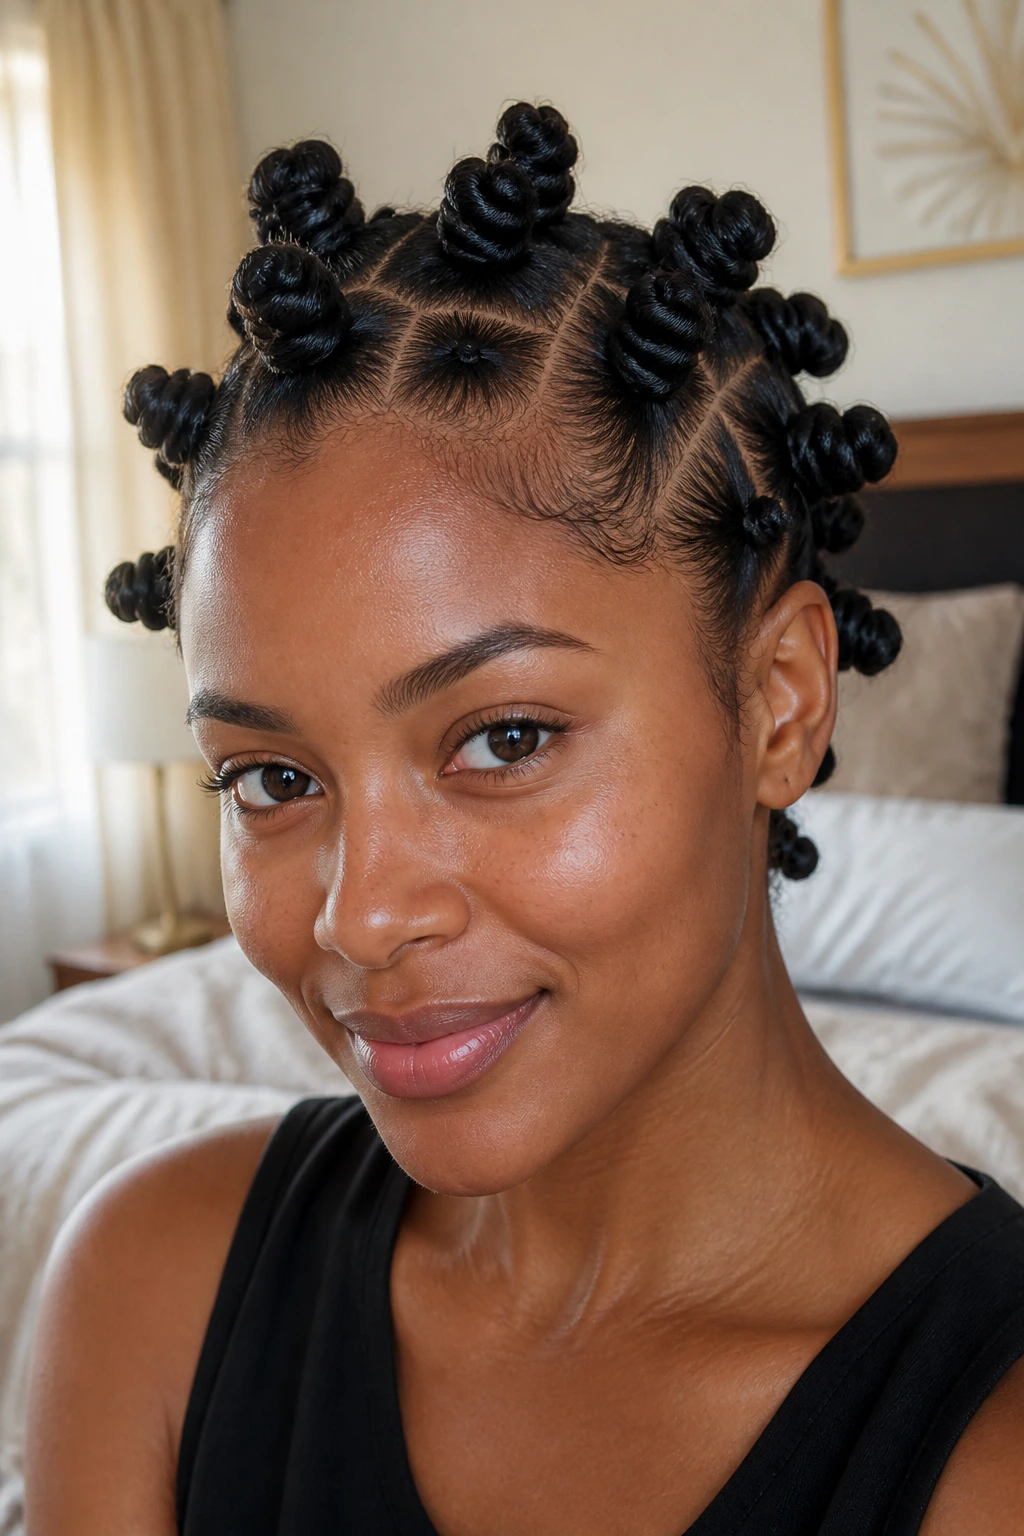
This is a hybrid style. You take sections of hair, twist them into individual twists, and then wrap those twists into small bantu knots. It gives you the volume of a bantu knot but with the added texture and protection of a twist.
Why This Style Rocks
It protects your ends perfectly. The ends of your hair are tucked away inside the base of the knot, safe from friction and breakage. It is a great style to do when you want to stretch your hair, as taking down the knots reveals a beautiful, tight curl pattern.
18. Half-Up Half-Down Twists
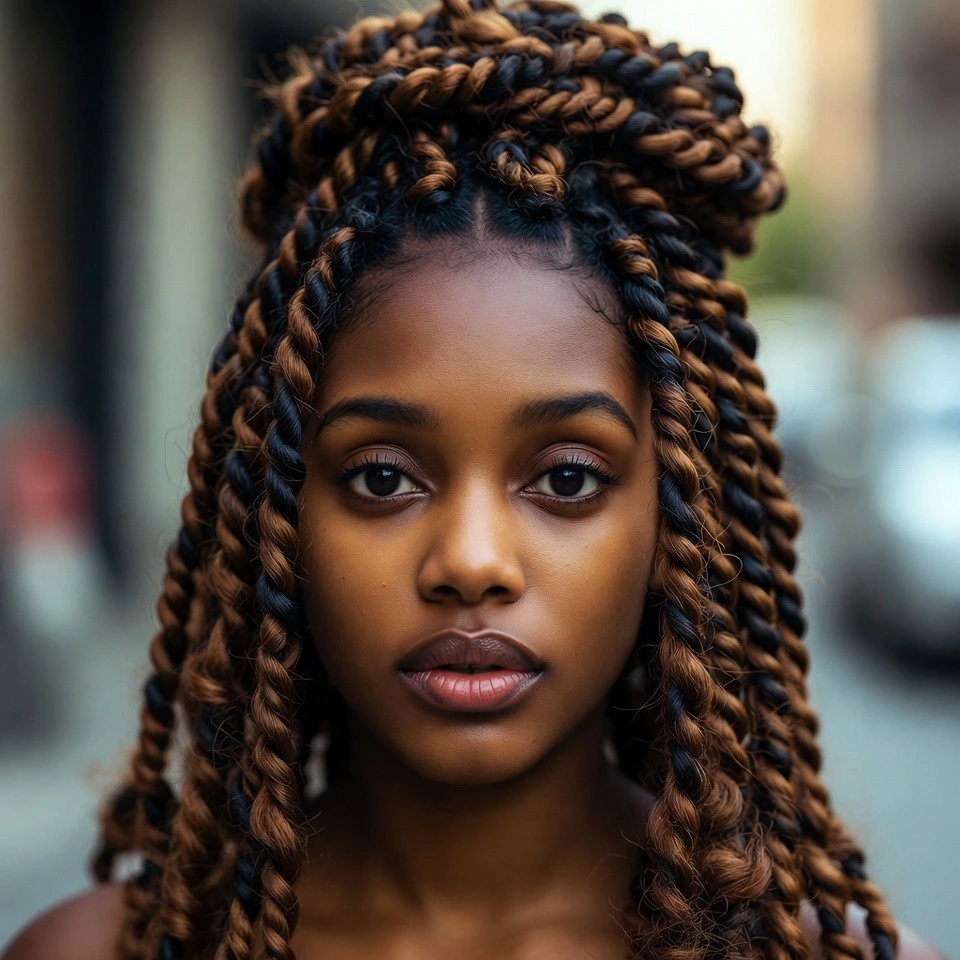
You don’t have to choose between a full protective style and wearing your hair down. By pulling the front half of your twists into a bun or a high ponytail and leaving the back down, you get the best of both worlds.
The Scalp Comfort Check
When pulling the front section up, be mindful of the hairline. Do not create a tight tension point right at the front. Use a loose hair tie or a decorative clip to secure the bun. If you feel your eyes being pulled, the style is too tight.
19. The Twisted High Bun
This is an elegant, sophisticated way to wear twists. You take all of your twists and gather them into a high bun at the crown. It is a classic look that works for almost any occasion.
Styling Variation
You can wrap the twists in a circular motion to create a donut shape, or you can stack them for a more voluminous, avant-garde appearance. Use bobby pins that match the color of your extensions to secure the ends without disrupting the shape of the bun.
20. Twisted Updo
If you have long twists, an updo is a great way to get them out of your face and off your neck. You can create a low chignon, a French twist, or a complex braided-updo look. The key is using the twists as the “rope” to weave the style together.
The “No-Tool” Method
You rarely need heavy hair ties for this. You can often loop the twists over each other and tuck the ends into the base of the style to secure it. This minimizes breakage and keeps the style looking seamless.
21. Twisted Crown
This is a regal, halo-like style. You take the twists at the front of your hairline and wrap them along the perimeter of your head, pinning them in place. It frames the face beautifully and highlights your features.
Facial Framing
Don’t pull all the hair back. Leave a few twists loose around the temple or near the ears to soften the look. It prevents the style from looking too severe and adds a bit of playful movement.
22. Twisted High Pony
A high ponytail is timeless. With twists, it takes on a different texture. The hair creates a voluminous fan at the top of your head. Because the twists are already “pre-styled,” you don’t need to do any extra work to get that full, thick look.
The Base Wrap
To make the ponytail look polished, take one twist and wrap it around the base of the ponytail to hide the hair tie. Secure the end with a small pin. It’s a simple trick that instantly elevates the look from casual to professional.
23. Faux Locs Twists
Faux locs are often installed using a twist technique. You wrap extension hair around a base twist to create the appearance of a mature loc. It is a fantastic way to experiment with the loc aesthetic without the permanent commitment.
Maintenance and Weight
These can get very heavy. Because you are wrapping multiple layers of hair, the weight adds up quickly. Keep the sections moderate to avoid neck strain. If you start to feel discomfort, take the style down—no hairstyle is worth a headache.
24. Twisted Mohawk
For those who want an edgy look, the twisted mohawk is perfection. You can cornrow the sides up or simply pin them tightly to the scalp, leaving a row of twists running down the center of the head. It is bold, fun, and incredibly stylish.
Styling the Sides
If you do not want to cornrow the sides, you can use hair gel and bobby pins to create a sleek “slicked” look. It’s a great way to get the mohawk aesthetic for a night out without having to commit to the braiding process.
25. Twisted Bob
If your twists are long but you crave a shorter look, a twisted bob is the solution. You fold the twists under and pin them to create a blunt, chin-length or shoulder-length bob. It changes your entire silhouette instantly.
The Folding Technique
Start by gathering the twists at the nape of the neck. Fold them upward and pin them close to the scalp. Continue folding and pinning sections until you reach your desired length. Be careful not to create a “bulky” area at the back of the head.
26. Havana Mambo Twists
These are similar to Havana twists but are specifically designed to be soft and very lightweight. They have a more “gently twisted” appearance, meaning they aren’t as tight or rigid as rope twists.
Why They Feel Different
The hair used for Mambo twists is often a mix of synthetic fibers that creates a softer feel. They are perfect for people who find standard synthetic twists too scratchy or uncomfortable against the skin.
27. Short Twisted Taper
This style is for the brave. You cut your natural hair into a short, tapered style and then add twists just to the top section. It’s a chic, modern, and very low-maintenance look.
The Maintenance Ease
This is the ultimate “wake up and go” style. Since the hair is short, it doesn’t get tangled, and the twist section on top is small enough that it only takes a few minutes to touch up if needed.
28. Twisted Side-Swept
This is all about asymmetry. Take all of your twists and pull them over to one side of your head. Secure them with a clip or just let them drape over your shoulder. It’s a glamorous, red-carpet-ready look that is deceptively simple.
The Draping Effect
The direction of the sweep matters. Try sweeping them to the side opposite your natural part to add extra volume at the roots. It creates a lush, cascading effect that frames one side of your face perfectly.
29. Ombre Twists
If you want to experiment with color but don’t want to use harsh chemicals on your natural hair, ombre twists are the answer. You can buy extension hair that is already colored, so you get the gradient effect without any damage to your real hair.
Choosing Your Contrast
For a natural look, stick to colors that are only two or three shades lighter than your natural hair color. If you want something bold, go for high-contrast colors like deep burgundy or honey blonde. The beauty of extensions is that you can change your hair color every time you re-twist.
30. Twisted Bangs
Sometimes you just want a bit of face-framing action. You can install a few smaller twists at the front of your hairline to mimic the look of bangs. You can leave them straight or curl the ends to give them a soft, rounded shape.
The Length Balance
Keep these shorter than the rest of your hair. If you make them too long, they will just get in your eyes and become a nuisance. They should graze your eyebrows or the bridge of your nose for that perfect “bang” effect.
Final Thoughts
The beauty of wearing twists is that they are not just a style; they are a tool for growth and health. When you choose a protective style, you are giving your natural hair a break from the daily manipulation that leads to breakage and thinning. Whether you are aiming for the sleek precision of Senegalese twists or the wild, textured volume of butterfly twists, the key remains the same: moisture, patience, and scalp care.
Do not be afraid to switch it up. You do not need to be a professional stylist to get creative with these looks. Start with simple two-strand twists and work your way toward more complex updos and accessories. The more you work with your hair, the more you will understand what it needs, what it loves, and what it can handle. Your hair is an asset—treat it well, and it will flourish regardless of which twist you choose.
